Long-distance motorcycle touring is about freedom, rhythm, and endurance. Hours on the highway, changing weather, unfamiliar roads, and constant wind noise all test your gear — especially the communication system for touring. A touring motorcycle intercom is not the same as a short-ride or commuter intercom. On a multi-day trip, small weaknesses become big problems: […]
How To Change ATV Tires? 5 Step To Change It At Home
The safety of you and your ATV depends on the condition of your ATV's tires and a good condition engine. Most ATV owners sometimes have to repair or replace the tires on their vehicles.
Auto stores with professionals to change and replace ATV tires cost a lot of money. But you can also get the job done without spending a fortune on expensive professional tools.
In fact, there's nothing complicated about it. With the right tools, anyone (yes, even you) can mount ATV tires.
In this article, we will discuss how to complete the step-by-step replacing ATV tires, so let us walk you through it.
Table of Contents
How Do You Change A Tire At Home?
The hardest part of mounting a tire is removing the old tire from the rim and putting on the new one. There are some specialized tools that can make the job easier, but you can also do the tire change yourself with some cool tips.
Here are the steps you'll use to remove the old tires and mount the new ones and don't worry, I'll go into step-by-step detail on how to change ATV tires.
- Step 1: Deflate Tire
- Step 2: Break The Bead
- Step 3: Remove The Tire From Rim
- Step 4: Mount New Tire On Rim
- Step 5: Inflate New Tire
Tool Requirements:
Pay bar: Sometimes called a mounting or demounting tool, it has a smooth, curved end. It is used both to remove the old tire from the rim and to mount the new tire on the rim.
Bead breaker tool: It is designed to pry the bead down off the rim. Over time, the tire bead may "freeze" onto the rim and eventually require a lot of force to remove.
Air tire bead seater: It is a small air reservoir that is filled with an air compressor. It has a wide nozzle designed to squeeze between the tire and the rim, so when you open the valve, it immediately dumps all the air into the tire, holding the bead in place and allowing you to inflate it properly.
Bead holder: Bead brackets are gadgets that help when you are trying to mount a tire on a rim. They hold the bead of the tire under the rim as you walk around.
Dish soap: Mix some dish soap with water, put it in a spray bottle and you will get the preferred tire bead lubricant. It's an inexpensive and easy way to help you mount your ATV tires and secure your beads.

Tool Requirements of ATV tires change
Step One: Deflate Tire
Before you start removing the tires from the wheels, you need to make sure they are deflated so they don't blow out and are looser and easier to remove.
First, open the cap or the tire valve stem to let the air out. The air will naturally escape slowly, but if you want, you can gently squeeze the tire to speed up the exhaust. You should hear a slight hissing sound as the air pours out of the tire valve stem. Make sure to keep the tire valve stem nearby;
You can also use a pressure gauge as you empty the tire to make sure the air doesn't escape too quickly or that you don't risk a blowout when you inflate the tire.
Step Two: Breaking The Bead
To get rid of the tire that's already on the rim, you need a bead breaker.
Breaking the bead is more difficult than it appears. The bead can fuse to the edge over time which makes it very difficult to remove.
- To make breaking a bead easier, first make sure the air is out of the tires.
- Slip the scooped end of your bead breaker bar between the tire and the edge.
- Pull down toward the tire with your weight on the opposite end of the tire. The bead ought to separate.
- Repeat these actions completely around the tire till it falls away easily. You may have to turn the wheel over and duplicate these steps on the opposite side as well.
Step Three: Removing The Tire From Rim
Currently it's time to remove the tire from the rim. In most cases, your tires will still be wrapped around the rim and almost impossible to remove by hand. A pry bar and a soapy solution of detergent and water can make it less complicated.
- Splash down the bead of your tire with a soapy remedy. This will help it slide over the rim.
- Take the flat end of the pry bar and also insert it between the rim and also the tire (suggestion: make use of some cloths to avoid scratching up the rim).
- Pry approximately draw the tire over the edge. Remember that due to the form of some rims, one method can be less complicated to obtain the tire off than the various other.
- Work around the tire, prying as you go. A second pry bar can be used to assist hold the tire in place so it doesn't slide back under the rim.
Once you get the top of the tire over the rim, the other bead should come up conveniently.

Removing The Tire From Rim
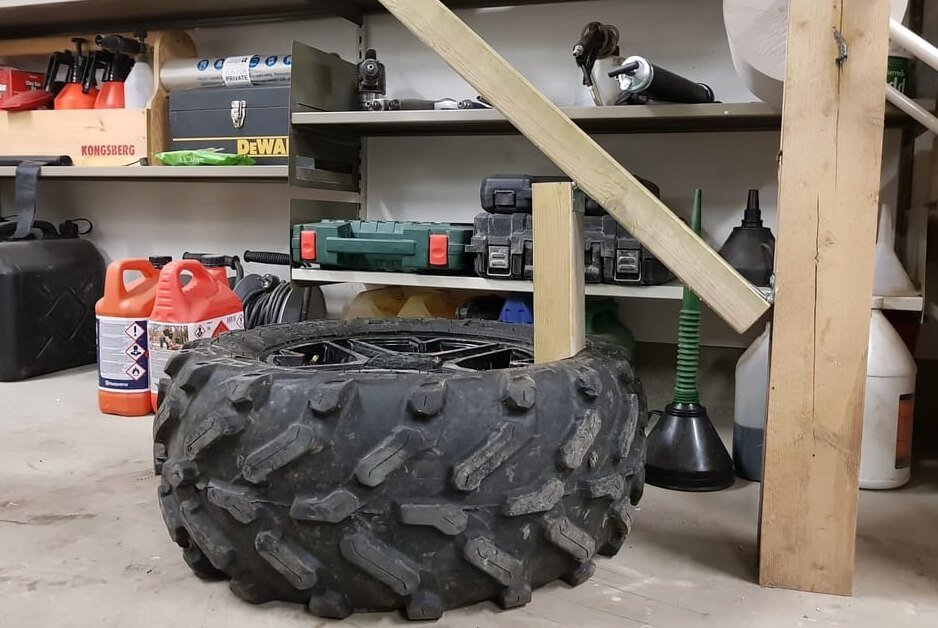
Step Four: Mount New Tire On Rim
Before mounting your new tire, you need to ensure that you are working on a flat platform, such as a garage floor.
- Put your wheel on a level surface area to make sure that it does not move during the mounting process. During the process, you must start to feel the bottom beads beginning to set into location within the bead retainer. Inspect to ensure that the entire inner circumference of the initial bead is conveniently suited the retainer.
- From here, you can then use pressure to the top fifty percent of the tire to fit the second bead right into its matching retainer. Using a comparable movement to before by going around the tire, gently using stress to slowly push the tire down into place.
- You will likely understand when the bead remains in place, as it ought to make a satisfying click sound and also will certainly really feel really protected. You might locate that the final part of the bead is somewhat harder to move right into the retainer.
- If this is the case, then just make use of tire irons to coerce the rest of the bead into the retainer. At some point, it should click in. Inspect that the bead has actually gotten on the retainer by inspecting the edge completely. Now, you have your new tire set up!
This process can be made much easier by gently applying a layer of lubrication to ensure that the tire will certainly slip on with little resistance or trouble. You can also use tire irons to slightly extend the tire to wrap around the wheel. Make sure to be mindful not to harm the wheel or your new tire.
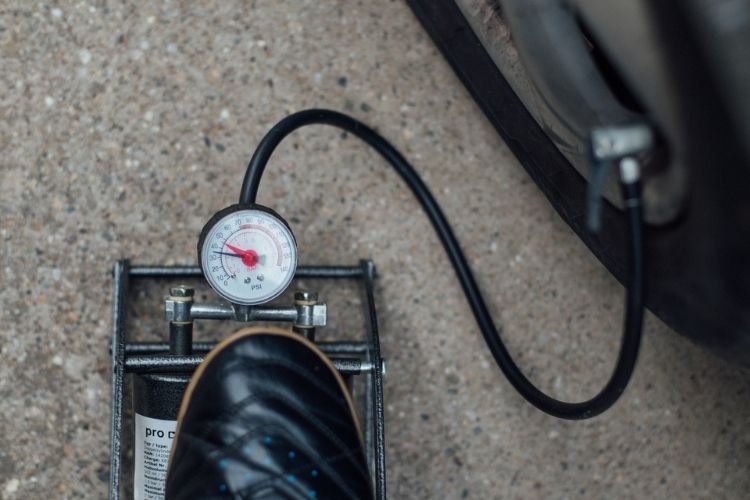
Step Five: Inflating Your Tire
The bead may not have been fully installed into the bead retainer prior to inflating the tire. This will happen during inflation because as you pump air through the tire valve stem, the bead will be pushed to the edge and installed directly into the retainer.
You may intend to keep your tire iron close to your hand to make sure that you can steer the bead into placement as you inflate. Placing ATV tires should be one of the simpler steps in the process, so don't push your tire also difficult and also risk damaging it.
Ensure to use your pressure gauge as you load your tire as well as fill it up slowly, with just percentages of air each time. This is so you do not risk breaking the tire therefore that it can effectively relocate right into setting.
Maintain inspecting each location of the tire as you inflate it to make certain that the bead is moving right into the right position which you are obtaining the right outcomes.
Use the tire shutoff stem to meticulously add more air. You can additionally use an air compressor to give you a continuous flow of air to make sure that you do not wind up with too much air. This is the most effective tool to use when installing ATV tires.
You'll recognize when to stop inflating your tire, as the optimal stress will likely be created onto the tire itself. Do not pump in too much air and also exceed this restriction, as it is there for your safety. A breaking tire can be very dangerous during setup, as well as particularly so while the vehicle is in use.
Do not fret regarding not filling your tire to its maximum stress; a tire can function completely great, if not much better, with a somewhat lower amount of air to supply them with a buoyancy that makes riding across rough terrain less complicated and more comfy.
Frequently Asked Questions
Is It Hard To Change ATV Tires?
ATV tires as well as various other off-road tires have more powerful beads than on-road tires. This makes them a bit harder to change. But when you know the steps, changing tires is about as hard as replacing brake pads or installing a brand-new exhaust system.
Just like any type of car upkeep project, changing ATV tires can occasionally be a difficult task, thanks to the much more complex knowledge that is needed as well as the specialized tools that might be needed for the procedure. Nonetheless, if you have the right tools as well as understanding, the procedure can be made a lot easier by following each step properly to ensure safe and full installment.
How Long Do ATV Tires Last?
Higher-quality ATV tires will last you a longer quantity of time than cheaper ones, thanks to their higher-quality materials as well as construction. How much time your tire lasts will depend totally on how often you use them, the type of surface you are going across, and also for how long you utilize them per session. A tire can last for well over five years, with appropriate upkeep and also care, so make sure to take great treatment of one to truly obtain your cash's worth!
Are ATV And UTV Tires The Same?
UTVs are designed to carry more than one passenger at a time, and sometimes heavy loads of cargo. As a result, they require a slightly different type of tire. These need to be strong and durable to withstand considerable weight while still allowing the vehicle to move smoothly as well as easily.
What Do You Do With Old ATV Tires?
Due to the sturdy materials used, old tires can be repurposed in many ways. You can use the high-grade rubber in a variety of means, such as for storage space, for decoration, or to produce odd and insane furniture. There are actually millions of means to make use of old tire products, which is fantastic for maintaining our setting risk-free and also making use of everything we contend our disposal while also saving a lot of money.
There are also several organizations that would gladly buy up your old ATV tires, to use the materials in producing products, or to reuse them back right into brand-new ones! Check out your local area for reusing efforts to see exactly how your old tire can be propounded excellent usage.
Can I Place Larger Tires On My ATV?
You can certainly put a larger tire on an ATV, which might supply you with far better traction, or may offer your ATV a mild lift from the ground to offer it much better defense in rough as well as irregular locations. Nevertheless, you ought to make sure not to set up any kind of that are substantially larger than the standard ones, as the vehicle may not have the ability to give the requisite quantity of power to have them spin completely. Larger tires might likewise not fit within the framework of your ATV, so make certain to inspect what your own can deal with prior to you purchase larger ones.
Why Do ATVs Have Smaller Front Tires?
Having smaller-sized front tires offers a variety of benefits. First of all, it makes the vehicle much easier to regulate, offering much better handling also in the most awful problems to make sure that the ATV can work at its ideal regardless of where it is taken. Smaller-sized tires additionally protect against tire rub, which happens when the tire rubs against the framework of the vehicle because they are too large.
What Is The Best Tire Pressure For ATV? Ultimate Guide 2022
How to Replace Motorcycle Clutch: Step-by-Step Guide
ATV & UTV Tire Guide: 7 Key Things to Know Before You Ride

Rodney L is a technical writer and product consultant with over a decade of experience in the motor industry. Rodney is a fan of performance machines that run fast and loud and an expert in all things custom. His numerous articles and write-ups are available at our knowledge base. Whether it’s something wrong with your motorcycle or you are building a custom bike, you can trust Rodney’s experience.
Subscribe
0 Comments
Oldest
You maybe like to read:
Adventure motorcycles, often called ADV bikes, are built to take you from smooth highways to rough backcountry trails. For new riders, picking the best adventure bikes for beginners can make all the difference. The right machine turns highways, gravel roads, forest tracks, and remote trails into places you actually want to explore, while the wrong […]
Riding in a group is thrilling, but without clear communication, even the best rides can turn chaotic. That’s where motorcycle intercom systems come in, letting you talk with your group, share GPS directions, listen to music together, and stay safer on the road. Whether you’re riding with a single friend or leading a pack of […]
I’ve used premium intercoms and budget ones on the same roads, in the same weather, on long touring days. The truth? Most riders don’t need a $400 system. Most riders still need the same basics: clear rider-to-rider talk, stable Bluetooth, and batteries that last a full day on the road. In 2026, budget motorcycle intercoms […]
What is the best motorcycle intercom for beginners? If you’re a new rider, the idea of adding another piece of tech to your helmet can feel overwhelming. I’ve been using motorcycle intercoms for years—on solo rides, long tours, group trips, and daily commutes—and I’ll tell you this upfront: A beginner motorcycle rider doesn’t need the […]
Mesh Intercom vs Bluetooth: Which Motorcycle Communication System Is Better? Mesh intercoms are best for riders who travel in groups because they automatically reconnect and stay stable, while Bluetooth intercoms are better for solo riders and two-up riding due to lower cost and simpler operation. As someone who both wrenches on bikes and rides long […]