The motorcycle communication systems field just got a significant upgrade with the release of the Fodsports FX7. This state-of-the-art Bluetooth mesh intercom is packed with many advanced features and techs. It will revolutionize the way riders communicate and enjoy their rides. Whether you're a solo rider or part of a group, the FX7 offers unparalleled […]

How To Paint Your Motorcycle Helmet? Ultimate Guide 2025
August 6, 2022

Riding motorcycles is a badass sort of leisure activity. It's thrilling to really feel the wind whip versus you as you punctured air at a high speed, the machine throbbing below you.
Ask anybody who rides a motorcycle, as well as they'll tell you that they enjoy the feeling of liberty that comes with the way of living. Part of that flexibility originates from being able to flaunt your individuality and reveal to the globe who you are.
Do not recognize exactly how to paint your motorcycle helmet? We've got you covered with the essential expertise. Keep reading to figure out what you ought to do.
Table of Contents
Can Motorcycle Helmets Be Painted?
Motorcycle helmets can be painted as long as it does not interferes with their paint chemistry as well as tampers with the existing precaution.
Painting helmets can be an aspirational sensation of liberty that comes with a way of life that one wishes to remember and also cherish.
Part of that liberty comes from being able to do so and not be restricted by regulations or technical concerns.
Nevertheless, all 2-wheeler (motorcycle/scooter) safety helmets sold to consumers should lug the criterion security qualification mark according to their nation's guidelines.
Imported crash helmets have DOT, ECE, SHARP, or SNELL safety and security ratings.
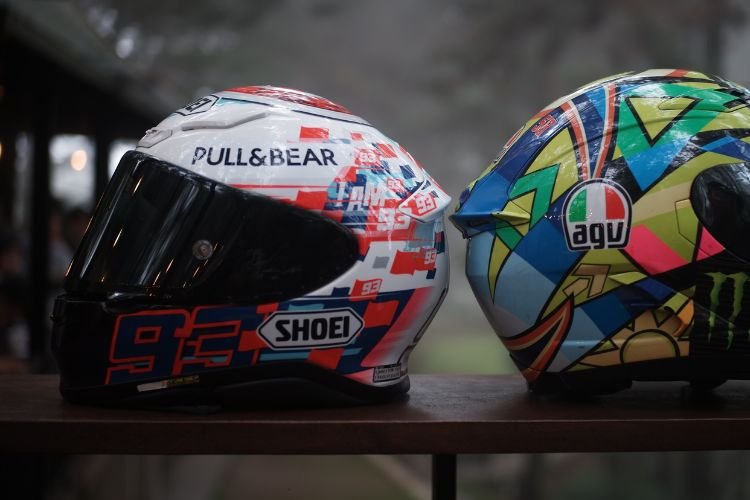
Personalized paint of safety helmets in some nations is an art type, yet one should abide by local regulations when doing so as some states have a specific collection of interpretations associated with the paint of motorcycle helmets.
Can Motorcycle Helmets Be Painted
Step-by-Step Guide to Paint Your Helmet
Tools You Will Certainly Need
- Helmet stand or wig head -- Keeps your helmet stable.
- Masking tape & paper -- To cover visor, vents, and logos.
- Screwdriver -- For removing visor, padding, and vents.
- Sandpaper (400–800 grit) -- For scuffing old finish.
- Scouring pad -- To dull clear coat.
- Denatured alcohol or mild solvent -- To clean dust and grease.
- Primer (plastic bonding primer) -- Helps paint stick to plastic shells.
- Spray paint or airbrush paint -- Choices vary: urethane for durability, acrylic for ease.
- Stencil or vinyl tape -- For custom patterns.
- Clear coat (UV-resistant) -- Protects paint from chips and sun.
- Safety gear -- Respirator mask, gloves, and goggles. Good ventilation is essential.
1. Dismantling the Helmet
The first thing that you need to do is to take apart the helmet. This procedure might differ according to the sort of headgear that you are working with. Nevertheless, typically speaking, most helmets have a simple layout that can quickly be dismantled in order to paint them.
Remove all the stickers and decals on your helmet, since once you paint them, they will not look excellent any longer.
You will need to get rid of all things like band clips, vents, etc, which are present on your safety helmet before repainting it.
2. Helmet Prep work
Clean the surface of the helmet with a fundamental cleaning detergent to get rid of any type of oil. Considering that your hands can leave marks on the painted surface, you must use latex handwear covers.
Check the helmet for any damage. As long as the base of your motorbike helmet is still intact, there is no restriction on the number of times that a helmet can be painted.
Eliminate Stickers. Eliminate any stickers by peeling off or applying warm to them with a Hair Dryer or Heat Gun.
Sanding. Eliminate the old paint and also the sticker adhesive by scrubbing a 400-grit sandpaper on the helmet. Painting on top of old paint leads to a terrible overview. For ideal results, run the sandpaper along the grain however not against it. Entirely remove any type of shiny surface from the existing paint with your 400 grit sandpaper or ScotchBrite abrasive pad, or else your brand-new paint won't stick.
As soon as you're finished with sanding, take a piece of fabric as well as use wax as well as grease remover, and also use it to eliminate any kind of dirt that might be on the safety helmet.

Helmet Paint Prep work
3. Helmet Masking
If you were not able to eliminate all of the inner linings from the helmet, you may need to do some masking up. Concealing tape comes in handy when you intend to cover the areas that you do not wish to be tarnished by the paint.
Covering up tape will certainly help you cover the areas that you don't desire to be touched by paint in all. Generally, you collect some old newspapers, which you scrunch up into a sphere and also things it in the helmet. Utilize the concealing tape to attach the stuffed paper sphere to ensure it doesn't fall off.
4. Apply Primer Undercoat
Primers are used for preparing a surface area before painting it by filling all the small holes and gaps in it to make sure that paint can be applied evenly.
Always put on latex gloves for protection. You can use spray paint, wet paint, or fresh paint to make your helmet's base material. Two or 3 coats for the whole helmet will certainly offer you a completed item.
In order to prime your bike helmet properly, just add some guide or undercoat on the areas that have actually been sanded previously, and then let them dry prior to moving on to the next step.
5. Add a Guide Coat
Use a flat black quick coat spray can to lightly spray the outer surface of the helmet, then give it time to dry.
After the guide coat layer dries, soak 400-grit wet-n-dry sandpaper and a block in water that is warm as well as soapy.
With great care, sand the helmet down smoothly using the block. If the black guide coat layer continues to be black in some locations, it is not yet totally smooth. Proceed sanding until the whole guide layer goes away, however, not the primer.
After you have actually finished sanding, clean the helmet. Apply wax and oil remover on a piece of fabric that you'll use to rub out any dust that gets on the helmet.
6. Paint
First, clean down the helmet to get away of any dust particles. If utilizing a professional spray gun, mix your paints. If utilizing an aerosol spray can, shake the can.
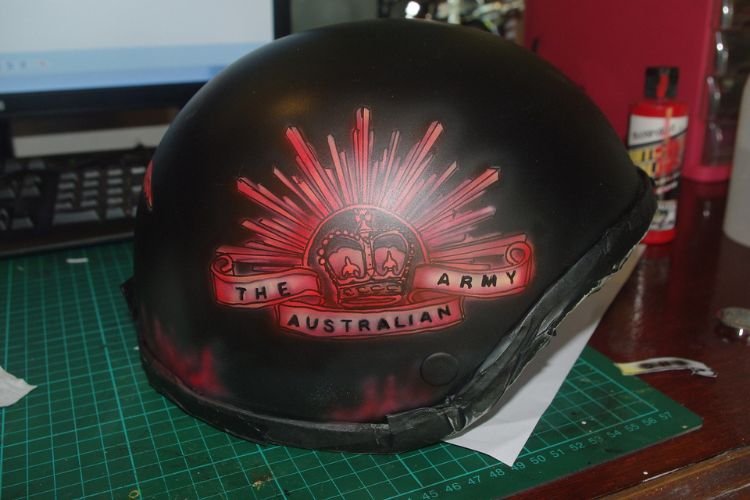
Start spraying far from the painted area, and afterward come on to it at an even range with a constant speed. Guarantee you do not drop in the middle to avoid runs. As you escape the painted location, quit spraying, just starting once more as you come back over again. Do this from the left to the right, duplicating the movement till you have actually used an even coat throughout the whole helmet.
Guarantee you have sufficient paint for at the very least 3 to 4 layers. Let the very first layer dry, and afterwards use one more until it looks satisfactory to you.
Helmet Paint
7. Add Multiple Colors (if needed)
If you intend to include multiple colors on the helmet, then the best technique is to utilize a standard coat of color as an undercoat and then add various other colors on top of it later.
In order to do this, initially, apply a base paint around the surface area, including visible vents and screws or nuts. After it dries up, simply adhere to the exact same actions as discussed above for applying paint to ensure that there are no bubbles in between coats.
8. Clear Coat Application.
Using a clear layer offers protection while eliminating the demand for buffing. You use the clear coat in a comparable fashion to applying the primary shade.
To boost the paint's depth, apply approximately clear-coat layers, and afterward allow it to dry for roughly 1 day. Later, smooth the helmet using a 1500-grade sandpaper to guarantee a nice coating.
9. Unmasking the helmet
After you have actually finished, you need to remove the concealing tape. A clean, dry cloth ought to be run under the surface that was covered by the covering up tape to eliminate any type of debris.
The masking tape and also the papers that were used must be peeled off carefully to stop the fresh paint from being removed.
10. Reassembling the helmet
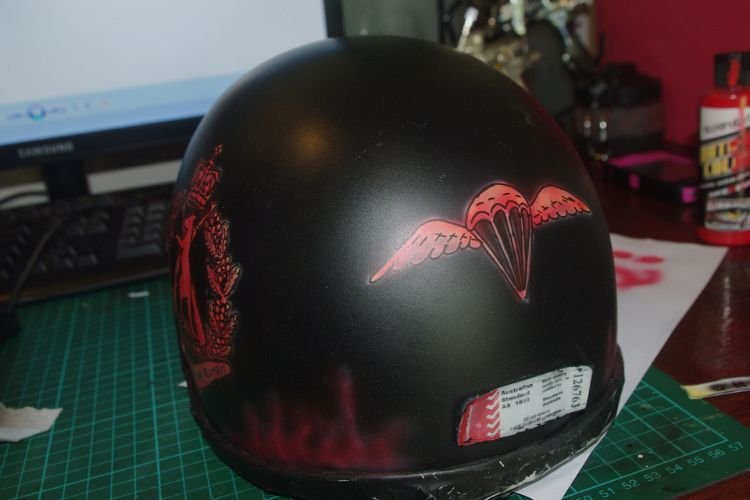
Ultimately, reconstruct your motorcycle helmet by including all the nuts as well as bolts back in their corresponding areas functioning from inner to external.
But make sure you tighten all these screws before using them since if they are lost during riding it can cause discomfort while putting on the helmet.
Reassembling the helmet
Conclusion
Currently, you recognize how to paint your motorcycle helmet step by step. The next time you intend to paint a helmet, follow this article. The process may differ depending on the kind of helmet, yet the overall method will always be the same as described in this extensive overview. So, enjoy painting your helmet!
How To Paint ATV Plastics? Step-by-Step Guide
13 Unique Motorcycle Helmet Accessories For Every Rider

Rodney L is a technical writer and product consultant with over a decade of experience in the motor industry. Rodney is a fan of performance machines that run fast and loud and an expert in all things custom. His numerous articles and write-ups are available at our knowledge base. Whether it’s something wrong with your motorcycle or you are building a custom bike, you can trust Rodney’s experience.
You maybe like to read:
Fodsports Brand Month: Unbeatable Deals and Top-Notch Service
Discover Fodsports Brand Month July and August mark a special occasion for motorcycle enthusiasts and tech lovers alike. Welcome to Fodsports Brand Month! This event is dedicated to celebrating everything that makes Fodsports a leading name in the motorcycle communication industry. Get ready for a fantastic promotions, exceptional service from Fodsports. Let's insights into Fodsports' […]
North Coast 500 Motorcycle Guide: Exploring Scotland in Autumn
Autumn transforms Scotland’s North Coast 500 into a memorable destination for motorcycle touring. Golden Highland forests, winding coastal roads, rugged mountains, and quiet fishing villages create a striking backdrop for an autumn ride. A North Coast 500 motorcycle trip, however, requires more than a scenic route. Rain, strong winds, wet leaves, and shorter daylight hours […]
Transalpina in Autumn: Romania’s Ultimate Motorcycle Riding Guide
Autumn brings a different atmosphere to Transalpina, Romania’s spectacular high-mountain road. Golden forests cover the lower slopes, open alpine ridges reveal sweeping Carpathian views, and winding asphalt makes this route a memorable destination for motorcycle touring. But an autumn ride requires more than choosing a scenic road. Temperatures can drop quickly at altitude, mountain weather […]
Motorcycle Camera Buying Guide: How to Choose the Right Camera for Your Ride
Every motorcycle ride has a story worth capturing: a winding mountain road, a weekend adventure with friends, or an unexpected moment in traffic. But choosing the right motorcycle camera is not simply about buying the model with the highest resolution. Shaky footage, poor audio, short battery life, and unreliable mounting can turn an exciting ride […]
Transfăgărășan in Autumn: Romania’s Ultimate Motorcycle Riding Guide
Autumn transforms Romania’s Transfăgărășan Highway into a dramatic mountain journey, with golden forests, rugged peaks, winding asphalt, and sweeping views across the Făgăraș Mountains. For motorcycle riders, it offers a memorable combination of technical corners, spectacular scenery, and opportunities to explore the Romanian countryside. But an autumn ride requires more planning than a summer trip. […]