Long-distance motorcycle touring is about freedom, rhythm, and endurance. Hours on the highway, changing weather, unfamiliar roads, and constant wind noise all test your gear — especially the communication system for touring. A touring motorcycle intercom is not the same as a short-ride or commuter intercom. On a multi-day trip, small weaknesses become big problems: […]
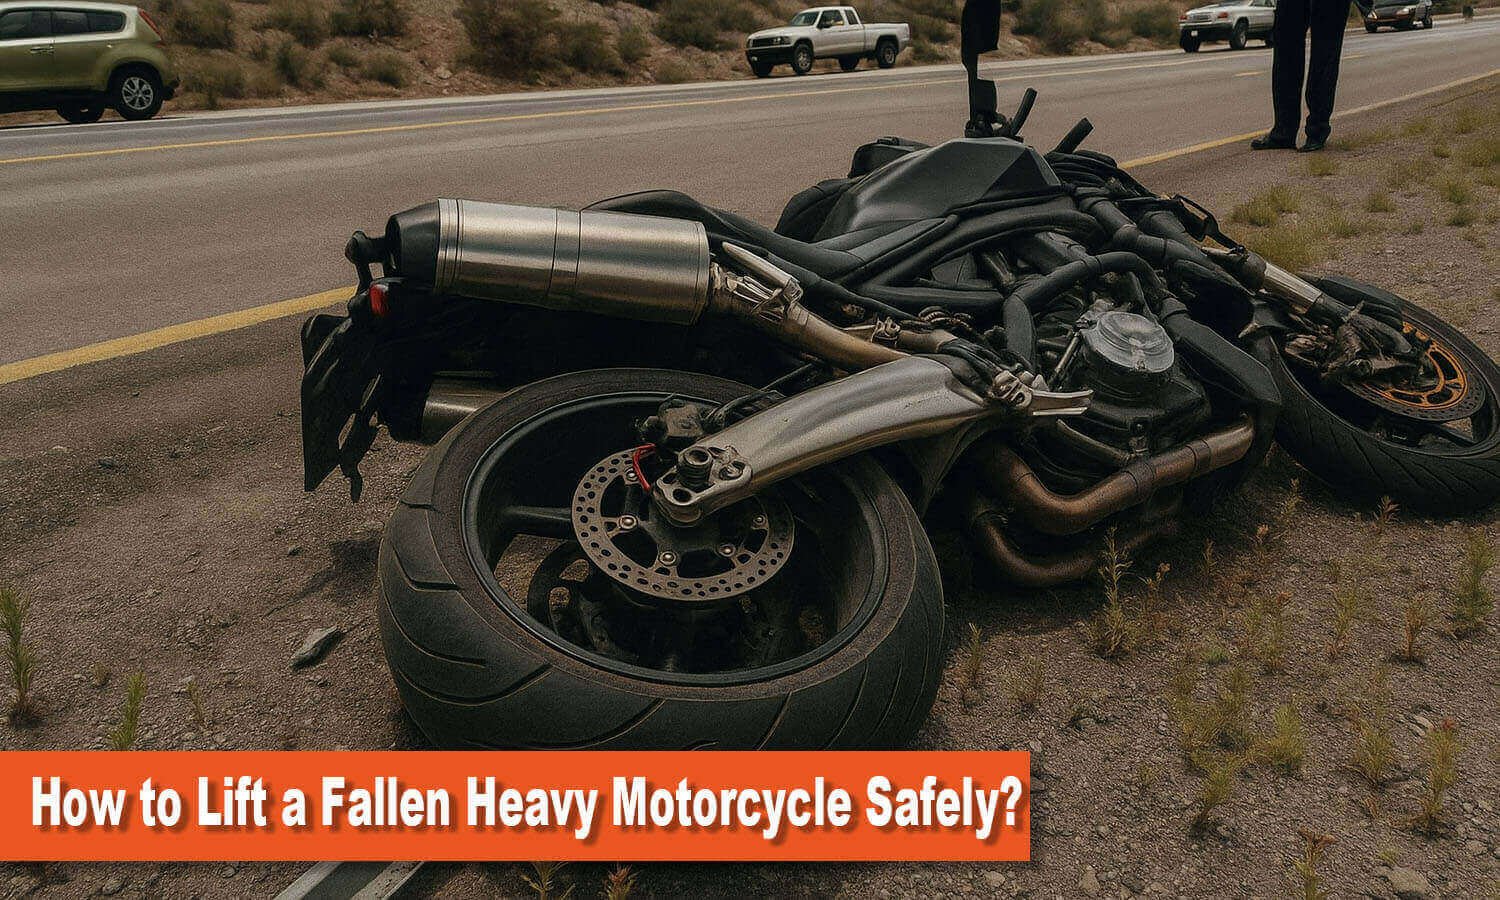
How to Lift a Fallen Heavy Motorcycle Safely
Dropping a motorcycle can be stressful, but knowing how to lift a fallen heavy motorcycle the right way can restore your confidence and get you moving again. In this guide, you’ll learn the essentials for safe and effective lifting without risking injury or further damage.
Table of Contents
Safety First: Assess Before You Lift
Step 1: Personal Readiness
Picture this: you’ve just dropped your motorcycle on a quiet roadside. Your first instinct might be to rush over and pull it up — but stop. Take a breath. This is the moment to make sure you are safe before touching the bike.
You kneel down and quickly check yourself. Are you hurt? Breathing normally? If not, lifting must wait. You slip on your gloves, adjust your boots, and calm your racing heartbeat.
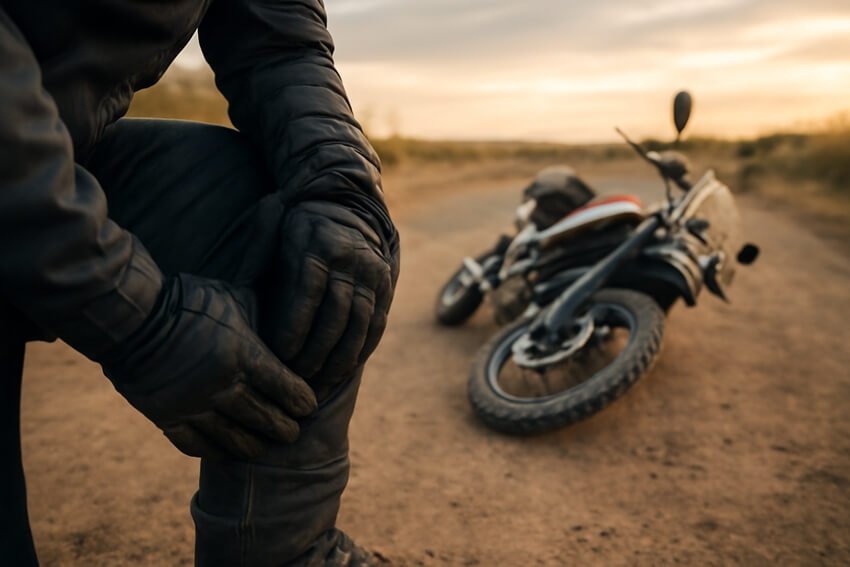
post fall assessment
Checklist
- No injuries or shortness of breath
- Wearing sturdy boots and gloves
- Calm, focused, and ready to plan the lift
✨ Key Tip: If your body isn’t ready, forcing a lift could cause more harm than the fall itself.
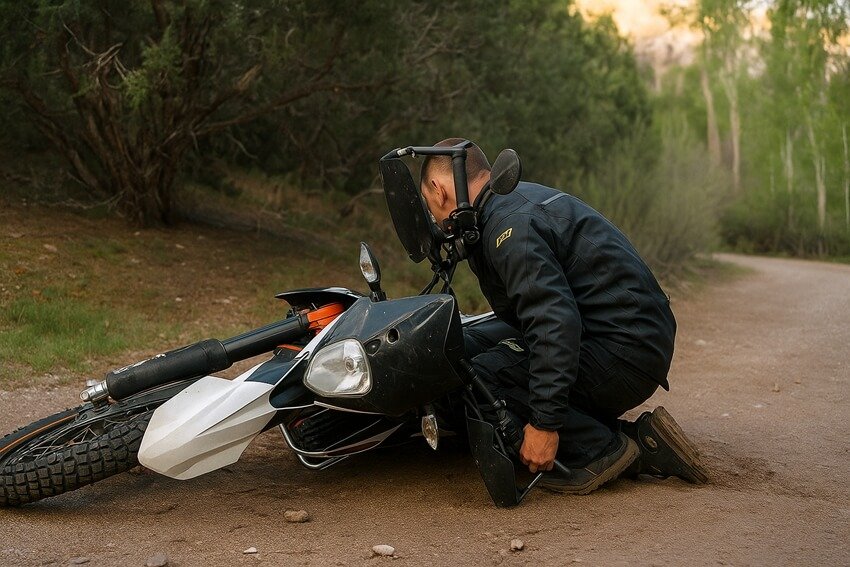
Step 2: Environment and Motorcycle Safety Check
Now that you know you’re okay, it’s time to check the scene and the motorcycle.
Look around first. Is there traffic approaching? Is the bike lying on a blind curve or on soft ground? Only lift when the surroundings are safe. If needed, drag or roll the motorcycle to firmer ground before attempting the lift.
Once the environment is secure, focus on the bike. Turn off the ignition and close the fuel valve. Shift into first gear to lock the rear wheel, and check for fuel leaks. If the bike is down on its right side, lower the side stand before lifting. If it’s on the left, be ready to deploy it immediately after.
Checklist
- Traffic is clear, and the environment is safe
- Stable ground (not slippery or soft)
- Ignition off, fuel valve closed, gear in first
- No visible fuel leaks
- Side stand positioned correctly
✨ Key Tip: The motorcycle must be stable and secure before you begin the lift.
How to Lift a Fallen Heavy Motorcycle (Standard Solo Technique)
Step-by-Step Guide (Detailed)
standard solo technique—lift a fallen heavy motorcycle
1. Turn the handlebars to full lock.
Point the front wheel into the ground toward the side you’ll be pulling. This locks the steering and makes the handgrip easier to reach.
2.“Sit” your hips or lower back on the seat.
Squat down and lean against the seat or frame for leverage. The bike may shift slightly — that’s normal.
3. Grab the bike securely.
- One hand underhand on the low-side handgrip.
- Other hand, on a solid frame point (grab rail, rear fender, or luggage rack).
- Avoid hot exhausts or fragile parts.
4. Position your feet.
Place them shoulder-width apart, slightly forward, with knees bent. Keep your back straight and arms locked.
5. Lift with your legs.
Push with your legs and hips, taking small steps backward while standing. Keep arms straight and spine neutral — never twist.
6. Finish carefully.
Once upright, lean the bike gently onto its side stand. Prevent it from tipping over to the opposite side.
7. Check the bike.
Inspect for leaks, bent levers, or other damage before riding.
💡 Expert Tip
✔ Practice this motion without a real drop — it builds muscle memory and makes the movement feel natural when it really matters.
Alternative Lifting Techniques
No one technique works in every scenario. If your bike is on loose gravel, a hill, or you have knee issues, you may try a different method. Three common solo lifts for heavy adventure/touring bikes are:
- Back-Facing Squat Lift (Standard Lift): Face away from the bike, butt against the seat, and lift as described above. This is the classic method and works well on flat, solid ground. However, it puts strain on the knees and is harder on slopes. Use it on pavement or hard-packed dirt.
- Front-Facing Deadlift Lift: Face the bike with the front wheel pointed in the lift direction. Squat slightly in a deadlift stance (hips down, chest up) and grab the downside handlebar with one hand and a solid rear point (frame or grab rail) with the other. Keep a flat back and core tight as you stand up and walk forward to lift the bike. This method places less stress on the knees and is better for loose, uneven, or slippery surfaces, because you can see and control the bike as it rises. It also reduces the chance of the bike flipping over the opposite way when it’s upright.
- Single-Handlebar Lift: Face the bike and grab both handlebars (downside bars) while standing close. Squat down and, keeping your arms locked, push up with legs so that the handlebars leverage the bike upright. This lift uses mechanical advantage from the bars and gives excellent control; it’s useful if the bike has not fully tipped or on uneven terrain. As the bike rises, you may need to straighten your elbows to push the bike away at the end.
| Method | Pros | Cons / Limitations |
|---|---|---|
| Back-Facing Squat Lift |
|
|
| Front-Facing Deadlift Lift |
|
|
| Single-Handlebar Lift |
|
|
| Use Stable Surface (wall/truck) |
|
|
| Ropes/Straps Assist |
|
|
Motorcycle Lifting: Terrain and Operational Tips
| Terrain / Surface | Tips / Actions |
|---|---|
| Hills / Slopes |
|
| Loose Gravel or Sand |
|
| Grassy or Wet Ground |
|
| Tip / Action | Notes / Guidance |
|---|---|
| Use Side-Stand |
|
| Steep Inclines / Extreme Cases |
|
Proper Body Mechanics to Prevent Injury
Your body mechanics are critical. The lift must come from your leg muscles and core, not your back. Keep your spine neutral and core tight throughout. Here are the key principles:
- Legs, not back: Your thighs and glutes are the strongest muscles. Bend at the knees and hips as you squat down. As you stand, push through your heels and legs. Never yank with your back or arms. Team Oregon cautions that trying to lift with your back can cause a “serious, lifetime injury”. Instead, think of the motion like doing a heavy squat or leg press.
- Straight back and head up: Whether you face the bike or have your back to it, keep your chest up and your spine aligned. Look ahead, not down at the ground, so your back remains straight. A good mental cue is “head up, chest up.” This posture engages the core and protects the lumbar spine.
- Lock your arms: Once you have a firm grip, keep your arms straight and locked during the lift phase. This forces your legs to do the work. If you bend your elbows or try to lift with your arms, you’ll lose power and risk back strain.
- Use slow, small steps: The safest lifts happen slowly. As you stand up, “walk” slowly by stepping back little by little. This keeps the bike balanced and prevents sudden shifts in weight. Never jerk or spin your torso – twisting during a heavy lift can cause muscle tears.
- Brace with your hips: As the bike comes upright, position it so your hip can catch its weight if needed. Once the bike is vertical, you can turn your hip sideways to support it. In practice, this means standing beside the bike and leaning one side of your body against it as you secure it on the stand.
- Breathe out: Don’t hold your breath. As you lift, exhale sharply – this engages your diaphragm and core stability muscles, protecting your spine.
Common Mistakes to Avoid
| Mistake | Why It's Dangerous | How to Avoid |
|---|---|---|
| Using the back or arms instead of legs | Risk of hernia or spine injury | Hinge at the hips and knees, lift with the legs |
| Twisting or jerking motions | Strains muscles, loses balance | Keep spine straight, avoid twisting |
| Not securing the bike in gear or off | The bike may roll unexpectedly | Switch off the engine and put in gear |
| Skipping preliminary checks | Unsafe environment, poor footing | Assess surroundings before lifting |
| Overreaching / weak grab points | Parts can break or burn | Grab solid metal parts, underhand grip |
| Letting the bike fall back | A sudden drop can injure | Step back slowly, reset, and lift again |
| Not wearing gloves or boots | Slips and injuries | Always wear proper riding gear |
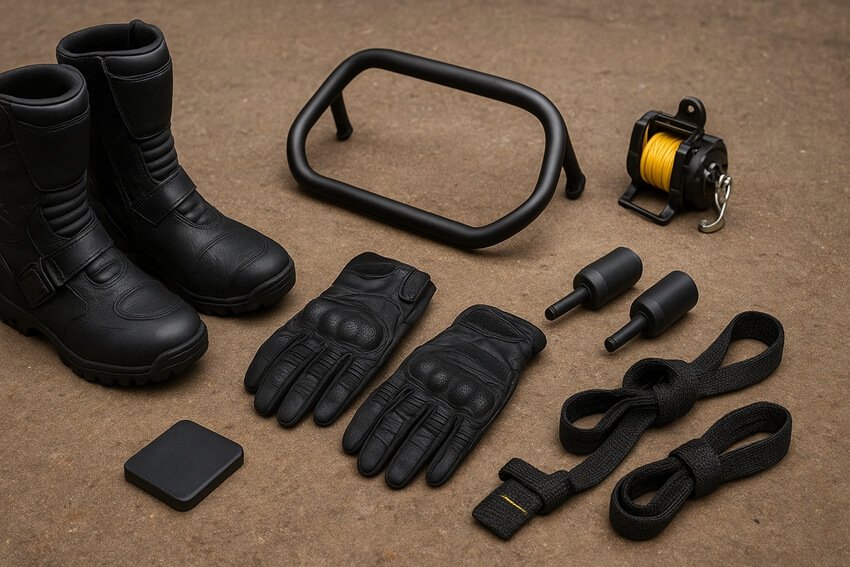
Protective Gear and Useful Equipment
protective gear and useful equipment
While any rider should always wear full gear (helmet, jacket, gloves, boots) when riding, some items are especially helpful around a fallen bike:
Sturdy boots with good tread: Boots with solid traction can keep you from slipping during the lift. A protective toe box also guards against getting your foot crushed by accident.
Riding gloves: Leather or textile gloves with grip protect your hands from burns and cuts when grabbing the frame or hot muffler. They also ensure you hold onto the bike securely.
Crash Bars / Engine Guards: These sturdy metal bars bolt onto the frame. In a drop, they take the brunt of the impact, keeping expensive motorcycle parts off the ground. They also give you an extra solid bar to grab or brace against when lifting. Many adventure bikes come with them stock; if yours doesn’t, they are worth considering as damage protection and leverage.
Frame Sliders / Bar Risers: Sliders won’t help lift the bike, but they help prevent damage. Taller bar risers can spread your stance slightly, which helps balance on uneven ground.
Lift Straps: Using lifting straps, ropes, or tie-downs around solid parts of the frame or forks can create strong grab points. They distribute the load and make solo lifting easier. Ideally, keep straps pre-installed or carry them so you’re prepared when the bike tips over.
Kickstand Extensions and Pucks: Accessories like a kickstand puck (a small plate that fits under the foot of the stand) prevent the stand from sinking into gravel or soft ground once the bike is upright. A kickstand extensor broadens the stand’s foot. Using one can avoid repeated drops in the future by giving the bike more stable footing when parked.
Compact Hoist or Winch Kit: For extreme backcountry riders, a small portable winch (motorized or manual pulley) can be carried. These are more specialized tools, but a motorcycle-specific recovery kit (with pulley blocks, anchor straps, etc.) can make a solo lift possible in tough terrain. Even a simple 3:1 pulley system with straps can multiply your strength.
Even without fancy tools, protective body gear is vital. If you do drop the bike, the gloves, jacket, and pants will protect you from scrapes. Plus, riding gear often has extra padding where you might bump the bike when lifting.
Preventing Tip-Overs
- Ride within your skill level; practice slow-speed balance.
- Keep at least one foot down at stops.
- Smooth clutch and throttle control.
- Park on solid, flat ground; use side-stand pucks if needed.
- Maintain tires, suspension, and steering.
- Optional stabilizers or aftermarket outriggers can help at very low speeds.
Conclusion
It is possible to lift a dropped heavy motorcycle with proper technique. Through practice with regular and alternate approaches with proper protective gear and basic lifting devices and by enhancing your ride practices to prevent unwarranted drops, you will become confident. Patience and appropriate body mechanics will enable you to safely lift a dropped heavy motorcycle and resume your ride with confidence.

With over 10 years of experience working on cars and trucks Item Training Supervisor Richard Reina is known around the office as one of our technical experts & real an "automobile person".
His rate of interest began, in his very own words, "at the age of two when his father educated him the distinction in between a Chevy and a Ford. Since then it's been cars regularly."
As a serious lover of practically all things with a motor Richard can address nearly any kind of inquiry related to car upkeep, fixing, or restoration & is a fact professional in electric motor background.
Subscribe
0 Comments
Oldest
You maybe like to read:
Best Adventure Bikes for Beginners (2026 Guide)
Adventure motorcycles, often called ADV bikes, are built to take you from smooth highways to rough backcountry trails. For new riders, picking the best adventure bikes for beginners can make all the difference. The right machine turns highways, gravel roads, forest tracks, and remote trails into places you actually want to explore, while the wrong […]
Best Motorcycle Intercom for Group Rides (2–20 Riders)
Riding in a group is thrilling, but without clear communication, even the best rides can turn chaotic. That’s where motorcycle intercom systems come in, letting you talk with your group, share GPS directions, listen to music together, and stay safer on the road. Whether you’re riding with a single friend or leading a pack of […]
Budget Motorcycle Intercoms from Fodsports: Honest 2026 Picks
I’ve used premium intercoms and budget ones on the same roads, in the same weather, on long touring days. The truth? Most riders don’t need a $400 system. Most riders still need the same basics: clear rider-to-rider talk, stable Bluetooth, and batteries that last a full day on the road. In 2026, budget motorcycle intercoms […]
2026 Best Motorcycle Intercom for Beginners from Fodsports
What is the best motorcycle intercom for beginners? If you’re a new rider, the idea of adding another piece of tech to your helmet can feel overwhelming. I’ve been using motorcycle intercoms for years—on solo rides, long tours, group trips, and daily commutes—and I’ll tell you this upfront: A beginner motorcycle rider doesn’t need the […]
Mesh Intercom vs Bluetooth Intercom: Which Motorcycle Communication System Is Better?
Mesh Intercom vs Bluetooth: Which Motorcycle Communication System Is Better? Mesh intercoms are best for riders who travel in groups because they automatically reconnect and stay stable, while Bluetooth intercoms are better for solo riders and two-up riding due to lower cost and simpler operation. As someone who both wrenches on bikes and rides long […]