Long-distance motorcycle touring is about freedom, rhythm, and endurance. Hours on the highway, changing weather, unfamiliar roads, and constant wind noise all test your gear — especially the communication system for touring. A touring motorcycle intercom is not the same as a short-ride or commuter intercom. On a multi-day trip, small weaknesses become big problems: […]
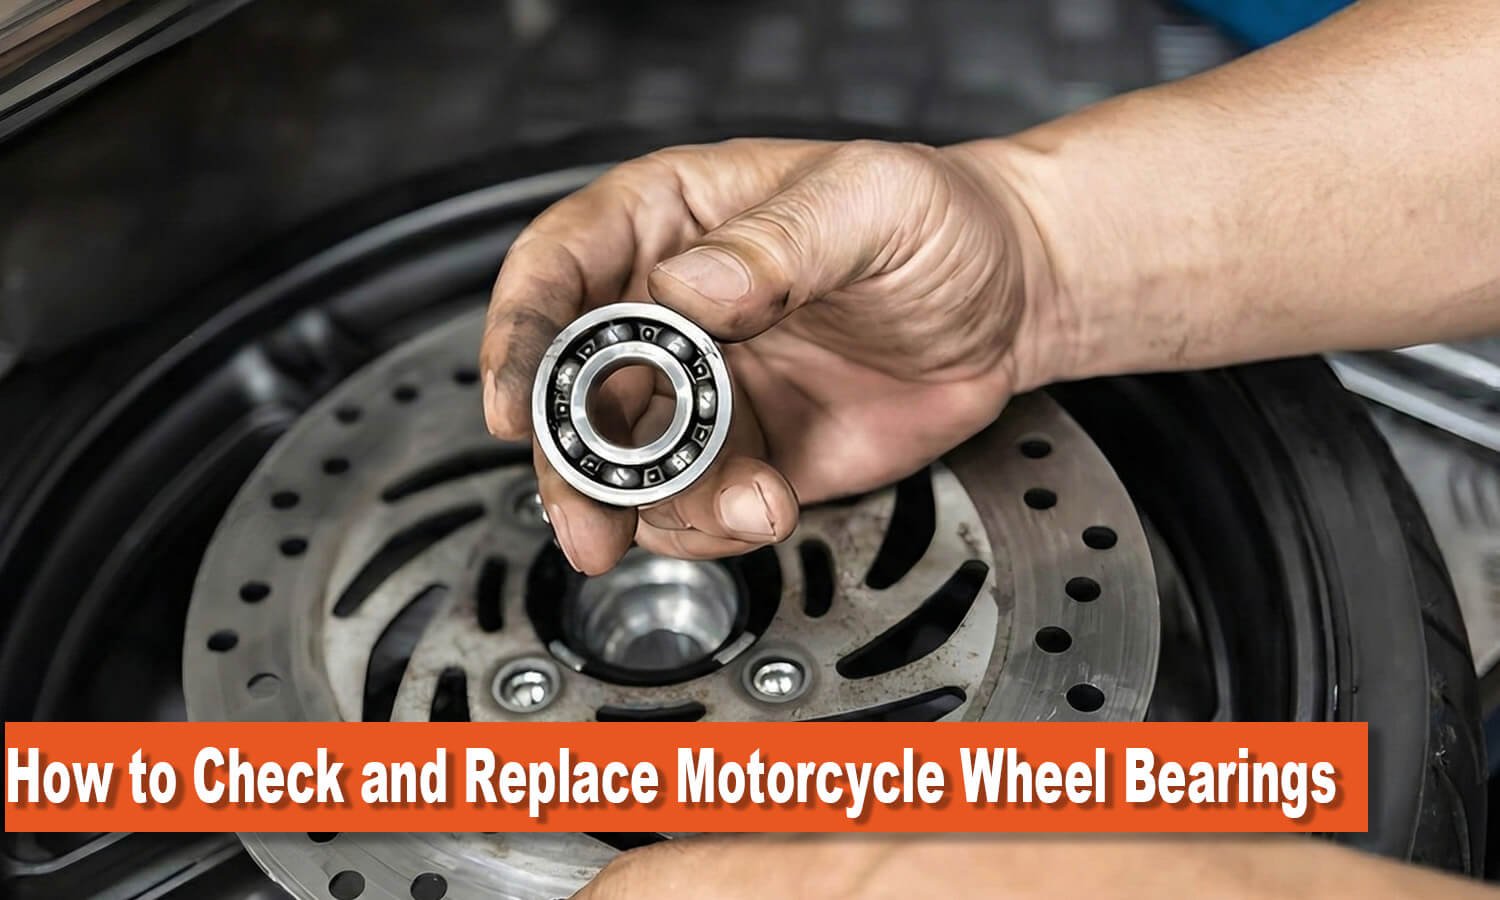
How to Check and Replace Motorcycle Wheel Bearings
Wheel bearings may be small, but they have a big impact on how smoothly and safely your motorcycle rides. When they start to wear out, your bike will warn you—through noise, vibration, or unstable handling. Learning how to check and replace them is simple, and doing it early can prevent bigger problems on the road. This guide walks you through the key signs, tools, and steps every rider should know.
Table of Contents
Understanding the Role of Motorcycle Wheel Bearings
Wheel bearings might be small, but they’re a huge part of how your motorcycle feels on the road. They sit inside the wheel hub and let the wheel spin smoothly around the axle without dragging or grinding. Inside each bearing are tiny steel balls or rollers. They glide inside a hardened metal ring, all sealed up to keep dirt and water out.
When your wheel bearings are in good shape, they:
- Let the wheel spin freely and quietly
- Keep the bike tracking straight, even under load
- Maintain proper alignment between the wheel, axle, and brakes
- Cut down on friction, heat, and unnecessary wear
When they start wearing out, you’ll feel it — steering gets vague, the bike may wander, and the wheel can create extra friction or heat.
Left unchecked, worn bearings can quickly turn into a real safety issue.
How Long Do Motorcycle Wheel Bearings Last?
Actually, there isn't a standard expiration date for motorcycle wheel brarings. Most motorcycle wheel bearings can hold up for about 10,000 to 20,000 miles under typical street riding. Some last far longer, while others wear out sooner — it really depends on your riding habits and the conditions your bike sees.
Factors Affect Motorcycle Wheel Bearing Lifespan
Several factors have a big influence on bearing life:
1. Where You Ride
Rain, mud, sand, or deep water can shorten a bearing’s lifespan.
Dusty off-road trails or using a pressure washer on the hub area can also push contaminants past the seals. Once dirt or moisture gets inside, wear accelerates quickly.
2. How You Ride
Carrying a passenger, loading up luggage, or riding long distances at higher speeds increases both load and heat to the wheel bearings.
Bearings cannot handle them well over time. Extra stress means a shorter service life.
3. Bearing Quality
Higher-quality bearings with well-designed seals usually last noticeably longer.
Cheaper, low-grade bearings may fit the bike, but they often don’t hold up as well in real-world use.
4. Maintenance Habits
Keeping the hub area clean, replacing damaged dust seals, and checking for wheel play during routine maintenance all help extend bearing life.
A few quick inspections throughout the year can prevent small issues from becoming major failures.
Common Signs of Worn Wheel Bearings
Before you start any inspection, let's know the typical motorcycle wheel bearings symptoms. These signs often appear while riding and can alert you to check the bearings as soon as possible.
1. Unusual noise:
A worn bearing may produce grinding, humming, growling, or clicking noises. These noises usually change with speed or when leaning into turns. They come from the wheel area and get louder as the bearing deteriorates.
2. Vibration or wobble:
If the bearings are failing, you may feel vibrations through the handlebars, footpegs, or frame. The front end may feel rough, unsteady, or “loose,” especially when holding the handlebars lightly at cruising speed.
3. Wheel play or looseness:
When the bike is stationary, you might feel movement in the wheel if the bearings are worn. Rocking the wheel by hand may produce a clunking sensation. Any lateral movement in the hub area is a red flag.
4. Handling problems:
The motorcycle may wander, drift, or fail to track straight. A worn front bearing can make the steering feel vague or unstable, especially when cornering.
5. Excessive heat or uneven wear:
In severe cases, a failing bearing can generate heat around the hub or brake disc. You may also notice uneven tire wear or a hub that feels unusually hot after riding.
If you observe any of these symptoms, inspect the wheel bearings without delay. Ignoring the signs can lead to sudden failure and a dangerous loss of control. The next section explains exactly how to do that.
How to Check Motorcycle Wheel Bearings
Before deciding to replace, first confirm the bearings are bad. A systematic check can save time and avoid unnecessary replacement.
Here’s a step-by-step approach.
1. Lift or Stabilize the Motorcycle
lift the motorcycle on a stand
Find a motorcycle wheel stand, place your motorcycle on the stand. The wheel must be able to spin freely.
- For the front wheel: a front stand, center stand, or jack under the engine works.
- For the rear wheel: use a paddock stand or the bike’s center stand.
You need the wheel to spin without touching the ground and the motorcycle must remain steady and balanced.
2. Spin the Wheel
spin the motorcycle wheel
Rotate the wheel with your hand and pay attention to these details:
- Roughness: The wheel should not feel like it’s dragging or scraping.
- Grinding sounds: Any metal-on-metal noise is a bad sign.
- Uneven spinning: The wheel should turn at a consistent speed and without vibration.
A healthy wheel bearing should spin smoothly and quietly.
3. Perform the Push–Pull Test
This test helps you find out if the wheel moves from side to side on the axle. Any sideways movement usually means the bearing is worn out.
- Grab the wheel firmly at 3 o’clock and 9 o’clock positions. Gently push with one hand and pull with the other.
- Repeat the test holding the wheel at 12 o’clock and 6 o’clock.
You should not feel:
- Any side-to-side movement
- A clicking sensation
- A knocking or tapping feeling
4. Check Movement at the Hub
Place one hand on the rim and the other on the hub. Push the wheel laterally.
- If the hub remains solid but the rim moves, the bearing is likely failing.
This step helps distinguish bearing issues from loose axles or spacers.
5. Inspect the Dust Seals
Wheel bearings are protected by rubber seals that keep dirt and water out. Look closely at the rubber ring surrounding the bearing area.
Check for:
- Cracks in the rubber
- Tears or missing sections
- Gaps where the seal is not sitting flush
- Grease leaking out
Damaged seals allow dirt and water to enter the bearings and accelerate wear.
6. Rotate the Bearing Inner Race (Optional)
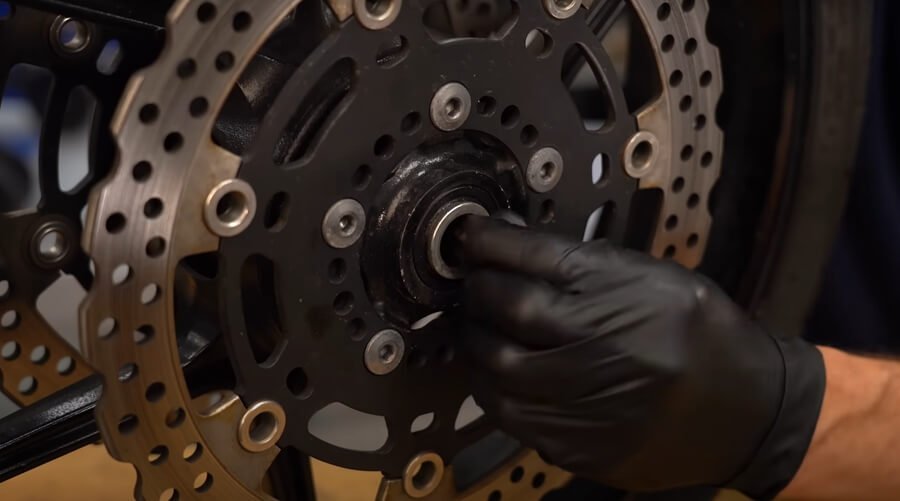
check the bearing inner race
If you have the wheel off the motorcycle, you can check the inner race — the metal ring inside the bearing — for smoothness and damage.
-
- Safety first: wear gloves if the wheel or hub is sharp, and keep the wheel stable on a workbench or blocks so it cannot roll.
- Locate the inner race: the inner race is the inner metal ring of the bearing where the axle normally sits.
- Rotate by hand: insert a clean finger or a small blunt tool into the inner race and gently turn it a full revolution.
- What to feel:
- Smooth rotation with no resistance = healthy bearing.
- Gritty, sandy, or rough feeling = bearing damage.
- Notchy or catching points = pitted races or worn balls.
- Sticky or uneven movement = contamination or corrosion.
- What to do if damaged: if you feel any of the bad signs above, plan to replace the bearing — do not continue using it.
7. Check for Heat After a Ride
Heat can indicate friction inside a failing bearing. This quick check should be done carefully.
- Short ride first: take the bike for a short ride (5–10 minutes) to bring parts up to operating temperature.
- Park safely: stop the bike on level ground and turn the engine off. Allow the bike to settle for a minute so hot exhaust or engine heat does not confuse the check.
- Careful touch test: using the back of your hand or a gloved finger, cautiously touch the hub area near each wheel bearing. Do not touch brake discs, pads, or exhaust surfaces.
- Normal vs abnormal:
- Slightly warm = normal.
- Very hot or painfully hot = possible bearing overheating and should be inspected immediately.
- Follow-up: if a hub is unusually hot, avoid riding further and remove the wheel for a detailed bearing inspection or seek professional help.
Tools Needed to Replace Motorcycle Wheel Bearings
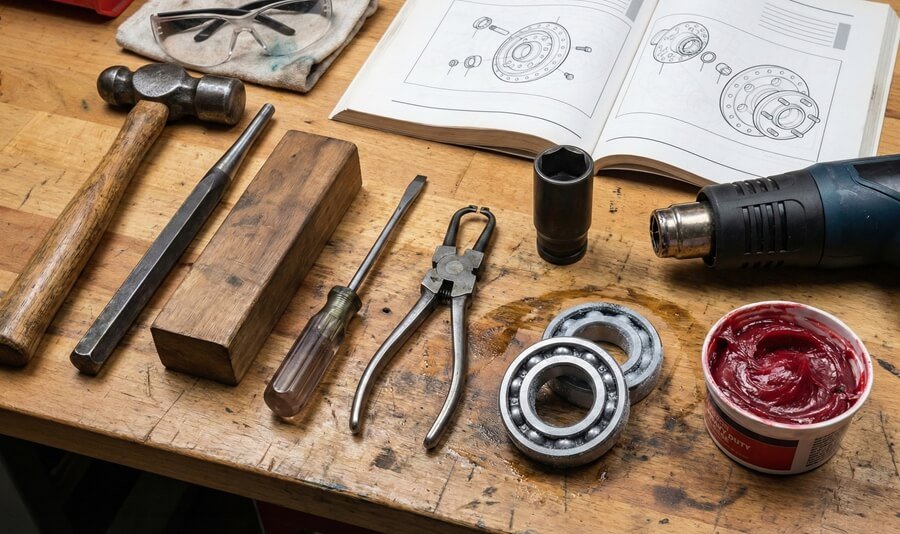
tools needed to replace motorcycle wheel bearings
Before starting the bearing replacement, gather all the necessary tools and supplies. You’ll typically need:
- Hammer and Drift/Punch: A heavy hammer and a sturdy steel punch or drift to knock the old bearings out of the wheel hub.
- Wooden Blocks: Solid blocks of wood to support the wheel off the work surface. Wood under the rim or hub absorbs hammer blows and protects the wheel edges.
- Flat-Blade Screwdriver: To pry out old dust seals covering the bearings.
- Circlip/Snap-Ring Pliers: Many bikes use a circlip to retain the bearings. Use circlip pliers to remove any retaining ring.
- Bearing Driver or Socket: A bearing driver set or a large socket that matches the bearing’s outer diameter. This lets you install new bearings by tapping on the outer race.
- Heat Gun or Torch (Optional): Warming the wheel hub with a heat gun or torch can expand the metal slightly, making it easier to seat new bearings.
- Freezer (Optional): Placing new bearings in the freezer causes them to contract slightly. Installing chilled bearings into a (warm) hub is often easier.
- Grease: Fresh, high-quality wheel-bearing grease to pack any open bearings and lubricate new bearings if not pre-greased.
- Safety Gear: At minimum, wear safety glasses when hammering or working with springs. The process can throw up metal shavings or cause snap rings to fly out, so eye protection is important.
- Service Manual: Always have your motorcycle’s service manual or guide on hand to follow the correct procedure and torque specs for your specific bike.
How to Replace Wheel Bearings
Replacing wheel bearings involves removing the old bearings from the wheel hub and installing new ones. Follow these steps carefully, referring to your bike’s manual if available.
Step 1: Remove the Wheel

place the motorcycle wheel on wooden blocks
First, fully remove the wheel from the motorcycle according to the service manual.
This usually means loosening and removing the axle nut, sliding out the axle, and taking off the brake caliper (and brake disc, if needed) and any sprocket or cush drive components on the rear.
Place the wheel on wooden blocks so that the rim is supported and the hub faces are accessible.
Step 2: Remove Dust Seals and Circlips
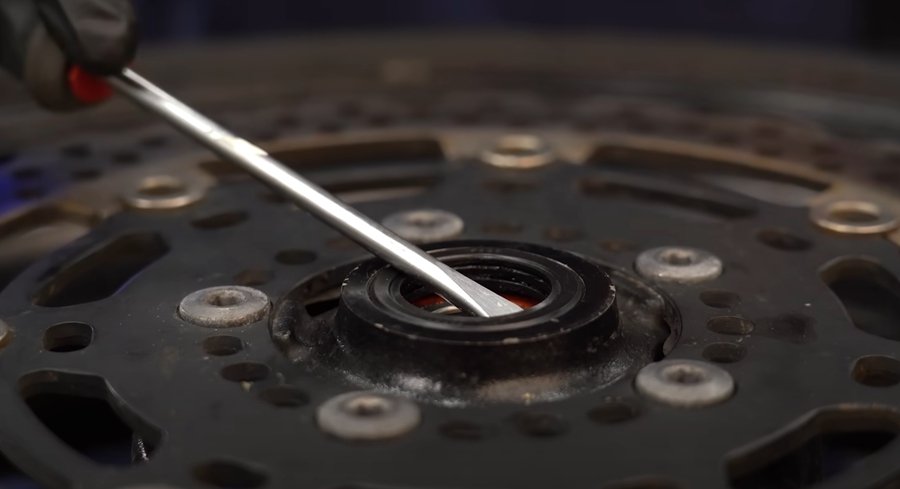
remove dust seals
Examine the sides of the wheel hub. Most wheels have thin dust seals over the bearings.
Use a flat-head screwdriver or seal puller to pry off each seal carefully.
Under those seals, check for a circlip or snap ring. Some bikes (like the ZX-6R) use a circlip to hold a bearing in place.
If you find a circlip, use circlip pliers to remove it and set it aside safely. Keep any spacers in order as you remove parts.
Step 3: Drift Out the First Bearing
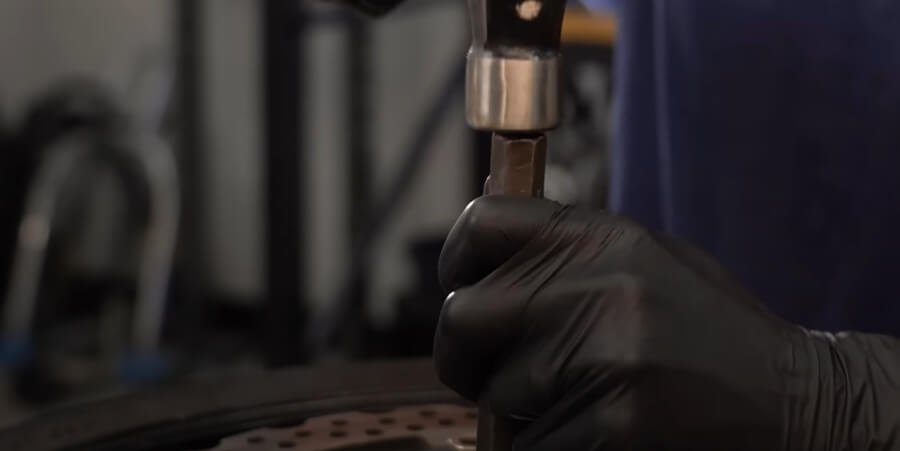
drift out the first bearing
With seals and clips removed, you can now drive the bearing out.
Place the wheel on the blocks with one side up. Use a long drift or punch that contacts the inner race of the bottom bearing (the side facing down on the blocks).
Strike the drift firmly with a hammer. Instead of hammering straight down on the bearing, rock the drift around in a circle, tapping each quadrant of the bearing in turn.
This “walking” technique helps ease the bearing out evenly.
Eventually the inner race of the bearing (and usually the spacer behind it) will drop out of the wheel hub.
Step 4: Drift Out the Other Bearing
Flip the wheel over and repeat the process for the second bearing on the other side. Make sure the wheel is well supported before doing this.
Use blocks so that the hub face sits above the table. Drive the second bearing out in the same way.
Both bearings should come free, possibly along with any hub spacer.
Tip: If a bearing’s inner race has collapsed and you can’t get a drift behind it, some mechanics feed a spindle or rod through the hub to push out the bearing shell from behind. Warming the hub slightly with a hot air gun can also expand the metal and help release stubborn bearings.
Step 5: Clean the Hub
Once the old bearings are out, thoroughly clean the bearing seats (the machined holes in the hub).
Use a clean cloth, soapy water, and a brush if needed to remove old grease, dirt, and corrosion.
Inspect the hub for any damage or gouges; small scratches can be smoothed with fine sandpaper, but deep damage may require wheel repair or replacement.
Also clean out any debris from the seal grooves and circlip slot. Dry the hub completely.
Step 6: Prepare New Bearings
Before installing, check that you have the correct replacement bearings and seals.
It’s best to use sealed (greased) bearings designed for your motorcycle. If they are open bearings, pack them with fresh grease now.
Optionally, warm the hub with a heat gun and/or cool the new bearings in the freezer to aid installation.
The goal is to have the hub slightly larger and the bearings slightly smaller by a few thousandths of an inch.
Step 7: Install the First New Bearing

install the first new bearing
Place one new bearing flat onto the hub from the top side (outer race against the hub lip).
Position the wheel so that the lip or shoulder (if any) on that side of the hub is on top to determine depth.
Use a bearing driver tool or a properly sized socket that only contacts the outer race of the bearing. Gently tap the bearing evenly into the hub, working around its circumference with a hammer.
Do not hit the inner race, as that can damage the bearing. You can place a wooden block on the bearing and hammer the wood for cushion.
Continue until the bearing is fully seated and flush with the hub face.
Step 8: Install Any Spacer and Second Bearing
If your wheel had a spacer (or a circlip), install it now. Then place the second new bearing on the opposite side of the hub.
Use the same tapping method with a driver or socket on the outer race to seat this bearing straight and square. (If your wheel uses a circlip on one side, install that circlip before driving in the bearing on that side.)
Make sure both bearings are fully in place and at the correct depth.
Step 9: Press in New Seals

press in new seals
After bearings are installed, push the new rubber dust seals into the hub so they cover each bearing.
You can tap the edges of the seal with the block of wood or a seal driver.
Ensure the seals are flush and even to keep dirt out of the bearings.
Step 10: Reassemble the Wheel
Reinstall any spacers, the sprocket carrier (for rear wheels), and the brake disc onto the hub.
Slide the axle back through the wheel and forks or swingarm.
Refit the brake caliper(s) and torque all fasteners (axle nut, caliper bolts, etc.) to the manufacturer’s specification.
It’s important to follow the correct torque and alignment steps from your manual.
Once reassembled, spin the wheel by hand again: it should turn freely without binding, and there should be no play in the hub. Now the wheel is ready to go back on the bike for final assembly and testing.
Safety Tips
- Secure the Bike: Always work on the bike in a stable position. Use a center stand, paddock stand, or jack stands so the wheel is completely off the ground and the bike cannot fall. Never rely on just a jack or one side alone.
- Protect Yourself: Wear safety glasses and work gloves. During bearing removal, circlips and metal bits can fly. Hands can get pinched by sharp edges. Closed-toe shoes are recommended in case tools or wheels drop.
- Use the Right Tools: Use tools designed for the job. A socket that only presses on the bearing’s outer race is safer than hammering directly on metal. Never pry on the wrong part or use a screwdriver to force bearings (except carefully lifting seals). Damaging the hub can ruin the wheel.
- Don’t Overheat: If using a torch or heat gun, heat slowly and don’t let the hub get red-hot. Excessive heat can damage wheel paint or nearby components of your motorcycle. A moderate temperature (around 175°F) is usually sufficient to aid installation.
- Follow the Manual: Refer to your motorcycle’s manual or reliable guides. Some bikes have specific procedures (e.g., factory spacers, torque values, or circlip use). A generic guide helps, but always adapt to your model.
- Check and Double-Check: After reinstallation, verify that seals sit fully and wheels spin smoothly. Torque all nuts and bolts to spec. Go for a short test ride in a safe area to confirm there are no noises or play.
Tips to Extend Wheel Bearing Life
- Keep Bearings Clean and Lubricated: Although many wheel bearings are sealed, keeping rims and hubs clean helps. Avoid blasting the hubs with a high-pressure washer or steam cleaner; this can blow grease out of partially sealed bearings. After cleaning a rim, wipe off any water and reapply a light coat of grease if you had exposed any open bearings.
- Avoid Deep Water and Rough Riding: Bearings have seals, but deep water or high-pressure water can sneak past them. Riding through flooded roads or frequent off-road riding can introduce water and dirt that shorten bearing life. If you must ride in rain or muddy conditions, inspect the bearings more often.
- Inspect Regularly: The owner’s manual for many street bikes recommends checking wheel bearings every ~7,500 miles. If you often ride in wet or dusty conditions, check them even sooner. Early detection of wear means simpler maintenance.
- Use Quality Parts: When replacing, use good-quality bearings (standard or cerametallic if specified). Cheap bearings may fail prematurely. Ensure new bearings have intact seals.
- Repack and Grease When Possible: On bikes with open (non-sealed) bearings, pack them with fresh NLGI-grade grease regularly. Bennetts BikeSocial suggests keeping open-cage bearings “packed with grease” during maintenance. Products like corrosion-resistant grease can also help protect the balls and races from moisture.
- Check Wheel Seals: Damaged or missing dust seals will let contaminants in. Replace any torn seals during bearing service. Clean and relubricate the hub before fitting new seals.
❓ FAQ
1. How often should motorcycle wheel bearings be replaced?
Motorcycle wheel bearings don’t have a strict expiration date, but most of them hold up for about 20,000 to 10,000 miles under typical street riding.
2. How do I know if my motorcycle wheel bearings are bad?
Common signs include unusual grinding, humming, or clicking noises from the wheels, vibrations through the handlebars or footpegs, wobble or play when rocking the wheel by hand, and handling that feels vague or unstable. Excessive heat near the hub after riding can also indicate worn bearings.
3. Can I ride with a bad wheel bearing?
It’s not recommended. Riding with worn bearings can make the bike unstable, cause uneven tire wear, and in severe cases lead to sudden failure — a serious safety risk. Replace damaged bearings as soon as possible.
4. Can I replace wheel bearings myself?
Yes, with the right tools, a clean workspace, and your motorcycle’s service manual, you can replace wheel bearings at home. Follow proper safety precautions and make sure you understand each step, especially bearing removal, installation, and torquing fasteners to spec.
5. How often should I check my wheel bearings?
For most street motorcycles, checking wheel bearings every 7,500–10,000 miles is a good rule of thumb. Off-road or adventure bikes should be inspected more frequently, especially after wet or dusty rides. Always check immediately if you notice noise, wobble, or unusual heat.
6. What tools are required to replace motorcycle wheel bearings safely?
Key tools include a hammer and drift/punch, bearing driver or socket, wooden blocks to support the wheel, circlip/snap-ring pliers if needed, a flat-blade screwdriver for dust seals, high-quality grease, and proper safety gear like gloves and eye protection. A service manual for your specific bike is highly recommended.
7. Can I use generic wheel bearings for my motorcycle, or do I need brand-specific ones?
High-quality generic bearings can work on many bikes, but it’s best to follow your manufacturer’s recommendation. Proper size, load rating, and seal type are critical. Using the wrong bearing can lead to premature wear or unsafe handling, so always double-check compatibility.
8. How much does it cost to replace wheel bearings on a motorcycle?
If you take your motorcycle to a mechanic to have the wheel bearings replaced, you can expect to pay roughly $300–$400, with the exact price depending on the shop, the bike model, and your area. However, if you choose to do the replacement yourself, the cost drops significantly—usually only about $15–$40 for the parts.
9. Can you use WD-40 on wheel bearings?
WD-40 is a very poor option for lubricating wheel bearings, and anti-seize isn’t much better. Compared to a quality bearing grease, neither provides adequate wear protection.
Conclusion
Good wheel bearings keep your motorcycle safe, smooth, and predictable. With a quick inspection routine and proper replacement when needed, you prevent bigger problems before they start. Take a few minutes to check them regularly—your bike will handle better, last longer, and keep every ride worry-free.
Recommended Reading

With over 10 years of experience working on cars and trucks Item Training Supervisor Richard Reina is known around the office as one of our technical experts & real an "automobile person".
His rate of interest began, in his very own words, "at the age of two when his father educated him the distinction in between a Chevy and a Ford. Since then it's been cars regularly."
As a serious lover of practically all things with a motor Richard can address nearly any kind of inquiry related to car upkeep, fixing, or restoration & is a fact professional in electric motor background.
Subscribe
0 Comments
Oldest
You maybe like to read:
Adventure motorcycles, often called ADV bikes, are built to take you from smooth highways to rough backcountry trails. For new riders, picking the best adventure bikes for beginners can make all the difference. The right machine turns highways, gravel roads, forest tracks, and remote trails into places you actually want to explore, while the wrong […]
Riding in a group is thrilling, but without clear communication, even the best rides can turn chaotic. That’s where motorcycle intercom systems come in, letting you talk with your group, share GPS directions, listen to music together, and stay safer on the road. Whether you’re riding with a single friend or leading a pack of […]
I’ve used premium intercoms and budget ones on the same roads, in the same weather, on long touring days. The truth? Most riders don’t need a $400 system. Most riders still need the same basics: clear rider-to-rider talk, stable Bluetooth, and batteries that last a full day on the road. In 2026, budget motorcycle intercoms […]
What is the best motorcycle intercom for beginners? If you’re a new rider, the idea of adding another piece of tech to your helmet can feel overwhelming. I’ve been using motorcycle intercoms for years—on solo rides, long tours, group trips, and daily commutes—and I’ll tell you this upfront: A beginner motorcycle rider doesn’t need the […]
Mesh Intercom vs Bluetooth: Which Motorcycle Communication System Is Better? Mesh intercoms are best for riders who travel in groups because they automatically reconnect and stay stable, while Bluetooth intercoms are better for solo riders and two-up riding due to lower cost and simpler operation. As someone who both wrenches on bikes and rides long […]