Long-distance motorcycle touring is about freedom, rhythm, and endurance. Hours on the highway, changing weather, unfamiliar roads, and constant wind noise all test your gear — especially the communication system for touring. A touring motorcycle intercom is not the same as a short-ride or commuter intercom. On a multi-day trip, small weaknesses become big problems: […]
How To Bleed ATV Brakes? Ultimate Guide With 3 Methods 2025
Bleeding the vehicle's brakes is part of the regular maintenance process. ATVs are not various. While the details procedure of bleeding the brakes might differ depending upon the make as well as the design of your vehicle, the standard steps include draining the brake fluid and then replenishing it with a new lubricating substance to eliminate any type of air bubbles, which might be embedded the system.
As an ATV proprietor, it's a good suggestion to learn a couple of standard mechanical abilities, such as being able to bleed the brakes when required.
This article will certainly take you through what, why, and exactly how to bleed ATV brakes to maintain everything running efficiently as possible so you can kick back and also enjoy your ride.
Table of Contents
What Does Bleeding The Brakes Mean?
Hydraulic brake systems use special brake liquid to move the energy from your hand or foot and to the brake caliper. The fluid is vital for correct brake features.
Inside the caliper, a piston is activated by the brake liquid when stress is applied. The piston will after that push the brake pad versus the brake disc, producing rubbing to stop the bike.
Bleeding the brakes means letting out some of the brake liquid to remove trapped air or to change the brake fluid entirely.
Why Do You Require To Bleed ATV Brakes?
Bleeding ATV brakes eliminate old brake liquid, enabling you to add brand-new brake liquid. It's recommended that you change brake liquid every time you change your brake pads.
You may likewise require to bleed your ATV brakes to get rid of caught air. Air in the cylinder or brake line can make your brake lever feel soft as well as squishy when you push it, seriously impacting braking efficiency.
Bleeding ATV brakes is a relatively easy process that you can do at home with basic tools. There are 3 methods to do it: the manual method, the vacuum method using a brake bleeder device, and also the reverse bleeding method.
Manual Method For Bleeding Brakes
Tool Requirements
- A jack-- to obtain the ATV off the ground
- A wheel nut tool-- preferably a hand tool as various other electrical torque wrenches are also strong for ATVs
- A hex or Phillips little bit that will fit-- you can additionally make use of a little impact driver
- A wrench for the bleeder-- most ATV bleeders are 8mm and a boxed end or a flat nut wrenches will certainly work
- Something to push the brake lever-- this can be a clamp or a helpful person
- Substitute brake liquid-- check the supplier of what type you need, this will also be marked somewhere on the brake storage tank cap.
- Latex gloves-- brake liquid will certainly not be kind to your hands
- Some clear vinyl tubes with one end in a container like an old oil bottle-- use it to accumulate the old brake fluid to make right disposal much easier and also less messy.
1. Make Use Of The Jack To Lift Your ATV
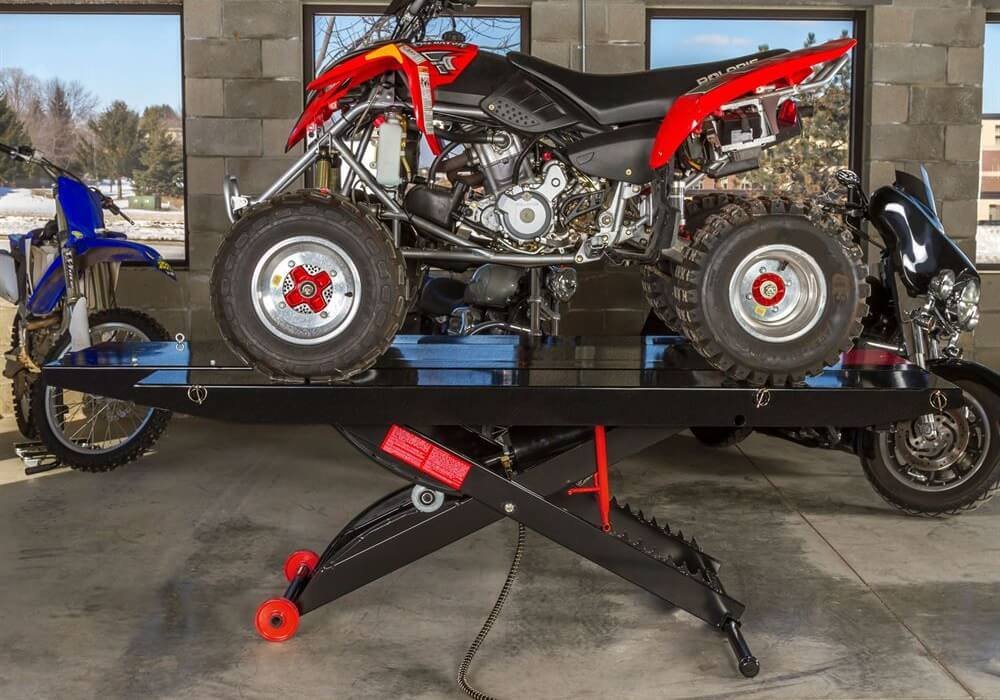
Use the jack to lift your atv
You need to jack your ATV as well as remove the wheels before you can bleed the brakes. It is in theory possible to bleed the brakes without removing the wheels but it is much more difficult. Removing the wheels makes it easier to reach the bleed nipple so it is suggested.
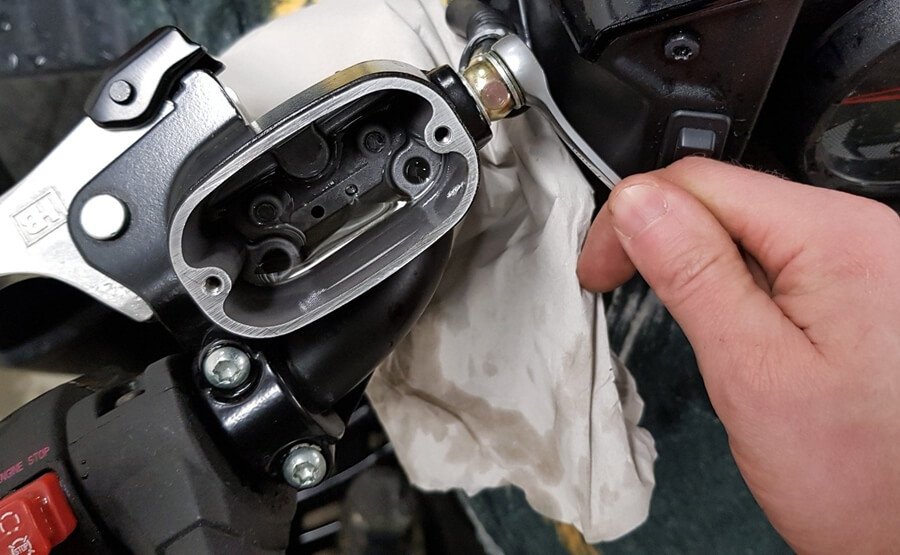
2. Take Off the Cap to the Brake Liquid Reservoir
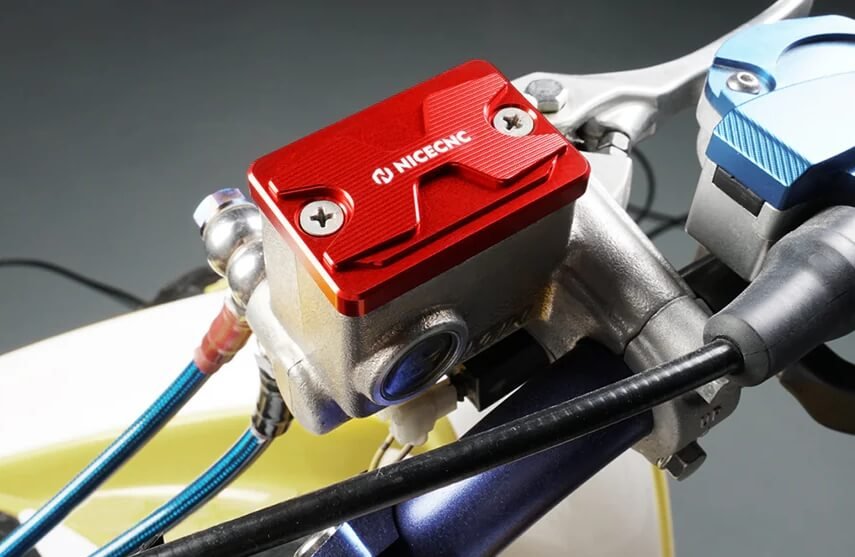
Take off the cap to the brake liquid reservoir
You require to put new brake liquid in as the old liquid comes out of the system.
The cap on the reservoir is secured with 2 hex screws. Be careful as you remove it as stripping strings is easy to do.
If it has been a while since you last removed the screw, you may need to use an impact driver. Find the correct bit and then use the driver to tap it gently. Hopefully, this will vibrate any corrosion and open the screw up a bit.
Fortunately, the reservoir for the foot pedal is usually a cap twist that you can do by hand.
3. Clean The Cap And Rubber Seal
Clean the cap and rubber seal
Brake liquid needs to be maintained unpolluted so any type of exposure to debris, dirt, or even water needs to be kept to a minimum.
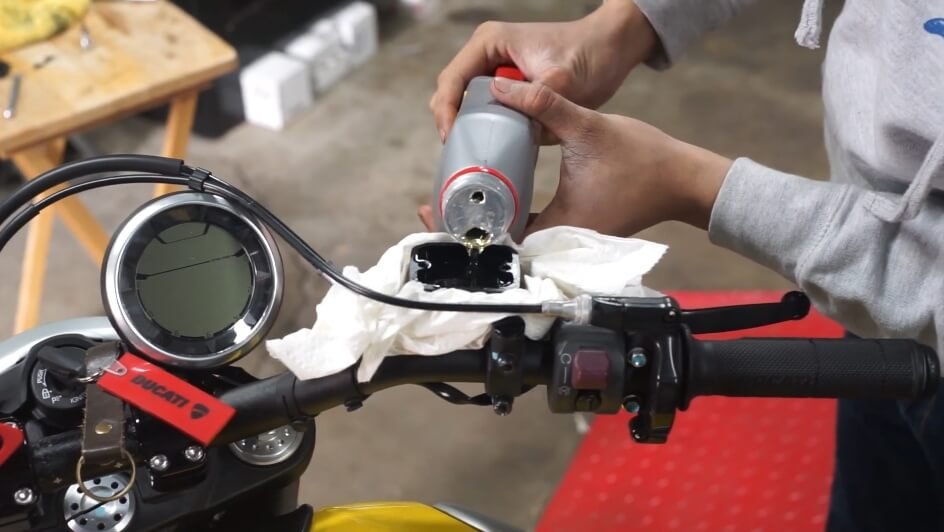
4. Top Up The Brake Liquid To The Optimum
You require to ensure that the level of brake fluid in the reservoir is maintained above the minimum during the bleeding procedure. It might be necessary to replenish the reservoir a number of times during the work.
It is best to replace the caps at this phase. You do not require to and you can pump brakes without cover, however, you are substantially more probable to get brake liquid everywhere.
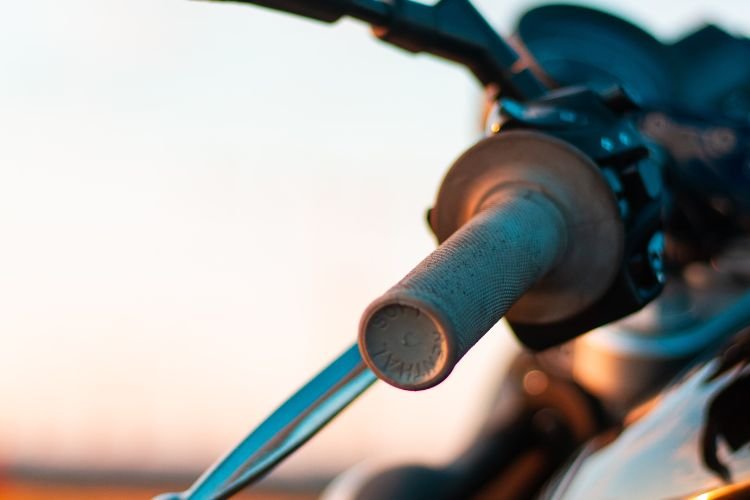
5. Pump The Brake Bar 3 to 4 Times
You will either pump the brake bar or the foot pedal depending on which system you are bleeding. Pump careful if you are risking it and also going cap-free!
You require to keep the lever activated with your hand or by utilizing a spring-loaded clamp. Essentially, you just require to keep it under tension while you are bleeding.
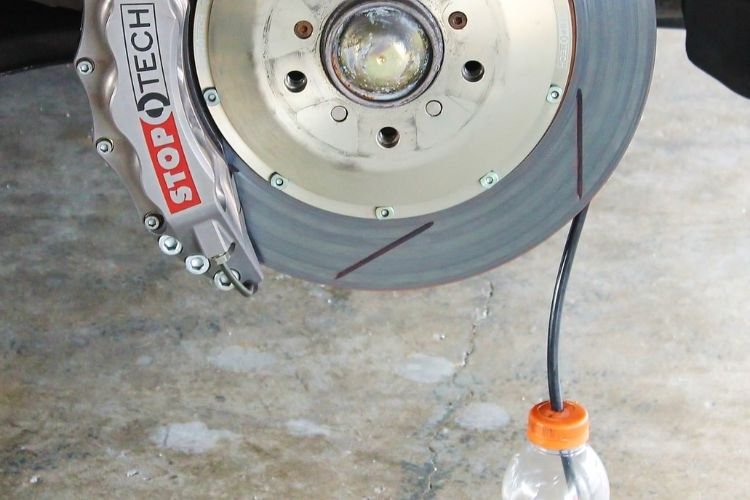
6. Open Up The Bleeder Valve

Open up the bleeder valve
It is much easier to begin with the bleeder valve outermost away from the fluid tank.
The valves will certainly get on the top of the brake caliper as well as are opened by turning anti-clockwise roughly half a turn. If you have done it properly, the brake fluid needs to begin to permeate out of the bleeder.
When the Brake Bar is at Over Three-quarters of the Total Travel Length, Close the Bleeder Valve.
It is very important not to over-tighten the valve as the threads can easily flake off.
7. Repeat
You require to repeat these actions up until the brake liquid that comes out of the bleeder valve has no air bubbles in it. Be prepared to do this for some time if there is a lot of air in the brake lines.
Repeat these actions for all wheels. Remember that some bikes have simply one brake caliper for the rear brakes-- they will be incorporated into one.
8. Re-fill The Reservoir To The Maximum Mark
refill the reservoir to the maximum mark
You require to fill with brake fluid to the maximum marker. This might get on the evaluation gauge on the side of the storage tank on the within. Some have a gauge at the top that changes color depending on whether the level is low or high.
If you are unsure, get in touch with your maker to learn more.
9. Replace The Cap And Rubber Seal
Make sure that the clean and dry cap and seals are properly installed and also make certain not to tighten the screws way too much.
You can currently replace the wheels as well as you are all done!

Pros and Cons of Manual Bleeding ATV Brakes
✅Pros:
- Inexpensive – only basic hand tools (wrench, clear tubing, container) plus the existing brake lever and reservoir are needed.
- Can be performed anywhere (no pump or power source required), ideal for trail‑side servicing.
- No specialized equipment to maintain or calibrate – fewer failure points compared to vacuum or pressure pumps.
❌Cons:
- Usually requires two people to operate the lever and open/close the bleed screw simultaneously.
- Pushing the master‑cylinder piston beyond its normal travel can accelerate seal wear or introduce debris.
- If the reservoir runs low or debris enters when the cap is off, you risk contaminating fluid or drawing in air.
Vacuum Bleeding ATV Brakes
While a little much more complicated, this method is still a very easy and also low-cost means to bleed brakes as well as might get out more air.
Tool Requirements
- You require every one of the tools for the previous method
- You will certainly likewise require a hydraulic brake bleeding tool-- these have been available in numerous forms however all work in similarly by drawing down brake liquid and also out through the bleed valve.
Some versions of hydraulic brake bleeders have a hand pump to create a vacuum. There will additionally be a one-way valve to maintain the liquid in one direction. Other models are connected to the compressor to produce the same vacuum result.
1. Repeat The Manual Bleeding Steps Until Pump
Adhere to the Same Steps for the Manual Method Up till the Brakes are Pumped. Stop right here.
Currently, you need to obtain the 8mm wrench so that it is ready to be used.
Link the hydraulic brake fluid pump to the bleeder valve. It is best to comply with the producer's directions right here for the very best results.
2. Turn On The Pump
Activate the pump and after that transform the bleeder valve into a half turn. Air bubbles need to be gotten with the fluid and splutter into the container.
You need to pay attention to the level in the reservoir as the pump can drain it immediately if you are not paying attention.
If your level begins to run low, you require to tighten up the valve again as well as switch off your pump. Put extra fluid into the tank, switch the pump back on and also loosen the bleeder valve.
3. Continue Pumping The Brake Fluid
Continue pumping until the brake fluid is streaming in a consistent stream-- no spluttering as this means there are air bubbles-- and also it is clear or slightly amber.
Tighten the bleeder valve and afterward turn off the pumping tool.
4. Repeat
Repeat this process for all of the brakes you wish to bleed.
When you are finished, ensure that you top up the brake liquid reservoirs so that the liquid sits at the maximum line.
Pros and Cons of Vacuum Bleeding ATV Brakes
✅Pros:
- Single‑person operation.
- Efficient and time‑saving compared to manual or gravity bleeding.
❌Cons:
- Risk of reservoir running dry, which can introduce air and even lead to brake failure if not closely monitored.
- Potential for air ingress at the bleeder nipple threads under vacuum, making it harder to achieve a clear, continuous fluid flow.
- Contamination of brake fluid with air, reducing fluid quality if the vacuum introduces bubbles into the reservoir.
- Stress on seals and brake lines, since hydraulic systems aren’t designed for vacuum—older components may develop leaks.
- Up‑front cost and need for specialized vacuum‑pump equipment, which may not be justified for occasional use.
Reverse Bleed ATV Brakes
If you don't want to buy an expensive bleeder venting tool, another quick way to remove trapped air and old oil is to reverse bleeding.
Reverse bleeding works in the opposite way to normal brake bleeding. Instead of pushing the old brake fluid out of the reservoir and draining it through the bleed valve, new brake fluid is added through the bleed valve and the old brake fluid is sucked out of the reservoir.
Not only is reverse bleeding easier and faster (especially because you don't need a pump brake lever), it can sometimes be better at removing trapped air pockets.
You'll need 2 syringes, a 5/16 inch clear tube, a Phillips screwdriver, and an 8mm wrench. Here's the step-by-step process.
- Open up the tank cap and make use of one of the syringes to suck out some of the old brake liquid. Do not allow the level to drop below the minimum.
- Load the various other syringe with brand-new brake fluid as well as attach the clear tube on its end.
- Open the bleed valve cap as well as put the clear tube. Hold the syringe and the connected tube vertically to prevent air from entering. Touch the tube to get rid of any type of caught air bubbles.
- Still holding the syringe upright, position the 8mm wrench on the bleed valve and also turn it anticlockwise half a turn. Currently, gently push the syringe to press new brake liquid with the valve.
- Quit after a few seconds to ensure the storage tank does not overflow. If there's someone else around, ask them to draw out more brake fluid from the storage tank. If you are alone, hang the syringe from something like a band or cord to maintain it upright, then go draw brake fluid from the reservoir.
- Open the bleed valve and push more brake liquid in. After a few seconds, close the valve as well as attract more brake fluid from the tank.
- Repeat this procedure until the liquid in the reservoir is clear or somewhat brownish-yellow. That suggests that the brake system now includes only brand-new brake fluid. Examine your brakes to make sure they feel firm and tight.
- When you are done, close whatever up the way it was and also dispose of the old brake liquid someplace safe. Repeat for any other brake line.
Pros and Cons of Reverse Bleeding ATV Brakes
✅Pros:
- Aligns with air’s natural tendency to rise. This way can improve the evacuation of trapped air bubbles.
- Especially effective on small‑bore master cylinders common in ATVs. They often can’t push fluid far enough in a standard bleed.
- Can be done solo, with no helper needed. And usually faster than pump‑and‑hold or vacuum methods.
- Faster overall procedure: fluid is driven continuously from the caliper back to the reservoir in minutes.
- Works well even on ABS‑equipped systems (though an initial flush may be recommended to clear old fluid/gunk).
❌Cons:
- Risk of forcing contaminated fluid and debris from the caliper back into the master cylinder. This may potentially introduce wear or seal damage.
- Requires a specialized reverse‑bleed tool (or DIY rig). Their prices can cost between $60 and $400.
- If the bleeder nipple isn’t at the highest point on the caliper, air pockets may remain trapped. This may lead to incomplete bleeding.
- Fluid can overflow or spill from the reservoir if not carefully monitored. Then, it may create a messy work area and potentially brake‑fluid damage to plastics/paint.
- Demands careful reservoir‑level checks and frequent fluid removal/addition to avoid overfill. Thus, it may add extra handling steps.
When To Bleed Brakes
Rule 1: Annual Service Is a Must
You should plan on bleeding your ATV's brake system at least once a year, even if you're not trying to beat lap times.
This gets rid of fluid with water in it and tiny bits of dirt before they make it harder to stop.
Rule 2: Watch for Spongy Feel
Check if your brake lever or pedal feels soft, spongy, or travels farther than usual. If these phenomena occur, it indicates that air has likely infiltrated the lines.
Then you should bleed the brakes immediately to restore firm, reliable modulation.
Rule 3: Fluid Clarity Check
Check the master cylinder reservoir every few rides. Brake fluid should be clear. If it turns yellow or dark brown, it's time to flush and bleed.
Rule 4: After Heavy Use
Long, steep descents or water crossings can heat the fluid or introduce moisture. A post‑ride bleed ensures that no vapor pockets remain to boil under hard braking.
Remember, you should always follow the user manual's guide. Always use the brake fluid type (DOT 3, DOT 4, etc.) specified by the OEM. Mixing fluid grades or brands can alter boiling points and seal compatibility.
Conclusion
Bleeding the brakes on an ATV is really important to maintain them functioning appropriately.
You can use the manual method to bleed your ATV brakes to easily change the brake fluid or eliminate air bubbles.
If you have a great deal of air in your liquid hereafter process, you might need to attempt once again using a vacuum pump to remove the brake liquid faster as well as with greater pressure. This will drag out more air from the brake system.
How To Bleed Motorcycle Brakes? Best Guide 2022

Rodney L is a technical writer and product consultant with over a decade of experience in the motor industry. Rodney is a fan of performance machines that run fast and loud and an expert in all things custom. His numerous articles and write-ups are available at our knowledge base. Whether it’s something wrong with your motorcycle or you are building a custom bike, you can trust Rodney’s experience.
You maybe like to read:
Best Adventure Bikes for Beginners (2026 Guide)
Adventure motorcycles, often called ADV bikes, are built to take you from smooth highways to rough backcountry trails. For new riders, picking the best adventure bikes for beginners can make all the difference. The right machine turns highways, gravel roads, forest tracks, and remote trails into places you actually want to explore, while the wrong […]
Best Motorcycle Intercom for Group Rides (2–20 Riders)
Riding in a group is thrilling, but without clear communication, even the best rides can turn chaotic. That’s where motorcycle intercom systems come in, letting you talk with your group, share GPS directions, listen to music together, and stay safer on the road. Whether you’re riding with a single friend or leading a pack of […]
Budget Motorcycle Intercoms from Fodsports: Honest 2026 Picks
I’ve used premium intercoms and budget ones on the same roads, in the same weather, on long touring days. The truth? Most riders don’t need a $400 system. Most riders still need the same basics: clear rider-to-rider talk, stable Bluetooth, and batteries that last a full day on the road. In 2026, budget motorcycle intercoms […]
2026 Best Motorcycle Intercom for Beginners from Fodsports
What is the best motorcycle intercom for beginners? If you’re a new rider, the idea of adding another piece of tech to your helmet can feel overwhelming. I’ve been using motorcycle intercoms for years—on solo rides, long tours, group trips, and daily commutes—and I’ll tell you this upfront: A beginner motorcycle rider doesn’t need the […]
Mesh Intercom vs Bluetooth Intercom: Which Motorcycle Communication System Is Better?
Mesh Intercom vs Bluetooth: Which Motorcycle Communication System Is Better? Mesh intercoms are best for riders who travel in groups because they automatically reconnect and stay stable, while Bluetooth intercoms are better for solo riders and two-up riding due to lower cost and simpler operation. As someone who both wrenches on bikes and rides long […]
Good information. The points are informative, high quality and easy to follow.
Rodney, you are really experienced and expertise in this field!