Long-distance motorcycle touring is about freedom, rhythm, and endurance. Hours on the highway, changing weather, unfamiliar roads, and constant wind noise all test your gear — especially the communication system for touring. A touring motorcycle intercom is not the same as a short-ride or commuter intercom. On a multi-day trip, small weaknesses become big problems: […]

How To Tighten Motorcycle Chain? How to check and adjust?
Do you know how to check and adjust your motorcycle chain?
Keeping your motorcycle's chain in good tension is super important, but it's something riders tend to forget. A chain with the right tension and that is lubed up properly gives you smooth power while riding. And, this also makes your bike last longer, and keeps you from having to pay for big fixes later on. But if you mess it up, you could end up damaging components and making things unsafe.
This article will tell you why, when, and how to check and adjust your motorcycle chain like you really know what you're doing—with easy steps, tips from the pros, and stuff to watch out for so you don't screw it up.
Table of Contents
Why Chain Tension Matters?
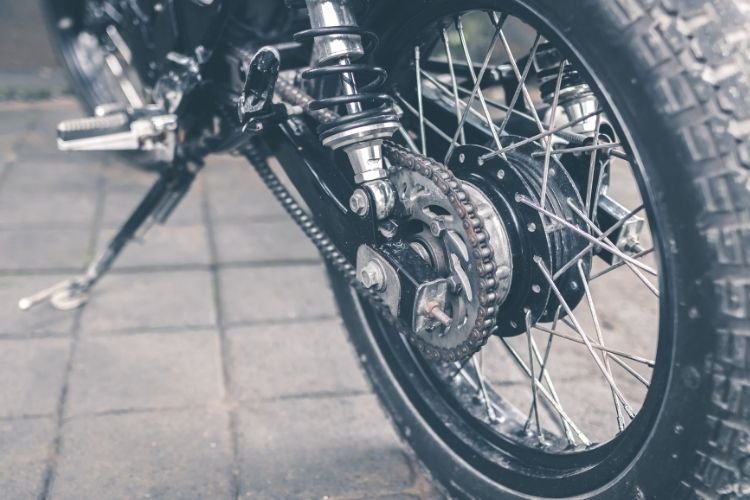
The drive chain transmits engine power from the front sprocket to the rear wheel. When a motorcycle is running, the chain moves constantly and experiences tension cycles with every rotation. Therefore, it naturally stretches and wears over time.
If your chain is too loose, it can:
- Slap against the swingarm
- Skip over sprocket teeth under load
- Lead to irregular power delivery
- Increase the risk of de-railment or rear-wheel lock-up
If it’s too tight, it can:
- Causes excessive sprocket and bearing wear
- Stress the gearbox output shaft
- Bind the rear suspension
- Result in premature drivetrain damage
Thus, you will need to find a balance between them and make sure the chain is correctly adjusted. It should have the right amount of slack that accounts for both normal wear and suspension movement.
Why is my motorcycle chain tight and loose?
Your motorcycle chain can feel tight in one spot and loose in another because of uneven wear, improper tension, and maintenance issues.
If some links or sprocket teeth are worn, rusted, or stiff, the chain won’t bend smoothly, creating tight and slack spots as it moves. Incorrect adjustment, loose rear axle alignment, or a stretched/aged chain also changes tension unevenly around the loop. Regular cleaning, correct slack per your manual, proper lubrication, and replacing worn parts keep chain tension stable and safe.
How Often You Should Check Chain Tension?
Routine inspection and adjustment will vary based on your riding style and conditions.
Here are some details you should know:
For every 300–500 miles (500–800 km) in normal riding, you should check the chain tension and lube the chain.
If you have just finished a long ride or a harsh conditions (off-road, rain, mud) ride, remember to check the chain sooner.
Besides, for every 600–1000 miles (1,000–1,600 km) ride, it is better to have a general slack chain review and adjustment.
One more thing, new chains(or new motorcycle) are different from old chains(or old motorcycle).
New chains typically stretch more in the first few hundred miles than old chains. So, it is important to have closer monitoring during that period.
Why is Proper Chain Tension so Crucial for City Motorcyclists?
A chain that's also loosened can miss over the tooth in the gears, triggering unequal power circulation to the wheels and uncertain speed oscillations when driving.
A chain that's too tight places unnecessary stress and anxiety on the suspension as well as causes the engine to function harder than it should.
So, just exactly how tight should a motorcycle chain be?
Learn exactly how to check and just how to tighten a motorcycle chain with this step-by-step, listed below.
Motorcycle Chain Tension Check Tools & Preparation
Tools You’ll Need
- Tape measure or dedicated chain gauge
- Wrenches/sockets for axle and adjuster nuts
- Torque wrench
- Motorcycle stand (center or paddock) — recommended but not always required
- Chain lubricant and cleaner
Preliminary Safety Steps
- Park on a level surface. Keep the bike upright and stable.
- Shift into neutral. This allows smooth rotation of the rear wheel for inspection.
- Support the bike. Use a stand to lift the rear wheel if possible — this makes measuring and adjusting easier and more accurate.
How To Check Chain Slack? Step by Step
Proper slack is measured at the midpoint between the front and rear sprockets. It is the spot that will reveal the true free movement of the chain.
1. Find the Measurement Point
Locate the center of the chain run between the sprockets.
2. Measure Slack
- Push the chain upward until it stops.
- Push the chain downward until it hangs at its lowest point.
- Record the vertical distance between these two points — this is the chain slack.
How tight should a motorcycle chain be?
The slack specs vary by bike, but most street motorcycles fall within 25–40 mm (1.0–1.6 in).
So, always consult your owner’s manual for the exact figure.
📌 A Pro Tip: Slowly rotate the wheel by hand and find the tightest point of the chain (due to uneven wear). Set tension based on the tightest spot to avoid over-tightening.
How To Tighten Motorcycle Chain? Step by Step
Tightening your bike's drive chain must be the simplest task in the world, nevertheless it is amazing the variety of riders you see with a chain so slack it is practically dragging on the ground.
Right here's our guide on exactly how to readjust it, with some leading pointers along the way.

Step 1: Check User Manual
The first thing to do is read your Motorcycle Owner's Manual.
There is no fixed policy when it comes to a chain's tension. Each bike is different, so search in your owner's manual to learn what the right figure should be.
As soon as you know what the slack must be, write it on your garage wall with a permanent marker so following time you will not need to dig out the guidebook.
Step 2
You only require very few devices to change a chain, a couple of spanners and also a ruler, nevertheless if your bike does not have a center stand you may need either a paddock stand or a friend to lend a hand.
Can I tighten my motorcycle chain without a stand?
Yes — you can tighten your motorcycle chain without a stand, but it’s a bit harder and less stable than using one. Many riders adjust chain tension with the bike on its side stand or wheels on the ground, loosening the rear axle and turning the adjuster bolts evenly to achieve proper slack. A stand makes it easier and safer, but it isn’t strictly required if you secure the bike and follow the correct tension specs.
Step 3
With the bike's rear-wheel off the ground, loosen up the axle nut and ease off the adjusters by the very same amount on each side.
Once the chain is nice and slack (or slacker than it was before you started!) do up the axle nut so it only has an extremely minimal amount of resistance after that tighten the insurance adjusters by the very same amount on each side, normally a quarter of a turn.
Step 4
Examine the chain's free play by holding the ruler versus the chain at the end of its loop and after that pushing it up and down to measure the activity.
Do not require it, simply see how much easy motion there remains in the chain.
When you enjoy you have the right tension it's time to examine the wheel's placement.
Step 5
Although most bikes have marks on their swingarm to assist you these are infamously incorrect so rather measure from the centre of the axle to a fixed factor on the swingarm.
Inspect both sides are the same as well as with any luck this should imply your rear wheel is correctly straightened.
You can gauge it extra precisely but this fundamental technique is good enough for a residence DIYer.
Step 6
Lastly, prior to tightening every little thing up appropriately, offer the wheel a great celebration inwards to ensure the adjustors are appropriately situated, check the free play once again and after that tighten the axle nut.
When tightening up the nut constantly make use of a torque wrench readied to the proper value (inspect your owner's manual) and use your freedom to put some stress on the chain when you are tightening it.
By tensioning the chain as you tighten up the axle nut you guarantee the wheel doesn't move and modify its setting.
OK, all done, nip up the insurer's nuts, lube the chain and offer it a last check for stress and also positioning.
While you are on your hands as well as knees provide the tires with a look into for step deepness and any damages and additionally examine your brake pads for wear and also your tire's stress.
Always remember to maintain your chain clean and also moisturized, utilizing just devoted products that will certainly not harm it.
I want to tell you that tightening your chain is not going to make the motorcycle go any kind of quicker.
However, it is vital if want it to last for a longer time. It very quick and easy procedure for a person that does not use wrenches and spanners every day.
An as well tight or too loosened chain is not suitable, the process is extremely basic and only involves 2 spanners.
It is recommended that you should check the slack(do not obtain overwhelmed by this word I will certainly describe it as you review even more) of your chain every 500 KMs.
For those of you who are located in seaside areas, the chain likewise tends to draw in rust, make use of a chain spray that maintains your chain lubed.
Few More Dos and Don’ts to increase the life of your chain.
- Do not accelerate like a MotoGP Racer unless you choose thrill over chain replacement.
- Do not drive on the engaged clutch on potholes or speed-breakers use the bike momentum to cross them as this stresses the chain.
- Check your chain slack every 500KMs and lubricate it only using chain spray.
✅ Motorcycle Chain Maintenance & Adjustment – Printable Checklist
Here’s a professional, printable checklist. It covers all the key steps of checking, adjusting, lubricating, and inspecting a motorcycle chain.
I have also provided a PDF version by the end. You can download and print it when you need to check the chain tension.
Before You Begin
☐ Park the bike on a level surface
☐ Place the motorcycle in neutral gear
☐ Support bike upright with center stand/paddock stand (optional but recommended)
☐ Gather tools:
- Tape measure or chain gauge
- Wrench/socket set (for axle & adjusters)
- Torque wrench
- Chain cleaner + brush
- Motorcycle-specific chain lube
☐ Put on work gloves
1) Inspect Chain Condition
☐ Rotate rear wheel and check entire chain length for:
- Rust or corrosion
- Stiff or binding links
- Severe dirt or debris
☐ Inspect sprocket teeth: - No hooked (“shark-fin”) shapes
- No missing or broken teeth
☐ Look for wear on rollers and side plates
☐ If chain or sprockets are excessively worn, plan replacement (chain & sprockets as a set)
Tip: Inspect both chain and sprockets together — wear in one accelerates wear in the other.
2) Measure Chain Slack
☐ Find the midpoint between front and rear sprockets
☐ Gently push chain upward then downward
☐ Record vertical movement (free play)
☐ Compare with manufacturer’s recommended slack (common: ~20–30 mm / 0.8–1.2 in)
☐ Check slack at multiple points (tightest spot governs)
✔ Chain should move smoothly with no excessive play
✔ Too tight → binds bearings / stresses drivetrain
✔ Too loose → risk of skipping, noise, or derailment
3) Chain Tension Adjustment
☐ Loosen rear axle nut just enough to move the wheel
☐ Loosen adjuster lock nuts on both sides
☐ Turn adjuster bolts in equal increments on each side:
- Clockwise → tightens chain (pulls wheel back)
- Counter-clockwise → loosens chain (pushes wheel forward)
☐ After each adjustment, re-measure slack
☐ Repeat until chain slack is within spec
📌 Make adjustments in small steps — don’t over-tighten.
4) Wheel Alignment
☐ Use swingarm alignment marks, tape, or straightedge
☐ Ensure both sides match — misalignment causes uneven wear
☐ Verify chain path looks straight from front to rear
☐ Check alignment again after setting tension
Tip: Proper alignment helps handling, braking stability, and extends component life.
5) Torque & Lock
☐ After correct tension & alignment:
- Torque rear axle nut to manufacturer spec
- Tighten adjuster lock nuts securely
☐ Re-check slack one last time after torquing
☐ Replace any cotter pins or safety fasteners removed earlier
6) Cleaning & Lubricating
☐ Clean chain with a chain cleaner or degreaser
☐ Use a small brush to remove stuck debris
☐ Wipe chain dry
☐ Spray or apply chain-specific lubricant:
- Inner side (contact area with sprockets)
- Spin rear wheel slowly while applying
☐ Wait 10–15 minutes for lube penetration
☐ Wipe off excess to prevent grit buildup
Note: Do not use engine oil or household oils — they lack proper lubrication properties.
7) Final Safety Check
☐ Spin rear wheel by hand — smooth motion
☐ No binding, catching, or uneven resistance
☐ No chain rubbing against guards or sliders
☐ Sprockets and chain move in harmony
Download the Motorcycle Chain Maintenance and Adjustment Checklist PDF >>
FAQS
When to Replace the Chain & Sprockets?
If a chain can no longer be tensioned within spec, has stiff links, rust, or visible elongation, then it is time to replace it.
If the sprocket teeth are worn, especially with “hooked” or shark-fin shapes, it means they are at the end of their useful life. You need to replace them with a new sprocket.
Which motorcycle chain tension gauges are recommended for home use?
Here are some motorcycle chain tension gauges and tools great for home use — easy to use and budget-friendly:
- Motion Pro Slack Setter Chain Tool – popular, accurate, and compact for consistent tension checks.
- Tru‑Tension Chain Monkey – simple tension setting tool, good for beginners.
- Tusk Chain Slack Measuring Tool – super affordable basic gauge.
- Taco Tensioner Pass/Fail Chain Tool – quick pass/fail tension check.
- Budget or specialized tools:
- Husqvarna Chain Gauge, DCMX Chain Slack Gauge‑Beta – simple tension gauges.
- Motorcycle Chain Slack Tool, SlackBuddy Dirt Bike Chain Tension Gauge – inexpensive options for basic checking.
What is the correct chain tension range for sport motorcycles?
For most sport motorcycles, the correct chain tension (measured as the vertical slack in the middle of the lower chain run) is usually around 20–30 mm (about 0.8–1.2 inches). This lets the chain move a bit as the suspension travels — not too tight to stress components, and not too loose to slap or skip. Always check your specific bike’s owner’s manual or swingarm sticker for the exact specification.
What are the signs of incorrect motorcycle chain tension?
Here are common signs your motorcycle chain tension is wrong:
- Chain slapping or loud noise while riding — a loose chain can hit the swingarm or other parts.
- Jerky or uneven acceleration and a “lurching” feel on throttle changes.
- Chain skipping or slipping on sprockets, especially under power.
- Chain too tight may cause whining noises or stiff suspension movement.
If you notice these, check and adjust your chain to the correct slack regularly.
How do I know my chain is tight enough on a motorcycle?
To know if your motorcycle chain is tight enough:
- Measure the slack at the midpoint between the front and rear sprockets while the bike’s upright or on its stand. Push the chain up and down and measure the total movement. The slack should fall within your bike’s factory spec (often about ~25–30 mm or ~1–1.5 in, but check your manual). If it’s within that range, it’s tight enough. Too little movement (almost no deflection) means it’s too tight.
Basically, correct slack—not overly tight or loose—ensures smooth power delivery and longer chain life.
How to check chain stretch without tool?
To check motorcycle chain “stretch” without a special tool, you can use a basic ruler or tape: pull the chain tight (so there’s no slack) and lay the ruler along a section of links. Count a set number of links (often ~12) and check if the length matches what it should be. If it’s noticeably longer than it once was, the chain is worn and stretched. Also look for visible gaps or loose links and compare against what a new chain looked like — big differences mean it’s worn.
In short: use a ruler and compare link length to expected length — if it’s too long, the chain is stretched.
How do you know if your motorcycle chain is loose?
Here are easy ways to tell if your motorcycle chain is too loose:
- You see too much slack or sagging in the chain when the bike is on its stand. Excessive slack means it’s too loose.
- You hear clanking, rattling, or metal-on-metal noise as the chain moves, especially under acceleration or deceleration.
- The chain slaps against the swingarm or chain guard while riding.
- You feel a jerky or tugging sensation when riding at low speed or changing gears.
If you notice these, check and adjust the tension to your bike’s recommended specification.
Is it safe to ride a motorcycle with a loose chain?
No — it’s not safe to ride a motorcycle with a loose chain. A loose chain can slap or lash around, cause jerky power delivery, and wear out the chain and sprockets faster. More seriously, it can jump off the sprockets or even snap, which might lock the rear wheel or make you lose control and crash. Always adjust your chain to the manufacturer’s recommended tension before riding to stay safe.
What happens if you tighten your motorcycle chain too much?
If you tighten your motorcycle chain too much, it puts excess stress on the drivetrain, causing premature wear on the chain, sprockets, bearings, and gearbox. This can reduce performance, make the engine work harder, increase vibration, and even lead to chain breakage while riding, risking damage and unsafe handling. Always set chain slack within the manufacturer’s recommended range to protect parts and ride safely.
Related Information
Top 10 Must Have Tools To Maintain Your Motorcycle
25 Best & Most Unique Gifts For Motorcycle Riders
How to Change a Motorcycle Chain? 8 Essential Steps
How to Clean Your Motorcycle Chain(Top Motorcycle Maintenance Tips)
Tips to Help You Get Rid Of Rusty Motorcycle Chain Problem

Rodney L is a technical writer and product consultant with over a decade of experience in the motor industry. Rodney is a fan of performance machines that run fast and loud and an expert in all things custom. His numerous articles and write-ups are available at our knowledge base. Whether it’s something wrong with your motorcycle or you are building a custom bike, you can trust Rodney’s experience.
Subscribe
0 Comments
Oldest
You maybe like to read:
Best Adventure Bikes for Beginners (2026 Guide)
Adventure motorcycles, often called ADV bikes, are built to take you from smooth highways to rough backcountry trails. For new riders, picking the best adventure bikes for beginners can make all the difference. The right machine turns highways, gravel roads, forest tracks, and remote trails into places you actually want to explore, while the wrong […]
Best Motorcycle Intercom for Group Rides (2–20 Riders)
Riding in a group is thrilling, but without clear communication, even the best rides can turn chaotic. That’s where motorcycle intercom systems come in, letting you talk with your group, share GPS directions, listen to music together, and stay safer on the road. Whether you’re riding with a single friend or leading a pack of […]
Budget Motorcycle Intercoms from Fodsports: Honest 2026 Picks
I’ve used premium intercoms and budget ones on the same roads, in the same weather, on long touring days. The truth? Most riders don’t need a $400 system. Most riders still need the same basics: clear rider-to-rider talk, stable Bluetooth, and batteries that last a full day on the road. In 2026, budget motorcycle intercoms […]
2026 Best Motorcycle Intercom for Beginners from Fodsports
What is the best motorcycle intercom for beginners? If you’re a new rider, the idea of adding another piece of tech to your helmet can feel overwhelming. I’ve been using motorcycle intercoms for years—on solo rides, long tours, group trips, and daily commutes—and I’ll tell you this upfront: A beginner motorcycle rider doesn’t need the […]
Mesh Intercom vs Bluetooth Intercom: Which Motorcycle Communication System Is Better?
Mesh Intercom vs Bluetooth: Which Motorcycle Communication System Is Better? Mesh intercoms are best for riders who travel in groups because they automatically reconnect and stay stable, while Bluetooth intercoms are better for solo riders and two-up riding due to lower cost and simpler operation. As someone who both wrenches on bikes and rides long […]