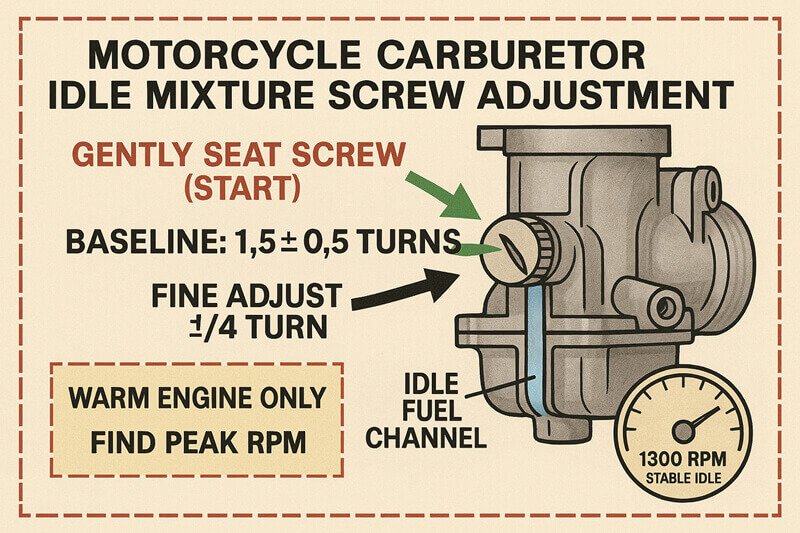
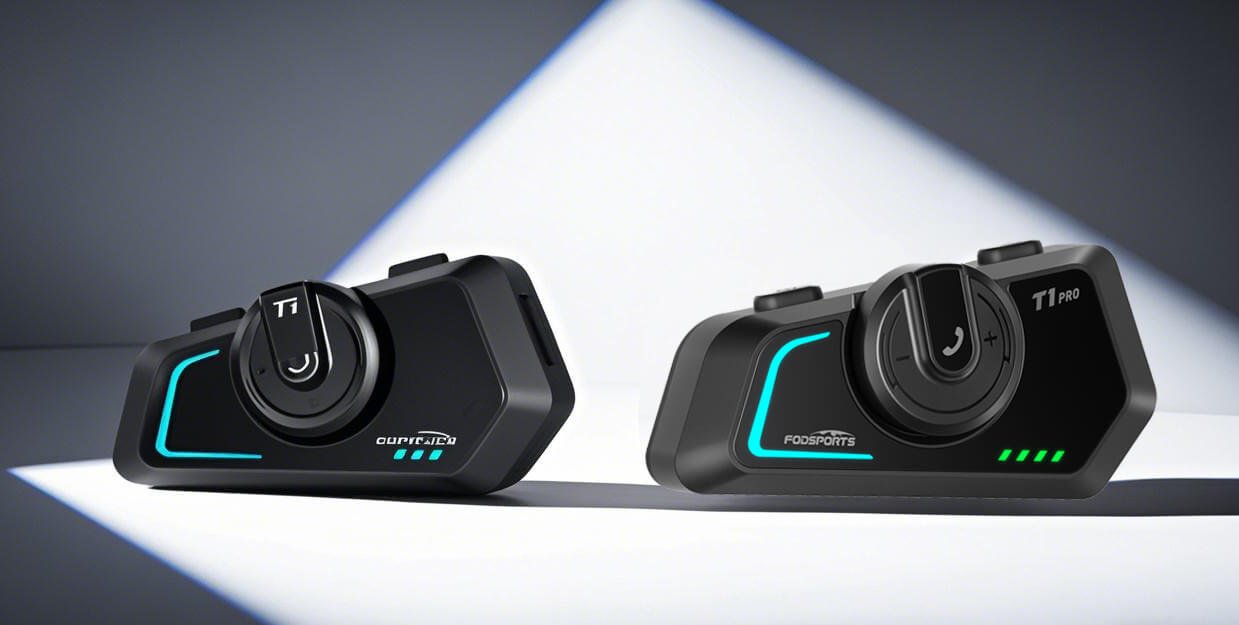
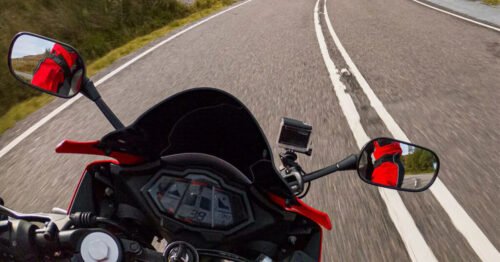
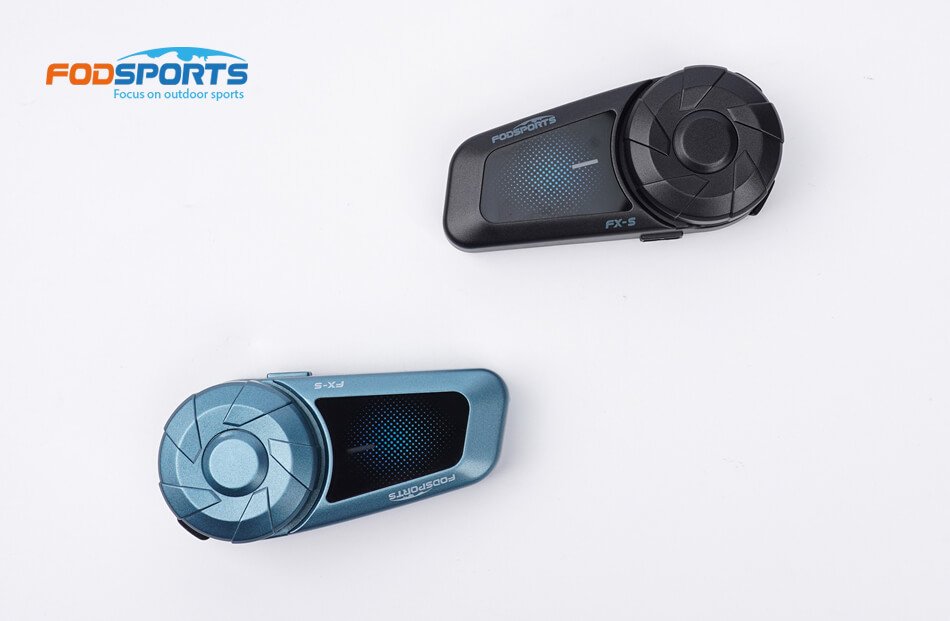
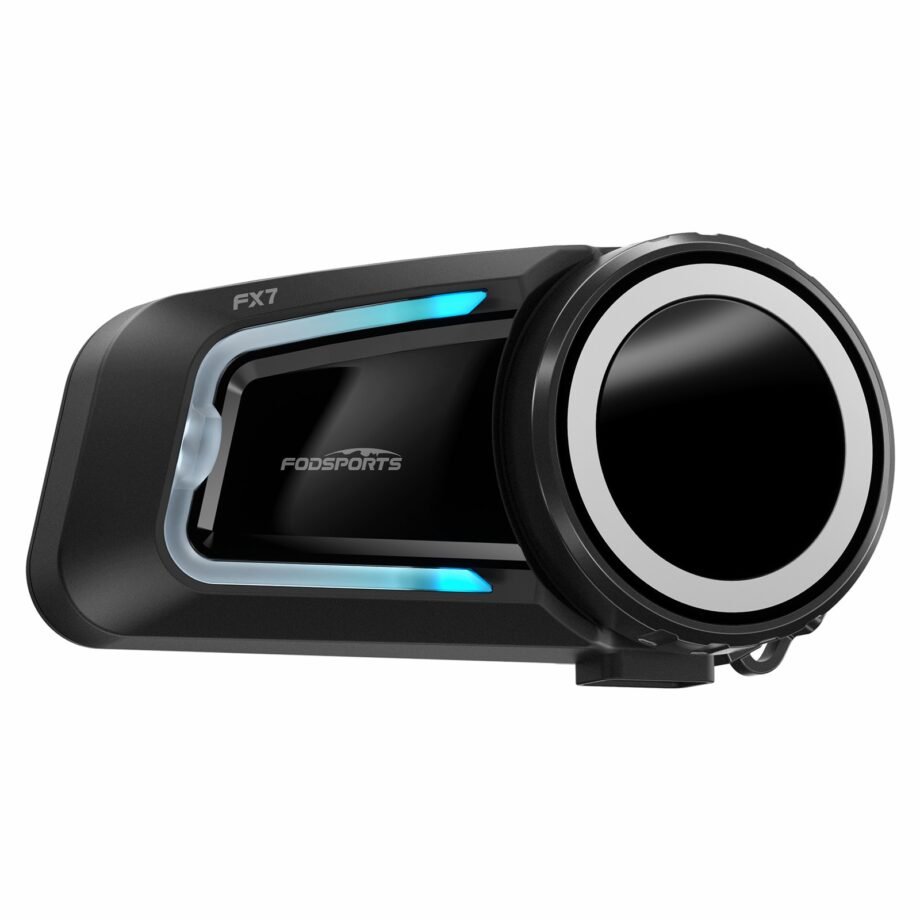
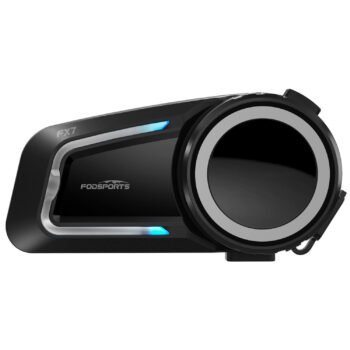
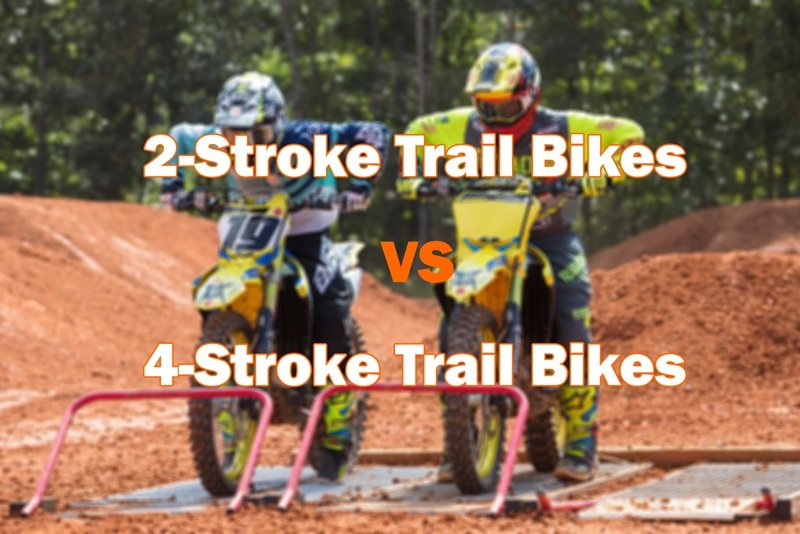
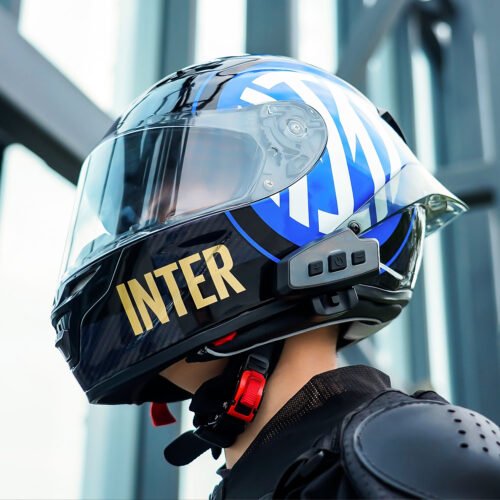
The motorcycle communication systems field just got a significant upgrade with the release of the Fodsports FX7. This state-of-the-art Bluetooth mesh intercom is packed with many advanced features and techs. It will revolutionize the way riders communicate and enjoy their rides. Whether you're a solo rider or part of a group, the FX7 offers unparalleled connectivity, sound quality, and ease of use. Let's dive into the incredible features of this new mesh motorcycle intercom.
Bluetooth Mesh Intercom.
Dual Bluetooth Chip Design.
10 Riders Group Audio, 2000m Distance!
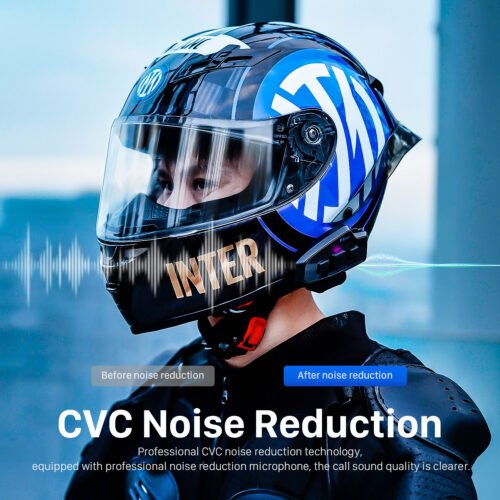
HRSQ Mic and Speakers, CVC + ENC + DSP Noise Cancelation.
Listen to Music/GPS and Intercom At the Same Time.
IP67 Waterproof.
FM Radio, Music Sharing, Voice Commands.
Main Features and Advantages of Fodsports FX7 Bluetooth Mesh Intercom
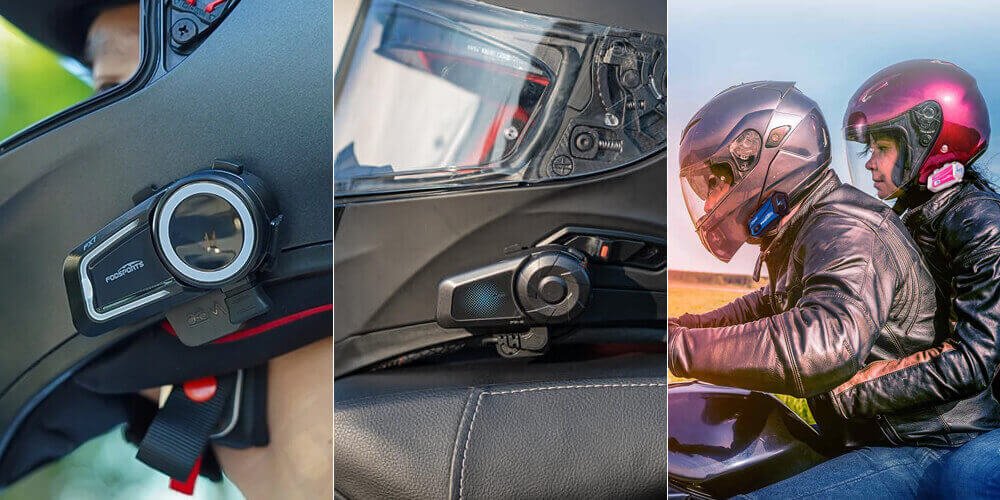
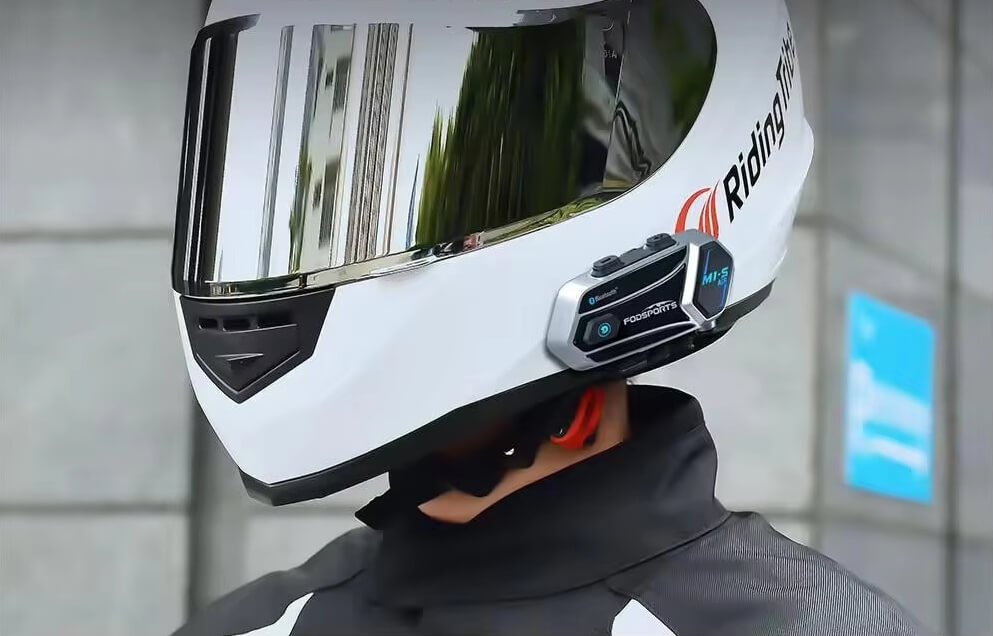
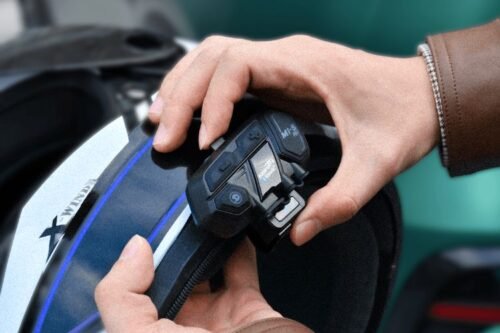
1. Dual Bluetooth Chip Design
FX7 dual Bluetooth chip design
The most outstanding feature of the Fodsports FX7 is its dual Bluetooth chip design.
One chip focuses on controlling Bluetooth audio. And, the other one focuses on controlling the Bluetooth intercom.
The two chips will work together and complement each other, greatly improving the performance of this Bluetooth mesh headset.
This separation ensures that both functionalities operate smoothly and without interference. Thus providing a seamless communication experience.
2. Three Quick Pairing Modes
FX7 three kinds of quick pairing mode
The FX7 offers three quick pairing modes to cater to different riding scenarios:
Two-rider intercom mode:
Perfect for a ride with a friend, allowing easy and quick 2-way intercom communication. Once in this mode, no other rider can join your intercom.
The intercom is secure, stable, and convenient. When you are riding with your friend/girlfriend, this mode will be the best choice.
Multi-rider intercom friends mode
This mode is ideal for a group of known riders to intercom. The riders can join and form a group.
Under this group intercom mode, other riders you don't know will not be able to join.
When you are riding with a group of familiar friends, using this mode will make your group intercom smoother without being disturbed by unknown riders who suddenly break in.
Multi-rider intercom make friends mode
In this mode, all the riders can join the intercom group and communicate freely.
Once a rider enters the communication range, he or she will automatically join the group without manual operation.
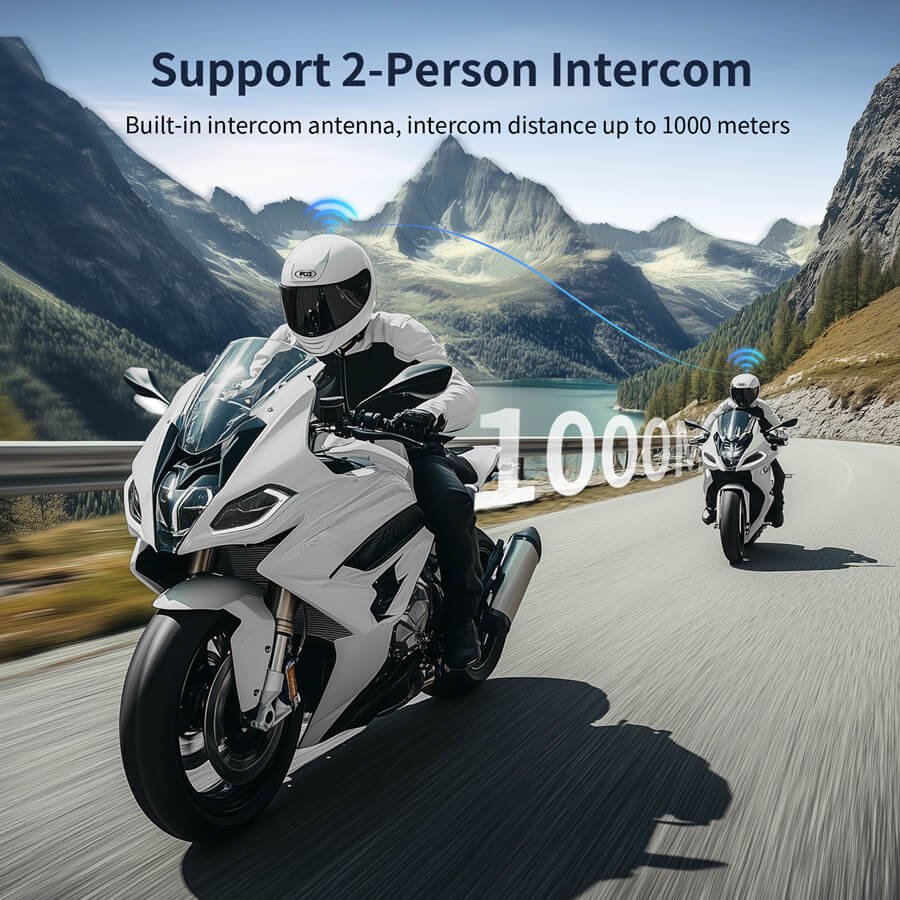
3. Long-distance Intercom
The FX7 offers an impressive intercom distance of up to 2000 meters.
This extended range ensures that you stay connected with your group even over long distances.
NOTE: The intercom distance may vary due to buildings, surrounding Bluetooth devices, and other environmental factors.
4. Multi-rider Mesh AD-HOC Network
When multiple riders are connected, the FX7 ensures that the intercom network remains intact.
Any rider who enters or leaves the group will not influence the other rider's intercom.
This mesh AD-HOC network feature provides continuous communication without any disruptions.
For group rides, this is a perfect function that is very convenient and efficient.
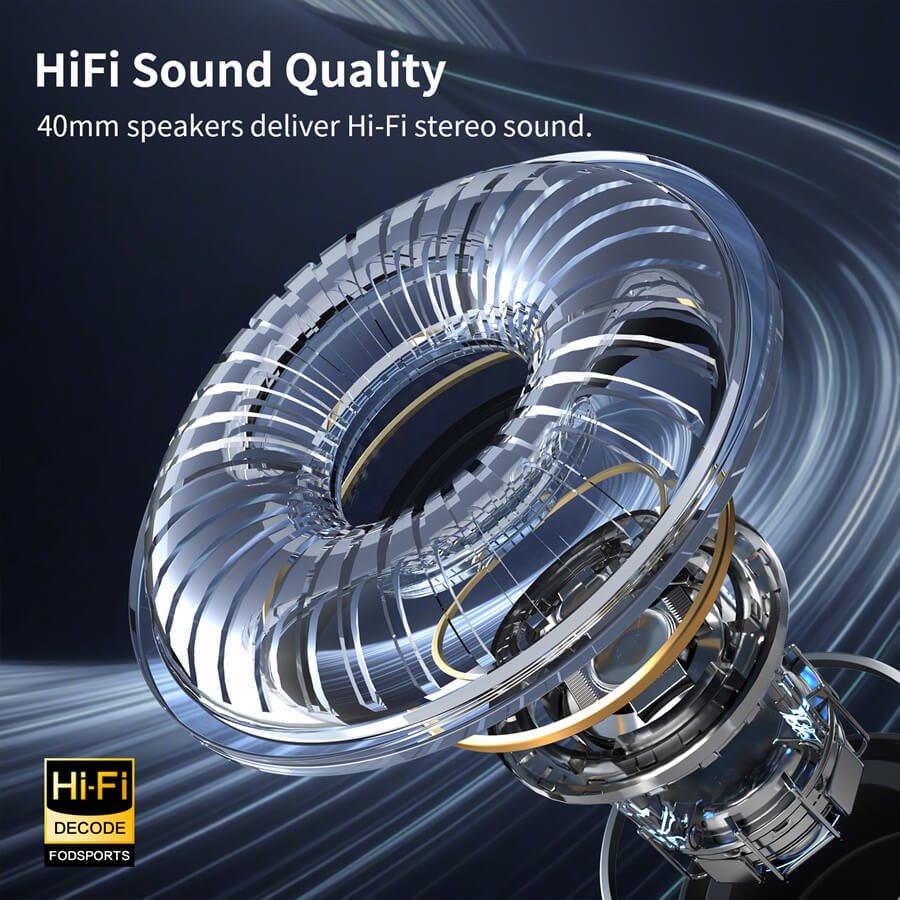
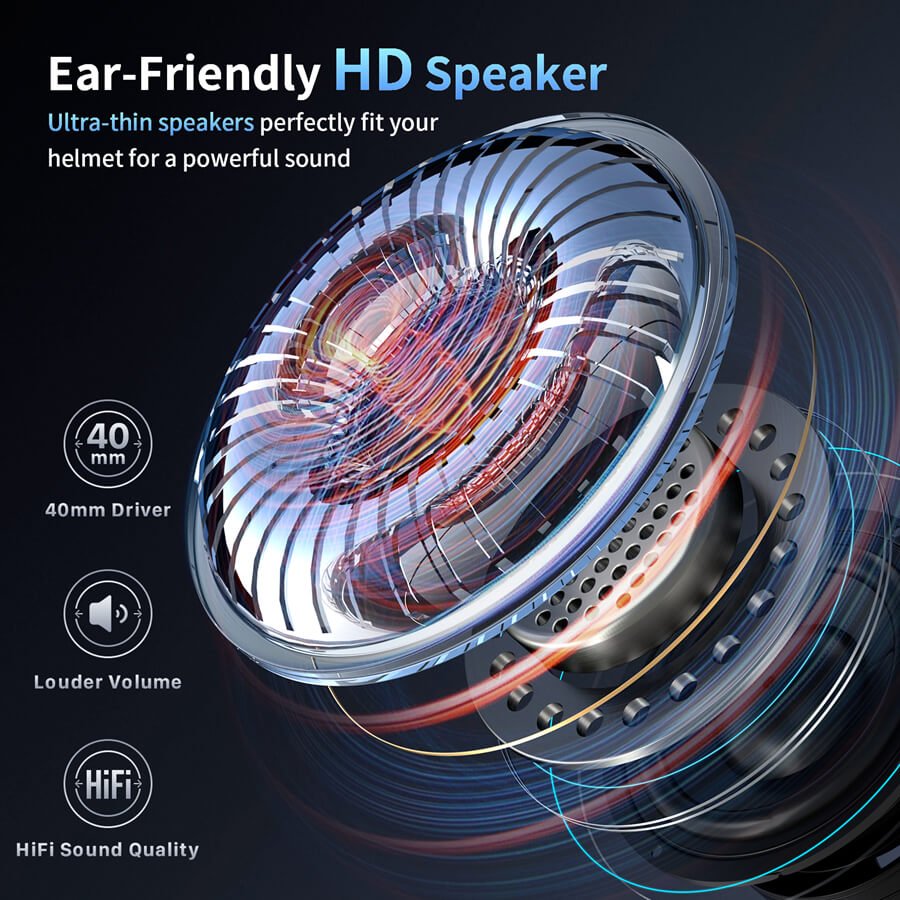
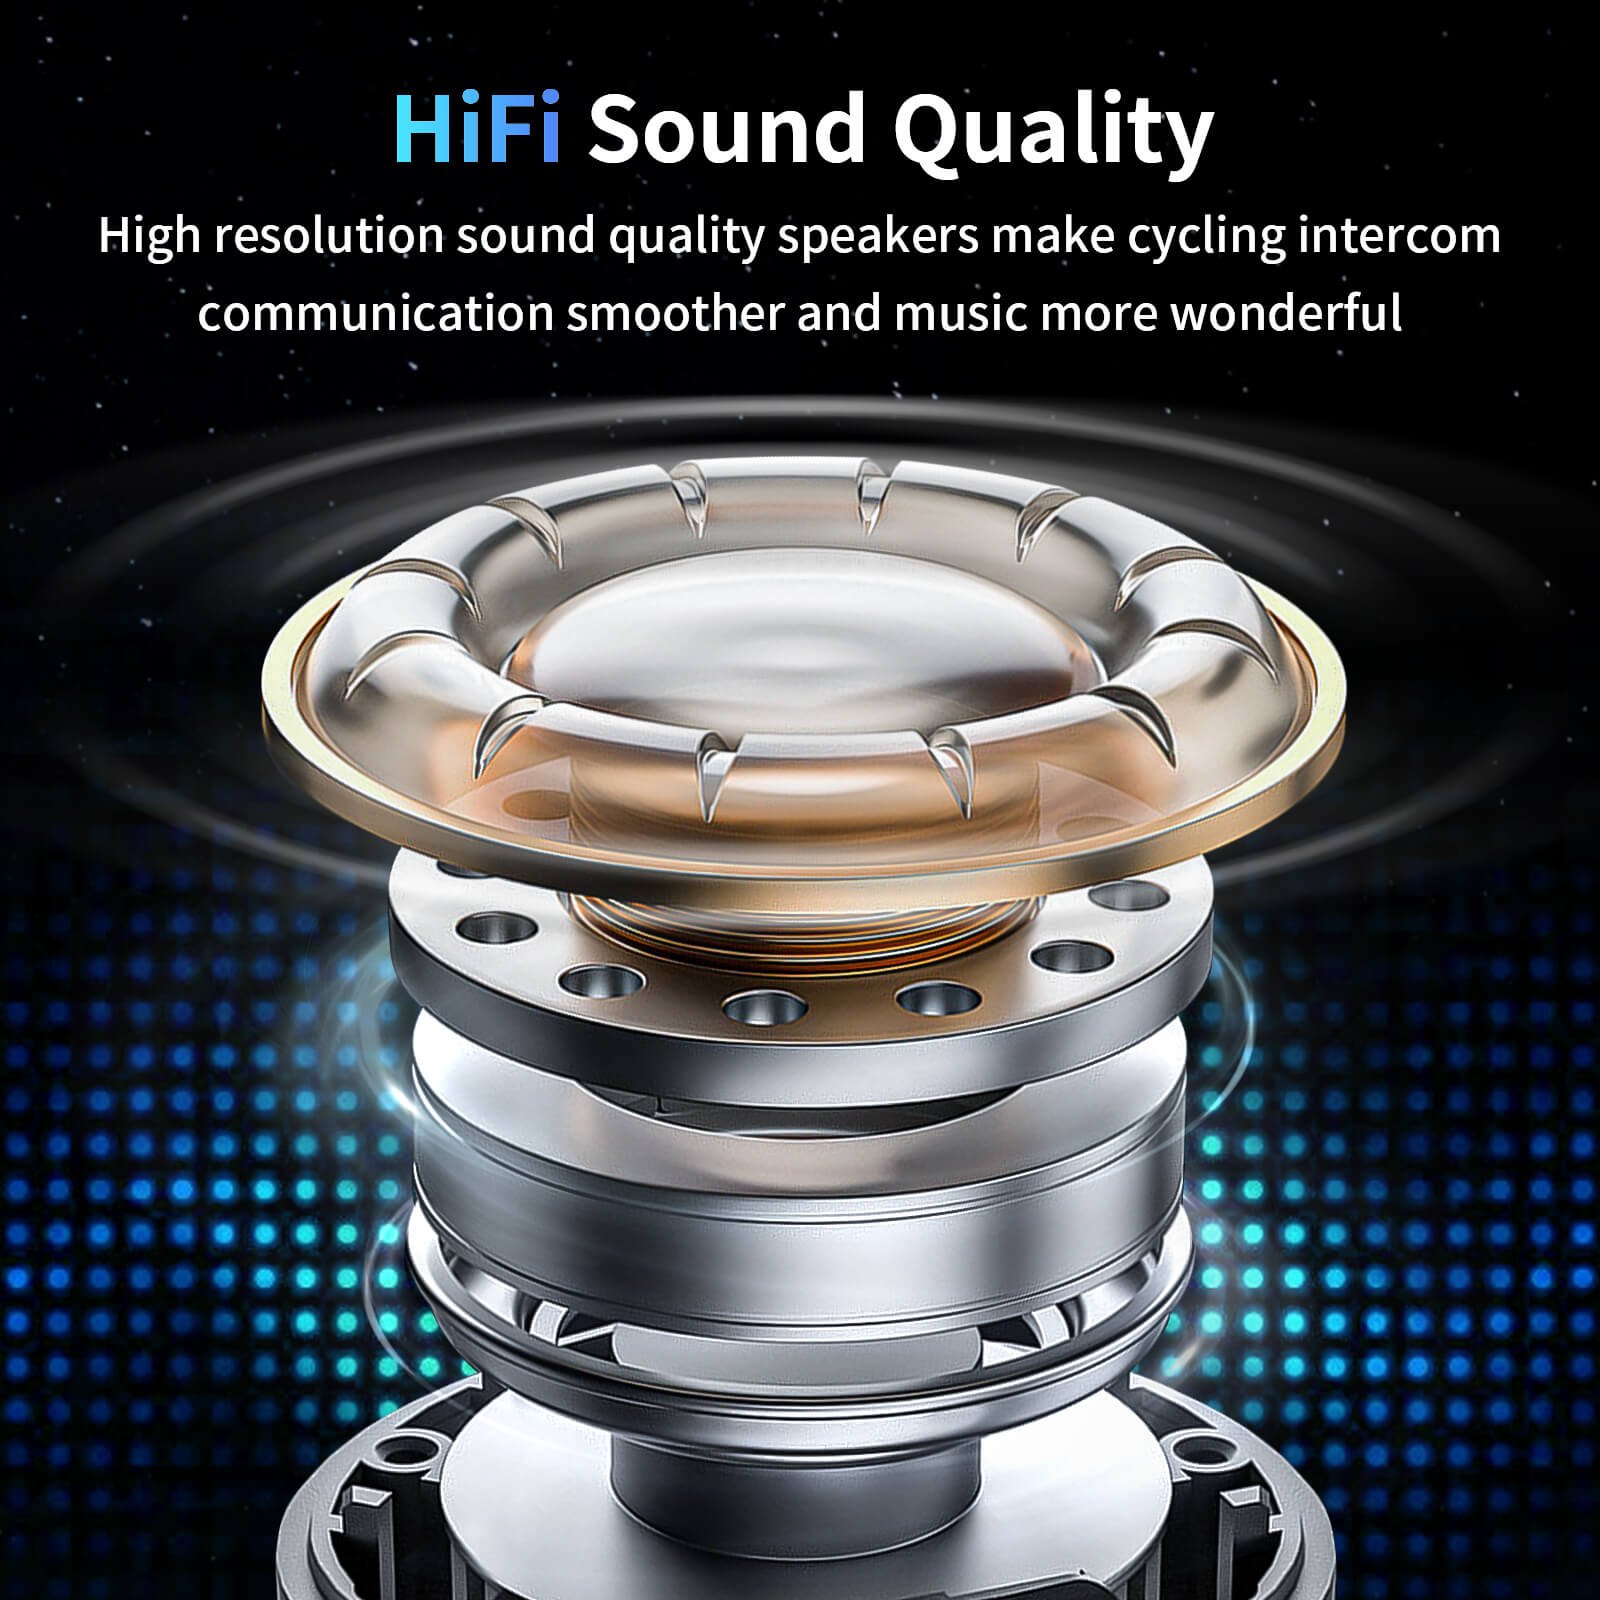
5. HIFI Sound Quality
high-resolution sound quality of Fodsports FX7 bluetooth mesh intercom
The FX7 is equipped with HIFI Stereo sound quality FOD HRSQS microphones and speakers to deliver crystal clear audio.
Whether you're listening to music or communicating with fellow riders, the high-fidelity sound ensures an exceptional auditory experience.
6. Advanced Noise Reduction
Noise-reduction tech in FX7 mesh bluetooth intercom
This combination ensures that the intercom quality is clearer and the noise is minimized.
Your conversations and audio from music, FM radios, and phone calls will be more pleasant and intelligible.
7. Bluetooth 5.4 Technology
Using the QCC chip BT 5.4 technology, the FX7 offers stronger compatibility, more stable connections, and lower power consumption.
This means you can rely on the FX7 for consistent performance and longer battery life.
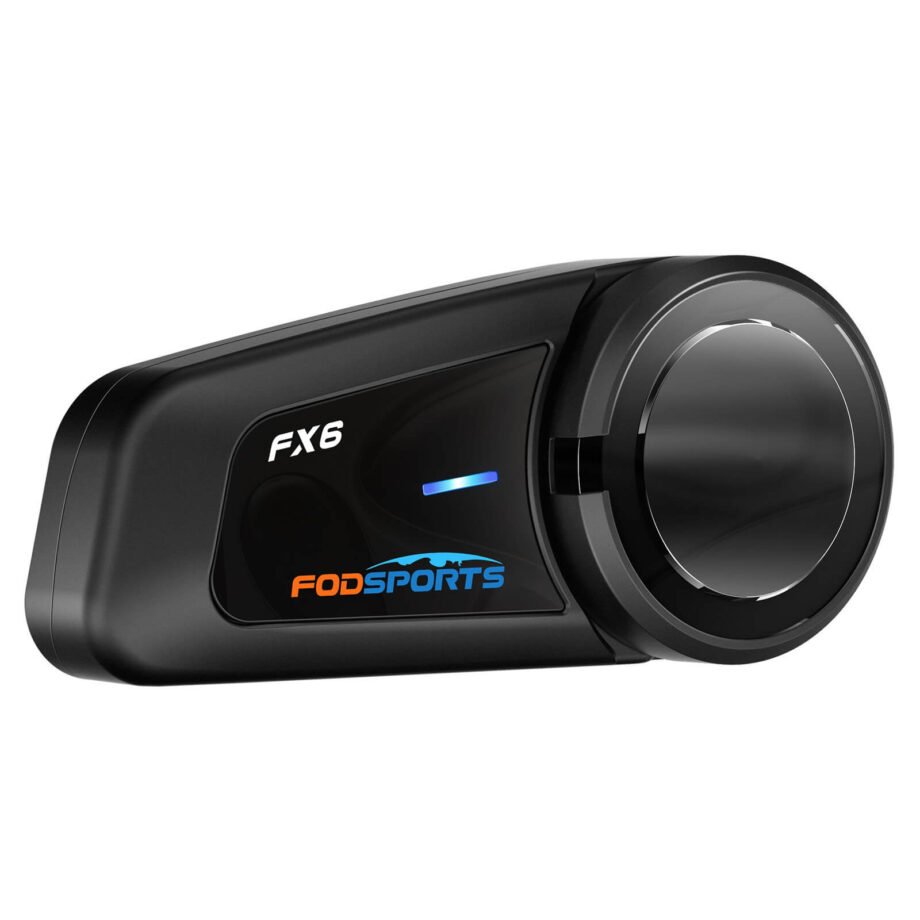
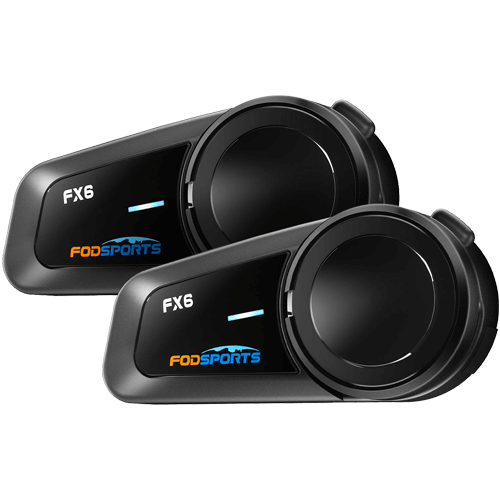
8. Intercom for Up to 10 Riders
The Fodsports FX7 supports a 2-way to 10-way intercom, allowing large groups to stay connected.
Whether you're navigating traffic or exploring new routes, this feature ensures everyone stays in touch.
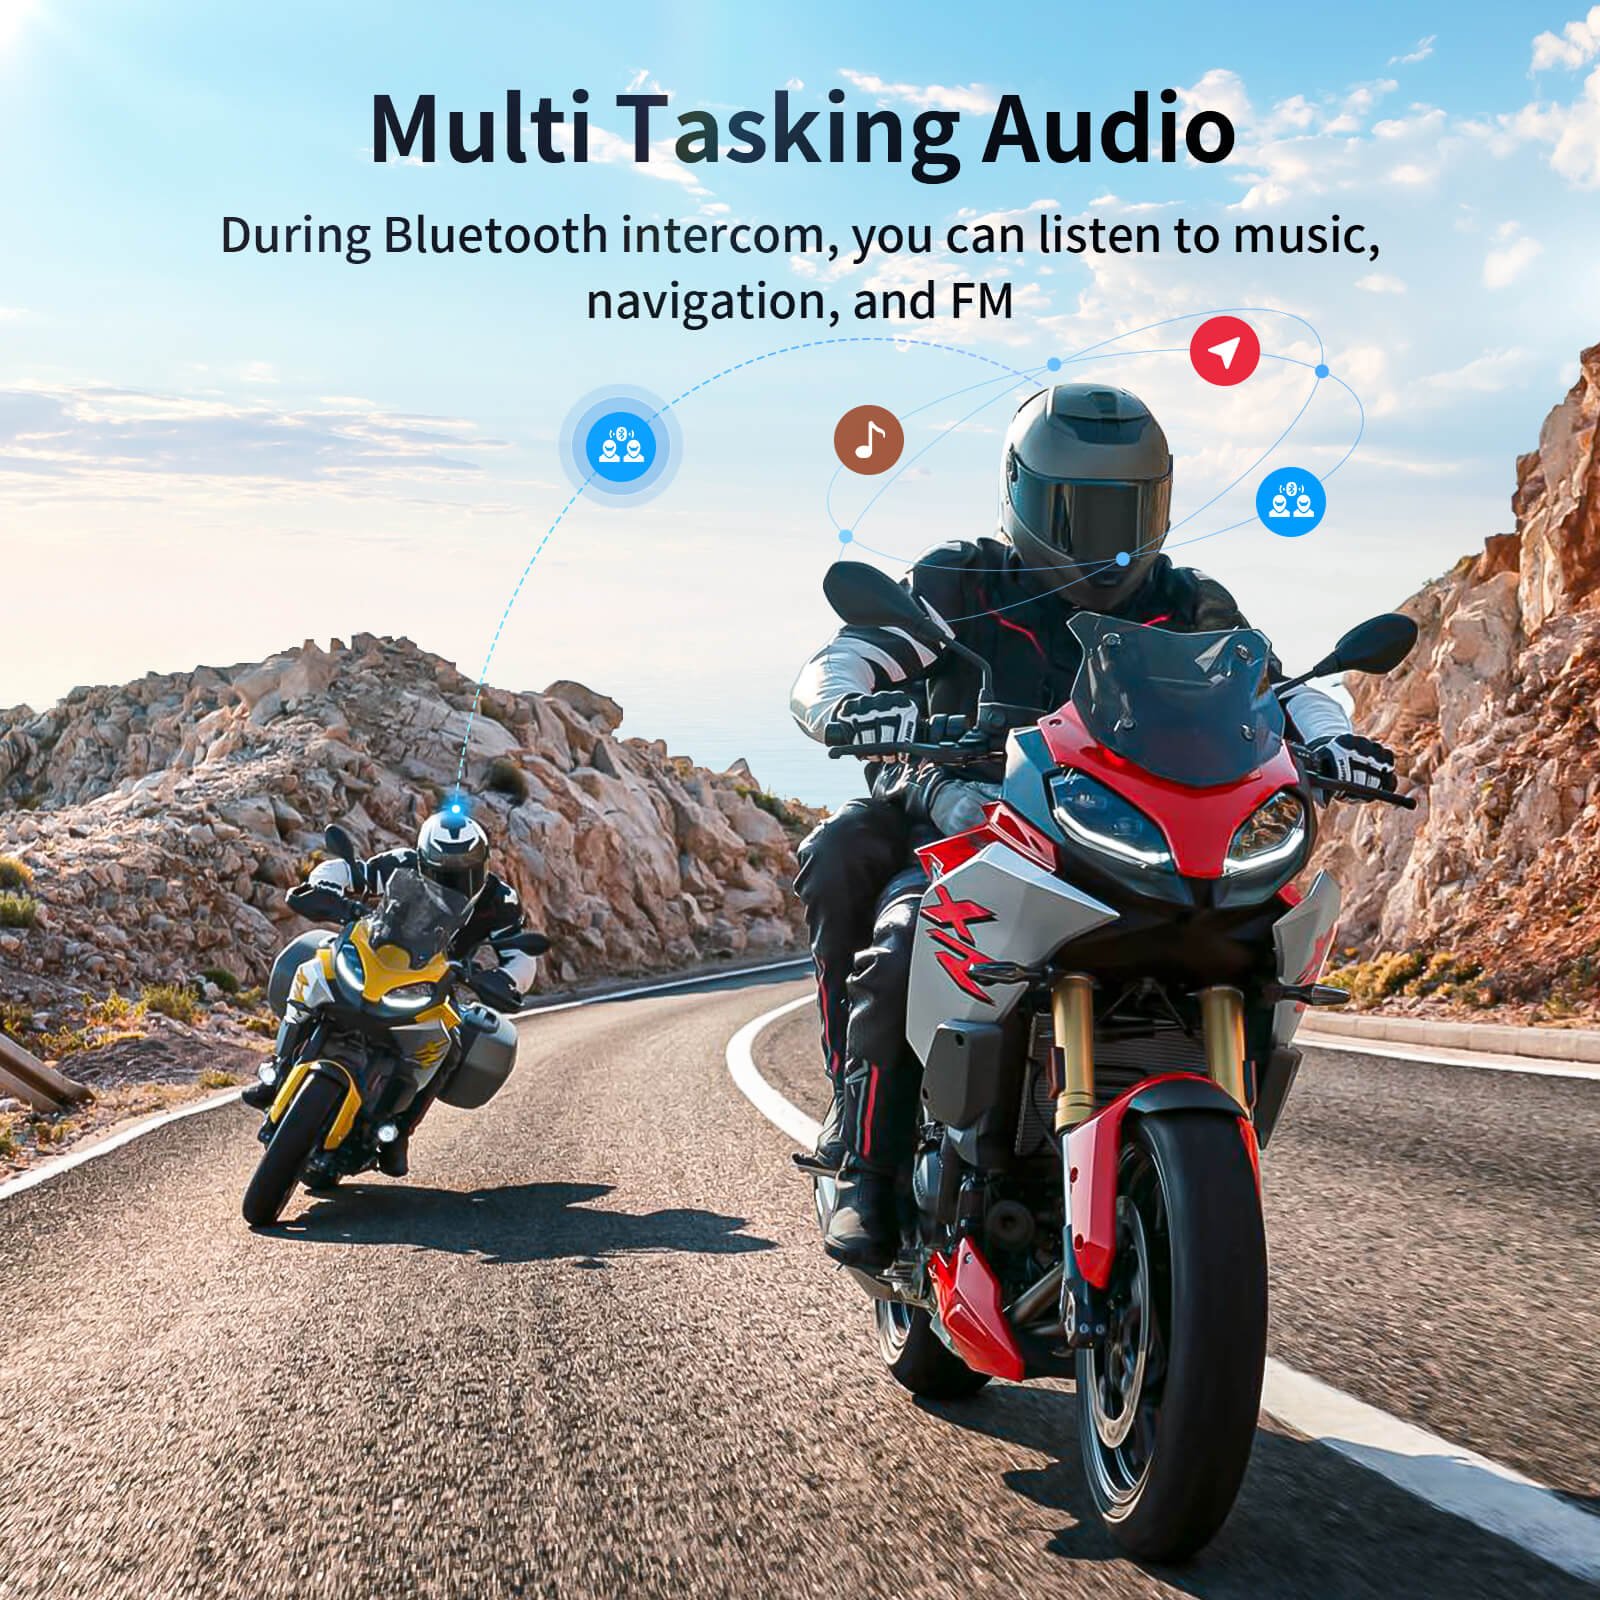
9. Multi-tasking Audio
Fodsports FX7 multi tasking audio feature
One of the most convenient features of the FX7 is its ability to handle multi-tasking audio.
You can listen to music, follow navigation instructions, and engage in intercom conversations simultaneously.
This ensures you never miss out on any important information or entertainment.
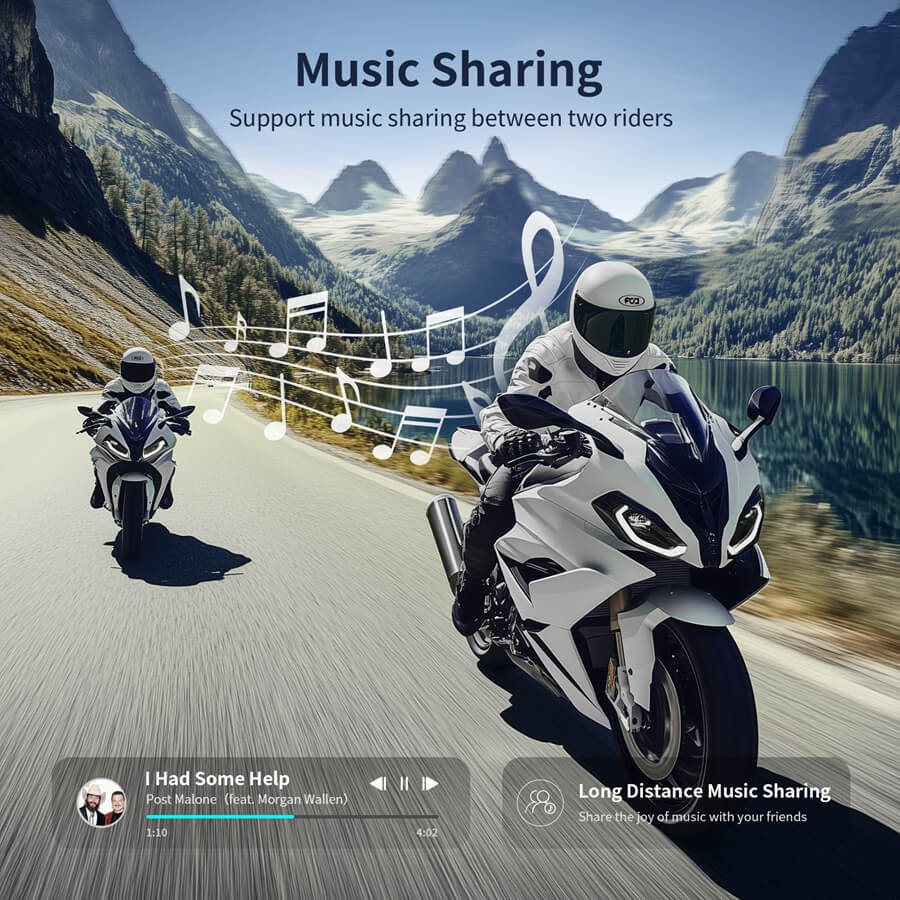
10. Music Sharing
The Fodsports FX7 supports music sharing between two riders, such as those in the front and back seats.
This feature enhances the riding experience by allowing you to share your favorite tunes with your riding partner.
11. User-friendly Design
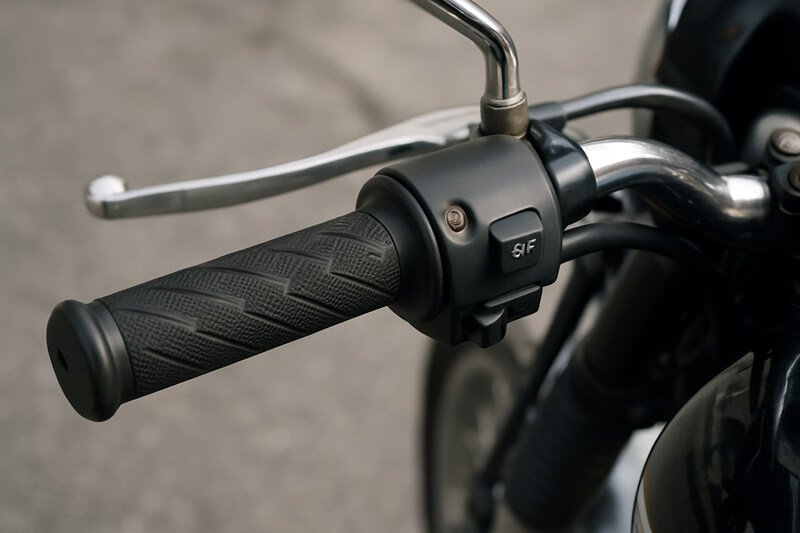
FX7 oversized rotary button design description
The FX7 features an oversized rotary button design, making it easy to operate while riding.
The riders can adjust settings and control the intercom without any hassle. This user-friendly design ensures you can even operate the intercom without taking off your gloves.
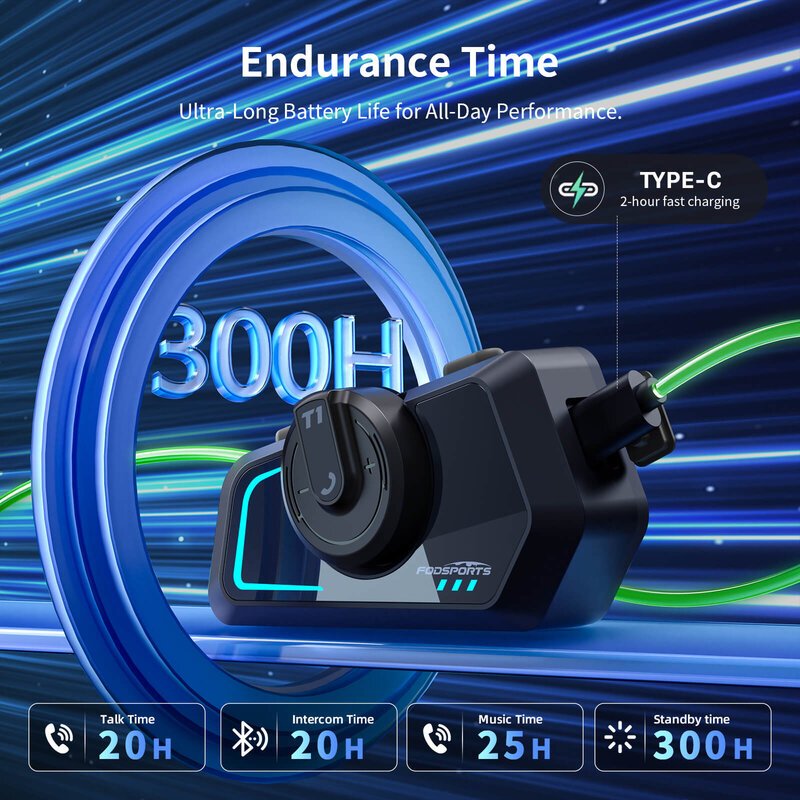
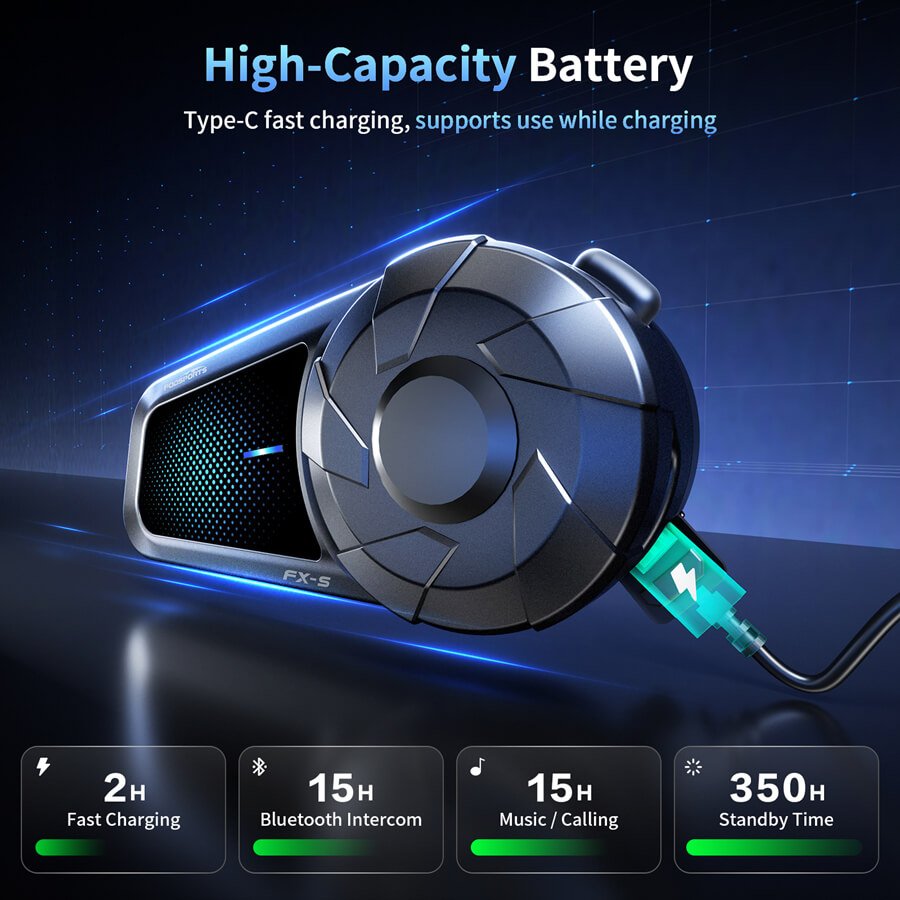
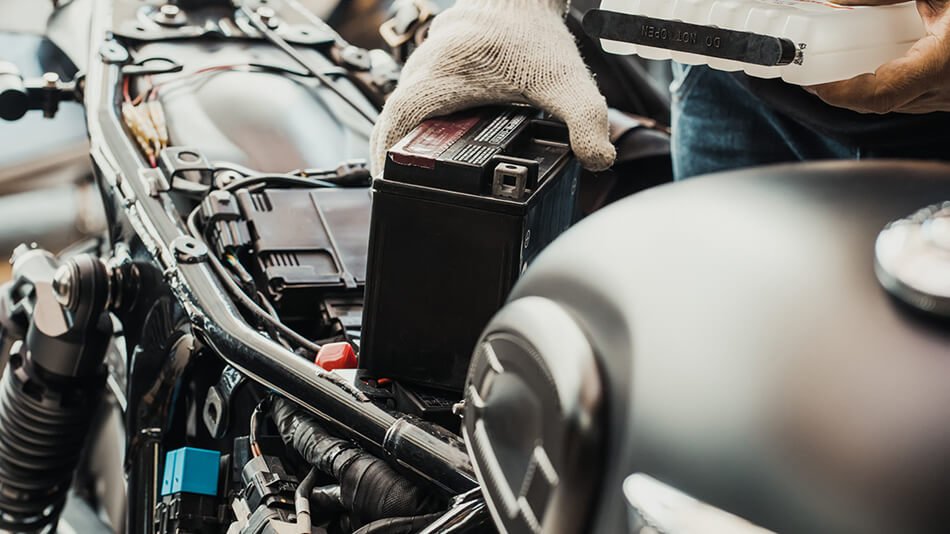
12. Battery and Power
FX7 power display on the phone
The FX7 comes with a large battery and low energy CSR chip, providing impressive battery life.
It offers up to 15 hours of phone talk time, 15 hours of music time, and 15 hours of Bluetooth intercom time. Additionally, it boasts a standby time of 300 hours.
Besides, when it is connected to the mobile phone, the battery percentage can be displayed on the phone.
And, when you power on the FX7, it will also broadcast the current battery level.
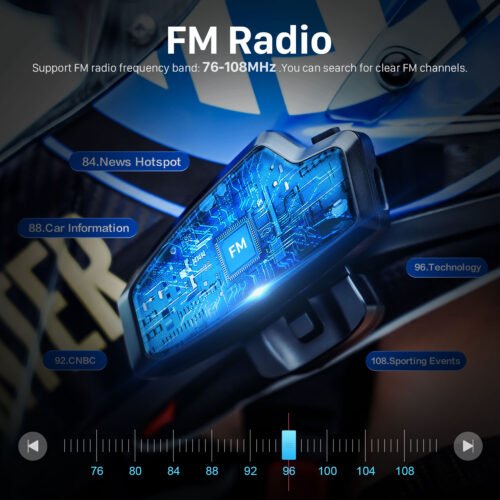
13. FM Radio
This mesh motorcycle intercom supports FM radio frequencies from 76 - 108 MHz. You can search for clear FM channels during your riding tour so that you can receive the latest news near you.
Besides, you can pre-store up to six commonly used channels. The next time you start the FM radio function, the FX7 can directly enter the channels you listening to.
This feature adds another layer of entertainment to your ride.
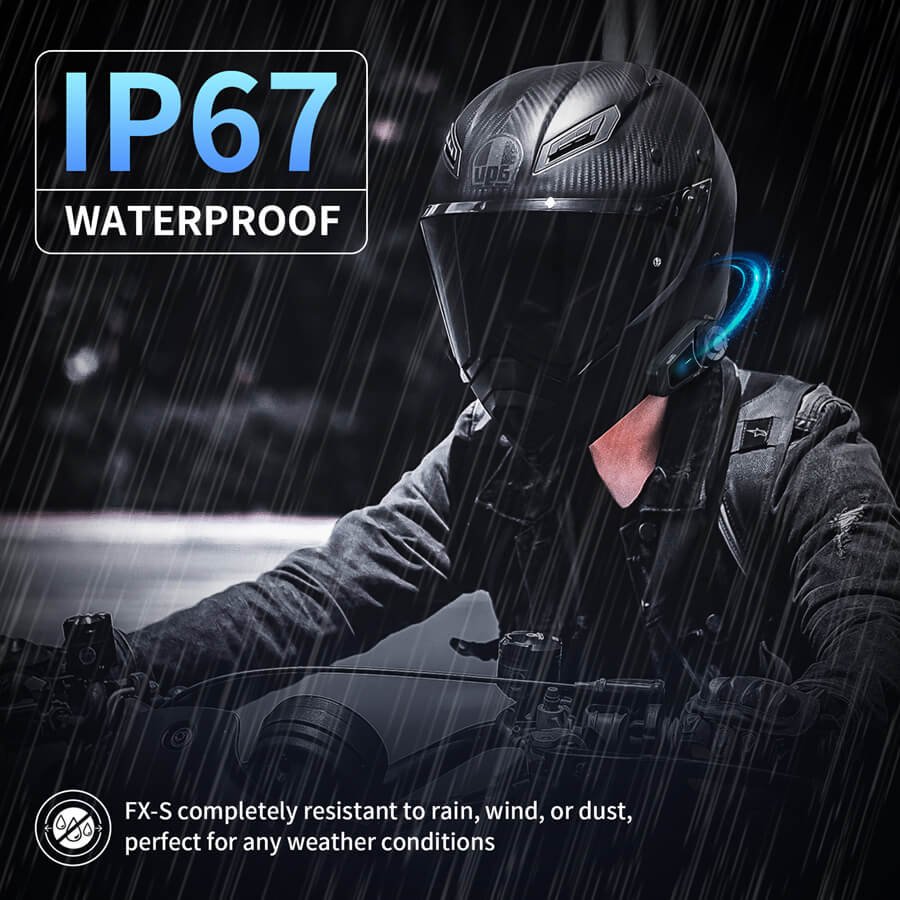
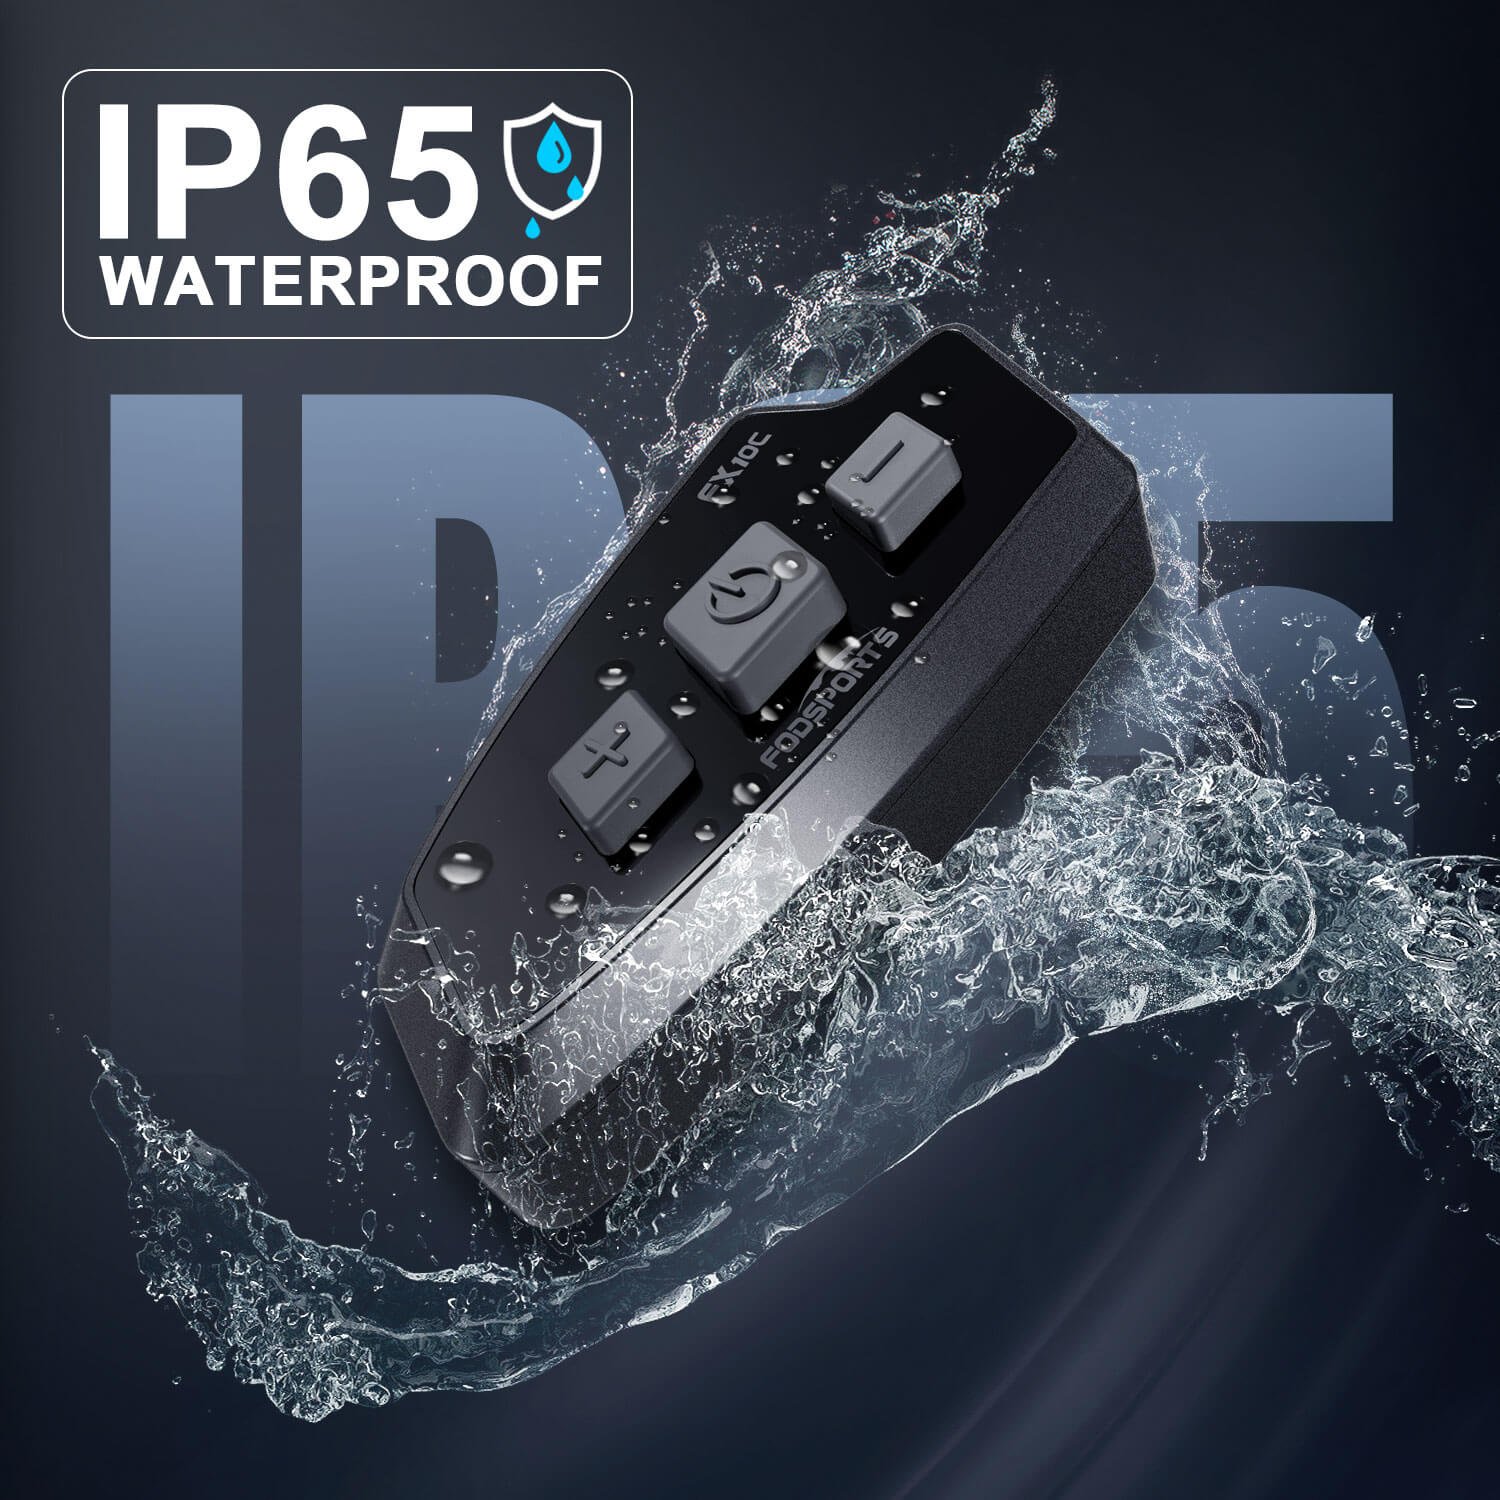
14. Waterproof and Durable
IP67 waterproof motorcycle mesh intercom
The FX7 is IP67 waterproof, ensuring it can withstand various weather conditions.
This durability makes it a reliable companion for all your rides, rain or shine.
15. Voice Command Support
The FX7 supports voice commands from various smartphone brands. For example, the iPhone's Sari, Samsung Bixby, Huawei's Celia, and Xiaomi's Mi AI.
With this mesh intercom, you can control various functions on your phone hands-free while riding.
This enhances safety by minimizing the need to interact with your phone while riding.
NOTE: You need to set up and enable the voice assistant function on your phone in advance.
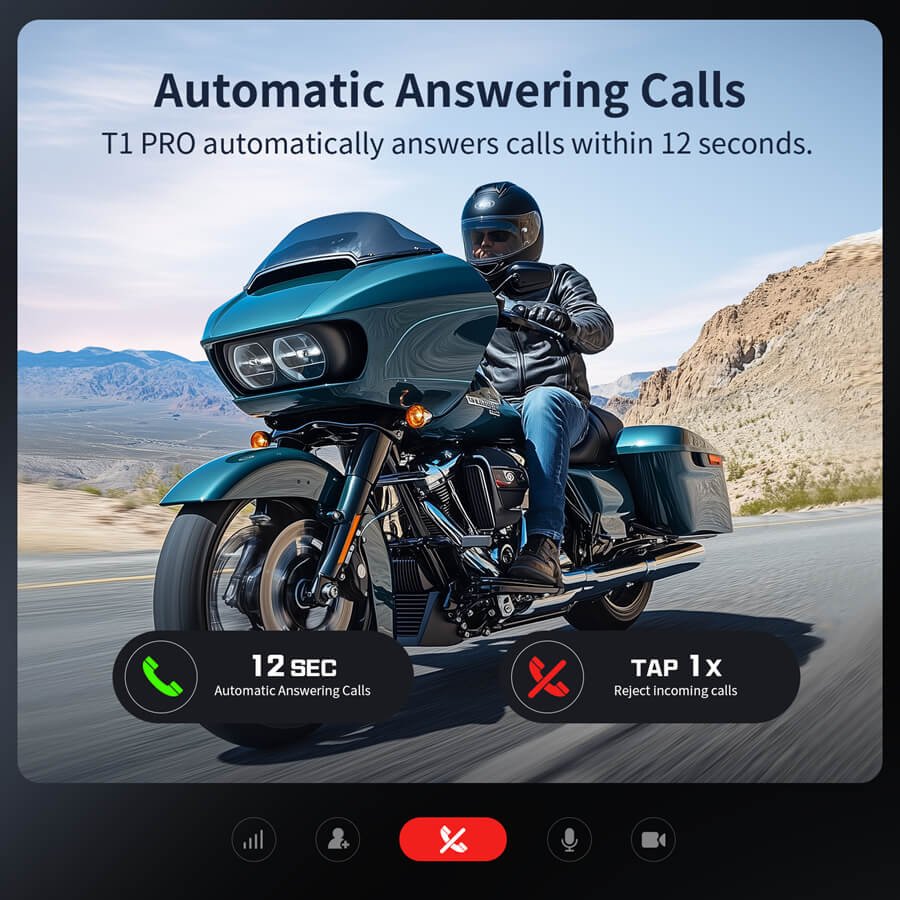
16. Automatic Call Answering
When your mobile phone receives an incoming call, FX7 can automatically answer the call for you within 15 seconds.
You will never miss any important call while riding. This hands-free feature adds to the convenience and safety of the FX7.
You can also manually cancel this to avoid receiving harassment calls while riding.
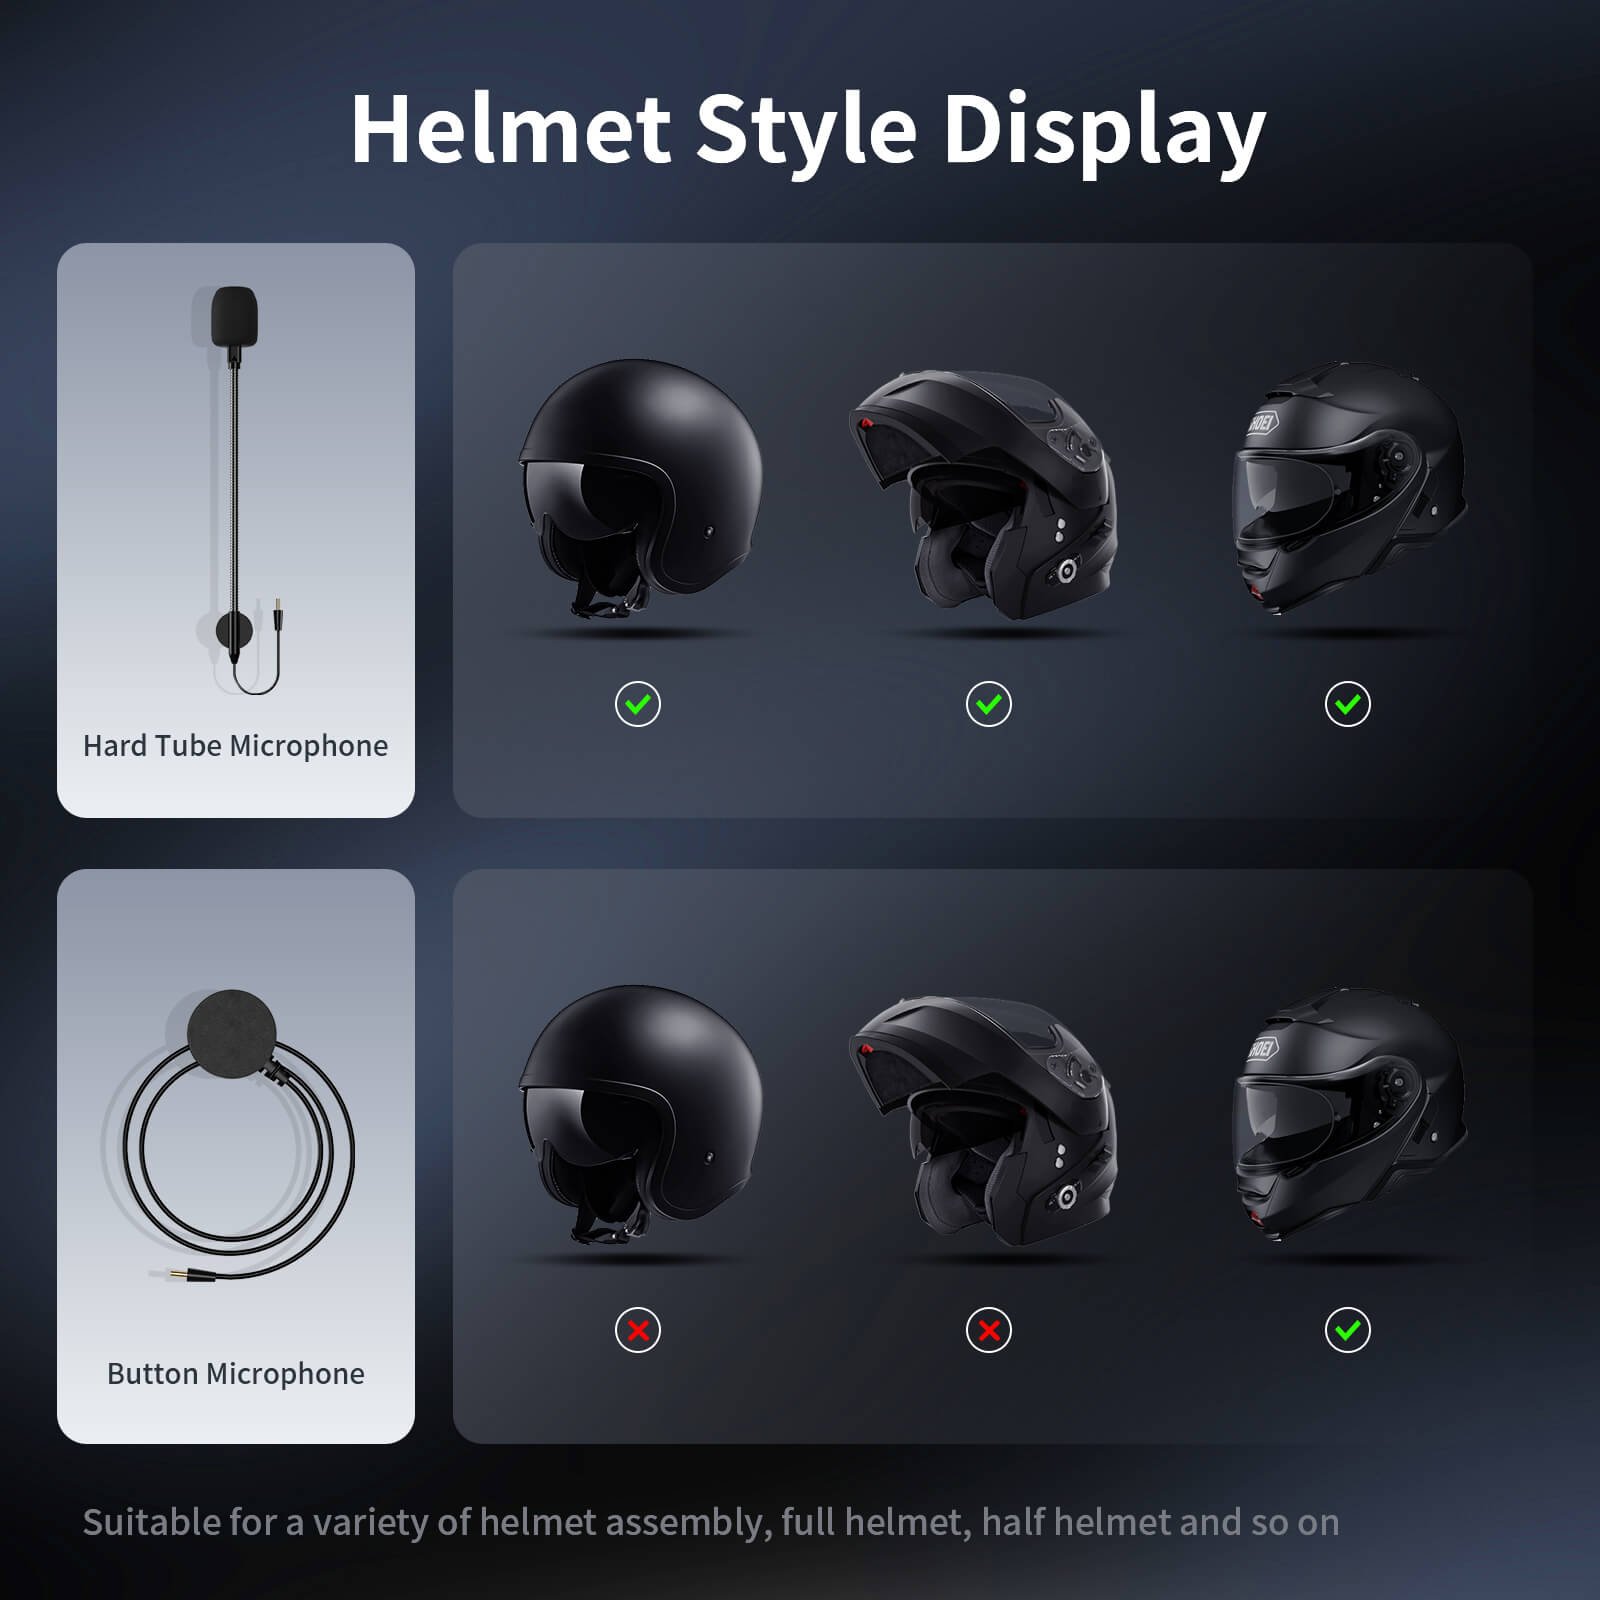
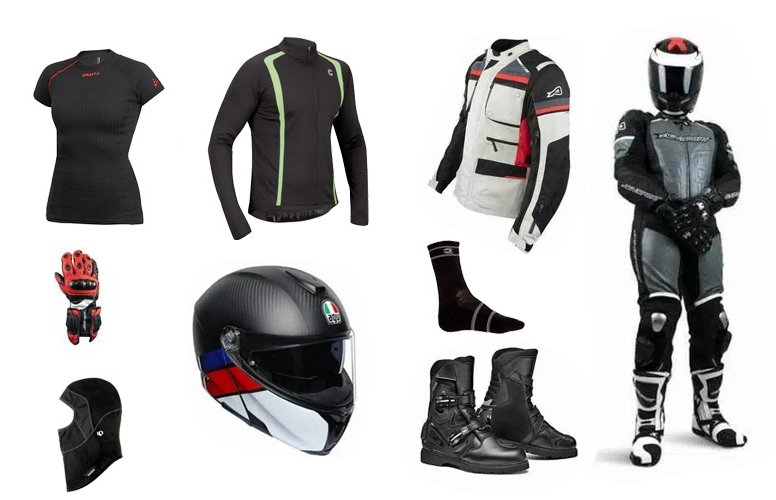
The FX7 is equipped with one hard mic and one soft mic in the standard kit. So it can pair with various types of motorcycle helmet, including full helmets and half helmets.
This versatility ensures that it can be used by a wide range of riders, regardless of their helmet preference.
18. Universal Pairing
The FX7 offers universal pairing with other intercoms, laptops, smartphones, and GPS navigators.
When pairing with other Bluetooth devices, it can only support a one-to-one connection.
This broad compatibility makes it a versatile communication tool for all your devices.
NOTE: Due to device compatibility issues, we cannot guarantee that FX7 can be paired with your device 100% successfully.
Bluetooth Mesh Intercom.
Dual Bluetooth Chip Design.
10 Riders Group Audio, 2000m Distance!
HRSQ Mic and Speakers, CVC + ENC + DSP Noise Cancelation.
Listen to Music/GPS and Intercom At the Same Time.
IP67 Waterproof.
FM Radio, Music Sharing, Voice Commands.
The Fodsports FX7 is a game-changer in the world of Bluetooth mesh intercoms.
Its dual Bluetooth chip design and advanced noise reduction technology make it outstanding in the market. And, the multi-tasking audio capabilities make it an essential gadget for any rider.
Whether you’re a solo rider or part of a group, the FX7 ensures you stay connected and entertained on your rides.
Besides, FX7 has features like long-distance intercom, waterproof design, and versatile helmet compatibility. It's clear that the FX7 is built to enhance every aspect of your riding experience.
If you're looking for a reliable, high-quality mesh motorcycle intercom, the Fodsports FX7 is the perfect choice. Its innovative features and user-friendly design make it a must-have for any rider.
Get your FX7 today and experience the ultimate in riding communication and entertainment.
July and August mark a special occasion for motorcycle enthusiasts and tech lovers alike. Welcome to Fodsports Brand Month! This event is dedicated to celebrating everything that makes Fodsports a leading name in the motorcycle communication industry. Get ready for a fantastic promotions, exceptional service from Fodsports. Let's insights into Fodsports' top-notch Bluetooth motorcycle helmet intercoms.
Unmatched Promotions
Fodsports Brand Month is the perfect time to upgrade your motorcycle communication gear. Throughout the month, enjoy exclusive discounts on Fodsports products. Whether you're a seasoned rider or a newcomer, there's something for everyone. Take advantage of these unbeatable deals and enhance your riding with the best Bluetooth intercoms.
Fodsports Service: Excellence at Every Step
At Fodsports, customer satisfaction is our top priority. From the moment you explore their products to long after your purchase, you can all trust us. Fodsports is dedicated to providing the most professional and exceptional service. Here’s what you can expect:
Expert Guidance: Fodsports offers detailed guides and customer support. Our pre-sales service team will help you choose the right intercom for your needs.
Easy Installation: Fodsports products come with clear instructions, making installation a breeze.
Reliable Support: The Fodsports customer service team is always ready to assist you. If you have any queries or issues in using our products, you can always contact us.
Explore Fodsports Bluetooth Motorcycle Helmet Intercoms
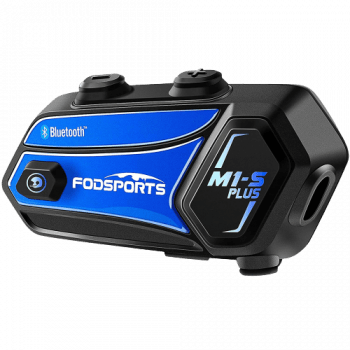
Fodsports is renowned for its high-quality Bluetooth motorcycle helmet intercoms. Let’s take a closer look at some of their most popular models: the M1-S Plus, M1-S Pro, FX30C Pro, and FX8 Pro.
The Fodsports M1-S Plus is an exceptional Bluetooth motorcycle helmet intercom. It is a Fodsports star product that offers top-tier features for a superior riding experience.
The M1-S Plus is a versatile intercom designed for group rides. It can support as many as 2 to 10 riders group intercom. If you and your partners are planning a riding trip together, M1-S Plus will be a top option.
We'd like to mention about the sound and audio quality of this famous motorcycle intercom.
On one hand, the CSR chip and noise reduction technology are added in this device. This can ensure you can other accompany riders get clear, natural voice communication.
Besides, you can share music with your passenger or fellow riders. The riders can also enjoy the convenience of muting the microphone for safe communication.
With a built-in FM radio, you can get real-time traffic updates. Its 900mAh battery provides long standby time, keeping you connected all day.
Moreover, we provide two mic options (one hard mic and one soft mic) in the kit. So the M1-S Plus can support universal pairing with various motorcycle helmet types. If you changed a new helmet type in the future, don't worry, you can still match the M1-S Plus to your new helmet.
Riders can use the AUX button to switch functions easily. Stream music, get navigation instructions, make or receive calls, send messages, and listen to the radio—all from your helmet. The M1-S Plus is designed to enhance every ride.
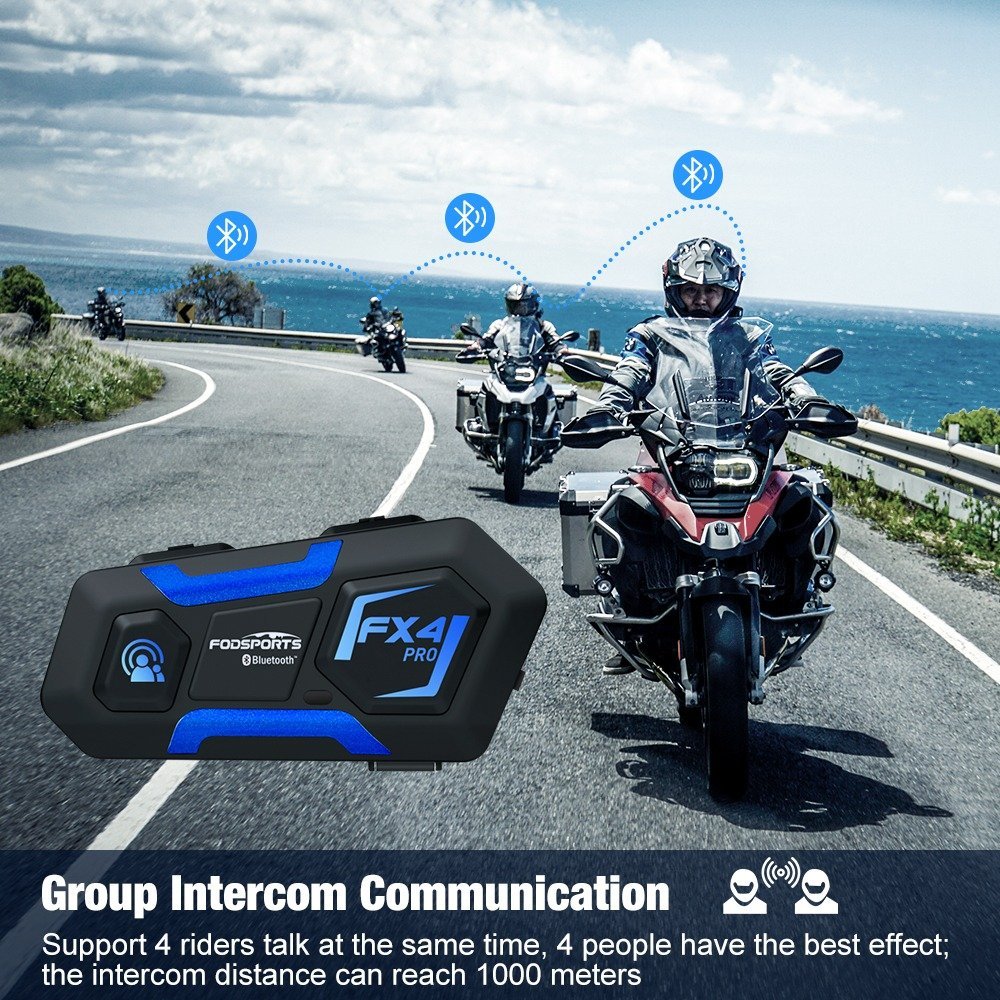
10 Riders Group Intercom, 2000 Meters Distance!
Optional HRSQ Mic and Speakers, Better Sound Quality.
Microphone Mute.
Music Sharing, FM Radio, Voice Command.
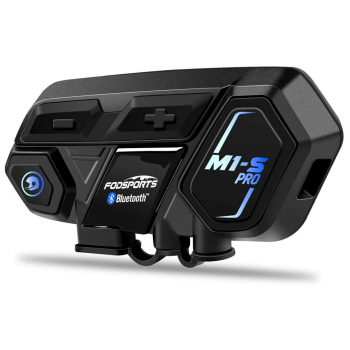
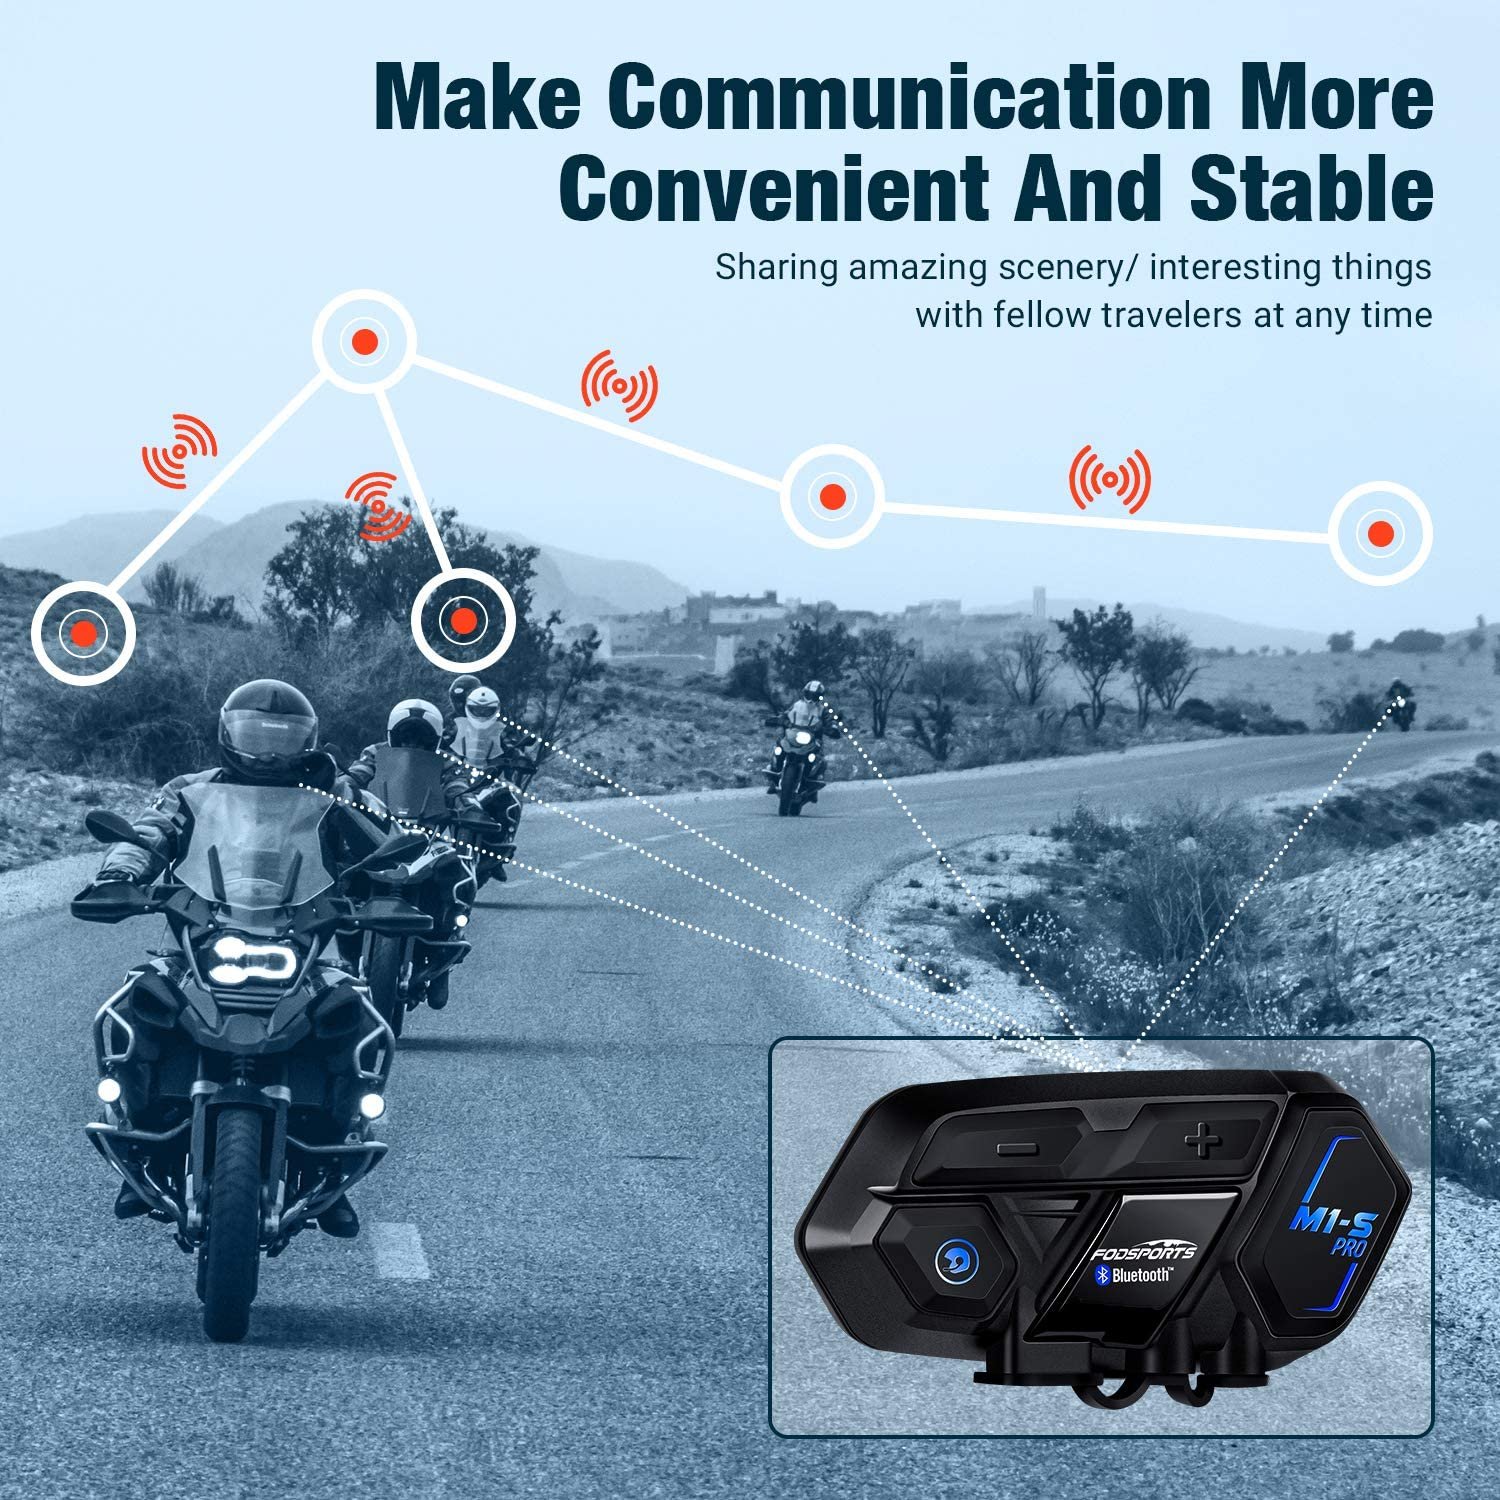
Fodsports M1-S Pro Bluetooth Helmet Intercom Headset
The M1-S Pro takes communication to the next level with advanced features:
The Fodsports M1-S Pro is another premium Bluetooth motorcycle helmet intercom. It is designed for seamless communication and entertainment on the go.
It can support a 2000M maximum distance and up to 2 to 10 riders in a group intercom. So it can definately ensures you stay connected with your partners during your rides.
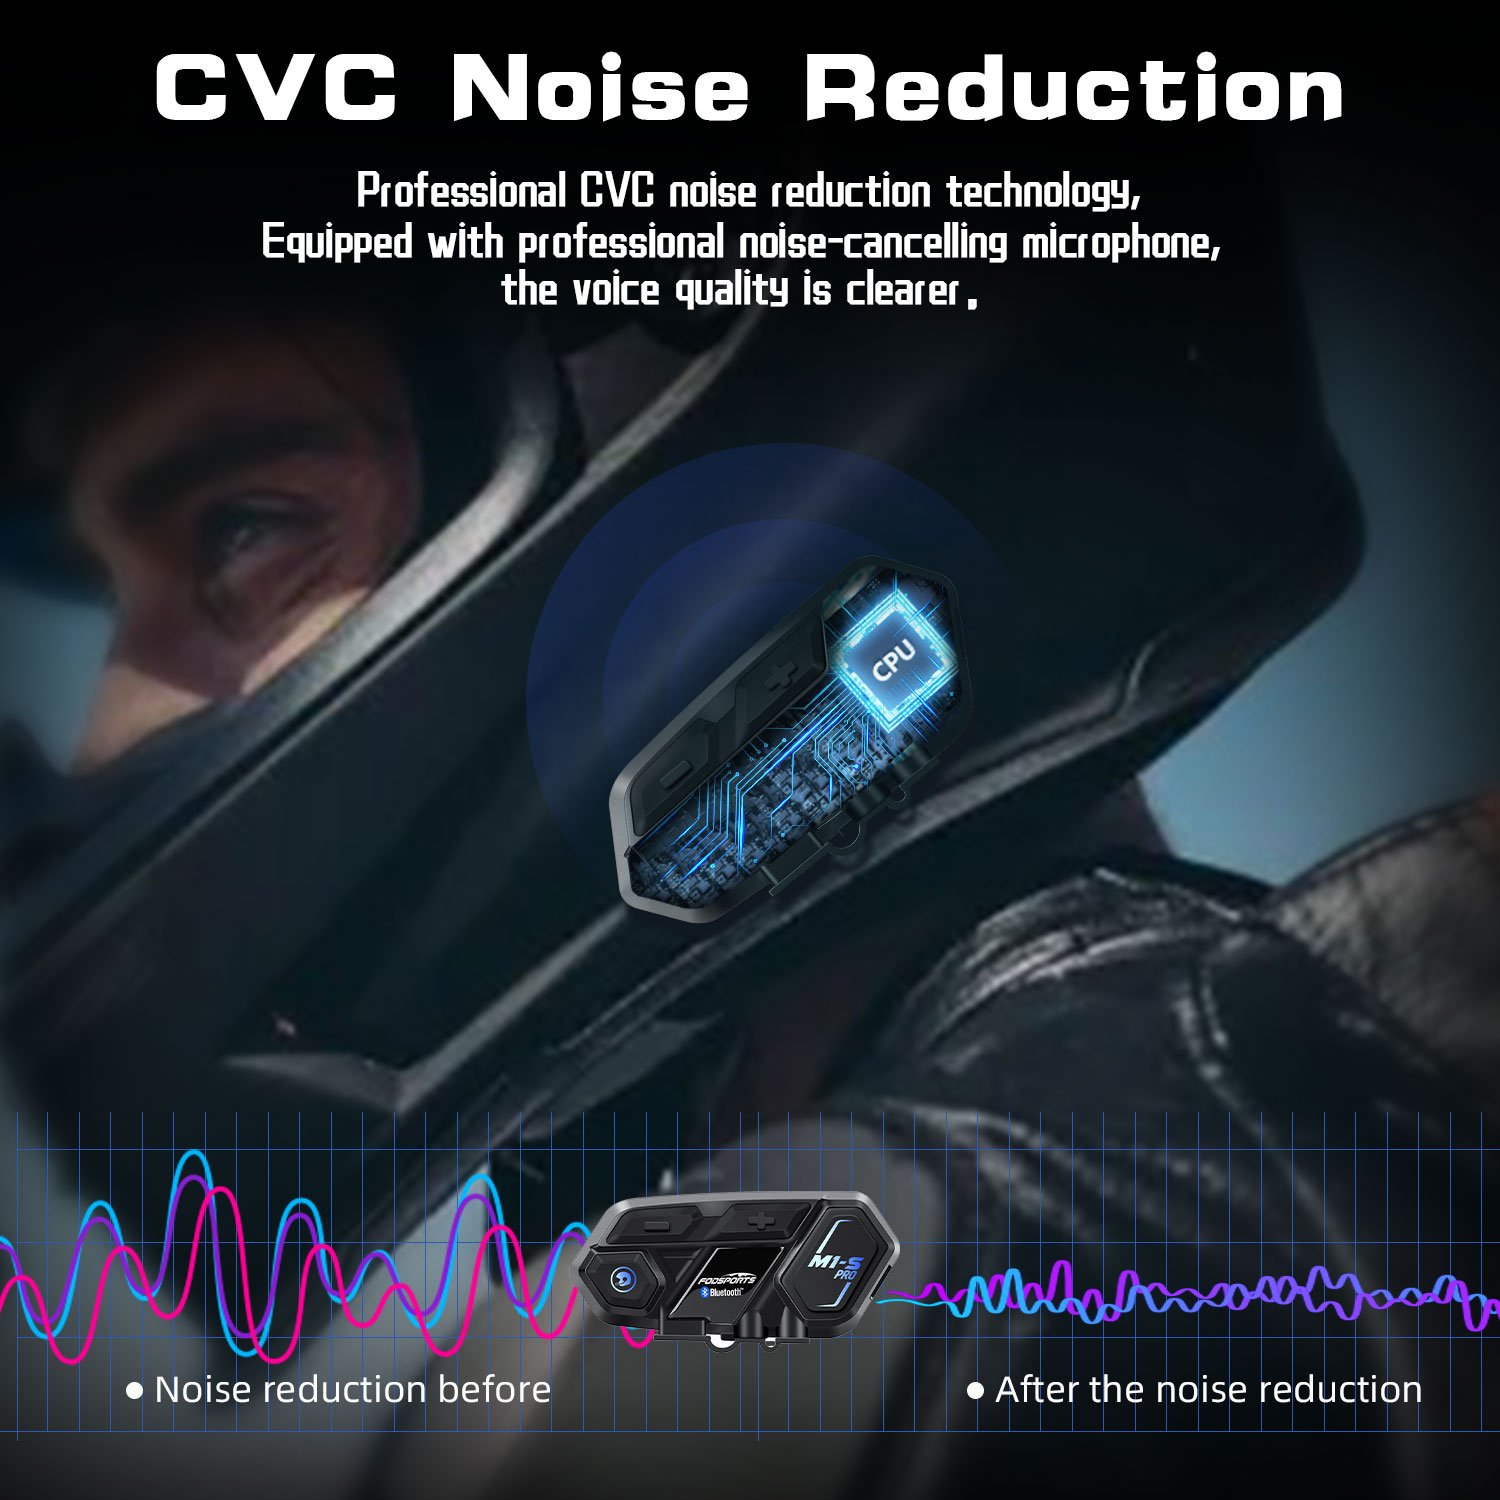
Thanks to the CSR chip noise reduction technology inside M1-S Pro. You can enjoy handsfree operation and crystal-clear sound quality.
What's more, the M1-S Pro is fully IP65 waterproof and dustproof. This ensures that this intercom can easily cope with various adverse weather and environments. No matter it is a rainy, snowy or dusty day, your intercom quality and stability will keep in good condition.
Besides, its 900mAh large battery also promiss you will get a long time intercom time. It can support 20 hours of talk time and 300 hours of standby time.
The M1-S Pro is not just an intercom, it also has many extra functions. Music sharing, FM radio, voice commands, spoken navigation instructions... There are more it can do.
Fodsports M1-S Pro is a ultimate riding companion for all riders.
M1S Pro Bluetooth Intercom Headsets
$89.99 $139.99
Code: DJOW9
Support up to 10 Riders Group Talk, 2000 Meters Distance!
High Quality sound, IP65 waterproof.
Compatiable with Fodsports Connect APP
Let's Go!
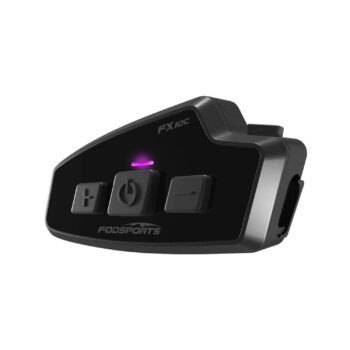
The Fodsports FX 10C is a cutting-edge mesh motorcycle intercom that leverages MESH tech.
It offers totally 10 mesh intercom channels, thus making various connection ability among riders. The riders can also switch channels freely when they are communicating with others.
The intercom participants number of Fodsports FX 10C is unlimited. This makes it a ideal intercom device for large group rider touring.
You can listen to music and navigate while using the intercom, and share music between two riders.
The FX 10C also supports two-way Bluetooth intercom for clear communication. Designed with a big button for easy operation while riding, it ensures convenience and safety.
Generally, the Fodsports FX 10C is the best option for mesh motorcycle intercoms. It will enhance your riding experience with advanced features and seamless communication.
Mesh Intercom, Bleutooth 5.0, 2000m Intercom Range.
10 Mesh Intercom Channels, Unlimited Connection Number.
Listen to Music/GPS and Talk with Other Riders At The Same Time.
High Quality sound, IP65 waterproof.
Music Sharing, Voice Commands, FM Radio.
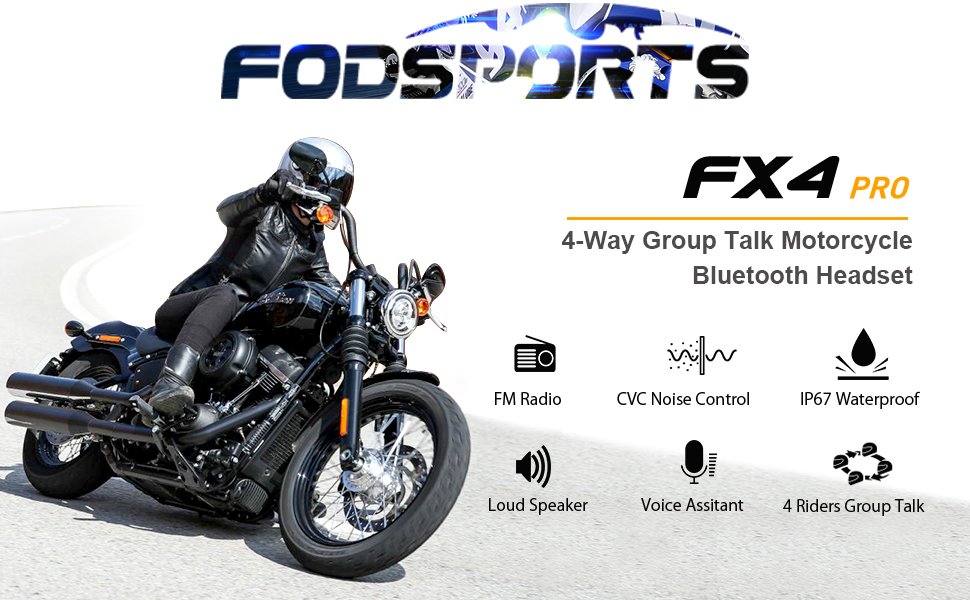
The intercom audio quality is a must mention advantage of FX4 Pro. Equiped with wind noise microphone cancelling tech, even you are riding at a high speed, the voice and sound will keep clear and pure. The Hi-Fi stereo sound quality with 40MM speakers ensure you are able to hear very clear sound.
Moreover, the FX4 Pro also aupport voice command . You can use the Siri or S voice assistant to make calls via this Bluetooth helemt headset.
The FX4 Pro is equiped with a 850mAh battery, ensuring a long-lasting performance for your ride.
Conversations with other riders, music sharing, FM radio, you will get them all.
Designed for easy and reliable communication, the FX4 Pro is the best choice for 4 rides intercom.
Just keep your hands on the handlebars, and focus on riding safely. You will be more enjoyable and convenient when riding with the FX4 Pro.
For riders prefer 2-6 rider cycling, The FX8 Air is the best option.
The Fodsports FX8 Air supports two to six riders talking simultaneously. It offers a 1000m intercom range, making it the best motorcycle comm system.
With a 900mAh battery, it ensures long-lasting use. Besides, you can enjoy three sound effects, treble, midrange, and bass.
Equiped with Bluetooth 5.0 tech, it provides high-fidelity Bluetooth transmission for music and calls.
Also, the FX8 Air features CSR chip, and A2DP EDR technology. The anti-noise mic and CVC digital noise reduction ensure clear conversations.
Voice command and prompt functions, along with three power reminder levels, enhance usability.
It also supports universal pairing, connecting with other Bluetooth headsets, and offers both automatic and manual call answering. Plus, you can listen to FM radio, making it a versatile choice for any rider.
Choosing Fodsports means opting for reliability, innovation, and superior performance. Each product is designed with the rider in mind, ensuring seamless communication and enhanced safety on the road.
Whether you're embarking on a solo adventure or riding with a group, there will be an intercom suits for you.
Fodsports intercoms provide the connectivity and clarity you need.
Conclusion
Fodsports Brand Month is an excellent opportunity to experience the best in motorcycle communication technology.
We offer you with fantastic promotions, exceptional service, and a range of top-tier intercoms.
There's no better time to upgrade your riding gear than now.
Explore the M1-S Plus, M1-S Pro, FX 10C, FX4 Pro, and FX8 Air, and see why Fodsports is the go-to choice for riders worldwide.
Don’t miss out on these exclusive deals and elevate your riding experience today!
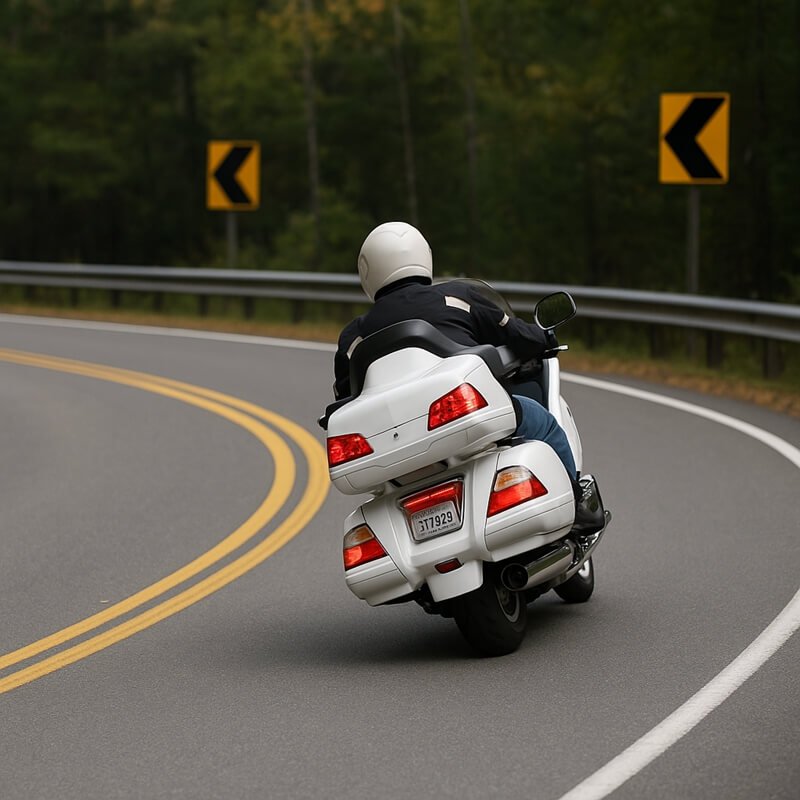
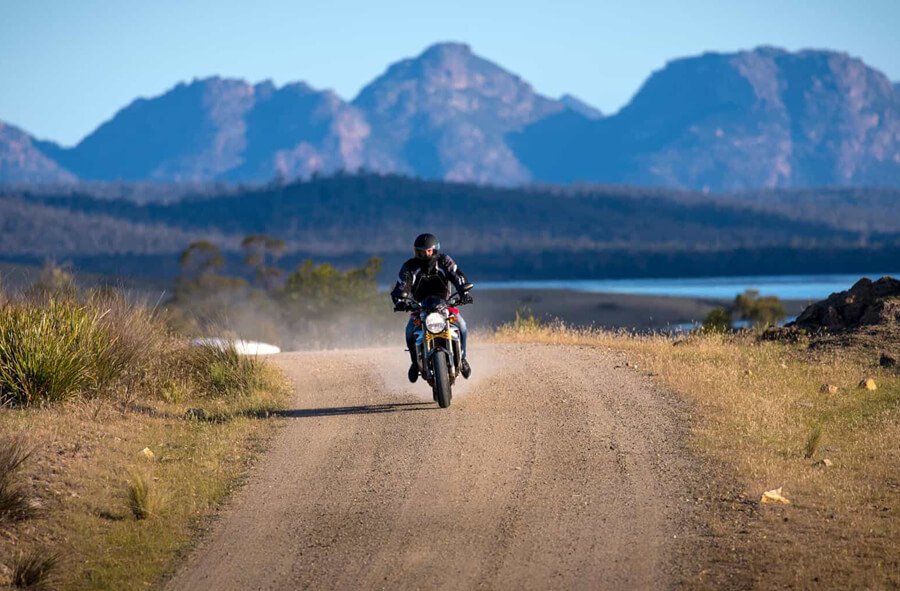
Colorado is one of the top motorcycle destinations in the United States, offering some of the most breathtaking scenic motorcycle rides in America. With the Rocky Mountains, endless winding roads, historic mountain towns, and dramatic landscapes, Colorado provides unforgettable experiences for every type of rider.
Whether you enjoy long-distance motorcycle touring, adventure riding, or relaxed weekend trips, the state has countless routes worth exploring. The combination of high mountain passes, smooth curves, and incredible viewpoints makes Colorado one of the best places for a motorcycle road trip.
From the legendary Million Dollar Highway to the peaceful Peak to Peak Scenic Byway, these are some of the best motorcycle roads in Colorado for scenic riding that every rider should experience.
🏔️ Million Dollar Highway: Colorado’s Most Iconic Motorcycle Route
A Legendary Mountain Ride Through the San Juan Mountains
The Million Dollar Highway, located on US Highway 550 between Silverton and Ouray, is widely considered one of the most beautiful motorcycle roads in Colorado.
This famous route is part of the San Juan Skyway and delivers everything riders look for in a mountain adventure: sharp curves, dramatic cliffs, high elevations, and unforgettable views.
Million-Dollar-Highway
The road climbs through the San Juan Mountains, passing historic mining areas and offering spectacular views of rugged peaks. Every corner reveals a new landscape, making it a favorite destination for photographers and motorcycle travelers.
Riding Experience
The Million Dollar Highway is exciting but requires attention. Some sections have steep drop-offs, narrow lanes, and limited shoulders. Riders should maintain a safe speed and stay focused, especially when meeting larger vehicles.
Best Time to Ride
The ideal riding season is usually from late spring through early fall. Summer provides the most stable weather, while early autumn brings beautiful golden colors across the mountains.
🏞️ Trail Ridge Road: Ride Above the Clouds
A High-Elevation Adventure Through Rocky Mountain National Park
Trail Ridge Road is one of the highest paved roads in North America and one of the most unique Colorado scenic motorcycle routes.
Trail Ridge Road
The road crosses Rocky Mountain National Park and reaches elevations above 12,000 feet. Riders can experience alpine landscapes, wide-open mountain views, and the incredible feeling of traveling above the tree line.
Highlights of Trail Ridge Road
Stunning Rocky Mountain scenery
Alpine tundra landscapes
Wildlife viewing opportunities
Smooth sweeping corners
Amazing photo locations
Because of the high elevation, conditions can change quickly. Even during summer, riders may experience cold temperatures, strong winds, and sudden weather changes.
Always check road conditions before departure and prepare for changing mountain environments.
🌲 Peak to Peak Scenic Byway: A Perfect Colorado Day Ride
Beautiful Mountain Views Near Denver
For riders looking for an accessible mountain route near Denver, the Peak to Peak Scenic Byway is one of the best choices.
This historic highway connects several mountain communities and provides beautiful views of the Front Range. Compared with some more technical mountain roads, this route offers a more relaxed riding experience while still delivering plenty of curves and scenery.
Peak to Peak Scenic Byway
Why Riders Enjoy This Route
Easy access from Denver
Great for weekend motorcycle trips
Beautiful forests and mountain views
Suitable for different riding skill levels
The route is perfect for riders who want to enjoy Colorado’s mountain scenery without committing to a long or difficult ride.
⛰️ Mount Blue Sky Scenic Byway: One of America’s Highest Roads
Experience Extreme Elevation and Alpine Views
Mount Blue Sky Scenic Byway is one of the highest paved roads in North America, reaching elevations above 14,000 feet.
The ride begins through forests before climbing into a dramatic alpine environment where riders can see endless mountain peaks and open landscapes.
Mount Blue Sky Scenic Byway
What Makes It Special
Incredible elevation changes
Unique alpine scenery
Peaceful mountain atmosphere
Unforgettable viewpoints
Due to the altitude, riders should take their time and avoid rushing through the route. Weather conditions can also change quickly, especially near the summit.
🏔️ Independence Pass: A Classic Rocky Mountain Ride
Twisty Roads With Incredible Scenery
Independence Pass connects Aspen and Twin Lakes and is one of Colorado’s most memorable motorcycle routes.
The road features tight corners, steep climbs, and beautiful views of the surrounding Rocky Mountains. It is especially popular among riders who enjoy technical mountain riding.
Independence Pass A Classic Rocky Mountain Ride
Things Riders Should Know
Some sections are narrow
Traffic can increase during peak seasons
Weather changes quickly at higher elevations
A smooth riding style and careful cornering are important when traveling through this mountain pass.
🌄 Pikes Peak Highway: Reach the Summit of America’s Mountain
A Unique High-Altitude Motorcycle Experience
Pikes Peak Highway is one of Colorado’s most famous attractions and offers riders a completely different experience.
The road climbs from forest areas to an exposed mountain summit where riders can enjoy panoramic views across Colorado.
Pikes Peak Highway
Riding Tips
Wear proper protective gear
Prepare for temperature changes
Use caution during downhill sections
Take breaks to enjoy the scenery
The combination of elevation, views, and challenging sections makes Pikes Peak a memorable motorcycle destination.
🏜️ Black Canyon of the Gunnison: A Quiet Scenic Escape
Less Crowded Roads With Amazing Landscapes
Western Colorado offers many hidden gems for riders who prefer quieter roads. The areas around Black Canyon of the Gunnison provide dramatic landscapes, open highways, and fewer crowds compared with some famous mountain routes.
This area is ideal for riders who enjoy relaxed motorcycle touring, scenic stops, and exploring less-traveled roads.
Best For
Long-distance motorcycle trips
Adventure riders
Photography enthusiasts
Riders looking for peaceful roads
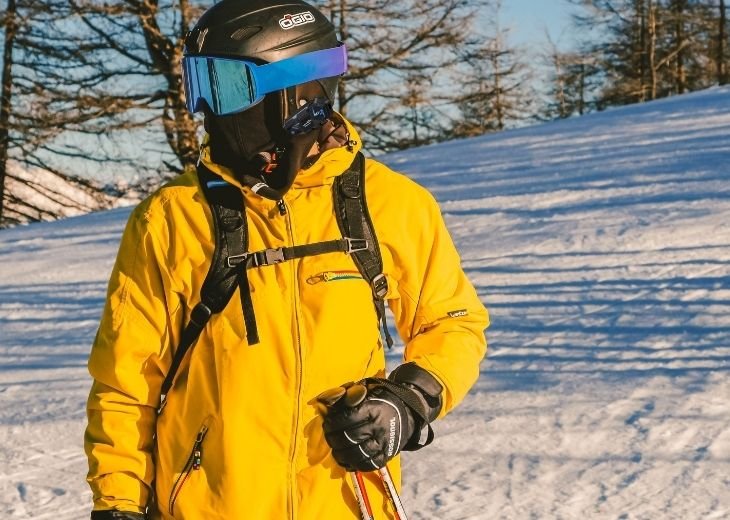
🧥 Essential Gear Tips for Colorado Motorcycle Riding
Colorado mountain weather can change quickly. A warm valley can become a cold mountain pass within a short time, so riders should always prepare properly.
Colorado offers some of the best motorcycle roads in the United States. From dramatic mountain passes to peaceful scenic highways, every route provides a different riding experience.
The best Colorado motorcycle rides are not only about reaching a destination. They are about enjoying the curves, landscapes, and freedom that come with exploring the open road.
Prepare your motorcycle, choose the right gear, and experience why Colorado remains one of the world’s greatest destinations for scenic motorcycle riding.
Frequently Asked Questions About Colorado Motorcycle Roads
What is the best motorcycle road in Colorado?
The Million Dollar Highway is often considered one of the best motorcycle roads in Colorado because of its incredible mountain scenery, challenging curves, and unforgettable riding experience.
When is the best time to ride motorcycles in Colorado?
The best motorcycle riding season in Colorado is usually from late May through September. Summer offers better weather conditions, while early autumn provides beautiful mountain colors.
Are Colorado mountain roads difficult for beginner riders?
Some routes are beginner-friendly, such as Peak to Peak Scenic Byway. However, high-elevation roads with steep climbs and sharp turns require more confidence and careful riding.
Do I need special gear for Colorado motorcycle trips?
Yes. Mountain weather can change quickly, so riders should bring protective gear, warm layers, rain protection, and basic emergency supplies.
Are Colorado motorcycle roads suitable for long-distance touring?
Yes. Colorado is an excellent destination for motorcycle touring, offering scenic highways, mountain passes, historic towns, and many memorable routes for long-distance riders.
Tail of the Dragon is one of the most famous motorcycle roads in the United States, and for good reason. Stretching just 11 miles along the Tennessee–North Carolina border, this legendary section of US Highway 129 packs an incredible 318 curves into a relatively short distance. There are no intersections, no driveways, and almost no straight sections, making it one of the most technical public roads in America.
Every year, thousands of riders travel to Deals Gap hoping to experience the Dragon for themselves. Some arrive expecting a racetrack, while others simply want to cross a bucket-list destination off their map. The reality is somewhere in between. Tail of the Dragon is an unforgettable ride, but it's also a road that rewards patience, preparation, and smooth riding. This guide covers everything you need to know before planning your motorcycle trip.
🏍️ Why Tail of the Dragon Is So Famous
The Dragon has earned worldwide recognition because no other public road in America offers such a concentrated series of corners.
What makes it special?
318 curves in just 11 miles
Beautiful mountain scenery
Excellent pavement
No commercial traffic
A gathering place for motorcycle enthusiasts
Instead of focusing on speed, riders come here to challenge their cornering skills and enjoy one of the most iconic motorcycle roads in the country.
🗓️ Best Time to Ride Tail of the Dragon
Spring (April–May)
Spring is one of the most popular seasons. Temperatures are comfortable, the forests are green, and traffic is usually lighter during weekdays.
Summer (June–August)
Summer offers long riding days but also brings the largest crowds. Early morning rides provide the best combination of cooler temperatures and lighter traffic.
Fall (September–October)
Many experienced riders consider fall the best time to visit. Cooler weather and colorful autumn leaves create spectacular riding conditions.
Winter
Winter can bring snow, ice, and temporary road closures. Always check weather conditions before your trip.
🛣️ What to Expect on the Dragon
The road is far tighter than many first-time visitors expect.
Instead of long sweeping corners, you'll encounter:
Continuous switchbacks
Blind curves
Rapid elevation changes
Limited passing opportunities
Many riders finish the Dragon in 20 to 30 minutes, but the experience stays with them much longer.
The goal isn't to set a fast time. It's to ride smoothly, safely, and confidently.
📍 Nearby Roads You Shouldn't Miss
Cherohala Skyway
Many riders combine the Dragon with the Cherohala Skyway, a scenic route known for long sweepers, mountain views, and lighter traffic.
Unlike the Dragon's tight corners, the Skyway offers a relaxed touring experience.
Cherohala Skyway
Foothills Parkway
Foothills Parkway provides beautiful views of the Great Smoky Mountains and is an excellent warm-up or cool-down ride before tackling US 129.
Foothills Parkway
Moonshiner 28
Highway 28 features hundreds of additional curves and connects several popular riding destinations throughout western North Carolina.
Many experienced riders say the surrounding roads are just as enjoyable as the Dragon itself.
If you're visiting during peak season, book accommodations well in advance.
⚠️ Common Mistakes First-Time Riders Make
Riding Beyond Their Skill Level
The Dragon attracts riders from around the world, but it isn't the place to test your limits.
Ride your own pace and ignore faster traffic behind you.
Looking at the Scenery
The mountain views are incredible, but save sightseeing for overlooks.
Your eyes should stay focused on the next corner.
Crossing the Center Line
One of the biggest causes of crashes is drifting across the double yellow line.
Stay in your lane, especially around blind corners where oncoming motorcycles and sports cars may appear suddenly.
Underestimating Fatigue
Riding hundreds of curves demands concentration.
Take regular breaks and stay hydrated.
🛡️ Safety Tips
Ride within your ability.
Slow down before entering corners.
Look through each turn.
Avoid riding aggressively in heavy traffic.
Watch for changing weather and fallen leaves.
Remember, every corner leads to another one. Smoothness is far more important than speed.
❓ Frequently Asked Questions
How long does it take to ride Tail of the Dragon?
Most riders complete one pass in about 20 to 30 minutes, depending on traffic.
Is Tail of the Dragon suitable for beginners?
It can be, provided beginners ride conservatively and avoid trying to keep up with more experienced riders.
What is the speed limit?
The posted speed limit is generally 30 mph.
Is the Dragon dangerous?
It can be challenging, but most incidents happen when riders exceed their abilities or cross the center line.
What other roads should I ride nearby?
The Cherohala Skyway, Moonshiner 28, and Foothills Parkway are all excellent additions to a Tail of the Dragon motorcycle trip.
🏁 Final Thoughts
Tail of the Dragon is more than just a famous road—it's a rite of passage for many motorcycle enthusiasts. While the 318 curves are the main attraction, the surrounding Smoky Mountains offer days of outstanding riding, making Deals Gap one of America's premier motorcycle destinations.
Ride with patience, respect the road, and enjoy every corner. Chances are, one trip won't be enough, and you'll already be planning your return before you leave.
Utah may be the most underrated motorcycle destination in America. While riders often dream about California's Pacific Coast Highway or the Blue Ridge Parkway, Utah quietly offers something many states simply cannot match: world-class riding roads combined with some of the most dramatic landscapes on Earth. Red rock deserts, alpine mountains, deep canyons, winding scenic byways, and five national parks all sit within a single state's borders.
For motorcycle riders, Utah delivers an incredible variety of experiences. One day you can be carving through mountain switchbacks above 9,000 feet, and the next day you can be riding through red sandstone cliffs that look more like Mars than America. Whether you're planning a Route 66 detour, a cross-country motorcycle tour, or a dedicated Utah motorcycle road trip, this guide covers the roads, routes, timing, and practical advice you need to make the most of your ride.
🗺️ Why Utah Is One of America's Best Motorcycle States
Utah consistently ranks among the best motorcycle destinations in the United States for several reasons:
Exceptional road quality
Low traffic outside major cities
Multiple world-famous scenic byways
Five national parks within one state
Long riding seasons in southern Utah
Endless photography opportunities
Unlike some famous motorcycle roads that become crowded during peak season, many Utah routes still provide long stretches of open road and uninterrupted scenery.
🏜️ Best Time for a Utah Motorcycle Trip
Spring (April to May)
Spring is one of the best times to ride in Utah. Southern Utah temperatures are comfortable, tourist crowds are smaller, and desert landscapes begin to come alive after winter.
Zion National Park
Ideal areas include:
Zion National Park
Moab
Monument Valley
Capitol Reef National Park
Summer (June to August)
Summer brings excellent riding conditions in northern Utah and mountain regions but can become extremely hot in the desert.
Temperatures around Moab and Monument Valley regularly exceed 100°F.
Early morning departures are highly recommended.
Fall (September to October)
Many experienced riders consider fall the perfect season for a Utah motorcycle tour.
Expect:
Mild temperatures
Clear skies
Less traffic
Excellent visibility
Winter (November to March)
Northern mountain roads can experience snow and closures, while southern Utah often remains rideable throughout much of the winter.
If Utah had an official motorcycle road, this would probably be it.
Stretching roughly 124 miles between Bryce Canyon and Capitol Reef, Scenic Byway 12 regularly appears on lists of America's best motorcycle roads.
Grand Staircase-Escalante National Monument
Highlights include:
Boulder Mountain
Escalante Canyon
The Hogsback section
Grand Staircase-Escalante National Monument
The Hogsback alone is worth the trip. Riders travel along a narrow ridge with steep drop-offs on both sides and panoramic desert views in every direction.
Recommended Riding Time
Allow a full day even though the mileage appears short.
You'll stop far more often than you expect.
🌄 Zion-Mount Carmel Highway
This route offers one of the most memorable entrances to any national park in America.
Zion-Mount Carmel Highway
Expect:
Red sandstone cliffs
Historic tunnels
Technical curves
Spectacular canyon views
Morning rides usually provide lighter traffic and better temperatures.
🏜️ US-163 Through Monument Valley
This road has appeared in countless movies, television shows, and advertisements.
Most riders recognize the famous view immediately:
The long straight highway disappearing toward the sandstone buttes of Monument Valley.
Many riders know it simply as Forrest Gump Point.
This is one of the most photographed motorcycle locations in America.
🏔️ Mirror Lake Highway
Located in northern Utah, Mirror Lake Highway provides a completely different riding experience.
Mirror Lake Highway
Instead of desert scenery you'll find:
Pine forests
Alpine lakes
Mountain passes
Cooler temperatures
During summer, this road becomes an excellent escape from southern Utah heat.
🏜️ Moab to Dead Horse Point State Park
The short ride from Moab to Dead Horse Point offers some of the best scenery in the American Southwest.
Colorado River overlooks
Expect:
Red cliffs
Colorado River overlooks
Smooth pavement
Endless photo opportunities
Sunrise and sunset rides are especially impressive.
📍 Best Stops for Motorcycle Travelers
Moab
Moab serves as the motorcycle capital of southern Utah.
Nearby attractions include:
Arches National Park
Canyonlands National Park
Dead Horse Point State Park
Most riders spend at least two nights here.
Bryce Canyon National Park
Bryce Canyon offers some of the most unique rock formations in North America.
Sunrise views are particularly spectacular.
Capitol Reef National Park
Capitol Reef receives fewer visitors than Zion or Bryce, which makes it perfect for riders looking to avoid crowds.
Monument Valley
Few places in America feel larger or more cinematic.
This is bucket-list territory for motorcycle photographers.
🏍️ Recommended Utah Motorcycle Itinerary
Day 1
Salt Lake City → Moab
Approximate distance:
230 miles
Day 2
Explore Arches and Dead Horse Point
Approximate distance:
100 miles
Day 3
Moab → Monument Valley
Approximate distance:
150 miles
Day 4
Monument Valley → Bryce Canyon
Approximate distance:
260 miles
Day 5
Bryce Canyon → Scenic Byway 12 → Capitol Reef
Approximate distance:
150 miles
Day 6
Capitol Reef → Zion National Park
Approximate distance:
180 miles
Day 7
Return toward Salt Lake City or continue west toward Nevada.
🎒 Essential Gear for Riding Utah
Utah weather changes quickly, especially when riding between desert valleys and mountain passes.
Pack:
Hydration pack
Layered riding gear
Sunscreen
Tire repair kit
Portable air compressor
Offline maps
Emergency battery pack
Hydration is more important than many visitors realize.
Desert air often hides how quickly riders become dehydrated.
⚠️ Common Mistakes Riders Make in Utah
Underestimating Distances
Utah looks smaller on a map than it feels on a motorcycle.
Fuel stops can be surprisingly far apart.
Never pass fuel with less than half a tank remaining.
Ignoring Elevation Changes
You may start your morning in desert heat and finish your afternoon above 9,000 feet.
Layered clothing matters.
Riding Midday During Summer
Southern Utah summer temperatures can become dangerous.
Many experienced riders finish the majority of their riding before noon.
Trying to See Everything
Utah rewards slower travel.
Trying to visit all five national parks in three days usually results in spending more time watching your GPS than enjoying the road.
❓ Frequently Asked Questions
What is the best motorcycle road in Utah?
Scenic Byway 12 is widely considered Utah's best motorcycle road and one of the best motorcycle roads in America.
How many days do you need for a Utah motorcycle trip?
Seven to ten days provides enough time to experience the state's major riding destinations without rushing.
Is Utah suitable for beginner riders?
Most roads are beginner-friendly, although riders should prepare for long distances and changing weather conditions.
What is the best month to ride in Utah?
May, September, and October generally provide the best balance of weather, scenery, and traffic levels.
Is Utah better than Colorado for motorcycle touring?
They offer very different experiences. Colorado focuses on alpine mountain riding, while Utah combines mountains, deserts, canyons, and some of the most unique scenery in North America.
Utah doesn't always receive the same attention as California or Colorado in motorcycle travel discussions, but many experienced riders consider it one of the best motorcycle touring states in America. The combination of open roads, incredible scenery, and relatively light traffic creates the kind of riding experience that stays with you long after the trip ends.
If your motorcycle bucket list includes iconic American landscapes, Utah deserves a place near the very top.
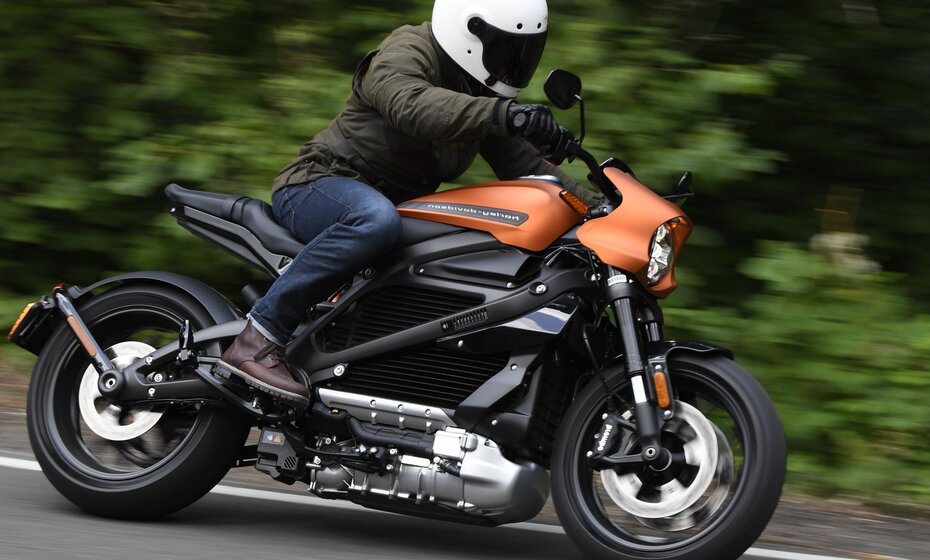
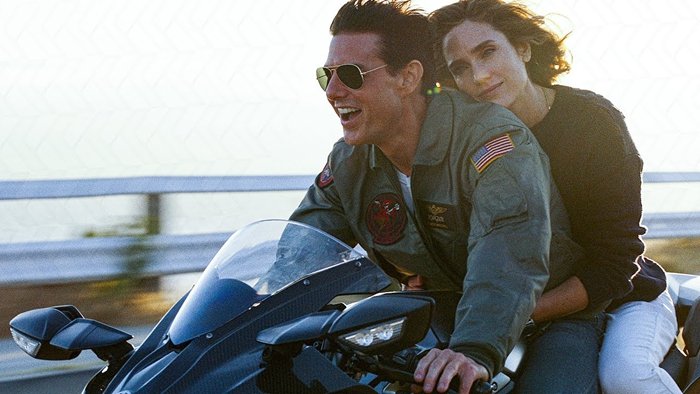
A lot of new riders dream about starting their motorcycle journey on a big cruiser. The low seat height feels reassuring, the relaxed riding position looks comfortable, and the classic styling never goes out of fashion. Compared to aggressive supersports or tall adventure bikes, cruisers often appear calm, predictable, and beginner-friendly. That perception has convinced countless new riders that a large cruiser is the perfect first motorcycle.
The reality is often very different. The first hard launch from a traffic light, the first tight U-turn in a parking lot, or the first emergency stop on a downhill road can quickly reveal how much power and weight some of these machines are hiding beneath the chrome. Many modern cruisers produce more torque than superbikes from only a few years ago, while carrying hundreds of extra pounds that become very noticeable at low speed. Some cruisers are not beginner motorcycles at all—they are muscle cars on two wheels. Here are five powerful cruisers that new riders should respect, and probably avoid, as a first bike.
Why Beginners Often Underestimate Cruisers
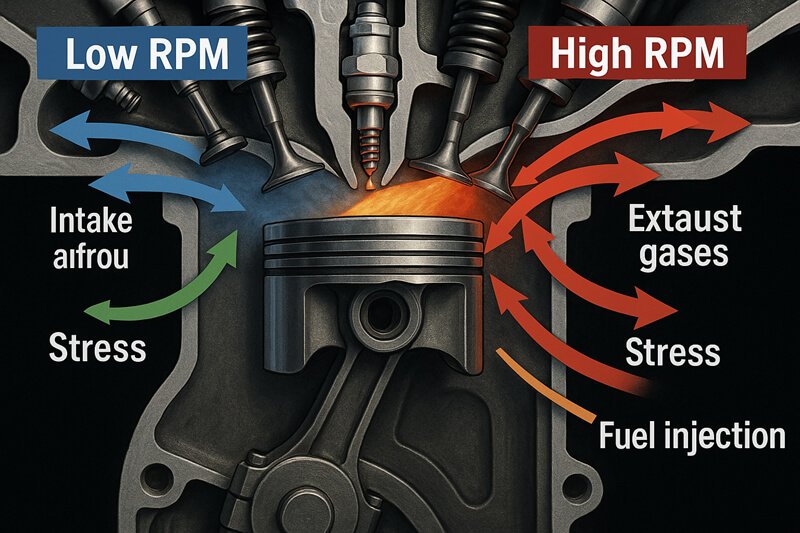
Torque Can Be More Intimidating Than Horsepower
Most beginners focus on horsepower figures because they are easy to compare. Experienced riders often pay more attention to torque. Large cruisers produce huge amounts of torque at very low RPM, exactly where new riders spend most of their time learning clutch control and throttle management.
On a middleweight motorcycle, an accidental twist of the throttle may be harmless. On a large-displacement V-twin or power cruiser, the same mistake can result in a sudden burst of acceleration that catches inexperienced riders completely off guard.
Weight Changes Everything
Many performance cruisers weigh between 700 and 900 pounds. At highway speed, that weight contributes to stability and comfort. At parking lot speeds, it becomes a completely different story.
Most beginner drops happen during slow U-turns, parking maneuvers, uneven road surfaces, gas station stops, and traffic jams. Managing a heavy motorcycle confidently takes experience that most new riders simply have not developed yet.
Low Seat Height Creates False Confidence
Being able to place both feet flat on the ground is helpful, but it does not mean a rider is ready for a 1,900cc motorcycle with massive torque.
Many beginners sit on a large cruiser, realize they can comfortably reach the ground, and immediately assume they can handle the motorcycle. Unfortunately, balancing a stationary motorcycle and controlling a moving one are very different skills.
Triumph Rocket 3 Storm
A Cruiser With Superbike Acceleration
The Triumph Rocket 3 Storm is one of the most outrageous production motorcycles available today. Its massive 2,458cc three-cylinder engine produces extraordinary acceleration and enough torque to embarrass many sports cars.
Triumph Rocket 3 Storm
Despite its surprisingly manageable manners in experienced hands, this is not a motorcycle designed for beginners.
Why Beginners Should Avoid It
The Rocket combines three characteristics that challenge inexperienced riders: enormous torque, significant weight, and extremely rapid acceleration.
Small throttle inputs produce big reactions, and mistakes happen very quickly. Many experienced owners describe the Rocket as feeling like a locomotive with handlebars, which is probably not the ideal environment for learning clutch control.
Who Should Ride It
The Rocket 3 is best suited for experienced touring riders, former sportbike owners, and riders moving up from large cruisers.
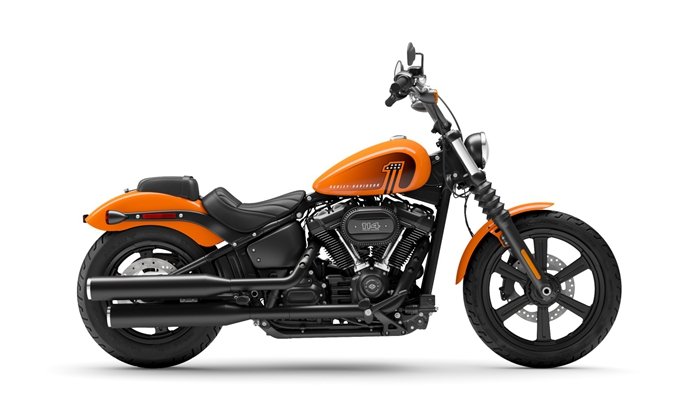
Harley-Davidson Breakout 117
A Drag Bike Disguised As A Cruiser
The Breakout 117 is one of Harley-Davidson's most visually striking motorcycles. Its stretched design, huge rear tire, and Milwaukee-Eight 117 engine create serious road presence and equally serious performance.
The motorcycle delivers strong acceleration and impressive torque almost immediately off idle.
Harley-Davidson Breakout 117
Why Beginners Struggle With It
The Breakout combines several traits that make life harder for new riders: heavy steering feel, a wide rear tire, a long wheelbase, and significant overall weight.
The motorcycle feels fantastic on open highways but can become intimidating during slow-speed maneuvers.
Who Should Ride It
The ideal owner already has experience with large cruisers or touring motorcycles and understands how to manage their size and weight.
Ducati XDiavel V4
A Superbike Wearing Cruiser Styling
The Ducati XDiavel V4 may look like a cruiser, but it behaves much closer to a performance motorcycle. The engine loves high RPM, throttle response is immediate, and acceleration is aggressive by any standard.
Ducati XDiavel V4
Many riders describe it as one of the most exciting cruisers currently available.
Why Beginners Should Stay Away
The biggest danger is expectation.
New riders see a relaxed seating position and assume relaxed performance. Instead, they get a motorcycle with sportbike DNA hiding beneath cruiser styling.
That mismatch catches many riders by surprise.
Who Should Ride It
The XDiavel is perfect for experienced riders who want cruiser comfort without sacrificing performance.
Suzuki Boulevard M109R
The Original Muscle Cruiser
The Boulevard M109R has built a reputation for brutal acceleration and intimidating road presence over nearly two decades.
Even in 2026, very few cruisers deliver the same combination of torque, weight, and attitude.
Suzuki Boulevard M109R
Why Beginners Have Problems
The M109R asks riders to manage nearly 800 pounds of weight, a massive rear tire, strong low-end torque, and aggressive power delivery.
Smooth inputs are rewarded. Hesitation and poor throttle control are not.
Who Should Ride It
Experienced cruiser riders and muscle bike enthusiasts continue to love the M109R for exactly the reasons beginners should avoid it.
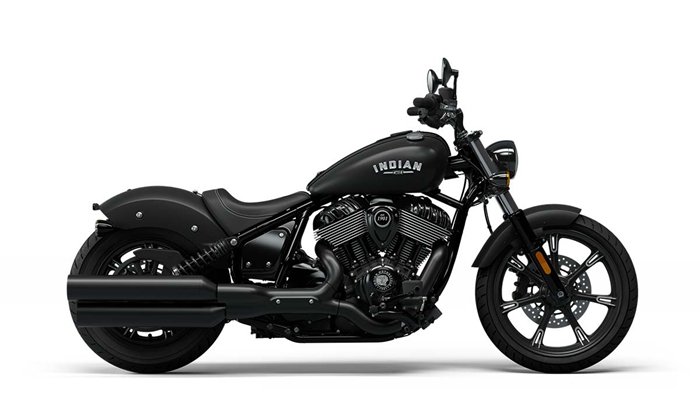
Indian Sport Chief
The Sleeper Performance Cruiser
Unlike some motorcycles on this list, the Sport Chief doesn't immediately look intimidating.
That may actually be its biggest danger.
Indian designed the motorcycle with upgraded suspension, stronger brakes, and handling performance that exceeds what many riders expect from a traditional cruiser.
Indian Sport Chief
Why It Can Surprise Beginners
The motorcycle hides its capabilities extremely well. That can encourage inexperienced riders to ride faster than their skills allow.
Confidence is important on a motorcycle. Overconfidence is expensive.
Who Should Ride It
The Sport Chief is best suited for experienced riders looking for a modern performance cruiser with excellent handling characteristics.
Better Alternatives For New Riders
Fortunately, beginners have plenty of excellent options available. Some of the best beginner cruisers currently on the market include the Honda Rebel 500, Kawasaki Eliminator 500, Honda Shadow Phantom, and Royal Enfield Super Meteor 650.
These motorcycles provide enough performance for highways while remaining forgiving enough to help riders develop proper skills and confidence.
How To Know If A Cruiser Is Too Much Motorcycle
Before buying any motorcycle, ask yourself a few simple questions: Can I comfortably control this amount of acceleration? Could I pick the bike up if I dropped it? Have I mastered emergency braking? Am I buying this motorcycle because I can ride it, or because I want to own it?
Those are not always the same answer.
Final Thoughts
The goal of a first motorcycle is not to impress other riders. It is to build skills, confidence, and experience in a safe and enjoyable way.
Every motorcycle on this list is an excellent machine in the right hands. In fact, one of them may eventually become your dream bike. Just don't rush the process. The riders who enjoy these motorcycles the most are usually the ones who spent years developing the skills necessary to appreciate them.
Motorcycles have a habit of teaching lessons quickly. The larger the engine and the heavier the motorcycle, the more expensive those lessons tend to become.
FAQ
Are cruisers good beginner motorcycles?
Many are. Smaller cruisers between 300cc and 650cc are among the best beginner motorcycles available.
Is a 1000cc cruiser too much for a beginner?
For most riders, yes. The combination of weight and torque is often more challenging than the engine size itself suggests.
Why are large cruisers difficult at low speed?
Their weight, wheelbase, and steering characteristics make parking lot maneuvers more demanding.
What is the best beginner cruiser in 2026?
The Honda Rebel 500 and Kawasaki Eliminator 500 remain two of the safest recommendations.
Should beginners buy their dream motorcycle first?
Most experienced riders recommend learning on a manageable motorcycle first and upgrading later.
Motorcycle communication has come a long way from hand signals and stopping at every gas station to repeat directions. Modern motorcycle intercom systems allow riders to talk, share route updates, warn about road hazards, and stay connected during long rides.
In recent years, one term has appeared everywhere in the motorcycle communication world: Mesh Intercom.
If you've been researching motorcycle helmet communication systems, you've probably seen phrases like Motorcycle Mesh Communication, Mesh Intercom Technology, or Dynamic Mesh Network. But what exactly is mesh communication, and why are so many touring riders and motorcycle clubs switching to it?
This guide explains how motorcycle mesh communication works, how it compares to traditional Bluetooth intercom systems, and which type of rider benefits most from mesh technology.
🏍️ What Is Motorcycle Mesh Communication?
📡 Mesh Communication Explained Simply
A motorcycle mesh intercom creates a communication network where every rider becomes part of the system.
Unlike traditional Bluetooth intercoms that connect riders in a fixed order, mesh technology allows all riders to communicate through multiple connections at the same time.
Think of it like a spider web.
If one connection disappears, the rest of the web stays connected.
This is why manufacturers often describe mesh as a self-healing network.
🌐 Why Is It Called "Mesh"?
In networking, a mesh network means every device can help relay information to other devices.
For motorcycle riders, this means:
Riders can spread out naturally.
Riders can leave the group temporarily.
Riders can rejoin automatically.
The communication network continues running without manual reconnecting.
For long-distance touring groups, this flexibility is often the biggest advantage of mesh communication.
🔗 How Traditional Bluetooth Intercom Systems Work
Before understanding mesh, it helps to understand traditional motorcycle Bluetooth intercom systems.
Most Bluetooth intercoms use a chain connection:
Rider A → Rider B → Rider C → Rider D
Every rider depends on the previous rider in the chain.
This works well for small groups and rider-passenger communication.
However, problems appear when groups become larger.
⚠️ The Biggest Bluetooth Limitation
Imagine four riders traveling together.
If Rider B exits for fuel or loses connection:
Rider A ❌ Rider B ❌ Rider C ❌ Rider D
The communication chain can break.
The group may need to stop and manually reconnect devices.
Most experienced group riders have experienced this at least once.
🕸️ How Motorcycle Mesh Communication Actually Works
📶 Every Rider Extends the Network
Mesh communication works differently.
Instead of one communication chain, every rider helps carry the signal.
Example:
Rider A ↔ Rider B ↔ Rider C ↔ Rider D
If Rider B leaves the group:
Rider A ↔ Rider C ↔ Rider D
The system automatically creates a new path.
Most riders never notice the change happening.
🔄 Automatic Reconnection
One of the biggest advantages of motorcycle mesh communication is automatic reconnection.
Imagine this situation:
One rider stops for fuel.
Another rider gets caught by a red light.
Two riders stop to take photos.
With traditional Bluetooth, reconnecting can become frustrating.
With mesh, riders simply return to range and automatically rejoin the conversation.
No buttons.
No pairing process.
No roadside troubleshooting.
🏔️ Real Riding Situations Where Mesh Works Best
🏍️ Large Group Rides
Mesh communication shines during group rides.
Examples include:
Motorcycle clubs
Weekend rides
Charity rides
Dealer events
Groups naturally stretch out over time.
Traffic lights, fuel stops, and different riding styles make perfect spacing impossible.
Mesh handles these situations extremely well.
🌎 Long-Distance Motorcycle Touring
Long-distance touring riders rarely ride wheel-to-wheel for hours.
Riders stop for:
Photos
Fuel
Coffee
Rest breaks
With mesh, communication remains much more flexible during these situations.
🏔️ Adventure Riding
Adventure riders often deal with:
Mountains
Forest roads
Gravel roads
Elevation changes
These conditions constantly change rider spacing.
Mesh communication was practically designed for this type of riding.
📏 Does Mesh Communication Increase Range?
This is one of the most common questions riders ask.
The answer is:
Yes and no.
A single rider-to-rider connection may have similar range to Bluetooth.
However, every rider extends the total communication coverage.
Example:
If each rider has a communication range of one mile:
Rider A connects to Rider B.
Rider B connects to Rider C.
Rider C connects to Rider D.
The group can now stay connected across several miles of roadway.
For large touring groups, this can make a huge difference.
👥 How Many Riders Can Use Mesh?
This depends on the manufacturer and model.
Modern motorcycle mesh communication systems often support:
8 riders
15 riders
24 riders
Open mesh groups with virtually unlimited participants
Traditional Bluetooth systems typically become more difficult to manage beyond four riders.
This is one reason why many motorcycle clubs prefer mesh systems.
For many riders, Bluetooth remains the perfect solution.
⚠️ Common Mesh Communication Myths
❌ Mesh Means Unlimited Range
No.
Each device still has a maximum communication distance.
Mesh simply allows every rider to extend the network.
❌ Mesh Replaces Bluetooth
Not at all.
Most modern motorcycle communication systems use:
Bluetooth for phones and GPS
Mesh for rider-to-rider communication
The two technologies work together.
❌ All Mesh Systems Work Together
Unfortunately, this is not always true.
Many manufacturers use proprietary mesh protocols.
This means riders in the same group often choose the same communication platform for the best experience.
🚀 Why Mesh Communication Is Becoming So Popular
Motorcycle touring and group riding continue to grow in popularity across the United States.
At the same time, riders expect communication systems to become:
Easier to use
More reliable
Less dependent on manual setup
Mesh communication solves many of the frustrations riders experienced with traditional Bluetooth intercom systems.
For many riders, the biggest benefit is simple:
The technology disappears into the background and lets riders focus on the road.
🏁 Final Thoughts
Motorcycle mesh communication is not simply an upgraded version of Bluetooth.
It is a completely different way of connecting riders.
For solo riders or couples, traditional Bluetooth intercom systems remain an excellent choice.
But for motorcycle clubs, touring riders, adventure riders, and large group rides, mesh communication offers a level of flexibility and convenience that traditional Bluetooth struggles to match.
No broken communication chains.
No complicated pairing sequences.
No stopping on the side of the road to reconnect devices.
Just smoother conversations and a better riding experience.
As motorcycle technology continues to evolve, mesh communication is quickly becoming the new standard for motorcycle group communication systems.
❓ Frequently Asked Questions
Is motorcycle mesh communication better than Bluetooth?
For group rides, yes. For solo riders or passengers, Bluetooth may be enough.
Can mesh intercoms connect to smartphones?
Yes. Most systems use Bluetooth for phones and mesh for rider communication.
Can riders join a mesh conversation while riding?
Yes. Most systems allow riders to join without stopping or re-pairing devices.
Is mesh communication worth the extra cost?
If you regularly ride in groups, most riders find the additional convenience worth it.
What is the biggest advantage of mesh communication?
Automatic reconnection and a self-healing communication network.
For generations of riders, Route 66 has represented something bigger than just a road. Known as the "Mother Road," this legendary highway stretches across the heart of America and has become one of the most iconic motorcycle road trips in the world. From Chicago to Santa Monica, Route 66 takes riders through eight states, historic towns, classic diners, desert landscapes, and countless pieces of American history.
Unlike modern interstates designed for speed, Route 66 rewards riders who slow down and enjoy the journey. Along the way, you'll find vintage motels, quirky roadside attractions, national parks, and some of the best motorcycle touring experiences in America.
If you're planning a Route 66 motorcycle trip, this guide covers everything you need to know, including route planning, the best stops, suggested itineraries, gear recommendations, common mistakes, and practical tips to help make your adventure unforgettable.
🏍️ What Makes Route 66 Special for Motorcycle Riders?
🌎 The History Behind America's Mother Road
Opened in 1926, Route 66 originally connected Chicago, Illinois, to Santa Monica, California.
The highway passes through:
Illinois
Missouri
Kansas
Oklahoma
Texas
New Mexico
Arizona
California
Although much of the original route has been replaced by modern highways, many sections remain preserved and are perfect for motorcycle touring.
🛣️ Why Riders Love Route 66
Route 66 offers:
Historic roads
Light traffic in many sections
Diverse scenery
Classic Americana
Endless photo opportunities
Unique roadside attractions
Every day brings something different, making Route 66 one of the best motorcycle roads in America for long-distance touring.
🗺️ Route 66 Overview
📍 Total Distance
The complete Route 66 motorcycle route covers approximately:
2,448 miles
Eight states
More than 100 historic towns
⏱️ How Long Does It Take?
Most riders choose one of these schedules:
Trip Length
Recommended Style
7 Days
Fast-paced
10 Days
Balanced
14 Days
Relaxed touring
3 Weeks
Full experience
Ten to fourteen days is ideal for most riders.
🏔️ Road Conditions
Expect a mix of:
Original two-lane highways
Modern roads
Small-town streets
Desert highways
Mountain sections
Road quality varies, but the route is generally suitable for:
Touring motorcycles
Cruisers
Adventure bikes
Sport-tourers
📅 Best Time to Ride Route 66
🌸 Spring
Spring offers:
Comfortable temperatures
Fewer tourists
Beautiful scenery
March through May is one of the best periods for a Route 66 motorcycle trip.
☀️ Summer
Summer brings:
Long daylight hours
Festivals and events
However, desert temperatures in Arizona and California can exceed 110°F.
Hydration becomes critical.
🍂 Fall
Fall combines:
Mild weather
Fewer crowds
Excellent riding conditions
September and October are considered prime riding months.
❄️ Winter
Winter riding is possible but less predictable, especially in northern states.
🎒 Essential Gear for a Route 66 Motorcycle Adventure
This section is often considered one of the highlights of the trip.
📍 Seligman, Arizona
Seligman helped revive interest in Route 66.
You'll find:
Classic diners
Vintage signs
Historic motels
Many visitors describe it as stepping back into the 1950s.
📍 Oatman, Arizona
Perhaps the most famous motorcycle section of Route 66.
Highlights include:
Wild burros
Twisty roads
Old mining town atmosphere
The ride between Kingman and Oatman is a favorite among riders.
📍 Santa Monica, California
The traditional end of Route 66.
Must-see locations:
Santa Monica Pier
Pacific Ocean
Route 66 End Sign
Completing the journey here is a bucket-list achievement for many riders.
🛣️ Suggested Route 66 Motorcycle Itineraries
🏍️ 10-Day Route
Day 1:
Chicago → St. Louis
Day 2:
St. Louis → Springfield
Day 3:
Springfield → Tulsa
Day 4:
Tulsa → Oklahoma City
Day 5:
Oklahoma City → Amarillo
Day 6:
Amarillo → Santa Fe
Day 7:
Santa Fe → Gallup
Day 8:
Gallup → Flagstaff
Day 9:
Flagstaff → Barstow
Day 10:
Barstow → Santa Monica
🏍️ 14-Day Relaxed Tour
Benefits include:
More sightseeing
Less fatigue
Better photo opportunities
Extra rest days
This is the preferred option for most motorcycle travelers.
⛽ Fuel, Lodging, and Camping
⛽ Fuel Planning
Never assume fuel is nearby.
In western states, distances between stations can be considerable.
Refuel:
At half tank
Before entering remote areas
🏨 Motorcycle-Friendly Towns
Good overnight stops include:
St. Louis
Tulsa
Amarillo
Santa Fe
Flagstaff
🏕️ Camping Options
Many riders combine hotels with:
KOA campgrounds
State parks
National forests
📸 Most Scenic Riding Sections
🌄 New Mexico
Beautiful desert scenery and mountain landscapes.
🏜️ Arizona
The section from Kingman to Oatman is legendary.
🌊 California
The final approach to Santa Monica delivers a memorable ending.
⚠️ Common Mistakes Riders Make
🚫 Trying to Finish Too Quickly
Route 66 is about experiences, not mileage.
Rushing means missing:
Historic towns
Museums
Local food
Scenic detours
🚫 Ignoring Desert Heat
Arizona and California can become dangerously hot.
Drink water frequently and avoid midday riding during summer.
🚫 Overpacking
Heavy luggage affects comfort and handling.
Pack efficiently.
🚫 Depending Solely on GPS
Modern GPS systems sometimes bypass historic sections.
Many riders carry a Route 66 guidebook for reference.
🏍️ Must-See Detours Near Route 66
🌲 Grand Canyon National Park
A worthwhile side trip from Arizona.
🏞️ Monument Valley
One of America's most iconic landscapes.
🌵 Sedona
Red rock scenery and excellent riding roads.
🌄 Petrified Forest National Park
A favorite among photographers.
🤝 Why Route 66 Is Perfect for Motorcycle Touring
🌎 Rich History
Few roads tell the story of America like Route 66.
🛣️ Endless Variety
Every state offers something different.
📸 Incredible Photography
From neon signs to desert landscapes, photo opportunities are endless.
🤝 Friendly Communities
Small towns along Route 66 often welcome motorcycle travelers.
A Route 66 motorcycle trip isn't just another vacation. It's one of the greatest motorcycle adventures in the United States and a dream ride for countless riders around the world.
From the skyscrapers of Chicago to the Pacific Ocean in Santa Monica, Route 66 offers a unique combination of history, scenery, culture, and unforgettable roads.
Some rides are measured in miles.
Route 66 is measured in memories.
❓FAQ
How many days do you need for a Route 66 motorcycle trip?
Most riders spend 10–14 days completing the route comfortably.
What is the best month to ride Route 66?
May, September, and October provide the best weather for motorcycle touring.
Is Route 66 suitable for beginners?
Yes. Most sections are easy to ride and suitable for riders with basic touring experience.
What is the most scenic section of Route 66?
Many riders consider the Kingman-to-Oatman section in Arizona to be the most memorable.
Is Route 66 still worth riding today?
Absolutely. Route 66 remains one of the greatest motorcycle road trips and one of the best motorcycle routes in America.
Few roads have earned the respect of motorcycle riders quite like the Blue Ridge Parkway. Stretching through the Appalachian Highlands, this legendary route offers hundreds of miles of sweeping curves, mountain vistas, peaceful forests, and small-town charm. For many riders, a Blue Ridge Parkway motorcycle ride is not just another road trip—it's a bucket-list experience.
Unlike interstate highways built for speed, the Parkway was designed for scenery. Riders won't find heavy commercial traffic, endless billboards, or crowded truck lanes. Instead, they'll discover some of the most scenic motorcycle roads in America, making it one of the best destinations for motorcycle touring and long-distance motorcycle travel.
Whether you're planning a weekend escape or a week-long motorcycle adventure, this guide covers everything you need to know before riding the Blue Ridge Parkway.
🏍️ What Is the Blue Ridge Parkway?
🌄 Route Overview
The Blue Ridge Parkway is a 469-mile scenic roadway connecting the southern end of Shenandoah National Park in Virginia to Great Smoky Mountains National Park in North Carolina.
Built during the 1930s and 1940s, the Parkway was designed specifically for leisurely travel through some of the most beautiful mountain landscapes in the eastern United States.
Blue Ridge Parkway
Unlike many famous motorcycle roads that focus on technical riding, the Blue Ridge Parkway combines:
Smooth pavement
Gentle curves
Spectacular mountain views
Historic landmarks
National park access
For riders seeking a true motorcycle touring experience, few roads can compete.
🛣️ Why Motorcycle Riders Love It
The Blue Ridge Parkway has become one of the most popular motorcycle touring routes in North America because it offers:
Low traffic volume
No commercial vehicles
Excellent scenery
Hundreds of overlooks
Well-maintained roads
Access to hiking and camping
Many riders consider it one of the best motorcycle roads in America, especially for touring motorcycles, adventure bikes, cruisers, and sport-touring machines.
🗺️ Blue Ridge Parkway at a Glance
📍 Route Length
Total Length: 469 miles
States: Virginia and North Carolina
Southern Terminus: Great Smoky Mountains National Park
Northern Terminus: Shenandoah National Park
⏱️ How Long Does It Take to Ride?
Technically, you could ride the entire Parkway in a single long day.
However, that would miss much of what makes this road special.
Most motorcycle travelers choose:
2 Days: Fast-paced trip
3–4 Days: Balanced experience
5–7 Days: Full touring experience
For riders interested in photography, hiking, and sightseeing, four to five days is often ideal.
🏔️ Road Conditions
The Parkway is known for:
Excellent pavement
Wide curves
Consistent road quality
Lower speed limits
Speed limits generally range from 35 to 45 mph.
This road rewards riders who slow down and enjoy the journey.
📅 Best Time to Ride the Blue Ridge Parkway
🌸 Spring Riding
Spring brings:
Blooming wildflowers
Fresh green landscapes
Cooler temperatures
Smaller crowds
Spring is an excellent season for riders who prefer mild weather.
Blue Ridge Parkway Virginia Mountains Spring
☀️ Summer Riding
Summer offers:
Long daylight hours
Warm temperatures
Full access to attractions
However, summer also brings:
More tourists
Afternoon thunderstorms
Busier overlooks
Starting early in the morning helps avoid congestion.
🍂 Fall Foliage Season
Many riders consider autumn the ultimate season for a Blue Ridge Parkway motorcycle trip.
Fall delivers:
Brilliant red and orange leaves
Crisp temperatures
Exceptional photography opportunities
October is often the busiest month of the year.
❄️ Winter Considerations
Winter riding can be unpredictable.
Snow, ice, and closures frequently affect higher elevations.
Always check weather forecasts and road conditions before departure.
🎒 Essential Motorcycle Touring Gear for the Parkway
🧥 Riding Gear
Weather conditions can change rapidly in the mountains.
Preparation helps prevent unnecessary stress during longer rides.
🌟 Best Stops Along the Blue Ridge Parkway
📍 Shenandoah National Park
Many riders begin their journey here.
Shenandoah National Park
Highlights include:
Skyline Drive
Mountain overlooks
Wildlife viewing
Scenic photography
It serves as a perfect introduction to the Appalachian Mountains.
📍 Peaks of Otter
One of Virginia's most popular stops.
Features include:
Mountain scenery
Historic lodge
Hiking trails
Beautiful lake views
The area is especially attractive during sunrise and sunset.
📍 Mabry Mill
Often called the most photographed location on the Parkway.
Mabry Mill
Visitors enjoy:
Historic mill
Appalachian history exhibits
Local crafts
Traditional southern food
Many riders consider it a mandatory stop.
📍 Linville Falls
Linville Falls offers some of the most dramatic scenery in North Carolina.
Linville Falls
Highlights include:
Waterfalls
Hiking trails
Canyon viewpoints
Forest landscapes
The short hike is worth the effort.
📍 Grandfather Mountain
One of the most famous attractions near the Parkway.
Grandfather Mountain
Known for:
Mile-high swinging bridge
Incredible mountain views
Wildlife habitats
Hiking opportunities
Bring your camera.
📍 Craggy Gardens
Craggy Gardens becomes especially beautiful during late spring and early summer.
Expect:
Wildflower blooms
Panoramic views
Cooler temperatures
A favorite stop among touring riders.
📍 Mount Mitchell
At 6,684 feet, Mount Mitchell is the highest peak east of the Mississippi River.
Mount Mitchell
The summit offers:
Spectacular overlooks
Visitor center
Hiking opportunities
The access road itself is enjoyable for motorcyclists.
📍 Asheville, North Carolina
Asheville has become one of America's most motorcycle-friendly cities.
Popular attractions include:
Local breweries
Motorcycle shops
Live music
Excellent restaurants
Many riders schedule an overnight stay here.
🛣️ Recommended Blue Ridge Parkway Motorcycle Itineraries
🏍️ Weekend Ride (2 Days)
Day 1:
Shenandoah National Park
Peaks of Otter
Roanoke
Day 2:
Mabry Mill
Linville Falls
Asheville
Ideal for riders with limited vacation time.
🏍️ Extended Touring Route (4 Days)
Day 1:
Shenandoah National Park
Lexington
Day 2:
Peaks of Otter
Mabry Mill
Fancy Gap
Day 3:
Linville Falls
Grandfather Mountain
Day 4:
Mount Mitchell
Asheville
Great Smoky Mountains
This itinerary balances riding and sightseeing.
🏍️ Full Parkway Experience (5–7 Days)
For riders seeking the ultimate motorcycle vacation, dedicate an entire week.
Benefits include:
More photography stops
Hiking opportunities
Relaxed riding pace
Better weather flexibility
This approach captures the true spirit of motorcycle touring.
⛽ Fuel, Lodging, and Camping Tips
⛽ Fuel Planning
One of the most common mistakes riders make is assuming fuel is always nearby.
Fuel stations are not located directly on the Parkway.
Best practice:
Refuel at half tank
Never pass fuel unnecessarily
Plan fuel stops ahead of time
🏨 Recommended Overnight Stops
Popular motorcycle touring towns include:
Roanoke
Boone
Blowing Rock
Asheville
These locations provide easy access to lodging and restaurants.
🏕️ Motorcycle Camping
Camping remains popular among adventure riders.
Options include:
National Park campgrounds
State parks
Private campgrounds
Reservations are strongly recommended during peak season.
⚠️ Common Mistakes Riders Make
🚫 Underestimating Travel Time
The Parkway is not designed for fast travel.
Frequent stops, curves, and sightseeing opportunities slow progress.
Expect average moving speeds to be lower than anticipated.
🚫 Ignoring Mountain Weather
Mountain weather changes quickly.
A sunny morning can become:
Foggy
Windy
Rainy
Always pack waterproof gear.
🚫 Skipping Scenic Stops
Some riders focus entirely on mileage.
The real value of the Parkway comes from its overlooks, waterfalls, and historic sites.
Take time to stop.
🚫 Riding Too Aggressively
The Blue Ridge Parkway is not a racetrack.
Wildlife, tourists, cyclists, and changing road conditions require constant awareness.
Smooth riding is far more rewarding than speed.
🏍️ Why the Blue Ridge Parkway Is Perfect for Motorcycle Touring
🌄 World-Class Scenery
The Parkway offers nearly continuous mountain views across two states.
Few roads in America provide such consistent beauty.
🛣️ Rider-Friendly Design
The road was created for enjoyment, not high-speed transportation.
This makes it ideal for:
Touring motorcycles
Adventure motorcycles
Cruisers
Sport-touring bikes
📸 Endless Photo Opportunities
Nearly every hour presents another memorable viewpoint.
Many riders leave with hundreds of photographs.
🤝 Strong Motorcycle Community
You'll encounter riders from across the United States and beyond.
Gas stations, overlooks, restaurants, and campgrounds frequently become gathering points for fellow motorcyclists.
🏁 Final Thoughts
A Blue Ridge Parkway motorcycle ride is not about reaching a destination quickly. It's about experiencing one of the most scenic motorcycle roads in America at a pace that allows you to appreciate the mountains, forests, overlooks, and small towns that make this route legendary.
Whether you're planning your first motorcycle road trip or adding another route to your touring resume, the Blue Ridge Parkway delivers everything riders seek: beautiful roads, unforgettable scenery, welcoming communities, and the freedom that only motorcycle travel can provide.
For many riders, one trip is never enough. After finishing the Parkway, you'll likely find yourself planning the next ride back before you've even unpacked your motorcycle.
❓FAQ
Is the Blue Ridge Parkway good for motorcycles?
Yes. It is widely considered one of the best motorcycle touring routes in America thanks to its scenery, road quality, and low traffic.
How many days do you need to ride the Blue Ridge Parkway?
Most riders spend 3–5 days exploring the Parkway comfortably.
What is the best month to ride the Blue Ridge Parkway?
October is famous for fall colors, while May and September offer excellent weather and fewer crowds.
Are there gas stations on the Blue Ridge Parkway?
No. Fuel stations are located off the Parkway, so planning ahead is essential.
Is the Blue Ridge Parkway difficult to ride?
No. The road is generally suitable for riders of all experience levels, though weather and mountain conditions require attention.
More than seventy years after its release, The Wild One remains one of the most influential motorcycle movies ever made. Long before Easy Rider became a symbol of freedom on the open road, The Wild One introduced mainstream America to motorcycle clubs, biker fashion, and the rebellious image that would shape motorcycle culture for generations.
For motorcycle enthusiasts, this classic film is more than a piece of Hollywood history. It offers a fascinating look at early American biker culture, vintage motorcycles, and the social attitudes that helped create the modern motorcycle lifestyle. It also inspires many riders to visit the California locations connected to the film and explore some of the roads that influenced America's motorcycle heritage.
Whether you're a fan of classic motorcycle movies, vintage Triumph motorcycles, or motorcycle road trips through California, The Wild One deserves a place on your watchlist.
🎬 What Is The Wild One?
🏍️ A Brief Overview of the Film
Released in 1953, The Wild One stars Marlon Brando as Johnny Strabler, the leader of a motorcycle club known as the Black Rebels Motorcycle Club.
The story follows Johnny and his fellow riders as they roll into a small California town, causing tension with local residents and law enforcement. While the plot may seem simple by modern standards, the movie's impact on motorcycle culture was enormous.
At the time, motorcycles were becoming increasingly popular among returning World War II veterans. The film captured public fascination with motorcycle clubs while also creating many of the biker stereotypes that still exist today.
🎥 Why Is The Wild One So Important?
Many motorcycle movies have come and gone, but The Wild One changed how motorcycles were viewed in popular culture.
Before the movie:
Motorcycles were mainly transportation or racing machines.
Motorcycle clubs were relatively unknown to the general public.
After the movie:
The "biker" became a cultural icon.
Leather jackets became associated with motorcycle riders.
Motorcycle clubs became part of American popular culture.
The rebellious rider image spread worldwide.
Even today, countless motorcycle movies, TV shows, and advertisements borrow visual elements first popularized by The Wild One.
🏍️ How The Wild One Shaped Motorcycle Culture
🧥 The Birth of the Modern Biker Image
One of the most lasting legacies of The Wild One is its influence on biker style.
Johnny Strabler's look became iconic:
Black leather jacket
White T-shirt
Engineer boots
Denim jeans
Motorcycle cap
Today, many of these items remain staples of motorcycle fashion.
The film helped create the image of the independent rider who values freedom, individuality, and life on two wheels.
🔥 The Influence of the Hollister Incident
Although The Wild One is fictional, it was heavily inspired by the famous Hollister motorcycle gathering of 1947.
The event attracted thousands of riders to the small California town of Hollister.
Sensationalized newspaper reports portrayed the gathering as a motorcycle riot, even though many accounts later suggested the media greatly exaggerated what actually happened.
Nevertheless, the incident became part of motorcycle history and provided the inspiration for the movie's storyline.
🤝 Brotherhood, Clubs, and Motorcycle Identity
One reason riders still connect with The Wild One is its portrayal of camaraderie.
Although the film focuses on conflict, it also highlights:
Strong bonds between riders
Loyalty within motorcycle groups
Shared adventures
Life on the road
Modern motorcycle clubs may look very different, but many riders still appreciate the sense of community shown in the film.
🏁 The Motorcycles Featured in The Wild One
For motorcycle enthusiasts, the bikes themselves are among the movie's biggest attractions.
Triumph Thunderbird 6T: Johnny Strabler's Motorcycle
The most famous motorcycle in the movie is the Triumph Thunderbird 6T ridden by Johnny Strabler.
Key specifications included:
649cc parallel twin engine
Approximately 34 horsepower
Four-speed transmission
Top speed near 90 mph
At the time, the Triumph Thunderbird was considered a high-performance motorcycle.
The bike's appearance in The Wild One significantly increased interest in British motorcycles throughout America.
🇺🇸 Harley-Davidson Hydra-Glide
Another notable motorcycle featured in the film is the Harley-Davidson Hydra-Glide.
This motorcycle represented the growing popularity of American V-twin motorcycles during the post-war era.
Key features:
Large displacement V-twin engine
Hydraulic front forks
Comfortable cruising capability
Distinctive Harley-Davidson styling
The contrast between British Triumphs and American Harleys remains a topic of discussion among motorcycle enthusiasts today.
🛠️ How These Motorcycles Compare to Modern Bikes
Compared with today's motorcycles, the bikes in The Wild One seem modest.
No California motorcycle trip would be complete without experiencing sections of the legendary Pacific Coast Highway.
The route offers:
Ocean cliffs
Coastal scenery
Excellent photography opportunities
World-famous motorcycle roads
For touring riders, it remains one of the best motorcycle roads in America.
📸 Best Photo Stops
Recommended stops include:
Malibu coastline
Santa Barbara waterfront
Hollister downtown
Pacific Coast overlooks
Historic gas stations
Early mornings often provide the best lighting and lighter traffic.
🗓️ Best Time to Visit
Ideal riding months include:
March
April
May
September
October
These periods generally offer:
Comfortable temperatures
Less tourist traffic
Better riding conditions
🤝 Lessons Modern Riders Can Learn from The Wild One
⚖️ Image Is Not Everything
One of the film's biggest themes is the difference between appearance and reality.
Modern riders still encounter stereotypes, but most motorcycle enthusiasts know that responsible riding matters more than image.
🛣️ Freedom Comes with Responsibility
The movie celebrates freedom but also shows the consequences of irresponsible behavior.
Today's riders can apply this lesson by:
Wearing protective gear
Respecting local communities
Riding within their limits
Following traffic laws
🤝 Community Matters
Perhaps the most enduring lesson is the importance of community.
Whether riding with a motorcycle club, touring group, or close friends, many of the best motorcycle experiences happen when riders share the road together.
🎥 The Legacy of The Wild One
🏍️ Influence on Future Motorcycle Movies
Without The Wild One, later classics might have looked very different.
The film influenced:
Easy Rider
Motorcycle club movies of the 1960s and 1970s
Modern biker television shows
Motorcycle advertising campaigns
Its visual style continues to shape motorcycle media today.
👕 Impact on Motorcycle Fashion
Many items commonly associated with riders became mainstream because of the movie:
Leather jackets
Motorcycle boots
Denim riding wear
Club patches
Few motorcycle films have had such a lasting influence on rider identity.
🌎 Global Impact
The biker image created by The Wild One spread far beyond the United States.
Today, riders around the world recognize the movie as one of the foundations of modern motorcycle culture.
🏁 Final Thoughts
More than seven decades after its release, The Wild One remains one of the most important motorcycle movies ever made.
While modern riders may laugh at some of the movie's outdated stereotypes, its influence on biker culture, motorcycle fashion, and motorcycle club history is undeniable.
For motorcycle enthusiasts, the film offers more than entertainment. It provides a fascinating look at the origins of modern rider culture and serves as a reminder that motorcycles have always represented more than transportation. They symbolize freedom, identity, adventure, and the enduring appeal of the open road.
Whether you're a fan of vintage Triumph motorcycles, motorcycle history, classic biker movies, or California motorcycle road trips, The Wild One remains well worth watching.
❓FAQ About The Wild One
What motorcycle did Marlon Brando ride in The Wild One?
Marlon Brando's character Johnny Strabler rode a Triumph Thunderbird 6T, one of the most iconic motorcycles in film history.
Was The Wild One based on a true story?
The movie was inspired by the 1947 Hollister motorcycle gathering in California, although many events in the film are fictionalized.
Where was The Wild One filmed?
Most filming took place in the Los Angeles area, particularly around Encino, California.
Is Hollister worth visiting for motorcycle riders?
Yes. Hollister remains an important destination for riders interested in motorcycle history and American biker culture.
Why is The Wild One important to motorcycle culture?
The film helped establish the modern biker image and influenced motorcycle movies, rider fashion, and motorcycle culture worldwide for decades.
Motorcycle culture has always had its own code. Some rules are obvious, like wearing proper riding gear or respecting traffic laws. Others are never officially explained, yet almost every experienced rider understands them instinctively after spending enough time on the road.
These unwritten motorcycle rules — often called biker etiquette or rider code — help riders communicate, stay safe, and build mutual respect within the riding community. Whether you ride a Harley-Davidson touring bike, a sportbike, an ADV motorcycle, or a daily commuter, understanding motorcycle rider etiquette can make you a safer and more respected rider.
A quick review of popular motorcycle forums, Reddit communities, riding schools, and Google search results shows that topics like “motorcycle wave meaning,” “group riding etiquette,” “biker code,” and “motorcycle hand signals” are consistently searched by new and experienced riders alike. Many articles focus only on stereotypes or outdated biker myths, but this guide focuses on practical motorcycle etiquette that actually matters in real-world riding.
This article covers:
The most important unwritten motorcycle rules
Motorcycle group riding etiquette
Highway and touring etiquette
Common rider mistakes
Respect between different motorcycle communities
Motorcycle safety culture
FAQs about biker etiquette
🏍️ Why Motorcycle Etiquette Matters
Motorcyclists operate differently from car drivers. Riders are more exposed, more vulnerable, and often depend on awareness and cooperation from other riders.
Good motorcycle etiquette helps:
Improve road safety
Reduce misunderstandings
Strengthen rider communication
Build trust during group rides
Create a better motorcycle community
Many riders also discover that motorcycle culture is surprisingly welcoming once basic respect is shown.
👋 The Motorcycle Wave: A Simple Gesture With Big Meaning
✌️ What Is the Motorcycle Wave?
One of the most recognized parts of biker culture is the motorcycle wave.
Typically, riders extend:
two fingers downward
a quick left-hand wave
or a subtle nod
The meaning is simple:“I see you. Ride safe.”
Many riders trace the modern biker wave back to Harley-Davidson culture in the United States, though similar rider gestures exist worldwide.
🛣️ Do All Riders Wave?
Not always.
You may notice:
touring riders wave frequently
ADV riders often wave
cruiser riders usually wave
some sportbike riders nod instead
commuters in busy cities may not respond
There is no requirement to wave. Traffic, clutch use, road conditions, or simple distraction may prevent it.
Experienced riders generally understand this and do not take it personally.
⚠️ Common Beginner Mistake
New riders sometimes become overly focused on waving and accidentally compromise control.
Safety comes first.
If:
you are cornering
shifting
braking
riding in traffic
keep both hands focused on riding.
🏍️ Group Riding Etiquette Every Rider Should Know
🧭 Ride Your Own Ride
This is one of the most important rules in motorcycle culture.
“Ride your own ride” means: Never ride beyond your skill level to keep up with others.
Group rides often create pressure, especially for beginners riding with faster or more experienced riders.
This leads to:
target fixation
panic braking
speeding into corners
crashes
Experienced group leaders understand that safe riders matter more than fast riders.
📏 Understand Staggered Formation
Most motorcycle groups ride in staggered formation:
lead rider left side
second rider right side
third rider left side
This creates:
better visibility
safer following distance
more reaction time
However, staggered formation is not always appropriate.
Switch to single file during:
twisty roads
mountain passes
poor weather
narrow lanes
🚦 Don’t Pass the Ride Leader Randomly
Passing the leader without reason is considered poor group riding etiquette unless:
instructed
necessary for safety
the group arrangement changes
The lead rider usually controls:
pace
route
fuel stops
hazard awareness
⛽ Fuel Up Before the Ride
One of the most common beginner mistakes:
showing up with an almost empty tank.
Good rider etiquette means arriving prepared:
full fuel tank
charged phone
proper gear
bike inspected
Nobody enjoys emergency gas station detours 20 minutes into a ride.
🧤 Respect Different Types of Riders
🏍️ Cruiser Riders vs Sportbike Riders
Motorcycle culture includes many subcultures:
Harley riders
sportbike riders
ADV riders
dual-sport riders
café racer builders
touring riders
Online arguments sometimes exaggerate these divisions, but real-world riders are usually more respectful.
The unwritten rule: Respect the ride, even if it is not your style.
🛠️ Don’t Mock Smaller Bikes
Experienced riders generally respect skill more than engine size.
A rider on a 300cc bike with solid skills is often safer and smoother than someone on a 1000cc superbike riding recklessly.
Motorcycle communities increasingly encourage beginners to start with manageable motorcycles rather than oversized machines.
🛣️ Highway and Long-Distance Touring Etiquette
🚛 Don’t Sit in Blind Spots
Highway riding etiquette matters because motorcycles are harder for drivers to see.
Avoid lingering:
beside trucks
directly behind SUVs
in blind spots
Pass efficiently and predictably.
💡 Use High Beams Responsibly
Many riders use daytime headlights for visibility, which is smart.
But:
blinding other riders
leaving high beams on continuously
using aggressive auxiliary lights
can irritate both drivers and fellow riders.
Good etiquette balances visibility with courtesy.
🧃 Take Breaks Before Fatigue Hits
Long-distance motorcycle touring can become physically exhausting surprisingly fast.
Experienced touring riders often stop:
every 60–100 miles
before fatigue becomes serious
Hydration, stretching, and mental focus matter far more than proving toughness.
🧠 The Unwritten Rules at Motorcycle Meetups
🏍️ Don’t Sit on Someone Else’s Motorcycle
This is one of the biggest unwritten rules in motorcycle culture.
Never sit on another rider’s bike without permission.
For many riders, motorcycles are:
expensive
customized
emotionally meaningful
Always ask first.
📸 Ask Before Touching Custom Builds
Custom motorcycles often involve:
thousands of dollars
hundreds of hours of labor
rare aftermarket parts
Touching controls, luggage, helmets, or electronics without permission is generally considered disrespectful.
🍔 Respect Everyone at Bike Nights
Bike nights and motorcycle meetups attract:
beginners
veterans
commuters
weekend riders
The healthiest motorcycle communities avoid gatekeeping.
Most experienced riders remember being beginners too.
⚠️ Dangerous Habits Riders Secretly Hate
🏁 Showing Off in Parking Lots
Aggressive revving, burnouts, and reckless stunts at crowded events create a bad reputation for riders.
It also increases:
police attention
complaints
event restrictions
Most mature riders prefer skill and control over noise alone.
📱 Filming While Riding Recklessly
Social media has created a wave of risky motorcycle content:
no-hands riding
traffic weaving
excessive speeding
Many experienced riders strongly dislike this trend because it normalizes dangerous riding behavior.
🚫 Loud Pipes Don’t Automatically Equal Respect
Exhaust sound preferences vary widely.
Some riders enjoy loud V-twins.
Others prefer quieter touring setups.
The unwritten rule: Don’t become “that rider” revving through neighborhoods at midnight.
🧭 Adventure Rider Etiquette and Trail Culture
🌲 Leave No Trace
Adventure and dual-sport riders often follow outdoor ethics similar to hikers and campers.
Good ADV etiquette includes:
packing out trash
respecting trail closures
minimizing environmental damage
staying on legal routes
Irresponsible riding can lead to trail restrictions.
🏕️ Help Other Riders on Remote Routes
Adventure riders often help one another because:
remote roads can be dangerous
phone signal may disappear
mechanical issues happen
Stopping to check on stranded riders remains one of the strongest traditions in motorcycle culture.
🧰 Motorcycle Gear Etiquette
🪖 Respect Riders Who Wear Full Gear
Some riders prefer:
full-face helmets
armored jackets
airbag vests
Others ride casually.
Good motorcycle etiquette means avoiding unnecessary judgment either way.
That said, most experienced riders strongly support protective gear after seeing enough crashes.
🎧 Keep Communication Systems Respectful
Bluetooth motorcycle communication systems are increasingly common during:
touring
group rides
ADV riding
Good communication etiquette includes:
avoiding constant chatter
keeping directions clear
limiting distractions during technical riding
🚔 Interacting With Law Enforcement
⚠️ Stay Calm During Traffic Stops
Motorcycles sometimes attract additional police attention.
Best practices:
keep hands visible
remove helmet if instructed
avoid sudden movements
stay respectful
Most traffic stops become easier when riders remain calm and cooperative.
🏍️ Common Beginner Mistakes in Motorcycle Culture
❌ Trying Too Hard to Look “Cool”
Many new riders focus heavily on:
image
loud exhausts
biker stereotypes
Experienced riders usually care more about:
riding skill
road awareness
safety
reliability
❌ Buying Beyond Skill Level
New riders sometimes purchase:
liter bikes
heavy touring motorcycles
powerful cruisers
before developing proper riding fundamentals.
Confidence should grow slower than horsepower.
❌ Ignoring Maintenance
Motorcycles require regular maintenance:
tire pressure
chain care
brakes
oil
suspension checks
A neglected motorcycle becomes dangerous quickly.
🌎 How Motorcycle Culture Changes Around the World
Motorcycle etiquette varies globally.
For example:
American riders commonly wave
European riders often nod
Asian urban riders may rarely acknowledge others due to traffic density
However, one rule remains almost universal: Riders usually help other riders.
That shared understanding remains one of the best parts of motorcycle culture.
🏁 Final Thoughts: Respect Matters More Than Image
Motorcycle culture can seem intimidating from the outside, but most real-world riding communities value:
respect
skill
preparation
safety
shared passion for riding
The unwritten rules are not about acting tough or pretending to belong.
They exist because motorcycles require awareness, trust, and mutual understanding in ways most other vehicles do not.
At the end of the day, good rider etiquette simply makes the road better for everyone.
And honestly, most riders would rather ride with a respectful beginner than an experienced rider with a bad attitude.
❓FAQ About Motorcycle Rider Etiquette
🏍️ Why do motorcycle riders wave at each other?
The motorcycle wave is a traditional gesture of mutual respect and recognition between riders.
👋 Is it rude not to wave back?
Usually no. Traffic, safety, or road conditions may prevent riders from responding safely.
🛣️ What does “ride your own ride” mean?
It means riding within your personal skill level instead of trying to keep up with faster riders.
🧤 Is it okay to sit on someone else’s motorcycle?
Not without permission. Most riders consider that disrespectful.
🏕️ What is the most important motorcycle etiquette rule?
Many experienced riders would say: Respect other riders and prioritize safety over ego.
Motorcycle movies have always been about more than just bikes. The best motorcycle films capture freedom, rebellion, speed, brotherhood, adventure, and sometimes the strange decisions riders make at gas stations after midnight. Whether you ride a Harley-Davidson touring bike, a sportbike, an ADV motorcycle, or a vintage café racer, there is usually one movie that reminds you why motorcycles matter in the first place.
A quick look at Google search results and motorcycle communities shows that certain films appear again and again. Classics like Easy Rider and The Wild One still dominate discussions, while documentaries such as On Any Sunday and TT3D: Closer to the Edge are widely respected among serious riders. Reddit communities also frequently recommend titles like The World's Fastest Indian and the Long Way Round series for riders interested in long-distance touring and motorcycle culture.
This guide breaks down the best motorcycle movies every rider should watch, explains why these films matter to motorcycle culture, and highlights the bikes, riding styles, and lessons behind them.
🏍️ Why Motorcycle Movies Still Matter to Riders
Motorcycle films continue to resonate because riding itself is emotional. A motorcycle is one of the few machines that can completely change how people experience distance, weather, noise, solitude, and risk.
Good motorcycle movies often reflect things riders already understand:
Sometimes the destination matters less than the ride itself
The strongest motorcycle movies are not always the ones with the biggest action scenes. Often, the most respected films among riders are documentaries or road-trip stories that feel authentic.
🎬 Classic Motorcycle Movies Every Rider Should Know
Easy Rider is probably the most influential motorcycle movie ever made.
Starring Peter Fonda and Dennis Hopper, the film follows two bikers riding across America after a drug deal funds their journey to New Orleans.
The movie helped define modern biker culture in cinema and became a symbol of freedom, anti-establishment attitudes, and cross-country motorcycle travel. Its custom Harley choppers became legendary almost overnight.
Why Riders Still Love It
Iconic Harley-Davidson choppers
Classic American highway scenery
Authentic road-trip atmosphere
Influenced motorcycle culture worldwide
Best For
Harley riders
Chopper enthusiasts
Fans of classic American motorcycle culture
🧥 The Wild One (1953)
Before outlaw biker culture became mainstream, The Wild One introduced the rebellious biker image to Hollywood audiences.
Marlon Brando plays Johnny Strabler, the leader of a motorcycle gang riding Triumph motorcycles through small-town America. The film influenced biker fashion, leather jackets, motorcycle club imagery, and the “bad boy rider” stereotype for decades.
Famous Motorcycle
Triumph Thunderbird 6T
Why It Matters
Many modern biker movie clichés started here:
Leather jackets
Outlaw gangs
Rebellious riders
Motorcycle club culture
🏁 On Any Sunday (1971)
If there is one motorcycle documentary every rider should watch, it is On Any Sunday.
Directed by Bruce Brown and featuring Steve McQueen, the film explores motocross, desert racing, flat track racing, and casual weekend riding.
Unlike fictional biker films, this documentary focuses on why people genuinely love motorcycles. Riders often describe it as one of the most authentic portrayals of motorcycle passion ever filmed.
Why Adventure Riders Love It
Real riders
Real racing culture
Vintage motorcycle history
Timeless riding spirit
🌍 Best Motorcycle Adventure and Touring Movies
🌎 Long Way Round (2004)
Technically a TV series rather than a film, Long Way Round changed modern adventure motorcycling forever.
Ewan McGregor and Charley Boorman rode BMW GS motorcycles from London to New York through Europe, Mongolia, Russia, and Alaska.
After this series aired, ADV motorcycle touring exploded in popularity. Many riders bought BMW GS bikes specifically because of this show. Reddit motorcycle communities still recommend it regularly.
Why Riders Love It
Real-world motorcycle touring
Mechanical breakdowns
Difficult weather
Border crossings
Genuine adventure riding
Best For
ADV riders
Long-distance touring riders
Overlanding fans
🏔️ The Motorcycle Diaries (2004)
The Motorcycle Diaries follows a young Ernesto “Che” Guevara riding across South America on a Norton 500 motorcycle.
Unlike traditional biker movies, this film focuses more on travel, culture, and personal growth than speed or rebellion.
Why Touring Riders Appreciate It
Scenic long-distance riding
Travel realism
Mechanical struggles
Emotional journey themes
This film resonates strongly with riders who enjoy motorcycle travel for exploration rather than adrenaline.
⚡ The World's Fastest Indian (2005)
The World's Fastest Indian tells the true story of Burt Munro, played by Anthony Hopkins.
Munro spent decades modifying an old Indian Scout motorcycle before traveling to the Bonneville Salt Flats in Utah to chase speed records.
Among motorcycle enthusiasts, this film is respected because it captures something riders understand well:
obsession with machines
endless garage projects
mechanical passion
determination despite age or money
Reddit riders frequently rank it among the best motorcycle films ever made.
Why Riders Connect With It
True story
Motorcycle engineering passion
Bonneville racing history
Inspirational underdog story
🏁 Best Motorcycle Racing Movies and Documentaries
🏆 TT3D: Closer to the Edge (2011)
Few motorcycle films capture danger better than TT3D: Closer to the Edge.
The documentary follows racers competing in the Isle of Man TT, one of the most dangerous motorcycle races in the world.
The film became especially popular because of racer Guy Martin, whose personality helped humanize the extreme risks involved.
Why Sportbike Riders Love It
Insane speed
Real racing footage
Honest rider interviews
Respect for racing skill
This is essential viewing for anyone interested in road racing or sportbike culture.
🏎️ Road (2014)
Road tells the story of the Dunlop racing family from Northern Ireland.
The documentary mixes motorcycle racing history with personal tragedy and family pressure. Riders often recommend it alongside TT3D.
Best For
Sportbike riders
Road racing fans
Riders interested in motorcycle history
🔥 Cult Classic Motorcycle Movies
🕶️ Harley-Davidson and the Marlboro Man (1991)
This movie makes almost no logical sense, and riders still love it anyway.
Harley-Davidson and the Marlboro Man became a cult favorite because it combines:
custom motorcycles
ridiculous action scenes
leather jackets
pure 1990s biker attitude
Why It Became Popular
Sometimes motorcycle movies do not need realism. They just need cool bikes and memorable scenes.
💨 Biker Boyz (2003)
Biker Boyz focuses on underground sportbike racing culture.
While critics were divided, the film gained popularity among younger riders because it showcased:
custom sportbikes
urban motorcycle culture
motorcycle drag racing
Best For
Sportbike riders
Street bike fans
Riders interested in custom builds
🔥 Ghost Rider (2007)
Ghost Rider is objectively ridiculous and still entertaining.
A flaming skull riding a supernatural chopper is not realistic motorcycle culture, but the movie became part of biker pop culture anyway.
Why Riders Still Watch It
Wild custom motorcycles
Over-the-top action
Comic-book biker fantasy
🛣️ Motorcycle Movies That Capture Real Riding Emotion
🌄 One Week (2008)
A lesser-known Canadian motorcycle film, One Week follows a rider crossing Canada on a vintage Norton motorcycle after receiving life-changing medical news.
Riders on Reddit frequently recommend this film because it feels emotionally authentic.
Why It Stands Out
Quiet touring atmosphere
Realistic solo travel
Reflective road-trip storytelling
🧭 Why We Ride (2013)
Why We Ride is less about motorcycle action and more about why people ride at all.
The documentary explores:
family riding culture
racing
commuting
touring
emotional connection to motorcycles
Many riders consider it one of the most relatable motorcycle documentaries available.
🧰 What Riders Can Actually Learn From Motorcycle Movies
Good motorcycle movies are entertaining, but they also reveal useful truths about riding culture.
🛠️ Mechanical Preparedness Matters
Adventure films like Long Way Round constantly show:
flat tires
breakdowns
weather issues
bad roads
Long-distance riders quickly learn that preparation matters more than horsepower.
🧭 Riding Is About the Journey
Many classic motorcycle films emphasize:
freedom
exploration
personal growth
The best motorcycle road trips are rarely perfect. That is part of the appeal.
⚠️ Movies Often Ignore Real Safety
Some motorcycle films are terrible examples of safe riding:
no helmets
reckless street riding
unrealistic stunts
Enjoy the movies, but do not copy everything you see onscreen.
🎥 Best Motorcycle Movies by Riding Style
🏍️ For Harley Riders
Easy Rider
The Wild One
Harley-Davidson and the Marlboro Man
🏁 For Sportbike Riders
TT3D: Closer to the Edge
Road
Biker Boyz
🌍 For ADV Riders
Long Way Round
The Motorcycle Diaries
One Week
🛠️ For Garage Builders and Vintage Bike Fans
The World's Fastest Indian
On Any Sunday
🍿 Where to Watch Motorcycle Movies
Most motorcycle movies rotate between streaming services regularly.
Popular platforms include:
Netflix
Amazon Prime Video
Apple TV+
YouTube
Documentaries like On Any Sunday and TT3D are also commonly available through motorcycle enthusiast platforms and digital rentals.
🏍️ Final Thoughts: Motorcycle Movies Are Really About Riders
The best motorcycle movies are not always technically perfect films. Some are rough, weird, low-budget, or deeply unrealistic.
But the strongest motorcycle films understand something important:
riders chase experiences
motorcycles create stories
roads change people
Whether it is the desert highways of Easy Rider, the brutal racing footage of TT3D, or the muddy breakdowns in Long Way Round, these films capture why motorcycles continue to matter across generations.
And honestly, after watching a good motorcycle movie, most riders end up doing the same thing:
checking weather forecasts and thinking about the next ride.
❓FAQ About Motorcycle Movies
🏍️ What is the most famous motorcycle movie ever made?
Most riders consider Easy Rider the most iconic motorcycle movie ever made because it shaped biker culture and inspired generations of riders.
🎬 What is the best motorcycle documentary?
Many riders rank On Any Sunday and TT3D: Closer to the Edge among the best motorcycle documentaries ever created.
🛣️ What motorcycle movie is best for touring riders?
Long Way Round is widely considered essential viewing for adventure touring riders.
🏁 What is the best motorcycle racing movie?
For realistic motorcycle racing, TT3D: Closer to the Edge and Road are usually the top recommendations.
🔧 Which motorcycle movie is based on a true story?
The World's Fastest Indian is based on the real-life story of Burt Munro and his modified Indian Scout motorcycle.
Long-distance motorcycle touring in America is unlike anywhere else in the world. Few countries offer the same combination of endless highways, mountain passes, desert roads, coastal scenery, and small-town culture packed into one riding destination. Whether you ride a Harley-Davidson touring bike, a BMW GS adventure motorcycle, or a sport tourer loaded with luggage, the United States has routes built for serious miles and unforgettable scenery.
Many riders search for the “best motorcycle roads in America,” but the answer depends on what kind of ride you want. Some riders chase technical mountain roads. Others want wide-open desert highways, coastal scenery, or historic cross-country routes. The best touring roads combine scenery, road quality, fuel access, rider services, and enough distance to truly experience life on two wheels.
This guide covers some of the best motorcycle touring roads in the United States, based on popularity among long-distance riders, touring communities, and road-trip culture. It also includes practical riding advice, route planning tips, and common mistakes riders make during multi-day tours.
🗺️ Recommended Touring Routes Overview
Before diving into each road, here’s a quick breakdown of America’s most iconic motorcycle touring routes:
Route
Best For
Approx Length
Pacific Coast Highway
Coastal scenery
650+ miles
Blue Ridge Parkway
Mountain riding
469 miles
Route 66
Historic touring
2,400+ miles
Tail of the Dragon
Technical riding
11 miles
Beartooth Highway
High-altitude scenery
68 miles
Going-to-the-Sun Road
National park riding
50 miles
Overseas Highway
Ocean views
113 miles
Million Dollar Highway
Mountain switchbacks
25 miles
🌊 Pacific Coast Highway (California Highway 1)
The Pacific Coast Highway is one of the most famous motorcycle roads in America for good reason. Running along California’s coastline, this road combines ocean cliffs, mountain curves, forests, and small coastal towns into one unforgettable ride.
Pacific Coast Highway Coastal scenery
🛣️ Why Riders Love It
The route delivers constant scenery changes:
Big Sur cliffs
Monterey coastline
Malibu curves
Redwood forests in Northern California
Unlike many straight interstate highways, Highway 1 keeps riders engaged with sweeping turns and elevation changes.
⚠️ Touring Tips
Summer traffic can be heavy
Coastal fog appears quickly
Fuel stations become limited in remote stretches
Watch for landslide closures near Big Sur
This road is ideal for riders who enjoy scenic touring rather than aggressive high-speed riding.
⛰️ Blue Ridge Parkway (Virginia & North Carolina)
The Blue Ridge Parkway is often ranked among the best motorcycle roads in the United States for long-distance touring. Stretching 469 miles through the Appalachian Mountains, it offers smooth pavement, scenic overlooks, and relaxed riding conditions.
Blue Ridge Parkway
🌄 What Makes It Special
The Parkway was designed for scenic travel, not commercial transportation. That means:
Few trucks
Lower speed limits
Consistent curves
Mountain views for hundreds of miles
Fall is especially popular due to the changing leaves.
🏍️ Rider Considerations
Wildlife crossings are common
Fog can reduce visibility early morning
Gas stations require short detours off the Parkway
For touring riders, this road offers one of the most stress-free long-distance experiences in America.
🛣️ Route 66
No motorcycle touring list is complete without Route 66. Running from Chicago to Santa Monica, the “Mother Road” represents classic American road-trip culture.
Route 66
Why Route 66 Still Matters
Route 66 is less about technical riding and more about experience:
Historic diners
Small desert towns
Vintage gas stations
Americana roadside attractions
For many riders, it’s the ultimate bucket-list motorcycle trip.
🔧 Touring Advice
Because some original sections disappeared over time:
GPS route planning is important
Fuel range matters in desert sections
Summer heat can become dangerous in Arizona and New Mexico
Long-distance riders should pace themselves carefully. Trying to rush Route 66 defeats the purpose.
🐉 Tail of the Dragon (Tennessee & North Carolina)
With 318 curves in 11 miles, Tail of the Dragon is legendary among sport riders and touring riders alike.
Tail of the Dragon
⚡ What Makes It Famous
This road demands focus and precision:
Tight corners
Rapid elevation changes
Technical riding skills
Unlike scenic touring roads, this route is more about riding performance.
⚠️ Common Rider Mistakes
Many crashes happen because riders:
Enter corners too fast
Cross center lines
Overestimate skill level
Weekdays are usually safer and less crowded.
🏔️ Beartooth Highway (Montana & Wyoming)
Often called one of the most beautiful roads in America, Beartooth Highway climbs to nearly 11,000 feet.
Beartooth Highway
🌨️ What Riders Should Know
Conditions change rapidly at high altitude:
Snow can appear even in summer
Temperatures drop quickly
Oxygen levels affect fatigue
The reward is incredible alpine scenery few roads can match.
🛑 Best Stops
Rock Creek Vista Point
Beartooth Pass summit
Yellowstone National Park nearby
Adventure touring riders especially love this route.
🌲 Going-to-the-Sun Road (Montana)
Located inside Glacier National Park, this road is short but unforgettable.
Going-to-the-Sun Road
🏞️ Highlights
Glacier views
Waterfalls
Sharp mountain cliffs
Wildlife sightings
The road usually opens only seasonally due to snow.
⚠️ Important Rules
Vehicle restrictions and heavy tourist traffic can affect riders during peak season. Early morning rides are best.
🌴 Overseas Highway (Florida Keys)
The Overseas Highway feels completely different from America’s mountain roads. Riding across bridges surrounded by open ocean creates a unique touring experience.
Overseas Highway (Florida Keys)
🌊 Why Riders Love It
Warm weather
Relaxed cruising
Endless water views
Tropical atmosphere
This route works especially well for winter motorcycle touring.
⚠️ Challenges
Strong crosswinds
Sudden rainstorms
Heavy tourist traffic
Early departures help avoid congestion.
⛰️ Million Dollar Highway (Colorado)
Colorado’s Million Dollar Highway is one of America’s most technical scenic roads.
Million Dollar Highway (Colorado)
🛣️ What Makes It Unique
No guardrails in many sections
Steep drop-offs
Tight mountain curves
Dramatic elevation changes
This is not a beginner-friendly touring road.
🏔️ Rider Tips
Check weather carefully
Afternoon storms are common
Avoid riding tired
Experienced touring riders consider this one of the best motorcycle roads in the Rocky Mountains.
🎒 Essential Gear for Long Distance Motorcycle Touring
Long-distance touring requires preparation. The right gear improves safety, comfort, and endurance.
🪖 Riding Gear
Full-face or modular helmet
Waterproof riding jacket
Layered clothing system
Riding gloves for multiple temperatures
🔧 Touring Essentials
Tire repair kit
Portable air compressor
Hydration pack
Basic tool kit
Phone mount and charging system
📡 Communication Systems
Modern riders often use Bluetooth helmet communication systems for:
GPS directions
Music
Group communication
Emergency calls
On long tours, communication systems reduce fatigue caused by constantly stopping for directions.
⚠️ Common Mistakes During Long Distance Motorcycle Touring
Even experienced riders make mistakes on major touring routes.
💤 Riding Too Far in One Day
New touring riders often underestimate fatigue. After 500+ miles, reaction time drops significantly.
⛽ Ignoring Fuel Range
Western states often have long distances between gas stations.
🌦️ Underestimating Weather
Mountain weather changes fast. Riders may encounter:
Rain
Fog
Snow
Extreme heat
all within one trip.
🛠️ Skipping Pre-Ride Inspection
A small mechanical issue becomes a major problem far from civilization.
❓ Frequently Asked Questions
🏍️ What is the best motorcycle road in America?
Many riders consider the Pacific Coast Highway and Blue Ridge Parkway the best overall touring roads due to scenery and road quality.
🌎 What is the best cross-country motorcycle route?
Route 66 remains America’s most iconic long-distance motorcycle touring route.
⛰️ Which road is best for mountain riding?
Million Dollar Highway and Beartooth Highway offer some of the best mountain riding in the United States.
🌊 What is the best coastal motorcycle road?
California’s Pacific Coast Highway is widely considered the best coastal ride in America.
🛣️ How many miles should a touring rider cover per day?
Most experienced touring riders average 250–450 miles per day depending on road conditions and sightseeing stops.
America offers some of the greatest motorcycle touring roads in the world. From the cliffs of California to the mountains of Colorado and Montana, every route delivers a completely different riding experience.
The best motorcycle road is ultimately the one that matches your riding style, experience level, and travel goals. Some riders want endless sweepers and technical curves. Others want open highways, small towns, and the freedom of long-distance travel.
No matter which route you choose, proper planning matters. Good gear, realistic daily mileage, weather awareness, and regular maintenance checks make the difference between a stressful ride and an unforgettable motorcycle adventure.
Because at the end of the day, long-distance motorcycle touring isn’t just about reaching a destination — it’s about every mile in between.
Few films capture the spirit of the open road like Easy Rider (1969). It’s more than a movie—it’s a manifesto of freedom, rebellion, and the motorcycle lifestyle that has inspired generations of riders. With its iconic choppers, breathtaking American landscapes, and counterculture undertones, Easy Rider helped define what it means to be a motorcyclist chasing the horizon. For riders today, the film offers both inspiration and practical lessons in long-distance travel.
Whether you’re a weekend cruiser or planning a cross-country adventure, understanding the Easy Rider legacy is essential for appreciating American motorcycle culture. From the motorcycles themselves to the roads they conquered, this guide will dive into every aspect a rider should know, with tips, trivia, and insights to make your ride safer and more enjoyable.
🏍️ Easy Rider Motorcycles: Choppers and Their Legacy
When talking about Easy Rider, you can’t skip the bikes. The film’s stars weren’t just riding motorcycles—they were riding symbols of freedom.
🛠️ Peter Fonda’s “Captain America” Chopper
Peter Fonda’s bike, famously dubbed the “Captain America” chopper, is arguably the most recognizable motorcycle in cinematic history. With its elongated front fork, flashy red-white-and-blue gas tank, and minimalist seat, it’s the archetype of the 1960s custom chopper.
Peter Fonda’s “Captain America” Chopper
The bike wasn’t just for looks. Its rigid frame and narrow front end made it challenging to handle, especially on twisty roads. Riders today can appreciate that Fonda wasn’t just acting like a rebel—he was physically riding one. The “Captain America” chopper cemented the chopper as a symbol of nonconformity and individual expression in American motorcycle culture.
🛠️ Dennis Hopper’s Chopper
Dennis Hopper’s bike was a darker, more aggressive counterpart to Fonda’s patriotic machine. It had a slightly shorter fork and a lower stance, giving it a more grounded look. Mechanically, it wasn’t too different, but aesthetically it represented a different kind of countercultural identity—tough, gritty, and unafraid to challenge norms.
For riders, Hopper’s chopper shows that motorcycle culture is not just about speed—it’s about personality. Your bike says something about you, whether it’s minimalist, flashy, or customized for comfort on long trips.
🛠️ Classic Chopper Culture
“Chopper” itself refers to a motorcycle that has been stripped down and rebuilt to a personal specification. After Easy Rider, choppers became synonymous with freedom and rebellion. Today, modern riders may not always ride extended forks or hardtails, but the principle remains: customization allows the rider to shape their machine to reflect their individuality, personality, and riding style.
Even if you prefer a touring bike or sport bike, appreciating the chopper philosophy can enhance your ride. After all, motorcycles are about freedom—and a little flair never hurt anyone.
🌄 Filming Locations and Iconic Routes
Part of what makes Easy Rider legendary is its setting. The film practically serves as a love letter to the American landscape. For riders today, retracing these routes can feel like a pilgrimage.
🏜️ Louisiana and Texas Countryside
The film opens in the deep south, capturing the Louisiana and Texas countryside. Wide highways, flat farmland, and small towns set the tone for freedom and exploration.
For modern riders, these stretches are mostly straightforward highways, but watch out for sudden weather changes—southern thunderstorms come fast and leave faster. These roads also give a taste of long stretches without stops, perfect practice for pacing yourself on multi-day trips.
🌉 New Mexico and Arizona Landscapes
As the journey moves west, the deserts of New Mexico and Arizona provide dramatic backdrops. Sparse traffic, long straightaways, and endless horizons make these roads a motorcyclist’s dream—but desert riding has its own challenges. Temperatures can swing drastically, and road surfaces vary from smooth asphalt to patched-up highways.
Tip for riders: Hydrate often, plan fuel stops, and remember that long straight roads can be deceptively tiring. Even the most experienced riders can zone out after miles of nothing but sand and sky.
🏖️ California Coast and Santa Monica
The film concludes along California’s western edge, including Santa Monica. Here, coastal highways, rolling hills, and ocean views dominate the scenery. Modern riders can replicate parts of this experience on the Pacific Coast Highway (Highway 1), but be prepared for tourist traffic in peak season.
California stretches remind riders of one truth: the scenery may be beautiful, but don’t let it distract you from the road. That cliff edge isn’t going anywhere… and neither is your bike, if you respect it.
🛣️ Easy Rider Legacy in American Motorcycle Culture
The cultural impact of Easy Rider extends far beyond the screen. It shaped how Americans view motorcycles, long-distance trips, and the open road.
🏁 Popularizing Motorcycle Touring
Before the film, motorcycles were often seen as urban machines or tools for local travel. Easy Rider helped popularize touring and long-distance rides, inspiring riders to explore highways across the country. Many routes featured in the film became unofficial pilgrimage paths for riders seeking a taste of freedom.
🌐 Motorcycling and Counterculture
The film wasn’t just about the bikes—it was about rebellion, identity, and living life on your terms. Motorcycle culture in the late 1960s merged with counterculture movements, and the influence is still visible today. Long-distance rides, group rallies, and custom bike shows all trace roots back to this ethos.
🗺️ Tips for Modern Riders Inspired by Easy Rider
Plan multi-day trips: Don’t try to cover too much in one day. The open road is best savored.
Prioritize safety: Helmets, gloves, and appropriate gear are essential, even if the film glamorized bare arms and cigarettes.
Study your route: Even a “free spirit” needs a plan for fuel, food, and lodging.
Ride your own ride: Take inspiration from the film, but adapt it to your comfort, skill level, and machine.
⚠️ Common Mistakes and Challenges for Riders
Even seasoned riders can stumble if they underestimate the practical demands of a long-distance trip:
Chasing the thrill: Riding fast on unfamiliar roads increases risk.
Ignoring weather: Desert heat, coastal fog, and sudden thunderstorms all demand preparation.
Neglecting bike maintenance: Long rides expose mechanical weaknesses. Pre-trip inspection is critical.
Overpacking: Extra weight can make handling a motorcycle difficult, especially on choppers or minimalist bikes.
Fatigue: Long hours on the seat require frequent rest and hydration.
❓ Frequently Asked Questions
What type of motorcycles were used in Easy Rider?
Peter Fonda rode the “Captain America” chopper, while Dennis Hopper had a darker, lower-profile chopper. Both were customized Harley-Davidson frames modified for long-distance travel and style.
Can I visit the filming locations today?
Yes. Many rural roads in Louisiana, Texas, New Mexico, Arizona, and California remain accessible. Modern riders can trace parts of the route, though traffic and road conditions have changed since the 1960s.
How did Easy Rider influence American motorcycle culture?
It popularized long-distance touring, inspired custom motorcycle design, and solidified the motorcycle as a symbol of freedom and individuality.
What are good routes for riders inspired by the film?
Pacific Coast Highway, California
Route 66 for cross-country nostalgia
Texas Hill Country for scenic southern riding
🏁 Conclusion: Riding in the Spirit of Easy Rider
Easy Rider remains a touchstone for American motorcycle culture. It teaches riders that the open road is about freedom, exploration, and self-expression—but also that preparation, respect for the machine, and awareness of your surroundings are non-negotiable.
For modern riders, retracing parts of the film’s journey is more than a tribute—it’s a chance to experience the thrill, beauty, and challenges that make motorcycling such a unique way to travel. Grab your helmet, plan your route, and ride your own story—just remember to check the weather and fuel levels before you hit the next horizon.
The Pacific Coast Highway (PCH) is one of the most iconic motorcycle routes in the United States. Stretching along the California coastline for over 650 miles, it offers a unique combination of challenging curves, elevation changes, and breathtaking ocean views. For motorcyclists seeking a multi-day ride, thorough planning and preparation are key to a safe and enjoyable experience. This guide covers route overview, essential gear, recommended stops, suggested itineraries, common mistakes, and FAQs for riders planning a Pacific Coast Highway adventure.
🌊 Overview of the Pacific Coast Highway
The Pacific Coast Highway, or Highway 1, runs from Orange County in the south to Mendocino County in the north. The route is famous for its diverse landscapes, including:
Coastal cliffs with panoramic ocean views
Rolling hills and winding mountain roads
Seaside towns with biker-friendly services
Forested stretches with challenging corners
Riders should be prepared for variable weather conditions, as fog, wind, and temperature changes are common along the coast. The highway offers both technical riding challenges and stunning scenery, making it suitable for experienced riders and those comfortable with long-distance touring.
🧰 Essential Gear for a PCH Motorcycle Trip
Successful navigation of the Pacific Coast Highway requires more than skill—it requires the right gear.
🛡️ Protective Riding Equipment
Helmet: A DOT or ECE-certified helmet is mandatory. Full-face helmets provide the best protection against wind, debris, and weather changes.
Jacket and Pants: Armored jackets and riding pants protect against abrasion and impact. Layering is recommended for temperature variation.
Gloves and Boots: Durable gloves with knuckle protection and ankle-support boots are essential for long rides.
M1S Pro Bluetooth Intercom Headsets
Price: $89.99 $139.99
Code:
DJOW9
Limited Time Promo! Extra 10% Off Code! Save Now!
Support up to 10 Riders Group Talk, 2000 Meters Distance!
High Quality sound, IP65 waterproof.
Compatible with Fodsports Connect APP
Let's Go!
Long stretches of the PCH can be remote. Carry water, snacks, and small personal items in easily accessible luggage. Proper hydration and nutrition are critical for maintaining focus on winding roads.
🏖️ Key Stops and Scenic Highlights
The PCH offers countless points of interest. Here are some notable stops along the route:
🌉 Golden Gate Bridge (San Francisco)
A must-visit landmark for riders starting or ending in San Francisco. The bridge provides iconic photo opportunities and a chance to prepare for urban riding traffic.
Golden Gate Bridge (San Francisco)
🐚 Monterey & Carmel-by-the-Sea
These coastal towns offer charming streets, cafes, and accessible fuel stations. The nearby 17-Mile Drive provides scenic curves perfect for experienced riders seeking technical challenges alongside natural beauty.
Monterey & Carmel-by-the-Sea
🏞️ Big Sur
The Big Sur coastline is the centerpiece of the PCH. Riders encounter steep cliffs, narrow roads, and multiple hairpin turns. Points like Bixby Bridge, McWay Falls, and Point Sur Lighthouse are highlights. Take care with sudden weather changes and limited roadside pull-offs.
The Big Sur coastline
🌴 Santa Barbara
A stretch of mild curves and ocean views, Santa Barbara is ideal for rest and refueling. The city offers motorcycle parking and services, making it a convenient stop for multi-day rides.
🌵 Malibu & Ventura
Known for twisty roads and ocean vistas, these areas are popular among experienced riders for practicing cornering and enjoying coastal scenery.
Malibu & Ventura
🌲 Northern Sections (Mendocino & Sonoma Coast)
Less crowded and more remote, the northern PCH provides forested roads, cliffside views, and small towns. Riders should prepare for limited fuel stations and cell service.
🛣️ Recommended Motorcycle Itinerary
A multi-day itinerary allows riders to experience the best of the PCH without fatigue:
Day 1: San Diego → Santa Barbara (~200 miles)
Coastal highways with moderate curves
Recommended fuel and rest stops in Ventura and Malibu
Day 2: Santa Barbara → Big Sur (~250 miles)
Mulholland Highway and Pacific Coast scenic routes
Big Sur offers technical curves and elevation changes
Day 3: Big Sur → Monterey (~90 miles)
Focus on hairpin turns and narrow sections
Stops at Bixby Bridge and McWay Falls
Day 4: Monterey → San Francisco (~120 miles)
17-Mile Drive and coastal stretches
Golden Gate Bridge approach may involve urban traffic
Day 5: San Francisco → Mendocino (~150 miles, optional)
Northern coastal roads with remote sections
Prepare for fewer services and winding forested roads
⚠️ Common Rider Mistakes
Even experienced motorcyclists can encounter problems on the PCH. Common mistakes include:
Riding too fast: Tight turns and cliffside roads require controlled speeds.
Poor route planning: Ignoring fuel stops and accommodations can lead to stress on remote stretches.
Fatigue: Long-distance rides demand frequent breaks. Riding tired increases the risk of accidents.
Ignoring weather: Fog and sudden rain are common along the coast. Prepare with proper gear and check conditions in advance.
❓ Frequently Asked Questions
Is the Pacific Coast Highway suitable for beginners?
Short stretches are manageable for novice riders, but technical sections like Big Sur are best for those with intermediate to advanced experience.
When is the best time to ride the PCH?
Late spring through early fall offers the best visibility and weather. Summer is crowded, winter can be foggy.
How long does it take to ride the full route?
A thorough ride typically requires 5–7 days, depending on stops and pace.
Are there good accommodations along the route?
Yes. Coastal towns offer hotels, motels, and inns with motorcycle parking. Plan ahead during peak seasons.
How should I prepare for remote sections?
Ensure your motorcycle is in top condition, carry extra fuel or know refueling points, and be prepared for limited services in northern sections.
🏁 Final Thoughts
Riding the Pacific Coast Highway is a blend of technical skill, endurance, and scenic appreciation. Proper planning, protective gear, and route knowledge are key to a safe and memorable ride. From the urban traffic near San Francisco to the remote cliffs of Mendocino, the PCH offers a diverse and challenging experience for serious motorcyclists. Careful preparation ensures that every twist and turn of this iconic route is both thrilling and safe.
Motorcycle riders often hear the terms lane splitting and lane filtering used like they mean the same thing. They don’t. Understanding the difference is not just about knowledge—it can affect your safety, your ticket risk, and even your insurance claim.
In this complete guide, you’ll learn:
The exact difference between lane splitting and filtering
Where each is legal in the United States
Which one is safer—and why
Real-world riding tips to avoid costly mistakes
If you ride in traffic, this is something you need to understand clearly.
Why This Matters for Riders?
Confusing lane splitting with lane filtering can lead to traffic tickets, insurance problems, and dangerous crashes.
In some states, one is legal while the other is not.
Knowing the difference can help protect both your safety and your riding record.
Updated April 2026 with current U.S. lane splitting and filtering laws
Quick Answer: Lane Splitting vs Lane Filtering
What is the difference between lane splitting and lane filtering?
Lane splitting means a motorcycle rides between lanes of moving traffic. Lane filtering means a motorcycle moves between stopped or very slow vehicles. The main difference is whether the surrounding traffic is moving or stopped. Lane filtering usually happens at traffic lights, while lane splitting often happens on highways.
Lane splitting = riding between lanes of moving traffic
Lane filtering = riding between lanes of stopped or very slow traffic
👉 The key difference is whether the surrounding traffic is moving or stopped
This small detail makes a huge difference in legality and safety.
What matters is what traffic is doing—not just your speed.
If cars are moving → you are lane splitting
If cars are stopped → you are lane filtering
This misunderstanding is one of the main reasons riders get tickets.
Is Lane Splitting or Filtering Legal in the U.S. (2026 Update)?
States
Lane Splitting
Lane Filtering
Key Conditions
California
✅ Legal
✅ Legal
Splitting allowed in moving traffic with safety guidelines
Arizona
❌ Illegal
✅ Legal
Traffic must be stopped, ≤15 mph, roads ≤45 mph
Colorado
❌ Not required
✅ Legal
Traffic fully stopped, ≤15 mph, pass on left only
Utah
❌ Illegal
✅ Legal
Stopped traffic, ≤15 mph, roads ≤45 mph
Montana
❌ Illegal
✅ Legal
Traffic ≤10 mph, rider ≤20 mph
Minnesota
⚠️ Limited
✅ Legal
Up to 25 mph, ≤15 mph over traffic (more flexible law)
All Other States
❌ Illegal
❌ Illegal (or unclear)
Enforced under unsafe lane use / passing laws
This is where things get serious.
Lane Splitting Laws
Is lane splitting legal in the United States?
Lane splitting is legal only in California. Most other states still consider lane splitting illegal. Some states now allow lane filtering under limited conditions, but riders should always check current state laws before riding between vehicles in traffic.
Legal: California only
Illegal or restricted: Every other state
California allows motorcycles to ride between lanes even when traffic is moving, with safety guidelines such as keeping speed differences low.
The image below will help you visualize the legality of lane splitting in the United States across various states.
Lane splitting laws in the US (by state)
Lane Filtering Laws (Growing Trend)
Several states now allow lane filtering—but with strict limits:
Arizona
Utah
Montana
Colorado
Minnesota (recently added)
Common rules:
Traffic must be stopped or very slow
Rider speed is limited (often ≤15–25 mph)
Only allowed on certain roads
Everywhere Else
In most U.S. states:
Lane splitting is illegal
Lane filtering is also illegal or unclear
Even if not explicitly banned, riders can still be ticketed under:
Unsafe lane use
Improper passing
Reckless driving
Important Notes Riders Must Know
1. Filtering Laws Are Strict
Even in legal states:
Speed limits are usually 15–25 mph max
Traffic often must be fully stopped
Only allowed on certain roads
Breaking any rule can still result in a ticket.
2. “No Law” Does NOT Mean Legal
Some states don’t mention lane splitting directly, but riders can still be cited for:
Unsafe lane usage
Improper passing
Reckless driving
3. Trend: More States Are Legalizing Filtering
Recent changes show a clear pattern:
Utah → 2019
Montana → 2021
Arizona → 2022
Colorado → 2024
Minnesota → 2025
👉 Lawmakers prefer low-speed filtering, not high-speed splitting.
Is It Legal in Illinois (Chicago)?
If you ride in Chicago or anywhere in Illinois:
❌ Lane splitting — illegal
❌ Lane filtering — illegal
Lane filtering is generally safer because it happens at lower speeds when traffic is stopped. Lane splitting carries more risk because surrounding vehicles are moving, which gives riders less time to react to sudden lane changes or driver mistakes.
Why Lane Filtering Is Safer?
Lane filtering is widely considered safer because:
Speeds are low
Traffic is stopped
Impact force is reduced
It helps riders avoid rear-end collisions, which are common when motorcycles are waiting in traffic.
Why Lane Splitting Is Riskier?
Lane splitting involves:
Faster-moving vehicles
Larger speed differences
Drivers who don’t expect motorcycles between lanes
This increases:
Sudden lane-change crashes
Visibility issues
Reaction time problems
Why States Are Starting to Legalize Lane Filtering
More states are allowing filtering because it:
1. Reduces Rear-End Accidents
Motorcycles are small and easy to miss. Filtering moves riders out of danger zones.
2. Improves Traffic Flow
Motorcycles take up less space when moving forward.
3. Increases Rider Safety
Studies and traffic agencies suggest filtering is a controlled, low-risk maneuver when done properly.
How Lane Splitting Can Affect Insurance Claims
If a crash happens while lane splitting in a state where it is illegal, insurance companies may argue that the rider shares fault.
This can reduce compensation for:
bike repairs
medical bills
lost wages
pain and suffering
In comparative negligence states, even partial fault can lower your payout.
How Lane Splitting Affects Accidents and Insurance
If you’re in a crash:
In states where it’s illegal → you may be considered partly at fault
Your compensation may be reduced under comparative fault laws
Example:
You’re 40% at fault → you only receive 60% of damages
Insurance companies often use illegal lane splitting against riders.
FAQs
Is Lane Filtering the Same as Lane Splitting?
No, lane filtering and lane splitting are not the same.
Lane filtering happens when surrounding vehicles are stopped or barely moving.
Lane splitting happens when surrounding vehicles are already moving.
This legal difference matters because some states allow filtering but still ban splitting.
Is lane filtering safer than lane splitting?
Yes. Filtering happens at lower speeds and is generally considered safer.
Can you get a ticket for lane splitting?
Yes, in most U.S. states, lane splitting can lead to a ticket.
Possible citations include:
unsafe lane usage
improper passing
reckless driving
Fines and points depend on state law.
This attracts traffic from strong commercial/legal search intent.
Why is lane splitting illegal in most states?
Because of safety concerns and unpredictable driver behavior.
Will more states legalize lane filtering?
Yes. The trend is growing as safety data improves.
How Lane Splitting Can Affect Motorcycle Insurance Claims?
If a rider is involved in a crash while lane splitting illegally, insurance companies may argue the rider contributed to the accident. This can reduce compensation and make a motorcycle insurance claim more difficult. In serious cases, riders may need a motorcycle accident lawyer to protect their rights after a traffic collision.
Final Verdict: Which One Should Riders Use?
Lane filtering → safer, increasingly legal
Lane splitting → riskier, mostly illegal
👉 The smartest move:
Follow your state laws
Use filtering only where legal
Prioritize safety over speed
Bottom Line
Lane splitting and lane filtering are not the same—and confusing them can cost you.
One happens in moving traffic
The other happens in stopped traffic
One is widely illegal
The other is slowly being accepted
As a rider, your goal is simple:
👉 Stay visible, stay predictable, and stay legal
Have you ever lane filtered in traffic? Riders in different states have very different experiences. Share your thoughts and riding experience below.
If you ride a lot, you already know this: your gloves get nasty.
Sweat, road dust, bugs, fuel smell—after a few weeks, they stop feeling like gear and start feeling like gym socks. I’ve had gloves get so stiff and smelly I didn’t even want to put them on anymore.
The truth is, most riders either:
Don’t clean their gloves at all
Or clean them the wrong way and ruin them
I’ve done both.
In this guide, I’ll show you exactly how to wash motorcycle gloves the right way—based on real riding experience and proven methods—so they stay comfortable, flexible, and safe.
Know Your Gloves First (Very Important)
Before you even think about washing, you need to know what your gloves are made of.
This is where most people mess up.
The 3 main glove types:
1. Leather gloves
leather motorcycle gloves
Leather motorcycle gloves are the “classic” choice for riders. The reason is clear and obvious - they offer some of the best protection you can get for your hands.
Leather is naturally tough and highly resistant to abrasion. This means it can hold up much better if you slide on the road during a crash.
Once, I was riding my motorbike on a wet and slippery road, and I fell. Luckily, I was wearing leather gloves at the time, so my hands weren't scraped.
They might not be as flexible… but will break in and be much more protective.
Many experienced riders prefer leather gloves over textile gloves.
Another big advantage is how leather feels over time.
When you first wear them, you may feel they are a bit stiff. But after a few rides, it softens and molds to your hands.
This gives you better grip and control on the throttle and brakes.
Good leather gloves can also last for years if you take care of them.
If they fit well and feel good, I buy them… comfort matters most.
However, leather has downsides. It doesn’t handle water well - getting soaked can make it stiff or cracked if dried wrong.
It’s also less breathable, so it can feel hot in summer.
In short, leather gloves are strong, durable, and comfortable—but they need proper care to stay that way.
👉 I usually wear leather motorcycle gloves in those low-temperature days. They keep my hands warm, so that I can control the handbar, throttle and brakes.
2. Textile gloves
textile motorcycle gloves
Textile motorcycle gloves are made from synthetic materials like nylon, Cordura, or Kevlar. So, they are built for comfort and everyday riding.
They are usually lightweight and breathable, which makes them great for hot weather and long rides.
So, compared to leather, textile gloves feel more comfortable right away. They don’t squeeze your fingers as much and are easier to wear for long rides.
Many textile gloves also come with waterproof layers, so they work well in rain and changing weather.
One big advantage is comfort. Unlike leather, textile gloves feel soft right away and don’t need a break-in period. They also dry faster after getting wet.
However, they are not as tough as leather. They can wear out faster and may not protect as well in a high-speed crash.
In real riding, textile gloves are perfect for commuting, summer rides, and daily use.
3. Mixed gloves
mixed motorcycle gloves
Mixed (or hybrid) motorcycle gloves combine leather and textile materials in one glove. Usually, you’ll see leather on the palm and impact areas, and textile on the back of the hand. This design perfectly balances protection and comfort.
Leather parts provide strong abrasion resistance and grip, which is important if you slide on the road.
Textile sections add flexibility, airflow, and better comfort in hot or changing weather.
Therefore, many riders switch to mixed gloves in hot weather because they feel cooler and less sweaty.
Experienced riders often own multiple gloves, but many say hybrid gloves are the closest thing to an all-in-one option.
When Should You Wash Motorcycle Gloves?
A lot of riders ask this. The answer is simple:
Wash your gloves when you notice:
Bad smell
Stiff feeling
Visible dirt or grime
Sticky or sweaty interior
Sweat is actually one of the biggest problems. Over time, salt from sweat breaks down leather fibers and causes cracking
Based on years of riding experience, I've summarized the following:
If you're a daily rider, you need to wash your motorcycle gloves every 2-4 weeks.
If you're a weekend rider, you can wash your gloves every 1-2 months.
Note: After rain or a long, hot ride → wash your gloves as soon as possible.
👉 Pro tip: If your gloves smell when you put them on, you waited too long.
What You Need Before Washing Motorcycle Gloves?
The preparation before washing motorcycle gloves is actually very simple. You don’t need any special or expensive items — just a few basic items most riders already have at home.
Basic setup:
Mild soap (baby shampoo works great)
Microfiber cloth
Soft brush (optional)
Towel
Leather conditioner (for leather gloves)
You should avoid using strong detergents, alcohol-based cleaners or bleach. These destroy materials and strip oils from leather
How to Wash Leather Motorcycle Gloves?
Leather gloves need patience. Don’t rush this. Here are the steps about how to hand wash leather motorcycle gloves properly:
Step 1 – Remove surface dirt
Remove the surface dirt on the gloves - how to wash motorcycle gloves
Before using any water or soap, always start by removing loose dirt. This step is simple but very important.
Use a dry microfiber cloth or a soft brush to wipe off dust, bugs, and road grime from the surface.
Please pay close attention to areas like the seams, finger folds, and palm, where dirt often hides. You can also gently tap the gloves together to shake off debris.
👉 Don't skip this step! Otherwise, you can rub dirt deeper into the material when you start cleaning. That can cause scratches or damage, especially on leather.
Step 2 – Clean gently (DO NOT soak)
Now it’s time to actually clean the gloves—but go slow and keep it gentle.
Take a soft cloth or sponge, dip it in a mix of lukewarm water and mild soap, then wring it out so it’s only slightly damp.
The glove should never be soaking wet.
Gently wipe the surface in small circles, focusing on dirty spots like the palm and fingers. Do not scrub hard, because leather can scratch or wear down easily.
The key rule is simple: use as little water as possible. Leather absorbs water, and too much can make it stiff, shrink, or lose its shape.
👉 Think of it like this: you’re wiping dirt off, not washing clothes.
Step 3 – Wipe off soap
wipe off the soap on the motorcycle gloves
After cleaning, you need to remove all the soap from the gloves. This step is very important because any leftover soap can dry out the leather and make it stiff over time
Take a clean, soft cloth, dampen it with plain water (no soap), and gently wipe the entire surface of the gloves. Go over all areas, especially the fingers and seams, where soap can hide. Don’t rush—make sure no slippery or soapy feeling is left behind.
Step 4 – Dry properly
Place the gloves in a cool, well-ventilated area and let them air dry naturally
After cleaning, drying your gloves the right way is very important. This is where many riders ruin their gloves.
Do this:
Gently press them with a towel to remove extra water;
Shape the gloves (don’t twist or wring them);
Place the gloves in a cool, well-ventilated area and let them air dry naturally;
You can also stuff the gloves with paper towels to help them keep their shape and absorb moisture.
Never:
Use a dryer
Put near the heater
Leave in direct sun
Drying takes time, but that’s a good thing. Slow drying helps the leather stay soft and comfortable, so your gloves feel right the next time you ride.
Step 5 – Condition the leather (CRUCIAL)
After your gloves are fully dry, the final step is conditioning—and this is the step many riders skip, but shouldn’t.
This step separates beginners from experienced riders.
Cleaning removes dirt, but it also removes the natural oils inside the leather. Without those oils, the leather can become dry, stiff, and even crack over time
Take a small amount of leather conditioner (about pea-sized), put it on a soft cloth, and gently rub it into the gloves using small circular motions.
Let it soak in slowly, then wipe off any extra. Don’t use too much—less is better.
Conditioning helps restore softness, flexibility, and grip, so your gloves feel comfortable again.
👉 Think of it like lotion for your skin—without it, leather dries out and wears out much faster.
Here is a video showing you how to wash leather motorcycle gloves:
How to Wash Motorcycle Gloves (Textile Gloves)?
Textile gloves are much easier to clean than leather ones, which is why many riders prefer them for daily use.
Textile material gloves support both hand washing and machine washing.
Method 1 – Hand washing (best option)
hand washing textile motorcycle gloves
Fill a bucket with lukewarm water
Add mild soap
Put gloves on your hands
Wash like you’re washing your hands
This works really well for cleaning the inside of the gloves, too.
Then:
Rinse thoroughly
Gently squeeze (don’t twist)
Method 2 – Machine washing (if allowed)
Some gloves allow it.
If you do:
Use a gentle cycle
Cold water
No harsh detergent
Always check the label first, make sure it supports machine washing.
👉 Important:
Textile gloves hold detergent easily, so rinse well, or they’ll feel sticky later.
How to Clean Inside of Motorcycle Gloves?
Most riders ignore this, and, this is where the real dirt is.
Sweat and bacteria build up inside the gloves, not outside.
Method:
Option 1 (best):
Wear gloves
Wash hands with mild soap
Rinse thoroughly
Option 2:
Use a cloth or soft brush
Clean inside gently
👉 From riders on forums:
“Soap takes away oils… use conditioner after”
👉 Another tip:
“Wash them while wearing them… then air dry slowly”
Important:
Don’t soak leather interiors
Don’t leave the inside of your gloves wet
That’s how you get smell and mold.
How to Dry Motorcycle Gloves Properly?
Drying is just as important as washing.
So what's the best way to dry motorcycle gloves after washing?
Best method:
Air dry at room temperature
Good airflow
Fingers pointing down
You can:
Stuff with paper towels
Wear them briefly while damp to shape
Never do this:
Dryer
Heater
Direct sunlight
All of these damage materials and cause shrinking or stiffness
👉 Real tip:
If gloves dry too fast, they get stiff. Slow drying = soft gloves.
👉 Pro tip:
Wear glove liners if you ride a lot in heat. They reduce sweat buildup big time.
Common Mistakes to Avoid
I’ve made most of these at least once.
❌ Washing leather in machine
Destroys structure and shape.
❌ Using hot water
Causes shrinking and damage.
❌ Drying with heat
Makes gloves stiff and brittle.
❌ Using strong chemicals
Removes protective oils.
❌ Twisting or wringing
Damages stitching and shape.
❌ Not conditioning leather
Leads to cracking and stiffness.
Pro Tips from Experienced Riders
These small habits make a huge difference.
1. Air your gloves after every ride
Prevents smell buildup.
2. Don’t store them wet
That’s how bacteria grows fast.
3. Use liners in hot weather
Keeps gloves cleaner longer.
4. Rotate gloves if you ride daily
Gives them time to dry fully.
5. Quick clean after long rides
Wipe them down before dirt sets in.
👉 From real rider habits:
Some riders barely wash gloves, but always air them out—and they last much longer.
How to Maintain Motorcycle Gloves (Make Them Last Longer)?
Cleaning is only part of the story.
For leather:
Condition every few weeks
Keep away from heat
Store in breathable space
For textile:
Wash gently
Reapply waterproofing if needed
Some waterproof gear needs treatment after washing to restore protection
General:
Don’t crush gloves in your bag
Keep shape when drying
Can You Wash Motorcycle Gloves in a Washing Machine?
Short answer:
Textile → sometimes yes
Leather → NO
Even for textile:
Use gentle cycle
Cold water
Always check the care label.
When Should You Replace Motorcycle Gloves?
No amount of cleaning can fix worn-out gloves.
Replace them if:
Leather is cracked
Stitching is broken
Grip is gone
Gloves feel loose or unsafe
Remember:
Your gloves are safety gear, not just comfort.
FAQ (Quick Answers)
Can you wash motorcycle gloves?
Yes, you can wash motorcycle gloves—but it really depends on the material. Leather and textile gloves need very different care. Leather gloves can be cleaned, but only in a gentle way using a damp cloth and mild soap. You should avoid soaking them or putting them in a washing machine, because leather absorbs water and can shrink, harden, or crack if handled wrong.
Textile gloves are much easier. Most can be washed with water and mild detergent, and some can even go in the washing machine if the label allows it.
👉 In simple terms: yes, you should wash your gloves to keep them clean and lasting longer—but always choose the right method based on what they’re made of.
How often should you clean them?
How often you should clean your motorcycle gloves depends on how often you ride and the conditions you ride in. If you ride regularly, cleaning them every few weeks is a good habit to keep them fresh and comfortable. Gloves collect sweat, dirt, and oils over time, which can damage the material if left too long.
For daily riders, a light clean or wipe-down can be done more often, especially after hot or dirty rides. A deeper clean can be done every few weeks or when you notice smell or stiffness. If you only ride occasionally, cleaning every couple of months is usually enough.
👉 Simple rule: clean them when they start to feel dirty, smell bad, or lose comfort.
Can leather gloves get wet?
Yes, leather gloves can get wet, but only to a limited degree. A little moisture—like light rain or sweat—is usually okay and won’t damage them right away. However, leather is a porous material, which means it can absorb water over time. If the gloves get too wet or soaked, the water can pull out the natural oils inside the leather. This can make the gloves stiff, shrink, or even crack as they dry.
So, the key is control. Light exposure is fine, but avoid soaking them. If your gloves do get wet, dry them slowly at room temperature and condition them afterward.
👉 Simple rule: a little water is okay, but too much can damage leather if not handled properly.
How do you soften stiff gloves?
If your leather gloves feel stiff, the best way to soften them is to use a leather conditioner after cleaning and drying. Cleaning removes dirt, but it can also take away natural oils, which is why gloves often feel hard afterward. Apply a small amount of conditioner to a soft cloth and gently rub it into the leather. This helps restore moisture and flexibility, making the gloves soft again.
After applying, let the gloves sit so the conditioner can soak in, then gently flex or wear them to help the leather loosen up. Working the fingers and moving your hands helps the material break in naturally.
👉 Simple tip: conditioner softens the leather, and wearing the gloves helps shape them to your hands for a better fit.
Can I machine wash textile motorcycle gloves?
Yes, you can machine wash some textile motorcycle gloves—but only if the manufacturer allows it. Many textile materials are safe for washing machines, especially on a gentle or hand-wash cycle with cold water. However, not all gloves are the same. Some have special materials like waterproof membranes (such as Gore-Tex), which can be damaged if washed incorrectly.
It’s also important to avoid top-loading machines with strong spinning, because they can stress or stretch the fabric. Always remove any armor or inserts before washing, and use mild detergent only.
What are the best detergents for cleaning motorcycle gloves?
The best detergents for motorcycle gloves are mild, gentle soaps that won’t damage the material. For most gloves, a baby shampoo, mild dish soap, or gentle liquid laundry detergent works very well. These are soft enough to clean dirt and sweat without harming the fabric or leather. Harsh detergents, bleach, or strong chemicals should always be avoided because they can break down materials and reduce the life of your gloves.
For leather gloves, it’s even better to use a special leather cleaner or saddle soap, since these help keep the leather soft and prevent drying. Liquid detergents are also preferred over powder, because they rinse out more easily and don’t leave residue.
Final Thoughts
If you ride a lot, your gloves go through a lot too.
Cleaning them the right way:
Keeps them comfortable
Extends their life
Maintains safety
From my experience, the biggest difference is simple:
👉 Riders who take care of their gloves enjoy riding more.
👉 Riders who don’t… end up buying new ones way too often.
Take a little time to clean them right—and your hands will thank you every ride.
Riding Route 66 on a motorcycle is one of those trips that stays with you long after it’s over. You will witness the best Route 66 attractions during your trip.
It’s not just about getting from one place to another. It’s about the feeling of the road, the small towns, the old signs, and the stories you pick up along the way. I’ve spent time riding long sections of this route, and I can tell you this: Route 66 is not perfect—but that’s exactly why riders love it.
This guide is built for motorcycle riders first. You’ll find the best attractions and things to see along Route 66 in each state, but more importantly, you’ll get real riding advice—what the road feels like, where to be careful, and how to enjoy it without burning yourself out.
Everything here is updated for 2026 and written in simple, clear language so you can actually use it while planning your ride.
🗺️ Route 66 Overview
Route 66 stretches about 2,448 miles from Chicago to Santa Monica. It crosses eight states, and each one feels different when you’re on a motorcycle/car.
You’ll ride through:
Busy city streets
Quiet farmland
Open plains
High desert
Mountain passes
That mix is what makes this trip special.
🏍️ Which Direction Should You Ride?
Most riders go east to west, starting in Chicago and ending at the ocean. This direction just feels right. The scenery gets better as you go, and finishing at the Pacific Ocean is a great reward.
⏱️ How Long Should You Take?
This depends on your riding style:
10–14 days: Fast trip, long riding days
14–21 days: Best balance (highly recommended)
3+ weeks: Relaxed pace with time to explore
If this is your first time, don’t rush it. Route 66 is about the points of interest as much as the riding.
Before you even start the engine, planning matters more than people think. Route 66 is not like a normal highway trip. Some parts are remote, and small mistakes can turn into big problems.
🎒 Gear That Actually Helps
You don’t need to overpack, but you do need the right basics:
A full-face helmet helps reduce wind noise and fatigue
Dual Bluetooth Chip Design.
10 Riders Group Communication, 2000m Distance!
Optional HRSQ Mic and Speakers, CVC + ENC + DSP Noise Cancelation.
Listen to Music/GPS and Intercom At the Same Time.
IP67 Waterproof.
Compatible with Fodsports Connect APP
FM Radio, Music Sharing, Voice Commands.
Your ride begins in Chicago, a busy city full of energy. It’s not the easiest place to ride, but it’s part of the experience.
Willis Tower
Willis Tower - Best Route 66 Attractions
Location: 233 South Wacker Drive, Chicago, IL 60606, United States
Website: https://www.willistower.com/
The Willis Tower is one of the most famous landmarks along Route 66 in Illinois and a must-see in Chicago. It is a popular starting photo spot. Many riders stop here before heading out. Completed in 1973, it was once the tallest building in the world and held that title for nearly 25 years.
Standing about 1,451 feet tall with 110 stories, the tower is known for its bold black design and impressive height. One of its biggest attractions is the Skydeck on the 103rd floor, where visitors can enjoy amazing views of the city and even see up to four states on a clear day.
A highlight of the visit is “The Ledge,” glass boxes that extend out from the building, letting you stand high above the streets below. Overall, Willis Tower is an exciting attraction that combines history, architecture, and unforgettable views.
Lou Mitchell’s
Lou Mitchell’s
Location: 565 W Jackson Blvd, Chicago, IL 60661, United States
Website: https://www.loumitchells.com/
Lou Mitchell’s is one of the most famous tourist spots at the very beginning of Route 66 in Illinois. Opened in 1923, this classic diner has welcomed travelers for over 100 years and is often called the “first stop on the Mother Road.”
Located near the historic starting point of Route 66 in Chicago, it has long been a favorite place for people to grab breakfast before starting their road trip. The restaurant is known for its friendly service and fun traditions, like giving free donut holes to waiting guests and Milk Duds to kids.
Inside, you’ll find a warm, old-school diner atmosphere with hearty meals like eggs, pancakes, and sandwiches. Overall, Lou Mitchell’s is more than just a restaurant—it’s a piece of Route 66 history and a perfect place to begin your journey.
Gemini Giant
Gemini Giant - famous and fun attractions along Route 66
Location: 201 Bridge St, Wilmington, IL 60481
The Gemini Giant is one of the most famous and fun attractions along Route 66 in Illinois. This giant fiberglass statue, built in the mid-1960s, shows a space-themed astronaut holding a rocket. It was originally placed outside the Launching Pad Drive-In restaurant to attract travelers during the excitement of the Space Race.
Standing about 30 feet tall, the Gemini Giant is part of a group of classic roadside figures called “Muffler Men.” Over the years, it has become one of the most photographed attractions on Route 66.
Today, visitors still stop to take pictures and enjoy this unique piece of American road trip history. The Gemini Giant is a great example of the fun, creative spirit that makes Route 66 so special.
🏍️ Tips in Illinois
Leaving Chicago can be stressful. Traffic is heavy, and drivers can be aggressive. Stay alert and take your time.
Once you get out of the city, things calm down. The roads become smoother and more relaxed. This is a great place to get comfortable with your bike before the longer stretches ahead.
🔵 Missouri: Easy Riding and Classic Stops
Missouri is where Route 66 starts to feel more relaxed and traditional. You’ll see more classic roadside attractions and fewer big city distractions.
The roads here are enjoyable. You’ll get a mix of gentle curves and straight sections. It’s not too challenging, which makes it perfect for steady cruising.
Watch for shaded areas, especially in the morning. Some spots can be damp and slightly slippery.
Overall, Missouri is a comfortable and enjoyable part of the ride.
Gateway Arch
Gateway Arch - famous landmarks(attractions) along Route 66 in Missouri
Location: St. Louis, MO 63102 (In Gateway Arch National Park)
Web: https://www.gatewayarch.com/
The Gateway Arch is one of the most famous landmarks along Route 66 in Missouri. Located in St. Louis, this shining stainless steel monument stands 630 feet tall, making it the tallest monument in the United States.
Built between 1963 and 1965, the arch was designed to honor America’s westward expansion and the city’s role as the “Gateway to the West.” Visitors can ride a unique tram inside the arch to reach the top, where they can enjoy amazing views of the city and the Mississippi River.
At the base, there is also a museum that shares stories about early explorers and life in the 1800s. Overall, the Gateway Arch is an exciting and meaningful spectacle that combines history, design, and unforgettable views.
Meramec Caverns
Meramec Caverns - famous and exciting stops along Route 66
Location: 1135 Hwy W, Sullivan, MO 63080
Website: https://www.americascave.com/
Meramec Caverns is one of the most famous and exciting stops along Route 66 in Missouri. It’s a huge system of limestone caves near Stanton that formed over millions of years and stretches about 4.6 miles underground. Guides lead visitors through amazing natural formations like stalactites, stalagmites, and wide underground chambers that feel like a hidden world below the Ozarks.
Opened to the public in the 1930s, the caverns became a classic roadside destination advertised with bright signs seen for miles, making it a memorable part of the Mother Road experience. Many people say there’s even a legend that outlaw Jesse James once used the caves as a hideout, which adds to the fun history.
Today, guided tours and spectacular views of nature’s underground art make Meramec Caverns a must‑see attraction for travelers exploring historic Route 66.
🟡 Kansas: Short but Memorable
Kansas only has a small section of Route 66, but it still feels special.
This section is very short—about 13 miles—but it’s peaceful and easy to ride.
It’s a good place to slow down, take photos, and enjoy a quick break before heading into Oklahoma.
Rainbow Bridge
Rainbow Bridge - a unique and historic sight on Route 66 in Kansas
Location: Rainbow Bridge, SE Beasley Rd, Baxter Springs, KS 66713
The Rainbow Bridge is a unique and historic sight on Route 66 in Kansas near Baxter Springs. Built in 1923, this old concrete arch bridge was part of the original Mother Road and carried travelers over Brush Creek for decades.
It’s also called the Brush Creek Bridge and is the only remaining “Marsh arch” bridge of its kind along the former highway. The graceful curved design and bright white color make it a favorite photo attraction for people driving the old Route 66.
In 1983 the bridge was added to the National Register of Historic Places because of its connection to Route 66 and Kansas history. Today visitors can walk or drive across the narrow span and enjoy a piece of America’s road‑trip past.
🔴 Oklahoma: Long Roads and Big Skies
Oklahoma has the longest stretch of Route 66, and you’ll really feel the distance here.
This is where things get more challenging mentally. The roads are long and straight, and it can feel repetitive.
Wind is also a factor. Strong crosswinds can push your bike slightly, which can get tiring over time.
Take breaks, stretch, and don’t try to rush through it.
Blue Whale of Catoosa
Blue Whale of Catoosa - fun and unique attractions along historic Route 66
The Blue Whale of Catoosa is one of the most fun and unique attractions along historic Route 66. Built in the early 1970s by Hugh Davis as a gift for his wife, this giant blue whale quickly became a popular place for families to swim, picnic, and relax.
Today, it stands as a classic piece of Route 66 history and a must-see roadside attraction. Even though swimming is no longer allowed, visitors can still walk around, take photos, and enjoy the peaceful park. The whale’s bright color and playful design make it a perfect photo attraction and a symbol of the fun, quirky spirit that makes Route 66 so special.
Route 66 Museum
Route 66 Museum
Location: 2229 W Gary Blvd, Clinton, OK 73601
Website: https://www.okhistory.org/sites/route66
The Oklahoma Route 66 Museum is one of the best places to learn about the famous “Mother Road.” It is a popular destination for travelers journeying along Route 66. Located in Clinton, it was the first state-sponsored Route 66 museum in the United States and opened in 1995.
Inside, the museum takes visitors on a journey through time, showing how Route 66 developed from early dirt roads to a busy highway. You can see vintage cars, old signs, and real artifacts from different decades. There are also fun displays like a 1950s diner scene and exhibits about the Dust Bowl and classic road trips.
Overall, this museum is both fun and educational. It helps visitors understand the people, culture, and history that made Route 66 such an important part of American travel.
🟠 Texas: Open Land and Strong Winds
The Texas Panhandle is wide, open, and exposed. You’ll see big skies and long roads that seem to go on forever.
Cadillac Ranch
Cadillac Ranch - famous and unusual sights along Route 66
Cadillac Ranch is one of the most famous and unusual sights along Route 66 in Texas. Located near Amarillo, this unique roadside attraction features ten old Cadillac cars buried nose-down in the ground. It was created in 1974 by a group of artists called Ant Farm as a piece of public art.
The cars are lined up in a row and show how Cadillac designs changed over time, especially the tail fins from 1949 to the early 1960s. What makes it even more fun is that visitors are allowed to spray paint the cars, so the artwork is always changing with bright colors and graffiti.
Today, Cadillac Ranch is a must-see attraction for travelers, offering a creative and playful symbol of Route 66’s unique spirit.
MidPoint Cafe
MidPoint Cafe
Location: 301 I-40, Adrian, TX 79001
The MidPoint Café is one of the most iconic points of interest along Route 66 in Texas. Built in 1928, this classic roadside diner sits in the small town of Adrian, exactly halfway between Chicago and Los Angeles—about 1,139 miles to each end.
Because of its unique location, the café proudly uses the slogan, “When you’re here, you’re halfway there.” Inside, visitors can enjoy simple, home-style meals like burgers, breakfast, and its famous homemade pies.
Over the years, the MidPoint Café has become a favorite attraction for travelers from around the world. With its vintage look and friendly atmosphere, it perfectly captures the spirit of a classic Route 66 road trip.
🟣 New Mexico: Culture and Changing Elevation
New Mexico brings a different feel to the trip. The landscape changes, and the culture becomes more visible.
You’ll notice the elevation changes here. Temperatures can drop, especially in the morning or evening.
The roads are generally smooth and enjoyable, and the scenery starts to become more interesting.
It’s a great place to slow down and take in the surroundings.
Santa Fe Plaza
Santa Fe Plaza - most important and historic landmarks along Route 66
Location: 63 Lincoln Ave, Santa Fe, NM 87501
Santa Fe Plaza is one of the most important and historic landmarks along Route 66 in New Mexico. Located in the heart of Santa Fe, this central square has been the city’s main gathering place since the early 1600s.
Surrounded by adobe-style buildings, shops, and museums, the plaza reflects the rich mix of Spanish, Native American, and Mexican cultures. Visitors can relax under shady trees, walk along stone paths, and explore nearby landmarks like the Palace of the Governors.
The plaza is also a lively place for events, including markets, festivals, and live music throughout the year.
Overall, Santa Fe Plaza is a beautiful and historic landmark where travelers can experience the culture, history, and unique atmosphere of the American Southwest.
Blue Hole
Blue Hole
Location: Santa Rosa, NM 88435
Website: https://www.santarosabluehole.com/
The Blue Hole is one of the most surprising and beautiful wonders along Route 66. Located in the desert town of Santa Rosa, this natural pool looks like a bright blue gem surrounded by dry land.
The Blue Hole is a deep, round sinkhole filled with crystal-clear water that stays about 62°F all year. It is over 80 feet deep and constantly refilled by an underground spring, which keeps the water clean and clear.
Travelers love stopping here to swim, relax, or even try scuba diving. In fact, it’s one of the most popular inland diving spots in the United States.
With its cool water and unique look, the Blue Hole offers a refreshing and unforgettable break during a Route 66 road trip.
🟤 Arizona: The Best Riding Section ⭐
For many riders, Arizona is the highlight of Route 66.
This is where the ride becomes exciting. You’ll find:
Curvy roads
Elevation changes
Amazing desert views
The section near Oatman is especially fun, with twisty roads that feel great on a motorcycle.
Take your time here—this is the part you’ll remember most.
Petrified Forest National Park
Petrified Forest National Park
Location: Petrified Forest National Park, AZ 86028
Web: https://www.nps.gov/pefo/
Petrified Forest National Park is one of the most unique and colorful landscapes along Route 66. Located in eastern Arizona, this national park is famous for its ancient trees that turned into stone over 200 million years ago. These “petrified” logs are scattered across the desert and shine with beautiful colors like red, yellow, and purple.
The park is also home to the Painted Desert, where rolling hills display bright layers of color shaped by wind and time. Visitors can explore easy trails, scenic viewpoints, and even see ancient rock carvings made by early Native American cultures.
Overall, Petrified Forest National Park is a fascinating place where history, nature, and science come together, making it a must-see point of interest on any Route 66 road trip.
Wigwam Motel
Wigwam Motel
Location: 811 W Hopi Dr, Holbrook, AZ 86025
Web: https://sleepinawigwam.com/
The Wigwam Motel is one of the most unique and memorable places to stay along Route 66. Built in 1950, this historic motel is famous for its unusual design—each room is shaped like a large concrete wigwam (or teepee), giving it a fun and eye-catching look.
There are about 15 wigwam-shaped rooms arranged in a small village, each with simple but comfortable features like beds and a private bathroom. Outside, you’ll often see vintage cars parked nearby, adding to the classic road trip feel.
The Wigwam Motel is one of the last remaining examples of this type of roadside architecture from the 1930s–1950s. Today, it remains a popular attraction where travelers can spend the night and experience the fun, nostalgic spirit of Route 66.
Oatman is one of the most unique and fun sights along Route 66 in Arizona. It started as a gold mining town in the early 1900s and quickly grew during the gold rush. After the mines closed, the town became nearly abandoned, but Route 66 helped bring it back to life as a tourist attraction.
Today, Oatman feels like a real Old West town, with wooden sidewalks, small shops, and staged gunfight shows on the main street. One of its most famous features is the wild burros (donkeys) that roam freely through town. These animals are descendants of the pack animals once used by miners.
Visitors love taking photos, feeding the burros, and enjoying the lively Western atmosphere. Overall, Oatman offers a fun and memorable step back in time along Route 66.
⚫ California: Heat, Desert, and the Finish Line
California is the final stretch. It starts with the desert and ends at the ocean.
The desert can be very hot, especially in the afternoon. Plan your ride early in the day if possible.
As you get closer to Los Angeles, traffic increases. Stay alert and be patient.
Reaching the ocean feels like a real achievement. It’s the perfect way to end the trip.
Elmer's Bottle Tree Ranch
Elmer's bottle tree ranch - creative and unusual highlights along Route 66 in California
Location: 24266 National Trails Hwy, Oro Grande, CA 92368
Elmer's Bottle Tree Ranch is one of the most creative and unusual highlights along Route 66 in California. Located in the Mojave Desert, this outdoor art site was created in 2000 by artist Elmer Long.
The ranch is filled with hundreds of “bottle trees,” which are metal poles covered with colorful glass bottles. When sunlight shines through them, the bottles glow and sparkle, creating a beautiful and almost magical scene.
Visitors can walk freely around the area and explore other unique items, like old signs, tools, and recycled objects turned into art.
Today, the Bottle Tree Ranch is a popular photo stop and a great example of Route 66’s creative spirit, offering travelers a fun and unforgettable desert experience.
Santa Monica Pier
Santa Monica Pier - most famous and exciting attractions at the end of Route 66
Location: 200 Santa Monica Pier, Santa Monica, CA 90401
Website: https://www.santamonicapier.org/
The Santa Monica Pier is one of the most famous and exciting attractions at the end of Route 66. Stretching out into the Pacific Ocean, it marks the symbolic “End of the Trail” for travelers finishing their journey across the country.
First opened in 1909, the pier started as a simple structure but later became a popular place for fun and entertainment. Today, it features an amusement park called Pacific Park, with a bright Ferris wheel, rides, games, and street performers.
Visitors can walk along the wooden pier, enjoy ocean views, watch the sunset, or grab food at nearby shops and restaurants.
With its lively atmosphere and beautiful coastal setting, the Santa Monica Pier is a perfect and unforgettable ending to a classic Route 66 road trip.
🧭 Suggested 14-Day Route 66 Motorcycle Itinerary
Here’s a simple plan that works well:
Days 1–2: Illinois
Days 3–4: Missouri
Day 5: Kansas + Oklahoma
Days 6–7: Oklahoma
Days 8–9: Texas
Days 10–11: New Mexico
Days 12–13: Arizona
Day 14: California
This gives you a good balance of riding and stopping.
⚠️ Common Mistakes Riders Make
Skipping Fuel Planning
Always know where your next gas stop is.
Ignoring Weather
Conditions change fast across states.
Riding Too Long Without Breaks
Fatigue can affect your focus and safety.
Overpacking
Extra weight makes your bike harder to handle.
🌟 Hidden Gems Riders Love
Some of the best parts of Route 66 are not famous:
Quiet small towns
Old gas stations
Local diners with great food
These places give you the real feel of the road.
❓ Frequently Asked Questions
Is Route 66 good for motorcycles?
Yes. It offers a mix of scenery, history, and long open roads that are great for riders.
How long does it take to ride Route 66?
Most riders take 10–14 days, but longer trips are more enjoyable.
What is the most scenic part?
Arizona is widely considered the best section.
Can you ride the original Route 66?
Most of it is still drivable, though some parts require detours.
🏁 Final Thoughts
Route 66 is not about speed. It’s about the experience.
You’ll ride through different landscapes, meet new people, and see parts of the country that feel frozen in time.
If you take your time, plan smart, and stay aware of the road, this trip can become one of your best riding memories.
And once you finish it, don’t be surprised if you start thinking about riding it again.
Maybe you’ve watched a group of riders cruise by in a tight group, all wearing the same patches and moving like one unit. They are riders from the same motorcycle club. Have you ever thought about how to join a motorcycle club?
Actually, motorcycle clubs aren’t just your average riding crew.
I’m not talking about those weekend hangouts or casual rides, I mean these real motorcycle clubs. The kind where loyalty matters, respect is earned, and nothing comes easy.
I’ve spent a long time around these clubs—riding alongside them, working with them, and picking up on how the whole thing really ticks behind the scenes.
And, honestly, joining a motorcycle club isn’t like signing up for a newsletter or a casual group. It’s earned. It’s a process, a commitment, and a test.
In this guide, I’m going to cover all the bases before you even think about jumping in a motorcycle club.
We’ll talk about how the system actually works,
what it really takes to be part of one,
and most importantly, what a lot of folks completely misunderstand about these clubs.
So buckle up, because it’s not as simple as it looks.
join a motorcycle club and ride together
What Is a Motorcycle Club (MC)?
A motorcycle club is not just about riding. It’s a structured brotherhood built on: loyalty, respect, commitment and shared identity.
It is the traditional, structured format. MCs have strict rules, hierarchy, and often patches (colors). Many are highly selective.
Key Characteristics of a Motorcycle Club (MC)
Structure and Hierarchy: MCs operate under a formal chain of command, typically including a President, Vice President, Secretary, Treasurer, Sergeant-at-Arms, and Road Captain.
The "Patch" and Colors: Members wear a vest, known as a "cut" or "kutte," which features the club's "colors" (patches). Traditional MCs often use a three-piece patch layout: a top rocker (club name), a center logo, and a bottom rocker (location/chapter).
Membership Process: Becoming a full "patchholder" is a long process. It usually involves starting as a "hangaround" (getting to know the club) and then becoming a "prospect" (a probationary period where loyalty and work are tested) before being voted in as a full member.
Camaraderie and Loyalty: For many, the MC is a second family. Members are expected to prioritize the club and support their "brothers" at all times.
MC vs RC vs Riding Groups
MC (Motorcycle Club)
This is the traditional, structured format. MCs have strict rules, hierarchy, and often patches (colors). Many are highly selective.
RC (Riding Club)
More relaxed than MCs. Still organized, but fewer rules and less commitment. Great entry point for most riders.
Riding Groups
These are casual—friends or online-organized meetups. No formal membership process, just show up and ride.
👉 If you're a beginner rider, an RC or riding group is usually the smarter place to start.
Should You Join a Motorcycle Club?
Let me be honest with you—this is not for everyone, and definitely not a path that suits everyone.
A lot of riders love the idea of joining a motorcycle club. The brotherhood vibe, the group rides, the respect that comes with it—it all sounds pretty great.
But what most riders don’t realize is how much the lifestyle actually requires from you.
The good side:
You get a strong bond with riders who feel more like family than just friends
You know you’ll always have riders to rely on, no matter what happens.
The club usually organizes rides and events in a structured way, so you’re not just out there solo all the time.
Being part of a club gives you a certain identity, something that sets you apart.
The reality:
In a motorcycle club, you’re not the top priority—the club is.
You’re stepping into a world where your personal time, money, and sense of freedom might take a backseat.
There are rules you have to follow, expectations to meet, and consequences if you don’t.
As a top and experienced rider, guide, I must emphasize this: joining an MC is a lifestyle commitment, not a hobby.
If you’re mainly after riding buddies and casual group rides, a riding club might actually fit your needs better.
But if you want something more meaningful and you’re prepared to put in the work to earn your place, then it’s worth diving deeper to understand what you’re really getting into.
Which Type Is Right for You?
Ask yourself:
Do I want structure or flexibility?
Am I okay with rules and commitments?
Do I ride often enough to stay active?
If you just want to ride and meet people, don’t jump straight into a hardcore MC. Build experience first.
Dual Bluetooth Chip Design.
10 Riders Group Communication, 2000m Distance!
Optional HRSQ Mic and Speakers, CVC + ENC + DSP Noise Cancelation.
Listen to Music/GPS and Intercom At the Same Time.
IP67 Waterproof.
Compatible with Fodsports Connect APP
FM Radio, Music Sharing, Voice Commands.
Different clubs may run differently, so the requirements may also different. But there are some expectations that tend to be pretty standard across the board.
If you’re thinking about joining a motorcycle club, there are a few basics you should know in advance.
1. You need a motorcycle
Sounds obvious, right? But it’s not just any bike that will do.
Some clubs have a clear preference—they might lean towards cruisers, Harleys, or certain types of bikes that fit their vibe.
For example, a Harley-Davidson motorcycle club usually only accepts Harley motorcycle owners. A Honda owner will never be allowed to join their club, right?
So, if you’re rolling in on something way off their radar, that might be a dealbreaker.
2. You need a valid license
This is not only proof that you are legally allowed to ride.
The members in the motorcycle club also expect you to actually know how to handle your bike well.
Riding skill is important. Nobody wants someone who’s more of a liability on group rides.
3. You need time
This is an aspect that many riders will ignore.
Motorcycle clubs aren’t just weekend hobbies; they expect you to show up regularly.
So, being consistent and present at the club's events and activities matters a lot.
Because what holds a club together is the face-to-face time and participation.
4. You need the right mindset
You need to be respectful, loyal, patient and not ego-driven in the club. Clubs want people who are there for the ride and the camaraderie, not personal glory.
Some clubs also have extra rules(requirements), like age limits or proof of being responsible in other areas of life. These aren’t universal but worth keeping in mind.
To be honest, what really makes a difference is your attitude and how you fit into the group dynamic. Skills and mindset often outweigh any formal requirement when a motorcycle club decides if you belong.
motorcycle club outdoor riding and camping
Step-by-Step: How To Join a Motorcycle Club?
This is where most people get it wrong.
Don’t walk up and directly ask, “Can I join this motorcycle club?”
That’s actually one of the fastest ways to make yourself get ignored.
Joining a motorcycle club isn’t like signing up for a gym—it’s a process.
Step 1 – Find the Right Club
Start from the motorcycle clubs that are near your location. Then you can attend their events conveniently and frequently.
These clubs usually grow from actual, face-to-face connections rather than just online chatter.
So where should you begin your search?
Check out bike nights in your area
Local motorcycle rallies and events are another good spot; you’ll find all kinds of riders there.
The meetups hosted by dealerships — they often draw a crowd of folks passionate about biking.
Learn from those social media groups.
What you need to pay attention to:
Be careful how the club members treat each other.
Notice the types of bikes they ride—sometimes that says a lot about the club’s focus or style.
Tune in to their overall vibe, the culture they’ve built around riding.
👉 Not every club is a good fit—and that’s okay.
Step 2 – The Hang-Around Phase
This is where it all begins when you start to ride with the motorcycle club.
Firstly, at this period, you should always remember:
You’re not a member.
You’re not even part of the club.
You’re just… around.
A “hang-around” is someone who spends time near the club, learning and being observed.
What you should do:
Show up consistently
Be respectful and quiet
Watch and learn
Don’t try too hard
What you should NOT do:
Don’t ask to join the club
Don’t act like you belong in the club
Don’t interrupt conversations
At this point, the club’s paying close attention to every little thing you do, so it’s a good strategy to just blend in and let things unfold gradually around you.
They’re asking:
Can this guy be trusted?
Does he show respect?
Does he understand how things work?
And here’s the truth—this stage can last months… or longer.
Step 3 – Earning Trust
If you stick around long enough with the club and don’t mess up, something starts to change.
The members in the club may begin to notice you.
Maybe they will talk to you more.
Maybe they will invite you to more rides.
This is where you earn your place. See? It is not by asking, but by showing up.
Consistency is everything here.
Top guides emphasize that simply being present over time builds credibility.
I’ve seen guys ruin their chances because they tried to impress too hard.
The ones who make it?
They’re reliable, respectful, and just genuinely themselves.
Step 4 – Become a Prospect
If the motorcycle club likes you and sees something good in you, you may be invited to become a prospect.
This is where things get serious.
What is a prospect in a motorcycle club?
A prospect is a candidate for membership. You’re not in yet—you’re being evaluated.
What Prospects Are Expected to Do?
Attend all rides and meetings
Help with club tasks
Follow instructions without attitude
Earn trust over time
This phase can last:
A few months (for casual clubs)
Up to a year or more (for stricter MCs)
What Clubs Are Looking For?
Loyalty
Consistency
Respect for hierarchy
Ability to represent the club well
It’s less about proving toughness and more about proving reliability.
Step 5 – Attaining Full Membership
Successfully pass the selection phase? It doesn't mean you can automatically join the club.
Usually, the club will hold a vote to decide on your admission.
So, don’t expect it to be a done deal right away.
If the vote goes your way, you’ll officially get your patch—the club colors—and that’s when you become a full-fledged member.
From that moment on, wherever you ride, you’re carrying the club’s identity with you.
It’s not just about wearing a patch; it’s about representing the club in every ride and every interaction.
Getting that patch is a pretty big deal in the biker world. For many clubs, it’s not something handed out lightly.
It’s a milestone that marks a shift—you’re no longer just a wannabe or a prospect; you’ve stepped into a role that comes with real responsibility.
But don’t think this is the end of the road. It’s actually the start of a whole new chapter where the expectations are higher, and your commitment truly counts.
Bluetooth Mesh Intercom.
Dual Bluetooth Chip Design.
10 Riders Group Audio, 2000m Distance!
HRSQ Mic and Speakers, CVC + ENC + DSP Noise Cancelation.
Listen to Music/GPS and Intercom At the Same Time.
IP67 Waterproof.
Support pair with Fodsports Connect APP
FM Radio, Music Sharing, Voice Commands.
Every motorcycle club has its own rules, but some are universal.
Respect Patches and Colors
Patches represent identity and reputation. Never:
Touch someone’s patch without permission
Wear similar designs to an established club
Never Ask to Join Directly
This is worth repeating: Don’t ask for membership.
Clubs decide if you’re a fit—not the other way around.
Follow the Hierarchy
Most clubs have ranks:
President
Vice President
Sergeant-at-Arms
Members
Prospects
Respect the chain of command.
Loyalty Is Everything
Clubs expect commitment. That means:
Showing up when it matters
Supporting the group
Not causing drama
Pros and Cons of Joining a Motorcycle Club
Pros
Cons
Brotherhood / Community: You’re never riding alone.
Structured Rides: Well-organized trips and events.
Support Network: Help with bikes, travel, and sometimes life situations.
Time Commitment: You can’t just show up when it’s convenient.
Rules and Expectations: Freedom comes with structure.
Potential Risks: Some clubs have reputations that can affect how others see you.
FAQs: People Also Ask
How do I find reputable motorcycle clubs near me?
You can find reputable MCs by searching online directories (like American Motorcyclist Association), visiting local dealerships, joining Facebook groups, or attending motorbike nights.
Sometimes. Some clubs prefer certain brands (like Harley-Davidson), while others are open to all bikes. Always check before committing.
What types of motorcycles are typically preferred by riding clubs?
Most riding clubs prefer cruisers and touring bikes for comfort and group rides. Some also use sport or adventure bikes, depending on riding style and purpose.
Can beginners join a motorcycle club?
Yes, especially riding clubs. Many welcome newer riders as long as they are willing to learn and ride safely.
What is a prospect in a motorcycle club?
A prospect is someone being evaluated for membership. They participate in club activities but have not earned full member status yet.
Are motorcycle clubs dangerous?
Most are not. However, some clubs—especially 1% clubs—can be associated with higher risks. Choose carefully.
Is joining a motorcycle club illegal?
No, joining a motorcycle club is not illegal. It’s protected by freedom of association. Only illegal if you personally commit crimes.
Is joining a motorcycle club worth it?
Yes, it can be worth it if you want friends, group rides, and support. But please notice, it takes time, money, and commitment.
Can you leave a motorcycle club?
Yes, but it depends on the club’s rules. In most cases, you can leave, but you may need to return your patch.
Final Thoughts: Is Joining a Motorcycle Club Right for You?
Joining a motorcycle club isn’t just about riding—it’s about commitment, respect, and finding the right people to share the road with.
If you take one thing from this guide, make it this:
Don’t chase the patch—build the connection first.
Spend time around different groups, learn the culture, and let things develop naturally. The right club won’t just accept you—they’ll recognize you as one of their own.
Have you ever experienced the joy of motorcycling? You know, motorcycle rallies are more than just events.
There's an undeniable magic to attending motorcycle rallies. They represent a season, a spirit, and for many riders, including myself, it's like an annual pilgrimage.
In 2026, motorcycle rallies across the United States will continue to be spectacular. From coastal cruises along Daytona Beach to the roar of Sturgis Black Hills, there's something for everyone.
Some rallies are vibrant and party-like; others focus on scenic rides. And, there are still other rallies that are perfect for casual riders who simply want to enjoy the comforts of the roads and ride with friends.
As riders, we judge a rally as "top-tier" not just by its size. We also consider the roads, the crowds, and the shared passion of the engines roaring at sunrise.
In this guide, we'll list the top 10 best motorcycle rallies in the US for 2026.
Providing authentic experiences to help you decide which rallies are worth your time.
They are worth planning your itinerary, route, and even allocating a whole year for.
How These Rallies Were Chosen
This isn’t just a popularity contest—and any rider who’s done a few of these knows exactly why.
A rally can pull in half a million people like the Sturgis Motorcycle Rally, but if you’re stuck crawling in traffic all day, it stops being about riding real quick.
What matters first is the ride itself. We are looking at places where the roads make you want to wake up early. Those twisty mountain runs, coastal loops, or at least routes that let you get out of the crowd and actually ride.
Then comes the overall experience. How well is the event organized? How easy is it to get around? And, whether it feels safe when things get busy? These are what we need to consider.
Atmosphere matters too. Some rallies are full-on party mode, others are built for touring riders who just want miles and scenery—like Americade, which is known for a more laid-back, riding-focused vibe.
Finally, we factor in history and real rider feedback. Events like Laconia Motorcycle Week have been around for over a century, and that kind of legacy says a lot about what they offer. But more importantly, we pay attention to what riders actually say after they leave—that’s where the truth is.
Quick Comparison Table of the Top 10 Motorcycle Rallies in US
Top US Motorcycle Rallies
Location
Est. Date
Best For
Attendance
Sturgis
South Dakota
Aug 2026
Everything
500,000+
Daytona Bike Week
Florida
Mar 2026
Party + racing
300,000+
Laconia
New Hampshire
Jun 2026
Scenic + chill
200,000+
Americade
New York
Jun 2026
Touring
50,000+
ROT Rally
Texas
Jun 2026
Custom + nightlife
100,000+
Bikes Blues & BBQ
Arkansas
Sep 2026
Scenic + food
400,000+
Arizona Bike Week
Arizona
Apr 2026
Desert riding
75,000+
Myrtle Beach
South Carolina
May 2026
Coastal cruising
300,000+
Laughlin River Run
Nevada
Apr 2026
Compact + casinos
30,000+
Born-Free
California
Jun 2026
Custom culture
20,000+
The Top 10 Motorcycle Rallies in the US (2026)
1. Sturgis Motorcycle Rally (South Dakota)
sturgis motorcycle rally - world's largest and most iconic motorcycle rally
Founded: 1938
Duration: 10 days (starting the first Friday of August)
Typical attendance: ~500,000+ riders annually
Record attendance: ~739,000 (2015)
2026 dates: August 7–16
Location: Black Hills, South Dakota
The Sturgis Rally is widely considered the world's largest and most iconic motorcycle rally event.
Currently, almost no motorcycle events in the world can rival the scale and historical significance of the Sturgis Rally.
This annual event, held since 1938, takes place every August in Sturgis and the surrounding Black Hills region.
During the event, it transforms this quiet South Dakota town into a global gathering place for motorcycle enthusiasts, with an average attendance of around 500,000 and a record exceeding 700,000.
During the 2025 rally, statistics show that over 537,000 vehicles entered Sturgis during this rally.
Why is Sturgis so unique and popular? Because it is a perfect blend of riding and festival culture. Beyond the bustling main street and non-stop nightlife, the surrounding Black Hills region boasts some of the most scenic and challenging riding routes in the United States. These make the journey itself as important as the destination.
What's more, this event is not a single event, but a decentralized experience—including concerts, races, custom motorcycle shows, and hundreds of booths.
In the past, it is just a small motorsport gathering. But nowadays, it has developed into a large-scale, professionally organized, and globally influential motorcycle rally event.
“Part road trip, part festival, part cultural pilgrimage” is often used to describe the rally’s unique atmosphere of freedom, rebellion, and community.
Sturgis is more than just a motorcycle gathering; it represents a cultural pilgrimage for motorcyclists—a place where freedom, community, and open roads combine on an unparalleled scale.
2. Daytona Bike Week (Florida)
Daytona bike week (florida) - one of the largest and most iconic motorcycle events in the United States
Time: Typically held in late February to early March
Duration: 10 days (Friday to Sunday of the following week)
Example: Feb 27 – Mar 8, 2026 (85th anniversary)
Location: Daytona Beach, Florida
Daytona Motorcycle Week is one of the largest and most iconic motorcycle events in the United States, held annually in Daytona Beach.
It’s more than just a meetup for riders — it’s sort of become a symbol of American motorcycle culture in its own right.
Back in 1937, this event was just a single race. But now, it’s grown into this 10-day festival spread over multiple locations. And, it has become a mix of motorsports, nightlife, and sightseeing that attracts over 400,000 visitors each year, sometimes edging closer to half a million. That kind of crowd shows it keeps pulling people in despite the years.
What’s cool is it’s not confined to one region. The whole rally week covers central Florida, with Daytona Beach as the main hub but also including places like Ormond Beach, Deland, and around Volusia County. This setup is truly friendly; riders can check out different scenes and roads every day, which keeps things fresh.
Daytona’s specialties really come from its variety. You might start your day watching fast-paced races, spend the afternoon cruising scenic coastal roads like the Ormond Loop, and then hit up Main Street in the evening where the energy is high.
This motorbike rally week is a perfect blend of riding freedom and social energy. Believe it or not, it creates an immersive experience that other motorcycle gatherings can hardly match.
Timing matters too. Daytona Motorcycle Week kicks off the riding season, giving folks a chance to shake off winter, reconnect with other riders, and get energized for what’s ahead. Even if the number of attendees varies, its role and impact on American motorcycle culture rarely waver.
3. Laconia Motorcycle Week (New Hampshire)
Laconia Motorcycle Week (New Hampshire)
Time: 9 days in June, always the 2nd and 3rd full weekend
2026 Dates: June 13–21, 2026
Main hub: Weirs Beach, Lakeside Avenue
Region: New Hampshire Lakes Region (near White Mountains)
As one of the top ten motorcycle rallies in the United States, Laconia Motorcycle Week is unique not for its size or chaos, but for its unparalleled heritage and authentic riding experience. Founded in 1916, Laconia Motorcycle Week is often called as the world's oldest motorcycle rally. Its origins trace back to early "Gypsy tours" where riders gathered to explore New England’s scenic roads.
Every June, this event takes over New Hampshire’s Lake District, especially around Wells Beach, running for about nine days. It draws in hundreds of thousands of riders year after year.
What makes Laconia special is how it mixes deep roots, great rides, and a strong sense of community. Riders come not only to participate in events like the legendary Louden Classic (one of America's most prestigious motorcycle races), but also to experience the scenic routes around Lake Winnipesokey and the White Mountains, offering some of the best riding experiences in the Northeast.
Compared to motorcycle rallies like Sturgis or Daytona, the Laconia rally is more relaxed and rider-centric. It perfectly blends classic motorcycle culture with breathtaking natural scenery. For many motorcycle enthusiasts, it represents the purest form of a motorcycle rally—a grand celebration of riding, history, and road freedom.
If you're looking for a rally that offers riding fun without being just a party, Laconia is an excellent choice.
4. Americade (Lake George, New York)
Americade (Lake George, New York) - world's largest multi-brand motorcycle touring rally
Founded: 1983
Duration: Lasts a full week; the first week of June (late May in some years)
Americade is America’s Premier Touring Motorcycle Rally.
Founded in 1983, the Americade takes place in the charming village of Lake George every year. Now, it is the world’s largest multi-brand touring motorcycle rally, and one of the most refined riding events in the United States.
Each year, it attracts tens of thousands of riders, generating over 100,000 visitor days during its late-spring run.
Unlike high-energy party rallies, Americade is built around the riding experience itself. Set against the breathtaking backdrop of the Adirondack Mountains and nearby Vermont routes, it offers some of the best touring roads in the Northeast—twisty, scenic, and refreshingly uncongested.
The week-long event features guided and self-guided “MiniTours,” one of the largest motorcycle expos in the country, and extensive factory demo rides from major brands.
And if you want a break from the bikes, there are boat cruises, live shows, and a friendly crowd that makes the whole thing feel like a community gathering.
What really makes Americade different is how calm, chill and well-organized it is. It’s not about loud engines or chaos—it's about meeting fellow riders, discovering new roads, and just enjoying the freedom that comes with being on two wheels.
5. Republic of Texas (ROT) Rally (Austin, Texas)
Republic of Texas (ROT) Rally - the largest ticketed motorcycle rally in the country
Founded: 1995
Duration: Typically 4 days (Thursday–Sunday, shortly after Memorial Day)
Typical attendance: ~200,000 visitors annually
2026 dates: May 14 - 17, 2026
Location: Austin, Texas
The Republic of Texas (ROT) Rally stands out as one of the top 10 motorcycle rallies in the United States, offering a unique blend of biker culture and full-scale festival energy. Held annually in Austin since 1995, it is widely recognized as the largest ticketed motorcycle rally in the country, drawing tens of thousands of riders and up to 200,000 spectators during its peak downtown events.
What makes ROT truly special is its festival-style structure. Unlike traditional open rallies, ROT combines motorcycles with live concerts, custom bike shows, stunt performances, and a massive vendor expo—all within a gated venue. The highlight is the iconic Friday night parade through downtown Austin, where thousands of bikes take over the streets in one of the most electrifying spectacles in American motorcycling.
With its mix of high-energy nightlife, organized events, and strong sense of community, ROT delivers an experience that goes beyond riding. For those seeking a rally that fuses music, machines, and Texas-sized atmosphere, it remains a must-visit event on any rider’s bucket list.
6. Bikes, Blues & BBQ (Arkansas)
Bikes, Blues & BBQ (Arkansas)
Founded: 2000
Duration: Typically 4 days (last week of September and ends on Sunday)
Typical attendance: ~100,000 visitors at peak seasons
2026 dates: Sep 30 - Oct 3, 2026
Location: Rogers, Arkansas
Bikes, Blues & BBQ (Arkansas) stands out as one of the most unique motorcycle rallies in the United States, blending scenic riding, live music, and a strong charitable mission into a single experience.
Held annually in Northwest Arkansas, the rally draws riders to the winding roads of the Ozark Mountains—especially iconic routes like the Pig Trail—offering some of the best riding terrain in the central U.S.
Beyond the ride, the event delivers a full festival atmosphere, with multiple stages of live blues, rock, and country music alongside a wide range of Southern barbecue vendors.
What truly sets Bikes, Blues & BBQ apart is its identity as a “rally with a purpose.” Since its founding in 2000, the event has raised over $3 million for local charities, supporting women, children, and underserved communities.
Attendance has reached hundreds of thousands of participants, making it one of the largest charity motorcycle rallies in the country.
Unlike more hardcore biker gatherings, BBB emphasizes inclusivity and community involvement, welcoming both riders and non-riders. The result is a balanced rally experience—part road trip, part music festival, and part philanthropic event—making it a standout destination for those seeking more than just a traditional motorcycle rally.
7. Arizona Bike Week (Scottsdale, Arizona)
Arizona Bike Week
Dates (2026): April 8–12
Duration: 5 days
Attendance: ~75,000+ participants in recent years
Venue Size: ~360–380 acres of event space
Arizona Bike Week is one of the largest and most energetic motorcycle rallies in the American Southwest, held annually in Scottsdale at the expansive WestWorld of Scottsdale. Typically taking place in early April, this five-day event blends high-performance motorcycle culture with a festival atmosphere of live music, desert riding, and large-scale entertainment.
Imagine a motorcycle rally framed by the scorching beauty of the Sonoran Desert—Arizona Bike Week offers just that, but with a certain polish you don’t always get. Instead of sprawling out across a wide area, this event keeps everything in one place: WestWorld of Scottsdale. It’s a huge, 380-acre spot built to handle big festivals without the usual hassle.
What makes this rally stand out is how it mixes motorcycle culture with a music festival vibe. During the day, you can wander among hundreds of vendors, catch stunt shows, or get a feel for the latest bikes. When night falls, the scene shifts to concerts with well-known artists, bringing a party atmosphere that pulls in not only die-hard riders but also those just looking for a lively crowd.
Timing adds to the draw as well. Scheduled in early April, the weather tends to be just right—warm and dry, ideal for cruising the scenic desert roads around Scottsdale. With tens of thousands of folks showing up each year, it’s become a go-to event in the Southwest.
If you’re after a rally that’s well put together and offers a solid mix of riding, entertainment, and easy access, Arizona Bike Week comes pretty close to ticking all those boxes in the U.S. motorcycle scene.
8. Myrtle Beach Bike Week
Myrtle Beach Bike Week
Main event: Spring Rally (typically mid-May)
2026 dates: May 8–17
Location: Not a single venue—spread across a 60-mile coastal stretch known as the Grand Strand, including:
North Myrtle Beach
Murrells Inlet
Surfside Beach
Georgetown
First launched in 1940, Myrtle Beach Bike Week began as a small gathering of riders enjoying coastal roads and ocean views. Over the decades, it has grown into a massive, multi-day motorcycle festival attracting 300,000+ participants annually.
Today, it is widely considered one of the largest motorcycle rallies in the U.S., with a strong reputation for combining scenic riding, beach culture, and a social biker atmosphere.
What makes Myrtle Beach Bike Week stand out from other big rallies in the U.S. is how it blends riding with a relaxed vacation vibe.
It’s not just about one spot; the whole Grand Strand gets in on the action.
Riders can chart their own path—whether that means rolling down Ocean Boulevard, kicking back on the beach, or bouncing between biker hangouts.
The event’s charm comes from how versatile and flexible it is.
During the day, riders take it easy with coastal rides and scenic group tours, often with the ocean breeze right alongside them.
When night falls, everything shifts into a lively social scene—live music, packed bars, and spontaneous meet-ups that keep fueling the energy well past dark.
What really gives it character is the welcoming, repeat crowd. Many people come back year after year, turning Bike Week into more than just an event—it's like a yearly reunion.
With over 300,000 riders showing up, the streets are always buzzing. You’ve got motorcycles lining every corner, engines humming, and a shared enthusiasm that ties everyone together.
In the end, Myrtle Beach Bike Week isn’t about strict schedules or rigid plans. It’s about freedom, connection, and the vibe—you care as much about the ride and the people as you do about the bikes, all set against the backdrop of the coast.
9. Laughlin River Run (Nevada)
Laughlin River Run (Nevada)
The Laughlin River Run was one of the most popular motorcycle rallies in the western United States.
It started in 1983 with only a few hundred riders, but it quickly grew into a huge event, attracting up to 70,000 people at its peak.
It was usually held in late April and became a favorite trip for riders looking for warm weather and open roads.
The rally took place in Laughlin, a small town next to the Colorado River. This location made it special because riders could enjoy both desert highways and beautiful river views.
Many people also rode along parts of historic Route 66 or visited nearby towns in Arizona, turning the trip into a full riding adventure.
During the event, there was always a lot to do. Riders could check out bike shows, shop at vendor booths, join poker runs, and watch live music and shows.
At night, the casinos and hotels became busy with parties and social events, giving the rally a fun and lively feeling.
Although the rally was very popular, it stopped happening after 2019 and is now considered discontinued.
Even so, it is still remembered as a classic West Coast motorcycle rally.
10. Born-Free Motorcycle Show (California)
Born-Free Motorcycle Show (California)
The Born-Free Motorcycle Show is one of the most popular custom motorcycle rally in the United States. It takes place every year at Oak Canyon Park in California. This show is known for its focus on vintage bikes, classic choppers, and custom builds. Unlike many big motorcycle rallies, Born-Free is not about big companies or flashy displays. It is about real riders, creative builders, and a love for motorcycles.
The event started in 2009, created by Mike Davis and Grant Peterson. In the began it is just a small gathering; now, it has grown into a major event that attracts thousands of people from around the world. One of the main highlights is the “Invited Builder” area, where selected builders show bikes they made just for the event. There are also vendors, swap meets, live music, and exciting shows like the Wall of Death.
Born-Free feels different from most motorcycle events. It is more relaxed and friendly, like a big meetup instead of a formal show. People come here not just to look at bikes, but to connect with others who share the same passion. You can walk around and see many different styles, from simple old-school choppers to rare vintage motorcycles.
One of the best parts is how close you can get to the builders. Many of them are happy to talk about their bikes and share their ideas. This makes the event more fun and personal, especially for younger riders or beginners who want to learn more.
Another reason people enjoy Born-Free is the strong feeling of freedom. There is no pressure to win awards or follow strict rules. Everyone can express their own style. Each bike is different, and each rider has their own story.
With its open outdoor setting and laid-back vibe, Born-Free is more than just a motorcycle show. It is a place where people come together to enjoy riding, creativity, and community.
Best Motorcycle Rallies by Riding Style
If you’re trying to choose just one, match it to your riding style:
Best scenic riding: Sturgis, Americade, Bikes Blues & BBQ
Best party atmosphere: Daytona, Sturgis, ROT
Best for touring riders: Americade, Laconia
Best for custom culture: Born-Free, ROT
When to Go: 2026 Rally Calendar Overview
March: Daytona Bike Week
April: Arizona Bike Week, Laughlin River Run
May: Myrtle Beach Bike Week
June: Laconia, Americade, ROT, Born-Free
August: Sturgis
September: Bikes Blues & BBQ
Smart riders sometimes plan multi-rally trips, especially in June when several events overlap.
What to Pack for Attending a Motorcycle Rally
A few things make a big difference:
Full-face helmet
Layered riding gear
Ear protection
Rain gear
Basic tools
And if you’re riding with friends, a helmet intercom system is one of those upgrades you don’t realize you need—until you have it. Being able to talk, share directions, or warn about road hazards makes group riding smoother and safer, especially in busy rally traffic.
Dual Bluetooth Chip Design.
10 Riders Group Communication, 2000m Distance!
Optional HRSQ Mic and Speakers, CVC + ENC + DSP Noise Cancelation.
Listen to Music/GPS and Intercom At the Same Time.
IP67 Waterproof.
Compatible with Fodsports Connect APP
FM Radio, Music Sharing, Voice Commands.
Question: What is the biggest motorcycle rally in the US?
Answer: Sturgis is the largest, with over 500,000 attendees in peak years.
Question: Which rally is best for beginners?
Americade is the most beginner-friendly due to its structure and organized rides.
Question: Are motorcycle rallies safe?
They can be, if you ride defensively and avoid high-risk situations, especially at night.
Question: Do you need to register for a rally?
Many rallies are free to attend, but certain events and rides may require registration.
Question: What should I bring to a motorcycle rally?
Bring riding gear, weather protection, earplugs, and communication tools like a helmet intercom.
Final Thoughts
The “best” motorcycle rally really depends on what kind of rider you are.
If you want legendary status, go to Sturgis.
If you want great roads and fewer crowds, try Americade or the Ozarks.
If you’re chasing energy and nightlife, Daytona or ROT won’t disappoint.
Plan early, ride smart, and make the most of it—because the right rally isn’t just an event, it’s a ride you’ll remember for years.
Riding motorcycles with friends is a unique experience. The sound of all those engines, the shared roads, and the camaraderie that comes with it all make group rides unforgettable. However, it's not all smooth sailing. Riding alone is one thing; navigating a group is another. Therefore, essential motorcycle group riding tips are needed.
You've got a mix of experience levels, bikes that behave differently, and less room to maneuver when something goes wrong.
Without a bit of structure, a day of fun can easily become something else entirely.
That's why experienced riders adhere to unwritten protocols, maintain proper formations, and typically have designated leaders steering the group. The goal is simple: keep everyone safe while still enjoying the ride.
In this post, I’ll share some down-to-earth tips for group riding, stories from actual rides, and the safety habits that help riders keep the whole crew rolling smoothly.
These motorcycle group riding safety tips will largely help the group riders.
Top 15 Motorcycle Group Riding Tips for Safety and Control
Ride in a staggered motorcycle formation for better spacing
Keep at least a 2-second gap from the rider directly ahead
Never pass the ride leader unless instructed
Assign a ride leader and a sweeper before starting
Respect traffic laws and other road users at all times
💡 Pro tip: Experienced riders focus less on speed and more on smooth, predictable riding. Consistency keeps the entire group safe.
Why Motorcycle Group Riding Requires Special Skills?
Riding in a group is very different from riding alone. When multiple riders share the same lane space on the road, the possibility for mistakes increases considerably.
If one rider brakes suddenly, the other riders behind him could easily react instinctively and brake as well. The reaction travels through the whole riding group like a chain.
This is why inexperienced groups often experience “accordion effects,” where riders repeatedly accelerate and brake.
During a weekend ride I joined through the mountains, one rider entered a corner too quickly and tapped the brakes mid-turn. Within seconds, three riders behind him also had to brake abruptly. Fortunately, everyone maintained their balance and no accident occurred. This showed how quickly the mistakes spread in group riding.
Because of these risks, experienced groups rely on structure and discipline. Good planning, clear leadership, and proper formations make group rides safer and more enjoyable.
group motorcycle riding on spring days
Pre-Ride Planning: The Most Important Step for Safe Group Riding
Most group riding problems start before the ride even begins. Proper planning prevents confusion and ensures motorcycle group riding safety on the road.
Choose the Right Group Size
Large groups look impressive, but they are harder to manage.
Most experienced riders recommend 5 to 7 motorcycles per group.
If more riders join, it’s safer to split into smaller groups with separate leaders and sweepers.
Smaller groups have these advantages:
react faster to traffic
navigate intersections more easily
reduce crash risk
Plan the Route in Advance
The ride leader should plan the route before the ride.
Important details include:
fuel stops
rest areas
scenic stops
construction zones
difficult roads
Sharing the route through GPS apps or navigation systems helps prevent riders from getting lost.
Assign Leadership Roles
Clear leadership makes a huge difference during group rides.
Ride Leader
The ride leader controls the pace and direction of the whole group ride team.
The leader should always ride smoothly and predictably.
Sweeper (Tail Rider)
The sweeper rides at the back of the group.
Their responsibilities include:
monitoring the group
assisting riders with mechanical issues
communicating problems to the leader
ensuring no rider gets left behind
Sweepers are often experienced riders with strong road awareness.
Hold a Pre-Ride Briefing
Before the ride begins, experienced groups gather for a quick briefing.
Topics usually include:
planned route
fuel stops
riding formation
communication signals
regroup points
This short meeting prevents confusion once the group starts moving.
Motorcycle Group Riding Formations
So, how to ride in a motorcycle group?
Riding in a motorcycle group requires discipline, awareness, and proper motorcycle club riding formation. The most common and safest setup is the staggered motorcycle formation, where riders alternate left and right positions in the lane while keeping safe spacing. Always follow the ride leader, maintain your position, and avoid sudden movements. Keep at least a 2-second gap from the rider directly ahead, and watch the rider behind you. On twisty or narrow roads, switch to single file for better control. Most importantly, ride at your own pace and communicate clearly to keep the entire group safe.
Using the correct group riding motorcycle formation and best motorcycle group riding positions will largely improve safety and visibility.
Staggered Motorcycle Formation
Staggered motorcycle formation - Motorcycle Group Riding Tips
The staggered motorcycle formation is the most common formation for street riding.
In this formation:
the leader rides in the left portion of the lane
the second rider rides in the right portion
the pattern repeats behind them
Spacing typically follows this group ride rule:
1 second behind the rider in the opposite lane position
2 seconds behind the rider directly ahead
This formation provides:
better visibility
more reaction time
efficient lane use
Single File Formation
Single file formation on the road - group riding motorcycle formation
Sometimes staggered formation is not safe.
Switch to single file when riding on:
twisty mountain roads
narrow rural roads
poor pavement conditions
heavy traffic
Single file increases maneuvering space during corners.
Highway Riding Formation
Highway riding requires larger spacing.
Wind turbulence and higher speeds mean riders need extra reaction time.
Good highway practices include:
increasing following distance
avoiding blocking traffic
making gradual lane changes
The 10 Essential Motorcycle Group Riding Rules
These motorcycle group riding rules are widely used by experienced riders.
During one long-distance ride I joined, our leader used an intercom to warn us about gravel in a corner ahead. Every rider slowed before reaching the turn, avoiding what could have been several crashes.
Fodsports FX7 Bluetooth Mesh Intercom - motorcycle group riding communication system
Bluetooth Mesh Intercom.
Dual Bluetooth Chip Design.
10 Riders Group Audio, 2000m Distance!
HRSQ Mic and Speakers, CVC + ENC + DSP Noise Cancelation.
Listen to Music/GPS and Intercom At the Same Time.
IP67 Waterproof.
Support pair with Fodsports Connect APP
FM Radio, Music Sharing, Voice Commands.
Question: What is the safest formation for motorcycle group riding?
Answer: The safest formation is the staggered motorcycle formation. It allows riders to maintain safe spacing while maximizing lane visibility.
Question: How many motorcycles should ride in a group?
Answer: Most experts recommend 5 to 7 motorcycles per group. Larger groups should split into smaller teams with separate leaders.
Question: What does a motorcycle ride leader do?
Answer: The ride leader plans the route, controls the riding pace, signals turns and hazards, and manages the group during the ride.
Question: How far apart should motorcycles ride in a group?
Answer: In staggered formation, riders typically maintain 1 second behind the rider in the opposite position and 2 seconds behind the rider directly ahead.
Question: Should beginner riders join group rides?
Answer: Yes, beginners can join group rides, but they should ride at the back, maintain extra spacing, and avoid trying to keep up with faster riders.
Question: Can motorcycle groups stop traffic?
Answer: No. Motorcycle groups generally cannot legally stop traffic. Only police or authorized personnel can control traffic. Riders blocking intersections are usually breaking traffic laws, though permitted events with police escorts are exceptions.
Question: Can a motorcycle riding group wear patches? Answer: Yes. Motorcycle riders can wear patches, and it’s generally legal. But club patches are usually only for members (you need to join a motorcycle club and win their patch). Wearing them without permission can cause problems or disrespect.
Final Thoughts: Enjoy Group Riding the Safe Way
Group rides can be some of the most memorable experiences in motorcycling. Riding through scenic roads with friends, sharing stops at small towns, and enjoying the journey together is what motorcycling culture is all about.
But great group rides don’t happen by accident.
They rely on clear motorcycle group riding rules, experienced leadership, and disciplined riders who respect the safety of everyone in the group.
Follow these motorcycle group riding tips, ride within your limits, and communicate clearly. When every rider works together, group rides become smoother, safer, and far more enjoyable.
If you ride a street bike long enough, you eventually notice something that new riders rarely think about: helmet noise. What are the best helmets for street bikes? Which one is the quietest?
The first time I rode for more than three hours on the highway, I realized the loudest thing on my bike wasn’t the engine—it was the wind hitting my helmet.
At highway speeds, wind noise inside a helmet can easily reach around 90–100 decibels, which is loud enough to damage hearing over time.
That’s why experienced riders eventually start searching for the quietest motorcycle helmet possible.
After many years riding street bikes—from naked bikes to sport touring machines—and testing different helmets, I’ve learned one simple truth:
No helmet is completely silent, but some are dramatically quieter than others.
In this guide, I’ll share:
What actually makes a helmet quiet
The best helmets for street riding
The 10 quietest helmets you can buy today
Real rider tips for reducing wind noise
Why Helmet Noise Matters for Street Riders?
When you’re riding through twisty back roads at 40 mph, wind noise isn’t a big deal.
But once you hit the highway at 65–80 mph, things change quickly.
The wind rushing around your helmet creates turbulence, and that turbulence turns into noise.
Studies and riding data show that wind noise at 50 mph can reach about 92 dB, even before engine noise is considered.
That level of noise can cause:
Rider fatigue
Constant loud wind noise wears you down faster than people expect.
After a long ride, you may feel tired even if your body isn’t sore.
Hearing damage
Long exposure to loud wind noise can permanently damage hearing.
Many experienced riders wear earplugs on every ride for this reason.
Communication problems
If you use a helmet intercom, too much wind noise makes conversations difficult.
A quieter helmet helps your intercom sound clearer.
Bluetooth Mesh Intercom.
Dual Bluetooth Chip Design.
10 Riders Group Audio, 2000m Distance!
HRSQ Mic and Speakers, CVC + ENC + DSP Noise Cancelation.
Listen to Music/GPS and Intercom At the Same Time.
IP67 Waterproof.
Support pair with Fodsports Connect APP
FM Radio, Music Sharing, Voice Commands.
After riding with dozens of helmets over the years, I’ve noticed something important:
Noise usually comes from turbulence—not just airflow.
The quietest helmets are designed to manage airflow smoothly.
Here are the biggest factors.
1. Aerodynamic Shell Design
Helmet companies spend huge amounts of time in wind tunnels refining shell shapes.
For example, the Shoei RF‑1400 was redesigned with improved aerodynamics that reduced drag and lift compared with its predecessor, helping reduce turbulence and noise.
Less turbulence = less noise.
2. Tight Visor Seal
One of the most annoying helmet noises is whistling.
This usually happens when the visor seal isn’t tight.
High-quality helmets use spring-loaded visor mechanisms that keep the shield sealed tightly against the shell.
For example, the Fodsports FS 90 helmet uses a lock to keep the visor in position. The lock in front can lock the windshield firmly in place, providing added stability and safety.
3. Neck Roll and Chin Curtain
A lot of noise enters from the bottom of the helmet.
That’s why touring helmets often have thick neck rolls and removable chin curtains.
These block air from rushing inside the helmet.
4. Interior Padding
Premium helmets use multi-layer liners designed to absorb sound vibrations.
The padding also improves fit, which is crucial.
5. Proper Helmet Fit
Here’s something many riders overlook:
A poorly fitting helmet will always be louder.
Choose a helmet that matches your head shape (round, intermediate oval, or long oval) seals better and reduces noise.
Types of Street Motorcycle Helmets (Noise Comparison)
Not all helmets are equal when it comes to noise.
Here’s how the main styles compare.
Full-Face Helmets (Quietest)
Full-face helmets usually provide the best noise isolation.
They have:
solid chin bars
tight seals
better aerodynamics
That’s why most quiet helmet lists are dominated by full-face models.
Modular Helmets
Modular helmets flip open at the chin.
They’re convenient for touring riders but usually slightly louder than full-face helmets.
However, brands like Schuberth have improved modular designs dramatically.
Open-Face Helmets
Open-face helmets expose your face to wind.
These are usually the loudest helmets.
They’re popular with cruiser riders but not ideal for long highway rides.
The Shoei RF-1400 is a solid full-face helmet that riders tend to like for a few good reasons. They are featured with chiefly safety, comfort, and keeping the wind noise down.
It’s built with Shoei’s AIM+ multi-fiber shell, which is pretty sturdy, and it ticks all the boxes for DOT and Snell M2020 safety standards, so you know it’s designed to protect well out there on the road.
Weighing in at about 3.6 pounds, it doesn’t feel bulky, especially when you’re on longer rides.
One standout feature that gets a lot of attention is how quiet it is.
Shoei put quite a bit of work into the aerodynamics—the shell was shaped in a wind tunnel, and they added things like Vortex Generators, tight window seals, and thicker cheek pads.
These all chip in to cut down on that annoying wind turbulence and noise, especially when you’re cruising at highway speeds.
From my own time wearing it, the RF-1400 definitely cuts through the usual helmet noise.
When you’re doing 65 to 70 mph, the wind sounds smooth rather than rough, which makes it easier to hear music or communicate through your intercom without constant bumps of noise.
There’s also a snug neck roll and chin skirt that block out some extra wind around your face.
It’s not completely silent—nothing really is—but for day-to-day riding and longer trips, it’s among the quietest helmets I’ve bumped into.
If you’re sensitive to wind noise, it’s worth a close look.
This helmet is often considered the benchmark quiet street helmet.
2. Schuberth C5 - Quietest modular helmet
Schuberth C5 - Quietest modular helmet for street bikes
Price: $699
Schuberth helmets are famous for low wind noise.
The Schuberth C5 Modular Helmet is a premium flip-up(modular) motorcycle helmet designed for touring and daily street riding.
It uses a fiberglass shell reinforced with carbon fiber and meets the modern ECE 22.06 safety standard.
The helmet also includes a Pinlock-ready visor, built-in sun visor, and is pre-wired for the helmet communication system.
Its ventilation system uses a large top intake and a dual chin vent to keep airflow moving on long rides.
The C5 is widely known as one of the quietest modular helmets available.
Its shell was shaped in a wind tunnel, and features like a redesigned neck roll, tight visor seal, and chin curtain help reduce turbulence and wind noise.
Tests report about 85 dBA at around 60 mph, which is extremely quiet for a modular helmet.
From my riding experience, the C5 feels very calm at highway speeds. Even on a naked bike around 65 mph, wind noise stays smooth rather than loud.
The thick neck padding really seals the helmet well, making music or intercom audio easy to hear.
Like any helmet, earplugs still help on long rides, but overall, it’s one of the quietest modular helmets for street motorbikes I’ve used.
3. Shoei GT‑Air 3 - Best sport-touring helmet
Shoei GT‑Air 3 - best helmets for street bikes
Price: $779.99
The Shoei GT‑Air 3 Helmet is a premium full-face helmet designed for sport-touring and everyday street riding.
It uses Shoei’s AIM composite shell and multi-density EPS liner for strong impact protection, and it meets DOT safety standards in the U.S.
These features make it very convenient for commuting or long distance rides.
Now, let's have a look at its quite performance. Actually, it is one of the biggest strengths of the GT-Air 3.
The aerodynamic shell and improved spoiler help reduce wind turbulence, and many reviewers say it feels very stable at highway speed.
In testing, it performed as quiet as other premium Shoei helmets like the RF-1400, which is known for low wind noise.
Let me share some of my real-life experience using the GT-Air 3.
Firstly, it lets me feel calm and comfortable on longer rides.
When cruising around 60–70 mph, the wind noise is smooth rather than loud. This makes it easier to hear music or intercom audio.
The neck roll and cheek pads seal the helmet well.
It’s not completely silent, but for daily street riding and touring, it’s definitely one of the quieter helmets I’ve used.
4. Arai Signet‑X - Best for long-oval head shapes
Arai Signet‑X - motorcycle helmets for street riding
Price: $749.95
The Arai Signet‑X Helmet is a premium full-face street motorcycle helmet designed mainly for riders with a long-oval head shape.
It uses Arai’s PB-SCLC composite shell and meets DOT and Snell safety standards, offering strong impact protection for street riding.
The helmet also includes a Pinlock-ready VAS-MV shield, adjustable ventilation, and removable comfort liners for better fit and airflow.
In terms of noise, the Signet-X performs fairly well for a traditional street helmet.
Thick interior padding and a large chin curtain help block wind coming from below, which reduces overall wind noise while riding.
However, with the top vents open at highway speeds, some wind rushing can still be heard. Therefore, many riders still use earplugs for long rides.
Based on the riding experience from many riders, the Signet-X feels very comfortable on longer rides, especially if you have a long-oval head shape.
At around 60–70 mph the wind noise is manageable and smooth.
It’s not the quietest helmet on the market, but it feels solid, stable, and very comfortable for everyday street riding.
5. AGV K6 - Lightweight and surprisingly quiet
AGV K6 - best street motorcycle helmets
Price: $469.95
The AGV K6 Helmet is a lightweight full-face motorcycle helmet designed for sport and street riding.
It uses a carbon-aramid fiber shell with a multi-density EPS liner, which helps provide strong protection while keeping the helmet very light—about 2.8 lb (around 1.3 kg).
It is certified with DOT and ECE safety standards, and it also includes a Pinlock-ready visor, good ventilation, and a comfortable interior liner.
In terms of noise, the K6 performs surprisingly well for such a lightweight helmet.
The aerodynamic shell, snug neck roll, and chin curtain help reduce wind turbulence while riding.
Many riders report that wind noise stays low even at highway speeds, and audio from speakers or intercom systems remains clear.
My partner Kevin uses the AGV K6. Let's see what he says about this helmet for street rides:
The K6 feels very light and comfortable on longer rides. At around 60–70 mph, the wind noise is smooth and not distracting. The good neck seal helps block extra wind, making music and intercom audio easier to hear. It’s not completely silent, but for daily street riding it feels impressively quiet and very comfortable.
6. HJC RPHA 71 - Best value quiet helmet
HJC RPHA 71 - best road motorcycle helmet
Price: $244.97
If you want a premium full-face helmet designed for sport-touring and everyday street riding, the HJC RPHA 71 is a perfect choice.
It uses a lightweight composite shell and meets the latest ECE 22.06 safety standard.
And, it is equipped with features like a Pinlock-ready visor, drop-down sun visor, and compatibility with the Bluetooth intercom system.
The helmet weighs about 1.6 kg, which is typical for modern touring helmets.
Besides, it offers comfortable padding and good airflow for long rides.
In terms of noise, the RPHA 71 performs reasonably well but is not the quietest helmet in its class.
Its aerodynamic shape and front spoiler are designed to reduce wind turbulence. But some reviews note that the top vent can create a whistling sound at medium to high speeds.
Because of this, wind noise may still be noticeable on fast highway rides.
Here is a riding experience shared by Lance, who is in the same motorcycle riding club as me.
I think the RPHA 71 is stable and comfortable for daily street riding. Sometimes, I ride at around 60–70 mph, the wind noise is manageable and smooth, especially if I use earplugs. The helmet seals well around the neck, which helps reduce airflow. It’s not the quietest helmet I’ve used, but for commuting and touring it offers a good balance of comfort, features, and price.
Shoei Neotec 3 - best recommended motorcycle helmet for street bikes
Price: $949.99
The Shoei Neotec 3 Helmet is a premium modular motorcycle helmet designed for touring and everyday street riding.
It uses Shoei’s AIM composite shell, and many versions meet modern ECE 22.06 safety standards.
The helmet includes a flip-up chin bar, built-in sun visor, Pinlock-ready shield, making it very convenient for commuting or long highway trips.
When it comes to noise, the Neotec 3 performs very well for a modular helmet.
Shoei improved the aerodynamics, added a thicker neck roll, chin curtain, and tighter visor seal, all of which help reduce wind turbulence.
Tests and reviews say it is quieter than the previous Neotec 2, and overall it ranks among the quieter modular helmets available today.
I have the Neotec 3 for years, I usually use this helmet for street bike riding tours.
Based on my feelings, the Neotec 3 always works smoothly and stably at highway speeds.
Around 60–70 mph, wind noise is controlled and not harsh, so intercom audio stays clear. The neck seal blocks most wind from below.
It’s not completely silent like a full-face racing helmet, but for a modular touring helmet, it feels impressively quiet and comfortable for daily street riding.
8. Schuberth S3 - Premium quite touring helmet
Schuberth S3 - quite touring helmet
Price: $649.00
The Schuberth S3 Helmet is a premium full-face helmet designed for sport-touring and everyday street riding.
It uses a fiberglass shell with reinforced materials and meets ECE 22.06 and DOT safety standards.
The helmet includes a drop-down sun visor, Pinlock anti-fog shield, and is pre-wired for the Schuberth SC2 communication system.
It also has a multi-channel ventilation system and a comfortable removable liner.
In terms of noise, the S3 is known for being a relatively quiet helmet.
Its aerodynamic shape, tight neck roll, and visor “turbulators” help reduce wind turbulence.
Schuberth claims about 85 dB at around 62 mph, which is impressive for a touring helmet.
The Schuberth S3 always lets me feel stable on the highway. I usually ride at around 60–70 mph, and wind noise stays smooth and controlled.
The good neck seal helps block extra airflow, so music or intercom audio is easy to hear.
It’s not completely silent, but it feels very calm and comfortable for long street rides.
9. Bell Race Star Flex DLX - High-performance sport helmet
Bell Race Star Flex DLX - High-performance sport helmet for street motorbikes
Price: $869.95
The Bell Race Star Flex DLX is a high‑end street and sport helmet.
It is built with a 3K carbon fiber shell and Flex impact liner for great protection in crashes.
Moreover, it includes a ProTint™ photochromic visor that adjusts to light, magnetic cheek pads, and speaker pockets for Bluetooth gear.
On the street, Bell Race Star Flex DLX is not the quietest, but still worth choosing.
Many riders notice wind noise at highway speeds and usually use earplugs to make long rides comfortable.
Ventilation is good in warm weather but the visor has limited positions.
In daily use I found it feels premium and protective, fits snugly after break‑in, and is light, but I definitely ride with earplugs for quieter cruising.
10. HJC RPHA 91 - One of the quietest modular helmets
HJC RPHA 91 - One of the quietest modular helmets
Price: $439.78
The HJC RPHA 91 is a high‑quality modular helmet built for street and touring riders.
It uses a lightweight Premium Integrated Matrix EVO shell that’s both strong and light, and features a clear, distortion‑free visor plus an internal sun shield for sunny days.
Ventilation is good with multiple intakes and exhausts, and it’s ready for Smart HJC Bluetooth systems if you want a communication system.
Most riders find it comfortable for long rides thanks to a plush, low‑noise interior and eyewear‑friendly fit.
In real use, it feels stable at highway speeds, the flip‑up chin bar is handy in traffic, and noise is lower than many other modular helmets — though fit and seal are key to comfort.
Personally, I liked how it handled long street rides with clear vision and decent airflow, but I noticed that a proper fit is important to keep wind noise down.
Quietest Motorcycle Helmet Brands
Certain brands consistently focus on acoustic engineering.
Here are the most respected ones.
Schuberth
Schuberth has built its reputation around quiet helmets.
Their touring helmets are often designed in wind tunnels specifically to reduce noise.
Shoei
Shoei strikes a great balance between:
aerodynamics
comfort
ventilation
noise reduction
Many riders consider Shoei the safest choice for long highway rides.
Arai
Arai helmets prioritize safety first, but their aerodynamic shell shapes also help reduce wind noise.
HJC
HJC offers impressive quiet helmets at more affordable prices.
My Real-World Experience With Quiet Helmets
After riding thousands of miles on different street bikes, I’ve learned something interesting.
Sometimes the motorcycle itself affects helmet noise more than the helmet.
Riding style: Daily commuting and touring riders benefit most from quiet helmets.
Head shape: Different brands fit different head shapes. Trying helmets on is always the best approach.
Weight: Light helmets reduce neck fatigue.
Ventilation: Quiet helmets still need good airflow.
Budget: Premium helmets cost more but often last longer.
Final Thoughts: Choosing the Best Quiet Helmet
After years of riding, I’ve learned something important:
There is no perfectly silent helmet.
But a good quiet helmet can make a massive difference on long rides.
If you want the safest and quietest experience on a street bike, start with:
Shoei RF‑1400
Schuberth C5
Shoei GT‑Air 3
Combine that with earplugs and a properly fitted helmet, and you’ll enjoy much quieter rides.
And trust me—once you experience a quiet helmet on a 300-mile ride, you’ll never go back.
People Also Ask
What is the quietest motorcycle helmet?
The quietest motorcycle helmets are usually premium touring or sport-touring models such as the Shoei RF‑1400, Schuberth C5, and Shoei GT‑Air 3. These helmets use aerodynamic shell designs, tight visor seals, and sound-dampening liners to reduce wind noise.
Are expensive motorcycle helmets quieter?
Often yes. Premium helmets usually include:
better aerodynamics
thicker padding
tighter seals
These features reduce turbulence and noise.
Are modular helmets louder than full-face helmets?
Usually yes. Because modular helmets have a hinge and extra seams, they can let in more air and noise. However, high-end models like the Schuberth C5 perform almost as quietly as full-face helmets.
Do motorcycle helmets reduce wind noise?
Yes, but they cannot eliminate it completely. Wind noise comes from airflow around the helmet. A well-designed helmet can significantly reduce turbulence and noise levels.
Should you wear earplugs with a motorcycle helmet?
Many experienced riders recommend wearing earplugs, especially for long highway rides. Earplugs reduce harmful noise levels while still allowing riders to hear traffic and surroundings.
North America is one of the best places in the world for motorcycle road trips. Riders can experience everything from Pacific coastal cliffs and desert highways to high-altitude mountain passes and legendary twisty roads. Whether you enjoy technical cornering, scenic cruising, or long-distance touring, the continent offers unforgettable rides for every type of motorcyclist.
Some roads are famous for their curves. Others are known for breathtaking landscapes or epic long-distance touring routes. The most legendary ride is the Tail of the Dragon, which packs 318 curves into just 11 miles, making it one of the most technical motorcycle roads in the world.
This ultimate guide covers 20 of the best motorcycle roads in North America, including route statistics, riding tips, difficulty levels, and the best seasons to ride.
Quick Comparison Table among the Best Motorcycle Roads in North America
Here is a comparison table to let riders know briefly about the best motorcycle riding routes/roads in North America:
Road
Location
Distance
Difficulty
Best Season
Tail of the Dragon
TN / NC
11 miles
Advanced
May to Oct
Pacific Coast Highway
California
650 miles
Moderate
Apr to Oct
Beartooth Highway
MT / WY
68 miles
Moderate
Jun to Sep
Blue Ridge Parkway
VA / NC
469 miles
Easy–Moderate
Apr to Oct
Cherohala Skyway
TN / NC
43 miles
Moderate
Apr to Oct
Going-to-the-Sun Road
MT
50 miles
Moderate
Jul to Sep
Million Dollar Highway
CO
25 miles
Advanced
Jun to Sep
Cabot Trail
Nova Scotia
185 miles
Moderate
Jun to Sep
Icefields Parkway
Alberta
144 miles
Easy
Jun to Sep
Sea‑to‑Sky Highway
British Columbia
~102 miles
Moderate
Late Spring to Early Fall
Lolo Pass
ID / MT
100+ miles
Moderate
May to Oct
Chief Joseph Scenic Byway
WY
~46–47 miles
Moderate
Late Spring to Fall
Needles Highway
SD
~14 miles
Moderate
Apr to Oct
Talimena Scenic Byway
OK / AR
~54 miles
Moderate
Spring to Fall
Twisted Sisters
TX
~100 miles
Moderate–Advanced
Spring to Fall
Mount Blue Sky Scenic Byway
CO
49 miles
Advanced
Summer (open Memorial Day–Labor Day)
Trail Ridge Road
CO
~48 miles
Moderate–Advanced
Late May to Mid‑Oct
Angeles Crest Highway
SC
~66 miles
Moderate
Spring to Early Fall
Pig Trail Scenic Byway
AR
~19–25 miles
Moderate
Spring to Fall
Vermont Route 100
VT
~216 miles
Moderate
Late Spring to Fall
Detailed Introduction to the Best Motorcycle Roads in North America
North America offers some of the best motorcycle riding in the world. Riders can experience coastal highways, high-altitude mountain passes, desert landscapes, and endless twisty roads.
Some routes are famous for scenery, while others challenge riders with technical curves and elevation changes.
From the Appalachian Mountains to the Canadian Rockies, these roads are bucket-list rides for motorcyclists everywhere.
1. Tail of the Dragon
Tail of the Dragon - one of the most famous motorcycle roads in the world
📍Location: Tennessee / North Carolina
📏Distance: 11 miles
🔁Curves: 318
🏍Difficulty: Advanced
☀ Best Season: Spring–Fall
The Tail of the Dragon is one of the most famous motorcycle roads in the world, located on U.S. 129 at Deals Gap on the border of Tennessee and North Carolina. This legendary stretch packs 318 tight curves into just 11 miles, making it one of the most technical and thrilling rides in North America.
Surrounded by the Great Smoky Mountains and Cherokee National Forest, the road has no intersections, driveways, or traffic lights, creating a pure riding experience focused entirely on curves. Riders from around the world come here to test their skills and experience one of the most iconic twisty roads ever built.
Pacific Coast Highway - one of the most scenic coastal motorcycle rides in the world
📍 Location: California
📏Distance: ~650 miles
🏍Difficulty: Moderate
☀ Best Season: Late Spring–Fall
The Pacific Coast Highway (Highway 1) is one of the most scenic coastal motorcycle rides in the world. The route follows California’s rugged coastline with dramatic cliffs, ocean views, and famous bridges. The route stretches for more than 650 miles, connecting coastal towns, dramatic sea cliffs, beaches, and forests while offering nonstop ocean views.
Riders experience legendary sections like Big Sur, where the road winds along steep cliffs above crashing waves and passes iconic landmarks such as Bixby Creek Bridge and Point Lobos. The combination of sweeping curves, cool ocean air, and scenic coastal towns makes it a bucket-list ride for touring motorcyclists.
Highlights
Big Sur coastline
Bixby Creek Bridge
Monterey and Santa Barbara
Best Season
Spring and fall offer the best weather and lighter traffic.
Beartooth Highway - one of the most spectacular motorcycle roads in North America
📍 Location: Montana / Wyoming
📏Distance: 68 miles
⛰Elevation: 10,947 feet
🏍 Difficulty: Moderate–Advanced
☀ Best Season: Late May–Early October
The Beartooth Highway is one of the most spectacular motorcycle roads in North America, running from Red Lodge, Montana to Cooke City near the northeast entrance of Yellowstone National Park. This legendary mountain route climbs dramatically from about 5,200 ft to nearly 11,000 ft through steep switchbacks, alpine plateaus, and rugged Rocky Mountain scenery.
Riders pass through the wild Absaroka–Beartooth Wilderness, where the road winds past high-altitude tundra, glacier-carved valleys, and dozens of sparkling alpine lakes. Many consider it one of the most beautiful drives in America because of its dramatic views and thrilling mountain curves.
Highlights
Alpine lakes
Snow-covered peaks
Access to Yellowstone National Park
Riding Tips
The weather can change quickly, so riders should bring warm gear even in summer.
(For the latest pass condition and closure information about Beartooth Highway, please check the MDT 511 Traveler Information map.)
4. Blue Ridge Parkway
Blue Ridge Parkway
📍 Location: Virginia & North Carolina, USA
📏 Distance: 469 miles
🏍 Difficulty: Easy to Moderate
☀ Best Season: Spring and Fall
The Blue Ridge Parkway is one of the most famous scenic motorcycle routes in the United States. The road stretches 469 miles along the Appalachian Mountains, connecting Shenandoah National Park to Great Smoky Mountains National Park.
Designed for scenic driving, the parkway features smooth pavement, gentle sweeping curves, and hundreds of scenic overlooks. Commercial trucks are not allowed, making the ride quieter and safer for touring riders.
Highlights
Panoramic Appalachian mountain views
Famous stops like Mabry Mill and Linn Cove Viaduct
Peaceful with flowing curves
Riding Tips
Ride during fall for colorful foliage, and bring warm gear—elevations can exceed 6,000 feet, making temperatures much cooler than nearby valleys.
(Blue Ridge Parkway official web: https://www.blueridgeparkway.org/)
5. Cherohala Skyway
Cherohala Skyway
📍 Location: Tennessee & North Carolina, USA
📏 Distance: 43 miles
⛰ Highest Elevation: 5,390 ft
🏍 Difficulty: Moderate
☀ Best Season: Spring–Fall
The Cherohala Skyway is one of the best scenic motorcycle roads in the Appalachian Mountains. The 43-mile route connects Tellico Plains, Tennessee, with Robbinsville, North Carolina, crossing the Cherokee and Nantahala National Forests—which is how the road gets its name.
Unlike the tight curves of the Tail of the Dragon, the Cherohala Skyway features long sweeping corners, smooth pavement, and high-elevation views, making it ideal for scenic touring. The road climbs from about 900 feet to over 5,300 feet, offering breathtaking mountain overlooks along the way.
Highlights
Sweeping curves and smooth pavement
Scenic overlooks and mountain views
Quiet, best motorcycle road trips with less traffic
Riding Tips
Bring fuel before entering—the Skyway has no gas stations or services along the route.
6. Going-to-the-Sun Road
Going-to-the-sun Road
📍 Location: Montana, USA (Glacier National Park)
📏 Distance: About 50 miles
⛰ Highest Elevation: 6,646 ft (Logan Pass)
🏍 Difficulty: Moderate
☀ Best Season: July–September
The Going-to-the-Sun Road is one of the most spectacular motorcycle roads in the Rocky Mountains. This scenic highway crosses the heart of Glacier National Park, connecting the west entrance at Lake McDonald with the east entrance at St. Mary. The road climbs to Logan Pass at 6,646 feet, crossing the Continental Divide and offering incredible views of glaciers, alpine lakes, waterfalls, and rugged mountain peaks.
Highlights
Glacier-carved mountains and alpine scenery
Logan Pass overlook and visitor center
Cliffside sections with dramatic views
Riding Tips
The road is narrow and winding in some areas, so ride carefully and expect tourist traffic during summer.
Fodsports FX8 Pro Motorcycle Bluetooth Intercom - Intercom for motorcycle roads in North America
Dual Bluetooth Chip Design.
10 Riders Group Communication, 2000m Distance!
Optional HRSQ Mic and Speakers, CVC + ENC + DSP Noise Cancelation.
Listen to Music/GPS and Intercom At the Same Time.
IP67 Waterproof is suitable for all motorcycle roads in North America.
Compatible with Fodsports Connect APP.
FM Radio, Music Sharing, Voice Commands.
📍 Location: Colorado, USA
📏 Distance: About 25 miles (Ouray–Silverton)
⛰ Highest Elevation: 11,018 ft (Red Mountain Pass)
🏍 Difficulty: Advanced
☀ Best Season: June–September
The Million Dollar Highway is one of the most thrilling motorcycle roads in the Rocky Mountains. This famous stretch of U.S. Route 550 runs through the rugged San Juan Mountains, connecting the historic mining towns of Ouray and Silverton.
The road is known for its steep cliffs, tight switchbacks, and narrow mountain lanes, often with very few guardrails. Riders climb over 10,000-foot mountain passes and experience breathtaking views of alpine peaks, deep gorges, and waterfalls. It is also recommended as one of the best motorcycle roads in Colorado.
Highlights
Dramatic mountain scenery in the San Juan Mountains
Hairpin turns and high-altitude passes
Historic mining towns along the route
Riding Tips
Ride cautiously—some sections are narrow with steep drop-offs, and weather in the mountains can change quickly.
8. Cabot Trail
Cabot Trail
📍 Location: Nova Scotia, Canada (Cape Breton Island)
📏 Distance: ~186 miles (298 km) loop
🏍 Difficulty: Moderate
☀ Best Season: May–September
The Cabot Trail is one of the most scenic and celebrated motorcycle roads in North America. This loop follows Trunk 30 around the northern tip of Cape Breton Island, passing through the Cape Breton Highlands National Park and along rugged Atlantic coastlines with ocean views, forests, and coastal cliffs. Riders enjoy a mix of sweeping turns, elevation changes, and charming fishing villages along the way.
Highlights
Stunning ocean vistas and highland landscapes
Cape Breton Highlands National Park overlooks
Small coastal towns and local culture
Riding Tips
Fill up on fuel in Baddeck, Cheticamp, or Ingonish before starting the loop, and consider riding counter‑clockwise so most scenic viewpoints are on your left.
9. Icefields Parkway
Icefields Parkway(Source: Mad or Nomad)
📍 Location: Alberta, Canada
📏 Distance: About 230 km (144 miles)
⛰ Highest Elevation: ~6,677 ft (Sunwapta Pass)
🏍 Difficulty: Moderate
☀ Best Season: June–September
The Icefields Parkway is one of the most scenic motorcycle road trips in North America, linking Banff National Park and Jasper National Park through the heart of the Canadian Rockies. This legendary route follows Highway 93 across dramatic alpine landscapes with towering peaks, turquoise glacial lakes, rushing waterfalls, and sweeping valleys. Riders will pass iconic highlights like Bow Lake, Peyto Lake, the Columbia Icefield, and Sunwapta Pass, with abundant wildlife sightings along the way.
Highlights
Breathtaking mountain panoramas
Glacier‑fed lakes & powerful waterfalls
Plenty of scenic pull‑offs and photo spots
Riding Tips
Fill up before departing and expect minimal services between Banff and Jasper; weather can change rapidly in the Rockies.
10. Sea-to-Sky Highway
Sea-to-Sky Highway
📍 Location: British Columbia, Canada (Highway 99)
📏 Distance: ~102 miles / 165 km (Horseshoe Bay to Whistler)
🏍 Difficulty: Moderate
☀ Best Season: Late Spring–Early Fall
The Sea‑to‑Sky Highway (BC 99) is one of Canada’s most scenic motorcycle routes. This road for motorcycle trips winds from Horseshoe Bay near Vancouver through Howe Sound and the coastal mountains up to the resort town of Whistler. Riders experience a dramatic change in landscape—from ocean views and rugged cliffs to soaring alpine peaks. Thus making this a favorite for scenic rides and best motorcycle road trips.
Highlights
Stunning ocean and mountain vistas along Howe Sound
Shannon Falls and other waterfalls just off the highway
Squamish rock formations and Whistler arrival views
Riding Tips
Expect traffic during peak season, ride cautiously through twisty sections, and plan fuel before departing; winter conditions can be challenging north of Squamish.
11. Lolo Pass
Lolo Pass
📍 Location: Idaho & Montana, USA
📏 Distance: ~100–132 miles ride on U.S. Highway 12
⛰ Highest Elevation: 5,233 ft
🏍 Difficulty: Moderate
☀ Best Season: Late spring–early fall
Lolo Pass is a scenic motorcycle ride through the Bitterroot Range of the Rocky Mountains, following U.S. Highway 12 (Lewis and Clark Highway) between Idaho and Montana. The route’s smooth pavement and sweeping curves make it a favorite for riders seeking a long, remote, nature‑filled journey. The pass itself has deep historical significance, having been used by the Lewis and Clark Expedition and the Nez Perce Trail centuries ago. It is also one of the best motorcycle road trips in the us.
Highlights
Historic Lewis and Clark trail corridor
Sweeping mountain and forest scenery
Lolo Pass Visitor Center with interpretive exhibits
Riding Tips
Fuel up before the ride—services are limited—and expect occasional wildlife crossings and remote stretches with little cell reception.
12. Chief Joseph Scenic Byway
Chief Joseph Scenic Byway
📍 Location: Wyoming, USA
📏 Distance: ~46–47 miles (Wyoming Highway 296)
⛰ Highest Elevation: Dead Indian Pass ~8,071 ft
🏍 Difficulty: Moderate
☀ Best Season: Late Spring–Fall
The Chief Joseph Scenic Byway is a stunning mountain motorcycle route that connects Cody with the Beartooth Highway and the northeast gate of Yellowstone National Park through Wyoming’s Shoshone National Forest. It closely follows the historic path taken by Chief Joseph and the Nez Perce during their 1877 retreat, offering sweeping curves, dramatic elevation changes, and panoramic views of the Absaroka and Beartooth Mountains.
Highlights
Spectacular mountain vistas and valley panoramas
Historic Dead Indian Pass overlook
Scenic Sunlight Creek Bridge over deep gorges
Riding Tips
Fuel up in Cody before riding—services are scarce along the byway—and plan extra time for photos and wildlife viewing.
4K Bluetooth Camera Intercom, 2000m Intercom Range.
4K, 2K, 1080P anti-shake & 360° rotation shooting video/photo.
Watch While Recording the video through the mobile APP.
8MP HD Photo Taking.
10 Way Group Communication.
HiFi Sound Quality, Noise Reduction Tech.
Music Sharing, FM Radio, Voice Commands.
Perfect communication system + Camera for motorcycle riding tours.
📍 Location: Custer State Park, South Dakota, USA
📏 Distance: ~14 miles (part of SD‑87)
🏍 Difficulty: Moderate
☀ Best Season: April–October
The Needles Highway is a historic scenic motorcycle route through Custer State Park in the Black Hills. Named for the towering granite “needles” that line the road, this 14‑mile stretch winds through pine and spruce forests, open meadows, and rugged rock formations that seem to pierce the sky, creating a unique and dramatic landscape.
Highlights
Narrow rock tunnels including the famous Needles Eye Tunnel
Towering granite spires and scenic pull‑offs
Sylvan Lake with hiking and photo opportunities
Riding Tips
Take your time—this is a slow, winding road with sharp turns and narrow sections, and avoid large trailers or RVs due to tight clearances. Riders should also be aware that the highway closes in winter due to snow.
14. Talimena Scenic Byway
Talimena Scenic Byway
📍 Location: Oklahoma & Arkansas, USA
📏 Distance: ~54 miles (87 km)
⛰ Highest Elevation: ~2,681 ft
🏍 Difficulty: Moderate
☀ Best Season: Spring–Fall
The Talimena Scenic Byway is a gorgeous motorcycle road through the Ouachita National Forest, running from Talihina, Oklahoma to Mena, Arkansas along Oklahoma State Highway 1 and Arkansas Highway 88. This 54‑mile ride winds along the ridges of Rich Mountain and Winding Stair Mountain, offering spectacular panoramas of forested peaks, valleys, and distant ridgelines—especially beautiful in spring bloom and autumn foliage.
Highlights
Panoramic mountain and forest views
22 scenic overlooks and pull‑offs
Queen Wilhelmina State Park atop Rich Mountain
Riding Tips
Fill up before the ride—there are no services or gas stations along the byway, so stock up in Talihina or Mena before you depart.
15. Twisted Sisters
Twisted Sisters
📍 Location: Texas Hill Country, USA
📏 Distance: ~100 miles loop (170 miles including access from Medina)
🏍 Difficulty: Moderate to Advanced
☀ Best Season: Spring–Fall
The Twisted Sisters are a legendary set of three ranch roads—RR 335, RR 336, and RR 337. They are the best motorcycle road trips in Texas. Together, they form one of Texas’ best motorcycle loops, northwest of San Antonio through rugged Hill Country canyons and ridges. Riders traverse rolling terrain filled with tight curves, steep hills, elevation changes, and dramatic vistas of limestone bluffs and open valleys. In one 15‑mile stretch alone, there are more than 65 curves, making it a thrilling challenge for experienced riders.
Highlights
Technical twisty roads with frequent bends and blind crests
Panoramic views of hill country and canyon landscapes
Classic biker stops like the Frio Canyon Motorcycle Stop and Lone Star Motorcycle Museum
Riding Tips
Fill up before you start—fuel and services are scarce along the route—and focus on smooth, controlled cornering. The loop typically takes 4–6 hours to ride and rewards patience with its scenic beauty and technical thrills.
16. Mount Blue Sky Scenic Byway
Mount Blue Sky Scenic Byway(Photo by: Ride to Food)
📍 Location: Colorado, USA
📏 Distance: 49 miles
⛰ Highest Elevation: 14,130 ft (highest paved road in North America)
🏍 Difficulty: Advanced
☀ Best Season: Summer (open Memorial Day–Labor Day)
The Mount Blue Sky Scenic Byway climbs from Idaho Springs into the Rocky Mountains, gaining more than 7,000 ft of elevation to reach the summit of Mount Blue Sky—formerly Mount Evans—making it the highest paved road in North America. Riders pass through pine forests, alpine tundra, and stunning mountain vistas, with wildlife such as mountain goats and bighorn sheep often seen along the route. The road features steep switchbacks and narrow sections with dramatic views, rewarding experienced riders with an epic high‑altitude ride.
Highlights
Highest paved road in North America
Alpine lakes, glacier‑cut valleys, and mountain wildlife
Panoramic Front Range and continental views
Riding Tips
Prepare for rapid weather changes and bring layers—at 14,000 ft temperatures can plummet even in summer.
17. Trail Ridge Road
Trail Ridge Road
📍 Location: Colorado, USA (Rocky Mountain National Park)
📏 Distance: ~48 miles
⛰ Highest Elevation: 12,183 ft (above sea level)
🏍 Difficulty: Moderate–Advanced
☀ Best Season: Late May–Mid‑October
Trail Ridge Road is one of North America’s most iconic high‑altitude motorcycle roads, slicing through Rocky Mountain National Park between Estes Park and Grand Lake. It holds the title of the highest continuous paved road in the United States, with nearly 8 miles above treeline and dramatic views of alpine tundra, glacier‑carved valleys, and the Continental Divide. Riders also enjoy frequent wildlife sightings, including elk, bighorn sheep, and marmots on the roadside.
Highlights
Sweeping mountain vistas above 12,000 ft
Continental Divide scenery
Scenic overlooks like Many Parks Curve and Forest Canyon
Riding Tips
Start early to avoid afternoon thunderstorms, be prepared for rapid weather changes, and enjoy the numerous pull‑offs for photos and wildlife watching.
18. Angeles Crest Highway
Angeles Crest Highway
📍 Location: Southern California, USA
📏 Distance: ~66 miles (106 km)
⛰ Highest Elevation: ~7,900 ft (Dawson Saddle)
🏍 Difficulty: Moderate
☀ Best Season: Spring–Early Fall
The Angeles Crest Highway (State Route 2) is a scenic mountain motorcycle road that climbs through the San Gabriel Mountains and the Angeles National Forest just outside Los Angeles. It winds for about 66 miles from La Cañada Flintridge to near Wrightwood, passing pine forests, chaparral, switchbacks, and high‑elevation ridges with panoramic valley views.
Highlights
Alpine mountain scenery just minutes from LA
Sweeping curves and high‑elevation viewpoints
Classic biker meet‑ups at spots like Newcomb’s Ranch
Riding Tips
Ride in spring through early fall to avoid winter closures due to snow and rockfall. Watch for wildlife crossing the road and be cautious of narrow sections with limited guardrails.
19. Arkansas Pig Trail
Arkansas Pig Trail
📍 Location: Northwest Arkansas, USA
📏 Distance: ~19–25 miles (Arkansas Highway 23 scenic section)
🏍 Difficulty: Moderate
☀ Best Season: Spring–Fall
The Pig Trail Scenic Byway is a legendary motorcycle traveling road through the Boston Mountains of the Ozark National Forest. This scenic section of Arkansas Highway 23 winds north from near Ozark through dense forests, steep hills, and hairpin curves that often feel like riding through a tunnel of trees. It’s known for its twisty pavement reminiscent of a hog’s tail, which has made it a top choice among riders and was even named one of America’s best rides by riders and publications.
Highlights
Forest‑shrouded curves and valley views
Seasonal wildflowers and brilliant fall foliage
Quiet road with minimal development
Riding Tips
Fuel up before you start—services are limited—and enjoy the Ozark Highlands scenery at a relaxed pace.
20. Vermont Route 100
Vermont Route 100
📍 Location: Vermont, USA
📏 Distance: ~216 miles (full length of VT100)
🏍 Difficulty: Moderate
☀ Best Season: Late Spring–Fall
Vermont Route 100 is one of the most iconic and scenic motorcycle riding roads in New England, often called “Vermont’s Main Street” as it runs almost the entire length of the state from south to north. The route follows the eastern edge of the Green Mountains, winding through rolling farmland, dense forests, river valleys, and picturesque small towns like Wilmington, Ludlow, and Stowe.
Highlights
Classic New England landscapes with rivers, covered bridges, and mountain views
Quaint villages, roadside diners, and local farms
Excellent fall foliage and iconic winter scenery
Riding Tips
The route’s gentle curves and varied scenery make it enjoyable for riders of all levels—just plan fuel stops in towns along the way and enjoy local attractions like craft breweries and maple farms.
Tips for Riding the Best Motorcycle Roads
Riding some of the best motorcycle roads in North America is an unforgettable experience. However, scenic mountain highways and winding backroads also require preparation and smart riding habits. Knowing the best time to ride, staying safe on the road, and choosing the right type of motorcycle can make your trip much more enjoyable. Below are some practical tips to help you get the most out of your motorcycle road trip.
Best Time of Year
The best time to ride scenic motorcycle roads usually depends on the location and elevation. In most regions, spring and fall are ideal seasons because the weather is comfortable and the scenery is beautiful. Spring often brings blooming flowers and fresh green landscapes, while fall offers colorful foliage and cooler temperatures that make long rides more comfortable.
However, many famous riding roads in North America are located in high mountain areas. Routes such as alpine passes or national park roads may only be fully open during the summer months, when snow has melted and road conditions are safer. Some mountain highways close in winter due to snow and ice.
No matter the season, always check local conditions before your ride. Weather can change quickly in mountainous regions, and sudden rain, fog, or cold temperatures can affect road safety. Preparing for different weather conditions will help you stay comfortable and focused during the ride.
Safety Tips
Safety should always be the top priority when riding scenic roads. Many beautiful routes pass through forests, mountains, and rural areas where hazards can appear suddenly.
One of the most common risks is wildlife crossing the road. Animals such as deer, elk, or smaller wildlife may suddenly run onto the road, especially during early morning or evening hours. Riders should slow down in wooded areas and stay alert for wildlife warning signs.
It is also important to check weather conditions before starting your ride. Rain, strong winds, or fog can make twisty mountain roads much more dangerous. Wet pavement, fallen leaves, gravel, or rocks can reduce traction and increase the chance of losing control.
Another key rule is to ride within your skill level. Many famous motorcycle roads include tight curves, steep climbs, and blind corners. Take your time and maintain a comfortable speed. Remember that scenic roads are meant to be enjoyed, not rushed. Riding smoothly and staying in control will make the journey safer and more relaxing.
Best Motorcycles for Scenic Roads
Different types of motorcycles can work well for scenic road trips, but some models are especially suited for long and winding routes.
Sport touring motorcycles are one of the best choices. They combine comfortable riding positions with good handling on curves, making them ideal for long-distance rides through twisty mountain roads.
Adventure motorcycles are another great option. These bikes are designed to handle a variety of road conditions, including rough pavement or occasional gravel sections. Their upright seating position also provides better visibility during long rides.
Finally, touring cruisers are popular for relaxed road trips. These motorcycles offer comfortable seats, stable handling, and plenty of storage for luggage. They are perfect for riders who want to enjoy scenic routes at a slower, more comfortable pace.
No matter what motorcycle you ride, the most important factors are staying comfortable, reliability, and control. When your bike fits your riding style and the type of road you plan to explore, every scenic ride becomes a much better experience.
Planning a Motorcycle Road Trip in North America
Planning ahead is one of the most important parts of a successful motorcycle road trip. A good plan helps you enjoy the ride, avoid unexpected problems, and make the most of scenic routes. From choosing the right roads to packing proper gear, a little preparation can make your journey much smoother and safer.
Route Planning Tips
The first step in planning a motorcycle road trip is choosing the right route. Many riders use motorcycle route planner tools or travel apps to design their trips. These tools allow you to map your route, add stops, and discover scenic roads, attractions, restaurants, and places to stay along the way. Some route planners even help you find twisty roads or scenic highways that are more enjoyable for riders than regular highways.
It is also important to plan fuel stops in advance, especially when riding through rural or mountain areas. Gas stations may be far apart, so riders should never let their fuel level get too low. Many experienced riders recommend refueling when the tank reaches about two-thirds empty to avoid running out of fuel in remote areas.
When planning your daily route, it is smart to keep the riding distance reasonable. Many touring riders limit their daily rides to around 300–400 miles, which allows time for breaks, sightseeing, and photos along the way. Taking short breaks every 60–90 minutes can also reduce fatigue and keep you alert during long rides.
Gear for Long Scenic Rides
Having the right riding gear is essential for comfort and safety on long scenic rides.
One of the most important items is a comfortable motorcycle helmet. Since riders may wear their helmet for several hours each day, it should fit well, provide good ventilation, and reduce wind noise. Comfortable gear can greatly extend how long a rider can travel without feeling tired.
Another useful piece of equipment for road trips is a Bluetooth communication system. Many riders install Bluetooth headsets inside their helmets so they can listen to GPS directions, music, or talk with other riders during group rides. This makes navigation easier and improves the overall riding experience.
Bluetooth Mesh Intercom.
Dual Bluetooth Chip Design.
10 Riders Group Audio, 2000m Distance!
HRSQ Mic and Speakers, CVC + ENC + DSP Noise Cancelation.
Listen to Music/GPS and Intercom At the Same Time.
IP67 Waterproof.
Support pair with Fodsports Connect APP
FM Radio, Music Sharing, Voice Commands.
Finally, riders should always pack rain gear and weather protection. Weather can change quickly, especially in mountains or coastal areas. A lightweight rain jacket or riding suit helps keep you dry and warm if conditions suddenly change. Many experienced riders also pack extra layers so they can stay comfortable in both warm and cool temperatures.
With the right planning, route preparation, and riding gear, a motorcycle road trip across North America can become an unforgettable adventure. Good preparation allows riders to focus on what matters most—enjoying the road, the scenery, and the freedom of the ride.
What is the most famous motorcycle road in North America?
The Tail of the Dragon on the Tennessee–North Carolina border is one of the most famous motorcycle roads. It features 318 curves in just 11 miles and attracts riders from around the world.
What is the most scenic motorcycle road in the United States?
Many riders consider the Pacific Coast Highway in California one of the most scenic routes because it follows dramatic ocean cliffs and coastal landscapes.
What is the best motorcycle road trip in North America?
The Blue Ridge Parkway is often considered the best long motorcycle road trip because it stretches nearly 469 miles through the Appalachian Mountains with continuous scenic views.
What time of year is best for motorcycle riding in North America?
Late spring through early fall is usually the best time. Mountain roads often open in summer because snow can close high-elevation routes during winter.
Are mountain roads safe for motorcycles?
Yes, but riders should watch for weather changes, wildlife, and sharp curves. Many scenic mountain roads have steep drop-offs and tight turns, so riding within your skill level is important.
Conclusion
The best motorcycle roads in North America offer unforgettable riding experiences—from coastal highways and alpine passes to twisty mountain roads.
Whether you want a relaxed scenic cruise or a technical riding challenge, these 20 legendary routes should be on every rider’s bucket list.
Every rider has their own idea of the best looking motorcycle.
Some are all about those fierce, stripped-down bikes with the edgy look and beefy tires. Others dig the classic vibe of old-school roadsters or the tough style of adventure bikes.
But let's be honest, killer design is something every rider can get behind. A bike that looks awesome isn't just about performance; it's the kind that catches your eye and makes you go, Wow.
So, here's a look at some of the coolest motorcycles from all the big names in 2026.
The Best Looking Motorcycle From Every Major Brand
1. Aprilia – RS 660
If you’ve spent any time around modern sport bikes, you probably already know that Aprilia has a real talent for building beautiful machines.
The flagship RSV4 still gets most of the attention, especially from riders chasing superbike performance.
But when it comes to pure visual balance, the Aprilia RS 660 might actually be the better-looking bike.
What makes the RS 660 special is how well everything fits together.
It has the sharp, aggressive look you expect from an Italian sport bike, but it never feels overdesigned. The fairings flow smoothly into the tank, the front end looks focused and compact, and the slim tail section gives the whole bike a light, athletic stance.
Stand next to one in person, and you’ll notice the details pretty quickly.
The triple LED headlights give the front a distinctive signature, and the small integrated aerodynamic elements add a bit of racing flavor without making the bike look overly complicated.
Even the aluminum frame plays a role visually, giving the bike a clean, lightweight feel.
Aprilia RS 660
A few design touches really help the RS 660 stand out:
Triple LED front lighting signature
Subtle integrated aerodynamic winglets
Lightweight aluminum frame that adds to the bike’s visual sharpness
Compact proportions that make the bike look quick and agile
The result is a motorcycle that looks fast even when it’s parked. It proves that you don’t need a massive liter-class engine to create something that feels exotic.
Sometimes, a perfectly balanced middleweight design can be even more appealing.
2. BMW – R12 S
If you walk through BMW’s lineup today, you’ll see a little bit of everything—big adventure machines, razor-sharp sport bikes, and long-distance touring bikes built for comfort.
But when it comes to pure visual impact in the 2026 lineup, the BMW R12 S is one that tends to make riders stop and take a second look.
What makes the R12 S interesting is how naturally it blends old and new.
At first glance, it clearly draws inspiration from BMW’s classic sport bikes. The retro-style fairing immediately gives it that vintage racing vibe.
But the moment you start looking closer, you notice all the modern touches that bring the bike firmly into the present.
And of course, there’s the boxer engine. BMW didn’t try to hide it or cover it up.
The horizontally opposed cylinders sit right out in the open, almost like they’re part of the bike’s visual identity. It’s one of those design features that instantly tells you: this is a BMW.
bmw r12s 2026
A few details really help define the look of the R12 S:
A classic sport fairing inspired by vintage BMW race bikes
The signature air-cooled boxer engine fully on display
Premium paint options, including eye-catching metallic orange
A clean, minimalist tail section paired with a sculpted fuel tank
When you see the R12 S in person, the bike has a kind of quiet confidence to it. It’s not trying to look extreme or futuristic.
Instead, it leans into BMW’s heritage while still feeling fresh and modern. And that balance is exactly what gives the bike its unique presence.
3. CFMOTO – 800MT-X
CFMOTO is one of those brands that a lot of riders have started paying more attention to in recent years.
The company has been expanding quickly, and their bikes keep getting more interesting with every new release.
In the 2026 lineup, one model that really stands out visually is the CFMOTO 800MT-X.
If you look at it for the first time, the bike doesn’t really follow the typical adventure bike formula.
Instead of the usual rounded shapes and conservative styling, the 800MT-X leans heavily into a rally-inspired look.
The front end is sharp and futuristic, almost like something you’d expect to see on a Dakar rally machine.
The tall stance and rugged bodywork also give it a very purposeful feel. Even standing still, the bike looks like it’s ready to head straight off the pavement and into the dirt.
cfmoto 800mt-x 2026
A few design details really help define the character of the 800MT-X:
A bold LED lighting setup that gives the front end a very modern appearance
Distinctive color combinations, including blue, white, and even pink accents
Rally-style windscreen and body panels that emphasize its off-road focus
Tall, athletic proportions designed with real off-road riding in mind
When you see the 800MT-X up close, it’s clear that CFMOTO isn’t just trying to copy what other manufacturers are doing.
The design has its own identity, and it shows how serious the brand has become about competing in the adventure bike segment.
4. Ducati – Streetfighter V4 S
When people talk about beautiful motorcycles, Ducati almost always comes up in the conversation.
The brand has a long history of building bikes that look just as exciting as they feel to ride.
Honestly, you could point at almost anything in Ducati’s lineup and make a strong argument that it’s a design icon.
But if we’re talking about pure visual aggression in 2026, the Ducati Streetfighter V4 S is probably the one that stands out the most.
The idea behind the Streetfighter is pretty simple: take the DNA of the Panigale superbike and strip away the full fairings.
What you’re left with is a naked bike that somehow looks even more intense than the fully faired version. It still has that unmistakable Ducati performance look, just rawer and more exposed.
The front of the bike is usually the first thing people notice.
The LED headlights have this sharp, almost angry expression that Ducati designers like to compare to a fighter jet.
It gives the bike a very aggressive “face,” especially when you see it in your mirrors.
Then there are the winglets. They’re not just there for show—they come straight from Ducati’s racing technology—but visually they also add to that high-performance feel.
Combined with the muscular tank and the exposed engine, the whole bike looks compact, powerful, and a little bit intimidating.
ducati streetfighter v4 s 2026
A few design features really define the Streetfighter V4 S:
Sharp LED headlights that give the bike a fighter-jet-like appearance
Prominent aerodynamic winglets inspired by Ducati’s racing machines
A high-mounted, minimalist tail section
A massive rear tire paired with Ducati’s signature single-sided swingarm
Walk around the bike and it just keeps getting better from different angles. A lot of riders say the best view is from the rear three-quarter angle.
From there, the wide rear tire, sculpted tail, and exposed mechanical parts all come together in a way that feels both aggressive and beautifully engineered at the same time.
If you’ve been around Harley-Davidson bikes for a while, you probably know the Sportster name carries a lot of history.
For decades, Sportsters followed a pretty familiar formula—low, simple, and unmistakably classic.
But when the Harley-Davidson Sportster S showed up, it was clear the company was ready to push that idea in a completely new direction.
The first thing that stands out is how muscular the bike looks. It’s compact, but it has this very solid, planted stance.
Harley moved away from the old-school proportions and gave the Sportster S a much more modern, almost performance-focused appearance.
And then there’s the front tire. It’s huge—much wider than what you usually see on a cruiser. That big 160-section front tire immediately gives the bike a different personality.
It almost looks like a flat-track racer that somehow ended up on the street.
Harley-Davidson Sportster S
As you walk around the bike, a few details really help define its style:
A massive 160-section front tire that gives the bike a bold stance
A flat-track-inspired exhaust that sweeps up along the side
A very clean, minimalist rear section
Modern LED lighting that contrasts nicely with the bike’s muscular bodywork
What’s interesting about the Sportster S is that it still feels like a Harley, even though the design is much more modern than the older Sportsters.
It keeps that strong, unmistakable identity, just presented in a way that feels fresh and a little more aggressive than what people might expect from the brand.
6. Honda – Africa Twin
Adventure bikes usually aren’t the kind of motorcycles people pick just because they look good.
Most riders choose them for comfort, reliability, and the ability to handle just about any road you throw at them.
But the Honda Africa Twin is one of those rare ADV bikes that actually manages to look pretty great while doing all that.
If you’ve spent any time around adventure riders, you’ve probably noticed how recognizable the Africa Twin has become.
Even from a distance, that tall stance and rally-style front end give it a very distinctive look.
It has that “ready for anything” vibe—like it could leave the pavement at any moment and disappear down a dirt trail.
A lot of that character comes from the bike’s design details.
The front fairing and windscreen have a strong rally-bike influence, which makes sense considering the Africa Twin’s history in off-road racing.
It doesn’t feel overly styled either—everything on the bike looks like it’s there for a reason.
Honda Africa Twin
A few features really define the Africa Twin’s appearance:
A tall windscreen and rally-inspired front fairing
Long suspension travel and plenty of ground clearance
A large 21-inch front wheel built for tackling rough terrain
The classic red, white, and blue color scheme that many riders instantly recognize
When you see an Africa Twin parked somewhere—whether it’s outside a café or covered in dust after a long ride—it just gives off that sense of adventure.
It looks like the kind of bike that’s meant to travel far beyond the city limits. And for a lot of riders, that’s exactly the appeal.
7. Husqvarna – Norden 901
If you park the Husqvarna Norden 901 next to a row of typical adventure bikes, it’s probably the one people will notice first.
Most ADV machines follow a pretty similar design language—sharp headlights, aggressive angles, lots of layered bodywork.
The Norden goes in a slightly different direction, and that’s exactly what makes it stand out.
The first thing that catches your eye is that big round headlight.
It’s a simple design, but combined with the bike’s smooth body panels, it gives the Norden this interesting retro-futuristic look.
It almost feels like a modern adventure bike that borrowed a little inspiration from older rally machines.
At the same time, the bike still looks properly capable.
The tall chassis, long suspension, and rugged components remind you that this isn’t just about style—it’s built to handle real off-road riding too.
husqvarna norden 901 2026
A few details really define the Norden 901’s look:
A large circular LED headlight that gives the bike its signature face
Minimalist Scandinavian design that keeps everything clean and simple
Smooth body panels with subtle graphics instead of loud styling
A functional rally-style layout that emphasizes practicality
When you see the Norden 901 in person, the design starts to make a lot of sense. It’s not trying to look overly aggressive or futuristic.
Instead, it has this calm, confident style that feels a bit different from the rest of the adventure bike crowd—and that’s a big part of its charm.
8. Indian – Chief Vintage
If you’ve ever seen an Indian Chief Vintage parked somewhere, you’ll know it has a very different kind of presence compared with most modern motorcycles.
While a lot of brands are chasing aggressive styling or futuristic designs, Indian Motorcycle leans heavily into its heritage—and the Chief Vintage really shows that.
The moment you look at it, the bike almost feels like a rolling piece of history.
The long, flowing fenders, the generous use of chrome, and the classic cruiser proportions all give it that old-school American look that goes back more than a century.
It’s the kind of motorcycle that doesn’t try to hide its roots.
One of the coolest parts is how much attention goes into the details.
The paintwork, the finishes, even the small trim pieces all feel carefully designed to capture that vintage spirit without looking outdated.
indian motorcycle chief vintage 2026
A few design elements really define the Chief Vintage:
Large, sweeping valanced fenders that give the bike its classic silhouette
Plenty of chrome accents that add to the traditional cruiser look
Long, relaxed cruiser proportions built for comfort and presence
Heritage-inspired paint schemes that highlight Indian’s history
When you see the Chief Vintage in person, it doesn’t just look like another cruiser—it feels more like a tribute to early American motorcycling.
For riders who appreciate that timeless style and a bit of nostalgia, it’s hard not to admire what Indian has done with this bike.
9. Kawasaki – Z900RS SE
If you’re into retro-style bikes, the Kawasaki Z900RS SE is one that usually gets a lot of appreciation from riders.
Kawasaki has been doing a great job with its retro lineup over the past few years, and the Z900RS series really captures that classic look without feeling outdated.
What makes this bike special is the way it connects back to Kawasaki’s history.
The design takes clear inspiration from the legendary Z1 from the 1970s, which was one of the most iconic motorcycles of its time.
But instead of just copying the old design, Kawasaki reworked it with modern components and cleaner lines.
The first thing many riders notice is the fuel tank. That teardrop shape is straight out of classic Japanese motorcycles, and it gives the bike a very authentic vintage feel.
Then you’ve got the round headlight up front, which keeps the traditional look but uses modern LED technology.
And if you look a little closer, the SE version adds some nice premium touches.
The gold front forks immediately stand out, and they give the bike a slightly more upscale appearance compared to the standard model.
kawasaki z900rs se 2026
A few details that really define the Z900RS SE’s style include:
A classic teardrop-shaped fuel tank inspired by the original Z1
A round LED headlight that blends vintage design with modern lighting
Gold front forks and upgraded suspension components
Retro-inspired paint schemes that highlight Kawasaki’s heritage
When you see the Z900RS SE in person, it just has a really balanced look. It captures that nostalgic 1970s style, but everything feels sharper and more refined.
For riders who love classic motorcycles but still want modern performance, it’s easy to see why this bike has become so popular.
10. KTM – 1390 Super Duke R
If you’ve spent any time around KTM bikes, you probably know subtlety isn’t really their thing.
The 1390 Super Duke R is a perfect example of that — it’s a hyper-naked bike that looks aggressive even when it’s just sitting still.
The front end is usually the first thing people notice. KTM uses that distinctive split LED headlight, and it almost looks like a pair of sharp eyes staring down the road. It gives the bike a really intense, almost futuristic look.
As you move around the bike, the rest of the design follows the same idea.
The body panels are sharp and angular, and a lot of the mechanical parts are left exposed, which gives it that raw, mechanical feel. KTM clearly isn’t trying to hide anything here.
One detail many riders like is the single-sided swingarm. It leaves the rear wheel fully visible and adds to the bike’s aggressive styling.
Plus, with the compact frame and bold orange accents, the whole bike ends up looking really muscular.
KTM 1390 Super Duke R
Some of the design elements that define the 1390 Super Duke R include:
KTM’s distinctive split LED headlight
Sharp, angular body panels
A single-sided swingarm
Bold orange accents and a compact, muscular stance
Overall, the Super Duke R looks just as wild as it rides. Even before you start the engine, the bike already gives off that “ready to attack” kind of vibe.
11. Moto Guzzi – V7 Sport
If you’ve ever looked at a Moto Guzzi, you’ll notice right away that their bikes have a personality all their own.
The V7 Sport is a great example of that. It keeps that classic Italian style Moto Guzzi is known for, but with just enough modern touches to keep it feeling fresh.
The first thing most riders notice is the engine. Moto Guzzi’s transverse V-twin sticks out on both sides of the bike, and it’s not something you see very often anymore.
It’s one of those designs that instantly tells you you’re looking at a Guzzi.
Then there’s the fuel tank. It’s large, nicely sculpted, and gives the bike a really balanced, classic shape.
Up front, you’ve got the traditional round headlight, which keeps the vintage look intact without feeling outdated.
Moto Guzzi also offers some great retro racing-style color options for the V7 Sport, which really complete the whole vibe.
Nothing about the bike feels overdesigned — it’s simple, clean, and very Italian.
Moto Guzzi V7 Sport
A few design touches that really define the V7 Sport include:
A large, sculpted fuel tank that gives the bike its classic silhouette
The exposed transverse V-twin engine that makes Moto Guzzi instantly recognizable
A traditional round headlight
Retro racing-inspired paint schemes
Overall, the V7 Sport has that cool café racer feel to it — like something a custom builder would put together — except this one rolls straight out of the factory looking that good.
12. MV Agusta – Superveloce
When people talk about motorcycles as art, MV Agusta is almost always part of that conversation.
The brand has a reputation for building bikes that look just as impressive as they perform, and the Superveloce is probably one of the best examples of that.
At first glance, it feels like a modern bike that somehow captures the spirit of old-school racing machines.
The design takes inspiration from classic race bikes, but everything is executed with a really clean, modern touch.
One of the most eye-catching details is the round headlight up front. It has that retro look, but it’s seamlessly built into the bike’s sleek fairings, which gives it a really unique mix of old and new.
The red and silver racing paint scheme also plays a big role in the bike’s overall character — it immediately reminds you of vintage race bikes.
Then there’s the tail section, which is extremely minimal. It keeps the whole bike looking light and focused, almost like it was designed purely for speed.
MV Agusta Superveloce 1000
A few design details that really define the Superveloce include:
A retro-style round headlight integrated into modern fairings
The iconic red and silver racing paint scheme
A very clean, minimalist tail section
Premium materials and high-end finishing throughout the bike
When you see the Superveloce in person, it honestly feels less like a regular motorcycle and more like something you’d expect to see in a design museum.
It’s one of those bikes you could park in your garage and just stare at for a while.
13. Royal Enfield – Continental GT 650
If you spend any time around retro motorcycles, theRoyal Enfield Continental GT 650 is a bike that tends to get a lot of nods from riders.
Royal Enfield has built its reputation on simple, classic-looking motorcycles that don’t cost a fortune, and the GT 650 is probably the one that best captures that idea.
What makes the Continental GT stand out is its café racer styling.
The whole bike feels like a tribute to those 1960s British café racers — the kind of machines riders used to race between cafés back in the day.
But instead of trying to overcomplicate things, Royal Enfield kept the design clean and straightforward, which actually makes the bike look even better.
One of the first things you notice is the riding position.
The low clip-on handlebars give it that proper café racer stance, with the rider leaning slightly forward.
Paired with the slim tank and the narrow tail section, the whole bike has that classic silhouette that café racers are known for.
And the design stays pretty minimal overall.
There isn’t a lot of unnecessary bodywork, which keeps the bike looking light and purposeful.
If you go with the optional solo seat and rear cowl, it really completes the vintage café racer look.
Royal Enfield Continental GT 650
A few details that really define the Continental GT 650’s style include:
Low clip-on handlebars that give the bike a true café racer riding position
A classic café racer silhouette with a slim, sporty profile
Minimal bodywork that keeps the design clean and simple
An optional solo seat with a rear cowl for a more authentic vintage look
When you see the Continental GT 650 in person, it just has that honest, old-school character. It doesn’t try too hard, and that’s exactly why it works.
For riders who love the café racer style but want something approachable and affordable, it’s easy to understand why this bike has become such a favorite.
14. Suzuki – GSX-R1000 (40th Anniversary Edition)
If you’ve been around sport bikes for a while, the GSX-R name probably needs no introduction.
The Suzuki GSX-R1000 has been one of the most recognizable superbikes on the road for years, and the 40th Anniversary Edition really reminds people why the GSX-R series became so iconic in the first place.
What immediately grabs your attention on this version is the color scheme.
Suzuki brought back that classic yellow and blue livery, which longtime riders will instantly associate with the brand’s racing history.
It’s a simple change on paper, but on the GSX-R1000 it just looks right — bold, aggressive, and unmistakably Suzuki.
Then you start to notice the actual shape of the bike.
The GSX-R has always had a very distinctive front profile, with sharp lines and compact proportions that make it look fast even when it’s just sitting still.
The aerodynamic fairings wrap tightly around the bike, giving it that purposeful superbike look that comes straight from the track.
And despite being a liter bike, the overall design still feels tight and compact, which is something GSX-R models have always been known for.
suzuki gsx-r1000 40th anniversary edition
A few details that really define the GSX-R1000 40th Anniversary Edition’s style include:
Aggressive aerodynamic fairings shaped with performance in mind
The signature GSX-R front profile that riders instantly recognize
A race-inspired yellow and blue paint scheme celebrating Suzuki’s heritage
Compact superbike proportions that give the bike a focused, track-ready look
When you see the 40th Anniversary GSX-R1000 in person, it really feels like a tribute to Suzuki’s superbike legacy.
It’s modern and sharp, but that classic racing livery brings a lot of history with it.
For many riders, this bike still represents the purest version of Suzuki’s sport bike DNA.
15. Triumph – Bonneville T120
If you think about modern retro motorcycles, the Triumph Bonneville T120 is usually one of the first bikes that comes to mind.
Triumph has updated the Bonneville over the years, but somehow the bike has always kept that same timeless look that riders instantly recognize.
What’s impressive about the T120 is how well Triumph managed to preserve the feel of a classic British motorcycle while still bringing everything up to modern standards.
On the surface, it looks like something straight out of the 1960s. But underneath, it’s got modern tech like fuel injection, ABS, and ride-by-wire, so it rides like a contemporary machine.
One of the most recognizable parts of the bike is the fuel tank.
That Bonneville tank shape has been around for decades, and it’s still one of the defining features of the whole design.
Then you’ve got the twin exhaust pipes running along both sides, which give the bike that proper classic roadster look.
The engine itself also plays a big role in the styling.
The parallel twin design is right out in the open, and Triumph did a great job making it look mechanical and traditional, even though it’s a modern engine.
Triumph Bonneville T120
A few details that really define the Bonneville T120’s style include:
The iconic Bonneville tank shape that immediately identifies the bike
Twin exhaust pipes that give it that classic British roadster look
A beautifully styled twin-cylinder engine that blends vintage aesthetics with modern engineering
Elegant paintwork and chrome details that add a touch of refinement
When you see the T120 in person, the whole bike just feels incredibly balanced. Nothing looks overdone, and every part of the design seems to fit together naturally.
For riders who appreciate classic motorcycles but still want something comfortable and modern to ride, it’s easy to understand why the Bonneville T120 remains such a favorite.
16. Yamaha – XSR900 GP
If you’re a fan of retro sport bikes, the Yamaha XSR900 GP is one of those machines that instantly gets people talking.
Yamaha really went all-in with this one, and it easily stands out as one of the most exciting retro-inspired bikes to come out in recent years.
What makes the XSR900 GP so interesting is where its design comes from.
Yamaha clearly looked back at its Grand Prix racing machines from the 1980s for inspiration.
When you see the bike, it almost feels like a modern interpretation of those old-school race bikes, just rebuilt with today’s technology underneath.
The first thing that catches most riders’ attention is the full fairing.
Unlike the regular XSR900, the GP version gets a proper retro racing fairing that completely changes the character of the bike. It gives the whole machine that classic track-bike vibe.
Then there’s the color scheme. The yellow and black livery is a clear nod to Yamaha’s racing heritage and reminds a lot of riders of the legendary Kenny Roberts era.
It’s bold, simple, and very much in line with those vintage GP machines.
From the side, the compact tail section also adds to the racing look. The whole bike feels tight and purposeful, like it was designed to look fast even when it’s parked.
Yamaha XSR900 GP
A few details that really define the XSR900 GP’s style include:
A full retro racing fairing inspired by Yamaha’s Grand Prix machines
A yellow and black livery that echoes classic Yamaha racing colors
A compact tail section that gives the bike a proper vintage race-bike silhouette
A modern chassis and performance package hidden beneath the retro styling
When you see the XSR900 GP in person, it’s one of those bikes that immediately stand out in a crowd.
It blends vintage racing character with modern performance in a way that feels both nostalgic and fresh at the same time.
For riders who love the look of classic race bikes but still want something modern to ride, this one really hits the sweet spot.
Final Thoughts
Okay, so what makes a motorcycle look amazing is really just a matter of taste. Some people are into those sharp, super-fast bikes, while others dig the old-school roadsters or the tough-looking adventure bikes.
Each motorcycle on this list proves that good design can really make a bike stand out. If a bike catches your eye and you can't help but stare at it every time you see it, well, that might just be the bike for you.
The 2026 Honda CB1000F has officially cleared a major hurdle for American riders. Certification documents filed with U.S. regulatory agencies confirm that Honda’s retro-inspired liter-class naked bike is now approved for sale in the United States.
For enthusiasts who have been following the CB1000F’s debut in Japan and Europe, this development answers the biggest remaining question: Is it coming to the U.S.? Based on regulatory approval, the answer now appears to be yes.
What U.S. Certification Means for the 2026 Honda CB1000F
Before a motorcycle can be offered for sale in the United States, it must comply with a comprehensive set of federal emissions and safety regulations.
These standards ensure that the motorcycle meets strict environmental benchmarks designed to reduce pollutants and improve air quality.
The Honda CB1000F has passed US certification
In addition to emissions compliance, the model must also satisfy Department of Transportation (DOT) safety regulations.
These rules cover critical components such as lighting systems, braking performance, mirrors, tires, reflectors, and overall roadworthiness.
Certification confirms that the motorcycle adheres to federally mandated safety specifications, allowing it to be legally registered and operated on public roads across the country.
In the case of the 2026 Honda CB1000F, the certification filings suggest Honda intends to distribute the motorcycle through official U.S. dealer networks rather than via limited or gray-market channels.
This typically indicates a full-scale market launch strategy, including factory-backed warranties, parts support, and nationwide service availability. For prospective buyers, such certification not only signals regulatory compliance but also reflects the manufacturer’s commitment to long-term support and integration into the U.S. market.
A Revival of the “F” Nameplate
The CB1000F designation marks a revival of Honda’s historic “F” naming convention, previously associated with performance-oriented standard motorcycles such as the Honda CB750F.
Honda CB750F
During the late 1970s and early 1980s, the “F” badge was used to distinguish sport-focused variants within Honda’s broader CB lineup, signaling sharper handling, more aggressive styling, and an emphasis on rider engagement compared to their more touring-oriented counterparts. The letter became shorthand for factory-backed performance within the universal Japanese motorcycle segment of that era.
By reintroducing the CB1000F name, Honda draws a deliberate connection between its heritage models and a new-generation platform.
The move reflects a broader industry trend in which manufacturers revive historically significant badges to reinforce brand continuity while appealing to both long-time enthusiasts and newer riders seeking authenticity.
The modern CB1000F adopts classic proportions that echo its predecessors, including a round LED headlamp, a sculpted fuel tank with pronounced knee cutouts, and a flat, horizontal seat profile.
large circular LED headlamp on Honda CB1000F
At the same time, these retro design cues are paired with contemporary mechanical and electronic systems—such as advanced fuel injection, ride-by-wire throttle control, and modern chassis geometry—ensuring the motorcycle meets current performance and safety expectations.
The result is a model positioned squarely within the growing global demand for retro-styled motorcycles that blend nostalgic aesthetics with present-day engineering precision and everyday usability.
How the 2026 Honda CB1000F Compares to U.S. Competitors
In the U.S. retro performance segment, the 2026 Honda CB1000F will compete with popular models such as the Yamaha XSR900, Kawasaki Z900RS, and Suzuki GSX-S1000.
While each bike has its own strengths, the CB1000F stands out thanks to its smooth inline-four engine, balanced ergonomics, and Honda’s renowned reliability.
Model
Engine
Power
Character
Estimated Price (USA)
Honda CB1000F
999cc inline-four
120+ hp
Balanced retro performance
$10,000–$13,000
Yamaha XSR900
847cc inline-triple
115 hp
Lightweight, agile
~$10,000
Kawasaki Z900RS
948cc inline-four
111 hp
Classic retro style
~$11,000
Suzuki GSX-S1000
999cc inline-four
150 hp
Aggressive streetfighter
~$11,500
Estimated pricing in the U.S. places the CB1000F competitively in the liter-class retro segment.
If U.S. specifications follow the global model, riders can also expect advanced electronics like ride-by-wire throttle, traction and wheelie control, and a full-color TFT display.
2026 Honda CB1000F USA Price and Release Date
1. 2026 Honda CB1000F USA Price
Honda has not disclosed U.S. pricing for the 2026 CB1000F.
However, comparable retro-oriented motorcycles in the American market typically retail between $10,000 and $13,000, depending on specification and brand placement.
Final pricing will likely reflect the model’s equipment level and strategic role within Honda’s broader naked-bike lineup.
2. 2026 Honda CB1000F USA Release Date
No official U.S. release schedule has been confirmed.
Historically, Honda announces new street models several months prior to their arrival in dealerships.
With certification now complete, additional details may emerge in an upcoming model-year announcement cycle.
What This Means for the U.S. Market
The U.S. certification filing for the 2026 Honda CB1000F suggests Honda is preparing to strengthen its presence in the American retro-performance segment.
With growing demand for liter-class retro motorcycles in the United States, the Honda CB1000F USA launch could expand the brand’s lineup beyond previous offerings.
2026 Honda CB1000F U.S. Market FAQ
1. Has the 2026 Honda CB1000F been approved for sale in the United States?
Yes. Regulatory certification filings indicate that the 2026 Honda CB1000F has completed the necessary compliance process for U.S. road use. However, Honda has not yet issued a formal press release confirming pricing or dealership arrival dates.
2. When will the 2026 Honda CB1000F be available in U.S. dealerships?
Honda has not announced an official launch timeline. Historically, new street models are introduced several months before dealer arrival, suggesting additional details may be released in an upcoming model-year announcement cycle.
3. What engine does the 2026 Honda CB1000F use?
The CB1000F is powered by a 999cc liquid-cooled inline-four engine paired with a six-speed transmission and assist-and-slipper clutch. Output figures for the U.S. version have not been formally confirmed.
4. Is the CB1000F replacing the CB1000R in the United States?
Honda has not stated whether the CB1000F will directly replace the CB1000R. The certification suggests an expansion or repositioning within Honda’s liter-class naked lineup rather than a confirmed discontinuation of existing models.
5. How much is the 2026 Honda CB1000F expected to cost in the U.S.?
Official U.S. pricing has not been released. Comparable retro-oriented liter-class motorcycles currently retail between $10,000 and $13,000 in the American market, placing the CB1000F within a similar projected range.
6. Will the U.S. model include advanced rider aids?
International versions of the CB1000F are equipped with IMU-based electronics, traction control, selectable ride modes, and cornering ABS. Confirmation of identical specifications for the U.S. model is pending official release details.
Final Thoughts
The certification filing suggests Honda is preparing to strengthen its presence in the retro performance category at a time when demand for modern-classic motorcycles remains steady in the U.S. market. Further details are expected once the company issues a formal announcement.
Upgrading your ride with the right motorcycle mods can dramatically improve performance, comfort, and style. Whether you’re looking for more power, better handling, or a unique look, the right modifications can transform your bike into a machine that truly fits your needs.
In this guide, we’ll highlight the top motorcycle mods of 2026 that will take your riding experience to the next level.
Top 10 Motorcycle Mods to Enhance Your Riding Experience
I haven't included upgrades like tires or brake pads here, as they are essential, consumable mods.
1. ECU Flash (Engine Tuning Software)
If you want a modification that truly changes how your motorcycle feels, an ECU flash is one of the best upgrades you can make.
The ECU (Engine Control Unit) is the brain of your bike. It controls fuel injection, ignition timing, throttle response, and rev limits. From the factory, motorcycles are tuned conservatively to meet emissions regulations, noise limits, and global reliability standards. That means your engine is often not performing at its full potential.
An ECU flash replaces the stock programming with optimized software. A professional tuner adjusts fuel maps and throttle settings to improve how the engine delivers power. The result is not just more horsepower, but smoother and more usable performance.
Many riders immediately notice quicker throttle response and stronger mid-range torque. On some modern bikes, factory gear restrictions or speed limiters can also be removed (where legal), making power delivery more consistent across all gears.
perform an ecu flash
Benefits:
Smoother throttle response
Stronger mid-range power
Removal of certain factory restrictions (where legal)
Improved fuel mapping for aftermarket exhaust systems
An ECU flash works especially well when paired with a quality aftermarket exhaust. Together, they help the engine breathe better and run more efficiently.
Because this modification directly affects engine management, always choose a trusted and experienced tuner. Done correctly, an ECU flash can make your motorcycle feel like a completely different machine.
2. Aftermarket Exhaust
Let’s be honest. One of the first things most riders think about changing is the exhaust.
Not because the stock one is “bad,” but because it’s usually heavy, quiet, and built to satisfy regulations more than excitement. Manufacturers design factory exhaust systems to meet strict noise and emissions standards. That often means extra weight, restrictive baffling, and a sound that feels a little muted.
An aftermarket exhaust replaces that bulky stock unit with something lighter and more free-flowing. And the difference is something you can hear and feel immediately.
The most noticeable change is the sound. A good exhaust gives your bike a deeper, richer tone. It doesn’t have to be obnoxiously loud. In fact, the best systems sound refined and purposeful, not harsh. The right exhaust makes your motorcycle feel more alive every time you twist the throttle.
Weight reduction is another big advantage. Stock exhausts can be surprisingly heavy because of catalytic converters and thick internal baffling. Swapping to a quality aftermarket system often saves several pounds. That weight usually comes off high on the bike, which can slightly improve handling and balance.
You may also see small performance gains, especially in throttle response and mid-range power. The improvement becomes more noticeable when paired with an ECU flash, since the engine can be properly tuned for the increased airflow.
aftermarket exhaust
Benefits:
Deeper, more aggressive exhaust note
Reduced overall weight
Improved airflow
Sharper throttle response
Potential power gains (especially with proper tuning)
There are two main types of exhaust upgrades:
Slip-on exhausts replace only the muffler section: They are more affordable, easier to install, and usually give you the sound upgrade most riders want.
Full exhaust systems replace the headers and mid-pipes as well: These offer better airflow and greater performance potential, but they cost more and may require professional tuning to get the best results.
Before installing any aftermarket exhaust, always check your local noise and emissions laws. Some systems are designed for track use only. It’s important to choose something that fits your riding environment and lifestyle.
At the end of the day, an exhaust upgrade is partly about performance, but it’s also about personality. The sound of your bike becomes part of the experience. When done right, it doesn’t just make the motorcycle louder — it makes it feel more like yours.
3. Suspension Upgrade
If I had to choose one upgrade that truly transforms a motorcycle, especially for real-world riding, it would be suspension.
Power is exciting, sure. But suspension is what lets you use that power safely and confidently.
The truth is, factory suspension is built for the “average rider.” Average weight. Average riding style. Average road conditions. But none of us are really average. Maybe you’re lighter. Maybe you’re heavier. Maybe you ride aggressively in the mountains, commute daily on rough streets, or carry luggage on weekends. When your setup doesn’t match your riding, the bike never feels completely settled.
That’s where suspension upgrades make a huge difference.
You can start with the basics:
Stiffer or properly rated springs matched to your weight
Adjustable front forks that allow you to fine-tune compression and rebound
A quality aftermarket rear shock with better damping control
Even a properly set-up rear shock alone can completely change the personality of a bike.
When suspension is dialed in correctly, you’ll notice it right away.
motorcycle suspension upgrade
Benefits:
Better cornering stability
Improved braking control with reduced front-end dive
More comfort over rough roads
Increased traction and tire contact
Greater confidence at higher speeds
The biggest upgrade, though, isn’t just performance — it’s confidence. When your suspension works with you instead of against you, you stop fighting the bike. You start trusting it. Once you experience a well-set-up suspension, it’s hard to go back. The bike feels tighter, smoother, and more precise — like it finally fits you instead of some imaginary “average” rider.
One important thing: installing high-quality suspension components is only half the job. Proper setup matters just as much. Sag adjustment, rebound, compression — these settings need to match your weight and riding style. If you’re not experienced with suspension tuning, it’s worth having a professional set it up. A correctly adjusted mid-range shock can feel better than an expensive one that’s poorly tuned.
You know that big plastic piece hanging off the back of most stock bikes? Yeah… that thing.
Manufacturers have to design rear fenders to meet license plate size requirements, lighting rules, and splash protection standards. The result is usually a long, bulky setup that sticks out behind the bike and ruins the clean lines of the tail section.
A tail tidy — also called a fender eliminator — removes that oversized rear fender and relocates the license plate closer to the bike. It’s a small change, but visually, it makes a huge difference.
The rear end suddenly looks tighter. Cleaner. More intentional. Instead of that long plastic extension, you get a compact, aggressive profile that matches the rest of the bike’s design.
This mod doesn’t add horsepower. It doesn’t change handling. But it changes how your bike feels when you walk up to it.
tail tidy
Benefits:
Sharper, sportier rear-end appearance
Reduced visual bulk
Cleaner, more aggressive lines
A more modern, custom look
It’s one of the simplest ways to make a motorcycle look less “factory” and more personal.
That said, don’t treat it like just a cosmetic swap. Make sure the new setup includes proper license plate lighting, secure mounting, and functional turn signals if they’re being relocated. Visibility matters — especially at night. When done properly, a tail tidy just finishes the bike. It makes the rear end look the way it probably should have from the factory.
And always check local regulations. Some areas have strict rules about plate angle, reflector placement, and signal spacing. A clean look is great, but getting pulled over for it isn’t.
5. Seat Mod
Let me ask you something. After an hour on your bike, how do you feel?
If you’re shifting around constantly, standing at red lights just to stretch, or feeling that dull ache creeping in — that’s not you being weak. That’s the stock seat reminding you it was built to hit a price target, not to carry you across a state.
Most factory seats are designed for cost efficiency and average comfort. Thin foam. Basic materials. Just enough padding to pass a short test ride. They’re fine for quick trips. But once you start riding longer than an hour, you really begin to notice the limitations.
That’s where a seat upgrade changes everything.
You’ve got a few solid options:
Gel inserts that distribute pressure more evenly and reduce hot spots
Memory foam padding that conforms to your body and improves long-distance comfort
Custom shaping and stitching tailored to your weight, riding posture, and even your inseam
A properly modified seat supports your hips instead of creating pressure points. It keeps your posture more natural. You don’t slide forward under braking as much. And most importantly, you stop thinking about discomfort and start focusing on the ride.
motorcycle seat mod
Benefits:
Reduced fatigue on longer rides
Better weight distribution and pressure relief
Improved riding posture
Increased overall comfort and endurance
If you regularly ride more than an hour at a time — commuting, weekend canyon runs, road trips — a better seat isn’t a luxury. It’s one of the smartest comfort upgrades you can make.
The funny thing is, it’s not flashy. No one at the gas station is going to compliment your foam density. But after two hours on the highway when everyone else is squirming and you’re still relaxed? That’s when you’ll know it was worth it.
6. Heated Handgrips
You don’t realize how important your hands are… until you can’t feel them.
Cold weather doesn’t just make riding uncomfortable — it makes it risky. When your fingers go numb, your throttle control gets sloppy. Braking inputs become less precise. Reaction time slows down. And that tiny delay? On a motorcycle, it matters.
Heated grips solve that problem in the simplest way possible. Instead of trying to fight the cold with thicker and thicker gloves, you bring the heat directly to your hands.
The first time you use them on a cold morning, you’ll get it. Within minutes, your palms warm up. Your fingers loosen. You stop clenching the bars. Everything feels smoother.
And it’s not just about comfort — it’s about control.
Modern heated grips are surprisingly easy to install. Most connect directly to the bike’s electrical system and come with integrated controllers. Many offer multiple heat levels, so you can dial it down on cool fall evenings or turn it up on freezing winter commutes.
place the heated handgrips
Benefits:
Warm hands during cold-weather riding
Improved throttle and brake control
Increased comfort on long winter rides
Multiple adjustable heat levels
Enhanced safety in low temperatures
For riders in colder climates, heated grips aren’t a luxury — they’re a smart upgrade. Even if you don’t ride through snow, extending your comfortable riding season by a few months makes a huge difference.
Once you’ve ridden with warm hands in 40°F weather, it’s hard to go back. You stay relaxed. You stay focused. And instead of counting the minutes until you can get off the bike, you actually enjoy the ride.
Sometimes the best upgrades aren’t about speed. They’re about making sure nothing distracts you from riding well.
7. Levers
You touch your brake and clutch levers more than almost anything else on the bike. Every shift. Every stop. Every corner entry. So if there’s one control point that deserves attention, it’s this.
Stock levers? They work. But they’re built to fit everyone and no one at the same time. Fixed reach. Basic materials. No refinement.
That’s where adjustable levers come in.
These high-performance levers focus on feel, adjustability, and durability. And the difference isn’t flashy — it’s tactile. You feel it immediately.
One of the biggest upgrades is adjustable reach. Not everyone has the same hand size. With adjustable levers, you can fine-tune how far the lever sits from the bar. That means you’re not overreaching or cramping your fingers. The controls feel natural, almost custom-fitted to your hand.
Then there’s the folding design. If you’ve ever dropped a bike at low speed — in a parking lot, on gravel, whatever — you know how easily stock levers snap. Adjustable levers pivot upward in a fall instead of breaking. That alone can save you from being stranded or replacing parts.
The materials are also stronger and more precisely machined than most stock levers. They feel solid. Smooth. Controlled.
asv levers on motorcycle
Benefits:
Adjustable reach for different hand sizes
Folding pivot design to reduce breakage in a drop
High-strength aluminum construction
Improved lever feel and modulation
Upgrading your levers isn’t about horsepower. It’s about connection. Better braking precision. Smoother clutch engagement. Less hand fatigue in traffic or aggressive riding.
When your controls feel right, everything else feels easier. Downshifts get smoother. Trail braking feels more controlled. Even daily commuting feels more refined.
It’s one of those upgrades you don’t realize you needed — until you try it. Then going back to stock feels… cheap.
Small part. Big difference.
8. Windscreen Upgrade
If you’ve ever done a long highway stretch and felt like you were holding onto the bars just to fight the wind, you already understand why this matters.
Wind pressure doesn’t seem like a big deal at first. But at 65–80 mph, that constant force against your chest and helmet slowly wears you down. Your neck tightens. Your shoulders tense up. After an hour, you’re more tired from the wind than from the ride itself.
That’s where a windscreen upgrade makes a real difference.
Most stock windscreens are a compromise. They’re often designed for styling, cost, or to fit a wide range of riders. Sometimes they’re simply too small to provide meaningful protection — especially if you’re taller than average.
A properly chosen aftermarket windscreen changes the airflow around your body. Instead of the wind hitting your chest directly, it’s redirected over or around you. The pressure decreases. Your upper body relaxes. You stop bracing yourself.
One of the biggest improvements riders notice is reduced helmet buffeting. That turbulent shaking at highway speed? A better screen can smooth out the airflow so your helmet stays steadier and quieter.
motorcycle windscreen upgrade
Benefits:
Reduced wind fatigue on long rides
Less helmet buffeting and turbulence
Improved comfort at highway speeds
Better upper-body protection for touring
There are different styles depending on how you ride.
Taller touring windscreens are ideal for highway and long-distance riders. They prioritize maximum wind protection and comfort, especially for commuting or cross-country trips.
Shorter sport screens don’t block as much air, but they help manage airflow more cleanly at higher speeds. They keep the bike looking aggressive while still improving stability and aerodynamics.
The key is choosing the right height for your body and riding position. Too tall, and airflow can hit the top of your helmet awkwardly. Too short, and you’re back to full wind pressure.
When you get it right, though? The ride feels smoother. Calmer. Less tiring. You arrive at your destination feeling like you rode there — not like you wrestled the wind the entire way.
It’s not about hiding from the elements. It’s about managing them so you can ride longer and more comfortably.
9. Rear Sets
Think about every time you’re cornering aggressively. Your foot is on the peg, your leg is tensing, and you’re trying to get the bike to respond exactly how you want.
Stock footpegs are fine for casual riding, but they’re built for “average” riders and everyday comfort. That’s where rear sets come in.
Rear sets replace your stock footpegs and controls with fully adjustable, high-performance units. Most are made from lightweight aluminum, sometimes billet-machined, so they’re stronger but lighter than what came with your bike.
And the magic is in the adjustability — you can move them higher, lower, or further back depending on your height, leg length, and riding style.
Why does that matter? Because a slightly higher or rearward footpeg position gives you more ground clearance when leaning into corners. You can scrape the pegs less often, push harder into turns, and feel more confident when the bike is leaned over. The difference is subtle at first, but after a few spirited rides, you’ll feel like you’re more “connected” to the bike.
motorcycle rear sets
Benefits:
More aggressive and ergonomic riding position
Better ground clearance in corners, so you can lean farther without dragging
Improved control and feel during spirited or track riding
Stronger, lightweight construction that can handle drops better than stock pegs
For street riders, the difference might seem small, but if you hit twisty roads or tracks often, rear sets dramatically improve your confidence and control.
Just remember: adjust them correctly for your size — too high or too far back, and it can throw off comfort during longer rides.
10. Better Mirrors
Let’s be honest—stock mirrors usually work, but not that well.
On some bikes, you end up staring at your own shoulders more than the traffic behind you. And once you pick up speed, the vibration turns everything into a blur. At that point, you’re not really “seeing” anything—you’re just hoping.
Swapping to better mirrors is one of those small upgrades that instantly makes riding feel more controlled. You don’t have to shift your body to check blind spots. You don’t have to squint through vibration. You just glance—and you know.
motorcycle mirror upgrade
Benefits:
Improved rear visibility – A wider, clearer field of view means fewer surprises.
Reduced vibration – Quality mirrors stay steady even at highway speeds.
Sleeker design options – From aggressive bar-ends to refined touring styles, they can completely change the bike’s look.
If you ride a naked bike, bar-end mirrors are a favorite for a reason. They open up the view and give the bike a sharper, cleaner stance.
If you’re more into long-distance touring, stability becomes the priority—touring mirrors focus on clarity and minimal shake over long rides.
It’s not the most exciting mod on paper, but on the road? You’ll appreciate it every single time you check behind you.
Choosing the right motorcycle mods depends on your riding goals. If you want more power, focus on ECU flashing, exhaust upgrades, and suspension improvements. If comfort is your priority, consider a seat mod, heated grips, and a windscreen upgrade.
Start with upgrades that improve safety and control before moving to cosmetic changes. High-quality parts and professional installation will ensure reliability and long-term performance.
With the right modifications, your motorcycle becomes more than just transportation. It becomes a machine perfectly tailored to your riding style and personality.
A motorcycle isn’t just about speed or looks — its sound is part of the thrill. From the deep rumble of a V-twin to the sharp scream of an inline-four, the right engine note can give a bike personality and presence. Engine layout and exhaust design shape this voice, and some machines simply stand out. In this guide, we’ll explore the best sounding motorcycles, highlighting ten bikes that turn every ride into a symphony of raw, exciting sound.
Top 10 Best Sounding Motorcycles
These bikes are not ranked by performance, but by character and sound personality. Every rider hears things differently — this list reflects a passion for machines that speak with personality.
1. Aprilia RSV4
If you’ve never stood next to an RSV4 when it fires up, you’re missing half the experience. That 65° V4 isn’t just about numbers — yeah, it makes around 214 horsepower from 1099 cc — but the real magic is in the way it sounds and feels.
aprilia rsv4
At idle, it’s tight and controlled. Not wild. Not messy. Just a low, tense pulse that tells you it’s holding something back. Then you ease into the throttle.
Mid-throttle is where it really starts talking to you. The sound thickens. It’s not a flat inline-four scream. It’s deeper than that. There’s a layered tone to it — a muscular growl underneath and a smooth, almost silky note riding on top. It feels alive. Like the engine is breathing with intent.
Crack the throttle harder and the twin-outlet exhaust wakes up properly. The resonance fills out. You get that sharp V4 pulse — quick, tight firing intervals — but with a richness that most four-cylinders just don’t have. It doesn’t just get louder. It gets angrier. More urgent. But still refined.
That’s the beauty of the RSV4. It can sound controlled and precise one second, then raw and race-bred the next. On track, when you’re driving out of a corner and it climbs through the revs, the note turns into this fierce, metallic roar that makes the hairs on your arms stand up.
It’s not just noise. It’s character.
And when you roll off the throttle? That slight crackle, that mechanical tension still humming underneath — it reminds you this isn’t some ordinary superbike. It’s a V4 built with attitude.
That’s why riders don’t just talk about how fast the RSV4 is. They talk about how it sounds. Because once you’ve heard it in person, you don’t really forget it.
Technical Snapshot
Engine: 1099cc 65° V4
Power: 214 hp
Redline: 13,600 rpm
Crankshaft: Counter-rotating
Layout: Compact race-derived V4
2. MV Agusta Brutale 1000
The Brutale 1000 isn’t the kind of bike that clears its throat quietly. The moment you hit the starter, you can already tell it’s not here to be polite. That 998cc inline-four feels tight and mechanical at idle, almost restrained — like it’s waiting for you to give it permission.
mv agusta brutale 1000
At lower revs, it’s sharp but controlled. Clean. Precise. Then you start climbing past midrange, and the whole character changes. The Arrow four-outlet exhaust starts to sing — and I mean really sing. It’s not a deep rumble like a big V-twin. It’s higher-pitched, more aggressive, almost surgical in the way it cuts through the air.
As the revs build toward that 13,000+ rpm redline, the sound turns into a full-on Italian scream. Metallic. Urgent. A little wild. It doesn’t just get louder — it tightens up and sharpens, like the engine is winding itself to the limit. And because this thing pushes around 208 horsepower, it revs fast and hard. The note climbs quickly, and when it does, it feels electric.
What I love about it is the contrast. Compared to something like a big Guzzi twin, the Brutale doesn’t rumble — it snarls. It howls. It almost sounds angry when you open it up. There’s this razor-edge tone in the top end that gives it that unmistakable “Italian superbike DNA.”
And when you roll off? You get that crisp deceleration bark. Not messy. Not sloppy. Just tight and purposeful.
It’s not a friendly soundtrack. It’s intense. Dramatic. The kind of sound that makes people turn their heads before they even see the bike.
That’s the Brutale 1000. It doesn’t whisper. It announces itself.
Technical Snapshot
Engine: 998cc inline-four
Power: ~208 hp
Redline: 13,000+ rpm
Exhaust: Quad-outlet Arrow system
3. Yamaha CP4 (MT-10 / YZF-R1)
If you’ve never heard a CP4 in person, let me explain it the way I would in the paddock.
It’s not your typical inline-four sound. It doesn’t have that smooth, sewing-machine whine. The CP4 — especially in bikes like the MT-10 or the R1 — feels alive in a different way. The crossplane crank changes everything.
Yamaha CP4 engine models
Fire it up, and the first thing you notice is that uneven pulse. It has this off-beat rhythm, almost like a V4 hiding inside an inline-four body. At idle, it already has a little attitude. Blip the throttle and you get this deep, bass-heavy bark that feels raw and mechanical.
Now here’s where Yamaha got clever. On the MT-10, they didn’t just tune the exhaust — they tuned what you hear. The intake ducts and those acoustic grilles channel the induction noise straight toward the rider. So when you roll on the throttle, you don’t just hear the exhaust behind you — you hear this deep intake roar rising up in front of you.
At lower RPM, it growls. Thick. Guttural. Almost muscular. It doesn’t sound refined — it sounds intentional. Then you climb past midrange, and the whole thing tightens up. The growl turns into a sharper, more urgent howl. Push it toward redline, and it starts to scream like a proper superbike — but it never loses that crossplane character underneath.
That’s what makes the CP4 special. It gives you two personalities in one engine. A rumbling, bassy bottom end that feels like it’s punching out of corners — and a snarling, race-bred top end that just begs to be revved.
And with around 165 horsepower in the MT-10, it has enough muscle to make that soundtrack feel real, not just dramatic.
It’s not the prettiest sound. It’s not the smoothest. But it’s one of the most visceral. The kind of engine that makes you roll the throttle just to hear it again.
Technical Snapshot
Engine: 998cc crossplane inline-four (CP4)
Power: ~165 hp (MT-10) / ~200 hp (R1)
Crankshaft: 90° crossplane
Redline: ~14,000 rpm
4. Honda VTR1000 SP-2 (RC51)
The Honda VTR1000 SP-2 (RC51) wasn’t built to be polite. It was built to go after Ducati on the world stage. And the moment you fire up that 999cc 90-degree V-twin, you can feel that purpose.
honda vtr1000 sp-2
At idle, it doesn’t explode into noise. It settles into this deep, steady pulse. There’s a heavy thump in the background, like a slow heartbeat with weight behind it. But then you notice something else — that mechanical whirr from the gear-driven cams. It’s subtle, but once you hear it, you can’t un-hear it. It gives the bike this layered personality: part muscle, part precision machine.
Blip the throttle and the whole thing tightens up. The low-frequency rumble becomes sharper, more focused. It doesn’t bark wildly like some Ducati twins. It’s more controlled than that. More disciplined. But it still carries that deep, chesty resonance that only a big V-twin can deliver.
Now roll it open under load. That’s when the SP-2 really shows itself. The exhaust note thickens and grows into a strong, rolling roar as it climbs toward redline. It’s not shrill. It’s not frantic. It feels planted and powerful, like the engine is pushing a solid wall of torque forward with every pulse.
Compared to some Italian twins, it might sound slightly less dramatic, less snarling. But what it has is substance. A bold, confident thump that feels mechanical and honest. You don’t just hear it — you feel it through the bars and the pegs.
It’s the kind of sound that reminds you this was a homologation race bike. Raw, purposeful, and built to compete.
The SP-2 doesn’t scream for attention. It stands there, idling with that deep twin rhythm, almost daring you to twist the throttle again.
Technical Snapshot
Engine: 999cc 90° V-twin
Power: ~133 hp
Valvetrain: Gear-driven cams
Redline: ~10,000 rpm
5. Ducati V2 (L-twin models)
When we talk about Ducati L-twins, we’re not just talking about engines. We’re talking about a sound that almost defines the brand.
Fire up a Panigale V2 or the new Monster V2 and you immediately know what it is. That 90-degree L-twin doesn’t hum — it pulses. There’s this tight, mechanical rhythm at idle, almost like the engine is breathing through its teeth.
Ducati V2
Blip the throttle and you get that unmistakable Ducati response. Not smooth like a Japanese inline-four. Not lazy like some big cruisers. It snaps. It barks. There’s a sharp, raspy edge to it that riders usually sum up with one word: braaap.
Out on the road, especially in the midrange, that’s where the magic lives. Roll the throttle open and the exhaust note turns into this rich, brappy roar that feels alive and slightly rebellious. It doesn’t just make noise — it talks back to you. There’s a surge in the middle of the rev range that matches the sound perfectly. You hear the growl, and at the same time you feel that strong twin-cylinder punch pushing you forward.
What makes the Ducati V2 so addictive is the texture of the sound. It’s raw. A little raspy. Almost metallic at times. Through the stock two-into-one system, it already has a strong personality. But open it up with less baffling — like on track setups or with a proper aftermarket pipe — and it turns into something much more primal. Louder, deeper, more aggressive. The kind of roar that echoes off walls and makes people turn around before they even see the bike.
It’s not a polite soundtrack. It’s emotional. Dramatic. Very Italian.
And that’s why, even today, the Ducati L-twin remains one of the benchmarks for how a performance twin should sound. Not just powerful — but full of character.
Technical Snapshot
Engine: 955cc 90° L-twin (Superquadro)
Power: ~155 hp
Valvetrain: Desmodromic
Redline: ~11,500 rpm
6. Triumph Speed Twin 1200
The Speed Twin 1200 isn’t trying to scream like a superbike. It doesn’t need to. The moment you fire it up, that 1200cc parallel twin settles into this confident, off-beat pulse thanks to the 270-degree crank. It has that slightly uneven rhythm that makes it feel alive — almost like a big V-twin hiding inside a classic British frame.
Triumph Speed Twin 1200
At idle, it’s deep and steady. Not loud. Not dramatic. Just a solid, reassuring thrum that you feel through the seat and bars.
Now roll away gently. Even at moderate speeds — say cruising through town around 60 km/h — you can clearly hear the exhaust note. It’s present, but never annoying. That’s the impressive part. It speaks, but it doesn’t shout. You don’t feel embarrassed riding past cafés, but you definitely know you’re on something with character.
Open the throttle harder and the tone changes. The low-end rumble thickens into a deeper, throatier growl. There’s a raw bark when you rev it out, especially in the midrange where the torque really wakes up. It doesn’t climb into a high-pitched scream like a four-cylinder sportbike. Instead, it stays muscular and earthy.
That 270-degree firing order gives it this demanding twin feel — you can sense each combustion pulse. It makes the engine feel engaged with you, not just spinning quietly in the background. Every twist of the throttle gets a response that feels mechanical and honest.
That’s what makes the Speed Twin special. It’s not about volume. It’s about texture. A deep, classic rumble at low revs, a lively bark when pushed, and a soundtrack that matches its modern-retro personality perfectly.
It’s the kind of bike that sounds exactly the way it looks — strong, confident, and full of character.
Technical Snapshot
Engine: 1200cc parallel twin
Crank: 270-degree
Power: ~100 hp
Redline: ~7,500 rpm
7. Moto Guzzi V100 Stelvio
Now this one… this one has presence.
The V100 Stelvio keeps that classic Moto Guzzi transverse twin layout, and you can feel it the second you hit the starter. The bike rocks slightly to the side — that familiar Guzzi handshake — and then it settles into this deep, confident rumble.
Moto Guzzi V100 Stelvio
At idle, it’s warm and heavy. Not sharp. Not frantic. Just a big 1042cc twin breathing slowly, almost lazily. There’s a richness to it that feels mechanical and old-school, even though the bike itself is modern.
Start rolling, keep the revs low, and you get that menacing undercurrent. It’s not loud in an obnoxious way — it’s just full. There’s weight in the sound. You feel it more than you hear it.
But here’s the part that surprises people.
As you climb through the rev range, the tone doesn’t just get louder — it transforms. That mellow burble tightens up and turns into a fierce, layered growl. There’s this complexity to it, almost like multiple notes blending together. Some riders even compare it to a small V12-style growl at higher revs. It has that smooth yet aggressive texture that feels bigger than a twin should.
A lot of that comes from the displacement and the way the headers are tuned. The sound builds in waves. It doesn’t spike — it swells.
And compared to older Guzzis, this one feels amplified. More refined, but also more dramatic. It keeps the traditional Guzzi rumble, but with modern sharpness layered on top.
The Stelvio doesn’t scream like a sportbike. It doesn’t snap like a Ducati. It growls. Deep. Confident. A little intimidating.
It’s the kind of sound that suits a big adventure machine perfectly — like it’s ready to cross continents, but it wouldn’t mind scaring a few tunnels along the way.
Technical Snapshot
Engine: 1042cc transverse 90° V-twin
Power: ~115 hp
Cooling: Liquid-cooled
Redline: ~9,500 rpm
8. Moto Guzzi V7
If you’ve ever stood next to a V7 when it fires up, you know it doesn’t try to impress you with volume. It wins you over with rhythm.
Hit the starter and the bike gives that classic little sideways shake from the transverse V-twin. It’s subtle, but it reminds you this isn’t just another parallel twin hiding in a retro frame. It’s pure Guzzi character.
moto guzzi v7
At idle, the V7 settles into a warm, steady thump. Not aggressive. Not flashy. Just honest. It sounds mechanical in a very satisfying way — like you can hear each piston doing its job. There’s a gentle burble from the exhaust that feels almost old-school, like something from a different era but refined enough for today.
Ride it through town and keep the revs low, and the sound stays mellow. Deep but relaxed. It doesn’t demand attention, but people who know motorcycles will turn their heads anyway. There’s texture in the note — a soft, syncopated pulse that feels alive beneath you.
Open it up a bit more and that mellow burble turns into a fuller, rounder growl. It never screams. That’s not its personality. Instead, it builds a thick, earthy tone that matches the bike’s laid-back torque delivery. You roll on the throttle and the sound just swells naturally with the power.
The V7 doesn’t try to be dramatic. It’s confident. It sounds like a motorcycle that knows exactly what it is — classic, soulful, and full of personality without trying too hard.
Technical Snapshot
Engine: 853cc transverse 90° V-twin
Power: ~65 hp
Cooling: Air-cooled
Redline: ~6,800 rpm
9. Kawasaki Z900
The Z900 is a completely different conversation.
Fire it up and you immediately hear that inline-four smoothness, but there’s a sharp edge underneath. It doesn’t rumble like a twin. It hums — tight, precise, controlled.
kawasaki z900
At idle, it’s clean and refined. But give it a quick throttle blip and you hear that classic four-cylinder snap. The revs climb fast, and the sound rises with them in a smooth, fluid sweep.
Cruising around town, it stays composed. The exhaust note is sporty but not overwhelming. There’s a crispness to it, like it’s always ready to spin faster. And that’s the key with the Z900 — it loves to rev.
Once you get into the midrange and start pushing harder, the tone sharpens. The smooth hum transforms into a higher-pitched, urgent howl. Not as wild as a supersport at 14,000 rpm, but aggressive enough to feel exciting. It has that unmistakable inline-four scream building as the tach climbs.
What makes the Z900 satisfying is how linear the sound feels. There’s no sudden spike or roughness. It just builds cleanly and confidently all the way through the rev range. Twist the throttle, and the soundtrack climbs in one smooth arc.
It’s not nostalgic like the V7. It’s modern. Precise. Athletic.
The V7 talks to you in a low, soulful voice. The Z900 speaks fast — and gets louder the more you push it.
Technical Snapshot
Engine: 948cc inline-four
Power: ~125 hp
Redline: ~11,000 rpm
Layout: 180° crank inline-four
10. CF Moto 450MT
Now this one surprises a lot of riders.
The 450MT doesn’t look like it should sound special. It’s a 449cc adventure bike. Not huge. Not exotic. But the moment you hear that 270-degree parallel twin, you realize there’s more character here than you expected.
CF Moto 450MT
At idle, it has that slightly uneven, off-beat pulse that we all love from a 270° crank. It doesn’t hum like a small twin. It has a little thump to it. A small but confident heartbeat.
Roll the throttle open and you get this grumbly growl that feels bigger than 450cc. There’s a bit of rasp in there too — just enough edge to keep it interesting. It doesn’t sound like a budget bike trying too hard. It sounds intentional.
What makes it fun is how the firing order gives it personality. That uneven pulse creates texture in the exhaust note. It feels alive, not flat or sterile. In the midrange, where you’ll spend most of your time riding trails or back roads, the engine has a throaty punch that matches the sound perfectly. You hear the growl, and you feel that little surge pushing you forward.
And if you swap to a sports silencer? That’s when it really wakes up. The tone becomes fuller and more defined. Deeper. A bit more aggressive. The rasp sharpens slightly, and the overall sound gains weight. Suddenly, this small adventure bike starts sounding far more serious than its 42 horsepower would suggest.
It won’t roar like a liter bike. That’s not the point.
What it gives you is character in a compact package. A nicely textured twin rumble that makes every throttle input feel more engaging than you’d expect from a mid-capacity ADV.
It’s one of those bikes where you start riding for practicality — and end up blipping the throttle just to hear that little twin talk back to you.
Technical Snapshot
Engine: 449cc parallel twin
Crank: 270-degree
Power: ~42 hp
Redline: ~9,500 rpm
Best Sounding Motorcycles – Technical Overview
For readers who prefer hard data alongside emotion, here’s a technical overview of the bikes featured above.
Model
Engine Layout
Displacement
Power (Approx.)
Redline
Sound Character
Aprilia RSV4
65° V4
1099cc
214 hp
13,600 rpm
Metallic V4 roar with layered midrange growl
MV Agusta Brutale 1000
Inline-four
998cc
208 hp
13,000+ rpm
Sharp Italian scream with aggressive top-end
Yamaha MT-10 / YZF-R1
Crossplane inline-four
998cc
165–200 hp
~14,000 rpm
Uneven pulse with deep intake roar and race-style howl
Honda VTR1000 SP-2 (RC51)
90° V-twin
999cc
133 hp
10,000 rpm
Deep twin thump with mechanical cam whirr
Ducati Panigale V2 / Monster V2
90° L-twin
955cc
155 hp
11,500 rpm
Raspy, brappy midrange punch with metallic edge
Triumph Speed Twin 1200
270° Parallel twin
1200cc
100 hp
7,500 rpm
Deep off-beat rumble with muscular bark
Moto Guzzi V100 Stelvio
Transverse 90° V-twin
1042cc
115 hp
9,500 rpm
Heavy rumble that swells into layered growl
Moto Guzzi V7
Transverse 90° V-twin
853cc
65 hp
6,800 rpm
Warm, syncopated classic burble
Kawasaki Z900
Inline-four
948cc
125 hp
11,000 rpm
Clean, linear build into sharp high-rpm howl
CFMoto 450MT
270° Parallel twin
449cc
42 hp
9,500 rpm
Compact twin throb with grumbly growl
🎵Which Engine Sounds the Best?
It really depends on your taste:
🔊 Deep rumble – V-twins like Ducati or Moto Guzzi
⚡ High RPM scream – MV Agusta or Yamaha R1
🎯 Balanced character – Aprilia RSV4
🕰️ Classic retro tone – Triumph Speed Twin 1200
💸 Character on a budget – CFMoto 450MT
Motorcycle sound is personal. The best bike is the one that makes you smile every time you twist the throttle.
💨 Stock vs Aftermarket Exhaust
Aftermarket exhausts from brands like Akrapovič, Termignoni, SC-Project, or Yoshimura can make your bike sound even better.
⚠️ But keep in mind:
📜 Follow local noise laws
✅ Ensure it is street legal
🚫 Don’t remove catalytic converters if it’s illegal
🌱 Modern motorcycles follow strict emissions rules. Ride responsibly!
Conclusion
At the end of the day, a motorcycle’s sound is more than noise — it’s character, emotion, and a connection between rider and machine. Whether it’s the throaty rumble of a Guzzi, the snarling scream of a Brutale, or the guttural howl of a Yamaha CP4, each of these best sounding motorcycles turns every ride into an experience worth remembering. So the next time you twist the throttle, don’t just feel the power — listen, and let the soundtrack of your ride speak for itself.
Green laning is a popular countryside activity. From quiet countryside tracks to rugged trails hidden from main roads, it’s a hobby that lets you uniquely experience the land. But it’s often misunderstood. Different routes allow different vehicles, and the rules can vary depending on location and classification.
In this guide, you’ll learn about the background of green laning, the vehicles involved, the legal framework, and essential tips for safe and responsible riding.
What Is Green Laning?
Green laning is basically hitting up old country roads that aren't paved. They're totally legal to use, but instead of smooth blacktop, you're dealing with grass, mud, rocks, and good old dirt. Because plants and grass grow over them, people call them “green lanes.”
Green laning isn't about going fast or doing crazy off-road stuff. It's about taking it slow, enjoying nature, and being cool to the land and everyone else using the path.
In the UK, green lanes are mainly found as Byways Open to All Traffic (BOATs) or Unclassified County Roads (UCRs). These routes are all over, and a lot of people probably live closer to one than they think.
A Brief History of Green Laning
history of green laning
Green lanes have been around way before they became a fun pastime. They popped up naturally as people walked, rode horses, or moved animals across the land.
Over time, these lanes turned into important links between farms, villages, and local markets.
Because these routes were used daily rather than built to modern standards, they were never paved. As folks started using newer roads, many of these old paths were left to chill out on their own. Slowly, grass, bushes, and trees took over again.
Later on, motorcycles and off-road vehicles got popular, and people began finding these forgotten routes.
Nowadays, green laning lets riders and drivers follow the same paths that have been used for ages. Plus, using them responsibly and legally helps keep them open for everyone.
Legal Considerations for Green Laning
Knowing the law is a key part of green laning. But before you do, it's super important to know the rules of the road (or, well, the trail).
Not every path is fair game for motorized vehicles. Messing up could mean fines and make green laning look bad overall.
1. Rights of Way
A right of way is a public route that people are legally allowed to use. However, only a small number of rights of way allow motor vehicles.
These routes are recorded by local councils and shown on official maps.
Always double-check if a green lane is legal before you take it. Don't just guess because it looks like a road!
2. Byways Open to All Traffic (BOATs)
Byways Open to All Traffic, often called BOATs, are public highways that allow all types of users. This includes cars, motorcycles, walkers, cyclists, and horse riders.
BOATs are usually your best bet for legal green laning. Since lots of people use them, drive slow, keep the noise down, and be polite to everyone else.
3. Restricted Byways
Restricted Byways are also public routes, but usually, no motor vehicles are allowed. They're mainly for walkers, cyclists, and horseback riders.
Unless a sign says otherwise, stay off restricted byways when you're green laning.
4. Road Traffic Act Compliance
Even off-road, green laning is still subject to UK road laws. Vehicles must be taxed, insured, and meet road safety standards if they are road-legal. Off-road-only vehicles must be used on trails where motor vehicles are allowed.
What Types of Vehicles Can Be Used?
Green laning can be done with different types of vehicles. Not every lane is cool with every vehicle.
Some paths are tight and bumpy, while others are more open and chill. Always double-check the rules beforehand.
types of vehicles used for green laning
Here are the most common vehicles used for green laning.
1. Motorcycles and Trail Bikes
Trail bikes are a top pick. They're light, easy to handle, and great for those skinny, rough trails where bigger rides would have a tough time.
If you're on a street-legal bike, remember the usual rules apply. You gotta have your license, insurance, road tax, and a bike that's not a death trap.
4x4s are often the go-to for the wider, tougher lanes. Think Land Rovers, Jeeps – those vehicles made for mud, rocks, hills, and splashing through water.
Some people trick out their rides with huge tires, lifted suspension, or even snorkels. These mods can be handy on super gnarly stuff, but you defo don't need them for the easier routes when you are starting out.
3. Electric and Hybrid Vehicles
You're starting to see electric and hybrid rides out on the lanes. They're quieter and cleaner, so they're a solid pick for areas where you want to keep things mellow.
Just plan ahead! Battery life, charging spots, and the type of land can all play a big role when you're bringing an electric ride.
Is Green Laning the Same as Off-Roading?
Green laning and off-roading are often confused, but they are not the same thing.
The difference between green laning and off-roading
Green laning is all about hitting up these legal, unpaved public roads. Think of them as part of the regular road system, just a bit rougher around the edges. You're still following the rules of the road out there.
Off-roading, on the other hand, usually goes down on private land, special tracks, or places where you pay to ride. These spots aren't public roads, and the vehicles don't always have to be street legal.
The whole vibe is different, too. Green laning is about taking it easy, checking out the scenery, and sharing the trail. Off-roading is often more about seeing what your vehicle can do, going over tough stuff, and pushing limits.
Since green lanes are for everyone, being a good sport is key. Stay on the path, don't go too fast, and be cool to other people out there.
Basically, if you're on a public, unpaved road that's legal to use, you're green laning. If you're on private land or a closed course, that's off-roading.
Green Laning for Beginners
If you’re new to green laning, here are some tips to help you get started:
Start Small – Begin with easy lanes to get used to handling your vehicle on rough terrain.
Join a Motorcycle Club – Many off-road clubs offer guided runs and training for beginners.
Learn Basic Recovery Skills – Know how to use a winch or tow strap safely if your vehicle gets stuck.
Use GPS or Maps – Mobile coverage may be poor, so bring a physical map and compass as backup.
Travel With Friends – Having a companion can be a lifesaver in remote areas.
Getting started is one thing, but staying safe on the lanes is just as important once you’re moving.
Safety Tips for Green Laning
Green laning is great fun, but a little preparation goes a long way. Before you head out, think about these safety tips – they'll make your trip way better.
Check your ride fast
Give those tires, brakes, lights, and engine a quick once-over. Spotting problems early? Huge win.
Gear up right
Helmet, gloves, tough boots, and bright clothes aren't just for show. They keep you safe and help others see you on tight paths.
Stick to the path
Going around mud looks good, but leaving the trail wrecks the place and is often not allowed.
Easy on the gas
Green lanes hide rocks, ruts, roots, and thick mud. Slow and steady wins every time.
Look out for others
Hikers, bikers, and horses use these lanes too. Slow down, chill out, and give them room.
Watch the weather
Rain can make any lane super slick. If it looks sketchy, turning back is smart.
Pack must-haves
A map, a first-aid kit, water, and some basic tools might really save you if you're stuck way out there.
Green Laning Etiquette
green laning etiquette
When you’re out on the lanes, it’s not just about having fun—you’re sharing the space with nature and other people.
Here’s how to keep things smooth and enjoyable:
Stick to the lanes that are there – It keeps the ground from getting torn up and protects the countryside.
Watch out for wildlife and sensitive spots – Some areas are fragile, so give them space.
Take your rubbish with you – Leaving trash behind spoils it for everyone.
Keep your engine quiet when you can – It’s nicer for the birds… and the walkers.
Give way to others – Walkers, cyclists, and horses all have priority, so slow down and let them pass.
Mind your noise – You don’t need to roar through every lane; a chill pace works just fine.
Don’t make new tracks – Stick to the paths that exist; widening or making your own trail damages the land.
Help out if you can – Pick up litter, tidy small bits of trail, or share tips with fellow riders—it keeps the lanes open and fun for everyone.
Popular Green Laning Routes in the UK
The UK has tons of green lanes, so there’s bound to be something perfect for you, no matter what you like to ride or how good you are.
Not sure where to begin? Lots of green laners love these areas.
The Lake District: Get ready for amazing views of mountains, valleys, and lakes all around. Many lanes work for both motorcycles and 4x4s. Just take it easy – other people love these routes too.
Exmoor National Park: If you like a challenge, this is a great pick. Think forest tracks, hills, and some tricky spots that will really test your skills.
The Peak District: This place has it all. There are easy lanes for those just starting out, plus tougher stuff for more seasoned riders, and it’s all packed into one area.
The New Forest: Things are slower and more chill here, with easy lanes going through woods and open fields. It is perfect for a relaxed day or for riding with friends who are newer to this.
The Scottish Highlands: It’s remote, rugged, and so worth it. If you want a real, wild time, these lanes are perfect. Just be sure to plan well, since it is far away and conditions can be rough.
How to Find Green Lanes
how to find green lanes
Finding green lanes is not rocket science, but you can't just wing it. Don't just head down any old track thinking it'll be alright.
Here's how most riders find the right lanes, the easy way.
1. Use Real Maps
The easiest thing to do is check the maps from the local council. These maps show all the routes that are okay for cars and bikes. It might take a minute, but it'll save you from getting into trouble later.
2. Use Green Laning Apps and GPS
Loads of riders use GPS apps made for green laning. These apps show you lanes where you're allowed to ride, track where you're going, and help you stay away from paths that are closed. Just remember—apps are good, but they aren't always spot-on.
3. Join a Club or Ride With People Who Know the Area
Riding with a club is a good way to learn. People who live nearby know which lanes are open, the best ones if you're new to this, and which ones to miss if it's been raining a lot.
4. Look for Signs
The signs at the start of a lane tell you what's what. A BOAT sign usually means you can drive or ride there. If you see signs that say you can't drive there, turn around and go somewhere else.
5. Check Before You Head Out
Lane rules can change because of bad weather or if the council changes them. Give it a quick check before you go, so green laning is safe for everyone.
Spending a bit of time finding the right lanes makes the ride way more chill. When you know you’re on the up-and-up, you can just enjoy the ride.
❓ FAQ – Green Laning Guide
🌿 What is green laning?
Green laning is the legal use of motor vehicles on unsurfaced public roads known as green lanes. These lanes are public highways, not private land, and are often found in rural areas.
Green laning is commonly enjoyed by riders on road-legal motorcycles and drivers of 4x4 vehicles who want to explore the countryside responsibly.
⚖️ Is green laning legal?
Yes, green laning is legal in the UK, but only on routes that have legal vehicular rights. These routes are usually classified as Byways Open to All Traffic (BOATs) or roads with proven motor vehicle access. Riding or driving motor vehicles on footpaths, bridleways, or restricted byways is illegal.
🛣️ What is the difference between a BOAT and a restricted byway?
A BOAT (Byway Open to All Traffic) allows all types of traffic, including motor vehicles.
A restricted byway does not allow motor vehicles, except in rare legal cases.
Confusing these two route types is a common cause of illegal riding, so it is important to check route classification carefully.
🚙 What vehicles are allowed on green lanes?
Only road-legal vehicles are allowed, including:
Road-legal motorcycles and trail bikes
Dual-sport and adventure motorcycles
4x4 vehicles
All vehicles must be registered, taxed, insured, and roadworthy. Off-road-only vehicles are not permitted on public green lanes.
🗺️ How do I know if a green lane is legal to use?
You can check legality by using:
📍 Local council Definitive Maps
🗺️ Ordnance Survey maps
📱 Trusted green laning GPS apps or route databases
Always check for Traffic Regulation Orders (TROs), as some lanes may be temporarily or permanently closed.
🌱 Can beginners do green laning?
Yes, green laning is beginner-friendly. Many lanes are easy and suitable for standard vehicles.
Beginners should start with simple routes, choose dry conditions, and avoid difficult terrain such as deep mud.
Riding or driving with experienced users or a local club is strongly recommended.
🎫 Do I need a special license for green laning?
No special license is required. You only need a valid UK driving or motorcycle license for the vehicle you are using. All normal road traffic laws apply on green lanes.
🚶♂️🐎 Are green lanes shared with other users?
Yes. Green lanes are shared with walkers, cyclists, horse riders, and farm vehicles. Motor vehicle users must slow down, give way, and be respectful at all times.
Pedestrians and horses always have priority.
🆚 What is the difference between green laning and off-roading?
Green laning takes place on public rights of way where motor vehicles are legally allowed. Off-roading usually happens on private land with the landowner’s permission.
Green laning focuses on access, scenery, and responsible use, while off-roading often involves technical obstacles and challenging terrain.
🌍 Is green laning bad for the environment?
Green laning is not harmful when done responsibly.
Staying on legal routes, avoiding damaged or waterlogged lanes, and following countryside codes help protect the environment.
Most environmental damage occurs when riders ignore rules or use illegal trails.
⛔ Can green lanes be closed?
Yes. Green lanes can be closed due to weather damage, safety concerns, or environmental protection.
These closures are usually enforced through Traffic Regulation Orders (TROs) and must always be respected.
🎒 What equipment do I need for green laning?
Basic equipment includes:
🧭 Maps or a GPS device
🩹 First aid kit
🧥 Suitable protective clothing
💧 Food and water
For vehicles, recovery gear such as a tow strap and basic tools is recommended, especially in remote areas.
🤝 Are green laning clubs worth joining?
Yes. Green laning clubs provide legal advice, route information, training, and organized group rides.
They also play an important role in protecting green lanes and maintaining long-term access for riders and drivers.
Conclusion
Green laning is a cool way to check out the countryside. You get to cruise on old trails and rough paths.
Whether you're on a bike or in a 4x4, just remember to be cool about it: respect the land, other people, and the animals you see.
If we play it safe, follow the rules, and keep these old routes in good shape, everyone can enjoy green laning for years.
So, get your stuff together, get out there, and have some fun. Your next awesome ride is waiting for you.
Long motorcycle rides sound romantic. You can enjoy the open roads, endless horizons, and hours of throttle therapy. But how to stay comfortable on long motorcycle rides?
Anyone who’s actually done 300, 500, or 1,000 miles in the saddle knows the truth: comfort is the difference between a great ride and a miserable one.
I’ve done long highway slogs on touring bikes, dusty all-day ADV rides, and slow, relaxed cruiser trips. But, somehow, it still left me sore by sunset. Over time, I learned that comfort isn’t about one magic upgrade. It’s a system—your body, your bike, your gear, and how you ride all working together.
This guide breaks down exactly how to stay comfortable on long motorcycle rides, based on my real-world riding—not theory.
Why Long Motorcycle Rides Become Uncomfortable
On long motorcycle rides, you’re in a mostly static posture for hours. This strains your back, neck, shoulders and legs, reducing blood flow, increasing pressure on contact points. And eventually, this causes muscle fatigue.
Besides, the constant wind resistance and vibrations from the bike and road are other problems. They make your muscles tense and even numb your hands or feet.
If the motorcycle you ride has poor ergonomics, you will also feel uncomfortable. For example, a seat that puts pressure on your sit bones or awkward handlebar/footpeg positions will add to your discomfort.
Moreover, if you are exposed to the elements and needing constant focus during long distance motorcycle ride, it also tires you physically and mentally.
Usually, after a few hours of long distance ride, I will feel:
Pressure points build up (seat, hands, feet)
Blood circulation slows, causing numbness
Wind and vibration fatigue your muscles
Mental focus drops, even if you don’t feel “tired”
On a bike, even small ergonomic problems get amplified with time. A slightly forward lean feels fine for 30 minutes—but brutal after 5 hours.
01. Prepare Your Body Before the Ride
Most riders focus on the bike and forget the rider. This is a big mistake.
I prefer to get my body well prepared before the long ride. Here I will share to all riders:
Firstly, do some cardio or core work in advance.
I will do some light cardio or core work in the weeks before a long ride. This aims to build my body's stamina and endurance.
Usually, you may plan to have a long-distance motorcycle rider a few weeks or months before it really starts. So, do some cardio or core work, make sure your body is in a good state.
Don't ignore this! I've tested this several times, and after doing these things, my physical condition during motorcycling was indeed much better than before.
Secondly, do some stretches.
Do some stretches before you start a long ride - Improve Comfort on Long Motorcycle Rides
I will stretch my legs, back, shoulders, and arms before I leave. This aims to warm up my muscles and helps reduce stiffness and fatigue once I’m on the road.
I used to skip stretching. Now I don’t leave without it. With just five to ten minutes of stretching, it makes a noticeable difference by midday.
I usually focus on neck rolls, shoulder shrugs, hip flexor stretches, hamstrings, and wrist circles.
This is especially important for ADV and sport-touring riders, who move around more on the bike.
Thirdly, sleep, hydration, and food
Sleep, hydration, and food are important parts of prepping your body before a big ride.
Usually, I will get a good night’s sleep for several nights leading up to my trip. This helps my muscles recover and keeps my focus sharp on the road.
If it is a hot weather day, I will try to stay well hydrated in the hours before I start riding and sip water often.
And, I will eat a balanced meal before I go. This gives my body steady energy and helps avoid mid-ride crashes or sluggishness.
Here are some tips that are best for me:
Light breakfast with protein
Small snacks during fuel stops
Constant hydration (camelback or tank-bag bottle)
02. Choose Proper Bike: Touring vs ADV vs Cruiser Ergonomics
For long-distance motorcycle rides, ergonomics make a huge difference. Different motorbike styles feel very different on your body.
Here’s a simple comfort comparison table for long rides between Touring, ADV (Adventure), and Cruiser motorcycles
Feature
Touring
ADV (Adventure)
Cruiser
Seating Position
Upright & neutral — great for long hours in the saddle
Laid-back feet-forward — comfy at first but can strain lower back over time
Wind Protection
Large windscreen & fairing — excellent at highway speeds
Often adjustable wind protection — reduces fatigue
Often minimal unless aftermarket added
Suspension Comfort
Soft/adjustable — smooth on long highways
Long-travel — great on rough roads
Softer rear shock — okay on smooth pavement
Storage for Gear
Built-in luggage — very practical
Often has panniers & racks — good versatility
Usually need aftermarket bags
Best For Long Rides Comfort
Highest
Very high (especially mixed roads)
Moderate (best for relaxed cruising)
Touring bikes
Touring bikes are built for long days in the saddle. They have an upright, neutral seating position, big comfortable seats, wind protection, and turned suspension. They are designed for smooth cruising, so you stay fresh mile after mile.
Pay attention to the following 2 aspects when riding with touring motorbike:
Often need bar risers or seat height tweaks
Wind management is key
ADV bikes
ADV (adventure) bikes also sit you upright with higher handlebars and supportive seats, plus great suspension for varied roads. That upright posture reduces strain on your back and wrists and helps comfort on long rides.
2 details you need to pay attention to if you choose ADV bikes for touring:
Peg-to-seat distance matters most
Standing occasionally helps circulation
Cruisers
Cruisers feel relaxed at first with their laid-back feet-forward position. However, over many hours, that posture can load your lower back and limit leg movement. This makes you more tired than a tourer or ADV on extended trips.
Be careful about the following when riding with cruisers:
Stock seats are designed for cost, looks, and short test rides. They are not designed for 8-hour days.
Comfort is not the first thing the factory seat considers. They often concentrate pressure on your tailbone and sit bones, causing numbness and soreness after a couple of hours in the saddle.
Aftermarket seats or gel/foam upgrades spread your weight more evenly, reduce pressure points, absorb road vibration, and let you ride longer with less fatigue.
Here are some popular aftermarket seat options riders swear by:
Constant wind pressure will slowly drain your energy. And this will sneak up on you during long highway miles.
A good windshield or fairing can redirect the air over and around you so your chest and head don’t take the full blast.
Once there is a long-distance motorcycle ride, I will install the windshield on my motorbike.
Believe me or not, this truly reduces the muscle fatigue in my neck, shoulders and arms. It also helps cut the wind noise and buffeting that wears me down over hours in the saddle.
So even if you’re not going faster, better wind protection keeps you more comfortable and less tired on long rides.
Here, I will give you a brief recommendation about reducing wind for different motor types:
Touring riders: Adjustable windscreens are worth it ADV riders: Look for turbulence reduction, not total block Cruiser riders: Even a small screen helps more than you expect
Vibration Control
Buzzing feeling through the bars is usually what makes your hands go numb — not how hard you’re gripping. Motorcycle engine and road vibrations travel straight through the handlebars into your hands and can irritate nerves and reduce blood flow. These will lead to numbness, tingling, and fatigue on long rides.
To improve comfort, I have several simple but useful tips. You can use vibration-damping grips (such as foam or rubber grips), padded gloves, bar-end weights, and make sure your suspension is set up right. Besides, properly balanced tires are also useful.
Earplugs = Less Fatigue
This one may surprise new riders, because they may ignore this.
But I still want to recommend it as a good option because wind noise causes mental fatigue.
Earplugs don’t block important sounds—but they reduce exhaustion dramatically.
06. Choose Gear That Keep You Comfortable for Hours
Helmet Comfort Is Everything
A helmet that feels “okay” for 20 minutes may be torture at hour four.
When I'm about to embark on a long-distance cycling trip, I choose a helmet that fits properly, with the main goal being a snug but not tight fit.
This type of helmet prevents pressure points and discomfort around my head and cheeks.
In addition, high-quality padding and moisture-wicking lining are also factors I consider. They help reduce sweat, heat, and irritation during long rides.
Another detail I consider is the helmet's weight; a lighter helmet reduces strain on my neck during extended rides.
Furthermore, a good ventilation system keeps my head cool, minimizing fatigue. Better sealing and a snug fit also reduce wind noise and buffeting, allowing me to stay energized during long rides.
In general, long distance motorcycle riders should look for helmets with:
Proper fit (no pressure points)
Good ventilation
Lightweight shell
Touring riders benefit most from:
Modular helmets
Internal sun visors
Jackets, Pants, and Temperature Control
Comfort isn’t about armor alone—it’s airflow.
What works on long rides:
Layering systems
Zip-open vents
Moisture-wicking base layers
ADV riders especially benefit from adjustable venting, since conditions change constantly.
Long-distance motorcycle touring is about freedom, rhythm, and endurance. Hours on the highway, changing weather, unfamiliar roads, and constant wind noise all test your gear — especially the communication system for touring.
A touring motorcycle intercom is not the same as a short-ride or commuter intercom. On a multi-day trip, small weaknesses become big problems: batteries die too early, buttons are hard to press with gloves, audio gets lost in wind noise, or connections drop miles from the nearest town.
This guide breaks down what truly matters in touring motorcycle intercoms, compares leading brands like Sena, Cardo, and Fodsports. And, we will help you choose the right system from Fodsports for long trips — whether you ride solo, two-up, or in a group.
What Makes Touring Motorcycle Intercoms Different?
Touring riders place very different demands on intercom systems than daily commuters or weekend riders.
When you are having a touring ride, you will face the typically conditions include:
6–10+ hours of riding per day
Sustained highway speeds (60–80 mph)
Strong wind noise and helmet turbulence
Rain, heat, dust, and temperature swings
Fatigue that makes complex controls frustrating
Because of this, touring intercoms must prioritize reliability, comfort, and endurance, not just features on a spec sheet.
Touring motorcycle intercoms are designed for long-distance riding, focusing on all-day battery life, stable connections at highway speeds, clear audio with wind noise, and simple controls that work with gloves.
The Most Important Features of Intercoms for Long-Distance Touring
Battery Life That Lasts All Day
Battery life is the #1 complaint among touring riders using entry-level intercoms.
On long touring days—especially 6–8 hours of highway riding—battery life and connection stability of the intercom matter a lot.
For the battery life of a touring intercom, they should at least meet the following requirements:
Minimum practical talk time: 12–15 hours
Ideal touring battery life: 18–24 hours
Standby time matters when stopping frequently
Some premium models allow charging while riding, which can save a trip if you forget to recharge overnight.
Touring tip: Real-world battery life is usually 20–30% lower than advertised when using music, GPS, and intercom simultaneously.
Audio Clarity at Highway Speeds
At touring speeds, wind and engine noise become the enemy. Even powerful speakers struggle if the system lacks good noise processing.
Here are the key audio factors you need to consider when buying reliable motorcycle intercoms for touring bikes:
Advanced noise cancellation (CVC, ENC, DSP)
Speaker placement and helmet compatibility
Performance with earplugs (many touring riders use them)
Cardo and Sena generally lead in audio processing, but newer Fodsports models have closed the gap significantly for budget-minded tourers.
Long-Range & Stable Rider-to-Rider Communication
Manufacturers often advertise that their intercoms have huge intercom ranges. But touring riders also care about connection stability, not marketing numbers.
In real touring rides, this range is affected by the terrain (mountains, curves, forests), riding formation, traffic, and interference, etc.
Therefore, sometimes, a more stable intercom system is much better than a longer-distance intercom system.
Mesh intercom systems automatically reconnect dropped riders, which is especially valuable on long tours.
Comfort for 6–10 Hour Riding Days
On a long trip, you interact with your long-distance motorcycle communication constantly. So, the using comfortness is another factor you need to consider.
A comfort touring intercom should have large, glove-friendly buttons, minimal helmet weight imbalance and a simple UI that doesn’t distract you.
Voice commands can be helpful, but only if they work reliably at speed.
Weather Resistance & Durability
During touring rides, you may meet rainstorms, dusty back roads, cold mornings and hot afternoons. These climate and environmental conditions will test the operational stability of your intercom.
Therefore, you should look for intercoms with IPX6 or higher water resistance, solid mounting systems, and proven durability over time.
Brand Comparison: Sena vs Cardo vs Fodsports for Touring
Below is a touring-focused comparison, not just spec hype.
Sena intercoms are widely used by touring riders who value connection stability, advanced mesh technology, and long-term ecosystem support.
Strengths
Advanced Mesh 2.0 technology
Wide helmet compatibility
Strong app ecosystem
Considerations
Premium pricing
Feature-heavy for casual users
👉 Best for: Riders who frequently tour in groups
Cardo Touring Intercoms
Strengths
Industry-leading JBL audio
Excellent noise cancellation
Very intuitive controls
Considerations
Higher cost
Slightly shorter battery life on some models
Best for: Audio-focused touring riders and long highway days.
Fodsports Touring Intercoms
Strengths
Outstanding price-to-performance
Stable connection
Long battery life (often 20+ hours)
Simple, glove-friendly design
Considerations
App ecosystem is simpler
Audio not as refined as premium brands (but close)
Best for: Budget tourers who want reliability without overpaying.
Best Fodsports Helmet Intercoms for Touring Riders
Fodsports FX7
Here, I'd like to recommend a travel communication device highly praised by riders: the Fodsports FX7 Bluetooth Mesh Intercom. With its Mesh network and powerful features, it's widely considered one of the best value-for-money motorcycle intercoms for touring on the market.
Fodsports FX7 Bluetooth Mesh Intercom - best value-for-money motorcycle intercoms for touring
Bluetooth Mesh Intercom.
Dual Bluetooth Chip Design.
10 Riders Group Audio, 2000m Distance!
HRSQ Mic and Speakers, CVC + ENC + DSP Noise Cancelation.
Listen to Music/GPS and Intercom At the Same Time.
IP67 Waterproof.
Support Pairing with Fodsports Connect APP
FM Radio, Music Sharing, Voice Commands.
Listen to music/GPS directions and intercom at the same time
Touring strengths
Reliable on multi-day group tours
Works well with GPS + music simultaneously
Riding experience:
My friends and I used the FX7 on several multi-day riding trips—especially on routes where staying connected was crucial (like winding canyon roads or long stretches of highway).
There were only six of us riding together usually, but FX7's mesh intercom system can support up to 10 riders simultaneously.
The intercom distance can reach 2000 meters among 10 riders in an ideal environment. According to our tests, the FX7 can easily support at least 1200 meters on the highway, canyon roads, and other complicated environments. For most group rides communication, this distance is well enough.
After a simple setup(one-click quick pairing), you can ride with peace of mind, without worrying about anyone dropping out of the network.
During a ride, our friend Dave briefly lost connection due to distance, but the communication among the rest of us remained unaffected. When he returned within range within 3 minutes, he automatically rejoined our intercom group. This feature of the FX7 is incredibly convenient for group riding.
The dual Bluetooth chips mean we can listen to music/GPS navigation, and communicate via intercom simultaneously. This is very useful whether you're leading or following the group.
The battery life easily lasts a full day of riding—approximately 15 hours—so we didn't have to worry about charging on the road. The IP67 waterproof and dustproof rating means it can easily handle light rain or sudden downpours.
The large knob and voice control features make it easy to operate even with gloves on.
For its price and features, it rivals more expensive brands for long-distance trips with friends or partners.
Consider before buying
A little expensive for solo riders
Best for: Serious touring riders who frequently ride in groups
Fodsports FX 60C
The Fodsports FX 60C 4K Bluetooth Camera Intercom is a great pick for touring riders who want communication and video. With built-in 4K action camera capabilities, it can be regarded as one of the best motorcycle intercoms for touring rides.
Fodsports FX 60C 4K camera intercom - Bluetooth intercom for touring rides
4K Bluetooth Camera Intercom, 2000m Intercom Range.
4K, 2K, 1080P anti-shake & 360° rotation shooting video/photo.
Watch While Recording the video through mobile APP.
8MP HD Photo Taking.
10 Way Group Communication.
HiFi Sound Quality, Noise Reduction Tech.
Music Sharing, FM Radio, Voice Commands.
4K high-resolution video recording, smooth anti-shake footage, and reliable Bluetooth communication performance, it has everything you expect! Thus, it is perfect for long rides and group adventures.
This all-in-one device shoots crisp 4K video at 30 fps with a 130° wide-angle lens and 360° rotation. So, riders can capture sweeping landscapes and road action without clipping the edges.
Besides, it also takes 8 MP photos and lets you preview footage live on your phone via the app.
On the communication side, it can link up to 10 riders over long distances (up to ~2000 m in open areas) using Bluetooth 5.4.
Its CVC noise reduction tech also ensures riders can have clearer and cleaner intercom and music audio.
Battery life is long enough, letting you ride and record for hours on end. The unit is weather-resistant and works in varied conditions, whether it’s drizzle or sunshine.
My riding test:
I personally took the FX60C along on a week-long twisty-road tour with my buddy and our group of four. We used it every day commuting between campgrounds in the Rockies.
It was awesome to chat with the guys as we wound through hairpins and to look back later at smooth, stable 4K footage of the canyon walls and sunrise runs.
Even on rainy stretches and highway blasts, the mic and intercom stayed solid, and capturing those spontaneous moments made the trip feel even richer.
With this FX 60C, I will not need to install an extra GoPro or Insta360 on my helmet.
If you like sharing rides and memories with your crew, this unit really delivers.
Why it excellent for touring riders
Capture the beautiful scenery and communicate at the same time
4K excellent video recording quality
Great gear for touring rides
Best for: Riders who want to record the rides and talk with other riders.
Fodsports FX8 Pro
For riders who want great sound and reliable group comms on tour, the Fodsports FX8 Pro motorcycle Bluetooth intercom is a solid choice. It offers high-quality audio, robust functions, and long battery life.
Fodsports FX8 Pro - Ideal long touring rides communication system
Dual Bluetooth Chip Design.
10 Riders Group Communication, 2000m Distance!
Optional HRSQ Mic and Speakers, CVC + ENC + DSP Noise Cancelation.
Listen to Music/GPS and Intercom At the Same Time.
IP67 Waterproof.
Compatiable with Fodsports Connect App
FM Radio, Music Sharing, Voice Commands.
The FX8 Pro lets you chat with up to 10 riders over distances up to about 2000 m.
Plus, its dual-chip design allows you talk with other riders and listen to music/GPS directions at the same time.
It uses 40 mm high-resolution speakers and advanced noise reduction tech (CVC/DSP) to keep voices clear, even at high speeds. You can choose between audio modes among HiFi Bass, Popular Golden Classic, and Pure Human Voice.
Besides, there’s also FM radio, easy one-click pairing, ambient mode for hearing outside sounds, and voice-assistant support like Siri/Google Assistant.
It’s weather-resistant (IP65) and has strong battery life. These 2 features also make it truly ideal for long touring rides communication.
Realistic using experience during touring rides:
On my recent Pacific Coast Highway trip with my partner and two riding friends, the FX8 Pro was on every helmet.
Cruising twisties and highways from Big Sur to Mendocino, we stayed in clear contact. Sharing navigation cues, warnings about traffic, music, and laughs.
Even in occasional coastal wind and drizzle, the audio stayed crisp and the large buttons were easy to tap with gloves.
For group touring, when you want a good sound and simple, dependable communication system without breaking the bank, this is a device I genuinely enjoy using.
Why touring riders love it
Dual Chip Design & Noise Reduction & Three Music Effects
Battery drains faster with heavy music and intercom use together
Best for: Audio-first touring riders
Fodsports FX30C Pro
The Fodsports FX30C PRO is another motorcycle intercom with a camera. It blends helmet-to-helmet Bluetooth talk with an integrated 1080 p HD camera and wide-angle lens.
So you can record your journey and talk with a partner at the same time.
Helmet audio syatem with camera - Fodsports FX30C Pro
2 Way Helmet Intercom with Camera, 1000m Intercom Range.
HD 1080P Camera & 360° Rotation Shooting.
Large Battery, Ideal for long rides.
IP65 Waterproof.
Music Sharing, FM Radio, Voice Commands.
If comparing the FX30C Pro with the FX 60C, you may find the FX30C Pro is lower than the FX 60C in all aspects. But that's the FX 30C Pro's market position. It is a budget choice for most couples touring riders.
This unit supports Bluetooth intercom up to about 1000 m, perfect for two riders cruising together.
Its 1080p camera with 120° wide-angle and 360° rotation lets you capture stunning scenery without extra gear.
You can connect the camera to your phone via Wi-Fi to preview and download recordings.
It also has three sound modes (like HiFi bass and pure voice) and CVC noise reduction for clearer communication at speed.
The large battery lasts all day for talking and video, and the IP65 waterproof design means rain won’t stop your ride.
Riding experience
I took my FX30C Pro with my partner on a weekend back-road tour through the Ozarks.
We used it to chat about turns, upcoming stops, and road hazards while we rolled along scenic byways. And, at the same time, the camera captured crisp video of riverside overlooks and quiet forest stretches.
At night, we reviewed videos over dinner, laughing at our goofs. We really appreciate having both comms and footage without lugging a separate action cam. It’s become our go-to for couple touring rides.
Why it works
Bluetooth intercom + camera
Excellent rider–passenger clarity
Long real-world battery life
Best for: Couples touring together
Fodsports T1 Pro
For touring riders who want solid group communication and great audio on the road, Fodsports T1 Pro 4 to 6 riders helmet Bluetooth headset is a standout option.
It’s widely regarded as one of the best touring motorcycle intercoms for medium group communication. It combines reliable intercom performance, crisp sound, and practical features into an affordable package.
The T1 Pro uses Bluetooth 5.4 tech for fast pairing and stable connections, letting you chat clearly with your riding crew even at highway speed.
It supports 2-rider intercom up to about 1000 m and group intercom (up to 4–6 riders) out to ~2000 m. This is very handy on scenic tours or club rides.
The 40 mm Hi-Fi stereo speakers and CVC + DSP noise reduction make voices and music sound full and clear.
Besides, FM radio, music-sharing, and voice-assistant support functions add entertainment and convenience on long journeys.
It’s IP67 waterproof, so it keeps working through rain or dust without much fuss.
On-road testing:
I took the T1 Pro along on a week-long tour of the Blue Ridge Parkway with three riding buddies, and it quickly became our go-to comms tool.
Whether we were cruising switchbacks at dawn or chatting about lunch spots, the intercom kept us connected.
The audio was rich enough to enjoy music between sections. And, the simple one-click mode switching made it easy to change from talking to sharing playlists on the fly.
For medium group touring where solid communication and sound matter without a big price tag, the T1 Pro has been a real keeper on the road.
Why it stands out
Mesh communication at a lower price
Strong 20+ hour battery life
Simple, glove-friendly controls
Touring strengths
Excellent for budget group touring
Stable highway performance
Great price-to-feature ratio
Consider before buying
App features are basic
Audio not as refined as Cardo (but solid)
Best for: Touring riders who want mesh without premium pricing
Fodsports M1-S Plus
Touring riders who want clear communication, long battery life, and fun features for group and couple rides, the Fodsports M1-S Plus Bluetooth motorcycle intercom is a highly recommended device.
M1-S Plus Intercom Headsets - Group Communication Touring Motorcycle Intercom
10 Riders Group Intercom, 2000 Meters Distance!
Optional HRSQ Mic and Speakers, Better Sound Quality.
Microphone Mute.
Music Sharing, FM Radio, Voice Command.
This unit lets you talk with up to 10 riders over long distances (total group range ~2000 m with typical intercom range ~500 m per pair). Therefore, it’s great for team riding or multi-bike tours.
It has 40 mm speakers with noise-reduction tech for clearer voice and music even at highway speeds. Functions like FM radio and music sharing between two units enable you and your passenger to enjoy more fun during long-distance touring rides.
You can also mute the mic when you need privacy, make hands-free phone calls, and hear GPS directions without taking your eyes off the road.
The big battery (~900 mAh) lasts about 20 + hours, perfect for full-day rides. It’s also IP65 waterproof so rain won’t stop the fun.
Practical riding experience
On my recent weekend ride through the Smoky Mountains with my partner and a couple of riding friends, the M1-S Plus was in constant use.
We chatted about stops, warned each other about sharp bends, and shared music on longer stretches.
Even when the wind gusted through the passes, voices stayed clear and the speakers were loud enough under my full-face helmet.
The large buttons were easy to hit with gloves, and the intercom stayed connected for hours without a charge.
For group touring or riding two-up without breaking the bank, this little unit has become one of my go-to pieces of gear.
Why it works
Long battery life
Simple Bluetooth setup
Extremely affordable
Best for: Solo or two-up touring on a budget
Mesh vs Bluetooth Intercoms for Touring Trips
This is one of the most common touring questions.
Bluetooth Intercoms
Best for: Solo riders, rider-passenger pairs, budget touring
Pros
Lower cost
Simpler setup
Stable for 1–2 riders
Cons
Manual reconnection
Limited group flexibility
Mesh Intercoms
Best for: Group touring, long multi-day rides
Pros
Automatic reconnection
Stable group communication
No complex pairing
Cons
Higher price
Slightly more power consumption
Mesh vs Bluetooth Comparison Table
Feature
Bluetooth Intercom
Mesh Intercom
Best for
Solo / small group riders
Larger groups (5 – 10+)
Reconnection
Manual
Automatic
Group stability
Moderate
Excellent
Setup complexity
Simple
Very simple
Touring reliability
Good
Excellent
Mesh intercoms are better for touring groups. Because they automatically reconnect riders and maintain stable communication over long distances.
Long Distance Touring Intercom Use Cases (Real-World Scenarios)
Solo Touring Riders
Solo tourers typically use a long-distance motorcycle intercom for:
GPS directions
Music and podcasts
Phone calls and emergency access
What matters most:
Battery life
Audio clarity
Phone/GPS integration
Bluetooth touring intercoms are usually sufficient for solo touring.
Rider & Passenger Touring
Two-up touring places heavy emphasis on clear, constant communication.
Important features:
Full-duplex conversation
Balanced audio for rider and passenger
Easy controls for both helmets
This is where premium systems often justify their price.
Group Touring (3–10+ Riders)
Group touring exposes weaknesses fast.
You need:
Stable connections
Automatic reconnection
Clear audio across multiple riders
Mesh systems shine here and reduce frustration over multi-day rides.
Common Mistakes Touring Riders Make When Choosing Intercoms
Focusing only on advertised range
Ignoring real battery life under touring conditions
Buying complex systems they don’t need
Overpaying for premium features they won’t use
Touring is about consistency, not just specs.
Quick Buying Checklist for Touring Motorcycle Intercoms
✅ Minimum 15 hours real-world battery life
✅ Clear audio at highway speeds
✅ Weather-resistant (IPX6 or better)
✅ Easy glove-friendly controls
✅ Mesh support if riding in groups
✅ Helmet compatibility confirmed
FAQs
How long does a motorcycle intercom battery last on tour?
Most touring-ready intercoms last 15–24 hours, depending on usage and features.
Can I charge my intercom while riding?
Yes, many touring intercoms support charging while in use, which is ideal for long trips.
Do touring intercoms work with earplugs?
Yes — especially models with strong speakers and noise processing. Many touring riders use earplugs successfully.
Is mesh intercom worth it for long trips?
For group touring, yes. Mesh provides more stable communication and automatic reconnection.
What’s the best touring intercom for two-up riding?
Look for long battery life, full-duplex communication, and clear audio — both Sena, Cardo, and Fodsports offer strong options.
Conclusion: Choosing the Right Motorcycle Intercom for Touring
The best helmet intercom for touring motorcycle riders isn’t the most expensive one — it’s the one that keeps working hour after hour, mile after mile.
For long trips, prioritize:
Battery endurance
Audio clarity at speed
Connection stability
Comfort and simplicity
Whether you choose Sena for technology, Cardo for sound, or Fodsports for value, the right intercom will make your touring experience safer, smoother, and far more enjoyable.
Adventure motorcycles, often called ADV bikes, are built to take you from smooth highways to rough backcountry trails. For new riders, picking the best adventure bikes for beginners can make all the difference. The right machine turns highways, gravel roads, forest tracks, and remote trails into places you actually want to explore, while the wrong one can feel heavy and intimidating.
In this guide, we’ll explore the most approachable, reliable, and versatile beginner-friendly ADV bikes for 2026, so you can start your adventure with confidence.
What Makes a Good Beginner Adventure Bike?
I hear this question all the time, mostly from folks just starting to think about riding off-road. A lot of adventure bikes might look easy to handle when you read about them, but trust me, some are anything but. I've watched plenty of beginners get frustrated because they picked a bike that was just too much – too heavy, too strong, or too hard to manage for their skill level.
What I've learned is that the best adventure bikes for beginners have a few things in common. You might not always see these things listed out, but they really matter when you're out on the road.
Key features of a beginner-friendly adventure bike
1. Manageable Engine Power
I always tell new riders this: you don't need a super powerful bike to have a blast when you're starting. Actually, having too much power can make things harder.
Bikes in the 300cc to 500cc range are usually the sweet spot. They've got enough oomph to ride on the highway and pass cars, and they can carry your stuff without struggling. Plus, they're easier to control, especially when you're going slow.
The way the engine puts out power is way more important than how much power it has.
If the throttle is smooth, you can mess up a bit without wiping out. When you're on gravel or dirt, that kind of power helps you feel confident.
Once you add fuel, crash protection, luggage, and tools, even a bike that's not that big can feel huge. That’s the reason weight is a big deal, mostly how it's balanced, especially when you're just starting out.
From what I can tell, bikes that don't weigh as much are just easier to get the hang of. You can move them around easier when you're going slow. They don't feel as scary when the ground gets tough. Plus, they're way more forgiving if you mess up.
I also check out how the weight sits on a bike. If it's balanced well and the weight is lower down, it feels calmer and steadier, mostly when you're standing up or riding where it's bumpy. That steadiness makes learning to ride off-road safer and way less tiring.
3. Comfort and Ergonomics
So, you know how a quick motorcycle trip can turn into a whole day thing? It always happens to me! You start checking out those little roads, and boom, the day is gone.
That's why I want a bike that lets me sit up straight and chill out. Wide handlebars give you some pull and keep you in charge. When your feet are in a good spot, it's easy to stand up or sit down.
And a comfy seat? Trust me, it's a must, especially if you're just starting out and your butt isn't used to long rides.
I've learned that when you're comfy, you're in control. The more relaxed you feel on the bike, the better you ride. You don't tense up, make dumb choices, and just flow with the road.
If you're a newbie, being comfy isn't just nice – it makes the bike easier and safer.
4. Reliability and Low Maintenance
When you're just starting out riding, you've already got a ton on your mind.
Figuring out how to ride, picking out your stuff, planning where to go – if you're always dealing with bike problems, you're gonna get fed up real quick.
That's why I always tell newbies to get ADV bikes that you can depend on, that have been around the block, and that aren't a pain to keep running. Simple engines, not having to service it all the time, and having a decent dealer network are way more important than bells and whistles.
You want a bike that starts up every time and doesn't need constant babysitting so you can focus on riding and having fun, not fixing stuff.
I think you build confidence when you know your bike will be there for you.
If you trust your bike, you're way more likely to go exploring, try out rougher roads, and really test yourself. And that's what adventure riding is all about, right?
5. Affordable Pricing
Getting into adventure riding is more than just picking a motorcycle. All that other stuff—gear, luggage, tires, and extras—can really add up, especially if you're just starting.
That’s why I usually suggest that beginners get a bike that won't break the bank.
If you don’t spend too much on the bike itself, you’ll have more cash for the things that keep you safe and comfy, like a good helmet, boots, riding suit, and gloves.
Look, I don’t think you should buy the cheapest motorcycle you can find. I just think you should find one that works well without making you cut corners on everything else.
A beginner ADV bike that's priced right makes the whole experience better and easier to keep up with.
🎯 Quick Decision Guide
If you value:
❤️ Lightweight & fun off-road → CRF300L Rally
🔥 Technical trails & strong, responsive power → KTM 390 Adventure R
The following adventure motorcycles represent some of the best options for beginners in 2026. Each model balances accessibility, performance, and long-term usability.
The bikes listed here are presented with no particular ranking, as each offers its own strengths for beginner adventure riders.
The Himalayan 450 is one of those adventure bikes that feels honest the moment you ride it.
It's not trying to wow you with crazy specs or a wild look, and it knows what it is. And honestly, that's why it's such a great choice if you're just getting started.
It’s got a 452cc engine that puts out about 40 horsepower. But how that power comes on is what counts.
The Himalayan isn't about screaming high RPMs. It's about that smooth, steady pull down low. When you're on dirt, that kind of control beats having a ton of horsepower any day.
For the price, people are usually shocked by what this bike can do. It's one of the cheaper choices out there, but it can still cruise on the highway, climb tough mountain roads, and handle rough ground without any problems.
And for slow rides, stops on tricky ground, or while you're just learning, it never feels like too much to handle.
This is a bike that helps you get confident, fast. You’re not fighting it; you’re not trying to fix bad moves. You just ride, learn, and get better.
And the cool thing is, as you get better, the Himalayan doesn’t suddenly hold you back. It’s still good to go with you.
Pros and Cons
Pros
The 452cc engine is incredibly forgiving for beginners.
Relaxed, upright stance built for long rides.
Adjustable setup builds instant confidence for all.
Simple, durable design that’s easy to maintain.
Cons
Suspension is too soft for aggressive riding.
Can't fine-tune the suspension for heavy loads.
High center of gravity feels "tippy" at low speeds.
The CFMOTO Ibex 450 really stands out once you start looking at what it offers for the money.
It’s one of those bikes that makes you pause and think, “Wait, this comes standard?” because many of its features are usually found on much more expensive adventure bikes.
What makes it feel different? The engine! It's got a 449cc parallel-twin, still kinda rare for bikes like this. It’s smoother than those single-cylinder bikes, for sure, and chill on the road. That smoothness? Big deal when you're riding the highway.
Then there are the tubeless spoked wheels — and this is a bigger deal than it sounds. If you pick up a nail or a sharp rock, you can plug the tire and keep moving. You don’t have to pull the wheel, wrestle with a tube, or turn a small problem into a long roadside repair. For newer adventure riders, that kind of simplicity is huge.
If you're riding on pavement, like half the time or more, the Ibex is a solid choice. It's cool and steady on the road. But when the pavement ends, it doesn’t suddenly feel out of place. You can still point it down a dirt road or a rough trail and keep going without hesitation.
When you get to the KTM 390 Adventure R, the tone of the conversation changes a bit. This is easily the most performance-focused bike on the list, and it’s also the one packed with the most technology.
One thing that’s important to clear up first: we’re talking specifically about the 2025 and newer 390 Adventure R. The earlier 390 Adventure models were more road-biased, with limited suspension travel and less off-road intent. The R version fixes that. This is the one KTM riders were waiting for.
Riding it feels like someone shrunk a big KTM adventure bike. The frame feels solid, the suspension is ready for some action, and the electronics help you out instead of getting in your way.
It's the kind of bike that gets better as you get better, instead of covering up your screw-ups.
Okay, it's not the easiest bike for total newbies, but that's cool. If you've got some experience, are ready to learn, and want something light that can seriously handle tough off-road stuff, the 390 Adventure R is a winner. It doesn't just take you places; it kinda forces you to up your riding game.
Now, let’s talk about the Honda CRF300L Rally. Sure, it's technically a dual-sport, but after you ride it for a bit, that description just fades away.
Honestly, it feels like a lightweight adventure bike, and sometimes, it even beats out those bigger, heavier bikes.
It's got a 286cc engine pushing about 27 horses, so yeah, it's the weakest on the list. But power isn’t really the point here. The trade-off is that it's super light, handles predictably, and is really forgiving when things get tough.
This bike just quietly builds your confidence. When the trail gets sandy, muddy, or rocky, you won't be scared.
You'll be more likely to try different routes you might skip on a bigger bike, mostly because it feels like if you mess up, it's not a huge deal.
If you're into hitting the dirt, tackling tough trails, and exploring the back country – and not into long highway rides – the CRF300L Rally is a great choice. It might not seem crazy cool when you read about it, but on the trail, it just works.
Pros and Cons
Pros
Easy to control off-road, especially for beginners
High ground clearance and long suspension travel for rough terrain
Finally, there's the Kawasaki KLE 500, which is more for streets—but in a useful way.
It’s the most street-focused bike here, and that's not a bad thing. Actually, for some riders, that's perfect.
The KLE 500 has a tested 451cc parallel-twin engine, so it’s got the most power of the bikes we’ve mentioned.
You’ll notice that extra power when you’re doing regular stuff like going to work, riding back roads, or taking long road trips. Kawasaki stuck with a 21-inch front wheel, so, it can handle rougher roads too.
Think of it as sitting on the dirt-friendly end of the “street-biased adventure” category.
It’s not trying to be a lightweight trail weapon, but it’s already more capable off-road than many bike riders regularly take onto dirt roads and fire trails without a second thought.
If you mostly ride on paved roads but want something that's good on gravel, bad roads, and a bit of off-road sometimes, the KLE 500 could be a smart, all-around pick.
Pros and Cons
Pros
Smooth, powerful 451cc twin-cylinder engine for highway and off-road
Great highway manners for long rides
Known for Kawasaki reliability
Capable off-road, especially for dirt and BDR routes
Cons
Lower ground clearance limits off-road ability
First-year model concerns may arise
Extra cost for premium trim features
Expected Specifications
Engine Type
451cc liquid-cooled parallel twin
Power
45 horsepower (expected)
Seat Height
33.8 inches
Wet Weight
425 – 430 lbs (estimated)
Fuel Capacity
Around 4.2 gallons
Front Wheel Size
21-inch
Primary Riding Focus
Street-biased adventure riding
Beginner Adventure Bike Comparison Summary
Category
Royal Enfield Himalayan 450
CFMoto Ibex 450
KTM 390 Adventure R
Honda CRF300L Rally
Kawasaki KLE 500
Engine Type
Single-cylinder
Parallel-twin
Single-cylinder
Single-cylinder
Parallel-twin
Displacement
452 cc
449 cc
399 cc
286 cc
~451 cc
Power (Approx.)
40 hp
44 hp
44 hp
27 hp
~45 hp
Torque Character
Smooth, low-mid focused
Broad and refined
Responsive, high-revving
Soft and predictable
Balanced street tuning
Seat Height
Medium (adjustable)
Medium-low
Medium-high
High
Medium
Wet Weight
Medium
Medium
Light
Very light
Medium
Fuel Capacity
Large
Large
Medium
Medium
Medium
Off-Road Capability
★★★☆☆
★★★★☆
★★★★★
★★★★★
★★★☆☆
Highway Comfort
★★★★☆
★★★★☆
★★★★☆
★★☆☆☆
★★★★☆
Technology Level
Basic & reliable
Adjustable suspension
Advanced electronics
Minimal, mechanical
Modern touring features
Maintenance Cost
Low
Medium
Medium
Low
Medium
Best Use Case
Touring + gravel roads
Daily riding + mixed terrain
Aggressive off-road riding
Lightweight trail exploration
Street-biased adventure touring
Why Some Popular Bikes Didn’t Make the List
Many bikes look good on paper but fall short for beginners:
Too heavy
Street-focused suspension
No 21-inch front wheel
Overpriced for what they offer
If your idea of adventure riding is well-maintained gravel roads, almost any motorcycle will work.
But if you want to leave the beaten path, these five bikes offer the best balance for new riders.
FAQs
❓ What is the easiest adventure bike to ride for beginners?
🔥 The Royal Enfield Himalayan 450 is one of the easiest adventure bikes for beginners. It offers smooth power delivery, a comfortable seat height, and excellent low-speed control. Its stability and forgiving nature help new riders build confidence quickly.
❓ Is a 450cc adventure bike too big for beginners?
🛡️ No, a 450cc adventure bike is not too big for most beginners, as long as the power delivery is smooth. Bikes like the Himalayan 450 and CFMoto Ibex 450 are designed to be beginner-friendly and easy to handle.
❓ Which adventure bike is best for off-road beginners?
🌄 The Honda CRF300L Rally is ideal for off-road beginners. Lightweight, easy to maneuver, and forgiving on dirt and gravel. The KTM 390 Adventure R is also excellent for beginners who want more off-road performance.
❓ Are adventure bikes good for daily commuting?
🏙️ Yes, adventure bikes are great for daily commuting. Benefits include:
Comfortable upright seating
Good visibility in traffic
Smooth suspension for rough roads
Models like the CFMoto Ibex 450 and Kawasaki KLE 500 perform especially well on pavement.
💰 Both options work, but many beginners benefit from buying used. Advantages include:
Lower cost
Less worry about drops
More value for money
The Kawasaki KLE 500 is a strong used option for beginners.
❓ What is the lightest adventure bike for beginners?
🏍️ The Honda CRF300L Rally is the lightest bike on this list at around 335 lbs wet. Its low weight makes it easy to control, ideal for off-road-focused beginners.
❓ Can beginners ride adventure bikes on highways?
🛣️ Yes, beginners can ride adventure bikes on highways. Bikes with engines above 300cc, like the Himalayan 450, Ibex 450, and KLE 500, handle highway speeds comfortably.
❓ Is the KTM 390 Adventure R too tall for beginners?
📏 The KTM 390 Adventure R has a taller seat height but is still manageable for beginners of average or taller height. Its lightweight chassis and advanced electronics compensate for the height.
❓ What safety features should beginner adventure bikes have?
🛡️ Beginner adventure bikes should include:
ABS brakes
Traction control (if available)
Predictable throttle response
These features help reduce mistakes, especially on loose or slippery surfaces.
❓ How long does it take to learn adventure riding?
⏱️ Most beginners become comfortable with basic adventure riding in a few months. Confidence grows faster with lighter bikes, proper training, and regular practice on mixed terrain.
Conclusion
At the end of the day, a good beginner adventure bike should feel like a partner, not something you have to fight. It should build confidence, forgive mistakes, and make you want to ride more.
The best adventure bikes aren't about being huge or having crazy power. They're about making you feel like you can conquer any road and explore any terrain. When you've got the right bike, learning is easier, safer, and way more fun.
No matter which bike you choose, any of these bikes are a great entry for the 2026's adventure riding. Pick the one that fits your goals — and start riding.
The adventure starts with choosing the right bike. Dual sport vs. adventure bike—which one fits your riding style? While both promise off-road freedom, their strengths are worlds apart. From tackling tough trails to conquering long highways, your choice makes all the difference.
This guide will tell you what makes each bike different, so you can pick the one that's best for you!
What Is a Dual Sport Motorcycle?
A dual sport motorcycle is a lightweight, street-legal bike designed primarily for off-road riding while still being capable on public roads.
Born from dirt bikes, they're light, street legal, and built tough for off-road fun. They're pretty simple to keep running, too. Most can handle trails, gravel, back roads, and even a bit of highway driving.
dual sport motorcycle
Key Characteristics of Dual Sport Bikes
Lightweight and narrow design
Long suspension travel
High ground clearance
Simple engines (usually single-cylinder) and minimal electronics
Street-legal lights, mirrors, and signals
Low fuel tank capacity (2–3 gallons)
Popular Dual Sport Models
Honda CRF300L
Yamaha WR250R
Suzuki DR-Z400S
Kawasaki KLX300
Dual sport bikes are often chosen by riders who want maximum off-road ability with basic road legality.
What Is an Adventure Motorcycle?
An adventure bike (ADV) is designed for long-distance travel across mixed terrain, including highways, dirt roads, gravel, and mild off-road trails.
They're all about being comfy, going far on a tank of gas, and having cool tech, not just tearing it up off-road. Usually, they're bigger, heavier, and pack more power than your average dual-sport bike.
adventure bike
Key Characteristics of Adventure Bikes
Larger engines (often 650cc–1300cc, twin or boxer engines)
Comfortable upright riding position with adjustable seats
Weight plays a huge role in how a motorcycle feels, especially once you leave the pavement.
Dual Sport
Dual sport motorcycles are relatively light, usually weighing around 280–350 lbs (127–159 kg).
On the trail, this makes a big difference. The bike feels easier to steer, easier to pick up after a fall, and far less intimidating in tight or technical sections.
Adventure
Adventure motorcycles are significantly heavier, often weighing 450–600+ lbs (204–272 kg) when fully fueled.
That extra mass isn’t a downside on the road. It helps the bike feel stable at highway speeds, more comfortable on long rides, and better suited for carrying luggage or a passenger.
If most of your riding involves trails and rough terrain, lighter is almost always better. If you spend long hours on the highway, the extra weight of an adventure bike becomes an advantage rather than a drawback.
2. Engine and Performance
dual sport vs. adventure bike in engine and performance
Engine characteristics determine acceleration, cruising ability, and off-road control.
Below is a breakdown of engine size, power delivery, highway behavior, and gear ratio for dual sport vs. adventure bikes:
Engine Size
Dual Sport: 250cc–450cc single-cylinder engines, prioritizing simplicity and reliability but limited in highway power.
Adventure: 650cc–1300cc twin or boxer engines, designed for smooth power delivery, high-speed cruising, and long-distance touring.
Adventure bikes offer higher displacement for long-distance performance, dual sport bikes favor off-road reliability.
Power Delivery
Dual Sport: Manageable low-end torque for trails, limited top-end for highway speeds.
Adventure: Strong, smooth power across rev range, ideal for overtaking and carrying luggage/passengers.
Dual sport bikes excel in trail control; adventure bikes excel in consistent high-speed performance.
Highway Behavior
Dual Sport: Less stable on highways due to light frame and smaller engine.
Dual sport is adequate for short highway rides; adventure bikes are superior for long-distance stability.
Gear Ratio
Dual Sport: Shorter gear ratios provide better low-speed control, quicker acceleration on trails, and improved climbing on steep or technical terrain.
Adventure: Taller gear ratios optimize cruising at highway speeds, reduce engine RPM, and improve fuel efficiency for long-distance travel.
Dual sport bikes are geared for off-road agility and low-speed power, while adventure bikes are geared for highway comfort and fuel-efficient cruising.
3. Off-Road Capability
Off-road performance is affected by terrain handling, suspension, and ground clearance.
This section compares how dual sport and adventure bikes tackle rough terrain:
Terrain Types
Dual Sport: Excellent on single-track trails, mud, sand, rocky terrain, and steep climbs.
Adventure: Suitable for gravel roads, fire roads, and light trails, but heavy weight limits technical terrain performance.
Dual sport bikes are ideal for aggressive off-road riding; adventure bikes handle light off-road conditions.
Adventure: Larger tanks (4–6+ gallons) allow for extended range; some models can travel 300+ miles on a single tank.
Adventure motorcycles are better suited for long trips; dual sport bikes require careful planning for fuel stops.
6. Luggage and Practicality
dual sport vs. adventure bike in luggage
Touring capability depends on luggage options and carrying capacity.
Here’s how dual sport and adventure bikes differ in practical use:
Dual Sport: Limited luggage capacity, lightweight subframes, best for solo riding or light packing.
Adventure: Supports hard panniers, top cases, passenger seating, and heavier loads, ideal for touring and two-up riding.
Adventure bikes offer more practical touring options; dual sport is limited to minimal gear.
7. Maintenance and Ownership Costs
Maintenance frequency, repair costs, and mechanical complexity affect ownership.
Dual Sport: Simple engines, fewer electronics, lower repair costs, easier to maintain in remote areas.
Adventure: Complex engines and advanced electronics; higher maintenance and repair costs, especially outside major cities.
Dual sport bikes are simpler and cheaper to maintain; adventure bikes require more investment but offer more features.
8. Electronics and Safety Features
Modern motorcycles may include ABS, traction control, ride modes, and other aids.
Dual Sport: Basic electronics, often limited to ABS, easy to repair and maintain.
Adventure: Advanced safety features including ABS, traction control, ride modes, cruise control, and other electronic aids.
Adventure bikes prioritize safety and convenience; dual sport bikes prioritize simplicity and reliability.
Dual Sport Vs. Adventure Bike Pros & Cons
Basically, dual sport bikes are great off-road because they're light, while adventure bikes are all about comfort and staying steady on long trips. Here’s a quick look at what each one is good and bad at, so you can see why they handle so differently.
Dual Sport Motorcycle Pros & Cons
Dual Sport Motorcycle Pros
Lightweight
Better off-road performance
Better handling
Better durability
Street legal
Can maneuver on rough terrain
Dual Sport Motorcycle Cons
Below average highway performance
No windscreen for heavy wind protection
Single-cylinder engines cause noise and vibrations
Complex engines and advanced electronics are difficult to repair
More expensive to repair
Which Is Better for Beginners: Dual Sport vs. Adventure Bike
The short answer is: Dual Sport.
Because they are lighter and easier to control, dual sport motorcycles are far more forgiving for beginners—especially at low speeds and on uneven terrain.
Category
Choose a Dual Sport If...
Choose an Adventure Bike If...
Experience Level
Beginner-friendly; easy to learn and recover from falls.
Requires more experience; can be intimidating off-road.
Primary Terrain
Mostly off-road, trails, and technical terrain.
Long distances, highways, and mixed pavement.
Riding Style
Enjoys simple, lightweight, and agile handling.
Values comfort, advanced technology, and stability.
Load & Passengers
Typically ride solo with minimal gear.
Carry heavy luggage or frequently ride with passengers.
Budget & Maintenance
Smaller budget; want a simple and reliable machine.
Higher budget; comfortable with complex maintenance.
When you're trying to decide between a dual sport bike and an adventure bike, your experience level is definitely something to think about, especially when it comes to off-roading.
Dual Sport for Beginners
Let’s talk about dual sport bikes first.
These are usually easier for beginners, especially if you're looking to spend a lot of time off-road. They're lighter, narrower, and just simpler to handle overall.
At low speeds, they feel way more manageable, and if you do tip over (which happens to everyone), picking it back up or recovering from a stall isn’t nearly as intimidating.
It’s a great way to build confidence and get a feel for off-roading without feeling too out of your depth.
Adventure Bike for Beginners
Now, adventure bikes are a bit of a different story.
While they’re still beginner-friendly on the road, off-road riding with an adventure bike can be a bit more challenging—especially if you're new to it.
They’re typically heavier, taller, and just bulkier overall. That can make things feel a little intimidating when you take them off the beaten path. You need a bit more experience, strength, and confidence to really handle an adventure bike off-road.
Honestly, it’s probably not the best bike for a complete beginner when it comes to dirt trails or rough terrain.
So, if you're more into road riding but still want some off-road capability, an adventure bike can be a solid choice.
But if you're mostly looking to dive into off-roading right away, a dual sport is probably going to feel more natural and manageable as you're starting.
❓Frequently Asked Questions (FAQ)
🏍️ Is a dual sport the same as an adventure bike?
No. Dual sport bikes are lighter and more off-road focused, while adventure bikes prioritize comfort, technology, and long-distance travel on mixed terrain.
🛣️ Can adventure bikes go off-road?
Yes, adventure bikes can handle gravel roads, fire roads, and mild trails. However, heavy adventure motorcycles can struggle on technical or aggressive off-road terrain.
💨 Are dual sport bikes good for highways?
Dual sport bikes can be ridden on highways, but long-distance highway travel is often uncomfortable due to smaller engines, narrow seats, vibrations, and minimal wind protection.
🧰 Which lasts longer, a dual sport or an adventure bike?
Both can last a long time if properly maintained. Dual sport bikes are mechanically simpler, while adventure bikes rely more on electronics, which can increase repair complexity over time.
🧠 Which is better for beginners, a dual sport or an adventure bike?
Dual sport motorcycles are generally better for beginners who want to ride off-road because they are lighter and easier to control. Adventure bikes can be beginner-friendly on pavement but are more challenging off-road due to their size and weight.
🌍 Can a dual sport be used for long-distance touring?
Yes, but with limitations. Dual sport bikes can handle long trips with modifications such as larger fuel tanks and more comfortable seats, but they lack the comfort, wind protection, and luggage capacity of adventure bikes.
⚖️ Are adventure bikes too heavy for off-road riding?
Larger adventure bikes can be difficult to manage off-road due to their weight, especially on technical trails. They perform best on gravel roads and mild terrain rather than aggressive off-road conditions.
💰 Is a dual sport cheaper to own than an adventure bike?
Yes. Dual sport bikes usually have lower purchase prices, lower maintenance costs, and simpler mechanical designs compared to adventure bikes, which are more expensive to buy and maintain.
🔄 Can one bike replace both a dual sport and an adventure bike?
Some mid-size adventure or lightweight adventure bikes can serve as a compromise, but no single motorcycle perfectly replaces both. Dual sport bikes excel off-road, while adventure bikes are better for comfort and long-distance travel.
Conclusion
So, when it comes to picking between a dual sport and an adventure bike, it really boils down to what floats your boat and the kind of riding you're into. Both are cool in their own way, so don't rush the decision – pick what feels right for you.
No matter which one you pick, get out there and have some fun!
Riding in a group is thrilling, but without clear communication, even the best rides can turn chaotic. That’s where motorcycle intercom systems come in, letting you talk with your group, share GPS directions, listen to music together, and stay safer on the road.
Whether you’re riding with a single friend or leading a pack of 20, choosing the right intercom can make a huge difference in both safety and enjoyment.
In this guide, we break down the best motorcycle intercoms for group rides sized from small (2–4 riders) up to larger packs (15–20+), with detailed comparisons, tech explanations, and answers to the most common questions riders ask.
How Motorcycle Intercoms Work — Bluetooth vs Mesh
Before comparing products, it’s important to understand the underlying tech:
Bluetooth Intercom
Uses direct device‑to‑device links.
Works well for small groups (2–8 riders).
Simple and often cheaper.
Intercom range ~1–2 miles in open terrain.
Pros: Easy setup, widely compatible Cons: Chain communication breaks if one rider drops out
Mesh Intercom
Each device becomes a node in a mesh network.
Supports medium to large groups (up to 24+ riders).
All necessary functions, perfect audio, easy to use
Medium group
$64.99
Cardo Freecom 4 Plus
Bluetooth
~4 riders
~1.3 km
~13h
Great mid‑range value
Small group
$314.95
Notes: Intercom ranges are approximate and vary by terrain and conditions.
🏍️ Best Intercoms for Large Group Rides (10–24 Riders)
1. Cardo PackTalk Bold / Edge
packtalk bold and edge
Price: US$439.95
When I’m out with my crew, nothing beats the freedom of a solid mesh intercom. Both the Bold and Edge use Cardo’s Dynamic Mesh Communication (DMC) to link up to 15 riders in a flexible network. There is no fixed order among us, no stopping to reconnect when someone drifts back.
My buddies and I can chat, share turns, or warn of hazards even when we’re spread out on long, twisty roads — it just works.
The Edge builds on the Bold with easier pairing, better Bluetooth range and waterproofing that stands up to real‑world rides.
Why it’s great: Dynamic Mesh Communication (DMC) creates a robust mesh network that reconnects riders automatically and supports up to around 15 riders group communication reliably. This system also integrates premium JBL speakers for clear audio even at speed.
Pros
✅Stable mesh network
✅Excellent audio balance
✅Long battery life
Cons
❌Higher price
❌A larger profile may not suit every helmet
2. Sena 50S and Sena 50R
50s and 50r
Price: $375.00/$379.00
When I’m out with a big club or weekend gang, these Sena units keep us talking without hassle.
They use advanced Mesh Intercom™ technology that links riders out to several miles and lets you run Multi‑Channel Open Mesh or private Group Mesh chats. This means riders can stay connected without dropping out.
The audio quality is great thanks to sound tuned by Harman Kardon, and setup is easy with voice commands and the Sena app.
Whether we’re cruising highways or twisty backroads, everyone stays in the loop — great for safety and just plain fun.
If you want maximum scalability (up to 24 riders in open mesh mode), Sena’s Mesh 2.0 system is a standout.
Sena 50S Highlights
Mesh 2.0 tech connects up to 24 riders
Harman Kardon speakers with crisp audio
Voice command and quick charge
8–13 hours battery (mode dependent)
Pros
✅Ultra‑wide group intercom capability
✅Low profile design
✅Multi‑channel mesh Cons
❌Slightly more complex menu navigation
❌Battery a bit lower than top Cardo
Best For: Large groups prioritizing range and capacity.
3. Fodsports FX 10C Mesh Intercom
Fodsports FX 10C Mesh Intercom - Best Motorcycle Intercom for Group Rides
Mesh Intercom, Bleutooth 5.0, 1000m Intercom Range.
10 Mesh Intercom Channels, Unlimited Connection Number.
Listen to Music/GPS and Talk with Other Riders At The Same Time.
High Quality sound, IP65 waterproof.
Music Sharing, Voice Commands, FM Radio.
For riders looking for a more traditional mesh networking approach, the FX 10C uses dedicated mesh tech (10 channels) that can handle effectively unlimited riders (as long as all riders are using FX 10C units).
It supports switchable mesh channels, so groups can choose separate networks to avoid interference — a useful feature for larger coordinated groups.
When I’ve hit the road with a big crew, this FX 10C unit really impressed me for group chats.
Its mesh intercom lets everyone stay connected no matter where you are in the pack, with up to 10 channels and unlimited riders if they’re all FX 10Cs, so no one gets left out.
The button controls are big and glove‑friendly, and the Bluetooth 5.0 + noise reduction keeps voices clear even with wind and engine noise.
Plus, you can listen to music/GPS and intercom with other riders at the same time — perfect for longer rides.
Why You Might Pick This
Supports unlimited riders in the same mesh network (with all units on the same tech, recommended number: 10 to 15 riders).
Allows listening to music and GPS while in intercom mode.
Long battery life (~15 h), IP65 waterproof, and HIFI stereo sound.
Offers 10 mesh channels for flexibility.
Best For: Large group rides where all riders use FX 10C mesh intercom system and want flexible channel options without brand restrictions.
4. Fodsports FX7 Bluetooth Mesh Intercom
Fodsports FX7 Bluetooth Mesh Intercom - Group Rides Motorcycle Intercom
Bluetooth Mesh Intercom.
Dual Bluetooth Chip Design.
10 Riders Group Intercom, 2000m Distance!
HRSQ Mic and Speakers, CVC + ENC + DSP Noise Cancelation.
Listen to Music/GPS and Intercom At the Same Time.
IP67 Waterproof.
FM Radio, Music Sharing, Voice Commands.
The Fodsports FX7 blends Bluetooth and mesh intercom capabilities in a very competitive package, with support for up to 10 riders communicating via a Bluetooth mesh AD-HOC network.
Its dual Bluetooth chip design means one chip handles audio streaming (music/GPS) while the other handles intercom connectivity. This enables group talk and multi-tasking audio without compromise
And, it offers a theoretical intercom range up to ~2000 m.
Fodsports FX7 is a Bluetooth mesh intercom I’ve used on long runs with my crew and it really holds its own.
Its mesh network lets up to around 10 riders stay connected out to about 2 km, so we can chat and coordinate even when spaced out on twisty roads.
It’s easy to pair, weatherproof with IP67 build quality, and lets you listen to music or GPS while talking — big plus on all‑day rides.
The buttons are glove‑friendly, and the sound is clear thanks to noise‑reduction tech. Overall, great value for group riders.
10 Riders Group Intercom, 2000 Meters Distance!
Optional HRSQ Mic and Speakers, Better Sound Quality.
Microphone Mute.
Music Sharing, FM Radio, Voice Command.
While not a full mesh intercom, the M1-S Plus supports group connectivity with Bluetooth 5.0, allowing up to ~10 riders to join a single intercom session.
Its reliable pairing and solid battery life make it a worthy contender where a simpler Bluetooth group setup is acceptable.
Fodsports M1‑S Plus has been one of my choices when I’m out with a small crew because it just works without being expensive.
It lets up to 10 riders stay in touch over Bluetooth intercom so we can chat about the route, warn about hazards ahead, or just joke around on the road — all without pulling over.
The setup is easy, the buttons are friendly with gloves on, and the battery will last all day.
Plus, you get music/GPS audio, noise reduction, and even FM radio built in, which is great on longer trips.
Want the best ride‑with‑friends setup that won’t break the bank? This M1-S Plus motorcycle intercom for group rides is solid.
Key Group Ride Features
Up to 10 riders supported via Bluetooth intercom.
Listen to music/GPS and intercom at the same time(with a wired cable)
Music sharing, FM Radio, voice command, etc.
Good battery life and easy pairing.
Best For: Riders who want a Bluetooth-centric group setup without full mesh networking.
🚦 Best Mid‑Range & Value Options (4–8 Riders)
6. Fodsports FX8
Fodsports FX8 - Motorcycle Intercom for Group Rides within 8 Riders
8 Riders Group Communication Intercom
2000 Meters Distance!
Noise Reduction Function
Hi-Fi Stereo Sound Quality.
Three kinds of sound effects
FM Radio, Music Sharing, Voice Command.
Universal Pairing.
The Fodsports T1 Pro is a Bluetooth 5.4-based group intercom designed to support 2–6 riders talking together simultaneously.
It can support up to 2 km communication range when 4-6 riders are connected (for 2 riders communication, it can support up to 1 km range).
Its one-touch mode switching, professional noise reduction (CVC + DSP), and HiFi stereo sound are easy and convenient functions for riders.
These user-friendly functions make it a strong contender for medium group rides where full mesh isn’t required but stable multi-rider comms are still needed.
Why It Stands Out
Supports up to 6 riders in group intercom (with manual add for the 5th/6th riders).
Bluetooth 5.4 tech offers stable connection and faster pairing.
Up to 2000 m range when multiple riders are connected.
HiFi stereo speakers with noise reduction help maintain clarity.
Four quick modes: Group intercom, two-rider intercom, universal pairing, and music sharing.
Best For: Riders who want a Bluetooth group intercom that handles small to medium packing reliably without the cost of full mesh systems.
Pros:
✅Stable and clear Bluetooth group communication
✅Good range for medium group rides
✅FM radio and music sharing included
Cons:
❌No mesh tech
8. Cardo Freecom 4 Plus
freecom4 plus
Price: US$314.95
Perfect for small groups or riders who want premium features without premium pricing.
Features
Up to ~4 riders
13h battery
Bluetooth connectivity
Best For: Couples or small touring groups.
🧠 How to Choose the Right Intercom for Your Group
Here’s how to narrow down your choice based on your riding style:
1. Group Size
2–4 riders: Bluetooth or small mesh (e.g., Fodsports T1 Pro, Freecom 4 Plus)
10+ riders: Full mesh leaders (e.g., Fodsports FX10C, Fodsports FX7, Sena 50S, PackTalk Bold)
2. Terrain & Range Needs
Long highway rides with spacing benefit from strong mesh range.
Urban environments may rely on Bluetooth connectivity more.
3. Other Considerations
Battery life: Aim for 10+ hours for full-day trips.
Audio quality: JBL or High-resolution sound quality units give clearer sound.
Ease of use: Voice commands and app setup ease helmet adjustments.
Frequently Asked Questions (FAQ)
Q1: Can all riders join a mesh network regardless of brand?
A: Usually not. Most mesh systems work best within the same brand due to compatibility limitations. Some offer limited cross-brand support. To ensure better compatibility and connection stability, we recommend you all use the same brand's mesh intercom.
Q2: How do I connect a large group with Bluetooth?
A: Pair sequentially, keeping the number of riders under the device limit. For 5+ riders, mesh networks are recommended.
Q3: How many riders can a mesh intercom really support?
A: Modern mesh with advanced tech can support 10–24 riders or more in ideal conditions, though voice chat and clarity may decrease with very large numbers.
Q4: How long do intercoms last per charge?
A: Battery life ranges from 10–15 hours, depending on model and usage. Heavy group use or long-range communication drains the battery faster.
Q5: Is mesh always better than Bluetooth?
A: For group rides beyond 4 riders and spread distances, yes — mesh is far more stable. Bluetooth remains great for small groups or simpler uses.
Q6: Can intercoms handle phone calls or GPS audio simultaneously?
A: Yes, most modern intercoms like Fodsports FX7, Fodsports FX10C support multi-channel audio, allowing GPS directions or phone calls while staying connected to riders.
Q7: Are intercoms weatherproof?
A: Yes, many high-quality intercoms are waterproof and dust-resistant, but check manufacturer specifications before exposure to heavy rain or extreme conditions.
Q8: Do intercom systems affect music or GPS sound?
A: Premium units handle audio multitasking well — letting GPS prompts and music play alongside intercom chats. Lower models may struggle to balance audio streams.
🏁 Conclusion — Best Motorcycle Intercom for Group Riders
🥇 Best Overall (Large Groups):Cardo PackTalk Bold / Edge, Sena 50S/50R, Fodsports FX10C, Fodsports FX7
💡 Best Mid‑Group: Fodsports M1-S Plus, Fodsports FX8
📍 Best Small Group: Fodsports T1 Pro, Freecom 4 Plus
Group rides are more enjoyable and safer with reliable motorcycle intercoms.
For small groups (2–8 riders), Bluetooth systems like Fodsports T1 Pro, Freecom 4 Plus, and Fodsports FX8 offer excellent value.
For larger groups (10–20+ riders), mesh intercoms such as Fodsports FX 10C, Fodsports FX7, Sena 50S or Cardo PACKTALK BOLD provide seamless communication, longer range, and scalable connectivity.
By considering group size, connectivity needs, and key features, you can ensure every ride is smooth, safe, and fun.
Stunt riding is not just a sport—it's a way to push the limits of control, precision, and creativity. Whether you're popping wheelies, performing stoppies, or mastering drifts, the thrill of performing acrobatic maneuvers on two wheels is unmatched. But to truly shine, a stunt rider needs the right bike.
In the world of stunt motorcycles, it’s not about raw power—it’s about having the perfect balance, smooth power delivery, and the right level of control. Whether you’re a beginner learning the basics or an advanced rider looking for your next pro-level challenge, the right motorcycle can make all the difference.
In this guide, we've curated a list of the top 10 stunt bikes that stand out for their agility, handling, and adaptability to various stunts. Get ready to discover your next stunt bike!
This list is not ranked by overall performance. Instead, each motorcycle is highlighted for the type of stunt riding it excels at and the rider skill level it best suits.
Anyone who’s actually spent time learning stunts knows why the Honda Grom shows up everywhere. It’s not about horsepower—it’s about how little the bike fights you.
With its short wheelbase, low center of gravity, and light weight, the Grom makes wheelies and balance drills feel natural instead of intimidating, which is exactly what you want when you’re learning or refining fundamentals.
At just over 100 kg wet, the Grom lets you focus on the important stuff: clutch timing, rear brake control, and slow-speed balance.
You can loop it, save it, mess up, and try again without the bike punishing you for every mistake.
The low seat height and predictable power delivery make it ideal for beginners, but it’s just as valuable for experienced riders who want a safe, low-stress platform to drill technique in tight spaces.
Honda Grom MSX125 beginner stunt bike
✅ Pros
Extremely lightweight and compact: Ideal for learning wheelies, circles, and balance tricks at low speeds.
Low seat height and forgiving geometry: Accessible to riders of all sizes and skill levels.
Massive aftermarket support: One of the easiest bikes to convert into a dedicated stunt build.
❌ Cons
Very limited power and top speed: Quickly becomes a limitation as skill level increases.
Not suitable for high-speed or advanced aerial stunts: Lacks the torque and chassis stability of full-size bikes.
Short wheelbase reduces high-speed stability: Less forgiving once speeds increase.
Handling
★★★★★
5.0
Power Delivery
★★★☆☆
5.0
Stability
★★★★☆
4.5
Brakes
★★★★☆
4.0
Overall
★★★★☆
4.2
Engine
125cc Single
Power
~10 hp
Weight
~103 kg wet
Seat Height
~761 mm
MiniMOTO chassis design
USD front fork
Digital instrument display
Bottom line: The Honda Grom is one of the easiest and most fun stunt bikes to ride, especially for beginners mastering balance and control.
2. KTM 390 Duke – Lightweight Street Stunt Bike
The KTM 390 Duke is one of those bikes that quietly makes learning stunts easier than it has any right to.
The upright riding position, light weight, and wide bars give you instant leverage, so the bike feels cooperative instead of twitchy when you’re working on wheelies, stoppies, or slow-speed balance drills. Nothing about it feels intimidating, which is exactly what you want when you’re building confidence.
The 373cc single-cylinder doesn’t hit hard—it responds cleanly. That smooth, predictable power delivery lets you focus on timing and control rather than fighting sudden surges.
Paired with the lightweight trellis frame and quick steering, the 390 Duke feels forgiving when you make mistakes, but still sharp enough to grow with you as your stunt skills progress.
ktm 390 duke
✅ Pros
Lightweight and extremely agile.
Smooth, predictable power delivery.
Upright ergonomics with wide bars for leverage.
❌ Cons
Limited power for advanced stunt riders.
Stock setup may require tuning for harder tricks.
Not as exciting at higher speeds.
Handling
★★★★☆
4.5
Power Delivery
★★★★☆
4.0
Stability
★★★★☆
4.0
Brakes
★★★★☆
4.0
Overall
★★★★☆
4.1
Engine
373cc Single
Power
~43 hp
Weight
~139 kg dry
Seat Height
~830 mm
Steel trellis frame
Dual-channel ABS (switchable)
Lightweight streetfighter design
Bottom line: The KTM 390 Duke is one of the best entry points into stunt riding, especially for riders learning technique over brute force.
3. BMW G310R – Entry-Level Stunt Motorcycle
The BMW G310R isn’t a bike people usually think of as a stunt machine, but once you ride it, you understand why beginners gravitate toward it.
The upright ergonomics and balanced chassis make the bike feel neutral and easy to manage, so you’re not fighting weight or awkward geometry while trying to learn basic techniques.
The single-cylinder engine delivers power in a calm, predictable way, which helps when you’re practicing controlled wheelies or slow-speed balance drills.
Add in the low seat height and light feel, and the G310R becomes a confidence-building platform—especially for riders who want to focus on precision and control before moving on to more aggressive stunt-oriented bikes.
bmw g310r
✅ Pros
Very approachable power and ergonomics.
Low seat height helps confidence.
Stable chassis at low speeds.
❌ Cons
Limited power for aggressive stunts.
Aftermarket stunt support is limited.
Suspension can feel soft under heavy load.
Handling
★★★★☆
4.0
Power Delivery
★★★★☆
3.8
Stability
★★★★☆
4.0
Brakes
★★★★☆
3.8
Overall
★★★★☆
3.9
Engine
313cc Single
Power
~34 hp
Weight
~158 kg wet
Seat Height
~785 mm
Upright naked-bike ergonomics
ABS braking system
Compact wheelbase
Bottom line: The BMW G310R is a confidence-building platform for new stunt riders who want control and predictability over raw power.
4. Suzuki DR-Z400SM – Supermoto Street Stunt Bike
The DR-Z400SM is one of those bikes that earns its place through abuse, not specs.
It’s light enough to throw around, tall enough to give you leverage, and torquey in a way that makes wheelies feel almost effortless.
The long-travel suspension and upright supermoto stance give you room to move, which is a big deal when you’re working low-speed tricks or sliding the bike around.
It’s not the most powerful machine on this list, but that’s part of why stunt riders trust it. The throttle response is predictable, the power comes in smoothly, and the bike can take hits without falling apart.
You can crash it, pick it up, and keep riding—something that matters a lot more in stunt riding than chasing peak horsepower numbers.
Bottom line: The DR-Z400SM is a tough, confidence-inspiring supermoto ideal for riders who value durability and control over outright power.
5. Yamaha MT-07 (FZ-07) – Torque-Focused Street Stunt Bike
The MT-07 is popular in stunt riding for a simple reason: the bike does half the work for you.
The CP2 parallel-twin makes usable torque right off idle, so wheelies come up easily without having to abuse the clutch or rev the engine hard.
That kind of low-end response is a huge advantage when you’re working on consistency instead of just trying to get the front wheel in the air.
What really makes the MT-07 work is how balanced it feels once the wheel is up. The torque delivery is smooth and predictable, which helps you settle into longer wheelies without constant corrections.
Add the upright ergonomics and short wheelbase, and the bike feels playful rather than demanding—strong enough to progress on, but forgiving enough that it doesn’t punish small mistakes.
yamaha mt 07
✅ Pros
Strong low-end torque makes wheelies effortless.
Lightweight and forgiving chassis.
Comfortable upright ergonomics.
❌ Cons
Stock suspension is soft for aggressive stunts.
Less power than supersport bikes.
Requires modification for advanced flatland tricks.
Handling
★★★★☆
4.0
Power Delivery
★★★★★
4.6
Stability
★★★★☆
4.0
Brakes
★★★★☆
3.8
Overall
★★★★☆
4.3
Engine
689cc Parallel Twin
Power
~74 hp
Weight
~180 kg wet
Seat Height
~805 mm
CP2 270° crank engine
Upright streetfighter ergonomics
Short wheelbase design
Bottom line: The MT-07 is one of the most versatile stunt bikes available, offering torque-rich performance without overwhelming the rider.
From my experience, the Honda CRF450R is a straight-up weapon for off-road and freestyle stunt riding.
This isn’t a bike you “learn” power on — it responds instantly, and if your body position is off, it’ll remind you fast. That said, once you’re dialed in, the front wheel comes up almost effortlessly, and mid-air corrections feel natural rather than forced.
The 450cc four-stroke delivers power in a way that’s aggressive but still readable. It’s not about chasing top speed; it’s about how quickly and predictably the bike reacts when you crack the throttle.
The lightweight aluminum frame and long-travel Showa suspension soak up hard landings without drama, which is exactly what you want when you’re repeating jumps, whips, or freestyle tricks all day.
For riders who already have solid control and want a bike that keeps up with their ambition, the CRF450R never feels like the limiting factor.
honda crf450r
✅ Pros
Extremely lightweight, making flips and wheelies easy.
Strong low-end torque for instant front-wheel lift.
Long-travel suspension absorbs harsh landings.
❌ Cons
Very tall seat height and aggressive ergonomics.
No street equipment like lights or ABS.
Power delivery can feel abrupt without clutch control.
Handling
★★★★★
4.7
Power Delivery
★★★★☆
4.3
Stability
★★★★☆
4.5
Brakes
★★★★☆
4.0
Overall
★★★★☆
4.5
Engine
450cc Single-cylinder
Power
~51 hp
Weight
~109–111 kg dry
Seat Height
~950 mm
Race-proven Unicam engine
Showa long-travel suspension
Ultra-light aluminum frame
Bottom line: The CRF450R is a dominant platform for freestyle and off-road stunts, best suited for skilled riders with space to unleash it.
7. Suzuki GSX-R750 – Midweight Supersport Stunt Bike
From my time riding and watching these bikes get abused properly, the Suzuki GSX-R750 earns its “wheelie king” reputation the hard way — by simply doing everything right.
It sits in that perfect middle ground where you get real punch without the constant fight of a liter bike. Once you’re at balance point, the bike feels planted and predictable instead of nervous or overpowered.
The 749cc inline-four hits hard but stays controllable, which is exactly what you want for long wheelies and clean transitions. You can bring the front up smoothly, hold it there, and set it down without the bike trying to buck you off.
The lightweight aluminum frame and sharp throttle response make quick corrections easy, while the strong front brakes give you confidence going straight into stoppies or hard landings.
That natural balance — power, weight, and control — is why the GSX-R750 has stayed relevant in the stunt scene long after other sportbikes faded out.
suzuki gsx-r750
✅ Pros
Exceptional midrange torque makes wheelies effortless and controllable.
Lightweight aluminum chassis offers excellent balance and flickability.
High-quality suspension and Brembo brakes inspire confidence during stoppies.
❌ Cons
Still a full-size sportbike with a relatively high seat and weight.
Aggressive riding position can be tiring during long stunt sessions.
Handling
★★★★☆
4.2
Power Delivery
★★★★☆
4.4
Stability
★★★★☆
4.3
Brakes
★★★★☆
4.2
Overall
★★★★☆
4.4
Engine
749cc Inline-4
Power
~147–150 hp
Torque
~86 Nm
Weight
~190 kg dry
Seat Height
~810 mm
Brembo front braking system
Compact aluminum twin-spar frame
Fully adjustable suspension
Bottom line: The GSX-R750 remains one of the most complete stunt-capable sportbikes ever made, perfectly suited for riders who want power without losing control.
The Honda CBR600RR is a pure race-bred supersport that feels razor-sharp in your hands. Its compact frame and snappy inline-four engine let you pull high-speed wheelies and weave through transitions with surgical precision.
It’s not a forgiving bike like a naked street bike—you really have to earn your points here—but when you’ve got the skills, the CBR600RR rewards you with rock-solid stability and brakes that inspire full confidence during aggressive stunts and precise landings.
Personally, I’ve found that mastering the throttle and body positioning on this bike is everything: even a slight misjudgment can throw off a trick, but when it clicks, the bike feels like an extension of your own instincts.
It’s a tool for riders who crave control and want to push limits safely—and trust me, once you understand its rhythm, there’s nothing else quite like it on the street or track.
Bottom line: The CBR600RR is a precision tool for skilled riders who want race-bike sharpness in their stunt riding.
9. Triumph Street Triple R – Triple-Cylinder Street Stunt Bike
From my perspective, the Triumph Street Triple R is pure character on two wheels.
Its 765cc triple-cylinder engine hits with an addictive midrange punch, giving wheelies and flicks that thrilling edge—you feel the torque surge instantly, yet it’s smooth enough to keep everything controllable.
The upright stance, wide handlebars, and refined electronics make it a bike that responds to every input without holding back.
I’ve spent hours wringing this bike out, and what I love is how alive it feels in your hands: it rewards precise throttle control and body positioning, turning even simple stunts into a dance.
For anyone who wants a naked bike that’s raw, playful, and fully engaging, the Street Triple R is an absolute favorite in my book.
Triumph Street Triple R
✅ Pros
Powerful midrange torque for wheelies and flicks
Wide handlebars for stunt leverage
Advanced electronics and stable chassis
❌ Cons
Relatively heavy for long sessions
Sensitive throttle needs experience
Firm seat can be uncomfortable
Handling
★★★★★
4.6
Power Delivery
★★★★☆
4.5
Stability
★★★★☆
4.2
Brakes
★★★★☆
4.4
Overall
★★★★☆
4.5
Engine
765cc Inline-Triple
Power
~118 hp
Weight
~189 kg dry
Seat Height
~830 mm
Ride-by-wire throttle
Advanced traction control and ABS
Wide streetfighter ergonomics
Bottom line: The Street Triple R is a thrilling stunt machine for experienced riders who want power, character, and control in equal measure.
The Kawasaki Ninja ZX-6R (636) is widely regarded as one of the best supersport stunt motorcycles for wheelies and street stunts.
If you’ve actually spent time doing stunts on supersport bikes, the ZX-6R makes sense almost immediately. The 636cc inline-four has noticeably more midrange than a typical 600, which means wheelies come up easier and stay more controllable once you’re near the balance point.
You don’t have to rev it to the moon just to get the bike to respond, and that matters a lot when you’re working on consistency rather than show-off power.
That midrange-focused character is exactly why the ZX-6R still shows up in professional stunt builds and street stunt riding today. With modern rider aids like multi-mode traction control, ABS, and a quick-shifter, the bike gives you a wider margin for error when things aren’t perfect—hard landings, rushed throttle inputs, or uneven braking.
The aggressive ergonomics, rear-set pegs, and taller bars also work well for riders who spend a lot of time standing up on the bike and managing balance rather than just sitting in the seat.
kawasaki ninja zx-6r
✅Pros
Strong midrange-focused 636cc engine: Makes wheelies and balance-point control easier, especially during high-speed street stunts.
Electronics that support stunt riding: Traction control, ABS, and a quick-shifter help manage throttle input, braking stability, and rear-wheel control.
High-quality brakes and suspension: Dual 310mm front discs and adjustable Showa suspension improve confidence during stoppies and hard landings.
❌Cons
Heavier than purpose-built stunt bikes: Its supersport chassis can feel bulky during tight or highly technical maneuvers.
Tall seat height (820mm): Can be challenging for shorter riders, especially during slow-speed balance stunts.
Requires refined throttle control: Best suited for intermediate to advanced stunt riders rather than beginners.
Handling
★★★★☆
4.0
Power Delivery
★★★★★
5.0
Stability
★★★★☆
4.5
Brakes
★★★★☆
4.3
Overall
★★★★☆
4.5
Engine
636cc Inline-4
Max Power
~134 hp
Max Torque
~70.9 Nm
Weight
Approx. 190–200 kg (wet)
Seat Height
820 mm
Brakes
Dual 310mm front, 220mm rear
Electronics
KTRC, ABS, Quick-shifter (KQS)
TFT display for clear visibility
Traction control with multiple selectable modes
Quick-shifter for smooth clutchless up/down shifts
Fully adjustable Showa suspension
Bottom line: In 2026, the Kawasaki ZX-6R remains one of the most capable supersport stunt bikes for riders who value midrange torque, stability, and modern electronics—but it rewards experience more than experimentation.
Conclusion
Choosing the right stunt bike is more than just about specs—it's about matching the bike to your skills, style, and ambitions. Whether you're looking for a beginner-friendly stunt bike like the Honda Grom, or a high-performance machine like the Kawasaki ZX-6R, the right motorcycle will make all the difference in mastering your tricks.
Every ride is an opportunity to improve, and with one of these 10 top stunt motorcycles, you’ll be ready to take on wheelies, stoppies, and drifts with confidence.
Which bike fits your stunt style? Explore your options and get ready to ride like a pro.
I’ve used premium intercoms and budget ones on the same roads, in the same weather, on long touring days. The truth? Most riders don’t need a $400 system. Most riders still need the same basics: clear rider-to-rider talk, stable Bluetooth, and batteries that last a full day on the road. In 2026, budget motorcycle intercoms like Fodsports still cover 80% of real riding needs — if you pick the right model.
Fodsports targets riders who care about function over branding. They aren’t perfect, but for commuting, touring, and casual group rides, they deliver strong value per dollar.
If you’re deciding between “cheap but risky” and “expensive but overkill,” this guide helps you land in the middle.
Why Budget Motorcycle Intercoms Matter More Than Ever in 2026
If you’ve been riding for more than a few seasons, you’ve probably noticed one thing: motorcycle gear prices keep climbing, but most of us are still riding the same roads, with the same buddies, doing the same weekend trips.
Not everyone wants—or needs—a $400+ intercom system just to:
Talk to a passenger
Chat with one or two riding buddies
Hear GPS directions
Play some music on a long highway stretch
That’s where budget motorcycle intercoms come in, and in 2026, Fodsports is still one of the brands riders keep circling back to.
What Budget Intercoms Are Actually Like on a Long Ride
On a 300-mile day, what matters isn’t brand names — it’s whether the intercom:
Still has battery at the last fuel stop
Doesn’t randomly disconnect
Lets you hear your riding partner clearly
Fodsports units handle these basics well, as long as expectations match the price.
I’ve used premium intercoms. I’ve also run budget units through rain, heat, cold mornings, and long touring days. This article isn’t about hype. It’s about what actually works, what doesn’t, and which Fodsports intercoms are worth your money right now.
How This Article Was Written (So You Know It’s Honest)
This isn’t a “copy specs from the box” review. These recommendations are based on real riding priorities, not spec sheets.
These picks are based on:
Real-world riding use (touring, commuting, weekend group rides)
Battery behavior after months, not days
Wind noise at 65–80 mph
Ease of pairing (because no one wants to fight buttons at a gas stop)
Value — not just price
Each Fodsports intercom was evaluated on:
Battery life during full-day rides
Stability at highway speed
Ease of use with gloves
Group vs solo riding performance
Long-term ownership expectations
If something has a weakness, you’ll see it here.
Best Fodsports Intercoms by Rider Type (2026)
Best overall budget intercom:
👉 Fodsports M1-S Pro – Best balance of price, audio, and reliability
Best for group rides:
👉 Fodsports FX7 / FX10C – Mesh stability for 3+ riders
Best for couples / two-up touring:
👉 Fodsports T1 Pro – Simple, stable, and easy to use
Best ultra-cheap option:
👉 Fodsports FX-S / T5 / T6 – Basic features at the lowest cost
Best for solo commuters:
👉 M1-S Pro or T1 Pro – Depends on budget and ride length
Quick Comparison: Best Budget Fodsports Intercoms (2026)
If someone asked me, “What’s the safest budget intercom to recommend in 2026?”
I’d still say M1-S Pro without hesitation.
It is designed for riders who want clear communication on the road during group rides. It supports for up to 8–10 riders with a range of up to about 2000 m.
It also features advanced noise‑reduction tech and waterproof construction so you can listen to music, get GPS directions, or chat with your crew comfortably while you ride.
Although it is an older Fodsports model, Fodsports does not stop upgrading it.
In 2024, Fodsports upgraded the M1-S Pro with a new Bluetooth chip. Now the new Bluetooth chip has better compatibility and a more stable connection.
What's more, it added one-click pairing between 10 riders, making it more convenient to connect. The prompt language also increased from 2 languages(EN, JP) to 7 languages (EN, JP, GE, FR, SP, IT, RU).
To improve the audio quality, Fodsports also upgraded the mic and speakers with a M1-S Pro high-resolution sound quality microphone and speakers. (Please notice, this mic and speakers kit is sold separately; it is not included in the standard M1-S Pro pack.)
In 2025, Fodsports released the Fodsports Connect APP. The M1-S Pro is the first model that can pair with this APP. Through the APP, riders can easily set and control the M1-S Pro, which is more convenient and intuitive.
Real Riding Experience
Riding with Fodsports M1‑S Pro in a group totally changes the experience. On a recent weekend run with four friends, we stayed connected easily up to a few hundred meters apart without screaming over the wind. And, the noise‑reduction tech kept everyone’s voices clear even at highway speeds. The intercom stayed paired for most of the ride and reconnected quickly after we stopped for coffee, so we could coordinate turns and share road views in real time.
Sound quality is decent. Not an audiophile, but voices are clear enough at speed, especially with a decent helmet seal.
Where It Falls Short
No mesh networking
Verdict
If you want maximum reliability per dollar, this is the safest Fodsports buy in 2026.
Tip: If you will buy multiple, contact the online service on the Fodsports official website and ask them to offer you a coupon code, you will save more.
Best Budget Mesh Option: Fodsports FX7
That said, the FX7 is one of the few ways to get into mesh intercom riding without premium-brand pricing.
The Fodsports FX7 Bluetooth Mesh Intercom is one of the best mesh intercom options if you want full group‑ride functionality without paying premium prices.
Best Budget Mesh Option - Fodsports FX7 Bluetooth Mesh Intercom
Bluetooth Mesh Intercom.
Dual Bluetooth Chip Design.
10 Riders Group Audio, 2000m Distance!
HRSQ Mic and Speakers, CVC + ENC + DSP Noise Cancelation.
Listen to Music/GPS and Intercom At the Same Time.
IP67 Waterproof.
FM Radio, Music Sharing, Voice Commands.
Mesh is the buzzword everyone throws around, but here’s the truth:
Mesh only matters if you ride in groups.
It uses Bluetooth 5.4 and mesh networking to let up to 10 riders communication smoothly, even if someone falls out of range and comes back again.
The FX7 also handles music, GPS directions, and intercom at the same time, has clear audio with noise reduction, and works in all weather with IP67 waterproofing.
Thus making it a great balance of features and cost for riders who want reliable communication.
The FX7 is the best budget mesh intercom from Fodsports, it is worth it for group riders.
Why Mesh Helps
Rider can join in and leave the group without influencing other riders
Group stays connected
Less manual re-pairing at stops
Multi-task audio enables riders to have music/GPS and intercom simultaneously
On longer group rides, this is a real advantage.
Real Riding Experience
On a sunny weekend, my 7 friends and I went for a bike ride, and the Fodsports FX7 mesh intercom system made our journey more enjoyable and brought us closer together. We used eight units in total, on both highways and winding country roads. The FX7 mesh intercom system allowed us to communicate clearly at all times. At one point, Steven temporarily fell behind and went out of range, but the rest of us were still able to communicate without any problems. When he returned to the communication range a few minutes later, he was able to rejoin the conversation immediately, and our communication remained uninterrupted. The music and GPS navigation prompts integrated seamlessly with our conversations without interruption, so we could hear navigation instructions and our favorite songs while coordinating stops and turns. Most of us found the setup simple and intuitive, so we spent most of our time riding rather than fiddling with buttons.
When riding with 5+ bikes, the FX7 is noticeably more stable than Bluetooth chains. FX7 keeps groups connected more reliably than Bluetooth chains. If someone falls behind, the group usually stays intact.
However, mesh eats more battery. Expect slightly shorter runtimes than Bluetooth-only models.
Downsides
More expensive than other Fodsports units
Learning curve for first-time mesh users
Overkill for solo riders
Will use Bluetooth when pairing with other models
Verdict
If you regularly ride with 3 or more bikes, FX7 makes sense.
If you mostly ride solo or with one buddy, skip mesh and save money.
Best Budget Dynamic Mesh Intercom: Fodsports FX 10C
The Fodsports FX-10C is a premium-style dynamic mesh intercom in Fodsports’ lineup. It offers enhanced group connectivity for riders who need reliable communication at higher speeds and in larger groups.
Mesh Intercom, Bleutooth 5.0, 1000m Intercom Range.
10 Mesh Intercom Channels, Unlimited Connection Number.
Listen to Music/GPS and Talk with Other Riders At The Same Time.
High Quality sound, IP65 waterproof.
Music Sharing, Voice Commands, FM Radio.
The Fodsports T1 Pro is a budget motorcycle intercom designed for small riding groups(2–6 riders) that want simple, reliable communication without mesh pricing or setup.
This model sits right between ultra-cheap intercoms and advanced mesh systems — and that’s exactly its strength.
What can you expect from this model?
Connection easily? It can support one-click quick pairing among 4 T1 Pro. (The 5th and 6th T1 Pro will need manual pairing, but very easy to operate.)
Intercom distance? For 2 riders intercom, it can support 1000 meters intercom distance. As for 4 - 6 riders group communication, its intercom distance can be enlarged to 2000 meters!
Audio quality? Its microphone and speakers are equipped with professional CVC + DSP noise reduction technology. Although it may not be as excellent as FX7's high-resolution sound quality, the T1 Pro's sound quality is also good enough for most riders.
Other functions? The T1 Pro also enables many other functions like music sharing, FM radio, voice command, universal pairing, etc.
Real Rider Perspective
For weekend rides with friends, the T1 Pro does the job. Pairing is straightforward, and once connected, it stays stable as long as riders keep reasonable spacing.
At highway speeds, voice clarity is acceptable up to typical cruising pace. Like most budget intercoms, wind noise becomes the limiting factor before electronics do.
Battery life comfortably covers half-day to full-day rides, depending on volume and talk time — which is what most casual group riders actually need.
Limitations (Honest Trade-Offs)
No mesh networking
Not ideal for large group rides (over 6 riders)
These aren’t dealbreakers — just realities of Bluetooth-based systems.
Tip: You can contact Fodsports online service for a larger discount if you buy multi-unit bundles.
Rider takeaway: If your group is small and rides together consistently, the T1 Pro offers better value than mesh — and fewer headaches.
Best Ultra-Budget Choice: Fodsports T5 / T6
For riders who usually ride with only one partner and also need modern functions, the Fodsports T5 or T6 will be the best affordable two-way communication system.
These 2 models from Fodsports have the same functions, abilities, and compatibility, just with different appearances.
On a Saturday morning, my best friend Rake and I had a ride from suburban Chicago out toward the Indiana Dunes. We used Fodsports T5 and a Fodsports T6, which made the whole trip feel more connected and fun. Rake and I kept clear conversations up to about 500 m apart as we cruised along US-12 and back roads. We can easily coordinate turns and stops. Thanks to the 1000 m range and solid noise reduction tech that cuts wind and engine sound. Between talking, we shared music, heard turn-by-turn navigation, and even caught a few FM radio moments without missing a beat. The simple button controls worked well with gloves. Having each other’s company on the road made the ride more social and enjoyable throughout the day.
Verdict
Good enough if money is tight. Not ideal for group rides.
Budget Motorcycle Intercom for 2-Way Communication: Fodsports FX-S
Not everyone rides in big packs. Many riders just want a rider-to-passenger comms; they may occasional buddy rides, and they need the comms system to be simple to set up.
That’s where Fodsports FX-S shines. The FX-S is the best Fodsports intercom for rider-to-passenger and consistent two-up touring.
The Fodsports FX-S is a budget intercom with only the necessary helmet communication functions like music sharing and FM radio.
For riders who are not interested in those functions, a FX-S is enough.
The FX-S offers two classical appearance colors: gunmetal black and turquoise blue. These two colors are perfect for couples to use.
The intercom range for FX-S is about 1000 meters. For most 2-way communication demands, this distance is well enough.
Although cheap, the FX-S still has CVC + ENC noise reduction tech. Therefore, the FX-S can still provide perfect sound quality to the riders.
In general, the FX-S offers reliable chat and audio without overspending.
Real-World Notes
On a crisp Sunday morning, my partner and I had a ride with the Fodsports FX‑S Bluetooth intercom from Chicago out toward the Wisconsin countryside. The convenient use of FX-S made our trip feel more connected. As we cruised along scenic backroads and the open stretches toward Lake Geneva, we chatted easily up to about a kilometer apart. The noise-reduction tech kept voices clear over wind and engine roar even at higher speeds. The long battery life meant we never worried about power. And, swapping between GPS directions and light music between conversations was simple with the intuitive controls.
Limitations
Not ideal for group riding communication
No music sharing
No FM Radio
Verdict
If you ride with the same person most of the time, FX-S is a smart, no-drama pick.
Consider Before You Buy a Budget Motorcycle Intercom
Facing with so many intercoms on the market, you may feel hard to choose. My method is to choose according to your practical demand.
You can ask yourself these questions:
01. Do I ride solo, with a partner, or in groups?
If you ride solo or with a partner, a simple 2 way intercom is enough. If you ride in groups, check the size of your group(how many riders) first, then you can know what kind of intercom you will need. You may need different intercoms for 4-6 riders, 6-8 riders, or more than 8 riders.
02. Do I actually need mesh?
Mesh intercoms generally have better working stability than Bluetooth intercoms. But they are more expensive.
If you usually ride solo or with a partner, a common Bluetooth intercom will be enough. If you ride with groups, then you can consider mesh intercoms to make sure a more stable connection.
03. Is helmet noise my bigger problem than speaker quality?
If you prefer better sound quality, you can consider Fodsports FX7 or M1-S Pro with high-resolution sound quality. Their speakers have better noise cancellation ability, and the 3.5mm speaker port also supports you to use other high-end speakers with a 3.5mm port (like JBL's).
Answering these honestly will save you money — and disappointment.
Sound Quality, Mic Performance & Wind Noise (The Budget Reality)
Here’s something most reviews avoid saying clearly:
Budget intercoms don’t sound great at 80 mph.
That’s not a Fodsports problem — it’s physics and speaker size.
What You Can Expect
Clear voice up to ~65–70 mph
Wind noise creeps in above that
Helmet quality matters more than the intercom
Tips from Experience
Wear Full-face helmets = better audio
Good chin curtain helps
Proper mic placement is critical
Upgrade speakers if possible — it helps more than people think.
Bluetooth vs Mesh: What Riders Actually Need
Choose Bluetooth If:
You ride solo or ride with 1–2 people
You want simplicity
You value battery life
Choose Mesh If:
You ride in groups regularly
Riders come and go during rides
You hate re-pairing
For most riders? Bluetooth is still enough in 2026.
Are Fodsports intercoms reliable?
Yes, Fodsports intercoms are budget-friendly and with solid performance, a perfect choice for most riders who want a quality product and an affordable price.
Can Fodsports connect to Sena or Cardo?
Yes, Fodsports intercoms can pair with Cardo, Sena, and many other intercom brands. This is because the Fodsports intercoms have universal pairing ability.
How long do batteries really last?
Usually, the battery of Fodsports intercoms can last 15 to 25 hours after a full charge. Depending on the model, the volume riders are setting, and multi functions operating simultaneously, the practical battery lasting time may vary.
Is mesh worth it for beginners?
Only if you ride in groups and they are also using mesh(sometimes will need the same model). Otherwise, Bluetooth is simpler.
Final Verdict: Honest 2026 Recommendations
If you want one clear answer:
Best overall value: M1-S Pro
Best group riding: FX7/FX 10C
Best for small groups riding: T1 Pro
Best for solo and couple: FX-S/T5/T6
Cheapest usable option: FX-S
Fodsports isn’t perfect — but for riders who care more about riding than branding, they still make some of the best budget motorcycle intercoms in 2026.
Rider takeaway: If your riding group is small and consistent, Bluetooth is still the smarter buy.
Motorcycle intercom battery replacement is a common issue riders encounter after a few seasons of use. Over time, batteries can wear down, causing the intercom to die mid-ride, struggle to hold a charge, or shut down unexpectedly.
This complete guide breaks down everything you need to know about motorcycle intercom battery replacement, helping riders understand the signs, the process, and the best options for their unit.
How to Replace a Motorcycle Intercom Battery
⚠️ Warning: This is a general guide. Always check your specific model first.
Tools to Replace a Motorcycle Intercom Battery
tools to replace a motorcycle intercom battery
Small Torx screwdriver or Phillips screwdriver (depending on the model)
To remove the screws holding the intercom housing.
Plastic prying tools
To safely open the housing without scratching or damaging it.
Soldering iron (fine tip recommended)
For soldering the battery wires to the circuit board, if needed.
Thin-gauge solder
For making precise, secure electrical connections when installing the new battery.
Tweezers
Helpful for handling tiny connectors and wires inside the intercom.
Heat shrink tubing or electrical tape
To insulate and protect any exposed wires after soldering.
Precision knife or wire cutters
For trimming wires or cutting tape as needed.
ESD-safe work surface (recommended)
Protects the electronics from static electricity while working.
Replacement battery (correct voltage & size)
The new power source for your intercom. Make sure it matches the original specifications.
Tip: Choosing the Right Battery
Voltage:Usually 3.7V, must match exactly
Connector:Must match the original
Size:Fit inside the housing
Capacity:Slightly higher (up to 10–20%) is okay
Chemistry:Only Li-ion or Li-Po batteries
Warning:Large upgrades may cause overheating or shorten lifespan
Step-by-step guide for changing motorcycle intercom batteries safely
Replacing a motorcycle intercom battery is delicate but possible on some models.
Follow these steps carefully, use the proper tools, and handle lithium batteries with caution.
⚠️ Note: Battery replacement is recommended only for out-of-warranty intercoms. Opening the unit may permanently reduce water resistance.
Step 1: Power Off the Intercom
Make sure the intercom is fully powered off before starting.
Disconnect it from any charger to prevent short circuits.
Step 2: Remove Mounting Clips and Accessories
Take off any clips, mounts, or ear speakers attached to the unit.
This makes opening the housing easier and safer.
Step 3: Open the Housing Carefully
Remove all exterior screws using the correct screwdriver (usually Phillips or Torx).
Keep the screws organized for reassembly.
Use a plastic pry tool to gently separate the housing along the seam.
Work slowly around the edges to release snap-fit clips.
Be careful not to:
Damage internal cables
Tear or stretch the rubber gasket (critical for waterproofing)
Step 4: Note Battery Orientation and Connector
Before disconnecting anything, note:
Battery position
Connector type
Wire polarity
Taking a photo at this stage is strongly recommended.
Check battery position and connector
Note: This image shows an older version of the intercom where the battery is soldered in place. The newer version has a removable battery with a plug-and-play connector, making it easier to replace the battery.
Step 5: Disconnect the Old Battery
If the battery uses a connector, press the locking tab and unplug it gently.
If the battery is soldered, carefully desolder the wires, noting polarity:
Red = positive (+)
Black = negative (–)
Step 6: Remove the Old Battery
Lift the battery out gently.
It may be held in place with adhesive or tape—peel it away slowly.
Connect the new battery to the board or connector.
If soldering is required:
Match polarity exactly
Insulate solder joints with heat-shrink tubing or electrical tape
Secure the battery in its original position using fresh double-sided tape if needed.
Step 8: Preliminary Power-On Test
Before closing the housing, power on the intercom briefly.
Confirm that:
The unit starts normally
The battery is detected
Do not connect the charger yet.
If the unit does not power on, recheck the connector and polarity.
Step 9: Reassemble and Fully Charge
Reassemble the housing and reinstall all screws.
Make sure all seals and gaskets are properly seated.
Once reassembled, fully charge the intercom and verify normal operation.
Tips & SafetyWaterproofing
Inspect rubber gaskets for cracks or damage.
Replace worn adhesive tape inside the housing.
Apply electronics-safe silicone sealant if necessary.
Proper resealing prevents moisture damage.
Battery Safety
Never puncture, bend, or crush lithium batteries.
Do not mix batteries with different voltages.
Avoid metal tools near exposed terminals.
Stop immediately if the battery swells or heats up.
Dispose of old batteries at a recycling facility.
Common Motorcycle Intercom Battery Designs
1. Internal Batteries (Most Common)
Most modern motorcycle intercoms use internal lithium-ion or lithium-polymer batteries.
Battery Comparison
The battery is built inside the unit, so replacement is technically possible, but it requires opening the housing and is not officially supported by most manufacturers.
Pros
Battery replacement is possible
Cheaper than buying a new intercom
Cons
Requires disassembly
Risk of losing water resistance
May void the warranty
2. Fully Sealed, Non-Replaceable Units
Some intercoms are designed as fully sealed units to maximize waterproofing and durability.
In these models, the battery is not intended to be replaced by the user.
Pros
Better waterproof protection
Compact, integrated design
Cons
Battery replacement requires manufacturer service
Often not cost-effective compared to buying a new unit
Why Motorcycle Intercom Batteries Fail Over Time
Motorcycle intercom batteries fail over time mainly because lithium batteries naturally degrade with age, charge cycles, heat exposure, and improper charging habits.
Most helmet intercoms use lithium-ion or lithium-polymer batteries, which are lightweight and powerful but have a limited lifespan.
Below are the most common reasons motorcycle intercom battery life shortens over time.
1. Charge cycle aging
Most lithium batteries last 300–500 full charge cycles before capacity drops noticeably.
Each time the battery is charged and drained, it loses a bit of capacity.
Many Li-ion cells are rated for roughly 1,000 full cycles before capacity falls to about 80%.
All lithium-ion batteries degrade slowly even when not in use.
Internal chemical reactions happen over time and reduce capacity.
After a few years, the battery may simply wear out—much like a phone battery that dies quicker than it did when new.
3. Temperature extremes
High heat greatly accelerates battery aging and capacity loss.
Helmets left in hot cars or direct sunlight speed up battery wear. Avoid using or storing the unit outside the 15–25 °C range.
Very cold weather can also temporarily reduce performance until the battery warms up.
4. Overcharging or deep discharging
Frequently charging to 100% or draining to 0% reduces battery health.
Frequently letting the battery become completely discharged (or leaving it fully drained for a long time) can cause permanent damage.
5. Improper charging
Using the wrong charger or fast-charging can stress the cell. Manuals usually advise using the supplied charger to avoid damage.
Fast charging may trigger lithium plating inside the cell, which accelerates capacity loss.
6. Heavy usage and discharge habits
Continuously running the intercom at high volume or for long periods drains the battery quickly.
Over many rides, these stresses cause the battery’s effective life to shrink.
Signs Your Motorcycle Intercom Battery Needs Replacement
A motorcycle intercom battery usually needs replacement when it can no longer hold a charge, shuts off unexpectedly, or shows clear signs of lithium battery degradation.
Before opening your helmet or ordering replacement parts, it’s important to confirm that the battery—not the wiring or speakers—is actually the problem.
Below are the most common signs your motorcycle intercom battery is failing.
Signs of a failing motorcycle intercom battery
1. Battery life drops significantly
The intercom drains much faster than when it was new and no longer lasts a full ride.
For example, a unit that once ran 6–8 hours now only lasts 2–4 hours, which is a clear sign of battery degradation.
2. The intercom shuts off before reaching 0%
The device powers off at 40–60% battery or experiences random shutdowns during calls or music playback.
This happens when the aging battery can no longer deliver enough power under load.
3. The intercom only works while plugged in
The intercom functions normally when connected to a charger but shuts off immediately once unplugged.
This usually means the battery can no longer hold any usable charge.
4. The battery never fully charges
The battery never reaches 100%, or the charging indicator never turns green, even after several hours of charging.
This often indicates internal cell damage or capacity loss.
5. Low-battery warnings appear too frequently
Repeated “battery low” alerts appear even during short rides, suggesting inaccurate voltage readings caused by battery wear.
6. The intercom becomes hot or the battery looks swollen ⚠️
If the unit becomes unusually hot or the battery visibly swells, stop using it immediately.
A swollen lithium battery is a safety hazard and must be replaced.
7. The intercom is more than 2–3 years old
Most lithium-ion batteries in motorcycle intercoms begin to degrade noticeably after 2–3 years, even with normal use.
If your intercom is within this age range, battery wear is very likely.
Can You Replace a Motorcycle Intercom Battery?
Yes, you can replace a motorcycle intercom battery—but only on some models.
Most motorcycle intercoms today are built as sealed units. The battery sits inside a closed housing, not to make things difficult, but because we need that seal to protect the unit from rain, dust, vibration, and everyday riding conditions. Once the shell is opened, we can no longer guarantee the same level of waterproofing or long-term reliability.
Because designs vary, some intercom models can support battery replacement, while others are not recommended to be opened due to their internal structure and sealing method. That’s also why there isn’t a single yes-or-no answer that applies to every model.
If an intercom is already out of warranty, we understand why some riders consider replacing the battery themselves. Replacement lithium cells are available, and technically, it can be done. However, from our experience, there are trade-offs. Once the unit is opened, the original water resistance cannot be restored, and the final result depends entirely on the installation.
So the honest answer from us is: sometimes.
The safest option is always to check with us first. If riders aren’t sure, they can contact us directly, and we’ll help confirm whether battery replacement is possible for their specific model.
For older or more budget-friendly intercom models, battery replacement can make sense if you’re comfortable doing it yourself. Replacement batteries are usually inexpensive, making this a cost-effective way for DIY users to extend the life of the device.
That said, if professional labor is required, the total repair cost can quickly approach the price of a new unit. In those situations, upgrading to a new intercom is often the more practical and economical choice.
When it comes to high-end Mesh intercoms, battery replacement is generally not recommended. These models use more complex internal designs, and the cost, difficulty, and potential risks involved in battery replacement often outweigh the benefits. As a result, many riders choose to upgrade rather than repair.
If you’re unsure which option makes the most sense for your situation, a simple comparison between the estimated repair cost and the price of a new unit can usually clarify the decision.
And if you decide that purchasing a new unit is the better option, feel free to contact us. As a valued customer, Fodsports is happy to offer a discount code for repeat purchases.
Once you install a new battery, following these good habits can significantly extend its lifespan:
Avoid charging to 100% every time
Charging to full capacity every time can stress the battery over time. Try to charge it when it reaches around 20-30%.
Do not store fully dead or fully charged
Storing a battery completely dead or fully charged can reduce its overall lifespan. Keep it within a mid-range charge.
Store at 40–60% charge for long periods
If you need to store your intercom for an extended period, make sure the battery is at 40-60% to prevent over-discharge or overcharge damage.
Keep the helmet away from extreme heat
Excessive heat can cause batteries to degrade quickly. Store your helmet in a cool, dry place.
Use certified chargers only
Using non-certified or cheap chargers can damage the battery and shorten its life. Always use the recommended charger.
These habits are essential for maintaining all motorcycle intercom batteries, ensuring they perform reliably for as long as possible.
Frequently Asked Questions (FAQ)
Q1: How long does a motorcycle intercom battery last?
🕑 A: 2–4 years, depending on usage and charging habits.
Q2: Can I replace a Cardo or Sena battery myself?
🔧 A: Technically, yes, for some models, but it’s not officially supported and may void the warranty.
Q3: Is battery replacement safe?
✔️ A: Yes, if done correctly using the correct battery and proper tools.
Q4: Can a bad battery damage my intercom?
⚠️ A: Yes, swollen or leaking batteries can damage internal circuits.
Q5: Where can I buy replacement batteries for motorcycle intercoms near me?
A:
📍 Local shops: Check with local electronics or motorcycle accessory shops.
💻 Online retailers: Amazon, eBay, or your intercom manufacturer’s website.
Q6: How much does it cost to replace a motorcycle intercom battery?
💰 A: DIY replacements typically cost $10–$30 for the battery.
🛠️ Professional repairs range from $40–$80.
Q7: What are the signs that my intercom's battery needs replacement?
🔋 A: If your intercom:
Drains faster than before
Shuts off unexpectedly
Doesn’t hold a charge
Shows signs of overheating/swelling
Q8: Can I replace the battery myself without voiding the warranty?
🛡️ A: It depends on the model. Some intercoms allow battery replacements without voiding the warranty, while others require professional service.
Q9: What’s the difference between Li-ion and Li-Po batteries for intercoms?
🔋 A:
Li-ion: More common, reliable, and widely used.
Li-Po: Lighter, more compact, but usually more expensive.
Conclusion
A failing battery doesn’t have to cut your ride short. Replacing it or upgrading your intercom can keep your gear performing reliably and your rides uninterrupted. The choice is yours, but the result is the same: clear communication, dependable performance, and the freedom to focus on the road ahead.
At Fodsports, we know every ride matters. Keep your equipment ready, ride smart, and enjoy the confidence that comes from knowing your intercom won’t let you down.
What is the best motorcycle intercom for beginners?
If you’re a new rider, the idea of adding another piece of tech to your helmet can feel overwhelming. I’ve been using motorcycle intercoms for years—on solo rides, long tours, group trips, and daily commutes—and I’ll tell you this upfront:
A beginner motorcycle rider doesn’t need the most advanced intercom. They need the easiest one to live with.
This guide is written from the perspective of someone who has paired, mounted, updated, broken, fixed, and replaced more intercoms than I’d like to admit. My goal is simple: help you choose an intercom that just works, even if you don’t consider yourself “tech-savvy.”
What Beginners Actually Need in a Motorcycle Intercom
Beginner riders need a motorcycle intercom that is simple, reliable, and easy to control while wearing gloves. Large buttons, clear voice prompts, stable Bluetooth connections, and easy helmet mounting matter far more than advanced features like mesh networking or audio tuning.
Short answer: simplicity, clarity, and reliability.
Most beginner riders use an intercom for:
GPS directions
Music or podcasts
Occasional phone calls
Maybe one riding buddy
That’s it.
What matters most (from real use):
Large, glove-friendly buttons
Clear voice prompts (“connected”, “battery low”)
Stable Bluetooth connection
Easy helmet mounting
Good battery life without micromanagement
What doesn’t matter (yet):
Large-group mesh networking
Advanced sound profiles
Custom EQ apps
Constant firmware tweaking
If an intercom makes you think about it while riding, it’s the wrong one for a beginner.
Bluetooth vs Mesh Intercom: A Beginner's Explanation
For beginner riders, Bluetooth motorcycle intercoms are usually the best choice. Bluetooth intercoms are easier to set up, cost less, and work perfectly for solo riding, rider and pillion communicating, or rider and rider communicating. Mesh intercoms are designed for large groups and add unnecessary complexity for most beginners.
Are mesh intercoms suitable for beginner riders?
Yes, they are suitable for beginner riders. But, since you are just a beginner, I don't recommend you spend too much on your gear. Try understand how the motorcycle intercoms work first. After 1 or 2 years of using a Bluetooth intercom, you can switch to a mesh intercom.
Bluetooth Intercom (Best for Beginners)
Connects like your phone does to earbuds
Simple pairing
Rock-solid for solo riders or 1-to-1 chatting
Lower cost
Less to manage
If you mostly ride alone or with one friend, Bluetooth is more than enough.
Mesh Intercom (Often Overkill at First)
Designed for group rides
Self-healing connections
More buttons, more modes, more complexity
Higher cost
Mesh intercom is great—once you know you need it. Most beginners don’t.
My honest advice:
Start with Bluetooth. Upgrade later if your riding style changes.
Support up to 10 Riders Group Talk, 2000 Meters Distance!
High Quality sound, IP65 waterproof.
Compatiable with Fodsports Connect APP.
Easy to operate.
If I were recommending one intercom to a brand-new rider, this would be the Fodsports M1-S Pro.
The M1-S Pro keeps everything simple: clear buttons, strong Bluetooth connection, and sound quality that’s more than good enough for GPS and music. There’s nothing flashy here—and that’s exactly why beginners tend to love it.
The M1-S Pro is the best-selling model of Fodsports in the past few years. And, Fodsports is still keeping upgrade it. Now, the newest V3.0 version M1-S Pro can support up to 2000 meters intercom distance among 10 riders.
Besides, it also supports pairing with the Fodsports Connect APP. In the APP, you can easily set and control the functions of M1-S Pro, like intercom, musics, etc.
For beginner riders, you will not need to remember all the pressing steps on the M1-S Pro. The APP will provide you with a more specific and clear function setting. It is truly convenient to use.
Best for: riders who want zero frustration
Why beginners love it
Simple button layout
Clear voice prompts
Excellent sound for the price
Reliable Bluetooth pairing
Real-world experience:
This is one of those units you install once and forget about. It doesn’t nag you, disconnect randomly, or require constant app interaction.
✅Pros
Good Communication Range & Group Support
Decent Sound Quality
Long Battery Life
Weather-Resistant
Overall Value (Budget-Friendly)
❌Cons
Perhaps it cannot support group talk when paired with other brands
Bluetooth Mesh Intercom.
Dual Bluetooth Chip Design.
10 Riders Group Audio, 2000m Distance!
HRSQ Mic and Speakers, CVC + ENC + DSP Noise Cancelation.
Listen to Music/GPS and Intercom At the Same Time.
IP67 Waterproof.
FM Radio, Music Sharing, Voice Commands.
Although this intercom has only been on the market for less than 2 years, it has received excellent feedback. Its performance has been approved by many riders.
It doesn't have complicated buttons, but it has all the necessary functions.
What's more, the FX7 features a dual-chip design, allowing riders to listen to music/GPS while simultaneously intercom with other riders.
The dial knob in front is appropriately sized and user-friendly, even for new riders. It can be easily operated even while wearing motorcycle gloves.
Don't worry, it is not complex to use, even though it has mesh tech.
If you’re unsure whether you’ll even use an intercom long-term, this is a smart starting point.
If you want to use mesh but don't want to pay too much, the FX7 is the best choice. With just $129.99, you can get a Bluetooth mesh intercom with a stable connection and excellent audio quality.
Why it works
Affordable
Straightforward controls
Music/GPS and intercom at the same time
Mesh tech
What you give up
Rarely rides a motorcycle
Want to pair with other brand models and have a group ride at the same time
Honest take:
If you’re not sure you’ll even like using an intercom, this is a low-risk way to try one.
✅Pros
Excellent Bluetooth Mesh Tech
Well-performed Group Communication
Dual Bluetooth Chips Enable Multi-tasking Audio
HiFi Sound & Feature Set
IP67 waterproof
User-friendly Operation
❌Cons
Compatibility Limitations
Installation Convenience
★★★★★
5.0
Sound Quality
★★★★★
5.0
Ease of use
★★★★★
5.0
Quality
★★★★★
5.0
Value
★★★★★
5.0
Overall
★★★★★
5.0
Intercom number
2 - 10
Intercom Distance
2000m
Bleutooth
Bluetooth 5.4
Speakers
High-resolution sound quality mic and speakers
Waterproof
IP67
Voice Command
Support
Music Share
Support
FM Radio
Support
Music/GPS and intercom at the same time
available
Charging port
Type-C fast charging
Battery life
15 hours
Dual Bluetooth chip Design
Multi-rider mesh AD-HOC NETWORK
Bluetooth 5.4 Tech
Multi-tasking audio
10 riders 2000m group intercom
3 Quick Pairing Modes
HIFI sound quality, CVC + ENC and Microphone Noise Reduction
IP67 Waterproof
Listening to music/navigating while intercom
Sharing music between two FX7
Here is a blog to introduce more specific features and functions of the Fodsports FX7:
The Fodsports T1 Pro is worth mentioning for beginners who want something straightforward but don’t mind a slightly more “traditional” intercom feel.
Fodsports T1 Pro is also a new Bluetooth intercom for 4 - 6 riders, just released by Fodsports in 2025.
For communicating among 2 - 4 riders, the T1 Pro supports a one-click quick pairing. You don’t need to dive into apps or advanced settings to get started — truly friendly to new riders.
If there are 2 more riders, the T1 Pro can also handle it with no problem. The NO. 5 and NO.6 rider can join the intercom group manually. (Still, very easy to join.)
For 2 way intercom between 2 riders, the T1 Pro can support up to 1000 meters of intercom distance and clear audio.
As for 4 - 6 riders, the T1 Pro's intercom distance can extend to 2000 meters!
The dial knob controls are physical and easy to recognize with gloves on, which is something many new riders appreciate right away.
Why it’s beginner-friendly intercom
Very intuitive controls
Budget-friendly with so many functions
Smooth Bluetooth performance
Why it lasts
Works fine for groups later
Proven reliability
My real usage experience:
From real-world use, this model stands out for its simple button layout and decent long-range performance, especially if you occasionally ride with a small group.
Audio quality is solid for voice and GPS directions. Though its sound quality is not as refined as premium brands like JBL's speakers, it is still good enough for most riders. I can still give it a 4.5 star.
This is a great option if you think you might get into group riding down the road—but don’t want to start overwhelmed.
✅Pros
2 to up to 6 riders support
Bluetooth 5.4 Connectivity
Good Sound & Noise Reduction
Functional Modes & Features
Best Budget Choice for Beginner Riders
❌Cons
Group Intercom Setup for Riders 5–6 (No. 5 and No. 6 riders need manual pairing)
Installation Convenience
★★★★★
5.0
Sound Quality
★★★★☆
4.0
Ease of use
★★★★☆
4.0
Quality
★★★★★
5.0
Value
★★★★☆
4.0
Overall
★★★★☆
4.5
Intercom number
2 - 6
Intercom Distance
1000 m for 2 riders and up to 2000 m in group mode
Bleutooth
Bluetooth 5.4
Waterproof
IP67
Battery life
20 hours
Bluetooth 5.4 Technology
Support 2 to 6 Riders Talk
One-Click 4 Modes Switching
1000m Intercom for 2 Riders, 2000m Intercom for 4-6 Riders
The Fodsports FX-S is a solid motorcycle intercom for beginners who commute alone and want something simple, affordable, and easy to live with every day.
As a solo commuter, you don’t need group features or complex pairing options. What you need is clear GPS directions, reliable music playback, and controls that work with gloves on.
That's what the FX-S has.
Just mount it on your helmet, pair it to your phone, and you’re basically done.
When paired with your phone, through voice command, you can ask your phone to play music, open the GPS map APP, make phone calls, etc.
You will not need to stop your motorbike and take out your phone to answer phone calls or play the next song.
In daily use, the FX-S does a good job with voice navigation and calls, and music quality is perfectly fine for commuting speeds.
It also has a dial knob design and a button at its center. They are physical and easy to operate, even at stoplights with winter gloves.
Who it’s for
New riders
Solo commuters
Riders who want zero drama
Who should skip it
Large group riders
Tech tinkerers who want advanced controls
✅Pros
Reliable Bluetooth 5.4 Connectivity
Decent Intercom Range (Up to ~1000 m) among 2 Riders
Ride with T reviewed the Fodsports FX-S in this video:
Motorcycle Intercoms for Beginners from Fodsports (Quick Comparison)
Ease of use and reliability matter more than range or advanced features for beginner riders. All models listed prioritize simple controls, stable Bluetooth connections, and minimal setup.
Model
Best For
Ease of Use
Sound Quality
Battery Life
Key Beginner Advantage
Price
Fodsports M1-S Pro
Most beginners
⭐⭐⭐⭐⭐
⭐⭐⭐⭐½
~20 hrs
Long-time best seller, work stable
From US$89.99
Fodsports FX7
Beginners who may ride in groups later
⭐⭐⭐⭐⭐
⭐⭐⭐⭐⭐
~15 hrs
Grows with your skills
From US$129.99
Fodsports T1 Pro
Budget riders
⭐⭐⭐⭐½
⭐⭐⭐⭐½
~20 hrs
Low risk, easy entry
From US$64.99
Fodsports FX-S
Solo commuters
⭐⭐⭐⭐⭐
⭐⭐⭐⭐
~15 hrs
Simple function, easy to operate
From US$49.99
How Hard Is Intercom Setup Really?
Most beginner-friendly motorcycle intercoms can be installed and paired in under 15 minutes. The most common setup issues come from speaker placement and microphone positioning, not from the technology itself.
But don't worry. Usually, the pairing steps and functions are very easy to operate.
In the Fodsports intercom user manuals, you can check all the steps for each function.
Besides, as an intercom brand who care their customers' using experience, Fodsports has already uploaded many video guides on their YouTube Channel. You can easily operate the installation, pairing, and functions by watching the videos.
Typical setup process:
Clamp or adhesive mount to helmet
Install speakers and mic
Power on and pair to phone
Test before riding
Common beginner mistakes (I’ve seen all of these):
Mounting speakers too far from ears
Putting the mic on the wrong side
Skipping the test ride
Updating firmware immediately (don’t)
Pro tip from experience:
Ride with it once before touching any app settings.
You can also read this article to learn how to install the intercom to your helmet:
Beginner Mistakes to Avoid When Buying an Intercom
There are indeed some common mistakes that new riders make when buying motorcycle intercom systems. These include choosing mesh systems unnecessarily, focusing on specs instead of usability, and selecting models with small buttons that are hard to operate with gloves.
❌ Buying mesh “just in case”
You’ll pay more and use less.
❌ Choosing tiny buttons
They look sleek—until you’re wearing gloves.
❌ Obsessing over specs
Range, codecs, and channels mean nothing if the unit is annoying.
❌ Ignoring helmet compatibility
Some helmets are intercom-friendly. Some fight you.
Is Using a Motorcycle Intercom Safe for New Riders?
Motorcycle intercoms are generally safe for beginners when used responsibly. Keeping the volume low, avoiding phone calls in traffic, and limiting interaction while riding. These can help reduce distraction and maintain focus.
Safety-first guidelines I follow:
Keep the volume low enough so that you can hear the traffic near you
Avoid fiddling while moving
Don’t answer calls in heavy traffic
Use voice prompts, not screens
My rule:
If it takes attention away from riding, it can wait.
How to Choose the Right Beginner Motorcycle Intercom (Quick Checklist)
Ask yourself:
Do I ride solo most of the time?
Do I hate complicated gadgets?
Do I want something that just works?
If yes → simple Bluetooth intercom
You can always upgrade. You don’t need to start advanced.
Final Thoughts: Start Simple, Ride More
After years of using motorcycle intercoms, here’s the biggest lesson:
The best motorcycle intercom for beginners is the one that fades into the background.
If it helps you ride more comfortably, stay oriented, and enjoy the ride—without becoming another thing to manage—you chose well.
Frequently Asked Questions (Beginner Focused)
Do beginners really need a motorcycle intercom?
No, but many find GPS directions and music make riding more comfortable and less stressful.
Is Bluetooth intercom good enough for new riders?
Yes. For most beginners, Bluetooth does everything they need.
Can I use an intercom without a smartphone?
Yes. Most intercoms work independently once paired.
Are motorcycle intercoms hard to use?
Modern beginner-friendly intercom models are very simple, especially Bluetooth-only units.
Will an intercom fit my helmet?
Most full-face and modular helmets work well, but speaker pocket depth matters.
Bikes from Sons of Anarchy are just as iconic as the characters who rode them. Years after the show first aired, Sons of Anarchy still resonates with bikers and TV fans alike. More than a crime drama, the series celebrates outlaw motorcycle culture, brotherhood, and life on the open road in the fictional town of Charming, California.
In this article, we break down the 15 most iconic bikes from Sons of Anarchy and explore why these machines became legends of the show.
1. Jax Teller’s Harley-Davidson Dyna Super Glide Sport (2003)
Jax Teller’s Harley-Davidson Dyna Super Glide Sport
Jax Teller's ride in Sons of Anarchy is legendary. Most of the time, he's on a 2003 Harley-Davidson FXD Dyna Super Glide Sport. This bike was a hit since it had the classic Harley vibe but handled way better than your typical cruiser.
Jax's Dyna is blacked out, giving it this tough look that totally fits his role as he climbs the ranks in the SAMCRO club. It's pretty stripped down, ditching the shiny stuff for a raw, outlaw feel. Check out that small drag-style windshield – barely there but keeps the bike looking mean.
A few things make Jax's bike special. Those tall T-bar handlebars make him sit up high and stand out from the other club members. Plus, the Arlen Ness quarter fairing gives it a bit of style and helps with the wind when he's speeding. The Thunderheader exhaust makes this deep, rumbling sound, which goes great with the show's vibe. The black solo seat? Simple and all about the rider.
The gas tank has the Sons of Anarchy club logo, which is the Grim Reaper. It stands for death, loyalty, and the club's wildlife. It's a big deal in the show. You see it all the time when they're riding and in the ads. Jax's Dyna just becomes a symbol of the show.
Jax rides this bike from seasons 1 to 5, during his change from unsure to leader. The bike becomes part of who he is. By the final season, Jax switches to his dad's old Harley-Davidson Knucklehead, like going back to the club's roots and wrapping up his story.
Model Specifications
Engine
4v air-cooled V-twin
Capacity
1450cc
Power
65 hp
Torque
81 lb-ft
2. John Teller’s Harley-Davidson EL Knucklehead (1946)
John Teller’s Harley-Davidson EL Knucklehead
John Teller's bike from Sons of Anarchy is way more than just some cool ride. It kinda shows where the whole club started and what they were first about. We're talking about a 1946 Harley-Davidson EL Knucklehead, a bike that really set the standard for American V-twins after World War II.
Now, the show didn't use a totally original Knucklehead. They got their hands on a custom chopper made to look like one. It had a front end like a '46 Harley, plus a simple frame and gas tanks from the Panhead era. That mix and match thing? That's how a lot of bikes back in the day really were. People changed them up instead of keeping them stocked.
That front suspension gives the bike that old-school look and feel, and the frame means it's a no-frills ride. The gas tanks just make it look bigger and tougher, with that old chopper vibe. Put it all together, and you've got a bike that looks rough, built to last, and full of motorcycle history.
In the show, John Teller's Knucklehead is like the soul of SAMCRO and his original dream for the club. It's a total contrast to the newer bikes the guys ride now. You don't see it much at first, but that makes it even cooler when it shows up later.
Then, in season 7, that Knucklehead becomes super important. Jax grabs his dad's bike and rides it for his last ride. It's a big moment. Leaving his modern bike behind, Jax is rolling with his dad's story and what the club was meant to be.
When Jax finally ends up on that ’46 Knucklehead, the bike stops being just a motorcycle. It suddenly becomes about fate, family, and finishing something that started long before him.
Model Specifications
Engine
Type 74 Knucklehead
Capacity
1207cc
Power
53 hp
Torque
Not Specified
3. Clay Morrow’s Harley-Davidson Dyna Super Glide (2008)
Clay Morrow’s Harley-Davidson
Clay Morrow's ride really shows who he is: the main man and OG president of SAMCRO. He rolls on a 2008 Harley-Davidson FXD Dyna Super Glide. It's a ride with muscle that just fits Clay's tough leader style and how he carries himself.
That ride's got a Twin Cam 96 V-Twin engine, which is about 1,584 cc. It kicks out around 92 ft-lbs of torque, so it has power when you need it. It's awesome for pulling away from a stop and keeping steady on those long highway runs. This fits Clay since he likes control more than just going fast. The Dyna Super Glide's frame makes it perfect for riding with the crew and looking intimidating while doing it.
The look of Clay's Dyna is on point, mainly black with white bits that make it look sharp but official. It has a bit more to it, look-wise, than Jax's ride, pointing out Clay's spot as the leader. The bike just looks solid and senior.
The fuel tank art seals the deal. It's got a black-on-white Grim Reaper and Sons of Anarchy – California written bold. It's classic, showing how Clay is all about the old ways and the club's order. You know right away what his deal is.
Clay rides this Dyna Super Glide from the first to the fifth season, when he's running things. The bike becomes part of who he is in SAMCRO. So, when he loses his title, not being able to ride that bike says it all. In Sons of Anarchy, taking a member's bike is a big deal—it means they've lost who they are, their freedom, and where they stand in the club.
Model Specifications
Engine
Twin cam push-rod V-twin
Capacity
1584cc
Power
Not Specified
Torque
92 lb-ft
4. Tig Trager’s Harley-Davidson Dyna Street Bob (2006)
Tig Trager’s Harley-Davidson Dyna Street Bob
People always ask me which bike from Sons of Anarchy screams outlaw, and I usually say Tig Trager's. I think his 2006 Harley-Davidson FXDBI Dyna Street Bob is one of the meanest-looking bikes on the show.
Engine-wise, it’s got an air-cooled V-Twin that’s about 1,450 cc, kicking out around 85 ft-lbs of torque. It's not super speedy, but it’s got some serious pull right away. That totally fits Tig, you know? He doesn’t ride smoothly; he's raw, quick off the mark, and a bit crazy.
What makes the Street Bob special is that it's stripped down. It’s got a solo seat, tiny fenders, and not much for comfort. I’ve always thought this simple style makes the bike look lighter and more dangerous, especially when it’s rolling with the crew.
Tig's personal stuff makes it even better. His bike is black with some shiny spots, and it’s covered in skulls and spikes all over. It’s loud, and pretty sure that’s the point. When you see it coming, you get the feeling is more threat than anything else. That look is just like Tig.
He’s also got those little ape-hanger bars, so he looks like he’s leaning in to fight. The rear shocks keep the bike low to the ground, making it look like it’s ready to jump.
Let's be real, when you check out Tig’s Street Bob, you get what people mean by outlaw motorcycle. It’s not comfy, it’s scary, and it’s got a violent style. I don’t think any other bike on the show fits Tig’s wild side like this one.
Model Specifications
Engine
Air-cooled, Twin Cam 88 V-Twin
Capacity
1450cc
Power
65–67 hp
Torque
85 ft-lbs
5. Opie Winston’s Harley-Davidson Dyna Super Glide Sport (2003)
Opie’s Harley-Davidson
Whenever someone brings up Opie Winston’s bike, I always say this: on paper, it seems almost the same as Jax’s, but when you look closer, it’s totally different. Opie rides a 2003 Harley-Davidson FXD Dyna Super Glide Sport, just like Jax’s main ride, and I don’t think that's random.
Under the hood, it’s got the same 1,450 cc air-cooled V-Twin engine, tuned for solid torque instead of crazy speed. It's the kind of engine that feels reliable, not flashy. That’s Opie all over. He’s not trying to be the center of attention. He just wants a bike that works hard and doesn’t quit.
Looks-wise, Opie’s Dyna is mostly blacked out with hardly any chrome, which gives it a darker, tougher vibe. It doesn’t look perfect; it looks used, like it’s been through hell. Jax’s bike is cleaner, but Opie’s feels more down-to-earth and a little rough, which fits his personality in the show.
One thing that always grabs me is the custom art on the gas tank. Instead of the Grim Reaper, Opie’s tank says “Sons of Anarchy” above a pile of skulls. It feels like old-school club artwork, kind of like Clay’s style. It shows how loyal Opie is to the club and its history, even when it costs him everything.
The main thing is how close Opie’s bike is to Jax’s. Same model. Same year. Similar setup. I think this is on purpose. It shows their bond and history, especially at the start of the show when they ride together. They look like equals, even if the club says otherwise.
Also, Opie fixes up an old Panhead chopper in season 4, which shows he knows his way around bikes and loves old-school Harleys. But even with that project, his main bike is still that 2003 Dyna Super Glide Sport. It’s the bike he trusts, the one he rides when things are serious, and the one that really shows who he is.
Model Specifications
Engine
Air-cooled, Twin Cam 88 V-Twin
Capacity
1450cc
Power
65–67 hp
Torque
Not Specified
6. Chibs Telford’s Harley-Davidson Dyna Street Bob
Chibs Telford’s Harley-Davidson
If you want my opinion on the best-looking bike from Sons of Anarchy, I'd pick Chibs' Dyna Street Bob. It's not showy or super loud, but all the parts seem to fit together perfectly.
Chibs rides a Harley-Davidson Dyna Street Bob, probably a 2007-2012 model, set up in a simple way. It's got matte black paint, no front, and no extra stuff. It just looks like a bike that’s ready to go. To me, it seems like the kind of ride you pick once you’ve been around enough to know what you don't really need.
The cool part about Chibs’ bike is the personal touches. There’s a small St. Andrew’s Cross on the back of his seat, a little shout-out to his Scottish background. It's easy to miss, but once you see it, you can’t ignore it. The anarchy A on the gas tank gives you a hint about Chibs’ background and loyalty issues.
He uses matte black Z-bars and avoids chrome, which keeps the bike looking serious and ready for action. No shiny bits to distract you. A lot of fans think Chibs has the coolest bike on the show, and I understand why. It’s not angry like Tig’s or loaded with meaning like Jax’s – it just looks right.
Model Specifications
Engine
Twin-Cam 96
Capacity
1800cc
Power
67 hp
Torque
81 lb-ft
7. Bobby Munson’s Custom Rigid Chopper
Bobby Munson’s Custom Rigid Chopper
Bobby's custom chopper on Sons of Anarchy is something else. Seriously, whenever I see it, I forget I'm watching TV. I just think that's a real biker's bike, not some fake prop.
It's a custom rigid-frame chopper, built just for the show. It isn't a factory-made Harley, even though it looks like one at first. That's what makes it cool. From what I can tell, it has either a Harley Evolution motor or an S& S V-Twin, depending on what they're shooting. Either way, that motor with an open belt tells you everything. It's not built for comfort or quiet rides or long trips. It's built to be felt.
The frame makes that clear. The long, hardtail frame gives it that stretched-out look, like old-school choppers. No rear suspension means you feel every bump. Add in the springer front forks, and you get that old-school mechanical movement that you don't see on modern bikes. It's raw and physical, and it demands your attention when you ride it – and that's the cool part.
What I like best is how it fits Bobby's character. It isn't as aggressive as Tig's, and it isn't as symbolic as Jax's. It's traditional, honest, and based in old biker culture. It shows Bobby's respect for history, loyalty, and the biker code.
You see this chopper a lot in seasons 3 through 5, and Bobby always looks right on it. I think it's his true bike, even more than the Harleys he rides later on. He looks the most comfortable on it, like it's part of him, not just something he's riding for the club.
8. Mayan MC Harley-Davidson Heritage Softail
Mayan MC Harley-Davidson Heritage Softail
You can always spot a Mayan MC member, not just because of their club colors, but also because they all seem to ride 1996 Harley-Davidson Heritage Softails. Just like SAMCRO, each Mayan gives their bike a personal touch, so no two rides are exactly alike.
The Heritage Softail has been around for a while. Bill Davis sold the idea to Harley-Davidson way back in 1982, and they started selling them in '83. It looks like an old-school hardtail, but it's got a hidden suspension that makes for a less bumpy ride. The engine's a V-Twin that puts out 57 horsepower and about 71 ft-lbs of torque, which is plenty of power whether you're on city streets or out on the open road.
Mayans like to make their Softails their own. You'll often see things like whitewall tires, high handlebars, fishtail exhaust, and paint jobs that show who they are and where they stand in the club. All that adds up to make the Heritage Softail the perfect ride for the Mayan MC, because it's tough, sticks to its roots, and definitely gets noticed.
Model Specifications
Engine
4v V-twin
Capacity
1449cc
Power
67 hp
Torque
81 lb-ft
9. Happy Lowman’s Harley-Davidson Dyna Street Bob (2011)
Happy Lowman’s Harley-Davidson
Happy's ride is exactly what you'd think it would be—maybe even more so. It's dark, mean, and you can't miss it. It feels less like a way to get around and more like a threat on wheels.
He rides a Harley-Davidson Dyna Street Bob from around 2011. If you're into Street Bobs, you get the idea. It's a basic Dyna from the factory: solo seat, skinny tank, tiny fenders, no extra stuff or shiny chrome. It's a blank slate, and Happy turned it into something scary.
The first thing you see is the paint job, but it's not just for looks. Reaper of Death is painted on the back fender in big, old-style letters. The gas tank has a Grim Reaper airbrushed on it, holding a scythe, but it's all dark and muted, not bright and flashy. It feels like the bike is marked, not just decorated. It’s right in your face, which is the point. This bike doesn’t just say Happy is here—it’s a warning.
The bike is set up to be small and ready to fight. He uses drag bars so he's leaning forward a bit, making the bike look like it’s hunting when he's riding. The short rear fender makes the bike look tight and ready to go, like it’s coiled up. Everything about it makes you think of speed, control, and hidden anger, not showing off.
Underneath, it’s still a Dyna, likely with the Twin Cam 96 V-Twin engine that was normal back then. That engine is known for its strong power at low speeds, and it fits Happy just right. He’s not the kind of rider who revs it up and shows off—he's about strong pull, straight-ahead power, and getting the job done. The exhaust sounds deep and mean, so you know he’s there even before you see him.
What makes Happy’s Street Bob really special is that he’s always riding it. It’s not just a bike for one scene or in the background. He’s on it in tons of episodes, over and over, and it becomes part of who he is. When you see that bike coming, you know what’s about to happen. Not many bikes in Sons of Anarchy get that well-known.
Model Specifications
Engine
Air-cooled, Twin Cam 96 V-Twin
Capacity
1584cc
Power
70hp
Torque
92 lb-ft
10. Marcus Álvarez’s Harley-Davidson Road King
Marcus Álvarez’s Harley-Davidson Road King
If you want my opinion on which bike shouts authority in Sons of Anarchy, it's gotta be Marcus Álvarez’s Harley-Davidson Road King. That custom touring bike tells you right away that he's not just some club member. He’s the head honcho of the Mayans MC, and his ride makes that clear before he even says a word.
Under the hood, it’s rocking a big Twin Cam engine, maybe the 103ci or even 110ci, plus Screamin’ Eagle upgrades. That setup means serious torque and smooth power, just what you need for a big touring bike. Unlike the Sons’ stripped-down bikes, this one feels strong, steady, and ready for long rides. You can almost hear the power in the engine's rumble.
But the color is what makes it stand out. That bright emerald green with a skull logo on the tank, plus all that shiny chrome, just pops. To me, it fits Álvarez perfectly—bold, can’t miss it, and a bit flashy, just like him. Put it next to the Sons’ black bikes, and you see the difference right away. It doesn’t just roll up; it yells, I’m the boss here.
Here's a cool fact: Emilio Rivera, the actor, used his Road King on the show. So when you see Álvarez riding, you’re seeing someone who actually knows his way around that bike, not just some actor pretending. And get this: the same bike shows up in the Mayans MC spin-off! I think that’s awesome – it keeps that connection alive.
That bike never breaks down on screen. In a crazy show full of action, Álvarez’s Road King always runs perfectly. That solidness speaks to his power, his control, and his professionalism. It's hard to miss when it rolls into a scene, and you know who’s in charge.
Álvarez’s Road King is more than just a bike. It’s a statement. It’s strong, confident, and makes you pay attention—just like the man himself.
If you’ve ever seen Piney Winston cruising on his Electra Glide Tri-Glide, you just know there's more to it than just power. This ain’t just a bike—it’s a real symbol of not giving up. Piney’s ride is a three-wheel Electra Glide Tri-Glide, with a Twin Cam 103 V-Twin engine, about 1,690 cc, that cranks out around 101 ft-lbs of torque. That’s plenty for a trike, giving him smooth, reliable power when he’s hitting the road.
But what makes Piney’s trike special is how he’s made it his own. Since he’s got emphysema, he’s got an oxygen tank strapped right behind his seat. Most folks would think that's a deal-breaker, but not Piney. He just makes it work. That oxygen tank ain’t just there, it’s part of his story. It shows how tough he is and how he’s not letting anything slow him down.
I gotta say, that fairing is something else. It’s got a Grim Reaper painted on it, wearing an oxygen mask. A nice, clever, and sad kind of touch, you know? It’s like Piney’s riding next to death, knowing he’s not gonna live forever, but still not giving in. Every time I see that trike, I see guts, a whole lot of will, and a real old-school biker look.
Piney never quit riding, never backed down, and that trike, with that Reaper logo, shows off his never-say-die thing. When you see him riding, you just know it’s more than a bike—it’s his statement on who he is.
Model Specifications
Engine
Twin-Cam 96
Capacity
1800cc
Power
67 hp
Torque
81 lb-ft
12. “Hellrazor” Custom Chopper
The Hellrazor in Sons of Anarchy
If you've ever seen Hellrazor on TV, you instantly know why it sticks with you. It’s not just some bike you cruise around on—it's a statement, a total beast, and a cool piece of art and machine work all in one. Rusty Coones, who plays Quinn, made it, so you know it's something special. It's a completely custom chopper. None of it came from a factory. No stock Harley parts here; everything was made just for this bike and the show, from the frame down to the wheels.
Under the hood, it’s got an S&S V-Twin, probably around 124 ci, and it doesn't care about being comfy or useful—that power is right there. The custom fuel tank and long frame give it a mean, low look. The huge front wheel, about 27 inches, grabs you right away. That long, hard frame? Not built for comfort. Every ride feels planned, like it’s challenging you to handle it.
The belt drive and big wheels just add to the tough feel. This bike isn't trying to hide anything—Hellrazor is over-the-top, shiny, and made to get looks. It almost feels like it has its own attitude. It kind of matches Quinn's rebel vibe when he joins SAMCRO.
What’s really cool is how few of these exist. They only made two Hellrazors, and just for the show. Kurt Sutter, who created the show, loved it so much he wanted it featured a lot. You can tell they really thought about every scene with it. Quinn only rides it in a few episodes—mostly around season 6—but it makes you remember it.
Honestly, I think Hellrazor is one of the craziest bikes to ever show up on Sons of Anarchy. More than just a custom chopper, it’s a piece of biker drama. It looks mean, rides tough, and has the same bold feel that made Quinn so memorable in the club. You can’t help but like the work and the guts it takes just watching it on TV.
Okay, so you know that orange and cream bike Linc Potter rides in Sons of Anarchy? The one that looks totally out of place among all those black and green bikes? Yeah, that Triumph Bonneville tells you everything you need to know about him.
It's basically a new Bonneville made to look like the old ones from the '70s. It’s got a 790cc engine that’s not too wild, which suits Linc perfectly. He's all about being in control. The bike has this classic look with a teardrop tank. He’s not trying to copy anyone else, and his bike shows it.
But the thing that really gets you is that orange and cream paint job on the tank. The rest of the bike is normal, but that color makes it impossible to miss. It screams that he’s an outsider. He isn't riding a black Harley like the club members. He’s a fed, and the bike is like saying, “Hey, I’m not one of you.”
People either love it or hate it, but I think it’s great. It's a pop of color in a dark world, shouting, Linc is different! The first time you see him on it in Season 4, it’s so clear. All those black Harleys just make him stand out more.
It might not be as flashy as Jax’s Dyna or Tig’s Street Bob, Linc’s Bonneville sticks with you because it’s full of character. It's quiet but confident, smooth but not invisible, and it just fits him. That’s why it’s unforgettable in the Sons' world.
Model Specifications
Engine
Air-cooled, parallel-twin
Capacity
790 cc
Power
60–61 hp
Torque
44–45 ft-lbs
14. T.O. “Orwell” Screamin’ Eagle Road King
T.O. “Orwell”’s road king
If you want a bike that grabs everyone's eyeballs the second it shows up, check out T.O. Orwell’s Road King. It's not trying to be quiet, and it shouldn't—just like T.O. himself. Right off the bat, this bike screams, “I’m loud, I’m wild, and I stand out.”
Under the hood, it’s a Harley-Davidson FLHR Road King that has been tricked out with Screamin’ Eagle parts, probably with the 117ci Milwaukee-Eight engine. That’s a ton of power for a big touring bike. The engine isn't just for looks—it gives you a smooth, powerful ride, which fits T.O.’s big personality. You feel this bike in your gut as it drives by, not just hear it.
Looks-wise, there is no way you will miss it. It's painted bright orange from front to back, which really shows T.O.’s character: sure of himself, full of energy, and a bit much. The quality paint job gives it a clean, stylish look that sets it apart from the Sons’ usual black Harleys. Even the 21″ front wheel and special front suspension are there for performance—plus they give the bike a strong look. This makes it look taller, meaner, and totally unforgettable on TV.
This Road King screams top-notch. From the great Screamin’ Eagle parts to the small chrome touches, it’s made to wow you, both when you look at it and when you ride it. Even though it’s wild, it still looks right at home when T.O. rolls up with the Sons in season 6. It fits in with the other big cruisers, but your eyes still go right to it.
What I love most is how the bike and rider are a great pair. T.O. is brave, daring, and doesn't care what people think, and you can see that in every line, color, and part of this Road King. It’s not just a touring bike—it’s a way of showing who you are.
Model Specifications
Engine
Twin Cam 103
Capacity
1690cc
Power
72.8 hp
Torque
84.4 lb-ft
15. Half-Sack Epps’s Harley-Davidson Dyna (White)
Half-Sack Epps’s Harley-Davidson Dyna
Half-Sack's bike always grabs my attention—mostly 'cause it's super white. In a club where almost every bike is blacked out or dark green, his Dyna just screams, I'm different! You can't miss it, and I think that was the whole point. He's the new guy, still trying to prove himself, and his bike totally shows that he's an outsider.
From what I can tell, it looks like a Street Bob or a Super Glide from around 2003–2004. The engine is the normal Dyna V-Twin—solid, dependable, and made for cruising—but it's the little things that make it stick in your head. Half-Sack kept it simple: a black solo seat, ape-hanger bars, and not much else. Nothing flashy, nothing too crazy, just enough to ride cool and feel good on the road.
I’ve always liked how the white bike stood out on screen. When he's riding with Jax, Opie, or Tig, the white really pops. It tells you he's the newbie. He's different. He’s still trying to find where he fits in. It shows a little story just by the bike he rides.
Even without crazy paint or lots of add-ons, the white Dyna is memorable. It proves you don't need a bunch of chrome or designs to stand out—sometimes just being white when everyone else is black is enough. That's why Half-Sack's ride is one of my favorites from the start of the show. It’s clean, it has a purpose, and it totally fits who he is.
Model Specifications
Engine
Air-cooled, 4-stroke V-Twin
Capacity
1,449 cc
Power
65–67 hp
Torque
78–80 ft-lbs
Conclusion
In Sons of Anarchy, the motorcycles weren’t just machines—they were extensions of the riders themselves. Every scarred paint job, roaring V-Twin, and custom handlebar told a story about loyalty, rebellion, and the outlaw life. From Jax’s blacked-out Dyna to Bobby’s fearless chopper and Linc Potter’s bold Triumph, these bikes weren’t props—they were characters, symbols, and silent witnesses to the drama, blood, and brotherhood that unfolded on the streets of Charming.
Decades from now, these rides will still turn heads, spark conversations, and inspire bikers to chase the same freedom the Sons lived for. Because in the world of SOA, it wasn’t just about who you were—it was about what you rode. And the roar of those engines? That echo will never fade.
Mesh Intercom vs Bluetooth: Which Motorcycle Communication System Is Better?
Mesh intercoms are best for riders who travel in groups because they automatically reconnect and stay stable, while Bluetooth intercoms are better for solo riders and two-up riding due to lower cost and simpler operation.
As someone who both wrenches on bikes and rides long miles, I’ll say this clearly:
Most intercom complaints don’t come from bad products—they come from riders using the wrong technology for their riding style.
This guide explains the difference in the way it actually shows up on the road, not just on spec sheets.
Quick Answer: Mesh Intercom vs Bluetooth
Mesh intercoms and Bluetooth intercoms are two different motorcycle communication systems designed for different riding needs. Mesh intercoms are best for group riding because they automatically reconnect and support many riders, while Bluetooth intercoms are better for solo riders or pairs due to lower cost and simpler setup.
Mesh intercoms are better for group riding because they automatically reconnect and handle large groups smoothly. Bluetooth intercoms are better for solo riders or pairs because they are cheaper, simpler, and more battery-efficient.
Motorcycle helmet intercoms have evolved from basic Bluetooth headsets into advanced communication networks. Today, riders must choose between traditional Bluetooth intercoms and modern mesh intercom systems. Understanding how each technology works—and when it actually matters—helps riders avoid overpaying or choosing the wrong system.
What Is a Bluetooth Intercom?
Mesh Intercom vs Bluetooth - Bluetooth intercom connects like a chain
A Bluetooth intercom is a helmet communication system that uses standard Bluetooth technology to connect riders directly. It works best for solo riders or small groups and requires manual pairing between devices.
How Bluetooth Intercom Works
Devices are manually paired, usually in a chain (Rider A → Rider B → Rider C)
Each unit connects directly to specific riders
If one rider disconnects, it can break the chain
Typical Bluetooth Intercom Use Cases
Solo riders
Rider + passenger
Two to four riders riding close together
Daily commuting
From a mechanic’s standpoint, I think Bluetooth intercoms are simple systems:
Fewer connection layers
Less software complexity
Better battery efficiency
Based on the long-time use of Bluetooth intercoms, I, as a rider, find that Bluetooth works great when:
You ride alone
You ride two-up
You don’t change riding positions often
From a rider’s perspective, Bluetooth intercoms are simple, reliable, and affordable, but they weren’t designed for large or dynamic groups.
If your riding is mostly solo or with one partner, a quality Bluetooth intercom saves money without sacrificing usefulness.
Dual Bluetooth Chip Design.
10 Riders Group Communication, 2000m Distance!
Optional HRSQ Mic and Speakers, CVC + ENC + DSP Noise Cancelation.
Listen to Music/GPS and Intercom At the Same Time.
IP67 Waterproof.
FM Radio, Music Sharing, Voice Commands.
A mesh intercom is a motorcycle communication system that creates a dynamic network where all riders stay connected. If one rider disconnects, the system automatically repairs itself without manual re-pairing.
mesh intercom connection way
How Mesh Intercom Works
Every intercom acts as a node in the network
If one rider drops out, the system automatically reroutes connections
Riders can leave or join without stopping the group
Why Mesh Was Created
Mesh technology was built to solve the biggest Bluetooth problem: unstable group communication. That is why it performs better in real-world group riding.
For riders who regularly travel in groups, mesh intercoms feel like a massive upgrade—less setup, fewer dropouts, and far less frustration.
This is where touring experience matters.
On group rides:
Riders spread out
Someone hits traffic
Someone pulls ahead
Terrain interferes
Bluetooth chains break. Mesh systems don’t care.
From my view, mesh intercom solves a design flaw Bluetooth was never meant to handle. And, it means no stopping, no button pressing, no yelling at helmets.
Bluetooth Mesh Intercom.
Dual Bluetooth Chip Design.
10 Riders Group Audio, 2000m Distance!
HRSQ Mic and Speakers, CVC + ENC + DSP Noise Cancelation.
Listen to Music/GPS and Intercom At the Same Time.
IP67 Waterproof.
FM Radio, Music Sharing, Voice Commands.
Mesh Intercom vs Bluetooth: Key Differences at a Glance
The main difference between mesh intercom and Bluetooth intercom is how they handle connections. Mesh intercoms automatically reconnect riders and support large groups, while Bluetooth intercoms rely on manual pairing and work best for small groups.
In general, if your group changes speed, spacing, or formation, mesh wins every time.
Mesh Intercom Pros and Cons
Mesh intercoms are ideal for group riding because they offer automatic reconnection, stable communication, and easy scalability. Their main downsides are higher cost and slightly increased battery usage.
Advantages of Mesh Intercom
From a rider’s point of view:
You don’t need to re-pair devices mid-ride
Riders can drop back or change position without losing audio
Perfect for group tours, club rides, and off-road rides
Voice quality stays consistent as the group spreads out
Drawbacks of Mesh Intercom
Higher price
Slightly higher battery use
Best performance when riders use the same brand
Mesh is not overkill—it’s just purpose-built for group communication. It is time-saving and frustration-reducing, especially when there is a group of riders waiting for you.
Bluetooth intercoms are best for solo riders or pairs because they are affordable, battery-efficient, and simple to use. However, they struggle with larger groups and connection stability.
Advantages of Bluetooth Intercom
Lower cost
Longer battery life
Simple operation
Excellent phone, GPS, and music integration
Drawbacks of Bluetooth Intercom
Group size is limited
Chain pairing breaks more easily (compared with mesh intercom)
Manual reconnection can be frustrating
Less stable over long distances
Bluetooth intercoms are still an extremely option — practical, reliable, and budget-smart.
Bluetooth intercoms are better for solo riders and two-person communication, while mesh intercoms are better for large group rides talk, touring communication, and dynamic riding conditions.
Solo Riders
Winner: Bluetooth Intercom
If you ride alone most of the time, mesh offers little benefit. Bluetooth handles calls, music, and navigation perfectly.
Winner: Bluetooth Intercom
Simple pairing, long battery life, and lower cost make Bluetooth ideal for two-up riding.
Small Groups (2–4 Riders)
Tie
Bluetooth works fine if riders stay close and don’t change positions often. Mesh is smoother but not mandatory.
Large Group Rides (5+ Riders)
Winner: Mesh Intercom
This is where mesh truly shines—no chain breaks, no re-pairing, no stress.
Touring & Adventure Riding
Winner: Mesh Intercom
Long distances, changing terrain, and rider movement all favor mesh technology.
Sound Quality: Mesh vs Bluetooth
Mesh and Bluetooth intercoms offer similar sound quality on modern systems. But mesh provides more consistent audio because the connection is more stable.
Audio Clarity
Both systems offer excellent sound quality when using modern intercoms with:
Noise cancellation
Wind reduction algorithms
Quality helmet speakers
Stability Matters More Than Raw Audio
Bluetooth can sound great—but only while the connection holds.
Mesh prioritizes connection stability, which riders notice more than minor audio differences.
Real-World Range Comparison
Mesh intercoms provide better real-world range than Bluetooth. Because the network extends through multiple riders, while Bluetooth relies on direct device-to-device distance.
In the past, we have made a test between Fodsports FX7 and Fodsports FX8 Pro.
The FX7 is a mesh intercom, FX8 Pro is a Bluetooth intercom.
According to the description on their product page, these 2 devices have the same intercom distance(about 2000 meters under ideal environment).
We tested their range on the same road, at the same riding speed, and on the same model. So, the testing environment is the same.
Generally, whether it is a straight open road, with no obstacles among these riders, or a forest off-road with obstacles, the FX7 always has a longer intercom distance performance.
Bluetooth Range
Advertised: up to 1–2 km
Real-world: often much less
Terrain, buildings, and rider position matter a lot
Mesh Range
Advertised: similar per hop
Real-world: extended through multiple riders
Network expands as riders spread out
In practice, mesh feels like it has more range, even when specs look similar.
Is Mesh Intercom Worth the Extra Cost?
The mesh intercom is worth the extra cost for riders who frequently ride in groups, while the Bluetooth intercom offers better value for solo riders or small groups.
Mesh intercom is worth it if:
You ride in groups often
You participate in organized rides or tours
You value convenience over budget
You don’t want to troubleshoot connections mid-ride
False. Bluetooth is still excellent for many riders—it’s just limited for groups.
“Mesh Drains Battery Too Fast”
Modern mesh systems are optimized and last all day for most riders.
“Mesh Works With Any Brand”
Mostly false. Mesh works best within the same ecosystem.
Quick Buying Guide: How to Choose the Right Intercom
Choosing the right intercom depends on your group size, riding style, budget, and ease of use.
Ask yourself:
How many riders do I usually ride with?
Do riders frequently change positions?
Do I hate re-pairing devices?
Is budget or convenience more important?
Rule of thumb:
Small group → Bluetooth
Big group → Mesh
Final Verdict: Mesh Intercom vs Bluetooth
Bluetooth intercoms are best for simple, affordable communication, while mesh intercoms are best for seamless group riding. The right choice depends on how and who you ride with.
There is no universal “better” system—only a better system for your riding style.
Choose Bluetooth intercom for simplicity, affordability, and solo riding
Choose Mesh intercom for stress-free group communication and modern riding convenience
From a rider’s seat, mesh feels like the future—but Bluetooth is far from obsolete.
FAQ (Optimized for Featured Snippets)
Is mesh intercom better than Bluetooth?
Mesh intercom is better for group riding because it automatically reconnects and supports more riders. Bluetooth is better for solo or two-person communication.
Can mesh and Bluetooth intercoms work together?
Most mesh intercoms support Bluetooth devices, but advanced mesh features usually work best within the same brand.
Do I need mesh intercom if I ride alone?
No. Bluetooth intercoms are more practical and cost-effective for solo riders.
Which intercom has better range?
Mesh intercoms offer more reliable real-world range due to multi-node networking.
Is mesh intercom worth the price?
Yes, if you ride in groups regularly. Otherwise, Bluetooth offers better value.
Motorbike vs. motorcycle is a debate that often confuses new riders. Okay, so people use the terms 'motorbike' and 'motorcycle' interchangeably, and most of the time, they do. But, depending on where you are, the bike scene, or just what you like, one word might just sound better.
Some riders will tell you that the words hint at different kinds of bikes – like how big the engine is, how fast it goes, how heavy it is, or what it's like to ride. That's normally where people start to get confused, especially if they're just getting started.
But does it even matter what you call it? Is there a real difference, or are motorbike and motorcycle just two ways of saying the same thing? If you've ever wondered which one makes more sense, this article will explain it simply for you.
Motorbike vs Motorcycle: What’s the Difference?
There is no technical or legal difference between a motorbike and a motorcycle.
Both terms refer to the same type of two-wheeled, engine-powered vehicle. In most countries, they are classified, registered, and insured exactly the same way.
The difference is mainly about language, region, and everyday usage—not engine size, speed, or performance.
Motorbike vs Motorcycle Around the World
Motorcycle and motorbike mean the same thing
Motorbike
In countries like the UK and Australia, “motorbike” is the word you’ll hear most often in casual conversation.
People might say, “I’m taking my motorbike out for a spin this weekend” without thinking twice.
It’s friendly, informal, and rolls off the tongue easily—perfect for chatting with friends or describing your ride in day-to-day talk.
Motorcycle
On the other hand, “motorcycle” is the more formal term, especially in North America. It’s the word you’ll see on legal documents, titles, insurance papers, and DMV forms.
If you’re buying a bike, registering it, or talking to insurance companies, “motorcycle” is the term that will almost always be used.
So, while the two words mean the same thing, one feels casual, and the other formal, and your choice depends on context.
Common Perceptions and Informal Distinctions
Even though there’s no legal difference, some riders like to talk about bikes in a way that suggests distinctions.
These are mostly informal and based on perception rather than rules. But they’re worth knowing, especially if you’re talking to other riders.
motorbike vs motorcycle
Based on Engine Size
A lot of riders casually refer to big, powerful bikes as motorcycles and smaller, lighter ones as motorbikes.
In reality, a 125cc “starter bike” is legally a motorcycle just like a 1000cc sport bike.
But people like to categorize them this way when chatting or giving advice.
Based on Use
Some use the terms depending on where and how the bike is ridden.
For long highway trips or touring, you’ll often hear “motorcycle.”
For short city rides or casual commuting, “motorbike” feels more natural.
It’s about perception and context, not law.
Based on Size and Weight
Heavier and bulkier bikes, such as cruisers, touring bikes, and sport bikes, are often called motorcycles.
These bikes are usually larger and built for power, long-distance riding, or high speeds.
Smaller and lighter bikes are sometimes referred to as motorbikes. They are generally easier to handle in traffic and are often considered more beginner-friendly.
Many riders use this distinction as a simple way to set expectations for handling and comfort.
Top Speed and Power
High-speed, high-performance bikes are often called motorcycles.
When people use this word, they’re usually talking about something built for power and speed.
Slower and less powerful bikes, on the other hand, are more likely to be called motorbikes.
The difference isn’t official at all, but it helps riders quickly get a sense of what kind of bike someone is referring to.
Safety Gear Needs
Regardless of the term, this isn’t a hard rule—just a common way riders talk about different bikes.
When people think of a motorcycle, they often picture full protective gear: a proper helmet, riding jacket, pants, gloves, and boots.
Since these bikes are usually faster and more powerful, wearing full gear feels like the obvious choice.
Smaller or lighter motorbikes, especially those used in city traffic, are sometimes viewed differently.
Because they tend to run at lower speeds, some riders believe a helmet alone is enough.
This mindset is more about perception and habit than real safety. After all, even a small, low-powered bike can lose balance or go down in traffic.
For instance, Harley-Davidson riders rarely call their bikes motorbikes – they might say hog or chopper instead.
It’s all part of rider culture, but it doesn’t reflect any mechanical difference.
Motorbike vs Motorcycle vs Scooter vs Moped
Two-wheeled vehicles come in many forms.
At first glance, they can look similar, especially if you’re new to riding.
But once you understand the key differences, choosing the right one becomes much easier—and far less confusing.
Type
Engine Size
Top Speed
Transmission
License Required
Best For
Motorcycle / Motorbike
125cc – 1000cc+
High (60–180+ mph)
Manual (mostly)
Motorcycle license
Highway riding, touring, performance
Scooter
50cc – 250cc
Low to medium (30–80 mph)
Automatic (CVT)
Motorcycle license (varies by cc)
City commuting, beginners
Moped
Up to 50cc
Low (25–30 mph)
Automatic or single-speed
Permit or basic license (varies)
Short trips, urban transport
License and speed limits vary by country and state. Always check local regulations before riding.
Motorcycle / Motorbike
motorcycle
“Motorcycle” and “motorbike” refer to the same category of vehicle. These are traditional two-wheeled machines with an engine mounted in a frame that the rider sits astride, with feet on pegs.
Engine size: Ranges from small (around 125cc) to very large (1000cc or more)
Riding position: Rider sits on top of the frame, usually leaning slightly forward
Use: Everything from city riding to highway cruising and long-distance touring
Legal definition: This is the broad category that technically includes scooters and mopeds as well
In everyday language, people often picture sport bikes, cruisers, or touring bikes when they hear “motorcycle,” but legally, the term is much broader.
Scooter
scooter
A scooter is a type of motorcycle with a different layout that focuses on comfort and ease of use.
Frame: Step-through design with a flat floorboard
Transmission: Usually automatic (CVT), making it beginner-friendly
Engine size: Commonly 50–250cc
Features: Leg shields, upright seating, and built-in storage
Best for: City commuting and short trips
In many regions, scooters with engines of 50cc or smaller may legally be classified as mopeds.
So, you’ve learned the difference between a motorbike and a motorcycle, and maybe you’ve even peeked at scooters and mopeds. Now the big question is: which one should you actually get? Let’s break it down.
Motorcycle
If you’re after long rides, highway cruising, or even some spirited cornering on open roads, a “motorcycle” is usually your go-to.
Think sport bikes, cruisers, or touring machines. They tend to have bigger engines, more power, and longer ranges, so you can cover serious mileage without constantly stopping.
Sure, they can be heavier and need a bit more skill to handle, but the reward is smooth, confident riding at higher speeds.
If adventure and versatility are your priorities, a proper motorcycle is hard to beat.
Motorbike
Now, the term “motorbike” is often used casually, especially in the UK or Australia, but remember—it’s still legally a motorcycle.
When people say motorbike, they often mean smaller, lighter bikes: easy to maneuver in traffic, perfect for quick city rides, and beginner-friendly.
If you’re just commuting, popping around town, or don’t want a beast of a machine, a motorbike-sized ride is ideal. It’s nimble, fun, and won’t intimidate you on your first few rides.
Scooter
Then there’s the scooter. Automatic transmission, step-through frame, upright seating—scooters are made to be simple and practical.
They’re perfect if your rides are mostly short trips in the city, zipping through traffic, or if you want a very low-maintenance, approachable ride.
Don’t be fooled by their small size—they can still get you where you need to go, but they won’t give you that adrenaline rush of a bigger bike.
For beginners, or anyone who values convenience over power, scooters are often the easiest way to start riding.
❓FAQ
🏍️Q: Are motorbikes and motorcycles the same? Are motorbikes smaller or weaker than motorcycles?
A: There is no technical or legal difference between a motorbike and a motorcycle. Both terms describe the same type of two-wheeled, engine-powered vehicle.
The difference is mainly about language and regional usage, not engine size, speed, or performance.
🛵Q: Why do people say “motorbike” instead of “motorcycle”?
A: It’s mostly a regional and cultural habit. In the UK, Australia, and many other regions, “motorbike” is commonly used in everyday conversation.
In the U.S., “motorcycle” is more formal and appears on legal documents, insurance papers, and registrations. Both terms are correct.
🔧Q: Do big brands avoid calling their bikes “motorbikes”?
A: Not really. Manufacturers focus on branding and marketing language, while riders use slang.
Harley-Davidson riders might say “hog,” others just say “bike.” Technically, any two-wheeled engine-powered bike can be called a motorbike, regardless of brand.
🛴Q: Is a scooter the same as a motorbike?
A: Not exactly. A scooter is a subtype of motorcycle. Scooters usually have a step-through frame, automatic transmission, and smaller engines, making them ideal for city riding.
However, in legal terms, many scooters are still classified as motorcycles.
🚲Q: What is the difference between a scooter and a moped?
A: A moped is usually limited to around 50cc and has a much lower top speed, often under 30 mph.
Scooters typically have larger engines, higher speeds, and require a full motorcycle license. Regulations vary by country and state.
📜Q: Do I need a motorcycle license to ride a motorbike?
A: Yes. In most regions, riding any motorcycle or motorbike on public roads requires a motorcycle license or permit.
Some low-powered mopeds may have lighter requirements, but scooters and motorbikes generally require proper licensing.
🏙️Q: Are motorbikes or motorcycles better for city commuting in the US?
A: For city commuting in the U.S., smaller motorcycles or motorbikes are usually more practical.
Scooters can also be a convenient choice for short urban trips, especially if you prefer automatic transmission and low-maintenance riding.
⚡Q: Are electric motorbikes considered real motorcycles?
A: Yes. Electric motorcycles meet the same legal definition as gas-powered motorcycles.
Power source does not affect classification, and many electric bikes offer performance comparable to traditional motorcycles.
A: Often yes, motorcycles can have lower premiums than cars because they are lighter and you usually carry less of a claim on them.
Small-engine bikes are typically cheaper to insure than big cruisers or sports bikes. However, factors like age, location, and driving record also affect cost.
🛡️Q: My friend says they need less gear for a motorbike. Is that true?
A: No. Any motorcycle rider should wear the same protective gear regardless of the bike’s name.
Safety gear should not depend on bike size. Even low-powered motorbikes can crash or lose balance in traffic.
Conclusion
In general, there is no real difference between a motorbike and a motorcycle. Both terms refer to the same type of two-wheeled vehicle, and they are often used interchangeably.
The words people choose usually depend on regional habits and everyday perception.
In the United States, “motorcycle” is the more common term, while in the UK and Australia, “motorbike” is used more frequently. Some riders also associate larger, more powerful bikes with the term motorcycle, and smaller, lower-powered bikes with motorbike, especially for city riding.
These distinctions, however, are based on common usage rather than technical or legal differences.
A motorcycle crash doesn’t have to be high-speed to cause serious injury. In a split second, unprotected legs can be scraped, bruised, or broken on asphalt. That’s why motorcycle pants exist. They are not as fashion, but as essential safety gear designed to protect riders where ordinary jeans fail. This guide will explain what motorcycle pants are, why they matter for safety, and how to choose the right pair for your riding style and conditions.
What Are Motorcycle Pants?
motorcycle pants
Motorcycle pants are durable riding trousers designed specifically to protect a rider’s lower body in the event of a crash.
Unlike regular jeans or work pants, they are built with safety as the primary goal, using reinforced materials and integrated protection to reduce injury.
Here’s what makes motorcycle pants different:
Tough, abrasion-resistant materials
Unlike normal jeans, which can shred almost instantly, riding pants are made from heavy-duty leather or technical fabrics.
Sometimes these fabrics are reinforced with Kevlar or Cordura. This makes them strong enough to handle sliding and scraping without falling apart.
Armor and padding
Most pants have pockets for CE-certified armor at the knees and hips.
These pads absorb impact and protect the joints that are most at risk in a crash.
Weather and comfort features
Many come with waterproof layers, removable liners, or vents to keep you cool in summer and warm in winter.
• Extremely tough and abrasion-resistant.
• Naturally insulating for cold weather.
• Long-lasting durability if maintained.
• Heavy and less breathable.
• Not inherently waterproof.
• Requires regular cleaning and conditioning.
• Sport and track riders seeking maximum protection.
• Riders in colder climates.
Textile Motorcycle Pants
Made from Cordura, ballistic nylon, or polyester blends. Lightweight, versatile, often waterproof with vents and liners.
• Lighter and more flexible than leather.
• Can include waterproof liners.
• Vents and stretch panels for comfort.
• Less abrasion-resistant than leather.
• Lower-quality textiles may tear more easily.
• Touring and commuting riders.
• Riders wanting multi-season versatility.
Motorcycle Jeans (Kevlar/Aramid)
Casual-looking denim reinforced with Kevlar/Aramid in knees, hips, and seat. Removable CE armor in some models.
• Stylish and casual; wearable off the bike.
• Better abrasion resistance than regular jeans.
• Slim CE-rated knee/hip armor pockets.
• Moderate protection; thinner fabric and less armor.
• Not ideal for high-speed or long-distance rides.
• Urban riders and city commuting.
• Riders seeking a “motorcycle-friendly casual” style.
Adventure & Touring Pants
Tough textile pants with reinforced panels, waterproof membranes, removable liners, cargo pockets, and adjustable fit.
• Durable and versatile; all-weather capable.
• Armor at knees/hips for crash protection.
• Adjustable features, cargo pockets, and reflective panels for comfort and safety.
• Bulkier; can feel heavy on short rides.
• High-quality models can be expensive.
• Adventure riders covering long distances in varying climates.
• Riders needing multi-season comfort and functionality.
Leather Motorcycle Pants
leather motorcycle pants
Leather pants are often considered the gold standard when it comes to abrasion protection. Full-grain cowhide—sometimes buffalo or goatskin—is incredibly tough if you end up sliding down the road.
That’s why track riders and sport riders keep coming back to leather. At high speeds and in long slides, it simply holds up better than almost anything else. A good pair of leather pants, or a one-piece suit, will usually earn the highest abrasion ratings, often CE AA or even AAA.
Of course, leather isn’t perfect. It’s heavy, it’s expensive, and it gets hot—really hot—especially once you’re off the bike. It doesn’t breathe much, it doesn’t stretch much, and walking around in leather pants can feel stiff and a bit awkward.
Still, if you’re the kind of rider who plans to push the limits—track days, fast canyon runs—and you want the best possible slide protection, it’s hard to beat a quality pair of leather pants zipped to a matching jacket.
Pros:
Extremely tough and abrasion-resistant – can handle multiple slides without tearing.
Naturally insulating – keeps legs warm in cold weather.
Long-lasting durability when properly maintained.
Cons:
Heavy and less breathable – can feel hot in summer.
Not inherently waterproof – requires treatment or layering.
Needs regular care – cleaning and conditioning to maintain flexibility and durability.
Best For:
Sport and track riders seeking maximum protection.
Riders in colder climates who need natural insulation.
Textile Motorcycle Pants
textile motorcycle pants
Textile pants are all about versatility and comfort. Made from modern materials like Cordura, ballistic nylon, or polyester blends, they’re surprisingly tough but a lot lighter and easier to handle than leather.
I’ve always liked textile pants for longer rides or when the weather is unpredictable. Many come with waterproof liners, removable thermal layers, and ventilation zippers that actually make a difference on hot days. Most also have armor at the knees and hips, and some can zip right into a matching jacket, which is really handy.
The beauty of textile pants is how practical they are. They keep you dry when it rains, let you cool off in summer with vents or mesh panels, and don’t wear you out over hours in the saddle. They won’t give you the same slide protection as full leather, but for day-to-day riding, touring, or adventure trips, they feel much more comfortable and forgiving.
Pros:
Lighter and more flexible than leather – better for long rides and commuting.
Can include waterproof liners or membranes for wet weather.
Often features vents and stretch panels for comfort.
Cons:
Generally, less abrasion-resistant than leather, high-speed slides can wear through faster.
Durability depends on material quality; lower-end textile pants may tear more easily.
Best For:
Touring and commuting riders who need comfort and weather protection.
Riders who want versatility for different seasons and conditions.
Motorcycle Jeans (Kevlar/Aramid Jeans)
motorcycle jeans
Motorcycle jeans are all about blending casual style with a surprising amount of protection. From the outside, they just look like regular denim, but inside they’re lined with aramid or Kevlar in key areas—knees, hips, and seat. Many also have removable CE armor pockets at the knees and hips.
I’ve always liked riding jeans for commuting or casual rides. You get the safety of reinforced fibers without looking like you’re suited up for a track day. Some high-quality brands—like Revit, Pando Moto, or Saint USA—even hit CE AA or AAA abrasion ratings, which is impressive for something that looks just like everyday jeans.
Of course, they won’t protect quite as much as full leather or textile pants. But for daily riding, short trips, or when you want to keep a low profile while still staying safe, riding jeans are hard to beat. They strike a nice balance between style, comfort, and protection.
Pros:
Stylish and casual – can be worn off the bike.
Better abrasion resistance than regular jeans due to reinforced fibers.
Often includes slim CE-rated knee and hip protector pockets.
Cons:
Offers moderate protection – less armor and thinner fabric than dedicated riding pants.
Not ideal for high-speed or long-distance rides where maximum protection is needed.
Best For:
Urban riders and casual city commuting.
Riders who want a dual-purpose “motorcycle-friendly casual” style.
Adventure & Touring Motorcycle Pants
adventure & touring motorcycle pants
Adventure or touring pants are built for long days on the bike and all kinds of conditions. They’re basically a tougher, more practical version of textile pants.
I’ve always liked them for multi-hour rides or trips where the weather can’t be predicted. They usually have lots of pockets—cargo pockets, map pockets—and reinforced panels on the seat and thighs. Adjustable features at the waist and ankles make them fit better over layers.
Most adventure pants come with a waterproof membrane, like Gore-Tex, and some even have removable liners for warmth. The fit is generally looser than other pants, which makes layering easier and keeps you comfortable for hours on end. Armor is included at the knees and hips, but the main focus is on durability, comfort, and all-day usability, rather than outright slide protection.
If you’re touring or hitting the trails for an adventure ride, a good pair of adventure pants with built-in liners and ventilation makes a world of difference. They’re not about looking sleek—they’re about keeping you going no matter how long or rough the ride is.
Pros:
Durable and versatile – handles all-weather conditions.
Includes armor at knees and hips for crash protection.
Adjustable features, cargo pockets, and reflective panels for long-distance comfort and safety.
Cons:
Bulkier than regular pants or jeans – may feel heavy on shorter rides.
High-quality models can be expensive.
Best For:
Adventure riders cover long distances across different climates.
Riders who need multi-season functionality and comfort over extended rides.
When it comes to motorcycle pants, armor and CE ratings are key to keeping you safe in a crash. Let’s break it down in simple terms so you know what to look for.
CE Level 1 vs Level 2 Armor
Level 1: Thinner and lighter, maximum average transmitted force ~35 kN. Common in general motorcycle pants for comfort.
Level 2: Thicker and stiffer, absorbs roughly double the impact energy (max ~20 kN transmitted). Recommended for high-speed or track use.
In short: Level 2 offers stronger protection, while Level 1 balances safety with comfort for everyday riding.
Knee Armor
Designed to fully cover the kneecap and flex point.
Quality pads (often D3O or foam) absorb energy and reduce bone injury.
Ensure knee armor stays in place when seated on the bike.
Hip Armor
Pads protect the pelvic bone, a vulnerable area in falls.
Falls often result in the hip striking the ground or bike; armor absorbs impact and prevents injury.
Proper pant fit keeps hip pads over the bone during riding.
Placement Matters
Pants that are too loose can allow armor to shift, reducing effectiveness.
Proper fit and pant length keep armor aligned over knees and hips.
Always test armor placement by sitting on the bike and bending your knees.
CE Ratings and Safety Standards for Pants
Motorcycle pants often carry CE certification, a European standard for abrasion and impact protection.
CE Classes:
Class A: Basic abrasion and impact protection—suitable for city or casual riding.
Class AA: Higher protection for highway, sport, or serious riding.
Class AAA: Highest protection, usually only full leather racing suits.
Approximate abrasion test speeds:
Class A ~45 km/h (28 mph)
Class AA ~70 km/h (44 mph)
Class AAA ~120 km/h (75 mph)
Even if you don’t ride at these speeds, higher CE ratings usually mean tougher fabrics and better armor.
Garment vs Armor CE Ratings
Garment rating (A/AA/AAA): Overall material, stitching, and abrasion resistance.
Armor rating (Level 1 or 2): Impact-absorbing pads inside the pants.
Example: A CE AAA pant could still use Level 1 armor for comfort.
Look for both CE markings (garment + armor) to ensure standardized protection.
Why CE-Rated Pants Matter
Pants without CE marks may still use strong materials (e.g., 600D Cordura), but CE-rated motorcycle pants are independently tested for abrasion, tear strength, and seam durability.
Wearing CE-rated pants means you choose protection that has been verified, not just claimed.
How to Choose the Right Motorcycle Pants
How to choose the right motorcycle pants
Selecting the right motorcycle pants involves balancing protection, comfort, and practicality. Consider the following factors:
1. Fit and Sizing
Try pants on in a riding stance. They should be snug but not restrictive.
Motorcycle pants are typically cut closer to the body (skinny or straight-leg styles) to prevent flapping.
Check that armor is correctly aligned with knees bent.
Waist size should match your measurements; some riders size up and use belts or suspenders, especially on sport bikes.
2. Riding Style
Track/sport riders: Prefer one-piece or two-piece leather suits or leather pants for maximum abrasion resistance.
Commuters and sport-tourers: Often choose textile or mesh pants with ventilation or waterproof features.
Adventure riders: Look for durable, multi-season motorcycle pants with liners and vents.
Casual riders: May opt for reinforced jeans that are safe on the bike and blend in off-bike.
3. Climate and Weather
For hot climates, choose pants with large mesh panels or Ventilation Control System (VCS) zips.
For cold or wet weather, look for thermal liners and waterproof membranes (e.g., Gore-Tex or laminated layers).
Some riders invest in multiple pairs: one fully waterproof/touring pant and one breathable mesh pant.
All-season motorcycle pants with removable liners can adapt to both hot and cold conditions.
4. Riding Frequency
Daily riders or long-distance tourers benefit from higher-end motorcycle pants with CE armor and quality materials.
Casual riders may start with more basic options.
5. Budget
Avoid skimping on safety for the lowest price.
Very cheap pants often cut corners on abrasion layers and lack certified armor.
Look for well-known brands offering CE-certified motorcycle pants.
Sales and closeout sites (e.g., Motorcycle Closeouts) can provide good deals on quality pants.
6. Quick Checklist
Ensure pants:
Fit well
Cover ankles or fit over boots
Include CE-rated knee/hip protectors
Suit your typical riding conditions (venting, liners, waterproofing, etc.)
Motorcycle Pants for Different Weather Conditions
Choosing the right motorcycle pants for the weather keeps you comfortable, safe, and focused on the road. Here’s a breakdown by season and conditions:
1. Summer Pants
Designed for maximum airflow to keep you cool in hot weather.
Typically mesh textile motorcycle pants or lighter textiles with large vent openings.
Mesh panels on thighs, shins, and knees allow air circulation while keeping abrasion-resistant fibers on skin-contact areas.
Use lightweight liners or none at all.
Ideal for hot-weather riding while still providing protection.
2. Winter Pants
Insulated and windproof motorcycle pants retain heat and block cold wind.
Look for pants with removable thermal liners (quilted or fleece) and wind-resistant outer shells.
Leather naturally insulates, but many riders prefer textile motorcycle pants with zip-in thermal liners.
Heated pants or pants with power leads are optional for extra warmth.
Goal: trap body heat and prevent muscle fatigue and discomfort in cold conditions.
3. Waterproof / Rain Pants
Fully waterproof motorcycle pants (rain pants or over-trousers) with sealed seams and membranes like Gore-Tex.
Can be worn over regular pants or as the outer layer.
Key features: fully seam-sealed construction and a reliable waterproof membrane.
Some touring pants include a built-in waterproof layer plus removable liners, or come with separate overpant covers.
Avoid zippers or vents that allow water in. Good rain pants keep you dry even in heavy downpours.
4. All-Season Pants
Multi-season or 3-in-1 motorcycle pants combine several features for year-round use.
Often include:
Zip-out thermal liner for cold weather
Waterproof membrane for rain
Ventilation openings for warm weather
In warm weather: remove the liner and open vents.
In cold or rainy weather: add the liner and zip everything up.
Versatility makes one pair usable year-round, especially for adventure-touring riders.
How Should Motorcycle Pants Fit?
try on motorcycle pants
Proper fit is essential for both comfort and safety while riding.
Here’s what to consider when choosing motorcycle pants:
1. Leg Length
Motorcycle pants are usually cut slightly longer than regular pants.
When standing, they may bunch slightly at the bottom—this is intentional.
Once seated on the bike, your knees bend and pull the pant legs up. Extra length ensures the pants aren’t too short while riding.
2. Armor Alignment
Knee armor should fully cover your kneecaps when knees are bent in the riding position.
Test by crouching or sitting on the bike. Guidelines suggest: “impact protection [should be] fully covering the joint and not slipping up or down.”
A proper fit keeps protectors snug on knees and hips without bunching.
3. Snug vs. Loose Fit
Pants should fit close to the body to reduce flapping in the wind.
Motorcycle pants come in “close” or “more relaxed” fits but are generally relatively body-hugging.
Think of them like straight- or skinny-leg pants rather than wide bootcut styles.
Stretch panels or pre-curved knees allow movement, but avoid overly baggy cuts.
Too-tight pants will restrict motion—always try them on and flex around before buying.
4. Waist
Choose the correct waist size for comfort.
Sport bike riders in a tucked position may need to size up slightly and use a belt or suspenders.
Check that pants don’t pinch your abdomen when leaning forward.
Cruiser riders usually find their normal waist size works fine.
Decide whether you’ll wear motorcycle pantsover or inside your boots:
Sport leathers often go over tall boots, sometimes zipped around them.
Many textile or casual pants are worn inside short riding boots.
Pants that go over boots should have narrow ankles or boot hooks.
Pants worn inside boots often feature internal grippers or wider cuffs for a secure fit.
Care & Maintenance Tips for Motorcycle Pants
Motorcycle pants care and maintenance
Proper care ensures that your riding pants remain protective, comfortable, and long-lasting. Follow these guidelines:
1. Washing
Always follow the care label instructions.
Textile and denim-style pants (with Kevlar or other liners) should be washed cold on a gentle cycle.
Use a mild detergent; avoid bleach or dry cleaning, which can damage protective fabrics.
Air-dry the pants fully; never use a tumble dryer, as heat can damage armor and fibers.
2. Leather Care
Clean the exterior with a soft cloth or sponge and a leather cleaner. Avoid detergents, silicones, or waxes that can dry out the leather.
After cleaning and drying, apply a quality leather conditioner to replenish oils and keep the leather supple. This helps prevent cracking and extends the life of your gear.
Wipe off salt, dirt, or debris after each ride when possible.
3. Armor Maintenance
Remove any CE-certified pads (knee, hip, etc.) before washing.
Inspect pads regularly and replace any that are cracked or deformed.
If armor is removable, store it separately when not in use.
Modern pants usually have removable armor pockets for convenience.
4. Inspection & Repairs
Periodically inspect stitching and seams for wear.
Repair small rips or loose threads promptly.
Reinforce areas of heavy wear (crotch, seat, knees) as needed to maintain protection.
5. Storage
Store pants flat or hung in a cool, dry place away from direct sunlight.
Avoid damp areas to prevent mold and odors.
Ensure good ventilation to keep pants fresh.
Common Mistakes Riders Make
Motorcyclists sometimes make errors when selecting pants, compromising safety and comfort.
Avoid these common pitfalls:
Choosing Style Over Safety
Prioritizing looks instead of protection is risky.
Example: Soft jeans that appear motorcycle-ready but lack reinforcement leave you vulnerable.
Tip: Always check for reinforced abrasion layers and CE-certified impact protectors. Stylish and safe options are widely available today.
Wearing the Wrong Size or Fit
Pants that are too loose can shift during a crash, exposing your skin.
Too-tight pants restrict movement and may prevent armor from sitting correctly.
Tip: Try pants on and sit on your bike to ensure proper fit and comfort.
Ignoring Armor Ratings
Some pants (especially cheap or off-brand) have no real armor or use flimsy foam.
Tip: Check for CE EN 1621-1 certified knee and hip protectors. If stock armor is inadequate, insert high-quality pads into the armor pockets.
Not Considering Climate
Assuming one pair works for all seasons is a frequent mistake.
Example: Heavy leather pants in summer can cause overheating; mesh pants in winter leave you freezing.
Tip: Choose season-appropriate pants, or invest in versatile, multi-season gear.
Skimping on Safety for Cost
Opting for the cheapest pants often means sacrificing protection.
Inexpensive pants may use low-quality materials or lack certification.
Tip: Invest in quality pants – the extra cost is worth the safety they provide.
❓ FAQ
Q: Are motorcycle pants worth it?
A: Yes. Motorcycle pants significantly reduce the risk of serious leg injuries and provide comfort and weather protection.
Q: Can I wear motorcycle pants every day?
A: Many textile pants and motorcycle jeans are designed for daily use and commuting.
Q: Do motorcycle pants protect against rain?
A: Many motorcycle pants are waterproof or include removable rain liners.
Q: Are motorcycle jeans safe enough?
A: Motorcycle jeans are safer than regular jeans but offer less protection than full motorcycle pants.
Q: How long do motorcycle pants last?
A: With proper care, quality motorcycle pants can last several years, depending on usage and material.
Conclusion
The right motorcycle pants aren’t just another piece of gear—they’re your shield on the road. Whether you’re cruising through city streets, hitting the track, or tackling long-distance tours, investing in pants with quality materials, proper armor, and the right fit can make the difference between a minor scrape and a serious injury.
So next time you gear up, think beyond style. Pick pants that protect, keep you comfortable, and suit the ride you love. Both you and your legs will thank you later.
The globe's first motorized bike hit the sidewalk over 150 years back and also a number of the fundamental parts of a motorcycle still continue to be the exact same. A motorcycle needs an engine, a chassis, a transmission, and also a set of wheels to run.
Some lingo and technical terminology might appear a little bit frightening for unskilled bikers. Those who are new to the world of bikes might struggle to recognize how a motorbike functions.
Thus, we've put together a simple guide to aid you to obtain a company hold on the essential parts of a motorbike. It can help you ride your bike safely and you can additionally get the most out of what your automobile can do.
Trying to discover each and every single part could take years, however, these parts of a motorcycle name checklist will educate you on the most important in case you require to replace or upgrade them.
Main Parts of A Motorcycle
Main Parts of A Motorcycle
Main parts of a motorcycle
In this article, we will take a Triumph Speed Triple 1200 RS as an example and introduce you the major parts of a motorcycle.
1. The Heart of the Bike: The Engine and Powertrain
The engine is the heart of every motorcycle; it is the most important part of the motorcycle. It burns fuel to produce mechanical power that turns the wheels.
Most motorcycles use gasoline internal-combustion engines, though electric motors are growing in popularity.
Engine types vary in configuration — single-cylinder, parallel twins, V-twins, inline fours, and more. Each engine type will influence power delivery, balance, weight, and character.
Here are the critical components inside the engine that you need to know:
Cylinder Block & Head – It houses pistons, valves, and combustion chambers.
Pistons & Rings – It moves up and down to compress the air-fuel mixture.
Crankshaft – It converts piston motion into rotational power.
Camshaft(s) – This part opens and closes the valves at precise times.
Valves & Rocker Arms – It controls intake of fuel/air and exhaust gases.
If you are interested, you can learn some knowledge about the engine’s anatomy. This helps when diagnosing compression issues, valve noise, or performance problems.
Transmission & Clutch
transmission area on the motorcycle
Directly connected to the engine is the transmission. It is a gear system that allows the rider to change speeds while keeping the engine in its most efficient power range.
Usually, it is a multi-speed gearbox with 5 or 6 gears. The main function of the gearbox is to transfer power from the engine to the rear wheel.
The clutch is what links your engine to the transmission. There are different kinds of clutches on the motorcycles. When you pull that clutch lever, it disconnects the engine so you can change gears without grinding them.
Key parts in this area include:
Clutch Plates / Basket
Shift Drum
Gears and Shafts
Shift Lever (Foot-lever)
You can learn something about the clutch feel, gear engagement, and linkage. This can dramatically improve your smooth shifting and long-term reliability.
motorcycle frame(the yellow metal structure in this photo)
In this photo, you can see a yellow metal-made structure. Yes, that's the frame of this motorcycle.
The frame is the core structural component of a motorcycle; it is like the backbone of your motorcycle.
Basically, it holds everything together – the engine, the suspension, all that body stuff. It also has a big impact on how the bike handles.
Now, with better tech, frames are built from all sorts of materials. You'll see frames made of steel, aluminum, or even carbon fiber.
Besides, frames also have different design styles, such as:
Cradle / Backbone frames
Perimeter / Twin-spar frames
Trellis frames
Each design balances strength, weight, and rigidity differently. A cracked or bent frame is a serious safety issue, so regular inspection is essential.
The swingarm is located at the rear of a motorcycle. It is a pivotal arm that links the motorcycle's rear wheel to the frame and houses the rear suspension.
It swings up and down to absorb bumps and maintain traction. So, yeah, how good your swingarm is will change how comfy your ride is.
Types include:
Double-sided swingarm
Single-sided swingarm
Parallelogram designs in some shaft-drive bikes
A stiff, well-maintained swingarm improves stability, especially during acceleration and cornering.
The front suspension usually consists of telescopic forks (the two tubes extending from the handlebars to the front axle). They absorb shocks and keep the front tire planted.
Parts include:
Outer Tube (Fork Leg)
Inner Tube / Stanchion
Springs
Seals
Damping Mechanism
Front suspension is one of the most important parts of a motorcycle; it affects your braking behavior and ride comfort. So properly tuned forks are crucial for your riding confidence.
Rear Suspension (Shock Absorber)
This is the rear suspension of triumph scrambler 900
At the back of your motorcycle, there is a shock absorber (sometimes dual shocks or a monoshock) works with the swingarm. Together, they aim to smooth out bumps, stabilize the rear wheel, and maintain traction.
Suspension settings — preload, compression, and rebound — are quite important. This drastically affects your riding comfort and handling.
Motorcycle wheels are typically made from cast or spoked rims with tires mounted to them. I think you can easily find out them on your motorcycle.
Important subparts in this area include:
Rims and Hubs
Spokes
Tires (front & rear)
Inner Tubes (in some designs)
Tires are regarded as one of the most important safety components of a motorcycle. Their compound, tread pattern, and pressure determine grip under acceleration, cornering, and braking.
Stopping a motorcycle quickly and predictably is just as important as going fast. So, you should always know that the brakes are also important safety parts on a motorcycle.
Front braking system has:
Brake Calipers – clamp brake pads onto the disc.
Brake Disc (Rotor) – metal disc attached to wheel.
Brake Lever (Hand) – controls front brake.
Rear braking system:
Brake Pedal (Foot)
Rear Caliper and Disc or Drum Brake
For the brakes, today's modern bikes are safer than those old motorbikes. They often feature dual-disc front brakes for high performance.
Remember to maintain your brakes properly; this is really critical. Worn pads or warped discs can severely degrade stopping power.
It is easy to understand the function of the fuel system part of a motorcycle. It delivers fuel from the tank to the engine.
Here are the key parts of the fuel system:
Fuel Tank – It holds gasoline.
Fuel Pump – It presses fuel toward the engine.
Carburetor or Fuel Injectors – It mix fuel and air.
Air Filter – It keeps air clean entering the engine.
As a professional motorcycle mechanic, I sincerely recommend that you check the fuel filter and injector regularly. These are essential checks to improve your fuel efficiency and prevent stalling.
The exhaust system works with the engine and fuel system. It has two main purposes: pushes burned gases away from the engine and reduces noise.
You can find the following parts in the exhaust system:
Exhaust Pipe
Muffler
Catalytic Converter (on some bikes)
The muffler and pipe design influence backpressure and performance. High-performance systems often balance sound and power output.
6. Electrical and Control Systems
Battery and Charging System
motorcycle battery charging
The battery stores electrical energy for starting the bike and powering electronics.
It’s supported by the:
Stator / Alternator
Rectifier / Regulator
Wiring Harness
Good electrical health ensures reliable starts and stable lighting performance.
Lights & Indicators
Lights and indicators system on a motorcycle
Lights and indicators are critical safety parts on your motorcycle. They bring you light and improve your visibility, so that you can ride safely. These parts include:
The dashboard and instrument cluster provide visible information on a motorcycle. It will displays vital information to you as soon as you power on the motorcycle. You can directly see the following information:
Speedometer
Tachometer
Fuel Gauge
Gear Indicator
Temperature / Warning Lights
Make sure to have a look at the instrument cluster before your motorcycle starts go. A messed-up gauge can give you wrong info about your gas or how your engine's doing. If this happens, you should get it fixed.
7. Steering and Controls
steering and controls parts of a motorcycle
Handlebars and Hand Controls
Handbars and hand controls may be the most used parts on a motorcycle. Every moment you are on the motorcycle, you will need to grab the handlebars, right?
The handlebar platform supports:
Throttle (Right grip)
Front Brake Lever
Clutch Lever
Switchgear (lights, horn, indicators)
Mirrors
Hand controls allow the rider to command the motorcycle precisely.
Foot Controls
Foot controls include:
Foot Pegs
Rear Brake Pedal
Gear Shift Lever
Comfortable and well-placed pegs improve ergonomics and control response.
8. Bodywork, Cowling, and Fairings
bodywork, cowling, and fairings parts on a motorcycle
Body Panels & Cowling
Fairings and cowling are protective and aerodynamic bodywork pieces:
Front Fairing – It shields the rider from the wind.
Side Panels – They cover mechanical parts.
Cowling – It covers the engine area, reducing drag.
Sport bikes feature extensive fairings for aerodynamics, while cruisers might have minimal bodywork.
9. Stands and Convenience Parts
motorcycle kickstand and center stand
Kickstand and Center Stand
Side Stand (Kickstand) – supports the bike at an angle when parked.
Center Stand – lifts the rear wheel off the ground, useful for maintenance.
10. Safety and Comfort Accessories
Crash Protection
Engine Guards
Frame Sliders
Skid Plates
These protect the bike (and rider) in falls and off-road conditions.
Rider Comfort
Seat
Passenger Pegs
Windshield
Saddlebags / Luggage Racks
Comfort accessories make long rides and touring more enjoyable.
A motorcycle is not just about the engine and tires. It's a bunch of stuff like how it's built, how the engine works, the electrics, and how it fits you. If you know this basic knowledge about all the parts of a motorcycle, you can figure out what's wrong when things break. When you talk to your mechanic without sounding like a dummy, or do some repairs yourself, it will be easier and more convenient.
So, if you're just starting out or you've been fixing bikes for years, getting to know all the parts helps you ride safe, know what's going on, and feel good about your bike.
As a rider who has logged hundreds of thousands of kilometers on everything from daily commutes to multi-week tours, I can say one thing with absolute confidence: choosing the best motorcycle intercom for modular helmets is critical. Get it wrong, and it can quickly ruin your riding experience.
Modular (flip-up) helmets are incredibly versatile, but they create unique challenges for communication systems. Most “best motorcycle intercom” lists completely ignore these realities.
This 2026 guide is different.
This guide will help you:
Understand what truly matters in an intercom for modular helmets
Avoid common marketing traps
Choose the right system for your riding style
Spend your money once—and spend it right
Why Modular Helmets Need a Different Intercom
Before listing products, let’s address something many articles skip: Modular Helmets Create Unique Challenges
Compared to full-face helmets, modular helmets have:
More wind turbulence
A moving chin bar that affects microphone placement
Less consistent speaker positioning
Higher chance of microphone noise leakage
More complex shell geometry for clamp mounts. This means an intercom that works great on a full-face helmet may perform poorly on a modular helmet.
📌 What Modular Helmets Demand from an Intercom System
From experience, the best intercoms for modular helmets must excel in:
🎧 1. Effective Noise Cancellation
Modular helmets make more wind noise inside the ear area compared to full-face helmets.
A motorcycle intercom should effectively filter wind noise and vibrations caused by helmet movement.
📡 2. Stable Connectivity
Whether Bluetooth or Mesh, your intercom must stay connected at highway speeds without dropouts.
🗣 3. Clear Microphone Performance
Accurate mic pickup is crucial—especially in modular helmets where fast airflow can distort audio.
📶 4. Easy Controls with Gloves
A motorcycle intercom should have buttons and jog dials that are intuitive and easy to press while riding.
💪 5. Installation Compatibility
Clamps and mounts must not interfere with the flip mechanism of a modular helmet.
Keep these in mind as we go through the best options.
🏆Best Motorcycle Intercom for Modular Helmets(2026)
Feature / Model
FX8 Pro
FX7
FX10C
M1S Pro
FX-S
Technology
Bluetooth 5.0
Bluetooth 5.4 Mesh
Bluetooth 5.0 Mesh
Bluetooth 5.0
Bluetooth 5.4
Group Communication
Up to 8-10 riders
Up to 10 riders
Unlimited riders (10 mesh intercom channels)
Up to 10 riders
2 riders only
Intercom Range
~2000 m
~2000 m mesh
~2000 m mesh
~2000 m
~1000 m
Music + Intercom
Yes (wireless)
Yes (wireless)
Yes (wireless)
With cable
No
Music Share
Yes
Yes
Yes
Yes
No
Noise Reduction
CVC + ENC + DSP
CVC + ENC + DSP
CVC/ENC
CVC+ENC
CVC+ENC
FM Radio
Yes
Yes
Yes
No
No
Voice Commands
Yes
Yes
Yes
Yes
Yes
Waterproof
IP65
IP67
IP65
IP65
IP67
Estimated Battery Life
15h working time/300h standby
15h working time/300h standby
15h working time/200h standby
~15 hrs
~15 hrs
1. Fodsports FX8 Pro
If you want a capable intercom for a modular helmet without paying premium-brand prices, the Fodsports FX8 Pro is one of the most practical options on the market.
Dual Bluetooth Chip Design.
10 Riders Group Communication, 2000m Distance!
Optional HRSQ Mic and Speakers, CVC + ENC + DSP Noise Cancelation.
Listen to Music/GPS and Intercom At the Same Time.
IP67 Waterproof.
FM Radio, Music Sharing, Voice Commands.
1. Bluetooth 5.0 provides excellent connection stability
The FX8 Pro uses Bluetooth (not mesh), but the connection is stable and reliable for small to medium group rides. For modular-helmet users who usually ride with a few friends, this is more than enough.
2. Strong speaker volume that cuts through wind noise
The included speakers deliver good volume and clear mids, helping voices cut through wind noise better than many budget motorcycle intercoms.
3. Strong noise reduction for flip-up helmets
Built-in CVC+ENC+DSP noise cancellation helps reduce wind and engine noise, which is especially important when the chin bar is raised or partially open at high speeds.
4. Slim, helmet-friendly design
The main unit is relatively thin and lightweight, making it easier to install on modular helmets without interfering with the flip-up mechanism.
Real-World Riding Experience
I’ve used the FX8 Pro on long highway tours at sustained speeds above 110 km/h. Voice clarity remains usable even in moderate crosswinds—something cheaper intercoms fail at quickly.
Touring riders, small-to-medium group rides, and serious modular helmet users
2. Fodsports FX7
If you like the idea of mesh intercom performance (like premium systems) but want it at a friendlier price point, the Fodsports FX7 hits a great sweet spot — especially for modular-helmet riders who want group communication plus music and navigation features without spending a premium.
Bluetooth Mesh Intercom.
Dual Bluetooth Chip Design.
10 Riders Group Audio, 2000m Distance!
HRSQ Mic and Speakers, CVC + ENC + DSP Noise Cancelation.
Listen to Music/GPS and Intercom At the Same Time.
IP67 Waterproof.
FM Radio, Music Sharing, Voice Commands.
Unlike many systems that only do Bluetooth or limited point-to-point links, the FX7 uses mesh technology, so a group talk network stays stable even if someone moves around — great for club rides or touring with friends.
2. Dual Bluetooth chips for audio multitasking
One chip handles music/GPS/phone audio while the other manages intercom communications so you can enjoy navigation prompts and tunes without interrupting your group chat.
3. Clear sound & noise reduction
HIFI-quality 40 mm speakers plus CVC+ENC+DSP noise reduction help keep voices intelligible at road speeds — important when your modular helmet’s flip-up chin bar or wind noise kicks in.
4. Weatherproof and durable
An IP67 rating means the unit resists dust and water, so rain-soaked rides won’t knock it out mid-tour.
5. Extra riders will love
You get music sharing between two riders, FM radio, voice-command support, and a glove-friendly oversized control wheel — all nice to have during long trips without fiddling too much while on the move.
Real-World Riding Experience
In everyday use, the FX7 handles both solo and group riding well.
Many riders report it stays connected consistently in mesh groups, and music/GPS audio stays clear enough even at open-road speeds. Battery life around 15 hours suits full-day rides, and pairing with a phone for maps or calls is straightforward.
Pros
Excellent mesh features for the price
Reliable Bluetooth + intercom performance
IP67 waterproof and rugged
Music/GPS intercom multitasking
Supports up to ~10-rider connection
Cons
Audio loudness and speaker quality won’t match top-tier brands
Mesh performance is good but not quite as refined as premium units
Best For
Commuters, weekend riders, and group tourers who want true mesh intercom capability in a modular helmet without breaking the bank.
If you like the idea of mesh-style communication (more dynamic and robust than standard Bluetooth) but want a more affordable choice than premium brands, the Fodsports FX10C hits a great sweet spot for modular helmet riders who do group rides or longer tours.
Mesh Intercom, Bleutooth 5.0, 2000m Intercom Range.
10 Mesh Intercom Channels, Unlimited Connection Number.
Listen to Music/GPS and Talk with Other Riders At The Same Time.
High Quality sound, IP65 waterproof.
Music Sharing, Voice Commands, FM Radio.
Thanks to mesh intercom tech, the FX10C lets riders stay connected with an unlimited number of riders when everyone uses FX10C units — much better than traditional Bluetooth limits.
2. Great for modular helmets
Thin, lightweight design and glove-friendly buttons make it easy to install and operate on helmets with flip-up chin bars. Its noise-reduction tech and clear audio help ensure voices stay intelligible even when riding with the chin bar open at high speeds.
3. Simultaneous audio multitasking
You can listen to music or GPS navigation while using the intercom, so you’re not forced to choose between entertainment and communication on the road.
4. Robust battery & weather resistance
With around 15 hours of music/intercom time and an IP65 waterproof rating, the FX10C is suited for long distances and variable weather conditions.
Pros
Mesh network with unlimited rider connections — ideal for group rides.
Supports Bluetooth 5.0 for two-way intercom with other devices.
Listen to music & GPS while talking.
IP65 waterproof and solid battery life (~15 h).
FM radio and music sharing add fun on long trips.
Cons
The mesh range (~500 m–1 km) isn’t as strong as higher-end systems like premium dual-chip mesh units.
The feature set is basic compared to flagship mesh intercoms (no advanced group management).
Best for
Weekend riders, touring riders on a budget, and modular helmet users who want mesh group comms without a premium price tag.
The Fodsports M1S Pro is a proven Bluetooth intercom designed for riders who want dependable group communication without stepping into more advanced mesh systems. It focuses on stability, battery life, and clear audio — all essentials for longer rides.
M1S Pro Bluetooth Intercom Headsets
$89.99 $139.99
Code:
DJOW9
Limited Time Promo! Extra 10% Off Code! Save Now!
Support up to 10 Riders Group Talk, 2000 Meters Distance!
High Quality sound, IP65 waterproof.
Compatiable with Fodsports Connect APP
Let's Go!
The M1S Pro supports group communication for up to around 10 riders using Bluetooth pairing. It provides a straightforward and reliable way to stay connected during group rides without the complexity of mesh networking.
2. Clear voice communication with noise reduction
Built-in noise reduction helps keep conversations clear at cruising speeds, making it suitable for touring riding communication and highway riding communication where wind noise can otherwise be distracting.
3. Strong battery life for long rides
With long-lasting battery performance, the M1S Pro is well-suited for full-day rides and multi-stop touring without frequent recharging.
4. Stable and dependable connection
Rather than focusing on cutting-edge features, the M1S Pro prioritizes connection stability, which many riders value for consistent, no-hassle communication.
Real-World Riding Experience
In real-world use, the M1S Pro delivers a solid balance of performance and affordability. Riders appreciate its dependable range, clear voice quality, and battery life that comfortably supports long-distance rides. While it doesn’t offer mesh technology, its Bluetooth intercom remains reliable and easy to manage.
Using Bluetooth 5.4, the FX-S provides a stable and efficient connection between two riders, with an intercom range of up to approximately 1000 meters under ideal conditions.
2. Clear audio with professional noise reduction
CVC+ENC noise reduction helps keep voices clear, even when riding at moderate speeds or in windy conditions — especially helpful for modular helmets.
3. Built to handle the elements
An IP67 waterproof rating ensures reliable operation in rain, dust, and changing weather, making the FX-S a dependable choice for daily riding.
4. Simple and intuitive operation
With a focus on essential features, the FX-S is easy to set up and use, even for riders new to helmet intercom systems.
Real-World Riding Experience
On the road, the FX-S delivers strong “bang for the buck.” Riders find it ideal for two-person communication, whether commuting, riding with a partner, or taking weekend trips. Its clear audio and weather resistance provide confidence without the need for premium features.
Pros
Affordable Bluetooth 5.4 intercom
Stable two-rider connection with a good range
Clear voice quality with CVC+ENC noise reduction
IP67 waterproof and durable
Easy to use and install
Cons
Designed for two riders only
No music sharing or FM radio
Not intended for larger group rides
Best For
Casual riders, commuting couples, and new modular-helmet users who want simple, reliable two-rider communication with strong weather protection at a friendly price.
How to Choose the Right Intercom for Your Modular Helmet
1. Be Honest About Your Riding Style
Ask yourself:
Do I ride solo or in groups?
Passenger communication needed?
Highway speeds often?
Long tours or short commutes?
Mesh systems are incredible—but unnecessary for many riders.
2. Speaker Quality Matters More Than Features
On modular helmets, audio clarity beats feature lists. Poor speakers will frustrate you every ride.
3. Mounting System Is Critical
Avoid bulky clamps that interfere with the flip-up mechanism.
4. Microphone Placement Is Everything
Even the best intercom fails with poor mic positioning. Spend time here—it matters more on modular helmets than any other helmet type.
Common Mistakes Riders Make
Buying based on brand loyalty alone
Ignoring helmet compatibility
Overpaying for features they’ll never use
Underestimating wind noise challenges
I’ve made all of these mistakes, so you don’t have to.
💡 Tips for Installing Intercoms on Modular Helmets
Installing an intercom in a modular helmet requires care, especially with mic placement. Here are quick tips:
📌 Microphone Setup
Boom mics are best for modular helmets because you can position them close to your mouth, even when the chin bar is lifted.
Flexible microphones can work too if they are long enough to stay near your mouth when the helmet opens.
🎧 Speaker Placement
Place speakers slightly above ear level in helmet pockets.
Modular helmets may have unique speaker cutouts—adjust positioning until comfortable.
🔧 Installation Tips
Use the Velcro pads included with your intercom for secure speaker and unit mounting.
Route wires along helmet liners to avoid pinching when the chin bar moves.
❓ FAQ
Q: Can Fodsports intercoms pair with different models?
A: Yes, many Fodsports intercoms can pair together for Bluetooth communication, but mesh features may be limited across models.
Q: Can you listen to music and the intercom at the same time?
A: FX7, FX10C, and FX8 Pro support listening to music and intercom simultaneously wirelessly, while some models require a wired cable for audio multitasking.
Q: Are these units waterproof?
A: Most Fodsports units like FX7 and FX-S have an IP67 waterproof rating; others are IP65, making them safe for rain and touring conditions.
Fodsports
Q: What is the best motorcycle intercom for modular helmets in 2026?
A: The Fodsports FX8 Pro is the best all-around option thanks to strong audio output, stable Bluetooth, and excellent value.
Q: Are Fodsports intercoms good for highway riding?
A: Yes. Models like the FX8 Pro and M1-S Plus perform well at highway speeds when properly installed.
Q: Do modular helmets need louder intercoms?
A: Absolutely. Modular helmets generate more wind noise, so volume and noise reduction matter more.
Q: Can Fodsports intercoms connect to GPS and smartphones?
A: Yes. All modern Fodsports intercoms support smartphone pairing, GPS prompts, and music.
Q: Is mesh communication necessary for modular helmets?
A: Not for most riders. Bluetooth systems are sufficient unless you ride in large, constantly changing groups.
📊 Summary
A motorcycle intercom isn’t a gadget—it’s part of your riding safety, comfort, and enjoyment.
Whether you ride solo, with a partner, or in a group, there’s a Fodsports intercom system made for your style:
✔️ Best overall balance: FX8 Pro
✔️ Budget mesh option: FX7, FX10C
✔️ Reliable Bluetooth groups: M1S Pro
✔️ Two-rider & commuting: FX-S
These systems offer Bluetooth connectivity, noise reduction, and reliable intercom communication—essential for modular helmets that expose riders to more wind and noise than full-face helmets.
If you invest in quality, install it correctly, and choose based on how you actually ride—not marketing hype—you’ll wonder how you ever rode without one.
A motorcycle with fat tires is hard to miss. Its wide, muscular look commands attention, exuding a sense of power and confidence. But there’s more to fat tires than just their striking appearance. Beyond the visual appeal, they have a profound impact on how the bike handles, offering enhanced stability, comfort, and even improved stopping power in specific conditions.
In this article, we’ll break down the pros and cons of fat tires and explore which riders and bike styles benefit the most from these chunky rubber wheels. Ready to find out if fat tires are right for you? Let’s dive in!
What Are Fat Motorcycle Tires?
motorcycle with a flat tire
Fat motorcycle tires are simply much wider than typical motorcycle tires.
As a general rule:
A rear tire wider than 200 mm (about 8 inches) is considered a fat rear tire
Most street motorcycles use 140–180 mm rear tires
On cruisers and custom bikes, fat front tires in the 130–160 mm range are also common
The key characteristics of fat motorcycle tires include:
A larger contact patch, meaning more rubber touches the road
A flatter tread profile compared to standard tires
Increased weight and rotational inertia due to extra rubber and larger wheel rims
These features affect both handling and ride feel, making fat tires distinct from standard motorcycle tires.
Fat tires are popular on certain motorcycle styles because the extra width dramatically changes the bike’s stance and riding experience.
Harley-Davidson with a fat tire
Many Harley-Davidson cruisers—such as the Fat Boy, Fat Bob, and various custom choppers—come equipped with wide rear tires to match their strong engine torque and bold styling.
Bobber-style motorcycles also commonly use fat tires, often paired with wire-spoked wheels, to achieve a retro-custom look.
In addition, some dirt and trail bikes use fat tires to improve flotation on soft surfaces like sand, snow, and mud, helping the bike stay on top of the terrain instead of digging in.
In contrast to fat tires, standard motorcycle tires are narrower (often 150–180 mm rear on cruisers, even thinner on sportbikes) and have more rounded profiles. Standard tires are lighter, easier to lean, and better at cornering precision.
A normal-sized tire gives sharper turn-in, clearer feedback, and is generally better for twisting roads and technical riding. The trade-off is that a standard tire has a smaller contact patch, which can feel twitchier on bumps and offers less pure traction on very loose surfaces.
Fat tires exaggerate these differences. Compared to a standard tire, a fat rear tire will grip better under power and smooth out bumps more – but it will also make steering heavier and turn-in slower. In a straight line, a fat tire is often more stable than a stock tire. But in corners, especially at high lean, a standard tire can be much more agile.
Designers of modern cruisers or baggers often purpose-engineer their bikes for fat tires: they put powerful V-twins and heavy frames on wide wheels to maximize highway comfort and style.
By contrast, sportbikes and most dirt bikes use standard or narrow tires to optimize handling. When thinking of fat vs. standard tires, consider how you ride: if your priority is straight-line comfort and grip (and you don’t lean hard), fat tires may suit you. If you want light steering and corner precision, standard tires are better.
Advantages of Fat Tires
A fat tire can improve grip and traction
Riding with fat motorcycle tires offers several distinct benefits, especially in certain scenarios.
These advantages stem from the extra rubber, larger air volume, and wider shape of the tire:
1. Improved Grip and Traction
The enlarged contact patch of a fat rear tire provides greater traction on loose or uneven surfaces.
With more rubber on the ground, fat tires help powerful bikes send torque to the road without excessive spinning. This is especially useful when riding on gas (accelerating hard) or on slippery terrain: the wide tire is better at “biting” into gravel, sand or wet pavement.
Many riders install fat rear tires on V-twin cruisers because the low-RPM torque can otherwise cause a skinny tire to spin.
In practice, fat tires work well for casual cruiser riding, for riding in loose sand or snow on small dirt-bike-style machines, and even for light beach or trail riding where the tire can float over the surface.
2. Better Straight-Line Stability
A fat tire tends to make a motorcycle feel more planted and stable in a straight line.
The wide rear wheel acts like a long, flat rail that resists small perturbations, so the bike doesn’t feel twitchy over bumps at speed. This “smooth and steady” behavior is why many cruiser riders prefer fat tires on long highway trips.
In effect, the broad tire helps the bike track straight over irregular pavement, requiring fewer small steering corrections.
This stability is an asset for touring or relaxed riding on open roads.
3. Enhanced Comfort Over Bumps
Fat tires can act like additional suspension.
The larger tire volume and surface area cushion small shocks, so tiny bumps and road imperfections feel less harsh.
A fat tire flattens out small rocks and road joints that would otherwise jolt a rider on a rigid-frame cruiser or vintage bike. In other words, the tire itself does some of the shock absorption.
Riders often feel that a fat tire “smooths out” a rough road, making slow-speed riding or carrying a passenger more comfortable. This can be especially helpful on bikes without long-travel suspension.
4. Better Flotation on Soft Terrain
(Mostly for off-road/dirt-bikes.) Because fat tires have a larger volume and run at lower pressure, they can float on soft surfaces like sand or snow instead of digging in. This makes them great for beach riding, desert dunes, or snow trails – the bike rides on top of the sand rather than plowing through.
Many fat-tire dirt-bike kits advertise that the tires “hug the surface” so you don’t get stuck. The tradeoff is that the bike may feel sluggish, but on soft ground, the wide tire’s floatation is a clear advantage.
5. Increased Stability at Low Speed
The wide profile also improves low-speed balance.
Fat tires are very stable when the bike is almost upright, which can make new riders feel more confident.
Small dirt bikes with fat tires are often recommended for beginners: the short wheelbase, low seat height, and broad tires help a novice plant both feet firmly on the ground.
The fat tires “self-level” over small ruts or bumpy patches, so a new rider is less likely to be thrown off by an obstacle that would trip up a bike with skinny tires.
6. Bold Style and Visual Appeal
Aesthetically, fat tires give a mean, muscular look to a motorcycle.
Choppers and cruisers often use a huge rear wheel as the centerpiece of their design. Manufacturers even cite the “iconic fat tire style” as a selling point.
For riders who love the classic cruiser look, the thick wheel with a wide fender creates an unmistakably bold stance. In custom bike building, a fat rear tire is often the focal point that makes the bike look low and complete.
In short, fat tires can make a bike look custom, heavy-duty, and imposing, which many riders find appealing.
Disadvantages of Fat Tires
Fat tires cause slower, heavier steering
While fat tires have clear benefits, they also introduce notable drawbacks.
Many of these stem from the tire’s mass and shape, which affect handling and performance:
The primary downside is that wide, flat tires make the bike harder to lean and turn quickly. To initiate a lean, a rider must push harder on the bars and lean more over, because the fat tire resists rolling to the side.
In other words, corner entry feels “lazy” and sluggish: turns require more effort. On a twisty road or during quick direction changes, a fat-tire motorcycle will feel less nimble than a bike with standard tires.
Some Riders report that in tight S-curves or switchbacks, a fat bike demands extra muscle and can feel slow to respond.
Thus, if you enjoy aggressive cornering or fast sport riding, fat tires will blunt the bike’s handling. In city traffic with tight turns and U-turns, the sluggish steering can also be a nuisance.
2. Reduced Corner Feedback and Precision
A fat tire can obscure the “edge” of grip when cornering. Because the tread is broad and flat, it’s harder for a rider to sense how close the tire is to losing traction at high lean angles.
In practical terms, a fat-tire bike tends to “stay flat” longer under braking, and it may abruptly slide if pushed too far. This means the handling feel is less sharp: the rider gets less feedback on the limits of traction.
Cruisers may tolerate this because they rarely lean deeply in corners, but for sport-style riding, it’s a serious issue. The bike’s turning is less precise, so accuracy in a corner suffers.
Fat tires trade corner confidence for straight-line stability, and many riders feel the turn-in is “blunted” compared to a skinny, round profile tire.
3. More Weight and Rolling Resistance
Fat tires are heavier to spin up. Simply having more rubber and a larger wheel increases rotational mass and aerodynamic drag.
This extra weight means it takes more engine power to accelerate, and the bike’s engine (and brakes) must work harder to overcome the inertia of the heavy wheel.
On a big cruiser with lots of torque, this is usually fine – you may not notice. But on a smaller bike or one with limited power, you will feel the difference: acceleration and top speed can be slower.
Fuel economy might also drop slightly due to the added drag. Essentially, a fat-tire wheel is “work” for the bike’s drivetrain.
4. Higher Cost and Faster Tire Wear.
Fat tires and related motorcycle parts cost more. Specialty wide tires themselves are pricier than standard sizes, and because they are often softer compounds for grip, they tend to wear out faster if ridden hard.
There’s also a hefty cost to install them: converting a bike to accept a fat tire usually requires new rims, possibly a new swingarm or spacers, modified fenders, and different belt/chain alignment hardware.
Converting a bike can cost thousands of dollars. Even buying a stock bike that already has a fat rear, you often pay extra for the larger wheel option. The bottom line is that fat tires raise up-front costs and long-term maintenance bills.
5. Poor Performance in Rugged Off-Road or Technical Riding.
Although fat tires float well on soft sand or snow, they are actually not ideal for rough, rocky trails or deep ruts.
In deep ruts, a fat tire tends to “ride on top” and slide, instead of digging in and following the rut. The extra width can also make choosing a line difficult on narrow trail paths.
On loose, rocky, or root-covered surfaces, the wide tire can lose steering traction and feel vague. This is why purpose-built motocross and enduro bikes use tall, narrow knobbies – those tires can push through dirt, clear mud, and change direction quickly.
In contrast, a fat tire-equipped off-road bike would be best used slowly or on open sandy tracks; it is not suited to high-speed trail racing or tight mountain tracks.
In regions with poor road conditions, cracks, or uneven pavement, fat tires provide a smoother ride.
The extra rubber helps absorb small bumps and vibrations.
6. Beginner or Less Aggressive Riders
Some beginners feel more stable on fat-tire motorcycles at low speeds. The bike feels planted and less twitchy.
However, beginners should still practice proper handling techniques due to heavier steering.
Riders Who May Not Benefit From Fat Tires
Fat tires are not ideal for sportbike riders who enjoy fast cornering
While fat tires are ideal for many types of riders, there are some who may not find them the best choice.
Here are some riders who might not benefit as much from wide tires:
1. Sportbike Riders Who Enjoy Fast Cornering
Sportbike riders typically prioritize agility and quick handling.
Fat tires, while providing stability, can make the bike feel less responsive in tight corners.
The increased width may hinder the quick transitions and sharp turns that sportbike riders crave.
2. Riders Who Frequently Ride on Tight Mountain Roads
Riders who navigate narrow, winding mountain roads may find that fat tires are not the best match for these conditions.
The added width of the tires can make the bike feel slower to turn and harder to maneuver in tight spaces, reducing the overall handling performance on these twisty routes.
3. Daily Commuters in Heavy Traffic
For riders who regularly commute in urban or congested environments, fat tires may not be the best choice.
They tend to make the motorcycle feel heavier and less nimble, which can be a disadvantage when navigating through stop-and-go traffic or squeezing between vehicles.
4. Riders Who Prefer Lightweight and Agile Motorcycles
Fat tires generally add weight and bulk to a motorcycle, which may not appeal to riders who prefer lighter, more agile bikes.
If quick handling and ease of maneuvering are more important than comfort or style, riders may want to stick to standard-width tires for a more nimble experience.
5. Competitive Off-Road or Track Riders
For those who engage in competitive off-roading or track racing, fat tires may not provide the performance needed for high-speed, precision riding.
Standard-width tires offer better traction, cornering capabilities, and overall performance on smooth surfaces or off-road tracks.
These riders usually benefit more from standard-width tires with quicker handling and better corner feedback.
Motorcycles With Fat Rear Tires: Riding Tips
Riding a motorcycle with a fat rear tire feels different from riding a bike with standard tires. These tips will help you ride more safely and comfortably.
1. Use Smooth Throttle Input
Fat rear tires provide a strong grip, but sudden throttle changes can upset the bike’s balance.
Apply the throttle smoothly, especially when exiting corners.
Avoid aggressive or abrupt acceleration.
2. Allow More Time to Turn
Wide rear tires make the motorcycle slower to lean.
Begin your turns earlier than you would on a standard tire.
Avoid sharp, last-second steering inputs.
3. Reduce Corner Speed
Do not force the bike into deep lean angles.
Fat tires are designed for stability, not aggressive cornering.
Enter corners at a controlled and comfortable speed.
Underinflated tires can cause vague steering and faster wear.
Always follow the manufacturer’s recommended tire pressure.
7. Practice Low-Speed Maneuvers
U-turns and parking-lot riding require more effort with fat tires.
Practice slow-speed control regularly.
Use clutch control, rear brake, and smooth throttle to maintain balance.
8. Check Tire Wear Regularly
Fat rear tires may wear unevenly over time.
Inspect the tire frequently for wear or damage.
Replace the tire when traction begins to decrease.
What Should You Consider When Purchasing Fat Tires for Your Motorcycle?
Before choosing fat tires for your motorcycle, it is important to consider a few key factors to make sure they match your bike and riding style.
1. Bike Compatibility
Not all motorcycles are designed for fat tires. Check frame clearance, swingarm space, wheel size, and belt or chain alignment before buying.
2. Riding Style and Usage
Fat tires work best for cruising, straight-line riding, and relaxed use. If you ride aggressively, on twisty roads, or in heavy traffic, standard tires may be a better choice.
3. Handling Trade-Offs
Wide tires improve stability but reduce agility. Be prepared for heavier steering and slower corner response.
4. Cost and Maintenance
Fat tires are more expensive than standard tires and may wear faster. Conversion kits and installation can add a high cost.
5. Tire Size and Profile
Choose a size that balances appearance and performance. Extremely wide tires may look good, but can negatively affect handling.
6. Local Road and Weather Conditions
Consider the surfaces you ride on most. Fat tires perform well on rough roads and soft terrain but are less effective in technical or high-speed cornering.
Innovations and Trends in Motorcycles With Fat Tires (Up to 2026)
innovations and trends in motorcycles with fat tires
Fat motorcycle tires themselves are a mature idea, but recent years have seen some interesting developments:
1. Factory Integration
More manufacturers now offer fat tires as stock on certain models, rather than leaving it to custom shops.
For example, Harley-Davidson’s 2024–2025 lineup includes multiple Softail cruisers with 240 mm rears, and Indian’s Dark Horse series uses 180–200 mm tires. This means riders can buy new bikes designed for fat tires, with the correct frames and suspensions, rather than retrofitting.
The trend toward factory fat tires highlights their popularity in the cruiser/touring market.
2. Aftermarket Kits and Wheels
Companies like SMT Wheels, Vicious Cycle Works, and AllThingsChrome continue to supply bolt-on kits for fat tires (often called “big wheel kits”).
Innovations here include lighter wheels (for example, new alloy 18″ wheels that are lighter than older cast rims) and more complete kits that simplify installation. Some kits now allow fitment of up to 280–300 mm rear tires on various bikes.
Tire makers have improved compounds and constructions for fat tires.
Modern fat motorcycle tires can be tubeless with reinforced sidewalls, improving puncture resistance. Some now use stiffer belts or carcasses to handle the unique loads of a wide profile.
For adventure-oriented fat wheels, a few brands are experimenting with “GPS” (GripLimitFeedback) or variable construction to give a better feel despite the wide footprint (Michelin’s technology).
4. New Styles
A new wave of electric cruiser concepts (and e-bikes styled like motorcycles) often include fat tires for that classic look.
The lasting popularity of the retro/moto culture (inspired by shows like Sons of Anarchy) means fat tires remain a symbol of cruiser identity.
On the other hand, some performance bikes are pushing fat tires to new extremes for novelty – custom baggers with 300 mm slick rear tires, or extreme “fatty” front end kits stretching 23″ wheels.
These are niche but highlight the ongoing fascination.
5. Rider Electronics and Safety
One positive trend is that modern bikes with fat tires often add electronic aids to compensate.
For instance, Anti-lock Braking Systems (ABS) and traction control can help mitigate the potential for a fat tire to slide unexpectedly in a corner.
Onkyus of technology also leads to adjustable ride-height or steering damping on heavy cruisers, helping the rider manage the extra mass of fat wheels.
In summary, innovations around fat tires have focused on making them easier to integrate into bikes (lighter wheels, complete kits), safer (ABS, stiff sidewalls), and retaining their classic appeal.
As of 2026, fat tires remain largely a styling and comfort choice rather than a performance trend. But they have carved out a firm niche, with enough demand that new models and parts support them more than ever.
❓FAQ
🏍️1. Do fat tires make bikes slower?
Fat tires can make a motorcycle feel slower in certain situations, but not always.
Because fat tires are heavier and have more rolling resistance, they require more power to accelerate and change direction. On smaller or lower-powered motorcycles, this can reduce acceleration and top speed slightly.
However, on large-displacement cruisers with strong torque, the difference is often minimal. In straight-line cruising, most riders won’t notice a significant loss in speed.
🏙️2. Are fat tires good for city commuting?
Fat tires can work for relaxed city commuting, but they are not ideal for heavy traffic.
They handle rough pavement, potholes, and uneven roads well, providing good comfort and stability.
That said, fat tires make low-speed maneuvers harder. Tight U-turns, lane filtering, and stop-and-go traffic require more effort due to heavier steering. Riders who commute daily in dense urban traffic may prefer standard-width tires for easier handling.
🔧3. How often do fat tires need maintenance?
Fat tires require similar maintenance to standard motorcycle tires, but they may need closer monitoring.
Because of their width and softer compounds, fat rear tires can wear unevenly or wear out faster, especially during frequent straight-line riding or aggressive acceleration.
Regularly checking tire pressure, inspecting tread wear, and watching for flat spots is important. In general, expect slightly shorter tire life compared to standard tires, depending on riding style.
🛡️4. Can fat tires improve safety?
Fat tires can improve safety in certain conditions, but they are not universally safer.
They provide better straight-line stability, improved traction under acceleration, and more confidence on rough or loose surfaces like sand or uneven pavement.
However, in corners, fat tires offer less feedback and slower response. This can reduce confidence during aggressive riding or emergency maneuvers. Safety ultimately depends on riding style, environment, and proper technique rather than tire width alone.
💰5. Are fat tires more expensive?
Yes, fat tires are generally more expensive than standard motorcycle tires.
The tires themselves cost more, and they may wear faster depending on usage. In addition, motorcycles designed for fat tires often have larger wheels, which increases replacement costs.
If converting a bike, the total expense can be significant due to additional parts and labor.
🔩6. Can I convert my standard motorcycle to fat tires? What kits are available?
In many cases, yes—but conversion is not simple or cheap.
Most standard motorcycles are not designed to accept very wide tires. Conversions often require aftermarket wheels, spacers, swingarm modifications, new fenders, and belt or chain alignment changes.
Aftermarket “fat tire kits” or “big wheel kits” are available from custom motorcycle suppliers. These kits vary by bike model and tire size, with some allowing rear tires up to 240–300 mm. Professional installation is strongly recommended.
🎯7. Is a fat tire motorcycle easier to ride?
At low speeds and in straight lines, a fat tire motorcycle can feel easier and more stable.
Many riders feel more confident because the bike feels planted and less twitchy. This can benefit beginners or casual riders during relaxed cruising.
However, fat tires make steering heavier and cornering slower. For new riders, tight turns and parking-lot maneuvers may actually be more challenging than on a standard-tire motorcycle.
📏8. What is the 3% tire rule?
The 3% tire rule refers to keeping tire size changes within 3% of the original overall diameter.
This guideline helps maintain accurate speedometer readings, proper ABS and traction control function, and predictable handling.
When installing wider or taller tires, exceeding the 3% difference can negatively affect braking systems, electronics, and overall ride quality. Always check manufacturer recommendations before changing tire sizes.
Conclusion
Fat tires excel in providing stability, comfort, and a bold aesthetic, making them perfect for cruisers, beach riding, and long-distance trips. They offer a great grip on loose surfaces and smooth out rough roads. However, they can be sluggish in corners and challenging for aggressive riders or those navigating tight spaces.
Ultimately, fat tires are best for those who prioritize comfort, style, and straight-line stability over quick handling or precise cornering.
Learning how to load a motorcycle by yourself can feel intimidating at first, especially when using a truck or trailer.
Many riders worry about dropping the motorcycle, losing control on the ramp, or strapping it down incorrectly.
The good news is that with the right setup and technique, loading a motorcycle solo is a safe, repeatable process that doesn’t require brute strength—just preparation and patience.
Can One Person Load a Motorcycle Into a Truck or Trailer?
Yes, one person can load a motorcycle into a truck or trailer safely with the right ramp, proper setup, and controlled clutch use.
Whether you are loading a motorcycle into a pickup truck, utility trailer, or enclosed trailer, the core process is the same.
This guide explains how to load a motorcycle by yourself step by step, including ramp setup, riding or pushing the bike up, and securing it correctly.
Essential Gear to Load a Motorcycle by Yourself Safely
1. A truck or trailer with solid tie-down points
A pickup truck or motorcycle trailer with solid D-rings or bed loops is essential when loading a motorcycle by yourself.
2. A sturdy motorcycle ramp
The ramp should be long enough to keep the angle shallow and strong enough to support the full weight of your bike. It should also be wide enough to provide a stable surface for your feet if you lose momentum.
A longer, arched ramp is best, as it creates a gentler angle and eases the “breakover” when entering the vehicle. Tri-fold ramps or ramps over 10 feet long are good choices. Aluminum ramps with crossbars give tire traction.
3. Straps and tie-downs
Use four or more quality straps. Cam buckle straps with built-in soft ties are ideal. Straps should each have a safe working load of at least 500 lbs, and you should use them in opposing pairs (left/right, front/back).
4. A step or crate
A stoolbox or crate helps you step smoothly into the truck bed.
5. Wheel chock (optional but recommended)
A front-wheel chock can help secure the bike's front wheel and keep it straight while you tie it down. I consider a chock to be a minimum requirement for safety, especially on long trips. If you don't have a chock, you can wedge the front wheel against the corner of the truck bed for added stability.
6. Protective material
Rags or foam to cushion where straps rub painted surfaces. Also, gloves to protect hands from straps.
Step-by-Step: How to Load a Motorcycle by Yourself
This step-by-step guide shows exactly how to load a motorcycle by yourself into a truck or trailer, from setting up the ramp to tying the bike down and unloading safely.
Step 1: Choose the Right Loading Spot
Choose the right loading spot
Before touching the ramp, take a moment to pick the best location. If possible, use a dip in the pavement, a gutter, or any feature that lowers the truck bed relative to the ground. Reducing the step-in height and ramp angle dramatically lowers the difficulty.
If that’s not an option, a flat parking lot works — you’ll need to be a bit more deliberate.
Step 2: Secure the Ramp and Load the Motorcycle Into the Truck or Trailer
This step focuses on ramp safety and the correct technique to load a motorcycle by yourself without losing control.
Most solo loading accidents happen when the ramp shifts or loses traction.
1. Secure the Ramp
position the motorcycle ramp slightly to one side of the center
Once you've chosen the location, securely install the ramp. Always position the ramp slightly to one side of the center. This gives you room to stand and walk the bike in. Attach the top of the ramp to the truck bed or hitch with a strap to prevent it from slipping while you load the bike.
Most pickup trucks allow you to thread a strap through the hitch receiver or D-ring. If possible, also secure the bottom of the ramp to the ground (e.g., by attaching it to the truck’s bumper) to further prevent slipping.
Place a toolbox beside the ramp for easier access
Next, place the toolbox or crate on the ground just beside the ramp’s entrance. This will allow you to step onto it easily, without overreaching, and make it easier to push or ride the bike into the truck bed. If you have a second ramp for the truck’s bumper or a built-in tailgate step, feel free to use those as well.
At this point, double-check everything: the ramp is securely in place, your straps are ready, and the step is stable.
Traction mats or crossbars on the ramp are crucial for safety, so test the grip of the ramp before moving the bike.
2. Ride the Bike Up the Motorcycle Ramp
keep a finger on the front brake
This method allows one person to ride a motorcycle up a ramp and into a truck safely.
Before you begin, you should start the engine and hold the front brake. Align the bike with the ramp and leave it in second gear with the clutch out.
Aim for around 3,000–4,000 RPM to pull the bike up the ramp. Instead of using the throttle to control speed, you'll use the clutch lever.
Keep your eyes forward (avoid watching the front wheel) to help maintain balance. Gently release the front brake and let the throttle guide you slowly up the ramp.
Use the clutch to control speed
Key tips:
Hold the throttle around 3,000–4,000 RPM
Use the clutch to control speed
Keep a finger on the front brake at all times
Once the front wheel reaches the truck bed, step up smoothly while the bike is still rolling. If you need to pause, pull in the clutch, apply the front brake, step up, then continue riding the bike fully into the bed. Once inside, shut the engine off and put the bike on its side stand to prevent damage. Position the front wheel in a chock or against the corner of the bed to prevent rolling.
How to Push the Motorcycle Up (Safest Way)
If you have a helper, one person can guide the bike on the ramp while the other pushes it up. Stand perpendicular to the bike for better leverage, keeping it balanced as it climbs. If you're on your own, put the bike in neutral, use the step for leverage, and proceed slowly over the breakover point. Pushing the bike is the easiest and safest way to load your bike into your truck, but it often requires two people.
Step 3: Tie the Bike Down Correctly
1. Use Low and Wide Anchor Points
The best tie-down points are low and spread wide, pulling the bike down and forward for maximum stability.
2. Best Front Tie-Down Location
best front tie-down location
The most secure place to strap a motorcycle is around the fork tubes near the lower triple clamp. This area is extremely strong, but take care not to pinch brake lines or wiring when routing soft ties.
If the lower triple clamp isn’t accessible (common on fully faired sport bikes), you can strap the handlebars — but only with a tool like a Canyon Dancer, which prevents grips from twisting or bars from bending.
3. Proper Strapping Sequence
Leave the bike on the side stand.
Take up slack on the left front strap, but keep it fairly loose.
Move to the right side of the bike, pull it upright, and tighten the right front strap while compressing the front suspension.
As the bike comes upright, the forks should compress about halfway, and both straps should be tight.
The motorcycle fork should compress about halfway
Once secured, give the bike a firm shove. If either strap goes slack, tighten it further.
Some riders tie a simple slip-knot or pinch the cam buckle to prevent straps from loosening with vibration.
Avoid tying the bike down while it’s leaning on the side stand. This puts unnecessary stress on the stand and prevents the suspension from absorbing bumps during transport.
4. Rear Straps (Optional)
Rear tie-downs are not always necessary. In many cases, a solid front tie-down is sufficient, especially if you drive smoothly. However, rear tie-downs can be helpful if your front anchors are not low and wide enough.
Attach the straps to the rear subframe
To secure the rear, attach the straps to the rear subframe, passenger footpeg brackets, or the swingarm. Pull the bike forward toward the front of the truck—do not pull the rear backward, as this could reduce the weight on the front wheel. When tensioning the rear strap, compress the rear shock about halfway. Be careful not to overtighten—just enough to preload the suspension.
If you have a wheel chock, use it. A chock locks the wheel in place and provides an additional anchor point for extra security.
Step 4: Drive Carefully
Wrap up any excess strap so it can’t flap in the wind or scratch paint. Wherever a strap touches painted plastic or metal, slip a rag underneath. Over long miles, even soft straps can rub through paint or fairings.
Place a rag under the straps
During transport, drive smoothly and conservatively. A motorcycle adds significant weight and raises your vehicle’s center of gravity, increasing braking distances and reducing maneuverability.
Driving and Transport Tips
With the bike secured, hit the road carefully. Your vehicle now carries extra weight (often 200–400+ pounds) high up, which affects braking and handling. Drive gently, as if the road were slick. Avoid sudden accelerations, hard braking, or sharp turns. Leave extra following distance and be ready for crosswinds or sway.
It’s wise to stop after a few miles to re-check the tie-downs. Straps can stretch or slip slightly, especially when new. Check that ratchets haven’t vibrated open or cam-buckles haven't slipped. If you gently push the bike and a strap slackens, tighten it down again immediately.
If you have shock-absorbing straps, you’ll have an easier time: those keep tension even when bumps try to “push” the bike back into the straps.
Step 5: Unload the Motorcycle
Unloading is simply the reverse process — with gravity doing most of the work.
1. Remove the rear straps if used.
Unhook any rear tie-downs if you used them. On the front straps, start by loosening one side slowly (usually the right side first).
Pulling the bike to release the strap tension
With cam straps, pull the bike toward you to take tension off the strap, then release the buckle a bit. With ratchets, unlock and gently ease the strap.
Don’t release one side fully at once, or the bike will tip. Instead, go a little on one side, then the other, gradually leaning the bike onto its side stand.
2. Lower the side stand.
As the straps loosen, the bike will lean. Once it tips enough, carefully let it rest on the side stand (if it didn’t already).
If it doesn’t have a center stand and is heavy, do this slowly and watch for stability.
It’s normal for it to feel a bit “lifted” when upright, so use the stand and your body weight to stabilize it.
3. Exit gear.
Put the bike back in first gear (this acts as a rolling block when you move it). Turn off the ignition if you haven’t already.
4. Walk the bike down.
Stand behind the bike in the truck bed and pull it back slightly until it’s resting on the side stand. Use one or two fingers to cover the front brake lever (this will control the bike's speed) and keep the clutch lever pulled in. Slowly walk the bike down the ramp, using the front brake to control its speed.
Make sure the rear wheel stays aligned with the ramp
Move carefully—don’t rush. Keep your eyes ahead (not focused on the ground) and make sure the rear wheel stays aligned with the ramp. Two fingers on the brake should be enough, applying gentle pressure (around 1–2%) to prevent the bike from rushing down.
If the bike starts to ride the brake or jerk, use the clutch to engage some low engine braking, but the front brake alone is usually sufficient.
Use the front brake as your primary control
Modulate with the clutch if needed
Move slowly and stay aligned with the ramp
Once the bike is on the ground, you’re done.
Quick Summary: How to Load a Motorcycle by Yourself
Use a long, secured motorcycle ramp
Position the ramp slightly off-center
Control speed with the clutch, not the throttle
Compress the suspension halfway when strapping
Unload using the front brake
Additional Tips for Safe Loading and Unloading
1. Use a wheel chock if possible.
A simple chock locked or bolted in place will keep the bike’s front wheel straight and braced. Without one, you must watch the front tire; any side-to-side movement could shift the bike. Even a 2x4 at the front wheel (as one tip has done) is better than nothing.
2. Know your ramps’ limits.
Never exceed the weight rating of your ramp, and make sure it’s properly supported. Don’t use a ramp that has only minimal contact.
3. Protect the truck bed.
For added safety, place a bed extender or wood blocks under the front wheel to stop it from rolling during transit.
4. Watch out for slippery surfaces.
If your ramps or truck bed are wet or icy, loading becomes much harder. Clean them or wait for dry conditions.
5. Ask for help if unsure.
Nothing wrong with enlisting another pair of hands. One person can hold the bike, another walk it, or ride it up. Even a friend spotting can prevent a fall.
Frequently Asked Questions
Can one person load a motorcycle into a truck?
Yes. With a long, secured ramp and proper clutch control, one person can safely load a motorcycle into a truck or trailer without excessive strength.
Is it better to push or ride a motorcycle up a ramp?
Both methods work. Riding up the ramp offers more control when done correctly, while pushing is safer for beginners or heavier motorcycles.
What type of ramp is best for loading a motorcycle by yourself?
A long, arched motorcycle ramp with a high weight rating and secure attachment points is best. Longer ramps reduce the angle, improve traction, and make solo loading much safer.
Final Thoughts
Loading a motorcycle by yourself isn’t about muscle — it’s about preparation, balance, and using the bike’s suspension correctly. Take your time, set up your ramp and tie-downs carefully, and don’t rush the process. A few extra minutes of caution can save you from costly mistakes. Master this skill once, and you’ll never hesitate to haul your bike again.
Hey there, fellow riders! If you’re anything like me, winter isn’t a time to park your bike and hide indoors. Nope, it’s an opportunity to embrace the chill head-on—and that means gearing up smart. This week, we’re diving deep into the best motorcycle gear for winter riding: the essentials that keep you warm, safe, and comfortable when the temperatures drop and the wind bites. I’ll share some hands-on advice from countless cold-weather rides, seasoned tips, and gear I trust to make winter riding not just bearable, but downright enjoyable.
Winter riding is a unique beast. It's not just about gripping the handlebars while teeth chatter; it's about mastering the art of layering with purpose, balancing protection and insulation, and honestly, still looking cool while you freeze your tail off (or don’t). Whether you’re commuting, adventuring, or simply can’t imagine a bike-free winter, your gear choices make all the difference. So let’s get to it—because frostbite and chill-induced fatigue have no place in our riding stories.
What Makes Winter Motorcycle Gear Different?
Before we jump into specifics, it’s important to understand what distinguishes winter gear from regular motorcycle apparel. The main priorities are insulation, windproofing, and moisture management. You want materials that trap heat but also breathe well enough to avoid sweaty discomfort beneath your layers. And then there’s protection from the elements: cold rain, sleety snow, and icy gusts that can all hit you unexpectedly on the road.
Most riders underestimate the power of wind chill. Even a mild-looking 40°F day can feel like 25°F once you hit 60 mph. Without the right gear, your body temperature plummets faster than your thrills spike. This is why my winter lineup always centers on creating a windproof barrier combined with thermal insulation and waterproof layers.
The Core Winter Riding Essentials
Winter motorcycle gear list for warm and safe ride
1. Helmet: Your First Line of Defense
A high-quality full-face helmet is non-negotiable. Beyond basic protection, choose one with an effective seal around your neck to block drafts and a face shield that resists fogging. Trust me—I’ve learned the hard way how miserable a fogged-up visor can make a cold morning ride. Look for helmets with built-in breath deflectors and anti-fog coatings, or invest in a Pinlock system to keep your view crystal clear.
Bonus tip: wearing a thin balaclava or neck gaiter under your helmet dramatically cuts wind intrusion without bulk. It’s a must-have for me when dropping below freezing.
DOT and ECE 05 Approved Motorcycle Helmet
Full face helmet style
5 Colors and 4 Sizes Available
Transparent Windshield(standard), 3 Other Colors Optional
Optional Pinlock P70 Fog-resistant Lens.
Removable and Washable Lining
Here are some well-reviewed motorcycle helmets that work great for winter riding. They are equipped with features like anti-fog shields, good insulation, and wind protection — ideal for cold-weather motorcycling (based on recent gear reviews and winter helmet guides).
2. Jacket: The Perfect Balance of Warmth and Armor
A winter jacket is essential motorcycle gear to keep you warm
Winter jackets must excel at three things: warmth, waterproofing, and protection. I recommend investing in a technical textile shell with a removable thermal liner. Gore-Tex or similar membranes are fantastic for shedding water while allowing sweat to escape.
Inside the jacket, look for synthetic insulation—Primaloft is my go-to because it stays warm even when damp. Puffy down jackets might feel cozy off the bike, but can lose insulation power when wet. Also, ensure your jacket has a high collar and adjustable cuffs to stop chilly air from sneaking in.
Don’t forget armor—CE-certified shoulder and elbow pads are standard, but in winter, a back protector is equally crucial because the cold weather can impair your reflexes, increasing accident risk.
The following are some top-recommended winter motorcycle jackets in the market; some of them I have tried in the past. They can keep you warm, windproof, and weather-protected while riding in cold weather.
🧥 Premium & All-Weather Picks
REV'IT! Jacket Potential GTX – Gore-Tex, waterproof, detachable thermal liner and excellent protection — great for cold commuting or touring.
Dainese Tempest 3 D‑Dry Jacket – Highly rated for winter use with removable thermal liner and strong waterproof performance.
Dainese Carve Master 3 Gore‑Tex Jacket – Sport-touring kind with Gore-Tex + thermal liner — versatile for cold and wet rides.
🏍️ Mid-Range & Value Options
Scorpion EXO Optima Jacket – Great value pick with thermal liner and waterproof construction — ideal if you want warmth and protection without huge cost.
Klim Badlands Pro Jacket – Premium adventure jacket with excellent insulation and protection for long trips.
💨 Everyday & Commuter Choices
Alpinestars Nevada 2 Thermal Jacket – Soft-shell with windproof fleece lining — lighter but warm for cold city rides.
509 Allied Insulated Jacket – Insulated and waterproof option that’s practical for shorter cold rides.
Street & Steel Drifter Jacket – Stylish and warm textile jacket with solid protective reviews.
Wear gloves to protect your hands and fingers during winter motorcycle ride
Nothing kills the ride faster than numb fingers. Winter gloves are a science unto themselves. I prefer gloves with multiple insulation layers combined with waterproof breathable membranes. Gore-Tex-lined gloves excel here, providing that precious barrier against wind and moisture.
Look for gloves with long gauntlets that seal snugly under or over your jacket sleeves. Heated gloves or liners can be a game-changer if you regularly endure subzero rides. Just be sure to maintain good battery life or bring spares!
Now, I will recommend some top-recommended winter motorcycle gloves to keep your hands warm, dry, and protected in cold riding conditions.
🧤 Premium & Weather-Tough Picks
ALPINESTARS WT‑4 Gore‑Tex Gloves – Gore-Tex waterproofing and PrimaLoft insulation for cold, wet tour riding.
Alpinestars WR‑X Gore‑Tex Gloves – Highly rated winter option with breathable membrane and strong weather protection.
ALPINESTARS XT‑3 Drystar Insulated Gloves – Great balance of warmth and dexterity for all-weather riding.
💪 Mid-Range & Commuter Friendly
Dainese Tempest 2 D‑Dry Long Thermal Gloves – Thermal liner + waterproofing keeps hands warm on chilly rides.
KEMIMOTO Thermal Winter Motorcycle Gloves – Excellent value budget choice with touchscreen compatibility.
ROCKBROS Winter Motorcycle Gloves – Highly rated budget gloves with gel padding and knuckle protection.
🛡️ Other Solid Choices
Odin Mfg APEX D3O Waterproof Gloves – 3M Thinsulate and waterproof build for cold rides.
Thrashin Supply Siege Insulated Gauntlet Gloves – Stylish gauntlet gloves with 3M Thinsulate and good grip feel.
Winter pants should complement your jacket’s protective and waterproof capabilities. Options range from insulated riding pants to shell pants designed to be layered over base insulating layers. For me, a waterproof, windproof riding trouser worn over thermal leggings hits the sweet spot.
Think about mobility too—stiff materials can restrict movement, especially as you shift and lean. Look for pants with stretch panels or articulated knees to keep you comfortable on longer rides.
Here are some excellent winter motorcycle pants — built for cold-weather riding with insulation, waterproofing, and protection.
🏍️ Best All-Around Winter Riding Pants
509 R‑200 Insulated Bib Pants – Excellent insulation + removable liner; great for cold-weather touring.
Dainese Carve Master 3 Gore‑Tex Pants – Premium sport-touring pants with Gore-Tex waterproofing and thermal liner.
Alpinestars Andes v3 Drystar Pants – Great waterproof and breathable performance with ventilation — good year-round.
An often-overlooked area, cold feet can ruin a ride faster than frozen fingers. I swear by waterproof, insulated boots with a beefy sole for grip on slick surfaces. Leather boots with a waterproof membrane work well, but always check for insulation and comfort—your boots should feel warm without overheating during milder spells.
Pro tip: Adding chemical foot warmers on extra cold weather days has saved me from painful cold toes more than once.
There are some excellent winter motorcycle boots that riders recommend for cold-weather riding. These boots focus on waterproofing, insulation, protection, and comfort:
🥇 Top Picks for Cold & Wet Riding
Alpinestars Web Gore‑Tex Boots – Premium waterproof Gore-Tex protection and breathable comfort for long winter rides.
Alpinestars Toucan Gore‑Tex Boots – Highly rated touring boots with excellent waterproofing and protective build — great for year-round winter use.
🛡️ Reliable All-Weather & Protection Focused
ICON Stormhawk Boots – Rugged waterproof boots with D3O ankle protection and solid grip — ideal for commuting and touring.
TCX Hero 2 WP Boots – Waterproof and comfortable half-boot style with great value for colder rides.
Indie Ridge Waterproof Boots – Highly reviewed waterproof leather boots with excellent comfort and protection.
TCX Blend 2 WP Boots – Full-grain leather waterproof boots with good grip and reinforcement.
💸 Great Value & Everyday Riding
Alpinestars Waterproof V2 Ridge Boots – Waterproof sport-style boots that perform well in cold, wet conditions.
Forma Adventure Boots – Comfortable adventure-style boots with waterproof lining and solid protection.
Winter riding is all about smart layering, and what you wear beneath your gear is just as critical. Start with a moisture-wicking base layer made from merino wool or synthetic fibers—cotton is a rookie mistake here, as it keeps sweat next to your skin and chills you quickly.
Next, add an insulating mid-layer like a fleece or a lightweight down jacket, depending on the temperature. The key is breathability—you want to trap warmth without overheating or sweating excessively. I’ve found merino wool mid-layers strike this balance perfectly and don’t stink after a day’s ride.
Other Winter Motorcycle Gear Accessories That Make a Difference
Neck Warmers and Balaclavas: These protect vulnerable skin and seal off cold winds under your helmet.
Winter Socks: Thick wool or thermal socks prevent toes from freezing, but beware of bulky socks that can restrict circulation.
Heated Gear: Battery-powered heated vests, gloves, and insoles are fantastic tech upgrades for the coldest rides—I rely on a heated vest especially when temps dip below 20°F.
Windproof Layers: Windproof shells or cuffs can be lifesavers against the gusts that invade through typical gear.
Helmet Communication System: Helmet communication systems like the Fodsports FX7 keep you connected with your friends. They can also connect to your phone via Bluetooth, allowing you to listen to music, receive GPS navigation alerts, or make and receive calls. You no longer need to stop your car, take off your gloves in the freezing cold to make a call.
Bluetooth Mesh Intercom.
Dual Bluetooth Chip Design.
10 Riders Group Audio, 2000m Distance!
HRSQ Mic and Speakers, CVC + ENC + DSP Noise Cancelation.
Listen to Music/GPS and Intercom At the Same Time.
IP67 Waterproof.
FM Radio, Music Sharing, Voice Commands.
Years of winter riding taught me that even the best gear requires thoughtful use. For instance, early on, I avoided gloves with removable liners to save weight—but winter riding changed my mind completely. Being able to swap out a wet liner mid-ride or dry it overnight cuts down on chill and helps extend your gear’s lifespan.
Another hard-learned tip: layering isn’t about piling on bulk. You want freedom of movement paired with efficient insulation. A heavy, unbreathable jacket might feel warm at rest, but once you’re moving, it traps sweat and makes you cold later. I always adjust layers dynamically on trips—removing or adding mid-layers during fuel stops or breaks.
Last but not least, visibility is crucial in the darker months. Reflective strips and bright colors not only amp up your style but also actually save lives. I’ve had several close calls where being visible was my best defense against inattentive drivers.
FAQS
How to Dress for Cold Weather Motorcycle Riding?
For cold‑weather motorcycle riding, it is better to dress yourself in the following manner:
Layer your clothing — start with a moisture‑wicking thermal base layer, add an insulating mid‑layer, and finish with a windproof, waterproof outer jacket and pants designed for riding. This traps heat and lets you adjust to changing temps.
Wear a full‑face helmet plus a neck warmer or balaclava to block wind.
Use insulated gloves and warm, waterproof boots with good socks to protect hands and feet.
Consider heated gear (jackets, gloves) for extra warmth on long or very cold rides.
Dressing right helps you stay warm, safe, comfortable and maintain control in the cold.
Are Heated Motorcycle Gloves Worth Buying?
Yes—if you frequently ride in cold weather, heated motorcycle gloves are worth buying. First, they can actively warm your hands and fingers, helping you maintain flexibility, grip, and safety when temperatures drop. Heated gloves can also extend your riding season during colder months and reduce numbness that can slow reaction time.
However, they are more expensive than regular gloves and may require charging or cable management. They may not be a necessity if you rarely ride in cold conditions, but they are highly beneficial for those who frequently ride in winter.
Do You Need Different Gear for Riding A Motorcycle in Winter Than in Other Seasons?
Absolutely. Winter motorcycle gear is usually equipped with warm linings, waterproof fabrics, and incorporates windproof and insulating design elements. On the contrary, summer riding gear typically uses ventilation holes or designs that allow cold air and rain to seep in.
How to Choose the Right Motorcycle Apparel for Winter?
The biggest threat to winter riding is the low temperatures; therefore, you need to carefully select appropriate motorcycle gear. It's also important to understand that the gear you need will vary slightly depending on the type of riding activity.
If you're about to embark on a long highway ride, it's best to wear specialized clothing with high insulation. Because you'll be exposed to cold conditions for extended periods during long highway rides.
For strenuous exercise or off-road riding in winter, you can consider wearing lighter clothing. This is because your body temperature will rise as you exert yourself during these activities. However, you should still carry a thermal undershirt or waterproof clothing, so that you can wear it during rest breaks.
How to Cope with Cold Weather When Riding a Motorcycle?
To avoid getting cold while riding a motorcycle, it is necessary to take some warm measures:
01. Choose appropriate winter riding clothing: wearing multiple layers, such as highly insulating winter underwear, can effectively wick away sweat and keep you warm, significantly improving comfort.
02. Use appropriate warm gloves, waterproof winter boots, and accessories such as heated grips or mittens to effectively keep your hands and feet warm.
03. Don't forget to protect your neck and face with a balaclava and scarf, and consider using a full face helmet with an adjustable liner for an extra layer of protection.
Following these recommendations will make winter riding more comfortable and safer.
Wrapping It Up: Prepare, Ride, Enjoy
Winter motorcycle riding isn’t for everyone, but with the right winter motorcycle gear, it can be one of the most rewarding ways to connect with your machine and the road. You don’t have to sacrifice comfort or safety to embrace the colder months. The right helmet, jacket, gloves, pants, boots, and layers transform a frosty challenge into a thrilling adventure.
So this season, gear up wisely. Test your layers before the big ride, invest in quality pieces that balance warmth and protection, and don’t forget to have fun out there. Riding through winter’s frosty beauty is a unique joy, one I hope you experience safely and warmly.
Next week, we’ll tackle winter motorcycle maintenance tips to keep your bike running smoothly through the cold and ice. Until then, ride safe, keep warm, and share your stories—I’m always keen to hear how fellow riders brave the winter roads!
The 2026 Triumph Scrambler 900 feels immediately more controlled and confident than the outgoing model. Rather than a full reinvention, Triumph has focused on fixing the things that actually mattered.Below, I’ll break down what’s new for 2026, what remains familiar, and how the Scrambler 900 feels on the road.
Design and Styling
2026 Triumph Scrambler 900
At first glance, the 2026 Scrambler 900 still looks unmistakably like a Triumph, but spending time with the bike reveals a clear shift in attitude.
The classic Bonneville proportions are still there — upright stance, high-mounted exhausts, relaxed silhouette — yet the overall design feels tighter and more purposeful than before. The lines are sharper, the surfaces more defined, and the bike no longer leans as heavily into pure retro charm.
What stood out to me most was how the updated bodywork changes the bike’s visual weight. The slimmer front fender, more compact tail section, and squarer side panels give the Scrambler a more muscular presence, especially when viewed from the side.
The fuel tank, with its crisper edges and deeper knee cutouts, looks more sculpted and makes the bike feel visually closer to the larger Scrambler 1200 than the outgoing Street Scrambler.
Color choice also plays a big role in how modern the bike feels. In matte finishes such as Khaki Green paired with Phantom Black, the Scrambler takes on a rugged, almost utilitarian look that suits its scrambler intent well. Lighter options, such as Mineral Grey with contrasting accents, soften the bike’s appearance slightly, but still avoid the overly “cute” aesthetic of earlier models. In person, the paint quality and subtle detailing give the bike a premium feel without being flashy.
Mineral Grey / Cosmic Yellow
Matt Khaki Green / Matt Phantom Black
Urban Grey
From most angles, the design works very well. The upswept twin exhausts and piggyback rear shocks reinforce the scrambler identity, although they do expose some heat and visually dominate the right side of the bike. That said, the overall effect is cohesive: modern without being sterile, and classic without feeling dated.
Some longtime fans may miss the simpler, rounder lines of the older Street Scrambler, but to my eyes, the 2026 Scrambler 900 strikes a more confident balance between heritage and contemporary design.
The steel frame is mostly the same, but Triumph has added a new cast-aluminum swingarm and upgraded suspension.
Triumph Scrambler 900 suspension
The bike now uses 43mm Showa upside-down forks (non-adjustable, 120 mm travel) and piggyback reservoir rear shocks (120 mm travel). This modern fork and shock setup significantly improves rigidity and handling compared to the old 41mm conventional forks.
The new swingarm and lighter aluminum wheels together save about 2 kg (4.4 lb) over the previous model.
2. Braking and Wheels
front brake disc
The Scrambler 900 gains a bigger 320 mm front brake disc with a radial-mount 4-piston caliper (Brembo). The rear brake is a 255 mm disc with a 2-piston caliper. These stronger brakes deliver firmer, more confident stopping power than before.
The wire-spoke wheels are now aluminum (instead of steel) and carry Metzeler Tourance 100/90-19 front and 150/70-17 rear dual-purpose tires, which reduce unsprung and rotating mass for quicker handling.
3. Modern Electronics
Triumph Scrambler 900 dashboard
A key update is the all-new dashboard and rider aids. The bike replaces the single analog speedometer with a circular combo dial that incorporates an LCD tachometer and a 2.0-inch TFT display. This hybrid gauge can show speed, revs, gear position, riding mode, trip info and more.
a standard USB-C charging port
Standard USB-C charging is fitted, and there is an optional Bluetooth module for smartphone integration (turn-by-turn nav and phone/music controls). An accessory cruise control kit is also available. Importantly, the 2026 Scrambler now has lean-sensitive cornering ABS and traction control as standard, thanks to a new IMU (Inertial Measurement Unit).
Three ride modes of the Triumph Scrambler 900
There are three ride modes – Road, Rain, and Off-Road. In Off-Road mode, the throttle response is softened, and rear ABS is deactivated to allow controlled slides. Full LED lighting with signature DRLs is standard on all models.
4. Styling Tweaks
Visually, the 2026 model is sharper and more modern. The fuel tank has a more sculpted shape with a new filler cap.
The seat is now a two-piece design with a narrower front section. Fenders are shorter, and the tail section is more tapered.
Triumph Scrambler 900 headlight
Minor styling changes — like new aluminum headlight brackets, camouflaged throttle-body covers, and revised side panels — give the bike a “muscular aesthetic” closer in spirit to the larger Scrambler 1200. The 2026 Triumph Scrambler 900 still looks unmistakably like a Scrambler, but with a more contemporary edge.
5. Engine Stays the Same
Triumph Scrambler 900 engine
The heart of the bike, the 900cc parallel-twin (with 270° crank), is largely carried over. It still makes about 64.1 bhp at 7,250 rpm and 59 lb‑ft (80 Nm) of torque at 3,250 rpm.
This isn’t blockbuster horsepower, but the engine is tuned for strong low-to-midrange grunt and a broad, usable power delivery. Emissions have been updated to meet Euro5+, but peak numbers and feel remain much the same as before.
The six-hole silencers now include a bit more heat shielding, which slightly improves things. But heat buildup is still noticeable on your right leg at low speeds.
6. Dimensions and Ergonomics
Triumph Scrambler 900 seat
The seat height is about 790 mm (31.1 in), which is very low for a scrambler and helps shorter riders flat-foot easily. The new seat is narrower at the front, which also aids low-speed confidence.
With a slim tank and a broadly upright riding posture (wide handlebars, mid-set pegs), the Scrambler 900 feels accessible and friendly. Despite the extra equipment, wet weight is around 221 kg (487 lb), about on par with the previous model.
Riding Experience
On the road, the 2026 Scrambler 900 immediately feels like a bike you can relax on and enjoy. The torque-rich engine, lighter chassis, and upgraded suspension work together to make it feel nimble and engaging without ever being demanding. From low revs, acceleration is smooth and confident, so overtakes and merges happen effortlessly.
I found myself short-shifting most of the time for an easy, laid-back ride, but when you wind it out, the parallel twin still delivers a satisfying surge of power. It handles both styles equally well.
2026 Triumph Scrambler 900 riding experience
Handling is noticeably sharper than before. The USD forks and lighter wheels make turn-in feel quick and natural, and the bike tracks cleanly through corners. At low speeds—tight turns, U-turns, parking-lot maneuvers—it honestly feels almost comically light and obedient. You point it, and it simply goes. Once the pace picks up, the weight becomes more apparent, but it never feels cumbersome or resistant.
Riding it back-to-back with a Bonneville T100 really highlighted how much better the new suspension deals with broken pavement. The front end gives clearer feedback now, and as I pushed harder into corners, I felt more confident in the available grip.
Braking is another clear step forward. The first squeeze of the front lever makes it obvious that there’s more power on tap than before. It feels firmer and more reassuring than the old single-caliper setup, which gave me confidence to brake later when needed.
I did notice a slightly soft initial lever feel at first, but once loaded up, the stopping power is strong and predictable. Overall, the brakes finally feel like they match the engine’s lively character—you can scrub speed quickly and cleanly coming out of a corner.
Triumph Scrambler 900 on city streets
The electronics fade nicely into the background during everyday riding. I left the bike in Road mode most of the time and let it do its thing. The TFT display is clear, with large speed and gear indicators that are easy to glance at on the move. Compared to the old, tiny LCD, this setup is far more intuitive and genuinely useful.
The four-way switch on the left handlebar
Switching modes or adjusting settings via the four-way switch on the left handlebar is straightforward. It does take a moment to adjust to everything being fully digital, but the extra information makes it worthwhile.
Triumph Scrambler 900 on a rough road
I also took the Scrambler onto some light gravel and rougher back roads, where the off-road mode and updated chassis add a bit of extra confidence. It’s not pretending to be a serious dirt bike—the 19/17-inch wheels and limited suspension travel set clear boundaries—but it copes with uneven surfaces far better than the previous model.
The lean-sensitive traction control and off-road mode make it easier to manage small slides if the rear steps out. That said, this is still very much a road-focused machine, and that’s where it feels most at home.
Overall, the 2026 Scrambler 900 feels like a genuine improvement over the bike it replaces. Triumph’s claim that they’ve refined every aspect of the riding experience doesn’t feel like marketing fluff here. It still has that easygoing Bonneville character. The satisfying engine burble and upright, relaxed stance are all still there, but now everything works just that little bit better.
2026 Triumph Scrambler 900 Specifications
Core Specifications
Engine size
900cc
Engine type
Liquid-cooled, 8v, parallel twin
Max power
64.1bhp @ 7,250rpm
Max torque
59.1 lb ft @ 3,250rpm
Electronics
OC ABS, traction control, riding modes
Chassis, Suspension & Brakes
Front suspension
43mm Showa USD forks
Rear suspension
Twin shocks, adjustable preload
Front brake
320mm disc, radial 4-piston caliper
Rear brake
255mm disc, twin-piston caliper
Tyres
Metzeler Tourance (19"/17")
Dimensions & Performance
Seat height / Weight
790mm / 221kg
Fuel capacity
12 litres
Top speed / Range
120 mph / 186 miles
Pricing & Ownership
Price
From $12,395 (£10,395)
Availability
March 2026
Warranty
Two years
Video Review
Pros and Cons
Pros
Noticeably improved chassis, suspension, and brakes deliver a more planted, confident ride.
Torquey 900cc engine remains friendly, flexible, and full of character.
Modern electronics (cornering ABS/TC, ride modes, USB-C, full LED) add usability.
Low seat height and upright ergonomics keep it accessible to a wide range of riders.
Lighter wheels and chassis updates improve agility and overall balance.
Cons
Styling leans more aggressively and less purely vintage than before.
Still relatively heavy for a mid-size scrambler, and offers no wind protection.
Exhaust heat remains noticeable in slow or hot conditions.
Seat comfort and initial brake lever feel may disappoint some riders on longer journeys.
2026 Triumph Scrambler 900 – Rivals
Even though adventure motorcycles and those retro rides are still hot sellers, real scrambler-style bikes are still kinda rare. So, the Scrambler 900 chills in its own little spot. Most other bikes are either all about that retro look for the street or trying too hard to be adventure bikes.
Ducati Scrambler Icon
Even with the name, the Ducati Scrambler is more of a road bike than the Triumph. It doesn't have that old-school scrambler feel either.
Price and power-wise, the Icon is closest to the 900. It’s got a bit more oomph up top, but doesn’t have the low-down pull of the Triumph.
Ducati Scrambler Icon
Royal Enfield Bear 650
The Bear 650 is way cheaper than the Scrambler 900, but it's got some of the same vibes, mixing old-school looks with that scrambler stance.
Still, that air-cooled 650cc twin isn't as strong, so it’s more of a chill, less exciting ride.
Royal Enfield Bear 650
Conclusion
The 2026 Scrambler 900 doesn’t try to redefine what a Scrambler is. It simply does the job better than before. By keeping the character that made the bike approachable while addressing its long-standing weak points, Triumph has turned the Scrambler 900 into a more rounded and convincing motorcycle.
It remains easy to live with, easy to ride, and easy to enjoy, but now offers the control and confidence to match its looks. For riders who liked the idea of the Scrambler 900 but wanted something more composed on the road, the 2026 update finally delivers.
A motorcycle wrap is a vinyl skin applied to a motorcycle. It’s an easy way to change the look without repainting. The vinyl wrap is a durable, flexible material that can bend to fit curved surfaces. It is ideal for motorcycles with sharp angles and aggressive lines. It also comes in a wide range of colors, patterns, and finishes to suit different styles. Below, we’ll break down motorcycle wrap costs and the different vinyl wrap options.
Types of Motorcycle Wraps and Their Costs
When people talk about motorcycle wraps, they’re really talking about different finishes. The material is still vinyl, but the look, feel, and price can change a lot depending on what you choose.
Gloss wraps
Gloss wraps are the most straightforward option. It resembles factory paint—smooth, shiny, and clean.
They’re easy to maintain, last a long time, and usually sit at the lower end of the price range.
If you want something safe and classic, gloss is hard to go wrong with.
gloss motorcycle wraps
Matte wraps
Matte wraps give the bike that flat, stealthy look a lot of riders love.
They instantly make sharp lines and angles stand out.
The trade-off is that they show dirt and fingerprints more easily, so they need a bit more care.
matte motorcycle wraps
Satin (semi-gloss) wraps
Satin is kind of the middle ground between gloss and matte. It has a soft sheen, not fully shiny like gloss and not completely flat like matte.
Many riders pick satin when gloss feels too flashy, and matte feels too dull.
satin motorcycle wraps
Metallic and pearl wraps
These wraps add sparkle and depth when light hits the bike.
They look more “premium” than basic colors and really pop outdoors or under streetlights.
But these wraps usually cost a bit more due to the extra material and finish.
Metallic motorcycle wraps
Chrome wraps
Chrome is the loud one. It’s mirror-like and impossible to miss.
However, it’s expensive and doesn’t last as long as other finishes, which is why most people use it for small accent parts instead of wrapping the whole bike.
Carbon fiber vinyl has a textured weave that mimics real carbon.
It’s popular on sport bikes and performance builds, especially for tanks, fairings, or trim pieces where you want a more aggressive, race-inspired look.
carbon fiber motorcycle wraps
Custom printed wraps
If you want something totally unique—logos, patterns, camo, or full artwork—custom printed wraps are the way to go.
These are printed onto vinyl and priced by square foot, so the final cost depends on how complex the design is.
Custom printed motorcycle wraps
The table below breaks down these wrap types by appearance, cost, and lifespan so you can quickly compare your options.
Motorcycle Wrap Types
Appearance
Approx. Cost (per 5×10 ft roll)
Typical Lifespan
Notes
Gloss
High-shine, like paint
$159–$169
~3–7 years
Classic shiny look; easiest to clean and longest-lasting.
Matte
Flat, non-reflective
$159–$179
~3–5 years
Modern, stealthy finish; shows dirt more easily but very popular.
Satin (Semi-Gloss)
Subtle sheen between gloss/matte
(similar to matte/gloss pricing)
~3–5 years
Subdued shine; a balance of gloss and matte qualities.
Metallic/Pearl
Shimmering, sparkly
$169–$179
~3–5 years
Contains metal flakes; more depth and sparkle; costs more.
Chrome
Mirror-like reflective
≥$179
~1–3 years
Eye-catching mirror finish; least durable, tends to fade/peel sooner.
Carbon Fiber
3D textured weave
$179–$189
~3–5 years
Simulated carbon weave look; gives a sporty, tech appearance.
Custom Printed
Any graphic/design
~$15–$20 per sq.ft
~3–5 years
Fully custom artwork or photos; design time adds to cost.
How Much Vinyl Do I Need for a Motorcycle?
This is one of the most common questions riders ask before wrapping a bike. The honest answer is: it depends on the bike and how much you plan to wrap.
However, you can obtain a fairly accurate estimate with a few simple guidelines.
Small bikes and scooters: These usually need the least vinyl. If you’re wrapping most painted parts, around 15–20 square feet is often enough. Great for beginners or budget builds.
Sport bikes and naked bikes: With more fairings and sharper curves, you’ll want extra material. Most riders plan for 20–30 square feet for a full wrap.
Cruisers and touring bikes: Big tanks, wide panels, and saddlebags eat up vinyl fast. Expect to need 30–40+ square feet, especially on full dressers or baggers.
Partial wraps: If you’re only wrapping a tank, fenders, or a few panels, you can usually get away with 5–15 square feet, depending on the part size.
How Much Does It Cost to Wrap a Motorcycle
Coverage
Typical Cost (USD)
Fuel Tank only
~$100–$300
Single Fairing Panel
~$200–$600
Front/Rear Fenders
~$100–$300 (each)
Partial Wrap (e.g. tank + few parts)
~$300–$600
Full Wrap, Standard Vinyl
~$600–$1,500
Full Wrap, Premium Vinyl / Design
~$1,500–$3,000+
Full Wrap, Big Cruiser
~$2,500–$3,500
(All above include both materials and installation costs.)
Here’s a quick overview of what you might expect to spend when wrapping a motorcycle:
Partial wraps
Wrapping just the fuel tank or a few panels is cheaper, typically $100–$600, depending on the parts you cover. Partial wraps are a great way to refresh your bike without doing the whole thing.
Full Wraps
Standard vinyl usually costs $600–$1,500. If you choose premium materials or detailed designs, the total can rise to $1,500–$3,000+, especially on larger bikes.
For example, Harley full wraps often hit $2,500–$3,500 due to extra panels.
Next, we’ll dig into what affects the total wrap cost so you can understand exactly why some wraps are cheaper or more expensive.
Factors That Affect Motorcycle Wrap Cost
Several factors determine how much you’ll pay for a motorcycle wrap. Let’s break it down so you can see what really makes the price go up or down.
1. Size of Your Motorcycle
The bigger the bike, the more vinyl you need and the longer it takes to wrap.
Small bikes or scooters: Require less vinyl and less labor. Wrapping is quicker and cheaper.
Cruisers, touring bikes, and modern sport bikes: Often have complex curves, sharp edges, and multiple panels. That means more vinyl, more work, and a higher total cost.
2. Quality of Vinyl Wrap
Not all vinyl is created equal. The better the material, the higher the cost. But it also lasts longer and looks better over time.
Basic Vinyl Wrap ($500–$1,000)
Cheapest option; fades and peels faster
Lasts around 2–3 years
Suitable for budget-conscious riders or short-term projects
Standard / Mid-Grade Wrap ($1,500–$2,500)
More durable, lasting around 5–7 years
Good stretch and UV protection
Ideal for riders seeking a balance of cost, quality, and longevity
Premium / High-End Wrap ($2,500–$4,000+)
Available in premium designs, textures, finishes, and graphics
Provides maximum protection and a longer lifespan
More expensive, but delivers a unique and personalized look
3. Wrap Design and Finish Type
The style you pick also affects the price:
Single-color wraps: Cheapest.
Gloss finish: Smooth and shiny, generally the most affordable.
Matte finish: Trendy, modern look, slightly more expensive.
Metallic / Pearl: Adds sparkle and depth, costs more.
Chrome: Mirror-like, eye-catching, more costly and less durable.
Carbon fiber texture: 3D textured look, premium cost.
4. Labor and Shop Location
Where you get the wrap done matters a lot:
Big cities and high-cost-of-living areas usually charge more.
Skilled installers may cost more but deliver a smoother, longer-lasting finish.
Specialized motorcycle wrap shops often offer premium materials and a wide variety of designs, which increases the total cost.
5. Design Complexity and Graphics
Complex designs cost more:
Simple single-color wraps: Quick and cheaper to apply.
Multi-color or custom graphics: Take more time, skill, and materials, which increases both labor and overall cost.
6. DIY vs. Professional Installation
You can save money by doing it yourself, but there are trade-offs to consider.
Risks: Mistakes can waste vinyl; requires patience and practice
Professional Installation
Clean, flawless finish
Access to quality materials and professional tools
Faster turnaround and often includes a guarantee
Typical cost: $1,000–$3,000 for a full motorcycle wrap
Motorcycle Wrap Lifespan
With proper care, vinyl wraps last several years but not forever. Most high-quality wraps on bikes can stay looking great for 5–7 years. Premium cast vinyl (3M 2080, Avery SW900, etc.) often touts a 5–7 year warranty, and riders have reported 5+ years of use before fading begins. Some budget films may start to crack or fade after only 3–4 years, especially in harsh sun or on frequently handled parts.
Gloss and Satin: These are among the longest-lasting (similar to each other). Gloss wraps typically last 3–7 years; satin about 3–5 years.
Matte: Also about 3–5 years, but matte wraps require more careful cleaning (avoiding harsh chemicals and overheating) to keep the finish from “glossing out”.
Chrome: Most reflective chrome wraps last only 1–3 years at best before peeling or dulling.
Custom Prints/Metallic: Prints on cast vinyl also last roughly 5 years, assuming a top-brand film is used. Metallics (pearl, glitter) behave like gloss, ~3–5 years.
Motorcycle Wrap Maintenance Tips
Regular cleaning: Hand wash your wrap every 1–2 weeks with mild soap and water. Avoid abrasive brushes or strong chemicals (no acetone or ammonia). Rinse and dry gently.
Avoid UV and heat: Whenever possible, park in shade or indoors. UV light gradually breaks down vinyl. A UV-protective overlaminate or ceramic coating can extend life.
Touch-ups: Small nicks or lifting edges should be repaired quickly. Many vinyls have self-healing properties for light scratches (apply heat), but any peeled edges should be re-tucked or replaced to prevent further peeling.
Longevity factors: Top brands and expert installation significantly extend life. Proper surface prep (cleaning/degreasing) before application also ensures better adhesion and lifespan.
Over time, all wraps fade or peel eventually. When it’s time, the vinyl can be peeled off, often revealing “like-new” paint underneath. This preserves your bike’s paint and can even boost resale value.
Vinyl Wrapping vs. Painting: Pros & Cons
vinyl wrap vs. painting your motorcycle
Vinyl Wrapping
Pros:
Cost: Far cheaper than a high-end paint job. Full bike wraps run ~$600–$3,000, whereas quality paint jobs often exceed $2,500–$5,000.
Flexibility: Vinyl is removable. You can peel it off and return to the original paint (or re-wrap in a new design) without damage. This makes style changes easy and is great for preserving collector value.
Design options: Unlimited colors and textures. Complex graphics or color shifts are easy with vinyl; doing the same in paint is extremely difficult or impossible.
Protection: Wrap adds a sacrificial layer, protecting paint from UV, chips, and scratches.
Turnaround: Wraps can be done in days; paint jobs take much longer (days to weeks).
Cons:
Durability: Vinyl wrap is less durable than quality paint. It will eventually fade, peel, or scratch through, especially thin/chrome films. A paint job (especially multiple clear coats) can last a decade or longer if maintained.
Limited Texture/Finish: Some finishes (like real matte) require careful installation to avoid glossy spots. Deep color changes (like color-shifting or pearlescent effects) may look better in paint than in wrap, although vinyl can approximate many looks.
Skill Required: Both painting and wrapping require professional skill for the best results. However, shoddy wrap installation (bubbles, edges) is a common issue if done poorly.
Permanent vs Reversible: Paint is permanent. If you get tired of it, you must repaint it. Wraps offer a non-permanent option.
Motorcycle Painting
Pros:
Durability & Finish: A high-quality paint job (with primer and clear coat) can outlast a wrap, often 10+ years. It yields the most durable, uniform finish for flat or metallic colors.
Texture and Gloss: Paint achieves deeper gloss and richer effects. Textures like candy coats, pearls, or real matte finishes (via special clear coats) can look smoother than vinyl.
Traditional Look: Some riders prefer the classic painted look, especially on vintage bikes. For authenticity (e.g. stock colors), paint preserves original style.
Cons:
Cost: Painting is expensive. Even a basic solid paint starts around $1,000–$2,500, with custom multi-color work going much higher (often $3,000+).
Time: It takes weeks (prep, paint, cure), and you’re bike-less during this time.
Permanence: Changing a painted color means sanding and a full repaint. No “undo,” and resale can suffer if the new color isn’t popular.
Environmental Concerns: Paint booths require ventilation and have VOC emissions. Although low-VOC paints exist, they cost more.
Below is a quick summary comparison:
Feature
Vinyl Wrap
Paint Job
Cost
~$700–$1,500 (full bike)
~$2,000–$5,000+ (full bike)
Time
~1–3 days
~2–4 weeks (multi-stage)
Custom Designs
Extremely high flexibility
Limited (complex designs cost much more)
Removability
100% removable, no paint damage
Permanent (changing color needs repainting)
Protection
Protects original paint
Paint itself is the finish (no extra protection)
Durability
~5–7 years typical
10+ years (with good care)
Environmental
Low emissions (no spray)
VOCs (unless using special paints)
In practice, many riders use wraps for bold, experimental styles or when they want to protect the original paint, and use paint when they want a long-term classic finish.
How to Save Money on a Motorcycle Wrap
How to save money on a motorcycle wrap
Motorcycle Wrapping can be affordable if you plan wisely.
Here are money-saving strategies:
Go Partial: Only wrap the most visible parts (tank, side panels, top fairing) instead of the whole bike. Partial wraps can dramatically cut costs.
Simple Designs: Stick to one or two colors and minimal graphics. Intricate multi-color or custom prints add labor and design fees.
Basic Finishes: Choose standard gloss or matte vinyl. These are cheaper than specialty finishes like metallic flakes, carbon fiber texture, or chrome. (Remember, a flat matte or gloss still looks very attractive on a bike.)
DIY Small Jobs: Practice wrapping on a small part or a friend’s bike first. Learning proper technique lets you tackle parts yourself (like a tank wrap) to save some labor. If confident, you can purchase vinyl and tools and do easy sections on your own.
Off-Season Discounts: Motorcycle shops may be slower in winter. Try to book a wrap during off-peak months; you might score lower labor rates.
Accurate Measurements: Measure each panel carefully before ordering vinyl. Buying extra film goes to waste if it’s never used.
Get Multiple Quotes: Prices vary between shops. Contact several installers, compare prices, and include services. Choose the best balance of quality and cost.
FAQs
1. What is a motorcycle wrap and what are its main benefits?
A motorcycle wrap is a vinyl film applied over the bike's paint to customize its appearance and protect the original finish. Benefits include paint protection, UV resistance, reversible customization options, and enhanced aesthetics without permanent alteration.
2. How much does it typically cost to wrap a motorcycle professionally?
Professional full motorcycle wraps generally range from $1,500 to $3,500 or more. For example, wrapping a Harley-Davidson Street Glide typically costs between $2,500 and $3,500. Partial wraps can cost between $300 and $1,000, depending on coverage.
3. What factors influence the overall cost of wrapping a motorcycle?
Key factors affecting cost include the size and type of motorcycle (e.g., cruiser, sports bike), quality and type of vinyl chosen (standard vs premium or specialty finishes), design complexity or custom graphics, and whether the installation is done professionally or as a DIY project.
4. How do different vinyl types and specialty finishes impact motorcycle wrap pricing?
Standard cast vinyl is generally more affordable, while specialty finishes like matte, gloss, chrome, metallics, carbon fiber texture, and color-shifting films increase the price due to their unique visual effects and material properties.
5. Can I save money by wrapping my motorcycle myself, and what tools are needed?
DIY wrapping can reduce costs significantly with vinyl materials available for as low as $200. Essential tools include a heat gun for shaping the vinyl, squeegees for smoothing out air bubbles, and precision knives for trimming excess material.
6. Should I consider professional installation even though it costs more?
Yes. While it costs more, professional installation usually means a cleaner finish and a wrap that lasts longer—often 5–7 years. Pros also know how to apply and remove vinyl safely, which helps protect your paint and avoids the mistakes that often happen with DIY wraps.
7. Is wrapping a motorcycle cheaper than painting?
Yes. In most cases, wrapping a motorcycle is cheaper than painting. Wraps usually cost less upfront and are easier to change or remove, while paint jobs are more expensive and permanent.
8. How long will a wrap last on a motorcycle?
A motorcycle wrap typically lasts 3–7 years, depending on the vinyl quality, riding conditions, and how well it’s maintained. Premium vinyl lasts longer, while cheaper films may fade or peel sooner.
Final Thoughts
Wrapping a motorcycle is a simple, flexible way to change your bike’s look without the commitment of paint.
Whether you choose a full wrap or just a few key parts, there’s an option to fit almost any budget. Take your time, plan smart, and pick a style you actually enjoy riding with.
In the end, your bike should feel like it truly belongs to you.
The holidays are almost here, and if you’re hunting for the perfect Christmas gift for motorcyclists, you’re in the right place. Forget generic gifts that end up gathering dust — motorcyclists appreciate things that make their rides smoother, safer, or just plain more fun.
In this gift guide, I’ve put together thoughtful, practical, and sometimes playful ideas for motorcycle riders of every kind, from weekend cruisers to hardcore adventurers. You can pick something you know they’ll genuinely love and use. Let’s dive in and find the perfect gift that will make a motorcyclist’s holiday feel extra special.
Best Christmas Gifts for Motorcyclists (2025 Gift Guide)
Best Motorcycle Gifts for Everyday Riders
Riders genuinely value anything that makes their time on the bike smoother, safer, or simply more enjoyable.
Here are some thoughtful tech and accessory gifts that truly make a difference:
1. Motorcycle Intercom
If you want to give a motorcyclist something they’ll use every single ride, a Bluetooth intercom is honestly one of the best gifts you can pick — and Fodsports makes some of the most solid, reliable options out there. Their units (like the Fodsports M1S Pro or the FX7) are known for clear audio, stable connections, and really easy pairing, even for riders who aren’t tech-savvy. Some models, such as the FX30C Pro and FX60C Pro, also come with built-in cameras, letting riders capture video of their rides while staying connected with their group.
Whether your friend rides with buddies, listens to music on long trips, or wants GPS directions without fumbling with their phone, a Fodsports intercom makes everything smoother, safer, and more fun. It’s one of those gifts that feels thoughtful and genuinely useful — something they’ll appreciate every time they put on their helmet.
Fodsports M1S Pro Intercom headsets
$139.99 $89.99
Fodsports FX7 Bluetooth mesh intercom
$219.99 $129.99
Fodsports FX8 Pro motorcycle Bluetooth intercom
$179.99 $109.99
Fodsports FX30C PRO Bluetooth Camera Headset
$199.99 $129.99
2. Quad Lock Phone Mount
A rock-solid phone mount can keep the rider's phone right where it should be—secure, steady, and easy to glance at for GPS or music. The best mounts clamp tight, won’t shake loose on rough roads, and let you adjust the angle with one hand.
Quad Lock Phone Mount
It’s a simple upgrade that instantly makes every ride smoother, safer, and a lot more convenient. If you want a gift that gets real use on every single ride, this is it.
3. GPS Navigation
Even if a rider relies on their smartphone, a dedicated motorcycle GPS is a real game-changer. A GPS provides clear, easy-to-read directions at a glance, helps plan routes in advance, and keeps riders focused on the road without constantly pulling out a phone.
It’s especially handy on long trips or when exploring unfamiliar areas, giving confidence that they won’t get lost and can enjoy the ride more. A Fodsports GPS is a reliable choice that any rider would genuinely find useful and appreciate.
Many riders love capturing their journeys. An action camera lets them record high-speed rides, beautiful scenery, and epic moments. With built-in stabilization, the footage stays smooth even over bumps, and some cameras offer 360° recording or wide-angle modes to capture every perspective.
Riders can mount it on their helmet or bike and relive the adventure later. It’s a fun, practical gift that lets your friend make their own helmet-cam videos and share the thrill of the ride.
Action Camera
5. Portable Tire Inflator
A portable tire inflator is one of those little lifesavers every rider is grateful for sooner or later. Tires lose air, cold weather drops PSI, and surprises happen — having a tiny pump in the bag just takes away so much stress. A good compact inflator doesn’t take up much space, but it can bring a soft tire back to safe pressure in just a few minutes.
Portable Tire Inflator
Most modern ones even let you set your target PSI and stop automatically when they’re done, which makes things super easy on the road. Honestly, it’s the kind of gift I’d recommend to any rider I care about. It’s not flashy, but it’s incredibly reassuring — the sort of thing that turns a potential headache into a quick fix, and keeps a ride from being ruined.
6. Smart Battery Charger
When a bike sits for weeks or during the colder months, the battery slowly drains, and nothing feels worse than gearing up for that first spring ride only to hear click… click… nothing.
A good smart charger keeps that from happening. It gently charges the battery, then automatically switches to a maintenance mode so it stays healthy without ever overcharging. Most of them work with common motorcycle battery types, including AGM and gel, which makes things simple.
It’s a gift that quietly makes a rider’s life easier.
Smart Battery Charger
7. Tire Pressure Monitoring System (TPMS)
A TPMS is one of those gifts that riders don’t always think to buy for themselves, but once they have it, they wonder how they ever rode without it. It shows live tire pressure while riding, which can help prevent slow leaks, wobble-inducing low pressure, or uneven tire wear.
Tire Pressure Monitoring System
What I really like about a TPMS is the peace of mind it gives. No more crouching down every few days with a gauge, no guessing if the tires are a little soft — the numbers are right there. For someone who rides long distances or just likes to keep their bike in top shape, it’s a gift that feels genuinely caring.
It’s a small device, but it makes riding safer and a whole lot less stressful.
8. Power Bank / MagSafe Charger
A power bank is one of those small things that makes a big difference on long rides. Phones, intercoms, and GPS units — they all drain quicker than you expect, especially on cold days or when you’re using navigation. A compact power bank, or a MagSafe-style wireless charger for those who prefer snap-on convenience, keeps everything topped up without any stress.
Power Bank on a motorcycle
I’d genuinely recommend one to any rider. It doesn’t need to be fancy — just something sturdy, with enough capacity to recharge a phone a couple of times. Some power banks can even jump-start a bike, which is a huge bonus when you’re far from home.
It’s thoughtful, practical, and honestly just reassuring to have in your backpack. Riders can never have too much backup power, and this is one gift that always ends up getting used.
Safety Gifts for Motorcyclists
When it comes to riding, nothing matters more than staying safe, so giving safety gear is one of the most meaningful ways to show you care.
Here are a few thoughtful options:
9. Helmet
A helmet is the single most important piece of protection a rider owns, so giving one as a gift really shows how much you care about their safety and comfort. It’s something they’ll use every ride, and a good helmet can make a huge difference in how enjoyable the road feels.
If you want a solid, practical option, the Fodsports FS90 is honestly a nice choice. It’s a straightforward, comfortable helmet without any overcomplicated features, but it has a few thoughtful touches riders really appreciate — like built-in channels for glasses, space that helps prevent pressure from speakers, and overall padding that feels good even on long rides. It’s the kind of design that shows someone actually thought about real riders when making it.
You’ll still want to know their size and preferred style, but if you get that right, a helmet like this feels genuinely meaningful. It’s practical, personal, and something they’ll think of you every time they head out on the road.
10. LED Auxiliary Lights
If your friend rides at night or spends time on quiet backroads, a set of LED auxiliary lights is honestly one of the most caring gifts you can give. Good lights don’t just make the road brighter — they help the rider stay visible to everyone around them, which makes a huge difference in real-world safety.
A motorcycle with led auxiliary lights
What I like most about gifting lights like these is the message behind them. It’s a quiet way of saying, “I want you to see clearly, and I want others to see you.” And as a bonus, they give the bike a clean, upgraded look that most riders appreciate right away.
It’s practical, protective, and genuinely thoughtful — the kind of gift that helps them ride with more confidence, especially after the sun goes down.
11. Small First Aid Kit
It’s one of those gifts you hope they’ll never need, but you’ll be really glad they have if something happens.
A compact first aid kit is perfect for slipping into a backpack, tail bag, or tank bag — it doesn’t take up much room, but it covers all the basics: bandages, antiseptic wipes, gauze, tweezers, and a few extra essentials for small roadside scrapes.
Motorcycle with a small first aid kit
Most riders don’t think to carry one, but once they do, it becomes part of their must-have gear. It’s a simple gift, but a deeply thoughtful one. It quietly says, “I want you to be okay out there.” And for a motorcyclist, that message goes a long way.
Practical Gifts for Motorcycle Riders
Every rider eventually has those moments where their bike needs a bit of care, practical tools and maintenance gear always make thoughtful, truly useful gifts.
12. Roadside Tool Kit
roadside tool kit
A roadside tool kit is one of those gifts that doesn’t seem exciting at first glance, but it becomes priceless the moment something goes wrong. It’s not just about wrenches — a good kit usually has tire repair plugs, a bit of sealant, zip ties, electrical tape, and a few basic tools to handle the small surprises that happen out on the road.
You can buy a ready-made kit or put one together yourself, which makes it feel even more personal. And honestly, any rider who’s ever been stuck on the side of the road knows how much it matters to have the right tools within reach.
If I were recommending this to a friend, I’d probably say something like, “This isn’t the flashiest gift, but it’s the one you’ll be grateful for when you really need it.” It’s practical, thoughtful, and it gives a little extra confidence every time they head out for a ride.
13. Oil Change Kit for the Bike
If your motorcyclist likes doing their own maintenance, an oil change kit is one of those gifts that feels both practical and surprisingly thoughtful. Most kits include the essentials — the right type of oil, a quality oil filter, a drain pan, and sometimes even nitrile gloves or a funnel. It basically wraps up everything they need for a smooth, no-mess oil change in one tidy package.
oil change kit for the bike
For riders who wrench at home, this is gold. It saves them a trip to the shop, keeps their engine running happy, and honestly just makes life easier. You can even tailor it to their bike model so it feels personal and well-chosen.
14. Multi-Tool
A good multi-tool is one of those little lifesavers every rider ends up relying on. It’s basically a tiny toolbox you can keep in your pocket, and it comes in handy far more often than you’d expect. Whether it’s tightening a loose bolt, snipping a zip-tie, trimming a strap, or fixing some small issue on the side of the road, having one tool that does it all feels incredibly reassuring.
multi-tool for motorcycle
Most multi-tools include things like pliers, screwdrivers, scissors, a small blade, and other useful bits — the kind of tools you don’t think about until the moment you suddenly need them. And since they’re compact and tough, they fit easily into a jacket pocket, tank bag, or backpack without adding bulk.
15. Magnetic Pickup Tool
Even if you’re not familiar with motorcycle maintenance yourself, a magnetic pickup tool is one of those little tools that riders genuinely find useful. When they’re working on their bike, small screws and bolts sometimes slip into hard-to-reach places — and a magnetic pickup tool makes retrieving them so much easier.
magnetic pickup tool
It’s compact, inexpensive, and surprisingly thoughtful. Many riders already have basic tools, but not everyone has one of these, and it’s the kind of item they’ll appreciate every time they do a bit of DIY work on their bike.
It also makes a great stocking stuffer: small, practical, and something a rider might not think to buy for themselves, but will be happy to have when they need it.
16. Chain Adjuster Gauge
A chain adjuster gauge is such a small tool, but honestly, it makes a big difference when you’re working on a bike. Adjusting a chain is something every rider has to do sooner or later, and doing it by eye is… well, not fun. You’re squinting at the marks on the swingarm, trying to match both sides perfectly, and hoping the wheel ends up straight.
chain adjuster gauge
That’s why I really like this little tool — it just removes the guesswork. With a gauge, you can line up both sides precisely, and the rear wheel sits exactly where it should. The chain runs smoother, handling feels nicer, and you don’t get that uneven wear that comes from tiny alignment mistakes.
It’s not flashy or expensive, but it’s one of those things that quietly makes maintenance way less stressful. And the best part is that it gets used every single time a chain needs adjusting.
17. Universal Socket Tool
Honestly, this one always makes me smile a bit because it looks like a gimmick at first, but it’s actually pretty clever. A universal socket adjusts itself and grips different bolt sizes, so instead of digging through ten different sockets, you just grab this one and get on with it.
Universal Socket Tool
From my point of view, it’s the kind of tool you don’t think you need… until the exact moment you do. Especially on bikes — there’s always that one weird bolt that doesn’t match anything else. I like gifts that make someone’s life easier in small, unexpected ways, and this is one of those.
It might not be a “must-have,” but it’s a fun, thoughtful little gadget that genuinely comes in handy more often than people expect. Perfect for someone who’s always wrenching on their bike and appreciates smart, practical tools.
18. Motorcycle Cleaning Kit
If I were giving this as a gift, I’d choose it because it shows you actually pay attention to a rider’s life. Keeping a bike clean isn’t just about looks — it’s a small ritual that riders genuinely enjoy. It’s calming, it’s satisfying, and it feels good to take care of something you love.
Motorcycle Cleaning Kit
So from my own perspective, I’d pick a simple kit with things they’ll actually use: a gentle cleaner, a decent chain lube, a soft cloth, maybe a bit of spray wax. Nothing flashy — just tools that make their bike look cared for.
And honestly, the part I like most about this gift is the meaning behind it. It tells them, “I know you love your bike, and I want to make that little part of your routine easier and nicer.”
It’s practical, thoughtful, and every time they clean their bike, they’ll feel that someone understood them a little.
Gifts for Dirt Bike and Adventure Riders
Sometimes the most meaningful gifts aren’t the big, flashy ones — they’re the little upgrades that quietly make every ride feel smoother. When you’re thinking about ways to make someone’s time on the bike more comfortable, more convenient, or just a little less troublesome, the right accessories can genuinely change their day.
These are the kinds of gifts that slip naturally into everyday riding — thoughtful, practical touches that riders end up appreciating far more than they expect.
19. Nylon Bolts
Nylon Bolts
This is one of those tiny upgrades I didn’t really pay attention to at first — until I actually used them. And once I did, I realised how much unnecessary trouble metal bolts were causing. Nylon bolts don’t rust, they don’t seize up, and they’re perfect for fairings, windshields, and those little body panels that always seem to have one stubborn screw.
What I really like is how lightweight they are and how they handle small accidents. If the bike tips over, they usually flex or break cleanly instead of cracking the fairing — which saves money and frustration. And when we’re doing maintenance, we don’t have to fight with stuck or corroded hardware anymore.
It’s a small, inexpensive upgrade, but it really helps the bike feel well cared for and keeps maintenance simple and hassle-free.
20. Motorcycle Backpack
Motorcycle Backpack
A good motorcycle backpack isn’t just a bag — it’s a way to make every ride easier. Regular backpacks can slip, pull on your shoulders, or make your back sweaty, but a purpose-built motorcycle pack stays secure and balanced.
With waterproof compartments and thoughtful organization, it keeps gear, tools, or a jacket safe and accessible. It’s the kind of gift that riders actually reach for on every trip because it makes carrying stuff simple and stress-free. Small details like straps that hold the pack close to your body can turn a long ride from uncomfortable into smooth and manageable.
21. Rok Straps
Motorcycle Rok Straps
If your motorcyclist friend ever carries extra gear — groceries, a backpack, a tent, or even just an extra jacket — Rok Straps are honestly one of the most useful gifts you can give them. They’re like the smarter, safer upgrade to traditional bungee cords. No metal hooks that could scratch the bike, no sudden snapping, and none of that awkward stretching that always feels a bit risky.
What I really like about Rok Straps is how trustworthy they feel. Riders love them because they’re strong, adjustable, and incredibly reliable — but for me, the best part is the peace of mind. Once you tighten them down, whatever you’re carrying stays exactly where it should, whether it’s a short ride through town or a long trip on the highway.
It’s a small, simple gift, but it solves a surprisingly big problem. And honestly, it’s the kind of thing your friend will end up using far more often than they expect.
22. Quick-Clamp Universal Mount
Quick-Clamp Universal Mount
If you want to give a rider something that’s genuinely useful — and honestly, a little bit clever — a quick-clamp universal mount is a fantastic choice. It’s a strong, tool-free clamp that can grab onto handlebars, crash bars, luggage racks, or pretty much any round or square surface. The best part is how effortless it is: you just snap it on, tighten it by hand, and it’s ready to go.
What I personally like about this kind of mount is how reliable it feels. It holds a phone, action camera, GPS device — whatever you attach — with surprising stability, even on bumpy roads. Riders appreciate that sense of security, but what stands out to me is its versatility. It’s the sort of small piece of gear that quietly becomes indispensable.
It’s one of those things you don’t realize you need until you have it. And once you do, you end up using it for everything. It’s simple, sturdy, and perfect for anyone who likes switching setups or doesn’t want anything permanently bolted onto their bike.
23. Lock-On Grips
Lock-On Grips
Lock-on grips are one of those small upgrades that quietly make a big difference. Since they clamp securely to the handlebars, they never slip or twist — and that alone gives a rider a little extra confidence and comfort. They also come in different thicknesses and colors, so it’s easy to pick something that matches the rider’s style or makes their bike feel a bit more personal.
What I really like about giving grips as a gift is how practical yet thoughtful they are. A fresh pair of soft, comfortable grips can genuinely change how a bike feels on longer rides. It’s not an expensive upgrade, but it’s one riders appreciate every single time they head out. I could honestly say, “A nice pair of cushy grips makes every ride feel better — and if the color fits their bike, that’s just a bonus.”
24. Gift Card
gift card for motorcyclists
Sometimes the best gift is giving them a choice. Motorcycle gear and parts are very personal, and even experienced riders have strong preferences for brands and styles. A gift card to a popular retailer (like RevZilla, Cycle Gear, or even a local bike shop) lets them pick exactly what they need.
A store gift card means no worries about choosing the wrong size or model. In my experience, motorcyclists can be very particular about their gear — which is exactly why giving them the freedom to choose is such a smart move. A gift card essentially guarantees they’ll end up with something they truly want and will actually use.
You can personalize it by tucking it inside a card or a nice leather wallet (maybe even a fun one shaped like a tire or a helmet). And the best part? It fits perfectly inside a Christmas stocking, making it a thoughtful, practical, and rider-approved holiday gift.
25. Cashmere Sweater
Cashmere Sweater
A cashmere sweater might not be the first thing you think of for a motorcyclist, but it’s actually one of the most thoughtful gifts you can give. Riders spend a lot of time dealing with changing weather, and having something warm, lightweight, and incredibly comfortable makes a huge difference — both on and off the bike.
What I personally love about cashmere is how it feels: soft, warm, and never bulky. It layers perfectly under a riding jacket without restricting movement, and it keeps the rider warm without adding weight. And when the bike is parked for the day, it’s just a genuinely cozy piece of clothing they’ll reach for again and again.
It’s a practical gift wrapped in a bit of luxury — something that makes cold mornings easier, long rides more comfortable, and everyday life a little nicer. Thoughtful, useful, and quietly special.
26. Darn Tough Socks
It might seem a little funny to put socks on a motorcycle gift list — but honestly, a really good pair makes a bigger difference than most people realize. And Darn Tough socks are on a different level. Riders, hikers, and anyone who spends long hours on their feet swear by them for a reason. They’re warm, breathable, and moisture-wicking, and somehow they hold up for thousands of miles without wearing thin. The lifetime warranty still amazes me — it tells you everything about how well they’re made.
Darn Tough Socks
What I appreciate most is how perfect they are under riding boots. On cold mornings or during long touring days, having socks that keep your feet comfortable and dry can completely change how the ride feels. It’s one of those small things that quietly improves every mile.
It’s a cozy, practical gift that adds comfort to every ride — and every motorcyclist can appreciate that.
Unique Christmas Gifts for Bikers
Finally, here are some gifts that carry a bit more heart and character. They’re thoughtful, meaningful, and especially fitting for riders who appreciate not only the ride itself, but also the culture, camaraderie, and memories that come with being part of the motorcycle world.
27. Gift Certificate for DC Dirt Camp
DC Dirt Camp
If your rider friend loves adventure — or has always wanted to try off-road riding — a gift certificate for DC Dirt Camp is an unforgettable surprise. It’s not just a class; it’s a full hands-on experience where riders learn real dirt-bike skills like body positioning, throttle control, hill climbs, and low-speed balance. The instructors are patient and fun, and they tailor the training to any skill level, from total beginners to confident riders wanting to sharpen their technique.
It’s the kind of gift that creates memories instead of clutter. You can tell your friend, “I got you something way cooler than gear — a day to go play in the dirt.” Whether they’re curious about off-road riding or looking to level up their confidence on the street, this is one of those gifts that sticks with them long after the holiday lights fade.
28. Guardian Bell
This gift comes from a classic biker superstition that has turned into a really sweet tradition. A small metal bell — often with a simple motorcycle design — is hung from the bike to keep away “road gremlins” and bring good luck. The idea is that the bell only has meaning when it’s given by someone who cares about the rider, which is what makes it such a heartfelt gift.
guardian bell
What I like about this tradition is how something so small can carry so much warmth. When you give a rider a guardian bell, you’re really saying, “I want you to stay safe out there.” It’s inexpensive, it’s simple, but it’s symbolic in a way that a lot of motorcycle gifts aren’t.
You could even include a short note, something like: “Hang this on your bike — it’s said to protect you on the road. Ride safe.” It’s a small charm, but it means a lot.
29. Model Motorcycle Kits
model motorcycle kits
For the rider who enjoys tinkering, building, or collecting, a scale model motorcycle kit can be a really fun and thoughtful gift. These kits often come with detailed parts like working suspension, turning handlebars, and even tiny brakes, so you end up with a miniature, realistic version of a motorcycle.
What I love about this kind of gift is that it gives a rider a way to enjoy their passion indoors. Even if they already ride a bike like the one in the kit, building it piece by piece is a satisfying challenge and makes for a great conversation piece. It’s engaging, hands-on, and rewarding — and it’s the kind of gift that shows you thought about what they’d genuinely enjoy.
30. Key Organizer / Motorcycle Keychain
motorcycle keychain
Motorcycle keys can be surprisingly awkward to deal with — especially when there are multiple locks or a bunch of small accessories dangling from the ring. That’s why a simple key organizer can be such a thoughtful gift. It keeps everything tidy, quiet, and prevents the keys from scratching the bike’s tank or ignition area.
If you want something a bit more personal, a motorcycle-themed keychain or a well-made leather fob is a lovely choice too. It’s small, but it carries a lot of meaning. I like gifts like this because they’re used every single day, and they add a little comfort or personality to a rider’s routine.
🎁Quick FAQ for Motorcycle Gift Ideas
🏆Q: What are some top-rated gifts for motorcycle enthusiasts?
A: Helmets, LED auxiliary lights, Bluetooth intercoms, portable tire inflators, and multi-tools are all highly practical and frequently used gifts. Cozy items like cashmere sweaters and Darn Tough socks are also appreciated for comfort on rides.
🛒Q: Where can I buy popular motorcycle accessories as Christmas presents?
A: Retailers like RevZilla, Cycle Gear, or local motorcycle shops are great options. Online marketplaces also offer a wide range of gear, from maintenance tools to riding accessories.
🎨 Q: Where to find custom motorcycle gifts online?
A: Websites like Etsy and specialized motorcycle accessory stores offer custom items such as keychains, personalized grips, or unique model kits.
✨Q: What are unique Christmas gift ideas for someone who loves motorcycles?
A: Gift certificates for off-road courses like DC Dirt Camp, guardian bells, scale model motorcycle kits, and personalized key organizers are memorable and thoughtful options.
🧔Q: What is the best Christmas gift for a man?
A: Practical tools, gear upgrades, or adventure experiences like a riding course often make the most meaningful gifts.
👩Q: What is the best Christmas gift for a woman?
A: Safety gear, comfortable riding layers (like a cashmere sweater), stylish accessories, or thoughtful tools that simplify maintenance are excellent choices.
Conclusion
At the end of the day, the best gifts for riders aren’t just about gadgets or gear — they’re about thoughtfulness, care, and making someone’s time on the road safer and more enjoyable. Whether it’s a small tool that quietly saves the day, a cozy layer for cold rides, or a fun keepsake that sparks a smile, every gift tells a rider, “I get you, and I want you to enjoy every mile.”
So pick something that feels personal, useful, or just a little clever, and you’ll be giving more than a present — you’ll be giving peace of mind, comfort, and the joy of knowing someone really thought about them. No matter what you choose, your motorcyclist friend will appreciate it every time they hit the road. Here’s to making their rides smoother, safer, and a little brighter — one thoughtful gift at a time.
Wheel bearings may be small, but they have a big impact on how smoothly and safely your motorcycle rides. When they start to wear out, your bike will warn you—through noise, vibration, or unstable handling. Learning how to check and replace them is simple, and doing it early can prevent bigger problems on the road. This guide walks you through the key signs, tools, and steps every rider should know.
Understanding the Role of Motorcycle Wheel Bearings
Wheel bearings might be small, but they’re a huge part of how your motorcycle feels on the road. They sit inside the wheel hub and let the wheel spin smoothly around the axle without dragging or grinding. Inside each bearing are tiny steel balls or rollers. They glide inside a hardened metal ring, all sealed up to keep dirt and water out.
When your wheel bearings are in good shape, they:
Let the wheel spin freely and quietly
Keep the bike tracking straight, even under load
Maintain proper alignment between the wheel, axle, and brakes
Cut down on friction, heat, and unnecessary wear
When they start wearing out, you’ll feel it — steering gets vague, the bike may wander, and the wheel can create extra friction or heat.
Left unchecked, worn bearings can quickly turn into a real safety issue.
How Long Do Motorcycle Wheel Bearings Last?
Actually, there isn't a standard expiration date for motorcycle wheel brarings. Most motorcycle wheel bearings can hold up for about 10,000 to 20,000 miles under typical street riding. Some last far longer, while others wear out sooner — it really depends on your riding habits and the conditions your bike sees.
Factors Affect Motorcycle Wheel Bearing Lifespan
Several factors have a big influence on bearing life:
1. Where You Ride
Rain, mud, sand, or deep water can shorten a bearing’s lifespan.
Dusty off-road trails or using a pressure washer on the hub area can also push contaminants past the seals. Once dirt or moisture gets inside, wear accelerates quickly.
2. How You Ride
Carrying a passenger, loading up luggage, or riding long distances at higher speeds increases both load and heat to the wheel bearings.
Bearings cannot handle them well over time. Extra stress means a shorter service life.
3. Bearing Quality
Higher-quality bearings with well-designed seals usually last noticeably longer.
Cheaper, low-grade bearings may fit the bike, but they often don’t hold up as well in real-world use.
4. Maintenance Habits
Keeping the hub area clean, replacing damaged dust seals, and checking for wheel play during routine maintenance all help extend bearing life.
A few quick inspections throughout the year can prevent small issues from becoming major failures.
Common Signs of Worn Wheel Bearings
Before you start any inspection, let's know the typical motorcycle wheel bearings symptoms. These signs often appear while riding and can alert you to check the bearings as soon as possible.
1. Unusual noise:
A worn bearing may produce grinding, humming, growling, or clicking noises. These noises usually change with speed or when leaning into turns. They come from the wheel area and get louder as the bearing deteriorates.
2. Vibration or wobble:
If the bearings are failing, you may feel vibrations through the handlebars, footpegs, or frame. The front end may feel rough, unsteady, or “loose,” especially when holding the handlebars lightly at cruising speed.
3. Wheel play or looseness:
When the bike is stationary, you might feel movement in the wheel if the bearings are worn. Rocking the wheel by hand may produce a clunking sensation. Any lateral movement in the hub area is a red flag.
4. Handling problems:
The motorcycle may wander, drift, or fail to track straight. A worn front bearing can make the steering feel vague or unstable, especially when cornering.
5. Excessive heat or uneven wear:
In severe cases, a failing bearing can generate heat around the hub or brake disc. You may also notice uneven tire wear or a hub that feels unusually hot after riding.
If you observe any of these symptoms, inspect the wheel bearings without delay. Ignoring the signs can lead to sudden failure and a dangerous loss of control. The next section explains exactly how to do that.
How to Check Motorcycle Wheel Bearings
Before deciding to replace, first confirm the bearings are bad. A systematic check can save time and avoid unnecessary replacement.
Here’s a step-by-step approach.
1. Lift or Stabilize the Motorcycle
lift the motorcycle on a stand
Find a motorcycle wheel stand, place your motorcycle on the stand. The wheel must be able to spin freely.
For the front wheel: a front stand, center stand, or jack under the engine works.
For the rear wheel: use a paddock stand or the bike’s center stand.
You need the wheel to spin without touching the ground and the motorcycle must remain steady and balanced.
2. Spin the Wheel
spin the motorcycle wheel
Rotate the wheel with your hand and pay attention to these details:
Roughness: The wheel should not feel like it’s dragging or scraping.
Grinding sounds: Any metal-on-metal noise is a bad sign.
Uneven spinning: The wheel should turn at a consistent speed and without vibration.
A healthy wheel bearing should spin smoothly and quietly.
3. Perform the Push–Pull Test
This test helps you find out if the wheel moves from side to side on the axle. Any sideways movement usually means the bearing is worn out.
Grab the wheel firmly at 3 o’clock and 9 o’clock positions. Gently push with one hand and pull with the other.
Repeat the test holding the wheel at 12 o’clock and 6 o’clock.
You should not feel:
Any side-to-side movement
A clicking sensation
A knocking or tapping feeling
4. Check Movement at the Hub
Place one hand on the rim and the other on the hub. Push the wheel laterally.
If the hub remains solid but the rim moves, the bearing is likely failing.
This step helps distinguish bearing issues from loose axles or spacers.
5. Inspect the Dust Seals
Wheel bearings are protected by rubber seals that keep dirt and water out. Look closely at the rubber ring surrounding the bearing area.
Check for:
Cracks in the rubber
Tears or missing sections
Gaps where the seal is not sitting flush
Grease leaking out
Damaged seals allow dirt and water to enter the bearings and accelerate wear.
6. Rotate the Bearing Inner Race (Optional)
check the bearing inner race
If you have the wheel off the motorcycle, you can check the inner race — the metal ring inside the bearing — for smoothness and damage.
Safety first: wear gloves if the wheel or hub is sharp, and keep the wheel stable on a workbench or blocks so it cannot roll.
Locate the inner race: the inner race is the inner metal ring of the bearing where the axle normally sits.
Rotate by hand: insert a clean finger or a small blunt tool into the inner race and gently turn it a full revolution.
What to feel:
Smooth rotation with no resistance = healthy bearing.
Gritty, sandy, or rough feeling = bearing damage.
Notchy or catching points = pitted races or worn balls.
Sticky or uneven movement = contamination or corrosion.
What to do if damaged: if you feel any of the bad signs above, plan to replace the bearing — do not continue using it.
7. Check for Heat After a Ride
Heat can indicate friction inside a failing bearing. This quick check should be done carefully.
Short ride first: take the bike for a short ride (5–10 minutes) to bring parts up to operating temperature.
Park safely: stop the bike on level ground and turn the engine off. Allow the bike to settle for a minute so hot exhaust or engine heat does not confuse the check.
Careful touch test: using the back of your hand or a gloved finger, cautiously touch the hub area near each wheel bearing. Do not touch brake discs, pads, or exhaust surfaces.
Normal vs abnormal:
Slightly warm = normal.
Very hot or painfully hot = possible bearing overheating and should be inspected immediately.
Follow-up: if a hub is unusually hot, avoid riding further and remove the wheel for a detailed bearing inspection or seek professional help.
Tools Needed to Replace Motorcycle Wheel Bearings
tools needed to replace motorcycle wheel bearings
Before starting the bearing replacement, gather all the necessary tools and supplies. You’ll typically need:
Hammer and Drift/Punch: A heavy hammer and a sturdy steel punch or drift to knock the old bearings out of the wheel hub.
Wooden Blocks: Solid blocks of wood to support the wheel off the work surface. Wood under the rim or hub absorbs hammer blows and protects the wheel edges.
Flat-Blade Screwdriver: To pry out old dust seals covering the bearings.
Circlip/Snap-Ring Pliers: Many bikes use a circlip to retain the bearings. Use circlip pliers to remove any retaining ring.
Bearing Driver or Socket: A bearing driver set or a large socket that matches the bearing’s outer diameter. This lets you install new bearings by tapping on the outer race.
Heat Gun or Torch (Optional): Warming the wheel hub with a heat gun or torch can expand the metal slightly, making it easier to seat new bearings.
Freezer (Optional): Placing new bearings in the freezer causes them to contract slightly. Installing chilled bearings into a (warm) hub is often easier.
Grease: Fresh, high-quality wheel-bearing grease to pack any open bearings and lubricate new bearings if not pre-greased.
Safety Gear: At minimum, wear safety glasses when hammering or working with springs. The process can throw up metal shavings or cause snap rings to fly out, so eye protection is important.
Service Manual: Always have your motorcycle’s service manual or guide on hand to follow the correct procedure and torque specs for your specific bike.
How to Replace Wheel Bearings
Replacing wheel bearings involves removing the old bearings from the wheel hub and installing new ones. Follow these steps carefully, referring to your bike’s manual if available.
Step 1: Remove the Wheel
place the motorcycle wheel on wooden blocks
First, fully remove the wheel from the motorcycle according to the service manual.
This usually means loosening and removing the axle nut, sliding out the axle, and taking off the brake caliper (and brake disc, if needed) and any sprocket or cush drive components on the rear.
Place the wheel on wooden blocks so that the rim is supported and the hub faces are accessible.
Step 2: Remove Dust Seals and Circlips
remove dust seals
Examine the sides of the wheel hub. Most wheels have thin dust seals over the bearings.
Use a flat-head screwdriver or seal puller to pry off each seal carefully.
Under those seals, check for a circlip or snap ring. Some bikes (like the ZX-6R) use a circlip to hold a bearing in place.
If you find a circlip, use circlip pliers to remove it and set it aside safely. Keep any spacers in order as you remove parts.
Step 3: Drift Out the First Bearing
drift out the first bearing
With seals and clips removed, you can now drive the bearing out.
Place the wheel on the blocks with one side up. Use a long drift or punch that contacts the inner race of the bottom bearing (the side facing down on the blocks).
Strike the drift firmly with a hammer. Instead of hammering straight down on the bearing, rock the drift around in a circle, tapping each quadrant of the bearing in turn.
This “walking” technique helps ease the bearing out evenly.
Eventually the inner race of the bearing (and usually the spacer behind it) will drop out of the wheel hub.
Step 4: Drift Out the Other Bearing
Flip the wheel over and repeat the process for the second bearing on the other side. Make sure the wheel is well supported before doing this.
Use blocks so that the hub face sits above the table. Drive the second bearing out in the same way.
Both bearings should come free, possibly along with any hub spacer.
Tip: If a bearing’s inner race has collapsed and you can’t get a drift behind it, some mechanics feed a spindle or rod through the hub to push out the bearing shell from behind. Warming the hub slightly with a hot air gun can also expand the metal and help release stubborn bearings.
Step 5: Clean the Hub
Once the old bearings are out, thoroughly clean the bearing seats (the machined holes in the hub).
Use a clean cloth, soapy water, and a brush if needed to remove old grease, dirt, and corrosion.
Inspect the hub for any damage or gouges; small scratches can be smoothed with fine sandpaper, but deep damage may require wheel repair or replacement.
Also clean out any debris from the seal grooves and circlip slot. Dry the hub completely.
Step 6: Prepare New Bearings
Before installing, check that you have the correct replacement bearings and seals.
It’s best to use sealed (greased) bearings designed for your motorcycle. If they are open bearings, pack them with fresh grease now.
Optionally, warm the hub with a heat gun and/or cool the new bearings in the freezer to aid installation.
The goal is to have the hub slightly larger and the bearings slightly smaller by a few thousandths of an inch.
Step 7: Install the First New Bearing
install the first new bearing
Place one new bearing flat onto the hub from the top side (outer race against the hub lip).
Position the wheel so that the lip or shoulder (if any) on that side of the hub is on top to determine depth.
Use a bearing driver tool or a properly sized socket that only contacts the outer race of the bearing. Gently tap the bearing evenly into the hub, working around its circumference with a hammer.
Do not hit the inner race, as that can damage the bearing. You can place a wooden block on the bearing and hammer the wood for cushion.
Continue until the bearing is fully seated and flush with the hub face.
Step 8: Install Any Spacer and Second Bearing
If your wheel had a spacer (or a circlip), install it now. Then place the second new bearing on the opposite side of the hub.
Use the same tapping method with a driver or socket on the outer race to seat this bearing straight and square. (If your wheel uses a circlip on one side, install that circlip before driving in the bearing on that side.)
Make sure both bearings are fully in place and at the correct depth.
Step 9: Press in New Seals
press in new seals
After bearings are installed, push the new rubber dust seals into the hub so they cover each bearing.
You can tap the edges of the seal with the block of wood or a seal driver.
Ensure the seals are flush and even to keep dirt out of the bearings.
Step 10: Reassemble the Wheel
Reinstall any spacers, the sprocket carrier (for rear wheels), and the brake disc onto the hub.
Slide the axle back through the wheel and forks or swingarm.
Refit the brake caliper(s) and torque all fasteners (axle nut, caliper bolts, etc.) to the manufacturer’s specification.
It’s important to follow the correct torque and alignment steps from your manual.
Once reassembled, spin the wheel by hand again: it should turn freely without binding, and there should be no play in the hub. Now the wheel is ready to go back on the bike for final assembly and testing.
Safety Tips
Secure the Bike: Always work on the bike in a stable position. Use a center stand, paddock stand, or jack stands so the wheel is completely off the ground and the bike cannot fall. Never rely on just a jack or one side alone.
Protect Yourself: Wear safety glasses and work gloves. During bearing removal, circlips and metal bits can fly. Hands can get pinched by sharp edges. Closed-toe shoes are recommended in case tools or wheels drop.
Use the Right Tools: Use tools designed for the job. A socket that only presses on the bearing’s outer race is safer than hammering directly on metal. Never pry on the wrong part or use a screwdriver to force bearings (except carefully lifting seals). Damaging the hub can ruin the wheel.
Don’t Overheat: If using a torch or heat gun, heat slowly and don’t let the hub get red-hot. Excessive heat can damage wheel paint or nearby components of your motorcycle. A moderate temperature (around 175°F) is usually sufficient to aid installation.
Follow the Manual: Refer to your motorcycle’s manual or reliable guides. Some bikes have specific procedures (e.g., factory spacers, torque values, or circlip use). A generic guide helps, but always adapt to your model.
Check and Double-Check: After reinstallation, verify that seals sit fully and wheels spin smoothly. Torque all nuts and bolts to spec. Go for a short test ride in a safe area to confirm there are no noises or play.
Tips to Extend Wheel Bearing Life
Keep Bearings Clean and Lubricated: Although many wheel bearings are sealed, keeping rims and hubs clean helps. Avoid blasting the hubs with a high-pressure washer or steam cleaner; this can blow grease out of partially sealed bearings. After cleaning a rim, wipe off any water and reapply a light coat of grease if you had exposed any open bearings.
Avoid Deep Water and Rough Riding: Bearings have seals, but deep water or high-pressure water can sneak past them. Riding through flooded roads or frequent off-road riding can introduce water and dirt that shorten bearing life. If you must ride in rain or muddy conditions, inspect the bearings more often.
Inspect Regularly: The owner’s manual for many street bikes recommends checking wheel bearings every ~7,500 miles. If you often ride in wet or dusty conditions, check them even sooner. Early detection of wear means simpler maintenance.
Use Quality Parts: When replacing, use good-quality bearings (standard or cerametallic if specified). Cheap bearings may fail prematurely. Ensure new bearings have intact seals.
Repack and Grease When Possible: On bikes with open (non-sealed) bearings, pack them with fresh NLGI-grade grease regularly. Bennetts BikeSocial suggests keeping open-cage bearings “packed with grease” during maintenance. Products like corrosion-resistant grease can also help protect the balls and races from moisture.
Check Wheel Seals: Damaged or missing dust seals will let contaminants in. Replace any torn seals during bearing service. Clean and relubricate the hub before fitting new seals.
❓ FAQ
1. How often should motorcycle wheel bearings be replaced?
Motorcycle wheel bearings don’t have a strict expiration date, but most of them hold up for about 20,000 to 10,000 miles under typical street riding.
2. How do I know if my motorcycle wheel bearings are bad?
Common signs include unusual grinding, humming, or clicking noises from the wheels, vibrations through the handlebars or footpegs, wobble or play when rocking the wheel by hand, and handling that feels vague or unstable. Excessive heat near the hub after riding can also indicate worn bearings.
3. Can I ride with a bad wheel bearing?
It’s not recommended. Riding with worn bearings can make the bike unstable, cause uneven tire wear, and in severe cases lead to sudden failure — a serious safety risk. Replace damaged bearings as soon as possible.
4. Can I replace wheel bearings myself?
Yes, with the right tools, a clean workspace, and your motorcycle’s service manual, you can replace wheel bearings at home. Follow proper safety precautions and make sure you understand each step, especially bearing removal, installation, and torquing fasteners to spec.
5. How often should I check my wheel bearings?
For most street motorcycles, checking wheel bearings every 7,500–10,000 miles is a good rule of thumb. Off-road or adventure bikes should be inspected more frequently, especially after wet or dusty rides. Always check immediately if you notice noise, wobble, or unusual heat.
6. What tools are required to replace motorcycle wheel bearings safely?
Key tools include a hammer and drift/punch, bearing driver or socket, wooden blocks to support the wheel, circlip/snap-ring pliers if needed, a flat-blade screwdriver for dust seals, high-quality grease, and proper safety gear like gloves and eye protection. A service manual for your specific bike is highly recommended.
7. Can I use generic wheel bearings for my motorcycle, or do I need brand-specific ones?
High-quality generic bearings can work on many bikes, but it’s best to follow your manufacturer’s recommendation. Proper size, load rating, and seal type are critical. Using the wrong bearing can lead to premature wear or unsafe handling, so always double-check compatibility.
8. How much does it cost to replace wheel bearings on a motorcycle?
If you take your motorcycle to a mechanic to have the wheel bearings replaced, you can expect to pay roughly $300–$400, with the exact price depending on the shop, the bike model, and your area. However, if you choose to do the replacement yourself, the cost drops significantly—usually only about $15–$40 for the parts.
9. Can you use WD-40 on wheel bearings?
WD-40 is a very poor option for lubricating wheel bearings, and anti-seize isn’t much better. Compared to a quality bearing grease, neither provides adequate wear protection.
Conclusion
Good wheel bearings keep your motorcycle safe, smooth, and predictable. With a quick inspection routine and proper replacement when needed, you prevent bigger problems before they start. Take a few minutes to check them regularly—your bike will handle better, last longer, and keep every ride worry-free.
A dope motorcycle jacket isn't only for show—it's super important for safety when you're riding. The right one can save you if you crash, protect your skin if you slide, and keep you comfy no matter the weather. Whether you ride every day, take long trips, or have fun on weekends, picking the right style, material, and fit can really make riding safer and way more fun. This guide will tell you about the different kinds of motorcycle jackets, what they're made of, and how to find the perfect fit for you and your riding style.
A motorcycle jacket provides protection.
Types of Motorcycle Jackets
Type
Key Characteristics
Best For
Main Trade-Off
Riding Shirt
Casual look with hidden reinforcement and optional armor.
City riding, commuters
Much lower crash protection
Mesh Jacket
Large airflow panels with basic armor coverage.
Hot climates, summer riding
Weaker abrasion resistance
Full-Textile Jacket
All-weather capability with liners and vents.
All-season riders, touring
Heavier and bulkier than mesh
Leather (Casual)
Classic look with strong abrasion resistance.
General street use, style-focused riders
Hot in warm weather, not waterproof
Leather (Sport/Race)
Tight fit with high-performance armor and shaping.
Sport riding, track days
Stiff and uncomfortable off the bike
Cruiser / Touring / ADV
Relaxed fit (cruiser) or long-cut, high-storage design (touring/ADV).
Long-distance and mixed-weather riding
It can be bulky and less stylish
Riding Shirt
motorcycle riding shirt
A casual-looking option with hidden reinforcement. Good for city riders who want comfort and style but still need basic protection.
Looks like flannel, denim, or a hoodie
Often includes Kevlar panels and pockets for optional armor
Very breathable and comfortable
Much lower slide protection than real motorcycle jackets
Not suitable for high-speed crashes
Mesh Jacket
motorcycle mesh jacket
Designed for maximum airflow in hot weather while still offering essential protection.
Made from strong open-weave mesh
Solid shoulder/elbow zones reinforced with textile or leather
Usually includes CE armor
Excellent airflow for summer riding
Not waterproof and offers little wind protection
Full-Textile Jacket
motorcycle full-textile jacket
A versatile, all-season option with strong weather protection and good abrasion resistance.
Made from materials like Cordura® or ballistic nylon
Often includes waterproof/breathable membranes (e.g., Gore-Tex®)
Many come with removable thermal liners
Good vents for summer and insulation for winter
Performs well in rain and cold
High-quality textile can rival leather in abrasion resistance
Leather Jacket
Classic motorcycle gear known for top-tier slide protection and a premium feel.
Leather jackets come in two main types.
Casual/“Biker” Style
casual moto leather jacket
Relaxed, stylish, and comfortable for everyday riding.
Iconic look (cruiser, cafe racer, vintage)
Roomier fit for comfort and layering
May include vents or perforation
Great aesthetics on and off the bike
It can get hot and is not waterproof
Sport/Race Style
sport leather jacket
Performance-oriented gear for aggressive riders and track days.
Snug, aerodynamic fit
Pre-curved sleeves for sportbike posture
Hard plastic/metal armor on shoulders and elbows
May include back “speed hump”
Best high-speed protection
Less comfortable and less ventilated for casual use
High-density cotton fabric coated with wax for a classic look and water resistance.
Stylish vintage appearance
Naturally wind-resistant
Softens and molds over time
Not fully waterproof
Needs periodic re-waxing
Lower abrasion resistance than leather
SuperFabric
Advanced textile reinforced with tiny armored plates for extreme abrasion resistance.
Very high durability
Often stronger than textile and some leathers
Ideal for high-wear zones
Expensive material
Used only on panels, not full jackets
Can feel slightly stiff
Choose the Right Fit: American, European, or Race
From left to right: American, European, and Racing fits.
American (Regular/Touring) fit
Built for comfort and room to move, especially for touring and everyday riding.
Roomy in the waist, chest, and arms
Works well with extra layers underneath
Comfortable even when fully zipped
Sometimes labeled “Classic” or “Comfort” cut
European (Slim/Sport) fit
A closer, tapered cut for a sleek look and better aerodynamics.
Slimmer waist and sleeves
Reduces fabric flapping at speed
Ideal for sport riders and café racers
Best if you don’t plan to layer much underneath
Racing fit
Designed for aggressive riding positions and track use.
Very snug, body-hugging cut
Strong pre-curved arms for full tuck
Shorter back to match race posture
Sleeves often optimized for gauntlet gloves and leathers
Consider Your Body Shape & Riding Style
Fit also depends on your proportions and how you ride.
Tall riders (≈6'1"+): Look for “tall/long” sizes so sleeves and torso don’t ride up.
Hem placement: Should sit near your belt when standing and still cover your lower back when leaning forward.
Broad chest/shoulders: American cuts or sizing up often provide better comfort.
Slim riders: European fits help avoid excess fabric and keep the jacket from feeling baggy.
How to Choose a Motorcycle Jacket
1. Pick a purpose: all-season or specialized gear.
Decide whether you want one do-it-all jacket or multiple jackets for different temperatures and weather.
2. Choose your weather protection.
Select between waterproof shells, fixed waterproof liners, or removable liners—based on whether you ride in rain, heat, or both.
3. Decide on material: leather or textile.
Leather offers great abrasion resistance but limited weather range; textiles provide versatility, waterproofing, and easier temperature control.
4. Select the cut and coverage.
Choose waist-length for sportier feel or three-quarter length for more protection against wind and rain.
5. Consider airflow and temperature control.
Pick mesh for hot climates or solid textile with vents for mixed conditions. Add liners or mid-layers for cold rides.
6. Think about color and practicality.
Lighter colors stay cooler in the sun; darker colors hide dirt but run hotter.
7. Choose the fit style: American, European, or Race.
American fit: roomier, more relaxed.
European fit: slimmer, more tailored.
Race fit: tight, pre-curved, body-hugging.
8. Measure your size accurately.
Use a soft tape to measure chest, waist, and arm length—ideally with someone’s help.
9. Try the jacket on and check riding fit.
10. Confirm comfort and mobility.
Final Tips
Use the size chart. Brands fit differently—measure, don’t guess.
Think about layers. Leave room if you ride in cold weather.
Test mobility. Sit, reach, twist. The jacket should move with you.
Inspect features. Check zippers, vents, and liners for smooth operation.
How to Find Your Jacket Size
Every brand is different, so always use the manufacturer’s size chart. But to get started, you’ll need a few body measurements (best done with a friend and a soft tape measure):
Chest
Measure around the fullest part of your chest, just below the armpits. Keep the tape level and breathe normally—don’t puff out your chest. This is the most important measurement for jacket sizing.
Sleeve / Arm Length
Brands use two common methods:
Shoulder to wrist: From the top of your shoulder to your wrist (results usually in the 20–25″ range).
Spine to wrist: From the base of your neck, across the shoulder, and down to your wrist (usually around 30–35″).
Check which method the brand uses and measure accordingly.
Waist
Wrap the tape around your waist about 1″ above your belly button (where you normally wear pants).
Note:Jacket waist measurements are often a bit larger than pant sizes, so don’t be surprised if the number doesn’t match your jeans size.
Once you have these measurements, compare them to the sizing chart for the jacket you like.
Remember: one brand’s “Large” can fit like another’s “Medium.” If you’re between sizes or a jacket runs “small,” size up.
Many jackets offer adjusters on cuffs and waist so you can fine-tune the fit.
Check for proper fit
The best test is putting the jacket on and sitting on your bike. Move your arms, reach for the bars, and see how it feels. The sleeves should come all the way down to your wrists, and the shoulders should allow a normal range of motion.
A snug jacket is good – if it’s loose, the armor can shift out of place in a crash.
A tight jacket that you can’t zip up or that digs into your armpits or shoulders is too small.
❓ FAQ
1. How long does a motorcycle jacket last?
Typically 5–10 years, depending on:
Material quality
Weather exposure
Maintenance
Leather lasts longer with proper care.
2. Differences between textile and leather motorcycle jackets for fit
Leather jackets usually have a more snug, body-hugging fit because leather protects best when it’s close to the body—especially for sport or cafe-racer styles. They break in over time and mold to your shape, but they offer less adjustability.
Textile jackets tend to have a more relaxed, flexible fit with more adjustment straps (waist, arms, cuffs). They’re easier to layer under, better for touring or ADV riding, and work well for a wider range of body types.
3. Is 600D polyester good for motorcycle riding?
Yes, 600D polyester is generally good for motorcycle riding, especially for entry-level to mid-range textile motorcycle jackets and motorcycle pants. It offers decent abrasion resistance, is lightweight, and keeps costs down. However, it’s not as protective as higher-denier textiles (e.g., 1000D+) or leather. For the best safety, look for jackets that pair 600D fabric with reinforced impact zones, such as ballistic nylon, Cordura, or additional armor panels.
4. Is leather or Kevlar better?
Neither is “universally better” — they excel in different ways.
Leather is stronger for abrasion, while Kevlar is great as a reinforcement layer inside textile gear. Many high-end jackets combine both to maximize protection.
Conclusion
The perfect jacket? It's gotta fit great, keep you safe, and just feel right when you hop on your bike. Choose the material, style, and size that work for how you ride, and you'll feel the difference every single ride. Look good, be safe out there.
If you’re shopping for a snowmobile and want the best bang for your buck, these tried‑and‑true models should be on your list. Used snowmobiles can save you a bundle, but it’s smart to pick reliable machines. Many older sleds offer great value, strong reliability and solid performance if you choose the right series. Below are five of the best options to consider when shopping on the second-hand market.
Top 5 Best Used Snowmobiles
Polaris Indy (600 & 800)
Polaris Indy trail sleds have been around for decades and enjoy a reputation for reliability and simplicity. Popular in North America, the Indy series (especially the 600cc and 800cc versions with electric start) is often recommended as a great used choice. They are solid trail sleds that handle well in most conditions.
Polaris 2018 600 Indy SP ES
Pros
Excellent reliability — The 600 HO and 800 Cleanfire engines are known for long life when maintained.
Extremely easy to find parts — Polaris parts are everywhere in the U.S., Canada, and northern states.
Versatile — Works as a daily trail sled, winter commuter, or weekend fun machine.
Stable ride quality — Polaris’s Pro-Ride and later suspensions improved comfort and handling.
Low running cost — Belts, filters, carb parts, shocks, and bushings are cheap compared to Ski-Doo or Yamaha.
Beginner friendly — Not twitchy or hard to control; great starter sled for adults.
Cons
Not as powerful as modern machines — Even the 800 Indy can feel mild compared to newer 850 E-TEC or 850 Patriot engines.
Older 600 Indys may feel underpowered in deep snow or steep climbs.
2-stroke maintenance — Requires oil injection or premix, and power valves need periodic cleaning.
Some early 800s had known issues (pre-2012 era). Always check compression and service history.
Base models are basic — Many older Indys don’t have reverse, electric start, or high-end gauges.
Average Used Price
Used Polaris Indys are some of the best bargains on the market:
2006–2014 Indy 600: $2,000 – $3,500
Indy 800 (2011–2015): $2,500 – $4,500
2015 Indy 600 ES: JD Power lists around $2,330 on average
Check belt wear — Indys can eat belts if clutches are out of alignment.
Do a compression test — both 600 and 800 engines should have consistent PSI across cylinders.
Test reverse and electric start if equipped — common issues on older models.
Check suspension rails and slides — older Indys often need new sliders (cheap fix).
Ask about oil type — using cheap oil on 2-strokes shortens engine life.
Because Polaris Indys use such common parts, even a “rough around the edges” sled can be brought back to life cheaply—another reason they’re such good second-hand purchases.
Ski‑Doo MXZ (Trail) and Summit (Mountain)
Ski‑Doo is the #1 snowmobile brand by sales, and their MXZ (trail) and Summit (mountain) series offer great options on the used market. The MXZ is a nimble trail sled, while the Summit is built for deep snow and hill-climbing. Both lines have long histories, so you’ll find plenty of older machines in good shape. In particular, the Summit Adrenaline or X models (for aggressive mountain riding) and MXZ X or Blizzard versions (for trail speed) have earned praise for reliability and performance.
Ski‑Doo MXZ
Pros
High-quality ride and performance. Ski-Doos are known for excellent suspension setups and refined handling, especially on REV-platform models (REV XP / REV XS / REV Gen4).
Strong Rotax engines. Both 2-stroke and 4-stroke Rotax engines have good longevity.
The 900 ACE 4-stroke is especially praised for outstanding fuel economy, quiet operation, and low maintenance.
Easy parts and service availability. Ski-Doo is extremely common in North America, so replacement parts and dealer support are easy to find.
Good used selection. Many MXZ (trail) and Summit (mountain) models from 2008–2016 are available with reasonable mileage and have proven reliability.
Cons
Some 800R E-TEC issues. Early 800R E-TEC 2-strokes can need top-end work after high mileage. Service records are important.
Suspension wear is common. Heavily ridden sleds can have worn bushings, shocks, or rails—especially on Summit mountain models.
Track/stud damage. MXZ trail sleds with studs often show torn lugs or pulled studs.
Advanced models cost more to repair. Higher-end versions (Summit X, MXZ X, X-RS) have more complex suspensions that are pricier if neglected.
Average Used Price
2015 Ski-Doo Summit SP 800 (163") – Around $4,000–$4,500 average used value.
MXZ 600 (mid-2010s) – Often $2,000–$2,500 depending on condition.
Older MXZ 600/800 (2000s–early 2010s) – Typically $1,500–$3,000.
Summit models (long track) – Usually $3,000–$5,000, depending on year, mileage, and track length.
Years to Consider
2008–2015 REV XP / XS platform – Excellent ride quality, very popular for both MXZ and Summit.
2009+ 800R E-TEC – Good performance; just confirm maintenance.
2017+ 850 E-TEC (Gen4) – Extremely strong engines for mountain/snowsports riders; often pricier but worth considering if budget allows.
Avoid pre-2006 unless very cheap and well-maintained—suspensions and tracks on older units tend to be heavily worn.
Buying Tips
Inspect the track carefully. Look for torn lugs, missing studs, or dry-rotted rubber.
Check belts and clutches. Worn drive belts or noisy primary clutches are common maintenance items.
For 2-strokes: Ask about top-end rebuilds, ring replacement, or E-TEC service history.
For Summit models: Verify skis, sway-bar status, and shock condition (mountain riding is hard on suspension).
Look for clean wiring and no aftermarket hacks. Ski-Doos with poorly done mods are common—avoid heavily tuned engines unless documented.
Always test compression or have a dealer/mechanic do a quick health check before buying.
Arctic Cat F‑Series (F5 / F6)
The Arctic Cat F‑Series (F5 and F6) are classic trail/sport sleds from the 2000s. The F5 (around 585cc, two‑stroke) and F6 (around 600cc) were rugged, powerful machines of their day. They deliver strong acceleration and a solid chassis. Though Arctic Cat merged into Textron a few years back, these older Cats have a loyal following and many remain running well. Reviews have even called the 2009 F5 “one of the most underrated snowmobiles” – offering a great balance of power, handling and comfort.
Arctic Cat F6
Pros
Strong and responsive engines. The 2-stroke twins in both the F5 and F6 offer impressive acceleration for their class. The F6 EFI models especially deliver crisp throttle response and better fuel efficiency than carbureted sleds of the era.
Light and agile Firecat chassis. Arctic Cat designed the F-Series for trail carving. They turn well, stay stable at speed, and feel playful without being unpredictable. Many riders still love how “flickable” these sleds are.
Good aftermarket and parts availability. Arctic Cat parts are easy to source, and many items interchange with other Cat models from the 2000s. Suspension parts, clutches, plastics, and even complete engines are easy to find.
Affordable and high value. Because these sleds fly under the radar, you can often get a well-maintained F5/F6 for significantly less than similar-year Polaris or Ski-Doo models.
Straightforward mechanical design. Perfect for DIY riders. Most maintenance jobs—clutching, belts, suspension greasing, even top-end overhauls—can be handled in a garage with basic tools.
Cons
Older suspension design. While good for its era, the F-Series suspension doesn’t match the plushness of 2015+ sleds. Expect a firmer ride on rough trails.
Potential wear from aggressive riders. These sleds were marketed as sporty, so many were ridden hard. Look closely for signs of abuse: bent A-arms, cracked belly pans, or worn-out shocks.
Track/stud wear is common. Many owners studded these sleds, and missing studs or torn tracks aren’t unusual on high-mileage units.
EFI models have extra components to check. On F6 EFI versions, injectors, throttle bodies, and sensors add complexity compared to the basic carb models.
Average Used Price
The F-Series sits comfortably in the budget-friendly range:
Typical price: $2,500 – $4,000
Clean, low-mileage F6 EFI models might be listed slightly higher, but bargains appear often.
Older or high-mileage F5 units sometimes fall below $2,000, making them one of the best true budget trail sled options.
Condition impacts the price more than the year. A well-cared-for 2004 F6 is worth more than a beat-up 2009 F5.
Years to Consider
2003–2006 F5 / F6 (Firecat platform)
These years are considered the peak of the F-Series. They’re known for reliability and solid suspension geometry.
2007–2010 models
Often similar mechanically, but may have more mileage. Still good buys if maintained well.
Buying Tips
Always check the bearings (suspension and crankshaft play) on older Cats. A compression test on two-strokes is smart too. Confirm the tunnel isn’t bent (Arctic Cat points on the chassis wear can tell you history). As with any used sled, insist on service records if available and beware of deals that are “too good to be true” – sellers claiming a rebuilt engine should provide proof.
Yamaha 700cc Series (SRX / Venture / Mountain Max)
Yamaha’s 700cc snowmobiles are classics in the used market—powerful, durable, and built with the typical Yamaha reputation for bulletproof engineering. Unlike the tiny 250cc Bravo, the 700cc lineup is made for riders who want real performance or strong utility capability. Whether it’s the legendary SRX 700 (speed king of the late ’90s), the comfy Venture 700 touring sled, or the deep-snow capable Mountain Max 700, Yamaha’s 700-class machines are consistently praised for reliability and long engine life.
These sleds often have triple-cylinder 2-stroke engines (Yamaha’s famous “triple”), known for their smoothness and power. They’re great options if you want a used machine that still feels strong on trails or in the mountains—without the price of newer 800cc or 850cc machines.
yamaha 700 sx
Pros
Super reliable engines – Yamaha’s 700cc triples are known for longevity and smooth power delivery. Many exceed 8,000–10,000 miles with good maintenance.
Strong performance – SRX models are fast, Mountain Max climbs decently, and the Venture 700 is excellent for two-up touring.
Great build quality – Yamaha has a reputation for solid frames, quality plastics, and trouble-free electronics.
Parts availability is still good thanks to Yamaha’s popularity and shared components across multiple model years.
Good value in the used market—often cheaper than comparable 800cc Ski-Doo or Polaris models.
Cons
Heavier than modern sleds – Yamaha sleds from this era tend to weigh more, especially the triple-cylinder models.
Not as nimble in tight or deep-snow technical riding compared to lightweight Polaris RMK or Ski-Doo Summit models.
Older suspension designs mean you don’t get the plush ride of post-2015 sleds.
2-stroke triples can be thirsty—fuel economy is not their strong suit.
Some models lack reverse (depending on trim and year), which can be inconvenient.
Average Used Price
Prices vary depending on condition and whether it’s an SRX, Venture, or Mountain Max:
$1,500 – $4,000 for most Yamaha 700cc sleds
(SRX 700 in mint condition may reach the high end)
Venture 700 is usually cheaper because it’s a touring sled:
$1,200 – $2,500
Mountain Max 700 tends to be mid-range:
$1,800 – $3,500
In general, Yamaha’s 700-class machines hold value well because of their reliability.
Years to Consider
Yamaha built 700cc sleds for many years. Good ranges include:
1997–2002 SRX 700 – extremely popular, high-performance, cult following
1998–2005 Mountain Max 700 – well-rounded mountain/trail crossover
1999–2006 Venture 700 – great for touring and utility use
Condition matters more than the year because Yamaha’s design philosophy emphasized durability and consistency.
Buying Tips
Check compression on all three cylinders—uneven compression is a sign of wear.
Inspect the power valves (if equipped) for carbon buildup—common on older Yamaha triples.
Examine the suspension rails and tunnel for cracks or corrosion, especially on Mountain Max models used in deep snow.
Test the clutch engagement—Yamaha triples are smooth, so jerking or hesitation may signal clutch issues.
If possible, avoid sleds with unknown modifications—some SRX owners race or tune their sleds heavily.
Look for documented carb cleanings, chaincase oil changes, and regular plug replacements.
Polaris RMK (800 Pro‑RMK / RMK EVO)
If you ride deep snow or mountains, the Polaris RMK (formerly “RMK Assault” or “Pro-RMK”) series is legendary. RMK stands for “Rider’s Mountain King.” These are aggressive off-trail sleds with high‑power motors (typically 800cc 2‑stroke engines) and long, skinnier tracks for flotation. The 800 Pro-RMK and its EVO variant (introduced around 2013) are especially sought after on the used market. In fact, Polaris experts often list the Pro-RMK 800 as the #1 off-trail choice in its price class.
Polaris PRO RMK 800
Pros
Elite deep-snow capability. RMKs excel in powder, sidehilling, boondocking and technical climbs thanks to their narrow stance, responsive front end and extremely light feel.
Strong, proven 800 twins. Polaris refined this engine for many years; when well-maintained, it pulls hard and is relatively easy to service for a mountain motor.
High-end mountain components. Pro-RMK models typically include premium skis, better shocks, and lightweight mountain-focused designs (tapered tunnel, powder-optimized running
boards, etc.).
Loved by the mountain community. Because of their agility and predictability, RMKs have huge aftermarket support and plenty of parts availability.
Cons
Not ideal for casual trail-only riding. RMKs are built for deep snow; on groomed trails they feel twitchy, loud, and over-specialized.
Higher maintenance expectations. Mountain sleds see harder hits, bigger climbs, and deeper powder—meaning suspension wear, bent A-arms, or fatigued tunnels are more common if the sled was ridden aggressively.
Certain model-year quirks. Some early-2010s Polaris 800 engines had durability concerns unless properly maintained; clutching must be dialed in for altitude; and replacement parts (like
long tracks or mountain shocks) cost more than trail equivalents.
Average Used Price
Used RMKs sit above typical trail sleds. Expect something like:
2013–2016 800 Pro-RMK: $6,000–$8,000 depending on miles and condition
2010–2012 models: generally $4,000–$6,000
Older 2007–2009 RMKs: often $2,500–$4,000, but these usually lack the big chassis advancements
RMK EVO: usually cheaper than a Pro-RMK, since it’s a lower-power, beginner-friendly light-mountain model
Actual prices vary a lot by region—mountain states (ID, MT, CO, WY) usually demand more, especially for long-track versions.
Years to Consider
Early models (2007–2012) have the older Axys chassis and 800R engine – still very good. The 2013 RMK EVO introduced a new frame and dual-spar chassis (lighter weight) – a great option if you find one. Check for model year quirks (for instance, 2014 saw an updated chassis). Generally, any 800cc RMK from 2010 onward is worth serious consideration.
Buying Tips
Verify the clutch alignment and that the track cam chain (on older models) is intact.
After a hard ride, look over the tunnel for scrapes.
On used RMKs, also make sure the electric start and brake fan are working (deep snow operations stress these).
As with any used Polaris, you can find expert guidance on year-specific issues (like clutch weights) online.
Also note that Polaris engineers limited budgets differently – some good used-buy lists rank the RMK Pro as a top value in mountain sleds.
Summary Table of Best Used Snowmobiles
Specification
Polaris Indy 600/800
Ski-Doo MXZ / Summit
Arctic Cat F-Series (F5/F6)
Yamaha 700cc Triple
Polaris RMK (Pro-RMK / EVO)
Engine Type
2-Stroke
2-Stroke / 4-Stroke (Rotax)
2-Stroke
2-Stroke Triple
2-Stroke
CC
600 / 800
600 / 800 / 850 / 900 ACE
~500–600
700
800
Power
110–150 HP
110–165+ HP
100–120+ HP
120–140+ HP
150–160+ HP
Best Use
Trail / All-around
Trail (MXZ) / Mountain (Summit)
Trail / Sport
Trail / Touring / Mountain
Deep Snow / Mountain
Strengths
Reliable, cheap parts, beginner-friendly
Excellent suspension & handling
Strong engines, easy to maintain
Extremely durable, smooth triple
Elite deep-snow performance
Weaknesses
Older models underpowered
Some 800R years need care
Older suspensions may be ridden hard
Heavy & thirsty
High wear from mountain riding
Used Price Range
$2,000–$4,500
$1,500–$5,000
$2,000–$4,000
$1,200–$4,000
$2,500–$8,000
Conclusion
If you're looking to buy a used snowmobile, stick with the series that are known to be reliable. The models I mentioned earlier? They're a good deal, work great, and spare parts are still around. Find one that the previous owner kept up well, and you'll end up with a snowmobile you can depend on without having to spend too much.
Clear vision is key to enjoying every run on the mountain, and the right goggles make all the difference. From protecting your eyes against glare and UV rays to preventing fog and snow intrusion, fit and lens choice matter. This guide explains how to choose ski goggles, covering fit, lens type, VLT, ventilation, and helmet compatibility, so you can stay safe, comfortable, and focused on the slopes.
Lens Shapes of Ski / Snowboard Goggles
Ski goggle lenses come mainly in two shapes, plus a newer “toric” design.
Cylindrical lenses: Cylindrical lenses curve horizontally across your face but are flat vertically. They tend to be cheaper and have a low-profile look. They can offer a wide field of view, but the flat vertical surface may cause a little more edge glare and slightly less peripheral vision than spherical lenses.
Spherical lenses: Spherical lenses curve both horizontally and vertically, like a section cut from a sphere. This round shape gives you a wider, more distortion-free view of the slopes. However, spherical lenses cost a bit more (they’re trickier to manufacture) and can make the goggles look bulkier.
Toric lenses: Toric lenses curve both horizontally and vertically, but less so than spherical lenses. They offer a balance between the flat cylindrical and the more curved spherical designs, reducing distortion and glare while maintaining a low-profile look. Toric lenses give a wider field of view than cylindrical lenses, but are more streamlined and affordable than spherical ones.
Lens shapes of ski goggles
Lens Type
Cylindrical Lenses
Spherical Lenses
Toric Lenses
Design
Horizontal curve, flat vertically
Curves both horizontally and vertically
Combines both horizontal and vertical curves
Advantages
- Affordable
- Sleek design
- Good side visibility
- Clear, wide view
- Less glare
- Comfortable fit
- Wide field of view
- Reduced glare
- Compact, lightweight
Disadvantages
- More glare
- Limited vertical vision
- Higher price
- Bulkier design
- Higher cost
- Less common
Summary
Great value for basic needs, but may have glare
Best for clarity and performance, with a higher price
A good balance of performance and comfort, but pricier
In practice, the differences between lens shapes are subtle. We should focus less on the shape itself and more on factors like fit and lens quality. Both cylindrical and spherical (as well as toric) lenses can perform well if designed properly.
Many professional skiers use both types. The key is to choose the lens shape that feels most comfortable on your face and provides the best visibility.
A snug fit and clear vision matter far more than whether the lens is round or flat.
Ski / Snowboard Goggles Ventilation and Anti-Fogging
Dual-layer lenses: Fogging is a goggle’s worst enemy. To prevent it, almost all quality goggles use dual-layer lenses. This double-lens design traps an insulating air gap (like a storm window) that resists fogging. Nearly all mid- and high-end goggles also add anti-fog coatings on the inner lens surface.
Ventilation: Good ventilation is equally important. Most goggles have vents along the top, sides, and bottom of the frame to circulate air. Bigger or more open vents let more airflow, which fights fog but can let a little cold air in. Some premium models even include tiny battery-powered fans to actively blow moisture away.
When choosing, look for goggles that mention anti-fog coatings and multiple vents. Cheap single-pane lenses (no dual layer) fog easily.
Remember to avoid touching the inside lens – let the coating do its job. If you do experience fog, wiping, waving the goggles or taking a quick break can help.
The best defense is good design: dual lenses + ventilation + anti-fog treatment.
Visible Light Transmission and Lens Color
The lens tint and VLT (Visible Light Transmission) are critical. VLT is the percentage of light that passes through the lens to your eyes.
ski goggle colors
A high VLT (say 60–100%) lets in lots of light, ideal for cloudy or low-light days. A low VLT (5–20%) blocks most light, good for bright sunny days.
Sunny, bright conditions: Use low VLT lenses (around 5–20%). Dark or mirrored tints like black, dark gray, platinum or red work best. They cut glare and prevent eye strain on bluebird days.
Mixed light (partly sunny/cloudy): Use medium VLT lenses (20–40%). Tints like rose, blue, or green are versatile, giving some contrast without being too dark.
Overcast or low light: Use high VLT lenses (50%+). Pale or warm tints (yellow, amber, gold or rose) let more light in. These bring out detail in flat light or snowy conditions.
Night skiing: Use clear lenses (near 100% VLT) so you can see terrain under artificial lights.
In practice, match your lens VLT to the weather you expect. If you find condition forecasts, pick lenses accordingly.
Many gear lists suggest carrying two lenses: a dark one for sun and a light one for low light. For example, some goggle kits include a ~12% VLT lens plus a ~60% VLT lens, covering most situations.
A useful rule of thumb is: under 20% VLT for bright sun, around 20–40% for variable light, and over 40% for overcast skies.
Additional Lens Features of Ski / Snowboard Goggles
Modern ski and snowboard goggles often include features designed to maximize versatility and eye protection.
A man is changing the lens on his ski goggles.
1. Interchangeable Lenses
Purpose: Quickly adapt to changing light and weather conditions.
How it works: Lenses attach via clips or magnets for tool-free swaps. Some models allow lens changes even while on a chairlift.
Pros:
Maximum flexibility for different weather and lighting.
Tool-free, quick lens swaps.
Can carry multiple lenses without buying multiple goggle sets.
Cons:
Extra lenses can be misplaced or lost.
Swapping lenses may take time in extreme cold or on the go if not practiced.
Goggles with interchangeable systems can be slightly more expensive.
Tip: Carry spare lenses and practice swapping before your trip.
2. Photochromic Lenses
Purpose: Automatically adjust tint based on sunlight.
Pros: Darken in bright light and lighten in shade.
Cons: Changes occur gradually, not instantly.
Use case: Ideal for long ski days with variable lighting.
3. Polarized Lenses
Purpose: Reduce glare from flat snow and ice.
Pros: Improves visual comfort and contrast in bright conditions.
Cons: Polarization does not change VLT (overall light transmission).
4. Mirrored Lenses
Purpose: Reflect light off the lens surface to reduce brightness.
Pros: Helps in very sunny conditions and adds a stylish appearance.
Cons: Works best in combination with correct VLT for the environment.
5. UV Protection
Purpose: Protect eyes from harmful UVA and UVB rays, which are stronger at high altitude.
Pros: Essential for long-term eye health and safety.
Note: Look for goggles that provide 100% UV protection.
6. Digital Displays / HUDs
Purpose: Provide on-goggle information such as speed, elevation, navigation, or notifications.
Pros: Useful for tech-savvy or performance-focused skiers.
Cons: Optional feature; not necessary for casual skiing.
Feature
Purpose
Pros
Notes
Interchangeable Lenses
Adapt quickly to changing light; tool-free swaps via clips or magnets.
Flexible, quick swaps, multiple lenses without buying extra goggles
Extra lenses can be lost; swaps take practice; slightly higher cost
Photochromic Lenses
Automatically adjust tint to sunlight.
Darken in sun, lighten in shade
Changes gradually; not instant
Polarized Lenses
Reduce glare from snow and ice.
Improves visual comfort and contrast
Does not change overall light transmission (VLT)
Mirrored Lenses
Reflect light to reduce brightness.
Good for sunny conditions; stylish look
Works best with the correct VLT
UV Protection
Protect eyes from UVA and UVB rays.
Essential for eye health and safety
Ensure 100% UV protection
Digital Displays / HUDs
Show speed, elevation, navigation, and notifications.
Useful for tech-focused skiers
Optional; not needed for casual skiing
Summary
Choosing goggles with the right lens system enhances your comfort and safety on the slopes:
Interchangeable lenses: Give maximum flexibility.
Photochromic lenses: Adjust automatically to changing light.
Polarized and mirrored lenses: Reduce glare and improve contrast.
UV protection: Essential for eye health.
Digital displays: Add convenience but are optional.
For best results, match your lens choices to typical conditions and consider carrying a spare or mid-VLT lens for compromise situations.
Additional lens features to consider:
Scratch resistance: Many lenses have hard coatings to resist scratches. This matters if you often stow goggles in a pocket or helmet goggle clip.
Mirrored coating: A mirror finish reflects extra light, effectively lowering VLT by 10–50%. Mirrors look cool, but also cut glare on sunny days. For example, a silver mirror lens might let only 10% of light through.
Hydrophobic/hydrophilic coatings: Some high-end lenses have special inner layers that repel moisture, further reducing fog.
Ski / Snowboard Goggles: Frames and Fit
Adjust ski goggles
Proper fit is crucial for both comfort and performance on the slopes. Here are the key factors to consider:
1. Helmet Compatibility
Fit is king: Goggles should sit snugly but comfortably against your face. Adequate foam padding cushions pressure points and prevents discomfort.
Frame size: Choose a frame that matches your face (small/medium/large, or women’s/kids sizes). Too small → tunnel vision; too large → cold air may enter.
Gap-free seal: Goggles should sit flush with the helmet brim, leaving no gap.
2. Strap Adjustments
Adjust the strap so goggles sit evenly around your eyes without pinching or shifting.
If you’re using a helmet intercom, make sure the goggle strap does not interfere with your intercom mounting position.
Many straps feature silicone grippers to prevent slipping on the helmet.
3. Low Nose Bridge Design
For faces with a lower nose bridge, look for goggles designed with a low nose bridge or adjustable nose foam.
Ensures a snug fit without pressure, reduces fogging, and improves comfort.
4. Padding / Foam
The foam layer around the frame provides cushioning and enhances the seal.
Multi-layer or softer foam improves comfort, manages sweat, and maintains a consistent fit for long ski days.
5. Eyewear Compatibility (OTG)
If you wear glasses, choose OTG (Over-The-Glasses) goggles with extra interior space to fit eyeglasses comfortably without pressure.
Ski Goggles vs. Snowboard Goggles
There’s really no hard rule that separates ski goggles from snowboard goggles – they are the same category of gear. Some manufacturers style certain goggles for snowboarders (wider frames, bolder colors) and others for skiers (sleek, aerodynamics). One guide notes ski goggles focus on high-speed vision and low drag, while snowboard goggles boast extra peripheral view for freestyle terrain.
In practice, however, the choice criteria are identical. Whether you ski or board, you want the same features: a snug fit, lenses with the right VLT for your conditions, and good venting. A snowboarder might prefer a slightly wider lens for more side vision, but it’s largely personal preference. Ski goggles excel in speed and precision while snowboard goggles aim for comfort and panorama – but either type works for both sports. Focus on the functional fit and lens match to conditions, and you’ll be happy whether you’re carving or catching air.
How to Choose Ski Goggles
Quick Buying Checklist
✅ Snug Fit with Helmet: Try goggles on with your helmet. No gaps should exist between helmet and goggle. Foam pads should seal around your cheeks and nose.
✅ Lens VLT for Conditions: Pick lens VLT based on expected weather. Dark/low-VLT lenses (<20%) for bright sun, mid-VLT for mixed, high-VLT (amber/clear) for cloudy or night.
✅ Anti-Fog Features: Dual-layer lenses and anti-fog coatings are musts. Check for good venting (top/bottom channels). Some goggles even have fans for extreme fog prevention.
✅ UV Protection: Ensure the goggles block 100% UV (nearly all new ski goggles do).
✅ Extra Lenses / Tech: Consider interchangeable lenses or photochromic if you face changing light. Polarized lenses can cut glare off snow.
✅ Brand and Price: Higher-end goggles often have better optics, coatings, and lens-swap systems, but good mid-range options exist.
✅ Style & Accessories: Frame color/style is up to you. Make sure straps have silicone backing or clips to stay snug. Look for extras like a goggle case or cleaning cloth.
Conclusion
Choosing ski goggles boils down to matching the gear to your face and the mountain’s light. Fit them properly with your helmet, and ensure the lens tint (VLT) suits your usual conditions. Don’t skimp on anti-fog features (dual-lenses and vents) and UV protection – these are essential for safety and comfort.
If you ski or snowboard in variable conditions, opt for goggles with interchangeable or photochromic lenses. Above all, try on several pairs if you can, and pick what feels most comfortable on your face.
With the right goggles, your vision will stay clear and your rides will be much more fun.
For snowmobile lovers, speed isn't just a thing; it's a total thrill. You got that throttle punch, the turbo wail, and the snow just flying by – it's like the perfect power trip. Now, those snowmobiles are super quick, like, proper top-notch bits of kit that can zoom over 100 mph on the snow. With cool turbo engines and light frames, winter is now race season. Here are the five fastest snowmobiles— each one built to chase the horizon and feed your need for speed.
The Yamaha SRViper L-TX GT runs on a 1049cc Genesis engine that gives you about 135 horsepower. It’s known for being reliable and giving you smooth, easy-to-control power. People like this three-cylinder engine because the throttle responds fast and it lasts a long time - perfect if you want something dependable for trail riding instead of something super aggressive with a turbo.
The SRViper's clutch system (YVXC) and Yamaha's tuning make sure the power goes where it needs to, giving you quick acceleration. Even though it doesn’t have a turbo, this snowmobile is light and balanced, so it can still hit speeds of up to 110 mph on smooth trails. Not bad for a machine without a turbo!
When it comes to handling, the SRViper L-TX GT does great. The front and rear suspensions make for a steady, secure ride, even when things get bumpy. Plus, with electric start, a heated seat, and a cool-looking body, you'll be comfy and in control on the trail.
Yamaha teaming up with Arctic Cat means it's built well and parts are easy to find. Yamaha's tuning gives the SRViper its own special feel. It starts at around $16,299, which is a reasonable deal for the amount of speed, comfort, and dependability you get if you're into long trail rides but don't want the trouble of a turbo engine.
Engine: 1,049 cc 4-stroke liquid-cooled 3-cylinder Genesis
At the top of Arctic Cat’s performance lineup, the ZR 9000 Thundercat stands as one of the fastest production snowmobiles on the market. Its heart is the 9000-series C-TEC4 turbocharged engine, a 998cc 4-stroke, three-cylinder powerhouse that produces around 200 horsepower. This setup delivers relentless acceleration and top-end speed, while maintaining refined throttle response and smooth power delivery across all conditions.
The Thundercat’s ADAPT CVT system automatically maintains optimal belt tension without any rider input, ensuring efficient power transfer, reduced wear, and longer belt life. Combined with electronic power steering (EPS), riders experience light, precise control even at high speeds.
Independent front suspension and SLIDE-ACTION rear suspension give the Thundercat exceptional ride quality, absorbing trail bumps while maintaining traction and balance through corners. The machine’s aggressive chassis geometry and weight distribution further enhance stability and control — crucial when reaching speeds of up to 116 miles per hour, as documented by riders during real-world runs on Long Lake, Maine.
Despite its muscle, the Thundercat also focuses on comfort and customization. Multiple configurations and performance add-ons allow riders to tailor the sled to their style. With its premium build quality, advanced suspension, and turbocharged might, the ZR 9000 Thundercat remains a true benchmark for high-performance snowmobiles.
Engine: 998 cc 4-stroke 3-cyl Turbo
Horsepower: ~200 hp
Top Speed: ~116 mph (186 km/h)
Track: (e.g.) Arctic Cat Ripsaw II – typically 16×137–151″
Dry Weight: ~ 603 lbs (273 kg)
Key Feature: Adapt CVT, ATAC suspension for stability at speed
The Switchback Assault, rocking the Patriot Boost 850 engine, throws down up to 180 hp with its built-in turbo. This 2-stroke, liquid-cooled twin engine gives you that instant go and crazy fast acceleration. Seriously, it's up there as one of the quickest trail sleds Polaris has ever made.
The Patriot Boost system's got this light turbocharger that's made just for snowmobiles. It keeps the power steady no matter how high you go, and there's no lag. Plus, it's matched with the PDrive clutch that makes sure the power goes where it needs to, giving you smooth starts. You can hit around 112 mph when things are perfect.
To manage all that oomph, the Switchback Assault uses the AXYS chassis, making it handle turns better and respond faster. The Walker Evans Velocity shocks and IGX 146 rear suspension soak up bumps and keep you in control, so the ride stays smooth even when you're flying.
This sled's built to do it all – it's just as good on smooth trails as it is tearing it up off-trail. Its tough looks, along with smart design for the rider, makes it comfy and keeps you feeling confident when you're hauling.
The Yamaha Sidewinder SRX LE EPS is Yamaha's fastest snowmobile, known for its speed and fancy design. It's got a 998cc Genesis Turbo 4-stroke engine, a three-cylinder engine that cranks out about 200 horsepower. It's the same engine as the Arctic Cat Thundercat, but tweaked for Yamaha's exact steering.
Its turbocharged engine gives you power right away with almost no delay, because of Yamaha’s boost control that keeps the pressure steady no matter how high you are. This helps the Sidewinder SRX hit a top speed of about 119 mph, making it one of the fastest snowmobiles you can buy.
The SRX's clutch makes sure the power goes where it needs to smoothly, and you can speed up without problems. The power steering makes it easier to control and keeps you from getting too tired, and the SRX suspension with special springs and shocks makes the ride steady, even when you're going super fast.
The snowmobile's track and streamlined shape make it more stable and easier to steer at high speeds. Plus, it has stuff like a push-button start, heated grips, and a digital display, so the Sidewinder SRX LE EPS is crazy fast and still comfy.
The Ski-Doo MXZ 850 E-TEC Turbo R is a seriously high-tech snowmobile. It's for those who want crazy power and super-sharp control. Its 850cc E-TEC Turbo R engine cranks out 180 horsepower, making it Ski-Doo's strongest 2-stroke ever. This factory-built turbo setup is cool because it gets rid of that annoying lag, so you get instant power and crazy fast acceleration no matter how high up you are.
The E-TEC Turbo R tech keeps tweaking the boost to keep performance at its peak. Plus, the pDrive clutch makes sure the power gets to the track without wasting any, and it saves wear on the belt. People are saying it hits around 118 mph, which puts it up there with the fastest snowmobiles you can get.
The MXZ 850 E-TEC Turbo R uses the REV Gen5 platform, which is light but tough, to give you better handling. The rMotion X rear suspension and RAS X front suspension work together. Also, this setup soaks up bumps and keeps you stable on the trail, so you can take corners like a pro even when you're going fast.
It's also got nice touches that add to the comfort and control, like the Smart-Shox semi-active suspension. This automatically changes how stiff the ride is based on the ground and how you're riding. A smooth-looking body, an easy-to-use 10.25-inch color touchscreen, and top-notch materials make it feel like a high-end ride.
Engine: Rotax 850 cc 2-stroke Turbo R (in-line twin)
These snowmobiles are less about how fast you're going and more about that rush you get when you crank the throttle wide open. Doesn't matter if you're blazing new trails, skimming over frozen lakes, or just chasing the sunset – these machines are all about giving you that raw, snow-fueled adrenaline rush.
So, you wanna fly with skis or snowboards? No sweat! It can be easy if you plan a bit. Most airlines are cool with skis and boards as checked bags, but prices and what you can bring change. This guide will tell you what's up for 2025, plus show you how to pack and move through the airport so your ski trip goes off without a hitch.
Airline Ski & Snowboard Baggage Policies
airline ski & snowboard baggage policies
When flying with skis or a snowboard, the good news is that most airlines treat your gear as part of your regular checked baggage allowance. However, each airline has its own rules and limits — especially when it comes to weight and international routes. Here’s a breakdown of how the major carriers handle ski and snowboard equipment in 2025.
✈️ U.S. Airlines
Delta Air Lines
Delta allows one ski or snowboard bag plus one boot bag per passenger, and the two together count as one checked item. You can even include your helmet or goggles inside the boot bag.
Lufthansa offers one of the most generous ski policies. On non-U.S. routes, every passenger can check one ski equipment item for free — this includes one ski/snowboard bag plus one boot/pole/helmet bag.
Valid on most international routes except to/from the U.S., Mexico, or Central America.
For U.S. routes: counts as normal checked baggage.
Air Canada
Air Canada also provides free ski equipment on certain long-haul routes.
Free allowance: On flights between Canada and Europe, the Middle East, or Africa, operated by Air Canada or partners (Lufthansa, Swiss, Austrian, Brussels).
Includes: One ski/snowboard bag and one boot bag.
Restrictions: Not available in Basic Economy; elsewhere, standard baggage fees apply.
British Airways
BA includes ski and snowboard gear in your regular checked baggage allowance as long as it fits within 190 × 75 × 65 cm.
You can pack your boots or clothes in the same bag as your skis.
A separate boot bag can count as hand luggage if it meets carry-on limits; otherwise, it becomes a checked bag.
If you’ve already used your free bag allowance, you’ll pay the standard checked bag fee.
🧳 Key Takeaways
Most airlines treat ski gear as one checked item, including both the ski/snowboard bag and a boot bag.
Watch the weight: anything over 50 lb (23 kg) usually triggers an overweight fee.
Free ski gear policies (like those from Lufthansa or Air Canada) often apply only on international routes outside the U.S.
❗️ Tip: Always verify the exact baggage rules for your flight — they can change year to year. And if you have elite status or a credit card, remember you might have extra free checked bags that can cover ski gear.
1 ski/snowboard bag (can include boots/clothes) + optional boot bag
Counts toward normal baggage allowance
Standard baggage allowance rules
Up to 190 × 75 × 65 cm
Boot bag can fly as hand luggage if within carry-on size.
How to Pack Your Ski or Snowboard Bag for Air Travel
Well-packed gear not only helps avoid extra fees but also keeps your skis or snowboard safe.
pack ski bag for air travel
Follow these practical packing tips to ensure your gear is properly protected:
1. Choose a Quality Ski Bag
Padded or hard-shell cases are ideal for protection.
Wheeled bags make transport easier.
Double ski bags can carry two sets of skis or extra clothing, which helps with space and weight distribution.
2. Bundle Your Skis Together
Lay skis base-to-base (bindings facing each other) and strap them tightly.
Add padding (bubble wrap or foam) around bindings, tips, and tails for extra protection.
Use interior straps to keep skis from sliding side to side.
Plastic spacers aren’t essential if your skis are well-packed, but they can add extra security.
3. Protect Edges and Tips
Cover sharp edges with tape or extra padding (like ski socks or foam).
Bundle poles together in a separate sleeve or pocket if the bag allows.
4. Boot Bag Strategy
If your airline counts the boot bag separately, consider carrying it on. Boots are difficult to replace and should stay with you if possible.
If you must check your boots, pack them in a dedicated boot bag.
Use the inside of boots to pack smaller items like socks, gloves, or a camera to save space and help meet weight limits.
Always fasten or lock your boot bag to prevent items from falling out.
5. Fill Gaps with Clothing
Use bulk ski clothes (jackets, pants) to fill gaps in the ski bag. This acts as extra padding and helps protect your gear.
Wrap each ski in a jacket or towel if needed for additional cushioning.
Some airlines may prohibit clothing in sports bags, but many travelers still use it to pad their gear.
6. Use Compression Gear
Bring compression sacks or packing cubes for your ski clothes. Vacuum-style compression bags can shrink bulky jackets and pants, giving you more room in your ski bag or main luggage.
Pack by category so you know where everything is and can easily access it.
7. Label and Lock Your Bag
Use sturdy baggage tags and write your contact info on the bag.
Add a business card or address label inside the bag.
Lock your bag with a TSA-approved lock to prevent theft or tampering. Note that non-TSA locks may be cut if required for inspection.
Mark the bag “FRAGILE” as a courtesy, especially if you're carrying delicate or expensive gear.
Always keep a photo of your packed gear in case you need to file a claim later.
Baggage Allowances & Fees for Air Travel
Even with careful packing, understanding baggage fees can save you from expensive surprises. Below is a clear breakdown of key points about allowances and common charges for ski and snowboard gear.
1. Standard Checked Bag Fees
On most U.S. airlines, ski or snowboard gear counts as a standard checked bag, not a special item.
If your ticket includes one free checked bag, you can use it for your ski gear.
If not, typical domestic U.S. fees are about:
$30–$40 for the first bag
$40–$50 for the second bag
Southwest: Allows one ski + boot bag as a single checked bag under certain fare/status conditions; many fares now require payment.
2. Weight Limits
Most carriers charge an overweight fee for bags weighing 51–70 lbs (23–32 kg).
Examples:
Delta: ~$100 for 51–70 lb
American Airlines: ~$150 (domestic) for 51–70 lb
Bags over 70 lb (32 kg) may require cargo shipment or incur very high fees.
Tip: Wear bulky ski clothes or boots on the plane, or redistribute heavy items to avoid extra weight charges.
3. Oversized Bag Policies
Most airlines allow ski or snowboard bags up to 115 linear inches (length + width + height) without oversize fees.
Bags exceeding this limit can cost $150–$200 per flight segment.
Tip: Avoid packing helmets or extra gear inside long ski bags if they risk exceeding the limit.
4. Ski & Snowboard Gear Specifics
Airline
Policy
Fees
Delta Airlines
Ski and boot bags count as one checked item if under 50 lbs combined
Standard bag fee applies; overweight charges if over 50 lbs
American Airlines
Ski or snowboard bag + one boot bag count as one item
$30–$40 per bag; overweight/oversize may apply
United Airlines
Ski equipment (1 pair of skis + poles + boots) counts as one bag
Standard checked bag fees; overweight if over 50 lbs
Southwest Airlines
Ski and boot bag together count as one checked item
Free for first two checked bags (fare dependent)
5. Tips to Save Money
Use an airline credit card to get free checked bags.
Book fares that include baggage, especially for international trips.
Pack boots separately if combined weight is near 50 lbs.
Compare shipping gear via services like UPS or FedEx for long trips.
Airport Tips & Logistics
Traveling with ski or snowboard gear can be smooth if you know what to expect at the airport.
A woman is ready to fly with skis
Below are practical tips to make check-in, connections, and customs easier.
1. Arrive Early
Oversized items like ski bags often require special handling. Plan extra time—ideally at least 90 minutes before departure for international flights. Some airlines (e.g., Lufthansa) ask you to drop ski gear at an out-of-gauge or oversized counter; others (e.g., Delta) tag it during regular check-in. Extra time ensures your bag is correctly processed as “sports equipment.”
2. Check Through on Connections
Your ski bag is usually tagged to your final destination like other checked luggage. On international itineraries you may need to claim it after customs and recheck for the next leg. Many airports deliver oversized baggage to a separate carousel or hold area—look for signs labeled “Oversize Baggage.” At ski hubs (for example, DEN or SLC), oversized gear may not appear on the main belt. When in doubt, ask a baggage agent where oversized sports gear is unloaded.
3. Keep Boots With You
If possible, carry your boot bag as carry-on or keep boots on your person. Boots are expensive and hard to replace; if your checked ski bag is delayed, having your boots means you can rent skis and still use your own boots. This is especially useful on tight connections or international trips.
4. Document and Track Your Gear
Before checking your skis, photograph them and note any existing damage. Keep baggage claim tags and consider placing a tracker (AirTag or similar) inside your ski bag so you can monitor its location. Keep a photo of the packed contents for insurance or claims if needed.
5. Be Prepared for Customs
When traveling outside the U.S., you typically claim your checked bag and pass through customs. Still, follow these precautions:
Make sure skis/boards are clean (no snow, soil, or plant material) to avoid biosecurity holds in countries like New Zealand or Australia.
Be ready to declare new or multiple sets of gear—customs officers may question items that look commercial or recently purchased.
Keep receipts for expensive equipment. Returning to the U.S., travelers may have a personal exemption (commonly up to $800) for new items—having proof helps if asked.
In most cases, a little preparation—arriving early, keeping boots with you, documenting gear, and checking customs rules—will keep your airport experience stress-free and get you to the slopes faster.
Customs & International Considerations
Flying internationally with skis or snowboard gear introduces extra steps. Follow these guidelines to avoid delays or unexpected fees:
1. Declare if Necessary
Some countries consider sporting equipment taxable imports.
For personal use (your own skis and boots), you usually do not owe duty.
If carrying brand-new gear, multiple sets, or oversized boxes, be prepared to fill out customs paperwork.
Always state “personal sports equipment” when asked—most of the time it clears without issue.
On connecting flights requiring terminal exit, you may need to show your gear to customs officials.
2. Cross-Border Rules
Countries like Canada have strict rules for food, plants, and animal products, but skis, snowboards, and clothing are generally fine if clean and dry.
Avoid packing prohibited items (e.g., snowboards with wood fragments may raise concerns in Australia).
Always check your destination’s official customs website if unsure.
3. Insurance
Consider travel insurance covering lost or damaged luggage internationally.
Some policies allow specifying high-value items like ski equipment.
Airline liability in the U.S.:
- International flights: ~$1,700 per passenger (Montreal Convention)
- Domestic flights: ~$3,800
High-end ski sets may exceed this, so insurance or declaring value at check-in provides extra protection.
Treat skis like any valuable item: keep them clean, declare them honestly if requested, and take precautions with insurance. Following these steps ensures that customs is usually a minor formality rather than a headache.
Air Travel Hacks & Pro Tips
Traveling with skis or snowboards can be expensive and stressful, but smart planning and packing can save money and time. Here are practical tips from experienced travelers:
1. Ship Your Skis
If airport hassles or fees are too high, consider shipping your gear via a courier service specializing in skis.
They pick up from home, handle customs paperwork, and deliver directly to your resort.
Shipping adds cost but ensures your equipment arrives safely and on time, avoiding baggage fees and airport stress.
2. Single-Bag Strategy
Some travelers pack both skis and personal items into a single large ski bag to avoid extra checked baggage.
Use stuff sacks or packing cubes to organize clothing alongside skis.
Tip: Carry boots separately as hand luggage so they don’t take up space in the ski bag.
This method is possible but not officially encouraged by airlines—stay under weight limits.
3. Wear Bulky Items on the Plane
Wearing ski boots, one bulky ski pant, or heavy layers frees up weight in checked bags.
Use the space around your feet for small items (snacks, insulated jacket) to save pounds.
4. Reserve Ski Bag Drop
Some airlines allow pre-booking oversize handling for sports equipment.
Ask at check-in for a “sports equipment” or “oversize” option to get a special tag or belt.
Drop off at designated counters to avoid long queues.
5. Lighter Packing & Seat Hacks
Consider renting bulky items like parkas or avalanche gear at your destination instead of packing them.
Wear the heaviest layers on the plane.
Check if your airline offers free extra weight allowance for ski equipment—some (e.g., Delta) list ski bags explicitly.
Keep receipts for rented or purchased gear in case insurance claims are needed.
6. Plan Ahead & Know Airline Policies
Weigh your gear and review the airline’s sports equipment rules.
Call the airline if uncertain about fees or allowances.
Politely challenge extra charges that are not supported by official policy—sometimes agents will waive unnecessary oversize fees.
Conclusion
Taking your skis or snowboard on an overseas trip might seem like a headache. But don't worry, if you plan ahead, pack smart, and know what the airline allows, your gear will be fine, and you'll have a much easier trip. Get these things sorted, and you’ll spend less time at the airport and more time skiing or snowboarding! Have a fantastic time, and have fun on the slopes!
Installing snowboard bindings may seem tricky at first, but with a few simple steps and a little patience, you’ll have them set up in no time. Whether you’re using Burton, Union, Ride, or another brand, the basic process is the same. In this guide, we’ll walk you through everything from gathering your tools to identifying your stance and making those final tweaks.
Tools for Mounting Snowboard Bindings
Before you begin, make sure you have everything you need:
Phillips #3 screwdriver: This is the most common tool for snowboard bindings. Many boards and bindings use #3 screws.
Snowboard, Bindings, and Boots: Of course, you need your snowboard, a matching set of left/right bindings, and the boots you’ll be riding in.
Screws: Usually come with the bindings (standard or M6 screws for most systems).
Multi-tool or Wrench (optional): If you have bindings with extra hardware (like adjustable heel cups), a snowboard multi-tool or wrench can help. But for mounting, the Phillips screwdriver is usually enough.
Measuring Tape or Ruler: For measuring stance width (distance between bindings). Blue Tomato suggests a calculator for figuring stance width, though a measuring tape often suffices.
Marker or Tape (optional): Some riders lightly mark their stance position on the board before screwing it in.
Tip: Keep all the screws and washers in one small dish or cup — they love rolling away when you least expect it.
Snowboard Binding / Board Compatibility
Not all snowboards use the same mounting setup, so it’s worth taking a quick look before you start.
There are a few main types you’ll come across:
snowboard mounting options
4x4 System: The classic setup — four holes arranged in a square pattern. It’s used by most brands and fits almost all standard bindings.
2x4 System: Similar to 4x4, but with holes spaced a little closer together. This gives you more fine-tuned stance options.
Channel System (Burton EST): Instead of separate holes, there’s a long slot down the middle of the board. You can slide your bindings along the channel to find your perfect stance position.
3D System (older Burton boards): Three holes in a triangle pattern — you won’t see this much anymore, but it still exists on some older models.
Before mounting, double-check that your bindings are compatible with your board’s system.
If they don’t match, you can usually fix that with the right adapter disc or baseplate — most brands sell them separately.
Choosing Your Lead Foot / Stance Direction
Before mounting anything, you need to know which foot goes in front. Snowboarders ride either regular (left foot forward) or goofy (right foot forward).
Snowboard stances - goofy vs regular
Here’s an easy way to find out:
Push Test: Stand relaxed, and have a friend gently push you from behind. The foot you instinctively step forward with to catch your balance is your lead foot. If it’s your left, you’re regular. If it’s your right, you’re goofy.
Slide Test: If you slide in socks on a smooth surface, which foot do you put forward? That’s usually your lead foot.
Foot Dominance: Some say your back foot is your dominant leg (the one you’d use to kick a ball). If that’s your right leg, you might prefer left foot forward (regular stance).
Regular stance = left foot in front; Goofy stance = right foot in front.
It might feel strange at first if you guessed wrong, but you can always switch and remount your bindings later. Try a few test slides or even test both stances on a gentle slope to see which feels natural.
Quick Tip: Once you know your stance, label your bindings “L” and “R” or check the straps. The binding designed for the front foot will have its ratchet buckles on the outside and straps that start on the inside of the boot. Also, binding bases often curve like shoes – the left binding curves to fit the left foot shape. Always mount the bindings so the buckles (ratchets) face outward on each side of the board.
Choosing Your Stance Width
Stance width is the distance between your bindings. A good starting point is roughly shoulder-width apart, but it varies per rider.
snowboard stance width
Here’s how to dial it in:
Shoulder-Width Rule: Stand in a normal stance with knees slightly bent. Many instructors say start with your stance just outside shoulder width. This gives a stable, balanced position.
Shin-to-Heel Method: Another beginner trick is to measure the length of your shin (from just below the kneecap to your heel) – use that distance (in inches) between your feet. REI notes that measuring your shinbone is “a great way to fine-tune your stance width”.
Board Reference Marks: Many snowboards have markings on the topsheet showing a recommended stance center. It’s usually a good starting point for beginners. Place each binding’s disc so that your boots are centered on those marks, and tweak from there if needed.
Height Guidelines: Some brands give a chart by rider height. For example, Jones suggests about 20–22 inches (50–56 cm) for someone 5’5″–5’8″. You can use these as rough guides.
If your knees feel cramped or your quads are burning when you're on the snow, try adjusting your bindings—move them in or out by one hole. A narrower stance can make turns feel easier, while a wider stance might give you more stability for jumps. Just play around with it and see what feels best.
Note on Offset/Setback: The stance setback (sometimes called offset) is how much the bindings are shifted toward the tail of the board. Most boards come with a “recommended stance” mark near center. Beginners should start with a roughly centered stance (equal nose and tail in front of your feet) for balance and easy turning. As you progress, you might set your stance back 1–2 inches on a directional board for better flotation in powder or easier turn initiation. However, never mount your bindings closer to the nose than the tail – that will make turning very unstable.
Position Your Bindings (Centered or Setback)
With stance width chosen, decide where along the board to place your bindings:
Centered Stance: As a default, mount bindings so your feet are evenly spaced between the nose and tail. This gives equal board in front and behind both feet. A centered stance is great for twin-tip boards and park riding because it balances your weight, making switch riding (riding backwards) easier.
Setback Stance: If you ride mostly in one direction (say you ride regular and don’t do a lot of switch) or you need more float in powder, shift both bindings toward the tail. This puts more of the board’s nose in front of you, helping with float and forward speed. Many free-riders and all-mountain riders ride with a slight setback for these reasons. Even 1–2 inches of setback can make a difference.
Board Type Matters: On a true directional board (designed to go one way) like some freeride or powder boards, a bit of setback is common. On a symmetric twin board (for freestyle), most riders keep it centered. Always refer to your board’s “Reference Stance” marks on the topsheet – that’s usually the intended center of mass position.
Adjust Evenly: If you move your stance wider or narrower than the marked stance, move both bindings outward or inward equally, so you stay centered in the board’s sidecut. Moving one binding without the other will shift you off-center.
Choosing Your Stance Angles
Your binding angles determine how your feet are rotated on the board. Beginners usually start with a “duck stance” or a slight forward stance. Here are some common angle setups:
Duck Stance (Positive/Negative): Both feet angle outwards (toes pointing away from each other). A typical beginner duck stance is +15° on the front foot and –6° (or –9°) on the back foot. This mirroring of angles feels natural for riding switch (backwards) and is forgiving for turns. Many freestyle riders use a duck stance for its balanced feel. For example, REI suggests front at +15° and back around –6° as a great starting duck setup.
All-Mountain Stance: For general riding where you carve groomers and ride directional terrain, a slight “forward” stance is common. This might be something like +15° front and 0° (or +3°) back. It still keeps the back foot mostly straight but gives more angle to the front foot. This helps initiate toe-side turns and still allows reasonable comfort switch.
Positive/Positive (Alpine) Stance: Both feet point forward (+ on both). For example, +15° front and +3° or +6° back. This stance is great for carving high-speed turns on-piste. Note it makes riding switch quite awkward, so it’s mainly used on directional boards.
Positive/Zero (Old School): Front foot forward, back foot at 0° (straight across). A classic freecarve stance. It lets you ride switch more easily than +/+, since the back foot isn’t angled. Many freeriders and powder hounds use + front, 0 back.
How to Set the Angles
Binding baseplates (discs) have markings around them (often 0°, +15°, +30°, etc.) or tiny notches for every 3°. Align the indicator (usually an arrow or marker on the baseplate) with your desired angle mark.
Duck Stance
A quick way: set front to +15°, back to –6° for a safe duck stance, then adjust from there.
Remember: Angles are measured relative to perpendicular to the board. Angling toes toward the nose is “positive”, toward the tail is “negative”.
Every rider’s body is different. Some prefer a wider duck like +15/–15, others might ride +18/–6, etc. Start with a modest angle. Too much angle can strain your knee.
Pro Tip: Write down or mark your final positions (angle and hole settings) so you can remount quickly if you ever change boards. Snowboard setups (stance width, angles, setback) are very personal. The goal is a balanced, comfortable stance that suits your riding style. If in doubt, start with the board’s reference stance – it’s “designed around” that setup.
How to Install Snowboard Bindings
Now that you’ve decided stance side (regular/goofy), width, position (centered/setback), and angles, it’s time to physically attach the bindings to the board. We’ll cover standard disc bindings first, then note the special case for Burton’s Channel system.
Identify Front vs. Back Binding: For a regular rider, the left binding goes in front; for a goofy rider, the right binding goes in front. (Binders are usually labeled or shaped for left/right.) The boot straps should face outward on each side.
Place Board Nose-Forward: Lay your board upside-down or on its base on a flat surface, with the nose pointing away from you. If uncertain which way is nose, look for manufacturer text; usually the tip is where you read the writing in the correct orientation.
Step 1: Attach the Disc (Standard Baseplate)
Most bindings use a circular mounting disc under the baseplate. Remove the disc from the binding (if it’s detachable) or move it to align with your chosen angle.
On the disc or board, find the insert holes matching your stance width.
Step 2: Set the First Screw
Hold the binding (with disc in place) on the board. At the front binding, orient your disc to your chosen front angle (remember each notch is about 3°).
Align it over the two center screw holes of the four-hole pattern.
Keeping your boot positioned in the binding can help judge centering – you want roughly the same amount of board at your toe and heel.
Now, turn in just one screw (start with a corner) loosely by hand or with the screwdriver.
Step 3: Insert Remaining Screws (Loosely)
Next, insert the remaining three screws, again only a few turns each, so the binding stays in place but can still shift slightly. Make sure the baseplate stays centered.
Step 4: Check Alignment and Angle
With all screws in place but loose, put on your boot and step into the binding.
If possible, have a friend help you see if your boot is centered on the board (heels and toes shouldn’t overhang too much).
Adjust the disc slightly so that there’s equal board showing at the front and back of the boot.
For example, REI advises positioning the binding so there’s the same amount of board in front of your toe as behind your heel.
Step 5: Tighten Screws Securely
Once everything looks centered and angled right, tighten all screws about one turn at a time, working diagonally (like tightening lug nuts).
Avoid overtightening – snug is good. Overtightening can strip threads or deform the board.
REI and Tactics both warn against going too tight or using adhesives, as it could void warranties.
Step 6: Repeat for Back Binding
Follow the same process for the rear binding.
Place it on the board at the rear stance position and at your chosen rear angle. (By default, many beginners use 0° to –6° for the back foot).
Insert screws loosely, center your boot, then tighten. Follow the same steps for mounting the front binding, but set the angle at –6° if you started +15° front.
Step 7: Final Checks
With both bindings attached, buckle your boots in to test. Wiggle side-to-side – the bindings should feel solid with no wobble.
Ensure buckles close easily without hitting any screw heads. Your toes and heels should line up with the binding edges – no major overhang on either side.
Do a quick jump in place with your board (on carpet or a soft surface) to feel if the stance width feels stable and comfortable.
Important: Never force the binding disc past its stop – if it’s not sliding, make sure you’re aligned with the inserts correctly. If something feels off (e.g., screws won’t align), back out the screws and reposition. And again, don’t use thread-locking glue (Loctite) on binding screws – it can void your snowboard’s warranty. Just snug is fine.
How to Install Burton EST Bindings
If you have a Burton snowboard with the Channel system (common on Burton’s Re:Flex and EST bindings), the steps differ slightly:
Step1. Pop Out the Channel Plugs
Each binding area on your board has two small rubber or plastic plugs covering the Channel slots.
Use the tip of your screwdriver to gently pop them out — don’t lose them, you’ll put them back later.
Once removed, you’ll see the long slot (that’s “The Channel”).
Step2. Insert the Channel Inserts
Take the two silver metal Channel inserts that came with your EST bindings.
Slide them into the slot from one end of the board — one goes near the toe edge, the other near the heel.
They’ll slide along the track freely, which is how you’ll adjust stance width and position later.
Pro tip: If the inserts feel stuck, angle them slightly when sliding them in; they’ll drop into place more easily.
Step3. Place Your Front Binding
Now grab your front binding —If you ride regular, it’s your left binding.
If you ride goofy, it’s your right one.
Set it on top of the Channel inserts. You’ll see that the screw holes in your binding’s baseplate line up with the inserts inside the Channel.
Step4. Insert the Screws Loosely
Drop the screws through the holes and into the inserts.
Use your screwdriver to turn each screw just a few turns — enough so the binding doesn’t fall off but can still slide and pivot.
You’ll adjust position and angle before fully tightening.
Step5. Adjust Your Stance and Angle
Now comes the alignment part.
Set your stance width: Slide the whole binding forward or backward along the Channel until it matches your desired stance marks on the board.
Set your stance angle: Rotate the binding until the small indicator window lines up with your chosen angle (for example, +15° for your front foot). You’ll see the numbers printed on the board around the Channel area.
Take a second to double-check the stance looks right — if the writing on your board is upright, the end above the writing is the front.
Step6. Center Your Boot
Before tightening everything down, slide your boot into the binding and check how it sits:
The boot should look centered over the board — equal toe and heel overhang.
If one side sticks out more, slide the binding slightly to even it out.
This step makes a huge difference in how your board turns and balances.
Step7. Tighten the Screws Evenly
Once everything looks good — stance, angle, and centering — go ahead and tighten the screws.
Do it one turn at a time, moving diagonally between screws so the pressure stays even.
They should be snug but not over-tightened.
Reinsert the rubber plugs you removed earlier to keep snow and moisture out of the Channel.
Step8. Repeat for the Back Binding
Follow the same process for your rear binding, just remember your back foot usually has a negative angle (for example, –6° or –9° if you’re using a duck stance).
Burton’s EST system gives more flexibility (literally infinite positions), but follows the same principles of centering and angle alignment. Blue Tomato summarizes these steps well. Remember: EST bindings only work with the Channel system. All other bindings (Union, Ride, etc.) use the standard four-hole mount.
Snowboard Binding Checks
Congratulations – your bindings are on! Before you hit the lifts, do these quick checks:
Boot Fit: Buckle into each binding fully. The boot should feel snug, and both the toe strap and ankle strap should connect without strain. Your heel should be pushed into the heelcup. If straps are too loose or too tight, adjust their length so they center over your boot.
No Overhang: Look down at your board. Make sure your toes and heels aren’t extending far over the edges of the binding baseplates. Some overhang is normal, but extreme overhang can cause heel or toe drag on turns. If you see a lot of overhang on one side, you may need to re-center the binding or consider a narrower stance width.
Straps Aligned: Check that the straps rest evenly across your boot’s toe and ankle when fastened. They should not slip off or be cocked to one side. Properly adjusted straps will keep your boot snug so your foot doesn’t slide.
No Wobble: Grab each binding (with screws fully tightened) and try to wiggle it. It should feel locked down. If you notice any movement, re-tighten the screws evenly.
Angle Comfort: Stand on carpet and shift weight heel/toe. If anything feels uncomfortable (knees twisting uncomfortably, for example), you might want to tweak an angle. It’s ok to loosen screws and re-adjust a few degrees as needed. As Tactics notes, even small angle changes can make a big difference.
Test Stance: Do a few squats or mimic turns with your bindings on carpet. Your knees should track naturally over your toes at those angles. If your stance feels too “wide” or “narrow,” you can break out the screwdriver later and shift the discs one hole in or out to fine-tune your width.
Quick Safety Note: Always double-check that no tool or screw is left under the board before riding. A loose object can damage the base or cause you to slip.
Conclusion
By following these steps, you’ll have your bindings securely mounted and tailored to your riding style.
But remember, every snowboarder is different—don’t be afraid to experiment with small adjustments once you’re on snow. The more you ride, the more you'll fine-tune your setup.
When it comes to snowboard bases, the debate of Extruded vs Sintered defines performance, cost, and care. Extruded bases are smooth and simple—easy to repair and budget-friendly—while sintered bases are engineered for speed and durability. In this guide, we explain the differences in plain terms to help new riders choose the right base for their needs.
What Is a Snowboard Base?
Snowboarding in winter
The snowboard base is the smooth bottom layer of the board (typically made of polyethylene) that contacts the snow. It glues onto the wood/fiberglass core and metal edges. A key difference lies in how that polyethylene sheet is made:
Extruded base: Polyethylene pellets are melted and extruded (pushed) into a flat sheet. The result is a one-piece, non-porous surface. Because it’s a continuous sheet, it doesn’t take in wax well, but it is very uniform and easy to repair.
Sintered base: Tiny polyethylene granules are fused under high pressure and heat. This produces a very dense, porous structure full of microscopic holes. Those pores soak up wax. Sintered bases are usually heavier-duty and faster when properly waxed, but they cost more and need frequent waxing.
Think of it this way: an extruded base is like plastic molded into a solid slab, whereas a sintered base is like very fine granules tightly squeezed together.
Why Base Material Matters
Speed: A properly waxed sintered base holds wax and glides very fast. An extruded base, even when waxed, can never quite reach that same top speed. (However, if not waxed, an extruded base can actually slide better than an unwaxed sintered base.)
Maintenance: Extruded bases require almost no special care – they hardly need waxing. Sintered bases must be waxed regularly to perform well, or they’ll become slow and even sticky in slow snow.
Durability: Sintered bases are more abrasion-resistant and hold up better to hard snow and rocks. Extruded bases can be more easily damaged and have a higher chance of warping if left in heat.
Repair: Extruded bases can be repaired with simple P-Tex candle fixes by a DIYer. Sintered bases require more careful repair (often using sintered P-Tex material) to avoid uneven patches.
Cost: Generally, extruded boards cost less. A sintered base adds to manufacturing expense, meaning boards with sintered bases sell for higher prices.
Each of these features is important for a new rider to understand. In the next sections, we’ll dig into each base type’s pros and cons, with clear language and examples.
Extruded Base Snowboards
extruded base snowboards
An extruded snowboard base is made by melting polyethylene pellets and forming them into a solid sheet that’s then attached to the snowboard core.
Because the material is a single, non-porous layer, it doesn’t absorb wax deeply.
However, that simplicity also makes extruded bases affordable, easy to maintain, and beginner-friendly.
✅ Pros
✅ Low Maintenance: Requires minimal care — ride for days without waxing and still get decent glide. Great for beginners.
✅ Easy to Repair: Quick DIY repairs with a P-Tex candle. Many techs use it to repair sintered bases as well.
✅ Affordable: Lower production costs mean less expensive boards, making them popular for entry-level and rental gear.
✅ Durable for Park Riding: Soft but tough enough for freestyle — handles impacts well and repairs are easy.
❌ Cons
❌ Slower Speed: Not as fast as sintered bases, even when waxed. Ideal for casual riders, not racers.
❌ Poor Wax Retention: Non-porous surface means waxing doesn’t last as long, and speed gains are limited.
❌ Slight Heat Sensitivity: Can deform under extreme heat or pressure, but this is rare in normal use.
Best for
Beginners / Casual Riders: If you’re new to snowboarding or just ride for fun, an extruded base is perfect. It’s low-maintenance, forgiving, and cheap to repair. You won’t need to wax it often, so you can focus on learning turns instead of tuning your board.
Freestyle / Park Riders: Riders who enjoy jumps, rails, and tricks in the park benefit from extruded bases. They’re durable enough to handle impacts and scratches, and simple P-Tex repairs make it easy to fix damage from rails or boxes.
Budget-Conscious Riders: If cost is a concern, extruded bases keep the price of the board low. This makes them a great choice for those who don’t want to spend a fortune but still want a reliable, beginner-friendly board.
Casual All-Mountain Riders: Even if you occasionally ride all over the mountain, an extruded base can handle moderate conditions without much maintenance. It won’t be as fast as a sintered base, but it’s consistent and easy to manage.
Extruded bases are the go-to choice for beginners, casual riders, and freestyle snowboarders. They’re simple, low-cost, and easy to maintain — perfect if you just want to ride without worrying about constant waxing or repairs.
Many popular beginner boards, such as the Ride Manic, use an extruded 1500 base known for being durable and easy to fix.
If you rarely wax or don’t plan to maintain your board often, an extruded base is the most practical and worry-free option.
Sintered Base Snowboards
sintered base snowboards
A sintered base is made by compressing tiny polyethylene (P-Tex) powder under high heat and pressure, creating a dense, porous structure.
These microscopic pores absorb wax deeply, which is why sintered bases deliver superior speed, durability, and long-lasting glide on the snow.
✅ Pros
✅ Faster Glide: Waxed sintered bases glide faster and stay smooth for longer, ideal for high-performance snowboards.
✅ More Durable: Tougher and more scratch-resistant than extruded materials, perfect for rocky or icy terrain.
✅ Better Wax Absorption: The porous structure absorbs wax, improving glide across all snow types.
❌ Cons
❌ Higher Cost: The production process is more expensive, raising the price.
❌ Frequent Maintenance: Regular waxing is needed, or the base may slow down.
❌ Harder to Repair: Deeper scratches require professional repair due to the hardness of the material.
Best for
Freeriders / Powder Lovers: If you chase speed, fresh powder, and backcountry terrain, a sintered base is ideal. It glides effortlessly over soft and deep snow and holds wax to maximize performance.
All-Mountain Riders: Intermediate and advanced riders exploring all parts of the mountain will appreciate a sintered base. It’s more durable and faster, making long runs smoother and more efficient, especially if you maintain it properly with regular waxing.
Advanced Riders: Riders who prioritize performance and want a faster, more responsive board should go sintered. The extra maintenance is worth it for improved speed, wax retention, and durability on diverse terrain.
Racers / Boardercross Riders: Anyone racing or seeking maximum speed gains from every run will benefit from a sintered base. Properly waxed, it accelerates quicker and maintains glide better than extruded boards, making it the choice for competitive riders.
Sintered bases are perfect for riders who want maximum speed and performance, but they do require more maintenance and care.
Other Types of Snowboard Bases
While extruded and sintered dominate the market, there are also hybrid or specialty bases worth knowing:
Hybrid Bases
Overview: Combines extruded and sintered materials or adds graphite to the base.
Pros: Offers a balance of speed, durability, and low maintenance. Often faster than standard extruded but easier to maintain than pure sintered.
Best For: Riders who want versatility without committing fully to high-maintenance sintered bases.
Graphite-Infused Bases
Overview: Sintered or hybrid bases with graphite particles.
Pros: Reduces friction, improves glide in various snow conditions, and makes waxing last longer.
Best For: All-mountain and advanced riders seeking maximum speed and smoothness.
Specialty High-Performance Bases
Overview: Proprietary sintered or composite bases designed for racing, powder, or extreme durability.
Pros: Exceptional speed, durability, and wax absorption, but requires careful maintenance.
Best For: Professional or experienced riders who ride frequently and can commit to proper care.
Note: Most beginners and casual riders don’t need these specialized bases. Extruded or standard sintered bases are sufficient for learning and improving skills. Hybrid or graphite-infused bases are options as you advance.
Extruded vs Sintered Comparison
Feature
Extruded Base
Sintered Base
Winner / Notes
Price
Lower; cheaper to produce
Higher; adds to board cost
Extruded – beginner boards are budget-friendly
Top Speed
Moderate; even waxed, slower than sintered
Very high when waxed; greater glide
Sintered – faster if waxed, but unwaxed extruded can sometimes compete
Waxing
Infrequent; optional
Frequent; needed for peak speed
Extruded – low-maintenance
Wax Retention
Low; non-porous
High; absorbs wax well
Sintered – better glide when waxed
Repairability
Easy; DIY P-Tex fixes
Harder; requires care or pro
Extruded – beginner-friendly
Durability
Less abrasion-resistant; can warp under heat
More abrasion-resistant; withstands rocks/rough snow
Sintered – holds up better in harsh conditions
Ideal Use
Beginners, freestyle/park, casual riders
Speed-oriented, all-mountain, advanced riders
Depends on skill and priority
Best Choice for Beginners
best choice for beginners
What base should you pick as a newcomer? In most cases, an extruded base is a safer bet for early learning:
You won’t need to wax often. You can learn turns without worrying about tuning your board.
Durability and cost favor extruded: if you ding the base or carry the board in a car roof, you’ll worry less about damage.
As a beginner, there are actually few reasons to choose a sintered base. Beginners often bang into things, so the tough, simple extruded base helps them “save cash” and avoid workshop visits.
REI notes extruded boards are “less expensive, low maintenance and relatively easy to repair” – perfect for someone just starting.
That said, if you already know you’ll want speed or plan to keep your board for many years, you could go sintered from the start. A sintered base will reward you with better glide as you improve. But for absolute newbies, extruded keeps things simple.
Maintenance Tips
snowboard maintenance
Whatever base you choose, keep these tips in mind:
Waxing Frequency: Even though extruded boards need waxing less often, it’s still a good idea before the season starts. For sintered boards, wax before every ski day if you want peak glide. Regular waxing seals the base and protects against drying out.
Flatness: Sintered bases may need periodic “flattening” if they develop puckers from heating. Keep your board under moderate heat (like a hot car) or soak in warm water to prevent warping after cold storage.
Scratches: Fix base scratches promptly. On extruded bases, drip P-Tex into the gouge, let it cool, then scrape flat. On sintered bases, use sintered P-Tex or bring it to a shop (or use extruded P-Tex carefully as a temporary fix).
Conclusion
For beginners, extruded bases are usually the best choice — forgiving, affordable, and low-maintenance, letting new riders focus on balance and turns rather than board upkeep.
Sintered bases provide superior speed and durability, but only shine if you’re willing to wax regularly and invest in maintenance. Advanced riders or those planning to ride all over the mountain may prefer sintered for extra performance.
Beginners can always start with an extruded board and upgrade later. Modern boards also offer hybrids, like graphite-infused extruded bases or “superdrive” materials, for those seeking a mix of speed and ease of care.
Pick the base that matches your riding style and commitment: extruded for simplicity, sintered for speed.
A brand new snowboard smell, the perfect edges, the glossy base — everything looks ready to go. But there’s one thing most riders wonder before their first run: Do I need to wax a brand new snowboard, or just use it as is?
Factory Wax on New Snowboards
a brand new snowboard
New snowboards come with a light factory wax, usually a quick spray-on or rub-on layer rather than a full hot wax. It mainly prevents the base from drying out and lets you ride right away. However, this thin coating wears off fast and offers little protection.
The factory wax is more of a “base coat” than a real performance wax. If the base looks cloudy or dry, it’s a sign the wax has faded during storage. You can ride a new board immediately, but for better glide and durability—especially on longer trips—it’s best to hot wax before hitting the slopes.
In short, factory wax lets you ride immediately, but it’s essentially a placeholder – treat it as a free bonus, not a substitute for a real waxing job.
Why Waxing Matters for Performance
Waxing a snowboard
Wax isn’t just about speed – it’s about protecting your board and maintaining control. A fresh coat of wax reduces friction between the board and snow, allowing you to glide more smoothly and ride faster. This extra glide also translates to improved stability and control, so turns feel more responsive and the board isn’t dragging you down on flat spots.
Regular waxing keeps the base material (P-Tex) nourished and prevents it from drying out and cracking. A well-waxed base resists damage from snow, ice, and little debris, extending the life of the board.
In short, waxing helps your snowboard perform its best on every run and keeps it in good shape long-term. Even beginner runs will feel smoother, and if you progress to steeper slopes, you’ll definitely notice the difference.
Signs Your Snowboard Needs Waxing
How do you know when it’s time to wax? Here are common clues that wax is needed:
The bottom of the snowboard looks dull and white
Dull or whitish base: If parts of the base look dry or chalky (cloudy white patches), the existing wax is gone. That “dry” look means your base is thirsty for fresh wax.
Slower rides: If you remember the board being faster when new, but now runs feel draggy or you’re slowing down on flats, that indicates more wax is needed.
Scratchy feel: If the base feels rough under your hand or your feet (you might feel little ridges or grit), the smooth wax layer has worn off.
After several outings: As a rule of thumb, every 3–5 full days of riding will consume a noticeable amount of wax. Beginners can try waxing after their first week on snow to notice the improvement.
In practice, watching for a loss of speed or a visibly dry base will tell you it’s time to re-wax. You don’t have to count runs exactly, but if your board slows down or starts looking white at the edges, plan on a hot-wax session soon.
Types of Waxing: Factory vs. Hot vs. Rub-On vs. Spray
There are several ways to wax a snowboard, each method has a place.
The thin factory coat is convenient for immediate use.
Hot wax (with an iron) gives the best, longest-lasting performance – it’s the standard for serious waxing because it melts into the base structure.
Rub-on wax is handy for a quick touch-up if you’re mid-trip and need a little extra glide.
Spray-on wax (often marketed as quick wax) sounds easy, but in reality, it just coats the surface and falls off quickly.
The table below compares the main methods:
Waxing Method
Pros
Cons
Durability
Ease of Application
Factory wax (pre-waxed)
Already applied; board is ready to ride out-of-box
Extremely thin; provides only minimal protection
Very short (only first few runs)
N/A (done by manufacturer)
Hot wax (iron-on)
Deeply penetrates base for longest-lasting glide; best speed and protection
Requires a waxing iron, time, and workspace
High (can last several full days on snow)
Moderate (needs iron, scraper, brush)
Rub-on / Paste wax
Very fast and easy to apply anywhere; portable for quick fixes
Not effective long-term; only coats surface; flakes off
Very low (almost immediately sloughs off)
Easiest (just spray on), but not recommended
🏁 Summary
🔥 Hot wax (iron-on) → Best overall performance and durability.
⚡ Rub-on wax → Great for quick touch-ups while traveling.
🧊 Factory wax → Fine for first use, but re-wax soon.
💨 Spray-on wax → Easy but not worth it unless layered over hot wax.
Pro tip: Spray-on wax is not worth the cost unless it’s layered on top of a real wax for racers.
Benefits of Waxing a New Board
Why put on wax when it already has factory wax? There are clear advantages when you wax a brand new snowboard before riding.
A proper hot wax will fill any tiny gaps or scratches in the base, giving you an immediate speed boost. You’ll notice smoother, faster rides and better edge response right away.
Waxing also applies a protective layer over the base, shielding it from abrasion and moisture. You can ride a new board a couple of times on factory wax. But before you really hit the slopes hard, make sure to get it waxed for maximum protection.
In short, wax a brand new snowboard pays off in better performance and longer board life.
Waxing Tools and Products for Beginners
snowboard wax tools
To wax your board at home, gather these beginner-friendly tools:
1. Waxing Iron
Function: A dedicated ski/snowboard waxing iron heats to the right temperature and spreads the wax evenly.
No Waxing Iron?: You can use an old clothes iron on a low setting, but after using it for waxing, that iron should never be used for clothes again.
2. Wax Bars
Recommendation: Beginners should start with an all-temperature (universal) wax. This type works well in most conditions.
Included in Kits: Many waxing kits come with a universal wax bar.
3. Scrapers
Purpose: Used to remove cooled wax from the base. A wide plastic scraper (plexiglass) is key to clearing wax without damaging the base.
Included in Kits: Most waxing kits include both plastic and metal scrapers, but plastic is all you need for beginners.
4. Brushes
Purpose: After scraping, a base brush is needed to smooth and finish the wax.
Recommended Types:Stiff nylon or horsehair brushes are standard for snowboards.
Extras: Some kits also include a small wire brush for initial cleaning, but a basic nylon brush and buffing cloth (or felt) are enough for beginners.
5. Base Cleaner (Optional)
Purpose: Base cleaner or rubbing alcohol helps remove old wax and dirt before applying a new coat.
Is It Necessary?: For beginners, it's optional. However, Red Bull recommends cleaning the base or doing a quick scrape with a hot wax before each new application.
6. Full Waxing Kits (Recommended)
If you’re new to waxing, consider getting a complete snowboard waxing kit.
These kits usually include everything you need — a waxing iron, universal wax bar, plastic scraper, and brushes.
Buying a kit ensures you have the right tools and saves you the hassle of purchasing each item separately.
How to Wax a Snowboard (Step by Step)
Step 1: Set Up Your Snowboard
Find a stable surface (e.g., two benches or a workbench) to hold your snowboard with the base facing up.
If the board is cold, let it sit at room temperature for a while. This helps the wax adhere better.
Step 2: Clean the Base
Wipe off any dirt or debris from the base.
Use a base cleaner or rubbing alcohol on a cloth to remove old wax.
Alternatively, perform a quick hot scrape (melt wax and scrape it immediately) to remove any leftover gunk.
Ensure the base is dry and clean before proceeding.
Step 3: Heat the Iron
Plug in your waxing iron and set it to the appropriate temperature (typically around 250–280°F / 120–140°C for non-fluoro wax).
Wait for the iron to fully heat up—most irons have an indicator light that tells you when it’s ready.
Step 4: Melt and Apply Wax
Hold a wax bar against the hot iron and let it drip fresh wax onto the snowboard base.
Move the iron across the base to spread and smooth the melted wax evenly, ensuring you cover the entire base with a thin film of wax.
Step 5: Iron the Wax In
Continue running the iron over the board in smooth, overlapping circles or paths.
Keep the iron moving to avoid burning the base. The wax will melt further and penetrate the pores of the P-Tex.
Step 6: Cool Completely
Turn off the iron and let the board cool for 20–30 minutes.
Wait until the wax has fully hardened before moving on to the next step.
Step 7: Scrape Off Excess Wax
Use a plastic scraper, holding it at a 45° angle, to remove the top layer of cooled wax.
Scrape from nose to tail until only a thin, even layer of wax remains. Ensure there are no drips or clumps.
Step 8: Brush and Finish
Use a nylon or horsehair brush to gently brush from nose to tail.
This buffs the base, opens its micro-structure, and removes any remaining wax crumbs.
The board’s surface should feel smooth but not slick, with a uniform texture.
How Often to Wax Your Board
For new snowboarders, a good rule is: wax after every 3–5 days of riding for optimal performance. In reality, beginners don’t have to be quite so strict right away. If you’re just playing around a couple of times a month, you can perhaps wax every few sessions or when you notice the board slowing.
High-end snowboard makers often recommend waxing every 3–4 runs, but that can be demanding. A more relaxed approach is to wax about 2–4 times per season if you ride casually, or at least once a month in winter. Watch the base – if it starts to look dry or your cruising speed feels down, that’s your cue.
On longer trips (a week or more), consider waxing mid-trip as needed. But for a beginner’s first runs on a new board, just start with that initial hot wax and you’ll ride very comfortably.
Alternatives for Casual Snowboarders
alternatives for casual snowboarders
Full iron-on waxing is ideal, but casual riders do have simpler options:
Rub-on (paste) wax: These bar or sponge-type waxes can be rubbed directly onto the base and buffed in. They won’t match a hot wax in durability, but they’re great in a pinch. A quick rub-on wax can noticeably improve glide between full wax jobs. Keep a small bar in your pocket for on-slope touch-ups.
Wax sticks or crayons: Similar to rub-on, these are wax blocks you squeeze or rub on the base. They’re easy for minor maintenance but again need more frequent use.
Spray-on/Fluid wax: Generally not recommended as a primary solution. Experts warn that spray wax merely coats the very surface and comes off immediately on the snow. In practice, spritzing a new board with “liquid wax” might feel fast but only gives a momentary sheen. Many sources say spray wax is basically worthless by itself. (If used at all, it should only be on top of a base that’s already well-waxed for racing scenarios.)
Hand wax (coolant blocks): Some wax kits include “crayon” bars that can be applied by hand. These again are just a form of paste wax – better than nothing if you have no iron, but far inferior to a real wax job.
Finally, riding without waxing at all is doable if you’re very casual, but expect slower, duller performance.
In most cases, even a quick rub-on wax provides enough benefit to make it worthwhile for casual use.
Tips to Maintain Snowboard Base Health and Glide
Keeping your board’s base in good shape goes beyond just waxing it when needed. Here are beginner-friendly maintenance tips:
1. Clean after each ride
clean snowboard after each ride
Snowboards pick up dirt, tree sap, and grit on the hill. Wipe the base with a mild soap solution or base cleaner (a few drops of dish soap or a specialty cleaner) to remove buildup. This keeps wax and water from being trapped in grime. Rinse and dry thoroughly; moisture left on metal edges or base can lead to rust or dry spots.
2. Brush and remove debris
After scraping excess wax, use a cloth or brush to wipe off any remaining particles. A clean base glides faster. For big flakes of wax or dirt, a quick swipe with a plastic scraper will do.
3. Storage wax
If you’ll park your board for the off-season (or even a few weeks between rides), put on a generous layer of wax and scrape it once. This thick coating keeps the base saturated with wax and prevents drying or oxidation while it sits. Don’t forget to wipe it off (scrape) before your first ride next season.
4. Store properly
Keep the board in a cool, dry place away from sunlight or chemicals. Hang it or lean it on a padded rack – never leave it sitting on concrete or outside. Cement floors and moisture can harm the base and edges. If possible, remove bindings for off-season to relieve stress on the board.
5. Brush out structure
Before each ride, use a soft brush (nylon or horsehair) on the base to restore the ski/snowboard base structure. This “frees” the tiny grooves and enhances glide, especially on wet snow.
Fix big gouges: If your base gets a deep scratch (e.g. metal edge hit a rock), a P-Tex candle repair can fill it in. This is more advanced, but know it exists so big damage doesn’t go untouched.
Regular waxing cycle: As noted, aim to wax every few outings. Consistency is key – “cleaning and regularly waxing your bases is the most common and easiest maintenance task”. A well-cared-for base will optimize your speed and turn performance.
❓FAQ
Q1: Do you need to wax a new snowboard?
No, you don’t necessarily need to wax a new snowboard right away, but it can be beneficial. Factory wax is enough for your first few rides. If you're looking for better performance or plan to ride a lot, wax it before hitting the slopes.
Q2: Do new snowboards come pre waxed from the factory? Do Burton boards come pre waxed?
Yes, most new snowboards, including Burton boards, generally come pre-waxed from the factory. The wax applied is usually a basic coating to protect the base during shipping and storage. However, for optimal performance, it’s always a good idea to apply a fresh coat of wax tailored to the snow conditions you'll be riding in. This helps ensure smoother gliding and better overall performance on the slopes.
Q3: Should a new snowboard be waxed?
While most new snowboards come with factory wax, it’s still a good idea to wax your new snowboard before its first big ride. Factory wax is often basic and may not provide optimal performance. Waxing your board helps protect the base, improves glide, and ensures smoother rides, especially in varying snow conditions.
Q4: Before waxing a new snowboard, do I need to remove the factory wax?
It's generally a good idea to remove the factory wax before applying your own. The factory wax is often a basic, low-quality wax used for transportation and storage, not necessarily for performance. Removing it ensures that the base is clean and ready to accept the higher-quality wax you're about to apply, which will enhance your snowboard’s glide and performance. You can use a waxing iron to gently heat the base and then scrape off the old wax.
Q5: When you buy a new snowboard, do you need to tune it?
Most new snowboards come pre-tuned, but it’s a good idea to check the edges and base. If the edges feel dull or the base has scratches, a quick tune-up can improve performance. Additionally, make sure your bindings are securely mounted and adjusted to your preferred stance.
Q6: What is snowboard tuning, and how often should I do it?
Snowboard tuning involves sharpening the edges, detuning where necessary, and ensuring the base is flat and smooth. You should definitely tune your board at the beginning of the season and maybe once throughout.
Q7: How often should I wax my snowboard?
It's recommended to wax your snowboard after every 3-5 full days on the slopes, or whenever you notice it starting to slow down or look dry.
Q8: Do I need to check my snowboard bindings regularly?
Check your bindings before every ride. Damaged, loose, or improperly installed bindings can affect the way you ride and increase your chance of injury.
Q9: Why is it important to clean your snowboard after use?
Cleaning your snowboard after use helps to remove dirt, salt, and snow build-up, which can damage the base and edges over time. It also prevents rust on the edges and keeps your board in top condition. Regular cleaning can improve performance, extend the life of your snowboard, and ensure smooth rides next time you hit the slopes.
Conclusion
Waxing your snowboard is a simple yet essential step to ensure top performance and longevity. While most new boards come with a basic factory wax, applying a proper hot wax before hitting the slopes will give you better glide, speed, and base protection.
Regular waxing, along with basic maintenance like cleaning and tuning, keeps your board in optimal condition for every ride. Whether you're a beginner or a seasoned rider, taking care of your snowboard will help you enjoy smoother, faster runs and extend the life of your gear.
Skis and snowboards inevitably pick up nicks and gouges from rocks, rails, and normal wear. With the right tools, you can perform most base repairs at home, including snowboard bottom repair. This snowboarding repair guide explains how to identify scratches and core shots, lists essential tools, and shows when to fix it yourself or take it to a pro.
Common Base Damage and How to Identify It
common case damage on skis and snowboards
1. Shallow Gouges
Depth & Appearance: Fine lines or nicks, usually less than 0.5 mm deep; appear as white streaks or light scratches on colored bases.
Feel: Slight edge or depression detectable by running your finger over the base.
Impact on Performance: Minimal; usually doesn’t slow you down.
Repair Tips:
Hard to fill with P-Tex due to shallow depth.
Scrape off raised edges using a metal scraper or razor.
Apply fresh wax — often makes scratches nearly invisible.
For many fine scratches or perfectionists, a professional stone grind can fully remove shallow damage.
2. Medium Depth Gouges
Depth & Appearance: Cuts ≥1 mm that do not penetrate through the base; base material is missing, but underlying fiberglass or wood remains intact.
Shape: Often V-shaped or U-shaped divots.
Cause: Small pebble impacts are common.
Repair Tips: Can usually be repaired at home using melted P-Tex — one of the easiest ways to fix snowboard base damage.
3. Core Shot Snowboard and Deep Gouges
Definition: Gouges that penetrate through the fiberglass layer into the core (usually wood).
Appearance: Exposed fiberglass strands or wood grain; metal edges may be cracked.
Risk: Water damage to the core if not properly sealed.
Repair Tips:
Small core shots (narrow cuts) may be repaired at home with careful preparation.
Large core shots (>1 square inch) are best handled by professionals.
4. Edge Damage
Indicators: Bent or nicked metal edges, dents, burrs, rust, or shiny/glinting spots from work-hardened steel.
Inspection: Use a bright light at an angle; run a diamond stone or fingernail along the steel to feel rough spots.
Repair Tips:
Minor burrs or rust can be polished out, but if the damage extends to the base, you’ll need to fix the snowboard base first before tuning the edges.
Major dents or missing sections require professional repair.
🛠️ Snowboard and Ski Base Repair Tools
snowboard and ski base repair tools
These are the essential tools and materials you’ll need for any DIY snowboarding repair project.
1. P-Tex Sticks or Candles
Purpose: P-Tex sticks are commonly used for snowboard bottom repair and to fix snowboard base scratches or gouges.
Types:
Standard P-Tex (black or clear): Common type, melted with a lighter or repair gun.
Sintered P-Tex Rods / Base-Weld Wire (e.g., “Slick Sticks”): Contain epoxy for stronger bonding, ideal for deeper or larger repairs.
2. P-Tex Repair Iron or Hot Gun
Purpose: Melts P-Tex evenly into the damaged base.
Advantages: Provides controlled, consistent heat for clean, durable repairs.
Alternative: If you don’t have a repair iron, you can use a P-Tex candle and lighter, though results may be rougher.
3. Metal Scrapers
Purpose: Levels the repaired area after P-Tex has cooled.
Recommended Tools:
Surform Tool: A small grater-style tool for quickly removing excess P-Tex.
Steel Scraper: Used afterward to create a smooth, flat finish on the base.
4. Edge Files and Diamond Stones
Purpose: For repairing and sharpening steel edges — essential tools for any edge repair snowboard work.
Tools:
Metal File (8–10″) with File Guide: Ensures a precise edge bevel.
Diamond Stones (200–400 grit): Removes burrs and polishes edges.
Pocket Diamond Stone: Handy for quick edge touch-ups on the hill.
5. Base Cleaner and Brushes
Purpose: Cleans the base before any repair work.
Procedure:
Apply base cleaner or wax remover and let it dry for about 15 minutes.
Wipe off residue and scrape away loose material.
Use a stiff nylon or brass brush to clean wax and debris from scratches.
6. Epoxy or Glue
Purpose: Used to seal exposed cores or attach base patches.
Recommendation: Use a strong two-part or marine-grade epoxy (e.g., JB Weld).
Application: Bonds damaged core fibers or secures P-Tex sheet patches in large repairs.
7. Clamps or Vise
Purpose: Holds parts in place while the epoxy cures or repairs set.
Recommendation: Small C-clamps or a ski vise work well to stabilize the ski during repair.
8. Safety Gear
Safety Notes:
Work in a well-ventilated area to avoid fumes from P-Tex or epoxy.
Wear gloves when handling epoxy or hot tools.
Use eye protection when scraping or filing.
Always unplug irons or torches when not in use.
Ski and Snowboard Base Repair
Check your skis and snowboard base carefully.
Repairing Shallow Gouges
Step 1: Clean the Base
Wipe the base thoroughly with a clean cloth.
If the surface feels waxy or dirty, use a base cleaner.
Scrape away any loose plastic or debris using a scraper or single-edge razor blade.
Step 2: Remove High Spots
For superficial scratches (less than 0.5 mm deep), filling may not be necessary.
Carefully shave off any raised edges or loose flaps of plastic with a razor blade or scraper to make the area smooth.
Step 3: Apply Hot Wax
After cleaning and smoothing, apply a generous coat of hot wax over the scratch.
Allow the wax to cool completely.
Scrape off the excess wax until the surface feels even.
In most cases, the wax will fill or hide the shallow scratch effectively.
Step 4: (Optional) Professional Base Grind
If there are many small scratches or you want a perfectly smooth finish, take your board to a shop for a professional stone grind.
This process evenly removes a thin layer from the base for a like-new surface.
Tip: Minor, fine scratches can often be left alone — regular hot waxing will usually fill them enough that they won’t affect glide or performance.
Filling Medium Depth Gouges with P-Tex
Step 1: Prep the Base
Clean the damaged area thoroughly to remove all wax, dirt, and debris.
Use a sharp scraper or knife to cut away any loose or frayed base material.
Make sure the edges around the gouge are solid so the P-Tex can bond properly.
Step 2: Light the P-Tex
Choose a P-Tex stick (black or clear to match your base).
Ignite one end with a lighter and maintain a small blue flame—avoid large orange flames, as they produce soot.
When the tip becomes soft and gooey, it’s ready to drip.
Step 3: Drip the P-Tex
Slowly drip the molten P-Tex into the gouge(this step is the heart of any ptex snowboard repair).
Keep the flame just at the tip of the stick and rotate it to control the flow.
Slightly overfill the gouge so the repair sits above the base level.
For deep gouges, apply the P-Tex in layers—let each layer cool before adding the next.
Work in a well-ventilated area.
Step 4: Cool and Scrape
Let the P-Tex cool completely (about 30 minutes).
Use a Surform shaver or razor blade to remove excess material.
Then use a sharp metal scraper to level the repair flush with the base.
Check your work using a straightedge or by sight to ensure it’s even.
Step 5: Finish the Base
Smooth any ridges with a fine file or stone.
Apply hot wax to the entire base to seal and condition the repaired area.
Once cooled, scrape and brush the wax for a smooth finish.
Note:
P-Tex candles are convenient but softer than the factory base, so they wear faster.
For a stronger, longer-lasting repair, use a P-Tex iron or gun with quality P-Tex wire.
Repairing Core Shots and Deep Gouges
Use a scraper to clear the damaged area
Step 1: Clean and Assess
Remove all dirt, wax, and debris from the damaged area using a scraper.
Examine the exposed core.
If you find splinters of wood or fiberglass sticking out, either epoxy them back in place or remove them cleanly for a solid repair surface.
Step 2: Seal the Core
Before applying any P-Tex, seal the core to prevent moisture damage.
Use a strong waterproof epoxy (such as marine epoxy or JB Weld).
Press the epoxy into any cracks or exposed areas of wood or fiberglass.
Allow the epoxy to cure completely—typically 24 hours—to ensure a waterproof barrier.
Step 3: Cut Out the Damaged Base (Optional, for Large Areas)
If the damaged section is larger than about 1 inch (2.5 cm), it’s often best to cut it into a clean, simple shape (square or rectangle).
Use a sharp knife and template to cut straight edges around the gouge.
Remove any loose or ragged base material within the outline.
Step 4: Glue in a P-Tex Patch (for Large Damage)
Cut a piece of sintered P-Tex sheet slightly larger than the hole.
Make sure the rough side faces downward—the epoxy adheres better to it.
Apply epoxy to the edges of the cut-out and press the patch into place.
Clamp the patch flat using wooden blocks or metal plates.
Leave it clamped until the epoxy cures completely (check product instructions for curing time).
Once cured, scrape the patch flush with the base and wax over it.
Step 5: Melt P-Tex (for Small Core Shots)
For narrower or shallow core shots, follow the standard P-Tex snowboard repair method after sealing the core.
Remember: P-Tex alone doesn’t bond well to wood or metal, so sealing first is essential.
For better adhesion near metal edges, mix in Metalgrip repair string or use epoxy-infused P-Tex rods (“welding” sticks).
These materials melt and bond more strongly than regular P-Tex candles.
Step 6: Finish the Repair
Once the patch or P-Tex fill has cured, trim and scrape the area level with the rest of the base.
If the base is heavily worn and not perfectly flat, consider a professional stone grind to even it out.
Finish by hot waxing and brushing the entire base for smooth glide and protection.
Step 7: Know When to Seek Professional Help
If the core shot extends into the edge, covers a large area, or you can clearly see wood or fiberglass, it’s best to take it to a ski shop.
Shops use base-welding machines that fuse plastic at higher temperatures for a stronger, longer-lasting repair.
Note:
If the damage is larger than a quarter or exposes wood, go to a pro.
Professional repairs typically cost $20–30 and provide a durable, factory-quality finish.
Fix Snowboard Edge
When your ski or snowboard base takes a hit, the metal edges often suffer too. Follow these edge repair snowboard steps to fix and maintain your edges at home.
Step 1: Remove Burrs
Check for sharp burrs or rough spots along the metal edges—these are usually caused by rocks or regular wear.
Use a coarse diamond stone to smooth them out.
Hold the stone flat against the edge and make a few light, even strokes along its length.
You’ll feel and hear the edge transition from rough to smooth as the burrs are removed.
Avoid pressing too hard—remove burrs, not steel.
Step 2: Sharpen and Bevel the Edges
Once the burrs are gone, use a file and file guide to reset or maintain the bevel.
Most skis have a side-edge angle of 88° or 89° (check your manufacturer’s specs).
Secure the file guide on the ski, place the file in it, and push along the edge in smooth, continuous strokes from tip to tail.
Repeat until the edge feels uniformly sharp.
If needed, lightly file the base edge using a base-edge guide (usually 0.5°–1°), though this is less common for recreational skis.
Step 3: Polish the Edges
After filing, polish to remove any fine burrs left by the file.
Use a 200–300 grit diamond stone (or finer) in the same guide and make light, even passes along the edge.
For a mirror finish and maximum sharpness, progress through finer stones (400–600 grit).
Regularly inspect edges—if you store skis in damp places, burrs can reappear overnight.
A pocket diamond stone is handy for quick touch-ups at the hill.
Step 4: Fix Bent or Broken Edges
Bent edge: Gently bend it back into shape using pliers or a light tap with a hammer on a solid surface or in a vise.
Apply a bit of epoxy to seal any visible cracks and clamp until cured.
Broken or missing edge: If a section of edge is split out or missing, it usually requires cutting out the damaged area and installing a replacement edge strip—this should be done by a professional technician.
Step 5: Know When to Visit a Shop
If the edges are severely bent, deeply gouged, or peeled away from the base, home repair may not restore full performance.
A ski shop can perform a stone grind to flatten the base and machine-tune the edges for perfect sharpness and uniformity.
Professional service is often faster, cleaner, and cost-effective for serious damage.
Step 6: Maintain Daily Edge Care
Before or after each ski day, run a gummy stone or fine diamond stone lightly along both edges to keep them burr-free.
Always dry your skis thoroughly and apply wax after skiing, especially in wet or slushy conditions—this protects both the base and the edges from rust and corrosion.
Comparing Repair Methods: P-Tex vs Base Welding
Method
Overview
Pros
Cons
Best Use
P-Tex Candles
Simple, low-cost DIY melt-in repair.
Quick and easy for small scratches.
Weaker bond; may leave carbon spots.
Minor gouges not reaching the core.
P-Tex Repair Iron / Gun
Controlled heat tool for cleaner melting.
Stronger, more uniform repair.
Needs proper P-Tex sticks; slower process.
Small to medium base damage.
Air Welder / Hot Glue Gun (Base Weld)
Shop-grade fusion using weld rods with epoxy.
Very strong, long-lasting repair.
Requires skill and specialized tools.
Deep gouges or core shots.
Epoxy vs P-Tex
Used for bonding or sealing core areas.
Excellent adhesion for patches.
Too hard and brittle as a surface filler.
Core sealing and patch gluing.
Safety Tips and When to Seek Professional Help
Seek professional help for ski and snowboard base repair
Ventilate
Always work in a well-ventilated area. Melting P-Tex releases fumes that are best not inhaled.
A window or fan is advisable. A simple dust mask helps for sanding or filing edges.
Protective Gear
Wear gloves when handling hot tools or epoxy. Be careful with hot irons and torches to avoid burns.
Eye protection is wise when filing edges or cutting base material.
Pro vs. DIY
Minor damage: Small scratches or gouges can be fixed at home with P-Tex.
Major damage: Large core shots, split edges, or deep multiple gouges should go to a ski shop.
Why pros help: They have stone grinders, strong base welders, and the experience to make repairs last.
Tip: If you’re unsure—or think a repair might make things worse—let a professional handle it. Even experienced skiers do small fixes at home but still get a full tune once a season.
Conclusion
Regular waxing and snowboard bottom repair keep your board fast, smooth, and protected from long-term damage. With patience and the right tools, you can easily handle most minor to medium repairs at home — saving money and extending the life of your gear.
For larger core shots, edge damage, or structural issues, professional repair is the smarter move. Tune shops have the equipment and experience to restore your base to near-factory condition, ensuring durability and top performance.
Whether you prefer to DIY or schedule a seasonal tune-up, consistent care is key. Keep your base clean, waxed, and smooth — and your gear will reward you with better glide, control, and confidence on every run.
Snowboards are all different, made for different ways of riding in other places. Picking the right snowboard types can make learning simpler and riding way better. In this guide, we'll discuss the various types of snowboards, exploring what makes them distinct, including their shape, flexibility, and camber/rocker profiles. By the time you're done reading, you'll know which board is right for how you ride and how good you are.
Main Snowboard Types
All-Mountain Boards
All-mountain boards are do-it-all snowboards for riding anywhere on the mountain. They often have medium flex and a hybrid camber profile for stability and versatility.
All-mountain boards are the jack-of-all-trades. They’re made to handle groomed runs, some park tricks, and even a bit of off-piste riding. Typical features include a directional or directional twin shape – meaning the board may be slightly longer in the nose than the tail, but can often ride switch like a twin.
The flex is usually mid-stiff (around 5–7 on a 10-point scale), giving a stable feel at speed while still being forgiving. Most all-mountain boards use a wood core (poplar or aspen, for example) with fiberglass layers for strength and pop. This construction provides a lively yet dampened ride.
all mountain boards
Shape: Directional or directional twin (sometimes true twin)
Flex: Medium to medium-stiff for a balance of stability and playfulness
Camber/Rocker: Often cambered or hybrid (camber underfoot with rocker at tips) for solid edge grip and float
Terrain: Designed for all terrain and conditions – groomers, bumps, and light off-piste
Best For: Beginners through advanced riders who want one board that does everything
All-mountain boards are popular for good reason. Their versatile shape and medium flex make them a great first board for beginners, and they let riders explore the whole mountain without switching gears. You can carve hard on the frontside, pop small jumps, and even dabble in powder with a good all-mountain board.
The trade-off is that they’re not perfect at any one thing – they won’t float as effortlessly as a dedicated powder board, and won’t spin as easily as a super-flexible park board – but for general use they are fantastic.
Freestyle (Park) Boards
Freestyle or park boards are short, soft, twin-tipped boards built for tricks. They have extra flex for popping and twin symmetry for landing switch.
Freestyle boards – sometimes called park or jib boards – are made for jumps, rails, and skate-park tricks. They tend to be shorter, lighter, and much more flexible than all-mountain boards. Key characteristics include a true twin shape (symmetrical nose and tail) so you can land and ride equally well in either direction.
The flex is soft to medium (often around 1–4 on a 10-point scale for jib boards, slightly higher for jump/freestyle boards). This bendy flex gives a “pop” off jumps and makes presses (nose/tail balances) easier.
freestyle boards
Shape: True twin (symmetrical) or very slight directional twin
Flex: Soft to medium-flexing for easy maneuvering and pop
Camber/Rocker: Varies by board; many park boards use full camber for maximum pop on jumps, though some use flat or rocker sections for a more forgiving feel
Terrain: Terrain parks and street/urban features (halfpipes, jumps, rails, boxes)
Best For: Tricksters and jumpers of all levels, especially beginners in the park who want an easy board to spin and press on
Freestyle boards feel very playful underfoot. When you load up the board by flexing it, it stores energy and “snaps” you into the next jump with extra pop. Because they are short and soft, however, they can feel a bit unstable when you try to ride fast on hard groomers.
But if your goal is to hit jumps and rails, the softer flex and twin shape make spins and switch riding a breeze. Advanced freestyle boards may use higher-end materials (like carbon stringers) to withstand big jumps, but they still prioritize flex and forgiveness over speed.
Freeride Boards
Freeride boards are stiff and directional, built for carving and steep terrain. They often have a tapered shape and hybrid camber for holding big turns and floating in powder.
Freeride boards are the opposite of park boards: they’re made for off-piste adventure, big mountain terrain, and high-speed carving. Most freeride boards are directional (nose longer than tail) or even tapered directional (with a wider nose than tail).
This design helps the board float in powder and lets you lean back naturally. Freeride boards usually have a setback stance (your bindings are mounted a few centimeters towards the tail) to keep the nose up in deep snow. The flex is generally stiffer than an all-mountain or freestyle board. A stiff flex provides stability at speed, so you won’t chatter on icy runs, and it gives powerful response when carving hard turns.
freeride boards
Shape: Directional or tapered directional (wider nose, narrower tail)
Flex: Stiff flex for stability and precise turning
Camber/Rocker: Often hybrid camber/rocker or mixed profiles – camber underfoot for edge hold, rocker at tip for float
Terrain: Ungroomed snow, steep runs, trees, and powder (backcountry and chutes)
Best For: Expert riders who tackle big hills, carve hard, and explore off-piste terrain
Think of a freeride board as a carving machine that can handle a variety of tough conditions. The sharp edges and stiff flex let you carve nice clean turns on hard snow, while the directional shape helps keep you afloat in powder. Because they are stiffer, freeride boards don’t turn as quickly as park boards, but they soak up bumps better and charge hills with confidence.
For example, freeride riders will often choose a board with a firm flex to “lay down epic turns on steep, technical terrain”. These boards may also have extra materials (like carbon or bamboo rods) in the core to boost edge power without excessive weight.
Powder Boards
Powder-specific boards have very wide noses and a lot of rocker for maximum float. They let you “surf” on deep snow with a stubbier, directional shape.
Powder boards are a special breed, optimized purely for deep snow. Everything about them is tuned for floatation – meaning you stay on top of the snow instead of plowing through it. Powder boards are directional and often tapered: the nose is much wider and longer than the tail.
Many have a huge rocker (reverse camber) in the front and a deep setback stance, so the nose lifts up naturally in powder. They’re also typically a bit shorter than your all-mountain board, making them easier to whip around in the trees.
powder boards
Shape: Directional, big wide nose and narrower tail; often tapered (wide tip, pinched tail)
Flex: Medium (sometimes soft at nose) to help the board conform to uneven snow; soft boards float easier
Camber/Rocker: Rocker-dominant or flat-to-rocker profile (usually flat under the back foot, rocker in the front)
Terrain: Deep powder and untracked snow only
Best For: Powder hounds and backcountry riders who chase fresh snow
Riding powder is like gliding on a cloud, and powder boards maximize that feeling. With the nose afloat and the tail down, you can throw big carving turns in the deep snow and feel like you’re “surfing” the mountain.
The downside is that powder boards perform poorly on hardpack or at speed – they can feel floppy and chatter on groomers because their tips are very loose. Some powder boards even have swallowtails or pin tails (notched or pinched tail shapes) to add even more float.
In short, if you dream of deep days and face shots, a powder-specific board will make that dream come true – just expect to swap back if you return to icy trail runs.
Specialized Snowboard Types
Volume-Shifted Boards
volume shifted boards
Volume-shifted boards are a newer and increasingly popular category. They’re shorter and wider than traditional snowboards, giving them the same surface area (and float) in a more compact shape. This design makes them extremely maneuverable in trees and excellent in powder, since the extra width provides plenty of lift while the short length allows for tight turns.
These boards often have directional or tapered shapes with rocker-dominant profiles, combining the float of a powder board with the playfulness of a freestyle shape. They can feel a bit different underfoot at first, but once you get used to them, they’re a fun and responsive option for riders who want something unique.
Shape: Short and wide, usually directional or tapered
Flex: Medium to medium-stiff for stability and control
Camber/Rocker: Often rocker-dominant or hybrid for float
Terrain: Powder, trees, and mixed terrain
Best For: Riders who want a surfy feel and quick turns in deep snow or tight spaces
Volume-shifted boards aren’t as common as traditional all-mountain models, but they’re gaining traction fast—especially among riders who spend lots of time chasing powder or weaving through tree runs.
Splitboards (Backcountry Touring)
Splitboards let you climb uphill on untracked snow and then ride down. They split into two ski-like halves for skinning, then snap together for the downhill ride.
Splitboards are essentially freeride or powder boards that split in half lengthwise to form two “skis”. This allows you to climb (with skins) in the backcountry instead of taking a lift. Specialized bindings attach to touring plates or pucks that position your feet forward for climbing, then return to snowboard mode for the ride down. Once you reach the summit, you remove the skins and reassemble the two halves into a regular snowboard.
Aside from this gimmick, splitboards share features with freeride/powder boards: they are usually mid-stiff (to add support with the extra hardware), directional in shape, and have ample rocker in the nose for float. They’re often slightly wider than average to help in deep snow.
splitboards
Shape: Directional (often similar to a freeride board, sometimes with taper)
Flex: Medium to medium-stiff (rigidity helps stability on varied terrain)
Camber/Rocker: Rockered or hybrid profile (to lift the nose in powder)
Unique Feature: Splits into two halves for uphill touring with skins
Best For: Experienced riders venturing into unpatrolled backcountry
Splitboarding is a niche, high-end activity. The upside is you get first turns on untouched powder. The downside is more cost and effort – splitboards are more expensive, and switching between ski-mode and board-mode takes time.
Note: Splitboarding requires additional gear (skins, avalanche equipment) and mountain safety knowledge, so it’s not recommended for beginners.
Alpine/Carving Boards (Bonus Category)
carving boards
For completeness, there are also alpine (race or carving) snowboards. These are very long, narrow, and extremely stiff boards used with hard boots and plate-style bindings (similar to ski systems). Their shape has a deep sidecut to carve huge arcs, and a full camber profile for edge grip.
These boards only ride in one direction – forward – and excel at high-speed carving on groomed slopes. They’re not common for recreational riders (or beginners) because they demand precision and don’t float in powder.
If your goal is Olympic-style racing or carving perfect GS turns, an alpine board is the specialty tool; otherwise, an all-mountain or freeride board will carve plenty well enough for most riders.
Snowboard Size
Even the same type of snowboard can come in different lengths.
Snowboards of different lengths are suitable for skiers of different heights and weights.
So, after you've chosen your snowboard type, you need to determine the right length for you.
The easiest way to determine the snowboard length is to stand the snowboard up close to your body. If the tip of the snowboard falls between your chin and your nose, it's considered the right size.
This method is sufficient for most amateur skiers.
Another method is to choose a snowboard length based on your weight. This method is more accurate and recommended by many snowboard manufacturers.
The size chart below can help you quickly determine the right snowboard length for you.
Snowboard Size Chart
Of course, the length of your snowboard also depends on your personal preference. If you're a fast, aggressive skier, you might consider a longer snowboard.
If you're a park skier who likes to do a lot of jumps and spins, shorter snowboards are better for you because they're easier to maneuver.
Snowboard Width
Different snowboards have different widths, which are related to the length of your snowboard boots.
You need to first determine the position of your snowboard boots on the waist of the snowboard and then choose a snowboard with the appropriate width.
Typically, snowboard boots should be slightly larger than the width of the snowboard (extending approximately 1-2 cm on each side). This ensures good support during turns.
If the snowboard is too wide but the boots don't extend beyond the edge of the snowboard, it will be difficult to slide from side to side.
Similarly, if the snowboard is too narrow and the boots extend too far, it will be difficult to control the snowboard and may cause you to lose control.
Please refer to the following table to select the appropriate snowboard waist width according to your boot size:
Snowboard Camber and Rocker
When choosing a snowboard, you may also notice that the side profiles vary significantly. Some have a center raised off, while others have a flat middle. This is the difference between camber and rocker.
The following diagram will visually introduce you to the basic snowboard shapes based on their appearance.
Snowboard camber and rocker - Different types of snowboard
It is obvious that they have different shapes, features, pros and cons. So, the following table will provide you with an ultimate comparison.
Profile Type
Details
Camber
🛹Shape: Traditional "upward" arch between the nose and tail, with contact points at both ends.
✨Features: Provides pop, energy, and precision on turns. Excellent edge grip, stability at high speeds.
⛷️Best For: Advanced riders, aggressive riders, carving, big jumps
✅Pros: Strong edge hold, precise turns, great for powerful carves and control.
❌Cons: Can be unforgiving, less forgiving in deep powder or rough conditions.
Camber/Rocker (Hybrid)
🛹Shape: Combination of camber between the feet and rocker at the nose and tail.
✨Features: Blends camber's precision with rocker’s forgiving nature. A good all-around performance profile with versatility for different terrain.
⛷️Best For: All-around riders, beginners to experts, park and freestyle
✅Pros: Mixes the best of both worlds: camber for control and rocker for playfulness and float.
❌Cons: Slightly less precise than full camber, may lack pop compared to camber only boards.
Flat/Rocker (Hybrid)
🛹Shape: Flat section underfoot, with rocker at the tip and tail.
✨Features: Stable underfoot with a catch-free ride in the nose and tail, making it great for jibbing and powder.
⛷️Best For: Park riders, powder days, mellow terrain
✅Pros: Stable underfoot, less likely to catch edges, smoother ride in powder and softer conditions.
❌Cons: Less edge grip than camber, not ideal for high-speed stability, lacks the power of camber boards.
Flat
🛹Shape: Flat from nose to tail, no camber or rocker shape.
✨Features: Provides a neutral, stable ride with a bit of playful feel. Offers a solid balance between camber and rocker characteristics.
✅Pros: Stable, predictable, even weight distribution, more forgiving than camber.
❌Cons: Not as much pop or edge control as camber; less float in powder than rocker.
Rocker
🛹Shape: U-shape or "reverse camber," with the middle of the board lifting off the snow, with contact points at the nose and tail.
✨Features: Very forgiving, especially in deep snow or powder, and easy to turn. Ideal for jibbing, park riding, and low-speed maneuvers.
⛷️Best For: Beginners, park riders, powder enthusiasts
✅Pros: Very forgiving, excellent float in powder, easy to initiate turns, less likely to catch edges.
❌Cons: Less edge control at high speeds, lacks pop and precision compared to camber.
Snowboard Construction (Materials)
Regardless of type, most snowboards share a similar construction: a wood core (commonly poplar, aspen, or bamboo) for strength and energy, sandwiched by layers of fiberglass or carbon fiber that control stiffness.
Manufacturers tune the flex and torsion by adjusting the wood mix and the orientation of the fiberglass.
For example, carbon stringers or basalt fibers may be added to stiffen certain areas or increase pop. The base is made of polyethylene plastic (P-Tex); sintered bases are faster and hold wax better but need more regular maintenance, while extruded bases are slower but more durable and easier to repair, great for beginners.
Protective sidewalls (often ABS plastic) encase the core, and edges of steel run around the perimeter to grip icy snow.
Which snowboard type is best for beginners?
Picking the right snowboard type when you're just starting out can really make learning easier. A good best type of snowboard for beginners is a true twin snowboard with a flex that's somewhere between soft and medium. Because the tips and tails are the same, it's simpler to ride either way, which is great while you're learning and practicing. The flex will make turning easier and help you stay in control, which is super important for feeling confident on the mountain.
As for the shape of the snowboard, flat or rocker snowboards are best for beginners. They make it less likely that you'll catch an edge, so you'll feel more steady and it'll be easier to move around. Also, be sure the board fits your weight and height so you can control it well. Lastly, grab a board that, when you stand it up, comes to somewhere between your chin and nose. This usually gives you a nice mix of steadiness and movability.
Choosing the Right Snowboard
In summary, here’s how to match a snowboard to the user:
Beginners and all-round snowboarders: Usually start with an all-mountain board for its forgiveness and versatility.
Park/Freestyle enthusiasts: Go for a freestyle park board (twin tip, soft flex) to learn jumps and tricks.
Big mountain adventurers: Choose a freeride or powder board – stiffer and directional – for carving and deep snow.
Backcountry explorers: A splitboard lets you climb and ride off-piste.
Flex ratings (1–10) vary by brand, so use them as a relative guide rather than an absolute number.
When choosing board length, consider not only your height but also your weight and riding style, since these factors affect float and control.
If you often hit the slopes with friends, staying in touch on the slopes is as important as choosing the right board. Modern ski intercoms let you talk hands-free while riding, making it easier to coordinate routes or warn about sudden changes in terrain. It’s a simple addition that makes group riding smoother and safer.
If you’re just starting out, don’t feel pressured to buy a brand-new board. Many used or previous-season snowboards can be found at great prices—especially toward the end of the season, when shops clear old inventory. As long as the snowboard’s base and edges are in good condition, a lightly used model will ride just as well as a new one and save you a lot of money. This makes it easier for beginners to try different snowboard styles before committing to a high-end setup.
Final Thought
Pick the board that fits where you ride and what you want to learn — all-mountain for starters, freestyle for park fun, freeride/powder for big mountain days, and splitboards for backcountry missions. Match length and flex to your weight and goals, try used gear if it helps you practice, and most of all—get out there and enjoy the snow.
Honda has officially pulled the covers off the all-new 2026 Honda CB1000F, a neo-retro naked machine that fuses the golden-age charm of the CB legacy with modern-day precision and performance. In a market filled with aggressive streetfighters and high-tech sport nakeds, Honda’s latest entry takes a different approach — one that celebrates simplicity, design purity, and mechanical honesty.
What Does “CB” Stand For?
The CB name has been a big part of Honda's motorcycles since the late 50s.
People thought CB stood for City Bike or Clubman Bike. It was put on street bikes made for regular riders and fans.
Over time, CB became more than just a short name. It started to stand for Honda's roadster history – smooth inline-four engines, classic looks, easy daily use, and a real, honest feel.
From the famous CB750, which changed what a superbike was, to the current CB1000F, the CB name still shows Honda's idea of making bikes that mix performance, dependability, and feeling.
2026 Honda CB1000F
Styling & Heritage
Drawing clear influence from the legendary CB750F that Freddie Spencer once raced, the CB1000F combines classic lines with modern engineering precision.
It features a large circular LED headlamp, a sculpted flat fuel tank with retro pinstripes, and a sleek tail cowl that evokes Honda’s golden era of the 1980s.
large circular LED headlamp
a sculpted flat fuel tank with retro pinstripes
sleek tail cowl on Honda CB1000F
In contrast to the sharper, more aggressive CB1000 Hornet, the CB1000F emphasizes smooth, flowing surfaces with a flatter silhouette and rounded contours.
The handlebar is positioned higher and closer to the rider, while the footpegs sit slightly forward for a more relaxed upright riding position. The seat height is 795 mm (31.3 in) — about 14 mm lower than the Hornet — improving accessibility for a wider range of riders.
Honda also offers a color-matched headlight cowl, either as a standalone accessory or as part of the optional Sports Pack.
Color options include:
Wolf Silver Metallic with Blue Stripes
2026 Honda CB1000F Graphite Black with Blue Stripes
Wolf Silver Metallic with Grey Stripes
2026 Honda CB1000F Graphite Black with Grey Stripes
Graphite Black
2026 Honda CB1000F Graphite Black
Engine & Performance
The CB1000F's got a 999cc inline-four engine that's based on the 2017 CBR1000RR. It's the same as what's in the CB1000 Hornet, but it's been tweaked to give you more oomph in the middle range and make it easier to ride every day.
To get that extra low-end and mid-range punch, Honda's team made the intake funnels longer, going from 90 mm to 140 mm. They also made the intake diameter a bit smaller, down to 36 mm, and messed with the valve timing and exhaust system.
Here's a cool detail: the left side intake funnels are 50 mm wide, but the right side ones are 40 mm. This difference is on purpose and gives the bike a cool, throbbing sound when it sucks in air.
The CB1000F also has a 4-2-1 exhaust with a three-chamber muffler shaped like a megaphone, which is a nod to the classic CB bikes.
Performance figures:
Claimed Power: 122 hp at 9,000 rpm
Peak Torque: 76 lb-ft (103 Nm) at 8,000 rpm
Compared to the Hornet’s 149 hp, this setup prioritizes real-world flexibility over peak performance — giving riders smoother roll-on power, refined throttle response, and effortless overtaking without chasing redline revs.
Honda has also adjusted gear ratios for the CB1000F’s more “gentlemanly” character:
1st and 2nd gears are shorter for quick low-speed response, while gears 3–6 are taller for relaxed highway cruising.
An assist/slipper clutch and an optional bidirectional quickshifter round out the drivetrain package.
Chassis, Suspension & Brakes
The CB1000F features a steel diamond twin-spar frame
Built on a steel diamond twin-spar frame, the CB1000F retains the structural foundation of the Hornet but introduces a new subframe and flatter tail section to enhance pillion comfort and luggage compatibility.
The suspension setup is all Showa:
Front: 41 mm SFF-BP (Separate Function Fork – Big Piston), fully adjustable for preload, rebound, and compression damping.
Rear: Showa single-tube shock with Pro-Link system, adjustable for preload and rebound.
Braking duties are handled by:
Front: Dual 310 mm discs with radially-mounted Nissin 4-piston calipers.
Rear: Single 240 mm disc with a single-piston Nissin caliper.
Cornering ABS and IMU-based traction management come standard.
Electronics & Rider Aids
Despite its classic appearance, the CB1000F is thoroughly modern beneath the surface.
2026 Hongda CB1000F dashboard
It features ride-by-wire throttle control, a six-axis IMU, and five selectable riding modes . (Sport, Standard, Rain, plus two customizable user modes)
Each mode allows individual adjustment of:
Engine Power (3 levels)
Engine Braking (3 levels)
Honda Selectable Torque Control (3 levels)
The bike is equipped with a 5-inch full-color TFT display operated via backlit handlebar switches, supporting Honda RoadSync smartphone connectivity for navigation, music, and calls.
A keyless ignition system adds convenience, while a traditional key is still used for seat and fuel-cap access.
Ergonomics & Everyday Comfort
2026 Honda CB1000F on road
Honda designed the CB1000F to be comfortable for long rides while maintaining sporty agility.
The seat and handlebar geometry provide a neutral posture, and the plush saddle enhances comfort for both rider and passenger.
Optional heated grips, a center stand, and soft luggage make it a capable tourer as well.
The Comfort Pack enhances wind protection with deflectors and fog lamps, while the Travel Pack adds soft saddlebags and a tank bag.
Price & Availability
2026 Honda CB1000F
In the UK market, Honda has set the MSRP at £10,599 for the early 2026 delivery timeframe.
For Japan, pricing begins at approximately ¥1,397,000 (roughly US $9,160 at current exchange rates).
While a U.S. release has not yet been confirmed, rollout across Europe is expected in early 2026.
2026 Honda CB1000F Specifications
Engine Type
Liquid-cooled, inline 4-cylinder, DOHC
Engine Capacity
1,000 cc
Bore × Stroke
76.0 × 55.1 mm
Compression Ratio
11.7:1
Fuel System
EFI
Claimed Horsepower
122 hp @ 9,000 rpm
Claimed Torque
76.0 lb-ft @ 8,000 rpm
Transmission / Final Drive
6-speed / Chain
Clutch
Wet, multiplate slip/assist
Frame
Steel, twin-spar
Front Suspension
41mm inverted Showa SFF-BP telescopic fork with adjustable preload, compression, and rebound damping; 5.1 inches of travel
Rear Suspension
Separate pressurized single-tube type cushion unit Pro Link; 140 mm (5.5 inches) of travel
Wolf Silver Metallic with Blue Stripe, Wolf Silver Metallic with Grey Stripe, or Graphite Black
Availability
Expected in early 2026
Conclusion
With its combination of retro styling and modern performance, the CB1000F slots into the growing "neo-classic liter-naked" segment. When compared with bikes like the XSR900, Z900 RS and Speed Twin 1200, Honda’s new offering appears competitive both in terms of price and spec.
Its focus on mid-range usability rather than top-end screaming revs makes it a compelling choice for riders who want liter-class hardware without the full-on track bias.
Getting your snowmobile’s track adjusted correctly doesn’t have to be complicated. In this guide, we’ll show you the tools, step-by-step instructions, and troubleshooting tips for all major brands — Polaris, Ski‑Doo/Lynx, Arctic Cat, Yamaha, and more. If you do it right, your snowmobile will run great quickly.
Why Track Tension Matters
Track tension directly affects handling, power transfer, and component wear.
Too much tension binds the suspension and track, causing power loss and premature wear on bearings and components.
Too little tension lets the track “slap” or skip (“ratchet”), causing thumping or slippage, and in severe cases, the track can derail.
In short, correct tension extends track life and keeps your sled on top of its performance. All manufacturers stress proper tension.
For example, Polaris warns that insufficient tension causes “ratcheting, hesitation, and excessive wear”. Checking tension is especially important on new or recently repaired tracks, which stretch during break-in.
Track tension is also linked to track alignment. An off-center track wears unevenly and may throw off tension. Always check alignment after adjusting track tension.
Snowmobile Track Tension Tools
1. Wrenches / Sockets
wrenches
Most sleds use metric sizes.
Common tools include:
15 mm for Polaris
17 mm for Ski-Doo
Sometimes 10 mm (Ski-Doo) or 14 mm for other models
A ratchet with extension helps reach tight spots.
Use a breaker bar if the bolts are stuck.
2. Track Tension Gauge or Weight
track tension gauge
A spring tensiometer is ideal for measuring track sag.
Alternatively, hang a known 10 lb (4.5 kg) weight about 16″ (40 cm) ahead of the rear axle (per Polaris spec).
Ski-Doo often recommends using a track gauge instead.
The key is applying a consistent downward force on the track.
3. Snowmobile Lift or Stand
lift the snowmobile
The rear end of the sled must be elevated so the track hangs free.
Use a center stand, a removable lift stand, or a snowmobile service jack.
Make sure it’s stable and locked before you start working.
4. Flat-Head Screwdriver
screwdriver
Many models (e.g., Ski-Doo, Lynx) have plastic caps over the rear idler wheel bolts.
A flat screwdriver or trim tool removes these caps for access.
5. Torque Wrench
torque wrench
Use this to retighten the idler axle to the manufacturer’s spec.
For example, Polaris specifies about 35 ft-lb (47 N·m) for the idler bolt.
6. Tape Measure
tape measure
A tape measure is essential for checking track deflection.
After applying the weight or tension gauge, measure the vertical distance between the bottom of the track and the slide rail.
Use one with both inch and centimeter markings for accuracy.
Measure from the correct spot — usually about 16″ (40 cm) ahead of the rear axle.
7. Safety Gear
Wear safety glasses and gloves (Polaris recommends nitrile).
Keep loose clothing and hair away from moving parts and the track.
Safety Precautions
Safety first: Always follow these precautions before and during the adjustment process:
Park on a level surface with the parking brake on. Chock the front skis if needed. Ensure the machine is stable before lifting.
Remove the tether cord and key; engine off. This prevents accidental starting. Never adjust the track with the engine running, except briefly when checking alignment.
Run the engine to warm up the track first. Tension should be checked on a warm, pliable track. A few minutes of idle/warm-up is usually enough.
Do not stand behind or near the track when it’s spinning. Always assume the track could move. Never stand behind or near a rotating track— debris could be projected.
Work in a well-ventilated area. If you run the engine to spin the track, avoid enclosed spaces, as carbon monoxide can build up quickly and is extremely dangerous.
Clear the track and suspension of debris. Snow, ice, or sticks jammed in the track can affect the track tension readings and alignment. Brush away buildup before measuring.
Lift the sled securely. If using a jack or lift stand, lock it in position. Never rely on a single jack alone; use stands on both sides if possible.
With tools and safety gear ready, you’re set to adjust the track tension systematically.
Step-by-Step Adjustment Guide
Step 1: Warm Up & Inspect
Run the engine on idle for 5–10 minutes (in neutral). This warms the track and lubricates the suspension.
While warm, inspect the track and skid frame.
Look for damage: tears in the rubber, loose studs, missing bolts, or cracks in the idler wheels.
Check that sliders (the plastic rails under the track) aren’t worn through or broken.
Replace or repair any damaged parts before adjusting track tension.
Step 2: Elevate the Rear
Position the sled on a lift or use the centerstand/side lift so the track is completely off the ground.
Make sure the track spins freely without touching the floor.
The track lift makes measuring and adjusting much easier.
Step 3: Measure the Current Slack
Check how much the track sags under weight.
Use a tension gauge or apply a small known weight (for example, around 10 lbs / 4.5 kg) at a point roughly midway between the track’s rear axle and the first rear idler wheel.
Measure how much the track deflects (sags) from the slide rail.
Typical targets
Polaris trail models call for about 7/8″–1⅛″ (2.2–2.6 cm) of deflection at 10 lbs.
Many two-stroke sleds (like Ski-Doo deep-snow sleds) aim for roughly 3/8″–½″ (1–1.3 cm) of sag.
Check your owner’s manual for the exact specs of your model. (In general, a loose track will deflect more than these ranges; a tight track will deflect less.)
Step 4: Loosen the Suspension
With measured slack noted, it’s time to adjust.
Loosen the rear idler axle bolt (both sides) so the axle can slide.
On Polaris, use a 15 mm socket; on Ski‑Doo/Lynx, use a 17 mm socket or wrench. Don’t remove the bolt, just break it loose.
Loosen the jam nuts (locknuts) on the track adjuster screws if present (Polaris models have locknuts). This frees the adjusters to turn.
Step 5: Adjust the Track Tension
Now, turn the adjustment screws on each side of the skid rail. Each screw raises or lowers one side of the rear suspension, tightening or loosening the track.
To tighten a loose track: turn both adjuster bolts clockwise (as viewed from the back) a little at a time.
Watch the track’s position: as it tightens, the rear of the track will climb toward the slides.
To loosen an overly tight track: turn both bolts counterclockwise. Make very small adjustments (¼-turn at a time), and turn the left and right screws evenly to keep the track centered.
After each tweak, measure the slack again at the same spot. Continue until the deflection meets the specification.
Step 6: Retighten and Torque
When correct slack is achieved, re-tighten the jam nuts or locknuts on the adjusters (if equipped) until snug.
Re-torque the rear axle bolt to the manufacturer’s spec (e.g., Polaris ~35 ft-lb).
On BRP sleds, refer to the Operator’s Guide for the exact torque value.
Replace any wheel caps or covers you removed (Ski‑Doo idler wheels have plastic caps).
Step 7: Check and Align the Track
With the engine off, spin the track manually several full turns to settle it into place.
Start the engine and slowly rotate the track (at idle) for 5–15 seconds. This lets the track find its center. Shut the engine off.
Inspect the alignment: measure the distance from the track lugs or clips to the slide on each side. They should be equal. If one side is farther from the slide, loosen the axle slightly and adjust that side’s screw to bring it in line.
Re-torque the axle. (Polaris has a detailed alignment procedure in its manuals, but the principle is the same: achieve equal spacing.)
Step 8: Final Check
Rotate the track by hand one more time. It should turn smoothly without catching or binding.
Listen for unusual noises (squeaks or scraping).
Lower the sled back down and take it for a short, cautious test ride.
Start at low speed and check for any skipping or vibration. If everything feels normal, the job is done.
Brand-Specific Notes
The general adjustment process is similar across all snowmobiles, but track tension specifications and tools vary by brand. Always confirm the exact values in your owner’s manual.
Polaris
Most models (Indy, Switchback, RMK, etc.) use 10 lbs (4.5 kg) of downward force 16″ (40 cm) ahead of the rear axle.
Target deflection: 7/8″–1⅛″ (2.2–2.6 cm).
Adjust on a warm track for best accuracy.
Use 15 mm tools on both the axle and the adjusters.
Polaris provides detailed online guides with torque specs and step-by-step tips.
Ski-Doo / Lynx (BRP sleds)
Dual adjusters are used on the skid frame.
Typical tools: 17 mm and 10 mm wrenches.
Often measured with a track gauge (tensiometer) rather than a hanging weight.
Deep-snow models: about ½″ (1.3 cm) sag at 10 lbs.
BRP recommends checking after the first 50 miles, then every few hundred miles.
Procedure: loosen the axle → adjust both screws evenly → re-tighten → spin and check alignment.
Arctic Cat (Textron)
Uses a similar spring-style suspension with adjusters.
Manuals typically specify 10–20 lbs of force at ~16″ from the axle.
Some crossover models call for 1.75–2″ (4.5–5 cm) deflection at 20 lbs.
If unsure, start around 1″ (2.5 cm) of sag and fine-tune by test riding.
Yamaha
Models such as Apex and Nytro feature adjustable rails.
Specs vary: some manuals list ~1″ (2.5 cm) deflection at 10 lbs.
Procedure: warm the track → elevate → loosen axle → adjust both sides equally → re-torque.
If no spec is available, use 3/8″–1″ (1–2.5 cm) at 10 lbs, then adjust after a short test ride.
Other brands
Newer models from Polaris (Matryx chassis), BRP (Lynx), Arctic Cat, and Yamaha all follow this same general process.
When in doubt, consult your Owner’s Manual or service guide for the exact deflection and torque values.
Troubleshooting Common Issues
Track still too loose (ratchet): If the track still slips when you speed up after you've tweaked it, it's likely still too loose. Check the sag again – it should be within the normal range. Tighten it bit by bit, going back and forth between each side. After each tweak, make sure the axle is fully tightened, or it might slip back.
Track too tight (hard to turn or squeaks): A track that's too tight will stick to the slide and put more stress on the bearings. If you sense less power or hear squealing while riding, slightly loosen the adjusters. Even if the bend looks normal, make sure the track isn't riding high on the sliders. Tighten it just enough, so the track barely moves under the weight.
Uneven Wear or Alignment Problems: If you see the track rubbing more on one side or the studs are wearing unevenly, the alignment might be off. Start the alignment again: spin the track, measure the clip-to-slide gap, and tweak that side's bolt. Also, see if the rear skid rails are straight and the locknuts are tightened equally – uneven rails mess up the alignment.
Noise or Vibration: Loud thumps, clunks, or shaking can happen from bad tension or damage. Check for broken studs, worn bearings, or things stuck in there. Sometimes, a track that’s too tight damages the sliders, causing noise. If weird noises keep happening after you set the track tension right, have a shop see the suspension and track parts.
Hard to Adjust: If the adjuster screws won't move, spray them with lubricant and use penetrating oil. First, be sure you've fully loosened the locknuts. Always use your hands or a breaker bar carefully – don't over-tighten the small adjuster bolts.
Conclusion
To get the most out of your snowmobile, keep the track in good shape for smooth rides, easy handling, and less chance of breaking down. Keep it clean and tight, and you’ll be set for the whole winter. So, get your tools, make sure the track tension is right, and go have fun.
Ducati has reinvented its middleweight adventure-tourer for 2025. The new Multistrada V2 S blends sportbike soul with touring comfort, wrapped around a lighter 890cc V-twin. It’s faster, sharper, and more refined — a true Italian all-rounder for riders who want one bike to do it all.
Ducati Multistrada V2 S Overview
The 2025 Ducati Multistrada V2 S boasts a sharper front end (shorter beak, new headlight) and slimmer bodywork.
It’s lighter than its predecessor and comes in Ducati Red or Storm Green ( +$400)
The 2025 Ducati Multistrada V2 S is powered by an updated 890 cc 90° V-twin engine, producing 115 hp at 10,750 rpm and 92.1 Nm of torque at 8,250 rpm.
This engine is around 2 kg lighter than the previous generation, thanks to revised internals and a more compact exhaust layout.
A key technical update is the variable intake valve timing (IVT) system, which improves midrange torque delivery.
In practical riding, this translates to smoother throttle response at low rpm and stronger pull from 4,000 to 8,000 rpm.
However, compared with the larger V4 models, the V2 S still requires more frequent gear changes at higher speeds.
The six-speed gearbox includes Ducati Quick Shift 2.0 for clutchless up and downshifts. It performs consistently in most situations, though some testers have reported slightly abrupt transitions below 3,000 rpm.
Overall, the engine provides a balance between efficiency and performance — not as aggressive as a superbike twin, but refined enough for long-distance touring.
Chassis, Suspension, and Handling
Ducati Multistrada V2 S
The 2025 Multistrada V2 S uses a new aluminum monocoque frame, replacing the previous steel trellis design. The engine now acts as a stressed member, helping lower the center of gravity and reduce overall weight. The swingarm is an aluminum dual-sided unit similar to the Multistrada V4, paired with cast-aluminum 19″ front and 17″ rear wheels wrapped in Pirelli Scorpion Trail II tires. Suspension travel is 170 mm at both ends.
The standard V2 features a fully adjustable 45 mm Marzocchi fork and a Sachs rear shock with manual preload and damping adjustment. The V2 S upgrades to Ducati’s semi-active Skyhook Suspension system, offering electronic control of preload, compression, and rebound. It also integrates anti-dive and anti-squat functions to maintain chassis balance during acceleration and braking.
On the road, the V2 S feels lighter and more agile than its predecessor. The revised geometry and updated suspension improve cornering stability and mid-corner feedback, while the 320 mm Brembo front discs deliver strong, predictable braking. Ride quality remains firm but compliant, keeping the bike composed over uneven pavement.
Overall, the chassis setup emphasizes sporty handling and precision control. The combination of the new frame, Skyhook electronics, and balanced geometry makes the V2 S handle more like a tall sportbike than a traditional adventure tourer.
Technology and Rider Aids
2025 Ducati Multistrada V2 S dash
The 2025 Multistrada V2 S comes with a comprehensive electronics package that enhances both safety and rider convenience. A 5-inch full-color TFT display serves as the central interface, offering sharp graphics and easy menu navigation via a five-way joystick on the left handlebar. The layout can be customized to show essential trip or performance data depending on riding preferences.
The Multistrada V2 S has five Riding Modes — Sport, Touring, Urban, Enduro, and Wet.
Each preconfigures settings for Cornering ABS, Ducati Traction Control (DTC), Wheelie Control (DWC), and Engine Brake Control (EBC). These can also be fine-tuned individually, allowing experienced riders to adjust response and intervention levels.
The V2 S version adds Ducati’s Skyhook Suspension system, which constantly adapts damping based on road surface and riding input. Additional aids include Ducati Quick Shift 2.0, cruise control, and Brake Light EVO, which flashes the rear light under hard braking to alert following traffic.
Connectivity is improved through the Ducati Multimedia System, enabling smartphone pairing, music control, and turn-by-turn navigation. A USB-C charging port is standard, and full-LED lighting with DRL improves visibility and energy efficiency.
Overall, Ducati’s electronics suite offers a balance between usability and sophistication. The system feels intuitive rather than intrusive, giving the V2 S a modern, premium feel without overwhelming the rider with unnecessary complexity.
Ergonomics and Comfort
Ducati Multistrada V2 S on road
The Multistrada V2 S combines sport and touring ergonomics. The upright position feels natural, with a wide handlebar and slim fuel tank that make movement easy.
The redesigned seat offers two heights — 850 mm or 830 mm — and can go as low as 790 mm with the lowering kit. Passenger comfort is also improved thanks to new grab handles and side-case mounts that create extra legroom.
Wind protection is good, and the fairing channels heat away from the rider. The heavier flywheel and smooth twin engine keep vibrations low even at highway speeds.
Overall, it’s comfortable enough for long rides but still light and responsive for everyday use.
Fuel Economy and Range
The Multistrada V2 S holds 5.0 gallons (19 L) of fuel and averages about 42 mpg (5.5 L/100 km) in mixed riding. That gives it a real-world range of around 250 miles (400 km) per tank.
While the Triumph Tiger 900 can stretch slightly farther thanks to its larger 20 L tank, the Ducati’s efficiency and lighter weight keep it close — making it a solid choice for touring without frequent fuel stops.
Practicality and Luggage
The Multistrada V2 S features upright ergonomics and built-in touring amenities such as cruise control and optional heated grips.
Ducati travel pack
Buyers can add Ducati’s Travel Pack, which includes 30-liter side cases, a centerstand, and heated grips. The luggage setup integrates neatly with the bike’s frame, though it increases width and weight when fully loaded.
Without the optional cases, storage space is limited to the under-seat compartment and top-box mounts. Overall, the V2 S delivers practical touring capability for its class, though some riders may prefer aftermarket luggage systems for greater flexibility.
Marzocchi 45 mm fork, electronically adjustable for preload, rebound, and compression damping; 6.7 in of travel
Rear Suspension
Sachs shock, electronically adjustable for preload, rebound, and compression damping; 6.7 in of travel
Front Brake
Dual Brembo monobloc four-piston calipers, 320 mm discs with ABS
Rear Brake
Brembo two-piston caliper, 265 mm disc with ABS
Rake / Trail
24.3° / 4.15 in
Wheelbase
61.9 in
Seat Height
32.7 / 33.5 in
Fuel Capacity
5.02 gallons
Tires
Pirelli Scorpion Trail II 120/70ZR19 (front), 170/60ZR17 (rear)
Claimed Weight
445 lb (without fuel)
Available
March 2025
Warranty
24 months
Comparison: Ducati Multistrada vs BMW F 900 XR and Triumph Tiger 900
The 2025 Multistrada V2 S competes in the “middleweight adventure-touring” category alongside the BMW F 900 XR and Triumph Tiger 900 series. Here’s how they stack up:
Despite having similar displacement, the Ducati leads in output and is also the lightest — weighing only ~445 lb (202 kg) wet.
In comparison:
BMW F 900 XR: ~476 lb (216 kg)
Tiger 900 GT Pro: ~483 lb (219 kg)
👉 Result: The Ducati’s extra power and lighter chassis translate into quicker acceleration and sharper, more agile handling than its rivals.
2. Price and Value
The Ducati comes with Italian flair — and an Italian price tag:
Multistrada V2 S: ~$19,295 USD (Storm Green adds ~$400)
BMW F 900 XR: ~$12,000–$12,500 USD
Triumph Tiger 900 GT Pro: ~$16,000–$17,000 USD
👉 Result: The Multistrada is the most expensive, but also the most premium and performance-oriented.
The BMW wins for value and accessibility, while the Triumph offers a balanced middle ground.
3. Comfort and Ergonomics
All three adopt an upright riding position and similar touring range, but they differ in focus:
BMW F 900 XR: 17" front wheel = more road-oriented; 2025 upgrades include a fully adjustable USD fork, adaptive Headlight Pro, and one-hand windscreen adjuster.
Triumph Tiger 900 GT Pro: multiple variants (GT / Rally); adjustable suspension; plush and relaxed for long rides.
Ducati Multistrada V2 S: seat height adjustable (790–850 mm); semi-active suspension adapts to on/off-road use. Sportier suspension tune gives it a firmer, more connected feel.
👉 Result: Ducati leads in electronic sophistication, BMW matches with adaptive tech, and Triumph focuses on usability and simplicity.
5. Riding Feel & Personality
Multistrada V2 S – Feels alive, sporty, and precise. The V-twin’s punch and lightweight chassis make every corner engaging.
BMW F 900 XR – Smooth, stable, and confidence-inspiring; prioritizes long-distance comfort and practicality.
Triumph Tiger 900 – The inline-triple offers linear power and a balanced ride — easy-going yet characterful.
👉 Verdict:
BMW = best comfort and value
Triumph = best smoothness and everyday balance
Ducati = best emotion and precision
If you buy with your heart, the Multistrada is the one that makes you smile every time you open the throttle.
Region-Specific Details (US vs Europe)
Although the 2025 Ducati Multistrada V2 S is mechanically identical across markets, a few regional details set the U.S. and European versions apart — mainly in pricing, warranty, and maintenance coverage.
United States
Launch: March 2025
Price: $15,995 (V2) / $19,295 (V2 S)
Warranty: 2 years, unlimited mileage
Valve Check Interval: every 18,000 miles
Emissions Standard: Euro 5+
Notes: Same performance and equipment as European models; released slightly earlier for the U.S. market.
United Kingdom
Price: £13,995 (V2) / £16,390 (V2 S)
Warranty: 4 years, unlimited mileage (4Ever Ducati program)
Valve Check Interval: every 45,000 km (~28,000 miles)
Emissions Standard: Euro 5+
Notes: Longer warranty and service intervals make ownership a bit easier.
In short, European riders enjoy a longer warranty and fewer maintenance stops, while U.S. buyers get earlier availability and transparent pricing.
Conclusion
The 2025 Ducati Multistrada V2 S captures what makes Ducati special: emotion, performance, and style.
The Multistrada V2 S isn’t the cheapest in its class, nor the softest. But it’s the one that reminds you why you ride — sharp, agile, and full of Italian character.
For 2025, Ducati has built the sweet spot between sport and touring.
For riders who want the most dynamic middleweight adventure-tourer of 2025, the Multistrada V2 S stands at the top of the list.
From gravel track through the Ardennes to secret mountain passes over the Pyrenees, from the Arctic circle to the warm beaches of Tarifa, the Trans Euro Trail is the ultimate European off-road playing ground. More than 100,000 kilometers of forest trails, back roads, and paths meander their way through 30 nations, all the time changing due to an enthusiastic group of volunteers the Linesmen.
This is not a race. There is no finish line, no support vehicles, no crowds—only you, your mountain bike, and illimitable adventure. The TET is built with lightweight adventure and enduro bikes in mind, but larger twins are welcome if you don’t mind hoisting an overweight one outta the mud more than once.
The Trans Euro Trail (TET) route
The Trans Euro Trail is made up of two key arms that are launched from the Arctic Circle all the way to the coastlines of Africa.
The Eastern Route: Begins in Finland and runs through the Baltic countries, Poland, Romania, Serbia, and Bulgaria. It then runs loop around the Bosphorus in Turkey before entering Greece, Italy, and France, where it connects with the Western arm.
Western Route: ALSO starts from Finland and extends over Sweden, Norway, Denmark, Germany, the UK, the Netherlands, and France.
Shared Path: After meeting in Southern France, the routes continue together through Andorra, Spain, and Portugal, ending at Tarifa on the Strait of Gibraltar.
Country Highlights & Trail Details
Belgium
TET Length: 450 km
Best Time to Ride: Spring to Autumn; Winter is possible but trails can be slippery when wet
Languages: Flemish (Dutch), French, German widely spoken
Currency: Euro (EUR)
Emergency Number: 112
Drive On: Right
Wild Camping: Illegal, but many official campsites available
Trail & Legal Notes:
Respect all restriction signs (private property, red circle with white center, etc.)
Riding in forests is prohibited
Respect other users (hikers, mountain bikers, horse riders)
The Belgian TET stretches approximately 450 km from the Dutch border near Eindhoven, traversing the picturesque regions of Flanders, Walloon Brabant, and Hainaut, and concluding in West Flanders near the Moeren area, seamlessly connecting with the French TET towards Calais.
The trail is mostly paved (98%), but offers a varied riding experience:
Sandy Field Tracks: Found near Tessenderlo, adding a touch of adventure.
Gravel Lanes & Cobblestone Streets: In areas like Hoegaarden, riders encounter dusty paths and narrow cobbled streets, which can be slippery when wet.
Single Tracks: Sections 6 and 7 provide more technical challenges for experienced riders.
Scenic Highlights
The TET showcases Belgium’s history and natural beauty:
Charming Villages: Quaint towns like Waver offer peaceful market squares perfect for a coffee break.
Historical Landmarks: Near Waterloo, riders can see the famous hill and other historical sites.
Natural Landscapes: The route winds through Wallonia’s diverse and picturesque countryside.
Netherlands
TET Length: 1,028 km
Best Riding Time: March – November
Languages: Dutch, English widely spoken
Currency: Euro (€)
Emergency Number: 112
Drive On: Right
Wild Camping: Not allowed, fines possible
Wild camping fine: €140
Making fire fine: €280
Trail Riding Laws: Obey traffic signs; some areas prohibit motorized entry
The Dutch section of the Trans Euro Trail stretches across the country from the northern border with Germany to the southern border with Belgium.
Covering a landscape of flat fields, canals, forests, and rural farmland, it offers a relaxed and scenic adventure suitable for riders of all skill levels.
Riding Conditions
Surface Mix: Sand, clay, gravel, dike and farm tracks, canal paths, and short paved sections.
Difficulty: Easy to moderate — manageable for most adventure or dual-sport bikes.
Challenges: Occasional loose, deep sand near dunes and muddy stretches in southern or rural areas.
Scenic Highlights
Countryside Charm: Endless fields, windmills, and canals define the Dutch landscape.
Forests & Heathland: Peaceful woodland trails and open heath in Brabant, Limburg, and Drenthe.
Village Routes: Quiet rural roads passing through traditional farms and small villages.
Riding Experience
The route’s balance of tarmac and gravel keeps the journey engaging without being overly demanding.
Some riders have even completed it on small-displacement bikes, showing its accessible and forgiving nature.
The TET Netherlands is a ride of tranquility and rural discovery, rather than technical challenge.
France
TET Length: 5,954 km
Best Riding Time: All year round except sections crossing the Massif Central and the Alps
National and regional parks have specific rules – check before camping
Otherwise:
Avoid private land
Stay one night with a light tent
Do not bivouac on coast, protected natural sites, or near historic monuments
No fires (especially in southern France)
Leave the area as you found it
Trail Riding Laws:
Respect signposts, red/white circle with barrier, and private property
Ride trails wide enough for a normal car if no sign prohibits entry
Avoid single tracks (mostly forbidden)
In southern France (Aude, Pyrénées-Orientales, Gard, Vaucluse, Corsica), summer restrictions may apply due to forest fire risks
Most TET tracks in Corsica are forbidden from June 15 to September 15
The French section of the Trans Euro Trail spans approximately 5,950 km, crossing the country from the Belgian border in the north to the Spanish and Italian borders in the south.
It passes through regions such as Normandy, the Loire Valley, the Massif Central, Provence, and the Alps, offering one of the most diverse riding experiences in Europe.
Riding Conditions
Surface Mix: Gravel, dirt, farm and forest tracks, plus tarmac links.
Challenges: Mud, deep ruts, rocky climbs, and occasional closures due to fire risk or weather.
Difficulty: Moderate — suited to adventure bikes with off-road capability.
Scenic Highlights
Alpine Passes: High-altitude gravel routes with sweeping mountain views.
Massif Central: Rolling plateaus, forest tracks, and remote rural charm.
Loire & Burgundy: Vineyards, rivers, and peaceful backroads.
Southern France: Mediterranean scenery, lavender fields, and historic hill towns.
Italy
TET Length: 3,532 km
Best Riding Time: May – October
Check for seasonal road closures; higher passes and roads may remain closed until mid-June
Languages: Italian; German and Italian in Alto Adige (Bolzano)
Currency: Euro (€)
Emergency Numbers:
112 – European emergency number (gradually adopted)
113 – Police
115 – Fire brigade
118 – First aid
Drive On: Right
Wild Camping:
Governed by regional laws; rules vary by region
Piedmont: allowed up to 48 hours, far from accommodation facilities
Alto Adige, Veneto, Friuli Venezia Giulia: forbidden
Valle d’Aosta: allowed from sunset to dawn above 2,500 m, outside Gran Paradiso National Park
Liguria, Lombardia: tolerated if far from residential areas; may need to inform local authorities
Anywhere with landowner permission
Trail Riding Laws:
Illegal on open land, footpaths, singletracks
Normal road laws apply
Some protected areas forbid offroading even without signs
Some roads (e.g., “Via del Sale”) require a permit to ride
The Italian section of the Trans Euro Trail running from the Alps in the north down through Piedmont, Liguria, Tuscany, and Umbria, and towards the Adriatic and Mediterranean coasts.
The trail follows a mix of ancient military roads, gravel passes, forest tracks, and quiet tarmac links. Riders will experience constant variation — from rough alpine switchbacks to smoother rural byways through rolling hills and olive groves.
It offers one of the most scenic and diverse riding experiences in Europe.
Riding Conditions
Surface Mix: Gravel, rocky mountain roads, forest trails, and short paved connectors.
Difficulty: Moderate to challenging — suitable for experienced riders or mid-weight adventure bikes.
Challenges: Steep rocky climbs, loose gravel, rain or fog in the Alps, and slippery clay sections after storms.
Scenic Highlights
Alps & Dolomites: High mountain passes, military tracks, and breathtaking panoramic views.
Lakes & Prealps: Forest trails descending towards the Italian lakes, surrounded by lush green valleys.
Tuscany & Umbria: Rolling hills, cypress-lined roads, vineyards, and medieval villages.
Ligurian Coast: Narrow dirt tracks and sea views — a fitting finale to a truly epic ride.
Portugal
TET Length: Not specified
Best Riding Time: October – May
June to September is too hot and forbidden in many areas due to wildfire risk
Closures may also affect paved roads crossing forested areas such as parks
Languages: Portuguese (official); Spanish and English commonly spoken; French less common
Currency: Euro (€)
Emergency Number: 112
Drive On: Right
Wild Camping:
Forbidden outside official campsites
Usually tolerated in isolated areas
Avoid camping along the southern Atlantic coast (overcrowded with campervans)
Trail Riding Laws:
Riding on unpaved roads is permitted throughout the country
Exceptions: beaches, dunes, and areas with valid road signs prohibiting access
In national and natural parks (e.g. Parque Nacional da Peneda-Gerês):
Trail riding allowed only in small, non-organized groups
Seasonal closures may apply
Portugal’s Trans Euro Trail runs roughly northwest to southwest, ending at Sagres in the Algarve, offering a ride through mountainous north, rolling central regions, forests, river valleys, and coastal landscapes.
The route is a mix of unpaved trails, forest tracks, rural roads, and occasional tarmac connectors. In many areas, the terrain gets rocky, especially in the mountains and older agrarian zones. Riding through national parks and natural reserves adds remoteness and scenic variety.
Difficulty: Moderate — some challenging rocky and remote sections especially in the north and interior; lighter bikes fare better in rough terrain.
Challenges: Heat and fire danger in summer; rocky and remote terrain; seasonal closures; very isolated sections with limited services.
Scenic Highlights
Mountain North: Serra da Peneda-Gerês and rocky forest tracks, rugged scenery.
Central Interior: Rolling hills, rural villages, river valleys, forests; quieter roads between towns.
Algarve & Coasts: Coastal paths, beaches, cliffs, ocean views; dramatic contrasts between inland terrain and sea.
UK
TET Length: 5,307 km
Best Riding Time: All year round
Snow may be present on higher roads when temperatures fall below freezing
In remote areas, tourist infrastructure may close during winter
Note: British weather is famously changeable – “if you don’t like it, wait an hour!”
Languages: English, Welsh
Currency: Pound sterling (£)
Emergency Numbers: 999 or 112
Drive On: Left
Wild Camping:
Illegal without landowner’s permission in England & Wales, even on moorland or in forests
Usually tolerated in remote areas if discrete, leave no trace, and decamp early
Plenty of campsites, hostels, hotels, bunkhouses, B&Bs, inns, and pubs available near the route
Trail Riding Laws:
Where You Can Ride: Only on public byways or carriageway roads (tarred or unsurfaced)
Where You Cannot Ride: Footpaths, bridleways, restricted byways, cycle tracks, or private/open land
Legal & Safety Requirements:
Road status may change — always respect official signs and closure notices
If in doubt, don’t ride
Normal road laws apply
Motorcycles must be road-legal, insured, and ridden by a licensed rider
Rider Conduct & Etiquette:
Be aware of the UK’s strong anti-access movement; avoid behavior that could harm motorcycling’s reputation
Be courteous: slow or stop for horse riders, wave, smile, and say hello
Avoid damaging trails, riding in groups larger than 6, or exceeding 25 mph (40 km/h) on unsurfaced roads unless safe
Leave gates as you found them
The UK section of the Trans Euro Trail follows public byways, green lanes, and rural roads across England and Wales. It leads riders along centuries-old paths through moorlands, woodlands, valleys, and coastal stretches, combining gentle countryside with more challenging upland terrain.
Many sections where riding is relaxed and scenic, with occasional tougher patches (mud, rock, water, steepness). It's ideal for riders who enjoy varied terrain and don’t mind dealing with weather, remote tracks, and some navigation. Light or mid‐weight adventure or dual sport bikes tend to fare better.
Riding Conditions
Surface Mix: Unpaved lanes, green roads, hard dirt/stone, compacted chalk, occasional paved segments.
Difficulty: Moderate. Some sections are easy and flow well; others (moorlands, hills, muddy or wet lanes) demand careful handling. Bigger/heavier bikes will feel it in the more technical spots.
Scenic Highlights
Southern England & the South West: Sunken holloway lanes, ancient villages, country gardens and stone walls.
Wales & Border Country: Remote tracks, steep forest sections, views over valleys and ruins.
Peak District / Yorkshire Dales / Lake District: Dry stone walls, moorland, steep climbs, expansive views, rock outcroppings.
Coastal & Northern Sections: Ports, cliffs, ferry links, and final stretches toward the North Sea.
Balkans
The Balkans section of the Trans Euro Trail spans multiple countries — including Albania, Serbia, Bosnia & Herzegovina, Kosovo, and Montenegro — combining rugged mountains, remote forests, and traditional rural landscapes. It’s one of the more challenging and rewarding stretches of the TET, appealing to riders who want variety, elevation, and remoteness.
The trail moves through high mountain passes, limestone karst, forest tracks, remote ridges, and quiet rural roads. Some sections are steep, rocky, or otherwise rough, especially in mountainous interior zones. Expect a mix of surfaces and plenty of variation from one country or even one day to the next.
Riding Conditions
Best Season: Late spring through early fall (often May to October). Snow, mud, or snow-blocks may make higher passes impassable earlier in the year. Some mountain weather can change suddenly.
Surface Mix: Rocky tracks, gravel roads, forest trails, limestone roads, patches of tarmac when connecting towns or crossing valleys. Some trails may be unmaintained or washed out.
Difficulty: Moderate to high. The terrain demands good bike setup, off-road experience, stamina, and careful navigation. Heavy bikes might struggle in certain technical or remote parts.
Challenges: Remote stretches with few services, steep climbs/descents, changing weather (snow, fog, rain), possible exposure in high ridges, occasional muddy or slippery terrain after snow or rain.
Camping & Regulations
Wild camping is often possible in remote and mountainous areas, but laws differ by country. Always be respectful of private land, local customs, and natural parks.
Protected areas and national parks often have rules restricting off-road riding, camping, or requiring use of specific trails.
In many places, use discretion: camp out of sight, avoid fires, carry out waste, and respect local communities.
Scenic Highlights
Albania & Kosovo Mountain Ranges: Rugged landscapes in the Albanian Alps, high ridgelines, dramatic views, very remote tracks.
Serbia’s Highlands: Forested mountain areas (Zlatibor, Tara, Kopaonik, etc.), high plains, rocky ridgelines, and lush greenery.
Bosnia & Herzegovina Lakes & Peaks: Glacial lakes, dramatic valleys (such as near Mostar), and mountain scenery in interior zones.
Montenegro Mountain Heartland: High altitude passes, steep climbs, vistas, remote ridges, and then descent toward the Adriatic.
Gear & Bikes
Bike choice
Light is right — and your back will thank you. The Honda CRF250L, KTM 690 Enduro R, and Royal Enfield Himalayan remain the sweet spot for TET-style adventures: manageable weight, solid reliability, and easy to fix anywhere in Europe.
Choose light motorcycles
Heavier adventure twins like the BMW GS, Africa Twin, or Tiger 900 can absolutely do the job, but they’ll make you work harder in mud, steep switchbacks, and rocky climbs. If you’re on a big twin, pack lighter, fit aggressive tires, and practice picking it up before you go. You’ll be doing it for real — sooner than you think.
Tires & protection
The TET is unpredictable — you’ll go from smooth gravel to deep ruts and slick clay within minutes.
Tires: Full knobbies (e.g., Motoz RallZ, Pirelli MT21, Continental TKC80) are ideal.
Protection: Skid plate, engine guards, handguards, radiator guard, and crash bars are non-negotiable.
Comfort: Add wider foot pegs, handlebar risers, and a seat pad if you’re covering long distances daily.
Carry a small brush or tire tool to clear mud build-up — it can overheat your bike faster than you expect.
Luggage
Go soft and simple. Soft panniers, a waterproof tail roll, and a small tank bag for essentials.
Keep weight low and balanced — tools, water, and food near the bike’s center.
Use dry bags inside for waterproofing.
Bring a cargo net or bungee cords for unexpected extras (like firewood or wet gear).
Remember: every extra kilogram matters when lifting a muddy bike uphill.
Tools & spares
You’re your own mechanic out there. Bring at least:
Tire levers, mini pump, spare tubes, or tubeless plugs
Chain lube, spare master link, and a bit of oil
Zip ties, duct tape, and wire — bush-fix essentials
Basic tool roll (Allen keys, sockets, screwdrivers)
Multitool, headlamp, and fuses
Tow strap — saves friendships
First aid kit & small fire starter
Satellite communicator for solo riders
Riding Gear
Helmet: Dual-sport or ADV helmet with peak and wide visor (for goggles).
Jacket & Pants: Waterproof or layered textile gear.
Boots: Sturdy, waterproof, off-road boots with ankle protection.
Gloves: Two pairs — lightweight for warm weather, insulated for cold or wet.
Base layers: Moisture-wicking thermal layers for temperature control.
Rain gear: Even in summer, it will pour somewhere.
Camping & Sleeping
If you plan multi-day rides or wild camping sections, good preparation makes all the difference.
Gear essentials
Lightweight tent or bivvy bag, 3-season sleeping bag, inflatable pad, compact stove with gas canister, titanium pot, and water purification system.
Bring a headlamp with spare batteries, power bank or solar charger, and a compact repair kit for both your tent and your bike.
Where to sleep
Wild camping is generally allowed in Scotland, Scandinavia, and parts of Eastern Europe—always camp discreetly, leave no trace, and use a stove instead of an open fire.
In most of Western Europe, stick to official campsites or small guesthouses.
Mixing camping and accommodation offers the best balance between comfort, safety, and flexibility.
Navigation & Communication
To stay on track, load GPX files from the official TET website or app, which are segmented by country.
Use a GPS unit or a smartphone with offline maps such as OsmAnd+, Gaia GPS, or the TET GPX viewer.
Keep a paper backup map in case your tech fails, and mount your device securely on the handlebars.
A hardwired USB charging port ensures your gear stays powered through long riding days.
Don’t forget to save emergency contacts offline—cell reception can be unreliable in remote areas.
Tip: “Your bike may fall more times than you drink water—pack smart, and keep smiling.”
If you’re new to off-road riding, start with shorter regional sections near home before tackling the full TET route — it’s the best way to build confidence and test your setup.
The TET throws everything at you—from smooth gravel lanes perfect for cruising to gnarly mountain passes that will test your skills and nerve. Ride smart, pace yourself, and always respect the terrain.
The Trans Euro Trail is full of challenges
You’ll be sharing it with locals, curious livestock, and wildlife—remember, many trails cut through working farms and sleepy villages.
TET Code of Conduct:
Respect trails and closures: Stay on marked paths. Private fields and restricted areas are off-limits.
Pack out all trash: Leave nothing but tire tracks.
Report obstacles to Linesmen: Fallen trees, washed-out paths, or broken signage—your report keeps the trail alive.
Pro Tip: Slow down near villages, give cows a wide berth, and keep noise in check. You’re a guest here—treat the land and its people with respect, and they’ll treat you like family.
Conclusion
The Trans Euro Trail is not only a road but an adventure across hidden corners of Europe, the ultimate adventure riding playground. From northern glacial fjords to the sunny vineyards of the south, each section provides discovery, adventure, and the rider's freedom to ride where you want when you want. There is no endpoint, no throngs—just you, the rider, the machine, and the open road.
Ride smart, pack light, and always give the land and the rules the respect they deserve. The TET will, in turn, pay you back plenty with muddy boots, tall tales, and memories to last an eternity. Proper preparation, adventurous soul, and sense of wonder will allow you to ride Europe the way few others do—conservative gravel roads ad infinitum, stunning landscapes, and the very essence of motorcycling liberation.
Your snowmobile’s track is what connects you to the snow — it affects everything from traction and handling to fuel efficiency. The right track makes your sled feel smooth and responsive, while the wrong one can make it sluggish or even unsafe. This quick guide on how to choose the right snowmobile track covers the basics of track design, the main types, and how to match the best one to your riding style.
Snowmobile Track Basics
Snowmobile tracks are described by several key dimensions. Understanding these terms will help you compare tracks and ensure compatibility with your sled:
Track Length
snowmobile track length
This is the internal circumference of the track, usually given in inches.
Calculation: drive pitch × number of track segments.
Shorter tracks (lower length) are generally more maneuverable and give quicker handling and stability, while longer tracks improve ride quality and “floatation” in deep snow.
For example, many trail sleds use lengths around 120–137″, whereas mountain and utility sleds often use much longer tracks (150–175″) for better flotation off-trail.
When replacing a track, the length must match your sled’s frame or be within a tolerable range (you can go slightly shorter if needed, but not longer without modifications).
Track Width
snowmobile track width
This is the width of the track (measured in inches) and is limited by the tunnel width of the snowmobile.
Common widths are 15″ and 16″ for most sleds. A slightly narrower track can sometimes be fitted (for example, a 15″ track in a 16″ tunnel) to save weight.
Narrow tracks reduce weight and improve acceleration and top speed, whereas wider tracks provide better flotation in soft, deep snow.
Tip: Make sure the track width doesn’t exceed your sled’s tunnel clearance — a track that’s too wide simply won’t fit.
Lug (Tread) Height
snowmobile lug height
This is the height of the lugs (the raised tread blocks) on the track, usually given in inches (e.g., 1.25″, 2.0″).
Taller lugs dig deeper into snow, greatly increasing traction. In fact, as one manufacturer notes, “more lug height equals better traction—as little as a quarter inch of extra height can make a substantial difference in acceleration and braking”.
However, taller lugs also mean more drag and weight, so there’s a trade-off. Long lugs can slow acceleration on hardpack trails and may wear faster if used on groomed snow.
Also, make sure very tall lug clear your sled’s skid rails and heat exchangers — if they hit any part of the chassis, you’ll end up with damage. The taller the lug height, the more you need to check that it actually clears your heat exchanger.
In practice, trail-only riders often use 1.25–1.5″ lugs, while deep-snow riders use 1.75″ or taller.
Drive Pitch
snowmobile drive pitch
Pitch is the distance between the centers of adjacent drive sprocket teeth (or track crossbars). It determines the spacing of the lugs along the track. Common pitches are 2.52″, 2.86″, and 3.0″, while newer mountain sleds sometimes use 3.5″.
The track pitch must match your snowmobile’s drive sprockets, or you’ll need to change the sprockets to fit the track.
“Drive pitch” refers to the drive cog center distance around the circumference — it must match the existing track, or the drive cogs have to be replaced.
In general, a wider pitch (e.g., 2.86″ vs 2.52″) means fewer but larger and lighter lug segments and slightly more flex in the track.
Snowmobile Track Quick Summary
Length: Shorter = quicker handling; Longer = better flotation. Width: Narrower = faster; Wider = more floatation. Lug Height: Higher = more traction; Lower = faster on hardpack. Drive Pitch: Must match sled; Common: 2.52″ / 2.86″ / 3.0″.
For example, a track labeled “136x15x1.75 (2.86)” would be 136″ long, 15″ wide, with 1.75″ lug height, and a 2.86″ drive pitch.
💡 Understanding these specs helps you compare tracks easily.
Track Types: Trail, Mountain, Crossover, and Utility
Snowmobile tracks are often categorized by intended use. Each type has design features optimized for certain conditions. Here’s an overview of the main track types:
Trail Tracks
trail snowmobile track riding
Trail tracks are designed for groomed or hard-packed trails. They prioritize speed, handling, and efficiency over deep-snow flotation. Typical trail track features include:
Length: Short to medium (often 120–137″). For example, many modern trail sleds use 129–137″. Shorter length allows quick turns and stability on hardpack. (Some trail riders upgrade to 146″ for occasional off-trail use, but standard is ~137″.)
Width: Usually 15″ (rarely 16″). Most trail sleds have a 15″ tunnel, so trail tracks are commonly 15″ wide.
Lug Height: Low to moderate (around 1.25″ to 1.50″). Trail riders do not need very tall lugs. In fact, Camso notes that for 100% trail riding, 1.25″–1.50″ lugs “will do the trick” and use less fuel. Shorter lugs also “give less push in corners,” improving handling. Taller lugs on groomed trails just create drag and wear.
Drive Pitch: Often 2.86″, especially on modern sleds. This pitch balances weight and durability for trail conditions.
Support Columns: Minimal. Trail sleds typically use fewer track support bars (columns) because the track profile can be lower for speed.
Clip Pattern: Fully clipped. Trail tracks usually have a “fully clipped” tread pattern (lugs on every crossbar) for smooth, even traction on hard surfaces.
Additional Features: Trail riders may add ice studs or use pre-studded tracks (e.g. Camso “Ice Storm” or “Ice Attak” models) for slick conditions. But in general, trail tracks focus on low drag and longevity.
In summary, a trail track is relatively short and narrow (around 130×15) with low lugs (1.25–1.5″). It excels on groomed terrain, offering quick handling, good top speed, and less fuel consumption. Manufacturers often call these trail or crossover (on-trail) tracks.
Mountain Tracks
mountain snowmobile track riding
Mountain tracks (also called deep-snow or backcountry tracks) are built for soft, unpacked snow and steep terrain. They are longer and have aggressive lugs to maximize floatation and grip:
Length: Long (often 154–175″). For deep powder and big climbs, longer tracks push the sled up instead of plowing down. For example, Camso recommends 162–175″ for general mountain riding in deep snow. (Some extreme models go as high as 177″, 180″ or more.)
Width: Often 15″ or 16″. Wider tracks give more surface area for floatation, but many mountain riders still use 15″ due to sled design. Some utility or mountain sleds may use 16″ for extra float.
Lug Height: Tall (roughly 2.0″ to 3.2″). Mountain tracks have the tallest lugs available. For general deep-snow riding (“boondocking”), lugs around 2.0″–2.5″ are common (e.g. 1.6″ to 2.5″ widths that are sometimes called “mountain tracks”). For climbing steep chutes or very steep terrain, extra-tall lugs (2.8″–3.2″, often cup-shaped or saw-tooth) are used. These enormous lugs bite through powder and hardpack to pull the sled up.
Drive Pitch: Some mountain sleds use wider pitches (2.86″ or 3.0″) to reduce weight and improve flex. Camso suggests 2.6″–3.0″ for mountain riding.
Support Columns: Many. Long, tall-lug tracks need additional support bars inside the track to keep the profile stiff and prevent lugs from folding over under load.
Clip Pattern: Often fully clipped too, but some deep-snow tracks use every-other (open) lugs to save weight. (Studs are less common, since studs can be ripped out in soft snow.)
In summary, a mountain track is very long (often >162″) with very tall, aggressive lugs (up to 3.0″+) and robust support structure. It gives maximum flotation and traction in deep powder and steep climbs. The trade-off is more weight, higher drag on trails, and it can be harder to handle on hardpack.
Crossover Tracks
crossover snowmobile track riding
Crossover tracks (sometimes called trail/mountain tracks or all-condition tracks) are a middle-ground between trail and mountain. They are intended for riders who do both trail riding and occasional off-trail riding. These tracks balance power and floatation:
Length: Medium (often 137–146″). A common crossover length is 137″ or 146″. For example, many manufacturers offer 146×15 tracks for crossover/backcountry sleds (see Ski-Doo Backcountry or Polaris models).
Width: Typically 15″.
Lug Height: Moderate to tall (1.5″ to 2.0″). Crossover lugs are taller than pure trail tracks but not as tall as full mountain lugs. For instance, one maker’s “C35” crossover track has 1.38″ lugs and is described as grabbing traction in deep snow or on groomed trail. Another “C38” model uses 1.50″ lugs for on-trail speed with some off-trail ability. In practical terms, many crossover tracks use lug heights in the 1.6″–2.0″ range.
Drive Pitch: Often 2.86″ (on most modern sleds) or 2.52″ depending on model.
Support: Moderate – usually more support columns than a pure trail track but fewer than a mountain track.
Crossover tracks are designed for mixed conditions: groomed trails, frozen lakes, and light powder. They offer better traction in loose snow than a trail track, without the full weight penalty of a mountain track. Think of them as a compromise: good acceleration on trails plus extra bite when you wander off-trail.
Utility Tracks
utility snowmobile track riding
Utility tracks are made for work and heavy hauling. They share some features with mountain tracks but are optimized for pulling loads and unpredictable terrain:
Length: Medium to long (often 154–156″, and sometimes as long as 162″ or more on heavy-duty models). Utility snowmobiles often use longer tracks for stability when towing or carrying.
Width: Often 15″ or 16″ (wide for flotation under heavy load).
Lug Height: Moderate (1.5″–1.8″ or more), often with cup (cupped) lugs for traction. The focus is on grip and durability, not maximum float. For example, Camso’s utility tracks use 1.5–1.8″ cup lugs to pull heavy loads.
Drive Pitch/Support: Similar to mountain tracks, with additional reinforcement (columns and stiffeners) so the track won’t fold under heavy pulls.
Clip Pattern: Fully clipped is common for maximum traction. Some utility tracks are also stud-ready or pre-studded, since these sleds often operate on ice and need good grip.
Utility tracks excel at towing, hauling, and work tasks. They provide reliable traction under load and on mixed snow/ice conditions. They are not primarily about speed or pure deep-snow flotation.
The table below summarizes these track types:
Snowmobile Track Types
Type
Typical Size (L×W)
Lug Height
Best For
Trail
120–137″ × 15″
1.25–1.5″
Groomed trails, speed, handling
Mountain
154–175″ × 15–16″
2.0–3.0″+
Deep powder, climbing
Crossover
137–146″ × 15″
1.5–2.0″
Mixed trail & off-trail
Utility
154–156″ × 15–16″
1.5–1.8″
Towing, heavy work
(Note: These are general ranges. Always verify your sled’s allowable track size.)
How to Choose the Right Snowmobile Track
Use your main terrain as a guide:
🛣 Mostly Groomed Trails
→ Choose a trail track (120–137", 1.25–1.5″ lugs).
→ Prioritizes handling, efficiency, and cornering.
🏔 Deep Snow / Backcountry
→ Go for a mountain track (154–175", 2.0–3.0″ lugs).
→ Maximizes flotation and traction in powder.
⚖️ Mixed Riding (Trail + Off-Trail)
→ Pick a crossover track (137–146", 1.5–2.0″ lugs).
→ Balances traction off-trail with smooth trail handling.
🛠 Work / Towing
→ Choose a utility track (154"+, 1.5–1.8″ cup lugs).
→ Built for durability and pulling power.
💡A simple rule of thumb:
The deeper the snow, the longer and taller the track should be.
The harder the trail, the shorter and lower the track should be.
Incorrect track size or pitch can leave you stranded or cause damage. But generally, the process is:
Verify stock track specs (length, width, pitch) for your model.
Decide what lug height and track length you want based on your riding style.
Use a fitment guide to narrow options and ensure compatibility.
Double-check clearance and any required modifications (skid kit, spring kit) before ordering.
❌Common Beginner Mistakes to Avoid
When choosing a new track, beginners often make a few mistakes. Here are pitfalls to watch out for:
1. Picking Too-Tall Lugs for Trail Riding
A new rider might think “more lug = more traction” and choose a big mountain track for a trail sled. But on groomed trails, tall lugs just slow you down and can overload the engine.
From my experience, using taller-than-needed lugs on trails causes extra push in corners and worse fuel mileage. It can also lead to premature wear or lug failure if the lugs flex too much.
Tip: Match your lug height to your terrain. If >50% of your riding is trails, stick to 1.5″ or less.
2. Ignoring Track Clearance
Some riders fail to check if a taller/larger track will even fit their sled.
Very tall lugs might hit the heat exchanger or tunnel frame. Always check clearance or consult a dealer before getting a very tall or wide track.
Like I always say, the taller the lug height, the more you need to make sure it’ll actually clear your sled.
3. Mismatched Pitch
Always verify pitch. Buyers sometimes assume all tracks will work, but installing a 2.86″ track on a 2.52″ drive (or vice versa) won’t work without new drive sprockets.
This mistake can ruin your driveline.
4. Overlooking Fitment Guides
Beginners may not use a fitment guide or check the manual, and order a track that doesn’t fit their model.
The simplest way to avoid the wrong size is to look up the OEM track dimensions for your make/model.
Fitment guides (online or dealer) show exactly what length, width, and lug height your sled was sold with.
5. Skipping Maintenance
Once the new track is on, don’t forget to keep it in shape.
A common mistake is to assume a new track needs no care. But you should still check tension, inspect for damage, and service studs.
In short, avoid thinking “bigger is always better.” Bigger lugs and tracks have trade-offs.
Choose features that match your use case. Consult specs and experts rather than guessing.
Conclusion
Choosing the right snowmobile track means balancing your riding style, terrain, and sled setup. For beginners, start with a stock-style track and upgrade only if needed. Always check fitment and think about how often you’ll ride in each condition.
There isn't one perfect track — trail tracks work best on groomed trails, deep-snow tracks off-trail but apparently wedged on hardpack. Your decision between the good one keeps your ride safe, smooth, and enjoyable.
Choosing a snowmobile engine as a beginner is overwhelming—after all, it's not just metal and gas, it sets the stage for your entire experience. Understanding 2-Stroke vs 4-Stroke snowmobiles is a key starting point, as every engine has its own range of qualities in power delivery, weight, fuel efficiency, noise, and maintenance.
This article will walk you through everything you need to know so that you can confidently select the engine that best meets your riding requirements.
Engine Basics and How They Work
Snowmobile engines cycle through intake, compression, power and exhaust strokes.
A 4-stroke engine does this in four piston movements (intake, compression, power, exhaust) over two crankshaft revolutions.
A 2-stroke engine completes the cycle in just two strokes and one crankshaft revolution, so it fires on every crank spin.
Cycle: A 2-stroke fires every crankshaft turn, giving a power stroke on each revolution. A 4-stroke fires once every two revolutions (every other crank turn).
Lubrication: 2-strokes mix oil in the gas, so fuel and oil go together through the engine. 4-strokes have separate oil and gas tanks (like a car), with oil kept in a crankcase.
Components: 4-strokes have extra parts (valves, camshafts, a separate oil pump) that 2-strokes lack. This makes 4-strokes mechanically more complex but also smoother and more durable.
Because of these differences, 2-stroke engines tend to be lighter and high-revving, delivering explosive power for their size.
4-stroke engines run more smoothly, with strong low-end torque, and burn fuel more completely.
In short, 2-strokes trade fuel economy for power, while 4-strokes trade some power for efficiency and longevity.
2-stroke snowmobiles usually feel faster and more reactive thanks to their lighter weight and the fact that they fire every crankshaft revolution. The result is sharp, instant throttle response and acceleration that can make even short bursts exhilarating.
Most 2-strokes are naturally aspirated, giving immediate power with every twist of the throttle. Older carbureted models deliver a raw, snappy response but can be finicky in cold or high-altitude conditions, whereas modern EFI 2-strokes improve reliability while still requiring a fuel-oil mix.
By contrast, 4-stroke engines produce power more smoothly, building torque at lower RPM and delivering steady, consistent acceleration.
4-stroke engines come in both naturally aspirated and turbocharged variants. Turbocharged 4-strokes offer strong horsepower from smaller displacement with a smooth, controlled pull, while naturally aspirated 4-strokes emphasize reliability, fuel efficiency, and low-end torque.
EFI is standard, providing consistent fuel delivery and cleaner emissions without the need for fuel-oil mixing.
Those differences aren’t just numbers on paper — you can feel them the moment you ride.
A few years back, I had the chance to ride two very different sleds side by side: 2016 Ski-Doo Renegade Sport (600cc 2-Stroke) and 2021 Yamaha SR Viper GT (1000cc 4-Stroke)
2016 Ski-Doo Renegade Sport and 2021 Yamaha SR Viper GT
Even though both are older models compared to today’s sleds, the contrast I felt between them perfectly illustrates the difference between 2-stroke and 4-stroke designs.
The Ski-Doo’s light frame and high-revving engine made it spring forward with every twist of the throttle. It felt playful, almost impatient — the kind of sled that begs to dart into corners and dance across fresh powder.
By comparison, the Yamaha was slower to respond at first, but when the torque kicked in, it pulled with a steady, relentless surge. The extra 200 pounds gave it a more grounded feel, especially on long, groomed trails, where it tracked straight and stable even at higher speeds.
In drag race testing, that split personality became unmistakable: the Ski-Doo leapt ahead off the line thanks to its lighter weight and quicker throttle response, but halfway down the run the Yamaha’s 4-stroke torque started reeling it in, overtaking smoothly and carrying its speed further.
In short, the numbers tell you what to expect, but the ride experience makes it real.
The 2-stroke is like a sprinter exploding off the blocks, while the 4-stroke is a marathoner hitting stride and never letting up.
Riders looking for quick bursts, playful handling, and aggressive off-trail fun will gravitate to 2-strokes, while those who prefer smooth, steady power for long-distance trail cruising and predictable control will favor 4-strokes.
Maintenance and Longevity: 2-Stroke vs 4-Stroke
Snowmobile Maintenance
2-Stroke Engines
Lifespan: Typically 5,000–8,000 miles before a top-end rebuild.
Complexity: Simple design, easier for DIY repairs, but top-end rebuilds needed sooner.
4-Stroke Engines
Lifespan: Often exceeds 15,000 miles; some models can reach 30,000–40,000 miles before major rebuilds.
Maintenance: Regular oil changes and valve inspections; rebuilds are rare but more technical and costly.
Complexity: More moving parts; daily upkeep is easier, but repairs require skill.
Summary:
2-strokes need more frequent minor attention and earlier major rebuilds but are mechanically simpler.
4-strokes last longer between major services, with less daily attention, but repairs are more complex.
Fuel Economy: 2-Stroke vs 4-Stroke
2-Stroke Engines
Fuel Efficiency: Lower, typically 8–14 MPG depending on engine size and riding style.
Oil Use: Requires oil mixed in fuel or via injection; extra attention needed during rides.
Practical Impact: More frequent fuel stops and higher running costs.
4-Stroke Engines
Fuel Efficiency: Higher, often 15–28 MPG; larger 900cc engines can still reach ~22 MPG.
Oil Use: Separate crankcase oil, changed infrequently; no need to mix with fuel.
Practical Impact: Fewer fuel stops, lower fuel costs, and more convenient for long-distance riding.
Summary:
4-strokes win on fuel economy, convenience, and lower running costs, while 2-strokes demand more fuel and oil management but offer lighter weight and quicker throttle response.
Riding Impact: Thrilling but attention-grabbing; more noticeable smoke and smell.
4-Stroke Engines
Noise: Quieter and smoother operation.
Emissions: Cleaner-burning; fewer pollutants and almost no visible smoke.
Riding Impact: More eco-friendly, less polluting, and comfortable for long rides.
Summary:
2-strokes offer excitement and character but are noisier and less clean, whereas 4-strokes provide a quieter, more environmentally friendly ride.
Riding Experience and Ease of Use for Beginners
For someone new to snowmobiling, the engine type can affect ease of use.
ride a snowmobile
4-stroke sleds tend to have a smoother, more predictable power delivery, which many beginners appreciate. They idle smoothly, you can cruise at low speed without hunting for the choke, and the throttle response is gentle. Trail riding on a 4-stroke is often described as comfortable and easygoing.
On the other hand, 2-stroke sleds deliver power very quickly. This “snappy” throttle can be thrilling but also requires some skill to manage, especially for a beginner.
If you like slow, steady riding on groomed trails, a 4-stroke is usually best. It won’t catch you off guard when you open the throttle, and it’s easier to start (especially in cold weather) because 2-strokes generally fire right up.
If you want to play off-trail, jump, or climb hills, a 2-stroke gives more performance for the pilot.
In short, a rider who enjoys blasting off-trail into deep snow and climbing hills will likely find a 2-stroke more exciting, while those who prefer cruising on groomed snowy trails may be better suited to a 4-stroke.
Cost Differences: Price, Maintenance, and Resale
When it comes to money, 2-strokes and 4-strokes differ in several ways:
Purchase Price: 2-stroke snowmobiles generally cost less new. Entry-level 2-stroke trail sleds can often be found under $10,000, while comparable 4-strokes (especially high-end models) start around $12,000 and can exceed $15,000. More power and complexity in 4-strokes drive up the price.
Maintenance Cost: 2-stroke engines are cheaper to rebuild (fewer parts, simpler design), but they need those rebuilds more often (every few thousand miles). 4-stroke parts (oil pumps, injectors) are costlier, but require service less frequently. Routine maintenance (oil change, filters) on a 4-stroke is similar to a car, whereas a 2-stroke demands frequent oil mixing and top-end checks. Over the lifetime of the sled, a diligent owner might spend several thousand dollars on top-end rebuilds for a 2-stroke, versus mostly oil and belt changes on a 4-stroke.
Fuel/Oil Cost: Because 2-strokes burn more fuel and oil, their operating costs per mile are higher. One dealer pointed out that riding 1,000 miles on a 2-stroke might use 10 quarts of oil on top of gas. In contrast, a 4-stroke uses only engine oil changes.
Resale Value: Opinions vary, but many experts note that 4-stroke sleds hold their value well because of their longevity. A 4-stroke engine can last 30,000–40,000 miles, which makes used 4-strokes attractive and resale prices strong. Some forums suggest 4-stroke values are generally better due to reliability (though interest in 2-strokes remains high among enthusiasts). In any case, expect a premium secondhand market for well-maintained 4-strokes, while used 2-strokes often sell on nostalgia and performance.
Overall, 2-strokes save money upfront but may cost more over time in fuel and rebuilds. 4-strokes are pricier to buy but can be cheaper to run if you ride a lot.
Safety Precautions: 2-Stroke vs 4-Stroke
Operating a snowmobile safely depends in part on understanding your engine type.
2-Stroke Engines:
Avoid open/unbaffled exhaust systems.
Warm up engine before riding.
Check for leaks (crank seals) to prevent idling issues or engine failure.
Be cautious with aftermarket exhausts; many clubs discourage them.
4-Stroke Engines:
Warm up engine and perform routine maintenance (oil, valves, fuel system).
Less noise restriction, but still inspect for leaks and mechanical issues.
Summary: Both engine types require proper understanding and maintenance to ride safely and reliably.
2-Stroke vs 4-Stroke Snowmobiles Comparison Table
Feature
2-Stroke Snowmobiles
4-Stroke Snowmobiles
Power & Acceleration
Pros: Quick throttle response, high power-to-weight ratio
Cons: Peakier power delivery, fires every crank revolution
Pros: Smooth, consistent power, strong low-end torque
Cons: Slightly delayed throttle response, fires every other crank
Weight & Handling
Pros: Lighter frame (100+ lbs), easier to flick around corners
Cons: Less planted at high speeds
Pros: Heavier weight adds stability, tracks straight on groomed trails
Cons: Harder to maneuver, slower steering response
Fuel Efficiency
Cons: Lower MPG (8–14), burns oil with fuel, frequent refueling
Pros: Higher MPG (15–28), separate crankcase oil, fewer fuel stops
Pros: Higher resale value, less frequent maintenance
Cons: Higher upfront cost, individual repairs more expensive
Intake & Aspiration
Generally naturally aspirated; simpler intake system
May be naturally aspirated or turbocharged; more complex intake system with valves and oil pump
Which Engine Is Right for You?
For recreational riders, the choice often comes down to style and priorities:
Trail Cruisers & Beginners: If your main riding is on groomed snow trails, a 4-stroke snowmobile is a safe bet. Its smooth power delivery, quiet operation, and better fuel economy make it ideal for long, steady rides. The extra weight isn’t a drawback on open trails, and the strong torque provides plenty of confidence.
Mountain Riders & Performance Seekers: If you crave deep powder, steep climbs, and playful handling, a 2-stroke snowmobile is the better match. Its lighter frame and responsive throttle give it the agility to dart through trees, climb hills, and tackle technical terrain with ease.
Cold Weather or Remote Riding: A 2-stroke is often easier to start in extreme cold, which helps in backcountry conditions. However, you’ll need to carry oil and perform more frequent checks. On the other hand, 4-strokes excel on long-distance trips thanks to their fuel efficiency and quiet ride.
Budget & Long-Term Ownership: If you want a lower upfront cost and don’t mind occasional maintenance, a 2-stroke offers strong value. But if you plan to keep your sled for many years and log high mileage, a 4-stroke’s durability and lower long-term costs make it more practical.
❄️FAQ
1. 🔧 What is the difference between a 2-stroke and a 4-stroke snowmobile engine?
A 2-stroke engine completes its power cycle in two piston strokes, firing every crankshaft revolution, which gives it a lighter frame, higher power-to-weight ratio, and quicker acceleration.
A 4-stroke engine completes its cycle in four piston strokes, firing every other crankshaft revolution, which results in smoother power delivery, stronger low-end torque, and better fuel efficiency.
2. 🏁 Which engine is better for beginners?
4-stroke snowmobiles are usually recommended for beginners because they have smoother, more predictable power, quieter operation, and better fuel economy.
2-stroke sleds are more responsive and fun but require more skill to manage throttle and maintenance.
3. ⛽ How do fuel efficiency and oil use compare between 2-stroke and 4-stroke engines?
2-stroke engines have lower fuel efficiency (8–14 MPG) and require oil to be mixed with fuel.
4-stroke engines are more fuel-efficient (15–28 MPG) with a separate crankcase for oil, meaning fewer fuel stops and lower running costs.
4. 🛠️ How do maintenance and lifespan differ?
2-strokes typically need top-end rebuilds every 5,000–8,000 miles and more frequent oil/fuel checks. They are mechanically simpler but require more frequent maintenance.
4-strokes can last 15,000–40,000 miles before major service, with routine maintenance mostly limited to oil changes and valve checks. They are more complex but less demanding in daily upkeep.
5. 💰 Which engine type is more cost-effective?
2-strokes are cheaper upfront and have lower parts cost for rebuilds, but they consume more fuel and oil and require more frequent major maintenance. 4-strokes are pricier to buy, but their long-term running costs are lower, and they maintain higher resale value.
6. 🧊 Which one’s easier to start on a freezing morning?
2-strokes usually fire up quickly in cold weather—instant satisfaction. 4-strokes can be a bit temperamental, especially older models, but once they’re rolling, you barely think about them.
7. 👨🔧 Do 2-strokes require more attention?
Yes. They demand more TLC: oil checks, fuel mix, warming up. But that’s part of the fun for some riders—you feel more “in tune” with the machine. 4-strokes are more like a faithful companion: set it and ride, mostly worry-free.
8. Any advice for beginners who are undecided?
Think about your riding style: if you crave adventure and agility, go 2-stroke. If you want comfort, reliability, and long-distance ease, 4-stroke. And honestly, some riders have one of each—they pick based on mood and snow conditions.
Conclusion
Neither 2-stroke nor 4-stroke snowmobiles are universally “better.” Instead, the right choice depends on how and where you ride. Aggressive mountain and off-trail riders will get more excitement from a 2-stroke, while touring and trail-focused riders will appreciate the comfort and reliability of a 4-stroke.
Both engine types continue to improve, and all major brands still offer them — so your decision comes down to matching your riding style, budget, and priorities.
Catch the first snow of the season. In the U.S., ski lifts start spinning as early as late October, giving early-bird skiers a head start on fresh powder and empty slopes. Beat the crowds, enjoy wide-open trails, and snag the best lodging options. Here’s your guide to the top early-season ski resorts to plan your trip now.
Key Facts Overview: Early-Season Ski Resorts
⛷️ Early-Season Ski Resorts in America
Resort
Elevation (Base / Summit)
Average Snowfall
Snowmaking
Terrain Highlights
Arapahoe Basin (CO)
Base ~10,520 ft / Summit 13,050 ft
~350"
✅ Advanced
1,428 acres, 147 runs; mostly expert terrain
Alta (UT)
Base ~8,530 ft / Summit 11,068 ft
~548"
❌ Natural snow only
2,614 acres; steep runs and legendary powder
Wolf Creek (CO)
Base ~10,300 ft / Summit 11,904 ft
~430"
❌ Minimal
1,600 acres; trees and bowls
Mammoth Mountain (CA)
Base ~7,953 ft / Summit 11,053 ft
~400"
✅ 46 trails
3,500+ acres; bowls & diverse terrain
Keystone Resort (CO)
Base ~9,273 ft / Summit 12,408 ft
~215"
✅ Extensive
3,148 acres; parks + family-friendly
1. Arapahoe Basin, Colorado
Nicknamed "A-Basin," Arapahoe Basin is one of Colorado’s earliest-opening ski resorts. Its base sits at 10,520 feet, rising to a summit of 13,050 feet, and it receives roughly 350 inches of snow each winter. Arapahoe Basin's 1,428 acres of steep, glade-filled terrain favor advanced and expert skiers, and snowmaking ensures a solid early-season base.
Arapahoe Basin in Colorado
Early-season skiing here feels rugged and wild. The winding roads above the timberline lead to “island” slopes, where crowds are minimal and groomers can be yours to lap without lines.
Midday sun and winds can be intense at such an altitude. But if a cold snap blows in, you’ll bask in cold, crisp powder on slopes that very few have skied that morning.
From the summit, you can see Keystone and Breckenridge in the distance. Summit County snow trends often let A-Basin and Keystone trade opening honors.
A-Basin has no on-mountain lodging, so most visitors stay in nearby Silverthorne or Frisco, about 30 minutes away, or take the scenic drive over Loveland Pass for a sunrise start.
Travel tip: For the best experience, monitor A-Basin’s website for the exact opening date.
2. Alta, Utah
If you’re chasing early-season powder, Alta Ski Area in Utah’s Wasatch Range demands your attention. Alta sits at a base elevation of around 8,530 feet and tops out at 11,068 feet.
Skiing in Alta
Unlike resorts that depend on snowmaking, Alta thrives on Mother Nature’s bounty. It has no snowmaking but makes up for it with unbelievable snowfall. The resort’s statistics boast an average annual snowfall of 548 inches – among the highest in North America.
Wake up at Alta’s Wildcat to crisp mountain air and a few fresh inches of powder, with the slopes all to yourself before the holiday crowds. The mountain’s steep, fall-line runs—first chosen by Alf Engen decades ago—remain legendary today. Early-season skiing here can be a gamble, but when it’s good, it’s exceptional.
Alta is a skier-only mountain with limited on-mountain lodging. Options include the classic Alta Lodge or condos at Snowpine and Alyeska. Many visitors also stay in nearby Little Cottonwood Canyon (10–20 minutes away) or in Salt Lake City, just a 45-minute drive.
Quick note: Alta is often paired with neighboring Snowbird (just a ski pass transfer away), so you can “double-dip” both resorts on the same trip. Both open around the same time. Many skiers say Alta has slightly deeper, fluffier snow, making it a special experience.
3. Wolf Creek, Colorado
Tucked into Colorado’s San Juan Mountains, Wolf Creek is legendary as the state’s snowiest ski area. Its base sits at 10,300 feet, and the summit rises to 11,904 feet, with most terrain above treeline.
Skiing at Wolf Creek
Wolf Creek’s appeal is simple: unmatched snowfall and a no-frills, authentic ski experience. The atmosphere is rustic and relaxed, with a loyal local crowd and a focus squarely on skiing. There are no luxury amenities here, but the tradeoff is uncrowded lifts, wide-open bowls, and some of the deepest snow in Colorado.
For early-season skiers, Wolf Creek often delivers before other resorts. A well-timed storm in late October or November can blanket the mountain, with enough coverage to open much of the terrain weeks ahead of the Front Range. With its reputation for abundant snow and a straightforward, skier-first vibe, Wolf Creek is a rewarding choice for those chasing an early start to winter.
There’s no lodging on the mountain, so skiers base in Pagosa Springs (23 miles east), with its hot springs and small-town character, or in South Fork. Both offer cozy spots to unwind after a day on Wolf Creek’s famously snowy slopes.
4. Mammoth Mountain, California
High in California’s Sierra Nevada, Mammoth Mountain lives up to its name. With a summit of 11,053 feet—the highest lift-served peak in the state—and a base at 7,953 feet, the resort offers a vertical rise of 3,100 feet across more than 3,500 acres.
Mammoth Mountain Ski Resort
Fed by Pacific storms, Mammoth averages about 400 inches of snow each season, yet also invests heavily in snowmaking, with over 40 trails equipped for early coverage.
An early-season trip here will feel both relaxed and rewarding. Arrive in Mammoth Lakes, and you may catch the tail end of an autumn storm, crisp air, and white-dusted peaks. Even with just a thin base, wide groomers like Broadway or the Unbound Terrain Park are often skiable thanks to snowmaking. By the holidays, Canyon Lodge and the surrounding lifts are almost always open.
Mammoth also delivers plenty of sunshine—about 300 days a year—so early turns often come with bluebird skies. In strong snow years, December brings the opening of upper bowls and iconic terrain like Cornice Bowl, but in early season, the lower runs provide ample space to carve.
With its combination of reliable snowmaking, vast terrain, and sunny Sierra vistas, Mammoth is one of the best bets for an early start to winter in California.
Mammoth Lakes town at the mountain’s base has all the lodging (hotels, condos, cabins). It’s a full-service resort town with restaurants, shops, and year-round skiing.
5. Keystone Resort, Colorado
Known for its accessibility and family-friendly atmosphere, Keystone is one of Summit County’s most reliable early-season resorts.
Skiing at Keystone Resort
The Keystone averages about 215 inches of natural snow annually, but its state-of-the-art snowmaking system ensures that trails are open by mid-November. The resort spans 3,148 acres across three mountains—Dercum, North Peak, and Outback—with a vertical drop of 3,138 feet.
Keystone’s village adds to its early-season charm. Guests can grab coffee at a rustic lodge and ride the iconic gondola above most lift lines, making even opening weekend feel relaxed. Snowmaking often has a dozen or more trails groomed and ready by mid-November, including family-friendly runs on North Peak. The resort also offers one of the earliest night skiing areas in Colorado on Dercum Mountain.
Arapahoe Basin, located right across the highway, allows skiers can easily combine both resorts into one trip. Keystone’s combination of accessibility, early openings, and groomed terrain makes it a dependable pick for first-season turns.
Keystone has a large base village with hotels, condos, and restaurants. Stay at the Keystone Lodge or River Run Village for ski-in/ski-out. Lodging is plentiful (and cheaper) early season before holiday crowds arrive.
Check Opening Calendars: These resorts may update open dates daily as weather allows. Always verify via the resort’s website or ski news (e.g. Powder, OnTheSnow) before you go.
Bring Layers: Early season temperatures can vary wildly – cold mornings but sunny afternoons. Dress in layers and pack goggles for sun/goggles for wind/drizzle.
Be Flexible: If one resort hasn’t opened yet, consider a nearby alternative. For example, if Keystone isn’t ready, head to A-Basin (or vice versa) on the same trip.
Enjoy the Quiet: Early season often means uncrowded lodges and deals on lift tickets/hotels. Enjoy the slower vibe – grab first tracks without lines.
Plan for Access: Some trail closures (or remaining summer trails) can affect valley routes; always check road conditions into the canyon or pass.
Skiers on the chairlift
Conclusion
No matter which mountain you choose, skiing these high-altitude resorts in October/November feels like a small victory – the first breaths of winter. Whether you’re chasing the earliest gun blasts at Keystone, the deepest Colorado powder at Wolf Creek, or the legendary Utah snow at Alta, these five destinations stand ready to launch your season. Pack your gear, watch the weather, and you could be shredding those crisp early-season turns before the holiday crowds arrive.
You know how to ride a motorcycle, but do you know how to lift the front wheel and pull off a smooth wheelie? Motorcycle wheelie is more than just a stunt—it’s a skill that builds confidence, control, and pure adrenaline on your sportbike. Don’t worry—this is a skill that can be learned safely if you follow the right steps and practice patiently. I’m going to walk you through the process, step by step, while sharing tips from my own experience.
Wheelies are thrilling, but they can be risky if attempted carelessly.
Before you try your first wheelie, here’s what I recommend: always start in a safe, controlled environment. Find a large, empty parking lot or a closed course with smooth asphalt and no traffic.
From my experience, empty lots or sanctioned stunt days at racetracks work best—they give you plenty of room and no roadside hazards.
Always check the surface carefully, because even a tiny patch of gravel or a small bump can ruin your balance. And yes, always wear full protective gear—helmet, gloves, jacket, and anything else you can safely add. Trust me, a little extra precaution goes a long way.
Step 1: Choose the Right Gear and Speed
I recommend starting in first gear—it gives the most torque to lift the front wheel. Roll forward at a slow, steady pace (around 10–15 mph).
Too slow, and your bike won’t pop up; too fast, and you risk losing control.
Finding the right speed is key to hitting the balance point later on.
Gear choice matters
Staying in first gear avoids having to shift mid-wheelie, which keeps things simpler and safer for beginners. Only after mastering basic wheelies should you experiment with higher gears.
Second gear can work for rolling throttle lifts at very low speed, but holding a wheelie in second requires more speed.
Advanced riders even perform wheelies in second or higher for rolling starts, but as a beginner, sticking to first gear is the best way to stay consistent.
Step 2: Get into Position
Slide back on your seat and grip the fuel tank with your knees. Keep your back straight, head up, and arms relaxed with elbows slightly bent. Lean back just enough to shift weight onto the rear wheel, helping the front lift, but avoid over-leaning.
Your body position is crucial for balance: stay centered on the seat, use your legs and core to stabilize, and keep your arms loose—stiff arms will upset balance.
Look straight ahead toward where you’re going, not down at the wheel; your bike will naturally follow your gaze.
Small adjustments in posture can make a big difference in sensing the bike’s balance point.
Step 3: Lift the Front Wheel
There are two ways I usually recommend:
Power Wheelie: You rely purely on acceleration: come off the line in first gear and roll on the throttle quickly. The bike’s torque and inertia will pop the front up. On powerful bikes (600cc+), I’ve found this to be the easiest way once I have some speed. Sitting back on the bike and opening the throttle just right makes all the difference.
Clutch-Up Wheelie: Sometimes, especially on smaller bikes, I prefer using the clutch to build revs. I pull in the clutch lever, rev the engine to around 4–6k RPM, and then release the clutch while giving it gas. This gives a sharp burst of power that lifts the wheel at lower speeds. I usually perform the same initial steps as a power wheelie, then let the clutch slip just enough to loft the front wheel. I’ve found clutch-ups great for precise launches and on sport bikes with smaller displacements (300–500cc), where throttle alone doesn’t easily pop the wheel.
Pro Tip: If you feel yourself tipping backward, gently tap the rear brake. It’s your safety net and will help bring the front wheel down without panicking.
Step 4: Find the Balance Point
Once the front wheel lifts, the next challenge is finding the balance point and keeping the wheel in the air smoothly.
The key here is delicate throttle control. Too little gas and the wheel drops; too much and it jumps up too high. Small, precise throttle adjustments are essential—you can think of it like gently nudging the bike rather than forcing it.
Practice feathering the throttle: short twists or gentle rolls help you find the zone where the bike floats steadily on one wheel.
Once you reach the balance point, keep your weight steady, knees gripping the tank, and back slightly leaned. Maintain a constant, smooth throttle to hold the wheel up.
Pro Tip: Always cover the rear brake with your foot. Even a light tap can instantly lower the wheel if you overcorrect, acting as a safety net. Look straight ahead rather than down at the wheel—your bike naturally follows your gaze, helping you keep a straight line while balancing.
Step 5: Control and Lower the Wheel
Throughout the wheelie, keep at least one finger on the rear brake. A gentle tap will lower the wheel if you over-rotate. When you’re ready to end the wheelie, slowly close the throttle and let the wheel descend smoothly.
Landing smoothly is just as important as lifting the wheel. Aim to touch down squarely—landing crooked can make the bike wobble or even cause a crash. If needed, slightly modulate the throttle as the front wheel comes down to help keep the bike balanced.
Pro Tip: Start with small, low wheelies and gradually increase height as you build confidence. Every short hop teaches you throttle control, weight distribution, and balance. Patience is your best friend here.
Common Mistakes to Avoid
Learning to wheelie takes practice. Watch out for these common errors:
Too Much Throttle, Too Fast: Jerking the throttle open suddenly at high revs can loop out (flip the bike). If you feel yourself tipping backward, tap the rear brake immediately. Even skilled riders use a light rear-brake drag to prevent over-rotation.
Not Using the Rear Brake: Some new riders panic and let the rear brake off. The rear brake is your safety net for dialling in wheelie height. Always keep your right foot near the brake to gently stabilize or end the wheelie.
Poor Body Position: Leaning too far back or forward will upset your balance. As noted, keep weight over the seat – leaning past the balance point will cause the bike to flip backwards, and leaning forward will bring the wheel down. Some warnings advise against tipping forward or backward too much when the wheel is up.
Looking Down: It’s tempting to stare at the front tire, but that ruins your balance and steering. Keep your eyes on a fixed point ahead of you to help the bike track straight.
Starting Too Big: Beginners often try to launch extremely high wheelies right away. This is dangerous. Instead, start with short, low hops and gradually get higher. Each small success builds throttle feel and confidence.
Practice a motorcycle wheelie
Practice Tips
Progress Gradually: Begin with tiny wheelies — just a couple of feet of lift — before attempting higher lifts or longer wheelies. Guides suggest moving from short hops to full-fledged wheelies with patience.
Smooth Inputs: Roll on the throttle gently. Jerky or overly aggressive inputs can throw you off balance. Aim for smooth, consistent movements on the bars and throttle.
Use a Buddy or Coach: If possible, practice with a more experienced rider or instructor. They can watch for hazards and give real-time feedback. Some riders even use training wheels or a helper dragging the rear brake for safety until they feel comfortable.
Safe Environment: As emphasized, always practice in a wide-open space. Many sources recommend empty parking lots or tracks where you won’t risk hitting obstacles or encountering traffic. Never attempt wheelies on public roads or near pedestrians.
Stay Relaxed: Tension can work against you. Keep your grip firm but not stiff, and breathe normally. A relaxed posture helps absorb motions and maintain the balance point.
Conclusion
Pulling a wheelie isn’t just a stunt—it’s a skill that boosts your confidence and control on the bike. Take it step by step: start in first gear, find the right speed, adjust your body, lift the wheel with throttle or clutch techniques, and always practice in a safe, open space.
Remember: gear up, stay alert, and respect your limits. Wheelies are fun, but safety always comes first. With practice, patience, and attention to technique, you’ll be able to pull smooth wheelies and enjoy every bit of the ride.
As an avid motorcycle enthusiast, I couldn’t wait to take a closer look at Suzuki’s new DR-Z4SM. This 2025 model brings back the spirit of the old DR-Z400SM but adds a modern twist. In this review, we’ll break down what makes the DR-Z4SM special—from its key specs and features to how it performs in real-world riding. We’ll cover handling, comfort, and day-to-day usability before wrapping up with a look at its strengths, weaknesses, and whether it’s worth considering for riders seeking an agile supermoto experience.
Suzuki DR-Z4SM Model Overview
The 2025 Suzuki DR-Z4SM goes on sale in the U.S. with an MSRP of about $8,999 (plus $600 destination). It comes in two color schemes—Sky Gray or Solid Special White No. 2—and features a new slim fuel tank (2.3 gal/8.7 L) along with a high-mount LED headlight that give it a sharp, minimalist look.
Suzuki DR-Z4SM - Sky Gray
Suzuki DR-Z4SM - Solid Special White No. 2
Engine and Performance
The DR-Z4SM is powered by a 398cc liquid-cooled single-cylinder DOHC engine (four valves, dual iridium plugs) that produces roughly 37–38 hp (27–28 lb-ft torque) in A2-restricted trim. This is essentially the same displacement as the old DR-Z400SM, but Suzuki heavily revised the internals: ~80% of components are new.
Upgrades include a redesigned cylinder head with optimized intake ports, titanium intake valves, hollow sodium-filled exhaust valves, and a new piston/crankcase to reduce mechanical loss.
Crucially, the DR-Z4SM gains electronic fuel injection and 42mm ride-by-wire throttle (10-hole injector). The result is smoother throttle response, better low-end torque, and cleaner emissions.
We can even pick between three engine maps using Suzuki’s Drive Mode Selector to make the throttle feel sharper or more mellow, depending on how we want to ride. All of this makes the DR-Z4SM really smooth and controllable from low revs up to the top.
The new engine “boosts low-down torque,” which makes city riding way more relaxed. Peak power isn’t much higher than before, so it’s not a rocket on the highway, but the low-to-mid range is much more usable.
The exhaust is short and compact, keeping weight and heat centralized, and the bike starts up instantly thanks to a large electric starter and Suzuki Easy Start. Downshifts are also nice and smooth with the slipper clutch and Suzuki Clutch Assist System.
That said, don’t expect it to shine on long freeway runs. With only five gears and tall ratios, it starts to feel buzzy above 60 mph.
Honestly, a sixth gear would make highway riding a lot nicer, but Suzuki stuck with just five to keep the weight down. Even so, the throttle feels really smooth and easy to control—it’s soft and gentle, which is perfect if you’re a newer rider.
If you’re more experienced, you might notice the top-end punch is a bit limited, but the revised fueling and cam setup make it way easier to ride at low speeds compared to the old model.
Key Engine Specs and Features
Specification
Details
Engine
398 cc, liquid-cooled, DOHC 4-valve single (dual spark)
Fuel System
EFI with 42 mm ride-by-wire throttle body (10-hole injector)
Power
Claimed 37.5 hp @ 8000 rpm, 27.9 lb·ft @ 6500 rpm
Transmission
5-speed, final drive chain (same as DR-Z400 series)
Clutch
Slipper & assist clutch (SCAS) for light lever pull
Lubrication
Dry-sump system (for compactness and low CG)
Fuel Tank
2.3 gal (8.7 L)
Chassis, Suspension and Handling
Suzuki DR-Z4SM review
The DR-Z4SM’s chassis is all-new. Gone is the old single-cradle frame; in its place is a twin-spar steel frame with an aluminum subframe. Suzuki claims this frame is about 9.3% more torsionally rigid than before.
The engine is now a stressed part of the frame, improving balance and making the bike feel compact. The rear swingarm is also new: it’s aluminum (up from steel) and features a progressive linkage.
Overall, the DR-Z4SM weighs around 154 kg (340 lbs) curb, which is roughly 16 lbs heavier than the outgoing DR-Z400SM due mostly to added electronics and a sturdier build.
Front suspension is a 46 mm KYB inverted fork with 10.2 inches (260 mm) travel. It’s fully adjustable for compression and rebound.
The rear shock is also KYB, fully adjustable for preload, compression, and rebound, with 10.9 inches (277 mm) travel.
Compared to the old DR-Z400SM’s parts, which felt softer and weren’t adjustable, I noticed the new KYB suspension has more travel and adjustability. Right out of the factory, it feels really soft, though, so I’d suggest stiffening the spring preload if you want a more spirited ride.
With stock settings the bike is very forgiving on bumps, but it responds well when firmed up, indicating high-quality suspension that can handle track use.
The DR-Z4SM’s wheelbase is relatively short (1,465 mm), and rake/trail are tuned for quick steering, giving the bike a flickable, mini-bike feel.
Braking and tires are upgraded to match the sporty intent. Up front is a 310 mm floating disc gripped by a two-piston Nissin caliper; the rear has a 240 mm disc with a single-piston caliper. Both are linked to a Bosch ABS system (with switchable rear-wheel-only mode for track use).
We find the brakes strong and confidence-inspiring, with plenty of bite and good feel.
Notably, Suzuki fits Dunlop Sportmax Q5A 17-inch tires front and rear (sizes 120/70-17 front, 140/70-17 rear). These sportbike-style tires provide superb grip on asphalt, greatly improving cornering traction.
The Dunlops provide good grip while remaining progressive, offering clear feedback and allowing the rider to use the lean angle with confidence.
Key Chassis / Suspension Specifications
Specification
Details
Frame
Twin-spar steel frame, aluminum subframe
Front Suspension
46 mm KYB inverted fork; 10.2″ travel, adjustable compression/rebound
SDMS (3 maps)
Traction control
Switchable rear ABS
LCD dash with fuel gauge
Full suite of modern electronics
Engine Internals
Original parts (cams, valves, piston, etc.)
~80% new parts
Smoother low-end torque
Euro5-compliant
Better low-end torque
Peak power slightly lower due to emissions compliance
Suspension
Non-adjustable USD forks
Softer damping
Fully adjustable KYB front & rear
More travel
Improved handling and comfort
Brakes & Wheels
310 mm front / 240 mm rear discs
Standard tires
Same disc sizes
Stickier Dunlop tires on 17″ wheels
Similar braking hardware
Better traction
Lighting
Halogen headlight
Basic indicators
Full LED: headlight, taillight, indicators
Modern, lighter, more aggressive look
Ergonomics
Upright and neutral
Upright and neutral
Wider aluminum handlebars
Reshaped seat
Sturdy pegs
Improved comfort and control
Overall
Playful, light, strong low-end grunt
Retains playful character, more modern and sophisticated
Heavier but more refined and usable
Test Ride Impressions
Suzuki DR-Z4SM on road
Ease of Riding (Beginners)
From my experience, the DR-Z4SM feels very user-friendly. At around 154 kg, the chassis is light and agile, which makes low-speed riding and U-turns almost effortless.
It’s a fun bike for short trips and gives just enough performance that riders of any skill level can enjoy it. The throttle response is smooth and predictable, especially in Mode C, and the EFI keeps the power delivery consistent.
I also like that there are three ride modes, so you can adjust how sharp the throttle feels, and the traction control plus ABS add an extra layer of safety.
Overall, I think the DR-Z4SM is confidence-inspiring and very forgiving, which makes it a great option for new riders.
Performance and Speed (Experienced riders)
From my perspective, the DR-Z4SM really shines in the city and on twisty backroads. The chassis is light and agile, the suspension is soft enough to soak up bumps, and the narrow profile makes it easy to maneuver.
I find the front end light and fun in corners, and the Dunlop tires give me plenty of feedback and confidence to lean the bike. The low-end torque is strong enough that I don’t often need to rev past 5–6k rpm, and the slipper clutch makes downshifts very smooth. The brakes also feel strong enough for aggressive cornering.
On the highway though, I think the bike feels a bit limited. Without a sixth gear, the engine revs quite high once you’re over about 60 mph, and the vibration through the bars makes it feel busy.
The motor has good punch down low, but the top-end power runs out quickly, which makes long straights or motorway riding less enjoyable. For me, the 5-speed gearbox is the main drawback compared to other bikes in this class.
Comfort & Ergonomics
The DR-Z4SM’s upright riding position feels like a middle ground between a dirt bike and a street bike. It works well for short commutes and twisty canyon runs.
At 35″, the seat height is a bit tall, so very short riders might struggle, but for me, the leg position feels natural, and the wide handlebars are comfortable. The seat has new foam and a slightly different shape, but honestly, it’s still pretty firm, and I wouldn’t call it comfortable for long-distance riding.
For me, this bike is at its best during short, fun rides—popping wheelies or carving turns—rather than hours on the highway. And of course, there’s basically no wind protection, so long freeway rides get tiring pretty quickly.
Instrumentation and Ride Aids
From my point of view, the electronics on the DR-Z4SM are nice to have, but they feel a bit unnecessary for a bike with under 40 horsepower.
The three engine modes don’t really change much in day-to-day riding, although I can see the lowest mode being useful for slippery conditions or if someone is just learning. The traction control works fine, but I don’t really see the need for a “G” mode on a street bike.
I find the ABS responsive, and I like that the rear can be switched off, even though the labeling of the front “off-road” mode is a little odd. The LCD dash is straightforward and easy to read, but I do wish it had a few more features—like a gear indicator or a built-in USB port instead of needing an accessory.
Pros and Cons
✅ Pros
✅ Light & Nimble: At ~154 kg (340 lbs) curb, very agile and fun to ride.
✅ Soft, Forgiving Chassis: Stock suspension is plush and adjustable.
✅ Modern Electronics: Ride modes, traction control, switchable ABS.
❌ Ride Modes Overkill: Too many electronics for a <40 hp bike.
❌ Price: ~$9k MSRP is steep compared to some European rivals.
2025 Suzuki DR-Z4SM Specifications
Specification
Details
Price
$8,999
Engine
398cc, 4-stroke, liquid-cooled, single cylinder, DOHC
Bore x Stroke
90.0 mm x 62.6 mm
Compression Ratio
11.1:1
Fuel System
Fuel injection
Starter
Electric
Lubrication
Dry Sump
Clutch
Suzuki Clutch Assist System
Transmission
5-speed constant mesh
Final Drive
Chain
Front Suspension
KYB inverted fork with adjustable compression and rebound damping. 10.2 inches of travel.
Rear Suspension
Link type, coil spring, oil damped, adjustable spring preload and damping force. 10.9 inches of travel
Front Brake
Disc brake, single 310mm rotor
Rear Brake
Disc brake, single 240mm rotor
Front Tire
120/70R-17M/C 58H, tube
Rear Tire
140/70R-17M/C 66H, tube
Fuel Capacity
2.3 gallons
Length
86.4 inches
Width
34.8 inches
Height
46.9 inches
Wheelbase
57.7 inches
Ground Clearance
10.2 inches
Seat Height
35 inches
Curb Weight
340 pounds
FAQs
Q1: How is the DR-Z4SM’s power delivery and performance?
A: The engine is very smooth and controllable from low to mid revs, ideal for city and canyon riding. Peak power is modest, and the 5-speed gearbox can feel busy on highways above 60 mph. The bike excels at low-to-mid speed agility rather than long highway runs.
Q2: Is the DR-Z4SM beginner-friendly?
A: Yes. The bike is light (~154 kg / 340 lbs), easy to handle, and has predictable throttle response. Three engine maps, traction control, and ABS add extra safety, making it very approachable for newer riders.
Q3: Would you recommend it for experienced riders?
A: It’s fun, but experienced riders may miss top-end power or a 6th gear. That said, for city fun, backroad carving, and easy handling, it’s still very engaging.
Q4: Is it comfortable for long rides?
A: The upright riding position is good for short trips, canyon runs, or city riding. However, the seat is quite firm, and wind protection is minimal, so long freeway rides can become tiring.
Q5: How does it compare to the old DR-Z400SM in feel?
A: The new DR-Z4SM is more refined and usable at low speeds. The suspension is more adjustable, the engine smoother, and electronics add confidence—but it’s slightly heavier, so it feels more planted than the raw, playful DR-Z400SM.
Conlusion
The DR-Z4SM isn’t about speed or highway comfort—it’s about playful city fun, short blasts, and confidence for new riders.
If that’s what you want, it’s hard to beat; but if you need long-distance touring or strong top-end power, you may want to look elsewhere.
If you love covering big miles on two wheels, 2025 has plenty in store for you. From sleek sport-tourers that carve through mountain passes to full-dress tourers built to swallow highways in comfort, the latest machines blend power, tech, and long-distance luxury like never before. Here are some of the standout touring and sport touring motorcycles for 2025.
The Tiger Sport 660 might not look vastly different year-over-year, but actually, under the covers, it gets quite a few nice little upgrades.
You see the 660cc inline triple remains the Same at 80 horsepower Peak as does the chassis. The chassis was already very good in terms of handling, but it's the package that does get some attention with plenty of new features now fitted as standard
The Tiger Sport 800 is going to look very tempting. The 800cc version that's new for 2025, now admittedly it is a couple of grams more than the 660 version, but with a good 30 horsepower more on tap, it's going to make it quite appealing.
The first point is pretty obvious: it's going to be a much quicker bike. The second point is that if you are thinking of going in and you like to ride two open with luggage, then 113 horsepower Peak sounds much more appropriate for that kind of work.
In fact, there are plenty of reasons why I think this bike will be better two-up, like the fact that you’ve got more adjustability in the suspension, with compression and rebound on the fork, preload and rebound on the shock — and that’s as opposed to just preload only on the shock of the 660 bike.
Then, when you’ve got more mass on the bike, a bit more stopping power is always going to be welcome, especially if it’s a faster bike too. And so, the upgraded Triumph-branded radial calipers definitely look like a good addition, as does the fact that you get a little more wind protection courtesy of the slightly bigger fairing.
All in all, I think this is a much more accomplished tourer, especially if you load it up.
There are some other great alternatives in this part of the market, in this sort of price bracket too, like the F900 XR from BMW, which is another one that hasn't changed a great deal visually, but does have a few tweaks to the spec, which keep it fresh for the new model year.
The wheels, for example, they've shed 1.8 kg between them, so that should give you quicker changes in direction. And they've also upgraded the fork on this one with full adjustability, with the previous generation being completely non-adjustable.
Then you've got more tech with lean-sensitive ABS and traction control, an adaptive headlight, a USB-C socket, and heated grips all fitted as standard now.
The aerodynamics have also been revised for a little more comfort on the motorway — the new shape of the windscreen reduces pressure and buffeting on the rider, and also, of course, the standard-fit handguards do give you a bit less chill on your fingers.
On top of all that, though, they've added an Akrapovič exhaust accessory that wasn't available for the previous generation, and also a couple of fancy new paint jobs.
But I think the main consideration when trying to choose between a bike like this and the Tiger, for example, is the vastly different engine character: with this one being a parallel twin with a 270° crank, which might be preferable to some people to the inline triple.
I think it's going to be a really tough call between the new Tiger Sport 800 and one of the proven performers in this market, which is the Tracer 9 from Yamaha. Both are triples, both come in around the same price point as well, and so both look like great options for 2025, with the Tracer also getting plenty of updates to its three-model lineup.
Model
Key Updates / Features
Price
Yamaha Tracer 9
Cornering headlights
7" TFT display
Revised switchgear
Styling tweaks
$12,599
Yamaha Tracer 9 GT
Electronic suspension
Hard luggage
Electronic windscreen
Heated grips
Keyless ignition
Phone connectivity
£14,000
Yamaha Tracer 9 GT+
Front & rear radar (adaptive cruise & blind spot)
First-ever motorcycle Matrix LED headlight
Optional automated manual transmission (AMT)
£17,000
Tip: In the US, only the base model of the Tracer 9 is available.
The Yamaha Tracer 9 might not be a looker — in fact, it's quite a difficult bike to get on with visually — but it should give you incredible visibility at night, with a link to the bike's inertial measurement unit to feed in lean angles so it's adaptive and illuminates the inside of a turn.
But then also, data from a built-in camera gives it a view of the surrounding traffic, the levels of light, and also what the weather conditions are doing. And so it should be able to give you the perfect lighting for any given scenario. But then there's also the option now for both these bikes to spec up their new YT system, or automated manual transmission.
Now in the Tracer 9 lineup, you've got such a wide spectrum of prices and specs that there should be something to suit all budgets and tastes — from, effectively, what's still a good, simple sports tourer, right up to something that's absolutely dripping in all the latest tech.
Mid-to-high end (larger displacement & touring capability)
Now, Kawasaki's Versys 1000 has been a solid performer for many years, but 2025 brings a bit of a refresh with more capacity and a new name. So the big inline-four goes from 1,043 cc up to 1,099 cc, and with it, for this particular bike, you get a substantial hike in peak power — it goes from 118 on the previous generation to a rather handy 133 now.
On top of that, there's also more torque in the mid-range. Gearing is revised too, and the quickshifter, which comes as standard on the premium S and SE versions, has been refined so it now operates lower in the revs.
Elsewhere, the bike is largely the same as the previous generation: the looks, the chassis, and the ergonomics are all pretty much unchanged. But given that it was already a fairly popular bike, it was a good formula.
The other option that you could go with from the Kawasaki lineup is much more of a sports tourer in the form of the new 2025 Ninja 1100 SX.
Compared to the Versys, you get a lighter, lower-slung, faired bike with a more aggressive riding position that clearly is going to make it the better choice if you want to go quick, while still retaining enough comfort to cover some distance.
Now, for 2025, they actually share that 1100 inline-four with the exact same state of tune. And so, while the Versys actually got that really nice bump in peak power, this one is actually a handful of horses down.
Still, that blow might have been softened ever so slightly for anyone considering a Ninja 1100 SX because, for the first time, it'll be available in a more premium S spec, which gets you some rather nice-looking Brembos up front and an upgraded Öhlins shock on the rear.
The Honda NT1100 is a super-solid, comfortable touring bike that's built upon the Africa Twin platform. It was launched a couple of years back, and I’ve got to say, I was generally impressed — although it did have a couple of little quirks and niggles that certainly needed ironing out.
Thankfully, for 2025, they seem to have got them all sorted, with bigger side cases, for example, that can now take a helmet. And the windscreen is now easier to adjust — with the previous generation being a bit awkward, it was so stiff that you pretty much had to get off the bike and move it with both hands. Whereas on this new 2025 bike, I believe it's adjustable with a single hand, so you can just make quick changes on the fly.
On top of that, as well as being available with their DCT automatic box, it now gets their ES version, or electronic suspension, which I guess carries over a similar Showa semi-active system to the one found on the Africa Twin. For me, this is absolutely perfect for this style of bike, where you want that versatility of suspension that's constantly adjusting to give you the best possible ride.
Although, of course, like the Africa Twin, you've got to be prepared to pay a little bit more for it. Still, for the base model, they’ve managed to keep the price the same year-over-year, which I think is impressive considering they've dealt with some of the problems and made some enhancements.
Next up is the new Ducati Multistrada V2. The slightly oversized 19-inch front wheel does kind of give it that ever-so-slight off-road ability and maybe a bit of the adventure bike handling. But apart from that, I think it's basically a direct competitor for stuff like the Tracer 9 and the Tiger Sport 800.
It is, though, a much more spendy option, as you might expect from Ducati. Although it has to be said, it has this level of desirability in the looks, which you might not necessarily get from one of the other two.
New for 2025, it gets their completely brand-new V2 engine, which replaces the Testastretta in the previous generation. And while it's not massively different in terms of performance, it is significantly lighter — which has helped to lighten the whole package — as well as a new aluminium frame.
Still, I’ve got to say, that price tag does look pretty steep versus the competition, and it looks even more so if you opt for the up-spec S version with the semi-active suspension.
The KTM 1390 Super Duke GT is the most powerful bike on this list. And the rest of the chassis also looks up to spec, with top-notch brakes and semi-active suspension courtesy of Brembo and WP, respectively.
On top of that, there's the new, more aggressive styling, which I think is a decent improvement, and also some revisions to the tech, which include their new 8.8-in TFT display. It's absolutely massive, and gets some super wizzy-looking new graphics.
In the meantime, this is certainly one for the maybe list — if you want a really quick sports tourer in 2025, that is. Of course, assuming you can afford it still.
The BMW R18 B and the BMW R18 Transcontinental both got updates in 2025, with tweaks to the big 1.8 L boxer twin to make it Euro 5+ emissions compliant. They also added a good whack more torque — so it now makes 163 Nm peak, which is 5 Nm more than the last generation.
But yeah, what I think is most impressive about them — especially considering how substantial these bikes are — is the US pricing, which comes in a lot lower than the competition, presumably in a bid to drive some sales.
Take the R18 B, for example — it goes for £22,450 in the UK, but in the US, the starting price is $20,700. Of course, there are some tricky bits when it comes to importing bikes between countries, but if you just do a simple currency conversion, that US price works out to around £16,999 — which is honestly a crazy good deal.
For 2025, the Indian Chieftain and the Indian Roadmaster have moved over to their liquid-cooled PowerPlus engine. That brought more performance, especially in terms of peak power — now 126 horsepower peak — while still retaining plenty of torque, with 181 Nm available right in the mid-range at 3,800 rpm.
On top of that, both bikes now get a more sporty chassis, with the new frame, an upside-down fork, and Brembo brakes. Tech has also got a massive boost, with a rear-facing radar for blind spot, tailgate, and rear-collision warnings. So, these two bikes have received a major update, completely rebuilt from the ground up. The two bikes are positioned as premium models, but their overlap with the Challenger and Pursuit makes them less distinctive.
Harley-Davidson is still top of the list. The Harley-Davidson Street Glide Ultra gets pretty much all the same good stuff from the regular Street Glide — like the 117 cubic inch version of the Milwaukee-Eight V-twin, bags of comfort from a big cushy chassis, and their latest Skyline OS in a massive TFT dash with all the bells and whistles in terms of connectivity and rider aids.
This Ultra version adds the absolute works in terms of touring comfort. And so, with this one, you get a top box that integrates the passenger backrest and armrest, as well as a luggage rack, fairing lowers, side case guards, a tall windscreen, and more.
So look, undoubtedly, it is a lot of money — but then again, this one is definitely a lot of bike. And I actually think, especially with the Batwing fairing, this one looks pretty handsome from the front end.
Conclusion
Each of these motorcycles brings its own strengths to the touring segment – from the lightweight agility of the Tiger Sport 660 to the hyper-powered KTM 1390 GT, and from the timeless luxury of the BMW R 18 Transcontinental to the all-American muscle of the Indian Roadmaster.
That wraps up our look at the new and updated touring motorcycles for 2025. Which one would you choose?
Few motorcycle manufacturers carry the kind of mystique that Triumph does. Born in Britain over a century ago, Triumph Motorcycles has experienced highs and lows, near collapses, and glorious revivals.
Under John Bloor’s leadership in the 1990s, the brand roared back to life, fusing retro charm with cutting-edge performance. Today, Triumph occupies a unique position: a company that honors its heritage while pushing into modern markets, from café racers to adventure bikes. But not every model has been a hit.
In this ranking, we’ll walk through Triumph’s lineup—from its least-loved machines to the bikes that define the brand at its best.
The Bonneville Bobber is a retro-styled cruiser designed to mimic an American Harley. It has a single solo seat, a very large fat front wheel, leather detailing, and a low, minimalist profile.
Bonneville Bobber
The Bonneville Bobber uses Triumph’s 1,200cc “high-torque” parallel twin (77 hp @ 6,100 rpm, 78 lb-ft @ 4,000 rpm), which is tuned for low-end pull.
With only about 77 hp and a curb weight of around 705 lb (318 kg), the Bobber feels leisurely rather than fast. The fuel tank is small (~3.2 gal), and there’s no passenger seat, so its practical range and utility are limited.
In short, it looks eye-catching but offers only “average” performance for its heavy build.
The Bonneville Bobber handles nimbly, but overall it’s built more for style than speed. For most riders wanting bang for the buck, other Triumphs are simply more capable, which is why I place the Bobber at the bottom.
Triumph’s 900cc modern-classic models (like the T100, Street Twin, and Speed Twin 900) exude classic Bonneville charm with retro tanks and twin shock rear ends.
Bonneville 900 Series
Under the hood is a smoothly tuned 900cc triple (or parallel-twin) that makes roughly 64–81 hp.
For example, the 2025 Speed Twin 900’s engine makes 64 hp and 59 lb-ft, much less than the larger 1,200cc Bonneville.
These bikes are tuned to be easy and accessible – perfect for relaxed cruising – but “not exciting enough” for riders who want more punch.
They do come with nice features (LED lights, a TFT display, etc.), but their performance is deliberately mild. At the same time, prices start around $9,995–$11,000, which is fairly high for the power delivered.
In practice, a 900 Bonneville makes a great entry-level or second bike for an older rider who values the classic Bonneville look and a gentle powerband.
But the modest horsepower and premium cost make these models less compelling than many of Triumph’s other offerings, so they land low on our list.
The Rocket 3 (both Storm and GT versions) is Triumph’s biggest and most powerful cruiser.
Triumph Rocket 3
The Rocket 3 packs a massive 2,458cc triple engine that now produces approximately 180 hp and 166 lb-ft of torque. This gives it acceleration on par with many sport bikes. However, all that muscle rides on a huge motorcycle – curb weight is about 705 lb (320 kg).
On the plus side, it has top-tier components (semi-active Showa suspension, massive Brembo brakes, wide fat tires) and luxury fit/finish.
On the downside, it’s extremely heavy, tall, and not very maneuverable at low speeds. Its wheelbase is long (66 inches), and the fuel tank is just 4.8 gal, so it can feel like piloting a small ship. With an MSRP of around $25,000, it’s also very expensive.
In short, the Rocket 3 is a thrilling power machine—fun to blast ahead on—but it’s wildly impractical for daily riding or commuting. Its enormous size and cost earn it a low ranking despite its sheer excitement.
The Tiger 900 series are middleweight adventure bikes (GT for street, Rally for off-road styling) that replaced the older 800cc Tigers.
Triumph Tiger 900 series
With a displacement of 888cc, the triple engine makes about 106.5 hp and 66 lb-ft. This is more power than the 800, but still modest by super-tenere or GS standards.
The Tiger 900s come in comfortable all-road packages (upright ergos, long suspension travel, upright windshield) and do a bit of everything well. Weight is substantial (about 228 kg dry, or ~502 lb), though the long-travel suspension and tall handlebars give a roomy feel.
The Tiger 900 feels smooth and tractable on pavement and dirt, but it’s not flashy—you won’t find unpredictable arm-yanking power here, though it does deliver ground-rushing acceleration in a friendly way.
The styling is fairly ordinary for an ADV, and to me it comes across as the kind of bike even a complete beginner could ride, which reflects its relatively tame image.
In summary, the Tiger 900 is competent and versatile (good for riders on a variety of terrain), but its performance and street presence are average. It lands low because other Triumphs in the lineup outshine it in excitement or specialty.
The Tiger 1200 models are Triumph’s large adventure-tourers, directly aimed at taking on the BMW R1250GS. They use a 1,160cc inline-triple that now produces roughly 148 hp and 96 lb-ft. This is very strong for a large bike.
Triumph Tiger 1200
The Tigers carry a rich equipment list: Showa semi-active suspension, Brembo Stylema calipers, cornering ABS, ride modes, etc. Seat height is high (~835 mm to 845 mm), and fuel range is good with a 6-gallon tank. The handling is more sport-oriented than the GS, with sharper steering geometry.
A drawback is cost: the Tiger 1200 GT Explorer lists at $23,795 and the Rally Explorer at $24,895. That’s well above $20k for a middleweight ADV.
Overall, it’s an impressive machine – very fast in a straight line and packed with tech – but its heft and price make it a niche choice.
We rank it here because, despite its strength, the outlay is huge and it only slightly edges the R1250GS rather than fundamentally outclassing it. (Basically, you pay a premium for the Triumph’s triple character and kit.)
The Speed Twin 1200 is Triumph’s “neo-retro” naked roadster that combines classic styling with a modern twin engine.
Speed Twin 1200
The Speed Twin 1200 shares the 1200cc twin (in a more powerful state than the 900) and makes roughly 92–100 hp (dyno tests showed about 92 hp at the rear wheel) and about 78 lb-ft of torque. This is a substantial step up from the 900cc Bonneville twins, giving the Speed Twin brisk acceleration.
The Speed Twin 1200 rides with a sporty yet comfortable attitude (upright bar, bit forward-set pegs) and has modern chassis bits (twin disc Brembo brakes).
On the downside, the newest Speed Twin loses some old-school appeal by ditching the dual round analog gauges: Triumph replaced the pair of clocks with one big TFT display, which some enthusiasts lament as a loss of vintage character.
In terms of value, the Speed Twin sits in the mid- to high-$10k range, making it pricier than some pure retro bikes. But its lovely engine feel and cool styling keep it higher than the cruder Bonneville models.
We’ve placed it above those older Bonnevilles because of its superior performance and muscular look, even though it’s still primarily a style-driven cruiser rather than an outright sportbike.
The Speed Triple 1200 RS is Triumph’s flagship naked streetfighter – essentially a light superbike without a fairing.
Speed Triple 1200 RS
The Speed Triple 1200 RS with its 1,160cc triple is the most powerful inline-3 Triumph makes, cranking out about 177 hp and 92 lb-ft. This lets the RS blast to high revs (redline is 10,750 rpm) and deliver supercar-like acceleration.
The chassis is sporty (adjustable Öhlins suspension on the RS, Brembo brakes, aggressive ergonomics) for razor-sharp handling.
However, at a base MSRP around $18,900 (RS model), it’s very expensive for a naked bike, and still trails the latest V4 superbikes (e.g., Ducati Streetfighter V4’s ~205 hp) in outright power.
In other words, the Speed Triple is outstanding by Triumph standards but isn’t exotic compared to the latest superbike-derived racers.
We rank it here because it is indeed potent and fun ( “balanced performance”), but its high cost and stiff competition temper its appeal. It’s a “high-end” Triumph street bike – thrilling, but not by as wide a margin as the hype suggests.
The Scrambler 1200 X/XE are retro scrambler/adventure hybrids. They use a 1,200cc parallel twin (based on the Triumph sport-twin) tuned for an easy power delivery (89 hp).
Scrambler 1200
The XE model in particular has nearly 10 inches of suspension travel at each end, with a 19″ front wheel and long-travel Marzocchi forks. This gives it surprisingly serious off-road capability for a classic-looking bike.
With a seat height of 34.25″ and generous ground clearance, it can handle rough trails easily. I consider it one of the coolest modern scramblers, complete with retro details like brushed-aluminum fenders.
Despite its 503 lb weight, it can charge headlong through tough terrain, and it comes equipped with premium Brembo Stylema brakes and cornering ABS.
Many enthusiasts prefer its blend of old-school style and modern capability to something like the Ducati Desert Sled, which is smaller. It’s more off-road-focused than most modern classics.
The main downside is that its large size and price ($13–15k) may deter typical scrambler buyers.
Overall, the Scrambler 1200 is loved by many riders for its fun mix of style and function, so it ranks in the upper half of the list.
The Trident 660 and new Daytona 660 are middleweight roadsters/sportbikes that revive Triumph’s nameplate with a punchy 660cc triple.
Trident 660 and Daytona 660
The Trident 660 (naked) makes about 81 hp and 47 lb-ft. It’s remarkably affordable and compact: MSRP starts around $8,595, which is a lot of motorcycle for the money.
Riders praise its smooth three-cylinder engine (strong midrange) and flickable handling.
The Daytona 660 (fully-faired sportbike) uses the same block but with minor tweaks to hit about 94–95 hp and 51 lb-ft.
For example, Rider Magazine measured 95 hp @11,250 rpm on the Daytona 660’s dyno. Both bikes have modern chassis (upside-down fork, decent brakes) but no advanced trimmings like semi-active suspension.
In other words, they aren’t groundbreaking performers, but they deliver sporty performance on a budget. The triple cylinder makes them unique in a segment dominated by parallel twins.
We rank them mid-list because they offer excellent value and fun for entry-level and intermediate riders, even if the spec sheet isn’t head-turning. They’re essentially the entry/mid-market champions of the Triumph line.
The Tiger Sport 660 is the sport-touring variant built on the same 660cc triple as the Trident.
Tiger Sport 660
The Tiger Sport 660 produces about 79–81 hp and 47 lb-ft, giving it more punch than a Versys 650 or similar mid-size twin.
With an upright riding position, aluminum handlebars, and optional luggage, it’s intended as a do-it-all bike (commuting, highway touring, light backroads).
Like the Trident, the Tiger Sport 660 is well under $10k (~$9,695 base).
The Tiger 660 is very approachable and versatile, but also a little boring—it performs its duties capably but isn’t especially thrilling. I’d describe it as having a ‘dull’ character, not because it has any glaring weaknesses, but simply because there’s no wow factor
In short, the Tiger Sport 660 is a competent all-rounder: easy to ride and useful in many roles, but it lacks standout excitement.
We place it above the smaller Bonnevilles because it can handle longer trips and is more modern, but below the purely high-end models since its ride is relatively mild.
Triumph’s all-new Speed 400 and Scrambler 400 X (built in partnership with Bajaj in India) are small-displacement entry-level bikes. They use a 398cc single-cylinder engine making about 39.5 hp and 27.7 lb-ft.
Speed 400 and Scrambler 400
The Speed 400 has a retro roadster look (like a shrunk-down Bonneville), while the Scrambler 400 X has a 19″ front wheel and a little extra suspension travel for light off-road use.
Both weigh under 375 lb wet and have low seat heights, making them very accessible.
Crucially, they are very affordable: the Speed 400 MSRP is only $4,995, and the Scrambler 400 X is $5,595. This pricing undercuts most competitors, and the attractive Triumph styling makes them stand out.
I find their power delivery very friendly, and their lightweight agility makes them easy to handle. These bikes sell well worldwide and fill an important niche for Triumph as beginner-friendly models.
They rank high because they hit the sweet spot of being easy to ride, well-designed, and inexpensive. They expand Triumph’s lineup into markets and new riders in a way no other model does, so even though they are small, they’re big in importance.
The Tiger Sport 800 (often called the new Tiger 850 Sport) is a mid-size sport-touring/adventure bike introduced for 2025.
Tiger Sport 800
The Tiger Sport 800 borrows heavily from the Street Triple, using a bored-out 798cc triple that produces about 115 hp and 62 lb-ft. This provides a very lively powerband in the midrange.
The bike’s ergonomics are upright and comfortable, with a modest windscreen and upright bars, making it ideal for both daily riding and twisty roads. Suspension is fully adjustable (Showa), and braking is strong (good-enough Brembos).
Despite not having the absolute top-shelf components, I find the Tiger Sport 800 feels very balanced, with addictive acceleration, rock-solid handling, and confidence-inspiring brakes. It’s essentially a ‘Street Triple on stilts,’ offering that bike’s fun character but with more comfort and luggage capability.
With a price around $14–15k, it is less expensive than the premium top models and more approachable. Many consider it the best all-round Triumph: fast and agile enough to thrill on a canyon road, yet practical enough for everyday use.
In fact, some riders consider it the best Triumph motorcycle. Its combination of power, handling, and versatility is hard to beat, so it earns the #2 spot.
Top of the list is the Triumph Street Triple 765 (R, RS and higher trims). This middling-sized naked sportbike is often hailed as the pinnacle of Triumph’s lineup.
street triple 765
The Triumph Street Triple 765 is powered by a 765cc inline-triple (derived from Triumph’s Moto2 racing engine) that now makes about 118 hp (R version) or 128 hp (RS version) and ~59 lb-ft of torque.
The result is explosive acceleration and extremely agile performance in a very manageable package.
The chassis is world-class: the frame is light, the suspension fully adjustable, and the braking is a high-end Brembo setup.
What really sets the Street Triple apart is its balance of everyday usability and sheer fun. At around $10,000 (for the R model), it delivers “undeniable value for a sporting naked streetbike,” says Cycle World.
It’s fast enough for track days yet comfortable for commuting, and always engaging thanks to the quick-revving engine and precise handling.
The Street Triple’s only real criticism is its fairly modest instrument cluster – some note the RS’s small 5″ TFT (and the base R’s simpler display) is adequate but not as cutting-edge as the bike’s overall performance. Even so, that is a minor point.
In short, the Street Triple 765 combines everything we love about Triumph: exotic triple sound, razor-sharp handling, high-end build, and everyday practicality.
It earns the top rank as the “pinnacle” of middleweight street bikes, delivering the most complete, thrilling ride in Triumph’s lineup.
Final Thoughts
Triumph has produced everything from forgettable cruisers to unforgettable sportbikes.
While some models like the Speed Triple and Thunderbird Storm stumble, icons like the Daytona 675 and Bonneville T120 prove why Triumph is one of the most respected names in the industry.
Whether you’re drawn to the rebellious Thruxton, the monstrous Rocket III, or the timeless Bonneville, Triumph offers motorcycles that combine history, character, and performance in ways few brands can match.
When it comes to naked motorcycles in 2025, few battles are as exciting as the Triumph Speed Triple 1200 RS squaring off against the BMW S1000R. Both bikes deliver jaw-dropping performance, loads of modern tech, and that raw, unfiltered naked-bike attitude we love—but they bring it to the table in very different ways.
If you’re hunting for a top-tier naked sportbike, this head-to-head breakdown will help you figure out which machine truly matches your riding style, priorities, and personality.
New twin-headlight front end (matches S1000RR look)
Updated paint schemes, including a striking blue + yellow-green combo
More aggressive ergonomics with flatter handlebars
Triumph Speed Triple 1200 RS vs BMW S1000R
⚙️ Engine Comparison
Triumph Speed Triple 1200 RS
Triumph Speed Triple 1200 RS 2025
Power delivery:
The triple-cylinder layout gives it lots of torque at low and mid revs, so you get strong acceleration without needing to rev the engine very high.
Smoothness:
Triumph updated the engine’s balancer system, which reduces vibrations compared to the old model → feels more refined in your hands and feet.
Quickshifter:
Gear changes are seamless and slick, adding to the smooth, effortless feel.
Wheelie control:
The electronics let the front wheel lift slightly and then set it back down gently → makes even casual riders feel like pros.
Overall feel:
Effortless, powerful, smooth, and fun. You don’t need to work hard to access the performance — it’s always there and always usable.
BMW S1000R
BMW S1000R 2025
Power delivery:
Inline-fours are naturally revvier and sportier. The BMW feels lighter and sharper, especially with the new shorter gearing (larger rear sprocket), which gives it quicker acceleration.
Throttle response:
The new shorter throttle twist (58° vs 72°) makes it feel even more direct and aggressive.
Smoothness:
Unlike the Triumph, the BMW still suffers from noticeable vibrations, particularly in the handlebars. Over time, this buzz can reduce comfort and enjoyment.
Overall feel:
Fast, exciting, and sporty — but you need to rev it more and tolerate the vibrations. It feels rawer but less refined than the Triumph.
➡️ Winner (Engine): Triumph
Both bikes are extremely fast, but the Triumph combines power with refinement.
You get strong acceleration at any speed, smoother ride quality, and excellent electronic aids.
The BMW is exciting, but its buzziness and rev-hungry nature make it less pleasant for everyday use.
2. This means the suspension can automatically adjust depending on what you’re doing:
Cruising → soft and comfortable.
Braking or cornering → firms up to give you more control.
You can also fine-tune it via the dash, making it adaptable to different riding styles.
Ride feel:
More forgiving and comfortable.
Stable and balanced — doesn’t feel twitchy or nervous.
Excellent for everyday riding and longer trips.
BMW S1000R
Suspension & Handling:
Sportier setup than Triumph, with sharper geometry.
Steering is quicker and more responsive to rider inputs.
Brakes & Weight:
The brakes feel aggressive at the lever.
M Pack forged wheels reduce total weight to 196 kg (vs Triumph’s 199 kg), making the bike easier to flick, quicker to accelerate, and faster to stop.
Ride feel:
Very agile and exciting in corners.
But also twitchier and less stable compared to the Triumph, especially if you want a more relaxed ride.
➡️ Winner (Handling): BMW
Even though the Triumph has the fancier suspension and is more versatile for real-world riding, the BMW feels sharper and more aggressive on the road.
Since the review focuses on fun and performance (what these “super-naked” bikes are about), the sportier edge of the BMW gave it the win, despite being a bit twitchier.
🏍️ Ergonomics
Triumph Speed Triple 1200 RS
More upright, relaxed “sit and beg” riding position
Wider, more comfortable bars in the 2025 update
BMW S1000R
Flatter bars = slightly more aggressive stance
Sportier riding feel
➡️ Split: Tim preferred BMW (aggressive), reviewer preferred Triumph (comfort)
🎨 Looks
Triumph Speed Triple 1200 RS
Overall design: More refined and cohesive — the whole bike looks well put together without being too flashy.
Key detail 1: Single-sided swingarm → exposes the rear wheel beautifully, giving it a premium and sporty “showroom appeal.”
Key detail 2: Tail light design → distinctive and classy when viewed from behind, stands out compared to rivals.
Distinctive and elegant tail lights—Triumph Speed Triple 1200 RS
Impression: A bike you’d open the garage door to and admire for its sleek, purposeful style.
BMW S1000R
Overall design: Bolder and louder, especially in the new blue-and-yellow-green paint scheme. It grabs attention immediately.
Key detail: Twin headlights → more aggressive than the old single headlamp, making it look closer to the S1000RR superbike.
Twin headlights—BMW S1000R 2025
Impression: Flashy and aggressive, but perhaps less “timeless” than the Triumph.
➡️ Winner (Looks): Triumph
The Triumph looks more elegant, refined, and premium.
The single-sided swingarm + neat tail light give it an extra touch of class.
The BMW looks sporty and eye-catching, but the Triumph feels like the more stylish, well-proportioned machine overall.
Note: This is just my personal opinion—others may prefer the BMW’s sportier aesthetic.
💰 Price & Value
Triumph Speed Triple 1200 RS
$19,995.00 (price increase due to EC3 suspension)
BMW S1000R
Base: $15,440
Fully specced test bike (M pack, forged wheels, extras): $24,000
Much more affordable if you keep it closer to the base spec
➡️ Winner (Price): BMW
Speed Triple 1200 RS vs BMW S1000R (Quick Comparison)
✘ Higher price tag
✘ Less razor-sharp than BMW in handling
✘ Noticeable vibrations
✘ Fully-loaded version is very costly
Best For
Riders who want a balanced all-rounder: comfort + high performance, ideal for daily use and spirited riding
Riders who want a pure streetfighter: sharper, racier feel, with flexible pricing depending on chosen spec
🏁 Final Verdict
Engine → Triumph
Handling → BMW
Ergonomics → Split
Looks → Triumph
Price → BMW
Overall:
Triumph Speed Triple 1200 RS → smoother, more versatile, refined, yet still brutally fast
BMW S1000R → sharper, sportier, more exciting straight out of the box
The 2025 Triumph Speed Triple is the smoother, more refined all-rounder with better looks and engine feel, while the BMW S1000R is cheaper, sharper, and sportier — but buzzier and less refined.
Motorcycle riding is all about the sense of freedom, adventure, and thrill of the open road. But come on—being connected when you ride isn't always an easy thing. Whether you're riding with a buddy, navigating traffic in the city, or long-distance riding, effective communication is crucial. That's where the Fodsports T5 and T6 come in, with smooth communication, crisp audio, and an improved riding experience.
In this blog, we’ll take you through the newly launched Fodsports T5 and T6. If you’re a motorcycle enthusiast on the hunt for a reliable, stylish intercom system, stick with us to find out why the T5 and T6 might be the perfect fit for your next ride.
Fodsports T5 and Fodsports T6 Overview
The T5 and T6 from Fodsports both provide the same high-powered capability and performance.
The style is something the rider can choose based on their personal preference, which doesn't affect the function or the ride.
One of the standout features of both the T5 and T6 is their long-range two-way intercom system.
The T5 and T6 support an intercom range of up to 1000 meters
Whether you’re riding with a friend or part of a group, these intercoms allow for crystal-clear communication at a distance of up to 1000 meters.
This ensures that you can always stay in touch, even if you’re riding at varying speeds or in more remote locations.
2. HIFI Stereo Sound Quality
Both models are equipped with 40mm speakers that provide clear stereo sound.
Whether you’re listening to music, following navigation, or making a call, the audio remains steady and easy to hear.
40mm speakers provide clear stereo sound.
Riders can rely on these intercoms for reliable sound quality, ensuring communication and music playback are always clear.
3. Bluetooth 5.4 Technology: Stable and Efficient Connectivity
The T5 and T6 are powered by advanced Bluetooth 5.4 technology. They feature a QCC chip that enhances compatibility, stability, and low power consumption.
Bluetooth 5.4 enhances compatibility, stability, and low power consumption.
This makes them easier than ever to connect with your phone, GPS device, or another rider’s intercom.
With Bluetooth 5.4, you can trust that your connection will remain stable, even during long rides.
4. Noise Reduction for a Clearer Experience
Motorcycle rides can be loud, but that’s no problem for the T5 and T6.
These intercoms come with professional-grade CVC and DSP noise reduction technology, which ensures that your voice comes through loud and clear while reducing background noise.
CVC & ENC + HD mic = crisp communication
Whether you’re chatting with a fellow rider or answering a call, the T5 and T6 filter out wind and engine noise, providing crisp communication at speeds up to 120 km/h.
5. Waterproof and Built for Any Weather
Both models feature an IP67 waterproof rating, which means you can use them confidently in all weather conditions.
Whether you're riding through rain or snow, the T5 and T6 will keep performing without a hitch.
Their rugged construction makes them durable and ready for whatever the road throws your way.
6. Music Sharing and FM Radio
Fodsports T5 and T6 allow two matched riders to share the same listening experience while they ride, providing an amplified and more exciting experience.
Support music sharing between 2 riders.
The feature is particularly useful in long journeys. The incorporation of music helps set the ambiance, reduce stress, and make the experience more memorable.
Besides the role of playing songs, both the T5 and T6 contain an inbuilt FM radio in the frequency range 76–108 MHz.
FM radio frequency band: 76 - 108MHz.
The riders can immediately switch from the playlist to live shows whenever they are checking on the live status of the current traffic, listening to local radio stations play their local songs, or just listening in terms of entertainment while heading somewhere.
These give the T5 and T6 more flexibility as well as more options in terms of what they listen to while they are on the move.
7. Voice Command for Hands-Free Operation
Safety is a priority, and the T5 and T6 allow you to stay focused on the road with their voice command functionality.
Hands-free operation with voice commands.
By simply speaking, you can control your phone, music, navigation, and even answer calls—without ever taking your hands off the handlebars.
This hands-free operation ensures that you can keep your focus on the road while still enjoying all the intercom’s features.
8. Long Battery Life for Extended Rides
With up to 30 hours of music, phone calls, or intercom use on a full charge, the T5 and T6 ensure that you’ll never run out of power during your ride.
The long battery life makes these intercoms ideal for both short commutes and extended road trips.
The T5 and T6 offer up to 30 hours of endurance time.
Additionally, once connected to your smartphone, the T5 and T6 can display the battery percentage directly on your device, giving you a clear view of remaining power.
When powering on, the units also announce the current battery level, so you always know how much charge is available without needing to check manually.
9. Universal Pairing and Device Compatibility
Whether you have a smartphone, GPS, or other Bluetooth-enabled devices, the T5 and T6 can connect to all of them.
You can even link the intercoms with other brands of motorcycle helmets and Bluetooth communication devices, making these models highly versatile and user-friendly.
Universal pairing with intercoms, smartphones, GPS, laptops, and more.
10. Large Button Design for Easy Operation
Both the T5 and T6 have large, intuitive buttons. These buttons are easy for motorcycle riders to control their intercom even while wearing gloves or riding at high speeds.
The well-spaced design ensures that each function is accessible without fumbling, allowing riders to stay focused on the road.
This practical layout not only enhances usability but also contributes to overall safety, giving you confidence and convenience during every ride.
Key Difference: A Stylish Selection Between the T5 and T6
While the Fodsports T5 and T6 share the same impressive features, they do differ in terms of design and aesthetics. This allows riders to choose the model that best suits their personal style and helmet preferences.
Though their designs differ, both models pack the same powerful performance, ensuring that whether you choose the T5 or T6, you’re getting an intercom system that is designed to enhance your ride in every way.
T5 & T6 Features Overview
Feature
T5
T6
Intercom Numbers
2 riders
2 riders
Intercom Range
1000 meters
1000 meters
Battery Capacity
900mAh
900mAh
Waterproof
IP67
IP67
FM Radio
✓
✓
Music Share
✓
✓
Battery Display on Phone
✓
✓
Voice Commands
✓
✓
Answer phone call
Auto/manual
Auto/manual
Universal Pair
✓
✓
USB Injection
TYPE-C
TYPE-C
Music While Talking
✕
✕
Why Choose the Fodsports T5 or T6?
Selecting a good-quality motorcycle intercom makes a big difference in how you enjoy riding. The Fodsports T5 and T6 offer a host of advantages aimed at uplifting your riding experience:
Reliability: Both the T5 and the T6 are rugged and reliable. With IP67 water resistance, noise rejection, and long-lasting batteries, the T5 and T6 are made to keep pace with you on every ride without a problem.
Reliable Range: With a range of up to 1000 meters, the Fodsports T5 and T6 allow you to enjoy clear communication with your riding partner while you are on the move.
Clear Sound: Listen via clear and accurate Hi-Fi stereo speakers, whether you are listening to music, listening to navigation messages, or chatting via a riding partner.
Enhanced Security: The T5 and T6 enable you, via auto answer and hands-free, to attend to things in front of you on the road, but still give you access to all the functionality you need.
Stylish Looks: Both the T5’s subdued simplicity and the T6’s fashion-forward flair are designed to perform professionally and look good.
Imagine you and a friend on a long road trip, cruising down scenic highways and having the wind in your hair. You require a stress-free means of communicating, whether discussing a shortcut, trading favorite tunes, or merely joking around about everything. The Fodsports T5 or T6 allows seamless and reliable communication so that you can focus on the trip.
With city riding, it is a real advantage if you can take and make hands-free phone calls while riding through congested city centers. The T5 and T6 allow you to automatically answer calls, hold the handlebars, and ride through traffic safely.
Even during solo riding, the intercoms allow you to have clear listening ability for music, GPS, or simply stay connected with the rest of the world without conceding the silence of the ride.
Among motorcycle communication systems, Fodsports T5 and T6 deliver on reliable performance, decent-quality sound, and helpful functionality to motorcyclers. The T5 is designed in a straightforward, functional fashion, and the T6 in fashionably sleek style—in both, priority is a comfortable and enjoyable ride.
Explore the style that suits you and check out the Fodsports T5 and T6 on our website today.
If you must procure yourself a brand-new bike and don't want to stretch the budget, keep read. 2025 has some wonderful budget-friendly motorcycle solutions to offer. You can obtain yourself a decent entry-level commuter, a zippy mini-bike, or a snazzy retro unit within the budget of nearly $5,000.
In this article, we will include the top 10 cheapest motorcycles of 2025. We will examine the specifications, key characteristics, the pros and cons, and reveal the ideal bike that fits your needs.
Top 10 Cheapest Motorcycles (Priced from Low to High)
Cheapest Motorcycle Model
Price
Honda XR150L
$3,099
Kawasaki Z125 Pro
$3,699
Royal Enfield Hunter 350
$3,999
CFMoto 300NK
$4,199
KTM 250 Duke
$4,599
Honda Rebel 300
$4,849
Kawasaki KLX230
$4,999
Yamaha TW200
$4,999
Suzuki GSX250R
$5,149
Triumph Speed 400
$5,195
1. Honda XR150L ($3,099)
Honda XR150L
The Honda XR150L is the cheapest new motorcycle you’ll find in 2025, coming in at just $3,099.
It’s kind of a rare deal, just costs about the same as an entry-level scooter.
But, it gives you a real 150cc dual-sport bike. That makes it a solid pick for newbies or anyone trying to stick to a budget.
Honda kept things simple to keep the cost down, so there aren't any bells and whistles here. But it’s got all the basics covered.
Unlike scooters, the XR150L has a manual clutch and real off-road clearance, so whether you’re cruising around town or heading down a dirt road, it’s ready for anything.
For first-time riders, the XR150L is super easy to handle. It's light, with controls that are simple to get the hang of, so it won’t feel intimidating. And since it’s a Honda, you know it’s built to last without costing you a fortune in repairs.
Honda XR150L Performance Specifications
Engine Type
air-cooled single-cylinder four-stroke
Displacement
149cc
Max Power
12.1 hp @ 7,750 rpm
Max Torque
9.2 lb-ft @ 6,000 rpm
Transmission
5-speed
Top Speed
60 mph
Fuel Capacity
2.8 gallons (including 0.9-gallon reserve)
Weight (curb)
128kg
✅ Pros
Super affordable
Lightweight and easy to handle
Durable and simple to maintain
❌ Cons
Carburetor instead of EFI
Struggles at highway speeds
Best for: Riders who need a simple, tough bike for city streets and dirt roads, not highways.
2. Honda Grom ($3,599) / Kawasaki Z125 Pro ($3,699)
Next up are the tiny “pocket” bikes: Honda’s Grom (also known as the MSX125) starts at around $3,599, and its rival, Kawasaki’s Z125 Pro, comes in a bit higher at about $3,699.
Both bikes pack a 125cc single-cylinder engine—the Grom with 124cc and around 9.7 hp, and the Z125 with 125cc and about 9.5 hp. They both have manual transmissions (5-speed for the Grom, 4-speed for the Z125) and electronic fuel injection, which is a step up from the carburetor on the XR150L.
These bikes are ultra-light and super nimble, making them perfect for zipping around the city or running short errands. With their mini sport bike look (small wheels, upright seating), they’re also famous for having tons of aftermarket tuning options. You’ll get some modern touches like fuel injection and LED lights, but they still keep things simple and fun.
At just around $3,600, these bikes are a blast to ride and make a great choice for beginners or anyone looking for a small, fun ride for commuting or weekend joyrides.
Pros and cons shared by both the Honda Grom and the Kawasaki Z125 Pro
✅ Pros
Huge aftermarket support
Fuel-injected for reliability
Incredibly fun in the city
❌ Cons
Too small for long trips
Limited top speed (~55 mph)
Best for: New riders who want a fun city bike or experienced riders looking for a cheap second toy.
3. Royal Enfield Hunter 350 – $3,999
Royal Enfield Hunter 350
Royal Enfield’s Hunter 350 is the brand's first bike designed specifically for urban riders, and it comes in at a budget-friendly $3,999.
Behind its cool café-racer retro vibe, you'll find a 349cc air/oil-cooled single engine (the same “J-series” engine used in the Classic and Meteor 350) that puts out 20.2 hp at 6,100 rpm and 19.9 lb-ft of torque at 4,000 rpm.
While the power is on par with the Classic 350, the Hunter 350 is lighter (weighing just 181kg, about 10–15 kg less than the Classic/Meteor), and its more compact frame (shorter wheelbase and sharper geometry) makes it feel more agile and quicker on city streets.
It's got a bunch of rider-friendly features too, like a 31.5" seat height, 17" wheels (a bit smaller for an RE), tubeless tires, and dual-channel ABS for added safety. If you're after that classic Royal Enfield “thump” and vintage style without breaking the bank, the Hunter 350 is a solid pick—it delivers solid build quality, retro looks, and all that iconic Enfield charm for just under $4K.
Royal Enfield Hunter 350 Performance Specifications
Engine Type
Single-cylinder, 4-stroke, air/oil-cooled
Displacement
349cc
Max Power
20.2 hp @ 6,100 rpm
Max Torque
19.91 lb-ft @ 4,000 rpm
Transmission
5-speed manual with assist-and-slipper clutch
Top Speed
70 mph
Fuel Capacity
3.4 gallons
Weight (curb)
181kg
✅ Pros
Classic looks with modern reliability
Affordable entry into retro style
Lighter and nimbler than other RE models
❌ Cons
Heavier than Japanese rivals
Performance is mild
Best for: Riders who want vintage charm with everyday usability at a bargain price.
4. CFMoto 300NK – $4,199
CFMoto 300NK
The CFMoto 300NK is a budget-friendly naked sport bike that delivers a lot of value for its $4,199 price tag in the US. At this price, it's loaded with features you wouldn’t normally expect.
Powered by a 292cc DOHC liquid-cooled single engine (29 hp and 18.7 ft-lb of torque), it pairs with a 6-speed transmission and a slipper clutch. What really sets it apart from other bikes in this price range is the premium gear—it comes with a 37mm upside-down (USD) fork, rear monoshock, a 5.5” full-color TFT dash, and dual-channel ABS. Weighing in at 333 lbs (151kg), it’s pretty nimble and rides on alloy wheels with grippy tires.
The downside? CFMoto doesn’t have the same brand recognition as Honda or KTM, which means it might depreciate faster and have fewer dealers around for support. But if you’re a budget-conscious rider who wants modern features and near-300cc performance, the 300NK is a solid choice—especially since you won’t find many bikes this cheap with USD forks and a TFT screen.
CFMoto 300NK Performance Specifications
Engine Type
Single-cylinder, liquid-cooled, DOHC, 4 valves
Displacement
292cc
Max Power
29 hp @ 8,750 rpm
Max Torque
18.7 lb-ft @ 7,250 rpm
Transmission
6-speed with a wet, multi-plate, CF-SC slipper clutch
Top Speed
85 mph
Fuel Capacity
3.3 gallons
Weight (curb)
151kg
✅ Pros
Excellent value with high-end parts
Good power for a small single
Sharp naked-bike styling
❌ Cons
Lower resale value
The dealer network is smaller
Best for: Budget-conscious riders who want modern features without paying Japanese-brand prices.
5. KTM 250 Duke – $4,599
KTM 250 Duke
The KTM 250 Duke is a small but powerful street bike with bold, aggressive styling, priced at around $4,599 for 2025.
Under the hood, it runs a 249cc liquid-cooled DOHC single-cylinder engine with fuel injection, putting out 31 hp and 18.4 lb-ft of torque. At just about 165kg curb weight, it’s light and quick—tests show it can hit 0–60 mph in around 8–9 seconds, with a top speed close to 95 mph.
Its look is pure streetfighter: sharp bodywork, upright bars, and a sleek LED headlight. KTM also loads it up with class-leading tech, including a 5” full-color TFT display, LED lighting, ride-by-wire throttle, a slipper clutch, and switchable ABS. Suspension comes from WP, featuring a 37mm non-adjustable front fork, while braking is handled by 320mm/240mm discs with cornering ABS for extra safety.
On the road, the 250 Duke feels like a mini version of KTM’s bigger Duke lineup—nimble, responsive, and way quicker than most entry-level bikes thanks to its ~30 hp engine. Sitting in the mid-$4K price range, it’s easily one of the most exciting 250cc naked bikes you can buy.
KTM 250 Duke Performance Specifications
Engine Type
SOHC, liquid-cooled, four-stroke single-cylinder
Displacement
249cc
Max Power
31 hp @ 9,250 rpm
Max Torque
18.4 lb-ft @ 7,250 rpm
Transmission
6-speed with PASC slipper clutch
Top Speed
95 mph
Fuel Capacity
4.0 gallons
Weight (curb)
165kg
✅ Pros
Sporty handling
High-quality components from WP and Bosch
Stylish “big bike” looks
❌ Cons
Firm ride for long trips
Slightly pricier than some rivals
Best for: Riders who want KTM performance and style in an affordable entry-level bike.
6. Honda Rebel 300 – $4,849
Honda Rebel 300
The Honda Rebel 300 is a low-slung cruiser with a starting price of $4,849 for the non-ABS model (an ABS version is available for around $5,149).
It’s powered by a torquey 286cc liquid-cooled single-cylinder engine (DOHC, 4-valve) that produces around 24–25 hp. The Rebel comes with fuel injection, a 6-speed gearbox, and a wet slipper clutch to keep things smooth and manageable on the road. What makes it such a great choice for beginners is Honda's “low seat, easy ergonomics” design—its seat height is just 27.2 inches, making it super approachable and easy to handle, especially for shorter riders.
In terms of styling, think bobber-inspired cruiser: chunky tires, swept-back handlebars, and a minimalist vibe. Plus, there’s a ton of available accessories—luggage, windscreens, and more—if you want to customize it.
The Rebel 300 often gets overshadowed by its bigger sibling, the Rebel 500 (with a 471cc engine), which packs more power for just about $1K more. A lot of riders suggest stretching your budget for the 500 if you can.
But if you’re looking for a cruiser that's easy to ride and doesn't break the bank, the Rebel 300 is still a solid option. It’s nearly as affordable as a commuter bike, but with that classic cruiser style. Quiet, easy to ride, and lightweight, it's perfect for new riders who want that cruiser look without the heft or price tag of a bigger bike.
Honda Rebel 300 Performance Specifications
Engine Type
liquid-cooled single-cylinder four-stroke
Displacement
286cc
Max Power
25 hp @ 7,640 rpm
Max Torque
17.6 lb-ft @ 7,320 rpm
Transmission
6-speed manual with slipper clutch
Top Speed
85 mph
Fuel Capacity
3.0 gallons
Weight (curb)
165 kg (non-ABS), 167.8 kg (ABS)
✅ Pros
Easy to ride and confidence-inspiring
Classic bobber style
Optional ABS
❌ Cons
Modest power
Rebel 500 offers more value for just a little more money
Best for: Beginners who want a cruiser look and a low seat without heavy weight.
7. Kawasaki KLX230 – $4,999
Kawasaki KLX230
Kawasaki’s 2025 KLX230R is a dual-sport bike built for off-road adventures, with a price tag of around $4,999.
It’s powered by a 233cc air-cooled single-cylinder engine (2-valve SOHC), now with a fuel injection upgrade for 2025, delivering just under 19 hp and around 13 lb-ft of torque. Paired with a 6-speed transmission and a wet multi-plate clutch, the KLX230R is designed primarily for trail riding. It comes with 21" front and 18" rear wheels for high clearance, along with 9.8" of suspension travel (37mm front fork) and a tall ~35.6" seat height, making it perfect for rougher terrain.
At around 132kg wet, it’s fairly lightweight, but don’t expect stellar pavement performance—top speed is about 70–75 mph, so it’s definitely better suited for trails or forest roads. Many riders love its engine’s low-end power, making it easy to handle off-road, even with the relatively mild horsepower.
For $4,999, you’re getting a modern small dirt bike with up-to-date features like fuel injection and an updated ECU. It’s pricier than a Grom or a dual-sport scooter, but it’s a genuine off-road machine that you can still take on the street if you want.
Best for: Riders who want an affordable street-legal dirt bike.
8. Yamaha TW200 – $4,999
Yamaha TW200
The Yamaha TW200 keeps its beloved off-road cruiser vibe, priced at around $4,999.
It’s powered by a simple 196cc air-cooled SOHC single (carbureted) that makes 14–16 hp, paired with a 5-speed transmission. The TW200’s standout feature? Its giant fat tires (130/80-18 front, 180/80-14 rear) give it a “moon buggy” look while offering impressive low-speed traction on dirt.
The design is pretty basic: steel frame, drum rear brake, and analog gauges—nothing fancy, but it gets the job done. With a 31.1" seat height and weighing around 278 lbs, it’s an easy bike for shorter riders to manage.
While its off-road capabilities are on the mild side (low power, short suspension travel), it’s better suited as a “dirt-ready commuter” than a hardcore dirt bike. That said, it's torquey and relaxed at low speeds, making it perfect for beginners or anyone who loves vintage-style bikes. Plus, it delivers fantastic fuel economy at about 78 mpg.
At $4,999, the TW200 is a niche choice: super simple, not the fastest, but famously reliable. Motorcycle enthusiasts swear by it for fun cruising and light off-road riding—just don’t expect highway speeds or modern tech.
Yamaha TW200 Performance Specifications
Engine Type
air-cooled, SOHC, 4-stroke, single-cylinder
Displacement
196cc
Max Power
16 hp @ 8,000 rpm
Max Torque
11 lb-ft @ 7,000 rpm
Transmission
Constant-mesh 5-speed; multi-plate wet clutch
Top Speed
66 mph
Fuel Capacity
1.8 gallons
Weight (curb)
126kg
✅ Pros
Super reliable
Unique fat-tire design
Low seat height
❌ Cons
Outdated carburetor
Limited highway ability
Best for: Riders who want a quirky, dependable dual-sport that can handle dirt, sand, and city streets.
9. Suzuki GSX250R – $5,149
Suzuki GSX250R
The Suzuki GSX250R, a fully-faired quarter-liter sportbike, stays consistent for 2025 with a price tag around $5,149 (with ABS), making it one of the more expensive options on this list.
Under the hood, it’s powered by a 248cc liquid-cooled parallel-twin engine, cranking out 24–25 hp—pretty much the same as the Rebel 300, but with the added benefit of a twin-cylinder. It's built solidly and reliably, though it’s a bit on the heavy side for its class, coming in at about 399 lbs (181kg), which makes it feel a little slower and less agile than lighter bikes.
Ergonomically, it’s designed with commuters in mind, offering an upright riding position and a seat height of 31.1" (790mm), making it fairly comfortable for a variety of riders. It’s also got all the modern sportbike features you’d expect: fuel injection, ABS, LED lighting, and an LCD dash. Plus, its styling takes cues from Suzuki’s bigger GSX-R superbikes, giving it a sporty, aggressive look.
Performance-wise, it's not a speed demon—0-60 mph takes around 8–10 seconds, with a top speed under 90 mph. So, it’s definitely not a racer, but more of a smooth, easy-to-ride entry-level bike. Riders love it for its rock-solid engine and dependable nature—it’s a tough, no-fuss commuter that’ll get you where you need to go without any drama, even if it’s not going to set any speed records.
Suzuki GSX250R Performance Specifications
Engine Type
liquid-cooled, SOHC, parallel-twin
Displacement
248cc
Max Power
24.7 hp @ 8,000 rpm
Max Torque
17.3 lb-ft @ 6,500 rpm
Transmission
6-speed constant mesh
Top Speed
85 mph
Fuel Capacity
4.0 gallons
Weight (curb)
181kg (ABS)
✅ Pros
Full fairing with sportbike looks
Reliable twin-cylinder engine
Comfortable ergonomics
❌ Cons
Heavier than rivals
Not very fast for a “sportbike”
Best for: Beginners who want sportbike styling without intimidating power.
10. Triumph Speed 400 – $5,195
Triumph Speed 400
Finally, the 2025 Triumph Speed 400, a British newcomer that just sneaks over the $5K mark, starting at around $5,295 (some dealers even offer it for $5,195).
It’s powered by a 398cc liquid-cooled “TR-series” single-cylinder engine, delivering a solid 39.5 hp at 8,000 rpm and 27.7 ft-lb of torque at 6,500 rpm—way more than most bikes in the sub-$5K range. Despite the nearly 400cc engine, it stays pretty lightweight at around 375 lbs (170kg) wet, thanks to its modern frame, making it super agile on the road.
Styled like a smaller version of the Triumph Bonneville (think modern-retro roadster vibes), the Speed 400 comes with some serious premium parts: a 43mm inverted fork, a 6-speed gearbox with a slipper clutch, dual-channel ABS, and traction control (TCS). The low 31.1" seat height makes it beginner-friendly, and it mixes analog-digital gauges for that retro feel with all the modern functionality you want.
I love how Triumph packed “big-bike features” into an entry-level package, with one dealer even calling its performance “class-beating.” For around $5.2K, you’re getting nearly 40 hp and premium components, which makes it a standout value in this price range—way more than the typical entry-level bike under $5K.
Triumph Speed 400 Performance Specifications
Engine Type
Liquid-cooled single-cylinder, DOHC, 4 valves
Displacement
398cc
Max Power
39.5 hp @ 8,000 rpm
Max Torque
27.7 lb-ft @ 6,500 rpm
Transmission
6-speed with a wet, multi-plate, slip-and-assist clutch
Best for: Riders who want maximum value – a stylish, powerful, modern bike at an entry-level price.
Which is The Best Motorcycle at Low Price?
For a low-price motorcycle that feels refined, well-equipped, and fun, the Triumph Speed 400 is the top bargain pick.
Priced just under $5,000, it delivers all features rare at this price. These include: premium build quality, full LED lights, traction control, ABS, and even a USB-C port.
Many riders, including me, praise it as “a lot more bike” compared to similarly priced options. Because this model has excellent handling and modern tech.
What Time of Year are Motorcycles the Cheapest?
Wait until late fall or winter, and especially around year-end! You may snag the cheapest motorcycle deals during this period.
Motorcycles are usually cheapest during the off-season—late fall through winter (roughly October to February).
We all know that, as the riding season winds down, the motorcycle dealerships face lower demand. So they often discount older models to make room for new ones. During this period, you can get better deals and more negotiating power.
January and February are standout months. Buyers often get the best prices because both dealers and private sellers are motivated.
Year-end clearance events around November and December also bring deep discounts, especially on previous year models.
Dealers may additionally offer price discounts around holidays and at month-end or quarter-end, when they need to hit sales targets.
New vs. Used: Which One Should You Choose When Buying Cheap Motorcycles?
If you want affordability and don’t mind extra checking and maintenance, choose a used motorcycle. If you prioritize worry-free ownership, safety tech, and peace of mind, and can stretch your budget, then choose a new motorcycle.
Used motorcycles often win the value contest. They cost less upfront, face slower depreciation, and typically cost less to insure. Then you will have more budget for gear or upgrades.
However, I must mention, buying used brings risks. Used models may lack modern safety tech like ABS or traction control. Besides, they may have hidden maintenance issues, and usually come with no warranty.
In contrast, new motorcycles offer the latest tech, full warranties, and known condition. But cost more, depreciate quickly, and have higher insurance.
On Reddit, many first-time riders say:
“Used all the way… you’ll need the extra money for the insurance”
“First motorcycle should always be used… you will be making mistakes”.
If you’re looking for the best options without breaking the bank, here’s a quick breakdown of the top choices for 2025:
Cheapest Motorcycle: Honda XR150L – $3,099
Best for City Fun & Customization: Honda Grom & Kawasaki Z125
Retro Style: Royal Enfield Hunter 350 & Triumph Speed 400
Best for Off-Road: Kawasaki KLX230 & Yamaha TW200
Most Comfortable Cruiser: Honda Rebel 300 – Beginner-friendly
Overall, the Triumph Speed 400 stands out as the best value pick, offering near-premium specs at an affordable price. Whatever bike you choose, the 2025 market shows that you don’t need a huge budget to hit the road.
👉 Tip: Always check your local dealer for fees, destination charges, and availability. Prices listed are U.S. MSRPs and may vary slightly.
If you’ve been around motorcycles for a while, you’ve probably heard all sorts of numbers thrown around: “A sportbike dies at 20,000 miles.” “My touring bike has 100,000 and still purrs.” Or my favorite — “Once it hits 30,000, you should sell it before it falls apart.”
But is mileage really a death sentence for motorcycles? Not necessarily. In fact, a well-loved machine can outlast all those myths. Let’s dive into what really decides a motorcycle’s lifespan and why that odometer number doesn’t always tell the full story.
Average Lifespan: Numbers People Quote
The average motorcycle lasts between 20,000 and 100,000 miles, though this can vary significantly depending on the type.
Touring bikes: Built for endurance; can last 100,000–200,000+ miles with proper care.
Cruisers: Relaxed engines; typically 80,000–100,000+ miles.
Sport bikes: High-revving, performance-focused; usually 20,000–30,000 miles, but up to 100,000 miles if well maintained.
Adventure/Dual-sport bikes: Handle mixed terrain; average around 50,000 miles.
Dirt bikes: Off-road only; heavy wear leads to the shortest lifespan, often under 20,000 miles.
👉 But here’s where it gets tricky: I’ve seen a Yamaha FJR with 120,000 miles still going strong, and I’ve also seen a Ducati Monster with only 15,000 miles look like it’s on its last legs. Mileage doesn’t tell you the whole story.
Key Factors That Affect Lifespan
motorcycle lifespan factors
Instead of obsessing over numbers, think about these factors:
1. Maintenance and Service
Skip oil changes? Neglect your chain? Forget coolant? Your bike will let you know — and not in a kind way. On the other hand, regular service can make an engine practically bulletproof. A well-maintained sportbike can outlive a poorly maintained cruiser.
Oil Changes: Synthetic oil and timely changes prevent engine wear.
Brake System: Pads, rotors, and fluid must be checked regularly.
Chain & Sprockets: Clean and lube every 300–600 miles.
Cooling System: Overheating shortens engine life; flush coolant as recommended.
Battery: Replace every 3–5 years to avoid starting issues.
2. Riding Style
Aggressive redline riding every weekend vs. smooth commuting makes a world of difference. One rider can burn out a clutch in 10,000 miles, another makes it last 40,000 miles.
Aggressive Riding: Frequent redlining, hard braking, and clutch abuse wear components faster.
Poor Storage: Outdoors, exposed to rain and humidity, leading to rust, corrosion, and electrical issues.
4. Brand & Build
Some brands just have reputations for longevity. Hondas and Yamahas are famous for it. Ducatis and Triumphs? Fantastic machines, but they usually need more attention.
5. Technological Improvements
Modern motorcycles generally last longer than older ones due to:
Here’s the mistake a lot of new riders make — they see 40,000 miles on a used bike and run away. But here’s the truth: a well-kept 40k bike is often better than a 10k one that sat neglected in a garage.
When you’re checking a used motorcycle, look for:
Service records (oil, valves, chain, fluids).
How it shifts (gears should be smooth).
Brake feel (firm, not spongy).
Signs of storage (rust, faded plastics, dry rot on tires).
High miles with care > low miles with neglect. Remember that.
How to Keep Your Motorcycle Alive Longer
If you love your bike, treat it like it loves you back:
Change oil frequently to keep your motorcycle alive longer
Gentle Warm-Up: don’t rev a cold engine like you’re Rossi on the grid.
Ride Smoothly: hard launches and constant redlining kill components faster.
Store Properly: dry, covered, battery tender in the off-season.
And here’s something riders forget: listen to your bike. That weird rattle? That squeak? Don’t ignore it — small fixes now prevent big repairs later.
Conclusion
So, how many miles can a motorcycle last? Honestly, there’s no magic number. Some bikes fade out at 25k, others soldier on past 100k. It all comes down to how it’s ridden, maintained, and stored.
The odometer might be the first thing you glance at, but it shouldn’t be the last. Look at the bike’s history, the rider’s habits, and the care it’s received. Because in the end, a motorcycle’s lifespan isn’t written in miles — it’s written in how much love you give it.
The 400cc motorcycle range is the sweet spot for beginner riders. It offers manageable power, light weight, and enough versatility for city commuting, weekend rides, or even light adventure. In this article, we will talk about the 10 best 400cc motorcycles for beginners in 2025. This guide will help you choose your first bike.
The KTM RC 390 has a top speed of 118 mph (190 km/h). It is one of the fastest bikes in the 400cc class. The RC 390 is also very track-focused. It suits riders who want sharp handling and aggressive styling.
The Kawasaki Ninja 400 reaches about 105 mph (170 km/h). It is slightly slower than the RC 390. However, it delivers smoother power and is much more beginner-friendly. This makes it the most approachable sportbike in the 400cc category.
Overall Best 400cc Motorcycles
Although there are many strong contenders, here are the Top 3 overall picks balancing performance, comfort, beginner-friendliness, and availability:
The KTM 390 Duke is a light naked motorcycle. It was made for new riders and city use.
It is easy to ride but still exciting. The 390 Duke looks sporty but also feels comfortable. Its small frame and upright seat give good visibility in traffic. The trellis frame is strong but light.
The engine is 399cc, single-cylinder, and liquid-cooled. It gives smooth power that is easy to control. New riders will find it safe, but it also has enough power for highways and mountain roads.
KTM added modern safety features. It has cornering ABS, traction control, and an optional quickshifter. These make the bike safer and easier to ride in different conditions.
The bike is light and has responsive suspension. It is easy to handle in the city and fun on curvy roads. Riders can learn throttle control, braking, and body position without feeling stressed.
The design is sharp and bold. The headlight and orange trellis frame make it stand out on the road.
The KTM 390 Duke comes in many colors. Most have KTM’s orange mixed with black or white. KTM updates the bike often so it stays modern and meets Euro 5 rules.
Pros and Cons of KTM 390 Duke
Pros:
Lightweight and highly maneuverable, ideal for beginners
Playful power delivery with smooth torque curve
Modern electronics, including ABS and traction control
An upright, neutral riding position reduces fatigue on longer rides
The Husqvarna Svartpilen 401 is a modern city scrambler. It mixes new tech with easy riding.
The bike uses the same base as the KTM 390 Duke. It has a light frame and a 399cc single engine. The power is close to the Duke, but the style is simpler and cleaner.
It has an upright seat, wide bars, and a medium seat height. This makes it comfortable in the city. It is also good for beginners and easy to ride.
The 401 has cornering ABS, Supermoto mode, and ride-by-wire throttle. It comes with a smooth 6-speed gearbox. The engine gives steady power that is safe for new riders but still fun on small roads.
The look is tough and modern. It has a high exhaust, an open trellis frame, and small body panels. These make the Svartpilen 401 easy to notice in traffic.
The colors are soft with bright details. The bike shows Husqvarna’s clean design and premium style.
Pros and Cons of Husqvarna Svartpilen 401
Pros:
Upright and intuitive ergonomics are ideal for beginners
Modern electronics enhance safety and rider confidence
The KTM RC 390 is a sportbike for new riders. It gives the feeling of a supersport but is not too hard to ride.
It is based on KTM's LC4 platform and also has many common parts with the 390 Duke. The RC 390 has full-body fairings and an upright riding position. Its piercing appearance, lightweight frame, and body with aerodynamic effects differentiate it from others in the 400cc segment.
It comes with ride-by-wire throttle, cornering ABS, and an optional quickshifter. These enhance safety and ease of riding for new riders.
This 373cc single-cylinder engine provides smooth and consistent power. It can be handled easily for new riders, but powerful enough for thrill rides.
Riding style is sporty. The clip-on bars and slanted-forward riding position are not as comfortable for long-distance riding, as new riders lack experience with sportbike riding technique.
It has a lightweight frame and low-set suspension, which provides the bike with good manners. The RC 390 will enjoy winding roads, and also will not be hard on inner city roads.
Pros and Cons of KTM RC 390
Pros:
Sporty supersport styling for beginner riders
Lightweight and agile, great for learning handling techniques
Electronics, including ABS and an optional quickshifter, enhance safety
Smooth and predictable power delivery
Compact chassis ideal for twisty roads and city riding
Cons:
Clip-on handlebars may be uncomfortable for commuting
Sporty suspension feels firm on rough roads
Smaller fuel tank limits long-distance touring
Forward-leaning ergonomics may not suit all riders
The KTM 390 Adventure is made for new riders. It works well in the city and can also go on light off-road trails.
It uses the same engine as the KTM 390 Duke and RC 390. The Adventure has longer suspension, a taller seat, and an adventure-style design. The upright seat and wide handlebars give good control on both roads and dirt.
This bike features modern technologies. There are features of cornering ABS, traction control, and ride modes for safe riding.
It has smooth and continual power thanks to its 373cc unit engine. It is extremely easy for new riders but strong enough for thrills on winding roads or on gnarly trails.
It has a strong yet lightweight frame. As such, the 390 Adventure has an easy ride for city travels as well as stability on bumpy surfaces.
It also has a bigger fuel tank, an adjustable windscreen, and space for luggage. These features make it good for commuting or weekend trips.
It has rugged looks with functionality. Its orange paint with adventure styling provides intense road presence.
Pros and Cons of KTM 390 Adventure
Pros:
Versatile and capable on both street and light off-road
The Suzuki DR-Z400S is a dual-sport bike. It is simple, strong, and easy to care for. Many riders like it because it is reliable.
The bike is light, has long suspension, and an upright seat. It feels good on the road and works well on dirt or trails.
Smooth power is delivered from the 398cc single engine. Control at low speed is easy. The practice of clutch and throttle is made easy for the newcomer.
There are no fancy electronics on the DR-Z400S. Its rugged design makes it ideal for learning the fundamentals.
It is tough and not hard to maintain. That suits best for new riders who are learning how to maintain. It also has good ground clearance, a slim seat, and wide bars. These are easy to handle and ride with.
It might seem plain. But the DR-Z400S is a reliable machine for learning tricks and experiencing streets and off-road riding.
Pros and Cons of Suzuki DR-Z400S
Pros:
Extremely durable and reliable
Lightweight, easy to maneuver, and forgiving for beginners
Versatile for both on-road and light off-road use
Simple mechanics make maintenance easy
Upright and comfortable riding position
Cons:
High seat height may be challenging for shorter riders
Lacks modern electronics like ABS or traction control
It is the supermoto variant of the DR-Z400S specifically constructed for city commuting and quick maneuvers. It has sport tires and powerful brakes with 17-inch wheels, so it handles sharply and is light on the road.
Suzuki DR-Z400SM has an upright seating position and low weight. The suspensions are light and fast. That keeps it easy to handle and good for learning.
Riding newbies can train the turn, balancing, and throttle with ease.
It has the same 398cc single as the DR-Z400S. It offers smooth and dependable power. It's easy and gentle with new riders. It doesn't have any fancy electronics, but its lightweight frame and plain style keep it safe.
The DR-Z400SM handles well on skinny city streets and serpentine backroads. It also excels on training fields. It can serve for daily use and for learning.
It has the appearance of a sport bike with aggressive lines and minimal bodywork. It also retains the rugged look of the dual-sport. The DR-Z400SM is an easy and fun bike for commuters and for play on the weekends.
Pros and Cons of Suzuki DR-Z400SM
Pros:
Extremely agile and fun to ride in the city
Lightweight and beginner-friendly handling
Simple and reliable engine
Upright seating improves visibility and confidence
It is one of Kawasaki's new naked bike riders. The Kawasaki Z400 engine is identical to the Kawasaki Ninja 400.
It derives its smooth and consistent power from the 399cc twin. You'll have no issue handling it, but appreciate highways and twisty roads.
It has low seating and a lightweight body. The Kawasaki Z400 can comfortably ride in traffic due to its upright riding position.
Even shorter riders will feel stable and secure. The Kawasaki Z400 has ABS as well for secure stoppages with sharp braking.
It looks sleek with streetfighter styling on the Z400. There is little bodywork and minimalist styling. Seat and bars are positioned for control and comfort. Smooth clutch and throttle make it easy for new learners.
The Kawasaki Z400 performs well for urban cycling, weekend outings, and commuting on a daily basis. It is dependable, low-maintenance, and has numerous spare parts on the market.
The Z400 is a smart choice for a first bike that can last.
Pros and Cons of Kawasaki Z400
Pros:
Low seat height and upright ergonomics are ideal for beginners
Smooth and manageable parallel-twin engine
Lightweight and agile chassis
Modern safety features, including ABS
Minimal maintenance and strong reliability
Cons:
Less wind protection compared to fully-faired sportbikes
Not as aggressive or track-focused as sport versions like the Ninja 400
The CFMoto 400NK naked bike for new riders features smooth and consistent power from its 400cc twin motor.
It has easy control in the city and is still enjoyable on twisty roads. The lightweight body and vertical seat provide comfort and ease of handling.
It also features ABS, digital instrumentation, and LED lighting. Parts are good and trendy in looks. Streetfighter's body and sharp lines give it an identifiable style.
400NK also offers an affordable price point for budget riders. It has style, safety, and ease of riding.
CFMoto 400NK runs well for daily commute, weekend excursion, and short trips too.
Pros and Cons of CFMoto 400NK
Pros:
Smooth, manageable parallel-twin engine
Modern styling and premium components
Lightweight and beginner-friendly chassis
Upright ergonomics for comfort and control
Good value for money
Cons:
Smaller fuel tank limits long-distance rides
Less brand recognition compared to Japanese/European bikes
The Triumph Speed 400 is a standard bike with a classic look and modern parts.
The Triumph Speed 400 has a 398cc single engine that gives smooth and steady power. It is easy for beginners to use, but still fun as skills grow.
Standup seating and a lightweight frame make the Triumph Speed 400 comfortable and suitable for city riding.
It comes with ride-by-wire, digital instrumentation, and good suspension. It blends classic style with new-era design. Its minimalist form and classic details are attractive.
The Speed 400 is safe, easy to ride, and stylish. It works well for daily rides, learning, and weekend fun.
Pros and Cons of Triumph Speed 400
Pros:
Smooth, predictable engine ideal for beginners
Retro-modern styling with premium feel
Upright ergonomics for comfort and confidence
Lightweight and agile for urban and twisty road riding
Modern electronics and quality components
Cons:
Limited wind protection for highway use
A single-cylinder engine may feel less smooth at high speeds
💡 Special Note: Kawasaki Ninja ZX-4R / ZX-4RR (399cc)
Yes, it’s only 399cc, but this is a high-revving inline-four screamer with supersport DNA and track-ready components.
Best for: disciplined beginners who are patient and willing to invest in proper training
Tip: start in the calmest ride mode and progress gradually
Otherwise, stick with one of the 10 recommended beginner bikes above
Buying Tips for New Riders
Fit Matters – Sit on the bike and check if your feet reach the ground comfortably
Prioritize Safety – ABS and traction control are highly recommended
Budget for Gear – Helmet, jacket, gloves, boots, and a training course
Consider Riding Conditions – City, highway, or adventure-style riding influences your choice
Tires Make a Difference – Upgrading stock tires dramatically improves handling
Conclusion
Choosing your first 400cc motorcycle doesn’t have to be overwhelming. These 10 bikes cover all styles—naked, sport, adventure, supermoto, and retro—so you can find one that matches your taste, budget, and riding goals.
Top picks for beginners:
Kawasaki Ninja 400
KTM 390 Duke
Triumph Speed 400
Start with one, enjoy the ride, and grow your skills safely!
Dirt biking is no longer about fuel tanks and loud engines come 2025. As electric technology continues to soar in popularity, riders are presented with a difficult decision: should there be an electric dirt bike or a classic gas-powered dirt bike?
Each one comes with its respective benefits and disadvantages. The electric version delivers silent operation, eco-friendly power, and modern style. Gas bikes offer tried-and-true ruggedness, greater range, and the classic ride.
This article explores the pros and cons of both electric and gas dirt bikes, covering performance, durability, ease of use, costs, and market trends in 2025.
Whether you’re a beginner looking for a simple entry point or an experienced rider chasing high-speed adventure, understanding the strengths and weaknesses of each type will help you make the right choice.
Electric dirt bikes run on batteries, so they need no gasoline. They operate silently, avoiding fuel costs and noise. Portable solar chargers can even recharge an e-bike’s battery off-grid.
However, recharging an e-bike takes time; for example, the 2025 SurRon Light Bee X can take about 2 hours to charge from 20% to 80%.
Its range also varies by model: entry-level e-bikes might only go 10–20 miles on a charge, while premium models claim 70–90+ miles. Aggressive riding or high speeds quickly cut that range (often to ~20–30 miles).
Electric vs Gas Dirt Bike Energy & Range
By contrast, gas dirt bikes refuel in minutes and can run much farther on a full tank. Their extended range and quick refueling make them ideal for long rides or remote areas. Gasoline is also easy to stockpile (with stabilizer) for long-term storage, ensuring you can carry extra fuel if needed. In short:
Electric Dirt Bike – Pros: Quiet operation; no gas needed (can use solar charging).
Electric Dirt Bike – Cons: Long recharge time (e.g., ~2h to 80%); range drops sharply with aggressive riding (typically 20–30 miles at high speed).
Gas Dirt Bike – Pros: Fast fueling; long range per tank; fuel can be stored long-term.
Gas Dirt Bike – Cons: Noisy; emits exhaust and requires gasoline.
2. Durability & Parts
Gas dirt bikes have decades of engineering behind them, so they tend to be extremely tough. Their engines and frames can be overhauled and rebuilt repeatedly. Importantly, spare parts and service are widely available.
A U.S. market report notes the “wide availability of aftermarket parts and accessories” for ICE dirt bikes, and mechanics experienced with gasoline bikes are common. This means a fuel bike can be kept running indefinitely with routine repairs.
Electric vs Gas Dirt Bike Parts Comparison
Electric motocross bikes have fewer drivetrain components (fewer moving parts), thus fewer parts to wear down. Low-end or early e-bikes sometimes had flimsy parts, but premium e-bikes (e.g., Zero Motorcycles, Stark Varg) now approach gas bike levels of reliability.
Nevertheless, there remain electric-specific parts — most importantly, the battery and the high-voltage electronics — that ultimately wear down and may be expensive or difficult to replace.
In conclusion, ICE bikes are “bulletproof” due to tried-and-true designs and an abundance of parts, while e-bikes are getting better rapidly but may come with long-term parts problems.
3. Ease of Use & Learning Curve
Electric dirt bikes are very beginner-friendly. They have no clutch or manual gears to worry about – you simply twist the throttle and go. The power delivery is smooth and instantaneous, making handling almost as easy as an electric mountain bike. For novices, this plug‑and‑play feel is a huge plus.
Gas dirt bikes require learning clutch control and gear shifts. Two-stroke motocross bikes are very light and powerful, but can be tricky for new riders. Four-stroke bikes run smoother but are heavier and more complex to operate.
In other words, a gas bike has a steeper learning curve (stalling the engine or misshifting is common at first), but mastering it builds real riding skill. So, e-bikes are “on/off” simple, while gas bikes demand more practice with the clutch and throttle.
4. Price Range
Electric models cover a wide price range. Budget e-bikes for youth or casual use may start around $1,500. Mid-range adult e-bikes often cost $2,500–$5,000. Premium performance e-bikes (from brands like KTM Freeride E-XC or Stark Varg) can reach tens of thousands of dollars. Battery packs are a major cost driver.
Gas dirt bikes are generally cheaper to buy. Because the used market is mature, you can find a decent beginner gas bike (125–250cc) for about $2,000. Brand-new mid-range models (250–450cc four-strokes) typically sell for $7,000–$10,000. Notably, research finds electric dirt bikes tend to cost more upfront, while gas bikes are more affordable initially.
In summary:
Electric Dirt Bikes: ~$1,500 entry up to $20–30k+ for high-end models.
Gas Dirt Bikes: Used beginner bikes ~$2k; new high-performance models ~$7k–$10k.
5. Maintenance Costs
Gas bikes require regular service. You must change oil, coolant, air filters and spark plugs on schedule, and check valves and fuel systems periodically. Chains, sprockets and tires also wear out with riding. Over time, maintenance parts (oil, filters, cables) add up.
E-bikes need much less routine maintenance: no oil or coolant, and no carburetor or injection system. The main care items are charging and battery health. Brakes, tires and chains still need attention, but the absence of an engine means fewer service intervals.
Electric bikes generally save money on consumables. When the battery or controller eventually needs replacement, though, it can be expensive.
Electric vs Gas Dirt Bike Maintenance
In the long term, a gasoline bike can be rebuilt repeatedly (long-lived), whereas an electric bike’s battery cycle life is a limiting factor.
Electric Dirt Bikes: Minimal scheduled upkeep (no engine oil changes); focus on battery/motor checks and brake/chain wear.
Gas Dirt Bikes: Frequent servicing (oil, filters, engine tuning); more consumables and parts to replace.
6. Handling & Riding Experience
Electric bikes ride like lightweight motocross machines. They often feel more nimble than gas bikes because of instant torque and (often) lighter construction. Riders can jump on power smoothly and enjoy responsive handling.
However, some riders note e-bikes can feel a bit “twitchy” at very high speeds since they are lighter, and they lack engine braking (you rely entirely on the brakes).
Gas dirt bikes (especially four-strokes) are heavier, which tends to make them more stable at speed. This extra mass can help the bike absorb rough terrain at high speed. Also, engine braking on a gas bike can be helpful on steep descents.
In practice, electric bikes excel in tight, technical or park-style riding where agility is king, while gas bikes excel on fast, rough trail rides where stability and endurance matter.
7. Transportation & Load
E-bikes tend to be lighter and less cumbersome. Most e-bikes (often less than 100 lbs) will fit on a compact trailer or even hoist into the bed of a truck without hassle. Riders may even be able to use bike racks that are heavy-duty.
Gas bikes tend to be heavier (often 200+ lbs) and will normally need a full-sized pickup truck, trailer, or hitch mount.
When transporting gear, both may employ racks or racks, though electric riders may enjoy the fact that sometimes their bike may fit inside or on a rack better. Overall, e-bikes are generally portable bikes, yet gas bikes tend to need sturdier transport.
8. Noise & Stealth
By design, e-bikes are very quiet. An electric off-roader produces only a low hum at full throttle. This makes them much less disruptive to wildlife and people – an e-bike can sneak up on someone or an animal without alarming them. Gas bikes are much louder; even a few yards away, the roar of a 250cc engine is unmistakable.
In open country, that noise travels far. Interestingly, while e-bikes are acoustically stealthy, their unusual appearance can draw curiosity in some settings.
Electric vs Gas Dirt Bike Noise & Stealth
In city trails, for example, people unfamiliar with e-bikes might notice them easily, whereas a gas dirt bike might look more “normal.” But strictly speaking of sound, e-bikes win on stealth and gas bikes are loud.
2025 Market Insights
The dirt-bike market is evolving rapidly. Electric dirt bikes are a fast-growing segment: a 2025 market report estimates the global e-dirt-bike market was about $1.2 billion and will expand to roughly $4.5 billion by 2033 (around a 16.5% CAGR).
Growth is driven by better batteries, smart features (GPS, apps), and eco-friendly trends. Manufacturers are introducing many new electric models – for example, Luna’s Talaria Sting MX5 e-trail bike (2024) offers race-level performance at a relatively affordable price. Similarly, Beta released its new 300 Xtrainer enduro (2024), which combines a refined 2-stroke engine with an electric-like power curve.
Despite this, gasoline bikes still hold the largest share of the market. Reports note ICE dirt bikes dominate U.S. sales because of their proven performance and mature support network. ICE technology is also improving (fuel injection, electronics) to meet emissions rules.
In practical terms, 2025 is seeing both sides advance: electric bikes are growing fast and attracting new riders, while gas bikes remain strong among traditional enthusiasts. Trends like lighter beginner-friendly models and youth programs are helping both categories expand. Governments are even offering rebates or incentives for e-bikes.
In summary, the market outlook is optimistic for both: electric dirt bikes are gaining momentum as technology and demand improve, and gasoline dirt bikes continue to evolve and hold the majority of sales.
Conclusion
Choose whichever works best for you. If quick, short-distance excitement (quiet local trails, immediate acceleration response, minimal hassle) is your style, an electric dirt bike cannot be beat. If long distance, high speeds, or mastering traditional bike skills (clutch control, engine braking) are the requirements, a gas-powered dirt bike will be the better choice.
Riders love both: e.g., warming up on the gas bike with an e-bike or laps around the motocross course. Both ultimately enhance your off-road skills – both markets are active, and both bikes have fair resale/marketing opportunities when the time does come to move on. Either way, getting mud on both tires is the important part!
Parking a motorcycle seems simple, but it has unique challenges. Beginner riders especially need to be careful: the wrong parking position can lead to a toppled bike or even personal injury. Below, we cover six common parking mistakes riders make and how to avoid them. For each mistake, we explain the issue, its consequences, and the correct way to park.
Motorcycle Parking Mistakes
Mistake #1: Facing Downhill (“Nose-In” Parking on a Slope)
A widespread error is pulling straight into a downhill space so the bike’s front points downhill. In other words, the bike’s nose is lower than its rear. Riders may do this out of habit (like parking a car), but it causes big problems when you leave. If the bike is pointing downhill, you’ll have to push the bike uphill to exit, which is strenuous and dangerous, especially with a heavy bike.
⚠️ Warning: Parking nose-first downhill makes it very hard to push a heavy bike uphill. Trying to right a tipped-over bike can be back-breaking!
Solution
Always back into a downhill slot so that your bike ends up facing uphill when parked. In other words, park tail-first into the space. This way, the motorcycle is pointed uphill, and you simply ride off forward using engine power when it’s time to go.
motorcycle facing uphill
Experienced riders recommend parking with the motorcycle’s front end facing uphill. This position helps keep the bike stable when parked in gear or using the brake. If the bike faces downhill, the side stand may become unstable, increasing the risk of the bike tipping over.
By backing in (nose uphill), you avoid having to push the bike uphill later. You can stay in first gear so that releasing the clutch starts the bike moving, making it easy to drive forward out of the spot. Remember: never park in neutral on a slope (see mistake #5), and always confirm the bike is stable before letting go of the handlebars.
Mistake #2: Parking at the Wrong Angle on a Slope
Another mistake is parking at the wrong angle on a sloped or uneven surface. Imagine a hillside parking lot: if you park parallel to the curb or parking lines without regard to the slope, your motorcycle may lean too much or too little. Each extreme is problematic.
motorcycle parking angle
If the bike is too upright (side stand on the downhill side), a strong breeze can easily blow it over. If it is too far leaned over (side stand on the uphill side), it can be very difficult to push the bike back upright when leaving. Both cases make the bike unstable.
Parking with the side stand on the downhill side causes the motorcycle to lean more than on flat ground, increasing the risk of tipping over. Using the side stand on the uphill side keeps the bike closer to vertical, but it can still be unstable.
Solution
Align your bike with the slope, not across it. In practice, look for the “fall line” of the slope – the direction a ball would roll downhill – and park so your wheels are in line with that direction.
This can be compared to imagining how a ball would roll on uneven ground. By parking in line with the slope, the motorcycle balances more evenly, avoiding extreme lean angles and reducing the risk of tipping over. In other words, if the surface tilts, point the bike slightly uphill or downhill so the wheels follow the slope direction, instead of pointing directly across the slope. This keeps the kickstand at a moderate angle.
Additionally, always leave the bike in gear (see mistake #5) when parked on any slope, even a mild one.
Engaging first gear or a low gear uses the transmission to hold the bike still as an extra safeguard. If the lot is extremely sloped or the stand won’t feel secure, consider using the center stand (if equipped) or finding a flatter spot.
But in general, parking aligned with the fall line – so the bike isn’t excessively tilted one way or the other – is key.
Mistake #3: Parking Too Close to Other Vehicles
New riders often squeeze their bike into tight spots “between” cars or next to another motorcycle, thinking smaller size means it will fit. However, motorcycles lean over when on the sidestand, and handlebars or foot pegs can extend unexpectedly.
If you park too close to a car, your bike’s bars, mirrors, or pedals might scrape the car when you lean it, or vice versa. This can cause scratches or dents on both vehicles. Even worse, another rider or driver might get stuck if you’ve left no clearance.
Motorcycle parking is too close to other vehicles
Solution
Leave extra space on at least one side of your bike. Plan ahead so your bike has room to lean fully without touching a neighbor.
Always leave enough space for the motorcycle to lean fully on its side stand without the handlebars or mirrors hitting another vehicle. A good rule of thumb is to give about an extra foot of space beyond what the bike looks like it needs, both for the bike’s lean and for you to dismount safely.
Be courteous: imagine someone opening a car door next to you. Also, leave space in front so your handlebars or tank won’t hit the back of a parked car if you lean. In a row of bikes, a staggered formation (front wheel by rear wheel of the next bike) can help ensure each rider has clear space.
Leaving ample room prevents embarrassing or dangerous damage. Remember – your bike will tip onto the sidestand, so account for that tilt angle when judging distance. Leaving adequate space helps prevent damage from car doors and reduces the risk of the motorcycle being knocked over by a nearby vehicle.
Mistake #4: Parking Too Close to the Roadway (Leaning into Traffic)
When pulling off on a road shoulder or narrow side street, it’s tempting to park close to traffic, especially if space is tight.
But parking leaning into the road is very dangerous. If your bike is too close to traffic, one distracted driver could clip it. Your handlebars or a mirror might stick out into the lane, making your bike a roadside obstacle.
Motorcycle parking is too close to the roadway
Even worse, you may have to dismount straight into traffic to get off the bike – a fatal risk. This position places both the motorcycle and rider in the path of oncoming traffic, creating a dangerous situation.
Solution
Always pull as far off the road as safely possible, toward the shoulder, curb, or sidewalk, leaving plenty of buffer from moving vehicles.
If the road is very narrow, wait for a wider turnout or side road before stopping. When you do stop, position the bike so that both rider and bike are well clear of the travel lane.
In many places, local laws actually prohibit parking (or even standing) in a traffic lane. This ensures you can lean the bike over onto its side stand without any part of it extending into the street.
Once parked, double-check before dismounting. Look twice to ensure no traffic is right alongside you, and step off safely toward the sidewalk or away from the road.
In short, never park with your bike leaning into the path of cars. Always give yourself a solid margin to the road. As one rider observes, “you should always pull as far away from the road as possible” to avoid being sideswiped.
Mistake #5: Leaving the Bike in Neutral (No Gear on a Slope)
A surprisingly common mistake is forgetting to leave the bike in gear when parked on any incline.
A motorcycle has no true parking brake (unless equipped) and rests only on its engine compression and the stand for support.
If you leave it in neutral on a slope, gravity can roll it. On a downhill park, the bike might roll forward: the sidestand can buckle under pressure, and the bike could tip. On an uphill spot, the bike can roll backward off its stand. Parking a motorcycle in neutral is risky. If left this way, the bike can roll forward and collapse over the side stand, or even roll backward down a hill.
Solution
Always park in first (or at least a low) gear, and keep the clutch engaged or the side brake on while you put it on the stand.
When in gear, the engine’s compression helps hold the bike in place. As the Motorcycle Legal Foundation notes, “before leaving your motorbike on a slope, ensure it is in first gear,” because this “adds stability to your bike via the transmission”.
In practice, while holding the front brake with your hand or foot, shift into first gear before kicking down the sidestand and letting the bike settle. Now the bike can’t roll away easily; the engine must overcome gear resistance.
If you have a parking brake (some do, or you can use the disc brake lock), use it as an extra safeguard. But the simplest and most effective tip is: never leave the bike in neutral.
Even on level ground, keeping the bike in gear is a smart habit. As one safety guide points out, the fear that “parking in gear” damages the transmission is negligible and not worth the risk of a runaway bike. In short: shift into gear each time you park.
If you live or ride in a windy area (desert roads, mountain passes, or Patagonia), pay attention to how you face your bike relative to the wind.
A motorcycle is like a big sail: parked with its side toward powerful gusts, it catches the wind and can easily tip over. Riders have witnessed bikes blow off their stands when parked across strong winds.
Solution
Park facing into or away from the wind, not sideways. In other words, the wind should hit your front or back end, not the side.
A useful technique is to park the motorcycle either facing the same direction as the wind or directly against it. This helps reduce the effect of wind catching the bike.
Essentially, you line the bike up so it is more aerodynamic. If a strong gust hits, it won’t create a large “sail” force to knock the bike over.
For example, if a north wind is blowing, try to park the bike pointing north or south. Avoid having a broad side facing east or west. Also, if possible, park with your side stand down on the up-wind side so that the bike naturally leans into the hill (making it more stable) rather than away.
In extreme cases, use the center stand for extra stability, or wait for a lull in the wind. But as a rule of thumb, don’t park crosswise in the wind. Parking across strong gusts is risky. The wind can catch the motorcycle like a sail, increasing the chance of it being pushed over.
By heeding wind direction, you avoid one more surprise. Even if the wind isn’t hurricane strength, a sudden gust can topple a side-stand bike. The simple orientation trick (into or away from wind) goes a long way to protect your motorcycle on blustery days.
Summary Table of Motorcycle Parking Mistakes
#
Common Mistake
Quick Tip
Why It Matters
1
Nose-in on Downhill
Back in tail-first; bike faces uphill
Avoid pushing the bike uphill; it prevents side-stand collapse
2
Wrong Angle on Slope
Align with slope “fall line”; leave bike in gear
Prevents tipping; ensures balanced lean angle
3
Too Close to Other Vehicles
Leave extra space for lean; stagger if needed
Avoid scratches, dents, and blocking neighbors
4
Leaning into Traffic
Pull far off the road; check traffic before dismounting
Keeps bike & rider safe; reduces collision risk
5
Parking in Neutral
Always use first/low gear; hold the brake while setting the stand
Stops the bike from rolling; prevents falls
6
Sideways to Strong Wind
Face the bike into or away from the wind; side-stand upwind
Prevents the bike from being blown over like a sail
Conclusion
Parking safely is about thinking ahead. These six mistakes are easy to make but also easy to prevent with a little care. Before you shut off your engine, take a second to consider the slope and wind, and leave space around your bike.
Proper parking is a skill just like riding – it keeps your bike upright and secure, and lets you ride away without hassle. By avoiding these common errors, even beginner riders can park like pros and prevent accidents. Safe parking means one less thing to worry about on every ride.
Dropping a motorcycle can be stressful, but knowing how to lift a fallen heavy motorcycle the right way can restore your confidence and get you moving again. In this guide, you’ll learn the essentials for safe and effective lifting without risking injury or further damage.
Safety First: Assess Before You Lift
Step 1: Personal Readiness
Picture this: you’ve just dropped your motorcycle on a quiet roadside. Your first instinct might be to rush over and pull it up — but stop. Take a breath. This is the moment to make sure you are safe before touching the bike.
You kneel down and quickly check yourself. Are you hurt? Breathing normally? If not, lifting must wait. You slip on your gloves, adjust your boots, and calm your racing heartbeat.
post fall assessment
Checklist
No injuries or shortness of breath
Wearing sturdy boots and gloves
Calm, focused, and ready to plan the lift
✨ Key Tip: If your body isn’t ready, forcing a lift could cause more harm than the fall itself.
Step 2: Environment and Motorcycle Safety Check
Now that you know you’re okay, it’s time to check the scene and the motorcycle.
Look around first. Is there traffic approaching? Is the bike lying on a blind curve or on soft ground? Only lift when the surroundings are safe. If needed, drag or roll the motorcycle to firmer ground before attempting the lift.
Once the environment is secure, focus on the bike. Turn off the ignition and close the fuel valve. Shift into first gear to lock the rear wheel, and check for fuel leaks. If the bike is down on its right side, lower the side stand before lifting. If it’s on the left, be ready to deploy it immediately after.
Checklist
Traffic is clear, and the environment is safe
Stable ground (not slippery or soft)
Ignition off, fuel valve closed, gear in first
No visible fuel leaks
Side stand positioned correctly
✨ Key Tip: The motorcycle must be stable and secure before you begin the lift.
How to Lift a Fallen Heavy Motorcycle (Standard Solo Technique)
Step-by-Step Guide (Detailed)
standard solo technique—lift a fallen heavy motorcycle
1. Turn the handlebars to full lock.
Point the front wheel into the ground toward the side you’ll be pulling. This locks the steering and makes the handgrip easier to reach.
2.“Sit” your hips or lower back on the seat.
Squat down and lean against the seat or frame for leverage. The bike may shift slightly — that’s normal.
3. Grab the bike securely.
One hand underhand on the low-side handgrip.
Other hand, on a solid frame point (grab rail, rear fender, or luggage rack).
Avoid hot exhausts or fragile parts.
4. Position your feet.
Place them shoulder-width apart, slightly forward, with knees bent. Keep your back straight and arms locked.
5. Lift with your legs.
Push with your legs and hips, taking small steps backward while standing. Keep arms straight and spine neutral — never twist.
6. Finish carefully.
Once upright, lean the bike gently onto its side stand. Prevent it from tipping over to the opposite side.
Inspect for leaks, bent levers, or other damage before riding.
💡 Expert Tip
✔ Practice this motion without a real drop — it builds muscle memory and makes the movement feel natural when it really matters.
Alternative Lifting Techniques
No one technique works in every scenario. If your bike is on loose gravel, a hill, or you have knee issues, you may try a different method. Three common solo lifts for heavy adventure/touring bikes are:
Back-Facing Squat Lift (Standard Lift): Face away from the bike, butt against the seat, and lift as described above. This is the classic method and works well on flat, solid ground. However, it puts strain on the knees and is harder on slopes. Use it on pavement or hard-packed dirt.
Front-Facing Deadlift Lift: Face the bike with the front wheel pointed in the lift direction. Squat slightly in a deadlift stance (hips down, chest up) and grab the downside handlebar with one hand and a solid rear point (frame or grab rail) with the other. Keep a flat back and core tight as you stand up and walk forward to lift the bike. This method places less stress on the knees and is better for loose, uneven, or slippery surfaces, because you can see and control the bike as it rises. It also reduces the chance of the bike flipping over the opposite way when it’s upright.
Single-Handlebar Lift: Face the bike and grab both handlebars (downside bars) while standing close. Squat down and, keeping your arms locked, push up with legs so that the handlebars leverage the bike upright. This lift uses mechanical advantage from the bars and gives excellent control; it’s useful if the bike has not fully tipped or on uneven terrain. As the bike rises, you may need to straighten your elbows to push the bike away at the end.
Motorcycle Lifting Techniques: Pros & Cons
Method
Pros
Cons / Limitations
Back-Facing Squat Lift
Classic, widely taught method
Works well on flat, firm ground
Can strain knees
Harder to execute on slopes
Front-Facing Deadlift Lift
Better on loose/uneven/slippery surfaces
Good visibility and control as bike rises
Reduces chance of flip-back
Requires correct deadlift form
May be challenging without practice
Single-Handlebar Lift
Excellent bike control
Less stress on knees
Useful if the bike hasn’t fully tipped
Limited leverage when the bike is fully flat
Needs careful arm/leg coordination
Use Stable Surface (wall/truck)
Extra leverage and stability
Can reduce physical effort
Only works when a stable object is nearby
Ropes/Straps Assist
Lift from higher/safer points
Reduces strain on the body
Must attach only to strong points (frame/forks)
Not always available in the field
Motorcycle Lifting: Terrain and Operational Tips
Motorcycle Lifting: Terrain / Surface Tips
Terrain / Surface
Tips / Actions
Hills / Slopes
Stand on the uphill side if possible
Brace footing; move bike to firmer ground if needed
Use slow, small steps; keep the bike in gear or the wheel blocked
Loose Gravel or Sand
Use a wider stance for stability
Take deliberate steps
Face the bike if the terrain is very loose
Stop and reset if the footing is slipping
Grassy or Wet Ground
Be cautious of slips
Check side stand traction or use a kickstand puck/plate
Motorcycle Lifting: Operational Tips
Tip / Action
Notes / Guidance
Use Side-Stand
Deploy if possible before lifting
Right-side falls: extend the kickstand first
Left-side falls: be ready to deploy once upright
Steep Inclines / Extreme Cases
Use a rope or strap attached to a stable anchor if needed
Lift in small, controlled increments
Ensure anchor points are solid and safe
Proper Body Mechanics to Prevent Injury
Your body mechanics are critical. The lift must come from your leg muscles and core, not your back. Keep your spine neutral and core tight throughout. Here are the key principles:
Legs, not back: Your thighs and glutes are the strongest muscles. Bend at the knees and hips as you squat down. As you stand, push through your heels and legs. Never yank with your back or arms. Team Oregon cautions that trying to lift with your back can cause a “serious, lifetime injury”. Instead, think of the motion like doing a heavy squat or leg press.
Straight back and head up: Whether you face the bike or have your back to it, keep your chest up and your spine aligned. Look ahead, not down at the ground, so your back remains straight. A good mental cue is “head up, chest up.” This posture engages the core and protects the lumbar spine.
Lock your arms: Once you have a firm grip, keep your arms straight and locked during the lift phase. This forces your legs to do the work. If you bend your elbows or try to lift with your arms, you’ll lose power and risk back strain.
Use slow, small steps: The safest lifts happen slowly. As you stand up, “walk” slowly by stepping back little by little. This keeps the bike balanced and prevents sudden shifts in weight. Never jerk or spin your torso – twisting during a heavy lift can cause muscle tears.
Brace with your hips: As the bike comes upright, position it so your hip can catch its weight if needed. Once the bike is vertical, you can turn your hip sideways to support it. In practice, this means standing beside the bike and leaning one side of your body against it as you secure it on the stand.
Breathe out: Don’t hold your breath. As you lift, exhale sharply – this engages your diaphragm and core stability muscles, protecting your spine.
Common Mistakes to Avoid
Common Mistakes to Avoid When Lifting a Heavy Motorcycle
While any rider should always wear full gear (helmet, jacket, gloves, boots) when riding, some items are especially helpful around a fallen bike:
Sturdy boots with good tread: Boots with solid traction can keep you from slipping during the lift. A protective toe box also guards against getting your foot crushed by accident.
Riding gloves: Leather or textile gloves with grip protect your hands from burns and cuts when grabbing the frame or hot muffler. They also ensure you hold onto the bike securely.
Crash Bars / Engine Guards: These sturdy metal bars bolt onto the frame. In a drop, they take the brunt of the impact, keeping expensive motorcycle parts off the ground. They also give you an extra solid bar to grab or brace against when lifting. Many adventure bikes come with them stock; if yours doesn’t, they are worth considering as damage protection and leverage.
Frame Sliders / Bar Risers: Sliders won’t help lift the bike, but they help prevent damage. Taller bar risers can spread your stance slightly, which helps balance on uneven ground.
Lift Straps: Using lifting straps, ropes, or tie-downs around solid parts of the frame or forks can create strong grab points. They distribute the load and make solo lifting easier. Ideally, keep straps pre-installed or carry them so you’re prepared when the bike tips over.
Kickstand Extensions and Pucks: Accessories like a kickstand puck (a small plate that fits under the foot of the stand) prevent the stand from sinking into gravel or soft ground once the bike is upright. A kickstand extensor broadens the stand’s foot. Using one can avoid repeated drops in the future by giving the bike more stable footing when parked.
Compact Hoist or Winch Kit: For extreme backcountry riders, a small portable winch (motorized or manual pulley) can be carried. These are more specialized tools, but a motorcycle-specific recovery kit (with pulley blocks, anchor straps, etc.) can make a solo lift possible in tough terrain. Even a simple 3:1 pulley system with straps can multiply your strength.
Even without fancy tools, protective body gearis vital. If you do drop the bike, the gloves, jacket, and pants will protect you from scrapes. Plus, riding gear often has extra padding where you might bump the bike when lifting.
Optional stabilizers or aftermarket outriggers can help at very low speeds.
Conclusion
It is possible to lift a dropped heavy motorcycle with proper technique. Through practice with regular and alternate approaches with proper protective gear and basic lifting devices and by enhancing your ride practices to prevent unwarranted drops, you will become confident. Patience and appropriate body mechanics will enable you to safely lift a dropped heavy motorcycle and resume your ride with confidence.
When it comes to high-performance motorcycles, top speed and power are the final symbols of prestige. These motorcycles on this list are the pinnacle of engineering, boasting insane horsepower and scorching acceleration, but still staying street-legal. They are flagship machines, many of them with race-bred technology, sophisticated electronics, and highly tuned engines. Here we list ten of the fastest and most powerful motorcycles, with their major specs and what's so special about each of them.
10 Fastest and Most Powerful Motorcycles – Key Specs Overview
The BMW S1000RR is a liter-class superbike, and its M1000RR variant is a track-focused homologation special for World Superbike (WSBK). Both share a 999cc water-cooled inline-4 engine.
In standard form the S1000RR makes around 205 hp at 13,000 rpm. The M1000RR version also makes 205 hp (212 hp peak) but includes extensive racing upgrades.
The M model adds titanium connecting rods and forged pistons for reduced weight and strength, plus carbon-fiber wheels and high-downforce winglets. These changes raise the redline and improve track performance.
The bikes can reach roughly 189 mph (304 km/h), making them among the quickest BMWs ever.
The S1000RR/M1000RR blends street usability with race-level performance. Its fully equipped electronics (traction control, quickshifter, etc.) and superb handling make it a track monster, while still legal for road use.
Honda’s CBR1000RR-R Fireblade SP is the flagship literbike, designed for the racetrack. It uses a 999cc inline-4 engine derived from Honda’s MotoGP efforts, tuned for extreme revs and power delivery.
The SP model produces about 215 horsepower (160 kW) at 14,500 rpm – although the US model is electronically limited to a lower figure. Peak torque is around 113 Nm (83 lb-ft) at 12,500 rpm.
The Triumph Rocket 3 is a unique powerhouse – a giant “muscle cruiser” rather than a race replica. It holds one of the largest production engines on earth.
The latest Rocket 3 R/GT uses a 2,458cc inline-3 engine. This colossal engine produces about 165 horsepower at 6,000 rpm and a breathtaking 163 lb-ft (221 Nm) of torque at 4,000 rpm. (Triumph claims this torque is a world-best for production bikes.)
Triumph Rocket 3
Key features:
Engine: 2,458cc inline-3, DOHC, liquid-cooled. The largest-displacement engine on a production bike.
Power/Torque: ~165 hp @ 6,000 rpm; 163 lb-ft (221 Nm) @ 4,000 rpm. This immense low-end torque means phenomenal acceleration, even for a heavy bike.
Chassis: Aluminum frame, shaft drive. Long wheelbase for stability.
Comfort: Cruising ergonomics with a relaxed riding position, big fuel tank, and modern features (TFT dash, cruise control, ride modes).
The Rocket 3 is not the fastest in a straight line (it’s heavy) but its massive torque makes it feel explosive from any rpm. It combines powerful acceleration with cruiser comfort.
Commentators note it delivers “torque for days”. Its 0–60 mph time is under 3 seconds, rivaling many sportbikes, making it a unique entry in any list of powerful motorcycles.
The Yamaha R1M is the top-end, track-focused version of the Yamaha R1. It features Yamaha’s famous 998cc crossplane inline-4 engine. This engine produces roughly 200 horsepower (198 hp) and 83 lb-ft of torque.
What sets the R1 apart is its crossplane crankshaft derived from Yamaha’s MotoGP YZR-M1, which gives a very tractable power delivery and unique sound.
Yamaha R1M
Key features:
Engine: 998cc inline-4 with crossplane crank. 200 hp (claimed). Titanium valves and forged pistons for high RPM reliability.
Electronics: Full IMU-driven electronics package (cornering ABS, traction control, slide control, etc.). Multiple riding modes and engine maps.
Suspension: R1M gets fully adjustable Öhlins ERS electronic suspension (Yamaha’s advanced electronic racing suspension) front and rear. The standard R1 uses KYB.
Chassis/Brakes: Aluminum Deltabox frame; 320mm dual front discs with Yamaha-branded radial monobloc calipers; quickshifter; cruise control.
Weight: Ultra-light (about 448 lbs dry). Carbon-fiber bodywork on R1M for extra savings.
Other:GPS lap-logging on R1M, Yamaha Launch Control, app connectivity.
In short, the R1M is a compact superbike built with MotoGP technology. Its 200-hp crossplane engine and high-tech electronics make it a potent package on the track.
Reviews praise its refined power delivery and sharp handling.
The Ducati Panigale V4 R is a homologation special based on the WorldSBK championship bike. It features a 998cc Desmosedici Stradale R V4 engine.
In street (Euro5) trim it makes about 207 horsepower at 13,500 rpm. With the full track kit (racing exhaust and oil), it can reach up to about 240.5 hp. The V4 R revs to a stratospheric 16,500 rpm (limited by software).
Ducati Panigale V4
Key features:
Engine: 998cc Desmosedici R V4. Peak 207 hp @ 13,500 rpm in road trim. With racing accessories and special oil, ~240 hp. 16,500 rpm rev limit.
Torque: ~83 lb-ft (113 Nm) at 10,500 rpm (Euro5 version).
Weight: Very light chassis (~166 kg dry) and carbon parts. Dry clutch (first time on a road Ducati) to handle the racing oil additives.
Aerodynamics: Carbon winglets derived from MotoGP (the 2022 model) for downforce. The R also has a taller swingarm pivot setting for agility.
Electronics: Upgraded Marelli ECU, power modes, advanced traction/wheelie control, DQS Evo 2 quickshifter, exhaust valve, etc.
Price: Around $45,000 USD (base).
The V4 R is essentially a street-legal race bike. Its high-strung engine and top-tier suspension make it track-ready.
Ducati intentionally made it “the closest production model to a competition bike ever”. The dry clutch and race parts highlight its no-compromise design for serious riders.
The Suzuki Hayabusa is an icon among fast bikes and long was the fastest production motorcycle. It’s designed for high-speed stability and cruising comfort.
The Hayabusa uses a 1,340cc inline-4 engine. This engine produces about 190 horsepower and 150 Nm (111 lb-ft) of torque.
Suzuki Hayabusa
Key features:
Engine: 1,340cc liquid-cooled inline-4, DOHC. Power ~190 hp; torque 110 lb-ft. It’s tuned for strong midrange and top-end performance.
Top Speed: Electronically limited to 186 mph (300 km/h) due to the gentlemen’s agreement. Unrestricted tests have shown ~200+ mph with modifications.
Aerodynamics: Famous shark-like fairing with Ram Air ducts. Excellent high-speed stability. Drag coefficient tuned in a wind tunnel for minimal windblast.
Electronics: Full suite called Suzuki Intelligent Ride System (SIRS): launch control, 10-level anti-wheelie, traction control, cruise control (to 200 km/h), quickshifter, engine braking control. Bosch 6-axis IMU for advanced ABS/TC.
Brakes: Brembo Stylema® radial 4-piston front calipers (320mm discs) for strong stopping power.
Comfort: Despite the power, the Hayabusa is known for a smooth ride and rider comfort (wide ergonomics). Suitable for long-distance highway runs.
Styling: Distinctive bullet-shaped look, available in striking color schemes.
The Hayabusa’s blend of straight-line speed, electronics, and usability has made it a legend. It accelerated to 60 mph in ~3.2 sec. Even though new hypersports now equal or surpass it in acceleration, the Busa remains unmatched for top-speed riding comfort.
The MV Agusta Brutale 1000 RR is a “hyper-naked” streetfighter – essentially the naked version of a superbike.
Its engine is a 998cc inline-4 (derived from MV’s F4 superbike) that produces 208 horsepower at 13,000 rpm, making it one of the most powerful naked motorcycles ever. Torque is about 116.5 Nm (86 ft-lb) at 11,000 rpm.
MV Agusta Brutale 1000 RR
Key features:
Engine: 998cc inline-4, DOHC. 208 hp @ 13,000 rpm. 116.5 Nm @ 11,000 rpm. Titanium rods and valves (as noted by MV) to handle the high rpm.
Design: Exquisitely styled Italian naked bike. Carbon-fiber bodywork panels and heat shields. The Assen edition (300 units) adds unique colors.
Wheels: Lightweight Rotobox carbon-fiber wheels front/rear (very fine spokes, proprietary tech). This cuts unsprung weight dramatically.
Electronics: High-end IMU-based electronics: cornering ABS, traction control, slide control, lift control (wheelie), launch control. MV Ride app for fine-tuning.
Exhaust: Custom titanium Arrow racing exhaust (with the optional racing kit) for maximum power.
Weight: Extremely light – curb around 198–203 kg (436–447 lbs). Power-to-weight ~1.1 hp/kg.
Sound/Feel: Throaty exhaust note. Crisp throttle response. Designed for thrill (“the most exciting naked motorbike”).
In summary, the Brutale 1000 RR is a blend of art and performance. It has superbike power (208 hp) in a naked chassis, with exotic details (carbon wheels) and racing tech.
It’s a limited-production, hand-built machine aimed at enthusiasts who want extreme performance in streetfighter form.
The Kawasaki Ninja H2 is a supercharged hypersport motorcycle. Its 998cc inline-4 uses a centrifugal supercharger developed with aerospace input.
The result is monster power: the H2 (street-legal) makes about 200–228 horsepower (depending on model year and tuning).
The track-only H2R produces 326 horsepower at 14,000 rpm, making it the most powerful Kawasaki ever.
Kawasaki Ninja H2
Key features:
Engine: 998cc inline-4 with Kawasaki centrifugal supercharger (two-speed). Wet sump.
Power: ~240 hp claimed (170 kW) in the latest H2; older models around 200 hp. H2R (non-street legal) claims 326 hp.
Torque: ~98–115 lb-ft (depending on tune). Very broad torque curve thanks to forced induction.
Chassis: Steel trellis frame and swingarm. Wheels are strong, cast aluminum.
Brakes/Suspension: Brembo front calipers (radial mount), 330mm discs; adjustable suspension (KYB front fork, Öhlins rear on H2R).
Aerodynamics: Winglets on fairing for stability (especially on H2R). The body is very compact and streamlined.
Electronics: Highly advanced – ride-by-wire, multiple ride modes, traction control, launch control, supercharger cooler (H2R), etc. Bosch IMU on H2.
Unique: Collaboration with Kawasaki Aerospace Division; high-tech supercharger similar to F1 principles. The H2 series is famous for its rocket-like acceleration.
On the street, the H2 is already blisteringly fast (0–60 in ~2.5s). The top speed of the H2 is around 201 mph (323 km/h) despite being limiter-bound.
The H2R, only track-legal, can exceed 240 mph. The Ninja H2 is more exotic than most: an ultra-powerful, limited-production machine that blends Kawasaki’s jet-fighter tech into a bike.
The Kawasaki ZX-14R (known as ZZR1400 in some markets) is a high-performance sport-tourer. It has the largest engine in this list: 1,441cc inline-4.
This big engine produces around 197–200 horsepower and about 116–117 lb-ft of torque. Despite being heavy (~593 lbs wet), its sheer size and power make it extremely quick in a straight line.
Suspension: 43mm inverted fork and bottom-link Uni-Trak® rear. Both ends are adjustable (preload, compression, rebound) for tuning ride/handling.
Electronics: Dual power modes (full or reduced power), 3-mode Kawasaki Traction Control (KTRC), ABS, slipper clutch. No IMU (older platform), but still sophisticated for its time.
Ergonomics: More relaxed than a pure sportbike – fairing with windscreen, adjustable handlebar height, twin-seat touring comfort.
Performance: 0–60 mph in about 2.85 seconds (quickest 1/4-mile of ~9.3s).
The ZX-14R is often called the “King of the Quarter Mile.” It was specifically engineered for straight-line speed and a smooth high-speed ride.
Its enormous torque and comfortable ergonomics make it fast but also user-friendly. In fact, the ZX-14R and the Suzuki Hayabusa together represent the last of the big-liter, high-speed sportbikes.
Conclusion
These bikes are among the world's quickest and most powerful production motorcycles. While not every bike is the absolute top speed record holder, each showcases extreme power, advanced technology, and cutting-edge engineering. From track-oriented superbikes to high-torque cruisers, they epitomize the extreme possibilities of contemporary motorcycle performance.
High-Performance Motorcycle FAQs
Explore the most common questions about high-performance motorcycles and get the answers you need!
Which motorcycles are best for track riding? ▼
The BMW M1000RR and Ducati Panigale V4R are among the top choices for track performance, making them ideal for racing circuits.
Are high-performance motorcycles expensive to maintain? ▼
Yes. Insurance, maintenance, and running costs are generally higher for high-performance motorcycles, so ownership requires careful budgeting.
How do I choose the right type of motorcycle? ▼
Consider your primary use. For example, street riding, track racing, and long-distance cruising each have dedicated motorcycle categories designed to match those needs.
What makes the power delivery of high-performance motorcycles different? ▼
Different models are tuned for unique power characteristics, which directly affect acceleration, stability, and overall riding experience.
Can beginners handle high-performance motorcycles? ▼
It’s not recommended. Beginners should start with entry-level motorcycles and gradually move up to high-performance models as their skills develop.
Whether you’re powering through muddy trails, climbing rocky slopes, or gliding over sand dunes, your ATV & UTV Tires play a crucial role in performance. The right tires not only improve speed and handling but also help you tackle tough terrain with confidence. Looks are just the surface — tire size, construction, tread pattern, and pressure are what truly matter for safety and performance.
In the next seven key points, we’ll walk you through how to choose the perfect tires for your ATV/UTV ride.
✅ Pre-Ride Tire Checklist — ATV & UTV Edition
Tick off each item to check your ride’s readiness!
Right Tire Size — Matches your ATV/UTV manufacturer’s specifications.
Tread for the Terrain — Mud, sand, or all-terrain pattern that fits where you’ll ride.
Width & Rim Match — Tire width is correct for your rim size.
Carcass & Materials — Choose the right layer structure and material for comfort and durability.
Ply Rating — Strong enough to carry your load, but not too heavy for your ride style.
Sidewall Condition — No cracks, bulges, or damage; stiffness fits your handling preference.
Correct PSI — Adjust for terrain and temperature before every ride.
Safety Rating:
Click "Submit Checklist" to evaluate your tire setup now!
7 Keys to Picking ATV/UTV Tires
1. Key Tire Selection Factors
When choosing ATV/UTV tires, start with compatibility.
Check your owner’s manual for the correct tire size and wheel combinations approved for your vehicle. This ensures safe fitment and proper handling.
Next, match the tread pattern to your riding terrain.
Muddy bogs: Large, widely spaced lugs to shed mud.
Sandy dunes: Paddle-like ribs for maximum thrust.
Rocky or mixed trails: Medium-lug all-terrain designs for balanced grip and comfort.
A triptych-style photographic comparison of three ATV/UTV tire designs for different terrains.
Compatibility & Size
Always confirm that the tire’s dimensions (diameter and width) fit your ATV/UTV and its wheels.
Tires that are too large or too small can cause handling problems, interfere with suspension, or even lead to tire blowouts.
Choose tires designed for your terrain. Different tires are designed for different terrains – such as mud, sand, snow, or rocky terrain.
An all-purpose tire may work fine for general trail use, but if you often ride in extreme mud or deep sand, use a specialized mud or sand tire.
Tread Pattern
The shape of the treads determines traction. Aggressive, deep-lug tread grips loose mud and snow better, while a smoother, closer-set lug pattern rides quietly on hardpacked trails.
Durability
Off-road tires see rocks and debris.
Look for reinforced sidewalls and carcass for durability. Heavy-duty ratings and puncture-resistant compounds can save you from flats.
Tire Width and Load (Ply Rating)
Ensure the tire width matches your wheel and frame. Wider tires can improve flotation in mud but may rub on narrow suspension components if too wide.
Also note the ply rating: higher is stronger. A common tip is, “ensure the size of the tire matches your ATV’s specifications. The ply rating … indicates the tire's strength and capacity”.
2. Decoding Tire Size Labels
Every ATV/UTV tires sidewall shows its size and key specs. Understanding these codes ensures proper fitment.
Imperial sizes (inches) are written as Diameter × Width – Rim.
ATV/UTV tire size comparison: 25×10-12 vs 203/80R10
Metric sizes use the format Width / Aspect Ratio R Rim.
Example: 203/80R10 → 203 mm tread width, sidewall height is 80% of 203 mm, fits a 10″ rim.
Always match the tire’s rim diameter to your wheel exactly—never try to mount a 10″ tire on a 12″ rim or vice versa.
Correct sizing ensures the bead seats properly and the tire seals securely.
3. Wheel and Size Compatibility & Tread Types
Tire width and diameter must suit your wheel and frame.
On most ATVs, the rear tires are about 2″ wider than the fronts. If you swap to a much larger tire, check that it has clearance.
For example, if your ATV is rated for 25-inch tires, you can generally go up to 27 inches. Going bigger than that may require a lift kit.
Exceeding the recommended size can cause the tires to rub against the fenders or suspension.
⚠️ Heads Up! Always check your owner’s manual — your ride only fits certain tire sizes without mods.
Next, consider tread patterns. Each design suits certain conditions:
All-Terrain Tires: The most common type, designed for versatility on mixed terrain. They have moderately aggressive lugs and a wider contact patch for traction on dirt, gravel, and some mud. These are often the stock tires on ATVs/UTVs and are a good general choice for trail riding.
Mud Tires: These feature very large, widely spaced knobs (lugs) to dig into deep mud or sludge. The huge lugs scoop out mud for better grip. Interestingly, mud tires also excel in snow and slush because the wide tread clears mud and snow easily. If you frequently slog through muddy trails, these give you the biggest traction boost.
Sand (Paddle) Tires: Also called paddle tires, they have big paddle-shaped ribs on the rear tires. These ribs push sand back under them, keeping the ATV on top of loose dunes. “The paddle tire will push the sand backward so you have ample traction,” which makes climbing sand dunes easier. However, they wear very quickly on hard surfaces – riding these tires on anything other than soft sand will ruin them.
Other Specialized Tires: (Not in the core list but for context) Some users also use rock or trail tires. Rock tires have tight, small lugs and strong sidewalls for crawling over boulders. Snow tires with metal studs or siping help in icy winter conditions.
Choosing the right tread is as important as size.
A tire that’s too aggressive off-road can make the ride choppy on flat trails, while a smooth tire may spin uselessly in deep mud. Always pick a tire whose intended use (all-terrain vs mud vs sand) matches where you ride most.
4. Tire Construction (Carcass) – Layers and Materials
Beneath the tread lies the tire’s carcass (casing) – a stack of fabric or steel layers that give the tire its shape and strength. The casing determines how flexible or stiff the tire is.
Heavy-duty off-road tires often have multiple reinforcement layers (plies) and special inserts. Stronger materials and extra layers make the tire tougher against punctures and heavy loads, but also heavier.
tire construction
Materials
Most ATV/UTV tires are made of nylon or polyester cords, sometimes with steel belts (in radials).
Newer tires may use high-strength synthetic fibers to get the same strength with fewer actual plies.
Sidewall Reinforcement
The sidewall of the tire also plays into the carcass. Many off-road tires have reinforced or thicker sidewalls to resist punctures from rocks.
The sidewall must be strong enough to support the tread under load. The casing and sidewall together absorb shocks and maintain stability.
Impact on Performance
A stiffer carcass (many plies) reduces tire flexing, which can improve handling and reduce rolling (side-to-side wobble). It also increases load capacity.
However, very stiff tires transmit more bumps and vibrations to the rider. Manufacturers balance ply count and materials to get the desired blend of durability and ride comfort.
💡 Tip: “6-ply” doesn’t always mean six layers — modern materials make it more about strength than actual layers.
5. Ply Rating and Bias-Ply vs Radial Tires
Ply Rating: The ply rating (often stamped on the sidewall, e.g. “6-ply” or “8-ply”) is a measure of the tire’s strength.
It roughly corresponds to how many layers are used in the carcass (though modern tires use stronger materials, so a 6-ply rated tire might only have 2–3 actual plies).
A higher number means more capacity; a 6-ply tire is sturdier than a 4-ply, and an 8-ply even tougher.
This is great for heavy loads or very rough terrain, but remember: more plies mean a stiffer, heavier tire, which can make acceleration and handling slightly less sharp.
Radial tires have plies running radially (at 90° to the direction of travel) and usually include steel belts under the tread. This design separates tread flex from sidewall flex.
Radial Tires
Benefits:
Provides a smoother ride
Offers better traction and handling
Improves steering and lowers rolling resistance
Extends tread life
Rolls more smoothly on flat ground and flexes better to terrain
Drawbacks:
More expensive to manufacture and buy than bias tires
Bias-Ply Tires
Bias-ply tires have plies that crisscross at angles, with cords running diagonally from bead to bead and overlapping in alternating layers. This design makes the tread and sidewall work together, creating a strong, flexible tire.
Bias-Ply Tires
Benefits:
Excellent traction on very rough terrain
Sidewalls flex to conform to rocks, deep mud, and other obstacles
Ideal for extreme off-road conditions, such as rock crawling or deep mud riding
Drawbacks:
Generate more heat
Higher rolling resistance
Can feel squirmy at higher speeds
ATV & UTV Tire Comparison: Radial vs Bias-Ply
Tire Type
Pros
Cons
Best For
Radial
Smooth ride, better handling, longer tread life
Higher price
High-speed trail riding, general use
Bias-Ply
Very strong/flexible, excellent traction in mud/rocks, forgiving sidewalls
More vibration, faster wear under aggressive riding
Extreme off-road, hauling, mud-running
Tip: Choose based on how you ride — speed-focused riders usually prefer radials, while mud-runners or heavy load users may prefer bias-ply.
6. Sidewall Design: Stability vs. Comfort
The tire sidewall (the wall between tread and wheel rim) also affects ride quality and stability. Its construction and flexibility determine how the ATV handles bumps and turns.
Stiffer Sidewalls
A rigid sidewall resists flexing.
This tightens up handling: the ATV will feel more precise and stable in corners, and less prone to wobble under high loads or speeds.
Racing tires or high-speed UTV tires often use tougher sidewalls.
The downside is comfort: hard sidewalls transmit shocks and vibrations straight to the rider, making the ride harsher.
Flexible Sidewalls
A softer sidewall absorbs impacts. It lets the tire bulge a bit over obstacles, cushioning bumps.
This yields a smoother, more comfortable ride on rough trails. Flexible sidewalls can also improve grip, as they allow more of the tread to stay in contact with uneven ground.
However, too much sidewall flex can make steering feel sluggish and can negatively affect high-speed cornering.
Many ATV tires strike a balance. Some special tires include sidewall reinforcements or inserts for extra protection without making them too stiff. If you carry heavy loads or tow, you might prefer stiffer sidewalls. If you want comfort on long trail rides, a bit of sidewall flex is beneficial.
In short, stiffer sidewalls increase stability and responsiveness (at the cost of ride comfort), while softer sidewalls enhance shock absorption and comfort (at the cost of some sharp handling).
Tire pressure (PSI) is crucial for grip, ride quality, and safety. Proper PSI ensures the tire’s shape and tread engage the ground correctly.
Baseline PSI
Your ATV/UTV or tire sidewall will list a recommended pressure range. For many utility ATVs, this is around 7–12 PSI.
For example, one source mentions standard trail tire pressures of about 7–8 PSI. Always start with the manufacturer’s recommendation printed on the sidewall or in the manual.
Soft Terrain
On sand, mud, or loose dirt, lower the PSI.
Soft ground allows tires to sink and conform, so dropping pressure to 6–8 PSI (or even lower in deep sand) increases the tire’s contact patch and traction. The tire becomes more “balloon-like,” gripping better.
However, be careful – too-low pressure can allow the tire to deform under sharp objects. Always avoid underinflation that risks rubbing the rim.
Hard Terrain
On rock, gravel, or pavement, raise the PSI to firm up the tire.
Higher pressure (around 10–12 PSI or even more for sustained pavement use) prevents pinch flats (when the rim pinches the tire against a rock) and helps the tread keep its shape against hard edges.
Temperature Effects
Air pressure changes with temperature. As a rule of thumb, tire pressure increases by about 2% for every 10°F rise in air temperature, and drops similarly when it’s cold.
So if you fill tires to 10 PSI at 60°F, they’ll read about 10.6 PSI at 100°F. Check PSI when tires are cold for consistency.
Load and Speed
A heavier vehicle or additional cargo requires higher PSI to support the weight.
Also, high-speed riding can heat the tires and increase pressure, so don’t overfill before a fast run. Always stay within the maximum PSI printed on the tire.
ATV/UTV tires pressure tip
By tuning tire pressure to the ground beneath you, you’ll get better traction, ride comfort, and fewer flats. It’s one of the simplest yet most impactful adjustments for ATV/UTV riders.
❓ Tire Safety FAQs
Check out the most common questions about ATV/UTV tires and stay safe on every ride!
How do I choose the right tires for my ATV/UTV? ▼
Consider your vehicle type, intended use, and the terrain you will be riding on most often.
Match tire size to manufacturer specifications and select a tread pattern designed for your typical riding conditions.
What is a tire's “ply rating” and what does it mean? ▼
The ply rating indicates the tire’s load-carrying capacity and durability. A higher ply rating generally means stronger
construction and better resistance to punctures, but it can also add weight.
How can tires improve handling? ▼
The right tread pattern, combined with proper tire pressure, can significantly enhance traction, stability, and steering
control across different types of terrain.
How do I find the best tire pressure? ▼
Check your ATV/UTV manufacturer’s manual or the markings on the tire’s sidewall for recommended PSI. Adjust pressure
based on terrain and load, keeping within safe limits.
The new Fodsports FS90 Helmet brings a fresh mix of style, comfort, and modern safety to the road. Designed with both commuters and touring riders in mind, it’s a helmet that turns heads before you’ve even started the engine — and delivers much more once you do.
In this article, we’ll explore its key features, design details, and why it could be the perfect choice for your next ride.
The FS90 offers a sleek full-face profile that balances sportiness and practicality. Its aerodynamic shell reduces wind drag, making it ideal for highway touring and urban commuting alike.
The Fodsports FS90 Helmet also lets you switch up your look and visibility with four interchangeable windshields — perfect for changing light conditions or adding extra style to your ride.
Clear White
Dark Brown Lens
Silvering Lens
Blue Plating Lens
Between its variety of helmet colors and visor options, the FS90 gives you plenty of ways to create a setup that’s uniquely yours — and look good while staying safe.
Safety and Protection
On the road, safety isn’t optional — it’s rule number one.
The full-face design of the Fodsports FS90 helmet and tough ABS outer shell aren’t just there for aesthetics; they meet rigorous DOT safety standards, meaning this helmet is built to withstand real-world impacts.
That peace of mind matters whether you’re splitting lanes through rush-hour traffic, carving up scenic backroads, or cruising long stretches of interstate.
Quick button of FS90
A quick-release chin strap makes putting the helmet on and taking it off effortless, even with thick riding gloves on. It’s the kind of small, rider-focused detail that becomes a daily convenience.
Inside, a honeycomb EPS liner cradles your head, disperses impact forces, and channels airflow to keep you cooler.
Paired with soft, breathable fabric, it creates a protective environment that doesn’t feel suffocating, even on long summer rides.
Ventilation and Anti-Fog
If you’ve ever been stuck at a sun-baked stoplight in July or tried to ride on a frosty winter morning with your visor fogging up, you know how much ventilation matters.
The FS90 gives you control over your airflow with strategically placed vents on the chin bar and crown.
Open them up for a cooling breeze on hot days, or close them to seal in warmth when temperatures drop.
Built-in insect screens keep bugs and debris out while letting fresh air flow freely.
FS90 Clear Vision Pinlock
For fog-prone conditions — think chilly mountain passes, rainy commutes, or humid coastal rides — the FS90 is Pinlock®-ready (insert sold separately).
This anti-fog system keeps your vision clear without the need for constant wiping, so you can focus on the road ahead instead of fighting condensation.
Comfort and Fit
A helmet that pinches, overheats, or rubs in the wrong spots can turn an otherwise perfect ride into a miserable one.
The FS90’s interior is designed for all-day comfort, with padding that’s both plush and removable.
Riders wearing glasses will appreciate the thoughtful temple cutouts, which prevent frames from digging into your head — no more choosing between comfort and clear vision.
Whether you’re chatting with your riding group, following GPS directions, or streaming your favorite playlist, the FS90 keeps you connected without compromising fit or safety.
Accessories and Extras
Built-in Safety Light
One standout feature of the FS90 hides in plain sight: a built-in red LED safety light on the rear.
Powered by a 600mAh rechargeable battery, it delivers up to 40 hours of runtime on a single charge. Charging is quick and convenient via a USB Type-C port, taking only about two hours.
You can choose from four modes — steady, fast flash, slow flash, or pulse — to match your riding conditions.
Protecting your helmet off the bike is just as important as wearing it on the road.
The Fodsports Multi-Use Helmet Bag is made from waterproof, scratch-resistant fabric that shields your gear from rain, dust, and accidental knocks.
Fodsports motorcycle helmet bag
You can carry it by the sturdy handle for short trips, or wear it as a backpack using the adjustable straps — ideal for walking around at a rally, commuting to work, or hopping between rides.
With extra space for gloves, a balaclava, or small tools, it’s a practical companion for riders who demand both function and style.
Key Features at a Glance
🛡️
Full-Face Protection
Covers your entire head and chin, built with a DOT-approved shell for certified safety on the road.
🕶️
Dual Visors
Clear outer shield plus an inner drop-down sun visor for instant, easy light adjustment.
🌬️
Advanced Ventilation
Adjustable chin and top vents with insect screens for cool, bug-free airflow.
❄️
Anti-Fog Ready
Supports a Pinlock® insert custom-made for the FS90 to keep your vision clear in any weather.
🔴
Built-in Safety Light
USB-C rechargeable rear LED with steady and flashing modes to boost your visibility day or night.
🛋️
Comfortable Fit
Removable, washable padding; glasses-friendly cutouts; and a quick-release chin strap for easy on/off.
🎨
Color and Style
Choose from five modern color options and a sleek, aerodynamic shell that looks as good as it performs.
Every feature above supports the FS90’s promise of comfort, style, and protection. It’s more than a helmet — it’s a practical, modern riding companion.
In short, the Fodsports FS90 helmet gives riders the best of all worlds: rugged protection, user-friendly comfort, and a stylish edge.
Early reports from riders suggest it’s a great choice for anyone looking to upgrade their helmet without compromising on looks or budget. Whether you’re zipping through city streets or cruising open highways, the Fodsports FS90 is built to help you ride safely and comfortably.
When it comes to riding motorcycles, every second—and every foot—counts. Whether you're cruising through city traffic or riding along a quiet backroad, your ability to stop quickly can be the difference between a close call and a crash. That’s why understanding how to reduce your stopping distance isn’t just good practice—it’s a life-saving skill.
In this article, we’ll break down what stopping distance really means, what affects it, and share three proven techniques to help you react faster and brake more effectively.
What Is Stopping Distance?
When a motorcycle user sees a hazard on the road, the stopping distance is the entire distance it takes for it to stop. It is equal to the thinking (reaction) distance plus the braking distance. That is, the bike goes a certain distance with the user noticing and responding, then another distance with the brakes reducing the bike's speed down to zero.
Small delays end up costing yards of asphalt – at 20 mph the bike may go a dozen or so metres before it comes to a halt (6 m thinking + 6 m braking), but at 40 mph that increases to around 36 m (12 m + 24 m).
motorcycle stopping distance
Notice how doubling speed doubles reaction distance but quadruples braking distance. This is why speed, road conditions, and alertness dramatically affect safety – at higher speeds your bike carries much more energy and needs far more space to stop.
Motorcyclists can generally stop in a shorter distance than cars due to lighter weight, but bikes are far more sensitive to traction loss on wet or loose surfaces. That’s why maintaining good technique and proper control is critical.
🟡 1. What Does It Mean to “Cover the Front Brake”?
Definition: Covering the front brake means resting one or two fingers lightly on the front brake lever before you need to use it.
Instead of wrapping all four fingers around the throttle, your fingers stay ready on the brake.
Purpose: Reduces reaction time in emergencies — you can begin braking instantly without needing to move your hand.
🟡 2. Why Is This So Important?
Milliseconds Matter: In a panic situation, even a half-second delay can mean several meters of extra travel at speed.
Shorter Reaction = Safer Rider: You’re physically prepared to react the moment a hazard appears.
Expert Insight:
“The moment spent reaching for the brake can be extremely costly because of the distance we’ve traveled in that time.”
🟡 3. Beginner Advice vs. Advanced Practice
Basic Training (Beginner Riders):
New riders are often taught to cover the clutch and avoid touching the front brake.
The idea is to prevent accidental or abrupt braking, which can lead to instability.
Advanced Riders:
Experienced motorcyclists almost always keep 1–2 fingers on the front brake.
Real-world riding demands faster response than beginner techniques allow.
“Basic rider courses teach us to cover the clutch... but if we want to survive long enough to become experienced, we have to grow beyond a few of those things.”
🟡 4. How to Properly Cover the Front Brake
1. Finger Positioning
Rest one or two fingers (usually index and/or middle finger) on the front brake lever.
Slightly roll off the throttle as you cover the brake.
This prepares the bike for smoother and more stable initial braking.
3. Smooth Initial Pressure
Don’t grab or yank the front brake lever.
The first 5% of brake pressure is crucial:
It increases grip by loading the front tire and suspension.
A smooth squeeze improves traction and control.
4. Build the Habit
Practice this technique until it becomes second nature.
Muscle memory ensures you’re not wasting time repositioning your hand when a hazard appears.
✅ Tip 2: Use Both Brakes Together
🟡 1. Why Use Both Brakes?
Front vs Rear Brake Roles
Front brake = 70–75% of total stopping power.
Rear brake = 25–30%, but plays a critical role in:
Stabilizing the motorcycle.
Preventing rear-wheel lift.
Improving balance during braking.
Dual Braking = Maximum Control
Applying both brakes simultaneously yields:
Shorter stopping distance.
Better stability, especially under heavy braking.
More predictable deceleration in emergencies.
“Proper braking technique involves keeping the bike upright… and applying both brakes smoothly and simultaneously.”
🟡 2. The Danger of Using Only One Brake
If You Rely Only on the Rear Brake:
You limit your braking force to ~30%.
You fail to develop skill and muscle memory for using the front brake effectively.
You may panic and overuse the front brake in an emergency, risking a front-wheel lock.
If You Rely Only on the Front Brake:
You miss out on rear brake stability.
The rear may lift or slide, especially on downhill or slippery surfaces.
“If you use the rear brake for normal stops, you may not have enough skill to use the front brake properly when you really need it.”
🟡 3. How to Use Both Brakes Correctly
1. Brake Smoothly & Progressively
Do not grab the brakes suddenly.
Begin with light pressure, then squeeze or press more firmly as the suspension compresses and grip increases.
2. Keep the Bike Upright
Always try to brake in a straight line.
Avoid braking while leaning unless you’re using advanced trail braking techniques.
3. Use Coordinated Control
Front brake: Squeeze with your fingers (already covering the lever).
Rear brake: Press with your foot gently but firmly.
Both should be applied at the same time.
🟡 4. Braking with and without ABS
With ABS (Anti-lock Braking System):
You can brake hard and confidently, as the system prevents wheel lock-up.
Still, you must apply pressure progressively to maintain stability.
Without ABS:
You must modulate brake pressure manually.
If a wheel locks:
Stay upright and straight.
Hold the brake steady until the wheel regains traction or comes to a stop.
Avoid slamming the brakes suddenly.
🟡 5. Practice Makes Perfect
Use both brakes every time you slow down or stop.
Build muscle memory for applying both controls together.
Practice emergency stops in a safe environment so your reactions become instinctive.
✅ Tip 3: Maintain Proper Hand/Wrist Position
🟡 1. Why Hand and Wrist Position Matters
Safe braking begins with correct posture — not just body posture, but hand and wrist alignment.
Your wrist and hand must be in a position that:
Allows you to roll off the throttle smoothly.
Lets you reach the front brake lever quickly.
Prevents accidental throttle input during braking.
“You can’t brake quickly or safely if your wrist position makes you fight the throttle.”
🟡 2. The Correct “Wrist Down” Position
What It Looks Like:
Your hand, wrist, and forearm form a straight line when resting on the throttle and brake lever.
The back of your hand stays level with your forearm — not angled up or bent down.
Why It Works:
When reaching for the front brake, the natural wrist motion rolls off the throttle.
This eliminates the risk of accidental acceleration while braking.
The position allows faster reaction, as your fingers are already where they need to be.
“A straight line from your fingers to your arm will make you naturally close the throttle as you reach for the front brake.”
🟡 3. What to Avoid
❌ Cock-wrist position: Hand angled upward so that the wrist bends back.
Risk: When you reach for the brake, the hand may twist the throttle open, not closed.
❌ Excessive downward bend: Overcorrecting with too steep an angle can feel awkward and fatiguing.
❌ Hovering with poor finger contact: Leads to unsteady grip and inconsistent brake pressure.
🟡 4. Recommended Grip Technique
2-Finger Brake Control
2-Finger Brake Control:
Use your index and middle fingers to rest on or cover the front brake lever.
Keep your ring and pinky fingers wrapped around the throttle grip.
Your thumb and lower fingers stabilize your grip on the handlebars.
Coordinated Function:
This split-finger grip allows you to:
Roll off throttle and begin braking in one smooth motion.
Maintain control of the bike even while braking hard.
Adjust the Lever:
Make sure the brake lever is positioned to match your natural finger reach.
If the lever is too high or too far away, it forces awkward wrist angles.
Most levers are adjustable — take the time to set it correctly.
🟡 5. Practice and Muscle Memory
In a parking lot or quiet area, practice:
Wrist-down throttle position.
Rolling off throttle while squeezing the brake.
Emergency stops with this posture until it becomes second nature.
The more you rehearse this posture, the quicker and more automatic your emergency responses become.
Conclusion
Stopping distance depends on awareness, technique, and bike condition. Ride at a pace that lets you stop within your sight, use both brakes smoothly, and keep your gear well-maintained.
Practice builds reflexes. Emergency stop drills sharpen your response—because even with ABS, good habits save lives when every foot counts.
Buy a used UTV (Utility Terrain Vehicle) and you’ll save some cash, but it’s important to do your research. UTVs—also called side-by-sides—are larger off-road vehicles with seats for two or more people and are steered with a wheel and pedals. Unlike smaller, single-rider ATVs with handlebars, UTVs are built for both work and recreation, often featuring extra cargo space and higher towing capacity.
In this article, we’ll share some key tips to help you buy a used UTV. Whether you’re looking for a tough workhorse or a fun off-road vehicle, these tips will ensure you make a smart purchase.
Why Buy a Used UTV Instead of a New One
Save big with a used UTV
Used UTVs cost much less than new ones. Thanks to depreciation, a new UTV loses a big chunk of its value as soon as it’s driven off the lot, so the first owner takes the hit. You can often buy a high-quality used UTV at a fraction of the new price. This saves thousands of dollars and means you’ll also pay less for insurance and registration. In fact, one dealer notes that many buyers get hundreds or thousands off the sticker price by going used.
Other advantages of buying used include:
More choices and faster availability. The used market has many brands, models, years, and options in stock. You can browse local inventory and often find exactly what you want without waiting for a new build.
Lower insurance and fees. Used vehicles generally cost less to insure. And because you pay less upfront, sales taxes and loan interest (if financing) are lower, stretching your budget further.
Eco-friendly reuse. Giving a pre-owned UTV another life keeps it out of the scrapyard and reduces waste. It’s an environmentally responsible choice.
In short, a used UTV buying guide often advises: if you don’t need the absolute latest model, a pre-owned machine can give you nearly all the utility at a much lower cost.
Key Factors to Consider Before You Buy
Before you shop, decide what you really need. This will help you narrow choices and avoid regrets.
Budget and Cost of Ownership.
Figure out how much you can spend up front and for ongoing costs. A UTV isn’t just the purchase price – consider fuel, routine maintenance, parts, insurance, and gear. Make sure your budget covers these. Financing or layaway plans may help if you need it.
Intended Use (Sport vs. Utility vs. Recreational).
Type
Purpose
Features
Best For
Sport UTV
Speed, trail riding
Lightweight, agile, high horsepower
Off-road fun, racing, and trail riding
Utility UTV
Work, hauling
Durable frame, cargo bed, towing hitch
Farming, ranching, job sites
Recreational UTV
Balanced use
Moderate power, comfort, light hauling
Casual riders, light utility tasks
Terrain and Trails.
Consider where you’ll ride. Rocky trails, mud bogs, or sand dunes all pose different demands.
Make sure any used UTV you buy is suitable for those conditions (good ground clearance, 4WD if needed, proper tires, etc.).
UTVs used in very harsh terrain wear out faster, so inspect accordingly.
Size and Capacity.
UTVs vary from 2-seat to 6-seat models. How many passengers or how much cargo do you need to carry?
Buying a 4- or 6-seater can be more cost-effective if you ride with family or a crew, rather than owning multiple ATVs.
But larger UTVs take up more space and cost more, so balance capacity with budget and storage space.
Condition and Maintenance History.
A UTV that has been well maintained is worth more than a same-age model that’s been neglected. Ask to see any service logs or maintenance records before buying.
A detailed service book (dates of oil changes, filter swaps, belt changes, etc.) is a strong sign the owner took care of the machine.
If the owner can’t provide records, it makes it harder to know what work was done – be cautious. Also check if any parts (like belts, tires, brakes) are recently replaced or near their end of life.
By considering these factors up front, you can target models that fit your needs and avoid spending on a UTV that’s the wrong size, type, or in poor shape.
Where to Find Used UTVs
Source
Pros
Cons
Tips
Dealerships
Certified used inventory, warranties
Higher prices
Ask about maintenance history and return policy
Online Marketplaces
(e.g. Craigslist, Facebook)
Wide selection, potential bargains
Scams, no guarantees
Meet in safe locations and bring a mechanic if unsure
Auctions
Low starting prices, unique finds
Limited inspection, no returns
Attend in person if possible and set a strict budget
Private Sellers
Lower cost, room to negotiate
No protection if issues arise
Ask detailed questions and get a bill of sale
How to Inspect a Used UTV
When you find a promising UTV, do a thorough in-person inspection. UTVs endure hard off-road use, so even slight damage or leaks can indicate bigger problems. Key inspection points include:
Exterior & Frame.
Inspecting a used UTV before purchase
Walk all around the UTV. Look for cracks, dents, or rust on the body panels. Even small scrapes on the plastic can tell you it’s been in heavy field use (which is normal), but any cracks in the frame or roll cage are serious warning signs.
Flip it over if possible or crawl beneath and check that the chassis is straight. Run your hands along welds on the roll bars and frame; feel for signs of recent welding or straightening, which could mean a previous crash or rollover was repaired. Any bends or mismatches in the frame tubes deserve a red flag.
Tires and Suspension.
Check all tires for remaining tread, uneven wear, or dry rot. Uneven wear can indicate suspension or alignment issues.
Inspect the shocks and struts closely – there should be no wet spots or oil leaks on the shocks.
Test for sagging: press down on each wheel and bounce it; the UTV should smoothly absorb bumps, not bottom out or stay sagged.
Uneven suspension or a bouncy ride suggests worn suspension parts.
Look at steering components for play or damage.
Engine and Fluids.
Used UTV engine inspection before purchase
Pop the hood. Look under the engine for fresh oil leaks or drips. Ask the seller not to start the engine before you arrive (a cold engine is easier to inspect).
When you do start it, listen for ticking, knocking, or any unusual noise.
After a few minutes, turn off the engine and check the oil on the dipstick. Oil should be at the proper level and clean (dark but not thick and gritty). If the oil looks milky or has water droplets, that indicates internal leaks or overheating.
The coolant reservoir should be full and the fluid clear; brown or rusty coolant means it hasn’t been changed and may have internal corrosion. Low oil or coolant, or very dirty fluid, is a definite red flag.
Electrical and Controls.
Test all electronics. Turn on the UTV and try the headlights, brake lights, horn, dashboard gauges, and any accessories.
Make sure the gauges (fuel, speedometer, etc.) and lights work. Faulty wiring or burned-out lights are easy fixes, but can be annoying if you overlook them.
Also, inspect the interior: seatbelts should retract and latch, controls (shifters, pedals, throttle) should move smoothly, and no buttons or switches should be broken. Any missing or broken switches might be evidence of aftermarket modifications or abuse.
Being thorough pays off.
Look over everything from the lights to the tires to the electrical systems to catch issues early. If possible, bring along a friend to help, or even hire a mechanic if you’re unsure.
At a minimum, plan to spend 30 minutes to an hour on inspection before making a deal.
Questions to Ask the Seller
Questions to ask the seller when you buy a used UTV
Good questions can reveal much about the UTV’s history and condition. When you talk with the seller, consider asking:
Usage and Owner History. “How many owners has it had, and how was it used?” A single owner who used it lightly is usually better than multiple owners or heavy commercial use. Ask if it was used on a farm, for recreation, or any other specific work. Also ask the hours (or miles) on the machine – UTVs count usage by engine hours often, which indicates total run time.
Maintenance and Repairs. “Do you have maintenance records? What major work has been done?” A well-maintained UTV will have documentation of oil changes, belt replacements, and any repairs. Verify who did the work (dealer or owner). If the seller admits to major fixes (like engine or transmission rebuilds), ask why it was needed. Frequent repairs can signal a problematic UTV, but a proper repair record can also be a reassuring sign.
Accident or Damage History. “Has it been in any accidents or had any frame damage?” Be wary if the seller hesitates or says “I’m not sure.” If there was a rollover or collision, the roll cage might have been stressed or repaired. Look for supporting evidence (like replaced body panels or new paint patches). Even minor accidents can hide serious issues.
Reason for Selling. “Why are you selling it?” Sellers will often tell you if the UTV no longer fits their needs. If the reason sounds off (e.g. “I just want a new one” vs. “it keeps breaking down”), that’s a clue. A seller in a hurry to get rid of it may be hiding problems.
Title and Liens. Ensure the title is clean. “Do you have the original title? Is there any lien or loan on it?” You want a clear title with no outstanding debts. The seller should provide the signed title (or Manufacturer’s Statement of Origin if very new) and a bill of sale. Never pay cash without getting the title paperwork. In most states you are required to transfer the title at the DMV once you buy.
Modifications and Parts. Ask if any aftermarket parts are on the UTV (lift kits, big tires, engine mods, etc.). Some mods can void warranties or make maintenance harder. Also inquire if any OEM parts have been recently replaced (like a new winch, exhaust, or stereo). Knowing about mods helps you factor in future costs (non-stock parts may be expensive or hard to insure).
By asking the right questions, you’ll learn if the UTV was well cared for or abused. For example, a serious owner should be able to produce service receipts or recall when basic services were done.
If the seller won’t answer or avoids details, consider that a warning sign.
Red Flags and Warning Signs to Avoid
When inspecting and talking, watch for these red flags. Any of these could mean expensive repairs later:
Frame or Cage Damage. Look under the UTV for frame bends, cracks, or welds. A bent roll cage, uneven frame, or sloppy welding often hides a major crash or rollover. Avoid machines where the structure looks repaired or out of shape.
Leaking Fluids. Fresh oil, coolant, or fuel leaks under the UTV are trouble. If oil is very low, or if the oil looks brown and murky (with water mixed in), that means the engine was neglected or overheated. Similarly, dirty coolant is a bad sign. Even if it’s a fixable issue, it’s leverage for negotiation – the repair could cost hundreds.
Smoke or Engine Trouble. A healthy engine should idle smoothly and not produce thick smoke. Watch the exhaust during the test run. Big clouds of smoke (especially blue or white) are dangerous signs. It can indicate oil burning (worn rings) or head gasket failure. If the engine chokes under acceleration or stalls easily, the internals may be worn.
Excessive Wear. Scrutinize seats, controls, and pedals. If everything is super worn (torn seats, frayed belts) but the hours are low, that’s suspicious. Also, if the tires are extremely mismatched or bald, it suggests the owner hasn’t kept up with maintenance (and you’ll have to replace them soon).
Missing or Tampered Title. Be very careful if the seller can’t produce a title, or if it looks altered. A missing or mistranscribed VIN on the title is a big no-no. In some states, buying without a proper title makes legal ownership difficult.
Basically, if something feels “off,” trust your instincts. For instance, if the seller is rushing you to buy or the price is too good to be true, it could be a trap.
⚠️
Important Tip: Never skip the inspection and test drive! Steer clear of vehicles that struggle to start.
Smoke, bad smells, or low fluids during a test drive often signal serious hidden issues.
The Importance of Test Driving
test drive before buying a used UTV
Never buy without driving it. A test drive can reveal issues that a visual inspection won’t. Always start on a flat surface (asphalt or hard-packed dirt) and then move to rough terrain. During the drive, check:
Brakes. They should stop smoothly without squealing or pulling to one side. Press them firmly – the UTV should stay straight under heavy braking.
Handling/Steering. Turn the wheel sharply left and right. There should be minimal “play” (dead zone) in the steering. Watch for any grinding or clunking sounds when you turn – that could be bad bearings or tie rods.
Acceleration/Power. The UTV should accelerate strongly. If it sputters, bogs down, or there’s a lot of exhaust smoke under throttle, that’s trouble. Listen for engine noise or misfires. A healthy engine will pull hard without hesitation.
Suspension Ride. Go over some bumps or a gravel patch. The ride should feel firm but not bone-jarring. Excessive bouncing or harshness means the shocks or springs are worn. Also, ensure the UTV stays level (no sagging corner).
Electrical Systems. Turn on every light (headlights, brake lights, turn signals) and accessory (horn, radio, if equipped). Faulty wiring may not stop you from riding, but it could be a nuisance or safety hazard.
A test drive is also your chance to assess general feel and comfort. Are the seats and controls in comfortable positions? Does it feel solid?
If the UTV struggles to start, stalls, or makes disturbing noises, take it as a major warning.
On the other hand, if it performs well in all these areas, that’s a great sign the vehicle is mechanically sound.
Always test on terrain similar to how you’ll actually use it – a UTV that rides okay on road but clunks over simple off-road obstacles may still be problematic.
Negotiating Tips
When you’ve inspected and test-driven, it’s time to negotiate price. Be prepared:
Do Your Homework. Before talking money, research prices for similar used UTVs in your area. Check multiple listings (dealer and private) to get a fair market range. Knowing average prices gives you leverage.
Ask for Details. Use any minor issues you found to negotiate. For example, if tires need replacement or a light is out, point that out and request a price cut. Sellers often price themselves in room for negotiation, so don’t accept the first number.
Get Multiple Quotes. If buying from dealers, contact a few and compare offers. It's recommended to request offers from multiple dealers and use “competitive pricing to your advantage”. Dealers may throw in extras (like accessories or delivery) or small discounts, especially on used inventory.
Be Polite but Firm. Communicate your budget clearly. It’s okay to make an initial low offer (but not insulting). If the seller won’t budge, be prepared to walk away. Sometimes the hint of losing a sale is enough to get a better deal.
Timing and Payment. Paying cash or arranging your own financing often gives you more bargaining power than letting the seller’s finance office set up a loan. Also, the end of the month or quarter can be a good time to buy, as dealers may be chasing sales targets.
💡 Smart Tip
✔ Tip 1: Use any faults or needed repairs as leverage when making your offer.
✔ Tip 2: Don’t rush the deal — take your time to think or compare other options.
Paperwork and Title Transfer Basics
Used UTV paperwork and title transfer
Finally, handle the paperwork correctly. Every U.S. state has its own DMV (or equivalent) rules, but generally:
Signed Title. The seller must sign the title over to you (as buyer) with the mileage noted. This document legally transfers ownership. Never pay without getting the signed title. Some states also require notarization of the title. Without this, you can’t register or insure the UTV. California’s DMV, for example, explicitly warns that “if you recently bought an OHV (off-highway vehicle), you must transfer the title”.
Bill of Sale. Even if not required everywhere, get a written bill of sale. It should list the VIN, purchase price, date, and buyer/seller names. This protects both parties and may be needed for registration or taxes.
Registration/ID. Many states require off-road vehicles to be registered. You’ll likely need to visit the DMV or county office to register the UTV in your name. Bring the signed title and pay any sales tax or fees. For example, California requires payment of a transfer fee, renewal fee, and use tax upon registration. Other states may issue an OHV identification plate or sticker. Make sure you know your state’s rules (and check if a driver’s license or VIN check is needed).
Check for Liens. Before finalizing, double-check that no liens (loans) are still on the UTV. The seller should provide a lien release or note that there are no outstanding debts on the title.
Keep Copies. After everything is signed, make copies of all documents (title, bill of sale, any maintenance records, etc.) for your records. Once you’ve transferred the title and registered it, keep the new registration handy whenever you ride.
🚨 Must-Do Reminder
✔ Tip 1: Always verify the vehicle title and registration documents.
✔ Tip 2: Incomplete paperwork can prevent insurance registration or legal ownership.
Conclusion
In summary, buying a used UTV can be smart for first-time buyers if you do your homework. Remember to research models, inspect carefully, ask detailed questions, and take it for a good test drive.
With these pre-owned UTV tips, you’ll be ready to negotiate confidently and handle the paperwork, ending up with a reliable side-by-side that fits your adventures and your budget.
Looking to buy a UTV in 2025 without breaking the bank? Every major brand now offers both a budget-friendly work model and an entry-level recreational model—perfect for getting the job done or hitting the trails.
In this guide, we’ll break down the most affordable UTVs from top manufacturers. Whether you're focused on hauling gear or weekend adventures, we’ve gathered the latest specs and pricing to help you choose the right side-by-side.
Dimensions (L × W × H): 108 × 56 × 74 in (274 × 142 × 188 cm)
Wheelbase: 73 in (185.4 cm)
Polaris’s cheapest utility UTV is the Ranger SP 570. It starts at about US$11,499. It has a 567cc single-cylinder ProStar engine making 44 hp, and a compact 56‑inch chassis width. (Polaris calls it a “mid-size” UTV.)
It carries up to 500 lb in the dump box and tows 1,500 lb, making it suitable for farm or work chores on a budget.
Dimensions (L × W × H): 110.9 × 50 × 67.9 in (282 × 127 × 172.5 cm)
Wheelbase: 79 in (200.7 cm)
For off-road riding, the most affordable Polaris RZR is the RZR Trail (Sport trim). It starts at US$15,999. It uses Polaris’s 875cc twin-cylinder ProStar engine producing 75 hp, and has a narrow 50‑inch track width.
This makes it easy to maneuver on tight trails. In short, the Ranger SP 570 is Polaris’s entry workhorse, while the RZR Trail is its entry off-roader.
Dimensions (L × W × H): 121 × 62 × 76 in (307 × 158 × 193 cm)
Wheelbase: 83 in (2,115 mm)
Can-Am’s basic work UTV is the Defender HD7 (base model). Its US MSRP is about $12,899 (plus destination), slightly above Polaris. This Defender has a 650cc single-cylinder Rotax engine rated at 52 hp and a 62‑inch frame width. (In Canada the Defender HD7 Base is actually a bit cheaper than Polaris’s work model.)
It features a heavy-duty 1,000‑lb cargo bed (tilt) and up to 2,500 lb towing, making it a tough machine for jobs.
Dimensions (L × W × H): 128.5 × 62 × 70.5 in (326.4 × 157.5 × 180.2 cm)
Wheelbase: 90.6 in (230.1 cm)
The entry-level Can-Am recreation model is the Commander DPS 700. It starts at about $15,699. It uses a Rotax 650cc single-cylinder engine (same block as the Defender) putting out 52 hp and the chassis is 62″ wide. The Commander is designed as a versatile “all-round” UTV that can haul cargo or head into the woods. It has a 29.5 x 45.2 x 10.6 in. box and 2,000‑lb tow rating.
In summary, the Defender HD7 is Can-Am’s cheapest work UTV, while the Commander DPS 700 is its cheapest multi-purpose side-by-side.
Engine: 475 cc liquid-cooled single-cylinder, 4-stroke, OHV
Dry Weight: 1,027 lb (465 kg)
Ground Clearance: 8.5 in (21.6 cm)
Dimensions (L × W × H): 102.6 × 50 × 71.2 in (260.7 × 127 × 180.8 cm)
Wheelbase: 73 in (185.4 cm)
Honda’s smallest UTV is the Pioneer 500, aimed at light utility tasks. It’s very compact – only 50 inches wide – so it can fit into a pickup bed or narrow trails. It uses a 475cc liquid-cooled single-cylinder engine (often called “500-class”) and is fairly light. The US MSRP is only about $8,999 (plus about $885 destination).
Despite its low price, it still tows 1,000 lb and has a rear rack (though no dump bed). Honda does not sell the Pioneer 500 in Canada; there the closest model is the Pioneer 520, which starts around C$16,500 (about $10,499 USD MSRP).
Pioneer 500 and Pioneer 700
Recreation Model – Pioneer 700($12,499)
Power: 61 HP
Engine: 675 cc liquid-cooled OHV single-cylinder, 4-stroke, EFI
Dry Weight: 1,292 lb (586 kg)
Ground Clearance: 10.8 in (27.4 cm)
Dimensions (L × W × H): 114.8 × 59.9 × 77.6 in (291.9 × 152.0 × 197.1 cm)
Wheelbase: 76.8 in (195.0 cm)
A step up is Honda’s Pioneer 700. This model blends utility with light recreation. It starts at $12,499 USD. It carries three people on a bench seat and has a small tilting cargo bed. The Pioneer 700 is powered by a 675cc liquid-cooled single-cylinder engine and can tow 1,500 lb.
It’s not a pure sports UTV, but its power and capacity allow some trail fun. In Honda’s lineup, the tiny Pioneer 500 is the work-oriented budget model, while the Pioneer 700 is the next-level crossover for utility and casual trail riding.
Engine: 401 cc 4-stroke, single-cylinder, OHV, air-cooled
Dry Weight: 1,056.2 lb (478 kg)
Ground Clearance: 6.7 in (170.2 mm)
Dimensions (L × W × H): 106.7 × 52.6 × 72.4 in (271.0 × 133.6 × 183.7 cm)
Wheelbase: 70.1 in (178.0 cm)
Kawasaki’s entry work UTV is the Mule SX 4x4. This is an unpretentious 2-seater that lists for only $8,299 (MSRP) in the US. It has a 401cc single-cylinder engine (air-cooled) and is very compact at 52.6 inches wide. The Mule SX is a stripped-down utility sled – it tows 1,100 lb and hauls 400 lb in its steel bed.
Notably, Kawasaki still offers a carbureted engine option in the US (rare among new UTVs) as a budget choice (EFI is available too). In Canada, Kawasaki only offers the EFI version, which is about C$11,799. Its low price and small size make the Mule SX ideal for those needing basic utility on a tight budget.
Mule SX and Teryx S LE
Recreation Model – Teryx S LE($14,199)
Power: 47 lb-ft @ 5,500 rpm
Engine: 783 cc liquid-cooled, SOHC, 4-valve V-twin
Dry Weight: 1,570 lb (712.2 kg)
Ground Clearance: 11.2 in (standard) / 12.2 in (max preload)
Dimensions (L × W × H): 118.1 × 60.0 × 75.8 in
Wheelbase: 88.2 in
For sport riding, Kawasaki’s cheap model is the Teryx S LE (sometimes called Teryx S Trix). Dealer pricing is about $14,199–$15,499 US (our sources show about $15,499 sale price, with list MSRP $16,499). It packs a 783cc liquid-cooled V-twin engine, delivering strong torque and 47 lb-ft at 5,500 rpm.
The Teryx S LE has 60″ of track width and long-travel FOX suspension, built for trail riding. In short, Kawasaki’s Mule SX is the bargain-basement workhorse, and the Teryx S LE is its affordable off-road sportster.
Engine: 686 cc liquid-cooled SOHC 4-stroke, 4 valves
Dry Weight: 1,431 lb (648 kg)
Ground Clearance: 11.8 in (29.9 cm)
Dimensions (L × W × H): 122.1 × 64.0 × 75.8 in (310.5 × 162.6 × 192.5 cm)
Wheelbase: 84.1 in (213.5 cm)
Yamaha’s “value” work UTV is the 3-seat Viking EPS. It is quite well-equipped – with steering assist and a big cab – but it carries a high price. The base MSRP is about $15,799, making it the most expensive entry work model of all brands.
In return, it offers a 686cc fuel-injected, four-valve single-cylinder engine, electric power steering, and seating for three. It can tow up to 2,000 lb. Due to its size and features, it’s a capable work machine, but not budget-priced. (Yamaha also sells a 6-seat Viking VI, but the 3-seat Viking EPS is the cheapest in their lineup.)
Viking EPS and Wolverine X2 850 XT-R
Recreation Model – Wolverine X2 850 XT-R($16,499)
Power: 47 lb-ft @ 5,500 rpm
Engine: 847 cc parallel-twin, liquid-cooled, 4-stroke, DOHC, 4-valve
Dry Weight: 1,365 lb (619 kg)
Ground Clearance: 11.4 in (29 cm)
Dimensions (L × W × H): 115.6 × 62.6 × 75.8 in (294.6 × 159.1 × 192.5 cm)
Wheelbase: 81.3 in (206.5 cm)
On the sport side, Yamaha’s lowest-priced model is the Wolverine X2 850 (XT-R trim). It starts at $16,499 (CA$22,799) MSRP. This two-seater uses an 847cc fuel-injected twin-cylinder engine. The XT-R edition comes with special paint, a WARN winch, and heavy tires.
Its stance is 58.7 inches wide, and it can tow 1,300 lb. (Yamaha actually cut Wolverine prices for 2025 to help sales – older models were higher.) In summary, the Viking EPS and Wolverine X2 are Yamaha’s entry models for work and sport, respectively. They are pricey but well-equipped machines, and Yamaha has lowered their prices recently.
Engine: 580 cc single-cylinder, liquid-cooled, 4-stroke, SOHC, 4-valve
Dry Weight: 1,345 lb (610 kg)
Ground Clearance: 10.5 in (26.7 cm)
Dimensions (L × W × H): 111.0 × 57.0 × 76.0 in (281.9 × 144.8 × 193.0 cm)
Wheelbase: 76.0 in (193.0 cm)
CFMOTO is the budget brand, and its entry work UTV is the UForce 600. The US MSRP is about $10,999. Despite the “600” name, it actually uses a 580cc liquid-cooled V-twin engine that makes more torque than many 500cc machines. The UForce 600’s chassis is 57″ wide.
What makes it a great value is that it comes loaded with extras: a full roof, windshield, front brush guard, 4,500‑lb winch, alloy wheels, and more all standard. It tows 1,100 lb and carries 600 lb in the dump bed. At its price, the UForce 600 undercuts many rivals by thousands of dollars even with these features.
UForce 600 and ZForce 800 Trail
Recreation Model – ZForce 800 Trail($13,099)
Power: 58 hp @ 7,500 rpm
Engine: 800 cc V-Twin, liquid-cooled, 4-stroke, SOHC, 8-valve
The cheapest CFMOTO sport model is the ZForce 800 Trail. It lists around $13,099 MSRP (our dealer data) which is very low for an 800-class machine. It has an 800cc liquid-cooled V-twin (about 62 hp) and delivers strong low-end torque. Its overall width is only ~54.2″ (narrower than most full-size UTVs) while still having a tilting cargo bed. Like the UForce, the ZForce 800 Trail is generously equipped (power steering, winch, upgraded suspension, etc.) despite its low price.
In fact, its 2025 model spec sheet boasts a 50″ trail width and a fully-featured rig. In short, CFMOTO offers unbeatable value: a $10.9K loaded UForce 600 for work, and a $13.1K ZForce 800 Trail for fun – both well below comparable models from other brands.
2025 Affordable UTVs: Work vs. Recreation
Brand
Model
Type
Engine
Horsepower
Width
Price (USD)
Polaris
Ranger SP 570
Work
567cc Single-Cylinder
44 hp
56 inches
$11,499
Polaris
RZR Trail
Recreation
875cc Twin-Cylinder
75 hp
50 inches
$15,999
Can-Am
Defender Base HD7
Work
650cc Single-Cylinder
52 hp
62 inches
$12,899
Can-Am
Commander DPS 700
Recreation
650cc Single-Cylinder
52 hp
62 inches
$15,695
Honda
Pioneer 500
Work
475cc Single-Cylinder
43 hp
50 inches
$8,999
Honda
Pioneer 700
Recreation
675cc Single-Cylinder
50 hp
58 inches
$12,499
Kawasaki
Mule SX
Work
401cc Single-Cylinder
27 hp
52.6 inches
$8,299
Kawasaki
Teryx S LE
Recreation
783cc V-Twin
50 hp
60 inches
$14,199
Yamaha
Viking EPS
Work
686cc Single-Cylinder
48 hp
59.8 inches
$15,799
Yamaha
Wolverine X2 850
Recreation
847cc Twin-Cylinder
50 hp
58.7 inches
$16,499
CFMOTO
UForce 600
Work
580cc V-Twin
40 hp
57 inches
$10,999
CFMOTO
ZForce 800 Trail
Recreation
800cc V-Twin
62 hp
54.2 inches
$13,099
Best Value Picks
Best Work UTV – Kawasaki Mule SX($8,299)
Kawasaki Mule SX
Of all basic utility UTVs, the Mule SX stands out for being extremely affordable, compact, and utilitarian. At $8,299 MSRP, it’s by far the cheapest new UTV. Despite its low price, it tows 1,100 lb and hauls 400 lb. Its 401cc engine is simple but reliable, and the narrow 52.6″ width means it fits in tight spaces or pickup beds.
In short, for a no-frills work machine on a shoestring budget, the Kawasaki Mule SX is our pick.
Best Recreation UTV – CFMOTO ZForce 800 Trail($13,099)
CFMOTO ZForce 800 Trail
For a sports/recreation UTV on a budget, the CFMOTO ZForce 800 Trail is hard to beat. It costs only about $13,099 MSRP – thousands less than competitors with similar power. In return you get an 800cc twin-engine UTV (roughly 62 hp) with independent suspension, power steering, and a winch. Its body is relatively narrow (54.2″) for trails, but it still has a cargo bed for gear.
In practice, the ZForce 800 Trail delivers much of the performance of a pricier UTV at a bargain price, making it our top pick in the recreation category.
Conclusion
In 2025 the UTV market is surprisingly competitive on price. Most brands have either held prices steady or cut them slightly. The entry-level models above now cost a bit less than they did a year ago. In many cases 2025 is the best time to buy an entry UTV: most manufacturers are running summer promotions or dealer discounts.
By comparing brands we see that Kawasaki and CFMOTO generally offer the lowest-price models (under $11K), while Polaris, Can-Am, Honda, and Yamaha sit slightly higher ($11K–$16K) for their base models.
In any case, careful shopping and knowing these baseline prices can help buyers get the best deal. Whether you need a basic work rig or an affordable trail sled, the above models represent the cheapest entry points in each brand’s lineup for 2025.
Choosing the right motorcycle battery is crucial for reliable starts, performance, and longevity. Motorcycles use several battery types – traditional flooded lead-acid, AGM (Absorbent Glass Mat), gel, and lithium (LiFePO₄) – each with distinct pros and cons. Riders worldwide care about “best motorcycle battery” options, but the ideal choice depends on riding style, climate, maintenance habits, and budget.
This article compares the main battery types by cost, performance, maintenance, lifespan, safety, and environmental impact as of 2025. We’ll also cover how cold or hot weather affects each type, and offer guidance on selecting the right battery for your bike.
Flooded lead-acid batteries are the oldest and most common type. They have removable caps and contain liquid sulfuric acid and lead plates. They are heavy but can deliver high cranking power. Because they are inexpensive and widely available, many entry-level and older bikes still use them.
motorcycle lead-acid batteries
Advantages of Lead-Acid Batteries
Strong Cold-Cranking Amps (CCA): Delivers high starting power, even in cold conditions.
Reliable Starting Performance: Consistently dependable for engine starts.
Handles Heavy Cranking Loads: Durable under high-demand starting situations.
Lowest Upfront Cost: Most affordable option among all battery types.
Proven Technology: Long history of use with well-understood reliability.
Compatible with Standard Chargers: Can be charged using common, non-specialized chargers.
Disadvantages of Lead-Acid Batteries
Very heavy and bulky. For example, a 37 kg battery might only deliver 800 amps.
Lower energy density results in shorter run-time between charges.
Flooded lead-acid batteries require regular maintenance, such as checking electrolyte levels and adding distilled water.
If left discharged, they can sulfate, which reduces capacity and shortens lifespan.
Typically have a modest lifespan of about 2 to 5 years under normal use.
Acid leaks can corrode terminals and nearby components.
In cold weather, a partially discharged battery can freeze and become damaged.
Cost & Maintenance
Flooded batteries cost the least upfront. A typical 12V motorcycle lead-acid battery (around 150–200 CCA) might run a few dozen dollars in many markets, though quality and price vary.
Their maintenance is highest: you must inspect and top off water levels and keep them charged. Failure to maintain them cuts life short – in practice many last only 2–3 years in demanding service.
Lifespan
About 3–5 years if properly cared for. Fast or deep discharges shorten life. Cycling a lead-acid battery often to low charge can halve its lifespan (e.g. from 5 years to 2 years).
Performance in Various Climates
Lead-acid batteries perform well in cold start conditions, as CCA ratings are measured at 0 °F (–18 °C). However, cold makes the internal resistance higher and cranking harder.
A fully charged battery resists freezing much better (battery acid won’t freeze until –59 °C when fully charged), but a discharged battery can freeze around –2 °C.
In hot climates, sealed flooded batteries vent hydrogen gas and lose water, so they must be checked; extreme heat accelerates plate corrosion and capacity loss.
Environmental/Safety Aspects
Lead-acid batteries contain toxic lead and strong acid. They can leak acid if tipped or cracked, posing environmental hazards.
However, they are highly recyclable – North American programs claim over 99% of lead-acid battery materials are reclaimed. Proper recycling mitigates much of their environmental risk.
Safety-wise, flooded batteries can emit flammable hydrogen gas when charging and should be vented. They are heavy, and acid spills can corrode or injure. Still, they are well understood and forgiving if kept charged.
In short, lead-acid batteries are cheap and proven, but heavy and maintenance-intensive.
AGM Batteries (Absorbent Glass Mat)
AGM batteries are a type of sealed lead-acid battery where the sulfuric acid is absorbed into glass fiber mats between the plates. They are sometimes called VRLA (Valve-Regulated Lead Acid). Unlike flooded cells, AGM batteries are sealed, spill-proof, and generally marketed as maintenance-free.
Motorcycle AGM Batteries
Advantages of AGM Batteries
Strong cranking power, similar to flooded batteries.
Vibration-resistant and safe for varied mounting positions.
Sealed design prevents acid leaks and gas emissions.
Low self-discharge (1–3% per month), good for long storage.
Delivers higher burst current than gel batteries.
Charges faster due to tolerance for higher current.
Longer lifespan than flooded types (typically 2–5 years).
Disadvantages of AGM Batteries
Heavier and bulkier than lithium batteries.
About 20–30% more expensive than flooded lead-acid.
Deep discharges below 50–80% reduce lifespan.
Require an AGM-compatible charger to avoid overvoltage.
Overcharging can vent gas and dry out internal plates.
Still lose capacity in cold; sub-zero temps affect performance.
Not ideal below 0°C unless periodically warmed.
Cost & Maintenance
AGMs cost more initially. For example, a 150 CCA AGM battery might run about 30% more than a similar flooded unit.
However, you never need to add water or open the cells – they are truly maintenance-free beyond keeping terminals clean. Simply keep an AGM charged with a proper charger.
Lifespan
Typically about 3–5 years in motorcycle use. High-quality AGM batteries can exceed this. An average AGM can survive ~500 cycles at 50% discharge.
Vibrations and shocks (e.g. off-road riding) do not degrade them as much as flooded batteries, so rugged use is an area of strength for AGM.
Performance in Various Climates
In cold weather, AGM batteries start engines well, similar to flooded cells. They should be stored charged in winter. They are less prone to freezing than flooded cells, because the acid is immobilized in the mat.
In hot climates, sealed design prevents electrolyte loss, but extreme heat still accelerates the aging of the plates.
Safety
AGM batteries vent very little gas and have no free liquid inside, so they are safer than flooded batteries. There’s little risk of acid spillage.
They can still build some pressure if grossly overcharged, but built-in valves recombine gas, making them much safer around riders and passengers.
Gel Batteries
Gel batteries are another sealed lead-acid type, but with the electrolyte suspended in a thick silica-based gel. This makes them completely spill-proof. Gel cells are less common in motorcycles today, but have niche uses.
Gel Batteries
Advantages of Gel Batteries
Extremely low self-discharge; ideal for long storage.
Tolerate deep discharges better than AGM or flooded types.
Handle high temperatures with less capacity loss.
Freeze-resistant; thick gel prevents expansion damage.
Long standby life — often used in backup systems (can last 10–20 years).
Fully sealed and maintenance-free.
Safe and stable for various mounting positions.
Disadvantages of Gel Batteries
Expensive — typically the most costly among lead-based batteries.
Lower burst current — not ideal for high-CCA starting.
Slow charging — cannot handle high charging currents.
Charger sensitive — must be charged at lower voltage than AGM.
Standard chargers can damage the battery.
Poor choice for high-current applications, like large engine starts.
Cost & Maintenance
Gel batteries carry a significant premium. As of 2025, a 150 CCA gel battery could cost roughly 30–50% more than an equivalent AGM. No maintenance is needed – just ensure you have a compatible charging system.
In motorcycles, gel batteries have fallen out of favor because modern bikes rarely require such deep-cycle performance, and the charging systems may not match gel requirements.
Lifespan
Very good under the right conditions. Gel batteries “excel in cycle life,” often achieving twice the cycle life of an AGM at 50% depth of discharge.
In everyday motorcycle use, you might see 5–10 years from a gel battery, especially if it isn’t deeply cycled often.
Performance in Various Climates
Gel batteries handle cold weather better than flooded batteries and are more freeze-tolerant. They can be left discharged without catastrophic failure (discharged lead-acid can freeze).
In hot weather, gels are more stable than flooded cells but still suffer from electrolyte drying if overcharged. Overall, gels are the most heat-resistant of lead-acids.
Safety
Gel batteries are very safe in terms of spills or gas. The gelified electrolyte is immobilized; even if the case is cracked, it won’t leak.
They will vent only if very overcharged at high voltages. This makes them safe around passengers. The main risk is using an improper charger, which can cause irreversible damage (or venting).
Lithium batteries for motorcycles are almost always of the LiFePO₄ (lithium iron phosphate) variety. This chemistry is lighter and safer than older lithium-ion types. Lithium batteries have soared in popularity for motorcycles, especially high-performance and off-road bikes, due to their impressive specs. They are often marketed as “drop-in replacements” for lead-acid types, but they are fundamentally different in chemistry and handling.
Lithium Batteries
Advantages of Lithium Batteries
Ultra-lightweight — up to 70% lighter than AGM or lead-acid.
High energy density — delivers more power in a smaller, lighter package.
More usable capacity — can safely use nearly 100% of charge.
Longer runtime under load — ideal for high-demand applications.
Improved vehicle performance — weight savings help with handling and efficiency.
Very low self-discharge — loses only a few percent per month.
Stable voltage — maintains consistent output, improving electronics performance.
Fast charging — charges in about half the time of lead-acid (with BMS).
Exceptional lifespan — lasts 5–10+ years, supports thousands of cycles.
Disadvantages of Lithium Batteries
High upfront cost — can be 3–5 times more expensive than AGM or lead-acid.
Cost may be offset by longer lifespan, but initial investment is significant.
Require careful charging with strict voltage limits.
Must use a charger with a lithium mode; normal lead-acid chargers can damage the battery or void warranty.
Performance degrades below freezing (0°C/32°F) due to increased internal resistance and reduced capacity.
May fail to start below 0°C unless the battery is warmed beforehand.
High temperatures (above 60°C/140°F) accelerate battery aging, despite LiFePO₄’s relative stability compared to other Li-ion types.
Cost & Maintenance
Lithium batteries have the highest upfront cost. A high-end LiFePO₄ motorcycle battery might be 3–5 times the price of a lead-acid unit of equal nominal capacity. However, you seldom have to replace it: with proper care a lithium battery can outlast 2–3 lead-acid batteries. Maintenance is very low – no watering, no equalization, just occasional charging. However, you must ensure the battery never sits deeply discharged.
Lifespan
Very long. Expect 5–10+ years under normal use. Some reports suggest over a decade is possible. Lithium cells can tolerate thousands of partial cycles (in the thousands), compared to a few hundred for lead-acid.
Performance in Various Climates
Lithium excels in mild and typical conditions. In cold weather, pure LiFePO₄ batteries will deliver cranking power (they often have high CCA ratings), but their available capacity drops as temperature falls. The CCA rating of a lithium pack is usually given at ~70°F, not 0°F like lead batteries. Thus in very cold starts, a lithium battery may struggle unless warmed. In contrast, most lead-acid designs are rated for 0°F and often outperform lithium in severe cold starts without warm-up.
In hot climates, lithium batteries maintain voltage very stably, but their lifespan can be shortened if routinely exposed to high heat. Most LiFePO₄ cells are spec’d up to ~140°F (60°C) operating, which covers normal engine heat and weather; however, extreme heat (e.g. desert sun) accelerates capacity fade.
Safety
Lithium iron phosphate is generally safer than older lithium-ion chemistries. LiFePO₄ is thermally stable and far less prone to thermal runaway. According to industry sources, LiFePO₄ lacks corrosive acid and is less likely to leak or explode than lead-acid.
That said, any lithium battery can be hazardous if severely shorted, overcharged, or punctured. A BMS is essential. Improper charging or a failed BMS can cause overheating.
Most lithium motorcycle batteries include built-in BMS protection to disconnect on fault. In use, they do not vent gas or spill, but they can catch fire if catastrophically abused. In practice, LiFePO₄ batteries are very reliable and safe when used as intended.
Environmental Impact
Lithium batteries avoid lead and acid, reducing pollution risk from acid spills. However, lithium cells contain other metals (iron, manganese, sometimes cobalt) and must be recycled properly.
Currently, lithium battery recycling is still developing, whereas lead-acid recycling is very mature.
On balance, lithium’s production has a higher environmental impact, but its longer life means fewer replacements and less material usage over time.
A Quick Comparison Of Motorcycle Battery
Feature
Lead-Acid
AGM
Gel
Lithium
Weight ⚖️
Heaviest
Heavy
Heavy
Lightest
Cranking Power
High
Very High
Moderate
High (at 70°F)
Depth of Discharge
Low
Fair
Good
Excellent ✅
Cycle Life 🔁
~300
~500
~1000
2000–5000
Self-Discharge
4–6%/mo
1–3%/mo
1–3%/mo
<5%/mo
Maintenance 🧰
Water+Charge
Charge
Charge
None (BMS)
Cost 💰
Low
Medium
High
Highest
Lifespan ⏳
2–5 yrs
3–7 yrs
3–7 yrs
5–10+ yrs
Cold Tolerance ❄️
OK charged
Better
Best
↓0°C suffers
Heat Tolerance 🔥
Weak
Fair
Good
Good
Safety 🛡️
Gas/Spill Risk
Sealed
Sealed
Safe w/BMS
Environmental 🌍
Recyclable Lead
Recyclable
Recyclable
No Lead
Environmental and Safety Considerations
All battery types have environmental impacts. Lead-acid batteries use heavy metal (lead) and corrosive acid, so improper disposal can pollute soil and water.
Thankfully, recycling programs for lead-acid are well-established; over 99% of lead batteries are recycled in many regions, reclaiming lead, plastic, and neutralizing acid. This makes lead-acid relatively benign if handled responsibly. Lithium batteries avoid lead, but use materials like lithium, iron, and occasionally cobalt or nickel.
Mining these elements has environmental costs, and recycling is more complex currently. The long life of lithium batteries partly offsets this by reducing replacements.
Safety-wise, the big hazards are different. A spilled lead-acid battery can burn skin and corrode metal, and its hydrogen gas can explode if ignited. Yet, modern sealed batteries (AGM/Gel) mitigate these risks. Lithium batteries do not leak acid or emit hydrogen, but they can catch fire if physically damaged or grossly overcharged.
Fortunately, LiFePO₄ is one of the safest lithium chemistries, being stable up to high temperatures and resistant to runaway compared to older Li-ion types. In practice, using the correct charger and BMS will keep a lithium battery operating safely.
In summary, AGM/Gel minimize spill hazards, flooded require ventilation, and lithium requires electronic safeguards. Each type is safe when used properly, but accidents (deep shorts, wrong charging) can be dangerous in any case.
Choosing the Right Battery
There is no single “best motorcycle battery” for all riders; the choice depends on your bike, riding style, and priorities:
Budget Rider / Infrequent Use: Flooded lead-acid is the cheapest. If you ride occasionally in mild weather, a standard lead-acid battery will do the job at minimum cost. Expect to replace it every 2–4 years, and keep it charged when stored.
Reliability / Maintenance-Free: AGM batteries offer a good balance. They start well and need no water maintenance. Cruisers, tourers, and commuters often stick with AGMs as they provide solid performance without fuss. An AGM is a safe bet if you want a “fit-and-forget” lead-based battery.
Deep-Discharge Use / Extreme Conditions: Gel batteries excel if you frequently draw power (e.g. extensive accessories or long periods without running) and need maximum longevity. Riders in very cold climates might appreciate gel’s freeze tolerance. However, make sure your charging system is gel-compatible. Gel batteries are common in specialized adventure or off-road bikes where reliability in harsh environments is crucial.
High-Performance / Weight-Sensitive: Lithium (LiFePO₄) is ideal for sport bikes, racing, or adventure bikes where weight and performance are paramount. The significant weight savings (up to 70% lighter) improve acceleration and handling. Lithium also holds charge indefinitely – great if you store your bike off-season. If you ride daily or cover long distances often, a lithium battery’s long life (5–10 years) can offset the higher price. Just ensure you have a lithium-compatible charging system and avoid extreme temperatures.
Cold Climate: If you regularly ride in very cold weather (below freezing), lead-acid (flooded or AGM) may actually be more dependable, since their performance is rated at 0 °F and they can be cranked even in deep cold. Lithium batteries will still work but may need pre-heating (by running lights, etc.) for best results.
Hot Climate: In very hot regions, all batteries age faster, but lithium and gel are less prone to evaporation or electrolyte degradation. If you ride in extreme heat or store your bike in the sun, lithium or gel might have a slight edge. Regardless, avoid leaving any battery in high heat for long periods.
Storage Considerations: If your bike sits for months, lithium batteries will hold their charge best, followed by AGM/gel. Flooded batteries can self-discharge and risk sulfation if left at low charge, unless you use a tender.
Conclusion
Each motorcycle battery type has its strengths and weaknesses. Flooded batteries are affordable but need upkeep, AGM offers durability with low maintenance, gel lasts long but requires careful charging, and lithium delivers the best performance at a higher cost.
Choose the battery that fits your riding style, budget, and climate to ensure reliable starts and long-lasting power. Proper care and regular charging will help you get the most from your investment.
Motorcycling is fun and liberating, but motorcycle riders are more vulnerable on the road due to its hazards. Motorcyclists, as per U.S. traffic statistics, are roughly 29 more times inclined compared to car drivers to end up dying in a crash on a given mile traveled. Indeed, almost half of fatal two-vehicle motorcycle accidents consist of a car making a left-hand turn into a rider. For safety, riders should be informed of common motorcycle dangers and use intelligent riding techniques.
This article shines a light on top motorcycle hazards – collisions from left turns, cornering accidents, and improper protection wear – and some practical advice for avoiding them.
Top 3 Motorcycle Dangers
1. Left-Turn Collisions (Vehicles Making a Turn Across)
Left-turn collisions occur when a car turns into a motorcyclist’s direction of travel, frequently at intersections. This is responsible for more motorcycle crash as well as being the most fatal. Based on 2022 United States statistics, 44% of fatal two-vehicle motorcycle crashes occurred when a vehicle was turning left to its right with the motorcycle going in a straight line. In this type of crash, a car often doesn’t see a bike in time.
left-turn collision
Ride with care at intersections.
Always be ready to stop. Hold your front brake lever with your hand ("hang on the brake") as you come up to an intersection, so you can easily brake if a car is going to pull out.
If your motorcycle has a daytime running tail light, keep it on to make yourself more visible. Also, stay a safe distance behind the vehicle ahead and, when possible, move slightly toward the left side of your lane. This off-center position makes you more visible to left-turning drivers and gives you space to maneuver if needed.
Keep an eye on wheels of approaching vehicles.
Look for cross-traffic with caution. If you notice a car’s front wheels turning or its turn signal flashing, it’s considering turning. Even if a driver hasn’t signaled, the alignment of wheels can be an indication that it’s going to cut in your path.
Make a “SMIDSY” wiggle.
If you believe a driver doesn’t see you, a bike waggle from side-to-side (the “SMIDSY” or “Sorry Mate I Didn’t See You” action) can attract a driver’s attention. It’s a slight motion that makes you more noticeable without destabilizing the bike.
Have both hands available on the grips and your eyes up. Even a good stance and alertness can’t avoid all collisions, so be prepared to jam on the brakes hard if some turning vehicle comes into your lane unexpectedly.
These preventive measures – extra vigilance, correct placement, and poised brakes – can significantly lower the risk of a surprise crash on a left turn. Keep in mind, drivers tend to underestimate how fast a motorcycle is approaching and tend to mistakenly think there’s more time. Remaining noticeable and predicting their action puts you at an advantage.
Even veteran riders can crash in a curve. Cornering collisions frequently occur when a rider comes into a corner too fast or estimates a curve as too mild. Unknown or twisty roads are particularly hazardous. A sharper-than-recommended turn or a patch of loose gravel can take a rider by surprise, sending the bike wide across the road or skidding out. Safe cornering involves scoping ahead of you and controlling your speed and line smoothly.
motorcycle loses control on a turn
Use the vanishing point technique.
Look well ahead toward where the road seems to disappear (the “vanishing point”). As you enter a bend, notice how the vanishing point moves:
If it is coming towards you, the curve is closing in – slow down.
If it stays at the same distance, the turn is a constant radius – maintain speed.
If it is approaching you, the road is closing – you can ease up a bit as you get closer.
This visual cue helps you judge the turn’s severity without guessing.
Brake BEFORE the turn, not during.
Avoid heavy braking while leaned over, because tires have limited grip and can slide if you brake mid-turn. Slow down to a safe speed before entering the curve, then roll on the throttle gently through the turn. If you find yourself still too fast, easing off the throttle or gently tapping the rear brake can help – but full brakes during a lean usually cause a loss of traction.
Keep to your lane and don’t cut the apex on unfamiliar roads.
An early turning instinct is to “straighten” the curve, but on an unknown road, this is a recipe for disaster. The inner edge of a curve can be home to incoming traffic, unseen driveways, or road hazards. Instead, choose a safe, predictable line: remain to the outside of your lane on entry (so you can see further into the curve) and go for a smooth arc, leaning into the lane’s center rather than crossing the centerline.
Look where you want to go.
Point your eyes at the far side of the turn. Your bike will naturally go in the direction your eyes point. If you look at a piece of gravel on the side of the road or at a car entering from the outside lane, you will tend to steer towards them. Pointing your eyes down through the turn keeps you on a steady line.
Be particularly careful on new roads.
If you are negotiating a new road for the first time, allow lots of room. Brake sooner before blind curves, anticipate unexpecteds (such as tighter turns or uneven pavement), and assume slow speeds until you have “read” your curve.
With smooth throttle control and an understanding of what you should be seeing, you can negotiate corners safely. Good technique – slow in, fast out – makes you balanced and predictable, minimizing the chance of running wide or losing control.
3. Lack of Proper Riding Gear (Inadequate Protection)
Many riders underestimate how important their gear is. In a crash, good protective clothing can mean the difference between minor bruises and life-changing injuries. Research shows that motorcyclists wearing proper jackets, pants, gloves and boots are significantly less likely to be hospitalized after a crash. For example, a study found that riders with armored jackets were about 20% less likely to be admitted to the hospital after a wreck, and those with armored pants were about 50% less likely. In short, wearing quality gear saves lives and limbs.
motorcycle riding gear
Invest in high-quality gear.
Ride-ready gear isn’t cheap, but it pays off. As a rule of thumb, allocate at least as much budget to protective gear as you do to the motorcycle itself. This means a top-quality helmet, jacket, pants, gloves, and boots. Make sure jackets and pants have built-in armor (CE-rated protectors on shoulders, elbows, back, hips, knees). A textile or leather suit with armor is far better than casual clothes. Motorcycle boots (at least mid-calf with ankle support) and full gauntlet gloves protect ankles and wrists – injuries common in crashes. The investment can drastically cut medical bills and long-term costs.
Always wear a helmet (and replace it after any crash).
Helmets are the most critical gear. They block lethal head trauma and brain injury. Studies show a helmet reduces a rider’s chance of death by about 37% and cuts head injury risk by about 69%. After any crash—even a minor drop—a helmet should be replaced. Helmets are designed for one impact only; even without visible damage, the integrity of the inner liner can be compromised. Do not ride another day with a helmet that’s been in an accident.
Consider an airbag-equipped suit or vest.
Airbag systems are becoming more popular. These electronic or mechanical suits inflate rapidly in a crash, protecting the neck, spine, chest and sometimes hips. They can greatly reduce injury in high-impact falls. Note that most airbag suits or vests can only inflate a few times (often 3–5 deploys) before needing replacement, so check the manufacturer’s specs. Also, individual inflator cartridges are inexpensive, but replacing a suit can cost around $1,200 or more. Still, for frequent riders or those on fast bikes, an airbag layer adds extra peace of mind.
Check safety certifications.
Gear should meet recognized safety standards. In the U.S., helmets should be DOT or Snell certified; in Europe, look for ECE certification. Gloves and boots should have abrasion-resistant material and armor. Spending a bit more on certified gear is worth it, because uncertified “bargain” gear may fail in a crash.
Finally, make sure your insurance policy helps replace gear if you crash. Many motorcycle insurers offer an add-on for “protective gear” or “custom parts and equipment.” For example, State Farm includes coverage for your riding gear (helmets, jackets, etc.) up to $3,000 under collision/comprehensive policies. If you have such coverage, keep receipts of your gear, and after a crash you can get reimbursed for repair or replacement.
Riding gear is your mobile safety net. Without it, even a slow-speed slide can result in road rash, broken bones, or worse. By suiting up completely – helmet on head, jacket and pants on body, boots on feet, gloves on hands – you give yourself the best chance to walk away from a fall.
Conclusion
Motorcycling carries inherent risks, but many accidents are preventable.
The three motorcycle dangers above – being struck by left-turning vehicles, losing control on corners, and riding with insufficient gear – account for a large share of serious motorcycle injuries and deaths. By adopting defensive habits (like covering your brake and scanning intersections), refining your riding skills (using visual cues and smooth throttle through turns), and always wearing certified protective gear, you can greatly reduce those risks.
Remember: ride within your limits, stay visible, and never skimp on safety equipment. These steps won’t eliminate all motorcycle dangers, but they stack the odds in your favor and help ensure you arrive home safely after every ride.
Many riders instinctively “death grip” the motorcycle throttle and handlebars, thinking it gives better control. In reality, this tension hurts your riding. As one expert notes, “your riding suffers when you grip the handlebars too tightly”. Fear and anxiety can make this worse – our bodies naturally clamp down on the grips when we’re nervous. The result is neck and shoulder fatigue, muddled steering inputs, and even lost traction in a corner.
Riders’ schools now recommend a different approach: hold the throttle lightly and with a lower wrist angle – as if you were holding an ice cream cone. This simple change can improve both safety and performance.
Why a Tight Grip Hurts Your Control
When tension kicks in, riders “tighten our hands on the grips while our body tenses up”. This elbow-flailing, fist-clenching grip breaks the smooth coordination between rider and machine. Rigid arms and wrists can’t accurately steer or feel subtle feedback from the bike.
In a turn, for example, a clenched grip often forces you to drag the throttle instead of smoothly twisting it – because your wrist is already at its limit. Worse, squeezing the bar hard actually muffles the precious sensations through the bars (vibrations, bumps, slipping) that tell you what the bike is doing. In short, a death-grip wastes energy and dulls your senses.
“Your riding suffers when you grip the handlebars too tightly,” warns an instructor. Riders often only realize this after their wrists ache or they struggle to corner smoothly. A relaxed grip is not only more comfortable – it is safer. By unclenching, you reduce fatigue and ensure you’re not fighting your own inputs.
Caveman Grip vs. Ice-Cream-Cone Grip
grip a motorcycle throttle
The old way – sometimes called the “caveman” or “fist” grip – means wrapping all four fingers (and even the thumb) completely around the motorcycle throttle tube. From above, the wrist is bent and your arm is tense like a barbell lift.
Many riders hold on tight out of habit or fear of sliding off. But this grip limits your wrist’s rotation when you lean the bike. If you lean far over, a fully clenched wrist simply can’t twist farther. You end up pulling the throttle instead of smoothly twisting it, which upsets the bike.
By contrast, the “ice cream cone” grip is much lighter and lower. Imagine holding an ice cream cone in front of you – you still keep a firm but gentle hold, but your wrist is dropped and you use mostly your fingers and forearm to twist.
Coach Dylan Code of California Superbike School even jokes that you should “think about ice cream” next time you ride. With this grip, your palms lightly touch the handlebar and your elbows point out. Only a couple fingers (instead of your whole fist) are wrapped around the throttle, giving your hand more room to roll open or closed even at maximum lean.
The benefit is immediate: you can still twist or close the throttle through the full range of motion as the bike leans, without hitting a hard stop on your wrist. You’re not cramming the throttle against your palm – instead the bar rests against the base of your thumb/hand and your forearm does most of the work. This makes it easier to “push and pull the bars toward and/or away from you without unintentionally also pushing down at the same time”.
In practice, that means your steering inputs are more precise (you push and pull in the steering plane), rather than accidentally pushing down and unsettling the chassis.
Overall, the ice-cream grip aligns your hands with your arms and shoulders. Your wrists stay fairly straight or only gently bent, so arm and torso muscles assist with control instead of locked wrists.
Tall riders especially notice the difference: when arms point straight down (caveman style), riders push the handlebars downward inefficiently. Dropping the elbows (ice-cream style) points your arms more forward. Now your push/pull force is aligned with the steering axis, and the bike responds faster and cleaner. In other words, the bike tips into turns with maximum efficiency, rather than fighting against a downward push.
How to Hold the Motorcycle Throttle for Better Control
hold the throttle for better control
Training instructors summarize the new grip in a few key points. Practice these tips to transform your throttle grip and handling:
1. Light, finger-only grip
Avoid squeezing the motorcycle throttle in your fist. Keep a light but secure hold using mostly your fingers. Let your palms partially release so they do not clamp the bar tightly. A gentle grip lets you easily roll the throttle open or closed with minimal effort.
2. Elbows down and out
Keep your elbows lowered and pointing outward (like an ice-cream vendor scooping). This allows your arms and shoulders to help rotate the bars. Riders with elbows high (and wrists low) often push down on the grips, which doesn’t turn the bike. By dropping your elbows, you apply force in the right plane – forward/backward – so steering inputs are more direct.
3. Push/pull, not down
Think of steering by pushing the bars away or pulling them toward you, not pushing downward. With your ice-cream grip, all your effort goes into tipping the bike over, rather than pressing the bars like a shopping cart. This aligns with how the steering actually works.
4. Keep feedback
Rest the bars lightly in the base of your palms. This actually increases the road feel: chassis vibrations and small slides will travel through your hands, giving you high-fidelity feedback. You’ll notice tire slippage or bumps sooner, which improves your situational awareness and control.
5. Lean before throttle
Especially in corners, establish your lean angle first, then roll on the throttle gradually. Never crank the throttle hard while still building lean – doing both at once overloads the tire. Instead, lean in, stabilize, then apply power. As expert instructors point out, avoid adding throttle and lean at the same time mid-corner. Pause the throttle input if you need to add more lean; only resume rolling it on once the bike is at the desired angle.
By following these steps, the throttle becomes an extension of your arm, not a clenched lever in your palm. You’ll find throttle inputs smoother and more intuitive. In fact, one riding guide notes that with the correct grip, “keeping your grip light but firm… makes it easier to twist the throttle open or closed as needed”. In other words, the small muscles in your forearm do the twisting instead of straining your fingers, leading to smoother speed control.
The grip technique matters most when cornering at speed. Physics dictates that a tire has limited traction (often pictured as a “friction circle”), so you must be careful how you apply forces. When you lean a bike, you use up most of the available grip for cornering. If you simultaneously crank the throttle, you’re asking the tire to handle two large forces (cornering + acceleration) at once. That can push it past its limit, causing a slide or highside.
lean first, then throttle
Experts agree on the mantra: “Lean first, then throttle.” As one coach warns, at any significant lean angle “it’s best that you do not add throttle while adding lean angle”. In practical terms, this means get the bike leaned into the turn, hold a steady roll-on throttle if needed, then smoothly unwind throttle through the exit. If you opened the throttle too early (with wrist cocked up), the contact patch gets pulled in two directions at once.
One guide explains that adding throttle too soon pulls the tire’s contact patch apart, and the traction “limit arrives sooner and without warning”. By contrast, if you lean first and then add throttle, each force is applied in turn, maximizing traction.
The ice-cream grip supports this technique. Because your grip stays light, you’re less likely to inadvertently jam the throttle while still leaning. Your forearm remains capable of rolling on throttle even as your body moves.
Meanwhile, your gentle grip ensures that the bike’s chassis and tires communicate with you – you’ll sense any front-end tuck or back-end slip through your hands before it cascades into a crash. In short, the proper grip and lean sequence work together to keep the bike within its grip circle.
Practice and Performance
Switching grips can feel strange at first. Your brain and body have to relearn the sensation of a looser hold. A useful drill is to practice at home: while holding an imaginary “ice cream cone,” swivel your wrist gently back and forth and up and down. Notice how your wrist and forearm move together as a unit. On the bike, start on easy, slow cornering.
Deliberately check your wrist: is it cocked up (too much)? Then relax and roll the throttle lightly. Try just two fingers on the throttle to start, keeping the other two fingers near or on the brake lever for support. Over a few miles, your forearm will start doing the work naturally.
On track days or twisty roads, the difference becomes clear. Riders who adopt the light, ice-cream grip report faster response and less fatigue. One article quipped: “If you want your superbike to handle like a shopping cart, go ahead and keep the caveman grip. Otherwise, loosen up.”
In practice, dropping elbows and lightening your grip is like upgrading your steering system. Everything lines up: faster turning, sharper feedback, and smoother throttle transitions.
Key takeaways: Let go of the death-grip. Adopt the ice-cream hold with wrists down and elbows out. Lean your bike into a corner first, then roll on throttle. With practice, your ride will feel more natural, responsive, and safe.
The next time you’re on the road or track, remember: hold your throttle like an ice cream cone – your bike (and your body) will thank you.
Conclusion
A relaxed grip reduces arm pump and lets you ride longer with good form. It also minimizes the chance of a surprise slide – when you’re properly loose and attentive, you’ll catch loss of traction before it gets out of control.
As your confidence grows, you’ll be able to concentrate more on smooth inputs and less on gripping for dear life.
A 1000cc motorcycle is any bike with an engine around one liter in size, known for delivering big power and thrilling speed. Modern liter‑class machines (around 998–1103cc) often make well over 150 hp and come in many styles—from sportbikes and naked bikes to adventure models and cruisers.
In this guide, we’ll break down what 1000cc means for performance, the main types of bikes, their pros and cons, how they compare to smaller or larger machines, what it costs to own one, and some of the standout 2025 models from top brands.
A 1000cc engine is a big and powerful motor. The “cc” means cubic centimeters. It shows the size of the engine’s cylinders. A bigger number means the engine can burn more fuel and air. That usually gives the bike more power and torque.
motorcycle with a 1000cc engine
In simple terms, a 1000cc motorcycle is much stronger than a 600cc or 300cc bike. Most 1000cc sportbikes can make 180 to 200 horsepower. That gives them super fast speed. Many can go from 0 to 60 mph in about 3 seconds. They can also reach top speeds over 150 mph.
But there are some downsides. Bigger engines are usually heavier and use more fuel. Still, they give strong power even at low speeds. This makes them good for highway riding without needing high RPMs.
In the end, a 1000cc motorcycle is made for riders who want serious speed and power. It’s not for beginners, but for people who are ready for a high‑performance ride.
Types of 1000cc Motorcycles
Type
Key Features
Example Models
Sport (Superbike) Track‑focused performance
Full fairings
Aggressive riding position
High-revving engines (160–210 hp)
Lightweight frames
Advanced electronics
Best for experienced riders
Ideal for smooth roads or racetracks
Kawasaki ZX‑10R
BMW S1000RR
Ducati Panigale V4
Suzuki GSX‑R1000
Yamaha YZF‑R1
Naked (Streetfighter) Upright & versatile
Minimal or no fairings
Upright seating position
Shares engines with sportbikes
Tuned for usable torque
Comfortable for daily street riding
Still offers strong acceleration
Yamaha MT‑10
Kawasaki Z H2
Suzuki GSX‑S1000
Honda CB1000R
BMW S1000R
Ducati Streetfighter V4
Adventure / Sport‑Touring Comfort & distance
Taller windshields
Luggage racks
Relaxed ergonomics
Suspension for long trips or light off-road
Blends highway speed with touring ability
Kawasaki Versys 1100
BMW S1000XR
Cruisers (≈1000cc) Relaxed power
Low-end torque
Laid-back riding position
Heavier frames
Focus on comfort and style over top speed
Honda Rebel 1100 (1083cc)
Indian Scout (1133cc V‑twin)
Victory Octane / Judge (~1200cc)
Power and Performance
A 1000cc engine gives you serious power. Some bikes in this class can rev over 12,000 rpm. That means they pull hard even in the middle of the rev range.
Ducati Panigale V4
For example, the Ducati Panigale V4 makes around 209 hp and almost 90 lb-ft of torque. BMW’s S1000XR makes 170 hp. Even smaller naked bikes like the Monster 937 can make over 100 hp.
With this much power, these bikes take off fast and can easily handle two riders or luggage. Some, like the Kawasaki Ninja H2R, go way beyond—over 300 hp—but those are track-only.
For most people, 1000cc motorcycles offer more power than you’ll ever need on public roads.
Pros and Cons of 1000cc Motorcycles
Advantages ✅
Disadvantages ⚠️
🔋 Big Power and Speed
Very fast acceleration and high top speeds.
Bigger engines mean more horsepower and stronger pull.
💰 Expensive to Buy and Own
Higher purchase price due to increased power and speed
Higher insurance costs are due to the enhanced performance and risk factors
Quickshifters enable smoother gear changes without using the clutch
Cornering ABS improves braking safety while leaning
Traction control reduces wheel slip and enhances stability
⚡ Too Much Power for Some Riders
A small twist can cause rapid acceleration
Demands precise control from the rider
Requires skill to handle safely
Riders must respect the bike’s power
🛵 Many Types to Choose From
Various types available: sport, naked, adventure, and cruiser
Sport bikes offer high performance and aggressive styling
Naked bikes provide a more upright riding position and less bodywork
Adventure bikes are built for long-distance and mixed terrain
Cruisers focus on comfort and relaxed riding
Allows riders to choose based on personal style and riding needs
⛽ Burns More Gas
Larger engines tend to consume more fuel
Sport models typically average around 30–40 mpg
Lower fuel efficiency compared to smaller or commuter bikes
Important to consider for long-distance or daily riding costs
💎 High Resale Value
1000cc models are popular and in demand
They tend to hold their value well over time
Easier to resell compared to less popular models
Can be sold later at a relatively good price
🔧 Higher Maintenance Costs
Tires and brake pads wear out more quickly due to high performance
Maintenance costs are higher than average
Annual upkeep typically ranges from $800 to $1,500
Important to budget for regular replacements and servicing
👤 Who Should Ride a 1000cc Motorcycle?
1000cc motorcycles are not for beginners. These bikes are very powerful and fast. They work best for riders who already have experience and feel confident on two wheels.
If you like speed and know how to control the throttle, you’ll enjoy riding a liter bike. They’re also great for riders who spend a lot of time on highways or take long trips.
Many people ask:
“Should I start with a 1000cc motorcycle?”
If you’re new to riding, the answer is usually no. A smaller bike is easier to control and safer to learn on. After some time, you can move up when you’re ready.
1000cc motorcycles have a higher risk of accidents
Big engines make a lot more power and torque. That also means higher accident risk if you’re not careful. Insurance companies charge more for these bikes for that reason.
Still, skilled riders can ride 1000cc bikes smoothly. You don’t have to go full speed. Just using the low end of the engine is enough for easy rides.
No matter what, always wear good gear, pick a bike that fits your size, and consider taking a safety course to learn more.
Tips for Beginners Considering a 1000cc Bike
1. Start Small
Before going straight to a 1000cc motorcycle, it’s wise to build your skills on something smaller—like a 300cc to 600cc bike. These lighter machines are easier to control and help you get comfortable with throttle, braking, and balance.
2. Take a Riding Course
Signing up for a certified safety course, such as those offered by the MSF (Motorcycle Safety Foundation), can teach you crucial techniques that aren’t easy to learn on your own—especially when dealing with high-powered bikes.
3. Gear Up Properly
Don’t cut corners on safety gear. A full-face helmet, armored jacket and pants, protective gloves, and sturdy boots are essential. A 1000cc bike means serious speed—so you need serious protection.
4. Choose the Right Bike Features
If you’re going for a liter bike, look for one with rider-assist features like ABS, traction control, and adjustable ride modes. These systems help manage the power and make the bike more forgiving for newer riders.
5. Ease Into the Power
When you first start riding a 1000cc, don’t use full throttle right away. Most modern bikes have power modes—start with the lower setting while you get used to the bike’s response.
6. Get Your Paperwork in Order
Make sure you have the correct class of motorcycle license for a 1000cc. And before buying, check insurance costs—premiums are usually higher for bigger bikes, especially for new riders.
7. Practice at Low Speeds
Handling a heavy, powerful bike at low speeds can be tricky. Use an empty parking lot to work on slow turns, U-turns, and emergency stops until you’re comfortable.
8. Budget for Maintenance
Big bikes mean bigger running costs. Tires, brake pads, oil changes, and general maintenance can add up quickly—expect to spend more each year compared to smaller bikes.
Notable 2025 Models by Major Brand (1000cc Motorcycles)
Brand
Key 2025 Models & Features
Honda (Japan)
CBR1000RR-R Fireblade SP – 999cc, top-level sportbike with high-end suspension
CB1000R – naked street version with same engine
Rebel 1100 – 1083cc cruiser with strong low-end torque
Yamaha (Japan)
YZF-R1 – 998cc superbike with crossplane crank
R1M – upgraded with electronic suspension
MT-10 – streetfighter version, same engine, ~36 mpg
Kawasaki (Japan)
Ninja ZX-10R – 998cc, ~196 hp, race-ready
H2 & Z H2 – supercharged power
Versys 1100 SE – 1099cc, soft suspension for touring
Harley‑Davidson – Sportster S (1250cc muscle cruiser)
Fuel Efficiency, Insurance, and Maintenance
Fuel Economy
1000cc engines burn more fuel than smaller bikes, especially under aggressive riding. Typical fuel economy for street-oriented liter bikes is in the mid-to-low 30s mpg.
Yamaha R1 and Yamaha MT-10
For example, Yamaha’s R1 (998cc) is EPA-rated at about 33 mpg, while the more upright Yamaha MT-10 (998cc) gets about 36 mpg. Cruisers and heavy tourers in this class often see high 30s to 40 mpg on highway cruising.
Fuel efficiency depends heavily on riding style – spirited riders will see much lower mileage. Using 91–93 octane premium fuel is common for many 1000cc performance bikes.
Insurance premiums rise with power. Most insurers charge higher rates for liter bikes because of their higher speed and accident risk. As one insurance guide notes, “bikes with higher engine displacement are usually associated with higher speeds and more power… higher premiums are charged for bikes with larger engines”.
A rider’s age and record also matter, but even a clean veteran rider will pay more to insure a 1000cc bike than a 600cc bike.
Maintenance
High-performance bikes require diligent servicing. Expect regular oil/filter changes every 4,000–6,000 miles (more often if used on track), and more frequent fluid changes. Tires and brakes, especially on sportbikes, can be very expensive.
According to J.D. Power, average motorcycle servicing and maintenance costs run around $800–$1,500 per year. Safety gear and periodic replacement of chains, sprockets, and cables add to costs. However, well-maintained liter bikes can be very reliable – just be prepared for higher service bills than smaller bikes.
Conclusion
1000cc motorcycles come in all kinds of styles — sportbikes, naked motorbikes, touring machines, and even cruisers. But no matter the type, they all deliver serious engine power.
That power brings excitement, but also some trade-offs. These bikes are heavier, cost more, and need more skill to handle. They're not the best choice for beginners.
If you’re experienced, a 1000cc bike can be an amazing ride. Just be sure to factor in things like licensing, insurance, and maintenance costs, which can run $800 to $1,500 per year.
Always wear full gear, take a safety course if you haven’t, and ease into the power. With the right prep, a liter bike can offer an unforgettable riding experience.
Naked motorcycles—also known as streetfighters—combine raw power, agile handling, and minimalist style. In 2025, these bikes range from lightweight fun machines to full-on liter-class beasts. Stripped-down and responsive, they focus on pure riding thrills.
Here are 10 of the best naked bikes of 2025 worth your attention.
10 Best Naked Motorcycles 2025
Model
Engine
Max Power (hp)
Max Torque (lb-ft)
Curb Weight (kg)
Key Features
Aprilia Tuono 457
457 cc parallel-twin
47.6
32
175
Lightweight
A2-friendly
quickshifter
alloy frame
Ducati Streetfighter V4
1,103 cc V4
205
88.3
202
MotoGP winglets
Öhlins electronic suspension
superbike power
Triumph Trident 660
660 cc inline-triple
80
47
190
Smooth triple
cruise control
cornering ABS
upright comfort
Yamaha MT-07 (2025)
689 cc parallel-twin
74.8
50
183
Lightweight
3 ride modes
traction control
semi-auto option
Honda CB1000 Hornet
1000 cc inline-four
155
78
211
Streetfighter style
quickshifter
Brembo brakes
ride modes
BMW F 900 R (2025)
895 cc parallel-twin
105
68.6
208
Lower bars
higher pegs
Dynamic ESA
full electronics
Kawasaki Z900
948 cc inline-four
124
73.1
212
Affordable
smooth 4-cyl
riding modes
strong brakes
Aprilia Tuono 660 Factory
659 cc parallel-twin
105
51.6
181
APRC electronics
adjustable suspension
lithium battery
BMW S 1000 R (2025)
999 cc inline-four
170
84
199
ShiftCam tech
IMU electronics
track-ready brakes
KTM 990 Duke R
947 cc parallel-twin
128
76
190
WP Apex suspension
Brembo Stylema
race-focused
Top 10 Naked Motorcycles to Ride
1. Aprilia Tuono 457
Aprilia’s Tuono 457 is a lightweight middleweight naked bike built around the 457cc parallel-twin from the RS 457. It makes about 47.6 hp at 9,400 rpm and 32 lb-ft of torque at 6,700 rpm, which is the Euro5-permitted maximum for A2 (learner) riders.
Aprilia Tuono 457
Specifications
Price: $6,599 (US MSRP)
Engine: 457 cc parallel twin, DOHC, 4 valves per cylinder, liquid-cooled, Ride-By-Wire
Power: 47.6 hp (35 kW) @ 9,400 rpm
Torque: 32 lb‑ft @ 6,700 rpm
Weight (curb): 175 kg
Seat Height: 31.4 in (≈798–800 mm)
Fuel Capacity: 3.6 US gal (≈13.6 L)
Despite its small size, the Tuono 457 punches above its weight: with an alloy frame and a curb weight of around 175 kg, it has class-leading power-to-weight. The chassis uses twin aluminum beams with the engine as a stressed member and 51 mm inverted forks, so it feels stiff and precise in turns.
Riders report the Tuono 457 is a “real naked sports bike” with surprising performance and agility. On twisty roads, it behaves like a toy: it drops into corners quickly and pivots with ease, giving a playful ride that enthusiasts love. Braking is handled by twin 320mm Brembo ByBre discs and a 220mm rear disc with switchable ABS, which are strong enough for spirited riding, though not as powerful as higher-end Brembos.
In practice, the Tuono 457’s responsive motor and light weight make it surprisingly quick and fun for its class. The engine’s 270° crank gives a lively character, and a quickshifter is standard on the new model. Riders note the bike is easy to ride around town or on country roads: the upright ergonomics are comfortable, and the broad torque curve means you rarely need to hunt for gears.
It is a real everyday naked bike. As it can commute smoothly yet still excite on backroads. In short, this little Aprilia is light, agile, and fun – ideal for new or budget-minded riders seeking an exhilarating naked bike experience.
Pros
Lightweight and agile
Sporty, precise handling with an aluminum frame and inverted forks
Lively 270° parallel-twin engine with quickshifter
A2-licence friendly
Comfortable upright ergonomics for city and backroad riding
Adequate brakes with ABS for spirited riding
Cons
Limited top-end power for experienced riders
Brakes are less strong than high-end Brembos
A small bike may feel light for bigger riders
Seat and suspension can be firm on long rides
Less suited for high-speed highway touring
2. Ducati Streetfighter V4
The Ducati Streetfighter V4 is a naked superbike built around the 1,103cc Desmosedici V4 motor, essentially a Panigale V4 with the fairings stripped away. It pumps out a claimed 205 hp at 12,650 rpm and 88.3 lb-ft of torque at 11,500 rpm. With a curb weight of only 202 kg, its power-to-weight ratio is in superbike territory.
The Streetfighter V4 carries MotoGP-derived tech: winglets for downforce, Ohlins electronic suspension on the top S model, and advanced rider aids. In practice, it accelerates extraordinarily fast (0–60 mph in roughly 2.5 seconds) and keeps the rider pinned to the fuel tank in a blur.
Despite the naked layout (no screen), Ducati’s aerodynamics and high-revving engine give a formidable performance ride. Riders report the acceleration is “monsterous” and the handling is razor-sharp, thanks to a tight trellis frame and high-spec Ohlins suspension. The Streetfighter V4’s riding position is aggressive but not as tucked as the full supersport; it still channels huge power through wide bars.
According to Ducati, “205 hp @ 12,650 rpm, 417 lb wet weight” yields a stunning power-to-weight of 0.49 hp/lb. With electronics like cornering ABS, wheelie control, and up/down quickshifter, the Streetfighter V4 is a naked rocket that feels like a race bike you can also ride on the street. For enthusiasts wanting the ultimate naked sportbike, the V4 delivers intimidation-level performance and high-end components.
Full rider aids (ABS, wheelie control, quickshifter)
Cons
Aggressive riding position, less comfy daily
Very high price and running costs
Intimidating for less experienced riders
Minimal wind protection
3. Triumph Trident 660
The Triumph Trident 660 is a middleweight British naked roadster powered by a 660cc inline-triple. The revised 2025 model continues to use the 659cc engine rated about 80 hp at 12,250 rpm and 47 lb-ft of torque (90% of that torque is available from 3,600 rpm upward). Curb weight is around 190 kg (419 lb).
Triumph Trident 660
Specifications
Price: $8,595 (US MSRP)
Engine: 660 cc liquid-cooled inline 3-cylinder, 12-valve, DOHC
Power: 80 hp @ 12,250 rpm
Torque: 47 lb·ft @ 6,250 rpm
Weight (curb): 190 kg
Seat Height: 31.7 in (≈805 mm)
Fuel Capacity: 3.7 US gal (≈14 L)
For 2025, Triumph upgraded the Trident’s electronics and chassis: it adds ride-by-wire throttle, 3 riding modes, traction control, cornering ABS, a bi-directional quickshifter, and cruise control as standard. The styling is minimalist and modern, with a clean, round LED headlight and an upright riding stance.
On the road, the Trident’s smooth triple engine feels eager and tractable. It has a broad, linear torque curve, making it easy to ride in traffic or twisties. Reviewers note the Trident “pulls cleanly all the way to redline” and is rewarding to rev. The bike doesn’t have the pole-vault feel of a liter-class engine, but the triple’s character and sound give it an engaging personality. The seating position is relaxed and comfortable for long rides. The chassis and suspension are tuned for stability with a hint of sport: the 310mm front discs, paired with Nissin calipers, provide predictable stopping power.
In mixed riding, the Trident is agile enough to have fun in corners, yet smooth in the city. Its combination of 80 hp, manageable weight, and modern electronics makes it a very well-rounded naked bike for enthusiasts who value a lively engine and rider aids.
Pros
Smooth triple engine, strong mid-range
Lightweight and beginner-friendly handling
Comfortable upright ergonomics
Good value with modern tech (ride modes, TFT, ABS, TC)
High build quality for its class
Cons
Basic suspension, non-adjustable
Minimal wind protection
Limited long-distance comfort
Smaller fuel tank range
4. Yamaha MT-07
The Yamaha MT-07 has long been a bestseller for its simple fun and friendly power. The 2025 MT-07 receives its biggest update yet, with a new lighter frame, upgraded suspension, and new technology. It keeps the proven 689cc “CP2” parallel-twin, now making about 72.4 hp at 8,750 rpm and 49.4 lb-ft of torque at 6,500 rpm. Wet weight is about 183 kg, which is very light for this power.
Yamaha MT-07
Specifications
Price: $8,599 (US MSRP)
Engine: 689 cc liquid-cooled DOHC parallel twin, 4-valves per cylinder, YCC-T throttle
Power: 74.8 hp (55 kW) @ 9,000 rpm
Torque: 50 lb-ft @ 6,500 rpm
Weight (curb): 183 kg
Seat Height: 31.7 in (≈805 mm)
Fuel Capacity: 3.7 US gal (≈14 L)
The latest model adds a 41mm KYB fork, a new link-type rear shock, and for the first time on the MT-07, radial front brake calipers. It also introduces Yamaha’s ride-by-wire throttle (YCC-T), unlocking 3 ride-control modes and 2-level traction control. A semi-auto Y-AMT gearbox (with optional cruise control) is offered too.
Riding the new MT-07, testers highlight its peppy and fun nature. The engine is smooth and flexible, with a distinctive torquey pulse from its 270° crank. Power delivery is lively but manageable – as one reviewer noted, “it’s a lovely engine to use” that both novice and veteran riders enjoy. The chassis is more sporty than before: the heavier MT-09-like fork and stronger brakes mean it can be hustled harder into corners with confidence.
Ergonomically, it’s still very neutral and comfortable, with an upright stance that’s easy on long rides. One quirk is that without an IMU, the MT-07 lacks cornering ABS and slide control, but it does have standard ABS and lean angle indicator. Overall, the MT-07 offers an excellent ride for its class: sharp handling, a playful engine, and new tech keep it competitive and entertaining on city streets or twisty backroads.
Pros
Lightweight and agile
Comfortable upright ergonomics
Modern electronics: ride modes, traction control
Optional Y-AMT semi-auto with cruise control
Smooth and balanced power delivery
Cons
No engine power upgrade
Suspension can be harsh
Minimal wind protection
Y-AMT adds cost/weight
Electronics may turn off purists
5. Honda CB1000 Hornet
Honda revived the “Hornet” name in 2025 with the CB1000 Hornet – essentially a naked, performance-focused take on the CB1000R. It uses a version of the latest Fireblade’s 998cc inline-4 engine. In base form this makes about 148 hp and 76 lb-ft, but the sportier SP model we rode boosts output to 155 hp at 11,000 rpm and 78 lb-ft at 9,000 rpm.
Honda CB1000 Hornet
Specifications
Price: $10,999 (US MSRP)
Engine 1,000 cc liquid-cooled inline-four, DOHC, 16-valve, PGM-FI, throttle-by-wire
Power: 155 hp @ 11,000 rpm
Torque: 78 lb-ft @ 9,000 rpm
Weight (curb): 211 kg
Seat Height: 31.9 in (≈809 mm)
Fuel Capacity: 4.5 US gal (≈17 L, incl. reserve)
The SP variant also gains a quickshifter, Brembo Stylema front calipers (with 310mm discs), an Öhlins rear shock, and cosmetic upgrades (gold forks, wheels). The standard Hornet (non-SP) uses Showa suspension front and rear, and Nissin brakes. Both versions offer ride-by-wire throttle with three preset modes (Rain, Road, Sport) and two custom modes.
On the road, the CB1000 Hornet surprises with its agility and power delivery. Test riders have praised its engine as “almost uncharacteristically punchy for a Japanese inline-four”. The throttle response in Sport mode is very direct, which feels exciting and immediate.
The Hornet’s chassis is light and nimble: even a slight shift in body weight makes the bike lean over aggressively, so it carves through corners with enthusiasm. Meanwhile, at higher speeds, it remains stable. Reviewers found the front end to be “incredible” – very confidence-inspiring – and said they could ask the bike “for anything” in a turn. Braking is strong and smooth; the SP’s Brembo system, in particular, gives excellent feel with minimal effort.
In terms of rider experience, the Hornet blends café-racer style with sporty performance. It has an upright seat for comfort and a sleek tank design. One quirk noted is that the throttle initially feels snappy (with engine braking), which can be tamed by switching to a more conservative setting. The exhaust note is notably deep and exciting – an almost unbridled scream for a Euro5 bike.
Considering its liter-bike power and premium equipment (even the base model is well-equipped), the Honda CB1000 Hornet is regarded as an exceptional value naked bike. It offers enthusiastic riders a superbike-derived engine and chassis in a versatile package that shines on fast roads and twisties.
Pros
Strong inline-four power with smooth delivery
Sharp handling with Brembo brakes & Showa/Öhlins suspension
Upright, comfortable ergonomics for daily riding
Modern electronics: ride modes, traction control, quickshifter
Great value compared to European liter-class nakeds
Cons
Less powerful than top rivals (BMW S1000R, KTM Super Duke)
Suspension can feel firm on rough roads
Lacks cornering ABS and advanced IMU aids
Styling and exhaust design are not to everyone’s taste
6. BMW F 900 R
The 2025 BMW F 900 R is a mid-capacity naked roadster revamped to be more aggressive. It keeps the same 895cc parallel-twin (now Euro5+), rated at 105 hp @ 8,500 rpm and 68.6 lb-ft @ 6,500 rpm. Thanks to a new lithium battery and some weight reductions, its wet weight drops to about 208 kg (458 lb).
BMW F 900 R
Specifications
Price from US MSRP: $8,995 (base); around $9,690 for higher-spec 2025 trims
Engine: 895 cc liquid-cooled parallel twin, DOHC, 4 valves per cylinder, dry-sump lubrication
Power: 105 hp @ 8,500 rpm
Torque: 68.6 lb·ft @ 6,500rpm
Weight (curb): 208 kg
Seat Height: 32.0 in (~813 mm) standard; optional range from ~30.3 in (low seat) up to ~33–34 in (tall seat)
Fuel Capacity: 3.4 US gal (~13 L) usable; reserve ~0.9 gal (~3.5 L)
For 2025, BMW redesigned the riding position – handlebars sit lower, footpegs higher – giving a more forward stance. Suspension is fully adjustable (including optional Dynamic ESA), and higher-spec brakes are fitted. Electronics include ride modes and cornering ABS, plus optional Pro riding modes and a quickshifter in higher packages.
On the road, the updated F 900 R feels markedly sportier than before. Test riders report the new geometry makes it feel “much more involved” – there’s more weight on the front end and it turns in much quicker. The engine, while not wildly characterful, pulls strongly through mid-range and top-end. In Dynamic mode with the quickshifter engaged, the throttle connection is “as good as it gets” – very precise and responsive. The chassis inspires confidence: even in aggressive cornering the front stays planted and the bike feels composed.
BMW’s implementation of Brembo radial brakes (320mm discs) and Cornering ABS Pro give strong, reassuring stopping power. Overall, the 2025 F 900 R sheds its commuter-bike past and becomes a true sport naked: lower, lighter and more focused, earning comparisons to a “baby S1000R” with much more performance intent. Enthusiasts will enjoy its precise handling and electronic aids, making it worthy to mix it up with rivals like the Yamaha MT-09 or Triumph Street Triple.
Pros
Parallel-twin engine with strong midrange torque
Comfortable upright ergonomics, good for daily use
Full electronics: ride modes, traction control, TFT display
Optional Dynamic ESA suspension for better comfort & handling
Solid BMW build quality
Cons
Not as powerful as liter-class naked bikes
Engine character less exciting than triples or inline-fours
It can feel heavy compared to rivals in the midweight class
Extra features raise price quickly
7. Kawasaki Z900
Kawasaki’s Z900 is a mature entry in this list, but still a top seller for its blend of power, reliability, and affordability. It uses a 948cc inline-four engine tuned for strong midrange power. Kawasaki rates it at about 124 hp (91 kW) at 9,500 rpm and 73.1 lb-ft at 7,700 rpm. The bike tips the scales at around 212 kg (467 lb) curb weight, making it relatively light for a liter-class naked.
Kawasaki Z900
Specifications
Price: $9,999 (US MSRP)
Engine: 948 cc liquid-cooled inline-4, DOHC, 16-valve
Power: 124 hp @ 9,500 rpm
Torque: 73.1 lb-ft @ 7,700 rpm
Weight (curb): 212 kg
Seat Height: 31.9 in (≈810 mm)
Fuel Capacity: 4.5 US gal (≈17 L)
The Z900 comes with a trellis steel frame, fully adjustable 41mm fork and rear shock, plus modern electronics: ride modes, traction control, cornering ABS, and an optional quickshifter (in SE trim). Brembo-style calipers on dual 300mm discs give strong, progressive braking.
Riders praise the Z900’s engine as powerful and refined. It pulls cleanly from low revs and “sounds amazing” as you climb through the RPMs. The Kawasaki feels agile in corners thanks to a sporty chassis geometry, making it fun on canyon roads. Its ergonomics are sporty but not extreme, so it’s still comfortable enough for daily riding. Owners often note the bike’s balance and poise: it handles quick direction changes easily and inspires confidence under braking. The Z900’s strengths are its smooth power delivery and excellent brakes.
One user review put it simply: “It’s a Kawasaki – lots of power when you need it. Brakes are fantastic… open it up and wow”. For 2025 it remains largely the same design, but riders on forums note that with its strong engine and affordable price, the Z900 remains a very competitive naked bike. In short, the Z900 is a powerful, reliable roadster that delivers thrilling acceleration and precise handling in one value-packed package.
Pros
Smooth and powerful inline-four
Agile handling with a stable chassis
Comfortable upright ergonomics
Modern electronics: ride modes, traction control, ABS
Good value for performance
Cons
Suspension is basic, not fully adjustable
Minimal wind protection
Engine not as characterful as triples or high-end nakeds
Less premium compared to European rivals
8. Aprilia Tuono 660 Factory
The Aprilia Tuono 660 Factory is the premium variant of Aprilia’s middleweight naked, sharing its base with the RS 660 sportbike. It uses a 659cc parallel-twin (270° crank) tuned to about 105 hp (the base Tuono 660 makes ~95 hp) and 51 lb-ft.
Aprilia Tuono 660 Factory
Specifications
Price: $11,499 (US MSRP)
Engine: 659 cc parallel-twin, DOHC, liquid-cooled, Ride-by-Wire with 52 mm throttle bodies
Power: 105 hp @ 10,400 rpm
Torque: 51.6 lb-ft @ 8,400 rpm
Weight (curb): 181 kg
Seat Height: ~32.2–32.3 in (≈820–822 mm)
Fuel Capacity: ~4.0 US gal (≈15 L)
The Factory model adds a host of upgrades: fully adjustable 41mm Kayaba forks and Sachs shock, a lithium-ion battery (lighter than a regular battery), and full APRC electronics (6-axis IMU, cornering ABS, traction control, engine braking control) all standard. It also gets a quickshifter, a single-seat cowl, and striking graphics. Wet weight is around 181 kg (399 lb) on the Factory, only slightly more than the standard bike.
In riding, the Tuono 660 Factory is praised for blending agility with punchy performance. The high-spec suspension and lighter weight make it corner like a small superbike. One test report noted it was “a joy in the twisties, light and nimble”. The engine feels eager to rev and has a broad powerband suitable for both city commuting and canyon carving. Despite its sportier focus, the cockpit remains fairly upright and usable for everyday riding (it even has optional cruise control on some markets).
Brembo brakes on the front (4-piston calipers) give excellent stopping power. Overall, the Tuono 660 Factory is regarded as a top-tier 600-class naked: it offers superior hardware and tech for riders who want an authentic Aprilia sport bike experience without a full fairing. It earns its “Factory” name by delivering hardcore performance and handling in a versatile package.
Pros
Strong and torquey 659 cc parallel-twin
Lightweight and agile, superb handling in corners
fully adjustable Kayaba forks & Sachs shock
APRC suite with 6-axis IMU, cornering ABS, traction & engine braking control
Quickshifter and optional cruise control for convenience
Cons
Minimal wind protection due to naked-bike design
Suspension can be firm for daily commuting
Less power than liter-class nakeds
Higher price compared to standard middleweight nakeds
The BMW S 1000 R is the naked sibling of the S 1000 RR superbike. The 2025 model gives it a boost to 170 hp at 11,000 rpm (about 5 hp more than before) and maintains 84 lb-ft (114 Nm) of torque at 9,250 rpm. This comes from a 999cc ShiftCam inline-4, which has a wide powerband. With a fully-fueled weight of about 199 kg (438 lb), the new S 1000 R has an impressive power-to-weight ratio.
BMW S 1000 R
Specifications
Price: $15,440 (US MSRP)
Engine: 999 cc inline-four, liquid-cooled, DOHC, 16-valve, with BMW ShiftCam variable intake timing, Ride-by-Wire
Power: 170 hp @ 11,000 rpm
Torque: 84 lb·ft @ 9,250 rpm
Weight (curb): 199 kg
Seat Height: 31.8 in (≈810 mm)
Fuel Capacity: 4.3 US gal (≈16.5 L)
It also inherits sophisticated technology from the RR models: new 52° M Quick-Action throttle, Dynamic ESA electronic suspension, cornering ABS (ABS Pro), multiple rider modes including DTC and wheelie control, and now MSR drag-torque control as standard. A quickshifter (Shift Assist Pro) and adjustable engine braking are fitted, making it fully tricked out for track use if desired.
On the street and track, the S 1000 R delivers a high-adrenaline ride. The engine pulls very hard and revs eagerly to the redline, with a linear feel. Testers describe the throttle as precise and “supremely accurate” in Dynamic mode. The additional electronics make it forgiving: launch control and cornering ABS let you really exploit its 170 hp. The bike’s chassis – aluminum beam frame and Öhlins DDC suspension in higher trims – is extremely rigid, giving razor-sharp turn-in and stability at speed.
The riding position is sporty (clip-on style bars) but still more upright than a sportbike, and riders report it feels like a “stripped-down superbike”. In short, the S 1000 R is a track-capable monster with the convenience of a naked roadster. It blends brutal acceleration with top-shelf handling electronics, making it a top pick for experts who crave liter-bike power in a more accessible package.
Pros
Powerful inline-four with strong torque
Sharp, sporty handling with premium suspension & brakes
Track-ready performance while still usable on roads
High build quality and premium components
Cons
Aggressive ergonomics can be tiring for daily riding
High price point
A powerful engine may be intimidating for less experienced riders
Minimal wind protection on the naked layout
10. KTM 990 Duke R
KTM’s 990 Duke R is a completely new model for 2025 – a hardcore evolution of the 890 Duke range. It is powered by a 947cc parallel-twin (LC8c) that has been retuned to 128 hp (about 5 hp more than the standard Duke 990’s 123 hp) and 76 lb-ft of torque. Despite the big torque, KTM retains a high 10,500 rpm redline. Wet weight is around 190 kg (419 lb), making it very light for this power.
KTM 990 Duke R
Specifications
Price: $13,999 (US MSRP)
Engine: 947 cc liquid-cooled parallel twin (LC8c), 8-valve, DOHC
Power: 128 hp @ ~9,500 rpm
Torque: 76 lb-ft @ 6,750 rpm
Weight (curb): 190 kg
Seat Height: 33.1 in (840 mm)
Fuel Capacity: 3.9 US gal (≈14.8 L)
The Duke R is purpose-built for aggressive riding: it comes with top-tier WP Apex suspension all around (48mm open-cartridge fork with 143 mm travel and a new pushrod rear shock), a higher 830mm seat, and a steeper swingarm angle for better cornering. KTM also fits race-ready components like a 320mm front disc with Brembo Stylema calipers and MCS master cylinder. Even the tires are exotic Michelin Power Cup 2 (semi-slick road-legal track tires) for maximum grip.
On the road, the Duke 990 R feels like a street-legal superbike. Its upgraded suspension is much stiffer, which means it stays composed under hard cornering and braking. Riders report a noticeably higher center of gravity and a very neutral crouch, which together improve agility: the bike changes direction easily and has strong corner exit grip.
The engine is thrilling – KTM’s parallel twin has a rasping bark and pulls hard through the revs. With 130 hp in such a light package, straight-line performance is ferocious (0–60 in low 3 seconds territory). The Brembo brakes provide outstanding feel and stopping power, making it easy to carry speed into turns. Electronic aids include lean-sensitive ABS (with Street and Supermoto+ modes), cornering traction control, and riding modes (Rain, Street, Sport, plus optional Track mode).
The 990 Duke R is a niche machine aimed at enthusiasts who want maximum performance in a naked bike. It’s very fast and sharp, perhaps better suited to experienced riders or track days given its aggressive setup. In the street, it rewards those who love the raw KTM character: a twin-cylinder supermoto-inspired ride that punishes lazy inputs and praises precision.
KTM themselves call it “The Punisher” due to its fearless nature. In summary, the 990 Duke R delivers on its promise of “more aggression, exhilarating output” by combining 130 hp, premium suspension and brakes, and a razor-sharp chassis – a true road-legal race weapon.
Pros
Powerful 947 cc parallel-twin with strong midrange torque
Lightweight and extremely agile, excellent for twisty roads
Race-focused suspension (WP Apex) and Brembo Stylema brakes
Sharp, responsive handling and precise chassis
Minimalist naked-bike design for pure riding feel
Cons
An aggressive riding position may be uncomfortable for daily use
Minimal wind protection
Firm suspension can feel harsh on rough roads
High maintenance and running costs
Conclusion
Each of these ten naked motorcycles brings its own flavor of performance and excitement. From the lightweight Aprilia Tuono 457 to the litre-class monsters like Ducati’s Streetfighter V4 and BMW’s S 1000 R, all share one goal: an unfiltered, adrenaline-fueled ride. They showcase how the 2025 models push the envelope in power, electronics, and handling. Enthusiasts will appreciate the detailed engineering in each, whether it’s a triple’s smooth torque, a twin’s snarl, or an inline-four’s outright rush.
Choosing the best depends on your style: some may crave the dueling blade of the Streetfighter’s V4, while others may prefer the fearless 990 Duke R. Regardless, these top ten naked bikes guarantee an involving and thrilling ride that pure sportbikes can’t match – and they all embody the latest tech and performance in a head-turning naked package.
Cornering on a motorcycle is super fun, but it can be tricky, especially if you've only been riding for a few months. A lot of new riders mess up turns or lose control because they make common errors. Let's talk about five of the most common mistakes people make when cornering. Knowing what these are and how to fix them will not only keep you safer but also make you feel way more confident when you're going through turns.
5 Common Motorcycle Cornering Mistakes
a rider on a touring motorcycle leaning into a curve.
1. Riding Too Fast (Improper Corner Entry Speed)
One of the biggest mistakes is coming into a turn going way too fast. If you do that, you'll quickly have to slam on the brakes or lean way over, which usually means you'll go off course or lose control.
The key is to start your turn at a speed where you can smoothly speed up as you come out of the corner. Basically, you should slow down a bit before you start turning. Like, maybe 10–15% slower than you would go on a straight part of the road. That way, you have some space to easily give it some gas through the curve.
One coach said that new riders often go into a turn too fast for how much they feel okay leaning. If you realize you're going in too fast, don't freak out and slam on the brakes. Instead, just try to let off the gas little by little to slow yourself with the engine braking, and then lean smoothly.
Trust that your bike will grip the road and lean a bit harder. This might be the only way to stay on the road if you're already going too fast for the turn.
Riding Advice
Always brake before you get to the turn, not while you're in it. Once you start turning, keep the gas steady. Don't suddenly grab the brakes or let off the gas in the middle of the turn, because that can make your bike unstable.
Keep some extra speed for when you exit the turn. If you start a little slower, you can speed up sooner and safely get out of the turn.
2. Poor Cornering Line (Bad Apex and Lane Choice)
Beginners often don't pick the right path through turns. Usually, the safest way to go is to start on the outside, hit the apex (tightest part) of the turn on the inside, and then go back out toward the outside of your lane.
A typical mistake is turning in too early. When riders cut the corner and hit the inside part too soon, their bike ends up pointing toward the outside edge of the road too early. To stay in their lane, they have to lean even more after they've already passed the tightest spot – which is exactly when they should be straightening up.
This often makes them slow down or even crash. But if you turn in a bit later, it naturally points your bike where you want to go when you exit the turn, which makes it safer and faster.
Common line errors include:
Turning in too soon: Cutting inside too early sends the bike off the road on the way out.
Staying too far outside: Forgetting to get close to the inside makes you turn more and kills your speed.
Switching lanes a lot: Moving back and forth between different spots in linked turns can mess up your control and how you see things.
The green path straightens the curve, while the red path (too early to apex) leads off the road.
If you plan your path, you make the curve straighter and save some grip. Ken Condon, who has been teaching people how to ride for 25 years, says that riders who turn in too soon often end up going toward the outside of the road, and that's a common reason why people crash in corners.
A better idea is to wait a little bit to turn in. Look ahead to where you want to go, and then turn the bike so it naturally points where you want to exit. After a while, aiming for the right spot to start turning (usually near the outside edge of your lane) and the tightest spot in the middle of the turn will become easy.
3. Fear of Leaning (Stiff Body Position)
A lot of new riders are scared to lean the bike over enough. This fear often makes them stiff.
If your arms or body are stiff, the bike won't want to turn, and you won't lean as much as you need to. But the truth is, motorcycles need to lean to stay balance centripetal forces in a turn. When you're in the right position, it makes it way easier to lean and stay stable.
To avoid this, keep your upper body chill and look where you want to go. Bend your elbows and let the bike tilt under you. Slide your hip on the inside of the turn a bit toward the tightest spot, and point your knee on the inside toward where you're turning. Moving your body like this can actually make you lean 10–15° less for the same speed.
In other words, if you lean your body in and don't hold on so tight, the bike will lean more easily. Riders who stay stiff make the bike stay more upright, so it takes more effort to turn.
One coach says, If you fight the lean with your arms or body, the bike won't respond as well. Instead, trust that your motorcycle can lean safely. Start with small leans in easy turns and get more confident over time.
One rider with a lot of experience says that once you decide to lean, you can actually lean quickly and smoothly. Do some practice in a parking lot or do slow exercises like figure-8s to get used to how it feels when the bike is leaning.
If you're jerky with the gas or brakes while you're turning, that's a big reason why you might run wide. Once you're actually in the turn, try to keep the gas steady (or smoothly roll it on).
If you suddenly speed up or crank the throttle after you pass the middle of the turn, the bike will get pushed to the outside because the weight shifts off the front tire.
On the other hand, if you chop the throttle (close it super fast), the weight goes forward, which messes with the suspension and could make you lose traction in the front.
Same deal with grabbing the brakes when you're leaning – you could lock up the wheel or screw up the suspension.
Someone wrote in a riding guide, When you start a turn, keep the gas steady – speeding up fast pushes the bike wide, and closing the throttle too fast can cause compression and make you lose grip.
Don't slam on the brakes mid-turn: Braking hard when you're leaning over makes the suspension dip down, and the bike will drift. If you need to slow down, just let off the gas a little early, or use the engine to slow you down by staying in a lower gear.
Don't just kill the throttle: If you give it too much gas, you'll go wide. If you cut the gas completely, the front tire will dig in and maybe skid. Instead, if you're going too fast, just ease off the gas gently and trust the bike to slow down.
Being smooth with how you control things keeps the suspension balanced. If you mess up a bit and start going wide, keep looking where you want to go and steer a little to fix it. Don't freak out – small steering changes and keeping the gas steady can usually get you back on track without a problem.
5. Poor Vision (Target Fixation)
You go where you look. A lot of new riders mess up by only looking at the road right in front of the tire or staring at something they want to avoid. That’s called target fixation – your eyes lock on something (like the lane lines, some paint, or something in the road), and your bike goes right toward it.
The fix is to look through the turn: focus on where you want to end up (and check the middle of the turn) instead of the stuff you don’t want to hit. One training thing suggests looking at three points when you turn: look through to where you're going, glance at the middle of the turn, and then check where you are right now.
Looking where you should makes turning way safer. For example, starting on the outside of the lane gives you a better view of the turn, so you see problems and slow down before it's too late. If you look far ahead, you'll stay calm, and the bike will naturally follow where you're looking. But if you stare at a ditch or the side of the road, you might end up steering right into it without even meaning to.
Like one teacher said, Stare at the EXACT spot you want to go... and if you're doing okay, the bike will get you there.
Riding Advice
Keep your head up and look through the turn to where you want to come out. Try moving your eyes a little from side to side as you go through the turn – from where you're going to the side of the road – so you aren't just staring at one thing.
Start slowing down way before the middle of the turn. If you see rocks or oil, slow down even earlier. When you look ahead, you can change how you're turning or how fast you're going slowly, so you don't have to panic later.
If you get good at looking ahead, you can fix problems early and not have to steer crazy in the middle of the turn, which could send you off the road.
Conclusion
If you're new to riding, you can get good at turning safely just by keeping these things in mind.
Always start turns at a safe speed (slower than you think you need to go). Pick a smooth path, starting outside, going inside, and then going outside again, waiting to turn in so the bike points to where you want to end up. Relax and let the bike lean by moving your weight slightly. Keep the gas steady and don't do anything sudden while you're turning. And look through the turn to where you want to go, not at the stuff you're scared of – that'll stop you from target fixation.
If you practice and pay attention to how you're doing things, every turn will feel controlled and confident instead of a gamble.
Everyone messes up sometimes, but if you know these five common mistakes, you can really cut down on the chances of it happening. Pay attention, ride safe, and let your eyes show you the way – you’ll be making smooth turns instead of ending up on the side of the road.
Not too long ago, hardly anyone talked about electric ATVs for kids. Now? They’re everywhere. Kids love them because they’re fun and cool. Parents like them too—no gas, no loud engines, no stress. Just charge it, and off they go. Some kids are just learning to ride. Others already race around the yard like little pros. Either way, an electric ATV is a solid pick. It’s safe, easy to use, and honestly? Kinda awesome.
This guide breaks down our top 5 electric ATVs for kids in 2025. We’re keeping it simple, so you can find one that fits your kid’s age, how they ride, and what kind of fun they’re after.
Why Should Kids Choose an Electric ATV?
More and more kids are riding electric ATVs these days—and honestly, it makes sense. They’re quieter, easier to use, and don’t need gas or oil. For parents, that means fewer things to worry about. And for kids? Just more time to ride and have fun.
Compared to the old gas-powered ones, electric ATVs feel way more kid-friendly. They’re cleaner, safer, and simpler all around. That’s probably why so many families are switching to them.
1. Cleaner and Eco-Friendly
Electric ATVs run on rechargeable batteries, which means they produce zero emissions. There’s no fuel, oil, or exhaust involved. This makes them a better choice for the environment and safer for children to ride near the house, in the backyard, or on trails without worrying about fumes.
2. Quieter Operation
Gas ATVs can be loud, which may disturb neighbors or startle young riders. Electric ATVs are much quieter, producing minimal noise. This makes them more family- and neighborhood-friendly, and it also lets kids focus better on riding safely.
3. Easier to Maintain
Electric models have fewer moving parts, no need for oil changes, no spark plugs, and no fuel tanks. This translates into less maintenance and fewer breakdowns, which is great for parents who don’t want to deal with complex repairs.
4. Safe for Beginners
Most electric ATVs come with speed limiters, parental remote controls, and multiple riding modes (such as beginner, normal, and sport). These features allow parents to gradually train their kids, offering a safer learning curve.
5. Instant Torque and Smooth Acceleration
Unlike gas engines that take a moment to respond, electric motors deliver instant power. This makes the ride smoother and easier to control, especially for younger kids still learning how to steer and balance.
6. Modern Features Kids Love
Many electric ATVs now come with Bluetooth speakers, LED headlights, app controls, and even customizable colors. These fun tech extras not only keep kids engaged but also enhance the overall riding experience.
7. More Indoor/Backyard-Friendly
Because they’re quieter and cleaner, many electric ATVs can be used in large indoor spaces or home yards, unlike gas ATVs which may not be allowed in such areas.
5 Best Electric ATVs For Kids
1. UTV‑MX
UTV‑MX
A rugged-looking, two‑seater electric UTV that brings real off‑road feel:
Power & Battery: 24 V system (2×12 V), dual‑motor 100 W (some models 4×12 V motors), 4WD — great for traction.
Features: Four‑wheel suspension, EVA (noise‑reducing) tires, opening doors, LED lights, MP3/Bluetooth/audio, seat belt, rear storage.
Run Time & Speed: About 60–90 minutes per charge; speeds up to ~8 km/h (5 mph).
Age & Capacity: Kids 2–6 years, roughly 50 kg load (110 lb), ideal for siblings to share.
Pros
Two-seater for shared fun
Parental remote & audio features
Good run time and off-road handling
Cons
Assembly can be tricky
Battery charge time is long (8–12 hr)
Heavier than simple ATVs
Best for: Families with younger kids (ages 2–6) who want shared, real-feel UTV experience with music, lights, and parental control.
2. Razor Dirt Quad SX McGrath
Razor Dirt Quad SX McGrath
An iconic ride-on quad inspired by pro-racer Jeremy McGrath:
Power & Battery: 350 W high‑torque motor; 24 V lead‑acid battery; twist‑grip throttle; forward/reverse switch.
Speed & Ride Time: Up to 8 mph; up to 40 min continuous high-speed, or 80 min on low.
The ATV world is entering a new era. Electric ATVs are growing in popularity, challenging traditional gas-powered models. For recreational riders, choosing between a gas ATV and an electric ATV involves weighing trade-offs in performance, cost, maintenance, and environmental impact. This article dives deep into the key factors to help you choose.
Gas vs Electric ATVs
Ride Feel & Performance
Gas ATV Highlights
2025 Polaris Sportsman 570
Raw power and speed: A typical mid-range ATV like the 2025 Polaris Sportsman 570 packs around 44 HP from its ProStar 4-stroke 570 cc engine.
Thrilling throttle response: Gas engines build rpm and come alive as you rev them. Off the line, acceleration is impressive—revving and roaring feel powerful.
Community favorites: Many riders on forums like Reddit praise the Sportsman 570 as “powerful” and “nimble,” ideal for mixed terrain.
Electric ATV Highlights
DRR EV Stealth
Instant torque: The motor delivers full power instantly; no need to rev or shift gears. Models like the DRR EV Stealth offer smooth, electric thrust ideal for tight trails.
Quiet operation: Electric ATVs run with minimal noise, perfect for camping, hunting, or enjoying nature in silence.
Heavier but stable: Electric quads weigh more due to batteries (typically ~200 kg), but the low battery placement improves stability and handling.
Range & Refueling vs. Recharging
Gas ATV Advantages
quick refueling
Quick refueling: Fill your tank in minutes. Expect 80–100 miles of range per tank—a major advantage for long rides or multi-day adventures.
Consistent consumption: With typical fuel efficiency of 10–20 MPG, you’ll spend roughly $3–$4/hour riding, based on 2025 U.S. gas prices around $3.75/gal.
Electric ATV Advantages
Decent daily range: The DRR EV Stealth, for example, offers about 35 miles per charge, with a top speed near 35 mph. Charging takes around 6 hours on 120 V.
Lower energy cost: Charging 4 kWh at $0.15/kWh costs just $0.60, versus dollars for a gallon of gas—huge savings per mile.
Home-friendly charging: Plug into a household outlet overnight. Optional 240 V cuts charging time roughly in half. No fast charging available yet.
Gas ATVs: Most models cost $6,000–$11,000. The Polaris Sportsman 570, for instance, is priced around $10,999. More powerful or specialty models run higher.
Electric ATVs: The DRR EV Stealth is about $9,299. Prices climb if you add higher-capacity batteries or premium components. In Europe, VAT can push prices higher.
Operating Costs
Gas fuel cost: Expect to spend $3–$4 per hour riding.
Electric power cost: A full charge is usually under $1, translating to mere tens of cents per hour—significantly cheaper in the long run.
Maintenance & Repairs
Gas ATVs require oil changes, filters, spark plugs, coolant checks, and engine servicing. Long-term maintenance can add thousands in costs.
Electric ATV maintenance
Electric ATVs are simpler under the hood—no oil, spark plugs, or filters. Brake and suspension are the main maintenance items. Battery lifespan is typically 3,000+ charge cycles, meaning minimal long-term cost.
Environment & Noise
Environmental Impact
Gas ATVs emit CO₂ and pollutants—one full-day ride can produce over 20 kg of CO₂. This matters in protected areas.
Electric ATVs: Zero tailpipe emissions. They’re quieter to produce lower noise pollution and reduce environmental disturbance. Charging emissions depend on your grid, but electric efficiency is high.
Noise Comparison
Gas ATVs roar at around 90–110 dB, loud enough to disturb wildlife and damage hearing.
Electric ATVs hum at approximately 60–70 dB, similar to lawnmowers or conversation—much friendlier in natural settings.
Real-World Use Cases
Feature
Gas ATV
Electric ATV
Purchase Price
$6,000–$11,000+
$9,000–$12,000+, premium higher
Range
80–100 miles per tank
30–40 miles per charge
Refuel/Recharge
Minutes
4–8 hours (120V); faster on 240V
Running Cost
$3–$4/hour
Under $1/charge
Maintenance
Regular service needed
Minimal, simple upkeep
Ride Noise
Loud engine noise
Whisper-quiet
Eco & Trail Impact
Highest emissions/noise
Lowest emissions/noise
Ideal Use
Long rides, remote terrain
Trails, camping, eco-friendly zones
Gas ATV: Ideal for long-distance rides, remote areas, and heavier tasks. Their wide availability and quick refueling make them a reliable choice.
Electric ATV: Perfect for shorter outings, environments requiring quiet operation (like campgrounds or wildlife areas), and lower maintenance. Great for learning and daily fun.
Final Verdict: Which One Is Best?
Choose a Gas ATV if…
You go on long-distance or multi-day rides
Refueling convenience is key
You need a rugged machine for heavy terrain
Choose an Electric ATV if…
You prioritize quiet, eco-friendly riding
You usually take shorter, local trips
You want lower running/maintenance costs
For many riders, owning both types could be ideal: a gas ATV for long adventures and an electric ATV for nearby, eco-friendly fun.
What Does 2025 Bring?
Battery improvements will deliver lighter packs, faster charging, and longer range.
Government incentives (especially in Europe) are increasing, pushing buyers toward electric options.
Major brands like Polaris, Yamaha, Honda, and Can-Am are actively developing and testing electric ATV models—expect more affordable, mass-market e-quads soon.
By the end of 2025, you might find electric ATVs priced near $7,000 with 50+ mile range and 2–3 hour charging capability, making them a strong competitor to gas bikes.
Safety Reminder
No matter which type you choose, safety always comes first:
Wear a helmet, eye protection, gloves, and appropriate gear.
Learn trail etiquette—don’t race near others, respect wildlife and property.
Take basic riding lessons if you’re a beginner.
Final Thoughts
Gas and electric ATVs each offer unique advantages.
Gasoline ATVs provide long range, quick refueling, and time-tested power and toughness. Electric ATVs deliver instant torque, quiet operation, and lower running costs – at the expense of shorter range and longer recharge times.
Maintenance on an e-ATV is typically easier and cheaper (no oil changes), and environmental impact is much lower during use. Price-wise, gas ATVs are generally cheaper to buy, but in many cases electric models can save money over years of ownership.
The right choice depends on your riding style and values. If you ride remote trails for days at a time, a gas quad still offers unmatched freedom. If you do shorter rides, care about noise or emissions, and like new tech, an electric ATV could be the future of trail riding.
With rapidly advancing technology and more models coming each year, 2025 is a pivotal time – the electric ATV market is growing fast, and even traditional ATV fans are noticing the new options out there.
Motorcycle riders understand that riding fast demands full attention at all times. A scary but unusual problem they might experience is the motorcycle death wobble. This happens when the front wheel or handlebars start shaking at high speeds. Even though it sounds frightening, the positive news is that death wobbles are rare in today’s motorcycles and can be stopped with good maintenance and careful riding habits.
This article explains what triggers motorcycle death wobble, how you can prevent it, and what steps to take if you face it.
What is the Motorcycle Death Wobble?
Motorcycle death wobble
The death wobble (also called a speed wobble or tank slapper) is a rapid front-end oscillation of a two-wheeled vehicle. In technical terms, it is a 4–10 Hz oscillation in the steering geometry often caused by a resonance between the bike’s speed and a steering disturbance.
In plain language, it feels like the front wheel violently shaking back and forth at high speed. This typically occurs when the front wheel is momentarily lifted (for example, from a bump or hard acceleration) and then returns to the road under misaligned forces. Instead of settling straight, the handlebars overshoot and swing like a pendulum. When a wobble builds up, the bike may begin to weave or dart laterally, making steering almost impossible.
Death wobbles are extremely frightening to riders, but they are uncommon on well-maintained motorcycles. Most riders will never actually experience one. The key is that some imbalance or looseness in the bike’s front end lines up with speed to create a positive feedback loop.
If there is too little steering damping or a significant disturbance, the oscillations can amplify until the bike pitches erratically. At that point, riders often instinctively grip tighter or brake hard, but fighting the wobble usually makes it worse. Instead, the accepted best response is to keep a loose grip, ease off the throttle, and let the bike settle.
Common Causes of Motorcycle Death Wobble
Motorcycle death wobble happens when one or more factors upset the motorcycle’s natural stability. Typical causes fall into three categories: mechanical issues, environmental factors, and rider behavior. In practice, multiple factors often interact. For example, a rough road (environmental) combined with a slight misalignment (mechanical) at high speed (rider/behavioral) could trigger a wobble.
Mechanical Factors
uneven motorcycle wheel
Uneven or poorly balanced wheels and tires are a leading cause. An out-of-round tire, bent rim, or heavy spot on a wheel creates cyclic forces that can excite the steering at speed. Similarly, worn-out or loose steering components – such as head bearings, steering stem nuts, axle pinch bolts, or triple-clamp hardware – let the front end flop or develop play.
For instance, worn steering head bearings or a loose triple-tree clamp can allow slight steering drift that turns into a wobble. Bad wheel bearings or improper axle alignment can also introduce slop. In some designs (notably certain Harley-Davidson cruisers), defective engine mounts or rear suspension linkages have been implicated in amplifying rear-end vibration into a front-end shake.
Finally, inadequate suspension setup – such as sag that’s too low/high or sprung weight mismatched to the bike, may contribute. If the front forks are too soft or misadjusted, the wheel can move freely and start to shimmy after a hit.
High speed itself is a factor: going very fast can “displace the alignment” of the bike and magnify any disturbance. In fact, one rider wrote that simple bumps at high speed turned into a wobble because the bike’s alignment was shifted by velocity.
Rider Behavior
How a rider accelerates, brakes, and handles the bike affects stability. Sudden throttle openings or abrupt braking can shift weight and change wheel traction unpredictably. For example, popping a wheelie or accelerating aggressively can cause the front wheel to rise and then slam back, initiating a wobble.
popping a wheelie
Riding too fast for conditions is a top contributor – in U.S. crash data, 35% of fatal motorcycle accidents involved speeding or excessive speed for conditions. High speed also means longer reaction time for small disturbances. A tense grip on the bars or panicky inputs during a wiggle will usually aggravate the oscillation. Improper loading of luggage or a passenger can unbalance the motorcycle and make wobbles more likely.
In short, riding style and speed must match the bike’s stability margin – going beyond it can turn a minor shimmy into a full-on death wobble.
How to Prevent Motorcycle Death Wobble
Avoiding the motorcycle death wobble comes down to proper upkeep and careful riding. Keeping the front end secure, balanced, and steady helps prevent most mechanical problems. Riding lowers the chance of triggering this issue. Check out these tips to stay safe:
1. Check Tires and Wheels
check tires and wheels
Make sure to check tire pressure and tread. Low-pressure tires or uneven wear can cause wobbling.
Always inflate tires to the manufacturer's recommendation and replace them if the tread is uneven or worn down.
Get your wheels balanced by a professional when you put on new tires. Even a tiny imbalance can lead to serious vibrations at high speeds.
Look over the wheels to spot any bends or dents in the rims and ensure spokes, if your wheels have them, are straight and tensioned. A balanced wheel setup reduces the risk of disturbances from the start.
2. Check and Adjust Steering Parts
Before riding, check the steering head for any looseness. Hold the forks and move the bike back and forth to see if the head bearings are loose.
Worn or loose bearings should be fixed or swapped out by a skilled mechanic.
Make sure the steering stem nut is tightened. Confirm that all key parts on the motorcycle, like the triple clamps, handlebar clamps, axle nuts, and pinch bolts, are fastened. Loose components in this area may cause wobbling while riding.
Replace damaged or rusty hardware, and apply threadlocker on bolts if needed, because vibrations can make bolts come loose over time.
3. Service Suspension and Frame
Suspension should be adjusted to match the bike’s weight and purpose. Set fork sag and spring preload according to the owner’s manual or a suspension technician’s guidance.
If the suspension is worn, leaking, or bottoming out, have it rebuilt. The front forks must be aligned and sliders in good condition so that the wheel tracks straight.
Check that the steering head bearings, fork sliders, swingarm, and frame mounting points have no cracks or excessive wear. A bent frame or misaligned steering geometry (for instance after a crash) can cause wobble. Correct any such damage.
4. Use a Steering Damper
motorcycle steering damper
Many modern motorcycles either come with or can be fitted with an aftermarket steering damper (stabilizer). A damper is a shock absorber for the steering, which suppresses sudden oscillations. Installing a quality steering damper is highly recommended for high-speed riding or performance bikes. It will not cause wobble, but it adds valuable damping to prevent a shake from building.
For bikes that did not originally have one, consider adding either an adjustable steering damper or even simple bar-end weights. Racers and off-road riders often run adjustable dampers so they can tune it for their weight and speed range. In short, a well-chosen damper (properly set) greatly raises the speed threshold at which a wobble can occur.
5. Balance Luggage and
If you carry gear, make sure the load is balanced left-to-right and front-to-back.
Overloading the rear or having an unsecured heavy tank bag can alter steering feel. Strive to keep the center of mass low and centered. Evenly distribute any panniers or top cases, and avoid exceeding the bike’s maximum load capacity. A heavy, loose item can shift its weight during a ride and send a wake of oscillations through the chassis.
6. Ride with Good Technique
Stable riding form helps prevent and manage wobbles.
Keep a light, relaxed grip on the bars – a death wobble will feel much worse if the rider fights it with a death grip. Sit upright with knees gently on the tank; gripping the tank with your legs will help stabilize the bike. Maintain a smooth throttle and brake application. Avoid jerky steering or shifting your weight suddenly at high speed. In corners or on uneven pavement, try to keep the suspension in its mid-range of movement rather than in hard compression or extension.
7. Be Cautious in High-Risk Situations
motorcycle in poor weather
When road conditions or weather are poor (rain, gravel, crosswinds, etc.), slow down and anticipate bumps. A high-speed bump that you would normally roll over smoothly can trigger a wobble if conditions align.
In mountainous or unfamiliar terrain, be especially alert for rail crossings, large stones or washboard surfaces. And always ride within your and your bike’s limits. Remember that on a motorcycle, excessive speed magnifies every small issue.
8. Regular Maintenance Schedule
Don’t neglect routine services.
Check steering play and tire health before every long trip. Have your mechanic torque the forks and wheel bearings annually. Replace aging steering head bearings or fork seals proactively.
If you notice any unusual vibration or shimmy – even a slight one – have it checked immediately. Early intervention is key. Many documented wobble incidents have occurred on bikes with neglected maintenance.
What to Do If a Wobble Starts
Even with precautions, a rider may occasionally encounter the beginnings of a speed wobble. It’s important to stay calm and respond correctly. Do not grab the bars or jam on the brakes, as that often makes the oscillation worse. Instead:
Loosen your grip and keep your arms relaxed.
Gently roll off the throttle to slowly decelerate. Maintain speed only so you don’t lose balance, then coast.
Look ahead – focus on the road where you want to go, not at the wobbling wheel.
Shift your weight slightly back or adjust your posture (for example, by pulling back on the handlebars) to lighten the front end.
Let the motorcycle slow itself down. Usually the wobble will naturally subside as you reduce speed. Once stable, pull over to inspect the bike.
Experts often compare it to a shuddering car after a flat tire: the best fix is slow, steady deceleration and avoiding overcorrection.
If the wobble does not stop, it is generally safer to continue slowing down in a straight line than to pull out of the road or suddenly jump off the bike. However, if an accident seems inevitable, safely leaping clear may be less dangerous than fighting the bike.
The motorcycle death wobble is a frightening but preventable phenomenon. By keeping tires balanced, suspension and steering properly maintained, and by riding with good technique, most wobbles can be avoided entirely. Modern bikes with well-tuned suspensions and optional steering dampers make full tank slappers very rare.
Key safety advice is to ride within the motorcycle’s capabilities – especially on unfamiliar or rough roads – and to inspect your bike regularly. According to safety data, excessive speed plays a role in a large share of motorcycle crashes, and high speeds can trigger wobbles. In practice, that means going easy on the throttle, especially over bumps.
Don’t let the thought of a death wobble stop you from enjoying your rides. If your motorcycle works and you stay cautious, it’s pretty rare to encounter. Stay focused, ride, and your bike will stay steady out there on the road.
Today's motorcycles pack a punch with engines built to rev high, but many riders aren't clear on the ideal operating range. Engines work best within specific RPM (revolutions per minute) ranges to deliver power, efficiency, and durability. Riding too slow in a high gear (called lugging) or always pushing the red line can damage the engine.
In this article, we'll break down why the right RPM is crucial, the dangers of lugging, the pros and cons of high RPM vs. low RPM, and how to use the full rev range to keep your bike running for years to come.
Understanding RPM and Engine Performance
RPM (Revolutions Per Minute) measures how fast the engine’s crankshaft is spinning. In a four-stroke motorcycle engine, the pistons fire in sequence (“bang, ding, ding, dong” on a four-cylinder) to turn the crankshaft.
Each firing stroke produces power, and the engine’s power and torque curves depend on RPM. Every engine has a powerband, a range of RPM where it makes the best torque and horsepower. Riding within that range usually gives the smoothest power delivery and efficiency.
On most street bikes, the ideal cruising RPM might be around 2,000–3,000 RPM (often called the “Goldilocks zone”), though this varies by bike type. For example, sportbikes typically make peak power at 7,000–10,000 RPM, while cruisers run smoothly at 2,500–4,000 RPM. Always consult your owner’s manual or torque curves for your specific model, but a good rule of thumb is to shift so the bike stays around half of its maximum RPM.
motorcycle tachometer
Keeping RPM in a healthy range means the engine runs hot enough to burn fuel cleanly, without constantly redlining. Using the tachometer (“rev counter”) helps: stay out of the red zone, but don’t baby the throttle either. Running at ultra-low RPMs can actually prevent the engine from reaching ideal operating temperature and burn out unburned fuel, which leads to problems (see below).
In short, proper RPM management ensures smoother riding, better fuel efficiency, and longer engine life.
What Is “Lugging” and Why Avoid It
“Lugging” refers to forcing the engine to move the bike at too low an RPM in a high gear. For example, trying to climb a hill in 6th gear at 2,000 RPM is lugging. In this situation, the throttle is open but the engine can’t rev up enough.
The motorcyclist is climbing the hill at low RPMs
Mechanics compare lugging to “hammering the engine parts with every explosion”. Every combustion stroke pushes hard against the engine load, straining parts:
At very low RPM under load, each power stroke delivers a strong jolt. This can make the pistons “slap the side of the cylinders hard” and pound on the crankshaft’s rod bearings. Over time this hammering causes wear on pistons, rings, bearings, and even the transmission.
Bearing and Clutch Wear
The rod bearings and crankshaft main bearings see extra torque spikes. Even the transmission and clutch (which absorb some shock) can wear faster. The Stack Exchange engineering explanation says lugging “racks on the rod bearing/journals... and if done enough, could probably break piston rings”.
Engine Knock (Detonation)
Lugging often leads to a heavy throttle at low RPM. This can cause fuel to ignite prematurely (ping or knock) because combustion pressure rises quickly. Notably, engine expert Kevin Cameron points out that detonation is “less of an issue at high RPM”, implying it’s more of a risk when RPM are low. Low-speed knock can damage pistons and valves.
Incomplete Combustion and Carbon
At low RPM, the engine runs cooler and the exhaust may not be hot enough to burn off byproducts. This leads to soot and carbon building up on pistons, valves, and spark plugs. Over time, heavy carbon deposits foul plugs, reduce compression, and hurt performance.
Shudder and Response
Lugging can make the bike feel jerky or shaky. You might feel vibrations or “judder” if the cylinders don’t fire smoothly. The engine struggles to pull the load, so throttle response is sluggish.
In summary, lugging is like using the engine as a hammer. It doesn’t immediately destroy the engine, but it causes unnecessary wear and stress. If you want your engine to last, avoid constantly riding in a gear too high for your speed.
The fix is simple: downshift or slip the clutch and rev up a bit before pulling away. For instance, many mechanics advise starting from a stop at around 1,500–2,000 RPM before releasing the clutch. This little extra rev means the engine can work smoothly, not under constant strain. Over time, releasing the clutch with gentle throttle and maintaining at least ~1500 RPM from a standstill becomes second nature.
High RPM vs. Low RPM
Balancing engine speed is a trade-off. Below is a summary of the pros and cons of running at higher RPM versus very low RPM (lugging):
High RPM vs. Low RPM
Carbon Control
High RPM generates higher exhaust and chamber temperatures. That heat can burn off carbon deposits.
In fact, one maintenance guide notes that “increasing the engine RPMs helps the motor to burn-off carbon buildup” when the engine is at operating temperature. In practice, taking your bike for a spirited run (when safe) can help clear out gunk.
By contrast, prolonged low-rpm riding (especially stop-and-go traffic) encourages carbon to accumulate, which can foul cylinders and valves.
Engine Heat and Efficiency
Operating at very low RPM (especially cold or in high gear) can cool parts of the engine below ideal. Fuel may not vaporize fully and residues stick around.
Higher RPM keeps oil circulated and engine bay warmer, which actually improves efficiency by ensuring more complete combustion and proper oil flow.
Mechanical Stress per Stroke
At high RPM, pistons cycle more times per minute, so the total wear can be higher over time. However, each individual power pulse occurs when moving fast, so pressure tends to be released more smoothly.
At low RPM, there are fewer power strokes but each one hits hard. That means more force per explosion, which can create “hot spots” and stresses that lead to knock or even piston damage (the dreaded “kaboom”).
Fuel Consumption
Generally, riding at higher RPM burns more fuel (since the engine is doing more work overall). That means fuel economy can drop if you redline constantly. However, lugging isn’t great for economy either. Incomplete combustion and engine strain at low RPM can result in inefficient fuel use.
Most manufacturers note that best mileage often comes in the mid-range – for some bikes around 4,000–5,000 RPM (though the exact figure varies widely by engine design). Riding in the optimal part of the powerband (where torque peaks) usually yields the best fuel economy without lugging.
Many modern bikes use traction control (TC) or other stability systems. These systems often intervene based on wheel speed and engine torque.
While specifics vary, note that at higher RPMs the engine’s response to throttle is quicker, and TC can modulate power pulses at a faster rate. At low RPM, the system has less resolution to work with. In general, though, it’s safest to keep steady revs rather than strain the engine.
Noise and Vibration
High revs mean more engine noise and vibration. If you prefer a quiet, smooth ride, cruising at moderate RPM (instead of screaming the engine) is more comfortable for you and other road users.
Low RPM is quieter, but again, it can be at the cost of engine health if you’re lugging.
In practice, using a broad rev range is best. Letting the engine spin freely through its designed RPM spectrum is not abuse; it’s actually what the engine was built for.
Modern four-stroke engines expect to be revved, and their parts (lightweight pistons, narrow-cam profiles, precise fueling) work best when used. In other words, don’t fear the tachometer’s higher numbers – use them appropriately.
Finding the Right RPM Range
Every motorcycle has its own “happy spot,” but here are some general guidelines:
Cruising RPM: For many bikes, about 2,000–3,000 RPM while cruising on flat roads is efficient and comfortable. This range usually provides enough power to accelerate smoothly without lugging. It also keeps the engine warm without screaming.
Shifting RPM: As a rule of thumb, shift gears in the middle of the powerband, not at idle and not redline. Many riders shift up around 4,000–7,000 RPM when accelerating (listen for a throaty engine note) and let the next gear settle in around 3,000–4,000 RPM. This keeps the engine lively. Of course, consult your manual: some manuals even list recommended shift points for fuel economy. If not, learning by feel is fine.
Bike Type Matters: Sportbikes often rev much higher (engines tuned for high-RPM power). For example, liter-class sportbikes may deliver peak power at 10,000 RPM or more. A cruiser or touring bike with a torquey engine may feel happiest at 3,000–4,000 RPM. An adventure bike might run 4,000–6,000 RPM at highway speed. Always tailor your riding to your bike’s characteristics.
Avoid “Stay-At-Home” RPM: If your bike is idling at 1,000 RPM in top gear and you try to accelerate heavily, you’re sure to lug. Likewise, don’t “short shift” too early to save fuel – that often backfires with lugging and weird load. Instead, shift so the engine revs up to a comfortable level before applying throttle.
Use the Tachometer: Modern bikes have tachometers for a reason. Keep an eye on it. When accelerating, upshift before hitting redline. When slowing, downshift before speed drops so low that RPM falls below an efficient range. Practice by glancing at the tach when you feel the bike struggle or roar, and adjust your gear use accordingly.
Remember: a brief engine test is helpful. When warming up or idling at a stop, the engine naturally drops toward idle RPM (~1,000 RPM). That’s fine when the bike is stationary, but once moving, keep the needle where the engine runs smoothly.
Listen to the engine: if it’s lugging, the sound may become dull or “garbled.” If it’s near peak power, it may sound very smooth and strong. Over time you’ll learn to “feel” if you’re in the wrong gear.
Practical Tips for Engine Health
To maximize engine life and performance, follow these practical tips:
Avoid Lugging at All Costs: If the engine sounds strained or if accelerating causes bucking/pinging, you’re lugging. Downshift or slip the clutch to raise RPM. As noted, aim for at least ~1500 RPM when starting or crawling. Most riders naturally learn this, but it’s important: starting on a hill or in traffic, use the lower gear and more throttle rather than inching forward at idle RPM.
Use Full RPM Range Occasionally: Once in a while (where safe and legal), open her up. This is sometimes called a “decarbonizing ride.” Running the engine up through the gears warms everything and can blow off some carbon. Maintenance guides confirm that “increasing the engine RPMs helps the motor to burn-off carbon buildup” when the engine is fully warm. Of course, don’t over-rev when the engine is cold. Wait until it’s up to operating temp.
Smooth Throttle Control: Sudden throttling at low RPM (especially after lugging) can be rough on the engine. Try to apply throttle smoothly and progressively. Anticipate when you’ll need power, and shift beforehand rather than rolling on the throttle in a too-high gear.
Regular Warm-Ups: Even before riding hard, let the bike idle a minute or two after starting. This warms up the oil and coolant. Avoid immediately redlining a cold engine. But also avoid riding a cold engine for long; find a moderate cruising RPM until it warms up fully.
Periodic High-Load Use: If your riding is mostly around town or low speeds, occasionally take a longer ride or open the throttle up on a highway. This “works out” the engine. Old-school riders often say engines need to be used, not just idled. Thorough warm-up followed by varying the RPM (light throttle to heavy throttle) is good.
Maintain Proper Gear Ratios: Make sure your final drive (sprockets or shaft) is set up so that you don’t have to lug in top gear at legal speeds. Some bikes have very tall gearing; if yours forces you to constantly ride near idle in high gear, consider if a smaller top sprocket or bigger rear sprocket is advised (speak to a mechanic or look for riders’ forums on your model). The idea is to have a gear that suits your typical speed range.
Use Quality Fuel and Tune-ups: Clean fuel and a tuned engine help maintain the right combustion at all RPM. Bad fuel or worn plugs/carburetors injectors can make carbon problems worse at any RPM. Keep up with regular tune-ups (plugs, oil, valves) so the engine can run smoothly. A well-tuned engine is more tolerant of low-RPM use because it won’t stumble as easily.
Check for Problems if Symptoms Arise: If you notice excessive smoking, rough idling, or poor power at any RPM, investigate (e.g., carbon clogging). Sometimes valves or exhaust ports get coated, especially on fuel-injected bikes that don’t run a lot of high-RPM. Address buildup early, as it only gets worse if left.
Conclusion
Your motorcycle’s engine is happiest when run through its designed RPM range – not only at idle.
Modern four-stroke engines are engineered for high revs, and running them at moderate-to-high RPM actually helps them stay clean and responsive. In contrast, hanging in too-high a gear at low revs (lugging) can “hammer” the internals, cause carbon buildup and knock, and shorten engine life.
Using the tachometer, shifting at appropriate points, and occasionally giving the engine a spirited run will keep it operating safely.
In practice, most street bikes cruise well around 2,000–3,000 RPM (longer is in the manual). Remember that each bike is different: a big cruiser’s “happy” RPM band is much lower than a supersport’s.
By understanding how RPM affects combustion, engine stress, and emissions, you can respect the mechanical design and ride smarter.
Let the engine rev when it needs to, avoid lugging whenever possible, and follow the manufacturer's shift recommendations. That way, you’ll maintain performance, improve fuel efficiency, and give your motorcycle the smooth, powerful ride it deserves.
In the world of naked sportbikes, the battle of Honda CB1000 Hornet vs Yamaha MT‑09 is one of the most talked-about matchups in 2025. On one side, you have Honda’s CB1000 Hornet—an aggressive, liter-class machine powered by a detuned Fireblade engine. On the other, Yamaha’s MT‑09 stands out with its lightweight chassis, torquey triple-cylinder engine, and advanced electronics.
This article explores performance, handling, technology, comfort, and value to help you pick the bike that suits your riding needs and budget.
Brief Overview
Honda CB1000 Hornet: A potent liter-class naked bike powered by a retuned Fireblade engine. Offers strong value with a balanced street setup.
Yamaha MT‑09: A middleweight champion with an 889 cc triple-cylinder motor. Known for its agility, torque, and fun-focused DNA.
Honda CB1000 Hornet vs Yamaha MT‑09
Engine & Performance
Honda CB1000 Hornet SP
Honda CB1000 Hornet SP
Engine: 998 cc in-line four, based on the 2017 Fireblade, detuned for sporty street use.
Power/Torque: ~155 bhp @ 11,000 rpm (SP) with ~79 lb‑ft torque. Flyer power in a naked package.
Feel: Punchy low-midrange, snappy throttle response. Strong engine braking and minimal vibrations at cruise speeds.
Transmission: 6-speed with slipper-assist and quickshifter—standard on SP, optional on base.
SP version adds premium suspension and brakes, making it competitive at around $12–13k.
Verdict: Hornet SP offers liter-bike hardware at cost closer to MT‑09 SP. Standard MT‑09 is cheaper entry to tech-rich middleweight class.
Reliability & Maintenance
Honda CB1000 Hornet SP
Based on proven Fireblade engine: reliable, durable, well-understood.
Minor QC notes: occasional bar-end and grip issues, settled quickly.
Good fuel efficiency (~48 mpg); low service costs due to simple systems.
Yamaha MT‑09
Rock-solid triple engine; smart electronics may need occasional updates.
Quickshifter tweaks: some flat‑spots, but aftermarket flashing is common.
Maintenance straightforward; Yamaha’s service network is strong.
Verdict: Both bikes are reliable. Hornet’s classic minimalism vs MT‑09’s electronic systems—choose based on your comfort with complexity.
Real‑World Feedback
Honda CB1000 Hornet SP
Reddit users praise the rider aids and adjustability:
“Apart from that this bike feels awesome. And has custom power/engine brake and Traction control you can adjust...”.
“Overall it’s great for commuting and fun riding... super easy and docile at low speeds”.
Yamaha MT‑09
Reddit owners love its grin-inducing nature:
“This truly is the best middleweight bike around. Performance, reliability... I think it looks great.”.
Cycle World says:
“The MT‑09 has all the torque you could ask for but delivers it in such a way that it’s eternally playful and completely unintimidating…”
Honda CB1000 Hornet vs Yamaha MT‑09—Which Should You Buy?
Choose the Honda CB1000 Hornet SP if you:
Want liter-class performance with agile handling.
Value strong brakes and fully adjustable premium suspension.
Prefer a stable, planted ride with minimal vibes.
Want great value—premium spec at mid-range price.
Appreciate simple tech and classic phone-nav UI.
Choose the Yamaha MT‑09 SP if you:
Crave lively torque and playful ride characteristics.
Want advanced electronics like slide/lift control.
Prefer a lighter, sharper, more responsive bike.
Value impressive looks and customizable electronics.
Enjoy weekend twisties and aggressive seating.
Buying Tips
Hornet extras: Grab optional heated grips, luggage, or touring windscreen for added comfort.
MT‑09 upgrades: Consider aftermarket exhaust and ECU mapping to fix flat‑spot—also comfort seat for long rides.
SP upgrades: If you don’t track, base spec bikes with optional aftermarket parts might save you money.
Final Thought
The CB1000 Hornet SP is a powerful liter bike that combines high-quality parts with street-worthy agility—all at a fair price. It shines for riders seeking robust performance with less compromise.
Meanwhile, the MT‑09 SP is a charismatic, agile middleweight full of torque, tech, and fun. Its advanced electronics and lighter chassis make it an ideal hooligan companion for spirited rides.
Neither bike is wrong. If raw power, value, and composed ride are your priorities, go Hornet. If lightness, fun, and tech appeal more, the MT‑09 awaits.
The Suzuki RG500 Gamma isn't just a motorcycle—it's a legend. Dubbed “the most dangerous motorcycle ever sold,” it drew acclaim and fear in equal measure.
In this detailed article, we'll explore why this 1985–87 two-stroke GP replica continues to thrill and terrify riders around the world. We'll cover its history, design, performance, handling, and unique dangers—and explain why it holds an almost mythical status among motorcycle aficionados.
The Most Dangerous Motorcycle Ever Sold
1. The Racing Roots
A Heritage Born on the Track
Suzuki-RG500—a heritage born on the track
The RG500's DNA traces back to Suzuki's victorious 500 cc racing campaign in the 1970s. Pioneered by legendary riders like Barry Sheene, Suzuki’s original RG500 racer secured back-to-back world championships in 1976 and 1977.
These machines used a radical square‑four, two‑stroke engine—essentially two parallel twins sharing a narrow crankshaft stack. This setup offered perfect balance and blistering performance.
From GP to Garage
Suzuki launched the RG500 Gamma in 1985 and sold it until 1987. This bike was almost street-legal and resembled a GP racing motorcycle.
The company produced about 9,284 units, enough to be considered mass-produced while still keeping a race-bike feel. The RG500 gave riders a genuine racing experience with its compact square-four engine, rotary-valve intake, and tuned exhaust system.
To emphasize its race-ready design, Suzuki equipped it with a cassette-style gearbox, high-performance suspension, and full body fairings.
2. Engineering Specifications
Suzuki-RG500—essential stats
Here’s a concise breakdown of the RG500’s essential stats:
Engine: 498.5 cc liquid-cooled square-four, twin crankshafts, rotary‑valve discs, four 28 mm Mikuni flatslide carbs.
Power: Claimed 95 hp @ 9,000 rpm (approximately 80–85 hp at the rear wheel).
Top Speed: Around 145 mph (236 km/h); some dyno-tuned examples even eclipsed this mark.
Dimensions: Wheelbase ~1425 mm, rake 25°, trail 4.4″.
3. Power Delivery & Performance
The Infamous “On‑Off” Powerband
two-stroke engine(Image taken from cycleworld.com)
The RG500's racing-inspired two-stroke engine packs a punch. At 6,500 rpm, it transforms from a soft purr to a roaring monster unleashing a sudden intense burst of power. The tach didn't even move until about 3,000 rpm.
When the engine hit its sweet spot, riders felt like they were on a GP bike—complete with front wheel lift-offs howling exhaust, and heart-pounding speed bursts.
Top-End Shock
Early reviews highlighted the bike's acceleration: 0–60 mph in roughly 3.5 seconds and an 11‑second quarter-mile run. Top speed hovered around 145 mph, making it one of the fastest production bikes of its time. Some tuned models even broke past 150 mph.
Breathing Fine & Delicate
The RG’s narrow operating range (8,000–10,500 rpm) required constant high revs.
Slip below 6,000 rpm and the bike felt lethargic, and running lean posed a serious risk of engine seizure due to overheating or piston expansion.
Riders developed lightning reflexes and rode with a finger hovering over the clutch—ready to disengage at even the slightest hint of trouble.
4. Handling & Chassis
The RG500 is incredibly agile
Race-Bred Precision
The aluminum perimeter frame, quick-ratio steering, and compact wheelbase made the RG500 incredibly agile.
Riders often compared its handling to Yamaha’s lightweight TZ racers.
Braking to Match Its Speed
Equipped with powerful four-piston brakes, the RG could pull down from triple-digit speeds with authority.
Anti-dive front forks maintained chassis geometry under heavy braking.
The Physical Demand
Despite its sleek size, the RG500 was unforgiving.
Reviews describe long rides as mentally and physically exhausting. Comfort was secondary; mission-critical focus was the only option.
5. Why It’s Considered Dangerous
Sudden Engine Seizures
Even with ideal tuning, the RG’s high-performance two-stroke engine was prone to seizures when overheated. A lock-up mid-corner or straight at 180 mph could turn catastrophic in a fraction of a second.
Barry Sheene, a former world champion, recalled one haunting seizure at 180 mph, “I had no chance… I went between barriers… into Stavelot Village”.
Designer Makoto Suzuki said he only dared a half-lap before he pulled back, too dangerous.
Power Band Hell
If you didn’t keep the revs in the sweet spot, the bike’s performance was flat. Miss the throttle opening and you're left with nothing—followed by a violent explosion once you landed back in the power zone.
Handling Like a Razor
While agile, the RG500 was unforgiving on erratic roads. One misjudged bump under braking, and the anti-dive fork system could catch riders out.
High Maintenance & Technical Demand
Owners faced frequent carburetor cleaning, gearbox upgrades (undercut gears), and engine seal replacements—all crucial to prevent sudden failures. Even short-term storage could lead to rusted crankcases or seized calipers.
6. Ownership & Maintenance
Common Weaknesses
Carbs: Float valves often stick; many owners install aftermarket upgrades.
Engine: Crank seal issues if left idle; risk of leaking gearbox oil and internal corrosion.
Gearbox: 2nd gear prone to failure; upgrade with undercut gears is standard.
Seals & Bearings: Brittle after years; rebuilds can exceed $6k in cost.
Maintenance Tips
Ride motorcycle regularly to keep seals healthy and fluids fresh.
Thoroughly clean carbs every season.
Consider gearbox upgrades as preventative measures.
Replace seals and bearings during major services.
Invest in performance exhaust and dyno tuning for smoother power delivery.
7. Cultural Legacy & Market Value
A Cult Icon
The RG500 Gamma is more than a bike—it’s a piece of GP racing history grafted to public roads. Its paring of lightweight chassis, fearsome power, and lethal unpredictability makes it legendary.
Owners often describe riding one as “selfishly irresponsible—but unforgettable”.
Collector Demand
Values have risen dramatically:
Rough condition: £10,000–13,000
Tidy: £15,000–19,000
Mint: £20,000–25,000+.
Canadian and U.S. import models fetch strong prices, regularly above $15,000–20,000 in good condition.
8. Is It Worth the Risk?
The Thrill Factor
Riders looking to experience the ultimate two-stroke sensation will find the RG500 offers unmatched excitement, history, and character. Very few bikes made for the public provide such pure, race-ready thrills.
The Reality Check
This bike isn't for beginners—or even casual riders.
It requires respect: thorough mechanical know-how, flawless riding ability, fast reactions, and dedication to ongoing upkeep.
Final Thoughts
The Suzuki RG500 Gamma stands alone as a relic of the two-stroke era—an authentic GP racer disguised as a street bike. Its power, handling, and fragility earned it a reputation as “the most dangerous motorcycle ever sold.”
Yet it's precisely this fearsome character that makes it so revered. For the informed enthusiast—mechanically capable and fearless—it offers a living, breathing time capsule. But for anyone else? It’s best admired from afar.
For riders, motorcycles represent more than just transportation—they embody freedom, rebellion, and a unique culture with its own language. Understanding motorcycle slang isn’t about showing off; it’s about connecting with a century-old community, ensuring safety, and truly embracing life on two wheels.
This guide will break down the most common modern terms, explaining each one in plain language. Whether you’re a beginner or a seasoned rider, learning these terms will help you understand conversations on the road and in the shop.
Motorcycle Slang
Gear & Safety: Helmets, Clothing, and ATGATT
Safety is top priority for bikers, and the slang reflects that.
The motto ATGATT (All The Gear, All The Time) literally means wear full protective gear on every ride. In other words, gloves, boots, jacket, pants, and helmet are non-negotiable.
Riders jokingly call helmets a “brain bucket” or “skid lid,” emphasizing how a helmet protects your brain. (As one motorcycle slang glossary explains, a skid lid is “slang for a helmet, emphasizing proper head protection”.)
Leather jackets and pants, riding boots, gloves, and even leather assless chaps are common – the gear you wear defines a lot of biker style. For example, assless chaps are leather leggings without a back that riders might sport for protection and flair.
ATGATT
ATGATT: Acronym for “All The Gear, All The Time.” Riders use this to stress always wearing full protective gear, especially a DOT-approved helmet and armored clothing. For example: “Before we head out, remember ATGATT – strap on your helmet, jacket, boots, and gloves.”
Skid Lid / Brain Bucket: Slang for a motorcycle helmet. These fun terms remind riders to keep their helmets on and protect their head. (A skid lid is literally “the helmet” in biker slang.)
Leather/Kit/Clad: Riders often say they are “leathered up” or in “kit” when fully dressed in riding gear. Being in full leather or armored gear means you’re protected.
Assless chaps: Open-back leather leggings worn over pants. They’re part style, part protection on cruisers and in club culture.
Wearing all the gear isn’t just for looks – it’s survival. As one expert rider notes, failing to wear full gear means risking “skin grafts, traumatic brain injury, broken ankles,” etc., in a fall.
The motorcycle slang ATGATT reminds riders that there’s no such thing as just a quick spin – you gear up properly every time.
Bikes & Styles: Crotch Rockets, Cafe Racers, and More
Motorcycles come in many shapes, and each style has its own nickname. Here are some common ones:
crotch rocket
Crotch Rocket: A slang term for a high-performance sport bike (modern sportbikes or racing-style bikes) known for speed and agility. Think Yamaha R1, Suzuki GSX-R (“Gixxer”), or Kawasaki Ninja. Example usage: “He loves the adrenaline rush of riding his crotch rocket down the highway.”
Cafe Racer: Originally, a lightweight bike stripped for speed on short “cafe” hops. Today it refers to any custom bike styled with low handlebars and a minimalist look. In practice, a cafe racer is built for nimble handling and style; riders might say, “He built a custom café racer from an old bike.”
Bobber: A motorcycle modified by “bobbing” (cutting) the fenders and keeping it simple. Bobbers have no front fender, a solo seat, and a clean look. The term comes from the old practice of trimming away excess parts, or “dressing it down.”
Dresser: Slang for a fully equipped touring bike. These bikes (like a Harley Ultra Classic or Honda Gold Wing) come “dressed up” with windshields, saddlebags, stereo, cruise control, and comfort. If someone loves long rides, they might say, “This sportbike is too harsh; I think I’ll trade it in on a dresser.”(As one glossary notes, a dresser is “motorcycle slang for ‘touring bike’”.)
Hog: Nickname for a Harley-Davidson motorcycle. This comes from Harley’s “Bar & Shield” logo with a hog. Fans might say, “I just parked my hog out front.”
Big Twin: Specifically, any large-displacement Harley engine (two-cylinder). Riders will distinguish big twins from smaller Harleys (like Sportsters).
Trike / 3-Wheeler: A motorcycle with three wheels (often two at the back). Trikes are called this slangy name since they offer more stability, useful for riders who prefer not to lean into turns as much.
ADV / Dual-Sport: A versatile bike built for both street and off-road. Sometimes called “adventure bikes,” they sport features like knobby tires and upright seating. Modern parlance shortens “adventure” to ADV. A true dual-sport (or ADV) can go on pavement or dirt. For example, BMW GS or KTM Adventure bikes. Many riders say, “I can’t wait for that epic ADV ride in the spring!”
Each style comes with its own lingo. For example, dual-sport bikes are sometimes just called ADV bikes. In fact, “dual sport” (street/off-road hybrid) is practically an exact synonym in today’s usage. Harley touring models might be called tourers or dressers, while fast bikes get names like crotch rocket.
Learning these terms helps you recognize what kind of bike someone means even if they speak in slang.
There’s a whole set of slang around how riders handle their bikes on the road or track: stunts, tricks, and smart techniques. Here are some key terms:
Blip: A quick roll-and-release of the throttle. Riders blip the throttle when downshifting so the engine speed matches the lower gear. While many definitions come from ride manuals (e.g. blip to match RPMs), riders just say “blip” for the quick throttle rev.
Wheelie and Stoppie (Endo): A wheelie is when the rear wheel lifts off the ground (front wheel high); an endo or stoppie is the opposite – lifting the rear end by using the front brake. These stunts are dangerous but famous: e.g. “He popped a wheelie on the freeway” or “She tried a stoppie at the track.”
Burnout: Holding the brake while revving the engine until the rear tire spins and smoke comes out. Often done at shows or races for showmanship. Riders will say, “He did a burnout at the start line.” (It literally “burns rubber.”)
Dragging a Knee: Leaning so far into a turn that the rider’s knee slider or boot skims the pavement. Racers use it in corners; it’s also called knee-down riding. A little “peg scraping” goes with aggressive cornering – that’s when the footpeg touches the ground.
Rev Bomb: Intentionally revving the engine loudly as a signal or just for effect. For example, a rider might “drop a rev bomb” to announce their presence. It produces a big boom of sound. The glossary defines it as “twisting the throttle to produce a loud burst of revs”.
Highside / Lowside: Types of crashes. A highside is when the rear tire loses grip and then suddenly regains it, flipping the rider over; a lowside is when the bike simply slides out under the rider. The highside is especially notorious for flinging riders up (picture a rider launching off a bend).
Road Rash: The scrapes and burns you get if you slide on pavement after a fall. For instance, “He had some road rash after that spill,” meaning skin abrasions from sliding. (It’s a reminder to always wear gear.)
Torque: Not exactly slang but often discussed. Torque is the twisting force of the engine, important for acceleration. Bikers will feel and praise torque especially when pulling from a stop: “Wow, this bike’s torque really pulls me off the line.”
Many of these terms are familiar if you hang out at tracks or stunt shows. But beginners should know them too – whether to understand advice or just to chat with veteran riders.
For example, someone watching a seasoned rider might note large “chicken strips” on their tires (unused tread edges) indicating how they take corners conservatively.
In contrast, an experienced rider leans fully, leaving no chicken strips visible. Talking about a “chicken strip” is a friendly way to tease a new rider about not leaning the bike enough.
Riders love personalizing their machines. The slang around customization reflects that creativity:
Motorcycle mods / Modifications: Generic slang for any changes to a bike to improve performance or style – like new exhaust, engine tuning, or cosmetic changes. The term is short for modifications. Example: “He’s added so many mods to his bike – new pipes, custom paint, and an upgraded ECU.”
Farkle/Farkles: Specifically, gadgets or motorcycle accessories added to a bike (especially adventure/dual-sport bikes). These could be lights, GPS units, frame sliders, aluminum racks, you name it. The term is playful; one rider joked about “An exaggerated motorcycle with tons of farkles” . A modern example: adding heated grips, extra bags, or a jump seat as farkles. (Dual-sport enthusiasts might use this most.)
Sheep-Shit: A cruder slang (less common in polite company) for customized parts, often used humorously. You may hear some riders joke about adding “a bunch of sheep-shit” to their bike meaning farkles.
Stage 1, Stage 2, etc.: Even shorthand for levels of performance upgrade (more common in import sportbike or car culture). A Stage 1 might be just a slip-on exhaust; Stage 2 could include ECU remapping, and so forth.
Brackets & Shims: Not exactly slang, but riders might call certain performance tweaks by their part name.
Customization goes hand-in-hand with slang, because any new gadget gets nicknamed.
For example, installing a small bell on your bike for good luck is called a Gremlin Bell in rider folklore (sprinkling ring-dings for safe travels). Adding chromed parts might get called “bling”. If someone adds a bunch of gadgets, you’ll hear jokes about their farkle fever.
But whether it’s functional or just for looks, mods and farkles are a huge part of the language of bike owners.
Riding in traffic or in a group brings its own terms:
Cager: Slang (often jokingly derogatory) for someone driving a car or SUV. Cars are “cages” to riders, so a car driver is a cager. For example: “Watch out for that cager texting – he almost ran into us.” One slang dictionary notes this is “derogatory slang for a car and the driver”.
Hogging the Road: When a rider takes up more than their fair share of the lane, making it hard for others to pass. Bikers will sometimes call out another bike for hogging. (Unlike the Harley “hog,” this means just staying in the center of your lane.)
Lane Splitting / White Lining: Riding between lanes of slow or stopped traffic. In California and a few other places it’s legal and called lane-splitting; in slang it’s also called white lining (sliding down the white line between lanes). For instance: “We saved time by white-lining through the jam.” Lane-splitting is controversial; riders praise its efficiency, and slang like “eye of the hurricane” (riding out the center of traffic) sometimes pops up.
Road Pizza: (Gruesome slang) What’s left on the pavement after a biker gets hit and scraped. It’s a morbid way to say a body or blood on the road. Often said jokingly as “Time for more road pizza?” meaning “someone’s about to crash.”
Tail Gunner / Sweep: In group rides, the tail gunner or sweep is the rider at the very back of the pack. Their job is to make sure no one falls off the formation. For example: “I volunteered as tail gunner, so I’ll bring up the rear and signal anyone who’s lagging.”
Iron Butt: A special title for riders who do extremely long rides. Traditionally, an Iron Butt ride means covering over 1,000 miles in 24 hours. The term refers to having an “iron butt” from sitting so long. If someone just finished a coast-to-coast trip, friends might salute their “iron butt” accomplishment.
Road Captain: A non-slang term turned title in group riding, meaning the person who plans the route and leads the pack. If someone is appointed road captain, they handle navigation and pacing. It’s not exactly common jargon among all riders, but within groups it’s known.
Knowing these terms can help you communicate on rides. For example, if someone says “Watch for that HOG; they’re not watching,” they mean a Harley (“hog”) in traffic. Or if a rider says “Time for a pit stop,” they just mean taking a break to refuel or stretch.
Understanding “cager,” “white lining,” and the rest will make it easier to read riders’ blogs or talk with other enthusiasts.
Club & Community Lingo: 1%ers, Prospects, and Riders
Motorcycle culture also has slang around clubs, riders, and social roles. For new riders, a few of these are good to know (even if they aren’t in a club).
Biker vs. Motorcyclist: The word biker has special meaning. Officially anyone riding is a biker or motorcyclist, but among riders biker often implies someone in a motorcycle club (like Hells Angels). A casual rider might prefer motorcyclist or rider. As one guide cautions, “a Hell’s Angel is a biker, but your uncle who rides on weekends isn’t – he’s a rider or motorcyclist”. Essentially, calling someone a biker can suggest club affiliation; some people get picky about it.
One-Percenter (1%er): This term refers to members of an outlaw motorcycle club. The story goes back to the AMA’s saying 99% of riders are law-abiding; the remaining 1% are outlaws. Seeing a patch with “1%” on a vest means that rider identifies as an outlaw club member. Essentially, it’s a warning sign: “keep your distance.” (For example, “If you see someone flashing a 1%er patch, be respectful – they’re an outlaw biker”.) A recent explanation puts it simply: “the 1%er clubs are those involved in criminal activities and violence… in other words, Outlaw Motorcycle Clubs.”.
Patch / Colors / Club Acronyms: Not exactly slang words, but club members have colorful ways to refer to each other. The embroidered back patches on vests are called “colors.” Someone might say “I’m in the local HOG chapter,” referring to the Harley Owners Group. Common acronyms include MC (Motorcycle Club) for 3-piece patches, or M/C (just letters). If a rider says “I’m a prospect,” it means they’re an accepted candidate in an MC, learning the ropes.
Old Lady: Slang for a biker’s girlfriend or wife (originally from WW2 Marine slang for wife). Often used affectionately among clubs. E.g. “His old lady’s ready to ride pillion.”
Squire / Road Captain / Tail Gunner: Other group terms include Road Captain (person leading the ride) and Tail Gunner (last rider, as mentioned above). These aren’t often needed outside group context.
Iron Butt: Besides the ride, “Iron Butt” can also just mean a rider who has done many long-hauls. Earned an Iron Butt Certification if you’ve logged crazy miles. It’s a badge of honor in long-distance rider circles.
Understanding the community slang lets you follow conversation at the motorcycle rallies or in forums.
For instance, if you hear “Our road captain had the head down, and I had to play tail gunner,” now you know they’re talking about leading and sweeping roles in a group. And if a friendly rider calls someone a “squid,” that’s a playful insult meaning an unsafe, gearless rider (not a compliment!).
Conclusion
Learning motorcycle slang is like getting a secret decoder ring for biker culture. These terms can let you connect with other riders and navigate the community language. Knowing the lingo makes riding safer and more social.
Ultimately, motorcycle slang is about sharing passion. Phrases like “I got some road rash” or “What’s your butt warmed up?” (meaning how was your ride) are more than words – they’re part of rider camaraderie. By picking up these terms and using them correctly, you’ll feel more at home in any group ride, garage chat, or motorcycle shop.
Knowing how to replace motorcycle clutch is a key skill for riders who want to handle their bike's upkeep. While it might look tricky, you can replace a motorcycle clutch at home if you prepare well and pay close attention to the details.
One of the main signs that your motorcycle clutch needs replacing is when the engine revs but the bike speeds up — a typical sign of a slipping clutch. You might also notice rough gear changes or a lack of power going to the back wheel.
This guide walks you through replacing your motorcycle clutch step by step. We'll cover everything from taking out the old clutch plates to putting in a new clutch pack. To stay safe, turn off the engine and prop it up. Don't forget to put on safety glasses and disconnect the battery before you begin.
Tools & Parts Needed
Tools to replace motorcycle clutch
Replacement Clutch Kit (plates & springs): Use a complete clutch kit (friction plates, steel plates, new springs) that’s correct for your bike.
Clutch Cover Gasket/Seal: Always install a new gasket or seal on the clutch cover to prevent leaks.
Hand Tools: A set of wrenches and sockets (metric or SAE as needed), including a torque wrench for critical fasteners. A flat-head screwdriver may help pry off the cover.
Drain Pan & Funnel: For catching and refilling transmission oil.
Motorcycle Stand: Using a paddock stand or center stand keeps the bike level. This makes draining oil easier and prevents spilled oil when the cover is removed.
Service Manual: Manufacturer specs (bolt torques, oil capacity, plate order) are essential. Your owner’s or service manual will give exact instructions for your model.
Tip: Soak the new friction plates in fresh transmission oil overnight before installation. This “pre-wets” the plates for quicker break-in and smoother operation.
Preparation & Safety
Park the bike on level ground and secure it with a stand
Work Safely: Park the bike on level ground and secure it with a stand. Wear gloves and eye protection. Disconnect the negative battery cable to prevent any accidental engine starts.
Drain Oil: Before opening the clutch cover, drain the transmission oil. Place a pan under the clutch (usually near the primary chain inspection port), remove the drain plug, and let the oil drain. Removing other covers (like the chain inspection cover) may be needed to access the plug. If your bike has a side stand only, you can also carefully tilt the bike and use a drain pan – the goal is to avoid oil spilling when the clutch cover comes off.
Remove Obstructions: The clutch cover is often on the left side (near the footpeg). You may need to shift gears to 1st (so the output shaft turns easily) and push down or wedge the rear brake pedal to keep it out of the way. Some models have footpegs or exhaust components that must be removed first – consult your manual.
Once oil is drained, locate the bolts around the perimeter of the clutch cover.
Unbolt the cover using the correct sockets or Allen keys. Loosen each bolt gradually (leave one or two partially threaded until the end) to prevent warping.
After all bolts are removed, gently pry the cover off; old gasket sealant may make it stick.
Be prepared for a little remaining oil to drip out. Set the cover aside and remove its old gasket (replace it with a new one when reassembling).
Step 2: Remove Pressure Plate and Springs
Once the clutch cover is removed, you’ll see the pressure plate.
Remove the pressure plate
It’s usually held in place by 6 to 8 spring-loaded bolts arranged in a circular pattern. Each bolt has a spring and possibly a washer underneath it.
To remove the pressure plate safely:
Loosen the bolts gradually and evenly in a crisscross pattern. This helps release pressure evenly and prevents the plate from warping.
Do not fully remove one bolt before loosening the others, as this can bend or damage the pressure plate.
Once all bolts are loosened, remove them completely, along with the springs and any washers. Keep track of the spring positions, although most clutch kits include a full set of new springs.
Carefully lift off the pressure plate and set it aside on a clean surface with the springs.
Tip: Some pressure plates have a small thrust bearing (also called a release bearing) pressed into them.
Check this bearing for wear — if it feels rough, loose, or gritty when turned by hand, it should be replaced.
Step 3: Remove the Old Clutch Plates and Inspect the Basket
Once the pressure plate is removed, you’ll see a stack of clutch plates inside the clutch basket. These plates are arranged in a specific alternating pattern that must be preserved for reassembly.
Observe the Plate Order
Clutch plates usually alternate between:
Friction plates (fiber-lined)
Steel plates
Before removing anything, carefully observe how the plates are assembled. Taking a photo is a good idea in case you need a reference later. Some motorcycles, especially those with factory (OEM) setups, may include a spring plate or cushioned ring within the stack. Make a note of its position if present.
Remove the Plates
motorcycle clutch plates
Start by removing the lifter or thrust washer — this is the round part that the pressure plate pressed against. Then, slide out the clutch plates one by one. Pay close attention to the order: friction, steel, friction, steel, and so on. The last plate at the bottom is typically a friction plate. Lay the removed plates neatly on a clean rag, maintaining their original order to simplify reassembly.
Inspect the Clutch Basket and Inner Hub
After removing the plates, inspect both the clutch basket (outer drum) and the inner hub splines.
Check the basket fingers (the parts the tabs on the friction plates slide into). Slight notching is normal due to wear, but if you see deep grooves or sharp ridges, they can cause new plates to catch or drag. In that case, the basket should be replaced. Some clutch baskets also include built-in damper springs; if these are loose or worn, replacement is recommended.
Next, check the splines on the inner hub — the parts that the steel plates slide over. Look for signs of wear, pitting, or deformation.
Clean the Components
Use solvent or brake cleaner to clean the clutch basket, inner hub, pressure plate, and inside of the clutch cover. Make sure to remove any metal debris or sludge. Many clutch covers have a small magnet that collects fine metal particles; wipe it clean as well.
Tip: Removing the Clutch Hub Nut
If your motorcycle has a large central nut holding the clutch hub in place, you’ll need to prevent the shaft from turning during removal or installation. To do this:
Shift the transmission into top gear
Hold down the rear brake pedal
This will lock the drivetrain and allow you to safely loosen or tighten the central nut.
Step 4: Prepare New Clutch Plates
Before installing the new clutch plates, take time to prepare them properly. This step is essential for smooth operation and a longer clutch life.
Soak the Friction Plates
Soak the friction plates
Most friction plates (the fiber-lined ones) need to be soaked in transmission oil before installation. This helps to fully lubricate the fibers and prevents harsh engagement during initial use.
Place the friction plates in a clean tray or container.
Pour fresh transmission oil over them until fully covered.
Let them soak for a few hours, or ideally, overnight.
Note: Some modern clutch kits may specify that the plates can be installed dry. Always read and follow the instructions provided with your specific kit.
Briefly Oil the Steel Plates
While you have the oil out, it’s also a good idea to briefly coat the steel plates with oil. You don’t need to soak them — just a quick wipe or dip is enough to prevent dry contact during the first few uses.
Organize the Plates
Lay out all the plates in the correct order before installation. The typical stacking pattern is:
friction – steel – friction – steel
The sequence usually ends with a friction plate on top, but you should always check your service manual or the instructions included in your kit for the correct order and quantity.
Orientation of Steel Plates
Some steel plates may have markings or slightly rounded edges on one side. If so, make sure that the rounded edge faces toward the engine during installation. This helps ensure smoother clutch engagement and reduces wear over time.
Finally, double-check the total number and order of both friction and steel plates before beginning assembly. Mistakes at this stage can lead to poor clutch performance or premature wear.
Step 5: Install the New Clutch
Once your new clutch plates are prepared, you can begin the reassembly process.
Stack the Plates in Order
Start by sliding the new clutch plates into the clutch basket. Follow the correct sequence:
Friction plate
Steel plate
Friction plate
Steel plate
...and continue alternating until all plates are installed.
The final (top) plate should be a friction plate, unless your service manual specifies otherwise.
If your original clutch assembly included thin dampers or spacer rings between certain plates, reinstall them in the exact same positions as before.
Make sure each plate is fully seated into the grooves of the clutch basket and inner hub.
Reinstall the Lifter and Pressure Plate
After all plates are stacked:
Reinstall the lifter and thrust washer onto the hub (if your motorcycle uses them).
Align the pressure plate on top of the clutch pack, ensuring it fits properly onto the hub splines or alignment tabs.
Install and Tighten the Spring Bolts
install and tighten the spring bolts
Next, insert the springs and spring bolts. Start all bolts by hand, turning them in just a few threads to avoid cross-threading.
Tighten the bolts gradually and evenly using a crisscross pattern (e.g., top-left, bottom-right, top-right, bottom-left).
Use a torque wrench to tighten each bolt to the manufacturer's recommended torque setting. This is typically low (e.g., around 8 ft-lbs or 10 Nm), so be careful not to overtighten.
Over-tightening can strip threads or damage the pressure plate. Under-tightening may allow the springs to loosen during operation.
Once all bolts are torqued properly, double-check each one. Make sure:
All springs are compressed evenly.
The pressure plate sits flush and centered.
At this point, your new clutch pack is successfully installed and ready for reassembly of the cover.
Step 6: Replace Clutch Cover & Refill Oil
Clean the clutch cover's mating surface and the engine. Take off any leftover gasket material or sealant to ensure a good seal.
Put a new gasket or seal on the clutch cover.
Put the clutch cover back on the engine. Check that the cover lines up right and sits flat to avoid pinching or hurting the gasket.
Tighten the cover bolts evenly:
Start all bolts by hand to prevent cross-threading.
Then tighten them bit by bit in a crisscross pattern to the torque listed in your manual.
Take out any tool you might have used to keep the brake pedal down. Push the brake lever or pedal several times to get it back to its usual spot.
Reinstall the oil drain plug:
Use a new crush washer if you need to.
Tighten the drain plug as much as your manual says to.
Refill with fresh transmission oil:
Pour oil through the chain inspection hole or the right fill hole.
Use the exact kind and amount of oil your motorcycle's manual tells you to.
Put the inspection cover or fill plug back on and make sure everything's sealed up tight.
Look for any leaks around the clutch cover and drain plug after you've filled it with oil.
Step 7: Reassemble and Adjust
After installing the new clutch pack and securing the clutch cover, it's time to complete the reassembly and test the clutch.
Reinstall Removed Parts
Reattach any components you removed during disassembly, such as:
If you disconnected the battery for safety during the repair, now is the time to reconnect it.
Adjust the Clutch
Depending on your bike's system:
For cable-actuated clutches: Adjust the clutch lever free-play according to the specifications in your service manual.
For hydraulic clutches: Check the fluid level in the reservoir and top it off if necessary. Bleed the system if there is air in the line.
Initial Test
With the bike securely on a center stand or paddock stand:
Start the engine and let it idle for a few minutes.
Gently slip the clutch and shift through a few gears to ensure everything engages smoothly.
Listen for abnormal noises or vibrations.
Take a Short Test Ride
Once everything checks out:
Go for a short, gentle test ride.
Avoid aggressive acceleration or high RPMs during the first few miles.
New clutch plates need a break-in period to bed in properly. Ride conservatively for the first 10–20 miles to allow the plates to seat and wear evenly.
Common Mistakes & Tips
Uneven bolt removal: Loosening one pressure-plate bolt completely before others can warp the plate. Instead, always loosen springs gradually in sequence.
Skipping soak: Never skip soaking new friction plates. Dry plates will make the clutch grab very suddenly and risk overheating.
Wrong plate order: Mix-ups happen. To avoid redoing work, double-check plate orientation and order before installing them.
Forgetting gaskets/seals: A leaking clutch cover or transmission oil is often due to a missing or damaged gasket. Always fit new seals.
Neglecting the clutch basket: Sharp notches in the basket can destroy new plates. Inspect the basket fingers carefully. If notching is severe, replace or have the basket professionally repaired.
Improper torque: Over-torquing spring bolts can strip threads, and under-torquing can allow springs to blow out. Use a torque wrench to tighten evenly.
Conclusion
Replacing your motorcycle’s clutch may seem daunting, but by following these steps – and referring to your bike’s specific service manual – you can do it safely and correctly.
Remember to work methodically, keep track of all parts, and double-check everything before final reassembly. With a fresh clutch installed, you’ll enjoy smooth power delivery and confident gear shifts for many miles to come.
When learning to ride – or even after years on the road – mastering clutch control is crucial for smooth, safe riding. A clutch transfers power from the engine to the rear wheel, and its “friction zone” is where the engagement happens gradually. Many riders, however, either ride with the clutch partially engaged for too long or slam it in and out too quickly, misunderstanding this delicate balance. This common clutch mistake not only affects your performance on the road but can also lead to premature clutch wear and costly repairs.
In this article, we’ll explain the most common clutch mistake riders make, why it matters, and how to fix it. You’ll get practical tips to improve your technique, avoid damage, and ride with more confidence. Let’s get started.
The Common Clutch Mistake: Misusing the Friction Zone
friction zone
The biggest mistake is simply not using the friction zone properly. Beginners often fear stalling, so they dump the clutch too fast, causing the bike to lurch. Others try to “feel” control by keeping the clutch partially pulled in while creeping along. Both habits are wrong. Holding the clutch in that dragging position or “riding the clutch” wastes power and overheats the plates.
On the other hand, snapping it closed too quickly gives a sudden power surge that upsets the bike’s balance. In either case, you’re fighting the bike instead of working with it. As one guide warns, “Incorrect clutch operation can cause the clutch assembly and gearbox to wear out quickly”. In other words, poor clutch technique not only bumps and stalls you now – it cuts its lifespan later.
Why It Hurts Your Riding Performance
Misusing the clutch holds you back immediately. When you dump or drag the clutch, starts become jerky and unpredictable. You may stall at intersections or rock the bike dangerously on takeoff. You won’t feel confident balancing at very slow speeds or tight turns because you’re not smoothly modulating power.
rear wheel lock
Even quick downshifts and stops suffer: when stopping, pulling in the clutch too late or too early can make the rear wheel lock or engine lug. In emergency maneuvers, any loss of smooth clutch action reduces control. By mastering the friction zone, you gain confidence: you can “start smoothly from a stop,” maintain balance during slow-speed maneuvers, and “execute controlled stops with ease”. In short, good clutch control is a core riding technique that builds comfort and safety.
Common beginner mistakes illustrate this gap. For example:
Releasing the clutch too quickly: This causes sudden jerks or stalls. The fix? Practice slow, deliberate lever release to avoid abrupt power surges.
Not using enough throttle: A weak throttle can starve the engine of power at release, causing it to bog or stall. A steady throttle through the friction zone prevents this.
“Popping” or “dumping” the clutch: Letting go all at once jolts the bike. Instead, roll off the lever gradually while feeding throttle.
Over-relying on throttle for low-speed control: Some riders think revving more will substitute for clutch work. In reality, delicate clutch-and-throttle balance is the key to fine control.
How It Affects Your Motorcycle (Maintenance)
Holding the clutch in the friction zone or slamming it does more than ruin your ride – it wears out the clutch itself. Every minute you leave the plates slipping, they generate heat and friction. Over time, this can glaze or warp the clutch plates. A telltale sign is a burning smell or slipping gears under load. If ignored, you’ll eventually need to replace the clutch pack.
worn motorcycle clutch
Indeed, a failing clutch costs time and money – with repair bills ranging from a few hundred to over a thousand dollars depending on the bike. (For example, Harley-Davidson clutches alone range up to $1100 for performance kits.)
Here are some concrete ways poor clutch use hurts maintenance:
Clutch slippage: Excessive slipping “during slow riding… wears out the clutch” prematurely. Constant friction-zone riding burns more oil and material off the plates.
Foot on lever: Resting your foot or hand on the lever at stoplights keeps it partially engaged. As RiiRoo advises, “resting your foot on the clutch lever… causes partial engagement, wearing it out faster”. Instead, put the bike in neutral and use the brakes.
Incomplete disengagement: Not pulling the clutch all the way when shifting gears leads to jerky shifts and extra wear. Always “fully disengage the clutch between gears for smoother transitions and less wear”.
High RPM abuse: Spinning the engine high while slipping the clutch (e.g. revving in first gear on takeoff) generates severe heat. Match RPM to road speed to avoid extra stress.
Traffic and hills: Using the clutch to hold the bike on an incline wears it out. Instead, use your rear brake or shift to neutral at lights.
Practical Clutch Control Solutions
The good news is this mistake is entirely fixable with awareness and practice. Here are some riding technique tips and exercises to improve clutch control and avoid the misuse:
motorcycle riding skills training
Practice friction-zone feel: In a safe, open area (like a quiet parking lot), use the “stop-and-go” exercise. Start in neutral, then find first gear. Slowly release the clutch while applying just enough throttle so the bike creeps forward. Notice the point where it begins to move – that’s the friction zone. Holding at that point and adjusting throttle teaches finesse. Repeat until you can start smoothly without backfiring or rolling back.
Rock the bike at a stop: With both feet down, engage first gear and slowly open throttle so the engine barely spins the wheel. As the bike rocks forward, pull in the clutch; as it rolls back, release gently. This “clutch rocking” exercise builds a feel for clutch modulation without fear of stalling.
Balance throttle and clutch: Always remember the clutch doesn’t work alone. Release the clutch and roll on throttle in tandem. The VikingBags guide emphasizes that “as you release the clutch slowly, you should also open up the throttle at the same pace” to avoid stalling. Think of it as a dance: too much throttle early and the rear wheel spins; too much clutch disengaged too soon and the engine dies.
Use your rear brake: When slowing to a near stop, keep a bit of throttle and release the clutch into the friction zone while lightly applying the rear brake. This prevents the bike from jerking forward as it comes to a stop, and it lets you practice slow clutch control.
Leverage engine braking: Decelerate off throttle in gear rather than just in neutral. The drag of the engine will slow you and reduce the need to slip the clutch constantly. Learning to downshift properly (clutch + brakes in unison) helps you use the drivetrain to manage speed instead of continuous clutch slip.
Remember these are motorcycle clutch tips for all riders. Even experts use them: practice your slow-speed maneuvers, get familiar with your bike’s clutch lever travel, and always approach stops by disengaging the clutch at the right time. Proper clutch technique is a fundamental riding technique that pays off in control.
Preventive Maintenance Tips
Along with better technique, take care of your clutch system to avoid problems:
inspect and adjust the clutch cable
Inspect and adjust the clutch cable or lever: For cable clutches, check and lubricate the cable. Ensure the lever has the correct free play (typically a few millimeters at the end). A cable that’s too tight keeps the clutch partially engaged. For hydraulic clutches, bleed and replace fluid as recommended.
Check clutch wear regularly: Periodically test for slipping under heavy throttle in a high gear. Look for a burning smell or drop in power. If the clutch is slipping even with the lever fully released, it’s time for an inspection of the plates and springs.
Use correct oil: If your bike has a wet clutch, use the oil grade specified by the manufacturer. Wet clutches rely on engine oil for lubrication, so using the wrong type can accelerate wear.
Quality replacement parts: When servicing, use OEM or high-quality plates and springs. Cheap parts can warp or deform under stress. If you haul heavy loads or ride aggressively, consider a performance clutch kit for durability.
Shift to neutral at stops: Whenever practical, get into neutral and stop completely instead of holding the clutch in. This simple habit (in traffic and on hills) gives the clutch a rest.
Monitor warning signs: Always be alert for unusual clutch behavior. Slipping under load, difficulty shifting, spongy lever feel, or strange noises mean you should address it now, not later. Early intervention (like replacing worn plates or cable) prevents total clutch burnout.
By combining these motorcycle maintenance habits with improved clutch technique, you’ll extend the life of your transmission and avoid costly repairs. A little care goes a long way – after all, “a well-maintained clutch… facilitates added control and increased vehicle life”.
Conclusion
Clutch control is a skill that rewards practice. It doesn’t matter if you’re a newbie or veteran – honing this riding technique makes every ride safer and more enjoyable. Refine your clutch use, and you’ll notice immediate improvements: no more stalls, smoother hill starts, and greater speed control.
Plus, by avoiding that one common mistake, you save money on motorcycle maintenance and keep your bike running strong. In short, learn to master your clutch – don’t let it hold you back
When riding a motorcycle, your lane position is one of the most powerful tools to stay safe, visible, and in control. Many riders underestimate its importance, yet the way you place yourself within a lane can mean the difference between avoiding danger and ending up in an accident.
This guide explores how to master lane positioning, when to use each option, common mistakes to avoid, and how to adapt in real-world conditions.
Why Lane Position Matters
Visibility: Motorcycles are slim and easy to miss. Choosing the right spot makes it harder for drivers to ignore you.
Room to react: A smart position gives you a way out if a car drifts or traffic suddenly shifts.
Hazard avoidance: Cars can roll over small debris or oil without issue; for a motorcycle, that same hazard can ruin your day.
Influence: Your placement can subtly guide how drivers around you behave.
Think of it less like a fixed rule and more like a strategy in a game—every move changes what options you have next.
The Three Lane Positions
A helpful mental model is to break the lane into three zones:
Position 1 (Left third): Closest to the centerline or yellow line
Position 2 (Center third): In the middle of the lane
Position 3 (Right third): Closest to the road edge or shoulder
Position 1: Left Side (Near the Centerline)
This is often the default choice for experienced riders.
Advantages:
Maximum visibility to oncoming traffic.
Best view ahead, especially around vehicles.
Allows you to discourage cars from drifting into your lane.
Risks:
Close to oncoming vehicles – dangerous if someone crosses the centerline.
Less buffer if the car in front swerves left.
When to use it:
On two-lane roads with moderate traffic.
When you want to be clearly visible to oncoming cars.
At red lights, stop in Position 1 or 3, not 2 – it keeps you visible and gives you space if a car approaches from behind too fast.
Always watch your mirrors, keep the bike in gear, and plan an escape path (like moving between cars).
Common Mistakes Riders Make
1. Riding Too Long in Position 2
Many beginners “center up” because it feels symmetrical. But this exposes them to slippery conditions and makes them invisible.
Fix: Learn to treat Position 2 as temporary, not permanent.
2. Never Changing Position
Some riders stick to one side no matter the situation.
Fix: Lane position should be dynamic. Shift often to adapt to traffic, visibility, and hazards.
3. Ignoring Blind Spots
Even if you’re in the best lane position, you can vanish in a car’s mirror.
Fix: Always check mirrors, stay out of blind spots, and flash headlights or tap your horn when needed.
Advanced Defensive Techniques: Lane Positioning
1. Maintain a Buffer Zone
Keep at least 2–3 seconds of following distance.
On highways, extend this to 4–5 seconds.
Side-to-side, leave at least half a lane of space from cars.
2. Always Have an Escape Path
Before committing to a lane position, ask: “If this car swerves, where do I go?”
Shoulders, empty lanes, or gaps between cars can all be options.
Keep scanning so you always know your exit.
3. Use Lane Position as Communication
A slight shift toward Position 1 signals you may turn left.
Hugging Position 3 shows the intention to exit or merge right.
Your body language influences how drivers react.
Pro Tips for Staying Safe: Mastering Lane Position
Scan far ahead: anticipate lane changes and road hazards early.
Adapt constantly: treat lane position as fluid, not fixed.
Avoid following directly behind vehicles: stagger slightly to see ahead.
Practice in low-traffic areas: build muscle memory before tackling busy streets.
Quick Reference: Lane Positioning
Position 1 (Left) → Best for visibility, general use, watch for oncoming traffic.
Position 2 (Center) → Use only temporarily, avoid in wet conditions.
Position 3 (Right) → Safer buffer from oncoming cars, but beware of blind spots.
Golden Rule: Stay visible, stay adaptable, and always leave yourself an out.
Conclusion
Mastering lane positioning is not about memorizing rules—it’s about thinking ahead, reading the road, and adapting in real time. By using each lane position strategically, you can stay visible, avoid hazards, and maintain control in any riding environment.
Your motorcycle gives you the agility that cars lack. Lane positioning is how you turn that agility into safety. Ride smart, ride visible, and make the road work for you.
If you're planning your first big adventure bike expedition or looking to improve your off-road capabilities, one of the best things you can do is practice essential riding techniques. Riding with luggage, managing your bike on uneven terrain, and safely climbing steep hills are not just challenges — they are critical off-road skills that can make or break the success and safety of your adventure ride.
This guide will walk you through three crucial off-road skills every adventure rider should master:
1. Counter-Steering and Chassis Control with Luggage
off-road bikes with luggage
One of the most underestimated aspects of off-road adventure riding is how your luggage affects the way your bike behaves. Think of your bike as a 4WD vehicle and your luggage as a 4-ton trailer. When you brake, corner, or accelerate, that extra weight is constantly trying to push, shift, and destabilize your chassis.
Why This Skill Matters:
The front tire alone cannot manage the additional load.
Without adjusting your steering technique, you risk front-end washouts.
Poor control can lead to jack-knifing or loss of traction.
Key Techniques to Practice:
Counter-Steering with Loaded Bags: Counter-steering is not just for high-speed road turns. On an adventure bike with luggage, gently push the left bar to go left and the right bar to go right. This technique engages the whole chassis to turn rather than overloading the front tire.
Subtle Drift and Weight Bias: Learn to shift weight between wheels smoothly. When carrying luggage, avoid sharp turns and allow the bike to veer naturally. Practice at speeds of 20-30 km/h to feel the balance shift.
Brake Management: Turn off ABS temporarily on suitable terrain to feel the natural sliding of the front wheel. Apply and release the front brake gently while in motion to teach your instincts when to let go.
Emergency Evasion Drills: At higher speeds, practice aggressive counter-steering to dodge imaginary obstacles like animals or fallen branches. This builds trust in your bike's agility and your muscle memory for evasive actions.
Pro Tip:
Use soft bags with elastic straps. They move slightly and absorb mild impacts if you nudge a tree or wall. Knowing the width and flexibility of your gear can prevent nasty surprises.
2. Balance and Obstacle Absorption
Mastering bike balance is a critical off-road skill
Adventure riding means constantly navigating ditches, erosion mounds, rocks, and random debris. Wherever you are, mastering bike balance is a critical off-road skill.
Why This Skill Matters:
Uneven trails test your ability to stay upright.
Smooth absorption prevents injury and damage to the bike.
Maintaining momentum over obstacles increases safety and fun.
Key Techniques to Practice:
Periphery Awareness Drill: In first gear, tip your bike gently from side to side between your knees. Try this near trees or poles to feel how close your panniers can get without causing imbalance. Learn the dimensions of your luggage setup.
Erosion Mound Navigation: These are common on trails and often look like fun jumps. They can also be dangerous if not approached correctly.
Upward Approach: Apply a bit of preload by squatting slightly just before the jump, then roll on the throttle evenly to maintain a level takeoff.
Downward Absorption: When coming down steep erosion holes, roll off the throttle, stay off the brakes, and absorb impact with your knees and elbows.
Jump Training: For more experienced riders, practice small jumps on uniform ramps. Focus on keeping the body centered and using preload to keep a flat trajectory.
Pro Tip:
Stay off the brakes while navigating steep descents or abrupt dips. Let the bike come up to you and absorb it with your body, not your handlebars.
Off-road motorcycle climbing a steep rocky slope with luggage
Climbing steep, rocky hills with luggage is one of the biggest challenges for adventure riders. Too much weight in the wrong place, or poor throttle control, can cause you to lose momentum or flip backward.
Why This Skill Matters:
You’ll encounter unexpected hill climbs in remote areas.
Good traction management is essential for climbing with gear.
Key Techniques to Practice:
Hill Start from Mid-Slope: Simulate starting on a slope after stalling. Begin with your weight all the way back to maximize rear-wheel traction. As the bike begins to move, gradually shift forward to gain steering control.
Body Positioning:
Rear Weight: Keeps traction on the back tire.
Head Forward: Maintains control of the front wheel. This dual approach keeps the bike balanced and prevents wheelies or losing line control.
Clutch and Throttle Management: Without electronic aids like traction control, practice feathering the clutch and using smooth throttle input. Avoid sudden bursts of power.
Steering Control on Hills: Most people lose their line and end up off the trail because they fail to guide the front wheel correctly. Keep your eyes up and your body slightly forward to steer around ruts and rocks.
Pro Tip:
If your bike is too top-heavy, re-evaluate your luggage setup before the ride. Keep heavy items low and centered.
Practice in a Safe, Controlled Environment
Before heading into remote wilderness, find a safe and open environment to practice these drills. Look for:
Empty gravel lots
Off-road parks
Forest service roads
Adventure riding schools
practice in a safe and controlled environment
Filming yourself can help you spot poor form, incorrect posture, or timing issues. Even 5–10 minutes of practice before each ride will dramatically improve your skill and confidence.
Final Thoughts
The best adventure rides come from preparation, not improvisation. These three off-road skills can be the difference between a thrilling experience and a dangerous one.
Before your next trip:
Test your luggage setup under real conditions.
Run these drills regularly.
Get to know your bike's limits and capabilities.
And remember: it's not about riding harder; it's about riding smarter. The more confident and skilled you are, the more fun you'll have on the trails.
Selecting the perfect motorcycle carburetor isn’t just about raw power—it’s about matching precision engineering to your engine’s unique personality. While modern fuel injection dominates new vehicles, carburetors remain legendary for their simplicity, affordability, and tunability in classics, hot rods, and muscle cars. However, with numerous options available on the market, a wrong choice can compromise drivability, efficiency, and even engine longevity. This guide cuts through the confusion with science-backed strategies and real-world insights.
The engine’s displacement (in cc or cubic inches) largely determines the carb size. Larger engines need larger venturi bores to flow enough air and fuel at high RPM. As a rule of thumb, the venturi diameter tends to scale with displacement.
For example, small 125cc street bikes often use carbs in the 21–24mm range, while a 600cc sportbike might need a 34–38mm carb. In general, match the carburetor’s venturi size to your engine’s displacement. (This matches the bike’s airflow needs – too small a carb will choke high RPM power, too large a carb can make low-RPM response sluggish.)
Two-stroke engines pull a charge of air-fuel mixture differently than four-stroke (because they rely on crankcase pressure to move fuel). Many small two-stroke engines use simpler slide-carb designs without gravity feed (since the bike might flip in orientation). Four-stroke street engines commonly use CV carbs or slide carbs. Check what type your engine was designed for.
Intended Use and Riding Style
Think about how you ride
Think about how you ride. A performance or racing bike (or spirited off-road dirt bike) often benefits from a mechanical slide carb for instant throttle response. A cruiser, tourer, or commuter might prefer a CV carb for smoothness and idle stability.
If you race or do track days, a high-flow slide carb (with easily adjustable jets) may give more power. For casual street riding, a CV carb’s altitude compensation and less finicky nature might be better.
Altitude and Climate
If you ride at high elevations or in very hot weather, the thin air can make a carb run rich unless tuned. Carburetors are sensitive to air density changes; a bike tuned at sea level will likely run rich on a mountain pass, requiring smaller jets.
Fuel injection automatically adjusts for altitude, but carbs must be rejet by hand. If you live or ride at altitude, plan to rejet or use an altitude kit, or favor a CV carb which mitigates this issue somewhat.
Fuel Delivery (Gravity vs. Pump)
Ensure fuel feed matches the carb. Most motorcycle carbs use gravity-fed fuel (tank above the carb). If your bike has a fuel pump in the tank, some aftermarket carbs may not accommodate pressurized feed. Check the carburetor’s requirement for fuel supply.
The carburetor must physically fit your bike’s intake manifold. Measure the intake manifold’s inner diameter and make sure the carb’s flange matches (adapters exist but are a hassle). Also, check your throttle cable type (some carbs are pull-type only, others push/pull) and choke style (manual lever vs. vacuum). For example, a carb designed for a manual choke won’t have an electric choke heater. Make sure the carb’s throttle/choke layout suits your bike.
Tuning Support and Parts Availability
A carburetor that is easy to adjust and has available parts is best for beginners. Look for well-known models or brands that have plenty of jets, needles, and spare parts. Carbs with built-in adjustment screws (air/fuel screws, pilot jet screws) let you fine-tune without complex disassembly. Also consider service information: good manuals or online guides will make jetting and syncing much easier. In short, choose a carb with readily available tuning parts and clear support.
Considering these factors – engine specs, how you ride, and practical fitment – will help you narrow down your options when shopping for a motorcycle carburetor.
Tips on Sizing a Motorcycle Carburetor Correctly
Carburetor sizing is partly scientific. The venturi diameter controls airflow velocity: too small a venturi chokes power at high RPM, too large slows airflow at low RPM.
venturi tube airflow principle
A practical tip is to use a carb diameter roughly proportional to engine displacement. In other words, match carb size to engine size: a 125–150cc bike might use a 21–24mm carb, a 250–400cc engine often uses 28–32mm, and a 600cc or larger engine might need 34mm and up. Always check manufacturer or performance tuning recommendations for your engine.
For a more exact method, you can calculate theoretical CFM (cubic feet per minute) using the formula:
CFM = (Engine cc × Max RPM × Volumetric Efficiency) ÷ 3456.
Then choose a venturi size that can pass that CFM at a reasonable airspeed (typically 60–80 m/s in the venturi). This math is advanced, but many riders simply consult tables or ask experts for the right carburetor diameter for a given cc and RPM. The key is not to oversize unnecessarily. In doubt, start with a carburetor size close to stock or just slightly larger.
Remember: you can always jet down (lean out) a little on a slightly larger carb, but a carb that’s too small cannot breathe enough even if jetted rich.
Above all, use the carburetor in the correct range. If your bike’s intake manifold limits the carb size, ensure it still meets your power needs. Consulting guides or using an online carb sizing calculator can help confirm your choice.
Signs You May Need to Upgrade or Replace Your Carburetor
Even a well-chosen carb can wear out or become outmatched. Here are clues that it’s time for service or replacement:
Signs you may need to upgrade or replace your carburetor
Poor Performance Symptoms: If you notice rough idle, hesitation, low power or poor fuel economy that cleaning and simple tuning don’t fix, the carb may be to blame. For example, rough acceleration, frequent stalling, or black smoke from the exhaust often indicate the mixture is off (too lean or rich).
Strange Noises and Backfiring: Unusual popping, sneezing, or banging sounds from the engine or exhaust can mean the air-fuel mix is very lean or very rich. A lean mixture can cause the engine to “sneeze” or backfire, while a rich mixture can produce black smoke. If such symptoms appear, inspect the carb for clogged jets, damaged diaphragms, or float issues.
Hard Starting or Flooding: Difficulty starting, especially when hot or cold, can signal carb trouble. If the carb is flooding (filling with excess fuel), you may see fuel leaking from the bottom or smell raw gas. Flooding often means a stuck float valve or worn needle. Conversely, if the engine won’t start and only runs momentarily on starting fluid, fuel is not reaching the engine (e.g. blocked pilot jet).
Idle Problems: A carb that refuses to hold a steady idle (either high-idle or stalling at idle) suggests the pilot jet or idle mixture is wrong. High idle that won’t settle may be due to an air leak or throttle slide not seating. An imbalance in the idle circuit can usually be fixed by cleaning or adjusting; persistent issues may warrant a rebuild or new carb.
Frequent Rejetting Needs: If you continually adjust jets without success (especially after engine upgrades), it may be better to go to a larger carb. For example, increasing bore size or adding high-flow exhaust can exceed what the stock carb can supply. In such cases, swapping to a bigger performance carb can unlock the engine’s potential.
In summary, if routine cleaning and tuning don’t resolve rough running, or if your motorbike’s modifications and usage demand more airflow than the current carb can give, it’s time to rebuild or replace the carburetor. These upgrades ensure your engine gets the right mix for best performance.
Maintenance and Tuning Basics
Keeping your carburetor clean and properly tuned is key to good performance. Even the best carb will run poorly if dirty or improperly adjusted. Here are beginner-friendly maintenance tips:
Regular Cleaning
Regular cleaning is important
Carbs accumulate varnish and debris from fuel over time, especially with ethanol-blended fuels. Periodically (e.g. every 5,000–10,000 miles or yearly) remove the carburetor(s), open the float bowl(s), and clean all jets and passages with carb cleaner and compressed air.
Check the float and needle valve for wear or sticking. Clear any blockages in the pilot (idle) jet or main jet. Inspect rubber diaphragms (in CV carbs) for tears. Keeping the carb clean prevents many common running issues.
Inspect and Replace Gaskets/Diaphragms
The gaskets and diaphragms that seal fuel and slides can harden or crack with age. Whenever you rebuild a carb, replace these seals with new ones (OEM or good aftermarket gaskets). A leaking float bowl gasket or torn diaphragm will cause fuel leaks or erratic mixture.
Float Height
Verify the float height per the service manual. If the float sits too high, the carb floods (rich); too low, it starves the engine (lean). Proper float level ensures the fuel bowl stays filled at the correct level. This is often adjusted by bending a little tab on the float needle.
Idle Mixture and Screw Adjustment
idle mixture and screw adjustment
With the engine warm, set the idle mixture screw so the engine runs smoothly at idle. This usually means turning the screw in or out until you find the highest stable idle (a fine adjustment, typically 1/4 turn at a time). Many carbs have a small “pilot screw” at the base for this. A good starting point is to screw it all the way in (gently) and then back it out 1–2 turns as a baseline.
Idle Speed
Set the throttle stop screw (usually a larger screw) so the engine idles at the correct RPM (refer to your manual). This is done after the mixture is roughly set. The idle speed should not be so high that the bike moves on its own, nor so low that it stalls easily.
Synchronization (for multi-carb bikes)
If your bike has more than one carburetor, they must be balanced (synced) so each cylinder draws the same vacuum. Typically, you idle the bike and adjust small screws so that all gauges read equally. Carolina Cycle recommends syncing every 6,000–12,000 miles. Signs of bad sync include a bumpy idle, uneven throttle response, or surging.
Any major changes (airbox, exhaust, altitude) may require new jets. For example, a high-flow air filter or exhaust usually leans out the mix, so a larger main jet is needed. Similarly, riding at high elevation often calls for smaller jets to compensate for the thin air. The main jet affects high-rpm mixture, the pilot (idle) jet affects low-rpm, and the needle (on slide carbs) affects midrange. Keep track of your stock jets so you can compare after changes.
Conclusion
A properly chosen carburetor – one that matches your engine and riding style – is vital for good motorcycle performance. With these tips and by choosing a carb from a reliable brand, even a beginner can safely optimize their bike’s air-fuel system. Happy riding and tuning!
Motorcycle carburetors have long been the heart of fuel delivery systems in motorcycles. Even as electronic fuel injection (EFI) becomes prevalent, carburetors remain popular—especially in classic, off-road, and aftermarket-tuned motorcycles. Understanding different types, their operating principles, and their strengths is crucial for riders, mechanics, and enthusiasts.
What a Carburetor Does and Why It’s Important
The carburetor's main job is to combine air and gasoline in the right proportion before the mixture goes into the engine cylinder. When the engine sucks in air, the carb forms a vacuum in the venturi (a narrowed throat), which draws fuel from the float bowl into the air flow. The air-fuel mix that results needs to be just right - not too rich (too much fuel) or too lean (too much air) - to burn well.
Opening the throttle allows more air to flow in and pulls in more fuel boosting power. On the flip side, shutting the throttle cuts down on airflow and fuel. The mix's makeup is crucial: a 14.7:1 air-to-fuel ratio is just right, perfect for full combustion. Any changes impact performance, gas mileage, and exhaust emissions.
Getting the mix right is key. If the carburetor gets blocked wears out, or isn't set up, the engine might run rough at idle, stumble when you step on the gas, cut out, or pump out black smoke.
For instance, a "lean" mix (too much air) can make the engine sputter or backfire, while a "rich" mix (too much fuel) can lead to black exhaust smoke and bad gas mileage. That's why an adjusted carburetor is key for smooth operation and why picking the right carburetor for your motorcycle is important..
The traditional float carburetor uses a float chamber to regulate fuel flow. When engine vacuum pulls air through the venturi, it draws fuel across the jet orifice. A butterfly valve regulates airflow, which in turn adjusts fuel delivery via fixed jets.
Float Carburetors
Pros
Simple and robust: fewer moving parts make it easy to rebuild.
Reliable: tough performance in a variety of conditions.
Cons
Throttling lag: slower response compared to performance carbs.
Less precise across RPM ranges: fixed jets limit optimization.
2. Slide-Valve (Mechanical) Carburetors
In mech-slide carbs, the throttle cable directly raises or lowers a slide (or piston), opening the venturi. A tapered needle increases fuel flow as the slide moves.
Mechanical slide carbs
Pros
Quick throttle response: instant connection between rider input and engine output.
Good performance: ideal for race and dirt bikes requiring immediate power.
Cons
Fuel economy: can run richer than needed at partial throttle.
Requires tuning: jets and needles must match engine conditions.
3. Constant Velocity (CV, Vacuum) Carburetors
CV carbs use a butterfly valve tied to throttle control and a vacuum-operated slide piston. Changes in vacuum dictate slide lift, maintaining consistent airflow velocity.
Constant Velocity Carburetors
Pros
Smooth throttle transitions: vacuum control prevents jerky acceleration.
Slower initial throttle: slight lag before vacuum opens slide.
Complex: diaphragms and springs require maintenance.
4. SU-Style Carburetors
Similar to CV carbs, SU carburetors use a floating piston and a tapered needle jet. However, they rely purely on airflow differential across the piston, without a throttle butterfly.
SU-Style Carburetors
Pros
Automatic mixture balancing: adjusts seamlessly to demand.
Simpler mixture tuning: one adjustment screw covers broader operation.
Cons
Airbox reliance: low vacuum may affect performance off-boost.
Not suited to high-performance demands: may lack throttle snap.
5. Specialized Racing Carburetors
Yoshimura’s MJN revolutionized fuel atomization by using a central nozzle with multiple holes, improving mid- to top-end response.
Motorcycle specialized racing carburetors
Pros
Sharper throttle bite: instant response even with larger bores.
While EFI dominates new bikes, motorcycle carburetors still thrive:
In developing/emerging markets where simplicity is valued.
Among enthusiasts who appreciate tinker-friendly setups.
Performance upgrades with tech like MJN keep carbs competitive.
Conclusion
Motorcycle carburetors come in many designs, each with unique traits. From traditional float types to cutting-edge MJN flat slides, riders have options to fit their needs—street, vintage, off-road, or performance. While EFI is modern, motorcycle carburetors endure thanks to their serviceability, customization, and charm. Choosing the right one means thinking about your bike, riding style, and mechanical skill.
Lithium-ion batteries power most electric motorcycles, giving riders long range and performance. However, these batteries can overheat or ignite if misused. Preventing motorcycle battery fires starts with understanding the risks and following simple safety steps every time you charge, ride, or store your bike.
This guide summarizes the latest expert advice (2025) on avoiding battery fires in electric motorcycles. It covers safe charging, routine maintenance, storage, warning signs, and the impact of extreme weather. Always prioritize safety by following manufacturer instructions and using common-sense precautions.
Why Motorcycle Battery Fires Happen
electric motorcycle charging outdoors
Understanding how fires start helps us prevent them. The main causes of lithium-battery fires include:
Overcharging: Plugging in too long or using the wrong charger can overheat the battery. Overcharging forces the battery to generate excess heat, potentially triggering a fire.
Physical damage: Dropping the battery or crashing the bike can dent or puncture cells. This can create an internal short circuit, causing the battery to suddenly overheat. Always handle batteries carefully to avoid cracks or dents.
Manufacturing or design defects: Poorly made batteries or aftermarket packs sometimes lack important safety features. A bad internal design or a missing Battery Management System (BMS) can fail to prevent overcharge/over-discharge, letting a fault lead to fire. Buy batteries from reputable sources and avoid cheap knockoffs.
Extreme temperatures: Very hot or cold weather stresses lithium cells. In intense heat, the battery’s chemistry can become unstable and cause thermal runaway. In freezing cold, charging can damage cells or the BMS. For example, experts warn that “exposure to extreme temperatures can cause an electric motorcycle battery to catch fire”. Always keep batteries within the manufacturer’s recommended temperature range.
Charging Safely to Prevent Motorcycle Battery Fires
Charging is one of the most critical moments for battery safety. Follow these guidelines every time you plug in your electric motorcycle:
1. Use the proper charger
Always use the charger supplied or approved by the manufacturer of your bike. Chargers and batteries are matched for voltage and current.
Using a random or counterfeit charger can provide the wrong power, overheating the pack.
UL and fire departments stress: only use batteries and chargers that meet recognized safety standards and are specifically designed for your model.
2. Follow charging instructions
Read the owner’s manual and abide by all charging instructions. Set up the charger on a flat, stable surface away from water or spills.
Keep the charging area clear of flammable objects (petroleum, fabrics, paper, etc.).
3. Never leave it unattended
Charging should be watched at all times. Don’t plug in your motorcycle and go to sleep, or leave it charging in another room where you can’t hear or smell problems.
City fire departments repeatedly warn not to leave batteries unattended or charge overnight.
If you notice the bike or battery getting hot while charging, unplug it immediately and move it to a safe place.
4. Keep away from exits and flammables
Keep away from exits and flammables
Position the charging setup so it does not block any exits or hallways. In a fire, you don’t want a charging bike trapping your escape path.
Also, avoid charging next to gas cans, paper boxes, wood, or other combustibles. In parking garages or sheds, put the bike on a non-flammable surface if possible.
5. Avoid power strips or extension cords
Plug the charger directly into a wall outlet. Do not use a power strip or extension cord, as these can overheat under high current.
If the outlet or charger feels warm to touch, unplug it and have an electrician check the circuit.
6. Watch the temperature
Charge the battery only within moderate ambient temperatures. Do not charge in extreme heat or cold.
Safety experts and fire departments caution: “Keep batteries at room temperature when possible. Do not charge them if it’s too cold (below 32°F) or too hot (above 105°F)”.
In practice, avoid charging outside on very hot summer days or during a cold night. Instead, charge in a climate-controlled garage or indoors (with venting) when weather is extreme.
7. Stop at full charge
Once the battery reaches 100%, immediately unplug the charger. Do not fully charge the battery.
Excess charging can cause heat build-up. Modern chargers usually shut off automatically, but it’s safest to still unplug promptly.
Tips to Prevent Motorcycle Battery Fires
Regular maintenance keeps the battery healthy and safe. Incorporate these habits into your routine:
1. Inspect the battery regularly
Inspect the battery regularly
Look over the battery pack and its casing for any signs of damage. Check for cracks, dents, or bulges in the case. Feel for any hotspots or “burning” smells when the battery has been running.
If the bike has been in a crash, assume the battery could be compromised. Seattle fire officials advise to “examine batteries for physical damage like punctures or dents, leaking, swelling, and other signs”.
Never ignore these warning signs. If you spot anything unusual , stop using the bike and get professional help.
2. Keep battery connectors clean
Battery connectors and terminals should be clean and snug. Dust, dirt, or corrosion can interfere with the electrical connection and cause resistance heating.
Wipe the contacts periodically with a dry cloth, and lightly apply the recommended grease or protector if the manual suggests it.
A clean, tight connection ensures efficient power transfer and reduces strain.
3. Avoid completely draining the battery
Try not to ride until the battery is 0%. Deep discharges can stress lithium cells. It’s best to recharge when the battery level drops to around 30–40%.
Likewise, you don’t need to charge to 100% all the time – partial charges are fine for daily use.
In fact, some experts recommend storing batteries at about 50–60% charge if the bike won’t be used for weeks.
This practice extends battery life and reduces fire risk from overcharging or over-discharging.
4. Use only the correct battery pack
If the battery ever needs replacement, be sure to use the pack designed for your motorcycle model.
Don’t try to fit a different size or voltage pack, and avoid “aftermarket” packs that aren’t manufacturer-approved.
CalBike warns that many fires were linked to unapproved batteries without proper cell separation or management.
Aftermarket or cheap replacement batteries may be cheaper, but they often lack safety features.
Stick to genuine or certified batteries recommended by your bike’s maker.
5. Replace old or worn batteries
Lithium batteries slowly degrade over time. If your battery no longer holds charge or shows significant capacity loss, have it checked.
An old battery with internal cell damage is riskier. Likewise, if the BMS (battery management system) signals faults often, service it.
The Occupational Safety and Health Administration advises removing any battery that shows damage, excessive wear, or performance issues.
Never continue to use a suspect battery “just for a short ride” – safety is paramount.
By maintaining the battery and its connections, you prevent many of the issues that can lead to overheating or failure.
Routine care is simple and keeps your battery in good shape, reducing the chance of a fire.
Electric Motorcycle Safe Storage Guidelines
How and where you store your electric motorcycle (and battery) can affect safety:
Store in a cool, dry place. Heat and humidity accelerate battery degradation and increase fire risk. Keep the bike and its battery out of direct sunlight and away from heat sources (radiators, furnaces, space heaters, etc.). A garage or covered shed is ideal, as long as it stays dry. As OSHA notes, batteries should be kept in “cool and dry environments and away from flammable material”.
Avoid indoor charging/storage if possible. If you have a dedicated battery room or garage, use it. Storing an electric motorcycle inside living spaces (like a home or apartment) can be hazardous – lithium fires are very hard to extinguish. One expert recommends keeping the bike outside of your home for safety. If you must store indoors temporarily, ensure it is on the ground floor (in case of fire) and not near exits or fabric.
Keep partial charge for storage. For long-term storage (weeks or months), leave the battery at roughly 50% charge, not fully charged or fully empty. This charge level is generally best for battery health and safety. Check the bike periodically and recharge if the voltage dips too low (avoiding deep discharge).
Monitor extreme climate changes. In very cold regions, don’t store or charge the battery below freezing. In very hot climates, ensure the storage area is ventilated or air-conditioned. Batteries shouldn’t sit in sweltering heat (e.g., inside a car on a summer day) nor freeze in open air. The Plymouth Fire Department warns not to keep batteries in hot cars or direct sun, as this “is a fire risk”.
Lock away from tampering. If children or pets are around, keep the bike locked or the battery cover secure. A curious child should not be able to touch the charging port or terminals. Also, store spare batteries separately, in a fireproof container if available, and keep them isolated from flammable materials.
Proper storage means the battery is less likely to face shock or heat that could trigger a problem. Even when not riding, treat your electric motorcycle’s battery with respect and caution.
Recognizing Warning Signs of Battery Problems
Early warning signs let you act before a fire starts. Regularly check your bike and battery for any abnormal symptoms. Stop using the battery if you notice any of the following and seek expert inspection:
Unusual odor or smoke. A chemical or “plastic” smell coming from the battery area is a bad sign. Smoke or vapor means an internal failure. Never ignore these – remove power immediately.
Heat or burning. If the battery or bike feels too hot to touch without riding (especially at rest), or if it heats up rapidly while charging, disconnect it. A very hot battery can indicate a short or failing cell.
Swelling or bulging. Lithium cells will swell when failing. If the battery pack looks puffed up or the casing is warped, stop using it at once. This means internal pressure has risen and the pack is unstable.
Leaking fluid. Any leakage (liquid or gel) around the battery means damage inside. Clean it up carefully (wear gloves) and get the battery serviced.
Motorcycle battery leaks
Strange noises. Hissing, popping, or crackling sounds from the battery pack are clear signs of trouble.
Failure to hold charge. If your battery suddenly can’t charge to full or depletes far quicker than normal, have it checked. A failing cell can cause overheating when trying to maintain voltage.
Any charger or indicator errors. If the charger’s LEDs blink abnormally or the bike’s dashboard shows battery warnings, investigate. Don’t bypass error codes; they are often telling you something is wrong.
These symptoms are real red flags. Both UL and Seattle safety guides list them clearly: examples include “leaking, swelling, smoking batteries, or hissing/popping sounds”. If any sign appears, stop using the motorcycle immediately, move it outside or to a safe area, and call a professional. It’s better to lose one battery than risk a fire spreading to your home or garage.
Finally, if the bike has been in a crash or extreme event (heavy rain, submersion, etc.), treat the battery with extra caution. Even if it seems okay, have it inspected. Trauma can cause hidden internal damage that later leads to failure.
Climate and Environmental Factors
Weather and environment affect battery safety. Keep these points in mind:
High ambient temperatures: In hot climates (desert sun, heat waves), lithium batteries can heat up on their own. Park your bike in the shade and avoid charging during the hottest hours. If your area often exceeds 95–100°F (35–40°C), be especially cautious. Heat accelerates degradation and can push a stressed battery into thermal runaway. In summer, minimize direct sun exposure on the bike’s battery.
Cold weather: Cold reduces a battery’s effective capacity and can make charging difficult or dangerous. Don’t charge below freezing temperatures. For example, experts advise not charging if below 32°F (0°C). If you ride in winter, consider charging indoors or using a temperature-controlled charging station. Also, don’t leave a frozen battery on charge hoping it will warm up; wait until it’s above the safe charging threshold.
Humidity and water: Battery packs are usually sealed, but heavy rain or flooding could still cause trouble. After riding in the rain or washing the bike, ensure the connectors are dry before plugging in. A wet connection can short. Do not charge a wet battery or inside a flooded area. Keep batteries off the ground in case of minor spills.
Storms and power surges: During electrical storms, avoid charging or leave the charger unplugged. Lightning strikes and surges can damage batteries. If your area has frequent power outages or surges, use a surge protector or dedicated circuit for the charger.
Wildfire smoke or emergency situations: If living in a wildfire zone, keep batteries very closely monitored. Smoke and heat from wildfires can raise indoor air temperature; store batteries in the coolest part of your home. In general, keep emergency numbers handy in case you see/hear battery issues.
By accounting for climate, you keep batteries within a safe operating envelope. Extreme weather can be as dangerous as misuse, so be prepared and adapt your practices to local conditions.
Conclusion
Electric motorcycles offer clean, quiet transportation, but their batteries demand respect. By following the tips above, you can greatly reduce the risk of battery fires.
In summary, the key to battery fire prevention is vigilance and care. Think of your motorcycle’s battery as a potential hazard that needs safe handling, just like gasoline in a car. With regular checks and smart habits, you can enjoy your electric motorcycle worry-free and keep both yourself and your property safe.
The middleweight adventure category (roughly 650–900cc bikes) offers a balance of power, comfort, and off-road ability for long-distance touring and dirt riding. These bikes are lighter and more nimble than heavyweight ADV models, yet more powerful and road-oriented than dirt bikes. For 2025, manufacturers have updated or introduced several standout middleweights. Below are ten top picks with their key features, from powerful twins to torquey triples. Each bike’s engine, performance, suspension, and electronics are discussed to help riders choose the right adventure companion.
CFMOTO’s 2025 800MT-X is a new dirt-focused adventure bike closely related to KTM’s 790 Adventure R. It uses the same 799cc parallel-twin KTM engine tuned to about 94 bhp and 57 lb-ft.
The chassis is also KTM-derived (steel tubular frame, 21″ front wheel, 18″ rear) but wrapped in unique bodywork. Long-travel suspension (48 mm USD fork, adjustable shock) and a low-mounted fuel tank give it true off-road geometry.
Engine: 799 cc liquid-cooled parallel twin (KTM-derived) – ~94 bhp and 57 lb-ft.
Chassis: Steel frame, 21″ front/18″ rear spoked wheels; long-travel adjustable suspension; dual 310 mm front disc brakes.
Features: Ride modes, switchable ABS, 5″ color TFT dash, optional quickshifter. Low-centre fuel tank (for better handling) and tubular crash bars.
Value: One of the cheapest 800-class ADV bikes, offering KTM-like tech at a fraction of the price.
The Kove 800X Pro is a brand-new Chinese entry for 2024/2025, designed to shake up the segment with light weight and performance. It packs a 799 cc DOHC parallel-twin making about 95 hp (95 hp), but with a claimed curb weight of only ~408 lb (185 kg) – roughly 50–100 lb lighter than most rivals. This low mass (and low CG from a subframe fuel tank) makes the 800X Pro exceptionally agile both on- and off-road.
The 800X Pro features fully adjustable KYB suspension (9.5″ travel each end), 21″ front & 18″ rear spoked wheels, and a 5-gallon (20 L) fuel tank for ~250+ mile range. Electronics include three ride modes (Eco/Sport/Rain), switchable dual-channel ABS (with rear wheel off option), and a 7″ TFT display.
In short, Kove’s 800X Pro is a high-value lightweight ADV: simple yet capable, with excellent off-road manners thanks to its low weight.
Suzuki’s all-new V-Strom 800 launched in two flavors. Both use a 776 cc parallel twin (4-valve DOHC) producing about 83 hp at 8500 rpm and 57.5 lb-ft at 6800 rpm. Importantly, each model carries a large 5.3 gal (20 L) fuel tank for over 250+ mile range.
The difference is in focus: the standard V-Strom 800 is road-biased, with 19″ front/17″ rear cast wheels, moderate 5.9″ travel suspension, and a tall windscreen. The 800DE (Dirt Edition) swaps to a 21″ front wheel, increased travel (~7.9″ front/7.9″ rear), and off-road-friendly tires. The DE also adds a full off-road ABS mode and extra electronic modes (gravel mode, more TC settings).
Both bikes share Suzuki’s smooth new engine and advanced aids. The V-Strom 800 has ride-by-wire, three power maps, traction control and dual-channel ABS (the non-DE lacks a full ABS-off setting on the rear). It even comes standard with an up/down quickshifter.
In short, the V-Strom 800 is a well-rounded middleweight: the street version is a great general-purpose tourer, and the 800DE adds the needed kit (higher travel, ABS off, cornering ABS, etc.) to make it capable on light trails.
Engine: 776 cc liquid-cooled parallel twin – ~83 hp, 57.5 lb-ft (new Euro5+ engine).
The Honda Transalp XL750 uses a brand-new 755 cc Unicam parallel twin (derived from the CB750 Hornet) tuned for touring. This engine makes about 90.5 hp (67.5 kW) at 9,500 rpm and 75 Nm (55 lb-ft) at 7,250 rpm, with a smooth 270° crank and assist-slipper clutch. Honda optimized it for low-end response with vortex intake ducts and Ni-SiC bore plating.
The Transalp’s steel frame with Showa 43 mm SFF-CA front forks (200 mm travel) and Pro-Link shock (190 mm) provides 212 mm ground clearance – enough for easy dirt roads. Unusually for Honda, the Transalp includes 5 ride modes (Sport, Standard, Rain, Gravel, Custom) via throttle-by-wire, and ABS (which can be turned off).
In practice, the Transalp is very comfortable on highway rides (thanks to its large fairing, tall windshield, and 5″ TFT with Honda RoadSync phone mirroring). The seat is adjustable (850 mm standard, optional 830 mm). Its heavy-duty 310 mm front brakes and traction control make it a safe tourer.
In summary, the Honda Transalp 750 is an excellent adventure tourer: powerful and refined with premium features (smartphone voice control, emergency stop signal, etc.).
Engine: 755 cc Unicam twin, 4-valve (270° crank) – ~90.5 hp and 55 lb-ft. High fuel pressure, assist/slipper clutch, gear-driven balancer.
Chassis: Steel truss frame, 43 mm Showa forks (200 mm travel), Pro-Link shock (190 mm), 21″ front/18″ rear spoked wheels, 212 mm clearance.
KTM’s 790 Adventure (2019–2022) and its successor, 890 Adventure (2023–), set benchmarks in this class. The original 790 Adventure R used a 799 cc KTM parallel twin, making ~95 hp, whereas the new 890 Adventure R bumps displacement to 889 cc for about 103 hp (77 kW) and 100 Nm torque.
KTM’s steel trellis frame (using the engine as a stressed member) is mated to fully adjustable WP suspension with 200 mm travel (43 mm fork, shock) and spoked 21″/18″ wheels. Both models offer rider aids like multiple ride modes, cornering ABS/TC, and optional quickshifter+. The 890 Adventure introduced a modern 5″ TFT display and even improved ergos (fuel tank, narrow waist).
The 790/890 Adventure R (the off-road-focused version) is known for excellent dirt capability. The 890 Adventure R especially adds cruise control and a “Demo Mode” to practice tech. In short, KTM’s 790/890 gives ~100+ hp with a light chassis (dry ~440 lb) and top-shelf off-road tech. It remains one of the most capable middleweight ADVs, with engine performance, 200 mm suspension travel, and WP APEX hardware.
The standard (S) or Rally trim is more road-oriented (smaller tank, less travel), but all 790/890 variants are sporty and versatile. The 890 model continues into 2025, carrying forward KTM’s reputation for rugged mid-size adventure bikes.
Yamaha’s Ténéré 700 has been a top seller since its 2019 debut, and it carries into 2025 with refinements. It uses the legendary 689 cc “CP2” parallel twin (shared with MT-07), now tuned to about 72 hp and 50 lb-ft. With a wet weight around 470 lb (213 kg), the Tenere 700 is lighter than most rivals and feels very flickable on trail.
Suspension travel is ample (8.3″ front KYB, 7.9″ rear) on 21″/18″ spoked wheels. Yamaha gave it a larger 5″ TFT dash (with two theme modes) and Y-Connect Bluetooth for 2024, plus optional ABS modes (front-only on/off, rear on/off) and an up-only quickshifter.
Ride reports consistently praise the Tenere’s balance and reliability. The simple twin is smooth and controllable off-road (“predictable and manageable… does not need multiple maps”). It’s not as powerful as bigger bikes on-road, but many riders value its simplicity and durability.
In use, the 700’s narrow profile, upright ergos (34.6″ seat), and modest wind protection make it comfortable for long days' rides. For 2025, the Tenere remains a “benchmark” middleweight due to its bang-for-buck value, packed with quality suspension and brakes (Brembo 282 mm dual front discs). It’s especially popular for mixed on/off touring.
Engine: 689 cc liquid twin – ~72.4 hp at 9000 rpm, 50 lb-ft at 6500 rpm (CP2 crossplane design, linear torque).
Features: 5″ TFT dash with Bluetooth Y-Connect, switchable ABS modes, optional quickshifter+, USB socket. 4.2 gal fuel (≈250 mi range), 34.6″ high seat.
Ride Impression: Known for lightweight agility and off-road prowess. Yamaha updated the dash and ABS settings for 2024, but the core bike remains unchanged and continues to sell well.
The Moto Guzzi V85 TT is a uniquely styled adventure-tourer with classic Italian character. It uses an 853 cc transverse V-twin (often called the “Small Block” engine) now updated with variable valve timing (Euro5+). Power is about 80 hp at 7750 rpm and 61 lb-ft at 5100 rpm – similar to the older model. A shaft drive (the only one in this class) sends torque to the rear wheel. Guzzi claims 90% of torque is available at just 3500 rpm thanks to the VVT system.
The V85 TT’s steel frame and suspension are fairly standard: 41 mm USD forks and shock with preload/rebound adjust, about 180 mm travel. Seat height is 32.6″ and wet weight is heavy (~507 lb for the base TT model). It rolls on 19″ front/17″ rear wheels with Metzeler Tourance tires.
The bike’s standout feature is its retro adventure styling (twin round headlights, boxer-appearance cylinders sticking out). Electronic aids include ABS and TC (cornering ABS on higher trims), multiple riding modes, and (in the Travel model) phone connectivity and panniers.
Reviewers note the V85 TT feels “laid-back” with smooth torque delivery, but it’s not as quick as liquid-cooled rivals. The shaft drive provides smooth power transfer, and the engine’s bottom-end grunt makes it comfortable for long touring.
In summary, the V85 TT is best for riders who appreciate classic Guzzi flair and long-haul comfort rather than maximum off-road agility. It’s a torquey, well-equipped tourer with a rich sound and unique style.
Engine: 853 cc 90° air/oil V-twin, 2-valve heads – ~80 hp @ 7750 rpm, 61 lb-ft @ 5100 rpm. Belt-driven cams, variable timing, shaft final drive (smooth but heavier).
Chassis: Steel frame, 41 mm forks, monoshock; 19″ front/17″ rear wheels; about 180 mm suspension travel. 495 lb (V85TT base) to 535 lb (Travel) wet.
Features: Riding modes (Sport, Road, Rain; TT Travel adds Off-road, Custom), optional cornering ABS/TC (with IMU), LED lights, Guzzi MIA Bluetooth system (TT Travel), luggage racks, heated grips (Travel).
The Aprilia Tuareg 660 (2022) brings sportbike DNA to adventure bikes. It uses a derived version of Aprilia’s RS660 engine – a 659 cc 270° parallel twin – making about 80 hp and 70 Nm of torque. The dry weight is only ~412 lb (187 kg), making it one of the lightest in class. Suspension is long-travel (43 mm Kayaba USD fork, 240 mm travel front; 230 mm rear) and wheels are 21″ front/18″ rear spoked.
What sets the Tuareg 660 apart is its electronics and agility. It has ride-by-wire with five modes (Road, Off-Road, etc.), 4-level traction control (can be turned off on the fly), cornering ABS, and a lean-sensitive IMU. A 5″ TFT dash provides clear info. Despite its smaller engine, the high compression (13.0:1) and race-inspired tuning give it a snappy character.
Reviews call the chassis “entertaining” and say it carries speed through rough sections with ease. At around $12.5K USD (Rally Pro is more), it’s pricier, but Aprilia has packed it with premium components (e.g. Brembo Stylema brakes) and accessories. In short, the Tuareg 660 is a light, sporty ADV for riders who want agile handling and high-tech features in a compact package.
BMW’s F 900 GS was fully redesigned for 2024. It now uses an 895 cc DOHC parallel twin (derived from the former F850’s engine) that makes 105 hp at 8500 rpm and 68.6 lb-ft torque – a healthy 15 hp increase. BMW also shed about 22 lb in the new model, with a fully-fuelled weight of ~483 lb. The 900 GS has a slimmer front end and new ergonomics: lower pegs, higher bars, and a 34.3″ seat (optional 32.9″ lower seat).
It rides on 43 mm Showa USD forks (9.1″ travel) and an adjustable rear shock (8.5″ travel), with 21″/17″ spoked wheels shod in Metzeler Karoo 4 tires. Braking is by Brembo: twin 305 mm front discs and a 265 mm rear. Standard electronics include a 6-axis IMU, cornering ABS (ABS Pro), two modes (Rain/Road), and TC.
The 900 GS also comes with a 6.5″ color TFT display (with smartphone connectivity) and many amenities (heated grips, USB, cruise control optional). An optional Enduro Pro pack adds Adventure/Dynamic riding modes and ABS pro on/off.
In use, the F 900 GS is praised for strong acceleration and smooth power delivery. The extra torque makes it more flexible off-road, and the sportier chassis (now with a lighter swingarm) gives confidence on trails. Overall, BMW’s new F 900 GS is a high-tech, comfortable adventure bike that rivals larger ADV machines, now with performance to match its weight class.
Engine: 895 cc liquid-cooled twin – 105 hp @ 8500 rpm, 68.6 lb-ft @ 6750 rpm. 270° crank, two balancers, Akrapovič silencer on R/Rally models.
Triumph’s Tiger 900 (introduced 2020) continues as a competitive middleweight with its agile 888 cc inline-3. The 3-cylinder motor makes about 108 PS (106.5 hp) at 9500 rpm and 66.4 lb-ft at 6850 rpm. It is paired with a smooth 6-speed gearbox, slip/assist clutch, and features like selectable riding modes.
The Tiger 900 comes in GT (road) and Rally (off-road) trims. Both share Brembo Stylema 320 mm front brakes, a 7″ TFT dash, and cruise control (on Pro models).
The Tiger 900 Rally Pro is the off-road version: it has 21″ front/17″ rear spoked wheels, long-travel Showa suspension (240 mm front, 230 mm rear) and an adjustable seat (820–840 mm). Notably, the Rally Pro’s unique “Off-Road Pro” mode disables all electronic aids (ABS/TC off) for expert riders who want full control.
The Tiger’s triple engine is smooth and tractable; reviewers note its excellent low-speed torque and refined power delivery on trails. In Rally Pro trim with trail-focused tires (e.g. Bridgestone Battlax Adventure), the Tiger 900 is a serious dirt machine, yet it still accelerates strongly on pavement.
For 2025, the Tiger 900 GT and Rally remain largely unchanged from 2024. They continue to offer class-leading features for the price. For example, the Rally Pro’s WP suspension and advanced traction control make it very capable off-road, while the GT Pro version has 19″ front wheels and slightly less travel (180/170 mm) for better on-road manners.
In summary, Triumph’s Tiger 900 gives 106 hp from a triple, top-tier brakes/suspension, and fully-loaded electronics (including a quickshifter and full-color TFT) – making it a versatile all-rounder.
Each of these middleweight adventure motorcycles brings a different blend of power, weight, and features. Riders should compare factors like engine feel, suspension travel, electronics, and ergonomics. Whether it’s the KTM-derived CFMoto 800MT-X’s value, Kove’s featherweight fun, Suzuki’s long-range practicality, or the sophisticated BMW and Triumph rigs, 2025’s lineup has something for every ADV enthusiast.
The swingarm is one of the most important components in a motorcycle's suspension system. It connects the rear wheel to the main frame and allows vertical movement to absorb shocks from the road. While it might seem like a simple part, the swingarm plays a critical role in handling, comfort, and even aesthetics. Over the years, various swingarm designs have emerged, each with specific strengths and applications.
In this in-depth guide, we explore nine swingarm types that define motorcycle performance, from traditional setups to futuristic engineering marvels.
9 Swingarm Types
1. Double-Sided (Conventional) Swingarms
double-sided swingarms
Double-sided swingarms are the traditional and most common design. They consist of two arms (often in a “box-section” or “twin-spar” layout) that run on each side of the rear wheel and pivot together on the frame.
In simple terms, a double-sided arm is like a rectangular U-shape or twin beams welded together around the wheel. Most mass-market bikes use this design because it is strong, simple, and cost-effective.
Pros:
High rigidity and stability: Box-section or twin-spar double arms provide excellent torsional stiffness. This rigidity improves high-speed stability and precise handling.
Simplicity and cost: Conventional double arms are relatively easy to manufacture and repair. They are generally cheaper than single-sided designs.
Balanced load: With two arms on either side, loads and stresses (like chain tension) are shared symmetrically, making weight distribution straightforward.
Cons:
They tend to be heavier (more metal) than single-sided arms because they use two supports.
Wheel changes can be more involved, since the wheel is clamped between both arms
On very high-performance bikes, a simple welded box-arm may not be rigid enough, so designers reinforce it (twin-spar or additional bracing) at the cost of weight.
2. Single-Sided Swingarms
single-sided swingarms
A single-sided swingarm (often called a monospoke or single-arm) supports the rear wheel from only one side. Essentially, the wheel is mounted on one large arm (like a stub axle) instead of being hugged by two arms.
This design has become popular on many high-end sportbikes, race bikes, and even some scooters. By holding the axle, chain, and sprocket on one side, the rear wheel can be removed much like a car’s wheel, without removing the drive components.
Pros:
Easy wheel removal: Because the wheel is only held on one side, you can take off the rear wheel without splitting the chain or belt.
Stylish appearance: Single-sided arms give a very clean, open look on the bike’s rear. They are often considered sleek and distinctive – an eye-catching feature on a showroom bike.
Lower unsprung weight: Because there is only one arm, the parts of the wheel assembly (rim, hub) are lighter with no matching arm on the other side. This reduces unsprung mass at high performance levels.
Cons:
Higher complexity and cost: A single arm must be much stronger and stiffer to handle loads that would normally be shared. Manufacturers often use thick cast or forged alloys and complex geometry to achieve the needed strength. This makes single-sided arms more expensive to build and repair.
Extra weight on the arm: Even though the wheel rotates more freely, the single arm itself is usually heavier than one side of a double arm.
Limited use: Because of the cost and complexity, single-sided swingarms are typically reserved for premium or specialty bikes. They are rarely found on budget or mid-range models.
3. Cantilever Swingarms
cantilever swingarms (Image taken from janusmotorcycles.com)
In many cantilever setups, the swingarm itself pivots at the frame, but the shock(s) are mounted in front of or above the swingarm, connected by a triangular linkage.
Pros:
Cantilever or linkage rear suspension gives engineers a lot of flexibility in tuning the spring rate. As the swingarm moves, the linkage can produce a rising-rate effect, where small bumps have a soft response but large compressions become progressively stiffer.
Compact packaging: By relocating the shock out of the swingarm bay, designers can shorten the bike or achieve a lower seat height. The shock can be buried under the tank or frame.
Progressive suspension: Cantilever linkages can create a desirable spring curve (soft at first, then stiffer) improving comfort on big hits. This suits off-road or touring bikes that need both comfort and bottoming resistance.
Hidden shocks: Especially on cruisers (e.g. Softail) and custom bikes, this lets the bike look “hardtail” while still having rear suspension.
Cons:
Cantilever systems add parts and weight.
Linkages mean more pivot points (which can wear) and slightly higher maintenance.
The setup must be carefully engineered to avoid friction or linkage flex.
4. Parallelogram Swingarms (Paralever)
parallelogram swingarms
Parallelogram or Paralever swingarms are specialized designs used on shaft-drive motorcycles (notably by BMW and Moto Guzzi). In a shaft drive, torque reaction can cause the rear to rise or squat (“shaft jacking”), which feels odd under acceleration or braking.
A parallelogram linkage solves this by adding a second pivot/link so that the driveshaft can move without changing the rear suspension geometry.
Pros:
Improved control of suspension under load, especially on hard acceleration.
Reduced maintenance (no chain lube/adjust needed).
Cons:
More moving parts and weight.
These systems (Paralever, Ca.R.C.) are complex and can be costly to manufacture and repair.
In practice, if you ride a shaft-driven bike (like many BMWs or Moto Guzzis), you get a swingarm that inherently incorporates a parallelogram linkage to handle torque. For chain-driven bikes, this design is unnecessary.
5. Box-Section Swingarms
Box-section swingarms are built using hollow rectangular or square tubes for maximum stiffness and strength.
Pros:
Superior rigidity: Ideal for performance applications.
Durable under heavy loads: Excellent torsional resistance.
Versatile design: Suitable for sports, adventure, and racing bikes.
Cons:
It can be heavy, particularly when made of steel.
Less refined appearance than sculpted or machined arms.
6. Rising Rate Linkage Swingarms
These swingarms use a linkage system to connect the shock absorber, providing a progressive damping response.
rising rate linkage swingarms
Pros:
Progressive suspension: Smooth over bumps, firm under hard load.
Enhanced traction: Keeps the rear tire planted during aggressive riding.
Performance-oriented: Common in motocross and sportbikes.
Cons:
More moving parts mean more maintenance.
Complex tuning and setup.
7. Extended Swingarms
Extended swingarms are longer than standard versions, often used in drag racing or custom builds.
extended swingarm
Pros:
Improved straight-line stability: Reduces wheelies under hard acceleration.
Better weight transfer: Ideal for drag racing setups.
Integrated swingarms combine the motor and suspension into a single unit, mainly in electric motorcycles.
motorcycle Integrated drive swingarm
Pros:
Minimalist design: Cleaner layout with fewer components.
Low maintenance: No chains or belts to service.
Space-efficient: Compact and futuristic.
Cons:
Expensive and complex.
Limited application in current production models.
9. Exotic Multi-Link / Hossack-Inspired Swingarms
hossack-inspired swingarm
These cutting-edge swingarms use complex link systems, sometimes borrowing concepts from front suspension systems.
Pros:
Unparalleled handling control: Reduces dive and pitch.
Innovative design: Stands out from conventional bikes.
Cons:
High cost and complexity.
Rare and difficult to service.
Used mostly in prototypes or niche high-end motorcycles.
Materials and Modern Innovations in Swingarm Design
Swingarms are typically made of strong metals (steel or aluminum), but material choice strongly affects performance. Engineers balance weight, stiffness, and cost when choosing materials and manufacturing methods.
By far the most common swingarm material on modern bikes. It offers a great strength-to-weight ratio and good corrosion resistance. Aluminum swingarms reduce unsprung weight, improving suspension performance and making the bike more agile. For example, many sport and touring bikes use aluminum or alloy castings to keep weight down.
Strong and durable, but heavier than aluminum. Steel swingarms are very cost-effective to make (often welded tubing). Heavy cruisers or budget models may use steel arms (sometimes chromed) for a classic look and ruggedness. The downside is extra unsprung weight and possible performance penalty at the limit.
Cutting-edge composites are now appearing. Carbon-fiber swingarms are extremely light and very stiff, offering major weight savings. They have mostly been used on high-end racing or prototype bikes so far. For example, Ducati’s top models (like the limited-edition 1299 Superleggera) used carbon fiber frames and parts, and BMW developed an award-winning carbon-fiber swingarm for its HP4 Race. Such designs are not yet in mass production, but they show where the technology is headed.
Even within metals, new processes help. For example, Husqvarna’s 2024 Vitpilen/Svartpilen 401 feature a new hollow die-cast aluminum swingarm made from a single casting. This improves stiffness and saves weight compared to older methods. Manufacturers also machine away material or use internal ribs to optimize rigidity. Some very high-end bikes might use magnesium or titanium parts in the swingarm assembly to cut weight further (though these are specialty cases).
Final Thoughts
Swingarms are much more than simple connectors for the rear wheel. Their design impacts how a motorcycle accelerates, turns, and absorbs shocks. As motorcycle technology evolves, so do swingarm designs. From the classic double-sided types to futuristic integrated electric designs, understanding these types helps riders make smarter choices—whether upgrading a suspension, choosing a new bike, or customizing a machine.
Whether you're a casual rider or a tech-savvy enthusiast, knowing the different swingarm types enhances not only your mechanical knowledge but also your riding experience.
Keeping your motorcycle in top shape doesn't have to be expensive or complicated. Many seasoned riders and mechanics have discovered practical, cost-effective maintenance tips that can save you time and money. Here are ten essential motorcycle maintenance secrets that every rider should know.
Chain lubrication doesn’t need to break the bank. In fact, many DIYers use a basic 75W‑90 or 80W‑90 gear oil just as effectively as name-brand chain sprays.
75W‑90 and 80W‑90 gear oil
Gear oil is thick and clings well, and a little goes a long way – you can even apply it from a spray bottle. Some riders mix paraffin (candle wax) with PTFE (Teflon) powder to make their own chain wax, or use engine oil or automatic transmission fluid sparingly.
The key is to coat all the rollers and O‑rings without slinging excess. Top brands often contain similar additives for dirt protection, so a cheap lubricant or homemade wax tends to work just as well as the “premium” stuff.
The result? Your chain stays quiet, lubricated and clean without spending extra cash on fancy aerosols.
2. Brake Fluid Doesn’t Always Need Changing Every Year
Brake fluid is hygroscopic (it soaks up water), so it does need replacing eventually – but usually not every 12 months unless you ride hard.
Most manufacturers and experts recommend flushing your brake fluid about every 2 years or 30,000 miles (whichever comes first). The big clue to replace it is performance: if the lever feels soft, spongy or goes too far before biting, that indicates moisture or air in the system.
Other warning signs include an illuminated ABS/brake light on dash or even a faint burning smell after very hard braking (sign of overheated fluid).
check the color of the brake fluid
In short, instead of blindly swapping fluid every year, listen and look: watch for a soft brake lever and check fluid color (clear fluid is good; dark brown means it’s gunked up). If you're not sure, check your owner's manual, but remember that changing every two years is common advice, not a strict yearly rule.
Motorcycle batteries can last a lot longer if you take good care of them. People often see them die after about 2 years when they don't look after them - but with a bit of effort, they can make it to 4-5 years or more.
The key is to keep them charged up and not let them run too low. For bikes you don't ride every day, use a smart charger or trickle charger. These keep the battery at the right voltage (12.6-12.8 V when full) without overcharging it.
When you put your bike away, take out the battery or keep it on a tender. Don't let the charge drop below about 50% (around 12.2-12.4 V) before you charge it again. It's also smart to check the battery voltage with a voltmeter now and then - if the resting voltage drops much below 12.4 V, give it a charge.
check the battery voltage
If you follow these tips (clean the terminals, keep it warm, don't let it die), your battery will live longer than the usual "2-year throwaway." In fact, if you look after a battery well, you might not need to replace it until 3-5 years have passed.
4. You Don’t Need Fancy Motorcycle Cleaners
Store-bought motorcycle cleaners aren't anything special. Most manufacturers suggest using water and mild soap to clean a bike. Dish soap (washing-up liquid) works great and is safe on all the metal and paint – contrary to internet rumors, it contains no corrosive road salts that will rust your ride.
After you rinse and wash, you can add shine with regular car wax or a spray detailer. For tough dirt or grease, cheap homemade degreasers work wonders: mix baking sod, a liquid soap, and white vinegar into a paste to cut through oily buildup (combine about 1 part baking soda, 4 parts soap, 16 parts vinegar, spray it on then scrub and rinse).
you do not need fancy motorcycle cleaners
You can even use a bit of WD‑40 to spot-clean tar or sticky stuff – just make sure to wash it off after.
Bottom line: don't bother with fancy cleaning kits; warm water, dish soap, and basic household degreasers get the job done, and you'll keep your bike shiny without spending a fortune.
5. Use a Toothbrush or Any Stiff Brush on Your Chain
You don’t need to buy special tools to clean your chain. A stiff brush, like an old toothbrush, works great.
First, apply a degreaser like kerosene or a citrus-based cleaner. Then scrub the chain from the back of the rear sprocket to remove dirt and grime. Make sure to clean all sides of the chain links and rollers. The trick is to use some effort and take your time. Specialty brushes like three-sided ones help, but a toothbrush does the job if used properly.
After cleaning, dry the chain and reapply lubricant. This cheap method keeps your chain in great shape.
If you see oil on your fork tubes, don’t panic. It’s often not a real leak.
oil on fork tubes
Dirt can collect under the dust seals and mix with a bit of fork oil, creating a brown ring that looks like a leak.
First, try cleaning it. Pull up the dust seal and wipe the tube and seal with a rag. Usually, you’ll find dirt causing the problem. After cleaning, bounce the forks a few times. A tiny bead of oil may appear, which is normal. If no more oil shows up, you fixed it.
Only consider replacing the seals if the fork keeps leaking after cleaning.
7. Don’t Over-Tighten the Oil Drain Plug
Be careful not to tighten the oil drain plug too much. Over-tightening can strip the threads or even crack the engine case.
Be careful to tighten the oil drain plug
Check your manual for the correct torque setting, which is often around 15-25 ft-lbs. If you don’t have a torque wrench, tighten the plug until it’s snug, then give it a small extra turn.
Also, always replace the crush washer during oil changes. A properly tightened plug won’t leak, and you’ll avoid expensive repairs.
8. Use Anti-Seize Compound on Key Fasteners
A small amount of anti-seize grease can save you a lot of trouble later. Use it on bolts that go from steel into aluminum and on hot parts like spark plugs, axle nuts, exhaust bolts, and brake caliper bolts.
Use anti-seize compound
The grease stops the parts from sticking or getting damaged by heat. Just use a thin coat and tighten to normal torque. This makes it much easier to remove bolts in the future and prevents them from seizing.
Coolant keeps your engine from overheating or freezing, but it goes bad over time.
deteriorated coolant
Old coolant can get dirty, turn acidic, and cause rust inside your cooling system. This can lead to serious damage like a warped cylinder head. Flushing the coolant every two years helps avoid these problems.
Drain the old coolant, fill the system with clean water or a flush solution, run the engine briefly, and then drain it again. Finally, fill with fresh 50/50 coolant mix. Even if the coolant looks okay, flushing helps prevent overheating and corrosion. It’s as simple as an oil change and worth doing.
10. Always Check Wheel Bearings During Service
Wheel bearings are very important for safety, but people often forget to check them.
check wheel bearings
Bad bearings can cause the bike to wobble or even make the wheel lock up. Whenever you remove the wheels or at least every few thousand miles, check them.
Lift the wheel off the ground and try to move it side-to-side and up-and-down. If it feels loose or rough, the bearings may be worn out. Spin the wheel and listen for grinding noises. If you hear anything odd, replace the bearings.
They are cheap and easy to replace early, but ignoring them can lead to dangerous problems. Check both front and rear bearings often and replace them when needed.
By incorporating these motorcycle maintenance secrets into your routine, you can keep your motorcycle running smoothly and safely while saving money. Regular inspections and simple DIY practices go a long way in ensuring your bike's longevity and performance.
A motorcycle’s clutch is the unsung hero of every ride. It connects the engine to the transmission, allowing smooth gear shifts and controlled power delivery. For beginners, understanding how to care for this critical component can prevent costly repairs, improve performance, and extend your bike’s lifespan.
In this guide, we’ll break down everything you need to know about motorcycle clutch maintenance, from spotting early warning signs to step-by-step care routines.
Keeping the clutch in good shape pays off. A well-cared-for clutch ensures smooth gear shifts and a more responsive ride. It also extends lifespan – regular checks prevent premature wear of plates and springs. In practical terms, routine clutch care (adjusting cables, changing oil) improves safety and performance, and it can save big repair bills later. Think of it like brakes or tires – simple maintenance now avoids problems on the road
Smooth Shifting: Proper clutch care makes gear changes seamless
Extended Life: Adjusting and cleaning parts prevents wear and expensive replacements
Better Performance: A healthy clutch keeps acceleration strong and the bike responsive
Watch for these warning signs of a failing clutch:
Slipping: Engine revs climb but the bike barely accelerates
This “rev without speed” means the clutch plates aren’t gripping.
Hard Shifts or Dragging: Gears jerk or grind, or the clutch lever feels stiff. This can happen if the cable is too tight or plates are sticking
Strange Noises: Rattling, clunking or grinding when you pull the lever. These can signal worn bearings or damaged plates
Burning Smell: A whiff of burning (like clutch material), especially after heavy use is a red flag
Leaky Fluid: For hydraulic clutches, fluid leakage or a constantly low reservoir means trouble (check seals and lines).
Poor Acceleration: If the bike drags or “chugs” in low gears, it may be a weak clutch
worn clutch
Noticing issues early helps you fix them before they cause breakdowns. If any of the above appear, check your clutch right away.
Basic Motorcycle Clutch Maintenance Tips
Follow these easy steps to keep your clutch in top shape:
Adjust Free Play: Ensure the clutch lever has a small gap (free play) before it starts to engage (typically ~10–20 mm at the lever tip on a cable clutch). Too little play can cause dragging; too much lets the clutch slip. Use the adjuster nuts or cable barrel to set this to the manufacturer’s spec
Inspect Cables and Levers: Look at the clutch cable and lever often. Lubricate the cable inside its sheath to keep it smooth, and replace it if you see fraying or kinks. A rusty or sticky cable makes clutch act unpredictably. Also make sure the lever pivots smoothly (a drop of grease on the pivot can help).
Use Proper Oil: On bikes with wet clutches (most modern bikes), always use a motorcycle-specific engine oil with a JASO MA or MA2 rating. These oils are specially formulated for clutches (no slippery additives) so the plates grip correctly. Change the oil at the recommended interval (often with the engine oil). For dry clutches, no oil bath is present, so just keep the interior free of debris.
Check Hydraulic Fluid: If your bike has a hydraulic clutch, periodically check the fluid level and condition in the master cylinder. Use the correct brake fluid (DOT 4 is common) and replace the fluid about every year or as the manual says. Old fluid absorbs moisture and can make the clutch feel spongy. Bleed the system if the lever feels soft. Keeping the fluid clean ensures consistent clutch feel.
inspect clutch plates
Inspect Clutch Plates: During major services (or when changing oil on a wet-clutch bike), look at the clutch plates. They should be flat and clean. If you see glazing (shiny spots), cracks, or if the friction discs are too thin, they should be replaced.
Watch Your Riding: Finally, use good clutch habits. Avoid “riding the clutch” (resting your hand on the lever) and limit long slipping during starts. For example, don’t hold the clutch halfway in while creeping at a light – it causes extra wear. Shifting promptly, matching RPM to speed, and smoothly engaging the clutch all help it last longer
Following these tips (and consulting your owner’s manual) means clutch maintenance for beginners is totally doable. It boils down to simple checks and good oils.
Most motorcycles use wet clutches, where the plates are bathed in engine oil. This keeps them cool and clean. For wet clutches, oil is key. Always change the engine oil on schedule with a motorcycle oil (JASO MA) that’s free of clutch-slipping additives.
At each oil change, you (or your mechanic) can remove the clutch cover and look at the plates: clean off any debris. Using the wrong oil can cause the clutch to slip, especially under load.
Dry Clutches
dry clutches
Some bikes (often older or racing models) have dry clutches that run without oil. These are simpler internally, but they wear faster. Maintenance is minimal: if the clutch is working, you typically leave it alone. There’s no fluid to change inside.
When a dry clutch starts slipping or grabbing, the usual fix is to replace the friction plates and springs. Don’t over-tighten a dry clutch cable – that can cause partial drag. Besides that, just keep the outside of the clutch clean; any “clutch dust” inside is normal and doesn’t affect performance.
Multi-Plate Clutches
motorcycle multi-plate-clutch
The term multi-plate just means several clutch discs stacked together (for more grip area) – almost all motorcycle clutches are multi-plate. Whether wet or dry, the maintenance steps above apply.
When inspecting, make sure each plate is in good shape. If you remove the plates, look for even wear and no warping. Keep them clean, and replace any that look burned or overly worn. Adjustments (free play or hydraulic setup) will affect the whole stack.
Slipper Clutches
slipper clutches
Slipper clutches are a type of multi-plate clutch found on sport bikes (they let the clutch slip a bit under deceleration to prevent wheel hop). Maintenance is much the same as a regular multi-plate clutch. Use the correct oil and keep the plates in good order.
Some slipper clutches are adjustable; if so, follow the service manual for the adjustment procedure. Generally, just know that a worn slipper clutch (like a normal one) will slip under load and need new plates or springs.
Cable-Actuated Clutches
Many motorcycles use a cable from the lever to operate the clutch. Cable clutches need periodic adjustment and lubrication. Always leave the recommended slack (free play) in the cable so the clutch fully disengages when you pull the lever.
Check the lever action: it should feel smooth. If it feels stiff or jerky, the cable likely needs lube or replacement.
Some tips: spray a bit of WD-40 or a cable lubricant at the lever end and work the lever back and forth to push lube down. Inspect the cable run for any sharp bends or rust – replace the cable if it’s frayed. A well-adjusted cable clutch will disengage cleanly (no dragging) and engage fully (no slipping) when released.
Hydraulic Clutches
Hydraulic clutches (similar to brake hydraulics) use fluid and pistons. Their maintenance is mainly keeping the fluid clean and adjusting the system. Check the fluid level in the small reservoir often; if it’s low, top it up with the correct DOT fluid. Every year or two, bleed the clutch hydraulics just like brakes – old fluid can absorb water and cause corrosion or a spongy lever.
Inspect the master and slave cylinders for leaks or pitting. A properly bled hydraulic clutch should have a crisp lever feel and consistent engagement. Remember, hydraulic clutches self-adjust (spring preload), so you typically just keep the fluid fresh.
Centrifugal (Automatic) Clutches
centrifugal clutches
Found on scooters, mopeds, and some small bikes, centrifugal clutches engage by engine RPM (often part of a CVT system). Maintenance is mechanical: inspect the clutch shoes and drum. Remove the clutch cover (usually after taking off the rear wheel or side panel) and look at the shoes (little weighted pads). They should have thick friction material.
If the lining is worn, replace the shoes. Also clean any dust or oil from the drum and pulley faces – contamination can make the clutch slip or grab. Many scooters also have a belt drive; check the belt for wear or glazing and replace if needed. In short, keep the shoes, drum, and belt clean and within spec.
Maintenance Checklist
To wrap up, here’s a quick clutch care checklist for riders:
Lever Free Play: Regularly check and adjust the clutch lever play (cable clutches) so that the lever moves a bit (e.g. 10–20 mm) before the clutch starts to engage.
Cables & Fluids: Inspect the clutch cable for frays and lubricate it. For hydraulic clutches, check fluid level/condition and bleed if needed.
Oil Change: If you have a wet clutch, change the engine oil on schedule with a motorcycle-rated oil (no car oil or slips additives). Dirty oil can make clutches grab or slip.
Plate Inspection: At major service intervals, inspect or replace clutch friction plates and springs if worn. A good rule is to replace components if shifting becomes problematic. Use high-quality motorbike parts from a reputable supplier.
Listen & Smell: Stay alert for clutch warning signs (slipping, burning smell, hard shifts). Catching problems early means simpler fixes.
Riding Habits: Shift gears smoothly and avoid riding the clutch (hands or foot resting on it). Good technique preserves clutch life.
Conclusion
By integrating these simple checks into your routine – for example, at each oil change or monthly – you’ll keep your clutch running smoothly.
How to maintain a motorcycle clutch really comes down to these easy steps: adjust, inspect, and use the right oil. Proper clutch maintenance for beginners isn’t complicated, and it pays off with safer, more enjoyable rides
A motorcycle clutch is the device that connects and disconnects the engine from the transmission, letting you change gears smoothly. When you pull the clutch lever (usually on the left handlebar), it separates a stack of friction plates inside the clutch, temporarily “disconnecting” the spinning engine from the gearbox.
Releasing the lever clamps the plates together again, so power flows to the rear wheel. Clutches come in two broad styles: wet clutches (bathed in engine oil) and dry clutches (running without oil). Inside most motorcycle clutches, you’ll find multiple interleaved friction and steel plates – this “multi-plate” design allows a compact clutch to transmit high torque.
Wet Clutches (Oil-Bathed)
Motorcycle wet clutches
Wet clutches are the most common on modern bikes. In a wet clutch, the plates are continuously soaked in engine oil. The oil cools the clutch and provides lubrication, so wear and tear are minimized.
For example, “the same oil is used for the engine to soak the clutch,” and this yields long life and high efficiency. Wet clutches are quiet in operation, and any friction losses are small.
Pros: Longer service life; smoother, quieter engagement; very high torque capacity; inexpensive design.
Cons: Slight reduction in engine output (drag from oil); requires oil changes as part of routine maintenance.
Dry Clutches
motorcycle dry clutches
A dry clutch runs without any oil bath. The clutch pack is exposed to air (and often visible through a clear cover on some bikes). Dry clutches deliver very direct power transfer since there’s no oil drag. They are easier to service or replace because no oil has to be drained.
Dry clutches are mainly found on high-performance or racing machines – for example, Ducati uses dry clutches on some superbikes. However, running without oil means more rapid wear. Dry clutches heat up faster and tend to be quite noisy when engaging.
Pros: Simple construction; no power loss to oil; quick and crisp engagement.
Cons: Prone to overheating and wear; louder operation; generally shorter lifespan.
Dry clutches often require more frequent adjustment or replacement of plates. Riders should adjust cable free-play correctly and inspect the friction plates regularly.
Because they run hot, a dry clutch may need a “clutch burnout” (running it in high gear) after wet conditions to clear water and moisture.
Multi-Plate Clutches
motorcycle multi-plate-clutch
Nearly all motorcycle clutches are multi-plate designs, whether wet or dry. A multi-plate clutch stacks several thin friction discs alternately with steel plates in a compact housing. Multiple plates greatly increase the contact area and torque capacity without needing a huge diameter.
In fact, a multi-plate setup can transmit much more torque than a single large plate of the same space. This is why almost all bikes use multi-plate clutches – they fit all that grip in the small engine case.
Pros: Very high torque capacity in a compact space. Reduces the size/weight of the clutch for a given power.
Cons: More complex and expensive than a single-plate design. Heavier feel on the lever due to many springs. Engagement can feel slightly “softer” (not instantaneous) because power has to transfer through several plates.
In practice, wet clutches are usually multi-plate as well. Some bikes have a wet multi-plate clutch (common on street/dual-sport bikes) while a few exotic bikes use a dry multi-plate clutch (e.g. certain Ducati sportbikes).
Slipper (Back-Torque Limiter) Clutches
slipper clutches
A slipper clutch (or back-torque limiter) is a special clutch designed to prevent rear-wheel hop during aggressive downshifts. Under hard braking, engine braking can make the rear wheel try to speed up relative to the engine, causing the clutch to momentarily slip.
A slipper clutch includes ramps or cams that allow the clutch to partially disengage when the back-torque is too high. This smoothes out engine braking, keeping the rear wheel from locking or skidding. The mechanism is especially valuable on race bikes or spirited street bikes where rapid downshifts are common.
Pros: Prevents rear-wheel lockup and hop under hard braking. Absorbs excess engine braking, so downshifts are safer. Allows very aggressive corner-entry downshifting without upsetting the bike. Reduces shock load on the drivetrain.
Cons: Mechanically complex and relatively expensive. Heavier and may require extra maintenance (though many designs are oil-bathed like normal clutches).
Most modern sportbikes include a slipper clutch for performance riding. It is typically a wet, multi-plate clutch with additional slip ramps. Off-road and commuter bikes may omit it, but almost all race bikes and high-end sport models use slipper clutches to improve stability.
Centrifugal (Automatic) Clutches
centrifugal clutches
Centrifugal clutches engage automatically based on engine RPM. They use weighted shoes or ramps that “throw out” under centrifugal force as the engine revs rise.
At low RPM, the clutch is disengaged (so the engine can idle without driving the wheel), but as RPM increases the weights press outward, clamping the shoes to the drum and transferring power.
This type of clutch is common in mopeds, scooters, mini-bikes and beginner motorcycles (like small trail bikes), where an automatic engagement is desired.
Pros: Fully automatic and simple – no clutch lever to operate. Prevents stalling at low speeds. Low cost and easy maintenance (fewer parts).
Cons: Cannot handle very high power – limited torque transmission. Some power loss and slipping are inherent in the design. Can overheat under heavy use or when slipping at a stop.
Centrifugal clutches free new riders from clutch control, but they are not used on full-size sport or touring bikes. All automatic scooters (with a CVT) still often incorporate a centrifugal clutch to smoothly transition power.
Cable-Actuated vs. Hydraulic Clutch
Motorcycles typically use one of two methods to actuate the clutch lever: a cable (mechanical linkage) or a hydraulic system.
Cable-Actuated Clutch
A steel cable connects the lever to the clutch release. When you pull the lever, the cable pulls on the clutch plate assembly. This traditional system is simple and inexpensive. It is easy to understand and allows the rider to adjust cable slack manually.
Pros: Very low cost; simple to maintain (lubricate or replace the cable).
Cons: Cable stretch and friction can make the lever feel stiff over time; requires periodic lubrication and adjustment to prevent sticking or drag. In cold climates a cable can freeze or corrode if not properly maintained.
Hydraulic Clutch
This system is analogous to a hydraulic brake. A reservoir at the lever supplies fluid to a slave cylinder at the clutch. Pulling the lever pressurizes fluid, which smoothly pushes a slave piston to disengage the clutch.
Pros: Much lighter lever pull with very consistent, smooth engagement. The system is self-adjusting for wear – you rarely have to tweak it. Riders often find hydraulic clutches easier on long tours or in stop-and-go traffic.
Cons: Higher cost and slightly more complex (master/slave cylinders, hoses). If leaks occur or fluid absorbs moisture, it requires bleeding and replacement, just like brake fluid. Some riders also feel the engagement point can seem “softer” or less tactile than a cable clutch.
Overall, hydraulic clutches are praised for their smoother operation and lighter lever pull, whereas cable clutches are cheaper, easier to fix on the road, and preferred by riders who like a very direct feel.
Many modern adventure and cruiser bikes use hydraulic clutches (or even electronic clutches, discussed below) for convenience, while budget sport and dirt bikes often still use cables.
Other Clutch Innovations
Diaphragm-Spring Clutch: Some clutches use a single diaphragm (disc-shaped) spring instead of multiple coil springs. This provides even clamping pressure and a lighter overall mechanism. Diaphragm clutches are common on heavier or larger-bore bikes to handle more torque with a lighter lever feel. They are compact but cost more than coil-spring clutches.
Electronic Clutch / Dual-Clutch Transmissions (DCT): A few bikes now use electronic or automatic systems. For example, Honda offers an E-Clutch that automates the traditional clutch lever using sensors and actuators, letting you ride without pulling the lever. Even more advanced are Dual-Clutch Transmissions (used on some Honda and BMW models), which use two clutches to shift gears automatically. These systems eliminate clutch work for the rider. They are more complex (and expensive), but they demonstrate how clutch technology continues to evolve. (For most riders, a manual wet multi-plate clutch is still the norm.)
Motorcycle Clutches Selection by Riding Style
Different clutches suit different riding needs. In general:
Street/Commuting: Most street bikes use a wet multi-plate clutch for reliability and smoothness. In heavy city traffic, a hydraulic wet clutch is ideal for light lever feel.
Sport/Racing: High-performance and race bikes often use dry clutches or wet clutches with slipper mechanisms. Dry clutches (as on many sportbike race replicas) give the quickest engine response. Slipper clutches are almost universal on race bikes to allow extremely fast downshifts without rear-wheel lockup.
Touring/Adventure: Long-distance bikes favor heavy-duty wet clutches and hydraulic actuation for durability and rider comfort. A hydraulic wet clutch on a touring bike can handle high mileage with minimal effort on the lever.
Off-Road/Dirt: Trail and motocross bikes typically use wet multi-plate clutches with very strong springs to prevent stalling in low-speed, high-load conditions. These clutches are also often slipper-type or have a slipper function to absorb engine braking when rolling over obstacles. Durability is key off-road, so the cooling effect of an oil-bathed clutch is beneficial.
Scooters/Beginner Bikes: These use centrifugal automatic clutches for ease of use. No manual shifting of the clutch is needed – the clutch engages as you twist the throttle, making them ideal for new riders or urban commuting.
In summary, wet multi-plate clutches are best for everyday riding due to their longevity and quiet operation, while dry/slipper clutches excel in performance and racing scenarios. Hydraulic clutches are preferred in long-haul and off-road bikes for light lever feel.
Motorcycle U-turns are deceptively simple maneuvers that even seasoned riders struggle with. While professionals often make them look effortless, hidden motorcycle U-Turn mistakes can lead to instability, drops, or accidents.
Drawing from expert insights and the latest rider training techniques, this article uncovers the most common U-turn errors—even pros make them—and provides actionable fixes to master this critical skill.
Why U-Turns Are Trickier Than They Seem
U-turns require riders to have a firm grip on their speed, balance, and body position. These slow-speed moves differ from taking corners at high speeds. When you're going slow, your bike loses its natural steadiness from spinning wheels. This makes U-turns tricky by nature. Throw in bumpy roads, other cars around you, or poor form, and even riders who've been at it for years might struggle.
Relying on the front brake during a U-turn is a recipe for disaster. At slow speeds, the front brake’s stopping power can cause abrupt weight shifts, destabilizing the bike and increasing the risk of tipping.
The Fix:
Use the Rear Brake Instead: The rear brake offers gentler deceleration and better control. “Dragging” it lightly (applying steady pressure) stabilizes the bike by creating resistance, allowing smoother speed adjustments.
Practice Clutch-Brake Coordination: Combine the rear brake with clutch friction zone control (partially engaging the clutch) to maintain steady power delivery.
Mistake 2: Poor Head and Eye Positioning
The Problem:
Looking down at the front wheel or straight ahead is a subconscious error. Your bike follows your gaze—failing to look through the turn disrupts balance and direction.
The Fix:
Turn Your Head Sharply: Rotate your head until your chin touches your shoulder, focusing on the exit point of the U-turn. This shifts your body weight and guides the bike’s trajectory.
Scan Ahead: Check for obstacles before initiating the turn, then lock your eyes on the target to maintain a smooth arc.
When turning a motorcycle, don't look at the wheels; look at the exit of the curve
Mistake 3: Ignoring Body Positioning and Counterweighting
The Problem:
When riding a motorcycle, don’t overcompensate by leaning too far.
Leaning with the bike during a U-turn reduces lean angle clearance and destabilizes the motorcycle. Pros sometimes overcompensate by leaning too far, causing the bike to drop.
The Fix:
Counterweight the Bike: Shift your weight to the outside of the turn. For a left U-turn, press down on the right footpeg and lean your body slightly right. This lowers the bike’s center of gravity and allows tighter turns without excessive leaning.
Stay Vertical: Keep your upper body upright while letting the bike lean. This maintains balance and control.
Relying solely on the throttle for speed control leads to jerky movements or stalls. Without mastering the clutch’s friction zone (the point where the clutch engages the engine power), riders lose precision.
friction zone (Image taken from msi.org.za)
The Fix:
Find the Sweet Spot: Practice slipping the clutch while applying steady throttle. This balances power delivery and rear brake pressure for silky-smooth turns.
Use Higher Revs: Slightly higher engineRPMs (2,500–3,500) provide stability. The spinning crankshaft enhances gyroscopic forces, keeping the bike upright.
Mistake 5: Stiff Arms and Death-Gripping the Handlebars
The Problem:
Tensing up or gripping the handlebars too tightly restricts steering input and amplifies wobbles. Even pros fall into this habit under stress.
Stiff arms and death-gripping the handlebars
The Fix:
Relax Your Grip: Keep your elbows slightly bent and shoulders loose. Let the bike’s front end move naturally.
Light Hand Pressure: Use gentle countersteering pushes (press left to go left) to initiate the turn, then let the bike follow its path.
Mistake 6: Forgetting Tire Pressure and Bike Setup
The Problem:
Underinflated tires, especially at the front, reduce stability and responsiveness. Heavier bikes or modified steering setups (e.g., ape hangers) exacerbate this issue.
underinflated tires
The Fix:
Check Tire Pressure Weekly: Follow the manufacturer’s recommended PSI. Properly inflated tires improve grip and reduce wobble.
Adjust Handlebar Position: Lower or narrower bars improve slow-speed maneuverability. Test different setups in a parking lot.
Mistake 7: Skipping Regular Practice
The Problem:
Many riders assume U-turns are a “basic” skill they’ve already mastered. Complacency leads to rustiness, especially when switching bikes or riding in unfamiliar terrain.
The Fix:
practice with traffic cones
Drill Figure-Eights and Tight Circles: Set up cones in a parking lot and practice alternating left/right U-turns. Gradually reduce the turning radius.
Simulate Real-World Scenarios: Practice on slopes, gravel, or wet surfaces to adapt to adverse conditions.
Advanced Fixes for Pro Riders
Trail Braking: Apply light rear brake while slipping the clutch to tighten turns mid-maneuver. This advanced technique requires precise throttle-brake coordination.
Hanging Off the Bike: Shift your body toward the turn’s inside while keeping your head upright. This maximizes lean angle without destabilizing the bike.
Emergency U-Turn Drills: Practice rapid U-turns to evade obstacles. Start at 10 mph and gradually increase speed while maintaining control.
Final Tips for Flawless U-Turns
Warm Up First: Cold tires and stiff muscles affect performance. Take a short ride before practicing.
Use All Controls in Unison: Throttle, clutch, rear brake, and body positioning must work together.
Stay Calm Under Pressure: Panic causes mistakes. Breathe deeply and trust your training.
Conclusion
Even the best motorcycle riders can make hidden mistakes during U-turns, but specific improvements and steady practice turn these moves into habits. Focus on managing the clutch using the back brake, and on where you look. Don't forget the importance of regular training.
Keep in mind: A clean U-turn isn't just about technique—it's about grace and precision.
If you're looking for a new motorcycle intercom system this year, Fodsports has something exciting in store. The company has launched two new Bluetooth helmet intercoms: T1 and T1 Pro. Both models bring upgraded features, sleek design, and high-definition audio quality for riders who want to stay connected, entertained, and safe on the road.
But Fodsports T1 vs. T1 Pro: Which one should you buy? In this article, we break down all the key differences and similarities between the two models to help you decide which is the better fit for your riding needs.
Let’s get started!
Overview of Fodsports T1 and T1 Pro
Overview of Fodsports T1 and T1 Pro
The Fodsports T1 is designed for riders who usually travel in pairs. It supports up to two people in intercom mode with a range of up to 1000 meters. It includes HiFi stereo sound, Bluetooth 5.4, FM radio, and more.
On the other hand, the T1 Pro offers advanced group intercom features. It supports 4 riders to pair with just one click and can handle up to 6 riders in group intercom. It includes the same audio quality, Bluetooth version, and features as the T1—plus an additional group intercom mode.
Whether you're a solo rider, often riding with a partner, or part of a larger group, Fodsports has you covered with the T1 and T1 Pro.
Both the T1 and T1 Pro feature a compact, durable design that easily attaches to any helmet. Whether you're using a full-face, modular, or half-face helmet, these intercoms are made to fit. They also come with 5 interchangeable stickers, giving riders the ability to personalize the look of their devices.
helmet-style display
Each device is rated IP67 waterproof, making them suitable for use in rain or dust without worry. Whether you're commuting or touring across the country, the T1 series is built to last.
Bluetooth 5.4 with QCC Chipset
Both T1 and T1 Pro use Bluetooth 5.4, powered by the QCC advanced chipset. This offers a few major benefits:
Faster pairing and stable connection
Low power consumption
Better compatibility with smartphones, GPS, and other devices
Whether you're listening to music, taking a call, or communicating with other riders, the connection is smooth and reliable. This is a major step up from older Bluetooth versions and gives both models strong performance in real-world use.
Intercom Functionality
T1: Ideal for Two Riders
The T1 supports 2-way intercom with a range of up to 1000 meters. It’s perfect for couples, friends, or a riding buddy who usually stay within close range of each other. The intercom audio is clear thanks to CVC and DSP noise cancellation, which blocks out engine and wind noise.
One-touch mode switch
It also features one-button switching between three modes:
Two-way intercom mode
Third-party intercom mode
Music sharing mode
T1 Pro: Made for Group Riding
The T1 Pro supports one-click pairing for 4 riders, with a maximum of 6 riders in a group. This is great for motorcycle clubs, families, or tour groups who want to stay in touch across greater distances.
The T1 Pro includes four function modes:
Group intercom mode
Two-way intercom mode
Universal pairing mode
Music sharing mode
fast switching mode
This added flexibility makes the T1 Pro more versatile for a variety of riding situations.
Sound Quality and Noise Reduction
Both models have 40mm HiFi stereo speakers that provide full, rich sound. Whether you are chatting, playing music, or listening to FM radio, they ensure a great audio experience. These speakers outperform basic ones and make everything sound better.
Support FM radio frequency band:76-108MHZ
CVC and DSP dual noise-canceling technology make sure the other rider hears your voice. Even when riding at fast speeds or in windy conditions, these features reduce background noise and improve voice quality for intercom and phone calls.
These numbers mean you can ride all day without worrying about charging. Whether you’re on a weekend adventure or a daily commute, the battery will keep up with your journey.
Additional Features
FM Radio
Both T1 and T1 Pro support FM radio between 76–108MHz. You can tune in to your favorite radio stations for news, music, or traffic updates.
Music Sharing
You and your passenger can enjoy the same playlist with the music sharing feature. This makes long rides more enjoyable and lets you share your favorite tracks without using separate devices.
Voice Commands
Want to make a call or play music without touching your phone? Both models support voice command functionality, allowing hands-free control. This improves safety by letting you focus on the road while managing your devices through simple voice prompts.
Auto Call Answer
If someone calls you while riding, the T1 and T1 Pro will automatically answer the call after 12 seconds, so you won’t need to take your hands off the handlebars.
Universal Pairing
Both models can connect with devices like:
Other intercom brands
Smartphones
GPS navigation units
This makes them compatible with almost any gear you use on your ride.
Both devices offer excellent value, but the T1 Pro is clearly built for more advanced or social riders, while the T1 is a great choice for everyday users or pairs.
Final Thoughts
Fodsports T1 and T1 Pro are both fantastic new intercom options for riders in 2025. With HiFi sound, Bluetooth 5.4, long battery life, and noise-canceling technology, they provide excellent performance at a reasonable price.
The main difference comes down to intercom capacity and functionality. If you're riding solo or with one partner, the T1 is more than enough. But if you're in a larger group or want more flexibility, the T1 Pro is worth the upgrade.
Either way, both intercoms will enhance your riding experience by keeping you connected, safe, and entertained.
Whether you’re cruising on highways, exploring rugged trails, or commuting daily, clear communication is key. Fodsports is thrilled to launch its latest Bluetooth intercoms: the T1 and T1 Pro. Built for riders who demand reliability, versatility, and crystal-clear sound, these devices redefine how you connect on the go. Let’s dive into what makes them stand out!
The Fodsports T1 allows two riders to talk with each other. Its intercom works up to a distance of 1000 meters, so you can stay connected even if you are not riding close together.
Intercom distance up to 1000 meters
This long-range helps you and your partner communicate well while riding through busy streets or cruising on open highways.
2. HIFI Sound Quality to Enjoy Your Ride
Built with 40mm speakers, the T1 delivers stereo sound in Hi-Fi quality. It might not rival the performance of high resolution sound quality speakers, but it performs way better than standard speakers.
This makes it easy to enjoy crisp sounds when chatting with other riders or playing music.
Hi-Fi stereo sound of Fodsports T1
3. One Button to Switch Between Three Modes
The T1 includes three modes that you can switch using a single button.
One-touch mode switch between three modes
These options are the two-rider intercom mode, the third-party intercom mode, and the music sharing mode.
This simple one-button setup allows riders to switch between features without dealing with tricky controls while riding.
4. Bluetooth 5.4 Technology for Stronger Connectivity
The T1 uses a QCC chip with Bluetooth 5.4, which gives it better compatibility across different devices.
It also provides more stable connections and draws less power. This helps the T1 deliver steady performance and longer battery life even on long rides.
5. Customizable Appearance with Replaceable Stickers
The T1 offers five different sticker options. These let riders change how their intercom looks to match their style or what they like.
You can go for a simple and understated design or pick something bold that stands out. The interchangeable stickers allow you to personalize the T1 however you want.
5 free stickers for easy style switching
6. Advanced Noise Reduction for Clear Communication
Professional CVC and DSP noise-reduction technology, combined with a professional noise-reduction microphone, ensures that the call sound quality is clearer and more intelligible.
This is especially useful in noisy riding environments where wind noise and engine roars can otherwise interfere with communication.
7. FM Radio for Additional Entertainment
Fodsports T1 supports FM radio frequencies between 76 and 108 MHz.
This feature provides extra entertainment like music, news, and weather updates while you travel.
8. Music Sharing Between Two Riders
Fodsports T1 supports music sharing between two riders. This feature allows you to share your favorite tunes with your riding partner, enhancing the overall riding experience and creating a more enjoyable and connected journey.
music sharing between two riders
9. Type-C USB for Convenient and Stable Charging
With a universal Type-C data interface, charging the T1 is both convenient and stable.
This widely used charging standard ensures that you can easily find compatible charging cables and power sources, reducing the hassle of charging on the go.
10.IP67 Waterproof Rating for All-Weather Reliability
Fodsports T1 boasts an IP67 waterproof rating, making it suitable for various weather conditions.
Whether you're riding in the rain or through muddy terrains, the T1 is built to withstand the elements and keep performing reliably.
11. Voice Command Support for Hands-Free Control
Voice control allows you to manage phone functions hands-free.
Supporting voice commands, the T1 allows you to control various functions on your phone through voice while riding.
This hands-free control enhances safety by minimizing the need to interact with your phone while on the move.
After successfully connecting to a mobile phone, the T1 can display the battery percentage on the phone. It also announces the current battery level when powered on.
The battery percentage can be displayed on the phone
This feature keeps you informed about the battery status, ensuring that you can plan your rides accordingly and avoid unexpected power outages.
13. Impressive Endurance Time for Long Rides
Fodsports T1 provides at least 20 hours of music, phone calls, and intercom usage — actual usage time may be even longer depending on condition.
With a standby time of 300 hours and a charging time of just 2 hours, you can enjoy long rides without worrying about frequent recharging.
14. Automatic Answering Calls for Convenience
automatically answer a call within 12 seconds.
The Fodsports T1 can automatically answer an incoming call within 12 seconds.
This convenient feature ensures that you never miss an important call while riding.
However, you can also manually cancel this function if you prefer not to receive certain calls during your ride.
The Fodsports T1 Pro offers group intercom functionality, making it convenient for riders to communicate during group travel.
Fodsports T1 Pro can support up to 6 riders in a group
It allows for one-button pairing for group intercom, with the ability to support up to 6 riders in a group.
When connecting more than 4 riders, a different pairing method is used to ensure smooth setup and stable communication.
This makes it ideal for larger riding groups, enabling everyone to stay connected and communicate effectively during group rides.
2. One-Button Switch for Four Functional Modes
The T1 Pro offers four functional modes that can be easily switched with just one button.
These modes include group intercom mode, two-rider intercom mode, universal pairing mode, and music sharing mode.
The one-button switching feature makes it quick and easy for riders to change between different functions on the fly.
3. Great HIFI Sound Quality
40mm speakers deliver Hi-Fi stereo sound
Like the Fodsports T1, the Fodsports T1 Pro is equipped with 40mm speakers for Hi-Fi stereo sound quality.
It provides a better audio experience than ordinary speakers, ensuring clear and enjoyable sound for both communication and music listening.
4. Bluetooth 5.4 Technology for Enhanced Performance
Using QCC chip Bluetooth 5.4 technology, the T1 Pro delivers stronger compatibility, more stable connections, and lower power consumption.
This ensures consistent performance and longer battery life, even during extended group rides.
5. Same Replaceable Stickers for Customization
The Fodsports T1 Pro also comes with five kinds of replaceable stickers(different from T1).
replaceable stickers for T1 Pro
This allows riders to customize the appearance of their intercom according to their personal style.
6. Identical Noise Reduction Technology for Clear Communication
Professional CVC and DSP noise-reduction technology, along with a professional noise-reduction microphone, ensures that the call sound quality is clear and free from interference.
This is crucial for effective communication in noisy group riding environments.
7. FM Radio and Music Sharing Features
Fodsports T1 Pro supports the FM radio frequency band of 76 - 108 MHz and allows you to search for clear FM channels.
It also supports music sharing between two riders, adding to the entertainment and enjoyment of your rides.
8. Type-C USB, Waterproof Design, and Voice Commands
The T1 Pro features a universal Type-C data interface for convenient and stable charging.
IP67 waterproof
It has an IP67 waterproof rating, making it reliable in different weather conditions.
Voice command helps hands-free
And like the T1, it supports voice commands for hands-free control of your phone's functions.
9. Power Display and Endurance Time
The T1 Pro can display the battery percentage on a connected mobile phone and announces the current battery level when powered on.
Ultra-Long Battery Life for All-Day Performance.
It offers at least20 hours of music, phone talk, and intercom time(actual usage time may be even longer depending on condition), with a standby time of 300 hours and a charging time of 2 hours.
10. Automatic Answering Calls and Helmet Compatibility
T1 PRO automatically answers calls within 12 seconds.
Fodsports T1 Pro can automatically answer an incoming call within 12 seconds and is compatible with various helmet styles, including full and half helmets.
The Advantages of Fodsports T1 and T1 Pro
1. Superior Connectivity and Communication
Both the Fodsports T1 and Fodsports T1 Pro excel in providing superior connectivity and communication capabilities. Whether you're riding with a single partner or in a larger group, these intercoms ensure that you can stay connected and communicate clearly over long distances.
Bluetooth 5.4 technology
The use of Bluetooth 5.4 technology enhances stability and reduces the chances of disconnections, making your rides smoother and more enjoyable.
2. High-Quality Audio Experience
The HIFI sound quality delivered by the 40mm speakers in both models sets them apart from many other intercoms on the market.
The advanced noise-reduction technologies further enhance the audio experience by minimizing background noise and ensuring that your conversations and music sound clear and crisp.
This is particularly important in the noisy environment of motorcycle riding.
3. User-Friendly Design and Operation
The one-button switching feature for different functional modes is a significant advantage that makes these intercoms user-friendly.
one-button switch
Riders can quickly and easily change between modes without having to navigate through complicated menus or settings.
The large battery capacity and long-lasting endurance time also mean that you can focus on your ride without constantly worrying about recharging the device.
4. Versatility and Customization
Riders can swap out the stickers and match them to different helmet styles, which lets them personalize how their intercoms look and pair them with their riding gear.
The universal pairing feature makes these intercoms connect with many devices. This flexibility makes them useful in a variety of riding situations and purposes.
5. Enhanced Safety Features
Features like voice command support and automatic call answering enhance safety by enabling hands-free operation.
Riders can control phone functions and answer calls without taking their hands off the handlebars or distracting their attention from the road.
This is crucial for maintaining safety while enjoying the benefits of modern technology during rides.
Applications of Fodsports T1 and T1 Pro
1. Solo Riding with Added Convenience
Even for solo riders, the T1 and T1 Pro offer significant benefits.
The FM radio function allows you to stay updated with news and weather reports, while the music sharing feature can enhance your riding experience by letting you enjoy your favorite tunes.
The voice command support and automatic call answering also add convenience, ensuring that you can stay connected with the outside world even when riding alone.
2. Communication and Entertainment
For riders who often hit the road with a partner, the intercom function is invaluable.
This function allows for clear and reliable communication between the two of you, whether you're discussing your route, sharing observations about the ride, or simply chatting.
The music sharing feature takes the experience a step further by enabling you to share music, creating a more connected and enjoyable journey for both riders.
3. Group Riding Coordination and Fun
Fodsports T1 Pro's group intercom lets six riders communicate at the same time.
The T1 Pro helps riders coordinate better, whether they’re dealing with tricky traffic or deciding on break spots during long rides.
This feature keeps everyone connected and makes riding more fun by adding a social vibe, letting people share the journey together.
4. Recreational Riding and Adventures
Whether you plan to take a weekend trip, explore scenic roads, or join in group riding fun, the T1 and T1 Pro add to the whole experience.
Their durable battery lets you ride longer without any stops. The water-resistant build means you can relax if the weather changes.
These intercoms combine connection, fun, and safety, making them great for any kind of ride.
The Fodsports T1 and Fodsports T1 Pro grab attention in the crowded motorcycle intercom market.
They combine useful features, reliable performance, and good value. Riders can switch between modes with just one button, and the extra replaceable stickers allow for more ways to personalize the device.
These details help make the T1 and T1 Pro easy to use while riding. Some competitors might provide similar features, but the all-around package here sets these models apart.
Small but important touches, like showing power levels, answering calls, and working with multiple devices, make them even more attractive compared to many other choices riders have today.
Today’s market offers plenty of choices for riders who want excitement on the road along with modern tech features. The Fodsports T1 and T1 Pro stand out as outstanding options.
They provide impressive communication and connectivity features, clear sound quality, and designs that are easy to use. These intercoms go beyond what many riders expect, working well with different riding styles and needs.
So, if you're looking for a new motorcycle intercom, the Fodsports T1 and Fodsports T1 Pro deserve serious consideration.
By 2025, motorcycle makers had stretched the limits of speed, style, and innovation. They present their top models, ranging from rare cruisers to powerful superbikes. This list looks at the priciest motorcycles offered by 15 leading manufacturers.
Price: Not officially disclosed; limited to 100 units
The Shotgun 650 Icon Edition is a collaboration between Royal Enfield and ICON Motosports, limited to just 100 units globally. This café racer-inspired model features gold alloy rims, a striking red seat, bar-end mirrors, and custom graphics celebrating ICON’s legacy. Buyers also receive a limited-edition jacket, adding to its exclusivity. Registration for the "drop" opened in February 2025, with only 25 units per region available, making it a rare collector’s item.
Royal Enfield Shotgun 650 Icon Edition
Key Features:
648cc parallel-twin engine (60 HP).
Custom paint, gold accents, and "24" side-panel graphics.
Race-inspired design with modern retro aesthetics.
Husqvarna’s Norden 901 Expedition is built for hardcore adventurers. Equipped with WP XPLOR suspension (240mm travel), heated grips, a touring windshield, and integrated 36L luggage, it’s designed to tackle remote terrains. The 889cc parallel-twin engine delivers smooth power, while features like tubeless spoked wheels and cornering ABS ensure confidence off-road. Its rugged yet refined design makes it Husqvarna’s premium offering for 2025.
Though details are scarce in available sources, the V100 Stelvio is Moto Guzzi’s flagship adventure-tourer for 2025. Expected to feature a 1,042cc transverse V-twin engine, semi-active suspension, and advanced electronics, it combines Italian flair with long-distance comfort. Unique design elements like the iconic longitudinal engine and shaft drive solidify its premium status.
Moto Guzzi V100 Stelvio
Key features: Shaft drive, adaptive cruise control, full LED lighting, 5-inch TFT display
Yamaha’s Tracer 9 GT+ elevates sport-touring with its KYB semi-active suspension, adaptive cruise control, and a 890cc CP3 triple-cylinder engine. The third-gen quickshifter allows clutchless up/down shifts, while a 6-axis IMU optimizes traction and braking. With a sleek TFT display and smartphone connectivity, it’s Yamaha’s most advanced—and expensive—tourer.
The 2025 Hayabusa retains its legendary status with a 1,340cc inline-four engine, now paired with Smart Cruise Control and bi-directional quick-shifting. Refinements like Brembo Stylema brakes, IMU-based ABS, and a drag-reducing silhouette keep it ahead of rivals. New color options, including Metallic Mystic Silver, enhance its iconic appeal.
KTM’s 1390 Super Duke R Evo is a 190 HP beast with WP semi-active suspension and five ride modes, including a track-focused setup. The redesigned LC8 V-twin engine churns out 145 Nm of torque, while features like a 5” TFT dash, cornering MTC, and aerodynamic winglets make it a tech powerhouse. Limited to 250 units, it’s KTM’s most aggressive naked bike.
Aprilia’s RSV4 Factory remains a track weapon with its 1,099cc V4 engine, producing 217 HP. For 2025, it features Öhlins Smart EC 2.0 suspension, carbon fiber bodywork, and Aprilia’s latest APRC suite (wheelie control, launch control). A lightweight chassis and aerodynamic updates cement its status as Aprilia’s pinnacle superbike.
Aprilia RSV4 Factory
Key features: Öhlins Smart EC 2.0 semi-active suspension, Brembo Hypure calipers, aerodynamic winglets, predictive electronic control system
Limited to 250 units, the Rocket 3 R Evel Knievel Edition celebrates the stunt legend with a 2,458cc triple-cylinder engine (180 HP) and custom livery mimicking Knievel’s jumpsuit. Laser-etched badges, a gold-plated cam cover, and a signed collector’s book add exclusivity. Triumph’s largest production bike is also its most luxurious.
Triumph Rocket 3 R Evel Knievel Edition
Key Features:
166 lb-ft torque (highest in class).
Öhlins suspension and Brembo brakes.
Themed startup animation and premium leather seats.
Kawasaki’s Ninja ZX-10RR is a homologation special with a 998cc inline-four engine (210 HP), forged Marchesini wheels, and Öhlins electronic steering damper. Optimized for track dominance, it includes KLCM launch control and KIBS braking. Only 500 units are produced annually, making it a rare gem.
Honda’s Gold Wing Tour DCT redefines luxury touring with a 1,833cc flat-six engine, dual-clutch transmission, and Apple CarPlay integration. Heated seats, an electric windshield, and a 7-speaker audio system cater to long-haul comfort. While not the fastest, its opulence and tech make it Honda’s crown jewel.
BMW’s M 1000 RR is a track-focused missile with a 999cc inline-four (205 HP), M Carbon wheels, and winglets for downforce. The M Competition Package adds a titanium exhaust and lightweight battery, shaving 7 lbs. Priced nearly double the base S 1000 RR, it’s BMW’s ultimate race replica.
Indian’s Roadmaster Elite is a rolling luxury suite with a 1,768cc Thunderstroke engine, 16-speaker audio, and electronically adjustable suspension. Limited to 150 units, it features hand-painted pinstripes and premium leather. The 7-inch touchscreen with navigation cements its status as the king of baggers.
Harley’s CVO Road Glide ST boasts a 121 HP Milwaukee-Eight 131 V-twin, inverted forks, and a hand-painted Whisky Neat finish. The 2025 model includes a 12.3-inch infotainment screen, gold badging, and a 500W audio system. Limited production ensures its exclusivity.
Ducati’s Panigale V4 Tricolore celebrates Italian heritage with a 1,103cc Desmosedici Stradale engine (228 HP) and a red-white-green livery. Öhlins Smart EC suspension, lithium-ion battery, and carbon fiber wings make it a track-ready masterpiece. Only 1,500 units are produced.
MV Agusta’s Superfast 1000 is a hyper-naked beast with a 998cc inline-four (212 HP), carbon fiber bodywork, and a race kit exhaust. Limited to 300 units, it features a 6-axis IMU, titanium components, and a premium leather-Alcantara seat. Its exclusivity and Italian craftsmanship justify the steep price.
MV Agusta Superfast 1000
Key Features:
MVICS 2.1 electronics with 8-level traction control.
Öhlins electronic suspension.
Hand-assembled in Italy.
Conclusion
Motorcycles in 2025 push the limits of art, creativity, and exclusivity while carrying hefty price tags. Powerful superbikes like the BMW M 1000 RR focus on speed, and luxurious models such as the Honda Gold Wing emphasize comfort. These bikes appeal to both enthusiasts chasing thrills and collectors craving rare finds.
When you ride on uneven trails muddy paths, or jagged terrain, every part of your motorcycle matters. Even the motorcycle fender plays a key role. The height of motorcycle fenders has a big influence on how the bike performs off-road. It helps with debris clearance and keeps the rider more protected. By 2025, riders still debate whether low or high fenders work better.
This guide takes a closer look at the upsides, downsides, and things to know to pick the best option for your off-road riding.
Why Fender Height Matters Off-Road
Motorcycle fenders have two main jobs: keeping things protected and improving how the bike rides. They keep mud, rocks, and water off the rider and away from important parts like the engine and suspension. At the same time, they can change the airflow around the bike and how it handles overall. Riding off-road requires fenders that are tough, lightweight, and able to handle rough and unpredictable trails.
Take high fenders, for instance. They work great in thick mud since they stop it from getting stuck. On the other hand, low fenders help the bike cut through the air more on faster parts of the trail. Let’s take a closer look at how these designs can change the way you ride.
Low fenders sit near the tire and help cut down wind drag. This setup works well for riders who focus on speed during rides on open trails or mixed terrain. Their sleek design moves through the air and makes the bike steadier when going fast.
Improved Balance:
Mounting the fender closer to the wheel helps spread the bike’s weight more. This design makes it easier to control the bike on rough paths that need extra precision.
Stylish Design:
Low fenders match clean or city-friendly bike styles, attracting riders who enjoy a modern, sharp look. Many in the cruiser or urban biking scene go for custom bobbed fenders because of their trendy and simple vibe.
Disadvantages
Reduced Debris Clearance:
Low fenders struggle in muddy or rocky conditions. Mud can quickly accumulate between the tire and fender, leading to clogged wheels or compromised braking. This design is less practical for heavy off-road use.
Limited Tire Compatibility:
Larger off-road tires (e.g., 21-inch front wheels) may rub against low fenders during suspension compression, risking damage to both the fender and tire.
High Motorcycle Fenders: Pros and Cons
high motorcycle fenders
Advantages
Better Protection Against Debris:
Raised fenders leave enough room between the tire and fender to stop mud, rocks, or water from clogging the wheels. This matters a lot when riding off-road on wet or uneven ground. The high front mudguard on the Ducati DesertX Rally, for instance, gives plenty of clearance even on rough trails.
Enhanced Water Resistance:
By sitting farther from the tire, high fenders reduce spray during river crossings or rainy rides. This keeps the rider drier and protects the electrical components of a motorcycle like the battery and wiring.
Compatibility with Large Tires:
Some adventure bikes use high fenders to accommodate 21-inch front wheels, which are essential for rolling over obstacles like logs and boulders.
The taller profile creates drag, which can slow acceleration and reduce fuel efficiency on paved roads. This makes high fenders less ideal for riders who split time between highways and trails.
Weight and Complexity:
High fenders often require sturdier mounting brackets and materials (e.g., steel or reinforced plastics), adding weight. For lightweight bikes like the Honda CRF300L, this could offset its agility advantage.
Key Factors to Consider
1. Terrain Type
muddy and wet road
Muddy/Wet Conditions: High fenders are non-negotiable. The Honda CRF450RX, designed for hardcore off-roading, uses a high fender to prevent mud buildup during races.
Mixed Terrain: Low fenders may suffice if your rides include paved roads or hard-packed trails. The Suzuki V-Strom 800DE’s mid-height fender strikes a balance for versatile use.
2. Bike Weight and Suspension Travel
Heavyweight adventure bikes often pair high fenders with long-travel suspension to handle rough terrain. Lighter bikes, like the Royal Enfield Himalayan, prioritize maneuverability with moderate fender heights.
3. Material and Durability
Carbon Fiber: Lightweight and corrosion-resistant, ideal for high-performance bikes.
Steel: Durable but heavier, suited for heavy-duty touring bikes.
4. Customization Options
Many riders opt for aftermarket fenders to tailor their setup. For example, the Honda CRF300L’s LS (Low Seat) model can be fitted with a custom high fender for off-road use, though this may require modifications to the mounting hardware.
This bike has a super-tall front fender to keep debris away and uses KYB suspension with long travel. The setup suits riders who want to tackle tough off-road races.
The LS version comes with a low front fender to help riders touch the ground easier. The standard model has a mid-height fender making it ideal for different trail rides.
Built for tough routes like the Trans Euro Trail, this off-roader comes with a high front fender and suspension you can adjust. It is designed to handle technical terrains without compromise.
Mud and grit can accelerate wear. Use a pressure washer to clean high fenders after rides, paying attention to mounting brackets.
2. Check for Cracks:
Inspect plastic fenders for stress fractures, especially around drill holes. Steel fenders should be checked for rust, particularly in coastal or wet climates.
3. Upgrade Mounting Hardware:
Aftermarket fenders may require stronger bolts or brackets to handle vibrations.
Conclusion: Which Fender Height Is Right for You?
Deciding on low or high fenders comes down to how you ride, where you ride, and your bike's setup. High fenders work best on tricky off-road trails. Low fenders are better for mixed-use trips. Swappable or adjustable fenders give riders the most flexibility.
Innovative motorcycle technology, such as built-in sensors or 3D-printed fenders, has the potential to enhance the performance of these components in the future. Riders should prioritize choosing durable and practical fenders to have a steady ride during their trips.
Motorcycle forks that get bent often happen because of wrecks, slips, or not looking after your bike properly. These crooked forks can mess with how the bike steers, make tires wear out badly, and sometimes cause crashes.
This guide gives you the full scoop—okayed by mechanics—on how to spot and sort out bent forks, making sure your ride is smooth and you stay out of trouble.
Understanding Twisted Forks
Motorcycle forks stay put because of the top and bottom triple clamps—they're a piece of the "triple tree." If a motorcycle hits something hard, the clamps might twist out of place. When that happens, one fork leg might end up a bit in front of its buddy. This throws off the way the bike steers and how well the shocks work.
twisted forks
Typical Reasons
Taking a spill or tumbling over if it's upfront or on the side.
Not getting those triple clamp bolts or axle pinch bolts tight enough.
Slamming into big holes or stuff on the road when you're zooming.
Diagnosing Twisted Forks
Before starting repairs, confirm the forks are twisted:
Visual Check: Look for a misaligned front fender or wheel. Sit on the bike and check if the handlebars, fender, and wheel form a straight line.
Ride Test: If the bike pulls to one side or feels stiff during suspension movement, the forks may be twisted.
Oil Leaks: Check for oil on the fork legs, which could indicate bent stanchions or damaged seals.
Got hex keys or a socket set? Size them up to fit your bike's bolts.
Don't forget a rear or center stand.
A soft mallet might come in handy, but it's not a must.
Grab some clean cloths and fork oil to keep things slick.
Tools to fix motorcycle forks
Step-by-Step Fix for Twisted Forks
1. Secure the Motorcycle
Place the bike on a rear stand or center stand to unload the front suspension. If unavailable, have a helper hold the bike upright111.
2. Loosen Key Bolts
Loosen (but do not remove) the following bolts in this order:
Top triple clamp bolts – that's if your ride's got 'em.
Bottom triple clamp bolts – both sides
The bolts pinching the front axle and that big ol' axle nut.
Pro Tip: Loosening these bolts allows the forks to self-align. Avoid removing bolts entirely—this prevents parts from shifting unpredictably.
3. Realign the Forks
Method 1 (Standing Compression):
With the bike upright, grip the handlebars firmly.
Push down on the front end repeatedly, using your body weight to compress the forks. The suspension’s natural movement will guide the forks back into alignment.
Method 2 (Spin-and-Brake Technique):
Lift the front wheel off the ground.
Spin the wheel rapidly and abruptly apply the front brake. This centers the axle and caliper, aligning the forks.
4. Check Alignment
Ensure the fender, wheel, and handlebars are straight.
Verify equal fork tube protrusion above the upper triple clamp (measure with a ruler).
5. Tighten Bolts to Spec
Re-tighten bolts in this order, using a torque wrench:
Upper triple clamp bolts (if loosened).
Lower triple clamp bolts.
Front axle nut and pinch bolts.
Fender bolts and caliper mounts.
Torque Values:
Triple clamp bolts: 15–22 Nm (check your bike’s manual).
Test alignment visually and with a short ride after adjustments.
Replace, don’t repair, severely damaged forks.
When to Seek Professional Help
If the above steps don’t resolve the issue, your forks may be bent, not just twisted. Bent stanchions require:
Hydraulic Press Straightening: A specialized tool to reshape the inner tubes. However, this weakens the metal over time.
Replacement: Severely bent forks should be replaced. Used or aftermarket forks cost 150–600, depending on the model.
Preventing Future Misalignment
Regular Inspections: Check the triple clamp and axle bolts before rides.
Proper Torque: Always use a torque wrench—overtightening strains components.
Fork Maintenance: Replace seals every 2–3 years and change fork oil annually.
FAQ: Twisted Motorcycle Forks
Q: Can I fix twisted forks without a torque wrench?
A: No. Improper tightening risks recurring misalignment or damage.
Q: How much does a professional fork overhaul cost?
A: Between €190–€300, including seal replacement and oil changes.
Q: Are bent forks repairable?
A: Mild bends can be pressed straight, but replacement is safer for severe damage.
Conclusion
Straightening out motorcycle forks isn't too tough if you've got the proper gear and a bit of patience on your side. Keeping up with the upkeep and being mindful while you ride can help avoid the chance of things getting wonky. But hey, if you're dealing with something hairy like crooked stanchions or leaks that just won't quit, better call in an expert to make sure everything's safe and up to snuff.
Motorcycle safety relies on mirrors for riders to keep tabs on what's going on around them. Yet, not every mirror cuts it the same way. Riders have long been bickering over which is better: bar end mirrors or the stock mirrors. They argue about which (Bar End Mirrors vs Stock Mirrors) gives a better view, looks cooler, and is more useful. This all-in-one guide will take apart the good and bad of both leaning on fresh knowledge and actual rider stories, to figure out which kind of mirror gives you the best view.
Understanding the Basics
What Are Stock Mirrors?
stock mirrors on a motorcycle
Motorcycles roll off the line sporting stock mirrors. These dudes are the ones you see chilling near your hands, all lined up with where you look as you ride. They gotta tick off a bunch of safety boxes and should make your ride look good too.
What Are Bar End Mirrors?
Bar end mirrors on a motorcycle
Bar end mirrors attach to the ends of the handlebars, replacing or supplementing stock mirrors. These mirrors are often praised for their sleek design and wider field of view. They’re a favorite among riders of sport bikes, cruisers, and adventure motorcycles.
Comparing Vision: Key Factors
1. Field of Vision
The primary purpose of a mirror is to eliminate blind spots. Here’s how the two types stack up:
Bar End Mirrors:
field of vision—bar end mirrors
Wider Coverage: Positioned at the handlebar ends, these mirrors extend beyond the rider’s shoulders, offering a broader view of the road behind. This placement minimizes blind spots, especially for lanes adjacent to the motorcycle.
Reduced Head Movement: Riders can monitor traffic without turning their heads excessively, which is crucial during high-speed maneuvers or in heavy traffic.
Aerodynamic Advantage: Many bar end mirrors feature streamlined designs that reduce wind buffeting, ensuring a stable view even at high speeds.
Stock Mirrors:
field of vision—stock mirrors
Closer Proximity: Mounted near the grips, stock mirrors are easier to glance at without shifting focus far from the road ahead.
Limited Peripheral Vision: Their inward positioning often creates blind spots, particularly for vehicles in adjacent lanes.
Verdict: Bar end mirrors excel in providing a wider, more comprehensive field of vision, making them ideal for highway riding or crowded urban environments.
2. Adjustability and Customization
A mirror’s adjustability directly impacts its effectiveness.
Adjust motorcycle mirrors
Bar End Mirrors:
360-Degree Flexibility: Most bar end mirrors allow riders to tweak the angle, height, and rotation to suit their seating position. For example, some brands’ models feature ball-and-socket joints for precise adjustments.
Personalized Fit: Taller or shorter riders can tailor the mirrors to their ergonomic needs, ensuring optimal visibility regardless of body type.
Stock Mirrors:
Fixed Range of Motion: Stock mirrors often have limited adjustability, constrained by their mounting position and design. This can lead to compromises in visibility for riders with non-standard postures.
Verdict: Bar end mirrors offer superior customization, enabling riders to fine-tune their view for maximum safety.
3. Stability and Vibration Resistance
A shaky mirror is as good as useless.
No more shaky mirror — ride clear, ride safe
Bar End Mirrors:
Vibration Dampening: High-quality bar end mirrors, incorporate weighted ends or rubberized mounts to minimize vibrations. Users report minimal shaking even at speeds exceeding 80 mph.
Material Quality: Some brands use aerospace-grade aluminum and anti-glare glass to maintain clarity under harsh conditions.
Stock Mirrors:
Factory Limitations: While some stock mirrors perform well, many budget-friendly models suffer from excessive vibration, especially on uneven roads.
Verdict: Premium bar end mirrors outperform most stock options in stability, though high-end OEM mirrors can be comparable.
4. Aesthetics and Bike Compatibility
Mirrors contribute to a motorcycle’s visual appeal.
Bar End Mirrors:
Sleek, Modern Look: Their minimalist design complements sport bikes and custom builds. Some brands offer finishes like black anodized or carbon fiber to match any bike’s style.
Handlebar Real Estate: By moving mirrors to the bar ends, riders free up space for accessories like phone mounts or GPS devices.
Stock Mirrors:
OEM Integration: Stock mirrors blend seamlessly with the bike’s original design, appealing to riders who prefer a factory-fresh look.
Bulkier Profile: Their larger size can obstruct lane-splitting in tight traffic or add unnecessary weight.
Verdict: Bar end mirrors win on style and versatility, though stock mirrors maintain a classic aesthetic.
5. Safety Beyond Vision: Added Protections
Some bar end mirrors go beyond visibility to enhance overall safety.
Integrated Protectors:
Some bar end mirrors include brake and clutch lever guards, shielding critical components during drops. These protectors don’t obstruct the mirror’s view, making them a dual-purpose upgrade.
Durability:
Bar end mirrors are often built to withstand crashes better than stock mirrors, thanks to robust materials like forged aluminum.
Verdict: Bar end mirrors with protective features add an extra layer of safety, a rarity in stock designs.
6. Installation and Practicality
Ease of installation affects long-term satisfaction.
Install motorcycle mirrors
Bar End Mirrors:
DIY-Friendly: Some kits include all necessary hardware and step-by-step guides. Most riders can install them in under an hour.
Handlebar Modifications: Some bikes require removing stock bar-end weights, which may affect vibration dampening.
Stock Mirrors:
Plug-and-Play: No installation needed, ideal for riders who prefer simplicity.
Limited Upgrades: Swapping to aftermarket mirrors often leaves empty mounting holes, requiring plugs or caps.
Verdict: Bar end mirrors require effort to install but offer long-term benefits, while stock mirrors are hassle-free but less customizable.
Are bar end mirrors better?
Bar-end mirrors can be “better” if you need a wider, more stable rear view and a clean, minimalist look.
You can mount them at your bars’ ends. And they reduce vibration and blind spots, giving a clear image when filtering through traffic.
Many riders also love the café-racer styling they add.
However, they usually have smaller glass, demand more head or eye movement. More importantly, they usually stick out past your grips.
This makes lane splitting, tight turns, and parking a bit trickier.
What's more, they’re prone to knocks and require sturdier mounts to stay steady.
Ultimately, “better” depends on whether style and peripheral vision outweigh convenience and durability for your ride.
Cost Comparison: Bar End Mirrors vs Stock Mirrors
Bar End Mirrors: 80–200+ (premium brands like Evotech).
Stock Mirrors: 50–150 (OEM replacements).
While bar end mirrors are pricier, their durability and enhanced safety features justify the investment for many riders.
Tips for Choosing the Right Mirror
Test Before Buying: If possible, try a friend’s bike with bar end mirrors to gauge comfort.
Prioritize Adjustability: Look for mirrors with ball joints or extendable arms.
Check Compatibility: Ensure the mirrors fit your handlebar diameter and don’t interfere with controls.
By weighing these factors, you can make an informed decision that enhances both safety and riding pleasure.
The Final Verdict
Riders who put visibility personal touch, and fresh looks first will find bar end mirrors top-notch. They offer a broad view, stay steady despite shakes, and come with extra safeguards, which boosts their game for zipping on freeways, long trips, or riding hard.
On the flip side, if you're just riding for fun or watching your wallet, the mirrors that come with the bike are still decent. They give you a good enough view without any fuss to put them on.
Dropping motorcycles can be embarrassing, costly, and even dangerous. Whether you are a beginner or a seasoned rider, avoiding dropping motorcycles should always be a priority.
In this article, we will first look at five common reasons why motorcycles get dropped. Then we’ll share five practical tips to help you keep your bike upright and under control. The tips are simple, easy to remember, and based on tried‐and‐true riding fundamentals.
Stepping up in engine size or weight without enough experience can quickly overwhelm your skills. A heavy cruiser, large adventure bike, or high‐powered sportbike has more mass to control at low speeds. If you don’t yet have the muscle strength or finesse to balance the extra weight, you may find yourself fighting the bars—or putting the bike on the ground to avoid dropping motorcycles on your foot.
Ironically, most drops happen at very slow speeds. At walking pace or below, a motorcycle’s gyroscopic stability is minimal. You need precise clutch, throttle, and balance inputs to keep moving forward without toppling over. When a rider hesitates, snatches the clutch, or misjudges the throttle at such low speeds, it can mean an instant drop.
Ride a motorcycle extremely slowly
3. Stopping with the Handlebars Turned
Stopping with the handlebars turned
Whenever the front wheel is turned off‐center, the bike’s lean angle changes, and the forks are no longer aligned with gravity. If you try to come to a complete stop with the bars turned, even a tiny lean will pull the bike down. Many riders forget to straighten the handlebars before killing the clutch or braking fully.
4. Forgetting to Put the Sidestand Down
Always remember to put the sidestand down
It sounds obvious, but many drops happen in the parking lot. You roll to a stop, twist off the throttle, and—without thinking—try to hop off to shut the engine off. Then the bike tips over because the sidestand never went down. This kind of drop is embarrassing and can easily damage mirrors, levers, or body plastics.
Knowing why drops happen is half the battle. Now let’s cover five simple tips—built around fundamental riding skills—that will greatly reduce your chances of laying your bike down. Memorize these and practice them regularly.
1. Always Keep the Handlebars Straight
Why it matters
When you come to a stop, ensure that the front wheel is pointed straight ahead. This aligns the forks with the forks’ steering head bearings and gives you the maximum lean‐angle margin before the bike falls over.
Always keep the handlebars straight
How to practice
As you slow down for a stop, gently roll off the throttle and pull in the clutch while steering the bars back to center.
Use your peripheral vision or look down briefly to confirm the wheel is straight.
When you’re fully stopped, clamp the clutch lever in and use both brakes to hold the bike upright if needed.
Once you build the habit of straightening the bars, you’ll avoid dozens of tip‐overs at stoplights and driveways.
The front brake is powerful. At low speeds, a slight grab at the front lever can abruptly upset the chassis and pull the front end down. The rear brake provides more predictable, gradual slowing without pitching the bike forward.
How to practice
When you drop to crawl speed (under 5 mph), shift your right foot to cover the rear brake pedal instead of squeezing the front lever.
Gently press the rear brake to control your speed. Keep your right hand relaxed on the throttle grip.
If you need to stop entirely, cover both controls—but let the rear brake do the majority of the work.
With rear‐brake practice, you’ll feel more confident moving in tight spaces at a crawl without the fear of grabbing too much front brake.
3. Feather the Friction Zone
Why it matters
The friction zone is the bit of clutch engagement between fully in and fully out. It lets you modulate power delivery at low speeds. Mastering this zone helps you prevent engine stalls and unnatural jerks, both of which can cause a loss of balance.
How to practice
In first gear, slowly lift the clutch lever until you feel the bike start to pull forward. That spot is your friction zone.
Ride in a small circle or slalom pattern while balancing in the friction zone, using the throttle to maintain smooth speed.
Practice coming to a stop from 5–7 mph, using only clutch work (no brakes) to control speed entirely in the friction zone.
Feathering the friction zone builds soft control over engine torque. This skill will give you smooth starts, stops, and slow‐speed maneuvers without dropping motorcycles.
4. Use “Head‐Knight” Sight Placement
Why it matters
Where you look influences where you steer, if you stare at your front wheel or the obstacle in front of you, your bike will naturally drift toward it. By contrast, placing your head and eyes like a knight on a chessboard, looking in the direction you want to go, helps you guide the bike smoothly through tight spots.
When riding, always look straight ahead and scan the road ahead of you.
How to practice
Pick a point about 15–20 feet ahead on your intended line. Keep your head and eyes fixed on it while you ride slowly toward it.
In a parking lot or quiet street, set up cones or markers in a curved path. Slowly weave through, always looking at the next cone, not the cone you’ll soon pass.
Maintain a relaxed grip and let your sight lead your handlebars. Your body and bike will follow your line of vision.
This “look where you want to go” principle is fundamental to safe riding. It prevents you from steering into hazards and helps keep the bike balanced at low speeds.
5. Approach the “Ground Gate” When Parking
Why it matters
“Ground gate” is the point at which you know the bike is safely supported by its sidestand. Approaching this point deliberately prevents surprise drops when you go to set the bike down.
How to practice
As you roll into your parking spot, slow the bike to a very low speed using the rear brake only.
Keep the handlebars straight and your eyes on your sidestand deployment area.
When you feel the bike’s forward momentum is nearly stopped, click your sidestand down and shift your weight off the seat so you add support.
Gently rock the bike so you feel it settle on the sidestand before letting the clutch fully out or killing the engine.
Thinking of parking as passing through a “ground gate” turns what often feels like a rushed maneuver into a controlled sequence. You’ll get a tactile sense for when the bike is ready to rest on its sidestand.
Bringing It All Together
Putting these tips into regular practice will build your confidence and muscle memory. Here’s how you might structure a typical slow‐speed skill session:
Warm up by riding in first gear at a crawl, practicing smooth starts and stops using the friction zone.
Cone drills: Set up a line of cones 10–15 feet apart. Ride straight between them at a steady crawl, using only the rear brake and friction zone. Keep your sight on the next cone and keep the bars centered.
cone drills
Bar‐turn stops: Accelerate briefly, turn the handlebars a few degrees to simulate a driveway entry, then come to a stop. Practice straightening the bars before the final slow roll stops.
Sidestand drills: In an empty lot, repeatedly roll to a stop, click the sidestand down, and let the bike settle. Hone the timing so you never forget to deploy it.
Surface variation: If safe, practice on different surfaces—concrete, asphalt, gravel—to feel how the bike reacts. Always prioritize level ground for parking.
Conclusion
Dropping motorcycles is an experience no rider wants to repeat. By understanding the five main reasons bikes get dropped and applying the five essential tips, you can dramatically reduce your risk of tip‑overs.
Spend time practicing these skills in a safe, controlled area until they become second nature. With patience and persistence, you’ll gain the confidence to handle your bike smoothly in any situation, keeping both you and your machine upright and ready for the road ahead.
Motorcycling brings freedom and excitement, but it also comes with its share of fears. Many new and even experienced riders worry about situations that, with the right skills and mindset, are far more manageable than they seem. In this article, we’ll explore seven common motorcycle fears and show you practical ways to overcome them. You’ll learn simple techniques, backed by expert advice, that will boost your confidence on two wheels. Whether you’re a beginner or looking to refine your skills, these tips will help you ride smarter and safer.
Riding in stop‑and‑go traffic can feel overwhelming. Cars change lanes without warning, and you must stay alert to avoid surprises. However, with the right approach, you can navigate congestion safely and calmly.
Position yourself where drivers can see you best—often slightly left of center in your lane. This gives you room to maneuver and keeps you out of blind spots.
2. Have an escape plan.
Always scan ahead for gaps or shoulders where you can pull over if needed. Knowing your exit routes reduces panic when traffic suddenly stops.
In places where lane splitting is permitted, move forward between lanes at low speed to clear congestion. Always check local laws first and ride at a crawl—never above 10–15 mph when filtering.
By mastering these steps, you’ll ride through heavy traffic with greater ease and safety.
2. Riding at Higher Speeds
Highway riding introduces faster vehicles, stronger wind, and less reaction time. Yet speed itself isn’t the enemy—how you handle it is.
Ride a motorcycle at higher speeds
Solution:
1.“Slow is smooth and smooth is fast.”
Focus on fluid control inputs. A smooth throttle roll and gentle braking keep the bike stable, allowing you to carry more speed safely.
2. Ease into it on slower roads.
Practice at moderate speeds before tackling highways. Gradually increase your pace on less busy roads until you feel comfortable.
3. Work up to riding in faster traffic.
Start by riding alongside slower-moving vehicles, then incrementally join faster lanes as your confidence grows.
Staying in touch with a passenger or fellow riders boosts safety and enjoyment. A good motorcycle intercom lets you share directions, warnings, or just chat without shouting over wind noise. Look for units with noise‑canceling mics, Bluetooth connectivity, and long battery life.
Conclusion
Every rider faces fears—traffic jams, high speeds, flats, weather, invisibility, stalls, and drops. Yet with the right knowledge and practice, none of these need hold you back. Use these seven strategies to transform worry into skill. Ride smart, stay visible, and keep refining your techniques. Soon, you’ll find that the road’s challenges only add to the thrill of motorcycling.
Happy riding, and keep the shiny side up!
Picking the perfect brake pads for your ride has an influence on how safe you are, how well your whip handles, and what you’ll shell out over time. You’ve got a whole menu, from wallet-easy organic pads to fancy ceramic or semi-metallic types. To get why budget brake pads ain't the same as the pricier ones, you gotta dig into the details. This rundown spells out the good stuff, the not-so-good stuff, and the major stuff to think about for a choice you can trust.
Understanding Brake Pad Types: Materials Matter
Brake pads are categorized by their composition, which directly affects their performance, durability, and cost. The three primary types are organic, semi-metallic, and ceramic brake pads.
1. Organic Brake Pads
Composition: Made from non-metallic materials like rubber, glass, Kevlar, and resin.
organic brake pads
Pros:
Quiet operation: Ideal for drivers prioritizing noise reduction.
Affordable: Typically the cheapest option, suitable for light-duty use.
Eco-friendly: Produce less environmental impact during manufacturing.
Cons:
Short lifespan: Wear out faster, especially under heavy braking.
Heat sensitivity: Prone to brake fade in high-temperature conditions.
Best for: Heavy-duty vehicles, frequent towing, or spirited driving.
3. Ceramic Brake Pads
Composition: Ceramic fibers and copper particles bonded under high pressure.
ceramic brake pads
Pros:
Quiet and smooth: Minimal noise and vibration.
Low dust: Keep wheels cleaner compared to other types.
Longevity: Outlast organic and semi-metallic pads.
Cons:
High cost: Most expensive option.
Cold-weather limitations: Less effective in extreme cold.
Best for: Luxury cars, high-performance vehicles, and drivers seeking low-maintenance solutions.
Cheap vs Expensive Brake Pads: Key Differences
Performance and Durability
Cheap Pads: Budget-friendly organic or low-steel pads wear faster and struggle under stress. Tests show they may warp rotors, produce excess dust, and fail in extreme conditions.
Expensive Pads: Premium ceramic or semi-metallic pads offer consistent performance, better heat dissipation, and reduced rotor wear. Brands like Brembo or Akebono use advanced materials for longevity.
Worn brake pads
Safety and Reliability
Cheap Pads: Prone to brake fade (reduced stopping power under heat) and corrosion. Tests reveal rust buildup on budget pads, compromising structural integrity.
Expensive Pads: Engineered for reliability. For example, ceramic pads maintain performance during aggressive braking, while OEM (Original Equipment Manufacturer) pads meet strict safety standards.
Rusty motorcycle brake pads
Cost vs Long-Term Value
Cheap Pads: Lower upfront cost but may require frequent replacements. A 30-organic pad lasting 20,000 miles could cost more than an 80 ceramic pad lasting 60,000 miles.
Expensive Pads: Higher initial investment but save money through longevity and reduced rotor damage. Mid-tier options often strike the best balance between cost and quality.
Factors Influencing Brake Pad Costs
1. Material Quality
Premium pads use superior raw materials like high-density ceramics or copper-infused semi-metallic compounds. These materials enhance heat resistance and reduce wear.
2. Brand Reputation
Established brands invest in rigorous testing and quality control. Their pads often include noise-reducing shims and anti-corrosion coatings.
3. Warranties
Many mid-tier and premium pads come with lifetime warranties, allowing free replacements if they wear prematurely. Budget pads rarely offer this.
4. Included Hardware
Higher-priced kits often include abutment clips, lubricants, and wear sensors, ensuring proper installation and performance.
How to Choose the Right Brake Pads
1. Assess Your Driving Habits
Daily commuting: Ceramic or organic pads for quiet, low-dust performance.
Towing/hauling: Semi-metallic pads for heat resistance and durability.
Performance driving: Carbon-metallic or track-focused pads for maximum stopping power.
2. Consider Climate
Ceramic pads may underperform in icy conditions, while semi-metallic pads excel in all weather.
Motorcycle on icy road
3. Vehicle Compatibility
Check your owner’s manual for manufacturer recommendations. Heavy vehicles like trucks often require semi-metallic pads.
4. Budget vs Long-Term Savings
Mid-tier pads often provide the best value, balancing cost and durability. Avoid ultra-cheap pads from unknown brands.
Common Myths Debunked
Myth 1: "Expensive Pads Are Always Better"
Reality: While premium pads excel in specific scenarios (e.g., racing), mid-tier options often match OEM performance at a lower cost. Tests show that a 400 brake kit can outperform factory brakes, but a 4,000 racing setup isn’t 10 times better.
Myth 2: "Cheap Pads Ruin Rotors"
Reality: Rotor wear depends more on pad material than price. Organic pads are gentler on rotors, while semi-metallic pads may accelerate wear despite their higher cost.
Myth 3: "All Aftermarket Pads Are Inferior"
Reality: Many aftermarket pads meet or exceed OEM standards. Some brands use OE-equivalent materials for safety and performance.
Final Recommendations
For Most Drivers: Mid-tier ceramic or semi-metallic pads (e.g., Centric, Akebono) offer the best balance of cost, noise, and longevity.
Budget-Conscious Drivers: Opt for reputable organic pads with lifetime warranties (e.g., Duralast, BrakeBest).
Performance Enthusiasts: Invest in carbon-metallic or high-friction pads for track use or heavy-duty towing.
Conclusion
Your motorcycle, how you ride, and what you wanna spend govern which brake pads are the "best." Fancy ceramic or semi-metallic ones are top-notch for lasting a long time and working great, but there are mid-level choices that are just as good and won't break the bank.
You should skip the super cheap ones for important stuff, but more expensive doesn't mean they're the best. Focus on the stuff the pads are made of, how good the brand is, and what you need, and you'll be set up with brakes that work well and don't cost a fortune.
Motorcycle modifications allow riders to personalize their bikes for performance, aesthetics, or comfort. However, not all mods are street-legal. Many enthusiasts unknowingly (or intentionally) install parts that violate state laws, risking fines, impounded bikes, or even safety hazards. Below, we break down the top 7 illegal motorcycle modifications based on the latest regulations, enforcement trends, and safety guidelines.
Top 7 Illegal Motorcycle Mods
1. Full System Exhaust Modifications
Full system exhaust modifications
Reason
Replacing a motorcycle’s stock exhaust with a full aftermarket system is popular for boosting performance and sound. However, noise and emissions regulations make many of these mods illegal. For example, California’s Vehicle Code restricts exhaust noise to 95 decibels under testing conditions. Similarly, non-compliant systems may bypass emissions controls, violating the Clean Air Act in states like California, New York, and Texas.
Enforcement Risks
Police often target loud exhausts during traffic stops or noise complaints. In 2025, California’s AB 2111 expanded penalties for license plate alterations linked to toll evasion, but officers also use noise violations to flag modified exhausts. Penalties range from fines (100–1,000) to mandatory reinstallation of stock parts.
Legal Alternatives
Opt for CARB-compliant or “for off-road use only” exhaust systems.
Fender eliminators remove the bulky stock rear fender for a cleaner look. However, many kits relocate or eliminate license plate lights or reduce the plate’s visibility. States like California and New York require plates to be clearly visible, illuminated, and free of obstructions.
Enforcement Risks
Police frequently cite riders for obscured plates, especially with vertical or angled mounts. California’s AB 2111 (2025) explicitly prohibits altering a plate’s reflective coating or angle to evade automated cameras16. Penalties include fix-it tickets or fines up to $250.
Legal Alternatives
Choose fender eliminators that retain OEM lighting and comply with your state’s plate positioning rules.
3. Removing Turn Signals
remove motorcycle turn signals
Reason
Motorcycles must have operational front and rear turn signals in most states. Removing them or installing hidden signals (e.g., integrated into mirrors) violates visibility laws. For example, Texas requires signals to be visible from 500 feet away.
Enforcement Risks
Officers often issue citations during routine checks. In 2025, California’s AB 3085 expanded vehicle impound rules for bikes used in sideshows, and missing signals could lead to secondary violations. Fines range from 50–200.
Legal Alternatives
Install LED mini-turn signals that meet brightness and spacing requirements.
Most states require at least one rearview mirror (typically left-side). Removing both mirrors compromises safety and violates equipment laws. For example, Florida mandates one mirror while California requires two.
Enforcement Risks
Mirrorless bikes attract attention during traffic stops. In states like New Jersey, missing mirrors can lead to “unsafe vehicle” citations, fines, or mandatory inspections.
Legal Alternatives
Swap stock mirrors for lighter bar-end or foldable models. Ensure they provide a 190-degree rear view to comply with state laws.
While less commonly enforced, missing reflectors can result in “non-compliant equipment” tickets during inspections. States like Pennsylvania include reflectors in annual safety checks.
Legal Alternatives
Use aftermarket reflectors with adhesive backing or integrate reflective tape into custom parts.
6. Illegal Lighting Modifications
motorcycle lighting modifications
Reason
Modifying lighting includes:
Colored headlights (e.g., red/blue, which mimic emergency vehicles).
Underglow kits that distract drivers.
Smoked taillight covers reduce visibility.
Most states prohibit non-white front lights and non-red rear lights. California’s Vehicle Code § 25950 explicitly bans blue lights.
Enforcement Risks
Lighting violations are easy targets for traffic stops. In 2025, California’s SB 1313 banned devices that interfere with driver monitoring systems, but officers also prioritize illegal lighting.
Legal Alternatives
Upgrade to DOT-approved LED lights with proper colors. For accent lighting, choose white or amber underglow that’s off while moving.
7. Action Cameras on Helmets
Action cameras on helmets
Reason
In California, motorcycle helmets must meet Federal Motor Vehicle Safety Standard (FMVSS) 218 — typically indicated by a DOT (Department of Transportation) certification. While there is no explicit California law banning helmet-mounted cameras, modifications that compromise a helmet’s structural integrity (such as drilling holes for mounts) may render the helmet non-compliant with DOT standards.
Enforcement Risks
Helmet-mounted cameras are not frequently ticketed by law enforcement. However, in the event of a crash, insurance companies may dispute claims if a helmet is found to be altered in a way that compromises its protective function. If the modification invalidates the helmet’s DOT compliance, riders could also be cited for using illegal safety equipment.
Legal Alternatives
Use adhesive mounts or chest harnesses. Brands like GoPro offer low-profile mounts that comply with safety standards.
How to Avoid Legal Trouble
Research State Laws: Check FindLaw’s state-specific guides for equipment regulations.
Consult Professionals: Mechanics or dealerships can confirm mod legality.
Keep Stock Parts: Reinstall OEM components before inspections or resale.
Prioritize Safety: Even legal mods (e.g., loud pipes) can antagonize communities or increase accident risks.
Conclusion
While motorcycle customization is a cherished part of rider culture, staying informed about evolving laws is critical. In 2025, states like California are tightening penalties for sideshows, exhaust noise, and license plate violations. Always balance personalization with compliance to avoid fines, impoundment, or worse—endangering yourself and others.
E-bikes have transformed into more than just gadgets to help you get around. Now, they're speed demons that can go toe-to-toe with motorbikes. It’s 2025, and these speedy machines have gotten a huge boost from better motors, more powerful batteries, and sleek designs that cut through the air like a knife. Let’s dive into the top five speediest electric bikes around. They all bring something different to the table with their quickness, cutting-edge tech, and super-smart build.
2025 Ultra-High Performance Electric Bikes (Fastest Electric Bikes)
Model
Top Speed
Motor Power
Battery Range
Weight
Tire Specification
Smart Features
HPC Revolution W
74 mph (119 km/h)
6,000W–8,000W
Up to 100 miles
85 lbs (38.5 kg)
26"×4.0" Reinforced
GPS Anti-theft, 4G Connectivity
HappyRun Gloo Pro
65 mph (105 km/h)
5,000W peak
60–80 miles
55 lbs (25 kg)
20"×4.0" Tubeless
IP67 Waterproof, Foldable Frame
T Tromx MC10
62 mph (100 km/h)
7,000W Hydraulic
70–90 miles
98 lbs (44.5 kg)
26"×4.8" Fat Tire
Modular Battery System, App Control
Solar E-Clip 2.0 R-E
60 mph (97 km/h)
5,500W Dual Drive
75–100 miles
72 lbs (32.6 kg)
700c×38mm Aero
Solar Charging, Regenerative Braking
Cyclone Big Boy
70 mph (113 km/h)
10,000W Industrial
50–70 miles
120 lbs (54.4 kg)
19" Motorcycle Tires
ABS Brakes, Diagnostic Dashboard
1. HPC Revolution W: The Speed King
The HPC Revolution W redefines the limits of electric bikes with its jaw-dropping top speed of 74 mph (119 km/h). Designed for adrenaline seekers, this e-bike combines motorcycle-grade components with cutting-edge technology. Its 6,000W motor (upgradable to 8,000W) delivers explosive acceleration, while the aerodynamic frame and wind-resistant screen minimize drag at high speeds.
HPC Revolution W
Key Features
Motor Power: 6,000W–8,000W customizable mid-drive motor.
Battery Range: Up to 100 miles on a single charge (eco mode).
Design: Rugged, dirt bike-inspired frame with integrated GPS tracking.
Advantage
The Revolution W ships as a Class 2 e-bike (20 mph limit) but can be unlocked for off-road use, making it versatile for both legal commuting and high-speed thrills. Its 4G connectivity allows geofencing and anti-theft features, adding practicality to its raw power.
2. HappyRun G100 Pro: Lightweight Speedster
The HappyRun G100 Pro prioritizes agility without sacrificing power. With a carbon fiber frame and a 5,000W rear hub motor, it reaches a top speed of 65 mph (105 km/h). Weighing just 55 lbs, it’s one of the lightest high-speed e-bikes, ideal for urban riders and off-road enthusiasts.
HappyRun G100 Pro
Key Features
Motor Power: 5,000W peak rear hub motor.
Battery Range: 60–80 miles (varies with terrain).
Suspension: Dual air shocks for smooth handling on rough terrain.
Portability: It has a Foldable design for easy storage and transport.
Advantage
The G100 Pro’s torque sensor ensures seamless pedal-assist transitions, mimicking the feel of a traditional bike while delivering bursts of electric power. Its tubeless tires and IP67 waterproof rating make it durable for all weather conditions.
3. TTromox MC10: Off-Road Dominator
Built for extreme terrain, the TTromox MC10 combines a 7,000W mid-drive motor with a heavy-duty frame to achieve speeds of 62 mph (100 km/h). Its fat tires and reinforced suspension system allow it to tackle steep inclines, mud, and rocky trails effortlessly.
TTromox MC10
Key Features
Motor Power: 7,000W mid-drive motor with 120 Nm torque.
Battery Range: 70–90 miles (dual-battery configuration).
Tires: 26" x 4.8" puncture-resistant fat tires.
Extras: Integrated LED lighting, rear cargo rack, and smartphone app integration.
Advantage
The MC10’s modular battery system allows riders to swap batteries mid-ride, extending its range for long adventures. Its ergonomic handlebars and adjustable seat post cater to riders of all heights, making it a favorite for touring and trail riding.
4. Solar E-Clipse 2.0 R-E: The Silent Speed Machine
The Solar E-Clipse 2.0 R-E stands out with its near-silent 5,500W motor and a top speed of 60 mph (97 km/h). Designed for urban commuters and performance riders, its sleek, minimalist frame hides a powerhouse of technology.
Solar E-Clipse 2.0 R-E
Key Features
Motor Power: 5,500W rear hub motor (65 dB noise level).
Battery Range: 75–100 miles (in eco mode).
Design: Aerodynamic aluminum frame with hidden cable routing.
Tech: Regenerative braking and solar-panel charging options.
Advantage
The E-Clipse 2.0 R-E’s regenerative braking system recovers energy during deceleration, boosting efficiency. Its optional solar charging kit—a first for high-speed e-bikes—makes it a sustainable choice for eco-conscious riders.
5. Cyclone Big Boy: The Powerhouse
The Cyclone Big Boy lives up to its name with a monstrous 10,000W motor, propelling it to 70 mph (113 km/h). Designed for heavy-duty use, it features a motorcycle-style frame and components built to withstand extreme stress.
Cyclone Big Boy
Key Features
Motor Power: 10,000W mid-drive motor.
Battery Range: 50–70 miles (high-performance mode).
Frame: Steel-reinforced chassis with dual suspension.
The Big Boy’s torque-focused motor excels in hill climbs, delivering 200 Nm of force for steep gradients. Its LCD dashboard provides real-time diagnostics, including motor temperature and battery health, ensuring optimal performance during intense rides.
Safety and Legal Considerations
Electric bikes deliver thrilling rides, but riders gotta put safety first and follow the rules. In the States, you've got three types of e-bikes, and the top dogs, Class 3, they max out at 28 mph on the streets. Mess with your bike to go faster and bam, it's in the motor vehicle club, meaning you've gotta get it registered, insured, and you better strap on a helmet. Key safety tips include:
Protective Gear: Always wear motorcycle-grade helmets and armor.
Maintenance: Regularly check brakes, tires, and battery connections.
Terrain Awareness: High-speed e-bikes perform best on paved roads or designated trails.
Final Thoughts
These five fastest electric bikes hit the top marks for fast rides and breakthroughs in 2025. Whether you’re a thrill-seeker craving 70 mph adrenaline rushes or a commuter needing a high-performance machine, there’s an option for every rider. Always balance speed with responsibility—ride safely, respect local laws, and enjoy the revolution in electric mobility!
Motorcycle track day is more than just a thrill for motorcycle lovers — it’s a transformative experience. Whether you’re looking to sharpen your riding skills, test your bike’s limits, or simply enjoy speed in a safe environment, track days offer unparalleled opportunities.
This guide breaks down everything you need to know as a beginner, from preparation to execution, using the latest insights and 2025 event trends.
What Is a Motorcycle Track Day?
motorcycle track day
A motorcycle track day is a structured event where riders can practice on a closed racetrack under controlled conditions. Unlike racing, track days focus on skill development, with no official timing or competition. Organizations likePrecision Track Days and Fun Track Dayz host these events, grouping riders by skill level (novice, intermediate, advanced) and providing coaching to ensure safety and progression.
Safety: Ride without road hazards like traffic or potholes.
Community: Connect with fellow riders and instructors.
How to Find a Track Day in 2025
1. Search Online
Start by Googling “motorcycle track days near me” or visit specific track websites (e.g., Laguna Seca, JenningsGP). Organizations like 2Fast Track Days and Precision Track Days list events on their sites, including 2025 schedules with new venues like Carolina Motorsports Park and extended weekends.
Carolina Motorsports Park
2. Consider Beginner-Friendly Programs
Look for events with novice-focused features:
Classroom Sessions: Learn track rules, flag systems, and riding lines.
Coaching: Some organizations, like Fun Track Dayz, offer pro riders like Hawk Mazzotta for personalized instruction.
Relaxed Requirements: Certain tracks allow textile suits and waive safety-wiring rules for beginners.
3. Check Discounts
Many 2025 events, such as those by Precision Track Days, offer early-bird pricing, multi-day passes, and holiday sales.
Preparing Your Motorcycle
1. Basic Modifications
Tape Lights: Use painter’s tape to cover headlights, turn signals, and mirrors. This prevents distractions and debris spread.
Remove Accessories: Take off license plates, phone mounts, and loose items.
Coolant Swap: Some tracks require water or Water Wetter instead of ethylene glycol.
2. Tire and Mechanical Checks
Tread Depth: Ensure tires have at least 50% tread remaining.
Pressure Adjustments: Lower PSI for better grip (ask instructors for recommendations).
Safety Inspection: Fix leaks, tighten bolts, and check chain tension before tech inspection.
3. Rentals
If your bike isn’t track-ready, organizations like 2Fast Track Days rent prepped motorcycles.
Gear Requirements
1. Protective Clothing
protective clothing
Leather Suits: One- or two-piece suits with armor (textile allowed at some novice events).
Skill Transfer: Techniques like emergency braking improve street safety.
Thrill: Experience your bike’s full potential legally.
Community: Join a supportive network of riders.
Final Thoughts
A motorcycle track day is a gateway to becoming a more confident, skilled rider. With 2025 events offering expanded schedules and beginner-friendly programs, there’s never been a better time to try. Remember: Speed comes with practice, but safety always comes first.
Riding a motorcycle offers unparalleled freedom, but it also demands heightened awareness and proactive safety measures. Defensive riding isn’t just a skill—it’s a mindset. By anticipating risks and prioritizing safety, you can significantly reduce your chances of accidents. Below, we break down the top 7 motorcycle defensive riding tips, combining expert advice, practical strategies, and the latest insights to keep you safe on the road.
Top 7 Motorcycle Defensive Riding Tips
1. Assume Everyone Is a “Dumbass” (Including You)
The golden rule of defensive riding: never trust other road users. Drivers might fail to check blind spots, run red lights, or make sudden turns without signaling. Even seasoned riders can make mistakes, so adopt a mindset where you expect the unexpected.
Anticipate Mistakes: Scan intersections, watch for cars pulling out of driveways, and avoid lingering in drivers’ blind spots. As noted in defensive riding guides, "surprises can force a freeze reaction"—staying alert prevents this.
Scan intersections and watch for cars pulling out of driveways
Own Your Errors: Regularly assess your riding habits. Are you speeding, tailgating, or neglecting signals? Self-awareness keeps you accountable.
Practice the “What If?” Game: Mentally rehearse responses to scenarios like a car swerving into your lane or a pedestrian stepping onto the road. This builds split-second decision-making skills.
2. Ride on the Left Side of Your Lane
Ride on the left side of your own lane
Lane positioning is critical for visibility and escape routes. While laws vary, staying to the left (in left-driving countries) offers strategic advantages:
Motorcycles are smaller and harder to spot than cars. Make yourself unmissable:
Wear High-Vis Gear: Opt for reflective jackets, helmets, or strips. Bright colors like neon yellow or orange stand out in daylight and low light.
wear high-vis gear to keep visible
Use Headlights: Even during the day, keep your headlights on. Some riders install auxiliary lights for added visibility.
Position for Line of Sight: Avoid riding directly behind large vehicles. If a driver can’t see you in their mirror, they won’t know you’re there.
Pro Tip: At night, use your bike’s high beams judiciously and angle them slightly downward to avoid blinding others.
4. Let Angry Drivers Go By
Don't argue with other drivers.
Road rage is a reality, and motorcyclists are especially vulnerable. De-escalate conflicts to stay safe:
Avoid Eye Contact: Aggressive drivers may interpret this as a challenge. Stay calm and focus on the road.
Create Space: Slow down or change lanes to let tailgaters pass. A 3–4-second following distance gives you time to react.
Don’t Engage: Honking or gesturing can escalate tensions. Remember, your goal is to reach your destination safely, not to “win” an argument.
Key Insight: As one safety guide notes, “You can’t control others’ behavior, but you can control your response”.
5. Get Away From Dangerous Situations
Get away from dangerous situations to avoid accidents
When danger arises, act decisively. Common threats include erratic drivers, road debris, or sudden weather changes.
Escape Routes: Always identify an exit path—e.g., a shoulder, empty lane, or gap in traffic.
Accelerate or Brake: If a car behind you isn’t stopping, speed up to create space. If an obstacle appears ahead, practice emergency braking: squeeze the front brake progressively while applying light rear brake pressure.
Swerve Smoothly: For sudden obstacles, push the handlebar in the direction you want to go (counter-steering) and keep your eyes focused on the escape path.
Practice Drill: Set up cones in a parking lot to simulate swerving and braking scenarios. Muscle memory saves lives.
6. Squishables vs. Non-Squishables: Prioritize Risks
This quirky term refers to categorizing hazards:
Squishables: Pedestrians, cyclists, or animals. Hitting them could cause severe harm to both parties.
Non-Squishables: Cars, guardrails, or parked vehicles. Collisions here are often fatal for riders.
How to React:
Avoid Non-Squishables First: Swerve around stationary objects or brake hard. Use techniques like throttle blipping (briefly revving before downshifting) to stabilize the bike during maneuvers.
Slow for Squishables: Reduce speed near crosswalks or areas with high pedestrian activity.
Case Study: Hitting a pothole (non-squishable) at speed can throw you off balance. Stand on the pegs, shift weight back, and maintain throttle control to glide over it.
7. “Loud Pipes Save Lives”—But Don’t Rely on Them
The debate over loud exhausts rages on. While they may increase auditory awareness, they’re not a substitute for proactive safety:
Pros: Loud pipes can alert distracted drivers to your presence, especially in blind spots.
Cons: They often annoy communities and may not be heard by cars with closed windows or loud music.
Use motorcycle horn sparingly
Better Alternatives:
Use Your Horn Sparingly: A quick beep can warn drivers encroaching on your lane.
Rev Match: Blip the throttle when filtering through traffic to signal your position.
Expert Verdict: “Visibility and positioning trump noise. Loud pipes are a backup, not a primary strategy”.
Final Thoughts
Defensive riding is about preparation, awareness, and adaptability. By mastering these 7 motorcycle defensive riding tips, you’ll significantly reduce risks. Remember, practice is non-negotiable. Regularly drill emergency stops, swerves, and slow-speed maneuvers to build confidence.
Stay visible, stay calm, and always have an escape plan. As motorcycle safety courses emphasize, “It’s better to arrive late than not at all”.
Embarking on the journey of sportbike riding is both exhilarating and challenging. These high-performance machines offer unmatched agility and speed, but they also demand a heightened level of skill and awareness. To ensure a safe and enjoyable experience, it's crucial to master fundamental techniques and adopt best practices. Here are seven essential riding tips for new sportbike riders.
7 Sportbike Riding Tips for New Riders
1. Perfect Your Body Position
A proper sportbike riding posture ensures control, balance, and safety.
Why It Works: Sudden twists shift weight abruptly. This can cause the motorcycle to feel unsettled in the mid-corner, and it will be harder for you to control it. Therefore, you should roll the throttle smoothly to keep the tires planted.
Practice: Try rolling the throttle by riding a motorcycle on a straight road can help you master the skill. You can practice accelerating from 30–60 mph while keeping the bike stable. Remember to focus on wrist control, not your arm strength.
Throttle Blipping
What is it?
A quick throttle “blip” while downshifting to match engine RPM to the lower gear.
Technique: Use the front brake for 70–80% of stopping power (it compresses the front suspension, maximizing tire grip). Apply the rear brake lightly to stabilize the bike, especially in low-speed maneuvers.
Why It Works: Weight shifts forward during braking, increasing front-tire traction. Overusing the rear brake can lock the wheel, causing skids.
Mistake to Avoid: “Panic grabbing” the front brake—squeeze progressively to avoid wheel lockup.
What It Is: Gradually easing off the brakes as you lean into a corner.
How to Do It: Begin braking before the turn, then reduce pressure as you tip the bike in. This maintains stability while entering corners at higher speeds.
Why It Matters: Abruptly releasing brakes mid-turn can unsettle the suspension, leading to loss of control.
Pro Tip: Practice trail braking on familiar, smooth roads first. Avoid gravel or wet surfaces until you’re confident.
Emergency Braking
Technique:
Squeeze the front brake firmly but smoothly.
Apply light rear brake to stabilize.
Keep the bike upright and eyes focused ahead.
Why Practice: Reflexive braking saves critical milliseconds. Modern ABS systems help prevent lockups, but muscle memory is irreplaceable.
Drill: In a parking lot, mark a stopping point. Accelerate to 40 mph, then brake hard, aiming to stop within the zone. Repeat to build consistency.
Weather and Road Surfaces: Reduce speed in rain, on gravel, or during cold mornings when tires lack grip. Wet roads can cut traction by 50%, increasing stopping distances.
Traffic Dynamics: Maintain a 3–4-second gap from vehicles ahead. Sportbikes accelerate quickly, but sudden stops from cars or debris require ample reaction time.
Curve Speed: Enter corners at a speed that allows you to accelerate out. Over-braking mid-turn can destabilize the bike.
While riding with others can be fun, group dynamics add complexity that new riders may not handle safely.
Risks of Early Group Rides
Peer Pressure: Keeping up with experienced riders might push you beyond your skill level, leading to reckless decisions.
Formation Challenges: Staggered formations require coordination, and inexperienced riders might struggle with spacing or sudden stops.
Distractions: Focusing on others instead of the road increases accident risks.
Pro Tip: Build solo confidence first. Once comfortable, join small groups and communicate using hand signals or Bluetooth helmet systems for clarity.
6. Prioritize Mental Clarity and Focus
prioritize mental clarity and focus
Riding a sportbike demands 100% attention. Distractions or emotional turbulence can be fatal.
Strategies for Sharp Focus
Pre-Ride Rituals: Perform a T-CLOCS inspection (Tires, Controls, Lights, Oil, Chassis, Stands) to ensure mechanical soundness and clear your mind.
Avoid Impairments: Never ride under the influence of alcohol, fatigue, or stress. Even over-the-counter medications can dull reflexes.
Defensive Riding: Assume drivers don’t see you. Position yourself visibly in lanes and watch for turning vehicles or open car doors.
Pro Tip: Practice mindfulness techniques like deep breathing before rides to stay calm and alert.
7. Understand Your Bike’s Power Band
Mastering your sportbike’s power band—the RPM range where the engine delivers peak performance—ensures smoother acceleration, efficient overtaking, and longer component life. Here’s how to harness it:
Torque vs. Horsepower
Torque: Provides low-RPM pulling power (e.g., accelerating from a stop). Ideal for city riding or tight corners.
Horsepower: Dominates at high RPMs (e.g., 8,000+ RPM), crucial for top-speed runs or track straights.
Sweet Spot: Learn where your bike’s power peaks (check the owner’s manual or dyno charts). For example, the Yamaha YZF-R3 hits its torque peak at 9,000 RPM.
Gear Selection Strategies
Short-Shifting: Upshift early (below the power band) for relaxed city riding. Reduces wheelies and improves fuel efficiency.
High-RPM Bursts: Downshift before overtaking or exiting corners to stay within the power band. Example: Drop to 2nd gear at 6,000 RPM for instant acceleration.
Engine Braking
Technique: Downshift while rolling off the throttle to let engine resistance slow the bike. Match RPMs to avoid rear-wheel lockup.
When to Use: Approaching red lights, descending hills, or slippery roads where brakes risk skidding.
Pro Tips
Beginner Bikes: Models like the Kawasaki Ninja 400 offer linear power delivery, forgiving erratic throttle inputs.
Tuning Tools: Aftermarket ECU flashes (e.g., Dynojet) can smooth abrupt power spikes in aggressive engines.
Common Mistake: Revving too high in low gears—this strains the engine and can cause instability.
Final Thoughts: Gear Up and Stay Curious
While these tips form the foundation, continuous learning is key. Enroll in advanced riding courses, track days, or online tutorials to refine your skills. Invest in DOT-certified helmets, armored jackets, and reinforced boots—ATGATT (“All The Gear, All The Time”) isn’t just a mantra; it’s a lifesaver.
Finally, choose a bike that matches your skill level. Lightweight models like the Honda CBR300R or Suzuki GSX250R offer manageable power and agility, letting you grow into your riding journey.
By combining technical mastery with situational awareness, you’ll unlock the full potential of your sportbike—safely and thrillingly.
Many riders who aren't so tall or ladies just starting to ride bikes need to pick out the best Motorcycles for Short Riders and Women. They gotta look for three key things: a seat that's not too high up, a bike that's not too heavy, and something that looks good enough to give them confidence.
When a bike’s too huge or tall, even stopping at a light or getting through busy streets can feel super stressful. But it's awesome 'cause now the folks who make these bikes are putting in the effort to make them easy to get on without ditching the cool looks or the fun of a good ride.
We're about to dive into a list of five awesome motorcycles (and throw in one extra just because!) perfect for riders on the lookout for a squat seat, a bike that won't break your back and is a breeze to use. No matter if you're dodging traffic on your daily grind, touring the open road, or leaning into bends, these machines are all about keeping you safe, snug, and smiling.
Best Motorcycles for Short Riders and Women
Model
Seat Height
Weight
Engine
Power
Key Features
Pros
Cons
Jawa
750mm (29.5")
191 kg
293cc Liquid-cooled
27 HP
• Retro design
• Dual-channel ABS
• LED lighting
✓ Low seat height
✓ Affordable maintenance
✗ Limited dealers
✗ Small fuel tank
RE Hunter 350
790mm (31.1")
181 kg
349cc Air-cooled
20.2 HP
• Flat wide seat
• Steel frame
• Navigation ready
✓ Customizable
✓ Smooth ride
✗ Basic dashboard
✗ Heavy build
Honda CB300F
789mm (31")
147 kg
286cc Single-cylinder
30.4 HP
• Adjustable brakes
• Digital dash
• Tapered tank
✓ 30+ km/L mileage
✓ LED lighting
✗ Basic suspension
✗ No base ABS
Hero Xtreme 200S
795mm (31.3")
153 kg
199.6cc Oil-cooled
18.4 HP
• Split seat
• Bluetooth cluster
• Dual ABS
✓ Budget-friendly
✓ Sporty design
✗ Limited service
✗ Hard seat
Kawasaki Ninja 300
780mm (30.7")
172 kg
296cc Parallel-twin
39 HP
• Sport ergonomics
• Lowering kits
• Trellis frame
✓ Premium quality
✓ Good resale
✗ High insurance
✗ Firm seat
Kawasaki Ninja 400
785mm (30.9")
168 kg
399cc Parallel-twin
49 HP
• Quick shifter
• Traction control
• Race-inspired
✓ Advanced tech
✓ Lightweight
✗ Premium price
✗ Firm seat
※ All specifications are manufacturer claims. Weights shown are kerb weights (ready-to-ride configuration).
✓ = Advantage | ✗ = Limitation
1. Jawa 750mm: Classic Design Meets Modern Accessibility
Seat Height: 750mm (29.5 inches)
Weight: 191 kg (421 lbs)
The Jawa brand is synonymous with vintage charm, and this model is no exception. With the lowest seat height on our list (750mm), the Jawa is ideal for riders under 5’5”. Its retro-styled teardrop fuel tank and chrome accents appeal to those who love classic aesthetics, while modern touches like LED lighting and dual-channel ABS ensure safety.
Jawa 750mm
Why It’s Great for Shorter Riders
The narrow seat design allows riders to plant both feet firmly on the ground.
A relaxed riding posture (upright handlebars and mid-set footpegs) reduces strain on wrists and back.
Lightweight chassis enhances control at low speeds.
Engine & Performance
The 293cc liquid-cooled engine delivers 27 HP, perfect for city rides and weekend getaways. The smooth throttle response and light clutch make it beginner-friendly.
2023 Updates: Jawa now offers optional low-seat accessories to further reduce height by 20mm.
Royal Enfield’s Hunter 350 is a nimble, stylish cruiser designed for urban adventures. Its 790mm seat height is accessible for riders around 5’4”, and the low-slung exhaust adds to its approachable stance.
Royal Enfield Hunter 350
Why It’s Great for Shorter Riders
Flat, wide seat offers ample room to shift positions during long rides.
Lightweight steel frame improves handling in traffic.
Wide handlebars provide leverage for easy steering.
Engine & Performance
The 349cc air-cooled engine generates 20.2 HP, prioritizing torque over speed. It’s ideal for relaxed cruising and handles potholes smoothly.
2023 Updates: New color options (Dapper White and Rebel Red) and an optional Tripper navigation system.
Pros
Smooth, vibration-free ride.
Affordable price tag.
Customizable with Royal Enfield accessories.
Cons
Basic instrument cluster (no gear indicator).
Heavier than competitors.
3. Honda CB300F: Sporty Looks with Everyday Practicality
Seat Height: 789mm (31 inches)
Weight: 147 kg (324 lbs)
The Honda CB300F blends sporty aggression with commuter-friendly ergonomics. Its 789mm seat height and 147 kg weight make it one of the lightest bikes in its class, perfect for shorter riders learning to handle a full-sized motorcycle.
Honda CB300F with short riders
Why It’s Great for Shorter Riders
Tapered fuel tank allows knees to grip comfortably.
Slim profile and upright riding position enhance visibility.
Adjustable brake lever accommodates smaller hands.
Engine & Performance
The 286cc single-cylinder engine produces 30.4 HP, offering zippy acceleration for highways. Honda’s reputation for reliability shines here.
2023 Updates: Revised graphics and improved muffler design for a deeper exhaust note.
Pros
Excellent fuel efficiency (30+ km/L).
LED lighting and digital dash.
Low maintenance costs.
Cons
Basic suspension setup.
No optional ABS in base models.
4. Hero Xtreme 200S 4V: Affordable Performance for Daily Commutes
Seat Height: 795mm (31.3 inches)
Weight: 153 kg (337 lbs)
Hero’s Xtreme 200S 4V is a value-packed sportbike with a slightly taller 795mm seat height. However, its narrow seat and rear mono-shock suspension compress under weight, making it manageable for riders as short as 5’3”.
Hero Xtreme 200S 4V
Why It’s Great for Shorter Riders
Split seat design narrows toward the tank for easier reach.
The Kawasaki Ninja series redefines sportbike accessibility. The Ninja 300 and 400 combine race-inspired styling with surprisingly manageable ergonomics. Their seats are sculpted to “hug” the rider, allowing shorter inseams to touch the ground.
Kawasaki Ninja 300 & 400
Why They’re Great for Shorter Riders
Aggressive fairings narrow the seat’s front for better reach.
Lightweight trellis frame aids in cornering confidence.
Optional lowering kits available (lower seat by 25mm).
Engine & Performance
Ninja 300: 296cc parallel-twin, 39 HP (ideal for beginners).
Ninja 400: 399cc parallel-twin, 49 HP (for intermediate riders).
2023 Updates: The Ninja 400 now features a bidirectional quick shifter and traction control.
Pros
Premium fit and finish.
Smooth, linear power delivery.
Strong resale value.
Cons
Higher insurance costs.
Firm seat padding on long rides.
Tips for Short Riders Choosing a Motorcycle
Test Ride Multiple Bikes: Seat height numbers don’t tell the full story. Seat width, suspension stiffness, and peg position matter.
Consider Lowering Kits: Brands like Yamaha and Kawasaki offer official kits to reduce seat height by 25–50mm.
Prioritize Weight Distribution: A lighter bike isn’t always better—a low center of gravity improves stability.
Adjust the Suspension: Softening preload can help the bike sag slightly, lowering seat height.
Final Thoughts
From the retro Jawa to the sporty Ninja 400, these motorcycles prove that you don’t need long legs to enjoy riding. Look for bikes with seats lower than 800mm, that weigh less than 200 kg, and that feel comfy even after riding a whole bunch. You should hit up a dealership to try sitting on the bike and have a go at walking it back—it's super important to know if you got it under control. Picking the perfect one, you'll feel more sure of yourself and get why riding is so awesome!
As we accelerate into 2025, motorbikes are getting a serious tech upgrade. They’re all about safer rides and more fun on the road. Even if you’re a pro or just starting, kitting out your two-wheeler with cool tech stuff is a game-changer. Check out these ten top motorcycle gadgets each motorcyclist will want in 2025.
10 Must-Have Motorcycle Gadgets
1. Augmented Reality (AR) Helmets
Imagine having real-time data projected onto your helmet visor, allowing you to access navigation, speed, and hazard alerts without taking your eyes off the road. AR helmets are set to revolutionize rider safety and convenience in 2025. Companies like BMW Motorrad and Nuviz are leading the charge with helmets that overlay real-time data onto your field of view.
Augmented Reality Helmets
Features
GPS Integration: Turn-by-turn directions appear directly in your line of sight, reducing distractions.
Collision Warnings: Alerts for nearby vehicles or obstacles enhance safety.
Voice Control: Hands-free operation allows you to adjust settings without removing your hands from the handlebars.
Rearview Camera Feed: Eliminates blind spots by providing a live feed of what's behind you.
Why You Need It:
AR helmets minimize the need to glance at handlebar-mounted devices, keeping your focus on the road. Expected to hit the market in late 2024, these helmets will range from $800 to $1,500, depending on features.
2. Motorcycle Airbag Vest
Motorcyclists always put safety first, and the introduction of airbag vests for motorcycles has stepped up the game in keeping riders safe. These vests pop open airbags when they sense you've had a crash. This gives the person riding some super important padding for their torso and back.
motorcycle airbag vest
Features
Rapid Deployment: Utilizes sensors to detect accidents and inflates within milliseconds.
Comprehensive Coverage: Protects vital areas including the spine, neck, and torso.
Reusable Design: Post-deployment, the vest can be reset and reused after replacing the CO₂ cartridge.
Why You Need It
In the event of an accident, an airbag vest is super good at making sure you don't get hurt as bad giving you another safety net on top of the usual stuff. Like, Harley-Davidson teamed up with Dainese to crank out the Smart Vest, which packs some serious airbag tech for better keeping bikers safe.
Whether they're hitting the commute or trekking across uncharted paths, every biker needs solid direction finding.
Today's motorcycle-specific GPS gadgets come with hefty capacities each designed to meet the demands of those on two wheels. These devices come packed with stuff to make navigation a breeze.
GPS navigation systems
Features
Glove-Friendly Touchscreen: No need to yank off your gloves to use it.
Weather Resistance: These things don't flinch at a little rain or wind.
Updates on the Go for Traffic: Keeps you in the know with traffic deets to dodge those pesky jams.
Why You Need It
Crafted for motorcycle riders, a GPS like this makes figuring out your route a piece of cake and keeps you glued to the right path. Plus, it ups your riding game, making every trip a bit more thrilling.
Communication on the road is crucial, especially during group rides. Bluetooth intercom systems facilitate seamless interaction between riders and devices.
Riding in the rain can be challenging, particularly when water obstructs your visor. Helmet rain repellents are essential for maintaining clear vision in wet conditions.
helmet rain repellent
Features
Hydrophobic Formula: Repels water to keep the visor clear.
Easy Application: Simple to apply and long-lasting.
Anti-Fog Properties: Some formulations also prevent fogging.
Why You Need It
Ensuring clear vision during adverse weather conditions is vital for safety. These products provide effective solutions for maintaining visibility.
Proper tire pressure is crucial for optimal handling and safety. TPMS devices monitor tire pressure in real-time, alerting riders to any issues.
tire pressure monitoring systems
Features
Real-Time Monitoring: Provides continuous updates on tire pressure.
Wireless Sensors: Easy installation without complex wiring.
Alert System: Notifies riders of significant pressure changes.
Why You Need It
Maintaining correct tire pressure enhances safety, fuel efficiency, and tire longevity. Investing in a TPMS can prevent potential accidents due to under-inflated tires.
7. Smartphone Mounts with Wireless Charging
Keeping your smartphone accessible and charged during rides is essential for navigation and communication. Modern mounts offer secure holding with integrated wireless charging.
smartphone mounts with wireless charging
Features
Universal Compatibility: Grips different phone sizes.
Qi Wireless Charging: Charges your phone without needing wires.
Vibration Dampening: Shields your phone from the jitters of the road.
Why You Need It
Keeps your phone safe and charged up for non-stop directions and staying in touch.
8. Helmet-mounted LED Brake and Turn Signal Lights
Enhancing visibility to other motorists is crucial for rider safety. Helmet-mounted LED lights synchronize with your motorcycle's signals to alert others of your intentions.
Helmet-mounted LED signal lights
Features
Wireless Synchronization: Connects seamlessly with the bike's signaling system.
High Visibility LEDs: Ensures clear signaling in various lighting conditions.
Rechargeable Battery: Offers extended usage between charges.
Why You Need It
Increased visibility reduces the risk of accidents, especially in low-light conditions. Investing in such a device enhances safety by ensuring your signals are clearly seen by other road users
9. Disc Lock Alarm System
A simple yet powerful security gadget, a disc lock alarm prevents theft by immobilizing your motorcycle’s wheel while sounding a loud alarm if tampered with.
disc lock alarm system
Features
120dB Alarm: Loud enough to deter thieves.
Motion Detection: Triggers the alarm when movement is detected.
Compact and Portable: Easy to carry in a tank bag.
Why You Need It
Motorcycle theft is a major issue, and a disc lock alarm adds an extra layer of protection. Quality models start at $40.
10. Windproof and Waterproof Motorcycle Backpack
A high-quality, weather-resistant motorcycle backpack is essential for carrying gear securely on long rides. Some models even include built-in hydration systems and Bluetooth speakers for added convenience.
windproof and waterproof motorcycle backpack
Features
Aerodynamic Design: Reduces drag at high speeds.
Waterproof Construction: Keeps belongings dry in the rain.
Multiple Compartments: Organize tools, laptops, and other essentials.
Why You Need It:
A well-designed motorcycle backpack ensures comfort and security for your belongings, no matter the weather. Prices start at $80.
Conclusion: Ride Smarter and Safer in 2025
Biking into 2025 is focused on new stuff staying safe, and making things easy. All this gear is about making your trips better and keeping you out of trouble on the streets. Putting your money into the latest gear means you’re cruising with top-notch tech.
Are you ready to upgrade your ride? Drop a line about which gadgets you’re most excited about!
Safety gear always needs a helmet, it's a must-have. If you like riding bikes, or motorcycles, hitting the slopes, or gliding on a skateboard, strapping on a helmet can reduce the chances of a bad head injury by 70%. But, not every helmet is the same. To guard your noggin and stay comfy, it is super important to choose the right helmet type and size.
We're gonna dive into all the deets you gotta check out to choose, with all that fresh safety rule info and tips from the pros.
Why Helmet Choice Matters
A helmet’s primary role is to absorb impact energy during collisions, protecting your skull and brain. However, an ill-fitting or poorly designed helmet can fail in critical moments. According to the CDC, over 64,000 cyclists visited emergency rooms for head injuries in 2022 alone. Proper helmet use could prevent many of these cases.
Helmet Types and Features
Helmet Type
Description
Key Features
Certifications
Road Bike Helmet
Streamlined for aerodynamics with ample ventilation.
MIPS Technology, Lightweight, Ventilated
CPSC, CE, AS/NZS
Mountain Bike Helmet
Extended rear coverage and visors for trail riding.
Extra Coverage, Visor, MIPS Technology
CPSC, CE, AS/NZS
Commuter Helmet
Includes built-in lights or reflective elements.
Reflective Elements, Integrated Lights
CPSC, CE, AS/NZS
Full-Face Motorcycle Helmet
Encloses the entire head with a chin bar.
Maximum Protection, Visor
DOT, ECE 22.06, SNELL
Modular Motorcycle Helmet
Flip-up chin bar for versatility.
Flip-up Chin Bar, Versatile
DOT, ECE 22.06
Open-Face Motorcycle Helmet
Covers the top, back, and sides but leaves the face exposed.
Lightweight, Less Coverage
DOT, ECE 22.06
Half Motorcycle Helmet
Minimalist design covering only the top of the head.
Lightweight, Minimal Coverage
DOT
Off-Road Motorcycle Helmet
Lightweight with a visor and extended chin guard.
Extended Chin Guard, Visor
DOT, ECE 22.06
Skateboard Helmet
(Longboard Helmet)
Durable, rounded shell for multi-impact protection.
Hard Shell, Multi-Impact Protection
ASTM F1492
Snow Sports Helmet
Insulated with goggles compatibility.
Insulation, Goggle Clips
ASTM F2040
Equestrian Helmet
Protects the back of the head.
Extended Rear Protection, Durable
SEI Certified
Climbing Helmet
Lightweight with minimal bulk.
Lightweight, Compact
UIAA, CE
Part 1: How to Choose the Right Helmet Type?
Different activities require specialized helmets. Here’s a breakdown of the most common types:
1. Bicycle Helmets
Bike helmets are lightweight and ventilated, designed for impact protection at moderate speeds.
Road Bike Helmets: Streamlined for aerodynamics, with ample ventilation.
Mountain Bike Helmets: Offer extended rear coverage and visors for trail riding.
Commuter Helmets: Often include built-in lights or reflective elements.
ECE 22.06: Updated European standard with rigorous testing (2023).
SNELL: Voluntary certification for high-performance helmets.
3. Sports and Specialty Helmets
Skateboarding/Longboarding: Durable, rounded shells for multi-impact protection (ASTM F1492 certified).
Snow Sports: Insulated with goggles compatibility (look for ASTM F2040).
Equestrian: Protects the back of the head and meets SEI certification.
Climbing: Lightweight with minimal bulk.
Part 2: How to Choose the Right Helmet Size?
motorcycle helmet size chart
Step1. Measure Your Head Circumference
The first step to choose the right helmet size is to measure your head accurately.
Use a Flexible Measuring Tape: Wrap a soft measuring tape around the widest part of your head, approximately one inch above your eyebrows and ears. Ensure the tape is level and snug but not too tight.
Note the Measurement: Record the measurement in centimeters or inches, depending on the sizing chart you'll be using.
Step2. Determine Your Head Shape
Understanding your head shape is vital, as helmets are designed to accommodate various shapes:
Long Oval: The head is longer front-to-back and narrower side-to-side.
Intermediate Oval: Slightly longer front-to-back; the most common head shape.
Round Oval: Almost identical measurements front-to-back and side-to-side.
Tip: Identifying your head shape helps in selecting a helmet that offers a snug fit without pressure points.
Step3. Consult the Manufacturer's Sizing Chart
Helmet sizes can vary between manufacturers. Always refer to the specific sizing chart provided by the brand you're considering. Match your head circumference to the corresponding helmet size.
General Helmet Size Reference:
Helmet Size
Head Circumference (cm)
XS
53 - 54
S
55 - 56
M
57 - 58
L
59 - 60
XL
61 - 62
XXL
63 - 64
If your measurement falls between sizes, it's generally advisable to opt for the smaller size, as helmets tend to loosen slightly over time.
Step4. Try the Helmet On
Once you've identified a potential helmet size, it's crucial to try it on:
Positioning: The helmet should sit evenly on your head, with the eye port's upper edge just above your eyebrows, offering good peripheral vision.
Cheek Pads: They should touch your cheeks firmly but not uncomfortably.
Movement: Fasten the chin strap securely and shake your head gently from side to side and up and down. The helmet should remain stable without excessive movement.
try the helmet on
Step 5: Adjust the Fit
Padding: Use removable pads to customize snugness.
Retention System: Turn the dial at the back to tighten the fit.
Straps: Buckle the chin strap and adjust until it’s snug (1–2 fingers max under the strap).
Step6. Perform a Long-Term Fit Test
Wear the helmet for at least 20-30 minutes to assess its comfort over time. This period helps identify any pressure points or discomfort that may not be immediately apparent.
Ventilation: Look for adjustable vents in hot climates.
Weight: Lightweight helmets (under 400g for bikes) reduce neck strain.
Lining: Moisture-wicking liners keep you dry.
3. Replace After Impact
replace your helmet promptly
Even minor crashes can compromise a helmet’s structure. Replace it immediately if:
The shell is cracked.
The foam liner is dented.
You’ve had a collision, even without visible damage.
Average Lifespan: Replace every 3–5 years due to material degradation.
4. Style vs. Safety
While color and design matter, never sacrifice safety for looks. Bright colors enhance visibility on roads.
5. Final Checklist:
☑️ Correct type for your activity.
☑️ Properly measured size.
☑️ Up-to-date safety certifications.
☑️ Comfortable fit with no gaps.
Conclusion: Safety First, Always
Choosing the right helmet involves balancing type, fit, and functionality. Always opt for certified helmets tailored to your activity, and never compromise on fit. Remember, a helmet is a lifesaver—not an accessory. Measure twice, try before buying, and ride safe!
Getting around the city every day can be super annoying. You've got traffic like molasses nowhere to park, fuel prices through the roof, and buses stuffed like sardine cans make heading to the office a real pain. For loads of folks, getting a motorcycle is a pretty slick move—they’re nimble, cost-effective, and perfect for squeezing through gridlock. But hey, not every moto is cut out for city slicking. Picking the best commuter motorcycles is all about finding that sweet spot between zip-saving gas sitting comfy, and not breaking down easily.
We're gonna dive into what makes a prime commuter motorcycle and show off our top 5 picks that shine in all the right places for city riders.
Key Features of Commuter Motorcycles
Before diving into our top picks, let’s explore what makes a motorcycle ideal for commuting:
Engine: 749cc inline-4 | Power: 114 HP | Weight: 213 kg | Fuel Efficiency: 45 MPG
The Suzuki GSX-S750 mixes sporty zip with features good for daily commuting. Its inline-4 motor pushes out steady power on the freeway, and the straight-up handlebars with a plush seat make sure you stay comfy on extended trips. This motorcycle's grip control system and ABS make safety super vital for the wild traffic in the city.
Engine: 689cc parallel-twin | Power: 75 HP | Weight: 180 kg | Fuel Efficiency: 60 MPG
The Yamaha MT-07 is a crowd favorite for its lightweight chassis and punchy CP2 engine. Its torquey performance makes zipping through traffic effortless, while the slip-assist clutch ensures smooth gear shifts. The upright riding position and narrow frame allow easy lane filtering.
Engine: 399cc parallel-twin | Power: 50 HP | Weight: 165 kg | Fuel Efficiency: 68 MPG
The Ninja 400 is perfect for new riders and city commuters. Its lightweight build and peppy engine make it a joy in traffic, while the sporty fairing reduces wind fatigue. The bike’s ABS and slipper clutch add confidence for stop-and-go scenarios.
Kawasaki Ninja 400
Pros:
Superb fuel economy.
Low seat height (785mm) suits shorter riders.
Affordable price tag.
Cons:
Limited power for highway overtakes.
Thin seat padding on long rides.
4. KTM 390 Duke: The Tech-Savvy Urban Warrior
Engine: 373cc single-cylinder | Power: 45 HP | Weight: 158 kg | Fuel Efficiency: 65 MPG
The KTM 390 Duke is a lightweight powerhouse packed with tech. Its TFT display offers smartphone connectivity, while the ride-by-wire throttle ensures precise control. The WP suspension and superbike-derived brakes make it agile on crowded streets.
Engine: 745cc parallel-twin | Power: 58 HP | Weight: 210 kg | Fuel Efficiency: 70 MPG
The Honda NC750X redefines practicality. Its frunk (front storage compartment) replaces the fuel tank, offering 22 liters of space—perfect for groceries or a helmet. The DCT automatic transmission (optional) simplifies riding, while the low-RPM engine delivers stellar fuel efficiency.
Honda NC750X
Pros:
Unmatched storage solutions.
Ultra-smooth DCT for stress-free rides.
Relaxed, upright riding posture.
Cons:
Heavier than competitors.
Less thrilling for performance seekers.
Final Verdict: Which Commuter Motorcycle Should You Choose?
Power Enthusiast: Suzuki GSX-S750 (highway dominance).
Conclusion
When you pick out a motorcycle to zip around the city, think about what you're after and how you like to ride. Bikes such as the Suzuki GSX-S750, Yamaha MT-07, Kawasaki Ninja 400, KTM 390 Duke, and Honda NC750X shine for city folks. So, might you crave that raw power, or is it the sharp style agile moves, cool sporty feel, or even the adaptable tech that calls to you? No matter your taste, these five speedsters are perfect for giving your daily commute a serious boost.
Before you choose, you should take each motorcycle for a spin to get a feel for how they handle and how comfy they are. Plus looking into what they'll cost to own, what you'll pay for insurance, and how much you might sell them for later can guide your decision. If you line up what you need with what these bikes do best, you'll snag yourself the ideal ride for cruising through the city streets, no sweat, and all fun.
The helmet for your motorcycle ranks as crucial gear. It shields your noggin and keeps you out of harm's way should you take a spill. As it rubs up against your skin and gets exposed to sweat and the elements, your lid could end up grimy, reeking, or worse, break down with time. At this time, it becomes extremely important to clean motorcycle helmets.
We're gonna walk you through the right moves to spruce up and keep your motorcycle helmet tip-top in this blog. Stickin' to this routine means your helmet's not just gonna last longer, it's also gonna ensure a snug and hazard-free ride for you.
Why Clean and Maintain Your Motorcycle Helmet?
dirty helmets
Regular cleaning and maintenance are essential for several reasons:
Safety Comes First: Keep your helmet clean to make sure it works the best way possible. The inner lining can get weak if it's dirty with sweat, oil, and all that. And if that happens, it might not be so good at taking a hit. A well-maintained helmet is more reliable in an emergency.
Comfort: If you wear your helmet a bunch, it's gonna get all grimy with sweat and oils on the inside. That grime can bug you, make your helmet smell bad, and even mess with your skin. Washing it a lot means you keep your head space neat and snug.
Keep It Going: Looking after your helmet by cleaning it right can make it last longer. Getting rid of the nasty stuff and making sure it's not ruined by strong cleaning things or being kept the wrong way means your helmet stays in top shape for more time.
Hygiene: Your motorcycle helmet touches your hair, your skin, and sometimes the rain or the sun. Making sure it gets a good scrub often cuts down on germs and stuff that can give you allergies. That way, your helmet stays clean and not full of icky stuff.
Step 1: Preparation—Clean Motorcycle Helmets
Proper preparation is key to a successful cleaning session. Follow these steps before you begin:
Read the Owner’s Manual: Every helmet is different. Peek at the manual before cleaning to dodge any special care tips or no-nos. Doing this makes sure you don't do something that borks the warranty or wrecks your helmet.
Get your cleaning spot ready: Pick a bright place where you've got room to move. A garage, kitchen, or bathroom is great if you want warm water close by. Spread out a fresh towel or cloth to keep your helmet from getting scratched up while you're on the job.
Remove Accessories: Pull off stuff like helmet intercoms, chat gadgets, or visors that you can remove. Getting these bits out of the way means you can scrub down every inch of your helmet super well.
Disassemble Removable Parts: If your helmet comes with liners inside, pads for the cheeks, or pads for the ears that you can take out, do it. Remember where each bit goes so putting it back together won't be a hassle. Certain helmets let you pull out all the padding inside to give it a really good scrub.
Step 2: Essential Tools and Cleaning Supplies
Get your cleaning gear ready before you tackle that helmet. Picking the right stuff means you won't wreck it, and every nook and cranny will get a safe scrub-down.
essential tools and cleaning supplies
Cleaning Tools
Microfiber Rags: Perfect for the helmet, these are soft and awesome for scrubbing both inside and out.
A Soft Toothbrush: Awesome for scrubbing those tiny gaps and tough spots on your helmet.
Mesh Bag for Laundry: If your helmet has removable liners, toss them in a mesh bag to keep 'em safe in the wash.
Cleaning Supplies
Mild Soap or Baby Shampoo: Use a gentle, non-abrasive cleaner. Baby shampoo is a popular choice because it is designed for sensitive skin and does not contain harsh chemicals.
Warm Water: It's good stuff for getting rid of muck and gunk and won't mess up the helmet bits.
Special Gear Scrubbers: The market has specific stuff you can grab to make your helmet neat. They're made for scrubbing up without messing up the sensitive bits like face shields or inner padding.
Stuff You Shouldn't Use
Potent Solvent Sprays: Stay away from things like isopropyl or turpentine - they're no good for your headgear's squishy middle or plastic parts.
Stuff with Ammonia: These cleaners are way harsh and could rub off the important shiny layer on your helmet's skin.
Nasty Chemicals: Dodge any cleaner packing a heavy chemical punch. Those bad boys can make your helmet's strength go bye-bye.
Note: Using these supplies will ensure that your cleaning process is safe and effective. Always read the manufacturer’s manual for any specific cleaning instructions for your helmet model.
Step 3: Cleaning the Helmet’s Interior
Dig into your helmet's insides. The foam layers and pads hang out with your head's sweat, oil, and grime. You've gotta keep 'em clean.
clean the helmet’s interior
Removing the Liner and Pads
If your helmet allows it, remove the inner lining and cheek pads. Heads up, some helmets use straps or the sticky side of Velcro to keep those pads cozy so take it easy when you pull 'em out. Then plop 'em on something clean and won’t get 'em wet.
Machine Washing vs. Hand Washing
Machine Washing: Toss the bits you can take out into a bag meant for laundry. Hit the gentle cycle cooler than warm water, and just a touch of easy-on-the-fibers soap. Skip the soft stuff that makes your towels fluffy—it leaves a residue.
Hand Washing: Grab some warm water and mix in a bit of baby shampoo. Dunk those pads and liners in there, and give them a little swirl to get the sweat and grime out. For any tough spots, give them a good rub with a gentle cloth.
Drying the Interior
Once you've washed them, spread the liners and pads out to dry on their own. Stay away from the dryer—don't want to wreck the foam and sticky parts with that heat. Lay them flat on a fresh towel away from direct sunlight where there's plenty of air. It'll take a good chunk of your day so don't leave it till the last minute.
For helmets that cannot be removed
Use a damp microfiber cloth soaked in a solution of warm water and mild detergent.
Wipe the interior carefully, ensuring you do not saturate the foam.
Use a soft brush to gently clean any textured areas.
Allow the helmet to dry in a well-ventilated space, turning it upside down to let any moisture escape.
Regular cleaning of the interior will help keep your helmet smelling fresh and maintain its cushioning properties.
Step 4: Cleaning the Helmet’s Exterior
The outer shell of your helmet not only provides protection but also enhances its appearance. Here are the steps to clean the outside of your helmet.
clean the helmet’s exterior
Wiping Down the Surface
Start by wiping the helmet with a damp microfiber cloth. This initial wipe helps remove loose dirt, bugs, and road grime. Use warm water for best results.
Using Mild Soap
Mix a small amount of baby shampoo or mild soap with warm water. Dip a microfiber cloth in the solution and gently scrub the helmet’s surface. Do not apply too much pressure, as vigorous scrubbing can scratch the surface.
Detailing with a Soft Brush
For areas with stubborn dirt, such as crevices or the helmet’s vents, use a soft-bristled brush. Brush gently to avoid damaging the helmet’s paint or finish.
Rinsing the Helmet
After cleaning, rinse the helmet thoroughly with clean water. Make sure all soap residue is removed, as any leftover detergent can affect the helmet’s durability over time.
Step 5: Cleaning the Face Shield, Sun Shield, and Vents
clean the helmet carefully
The face shield and other clear components of your helmet need special care to maintain their clarity and scratch resistance.
Wipe Gently: Use a soft microfiber cloth and a solution of warm water and baby shampoo.
Avoid Abrasives: Do not use paper towels, as they can scratch the surface.
Use Proper Products: If your visor has anti-fog or anti-scratch coatings, use products recommended by the manufacturer.
The sun shield, which protects your eyes from glare, should be cleaned carefully to avoid smudging. Wipe it gently with a damp microfiber cloth. Make sure no soap or residue remains, as this could affect visibility.
Cleaning the Vents
Dust and debris can accumulate in the helmet’s vents over time. Use a small brush or a cotton swab to clear out any blockage. In some cases, you can use compressed air on a low setting to blow out dust.
Step 6: Dry and Reassemble
After cleaning your motorcycle helmet, it's crucial to dry and reassemble it properly to maintain its integrity and ensure your safety.
Drying the Helmet Components
Pat Dry: Gently press a clean, soft towel against the helmet's shell, padding, and straps to absorb excess moisture.
Air Dry: Place all components in a well-ventilated, shaded area to air dry completely. Avoid direct sunlight or heat sources like hairdryers, as they can damage materials and adhesives.
dry the motorcycle helmet
Reassembling the Helmet
Internal Padding and Liners: Once fully dry, reinsert the internal padding and liners, ensuring they fit snugly and align correctly within the helmet.
Cheek Pads: Reattach the cheek pads securely, following the manufacturer's guidelines.
Visor and Accessories: Reinstall the visor and any other accessories, making sure all screws or clips are tightened properly.
Proper drying and reassembly are essential to prevent mold growth and ensure the helmet provides optimal protection during use.
Additional Maintenance Tips
Regular maintenance goes beyond just cleaning. Here are some extra tips to help you keep your helmet in top condition:
Regular Inspections
Check for Cracks or Damage: Regularly inspect both the exterior and interior of your helmet for any signs of damage or wear. Cracks in the shell or worn-out padding can compromise safety.
Inspect the Fasteners: Make sure that all straps, buckles, and fasteners are in good working condition. Replace any parts that appear worn or damaged.
Proper Storage
Keep It Out of Direct Sunlight: Prolonged exposure to direct sunlight can damage the helmet’s materials. Store your helmet in a cool, dry place when not in use.
Use a Helmet Bag or Case: Investing in a soft bag or a hard case for your helmet can protect it from dust, scratches, and accidental impacts during storage and transportation.
Avoid Extreme Temperatures: Do not leave your helmet in very hot or very cold conditions, such as in the motorcycle on a hot day or outside in freezing temperatures.
Odor Prevention
Use Helmet Liners or Skull Caps: Wearing a clean helmet liner or skull cap can reduce the buildup of sweat and oils on the interior.
Regularly Air Out Your Helmet: After a ride, if possible, remove the liner and let the helmet air out before storing it. This will help prevent the growth of bacteria and reduce unpleasant smells.
Timely Replacement of Parts
Replace Worn Liners: If you notice that the interior padding has degraded, consider replacing it. Some helmet manufacturers offer replacement pads and liners.
Monitor the Helmet’s Age: Even with proper maintenance, helmets should be replaced every 5 to 7 years, or after a significant impact, as the materials can degrade with time and exposure.
Common Mistakes to Avoid
common mistakes to avoid
Even with the best intentions, there are several mistakes motorcyclists often make when cleaning and maintaining their helmets. Here are some pitfalls to avoid:
Using the Wrong Cleaners: Don't go for solvent-based cleaners rubbing alcohol, or stuff that's got ammonia in it. , these things will damage your helmet's inside and outside.
Overwetting the Interior: Be careful not to soak the inner foam too much. If it gets too wet, you could wreck the liner and might even start a little mold or mildew party in there.
Pay attention to the Drying Process: Don't skip letting everything dry all the way. If you put your helmet away with damp spots, those areas can end up getting damaged after a while.
Not Following Manufacturer Guidelines: Every helmet has its own set of do's and don'ts when it comes to cleaning. If you don't pay attention to what the maker says, you might clean it wrong and then say bye-bye to your warranty, or worse wreck your helmet.
Using Abrasive Materials: Always steer clear of rough fabrics or stiff-bristled cleaners for your "face shield" or helmet surface. They'll scratch or wear down the protective layers.
Avoiding these common mistakes will help you preserve the integrity and safety of your helmet.
Conclusion
It is part of the deal to take care of motorcycle helmets for motorcycle riders. A helmet that's kept in good shape, not only keeps you safer but also improves your ride by giving you coziness and a neat appearance.
The instructions above are easy for newbies and still complete for pros who want to max out the benefits from their equipment. Enjoy the roads!
Rider safety demands motorcycle helmets. Yet, riders still clash over picking full-face vs open-face helmets. Full-face ones take the win for protecting in crashes, but open-face models charm folks who want cool looks better air, and that old-school vibe.
This guide dives into the latest research, technological advancements, and real-world insights to help you decide which helmet type aligns with your riding needs.
Comparison Table: Full Face Helmet vs Open Face Helmet
Feature
Full Face Helmet
Open Face Helmet
Protection
Maximum protection (covers entire head, including chin and jaw)
Limited protection (exposed face and jaw)
Impact Safety
High – absorbs impact across all areas
Moderate – protects top, back, and sides of the head
Weather & Debris Protection
Shields from wind, rain, dust, and debris
Exposed to wind, rain, and dust
Ventilation
Controlled airflow with vents
Natural airflow due to open design
Noise Reduction
Reduces wind and road noise
No noise reduction, wind noise is higher
Weight
Heavier due to full coverage
Lighter and more comfortable for short rides
Field of Vision
Slightly restricted peripheral vision
Unobstructed, wide field of vision
Comfort
Snug fit, better insulation
More open, breathable, and lightweight
Aerodynamics
More aerodynamic for high-speed riding
Less aerodynamic, more drag at high speeds
Best for
Long-distance riding, high speeds, off-road, racing
City riding, short trips, cruiser-style motorcycles
Cost
Generally more expensive due to advanced features
More affordable, with basic protection
Customization
Limited customization; some modular designs available
Highly customizable with visors, shields, and graphics
Safety Standards
DOT, ECE, Snell certified
DOT and ECE certified, but lower impact resistance
The Importance of Motorcycle Helmets
Motorcycle crashes are brutal. A 2021 study that looked at 137 crash reports found that helmets cut the risk of head injuries by 37%. Riders who don't wear helmets are four times more likely to die from head trauma. But the way helmets are made has a huge impact:
34.6% of impacts occur in the chin area, the most vulnerable zone in crashes.
Open-face helmets expose your face to dirt strong winds, and direct hits upping the chance of broken bones in the face and tooth damage.
Even though they're kinda risky open-face helmets are still liked for feeling light on your head and having a classic vibe. We're gonna dive into the good stuff, the bad stuff, and the cool new changes they're bringing to both types in 2025.
What Are Full Face Helmets?
Full face helmets are designed to cover the entire head, including the chin and jaw area. They offer the highest level of protection for motorcyclists.
man with full face helmets
Superior Protection
Total Head Defense: Full face helmets safeguard every part of your noggin. They keep your forehead, face, jaw, and even your chin.
Better Shock Soaking: Full face helmets have layers and layers of special foam that soaks up shock really well if you get hit.
Shielding from the Elements and Bits: Since they cover you all up, these helmets stop the wind, dirt, rain, and bugs from messing up your ride. They're super for when you're going far or fast.
Less noise: Full face helmet designs cut down on wind sound. You get a more silent ride, which isn't as tiring when you're on the road for a while.
Better shape for speed: They've got a design that lets the air slip past easier. You go faster and don't wear out as when you're riding without a helmet.
Cool air feature: These days full face helmets have got some neat systems to move air around. Your head stays chill even when the sun's beating down hard.
Technological Advancements
Innovations in Material: Lots of full face helmets are rocking stuff like carbon fiber, fiberglass blends, and high-density EPS foam now. They make them strong without weighing your head down.
Integrated Communication Systems: Some full face helmets are designed with built-in Bluetooth and communication systems, allowing riders to connect with fellow riders or listen to navigation instructions without removing the helmet.
Enhanced Visibility: Full face helmets got better thanks to visor upgrades that keep the fog away and resist scratches, so you can see well no matter the weather.
Considerations
While full face helmets offer numerous benefits, they may not be for everyone:
Heavier Weight: Full face helmets often weigh more because they are more designed. If you have a weak neck, this might bother you.
Restricted Peripheral Vision: The extended visor may slightly limit your peripheral vision, although modern designs have minimized this issue.
Cost: High-end full face helmets can be more expensive due to the advanced materials and technology used in their design.
What Are Open Face Helmets?
Open face helmets, also known as “three-quarter helmets,” cover the top, back, and sides of the head while leaving the face exposed. They are popular among riders who prefer a more open and connected riding experience.
man with open face helmets
Enhanced Ventilation and Visibility
Increased Airflow: You get more air with open face helmets. Unlike those full face ones, these helmets let the breeze flow without any trouble. When it's blazing hot or you're cruising at a turtle's pace in the city, this comes in super handy.
Wider Field of Vision: Since there's nothing blocking your mug, like a visor or chin bar face helmets give you a full view of everything around. That's a big plus if you're all about feeling free while you're zooming around.
Classic Style: They've got that old-school cool vibe. A bunch of riders dig the retro look of open face helmets. They've got a style that's stayed slick through the years, and that's why they keep sticking around.
Comfort and Weight
Lighter Weight: Open face helmets tend to be lighter so your neck doesn't get all tired out on long trips.
Simplified Design: Open face helmets have a no-fuss design too, with fewer bits and pieces that often make them comfier for folks who like to keep it simple. Plus, that simplicity means you don't have to fuss too much over keeping them clean.
Not Ideal for High-Speed Riding: Riding fast isn't the best with these helmets. They're good for slow rides in the city but not so much when you're speeding or on rough terrain.
Risk of Wind and Debris: Your face will catch all the wind, dust, and flying bits because there's no shield. You've got to remember this when the weather's acting up.
Technological Improvements
Modern Features: Modern open face helmets often include face shields that riders can attach or detach. This feature gives them the choice to ramp up protection when they feel like it.
Customization: A lot of makers let you tweak these helmets. You can swap out the insides or slap on some cool designs that scream 'you.' It's a sweet deal for riders who dig to make a statement while staying safe.
Safety: Full Face vs Open Face Helmet?
full face helmet and open face helmet
Safety is the top priority for any motorcyclist. Here’s a detailed look at how full face and open face helmets compare in terms of safety:
Impact Protection
Full Face Helmets: Full Face Helmets give you top-notch safety 'cause they cover your whole noggin. They're built tough to tackle real hard knocks, which is why folks who love speed on their bikes or hitting the race tracks dig 'em the most.
Open Face Helmets: Open Face Helmets don't guard your mug and chin much. Sure, they take a hit kinda okay but don't count on 'em when you need your whole head in one piece.
Face and Jaw Protection
Full Face Helmets: Include a robust chin bar that protects the jaw and lower face. This is critical in accidents where the impact might come from the front.
Open Face Helmets: Leave the face and jaw exposed. This can result in more severe injuries if you are involved in a collision.
Standards and Testing
Certification: Both full face and open face helmets must meet safety standards set by organizations such as DOT (Department of Transportation), ECE (Economic Commission for Europe), and Snell. However, the testing criteria for full face helmets tend to be more rigorous due to their design.
Impact Testing: Full face helmets undergo extensive impact testing to ensure they provide maximum protection across different types of collisions. Open face helmets, while certified, have a different set of safety criteria focusing on head protection rather than full-face coverage.
Real-World Scenarios
Research and numbers point out that riders with "full face helmets" tend to dodge face injuries more than riders who rock "open face helmets." Even though the open face ones feel comfy and look cool, they're a good pick for cruising in city spots or rolling slow during commutes.
Full Face vs Open Face Helmet: Comfort, Fit, and Usability
Comfort and fit are crucial when choosing a motorcycle helmet. A helmet that fits well not only provides better protection but also enhances your overall riding experience.
Full Face Helmets
riding motorcycle with full face helmet
Fit and Padding: Full face helmets usually come with high-quality padding that offers both comfort and shock absorption. The interior is designed to minimize movement during an impact.
Ventilation: Modern full face helmets have multiple vents that can be adjusted to control airflow. This helps maintain a comfortable temperature inside the helmet.
Weight Distribution: Although they are heavier, the design of full face helmets ensures that the weight is evenly distributed across the head, reducing strain during long rides.
Open Face Helmets
riding motorcycle with open face helmet
Lightweight Design: Their lighter build makes open face helmets a popular choice for riders who may experience neck strain with heavier gear.
Simplicity: With fewer components, open face helmets often have a more comfortable fit for casual riders. The minimalistic design allows for quick on-and-off usage.
Customization: Many open face helmets offer adjustable straps and removable liners, which can be tailored to fit your head shape perfectly.
Finding the Right Fit
Choosing a helmet means you gotta try on a bunch and figure out what works. Remember these bits when you're picking one out:
Secure Fit: Your helmet should grip your noggin just right—tight but not squeezing too hard. It shouldn't wiggle when you give your head a good shake.
Comfortable Padding: Check that the padding inside feels good and doesn't poke you in the wrong places.
Ventilation Options: key for full-face helmets—make sure there's enough airflow to stop your visor from misting up and to keep you from getting too hot.
Usage Scenarios: Which Helmet Suits Your Riding Style?
Different riding environments and styles may call for different types of helmets. Here are some common scenarios and recommendations:
High-Speed and Long-Distance Riding
Full Face Helmets: Ideal for highway riding, touring, and racing. Their comprehensive protection and aerodynamic design make them perfect for high-speed situations.
Weather Conditions: Full face helmets protect against wind, rain, and debris, ensuring your face remains shielded during long rides.
City Riding and Casual Cruising
Open Face Helmets: A great option for city commuting and short trips. The open design provides excellent ventilation and a wide field of vision.
Ease of Use: For stop-and-go riding, the convenience of quickly putting on and removing your helmet is a significant advantage.
Full Face Helmets: When riding on rough terrains or off-road, full face helmets offer better protection against impacts, falls, and flying debris.
Adaptability: Many full face helmets designed for off-road use have removable face shields or modular features that can be adjusted depending on the riding conditions.
Price and Value Considerations
Budget is another important factor when choosing a motorcycle helmet. Prices can vary significantly based on the helmet’s features, materials, and brand reputation.
Full Face Helmets
Higher Price Range: Full face helmets often have a bigger price tag cause of their fancy stuff and top-notch safety. But , you're getting your money's worth with the kind of protection and snugness they give you.
Durability: High-quality full face helmets are built to last. Fork out some cash for a solid one and you won't have to keep buying new ones, so it's kinder to your wallet over time.
Advanced Features: The inclusion of advanced ventilation systems, noise reduction, and integrated communication technology can justify the higher cost for many riders.
Open Face Helmets
More Affordable Options: Open face helmets come at a cooler price, so if your wallet's feeling light, they'll still have you covered.
Cost-Effective for Casual Use: If you're just chillin' around town and not racing the wind snagging an open face helmet could save you some cash while keeping your noggin safe.
Maintenance and Upgrades: They're low key when it comes to upkeep. The design's straightforward and swapping in new liners won't bleed your bank dry.
Conclusion
Picking a full face or an open face helmet relies much on how you ride, your need for safety, and what you like. Full face helmets give top-notch safety, advanced features, and enhanced coverage if you’re into fast rides or traveling far. On the flip side open face helmets come with great airflow, are light on your head, and have that classic style city riders dig a lot.
Devoting time to digging into information trying out, and choosing the perfect helmet means you're making every trip as secure and fun as it can be. The best helmet is one that ticks the boxes for recent safety standards and suits the way you are and your requirements.
Motorcycling is an exhilarating experience, offering freedom, adventure, and a unique connection to the road. However, even seasoned riders can develop dangerous habits that compromise safety and performance. In this comprehensive guide, we’ll explore the most common dangerous motorcycle habits, why they’re dangerous, and how to fix them. Whether you’re a new rider or a veteran, breaking these habits could save your life.
The Habit: Riding without a helmet, gloves, jackets, or proper footwear.
riding a motorcycle without protective gear
Why It’s Dangerous:
Motorcycle riding exposes you to greater risks in crashes, including head injuries and traumatic brain injuries. Helmets and protective clothing are essential for protection while wearing these items can prevent cuts, bruises, and road rash.
The Habit: Riding too fast for conditions or showing off with risky maneuvers.
Why It’s Dangerous:
Speeding and overconfidence are common temptations for motorcyclists, leading to unnecessary risks and accidents. Speeding reduces the time for reactions, increases stopping distances, and reduces the margin for error. Overconfidence can blind riders to potential hazards, leading to misjudgments and potential legal consequences. It's crucial for motorcyclists to stay aware of their surroundings and maintain a safe speed to protect themselves and others on the road.
The Habit: Weaving between cars at high speeds or in heavy traffic.
Why It’s Dangerous: While lane splitting is legal in some states (e.g., California), doing it recklessly can cause collisions. Drivers often don’t expect motorcycles in tight spaces.
The Fix:
Only lane split if it’s legal in your state.
Keep speeds under 10 mph faster than traffic.
Avoid splitting near large vehicles (trucks, buses).
Watch for car doors opening or sudden lane changes.
Did You Know? California’s lane-splitting guidelines recommend not exceeding 30 mph.
5. Riding Distracted
riding distracted is dangerous
The Habit: Using phones, adjusting GPS, or daydreaming while riding.
Why It’s Dangerous: A 2023 study by AAA found that riders who text are 8x more likely to crash. Distractions delay reaction time.
Self-Assess: Record your rides or ask a friend to critique your habits.
Practice Mindfulness: Stay conscious of your actions—no autopilot!
Take a Refresher Course: Many organizations offer advanced training.
Final Thoughts
Getting over lousy bike-riding habits ain't quick, but man, it's worth it. You score safer treks, dodge more scrapes, and just dig the ride heaps more. Keep up with the know-how, make sure you’re seen, and put bike upkeep at the top of your list.
Don’t forget minor tweaks such as a weekly tire pressure check, could be a game-changer for staying alive.
Riding a motorcycle is an exhilarating experience, but bad road conditions can turn it into a daunting challenge. Whether you’re facing rain, gravel, potholes, mud, or snow, being prepared is the key to staying safe.
This guide provides essential tips for motorcycle riding in adverse conditions, ensuring you stay safe while enjoying the ride.
Why Bad Road Conditions Demand Extra Caution
Motorcycles are inherently less stable than cars, making them vulnerable to road hazards.
common adverse conditions
Common bad road conditions include:
Wet or Slippery Surfaces: Rain, oil spills, or wet leaves can reduce tire traction, increasing the risk of skidding.
Uneven or Damaged Roads: Potholes, gravel, and uneven pavement can destabilize a motorcycle.
Debris: Objects like branches, rocks, or litter can obstruct paths and cause accidents.
The National Highway Traffic Safety Administration (NHTSA) says about 25% of motorbike crashes happen cuz of sketchy road situations, such as slippery roads or junk on the way. Stuff like bad light, not enough grip, and stuff popping up outta nowhere make things riskier. But, if you snag the proper skills and kit, you stand a better chance of dodging these hazards and having a cool safe trip.
1. Pre-Ride Preparation: Your First Line of Defense
Before hitting the road, perform a T-CLOCS check (Tires, Controls, Lights, Oil, Chassis, Stands):
Check Your Tires
Tread Depth: Old tires don't do well on slick or bumpy roads. Swap them out when the tread gets less than 2/32 inches (1.6 mm).
Pressure: Tires that aren't full enough lose traction, and the ones too full might slide around. For sure readings, go with a tire pressure monitor (TPMS).
Tire Type: Opt for all-weather or dual-sport tires if you frequently ride in mixed conditions(designed for mixed terrain, with deeper treads to channel water and grip loose surfaces).
Use engine braking and pump the brakes (if non-ABS).
9. Mental Preparedness: Ride Smart
Your mindset matters as much as your skills.
Stay Focused
Avoid distractions like music or phone calls.
Know When to Stop
If conditions worsen, pull over safely.
FAQs: Quick Answers to Common Questions
Q: What’s the safest speed for riding in the rain?
A: 10–15 mph below the posted limit. Adjust based on visibility and road texture.
Q: Can I use regular street tires on gravel?
A: Not recommended. Street tires lack the tread depth needed for loose surfaces.
Q: How do I recover from a fishtail?
A: Gradually release the throttle—don’t brake—and steer into the skid until stability returns.
Conclusion
Bad Road Conditions put your skills to the challenge, yet if you prep and practice tons, you'll get through them with no sweat. Make sure to keep your ride well-maintained, tweak how you ride, and don't skimp on good equipment. Keep in mind, the goal isn’t just to survive the ride—it’s to enjoy it, no matter what the road throws your way.
Stick to these pointers, and you're not just boosting your safety levels but also getting braver to face any kind of ground. Stay sharp, be ready for anything, and always land wheels on the ground!
An ultimate safety guide about motorcycle roundabout for motorcycle beginners.
Roundabouts can handle more traffic than traditional intersections. They work efficiently to keep vehicles moving. Yet motorcycle riders face the highest accident rates at these circular junctions.
The first modern roundabout opened in Germany in 1899. These circular intersections now dot roads worldwide.
Riders need to become skilled at handling roundabouts safely. U.S. roundabouts, with their counterclockwise traffic flow, create unique challenges for motorcyclists.
Besides, sudden lane changes and unnecessary stops make these junctions risky.
Many riders want to learn or improve their roundabout skills. This piece breaks down techniques and safety practices. You'll find everything you need to direct your motorcycle through roundabouts confidently.
Understanding Motorcycle Roundabout Basics
some motorcycle riders are riding through a roundabout
Firstly, you should know that roundabouts are different from traditional intersections. Because they keep traffic moving without complete stops.
Here is a data from Transportation Association of Canada:
"Conversion from a signalized intersection to a multi-lane roundabout (4 sites, suburban settings) yielded a 67% reduction in all crashes. In terms of injury crashes the sample size was too small to calculate a percentage, but of the 98 crashes in the after period, only 2 involved injury." "Conversion from a two-way stop to a multi-lane roundabout (11 sites, urban/suburban settings) yielded an 18% reduction in all crashes and a 72% reduction in injury crashes. Of the 272 crashes in the after period, 13 involved injuries."
From this data, you can find that the roundabouts are truly more safe. And, they can handle more traffic in a better way.
What Makes Roundabouts Different
Modern roundabouts have several unique features that set them apart from regular intersections.
Firstly, they work without traffic signals, so drivers must decide when it's safe to enter.
Another feature of roundabouts is their tight circular design. This makes vehicles slow down to 15-20 mph in urban areas and 30-35 mph in rural settings.
Besides, these roundabouts have fewer conflict points than traditional intersections.
Their design prevents dangerous right-angle and head-on collisions.
They also reduce vehicle emissions and fuel consumption. Because drivers make fewer complete stops and wait less.
Multi-lane roundabouts can be tricky for motorcyclists. These layouts see more sideswipe incidents, though such crashes usually cause minor damage instead of serious injuries.
Single-lane roundabouts prove safer and easier to navigate.
Key Terms Every Rider Should Know
Riders can navigate roundabouts with more confidence by knowing these important terms:
Yield Line: The point where entering traffic must give way to vehicles already in the roundabout
Central Island: The raised area in the middle around which traffic circulates
Deflection: The curved path that guides vehicles through the roundabout at appropriate speeds
Entry Lane: The approach road leading into the roundabout
Exit Lane: The departure road leading away from the roundabout
The "12 O'clock Rule" helps riders choose lanes in two-lane roundabouts. In countries with counterclockwise traffic flow:
Use the right lane for exits at or before 12 o'clock
Choose the left lane for exits after 12 o'clock
Your position are important, as roundabouts need planning based on your exit. Steady speeds help you navigate smoothly while watching for merging traffic.
I sincerely advise all riders can understand and remember these simple concepts. These will help you handle the roundabouts more confidently.
With these tips, you can make your own decisions and watch other vehicles on the road. Then you may not depend on the traffic signals.
Essential Safety Checks Before Entering
essential safety checks before entering a roundabout
"Awareness saves lives; ride alert."
Safety checks can help you reduce accident risks by a lot at roundabouts. This is a step that I wish all riders could pay attention to and put into practice.
What's more, motorcyclist needs to become skilled at these vital checks. Because these checks will ensure you smooth navigation through circular intersections.
Speed and Position Control
Your approach to a roundabout needs precise speed management.
You should slow down your speed early, downshift as needed, and keep a steady pace throughout.
The optimal control comes from reducing speed to 15-20 mph in urban settings.
What's more, stay centered in the right-hand lane unless road markings tell you otherwise.
Make sure to scan for advance warning signs while watching your rear.
Traffic conditions and visibility will determine your approach speed.
Constantly watch the direction you are traveling and traffic coming from the right.
Checking Blind Spots
Blind spot checks are vital for every motorcycle rider. The reason is, motorcycles have limited visibility on both sides and rear. I believe you will find this more challenging especially when you are wearing a helmet.
What's more, a motorcycle's small size makes it especially vulnerable in traffic. Why? It can easily vanish in other vehicles' blind spots.
These blind spot checks are essential:
Left shoulder check before entry
Right-side blind spot scan before lane changes
Left shoulder look when leaving
Lifesaver checks before direction changes
Signal Timing Tips
Clear signals let other road users know your intentions.
Start signaling as you pass the exit before your turn.
You don't need signals when going straight, but always signal left when leaving.
Steady throttle control during mirror checks helps smooth navigation. Traffic might force you to stop, but avoid sudden halts unless needed since they could cause rear-end collisions.
These additional tips will boost safety:
Look for good gaps in moving traffic before entering
Stay moving in the roundabout unless avoiding collisions
Keep right of the central island
Move counter-clockwise inside
Note: each roundabout has unique challenges based on its size, traffic flow, and weather. So, your approach should match each situation. At the same time, exercise proper caution and awareness and make safety your top priority.
Step-by-Step Navigation Guide
Motorcycle roundabout navigation guide
You need precise execution of steps to become skilled at roundabout navigation. These motorcycle roundabout tips will give a safe way through circular intersections.
Approaching the Roundabout
Your need to control the speed when you spot advance warning signs. Sometimes you will need to ride the motorcycle at a slow speed if the traffic is heavy.
Besides, start downshifting early to match your speed with engine revs.
Look back and forth between your planned direction and traffic flow.
After you pass the previous exit, you should show your exit plans right.
The first thing you should do is to check your blind spot to make sure no vehicles merge beside you.
Move at a steady speed through your exit once conditions are clear.
These points will help you exit smoothly:
Turn off indicators after exiting the roundabout
Watch mirrors for traffic behind
Keep proper tire position
Leave enough space between vehicles
Remember, once you are in the roundabouts, you need to keep continuous movement!
Only stop to prevent crashes or at pedestrian crossings.
If you miss your exit, just go around again until you reach it.
You can practice these methods on quieter roundabouts to boost your riding safety.
Pay attention to your lane position and speed control. Regular practice makes complex roundabout navigation feel natural.
Handling Different Types of Roundabouts: What to Do?
Every rider is a role model for road safety.
Different roundabout designs will bring you different challenges.
Studies show that while roundabouts are twice as safe as traffic signals for cars. However, motorcycles actually experience the opposite effect.
Single-Lane Navigation
Single-lane roundabouts are safer because they reduce potential conflicts between drivers.
Data shows that these designs cut fatalities by 90% and injury crashes by 75%.
This is because the simple layout eliminates lane choice decisions. So riders can focus on:
Managing speed (15-20 mph works best)
Staying in the right lane position
Watching traffic patterns
Note: Riders should look out for the truck apron in single-lane setups - it's a raised section next to the road. Since large vehicles often use this extra space, motorcyclists must stay alert.
Multi-Lane Challenges
Multi-lane roundabouts are more complex then single lane roundabouts. So motorcycle riders need to pay extra attention when go through these areas.
These designs create new conflict points you won't find in single-lane versions. Most problems come from:
Wrong lane choices
Bad turning decisions
Slow-speed side collisions
Turbo roundabouts offer a better design solution. They usually have better lane markers and simpler entry paths. These features make navigation smoother through:
Spiral roads that guide vehicles
Barriers that stop lane weaving
Easy-to-follow direction signs
Attention:
Picking the right lane is vital when you approach bigger roundabouts.
The left lane works for left turns and going straight. The right lane is for right turns and straight paths. New riders often have trouble with these multi-lane setups.
You should keep extra distance from large vehicles in complex roundabouts. (They often use both lanes to turn).
Some roundabouts even have special features built for big vehicles turn.
Each type of roundabout needs its own riding approach. Success comes from knowing these differences and changing how you ride.
Pay attention that road conditions can make things trickier. Because roundabouts often slope outward and can get slippery.
Conclusion
Becoming skilled at motorcycle roundabout navigation needs practice, awareness, and proper technique.
These circular intersections create unique challenges for riders. Understanding their design and following safety protocols reduces risk by a lot.
Safety checks, proper positioning, and speed control are the key of successful roundabout.
You can regard roundabouts as chances to boost your skills by using proven techniques systematically.
Besides, you must adjust your approach based on roundabout layout and traffic conditions.
Single-lane designs are straightforward to navigate. Multi-lane layouts need extra watchfulness and precise lane positioning.
Regular practice on quieter roundabouts helps build confidence before taking on complex configurations.
Successful roundabout navigation combines preparation, awareness, and execution. These essential tips and techniques help you safely handle any roundabout you meet during the rides.
FAQs
Q1. How should I approach a roundabout on a motorcycle?
You should approach the roundabout in a central position, and reduce your speed to 15-20 mph in urban area.
Look early into the roundabout, assess traffic flow, and decide whether to proceed or stop.
Use your rear brake for final speed adjustments.
Be prepared to yield to vehicles already in the roundabout.
Q2. What are the key safety checks before entering a roundabout?
Essential safety checks include: adjust your speed and position, check blind spots, use proper signaling.
Scan for advance warning signs, maintain effective rear observation.
Alternate observations between your direction of travel and traffic approaching from the right.
Q3. How do I navigate multi-lane roundabouts safely?
For multi-lane roundabouts, remember the followings:
Stay in your designated lane throughout
Avoid entering directly beside another vehicle
keep a safe distance from vehicles ahead.
Use the left lane for turning left or going straight, and the right lane for turning right or going straight.
Be extra cautious of larger vehicles that may require both lanes.
Q4. What's the proper way to exit a roundabout on a motorcycle?
Signal your exit intentions just after passing the exit before yours.
Perform a thorough blind spot check to ensure no vehicles are merging alongside.
Maintain steady speed through your exit, cancel your indicator once completed.
Check mirrors for following traffic.
Q5. How can I improve my skills in handling different types of roundabouts?
You should practice on less busy roundabouts firstly. The key is to focus on maintaining proper lane position and speed control.
Familiarize yourself with both single-lane and multi-lane configurations.
Pay attention to unique features both single-lane and multi-lane roundabouts. For example, the truck aprons in single-lane roundabouts and spiral road geometry in turbo roundabouts.
With consistent practice, navigating even complex roundabouts will become second nature.
Riding on the highway sure gets the adrenaline pumping, yet it requires talent, concentration, and getting ready beforehand. Highways are different from city streets because you're going faster dealing with drivers who do stuff out of the blue, facing stuff like side winds and getting super tired.
No matter if you're just starting out or you've been riding for a long time, this advice will guide you to travel on highways without trouble. We're gonna tackle the must-haves for riding on the highway. We'll cover everything from what you should wear and checking your motorcycle, to smart riding tactics and what to do if things go south.
1. Preparing for the Ride—the First Step of Riding on the Highway
Plan Your Route
plan your route—the first step
Before you hit the road for a journey on the highway craft your travel path. Trustworthy maps and GPS tech help you pick top-notch routes and steer clear of zones jammed with traffic or construction work. Today’s smart nav apps give you the lowdown on traffic as it happens, accidents, and other ways to go. Getting your trip plans sorted beforehand cuts down on the frazzle and lets you keep your mind on your driving.
Check the Weather
Highways might hit you with fast weather switches. Peek at the weather outlook for your path before stepping out. Spot rainheavy gusts, or mist? Maybe hold off on your travel or pick a different way. Cruising in nasty weather up the risk of crashing so better to cruise when it's nice out.
Rest and Hydration
Long rides can be tiring. Make sure you get a good night’s sleep before a long trip. Take breaks during your ride to stretch your legs, drink water, and rest your eyes. Fatigue reduces your reaction time and focus, so it is important to listen to your body and stop when needed.
Familiarize Yourself with Local Laws
Highway rules and speed limits can vary by state or region. Take a few moments to review the local traffic laws for the areas you will be traveling through. Being aware of speed limits, lane usage, and local regulations helps you avoid fines and stay safe.
Before hitting the highway, ensure your motorcycle and gear are road-ready.
Motorcycle Maintenance Checks
Tires: Inspect tread depth (minimum 2/32 inches) and pressure (check manufacturer’s PSI recommendation). Bulges, cracks, or embedded objects mean it’s time for a replacement.
Brakes: Test lever firmness. Worn pads or spongy feel? Replace them. Check brake fluid levels and color (dark fluid needs flushing).
Lights: Confirm headlights, taillights, brake lights, and turn signals work. Upgrade to LED bulbs for better visibility.
Fluids: Check oil, coolant, and clutch/brake fluids. Top off or replace if needed.
Chain/Belt: Lubricate and adjust tension (1–1.5 inches of slack is typical).
Safety Gear Essentials
Helmet: Choose a DOT or ECE-certified full-face helmet for maximum protection. Consider a photochromic visor for changing light.
choose a safe helmet
Jacket and Pants: Opt for abrasion-resistant materials like leather or textile with CE armor. High-visibility colors or reflective strips boost daytime visibility.
Gloves and Boots: Select gloves with reinforced palms and boots that cover ankles (e.g., motorcycle-specific or sturdy work boots).
Ear Protection: Use filtered earplugs to reduce wind noise without blocking crucial sounds like horns or sirens.
Reflective Gear: Wearing reflective gear can make you more visible to other drivers, especially at night. Choose jackets, vests, or patches that enhance your visibility on the road.
3. Highway Positioning and Awareness
Your position on the road impacts visibility and safety.
Keep a 3–4 second gap from vehicles ahead. Increase this in rain or heavy traffic. Use the “two-second rule”: Pick a roadside object. When the car ahead passes it, count “one-thousand-one, one-thousand-two.” If you pass it before finishing, you’re too close.
Front Tire: Gently roll off the throttle. Let the bike slow naturally before easing to a stop.
Rear Tire: Shift weight forward, reduce throttle, and brake lightly if needed.
motorcycle tire blowouts
Sudden Obstacles
Swerve vs. Brake: If space allows, swerve around debris. If braking is necessary, apply both brakes evenly. Bikes with ABS prevent wheel lock; practice emergency stops in a safe area.
Hydrate with water or electrolyte drinks. Wear moisture-wicking base layers and ventilated gear. Plan rides during cooler morning/evening hours.
7. Managing Fatigue and Taking Breaks
Long rides drain focus. Stop every 60–90 minutes to stretch, hydrate, and snack. Signs of fatigue:
Drifting in your lane
Delayed reactions
Frequent yawning
Use rest stops to check your bike for loose bolts or leaks.
8. Technology and Tools for Safer Rides
Leverage modern aids:
GPS with Traffic Alerts: Use apps like Waze or dedicated motorcycle GPS units (e.g., TomTom Rider or Fodsports) for real-time updates on accidents, road closures, or speed traps. These tools reroute you around delays and highlight hazards like potholes or debris. Pair with a waterproof phone mount and voice guidance to keep eyes on the road.
Bluetooth Communication: Upgrade your ride with a Fodsports motorcycle Bluetooth system, such as the M1S Pro model. These devices enable crystal-clear rider-to-rider communication and support group intercoms for up to 8 riders. Pair it with your smartphone for hands-free calls, music streaming, and voice-guided navigation via apps like Google Maps or Waze. The built-in noise-canceling mic reduces wind interference, while voice commands let you adjust volume or skip tracks without taking your hands off the handlebars. With IP67 waterproofing and 8–12 hours of battery life, Fodsports systems are ideal for long hauls.
Advanced Rider Assistance Systems (ARAS): Modern motorcycles integrate radar, cameras, and sensors for features like blind-spot detection (alerts to vehicles in adjacent lanes), traction control (prevents wheel spin on wet roads), and adaptive cruise control (auto-adjusts speed to maintain distance). Brands like Ducati and BMW offer ARAS to reduce fatigue and collision risks.
Highway riding requires a mix of preparation, sharp skills, and situational awareness. By investing in quality gear, maintaining your bike, and practicing defensive techniques, you’ll handle everything from aggressive drivers to sudden storms with confidence. Stay alert, respect your limits, and enjoy the ride!
Motorcycles offer freedom, thrill, and efficiency—but they also come with risks. In 2025, road safety remains a top priority, and one of the simplest yet most overlooked tools for staying safe is your motorcycle’s turn signals. Whether you’re navigating city traffic or cruising on a highway, these small blinking lights play a massive role in preventing accidents.
This guide dives into why turn signals matter, how to use them effectively, and the latest updates every rider should know.
1. The Basics of Motorcycle Turn Signals
Motorcycle turn signals, also known as indicators, are lights mounted on the front and rear of your motorcycle. They are essential components for ensuring the rider's safety and clear communication with other road users.
Turn signals are designed to alert other drivers and pedestrians about your intended direction, helping to reduce the likelihood of accidents and ensure smooth traffic flow.
When activated, they flash to notify other road users of your intended direction—whether you’re turning, changing lanes, or merging.
motorcycle turn signals
How They Work
Most modern motorcycles use a handlebar-mounted switch to control turn signals. Pressing the switch left or right activates the corresponding lights, which blink at a steady rate. Once you complete your maneuver, manually cancel the signal by pressing the switch again.
When you activate the turn signal switch on your motorcycle, you complete an electrical circuit that powers the turn signal lights. This circuit involves the following components:
The Switch: This is the component that you manually press or toggle to indicate your turn or lane change. Most motorcycles have the switch on the left-hand side of the handlebar for easy access.
Turn Signal Bulbs: These are the bulbs that light up when the circuit is completed. They are typically located at the front and rear of the motorcycle.
Flasher Relay: This component controls the flashing rate of the signal lights. It causes the lights to blink on and off at a steady interval, typically around 60-120 flashes per minute. The flasher relay is an essential part of ensuring that the signals blink at a consistent pace.
Wiring: The wires connect all components of the circuit and allow electricity to flow when the signal switch is activated.
Types of Turn Signals in 2025
There are a few different types of motorcycle turn signals based on their operation and design:
LED signals and incandescent bulbs
LED Signals: LED turn signals are increasingly common in newer motorcycles due to their energy efficiency and longer lifespan. Unlike traditional incandescent bulbs, LEDs consume less power, last longer, and are generally more visible, which enhances safety. LEDs also have the added benefit of being able to produce brighter, more focused light.
Incandescent Bulbs: Most traditional motorcycles use incandescent bulbs for turn signals. These bulbs are simple and reliable, but they can burn out over time and need to be replaced. The flasher relay ensures that the light blinks at regular intervals.
Smart Signals: New for 2025, these systems auto-cancel after turns or sync with GPS for adaptive blinking patterns.
Placement
Signals are typically located:
Front: Near the headlights or handlebars.
motorcycle turn signals at the front
Rear: Besides the taillight or license plate.
Some bikes add extra indicators on mirrors or fairings for better visibility.
2. Why Turn Signals Matter for Safety
Motorcycles are smaller and less visible than cars, making clear communication vital. Here’s how turn signals keep you safe:
A 2024 NHTSA study found that 27% of motorcycle accidents involved riders who didn’t signal their intentions. Drivers often misjudge a motorcycle’s speed or direction, but consistent signaling reduces this risk.
In 2025, LED signals will be brighter than ever, making you stand out in low-light conditions or bad weather. Amber-colored lights (the global standard) are instantly recognizable, even at a distance.
Build Predictability
Signals tell others what you’ll do next. For example, activating your left signal in traffic tells the car behind you to slow down, preventing rear-end collisions.
3. Legal Requirements in 2025
Using turn signals isn’t just smart—it’s often the law. Regulations vary, but here’s what riders need to know:
U.S. Laws
All states require turn signals for motorcycles manufactured after a certain year (e.g., 1973 in California).
Hand signals are permitted as a backup but aren’t a substitute for functional lights.
New for 2025: States like Texas and New York now mandate auto-canceling or self-adjusting signals on new bikes.
Global Standards
The European Union requires motorcycles to have self-canceling signals by 2025.
Failing to signal can result in fines (50–250 in most U.S. states) or even points on your license. In severe cases, it could affect liability in an accident.
Cancel immediately after leaving to avoid confusion.
Highway Riding
Signal earlier—cars travel faster and need more warning.
Avoid lingering in blind spots after signaling.
Conclusion
Your motorcycle’s turn signals are more than just blinking lights—they’re a lifeline. In 2025, with roads busier and technology smarter, using them correctly can mean the difference between a close call and a collision. Stay updated on laws, invest in upgrades, and practice consistent signaling. Remember: Safety isn’t just about protecting yourself; it’s about making the roads safer for everyone.
Motorcycles have amazing magic, right? They ain't just a bunch of motorcycle parts – they're a piece of who you are. It doesn't matter if you're hitting the road on Sundays or you're zipping through traffic every day, turning a regular bike into your special creation is super rewarding. Motorcycle customization goes beyond just making it look good; it's a mix of art, gears, and a whole lot of heart.
We're gonna dive into the ways to make that motorcycle amazed "you." Ready to kick off this adventure?
Understanding Your Vision—The First Step in Motorcycle Customization
Let's not rush headlong into tweaking that motorcycle without a game plan. Ponder on these points for a second:
What style speaks to you?
Do you vibe with a timeless style, dig a sleek modern vibe, or lean towards a retro flair? Deciding this will guide all the tweaks you make down the road.
Choose a motorcycle style you like
What will be the purpose of your motorcycle?
Gonna use it for the daily grind epic weekend adventures, or tearing up the racetrack? Figuring out what you need it for narrows down the performance boosts you should hunt for.
What are your favorite colors and materials?
Think about the mix of colors and surfaces that make you happy. Your bike can be your masterpiece of personal style.
Get inspired! Explore online galleries, hit up local motorcycle exhibitions, and chat with fellow bikers. Pull together a vision board with photos, color samples, and cool concepts that grab you.
This not only sparks your imagination but also gives you solid guidance while you figure out which mods you wanna slap on your motorcycle.
get inspired at motorcycle exhibitions
Planning and Budgeting
Getting your bike to look top-notch is super thrilling but, man, can it eat your wallet if you don't plan right. Being smart about your money is major for nailing this gig.
Set a Budget
Decide on a Total Budget: Pick the max dough you're down to drop on tricking out your bike. Make sure it's an amount that won't mess with your regular cash flow.
List Your Priorities: You don't gotta tweak everything all at once. Jot down what tops your list. Like maybe boost your ride's power before sprucing up how it looks.
Do Your Research: Price tags for parts and the work to slap 'em in place can be all over the map. Take your sweet time to scout out deals on the web and at shops nearby. Look out for solid parts that nail it with cost and how well they work.
Allow for Extra Costs: Smart move to have a little cash stash for those "oops" moments. You might find yourself in a spot where you need more work than you thought once you dive into pimping your set of wheels.
Planning Your Project
Having a solid plan is like having a treasure map for tricking out your vehicle. Write out all the changes you're aiming for and prioritize 'em. Keep in mind to:
Design and Style:
Imagine how you want your motorcycle to look. Pick the colors, stickers, and extras that fit what you're picturing.
Imagine how you want your motorcycle to look
Performance Upgrades:
Decide if you need to improve engine performance, braking, or handling. Each of these areas may require specific parts or adjustments.
Safety Considerations:
Safety has gotta come first. Double-check that your tweaks don't mess with the bike's safety stuff. Maybe even throw in some safety boosters, like top-notch brakes or lights that stand out.
By mapping things out and nailing down the cash you can spend, you dodge the spend-too-much trap and make sure your project keeps rolling smoothly.
Essential Modifications for a Personalized Bike
When it comes to motorcycle customization, there are several areas where you can make changes. Each modification can add a personal touch while also enhancing the bike’s performance and comfort.
1. Engine and Performance Enhancements
motorcycle engine and performance enhancements
Your motorcycle's engine is like its heartbeat. To tweak its power, consider these engine upgrades:
Engine Tuning: Getting a pro to tune your engine can make it stronger and more gas-friendly. They might tweak the mix of air and fuel or pop in a new performance chip.
Exhaust System: Upgrading your exhaust can not only improve performance but also give your bike a distinctive sound. Look for systems that are designed to enhance both performance and aesthetics.
Suspension Upgrades: Upgrading your bike's suspension gives better control on bumpy roads. Swap in top-notch suspension parts to make your journey silkier and way more fun.
2. Aesthetic and Cosmetic Changes
Cosmetic modifications allow you to make your bike truly one-of-a-kind. These changes are often the most visible, and they can completely transform the look of your ride.
Custom Paint Job: A new coat of paint is one of the most popular ways to personalize your motorcycle. Whether you choose a matte finish, metallic shine, or a vibrant color, a fresh paint job makes a strong visual statement.
motorcycle spray painting
Decals and Graphics: Decals and graphics can add a dynamic touch. You can select designs that reflect your interests, from racing stripes to intricate patterns that mirror your personality.
Seat Customization: The seat is a central part of your motorcycle’s comfort. Custom seats not only enhance the look but also provide better support and comfort for long rides. Choose from different materials and designs to find the perfect match.
Lighting Modifications: Upgrading to LED lights can enhance both the appearance and safety of your bike. Brighter headlights and decorative LED accents create a modern look and improve visibility at night.
3. Handling and Control Improvements
Safety and comfort on the road are essential. Modifications in this area can enhance your riding experience:
Handlebar Adjustments: The right handlebar can greatly influence your control and comfort. Consider changing the style or position of your handlebars for a more ergonomic fit.
Brake System Upgrades: High-performance brakes are essential for any customized bike. Upgrading your brakes can improve stopping power and give you greater control during rides.
Tire and Wheel Changes: New tires and wheels can change the look and performance of your motorcycle. Choose options that provide better grip, improved stability, and a style that suits your overall design.
handling and control improvements
DIY vs. Professional Customization
One of the key decisions you will face is whether to customize your motorcycle yourself or work with a professional. Both options have their advantages and challenges.
DIY Customization
Many riders enjoy the hands-on experience of modifying their own bikes. DIY customization allows for a personal touch and a deeper connection with your ride.
Pros
Cons
Cost Savings: You can often save money by doing the work yourself.
Time-Consuming: DIY projects can take longer, especially if you are learning as you go.
Learning Experience: Working on your bike teaches you valuable skills and knowledge.
Risk of Mistakes: Without proper experience, there is a higher chance of errors affecting performance or safety.
Creative Freedom: You have complete control over every detail of the project.
No Professional Expertise: Lacking professional skills may lead to suboptimal results.
Professional Customization
Hiring a professional shop can be a great option if you prefer expert advice and quality workmanship.
Pros
Cons
Expertise: Professionals have the experience and tools needed to ensure high-quality results.
Higher Cost: Professional services come with a higher price tag.
Time Efficiency: A professional team can complete the project faster than an amateur might.
Less Personal Input: You may have less control over every detail compared to a DIY project.
Safety Assurance: Skilled technicians can ensure that all modifications meet safety standards.
Limited Customization: Professionals may not accommodate every small detail to personal preference.
Deciding between DIY and professional help depends on your budget, time, and confidence in your skills. Sometimes a combination works best—for example, handling the cosmetic changes yourself while letting experts take care of the engine and suspension upgrades.
Final Thoughts
Customizing a motorcycle rocks because you get to be artistic, and smart, and show off your style. You just gotta think things through, don't blow your cash, and chill with each tweak. That way, you'll end up with a sick ride that's all you.
Keep in mind, that any tweak you add is another step to making a motorcycle that shows who you are. It does not matter if you do the work or hire some pros just make sure you have fun doing it. The ups and downs of the project won't just boost your bike; they'll make your rides way more awesome.
Electric motorcycles are getting more and more popular all over providing a slick, effective, and exciting travel method. Riders enjoy a smooth and silent ride with these motorcycles, plus they help reduce carbon footprints. Just like any ride, electric motorcycle maintenance is also required to keep them in top shape.
This blog post will explore the key daily care and routine maintenance that every electric motorcycle owner should understand. If you want to make your bike last longer and perform well for years, you're in the right spot.
But this doesn't mean electric motorcycles don't need any upkeep. They have their own special parts that need attention to keep them running at their best.
electric motorcycle maintenance
The electric motor, battery, controller, tires, and brakes form the core components of an electric motorcycle. To ensure proper function, inspect each part.
Lesser moving components are present compared to traditional motorcycles, but neglecting any part compromises efficiency depletes the battery swiftly, or poses safety risks.
The Basics of Electric Motorcycle Maintenance
Look after your electric motorcycle well, and you'll dodge pricey repairs down the road. Plus, you'll get to love riding it for ages. Let me break down the simple stuff you oughta do to keep your ride tip-top.
Battery Maintenance is mega important for electric motorcycles. It's what juices up your bike and figures out how far you can go. You gotta care for your battery well if you wanna stretch its lifespan and milk every trip for all it's worth.
electric motorcycle charging
Charging: Always charge your electric motorcycle in a dry cool spot. Try not to let your battery drop to 0% often, as this can reduce its lifespan. For the best performance, keep the battery level between 20% and 80%. Most new electric motorcycles have smart charging systems, but it's still smart to keep an eye on the battery's health.
Don't overcharge: If you charge too much, it's bad for your battery over time. Make sure to disconnect your bike once it's charged. A lot of electric motorcycles come with safety stuff to prevent charging too much, but you gotta watch out for it yourself too.
Storage: Don't plan to have a ride for some time? Best to stash it with the battery around 50% juiced up. If possible, yank the battery out and stash it somewhere that's not too hot or moist. Doing this helps the battery avoid wearing out as the days roll by.
Check your battery: Look at the battery often for any damage, leaks, or wear. A damaged battery could be unsafe, so a pro should fix it right away.
Motor Maintenance
Electric motors work with high efficiency and need minimal upkeep. Still, you should look after them to make sure they keep running for as long as they can.
Electric motors don't require the same oil-based care as gas engines, but they can collect dust and dirt over time. Be sure to clean the motor often particularly if you ride in grimy or dusty places. Just wiping it down with a soft cloth can help keep it working well.
Listen for Odd Sounds: Electric motors run, but weird noises can mean trouble. Grinding, squeaking, or whirring might show the motor needs a look. It's best to have a pro check it out.
Tires and Brakes
Just like regular motorcycles, electric bikes need you to check their tires often. Your tires are the only bits touching the road, so they need to be in top shape to keep you safe.
Tires
make sure your tires have enough air
Check your tire pressure often and make sure your tires have enough air. Tires without enough air can make your bike hard to control, and they can also cut down on how far you can go. Stick to what the maker says about the right tire pressure.
Brakes
Electric motorcycles often have systems that charge the battery while you ride by using the brakes. Still, the normal brakes are key to stopping your bike. Look at your brake pads often to see if they're worn down, and fill up the brake fluid if you need to. Listen for odd squeaks or if your brakes don't work as well as they should. If you notice these things, get them fixed.
Chain and Belt Maintenance
Electric motorcycles often use a chain or belt to move power from the motor to the wheels. Your motorcycle might have one of these systems. If it does, you need to take care of it to keep the power moving.
Lubrication: Chains and belts need oil now and then to cut down on wear. Use a special lube made for motorcycles. Also, the chain must be cleaned often to get rid of dirt that could hurt it.
lubricate the motorcycle chain
Tension: Check that the chain or belt is tight enough. A loose one can slip and lose power. A tight one can wear out the motor and parts too fast.
Electrical System
The electrical system of your bike has an influence on everything from lights to the motor, so keeping it in good shape is key. Check all electrical connections often to make sure they're snug and rust-free.
Wires and Cables: Look at wires to see if they're worn, damaged, or frayed. If you spot any bare wires, fix them right away to stop electrical problems.
check motorcycle wires
Lights: Keep tabs on your bike's lights such as headlamps, taillights, and turn signals. You might not notice a dead bulb, but it's vital for your safety. Check that all lights work as they should.
Seasonal Maintenance Tips
Your electric motorcycle needs more than just daily or weekly checks. You should change how you take care of it based on the season and weather.
Winter Care
Cold winters call for extra attention when you store your bike during downtime. The battery can get damaged in very cold weather so keep it in a warm dry spot. If you have to leave your bike outside, take out the battery and bring it indoors.
Summer Care
Hot weather can cause overheating if you ride a lot in stop-and-go traffic. Keep an eye on your bike's motor and battery to make sure they stay cool. Watch out for signs of overheating like less power or weird sounds.
Conclusion
Remember, these electric motorcycles might not need as much taking care of as gas ones, but you gotta check 'em to ensure they're all good to go.
Looking after the battery, and the motor, and giving a once-over to stuff like brakes, wheels, and all the electric bits is key to making your motorcycle running well. Take good care of it, and you'll get way more joy out of your rides.
Fodsports FX 60C vs FX30C Pro: What's new techs are the FX 60C bringing to us?
Fodsports is a brand worth-mention for helmet communication and video recording. This brand has established itself as a key player with its innovative Bluetooth camera intercom systems.
Recently, Fodsports has released a new camera intercom, the FX 60C. How is its performance? And, what new techs and ability does it bring to us compare with the previous Fodsports FX30C Pro?
In this article, we’ll break down the differences between the Fodsports FX 60C and Fodsports FX30C Pro. There will be an ultimate comparison between their features, performance, and user experience.
These detailed information will help you choose the right device for your rides.
This is almost the latest version of Bluetooth on the market. It provides a stronger, more stable connection, which reduces the chances of disconnection.
Besides, the low energy consumption chip ensures that your FX 60C lasts longer. Even during extended rides, it still can support you at least a full and half day of use for a single charge.
This is especially important for riders who need uninterrupted communication while on the road.
As for Fodsports FX30C Pro, it uses Bluetooth 5.0 tech. Though still a relative new and reliable Bluetooth standard, it is not as good as Bluetooth 5.4. This tech is still ideal for general consumer applications like audio streaming and IoT.
Bluetooth 5.0 offers solid connectivity, it is true. However it lacks some of the greater stability in environments with multiple Bluetooth devices or interference.
Verdict:
Both the FX 60C and FX30C Pro offer solid Bluetooth connectivity. But the FX 60C provides a more stable and energy-efficient experience with Bluetooth 5.4. If you ride in environments where many Bluetooth signals are present, the FX 60C will likely perform better.
2. Video Stabilization: Ensuring Smooth Footage
The FX 60C is equipped with HD anti-shake technology to minimizes the impact of vibrations and motion. So, it can help you take more smoother and more stable video recordings while you are using it.
This feature is beneficial for motorcyclists who prefer dirt bike or adventure rides. It enhances the clarity and quality of footage captured during these rides.
In contrast, the FX30C Pro does not include an anti-shake feature. So, videos recorded with this device may exhibit some motion blur and instability. When riding on rough or bumpy roads, the FX30C Pro may not be a good option.
Verdict:
For riders who want high-quality, stable video recordings, the FX 60C is the first choice. The FX30C Pro is more suitable for flat roads recording, for example, the city streets. Those who are less concerned about video stabilization may also find the FX30C Pro is good enough.
3. Camera Capabilities: Quality and Flexibility
The Fodsports FX 60C is equipped with a 4K camera, which is more advanced. It boasts 4K resolution HD video at 30FPS, along with 2K video at 60FPS and 1080P video at 60FPS. Riders also can manually set the perfered video recording resolution in the APP as they want.
Besides, its advanced anti-shake technology ensures smooth footage even on rough terrains. Thus it is an excellent choice for riders who want to record their journeys without worrying about video distortion.
The 130° wide-angle lens on the FX 60C is another outstanding feature. This lens can provide a wider field of view, capturing more of the surroundings. With it, riders can make more immersive videos during their rides.
The Fodsports FX30C Pro, in comparison, features a 1080P HD camera that records at 30FPS. It doesn’t support the 4K HD resolution that the FX 60C offers. Besides, anti-shake technology for stable footage are also not available on FX30C Pro.
The lens on the FX30C Pro offers a 120° field of view. This is slightly narrower than the FX 60C’s wide-angle lens, resulting in less coverage in the footage.
Both the Fodsports FX 60C and FX30C Pro can accept 360° rotation feature. So riders can adjust the camera angle for optimal recording.
Verdict:
When it comes to video quality and flexibility, the FX 60C is the clear winner. The 4K camera, wider angle lens make it the superior choice for riders. If you want to capture professional-level footage, the FX 60C is the first option.
4. Photography Capabilities: Capturing Your Ride in Detail
Fodsports FX 60C
The camera on the Fodsports FX 60C is able to output 8MP photos. Riders can capture HD images by just clicking the camera button 1 time.
This higher pixel count camera can bring more clearer and more detailed photos. So it is beneficial for those who wish to document their rides with sharp and vibrant imagery.
In contrast, the camera on the FX30C Pro can only output 2MP photos. Therefore, its image resolution output is lower than the FX 60C.
The resulting images by FX30C Pro may lack the sharpness and detail found in higher-resolution photographs.
Verdict:
For riders who need high-quality photo and wish to capture detailed images of their adventures, the Fodsports FX 60C stands out. If photography is a secondary concern and you are satisfied with basic image qualities, the FX30C Pro is considerable.
5. Intercom Features: Communication and Range
The Fodsports FX 60C allows communication for up to 10 riders in large groups. When intercom with 10 riders, its intercom range can up to 2000m. As for 2 rider communication, it still can support as far as 1000m.
This is an ideal solution for group riders who need to stay in touch with one another over long distances.
The FX30C Pro can only support communication between 2 riders, which is fewer than the FX 60C. And its intercom range is 1000 meters.
Verdict:
The FX 60C offers more intercom numbers and larger intercom distance that suits for group intercom. For larger group communication, the FX 60C is the better choice. If you usually only ride with 1 friend, then the FX30C Pro is enough for use.
6. Sound Quality: Music and Calls
The FX 60C is equipped with a high-end 40mm HRSQS stereo speakers. The speakers can bring high-fidelity sound that delivers rich and immersive audio.
What's more, the mic and speakers also add CVC + ENC + Professional noise cancelation microphone and speakers.
With all the techs together, the FX 60C will definitely bring better sound effects to riders.
The FX30C Pro also comes with a pair of stunning stereo speakers and CVC tech, but it pales in comparison to the FX 60C speakers.
While it still delivers solid sound quality, it doesn’t provide the same audio quality when comparing with the FX 60C.
Both of them feature three different sound effects:HiFi bass, Golden Classic, and Pure Human Voice. Whether for music, calls, or intercom communication, these sound effects are all impressice.
Riders can choose the sound profile that best suits their preferences. for music, calls, or intercom communication.
Verdict:
If sound quality are important to you, the FX 60C is the superior choice. But this does not mean the FX30C Pro is not worth-considering. It is also an good option for riders who are not so demanding about sound quality.
7. Pairing Convenience: One-Click Quick Pairing
The FX 60C is designed with a one-click quick pairing function, easy and convenient. So riders can connect their devices swiftly and effortlessly.
With a single press, users can establish a stable Bluetooth connection. This can minimize downtime and ensuring seamless communication during rides.
In contrast, the FX30C Pro lacks a dedicated one-click quick pairing feature.
Pairing this device requires a more manual approach. This includes multiple steps to establish a Bluetooth connection.
Verdict:
For quick and hassle-free connecting, the Fodsports FX 60C offers a significant advantage. This function brings more safety for riders and they can focus more on their rides. On the other hand, the FX30C Pro requires a more involved pairing process. This may be less convenient for users seeking rapid connectivity.
8. Price Comparison: Value for Money
While both devices are priced competitively, the FX 60C tends to be more expensive. Because it has more advanced features, like 4K camera, anti-shake, longer intercom range. The FX30C Pro, on the other hand, offers solid performance at a lower price point. It is still an excellent choice for riders who don't need the high-end specs of the FX 60C.
Verdict:
If you want top-tier features and performance, the FX 60C is worth the extra investment.
If you are on a budget and don't need the absolute best in every category, the FX30C Pro offers great value for the money.
Fodsports FX 60C VS FX30C Pro: Which One is Right for You?
In conclusion, both the Fodsports FX 60C and FX30C Pro are excellent options for riders. These are all worth-buying integrated communication system with video recording ability. Here’s a quick recap of what each model offers:
Fodsports FX 60C: Ideal for riders who want 4K video recording, better sound quality, longer intercom range.
Fodsports FX30C Pro: Perfect for riders who want a more affordable option with good video quality, solid intercom functionality. Its basic features still offer a reliable experience.
If you prioritize high-quality video/photo, and more advanced features, the FX 60C is the better choice.
If you're looking for a simpler, budget-friendly option, the FX30C Pro is the best choice. It delivers great value without breaking the bank.
Both devices will make your rides more enjoyable, safe, and connected. So it all comes down to your specific needs and preferences.
The Fodsports FX 60C is leading a revolution in the Bluetooth camera intercoms market. The 2025 newest intercom with camera by Fodsports is designed to enhance your riding experience.
This device comes with advanced features like Bluetooth 5.4, 4K HD recording, 10-way intercom, and plenty more. So it is clear that this device seamlessly blends communication, entertainment, and safety.
Fodsports FX 60C review - why motorcycle fans can't do without it
Below, we will explore each feature of the Fodsports FX 60C in detail. Also, we will explain why motorcycle fans can't do without this Bluetooth intercom with a camera.
1. Bluetooth 5.4 Technology: Better Connectivity for Smooth Communication
Fodsports FX 60C Bluetooth 5.4 feature
The FX 60C uses the almost latest Bluetooth 5.4 technology, powered by a QCC chip. That's the main reason why the FX 60C can provide reliable, fast, and energy-efficient communication.
Better Compatibility: Bluetooth 5.4 can work with older version Bluetooth devices. So you can connect your FX 60C to smartphones, GPS devices, and helmet intercoms from other brands. You can even pair with other riders who use different communication systems.
Stable Connection: The FX 60C keeps a strong connection whether you ride in whether you're riding in busy urban areas or remote regions. This reduces the chances of call drops or intercom disconnections, providing nonstop communication.
Energy-Efficient Design: The QCC chip uses less power, which leads to a longer battery life. Riders can enjoy hours of intercom communication or music playback without needing to charge up often.
With Bluetooth 5.4 technology, the FX 60C is future-proof, making it a trusty partner for the road ahead.
2. 4K HD Camera with Anti-Shake Technology: Record Every Moment in Crystal Clear Quality
Fodsports FX 60C 4K and 130 degree wide-angle camera
The FX 60C comes equipped with a 4K HD anti-shake camera. It is more than just a communication device, it's a complete riding companion for capturing your journey.
4K 30FPS Video: Record ultra-clear, true-to-life videos in 4K resolution. This ensures that every detail of your ride, from the landscape to the road, is captured with quality.
Multiple Recording Resolutions: The FX 60C offers several recording options in the APP. You can set the default recording resolution in the APP to suit your needs:
4K at 30FPS for the highest quality.
2K at 60FPS or 30FPS for smoother motion capture.
1080P at 60FPS or 30FPS for great quality and longer recording times.
Anti-Shake Technology: The built-in stabilization technology ensures that your videos remain smooth. Even when riding on rough terrain, the video/image quality is still clear. Vibrations, bumps, and sudden movements are minimized, giving you professional-quality footage.
Compact Design: Unlike big standalone cameras, the FX 60C is light and tiny. It can integrate seamlessly onto your helmet, ensuring convenience without compromising quality.
For riders who love documenting their adventures, the FX 60C offers a reliable and high-quality solution.
3. 130° Wide-Angle Lens: See and Capture More
The lens on Fodsports FX 60C is a 130° wide-angle lens, giving you an expansive field of view.
Broader Perspective: Wide-angle lens captures more of the surrounding environment. This ensures that nothing is left out of the frame. Whether you're riding through a winding mountain road or cruising along the coast, don't worry. The lens will include every detail in your footage.
Ideal for Group Rides Communication: Want to capture all your riding companions in the same frame? Use the FX 60C! Believe it or not, it will make your group rides more memorable.
This lens ensures that every video and photo captures the full experience of your ride.
4. 8MP Photo Capture: Amazing Photography on the Go
FX 60C Bluetooth camera intercom 8mp photo taking ability
The video recording ability of Fodsports FX 60C is outstanding, so how about its photo taking ability?
The answer won't disappoint you! The FX 60C also allows riders to take 8MP photos.
Sharp and Clear Images: The Fodsports FX 60C is equipped with 8MP lens. So it can deliver detailed, vivid, and quality images.
Easy Photo Taking: You can snap pictures at scenic stops or while riding through stunning views. There is no need to bring a separate camera with you in the packing list.
Simple Button Click: The device has user-friendly and convenient controls. With just one click, you can quickly take photos while riding. This ensures that you will never miss any important and impressive moment on the road.
This feature is perfect for riders who want to preserve their journeys in both video and still images.
5. 360° Rotation Shooting: Flexible and Versatile Angles
Fodsports FX 60C 360 degree rotating ability
The FX 60C camera intercom pack includes a rotating installation part that offers 360° rotation. Riders can enjoy total freedom when choosing their shooting angles.
Adjustable Shooting Angles: Adjust the camera as you prefer! Recording the road ahead, the surrounding scenery, the sky, or what's behind you - it's up to you.
Dynamic Footage: Create unique and creative videos by changing angles mid-ride. This is perfect for riders who love to experiment with their recordings.
Ease of Use: Adjusting the camera angle is simple and quick. Just turn the FX 60C to the proper angle you want, it is done! So you can focus on your ride while capturing the perfect shot.
The 360° turning ability of FX 60C makes sure your footage is unique. This also gives you unmatched flexibility and more possibility to your videos/photos.
For group intercom, the FX 60C is a perfect option. It offers a 10-way group intercom system, allowing up to 10 riders to stay connected at the same time.
Clear Communication: The intercom system provides clear and uninterrupted voice communication. Even in large groups, the communication is still clear and stable.
Perfect for Long Rides: Chat with your companions during long journeys through FX 60C is convenient. You can also coordinate stops, or share updates on road conditions with it.
Easy Pairing: The FX 60C makes it simple to connect with multiple riders through a single click. So you can get more time on the road and less fiddling with settings.
This feature makes group rides safer better coordinated, and more fun.
7. Long-Distance Intercom: Communicate Up to 2000 Meters
The FX 60C supports intercom communication over a distance of 2000 meters (2 kilometers among 10 riders). As for 2 riders intercom, it can support up to 1000 meters (1 kilometer).
Great for Open Roads: You can keep talking even if your group spreads out over long distances.
Reliable Performance: The FX 60C’s Bluetooth 5.4 technology ensures that communication remains stable, even at the edge of its range.
This long-distance capability is ideal for group rides communication, touring intercom, and adventures talk. Riders may naturally separate due to road conditions or traffic, the FX 60C will help you.
8. HiFi Sound Quality: Crystal-Clear Audio for Every Ride
HIFI sound quality speaker of Fodsports FX 60C camera helmet headset
The FX 60C is equipped with a 40mm HRSQS stereo sound speaker for superior audio performance.
Rich Audio Experience: The FX 60C gives high-quality sound when you are using it. Listening to music, making calls, or communicating on the intercom - whatever you are doing.
Three Audio Modes: There are three sound effect options in the Fodsports FX 60C. You can customize your listening experience like:
HiFi Bass to get deep and engaging music.
Popular Golden Classic for balanced tones.
Pure Human Voice for clear and natural communication.
This feature ensures that every sound is as enjoyable as the ride itself.
9. CVC + ENC Noise Reduction: Clear Calls in Any Environment
CVC noise reduction ability of Fodsports FX 60C
The HRSQS mic and speakers of FX 60C are equipped with CVC +ENC noise reduction technology. This tech ensures the FX 60C can keep a clear communication, even in noisy conditions.
Noise-Reduction Microphone: Background noises like wind, traffic, and engine sounds are minimized. So your voice comes through clearly.
Enhanced Call Quality: The FX 60C provides crystal-clear sound for both you and your conversation partner. Whether you're on a call or using the intercom, it is always reliable.
This feature is especially useful for riders who frequently navigate noisy environments or high-speed highways.
10. WiFi Data Transmission: Share Your Adventures Instantly
WiFi data transmission feature of Fodsports FX 60C
FX 60C supports Quick WiFi data transmission, a really helpful and impressive feature. When transferring videos or photos to your phone, social media, or online storage, it will be easy and fast.
Quick and Convenient: No need for cables or card readers when transferring. Just simply connect via WiFi and you will be able to transfer your media files.
Share on the Go: Post your videos and photos to social media or send them to friends and family in just a few moments.
Functions like this ensure that your memories are saved and shared effortlessly.
11. Watch While Recording: Monitor Your Footage in Real Time
The FX 60C allows you to view your recordings in real time via its mobile app.
Real-Time Monitoring: You can check your footage as you record the video/photo. This makes sure everything is framed through the Fodsports FX 60C perfectly.
Make Adjustments on the Fly: When the recording needs to adjust, just change angles or settings directly. You will not have to wait until after the ride to review your footage.
Riders will get complete control over their recordings, ensuring every shot is perfect.
12. Endurance Battery for Long Rides
FX 60C battery capacity
The FX 60C features a 2000mAh battery with impressive performance:
36 Hours of Phone Calls or Music.
32 Hours of Intercom Use.
6-7 Hours of Continuous Video Recording.
600 Hours of Standby Time.
With a charging time of only 2-3 hours, the FX 60C is ready to support even the longest adventures.
13. Universal Pairing for Maximum Compatibility
universal pairing ability
The FX 60C supports universal pairing, meaning it can connect with devices from other brands.
Works with Fodsports Intercoms: Pair with all Fodsports devices. (Support talk with 1 other model intercom for each time)
Works with Other Intercom Brands: Pair with non-Fodsports devices easily. (Support talk with 1 other model intercom for each time)
Connect to GPS and Smartphones: Connect the FX 60C with your GPS, smartphones, and other types of Bluetooth devices. Then you will be able to listen to music, receive GPS directions, and other functions.
This flexibility ensures compatibility with any gear you already own.
14. Battery Percentage Display on Phone
power display on the phone
The FX 60C displays battery percentage on your phone, so you can know exactly how much battery is left. The battery status can be accurated to each percent.
By short pressing the M button and PTT button together, it will broadcast its current battery status in the speaker.
This feature prevents unexpected shutdowns and helps riders manage battery life efficiently.
15. Music Sharing Between Two Riders
FX 60C music sharing ability
Love sharing music? The FX 60C supports music sharing between two riders using the same device.
With this function, you and your partner will have a synchronized listening experience.
This enhances the fun of group rides and strengthens the bond between riding partners.
16. Easy-to-Use Oversized Rotary Button
The large rotary button makes it easy to operate the device while riding, even with gloves on. This design ensures quick and effortless control without distracting the rider.
17. Built-in FM Radio for More Entertainment
FM Radio abiltiy of Fodsports FX 60C
Set your favorite FM radio stations (76-108MHz) for news, music, and entertainment on the go.
When streaming is not an option, this feature provides an additional source of audio entertainment.
18. IP65 Waterproof Rating for All-Weather Use
Fodsports FX 60C IP65 waterproof ability
The Fodsports FX 60C is built with an IP65 waterproof rating to withstand rain and dust. So it is able to handle all-weather riding.
Whether riding in heavy rain or dusty terrains, the device remains fully functional.
19. Voice Command for Hands-Free Operation
Connect your FX 60C with your phone through Bluetooth, you will be able to wake up your phone through voice commands.
Making or answering calls, sending text, changing music, or other functions, it is easy!
All you need is to place your phone in your pocket and keep your hands on the handlebars.
20. Long Battery Life – Ride Without Worries
The FX 60C is powered by a 2000mAh battery, providing:
36 hours of phone talk time
36 hours of music playback
32 hours of Bluetooth intercom
6-7 hours of continuous video recording
600 hours of standby time
2-3 hours for a full charge
(Note: If you intercom and keep recording videos at the same time, the FX 60C's work time may be shortened.)
21. Microphone Mute Function
For privacy, you can mute the microphone during intercom or calls whenever needed.
22. Automatic Call Answering
Never miss an important call! The FX 60C can automatically answer calls within 12 seconds if you don’t respond manually.
This is functional and convenient to ensure connectivity while keeping your focus on the road.
Of course, if you do not want others disturbing you while you are riding, you can also turn off this function as you want.
23. Work While Charging – Never Power Down
You can use the FX 60C while charging. Whether you’re on a call, using the intercom, listening to music, or tuning into FM radio, you will not get influenced.
It combines top-notch communication, high-quality video recording, and premium sound quality together.
Whether you're a solo adventurer or part of a riding group, the FX 60C delivers an unmatched experience. In all, it is truly a worth-owning device to make every ride safer, more connected, and more enjoyable.
Get your FX 60C today and take your riding experience to the next level!
Motorcycling is a way of life, a love affair, and for lots of people, a chance to feel free on the open road. But this freedom comes with duties. To make sure you have a safe and fun ride, every motorcyclist should build good riding habits. No matter how long you have ridden a motorcycle, these habits can boost your safety and make your rides better overall. Here are the top 10 riding habits every motorcyclist should get to know.
Wearing the right gear has a crucial impact on motorcycle safety. This includes a DOT-approved helmet, gloves, a jacket, pants, and boots made for motorcycle riding. Your gear serves as your primary defense if an accident happens.
Helmet: A full-face helmet gives the best protection to your head and face. Make sure it fits tight and you fasten it.
Jacket and Pants: Choose abrasion-resistant materials like leather or reinforced textiles. Many jackets and pants come with built-in armor to protect you more.
Gloves: In a fall, your hands often hit the ground first. Gloves with reinforced palms and knuckle protection can stop serious injuries.
Boots: The right motorcycle boots give support and protection to your ankles. They need to go above your ankles and have soles that don't slip.
always wear proper gear
Note: Wearing gear that fits well keeps you safe and makes you feel good when you ride for a long time.
Always look over your motorcycle before you start riding. This helps make sure your bike works well and stops problems or crashes you didn't see coming.
Tires: Look at how much air is in your tires and see if they look worn or hurt. Tires with the right amount of air help you control your bike better and use less gas.
Lights: Make sure all your lights work right, including headlights, brake lights, and turn signals.
Motorcycles are smaller and harder to spot than cars, so riders need to take extra steps to make sure other drivers can see them.
Wear Bright Colors: Pick gear and helmets in eye-catching colors like neon yellow, orange, or white. These colors stand out more when it's dark or dim outside.
Put Reflective Tape on Your Bike: Stick reflective tape to your motorcycle and gear to boost your visibility at night.
Pick the Right Spot in the Lane: Ride where other drivers can see you best. Stay out of their blind spots.
Turn On Your Lights: Keep your headlight on all the time even during daylight. Think about adding extra lights to stand out more.
take action to make sure the motorcycle is easy to see
Note: Being easy to see cuts down on crashes caused by drivers who don't notice you.
Stay far enough behind the car in front of you. This is key for motorcyclists. Bikes can stop faster than cars, but riders need more time to react when someone slams on the brakes.
Knowing how to use your brakes well is key to riding. Motorcycles have different brakes for the front and back wheels, and using them can stop accidents.
use brakes correctly
Front Brake: The front brake has an influence on about 70% of your stopping power. Apply it step-by-step to prevent the front wheel from locking up.
Rear Brake: The rear brake packs less punch but helps keep the bike steady when you slow down. Use it together with the front brake to stop.
Emergency Braking: In a crisis, press both brakes hard but don't let the wheels lock. If they do lock, ease off the brake a bit and try again.
Note: To build your skills, practice good braking methods in a safe place. This will help you act fast and well when you're out on the road.
Riding a motorcycle needs all your attention. Things that take your mind off the road can kill, so it's key to stay watchful and keep your mind on your riding.
Steer Clear of Distractions: Put your phone away, set your GPS before you start, and leave your gear alone while you're on the move. If you need to make changes, find a safe spot to stop.
Keep an Eye on the Road: Always look ahead for possible dangers, like holes in the road, stuff that shouldn't be there, or drivers acting weird.
Mind the Blind Spots: Know where other vehicles can't see and don't hang out in those areas. Just assume other drivers might miss you.
Note: When you stay alert, you can spot and handle potential risks before they turn into real problems.
Ride Within Your Limits
Every rider has a unique skill level, so it's crucial to stay within your comfort zone. Pushing too hard can cause accidents if you lack the experience to handle tough situations.
stay away from tricky roads before you become skilled
Know Your Skill Level: Be truthful about what you can do. If you're new to riding, stay away from fast highways or tricky roads until you become more skilled.
Take a Riding Course: Think about joining a motorcycle safety class to get better and learn advanced methods.
Avoid Peer Pressure: Don't let others push you to keep up if they have more experience. Go at a speed that feels right for you.
Note: When you ride within your limits, you keep control and lower your chance of getting into accidents.
Be Ready for Weather Changes
The weather can shift, so being ready is crucial to keep yourself safe while riding.
Look at the Forecast: Before you set off, take a look at the weather prediction for your journey. Get ready for possible rain, wind, or temperature shifts.
Put on Layers: Wear clothes you can put on or take off as needed. You must have waterproof gear to ride in the rain.
Change How You Ride: Wet or icy roads mean you need to be more careful. Slow down, leave more space between you and other vehicles, and try not to make sudden moves.
be more careful when you ride on wet roads
Note: Getting ready for weather changes helps you stay comfy and safe, no matter what the weather throws at you.
Defensive riding means you think ahead about possible dangers and take action to avoid them. This approach can help you stay safer on the road.
Think You're Invisible: Always act like other drivers can't see you. Be ready for cars to change lanes, turn, or stop without warning.
Look Out for Turning Cars: You need to be extra careful at intersections. Keep an eye out for vehicles turning left in front of you, as this often leads to crashes.
Stay Alert at Stop Signs and Lights: Even when you have the right of way, make sure other drivers are stopping before you go.
Note: Defensive riding is about staying one step ahead instead of just reacting. By spotting possible dangers, you can steer clear of many common accident situations.
Keep Learning and Improving
Even skilled riders can benefit from ongoing learning and improvement. The road changes and new things always pop up to learn.
Take Advanced Courses: Consider enrolling in advanced riding courses to sharpen your skills and learn new techniques.
Read and Research: Keep up with the latest riding tips, gear, and safety info. Join online forums or local riding groups to swap experiences and learn from fellow riders.
Practice: The more you ride the more at ease and proficient you'll become. Practice in various conditions to boost your confidence.
practice makes perfect
Note: Ongoing learning and improvement help you stay alert and ready for any surprises the road might throw your way.
Conclusion
Building good riding habits has a crucial impact on every motorcyclist. These habits make you safer and help you enjoy riding more. From wearing the right gear to riding, each habit plays a key role in keeping you safe on the road.
Keep in mind, that riding a motorcycle is a skill that needs constant focus and growth. By taking on these top 10 riding habits, you'll be on track to become a safer more sure rider.
For motorcycle riding safety, effective stopping rocks because it has an influence on how fast you stop how stable you are, and how much control you get. Figuring out when and how to use the front and back brakes can really bump up your riding game and keep you safe.
This guide is gonna show you the fundamentals of motorcycle braking, advanced techniques, common mistakes to avoid, and some pro tips for all sorts of weather and roads.
The Front Motorcycle Brake
The front brake is like the superstar of motorcycle brakes. It's chilling at the front wheel, and you boss it around with a lever to the right of your handlebars. When you gotta slow your roll, this brake is your go-to because it's responsible for most of the braking action.
Braking Force Distribution: Squeezing the front brake lever activates either a hydraulic or cable mechanism. This setup applies pressure on the brake pads up front. Then, the power shifts onto the front disc brake where the pads clamp down on the rotor (that flat circle thingy hooked up to your wheel).
Weight Transfer: When you hit the front brake, both you and your ride shift forward, bumping up the grip the front tire's got. That's how you get extra stopping muscle. That's also why the front brakes have more force delivering around 70% to 80% of the stopping action of your motorcycle.
When to Use the Front Brake
High-Speed Braking: You ought to bank on the front stopper when you're zooming along and gotta slow your roll. This works because more weight shifts to the front wheel giving it a better grip and letting you brake more efficiently.
Quick Stops: If things get wild you need to stop fast. The front brake plays a key role, keep it cool since hit it too hard or too hasty, and you’re asking for trouble, like having your wheel kiss the ground or doing a slip 'n’ slide in the rain.
Braking in a Line: The front brake works best when you need to stop while going straight. It gives you steady strong slowing power when you use it right.
The Front Brake's Importance
Strongest Stopping Power: As we said before, the front brake does most of the work to stop you. This is because it works with the natural way your bike's weight moves forward making it better at stopping you fast.
Keeps Balance: Using the front brake helps the motorcycle stay balanced and steady when stopping. Smooth application allows the rider to stop in a controlled way without slipping or losing control.
The Rear Motorcycle Brake
The rear brake is on the motorcycle's tail end, and you mash a pedal on the right to make it do its thing. It's not a champ like the front brake when you wanna cut speed, but don't miss it—it's surely got its slice of the braking pie.
rear brake of the motorcycle
How the Rear Brake Works
Braking Force Distribution: Give that rear pedal a push, and you're triggering either a hydraulic or gear-based setup. This system gets the rear brake clamps hugging the rear disc rotor. It creates some serious grip to reel in the back wheel's roll.
Less Weight Shift: Unlike the front brake which relies on the weight transfer, the rear one is different. It's more about keeping things steady when you're cruising slow or turning.
When to Use the Rear Brake
Slow-Speed Moves: In low-speed maneuvers, bikers often prefer the rear brake. This happens during U-turns, parking, or navigating cramped areas. Using the rear brake aids in maintaining balance and prevents the back wheel from skidding.
Starting on Hills: The rear brake plays a key role when starting on a slope. It keeps the motorcycle from rolling backward. The rear brake holds the motorcycle in place while you engage the throttle and clutch to start moving forward.
Keeping the Motorcycle Steady: The rear brake is useful when you need stability if you don't want to rely on the front brake. For example, when you're on gravel or slippery surfaces, it helps keep the back wheel grounded.
Trail Braking (Pro Move): Skilled riders apply the back stopper in trail braking for speed regulation and keeping a tight grip on the situation as they lean into a curve. You see this a lot on the racing circuit or when they're pushing their rides to the max.
The Rear Brake's Importance
Boosts Control at Slow Speeds: When you're on the move, using the rear brake steadies the motorcycle. Grabbing the front brake in these situations might knock the motorcycle off balance.
Keeps the Back Wheel Down: Slamming on the brakes with powerful stoppers on bikes could raise the rear wheel. Using the rear one ensures it doesn't lift. This keeps the bike firm with both wheels touching the ground.
Better for New Riders: People just starting out find the rear brake easier to handle at low speeds. It gives them a smoother way to slow down without going overboard.
How the Front and Rear Brakes Work Together
Each brake has a distinct function, but they work better together.
front and rear brakes work better together
Here's how they complement each other
Smooth and Gradual Braking: Riders gotta press both the front and back brakes gently when braking. Doing this divides the stopping power between both wheels making the motorcycle stop quicker and giving you better control.
Balancing Stability and Stopping Power: The rear brake is your best bud for keeping things steady when you're going slow. The front brake is the muscle that helps you slow down fast. Using them both is like a magic combo for keeping your motorcycle stable when you hit the brakes.
Preventing Skids: If you want to keep from sliding all over the place on wet or rough streets, be correct with both brakes. This move helps cut down on the odds of your wheels locking up and throwing you into a skid.
Efficient Braking Methods
1. Gradual Braking
Gradual braking requires a slow increase in brake pressure. Begin with a light touch and add more as you slow down. This approach stops sudden jolts, cuts down on skid risk, and keeps you in better control.
2. Using Front and Back Brakes Together
Though the front brake gives most of the stopping power using it can make the bike unstable. Always use both brakes at once. The back brake helps steady the motorcycle, while the front brake provides the needed force to stop.
Threshold braking is a skill where you push the brakes as hard as you can without locking the wheels. This method comes in handy during emergencies, as it gives you the most stopping power while keeping your tires gripping the road.
4. Downshifting While Braking
Downshifting while braking uses the engine to slow down, which helps stop the bike more. This trick works great when you're nearing turns or going down steep hills. It also gets the bike ready to speed up if needed.
5. Braking in Wet or Slippery Conditions
brake in wet condition
Slick or wet roads cut down on tire grip making your car take longer to stop. When you're riding in these conditions, press the brakes. Don't slam on the brakes, or your tires might slide. For wet roads, it's best to put 40% of your braking power on the front wheels and 60% on the back.
If you use the front brake, your front wheel might lock up, and you could lose control. Always use both brakes together to stay as stable as possible.
2. Slamming on the Brakes
Hitting the brakes too hard or fast can make your wheels lock, which can make you unstable or cause crashes. Work on pressing the brakes to stop.
3. Not Taking Care of Brakes
Brake pads wearing out, brake fluid running low, or rotors getting damaged can make braking less effective. Check and fix your brake system often to keep it working well.
4. Wrong Body Position
How you position your body matters a lot when braking. Keep your elbows a bit bent and your weight in the middle. This stance lets you control better and react faster.
Advanced Braking Techniques
1. Trail Braking
Trail braking is a technique used when entering corners. It involves applying the front brake as you enter the turn and gradually releasing it as you lean into the corner. This method helps maintain stability and control, especially on twisty roads.
2. Emergency Braking
During emergencies fast and strong braking helps stop accidents. Apply both brakes hard, stay loose, and keep the bike under control.
3. Engine Braking
Engine braking slows the bike by closing the throttle and shifting down. This method cuts down on brake wear and works well on long downhills or slick roads. But it doesn't turn on the brake lights so use it.
Tips for Different Riding Conditions
1. Dry Conditions
On dry roads, the front brake does most of the stopping. Use a 60% front and 40% rear brake split for the best results.
brake on dry roads
2. Wet or Slippery Roads
When you're on wet or slick roads, press the brakes. To keep your bike stable, experts suggest using 40% front brakes and 60% rear brakes.
3. Gravel or Uneven Terrain
If you're riding on gravel or rough terrain, don't slam on the brakes. Instead, press both brakes and keep a steady pace to avoid sliding.
4. Downhill Riding
When you're going down steep slopes, use your engine to slow down along with a bit of brake pressure. This way, you'll stop your brakes from getting too hot and have better control of your bike.
downhill riding
Conclusion
Every motorcycle rider needs to get good at the right way to brake. Get to know how your motorcycle's brakes work and keep on practicing. You'll boost both your safety and the fun you have while riding.
Make it a habit to use both brakes together, dodge the usual slip-ups, and tweak how you brake when you're facing different kinds of road stuff. Stick with regular practice and keep your brakes in top shape to make sure you can bring your motorcycle to a stop with total confidence, no matter what comes your way.
As the electric vehicle Revolution accelerates the world of motorcycles, is no exception To be a landmark year for electric motorcycles with Cutting Edge. Technology, performance, and design advancements reshape the market. Electric motorcycles. Now, offers impressive, power, extended range, and Sleek designs. Whatever you need, the options in 2025 are more diverse and exciting than ever before.
Here's a look at the top 10 best electric motorcycles for 2025, combining Innovation sustainability, and top-tier performance.
The Zero SR/F is a high-performance electric streetfighter that combines cutting-edge technology with sleek design. It’s perfect for riders who want a premium electric bike with impressive range and power.
The Energica Ego is a high-performance electric sportbike designed for speed enthusiasts. With its Italian styling and top-tier performance, it’s a dream machine for those who crave adrenaline.
Energica Ego
Key Features:
21.5 kWh battery with a max range of 261 miles.
Top speed of 150 mph and 0-60 mph in 2.8 seconds.
Four riding modes and regenerative braking.
Advantages:
Blistering acceleration and top-tier performance.
Long range and fast charging capabilities.
Stylish Italian design with advanced safety features like Bosch ABS.
Disadvantages:
Expensive, making it less accessible for average riders.
Overview:
The Harley-Davidson LiveWire ONE is a premium electric motorcycle that combines the iconic Harley-Davidson brand with modern electric performance. It’s perfect for urban commuters and Harley enthusiasts.
The Lightning LS-218 is the fastest electric motorcycle in the world, designed for speed demons who want unmatched performance. It’s a track-focused machine that delivers adrenaline-pumping acceleration.
The Damon Hypersport is a futuristic electric motorcycle packed with advanced technology and safety features. It’s designed for riders who want cutting-edge innovation and high performance.
The Cake Kalk OR is a lightweight, minimalist electric motorcycle designed for off-road adventures. It’s perfect for trail riders who want an eco-friendly and low-maintenance bike.
The Sur-Ron Light Bee X is an affordable and versatile electric bike designed for urban commuting and light off-roading. It’s a great entry-level option for new riders.
The Energica Eva Ribelle is a high-performance electric naked bike with a sporty design and long-range capabilities. It’s perfect for riders who want a blend of style and performance.
The Zero FX is a lightweight and versatile electric motorcycle designed for urban commuting and light off-roading. It’s an affordable option for riders who want a practical and fun electric bike.
The BMW M 1000 RR Electric is a high-performance electric sportbike that combines BMW’s engineering excellence with electric power. It’s designed for riders who want top-tier performance and premium features.
High performance with BMW’s signature engineering.
Sleek design and premium features.
Excellent handling and stability.
Disadvantages:
Expensive and heavy.
Limited availability and charging infrastructure.
Conclusion
There you have 10 of the best electric motorcycles to hit the roads and trails in 2025. There’s an electric ride to suit your taste and riding needs.
Choosing an electric motorcycle isn’t just about the numbers; it’s about the experience. As battery technology and design continue to evolve, riding electric is not only eco-friendly but also an exciting step into the future of motorcycling.
What's the best motorcycle gear for women? Have you chosen the right and proper gear for yourself, your girlfriend, your wife, or your mother?
Motorcycle riding gives you freedom and excitement like nothing else. But staying safe and comfy is key for women riders. Because they often struggle to find gear that fits right and keeps them protected. This guide breaks down the must-have motorcycle gear for women in 2025 giving you the scoop to help you choose.
Helmets: Guarding Your Brain
motorcycle helmet - best motorcycle gear for women
Why Pick This?
Your helmet matters more than any other gear. It guards your head if you crash. This is also the reason we recommend it at the first order.
However, not all helmet styles are suitable for women.
Women riders should look for helmets that fit, let air flow, and don't weigh much to avoid neck strain on long trips.
What's more, we advise female riders to consider full-face helmets as the first option. They can make sure women riders get the most protection.
The modular helmets are also a good choice for flexibility and ease.
Besides, make sure the helmet meets safety standards like DOT, ECE, or Snell.
Top Picks:
Bell Bullitt Helmet: This helmet has its origins in the 1960s and combines an old-school look with up-to-date safety tech. It's certified by DOT and ECE, which means it provides trustworthy protection.
Shoei RF-1400: This stands out as one of the top full-face helmets you can buy. It excels in air flow, wind resistance, and keeping things quiet.
AGV K6: This helmet is tough but doesn't weigh much, thanks to its carbon-aramid fiber build. It keeps you safe without sacrificing comfort.
Arai XD-4: If you're into adventure riding, this dual-sport helmet is just the ticket. It lets air in and feels good to wear.
Scorpion EXO-R1 Air: This top-notch helmet comes with an adjustable air fit system to give you a tight and safe feel.
Jackets: Blending Fashion and Protection
motorcycle jacket for women
Why Pick This?
A snug riding jacket plays a crucial role in guarding against scrapes harsh weather, and collisions.
Jackets tailored for women fit the female body shape. And they can give ease of movement and coziness for female riders.
Go for jackets crafted from top-notch leather or tough fabrics with built-in armor to shield shoulders, elbows, and back.
Also, jackets with tweakable parts and air vents are also excellent. They can offer extra comfort and can adapt to different weather.
Top Picks:
RST S-1 CE Jacket: Full-grain leather makes up this jacket. It has a sporty cut with Level-1 internal protectors and external shoulder armor. The S-1 meets the highest AAA rating to protect against abrasion.
Street & Steel Runaway Women's Jacket: This jacket looks low-key and performs even better. It has an outer shell that resists water and wind. It also has a mesh lining, zipper vents, and CE Level 2 armor.
Dainese Racing 3 D-Air Jacket: This high-tech jacket includes built-in airbag technology. It is able to provide advanced protection for riders.
REV'IT! Eclipse Women's Jacket: This stylish textile jacket breathes well making it ideal for summer rides.
Alpinestars Stella Andes V3 Drystar Jacket: This jacket works well in all weather. It has a waterproof liner and armor that meets CE standards.
Pants: To Keep Your Lower Body Safe
women motorcycle pants
Why Pick These?
Riding pants are crucial to protect your legs from getting hurt or scraped on the road.
Women's riding pants are made to fit better and feel more comfortable while keeping you safe.
Look for pants with extra protection at the knees and hips and materials that don't tear, like leather or tough fabrics.
Some riding pants have liners you can take out, so you can wear them in different types of weather.
Top Picks:
Bull-It SP120 Lite Fury Jeggings: These jeggings give top-notch protection for women riders. They have AAA abrasion resistance and CE Level 2 knee protectors while still being comfy and stylish.
Klim Artemis Women's Pants: A high-end touring choice women's riding gear. They come with strong abrasion resistance and waterproof features.
Dainese Drake Super Air Tex Pants: Perfect for summer rides with mesh panels and CE armor to keep you safe.
Alpinestars Stella Missile V2 Pants: A sports-focused option. They are equipped with knee sliders and leather build.
Oxford Super Leggings 2.0: These jeggings blend fashion with safety. They are suitable for city motorcyclists boasting Kevlar reinforcement.
Gloves: Keeping Control and Staying Safe
women motorcycle gloves - best gear for women motorcycle riders
Why Pick These?
Gloves shield hands from harm and help riders grip handlebars firmly.
Women should choose gloves made for smaller hands. Because they fit well without limiting finger movement.
What's more, you can look for gloves with extra protection on the knuckles and cushioned palms. And, materials that let air through will be better as they help to keep your hands comfy and safe.
Also, you can think about different gloves for different weather. Ones with good airflow are more suitable for hot days and warm ones are for cold weather.
Best Choices:
Alpinestars SP-2 V2 Gloves: These gloves blend flexibility with toughness. They have TPU-injected knuckle guards, fingers that work with touchscreens, and holes to let air in. This makes them great to wear on hot days.
Dainese Carbon 3 Women's Gloves: These gloves offer top-notch knuckle protection and give sporty riders a firm hold on their bikes.
REV'IT! Sand 4 Women's Gloves: This glove fits adventure-touring. It has good airflow and protection that moves with you.
Held Air n Dry Gloves: This glove keeps water out but lets your hands breathe. It's good for riding in all types of weather.
Icon Overlord Gloves: An affordable choice that offers good protection and a bold look.
Shoes play a key role in motorcycle gear. They keep you safe and give you support.
Women's motorcycle boots need to support their ankles, have soles that don't slip, and guard against hits.
Try to find boots made of tough stuff like leather. Look for extras such as strong toe boxes, heel guards, and water resistance. Make sure the boots fit right and feel good when you ride and walk.
Best Choices:
Alpinestars Stella SMX-1 R Women's Boots: These boots have a low-cut design to give flexibility. They protect the heel and toe. They also have a mesh lining that lets your feet breathe making rides more comfy.
TCX Street Ace WP Women's Boots: These boots look good and keep water out. They keep you safe and feel nice to wear.
SIDI Gavia Gore-Tex Boots: These high-end touring boots keep water out and give your ankles lots of support.
Forma Adventure Low Boots: Adventure riders who need extra protection and grip will like these boots.
Dainese Torque D1 Out Women's Boots: Made for fast riding with strong armor and great airflow.
helmet intercoms - women riders best motorcycle gear
Why Pick This?
A helmet intercom system is another essential riding gear for women riders. With this device, riders can keep in touch with others, get GPS directions, and enjoy music without interruptions.
It's handy for couples or groups who need to talk without using their hands. New intercoms have noise cancellation long-lasting batteries, and smooth Bluetooth connections.
Top Picks:
Fodsports FX7: This is a top-notch Bluetooth mesh intercom that was just released in 2024. It represents the best sound quality and intercom stability of Fodsports products. Noise-reduction tech, 2000m distance, 10 riders group talk, IP67, listen to music while intercom... It has all you want.
Fodsports FX-S: Built to provide crystal-clear communication among 2 riders. This model supports clear and stable 1000 meters of intercom distance. Though budget-friendly, it still supports voice commands, and universal pair to many Bluetooth devices.
Fodsports M1-S Plus: This intercom is great for group intercom. It allows group chats and gives top-quality sound while blocking out unwanted noise. Fodsports also released the M1-S Plus for couples. The pink appearance model is very perfect for women riders.
Sena 50S: A high-end choice that uses mesh intercom tech for group rides and delivers excellent audio.
Cardo Packtalk Bold: Has dynamic mesh communication, JBL speakers, and a strong waterproof design.
Besides the main gear, think about these add-ons to make your rides better:
Reflective Gear: Boosts visibility when it's dark making rides safer.
Base Layers: Fabrics that wick away sweat help keep your body at the right temperature while you ride.
Back Protectors: Extra armor you can put into jackets that support it to better protect your spine.
How to Pick the Best Motorcycle Gear for Women?
Make Safety Your Top Priority: Check that all your gear meets or goes beyond safety standards and gives you enough protection.
Get the Right Fit and Feel: Your gear should be snug but not limit how you move. Keep in mind how comfortable you are affects how well you can focus and control your ride.
Think About the Weather: Pick gear that works for the weather you'll ride in. If it's hot, go for gear with good airflow. For cold or rainy rides, you'll need warm waterproof stuff.
Show Your Style: Safety comes first, but wearing gear that matches your taste can boost your confidence and make your ride more fun.
To wrap up
Putting money into high-quality motorcycle gear made for women has a big impact on riding and having fun.
Pick gear that strikes the balance between keeping you safe, feeling good, and looking cool. With these gear, you can hit the open road with confidence.
Keep in mind, the gear that works best fits well, meets safety rules, and matches how you ride and what you like. Stay safe out there and keep riding!
Motorcycle enthusiasts are a dedicated group. They enjoy the sense of liberation on the open highway, the excitement of riding, and the opportunity to display their beloved two-wheeled machines. But in today’s world, there’s a new debate revving up in the motorcycle community: gas vs. electric motorcycles.
If you're an experienced rider or a beginner considering your first motorcycle, you should pay attention to this discussion. Do you choose a traditional loud gas-powered motorcycle? Or is it time to jump on the bandwagon of quiet cutting-edge electric motorcycles? Let's examine this issue.
Gas motorcycles run on internal combustion engines (ICE). When you turn the throttle, you hear pistons firing, fuel burning, and a mechanical symphony. Gas engines consist of cylinders, valves, and explosions, all working to create power.
motorcycle engine structure
The appeal is gut-level. You connect with the machine, from the shaking under your seat to the deep sound of the exhaust. It's more than just a way to get around—it's a full-on experience.
But there's a catch: gas engines are greedy and needy. They need oil changes often, valve adjustments, and lots of gas. Plus, all that burning creates pollution. Riding a gas motorcycle is like dating someone fun and fiery but a bit high-maintenance.
On the other hand, electric motorcycles use batteries and electric motors. They have no combustion, no pistons, and no exhaust. When you turn the throttle, you get power right away—like a rocket taking off. But instead of a roar, you hear... nothing. Well, maybe a soft hum if you listen hard.
E-bikes are less complex machines. Fewer parts that move mean you don't need to fix them as often. You don't have to change the oil, replace spark plugs, or swap out air filters. They're like the easy-going partner who just gets things done. But they're also a bit like going out with someone who's always meditating—peaceful and quiet, but maybe not as thrilling as you'd hope.
Speed freaks, get ready for electric motorcycles to rock your world. Electric motors give these bikes instant torque. When you twist the throttle, you're off like a shot. No need to wait for the engine to rev up or shift gears—just pure immediate power.
Look at the Zero SR/F. This motorcycle can sprint to 60 mph in less than 3.4 seconds. Or consider the Damon Hypersport, which can hit 200 mph. Make no mistake electric bikes pack serious speed.
Zero SR/F and Damon Hypersport
Gas motorcycles build power more gradually. They depend on a complex interaction of gears and RPMs to deliver their speed. This means they might not beat an electric bike in a drag race, but they make up for it with top-end performance and the pure enjoyment of shifting gears.
Range: Gas Holds Strong
Gas bikes still rule in this area: range. A typical gas motorcycle can travel 150 to 300 miles on a full tank based on the bike and your riding style. When you're low on fuel, filling up is a quick pit stop at the gas station—five minutes, and you're back on the road.
Electric motorcycles face limitations due to battery tech. Most can go 70 to 150 miles on a single charge, though top-end models like the Energica EVA Ribelle can reach 250 miles in the best conditions. But charging isn't quick. Even with fast charging, you'll need 30 minutes to an hour to hit the road again. And if you're using a regular home outlet? You might want to grab a book—it could take 8 to 10 hours to charge up.
Energica EVA Ribelle with high speed
Cost: Upfront vs. Long-Term
Upfront Costs: Electric Stings
Let's talk money. Gas motorcycles cost less upfront. You can buy a good mid-range gas bike for $5,000 to $10,000. High-performance models cost more, but you have many options for every budget.
Electric motorcycles however often come with a higher price tag. Basic models start around $10,000, and top-end bikes like the Harley-Davidson LiveWire can cost $22,000 or more. That's a lot of cash.
Harley-Davidson LiveWire
Long-Term Costs: Electric Motorcycle Wins
But here's the kicker: electric motorcycles cost less to own as time goes by. You don't buy gas, you skip oil changes, and fewer parts can break or wear out. Charging an electric bike costs way less than filling up a gas tank. Also, some places give tax breaks or cash back for electric vehicles, which can help cut down the upfront cost.
If you like numbers, think about it this way: owning a gas motorcycle is like paying for Netflix—you're always shelling out cash. An electric motorcycle is more like buying a bunch of DVDs—pricey at first, but it saves you money down the road.
Environmental Impact: A Cleaner Ride?
Gas Motorcycles: The Carbon Footprint
Gas motorcycles aren't the greenest option out there. They burn fossil fuels, which pump out carbon dioxide and other nasty stuff. Sure newer bikes do better than the old ones, but they're still messing up our air and heating up the planet.
motorcycle exhaust
Electric Motorcycles: Better, But Not Perfect
Electric motorcycles look like the way to go for the environment—and they are kinda. They don't spit out any fumes from the back, which is great for keeping our air clean.
But let's talk about the big issue: making those batteries isn't good for the planet. Digging up lithium, cobalt, and other stuff can be pretty rough on the environment.
electric motorcycle battery
Here's some good news: As renewable energy becomes more common electric motorcycles will have a smaller overall carbon footprint. And when the battery recycling industry catches up electric bikes will have an even lower impact on the environment.
Riding a gas motorcycle is about more than just getting from one place to another. The engine's roar, the gasoline's scent, and the feeling of changing gears all contribute to the experience. Many riders consider these elements essential. To them, these features define what makes a motorcycle a motorcycle.
Electric motorcycles give riders a unique experience. Their smooth quiet operation might throw you off at first. But this silence lets you tune into sounds you'd miss—the wind whistling past your helmet or birds chirping in nearby trees.
Some motorcycle riders dig this cutting-edge feel. Others think it lacks soul. It boils down to what you like. Do you crave the classic roar of an engine? Or are you ready to try the peaceful calm of an electric ride?
Gas vs. Electric Motorcycles: Which Is Better for You?
Let's be honest—no single answer works for everyone. Your choice between gas and electric motorcycles hinges on what matters to you how much you can spend, and how you like to ride. Here's a simple breakdown to help you make up your mind.
Go Gas If:
You love the classic motorcycle experience (sound, feel, and smell).
You value long-range and quick refueling for road trips.
You’re on a tighter budget and want more options.
Go Electric If:
You’re all about instant torque and futuristic tech.
You want lower maintenance and cheaper long-term costs.
You care about reducing emissions and embracing new technology.
Final Thoughts
Gas motorcycles have heritage, character, and that unique growl. Electric motorcycles represent the future—swift, eco-friendly, and easy to maintain. Each type has its upsides and downsides, and both can provide an incredible riding experience.
At the end of the day, the best motorcycle for you is the one that makes you excited to ride. So whether you’re filling up at the gas station or plugging in at a charging station, just remember: it’s all about the ride. Ride safe and have fun!
When picking a motorcycle, cruiser vs sport bike is a topic that riders often debate.
Both types have their own charm and perform well. The right choice depends on how you ride, what you like, and what you'll use it for.
In this article, we'll look at the differences good points, and drawbacks of cruisers and sport bikes. This info will help you choose the best bike for you.
What is a Cruiser?
Cruiser motorbike
A cruiser is a type of motorcycle built to provide a laid-back comfy ride. Most cruisers take inspiration from classic American bikes, like those made by Harley-Davidson.
You'll often see them with seats close to the ground wide handlebars, and a stretched-out position for the rider. Cruisers come with bigger engines that pack a punch at low RPMs. This makes them perfect to cruise at medium speeds.
Riding Position: Straight or leaned back giving the most comfort.
Weight: Bulkier adding stability when moving .
Style: Classic and enduring often with shiny chrome details.
Performance: Puts emphasis on pulling power instead of high speeds.
Are Cruiser motorcycles harder to ride?
Cruiser motorcycles are easier to ride than sports bikes. They have a more laid-back upright riding position and tend to be heavier with lower seats. This makes them stable when going slow.
But their weight can make them trickier to handle at very low speeds or when turning. In general, cruisers are good for beginners. However, if you're not used to a heavier bike, you might need some practice to get comfortable with it when stopping or moving in tight spots.
Are cruiser bikes good for street riding?
You bet, cruiser bikes are awesome for riding on the streets. As mentioned above, they're comfy and have a laid-back position. These advantages make them perfect for city roads and longer trips. Plus, their seats sit lower giving riders better stability. Their engines run too letting you cruise at a more relaxed speed. These qualities make them a joy to ride, whether you're commuting or just out for a weekend spin.
Cruisers might not be as nimble as sports bikes. But they're just right for people who want comfort and easy handling more than speed and tight turns. They're spot-on for everyday casual riding.
What is a Sport Bike?
Sport Bike
Sport bikes are built for speed, agility, and performance. Racing motorcycles inspire them, and they cater to riders who love thrills. Most sport bikes have an aggressive riding position and a light frame. Also, they shine in handling and acceleration. People often link them with the top motorcycle brands like Yamaha, Kawasaki, and Ducati.
Key Features of Sport Bikes:
Engine size: High-revving between 300cc and 1000cc (some go even higher).
Riding Position: Leaning forward, made to cut through air and boost control.
Weight: Light to improve handling.
Style: Smooth up-to-date, and bold.
Performance: Focus on speed and accuracy.
Pros and Cons of Cruisers
A man is riding a cruiser
Pros:
Comfort: Cruisers make long distance rides comfortable and easy. Their relaxed seating cuts down on tiredness, which makes them perfect for road trips.
Beginner-Friendly Options: You can find many starter cruisers, like the Honda Rebel 500 or Kawasaki Vulcan S.
Customizability: Cruisers let you add lots of different parts to make them your own.
Low-End Torque: These bikes are a breeze to ride at slow speeds, which works well for city trips.
Aesthetic Appeal: Their classic look draws in many riders who care about style.
Cons:
Weight: The heavy build might scare off new riders.
Performance: Cruisers don't match sport bikes in speed or nimbleness.
Ground Clearance: Less clearance can make turns less thrilling.
Performance: Speed, acceleration, and handling that can't be beaten.
Lightweight: Easier to control when going fast.
Advanced Technology: Sport bikes often have state-of-the-art features like systems to control traction quick gear changes, and different riding modes.
Thrill Factor: Just right for riders who want an adrenaline boost.
Track Capability: Great for track days and riding at high speeds.
Cons:
Riding Position: You'll feel uncomfortable on long rides due to the aggressive stance.
Fuel Efficiency: These high-performance engines guzzle more gas.
Maintenance Costs: Expect to pay more to keep sport bikes running because of their cutting-edge tech and parts.
Not Beginner-Friendly: New riders might struggle with the powerful engines and sharp handling.
Insurance Costs: You'll face higher insurance rates because these bikes are built for speed.
Comparing Cruisers and Sport Bikes
Feature
Cruiser
Sport Bike
Comfort
High
Moderate
Performance
Torque-focused
Speed and agility
Weight
Heavy
Lightweight
Aesthetics
Classic and timeless
Modern and aggressive
Riding Position
Relaxed
Forward-leaning
Beginner-Friendly
Many beginner options
Limited beginner options
Customization
Extensive
Limited
Long-Distance Rides
Excellent
Less suitable
Cruiser vs Sport Bike: How to Choose?
Cruiser vs Sport Bike how to choose
Consider Your Riding Style
Do you like laid-back easy-going rides? A cruiser fits you best.
Do you crave high-energy rides or track days? Pick a sport bike.
Think About Your Experience Level
Beginners might find cruisers easier to control because they forgive mistakes.
Sport bikes need more skill and self-assurance the bigger ones.
Assess Your Intended Use
To tour long distances or commute, cruisers give you top-notch comfort.
For weekend trips winding roads, or track time, sport bikes work better.
Budget and Maintenance
Cruisers cost more upfront but require less maintenance money.
Sport bikes might have cheaper starting prices but need more cash for upkeep.
Look and Feel
If you dig a classic old-school style, you'll lean towards a cruiser.
If a sleek high-tech design gets you pumped, a sport bike is your best bet.
Your Motorcycle Gear
Cruiser motorcycle riders can use half-face helmets with goggles, especially at low speeds.
Full-face motorcycle helmet is better for sport bikes riding.
No matter what kind of helmet you choose, other gear is also necessary. Helmet intercom, gloves, long pants and long sleeves, and jackets are essential.
There's no clear winner between cruisers and sport bikes. Each type fits different riding styles and likes.
Cruisers offer comfort, a laid-back riding position, and a low seat. This makes them great to ride on long easy trips. Sport bikes though, are built to go fast, turn quick, and perform well. They put you in a more forward position and handle curves and high speeds with ease.
These different features make each bike right for different rides. Cruisers work best for people who want a smooth easy ride and like to see the sights. Sport bikes are perfect for those who love thrills and racing on tracks.
If comfort and long disance rides are your top concerns, you might want to go for a cruiser. But when it comes to speed and handling, a sports bike could be just what you're looking for.
Final Thought
Cruiser vs sport bike: which one it right for me? Choosing between them depends on what you like and need for riding. Each type of motorcycle has its pros and cons. Cruisers are great for comfort, style, and long trips. Sport bikes excel at performance quick moves, and excitement.
Before you decide, it is better to have a test ride for different models, and do some research(review blogs and videos). Also, think about your long-term plans as a rider.
No matter if you go for a cruiser or a sport bike, the key is to have fun and stay safe while you're on the road.
Motorcycles sometimes act like that forgetful friend who always loses their keys: they might not start or run rough when you need them most. A faulty fuel filter often causes these issues. Most riders know motorcycles are picky about fuel quality. The fuel filter is key in ensuring your motorcycle gets clean fuel. When it gets clogged or starts to break down, problems crop up. So how can you tell when your fuel filter is about to fail? Let's look at the signs of a bad fuel filter.
Your motorcycle's fuel filter is super important for the fuel system even if you don't spot it much. It's all about yanking out the gunk like dirt, rust, and other nasty bits from the fuel before it gets to the motor. A clean filter prevents these contaminants from reaching your engine and causing problems.
You can think of the fuel filter as a bouncer at a high-end club—it's there to keep out the unwanted elements making sure the purest fuel gets into the VIP area (in other words, your engine).
When this filter starts going bad, it's like the bouncer falls asleep, and anyone with a fake ID can walk into your engine. The outcome? A range of problems could leave you stuck or even cause long-term harm to your motorcycle.
Early Warning Signs of a Bad Fuel Filter
Knowing what to watch for before the dreaded "no start" moment could save you from some big troubles.
Here are the main signs your fuel filter might be reaching its end:
1. Rough or Hesitant Idling
Your motorcycle starts, but it doesn't run. It shakes or sputters when idling. The engine seems to struggle to keep running like it's trying to cough up a hairball. This happens when the fuel filter clogs and the engine doesn't get a steady fuel supply.
Your motorcycle should have a smooth stable idle—if it's having trouble staying on, your filter might have problems letting fuel through.
Why it happens: A clogged filter limits fuel flow, which means the engine doesn't get the right amount of fuel it needs to run well. This causes stuttering and an unsteady idle.
2. Frequent Stalling
Your motorcycle stalling at red lights or after revving a few seconds after you speed up, signals trouble. This stalling can occur if your fuel filter clogs up and your engine lacks fuel. You might notice this happens more when you put stress on your motorcycle, like when you start moving or speed up fast.
motorcycle stalls on the road
Why it happens: A clogged filter limits fuel flow making it hard for your engine to get enough fuel when you need more power (like when you speed up or climb hills). This can cause your engine to lose power and shut off.
You turn the throttle, but your motorcycle feels slow as if it's having trouble speeding up. When the acceleration seems weak or unresponsive, a faulty fuel filter might be the cause. A blocked filter prevents the engine from receiving the correct amount of fuel at the right time, which leads to a big drop in how well your motorcycle runs.
Why it happens: When fuel can't flow, the engine doesn't get enough fuel to send power to the wheels. That is, your motorcycle won't react as quickly when you twist the throttle.
4. Engine Misfires or Backfires
When your engine 'pops' out of nowhere or your exhaust makes a loud bang, your motorcycle might have a fuel delivery problem. A blocked filter can stop clean fuel from reaching the engine. This throws off the balance between air and fuel, which can cause misfires or backfires.
Why it happens: When fuel doesn't flow right, it messes up the mix of air and fuel. This means the fuel doesn't burn, which leads to sudden explosions or pops in your exhaust.
motorcycle backfire
5. Lower Gas Mileage
Is your motorcycle guzzling more gas than usual? If you're stopping at the pump more often without changing how you ride, a blocked fuel filter might be the problem. When the fuel filter gets clogged, the engine tries to make up for the limited fuel flow by burning more gas.
What's going on: The engine uses extra fuel because it's not getting enough to run. This imbalance leads to higher fuel use.
6. Trouble Starting the Engine
You can spot this problem. When your motorcycle takes longer than normal to start up (or doesn't start at all), a dirty or blocked fuel filter might be the culprit. If the filter is clogged, the fuel pump has a hard time pushing fuel into the engine. This means you could end up cranking the starter longer than you should.
Why it happens: A blocked filter limits fuel flow to the engine. This makes it tougher for your bike to start if it's been sitting idle for a while.
7. Visible Debris in the Fuel System
visible debris in the fuel tank
Have you ever checked your fuel filter and seen tiny bits of junk? That's a clear sign your filter works well—, it means it's been working for too long. The more junk in your filter the more likely you need to replace it. If you often see particles, think about checking your fuel tank, as the filter might be working too hard.
Why it happens: The filter's job is to trap impurities from the fuel. As time passes, these impurities pile up causing the filter to get blocked and stop working.
How Often Should You Change Your Fuel Filter?
The time between fuel filter changes depends on your motorcycle model and how you ride, but changing it every 10,000 to 15,000 miles works well for most motorcycles. If you see any of the signs we talked about earlier, you should change the filter right away. Riders who often drive in dusty areas or at high speeds might need to swap out their filter more often.
The Fix: Replacing Your Fuel Filter
change the motorcycle fuel filter
If you're up for a challenge (and good with tools), changing the fuel filter on most motorcycles isn't too hard.
Here's a basic guide to help you:
Find the Fuel Filter: You'll see it somewhere between the fuel tank and the engine. You might have to take off the fuel tank or a few panels to get to it.
Lower Fuel Pressure: Before you start messing with the fuel system, cut off the fuel supply and get rid of any pressure in the system (check your motorcycle manual for this).
Take Off the Fuel Lines: Unhook the fuel lines from the filter with care. This job might call for special tools or clamps.
Take Out the Filter: Pull out the old filter without spilling any fuel.
Put in the New Filter: Set the new filter in place matching how the old one was positioned, and hook up the fuel lines again.
Check Your System: Start the fuel flow, look for any leaks, and ride your bike to ensure everything works well.
Conclusion
A faulty fuel filter might not seem urgent, but if you ignore it, you risk more severe engine issues later. The good news is that if you spot the signs, you can avoid a lot of trouble (and maybe a costly tow truck bill). So when you notice your motorcycle idling, stalling, or not picking up speed like it should, don't just shrug it off—take a look at that fuel filter.
Keep in mind that it's these small parts that keep your motorcycle running, and the fuel filter plays a key role.
If you're into motorcycles, you know that regular maintenance has an impact on your motorcycle's performance. Most riders remember to change the oil and check tire pressure, but one thing often gets overlooked: the coolant. You might ask, "Hold on, my motorcycle has coolant?" Unless you ride a specific old model, it does. Since coolant is essential to control the motorcycle engine temperature, you need to change motorcycle coolant regularly.
In this guide, I'll walk you through changing your motorcycle coolant. Relax, it's more fun to work on your motorcycle when you're not stressed about it. Ready to get started? Let's dive in!
Let's talk about why this matters before we get our hands dirty. Your motorcycle coolant stops the engine from overheating. It also prevents rust from forming in your cooling system and helps everything run. As time passes, coolant can break down losing its ability to do these essential jobs.
Replacing the Coolant on a Motorcycle
Here's how bad coolant can harm your motorcycle:
Engine overheating: Old coolant may lose its ability to transfer heat, which can cause your engine to overheat.
Corrosion: Degraded coolant triggers rust in your engine parts, radiator, and hoses.
Clogged cooling system: Over time, coolant gets dirty creating buildup that blocks your cooling system.
Changing the coolant isn't rocket science. It's pretty simple. But here's the thing: you need to do it right. So, get your tools ready, and let's begin.
Tools & Materials You'll Need
New Motorcycle Coolant: You'll find many types so check your motorcycle manual to get the right one. Most of the time, you should pick a coolant made for motorcycles, which doesn't have silicates. Many riders use a mix of distilled water and antifreeze (often a 50/50 ratio).
Funnel: This helps you avoid spills when you're filling up.
Drain Pan: This catches the old coolant. Believe me, you don't want that stuff to spill. It's not just toxic, but it'll ruin your driveway too.
Basic Hand Tools: You'll need a wrench set or screwdriver to take off panels or bolts.
Rubber Gloves: You don't want coolant on your skin. It can irritate and harm you if you touch it.
Rags: To clean up.
Optional: A Coolant Tester: This helps you check how good your current coolant is before you decide to change it.
Tools needed to change the coolant on a motorcycle
Remember: Don't use car coolant! It often has stuff in it that can harm your motorcycle's aluminum engine parts.
First, put your motorcycle on a stable surface on a lift or center stand so it stays upright while you work. You don't want your motorcycle to tip over and turn into a costly, engine-scraping mess.
Then, let your motorcycle engine cool down if you have recently ridden it. If you want to avoid burns from hot engine parts or pipes so take your time here.
Step 2: Find the Coolant Drain Bolt
Most new motorcycles have a coolant drain bolt on the engine block or at the radiator's bottom. You might need to take off some panels or plastic covers so grab your tools to loosen bolts or screws.
the location of the coolant drain bolt
Tip: Can't spot the drain bolt? Check your owner's manual or search online for your motorcycle's model. It’s worth the extra 10 minutes to avoid unnecessary confusion.
Step 3: Drain the Old Coolant
Put your drain pan under the engine (or wherever you find the coolant drain bolt). Now, grab the right wrench loosen, and take out the drain bolt. Let all the old coolant run into the pan. Take your time with this! You need to empty the system as much as you can.
Quick Tip: Check the coolant. If it looks rusty cloudy, or smells weird, it's time to change it. If it seems fine, your motorcycle might be okay for a while longer.
Step 4: Flush the Cooling System (If You Want)
You don't have to do this every time, but if you want to be extra thorough, you can clean the system with distilled water to get rid of any lingering dirt, debris, or old coolant.
Here's how you can do it:
Put the drain bolt back on.
Fill the system with distilled water.
Start the engine for a short time to move the water around (remember to keep the radiator cap off and put the motorcycle on its center stand to avoid spills).
Drain the water again and do it one more time if needed.
Step 5: Add New Coolant
add new coolant for motorcycle
After you drain (or flush) your cooling system, you need to fill it up with fresh coolant. Use a funnel to pour the new coolant into the radiator or coolant reservoir.
Tip: Take it slow and pay attention to the level. Don't put too much in the system—if you do, you'll create a mess when you start the engine. Always check your owner's manual to see how much coolant your motorcycle needs.
Step 6: Bleed the Cooling System
Bubbles in your cooling system can make cooling less effective so we need to get them out. To do this, you run the motorcycle for a few minutes and let it warm up while watching the coolant level.
Some motorcycles have a bleeder screw near the thermostat housing or at the top of the radiator. Loosen this screw a bit while the engine runs, to let any trapped air escape.
After you've removed the air, tighten the screw again and check the coolant level one more time. Top it off if necessary.
Step 7: Check for Leaks
check carefully to avoid motorcycle coolant leaks
After you finish refilling and bleeding, inspect the coolant reservoir, radiator, and drain bolts thoroughly to spot any leaks. A slow leak might not be noticeable at first but could cause big issues down the road.
Now that you've completed the task, avoid pouring the old coolant down the drain or dumping it on the ground. This harms the environment and breaks the law in certain areas. Most auto parts stores will accept it for recycling. Look into local disposal guidelines.
Conclusion
Changing your motorcycle coolant might look tough at first, but it's easy once you learn how. If you follow the steps, your bike will run cooler and better soon.
Remember, your motorcycle needs regular care, and this job could save you cash in the future by preventing overheating or engine issues. Plus, you'll feel proud doing it yourself. So get ready grab your coolant, and dive in—you can handle this!
A cross-country motorcycle trip can be one of the most exciting and unforgettable adventures.
The open road, breathtaking scenery, and sense of freedom always attracts the riders. Alos, this long-distance tour is a bucket-list experience for many riders.
But, do not just see others smile but don't see them crying. A proper planning is essential to ensure your journey is both enjoyable and safe. Otherwise you may cry on the road.
This guide covers everything you need to know during your cross-country riding trip. We will let you know the basic costs, packing essentials, recommended routes, trip planners, and itineraries.
Besides, we will also share some safety tips and commonly Q & A with you.
Estimated Costs of a Cross-Country Motorcycle Trip
Estimated costs of a cross-country motorcycle trip
1. Fuel
Fuel costs depend on your motorcycle’s mileage and the length of your trip. Assume an average of 40-60 mpg and calculate based on current gas prices. For a 3,000-mile trip:
Gas Cost: $300-$600 (depending on fuel efficiency and gas prices).
2. Accommodation
Hotels/Motels: $80-$150 per night.
Camping: $10-$40 per night (or free in some areas).
Budget Option: Consider Couchsurfing or staying with friends.
3. Food
Daily Budget: $30-$60 (mixing restaurants and groceries).
4. Maintenance
Before you start, inspect your bike and budget for:
Oil change: $50-$100.
Tires: $200-$400 (if needed).
Other tune-ups: $100-$300.
5. Miscellaneous Costs
Entry fees for parks or attractions: $10-$30 each.
Emergency fund: At least $500.
Souvenirs or keepsakes: $50-$100.
Connectivity (data or SIM cards for international trips): $20-$50.
Total Estimated Cost: $1,500-$3,500 for a two-week trip, depending on your choices.
Essential Packing List
Long motorcycle ride packing essentials
Packing light is key for a motorcycle trip. Use this checklist to ensure you’re prepared:
Sample Cross Country Motorcycle Ride Itinerary for a Two-Week Trip
Day 1-3: Start from the East Coast (e.g., New York)
Highlights: Begin your adventure by cruising through scenic routes in the Appalachian Mountains. Visit Shenandoah National Park for breathtaking overlooks and winding roads.
Stops: Roanoke, VA; Knoxville, TN.
Daily Distance: 300-400 miles.
Day 4-6: Midwest (Ohio to Kansas)
Highlights: Explore Midwest cities like Indianapolis and St. Louis. Enjoy the rolling plains and classic Americana stops.
Stops: Indianapolis, IN; St. Louis, MO; Kansas City, MO.
Yes, but inform someone of your itinerary and check in regularly.
Join group rides for safety and camaraderie when possible.
Q5: How far should I ride daily?
Aim for 300-400 miles to balance progress and comfort.
Adjust based on weather, terrain, and personal stamina.
Write In The End
A cross-country motorcycle trip requires careful preparation, but the rewards are unparalleled. With the right planning, you’ll create memories that last a lifetime. Start planning today and hit the open road!
Every motorcycle rider knows the embarrassment of a motorcycle stall. The experience of your motorcycle suddenly dying beneath you is never fun. But don't worry—stalls are as much a part of the riding experience. The key is to learn how to deal with it.
Here's your ultimate guide to diagnosing and fixing a motorcycle stall, infused with expertise to keep you rolling.
Why Do A Motorcycle Stall?
Before diving into solutions, let’s address the "why."
Knowing what causes the motorcycle stall can save you time, and energy, and maybe stop you from yelling inside your helmet.
Clutch Control Issues: Most riders stall because they can't balance the clutch and throttle. If you use too much clutch without gas? You'll stall. If you give it too much gas without a clutch? You might pop a wheelie (if you're lucky), but you could also stall.
Low Fuel: Sometimes, the reason you're stuck is obvious—just because you didn't remember to get more gas. Most new motorcycles have handy fuel gauges. But if yours is old and without fuel gauges, just give the tank a little shake to check if it's about to run on empty.
Dirty Carburetor or Injectors: When your motorcycle's fuel system gets clogged, it can stifle the engine and cause it to stop. Picture it as your motorcycle trying to breathe through a straw packed with peanut butter.
Electrical Gremlins: Disconnected wires bad spark plugs, or a drained battery can all make your motorcycle stall. Always inspect your electrical components when you're figuring out what's wrong.
Mechanical Issues: A blocked air filter, a broken fuel pump, or even an overheated engine can bring your ride to a sudden stop.
Diagnosing the Problem: A Step-by-Step Breakdown
If your motorcycle stalls, don’t panic. Instead, follow these steps to identify the culprit and get back on the road.
Step 1: Stay Calm and Assess Your Surroundings
Don't forget to turn on the motorcycle hazard lights
Stalling can be stressful in traffic, but keeping calm is essential to handle the situation safely.
Take a deep breath. You can handle this.
Pull in the clutch right away. This will disconnect the engine from the wheels and stop the motorcycle from jerking or halting.
Use your brakes to slow down and steer the motorcycle to the roadside or a safe spot.
Turn on your hazard lights if you have them, and make sure other riders and drivers can see you.
Keep watch on the traffic around you while signaling what you plan to do.
If you're on a hill, apply the rear brake hard to prevent the motorcycle from rolling backward.
Step 2: Check the Obvious
Did You Hit the Kill Switch? This happens to everyone. Make sure you didn't bump the kill switch while riding.
Are You in Neutral? Some motorcycles refuse to start unless they sit in neutral. Push the gear shifter to make sure.
Fuel Status: Pop open the tank and check if fuel sloshes inside. If it's empty, you'll need to push or call for help.
Step 3: Inspect the Fuel System
Carburetor or Injectors: If your motorcycle seems to lack fuel, a blocked carburetor or dirty injectors might cause the problem. Clean them if you have the right tools, or ride home and fix them later.
Fuel Line: A squeezed fuel line can leave your engine without enough gas. Look for twists or clogs.
inspect the fuel line
Fuel Pump: Listen for your fuel pump's buzz when you turn the key. Silence? It might be dead.
Step 4: Test the Electrical System
Battery: Use a multimeter to measure the voltage. A healthy battery should show between 12.6 and 12.8 volts at full charge.
Spark Plugs: Remove the plugs and look for fouling. A black sooty plug suggests your engine may run rich; a white plug points to it running lean. Either way, clean them or put in new ones.
Fuses and Connections: Make sure all fuses work and connections fit tight. At times, a loose wire can stop your ride.
Step 5: Mechanical Components
Air Filter: A dirty air filter can choke your engine. Look at it and clean or swap it out if needed.
Clutch Cable: Make sure the clutch cable has enough slack. If it's too tight, it might not engage, which can cause stalls.
Engine Oil: Not enough oil can make your engine overheat and stall. Check the dipstick and add more if you need to.
make sure motorcycle engine oil is enough to avoid motorcycle stalling
Step 6: Restart the Motorcycle
A proper restart stops the motorcycle from stalling again.
Switch off the ignition and pause for a moment. This resets the engine and helps fix any short-term problems.
Switch the ignition back on.
Make sure the kill switch (close to the right handlebar) is in the "Run" position. The engine won't start if the kill switch is off.
Squeeze the clutch lever hard.
Push the starter button (or use the kickstart lever if your motorcycle has one). Keep the throttle closed as you start up unless the engine isn't turning over. If that happens, give it a small twist to add more fuel.
On-the-Road Fixes
If you’ve identified the issue and have the tools and skills, here are some quick fixes you can perform:
Clogged Fuel System: Keep a small can of carb cleaner with you. Spraying it into the carburetor or injector ports can sometimes fix minor clogs.
Loose Connections: Keep a basic tool kit with screwdrivers and pliers to fix loose connections or wires.
Fouled Spark Plug: Clean it with a wire brush or sandpaper if you don't have an extra one.
clean the fouled spark plug to have a quick fix
Preventing Future Stalls
Prevention is better than cure, and with motorcycles, a little maintenance goes a long way.
Here are some tips to keep your bike running smoothly:
Regular Maintenance: Follow your motorcycle's service schedule without fail. You shouldn't skip oil changes, spark plug replacements, and air filter cleaning.
Fuel Quality: Don't buy cheap low-grade fuel. Use the type your manufacturer suggests to keep your engine clean.
Battery Health: Make sure your battery stays charged and its terminals stay clean. A trickle charger can help your battery last longer.
Clutch Practice: Take time to get good at using the clutch and throttle together. Practicing slow-speed maneuvers can significantly reduce stalls.
Carry a Tool Kit: Pack basics like screwdrivers, wrenches, an extra spark plug, and duct tape. It's even better if you have a small tire pump and patch kit.
When to Call for Help
Sometimes, despite your best efforts, the problem is beyond a roadside fix.
Don’t hesitate to call for professional assistance if:
The engine won’t turn over despite having power.
You suspect a major mechanical failure (e.g., a broken chain or seized engine).
call for professional assistance when the motorcycle chain broken
You’re in an unsafe location and can’t troubleshoot safely.
Conclusion
Stalling a motorcycle can make you angry, but it happens a lot to new riders. If you know what causes stalls and follow this guide, you'll be ready to handle it well. Practice using the throttle and clutch together, and keep your motorcycle in good shape to stop future stalls.
In a word, riding gives you freedom and fun. The more you prepare the better your rides will be—no matter what the road throws at you. Stay safe, and keep your tires on the ground!
Motorcycles have two wheels, and an engine that roars, and they give you this feeling of freedom that can make you forget your annoying boss. However, with all that fun, you should be responsible too. One responsibility that often gets overlooked is to replace motorcycle coolant.
Don't just ignore this—it's not about making your engine happy; it's about keeping it alive. Let's get into the deets about when and how often you need to switch out the colorful coolant in your motorcycle.
What Does Coolant Do?
motorcycle coolant
Motorcycle antifreeze, which folks also call coolant, is this fluid that keeps your engine's temperature in check. It zips through the cooling setup snagging all the warmth your engine makes and then spreading it out so things don't get too hot. When it's chilly out, it stops the stuff in the cooling system from turning into ice.
Here’s what it handles:
Heat Transfer: The coolant takes in heat from the engine and moves it to the radiator so the air can carry it away.
Corrosion Protection: The coolants are full of extras that stop rust and the buildup of hard deposits in your cooling system.
Lubrication: The coolant can also help things like water pump and seals work without a hitch.
Why Does Coolant Need to Be Changed Regularly?
If your motorcycle doesn't have coolant or if it's using some super old coolant, your engine might overheat, rust out, or just quit on you. It's like trying to run a super long race wearing a heavy winter coat. Not a good idea, right?
Here’s why it’s essential to replace it regularly:
Chemical Breakdown: Over time, the chemicals in the coolant that block rust and prevent deposit formation might degrade. When these additives aren't effective anymore, your engine could be at risk for corrosion or gunk up.
Contamination: Coolant might grab some grime, bits, and pieces from the motor as it moves around. This rubbish can jam up the cooling setup or mess with how well it moves heat around.
pH Imbalance: As coolant flows through the system, it can pick up dirt, debris, and particles from the engine. These contaminants can clog the cooling system or reduce heat transfer efficiency.
Overheating Risk: If your coolant is old or not up to par, it won't get rid of heat like it should. This means there's a bigger chance your engine might overheat.
Freezing Risk: If the coolant’s antifreeze properties deteriorate, it may freeze during cold weather, causing cracks or leaks in the cooling system.
change motorcycle coolant regularly
How Often Should You Replace Motorcycle Coolant?
The short answer: every two years or 24,000 miles, whichever comes first. If you’re using long-life coolant (LLC), it may last for up to five years or 50,000 miles.
The longer answer? It depends on a few factors:
1. Manufacturer Recommendations
Your bike’s owner’s manual is the holy book for maintenance schedules. Some motorcycles might call for a coolant change every year, while others can stretch it to three years. Follow those guidelines like your bike’s life depends on it—because it does.
Coolants aren’t one-size-fits-all. Here’s a quick breakdown:
Ethylene Glycol Coolants (Green): These are the most common and usually need replacing every two years.
Organic Acid Technology (OAT) Coolants (Orange or Pink): These can last up to five years but check your manual to be sure.
Hybrid Coolants: A mix of the two, offering moderate longevity—typically around three years.
Pro Tip: Mixing different types of coolant is a terrible idea. It’s like putting pineapple on pizza—some say it works, but you’ll regret it later.
3. Riding Conditions
Do you ride like you’re auditioning for the next Fast & Furious? Are you stuck in traffic under the blazing sun? Extreme conditions put extra stress on your coolant, meaning you may need to replace it more frequently. Regularly inspecting your coolant levels and quality can help catch issues before they escalate.
Signs to Replace Coolant
If you're clueless about when your ride last got new coolant.
Here are some hints that you should change it out:
Color Change: Good Coolant to go looks like bright green, orange, or pink. If yours is looking brown, cloudy, or just dirty, change it, please.
You can tell if your coolant needs to be replaced by its color.
Bad Smell: Catching a whiff of something burnt or sweet? That's a sign your coolant might be on its last legs, or you have some issues under the hood.
Low Levels: If your coolant level keeps dropping, you might have a leak—or worse, a head gasket issue.
Overheating: When your motorcycle starts feeling the heat more than it should, old coolant could be the culprit.
Replacing motorcycle coolant is a simple task if done carefully.
Here are the steps:
Let the Engine Cool Down: Make sure your engine's cooled off before you start, if you don't want to get burned! Forgetting it's a no-no to twist off that radiator cap while everything's still toasty.
Find the Drain Bolt: Locate the coolant drain bolt, usually near the water pump or at the bottom of the engine. Check the owner’s manual if unsure.
Drain the Old Coolant: Time to evict the old coolant! Slide a drain pan under the bolt, yank it out, and let the old coolant flow out. Crack open the radiator cap to make it all hustle out faster.
drain the old coolant
Flush the System: Chuck some distilled water into the radiator, fire up your engine for a short hangout then say goodbye to all that water and yucky leftovers.
Refill with New Coolant: Grab a funnel and introduce the new coolant to its home. Keep pouring till it's chock-full.
Bleed Air Bubbles: Start the engine, let it run briefly, and top off the coolant if needed.
Recheck Levels: After a short ride, check and adjust the coolant levels. Dispose of old coolant responsibly.
How Riding Conditions Affect Coolant Maintenance
Your riding habits and environment can impact how often you need to change your coolant.
Here are some factors to consider:
Frequent Short Rides: If you mostly ride short distances, your engine may not reach its optimal temperature often, which can lead to sludge buildup in the coolant system. In this case, you may need to change your coolant more frequently.
Hot Climates: Riding in hot weather puts extra stress on your cooling system. Check your coolant more frequently to ensure it’s in good condition.
Cold Climates: If you ride in freezing temperatures, old or degraded coolant can freeze and cause damage. Always make sure your coolant has adequate antifreeze properties.
Off-Road Riding: Dirt, mud, and debris can clog the radiator or contaminate the cooling system. Clean your radiator and check your coolant regularly if you’re an off-road rider.
Tips for Keeping Your Cooling System Healthy
Regular Inspections: Ensure you examine the coolant levels and scout for any leaks after a few weeks pass.
Don’t Cheap Out: Always use high-quality coolant recommended for your motorcycle.
Replace Hoses and Seals: Since rubber bits can break down as time moves on, don't forget to watch them when you're swapping out your coolant.
Monitor Riding Conditions: If you’re pushing your motorcycle hard or riding in extreme heat, be extra vigilant.
Regular Inspections to keep your cooling system healthy
Conclusion
The coolant in your motorcycle does a lot more than just fill up the tank. It plays a major part in keeping your engine chilly, rust-free, and running. You should change it out every couple of years—or follow what the manual suggests—to make sure your ride stays up and running.
Please treat your motorcycle right. Replace some fresh coolant in time to maintain a stellar cooling system, and savor every trip. Trust me, there's nothing worse than seeing your motorcycle overheat and smoke up while everyone else speeds away toward the horizon.
What types of motorcycle boots do you think are better for your next riding tour? Facing with various boots, how will you choose the right pair for yourself?
Motorcycle boots play a key role in riding gear. They shield your feet and lower legs from weather, scrapes, and hits if you crash. The wide range of motorcycle boot options can make picking the right pair tough.
This guide will explain the various motorcycle boots and their traits. We'll also help you choose the best pair for how you ride and what you need.
Why Do Motorcycle Boots Matter?
Different types of motorcycle boots
Let's get why motorcycle boots are needed before we look at the different kinds:
√ Protection: Motorcycle boots keep your feet, ankles, and shins safe. They shield you from flying road debris, stop you from sliding on the pavement, and soften the blow if you fall off your bike.
√ Comfort: You need to feel good and get properly prepared for long rides. Motorcycle boots give you the support you need when you're on the road for hours.
√ Weather Resistance: Rain, snow, or blazing sun - motorcycle boots can handle it all. They help your feet stay dry and cozy, no matter what Mother Nature throws at you.
√ Grip and Control: Motorcycle boots have a good grip on the foot pegs. This lets you steer your bike better and feel more in charge.
Design: Most cruiser boots have a classic look and often use leather in their construction. Riders who like easy-going trips on touring or cruiser motorcycles tend to go for these.
Protection: These boots offer basic safety features, with stronger toes, ankles, and heels.
Comfort: They come with softer insoles and more bendable soles. Therefore, cruiser motorcycle boots feel great to wear on long trips.
Weather Resistance: Cruiser boots are made from tough, water-resistant leather. While they can handle some moisture, they're not waterproof.
Pros:
√ Stylish and timeless appearance.
√ Comfy for extended rides.
√ Solid ankle and foot protection.
Cons:
× Water resistance is limited.
× Might not give complete protection in crashes at high speeds.
2. Sport Motorcycle Boots
Sport motorcycle boots
Features:
Design: Sport boots have a design that is suitable for high-performance riding. Usually, they tend to be more aggressive and angular in appearance. Riders who take part in track days, sport riding, or motocross often choose these boots.
Protection: These boots offer extensive protection to sports riders. They have extra reinforcements around the shin, ankle, and toe areas. Many sport boots come with sliders to protect the sides and soles if a crash occurs.
Comfort: Sport boots have a more rigid structure to increase safety. Although may feel stiff, they give better support during intense riding.
Weather Resistance: Many sport boots resist the weather. But pay attention, they don't have full waterproofing.
Pros:
√ Great defense for hard-core riding.
√ Stronger parts to last longer.
√ Perfect for fast or racetrack riding.
Cons:
× Might feel rigid and uncomfortable for everyday riders.
Design: Touring boots are built for riders who ride for long distances. They suit people who ride touring motorcycles or enjoy spending many hours on the road.
Protection: These boots give riders strong protection. Most touring boots have extra padding and reinforcements around the ankle and foot. The others may also include features like reflective panels to make riders visible at night.
Comfort: Comfort plays a key role in touring boots. Most of these boots come with cushioned insoles, materials that let your feet breathe, and designs that bend.
Weather Resistance: Touring boots keep out water and wind. This means they can keep your feet feeling good in different weather conditions.
× Takes up more space than other motorcycle boot styles.
× Might be too much for occasional riders.
4. Adventure (ADV) Motorcycle Boots
Adventure motorcycle boots
Features:
Design: Adventure boots are made for dual-sport or off-road riders. These boots can handle tough terrains while giving the protection needed for street riding.
Protection: There are strong reinforcements around the toe, heel, and shin areas on ADV boots. Many have ankle protection and hard plastic sliders.
Comfort: These boots are built to balance comfort and protection on long rides or off-road trips. They have a flexible, yet strong construction to achieve this.
Weather Resistance: Many ADV boots are waterproof, which makes them great to use in all weather. But they might not breathe as well as touring boots.
Pros:
√ Works well for riding on streets and trails
√ Gives great defense on bumpy ground
√ Keeps water out and lasts long
Cons:
× Weighs more than regular boots
× Not as cool-looking for daily wear
5. Motocross Boots
Motocross boots
Features:
Design: Motocross boots serve off-road riders who take part in motocross racing. These boots aim to give the best protection and performance in harsh conditions.
Protection: Motocross boots offer top-notch protection. There are tough leather, plastic, and metal parts in the motorcross boots. This design helps to guard your feet, ankles, and shins from harm if you crash.
Comfort: These boots are quite stiff, so they don't bend much. Their main job is to prevent injuries, not to be comfy.
Weather Resistance: Although they can resist water, motocross boots focus on protection. They're not the best choice for riding in the rain.
Pros:
√ Excellent safeguarding for off-road adventures.
√ Tough and long-lasting build.
√ Perfect for harsh riding environments.
Cons:
× Not comfy for extended trips on smooth roads.
× Doesn't let air flow as well.
× More cumbersome and weighty.
6. Short Motorcycle Boots
Short motorcycle boots
Features:
Design: Short boots are made for city or casual riders. These riders need protection but don't want bulky traditional boots. Short boots protect ankles while letting you move more .
Protection: Short boots don't protect as much as full-length boots. But they can support ankles well and have stronger toe and heel areas.
Comfort: These boots are often more flexible and comfy than full-height boots. Thus they are great for daily rides.
Weather Resistance: Short boots can handle some weather. But they are not waterproof.
Pros:
√ Light and comfy for everyday wear.
√ You can move more than in taller boots.
√ Just right for city commutes.
Cons:
× Don't protect as much as taller boots.
× Might not suit long-distance or aggressive riders.
7. Waterproof Motorcycle Boots
Waterproof Motorcycle Boots
Features:
Design: Usually, waterproof motorcycle boots have a special waterproof membrane (like Gore-Tex). That's why they can keep your feet dry in wet conditions.
Protection: Based on different designs, they can offer different levels of protection. Some protect your full ankle and shin. Others focus more on comfort and ease of use.
Comfort: Waterproof boots aim to keep your feet dry as their main goal. They try not to give up too much comfort. However, they might not breathe as well as boots without waterproofing.
Weather Resistance: Waterproof boots do their best job in wet weather. They give top-notch protection from rain and puddles.
Pros:
√ Keeps your feet dry when it's wet outside.
√ Works well for riding all year, no matter the weather.
√ Comes in different looks and levels of protection.
Cons:
× Doesn't let your feet breathe as well as boots that aren't waterproof.
× Might cost more because of the special materials used.
Motorcycle Boots Comparison Table
Motorcycle Boots Type
Protection
Comfort
Weather Resistance
Best For
Pros
Cons
Cruiser Boots
Moderate ankle and foot protection
Comfortable for long rides
Water-resistant but not waterproof
Cruiser and touring motorcycles
Stylish, comfortable, basic protection
Limited waterproofing, not ideal for high-speed crashes
Sport Boots
Extensive protection, ankle, shin, toe
Stiff but supportive for performance
Weather-resistant, not fully waterproof
Sport riding, track days
Maximum protection, durable, track-ready
Stiff, less comfortable for casual rides
Touring Boots
Solid protection with added padding
Comfortable for long distances
Waterproof, breathable
Long-distance touring riders
Very comfortable, waterproof, solid protection
Bulkier, not ideal for short rides
Adventure Boots
Heavy-duty protection for ankle and shin
Balanced flexibility and support
Waterproof
Dual-sport, off-road, adventure
Versatile, rugged, waterproof
Heavy, less stylish for everyday use
Motocross Boots
Superior protection for foot, ankle, shin
Very rigid, not flexible
Water-resistant
Off-road, motocross racing
Maximum protection for extreme riding conditions
Uncomfortable for street use, heavy
Short Boots
Moderate ankle protection
Lightweight and flexible
Weather-resistant
Urban commuting, casual riding
Comfortable, easy to wear, compact
Less protection, not ideal for long-distance rides
Waterproof Boots
Varies depending on the boot style
Typically comfortable, but less breathable
Fully waterproof
All-weather riders
Keeps feet dry in rain, good for year-round use
Less breathable, can be more expensive
How to Choose the Right Motorcycle Boots?
Choosing the right motorcycle boots depends on several factors:
Riding Style: Your riding style plays a major role in determining the type of boots you need. If you ride aggressively on a sportbike or participate in track racing, sport or motocross boots would be ideal. For long-distance touring or casual cruising, touring or cruiser boots are better suited.
Comfort vs. Protection: If comfort is your top priority, look for boots with cushioned soles and breathable materials. However, sometimes protection is the most important factor you are considering. For this circumstance, choose boots with reinforced areas and impact protection.
Weather Conditions: If you ride in rainy conditions often, waterproof boots are essential. If you live in a warmer climate, look for boots with breathable materials.
Fit and Flexibility: Make sure the boots fit well and offer flexibility where needed. For off-road riding, some stiffness is necessary for protection. As for street riding, the boots should allow more movement for comfort.
Price: Motorcycle boots vary in price based on materials, protection, and brand. Make sure you get the best value by considering your riding needs and how much protection you require.
Conclusion
Motorcycle boots are not just a fashion statement; they’re a crucial piece of safety gear. They can protect you in the event of a crash while providing comfort on long-distance motorcycle rides.
Understanding different types of motorcycle boots can help you make a well-informed decision. The right pair will enhance your safety and comfort on the road.
When choosing the right pair, you should consider your practical demands.
Your riding style and the level of protection you need are the main factors you need to pay attention to. Besides, don't forget the environmental conditions you typically ride in.
The right pair of boots will ensure your feet are protected, comfortable, and ready for the ride.
Motorcycle boots play a key role in riding gear. They shield your feet and lower legs from weather, scrapes, and hits if you crash. The wide range of motorcycle boot options can make picking the right pair tough.
This guide will explain the various motorcycle boots and their traits. We'll also help you choose the best pair for how you ride and what you need.
Motorcycle engines work hard. This happens when you're dealing with traffic, enjoying a ride on a warm summer day, or pushing your motorcycle to the max. Getting too hot can mess up your engine, make your ride less zoomy, and hit your wallet hard with repairs. That's why getting the lowdown on how to cool down the motorcycle engine fast and in the right way is super important
In this article, we're going to give you the scoop on all things about making your motorcycle's engine cool down, including stuff that makes your engine's temperature go up, what to do in a tight spot, and ways to stop your engine from overheating in the first place. Plus, we're going to take a peek at how much load your motorcycle can take since that's got a direct say in how your engine does its job and stays cool.
Why Do Motorcycle Engines Overheat?
Motorcycle engines generate heat through combustion and friction. While this heat is normal, it needs to be dissipated efficiently. If heat builds up and the cooling system can’t keep up, the engine will overheat.
Here are some common reasons why this happens:
Caught in Traffic: When you get jammed up on the road, your engine doesn't get much breeze to chill out, which makes it tougher to keep cool.
Scorching Temps: When it's blazing hot outside, your engine feels it too when you're cruising in the full glare of the sun.
Overloading: Hauling too much stuff puts a bunch of extra pressure on the engine, and this means it has to hustle more and get hotter.
Slacking on Upkeep: If your oil's all cruddy, your radiator's all gummed up or you're running low on coolant, your engine's gonna struggle to stay chill.
High RPMs: When you hammer it on the highway or keep revving up the engine, you're pushing your engine to its breaking point.
When you pick up on overheating symptoms like the scent of a sizzling engine, power dipping, or alert symbols flashing on your dash, please take action quickly to cool it down.
motorcycle engines overheat
Immediate Emergency Actions
Safe Pull-Over Procedures
Step one: pull over safely. Don’t just slam on the brakes and stop in the middle of traffic or on a busy street. Find a safe, flat area with plenty of space, preferably shaded if you can. If you want to avoid any further heat buildup, keep your motorcycle away from direct sunlight.
Quick Temperature Assessment
After you are safely pulled over, it's the moment to assess the situation. Certain motorcycles are built with temperature gauges. You should see if the needle's hanging out in the danger zone, which is usually in the red or above.
Lack of a gauge? No sweat! Just hover your hand near the engine—carefully, not super close—and if it feels like touching a stove then you bet, you've got yourself a problem.
Techniques to Cool Down the Motorcycle Engine
At this point, the goal is to reduce the engine's temperature as fast as possible, but without causing damage.
Here are some effective ways to cool down your motorcycle engine quickly and safely:
1. Stop and Turn off the Engine
The first and most obvious step is to stop your bike and turn off the engine. This gives the engine a chance to cool without generating more heat. Find a shady spot to park if possible, as direct sunlight will make the cooling process slower.
Pro Tip: Don’t rev the engine before turning it off, as this can actually increase the temperature.
2. Let It Idle (If Stopping Isn’t an Option)
If you're stuck in traffic or can’t stop, let your engine idle. While idling, the engine produces less heat compared to riding at high RPMs. If your bike has a fan, it will also kick in to help cool the engine.
Important: Don’t keep the engine idling for too long if there’s no airflow, as this can make overheating worse.
3. Check Coolant Levels
check the coolant levels of the motorcycle
Motorbikes with liquid cooling systems often get too hot because there's not enough coolant. Peek at the coolant tank and fill it up when it's low. Stick with the coolant kind your motorbike's maker suggests.
Quick Tip: Never open the radiator cap immediately after stopping the engine. The coolant inside may be under pressure and extremely hot.
4. Spray Water on the Radiator or Engine Fins
If you’re in a bind and need to cool the engine quickly, you can spray water onto the radiator (for liquid-cooled bikes) or engine fins (for air-cooled bikes). Use a spray bottle or pour water gently to avoid shocking the hot metal.
Caution: Do not use cold water directly on a very hot engine, as this can cause cracks or warping due to sudden temperature changes.
5. Turn on the Cooling Fan
Most modern motorcycles with liquid cooling systems have an electric fan attached to the radiator. The fan helps draw cool air over the radiator, even when the bike is stationary. If your bike allows manual control of the fan, turn it on when you notice the engine heating up.
Diagnose the Root Cause
Common Overheating Triggers
Understanding why your motorcycle overheated is key to preventing it from happening again.
Here are a few common culprits:
Low coolant levels: A lack of coolant is one of the most common reasons for overheating. Coolant helps absorb heat from the engine and dissipate it through the radiator. Learn how often you should replace the coolant and how to change the coolant is necessary.
Clogged cooling fins: Dirt, dust, or oil buildup can obstruct the air or coolant flow needed to cool down the engine.
Over-revving or high-speed riding: Using your motorcycle too hard, especially in stop-and-go traffic or at high speeds, can increase engine temperature faster than your cooling system can handle.
faulty radiator fan
Faulty radiator fan or pump: These are less common but critical failures. If your bike has a cooling fan, ensure it’s working properly.
Warning Signs to Watch
Keep an eye out for signs that your engine is at risk of overheating again. These include:
Unusual engine noise: A high-pitched whine or knocking sound could be a sign of something wrong with the internal components.
Excessive smoke or steam: This is a sign that the engine has reached dangerously high temperatures and could be close to suffering internal damage.
Overloading your motorcycle can directly impact its engine performance and cooling ability. To avoid putting unnecessary strain on the engine, it’s important to know your bike’s weight capacity.
The GVWR is the maximum weight your motorcycle can handle, including the bike itself, the rider, passengers, and any cargo. This information can usually be found in the owner’s manual or on a sticker near the frame.
2. Consider the Load Distribution
It’s not just about the total weight but also how it’s distributed. Uneven weight can affect handling and increase stress on certain parts of the engine.
Tip: Use saddlebags and tank bags to distribute weight evenly.
use tank bags to distribute weight evenly
3. Adjust Suspension and Tire Pressure
Riding with extra weight can affect your suspension and tires. Adjust the suspension settings and tire pressure according to the load to maintain stability and safety.
Essential Cooling Maintenance
Regular maintenance is your best defense against overheating:
Flush and replace coolant regularly, following the manufacturer’s guidelines. Old or ineffective coolant can lose its ability to dissipate heat.
Clean the cooling fins: These often gather dirt and debris, especially after off-road or long-distance riding. Clean them every couple of months to ensure proper air circulation.
Heat Management Tips
During the ride, managing heat can make all the difference:
Don’t ride at high RPMs for extended periods: This can stress your engine and cause it to overheat faster.
Don’t ride at high RPMs
Keep an eye on the weather: Riding in hot conditions? Plan your ride for cooler times of the day, like early morning or late evening.
Give your engine a break: If you’ve been riding hard, take periodic breaks to let the engine cool down.
Conclusion
Cooling down your motorcycle's engine fast is key to dodging damage and ensuring a smooth ride. If you get stuck in traffic, experience scorching weather, or give your motorcycle a workout on winding roads dealing with an overheating engine is super important.
Just keep in mind, that quick fixes are awesome when you're in a tight spot. However, keeping up with regular upkeep and getting why your engine heats up will mean a smarter safer, chill ride for the long haul.
Look after your engine's temperature, and your motorcycle will thank you.
How do you find motorcycle off-road trails before your adventure riding tour?
Exploring off-road motorcycle trails can be an exhilarating experience for any rider. Whether you’re a seasoned adventure rider or a weekend enthusiast, finding the right trails is essential to ensure a thrilling and safe ride.
In this blog, we’ll explore detailed strategies, tools, and tips for helping find motorcycle off-road trails. With these skills, you can easily find the perfect motorcycle off-road trails.
How Do You Find Motorcycle Off-Road Trails?
1. Know Your Off-Road Riding Style
Different motorcycle off-road riding styles - find motorcycle off-road trails according to your style
Before you start searching for trails, it’s important to identify your riding style. This will determine the type of trails that suit you best. Here are the main off-road riding styles:
Trail Riding:
It is suitable for those who love exploring wooded trails, single tracks, or rugged paths.
Adventure Riding:
Best for riders who enjoy long-distance rides that combine off-road sections and paved roads.
Motocross:
Designed for riders who prefer riding on prepared dirt tracks with jumps and turns.
Enduro Riding:
For those who enjoy endurance rides over varied terrains.
You should understand and choose your style before you start the off-road ride. This helps narrow down your trail options and ensures an enjoyable experience.
2. Use Online Resources and Apps
Use online resources and apps when finding off-road trails
Internet technology has made it easy to discover off-road motorcycle trails. Here are some of the best tools:
2.1 Trail-Finding Websites
AllTrails: Although commonly used for hiking and biking, it also includes motorized trails. You can filter by difficulty and user reviews.
Trailforks: It is a comprehensive resource with detailed trail maps and conditions. Of course, the dirt bike-specific paths are also included on this website.
RiderPlanet USA: A motorcycle-focused platform that lists off-road trails across the United States. It is generally categorized by state and difficulty level.
OHV Trail Websites: Many states have websites dedicated to Off-Highway Vehicle (OHV) trails. Check local Department of Natural Resources (DNR) websites.
2.2 Mobile Apps
REVER: This is an APP designed for motorcyclists. It provides off-road trail maps and allows riders to track their routes.
onX Offroad: This app specializes in off-road navigation. There are detailed trail information, waypoints, and weather updates in this APP.
Gaia GPS: Ideal for navigating remote trails with offline maps and GPS tracking.
2.3 Social Media and Forums
Social media platforms like Facebook, Instagram, and Reddit have active off-road riding communities. You can consider joining the local groups or forums such as ADV Rider or ThumperTalk. The experienced riders in the groups can share you some recommendations.
Local riders often know the best hidden gems for off-road trails. Here are some ways to connect:
Motorcycle Clubs
Many cities and towns have off-road motorcycle clubs. They usually organize group rides and events, and you can join them.
Events and Rallies:
You can also attend some off-road motorcycle events or adventure rallies. You can meet like-minded riders and learn about nearby trails on these events.
Local motorcycle dealerships often have insights into nearby trails. Or maybe they can connect you with other riders.
4. Research Public Land and Parks
Research public land and parks when choosing off road motorcycle riding trail
Public lands are often home to some of the best off-road trails. Here’s how to find them:
4.1 National Forests and BLM Land
National Forests: Most U.S. National Forests have designated OHV trails. Visit the U.S. Forest Service website for maps and regulations.
Bureau of Land Management (BLM): BLM lands are popular for off-road activities. They often provide vast, open spaces for adventure riders.
4.2 State Parks and OHV Areas
Many state parks and recreation areas have dedicated OHV trails. For example, California’s OHV areas like Johnson Valley or Colorado’s Rampart Range.
4.3 Wilderness Regulations
Ensure you’re riding in areas where motorized vehicles are allowed. Wilderness areas typically prohibit motorized use to protect the environment.
5. Use Google Maps and Satellite View
Google Maps can be a surprisingly effective tool for finding trails. Here’s how to use it:
Satellite View: Look for dirt roads, open spaces, and trails in rural or mountainous areas.
Street View: Verify trailheads and check accessibility.
Custom Maps: Create your own maps to mark trailheads and plan routes.
6. Check Weather and Trail Conditions
Trail conditions can vary widely depending on the season and weather. Here’s how to stay prepared:
Weather Apps: Use apps like Weather Underground to check real-time conditions.
Trail Reports: Many apps and websites provide user-submitted trail condition updates.
Local Knowledge: Contact local rangers or OHV offices to confirm trail status.
Avoid riding on muddy trails to prevent environmental damage and ensure safety.
7. Plan for Safety
Off-road riding comes with inherent risks. Preparation is key:
Know the Rules: Familiarize yourself with local laws and trail regulations.
Pack Essentials: Bring tools, a first aid kit, water, snacks, and GPS navigation tools.
Ride with a Buddy: Solo riding can be risky; a partner provides support in case of emergencies.
Communication System: Use motorcycle Bluetooth helmet intercoms to communicate with other riders. The intercoms can provide hands-free, convenient, and safe communication between riders.
Inform Someone: Share your route and estimated return time with a friend or family member.
8. Explore Popular Off-Road Destinations
If you’re willing to travel, some locations are renowned for their off-road trails. Here are a few:
Moab, Utah: Famous for its red rock landscapes and challenging trails like Hell’s Revenge.
Hatfield-McCoy Trails, West Virginia: A network of over 700 miles of trails for all skill levels.
Big Bear Lake, California: Offers scenic mountain trails suitable for various skill levels.
Black Hills, South Dakota: Known for its beautiful forested trails.
9. Respect the Environment and Other Users
Preserving trails for future generations is crucial. Follow these guidelines:
Stay on Designated Trails: Avoid creating new paths or riding off-trail.
Pack It In, Pack It Out: Carry out all trash and leave the area cleaner than you found it.
Respect Others: Yield to hikers, bikers, and equestrians when necessary.
Minimize Noise: Use proper exhaust systems to reduce noise pollution.
Conclusion
Finding motorcycle off-road trails doesn’t have to be a daunting task.
The tools and strategies above are the most convenient ways you can use when finding trails. They will help you access to a wide range of trails that suit your skill level and interests.
Whether you prefer the rugged wilderness or curated OHV parks, there’s a trail out there waiting for you.
Lane splitting on motorcycles, which means riding between lanes when traffic moves, has been legal in California for a long time. Yet, it's still one of the most argued about and confusing practices for both motorcycle lovers and car drivers. Learning how to split lanes can make your rides better and more fun. But like any skill, you need to learn, practice, and stay alert to master it.
In this full guide, we'll break down the key parts of lane splitting in California, from the basics to advanced tips and always keeping safety in mind.
Lane splitting happens when a motorcycle rider drives between two lanes of traffic going the same way. This often occurs in heavy traffic during rush hour, or when cars aren't moving. By splitting lanes, motorcycle riders can get through traffic faster, cut down on travel time, and stop their engines from overheating or getting strained during long waits.
California allows lane splitting but has rules about it. Knowing these lane splitting laws helps riders stay out of trouble and more importantly, lowers the chance of crashes. Since 2017, California law says lane splitting is okay if done and follows certain guidelines.
lane splitting is legal in California
California Paves the Way for Lane Splitting Laws
California leads the pack in making lane splitting legal, with clearer guidelines than other states where riders can't do it or the law doesn't talk about it. Here's the lowdown on lane-splitting rules in California:
Key Points of California’s Lane Splitting Law
Safety Comes First: Lane splitting is legal only when done safely and prudently. Riders need to consider traffic speed, road conditions, weather, and their ability to move between lanes.
Speed Rules: As a general guideline, don't split lanes more than 10 mph faster than the traffic around you. If other cars are going 30 mph, keep your speed under 40 mph when lane splitting.
Road Situation: You should only split lanes when traffic has stopped or is moving very fast. Zipping through fast-moving traffic isn't just against the law - it's super risky.
Highway Conditions: Riding between lanes on highways and freeways tends to be less dangerous than on city streets when cars are moving or have stopped.
The California Highway Patrol (CHP) offers advice on lane splitting stressing that bikers should do it in ways that don't make crashes more likely to happen.
Understanding why lane splitting is a common practice in California can help you make the most of it.
Riders use lane splitting for several reasons:
Time Efficiency: During peak hours or in gridlock traffic, lane splitting allows motorcyclists to bypass stopped or slow-moving vehicles, reducing their commute time significantly.
Heat Management: When stuck in heavy traffic, motorcycles can overheat. By lane splitting, riders can keep their engines cool and avoid mechanical failures.
Improved Safety: Surprisingly, lane splitting can increase safety for riders. Research has shown that motorcycles involved in rear-end collisions in traffic are at a higher risk of injury than those who lane split.
lane splitting can reduce commute times for motorcyclists
However, these benefits are only realized when lane splitting is done correctly. Misjudging the situation or splitting lanes too aggressively can result in accidents, which is why safety is paramount.
The Science of Safe Lane Splitting
It’s important to note that lane splitting is not as simple as just riding between two lanes. There’s a science behind safe lane splitting, and the most experienced riders always consider the following factors:
1. Speed Matching
The speed of traffic plays a significant role in how safely you can lane split. If traffic is moving at 15 mph, splitting at 25 mph or higher could be risky. Always try to match your speed to the speed of traffic, staying about 10 mph faster than the surrounding cars. If traffic is stopped, you can slowly crawl between lanes at a pace that feels comfortable.
2. Positioning
Position your bike in the best lane-splitting lane. On highways, there are typically three to five lanes. The middle lanes tend to have less congestion, giving you more room to split. Stay near the middle of the lanes for the most stability and visibility.
Avoid the shoulder: Splitting too close to the edge of the road or the shoulder can put you at risk of hitting obstacles such as debris, road signs, or even emergency vehicles.
Stay in your lane: If you're unsure about how much space is available between cars, don’t rush it. Keep a safe distance between you and the vehicles on both sides.
Keep a safe distance between you and the vehicles on both sides.
3. Anticipating Driver Behavior
One of the most important aspects of lane splitting is anticipating what other drivers will do. Not all drivers are familiar with lane splitting, and many might not know you’re coming. Be mindful of:
Lane changers: Always be aware of drivers signaling to change lanes, especially in heavy traffic. Drivers may not see you coming, and they may make an abrupt move.
Mirrors: Check car mirrors as you approach. Look for drivers making eye contact or any sudden movements. This gives you a clue about whether they are aware of your presence.
When lane splitting, protective gear is essential.
You should wear a full-face helmet first. A helmet that covers the whole face is top-notch when it comes to safety during a tumble and also keeps stuff thrown up by other rides out of your face. It is also necessary to wear a jacket that's tough and can stand up to scrapes; it'll keep you from getting all scratched up if you crash.
Don't forget about sturdy gloves and choose the right pair of boots. They're not just for show – they step up your safety game and help you keep a tight hold on your ride.
Even though it seems obvious, lots of bikers don't get how key it is to deck themselves out in armor before they weave through traffic. Trust me, if trouble hits, having the right gear can be a game-changer.
protective gear is essential
5. Observe Your Surroundings
Environmental conditions can affect how safe lane splitting is. Keep in mind:
Road surface: Wet, oily, or uneven road surfaces can make lane splitting more dangerous. Avoid splitting on roads that have been recently repaved or are poorly maintained.
Weather conditions: Rain, fog, and strong winds can make lane splitting more hazardous. Always adjust your behavior based on the weather.
Tips for Lane Splitting Safely
Mastering the art of lane splitting takes practice and knowledge of both the road and your bike. Here are a few extra tips to help improve your safety:
1. Don’t Rush It
Take your time when lane splitting, especially if you’re new to it. Start slowly and increase your speed as you get more comfortable with the technique. If you’re unsure, pull back and wait for a safer opportunity.
2. Use Your Mirrors
Check your mirrors frequently while lane splitting. This helps you track surrounding traffic and avoid dangerous situations. Be aware of tailgaters or other vehicles that might be coming up behind you.
3. Avoid Cutting Off Cars
Be mindful not to cut off other vehicles. When splitting, make sure you don’t cause any sudden disruptions to the flow of traffic. Always be predictable in your actions and give drivers enough time to react.
4. Look Ahead, Not Just Side to Side
Lane splitting requires you to scan ahead for potential hazards, not just focus on the vehicles around you. Look for things like construction zones, debris, and potholes that could throw you off balance.
be aware of the surroundings
5. Respect Other Drivers
While lane splitting is legal, it doesn’t mean that drivers in cars always expect it. Be courteous and never make aggressive maneuvers. A polite approach reduces the likelihood of car drivers making unexpected moves that could lead to accidents.
Conclusion
To wrap up, lane splitting in California has the potential to navigate traffic with effectiveness and efficiency as long as riders do it. You can cut down your accident risk by sticking to the law keeping your speed in check, putting your motorcycle in the right spot, and guessing what other drivers might do.
Like any move on a motorcycle, getting good at lane splitting comes down to practice knowing what's going on around you, and showing respect to everyone else on the road. Make sure you keep up with the newest laws and safety tips and always put safety first.
If you do this, you'll not only make your daily ride to work easier, but you'll also enjoy the journey while staying safe.
Keeping your Honda motorcycle well-lubricated is super important; it makes sure your ride stays smooth, lasts long, and keeps you safe. As a motorcycle rider, you might wonder, "Is it OK to slap on some regular grease on my Honda motorcycle?" It sounds like a no-brainer, but hold up—it gets tricky. Sure average grease could do the trick for a hot minute, but it's not the top choice for your bike's special part needs.
Let's jump into the nitty-gritty about grease—what it is, why it matters, and the best kinds for your Honda motorcycle. We're gonna talk about the danger of choosing the wrong grease and tell you why picking the perfect one can transform how your motorcycle rides and holds up.
What Exactly is Grease and Why Does It Matter?
Grease is a thick, lubricating substance made by combining oil with a thickener like lithium, calcium, or aluminum soaps. Unlike oil, which flows more, grease stays put. This prevents metal parts from rubbing against each other, which cuts down on wear as time passes.
On motorcycles, where heat, moisture, and shaking never stop, grease has a key job to keep things running without a hitch. It stops rust and corrosion, cuts down on friction, and makes sure important parts on the motorbike, such as axles, bearings, and seals work right. Using the best grease for your bike can boost how long it lasts and how well it runs.
The short answer: It depends. In some cases, regular grease works fine, but most of the time, you should use grease made just for motorcycles.
Reasons:
High-Temperature Resistance: Motorbikes crank up the heat close to their engines, tires, and exhaust spots. The usual grease, the kind you'd slap on cars or stuff at home just doesn't cut it under that scorching heat. Pick the wrong grease and boom, you're looking at some serious breakdowns or your parts wearing out way too fast.
Water Resistance: Motorcycles especially dirt bikes and touring bikes often get exposed to water, rain, mud, or even snow. Regular grease might not offer enough water resistance to protect key parts. In contrast, special motorcycle greases are made to stand up to these elements. This ensures that important components like wheel hubs, axles, and swingarms stay well-oiled even in tough conditions.
motorcycle on rainy days
Durability: Motorcycle grease contains additives that boost its stability and toughness. Regular grease can lose its power when exposed to heat and moisture. This may leave parts unprotected causing them to wear out too soon. To keep your Honda running for years, you need to use grease that offers long-lasting protection in tough conditions.
What Does the Honda Recommend?
Honda doesn’t just slap grease on parts haphazardly. Their engineers carefully choose grease types that align with the demands of specific components. From wheel axles to swingarms and steering head bearings, each part requires grease that can handle extreme heat, moisture, and stress. Honda typically recommends lithium-based or molybdenum disulfide (Moly) greases for many parts due to their superior heat and pressure tolerance. Each type is chosen specifically for its characteristics:
Lithium-Based Grease: An all-purpose grease used for wheel bearings, axles, and pivot points.
Moly Grease: Designed for high-pressure applications like suspension linkages and swingarm pivots.
Specialized Grease for Seals: For areas like steering head bearings where seals and water resistance are critical.
Honda’s manuals often include grease specifications for each component, so reading your bike’s service manual is always a good idea.
Using regular or incorrect grease might seem harmless, but it can lead to serious consequences for your Honda motorcycle. Let’s break down the risks in detail.
1. Inadequate Heat Resistance
When the motorcycle is running, the motorcycle gets super hot near the engine, axles, and where the exhaust pipes. The regular grease melts pretty easily. If it gets really hot, this grease can turn into liquid, drip off, or just burn up completely. That means the super important bits don't have any protection.
Example: A rider on a Honda Shadow used standard automotive grease for their axles, only to find it had melted after a long ride. The result? Damaged bearings and a hefty repair bill.
2. Lack of Water Resistance
Honda motorcycles are tough enough to deal with rain, slop, and slick streets. Regular grease just doesn't cut it for these motorcycles since it's not tough against water like the stuff made just for motorcycles. That regular grease might scram once it gets wet leaving your ride's metal bits to get all crusty and corroded.
So, get this - ever rolled your motorcycle into the garage after splashing through puddles and then heard it squeak the day after? Attention: That’s the sound of unprotected parts crying for help.
3. Shortened Lifespan of Components
Components like bearings, axles, and swingarms endure constant friction and pressure. Regular grease often breaks down faster than specialized motorcycle grease, leaving these parts vulnerable to wear. Over time, this leads to more frequent replacements and higher maintenance costs.
4. Chemical Compatibility Issues
Not all greases play well with each other. Some regular greases can chemically react with factory-recommended greases or seals, causing them to break down prematurely. This can lead to leaks, damaged seals, or compromised performance.
Best Types of Grease for Honda Motorcycles
Now let’s explore the best types of grease for your Honda motorcycle, ensuring peak performance and longevity.
1. Lithium-Based Grease
lithium based grease
Lithium grease is the Swiss Army knife of greases. It’s versatile, long-lasting, and resistant to both heat and water. Most importantly, it’s compatible with the demands of motorcycle components.
Best For: Bearings, axles, swingarms, and wheel hubs.
Why It Works: It stays in place, doesn’t break down easily, and provides excellent protection against friction and moisture.
Pro Tip: Look for lithium grease with added anti-corrosion properties for extra durability.
2. Molybdenum Disulfide (Moly) Grease
If you’re tackling off-road trails or subjecting your Honda to high-stress conditions, Moly grease is a solid choice. It contains molybdenum disulfide, a compound that reduces wear under extreme pressure.
Molybdenum Disulfide Grease
Best For: Axles, suspension linkages, and swingarm pivots.
Why It Works: Moly grease excels in high-load scenarios, making it ideal for parts under heavy stress.
3. Synthetic Grease
synthetic grease
Synthetic greases are designed to perform in extreme conditions. They offer superior heat resistance, water tolerance, and long-lasting lubrication.
Best For: Racing bikes, high-performance motorcycles, or frequent long-distance rides.
Why It Works: It’s engineered for demanding environments, providing unmatched performance.
Worth It? Yes, but it’s pricier than other options, so weigh the benefits for your specific riding style.
4. Dielectric Grease for Electrical Connections
While not used for moving parts, dielectric grease is crucial for protecting your motorcycle’s electrical connections. It prevents moisture ingress, corrosion, and short circuits, ensuring your Honda’s electronics stay reliable.
Where to Use It: Battery terminals, spark plug boots, and electrical connectors.
Dielectric Grease
Bonus Tips for Grease Application
Clean Before Applying: Always clean the area thoroughly before applying new grease. Old grease, dirt, and grime can reduce effectiveness.
Use Sparingly: Don’t overdo it! Too much grease can attract debris, which leads to buildup and accelerated wear.
Follow Honda’s Manual: Stick to your bike’s maintenance manual for recommended grease types and application points.
Don’t Mix Greases: Mixing different types of grease can lead to chemical reactions that degrade their effectiveness. If switching types, clean off the old grease first.
Inspect Regularly: During routine maintenance, inspect greased areas for signs of wear, dryness, or contamination.
apply grease carefully
Conclusion
Can regular grease damage your Honda motorcycle? The answer is a resounding "yes" —if it’s not up to the task. Regular greases might work for household fixes, but your Honda deserves better. By using the right type of grease—whether it’s lithium-based, Moly, or synthetic—you’ll ensure your bike stays in top shape for years to come.
Don't forget, greasing isn't just to make things slippery. It's for shielding boosting performance, and giving you a little extra peace of mind. Next time you're about to grab some grease, go for something that's up to snuff for your Honda. Your motorcycle and your wallet will thank you.
How much can you carry on a motorcycle? Have you ever considered this when you are planing to carry many goods on your motorcycle?
Riding a motorcycle offers a sense of freedom and adventure for many riders. But, like any vehicle, your bike has limitations when it comes to how much weight it can safely carry.
Understanding these limits is crucial for both safety and performance. Overloading your motorcycle can negatively impact handling, stability, braking, and overall ride comfort. And, it may cause potential damage to your bike.
This article will give you a comprehensive understanding of how much weight your motorcycle can handle. Besides, we will also provide some helpful tips for your safe and efficient riding.
consider the weight capacity of your motorcycle before trip
1. Motorcycle Weight Limits: What You Need to Know
The weight capacity of your motorcycle is a critical factor you need to consider. It will determine how much cargo, gear, or passengers you can carry without exceeding the bike's specifications.
Each motorcycle is designed to handle a certain weight. The total weight includes the rider, any passengers, luggage, and accessories.
Key Terms:
Gross Vehicle Weight Rating (GVWR): It refers to the maximum weight a motorcycle can safely carry. This includes the bike's weight, the rider, any passenger(s), and all added cargo or accessories.
Kerb Weight (Curb Weight): This is the weight of the motorcycle with all its fluids (oil, coolant, gas). It does not include the rider or any added accessories.
Payload Capacity: This is the difference between the GVWR and the kerb weight. It represents how much weight can be added to the bike (rider, passenger, luggage, etc.).
Potential damage to your bike's frame or components
Don't let excess weight turn your ride from exhilarating to hazardous.
Examples of Weight Terms for Several Popular Motorcycle Models
Models
Gross Vehicle Weight Rating
(GVWR)
Kerb Weight
(Curb Weight)
Payload Capacity
BMW R1250GS
1069 lb
591 lb
478 lb
Honda Goldwing
1270 lb
847 lb
423 lb
Yamaha MT-09
783 lb
417 lb
366 lb
Royal Enfield Himalayan
827 lb
439 lb
388 lb
KTM 690 SMCR
661 lb
324 lb
337 lb
Honda CB500X
825 lb
439 lb
386 lb
2. How to Find Your Motorcycle's Weight Capacity?
You can find the weight capacity of your motorcycle from the user manual or the label on the frame of the motorcycle
You should know that every motorcycle has a specific weight limit. This weight limit is typically stated in the motorcycle's manual or on a label located on the frame of the bike.
You can also find this information from the manufacturer’s website or customer service.
To find the weight capacity of your motorcycle, follow these steps:
Locate the Manufacturer’s Specifications: This is easy to find. Usually, it is in the owner’s manual, on the manufacturer's website, or on a label attached to the bike.
Understand the GVWR: The GVWR represents the total weight your motorcycle can carry. Subtract the bike's kerb weight from the GVWR to determine the amount of additional weight you can safely carry. This includes both the rider and any luggage or passengers.
Account for Accessories: Don’t forget the aftermarket accessories or modifications you’ve added. These might increase the weight of the bike itself. Finally, it will reduce the amount of weight you can carry in terms of luggage or passengers.
How To Calculate How Much Can You Carry on a Motorcycle?
Assuming your motorcycle has a curb weight of 400 lbs (180 kg) and a GVWR of 800 lbs (360 kg). So the maximum weight you can safely carry (rider, passenger, and cargo) would be:
800 lbs (GVWR) - 400 lbs (kerb weight) = 400 lbs of available weight capacity
If you're riding solo, that gives you 400 lbs for your gear and any other loads. If you have a passenger, you'd need to subtract their weight from that total.
Usually, for a short ride, there is no need to worry about this, because you will not bring too much cargo.
calculate how much weight the rider and passenger add
The weight of the rider and any passengers is the most obvious factor when determining the load on your motorcycle.
Rider weight is straightforward, but when it comes to a passenger, things can vary.
On average, most adult passengers range from 120-250 lbs (55-113 kg). This is a major part of what you should account for when figuring out how much more weight your bike can handle.
Solo Rider: If you're riding alone, it’s simply the weight of your body plus your gear.
Passenger: Adding a passenger increases the total weight, which can affect the bike’s balance and handling. The added weight will also impact the motorcycle's suspension and braking systems.
Tip:
Check if your motorcycle is equipped with proper passenger footpegs, seat support, and other features. These features will help your motorcycle to handle the additional load.
Some sport or cruiser models are designed with more robust systems for handling two riders. But others may not be as suited for a heavy passenger.
4. How Much Gear Can You Carry?
Motorcycle touring requires packing smart and safe. Whether you’re going for a day trip or a long cross-country journey, you must calculate the total weight. The way you pack and the weight of your gear can have a significant impact on your bike’s handling.
Things to Consider:
Soft Luggage vs. Hard Luggage: Soft bags (like saddlebags, tank bags, and tail bags) are lighter and more flexible. But pay attention that they don’t provide the same structural support as hard luggage. They can be used to help distribute weight more evenly.
Weight Distribution: Balance is key. So, remember to place heavier items low and close to the bike’s center of gravity to keep the bike stable. Do not strap heavy gear high on the bike. This can make your motorcycle top-heavy, which compromises stability.
Maximize Storage Space: Most motorcycles come with options for extra luggage like saddlebags, tank bags, and tail bags. However, you still need to check the weight limits for each of these storage options. Make sure the gear in these storage spaces does not overload the bike.
How to Pack:
When packing for a long ride, distribute the load evenly across the motorcycle. If possible, balance the weight on both sides of the bike to prevent it from leaning to one side.
This ensures better handling, and less tire wear, and prevents overloading any one part of the bike.
Tip: If you plan on carrying large or bulky items, consider investing in a sturdy luggage rack or top box. This will help you avoid compromising safety and stability.
5. How Does Extra Weight Affect Motorcycle Performance?
Adding extra weight to your motorcycle can affect its performance in several ways. Let’s take a look at some of the critical areas impacted by an overloaded bike.
1. Handling:
The more weight you add to your motorcycle, the harder it will be to maneuver.
Extra weight impacts the turning radius when you are riding through the corner. This will make you more difficult to lean the bike into corners.
Besides, the bike will also feel less responsive, and you may notice it’s harder to balance at low speeds.
2. Braking:
Braking distances will increase as the weight of the bike increases. Heavier motorcycles require more braking force to stop than lighter motorcycles.
And, the braking system (e.g., the brake pads, rotors, etc.) may wear out more quickly if you routinely overload the bike.
3. Suspension:
Most motorcycles come with adjustable suspension systems to accommodate varying loads. However, an overloaded bike can cause the suspension to compress too much.
This could lead to bottoming out, affecting comfort and safety during your rides.
If you frequently carry heavy loads, consider upgrading your suspension to something more robust. For example, the aftermarket springs or shock absorbers are top choices.
4. Fuel Efficiency:
Extra weight demands more energy to move. Your motorcycle’s fuel efficiency will decrease as the bike needs more power to carry the extra load.
Usually, a bike carrying 50 lbs (22 kg) more gear might lose 10-15% of its normal fuel economy.
6. How to Safely Carry Extra Weight?
Now that you know how much your bike can handle and how extra weight impacts performance. Here are some tips for carrying weight safely:
1. Use Proper Luggage:
Consider investing in motorcycle-specific luggage that fits your bike's design and weight capacity. Properly secured luggage will prevent the load from shifting during the ride.
2. Check Tire Pressure:
Make sure your tires are inflated to the manufacturer’s recommended levels. Under-inflated tires can negatively affect handling, especially with added weight.
3. Take Regular Breaks:
If you’re carrying a heavy load, stop more frequently to check how the bike is performing. Make sure the luggage is securely fastened and there are no issues with balance.
4. Load Distribution:
Keep heavy items low and centered. A good rule of thumb is to keep the heaviest items in the middle of the bike or as close to the engine as possible.
Control the following distance between you and the ahead vehicle. Make sure you have enough space and time to safely slow down or stop your motorcycle. And, you should consider increase the following distance when riding in rainy, fogy, snowy or icy days.
6. Test Ride:
Before you start your trip, take a short test ride to check that the bike is properly loaded. You can test the bike at slow speeds, fast speeds, uphill, downhill, around turns, and sudden stops. If there are any unusual behaviors, make sure to adjust them before you go.
Conclusion
Understanding how much weight your motorcycle can safely carry is essential for all riders. This ensures you can have a safe and enjoyable riding experience.
Usually, when you are planing to start a long trip, or want to add additional gear, you need to check the weight limit. Make sure your motorcycle's GVWR, kerb weight, and payload capacity can support you add these weight.
Packing carefully, keeping weight balanced, and respecting the load limits of your bike.
These will ensure that your motorcycle performs at its best, offering you the freedom and safety you expect on the road.
How much do you know about the motorcycle following distance while riding? How can you keep a safe distance between you and the ahead vehicle?
Riding a motorcycle is one of the most exhilarating ways to travel. Many people like to go on motorcycle riding tours during the holidays.
But, the freedom of two wheels also comes with a higher level of vulnerability compared to cars and other vehicles.
Therefore, mastering some motorcycle safe riding tips is essential.
Among those tips, many riders may ignore keeping a proper following distance between you and other vehicles. Actually, it is one of the simplest yet most critical habits a motorcyclist can develop.
This article will explore everything you need to know about motorcycle following distance. We will share with you the safe distance rules and tips for following various types of vehicles. Besides, we will also recommend you some strategies to ensure a safe ride.
The "Two-Second Rule"
motorcycle following distance 2-second rule
The basic guideline for following distance for motorcycle riders is the "two-second rule." Here’s how it works:
Pick a stationary object on the side of the road, such as a sign or a tree.
When the vehicle in front passes that object, begin counting: “One, two...”
If you reach the object before finishing the count, you’re too close.
This rule works well in normal conditions. But you still need to make some adjustments in specific scenarios.
Adjusting Your Motorcycle Following Distance for Different Conditions
Although the "Two-Second Rule" is a commonly used following distance rule, it is not always correct.
When facing different weather, road surfaces, and traffic conditions, you also need to adjust the distance. Generally speaking, let's be flexible according to the actual situation.
1. Riding Speed
motorcycle stoping distance based on your riding speed
Under different riding speed, you will need different distance to slow down and stop your motorcycle.
So, consider your motorcycle's riding speed and the ahead vehicle's speed when deciding the following space.
Here is a table showing you the relation between speed and following distance
Speed
Thinking Distance
Break Distance
Total Distance
20 m/ph
6 meters
6 meters
12 meters
30 m/ph
9 meters
14 meters
23 meters
40 m/ph
12 meters
24 meters
36 meters
50 m/ph
15 meters
38 meters
53 meters
60 m/ph
18 meters
55 meters
73 meters
70 m/ph
21 meters
75 meters
96 meters
2. Weather Conditions
Bad weather significantly increases your stopping distances and responding time. So, increase the following distance immediately:
Rain: Wet roads reduce traction. Increase your following distance to at least four seconds.
Fog: Limited visibility makes it harder to judge distances. Slow down and maintain a greater buffer.
Snow or Ice: Roads are extremely slippery if ride in a snowy or icy environment in the winter. Keep a distance of six seconds or more.
Tips for Riding Safely in Different Weather Conditions
Road conditions can vary widely and impact your ability to stop your vehicle. For bad road surfaces, you must increase the distance between your motorcycle and others:
Gravel or Loose Dirt: These surfaces reduce traction. So increase your following distance to avoid skidding or collisions.
Potholes or Debris: Maintain a larger safe gap to spot and avoid hazards.
Wet Leaves or Oil Spots: These are slippery and your motorcycle are easier to slip. Thus it requires you to slow down and leave more stopping distance.
4. Traffic and Speed
The faster you go, the longer it takes to stop. So, adjust your speed and leave enough following distance according to different traffic:
At highway speeds, a two-second gap may not be sufficient. Increase it to three or four seconds.
In stop-and-go traffic, keep a close eye on brake lights and maintain enough space to maneuver safely.
While motorcycles are faster and more agile, these road users are slower and unpredictable. So, here are some tips you should follow:
Reduce your speed and maintain extra space when following cyclists.
Be cautious in areas with heavy pedestrian traffic, especially near crosswalks.
5. Emergency Vehicles
Give emergency vehicles ample space and always follow traffic laws. If an ambulance or fire truck is approaching with sirens, pull over safely to let them pass.
Tips for Maintaining a Safe Following Distance
Stay Focused: Avoid distractions like adjusting your GPS or checking your phone. Focus on the vehicle ahead and the road conditions.
Anticipate Hazards: Watch for brake lights, turn signals, and sudden lane changes.
Use Engine Braking: Gradually reduce speed by rolling off the throttle before using your brakes. This helps maintain stability and alerts vehicles behind you.
Avoid Dangerous Riding Habits: Wrong riding habits are irresponsible to yourself. And it may also bring potential dangers to other road users.
Practice Situational Awareness: Scan the road ahead for a larger area. Do not just pay attention to the vehicle immediately in front of you.
Keep Your Bike Well-Maintained: Ensure your brakes, tires, and suspension are in good condition. They will help you handle sudden stops easier and quicker.
Learn to Countersteer: This technique is essential for making quick directional changes when hazards appear.
Be careful to avoid mistakes while following other vehicles
1. Tailgating
Following too closely to other vehicles is not a wise choice and can be dangerous. It limits your reaction time and increases the likelihood of a collision.
Always err on the side of caution and maintain a safe gap.
2. Relying on Vehicle Brake Lights
Don’t assume the vehicle ahead will always signal its intentions. You can find that many vehicles do not signal when they turn or stop on the road.
So, you can look for additional cues, like the driver’s head movements or the position of the car.
3. Failing to Adjust for Speed
A two-second gap between your motorcycle and other vehicles at 30 mph is not the same as at 70 mph. They will need different brake distance and responding time.
Therefore, always adjust your following distance as speed increases.
4. Overconfidence in Braking Skills
Even experienced riders need extra space to stop in emergencies. Do not ask the brakes to help you handle all the issues. Never underestimate the importance of maintaining a safe distance.
What to Do If The Vehicle Ahead Suddenly Stops?
If the vehicle ahead brakes unexpectedly, follow these steps:
Apply Brakes Gradually: Avoid slamming the brakes, as this can cause your wheels to lock up.
Use Both Brakes: Apply pressure evenly to the front and rear brakes for maximum stopping power.
Stay Upright: Avoid sudden swerves that could lead to a loss of balance.
Look for Escape Routes: If stopping isn’t possible, identify safe alternatives. For example, you can move to the shoulder or another lane.
Building Good Habits Through Practice
Safe following distance is a skill that improves with practice. Consider the following exercises:
Brake Testing: Find an empty parking lot and practice emergency braking at different speeds.
Traffic Simulation: Ride in low-traffic areas and consciously practice maintaining a proper gap.
Group Rides: Join group rides to learn from experienced motorcyclists who prioritize safety.
Final Thoughts
Motorcycle following distance is not just about avoiding accidents while on the road. It’s also about riding responsibly and confidently.
We sincerely advise you to adhere to the rules and tips outlined in this guide.
These tips will help you reduce the riding risks and enjoy the thrill of motorcycling with peace of mind.
Remember, every second counts on the road. A small adjustment in your following distance can make a huge difference in your safety and the safety of those around you.
Stay alert, ride smart, and always prioritize safety over speed.
It is a top-maintenance job to change a motorcycle chain that every motorcycle lover ought to master. A solid well-cared-for chain delivers smooth power, boosts performance, and ups your safety game. Chains get beat up from all the riding, weather, and sometimes not enough grease. Hooking up a fresh one before the old chain calls it quits can dodge some nasty wipeouts and big repair bills.
This blog will walk you through the process of replacing a motorcycle chain step by step.
Why You Should Change Your Motorcycle Chain?
Your motorcycle's chain is super important for your bike’s drivetrain. It hooks up the engine's front sprocket to the back one sending the oomph to the back wheel. If your chain's kinda old and tired, it could mess things up like:
Slipping: If the chain's not tight, it might miss some teeth on the sprockets. This means your bike won't speed up and might feel a bit jumpy.
Worn Down Sprockets: Chains that are past their best can wreck the sprockets faster, and that's gonna cost more to fix.
Safety Issues: Imagine your chain breaking while you're zooming along. That can wreck your ride or worse, cause a crash.
Swap out your chain when it's due, and you're gonna get a smoother journey more consistent power, and your bike will just run better overall.
Tools and Materials You’ll Need to Change A Motorcycle Chain
Before you start, gather the necessary tools and materials. Having everything ready will save you time and frustration.
New Chain: Make sure it’s the correct size and type for your motorcycle (refer to the owner’s manual).
Chain Breaker Tool: To remove the old chain.
Rivet Tool or Master Link Kit: For installing the new chain.
Socket Wrench Set: To loosen or tighten bolts.
Torque Wrench: For proper tightening of bolts and nuts.
Rear Stand or Center Stand: To lift the rear wheel off the ground.
Gloves and Eye Protection: For safety during the process.
Chain Lubricant: To lubricate the new chain.
Degreaser: To clean the sprockets.
Rag or Brush: For cleaning the chain and sprockets.
Step-by-Step Guide to Chang a Motorcycle Chain
Follow these detailed steps to change your motorcycle chain efficiently:
Step 1 Inspect the Old Chain and Sprockets
inspect the old chain and sprockets
Before removing anything, closely inspect your motorcycle chain and sprockets to determine their condition. Look for the following signs of wear:
Chain Issues: Check for excessive slack, stiff or frozen links, rust, or visible damage. A chain that sags too much or skips teeth needs replacement.
Sprocket Wear: Inspect the sprockets for sharp, hooked, or uneven teeth. Worn sprockets can cause a new chain to wear out prematurely.
Note: When the chain or sprockets show a lot of wear, you should replace both. Many people make the mistake of putting a new chain on old sprockets. This cuts down on how long the chain lasts.
Step 2 Secure the Motorcycle on a Stand
put the motorcycle on a stand
Stability is essential when working on your motorcycle.
Place the bike on a rear stand or center stand to lift the rear wheel off the ground. This will make it easier to rotate the wheel while working on the chain and sprockets.
Ensure the motorcycle is balanced and secure to prevent accidents while you work.
Test the stability by gently shaking the bike before starting.
Step 3 Remove the Old Chain
Removing the old chain is a crucial step, and it needs to be done correctly. Here’s how:
Locate the Master Link: Many chains include a master link, which is a removable link that allows you to disconnect the chain easily. It usually looks slightly different from the other links.
Detach the Master Link: Use pliers or a master link tool to remove the clip and separate the link. If your chain has a riveted link, you’ll need a chain breaker tool to push out a rivet pin and split the chain.
Remove the Chain: Once the chain is disconnected, carefully pull it off the sprockets. Set it aside for disposal.
Pro Tip: Should you decide to keep the old chain in place before putting on the new one, connect the fresh chain to the existing one. Spin the back wheel so the new chain moves through the sprockets helping it settle into the right spot.
Now that you've taken off the old chain, it's a good time to give the sprockets a proper cleaning and check-up. Dirt, gunk, and leftover lube can pile up making your new chain less effective.
Use a degreaser and a stiff brush to remove debris from the sprockets. Clean both the front and rear sprockets.
Check the sprocket teeth for wear. If you notice any hooked, uneven, or sharp teeth, replace the sprockets immediately.
Wipe the sprockets clean with a rag to remove any remaining residue.
Tips: Putting a new chain on grimy or beat-up sprockets will cut its life short and lead to subpar performance.
Step 5 Install the New Chain
Now it’s time to put the new chain on your motorcycle. Follow these steps carefully:
Unroll the New Chain: Lay the new chain flat and inspect it for twists or kinks. Make sure it matches your bike's specs (length, pitch, and type).
Feed the Chain Onto the Sprockets: Start by placing one end of the chain over the front sprocket. turn the rear wheel to guide the chain onto the rear sprocket. Check that the chain fits in the sprocket grooves.
Use the master link (if your chain has one) or a rivet tool to connect the two ends of the chain. If you're using a rivet link, follow the maker's instructions to press and fasten the rivets
Important: Ensure the master link or rivet is installed securely. A loose link can result in the chain coming apart while riding, leading to dangerous situations.
Proper chain tension is critical for the smooth operation of your motorcycle. A chain that’s too tight can strain the drivetrain and cause premature wear. A loose chain, on the other hand, can slip off the sprockets or damage them.
Refer to your motorcycle’s owner’s manual for the recommended chain slack. Most motorcycles require slack between 20-30mm (about ¾ to 1¼ inches).
Use the axle adjusters on the swingarm to tighten or loosen the chain. Turn the adjuster bolts evenly on both sides to maintain proper wheel alignment.
Check the slack by pressing the chain midway between the front and rear sprockets. Adjust until the slack is within the recommended range.
After adjusting, tighten the axle nut securely with a torque wrench to the manufacturer’s specifications.
Step 7 Lubricate the New Chain
lubricate the motorcycle chain
A new chain needs the right amount of lube to work well and last longer. Pick a top-notch motorcycle chain lube for this job:
Turn the back wheel to see the whole chain.
Spray the lube on the inside of the chain as it moves over the sprockets. The inside is where the chain touches the sprockets and rollers.
Use a clean cloth to wipe off extra lube. Too much lube can make dirt stick, which will make the chain wear out faster.
Lubricating the chain is not only essential during installation but should be part of your regular maintenance routine.
Before taking your motorcycle out for a ride, double-check your work to ensure everything is secure and functioning correctly:
Check Chain Tension: Reconfirm the chain slack to ensure it’s within the recommended range.
Inspect the Master Link or Rivet: Make sure the master link is properly secured or the rivets are pressed correctly.
Rotate the Rear Wheel: Spin the rear wheel by hand to ensure the chain moves smoothly and doesn’t bind or skip.
Test Brake Functionality: While the motorcycle is still on the stand, check the brakes to ensure nothing was disturbed during the process.
After completing these checks, take the motorcycle for a short test ride. Pay attention to how the chain feels and listen for any unusual noises. If everything feels smooth, the installation is complete.
Tips for Prolonging Chain Life
tips to prolong the motorcycle chain life
Changing a chain isn’t something you want to do frequently, so here are some tips to make your new chain last longer:
Clean and Lubricate Regularly: Clean your chain every 500-1,000 miles (or sooner if riding in wet or dirty conditions). Apply chain lubricant after cleaning.
Check Tension Often: Inspect and adjust chain tension every few rides. Proper tension helps prevent unnecessary wear.
Avoid Overloading: Carrying excessive weight or riding aggressively can strain the chain.
Inspect for Damage: Regularly check for stiff links, rust, or wear to catch problems early.
Common Mistakes to Avoid
Skipping Sprocket Replacement: Using old sprockets with a new chain will lead to faster wear.
Incorrect Tension: Riding with a chain that’s too loose or too tight can damage the drivetrain.
Neglecting Lubrication: A dry chain wears out quickly and can cause performance issues.
Rushing the Process: Take your time to ensure every step is done correctly. Mistakes can be costly or dangerous.
Conclusion
Changing a motorcycle chain may seem daunting at first but with the right tools and attention to detail. By following the eight detailed steps above, you can replace your chain safely and effectively. It’s a rewarding task that can save you money and enhance your bike’s performance.
Don't forget to check your chain and sprockets often, clean the drivetrain, and keep everything well-oiled to make your new chain last longer. If you take good care of it, your motorcycle will run and stay safe for many miles to come. Always prioritize safety and take your time during the installation process. Happy riding!
When it comes to motorcycle riding, speed and control are important but so are comfort and safety. It is a top priority to adjust motorcycle suspension to suit your weight if you want to achieve the best balance of comfort and safety.
It doesn't matter if you're all about lazy Sundays on the road living for speed on the racetrack, or just scooting around town every day. When you dial in your suspension, you're looking at smoother steering, tires gripping the road like glue, and an overall buttery glide.
This guide is gonna show you all the steps to adjust your motorcycle suspension with your poundage, so you can ride freely.
Why's it a big deal to tune your suspension to your weight?
Before we leap into the how-to, let's break down why it's wicked important to adjust your motorcycle’s suspension:
Tweaking Handling: If you dial in the suspension right, your motorcycle works better when you're making turns, stopping, or picking up speed.
Smooth Rides: When the suspension is on point, it gobbles up the rough stuff on the road making your ride a lot comfier.
Staying Safe: Get the suspension wrong, and it might mess with your grip, make the motorcycle, and things could get risky.
Tires Lasting Longer: When you've got the suspension set just so, it means your tires wear down nice and even, which will keep your wallet happier.
Motorcycles come ready for someone who's around 150-180 pounds (68-82 kg). If you're lighter or heavier than that sweet spot, tweaking your motorcycle's suspension is key so it can do its thing the right way.
The Guts of Motorcycle Suspension
guts of motorcycle suspension
Okay, before you go tweaking stuff, you gotta get the down-low on the main bits of your motorcycle suspension setup:
The telescopic tubes at the front of the motorcycle.
Absorb shocks from the front wheel and maintain stability.
Shock Absorber (Rear Suspension):
Located at the rear, it supports the bike’s weight and absorbs bumps.
Many modern bikes use a single rear shock, while older models may have dual shocks.
Springs:
Both the front and rear suspensions use springs to absorb impact.
Their stiffness (spring rate) determines how much weight they can support.
Damping:
Controls how quickly the suspension compresses or rebounds after hitting a bump.
Adjustable on most modern motorcycles.
Preload:
Adjusts the initial tension on the suspension spring to account for rider weight.
Critical for setting the proper sag (explained below).
Steps to Adjust Motorcycle Suspension to Your Weight
Follow these detailed steps to fine-tune your suspension for optimal performance.
Step 1: Measure Rider Sag
measure rider sag
Rider sag is the most critical step in suspension adjustment. It refers to how much the suspension compresses under your weight when you sit on the motorcycle.
How to Measure Rider Sag: You should get the Right Tools, such as measuring tape or ruler. A stand to hold the motorcycle upright is necessary. You'd better ask a friend to assist you.
Take Baseline Measurements: With the motorcycle on a stand, measure the distance from a fixed point on the frame to the axle (front and rear). Write this number down as your "static measurement."
Sit on the Bike: Wear your full riding gear (helmet, jacket, etc.) to account for your true riding weight. When you sit in a normal riding position, you can ask a friend to hold the motorcycle upright.
Measure Again: Measure the same distance from the fixed point on the frame to the axle. This is your "loaded measurement."
Calculate Sag: Subtract the loaded measurement from the static measurement. (Ideal rider sag is typical: Front Suspension: 30-35mm. Rear Suspension: 25-30mm.)
Adjusting Preload for Sag: If the sag is too much (more than the ideal range), increase the preload. If the sag is too little (less than the ideal range), decrease the preload.
Note: Most bikes have preload adjusters which can be turned with a spanner or wrench. You can know the exact location by reading your owner’s manual.
Step 2: Adjust Compression Damping
adjust compression damping
When you hit a bump, the speed at which your suspension squishes is managed by compression damping. Crank it too low and your bike might just smack the ground. Jack it up too high and you're in for a rough ride feeling every little bump.
How to Adjust Compression Damping:
Locate the Adjuster: Usually found on the top or bottom of the fork for the front suspension. On the rear shock, it’s typically a knob or screw near the spring.
Adjust Gradually: Turn the adjuster clockwise to increase damping (stiffen) or counterclockwise to decrease it (soften). Make small adjustments (1-2 clicks at a time) and test to ride the motorcycle after each change.
Test for Balance: Ride over bumps and observe how the suspension reacts. Aim for a setting that absorbs bumps effectively without feeling too soft or too harsh.
Step 3: Adjust Rebound Damping
rebound damping
Rebound damping ensures the suspension returns to how it was before getting squished. If you don't set up rebound right, your bike might bounce around a lot (if it's too zippy) or act lazy (dragging its feet).
How to Adjust Rebound Damping:
Locate the Adjuster: For the front fork, it’s often at the bottom. On the rear shock, it’s typically near the compression adjuster.
Fine-tune the Rebound: Turn the adjuster clockwise to slow down the rebound or counterclockwise to speed it up. Make small adjustments and test the motorcycle.
Test the Feel: Push down on the suspension and let go. It should return to its original position smoothly without bouncing excessively or being sluggish.
Step 4: Check and Adjust Spring Rate (If Necessary)
check the spring rate
If you’ve adjusted the preload and damping but still can’t achieve the correct sag or ride quality, your springs may not be suitable for your weight.
Determine the Correct Spring Rate: Consult your motorcycle manual or an online calculator to find the ideal spring rate for your weight and riding style. Heavier riders may need stiffer springs, while lighter riders may need softer ones.
Replace the Springs: Replacing springs requires specialized tools and knowledge. If you’re unsure, take your bike to a professional suspension tuner.
Step 5: Test Ride and Fine-Tune
After you adjust the suspension, a test ride is necessary.
Once you’ve made the initial adjustments, take your bike for a test ride.
Pay attention to the following:
Handling: Is the bike stable during cornering and braking? Does it feel balanced front-to-rear?
Comfort: Does the suspension absorb bumps well? Does it feel too firm or too soft?
Traction: Are the tires maintaining a good grip on the road? Based on your observations, make small adjustments to the preload, compression, and rebound settings until you achieve the desired performance.
Additional Tips for Suspension Adjustment
Adjust for Riding Conditions: If you’re riding with a passenger or carrying luggage, increase the preload and damping to handle the extra weight. For track days, you may want firmer settings for better performance.
Keep a Log: Write down your suspension settings and the changes you make. This helps you track what works and what doesn’t.
Regular Maintenance: Suspension components wear out over time. Check your forks and shocks regularly for leaks or damage, and replace fluid as recommended by the manufacturer.
Seek Professional Help: If you’re unsure about making adjustments yourself, consult a professional suspension tuner. They can customize your setup to match your weight, riding style, and preferences.
Setting up your motorcycle suspension for your weight has a huge impact on your riding experience. You might think it's tough, but breaking it down into steps—checking sag tweaking preload, and adjusting damping—makes it easier to nail. After you put in the effort to dial in your suspension, you'll notice better handling more comfort, and improved safety on all your rides.
Remember, tuning your suspension doesn't work the same way for all riders. Put some effort into experimenting with various adjustments giving them a whirl, and fine-tuning to discover the perfect fit for your style. After nailing the right suspension setup, connecting with your bike and the road adds a bunch more enjoyment to every trip.
Got your top-notch cold-weather gear for adventure motorcycle riding yet?
Riding a motorcycle can excite you in any season. But cold weather brings its own set of hurdles.
When you ride in cold conditions, you need to pay extra attention to your gear, technique, and safety. This does not matter whether you're tackling tough trails cruising scenic roads, or exploring far-off places.
The proper riding gear for winter days is crucial for your cold-weather ride. They can not just keep you warm but also ensure your safety and comfort. Besides, it will help you handle the icy temps, wind chill, and unpredictable weather.
This article talks about the top cold-weather equipment for adventure motorcycle riding. We'll start by looking at the must-haves like clothes and safety gear. After that, we'll give you some handy advice on how to deal with the tough parts of riding in winter.
What Are The Best Cold-Weather Gear for Adventure Motorcycle Riding?
To keep warm on winter rides piling on multiple layers rocks as your first move. The goal is to hold in your body heat with several garments while letting sweat out.
Here's a rundown of the essential pieces for your outfit.
Base Layer (Keeps You Dry)
Your base layer is super important in your cold-weather motorbike kit.
Materials that keep moisture away, like merino wool or man-made fibers (like polyester), stand out when choosing base layers and long johns. They're stellar at keeping your body temp just right.
The base layer's got this cool advantage - it yanks sweat off your skin so you stay dry and don't lose body heat.
You shouldn’t grab cotton for your base layers though. They just suck up moisture and can leave you feeling chilly.
Mid Layer (Insulation)
Your mid-layer is like your personal heater - it traps warmth to keep you cozy.
You could rock a fleece jacket, a down vest, or a synthetic thermal jacket. If you wanna keep it chill, a flannel shirt does the trick as a mid-layer too.
What you want is a mid-layer that’s a pro at holding onto your body heat and tells the cold to back off.
Outer Layer (Windproof & Waterproof)
Now, the outer layer - that's your armor. It’s what you need to stay winning against wind, rain, snow, and all that other gnarly stuff.
Scout for a winter riding jacket that's top-notch in quality and keeps out water and wind—think waterproof and wind-resistant.
Jackets made of Gore-Tex stand out since they let your skin breathe and block rain . Choosing a softshell kind gives you solid guard against weather and the bonus of moving easy.
Also super important, make sure your top layer lets air through. You gotta stay cool to stop from getting too hot or sweaty inside.
Layer-up Smart:
A solid tip is making sure you're snug and toasty just hanging around. That's the sweet spot for when you're on the bike.
Skip piling on too many layers; this could make moving tough and mess with your coziness.
An awesome winter motorcycle jacket tops the list as a must-have when you're gearing up for a chilly ride.
To kick things off, it needs to keep you toasty as you cruise in the cooler temps.
Plus, it's gotta have your back with solid protection from scrapes and smacks.
Essential Things to Scope Out in Top-Notch Frosty Motorcycle Gear:
Insulation: Look for coats that boast built-in cozy fill or zip-in liners. These brilliant add-ons let you tweak your warmth as the climate does its thing.
Waterproofing: You gotta face the fact; winter treks mean squaring off with rain or snow. Scoop up a jacket that laughs in the face of water or snag one with a liner that doesn't mind a downpour.
Ventilation: Jackets kitted out with vents you can mess with are top notch. Crank them open or slam them shut based on how hot or chilly you feel keeping your comfort game on point when the ride stretches out.
Armor: Hunt down gear that sports CE-rated armor covering your shoulders, elbows, and spine. When it's frosty and the road's playing it slick extra padding's your best bud for those just-in-case tumbles.
Stands Out in the Dark: Grab jackets that come with shiny parts so you're easier to spot when it gets dark, like on those short winter days.
Hot picks for chilly rides – moto jackets that'll keep you toasty are:
REV'IT! Offtrack Jacket
Klim Badlands Pro Jacket
Alpinestars Andes V3 Jacket
3. Riding Pants for the Winter
prepare riding pants for the winter
Sure, the jacket's got your back, but that's not gonna cut it when you're cruising in the frosty air. Remember to kit out your legs with some winter riding trousers or pants made for the icy temps.
These bad boys deliver the triple threat – they're warm, they guard you, and they're snug on your legs.
Your bike pants gotta have the tough stuff sewn in – we're talking armor for your hips, knees, and thigh areas, 'cause let's face it, winter roads can be downright brutal.
Keep Your Eyes Peeled for These Key Bits When Picking Out Winter Riding Trousers:
Detachable Thermal Layers: Trousers that let you pull out the warm lining rock for staying comfy in different cold levels.
Keeping Water Out: Make sure your trousers won't let in water. You don't wanna get your legs all soggy and in the snow or when it pours! Stuff like Gore-Tex is what the fancy riding clothes use to keep you dry.
Making Moves and Staying Bendy: Hunt for trousers that give you a little stretch or have knees that bend easy. Trust me, you'll wanna move around without feeling all stiff when you're out there braving the cold.
Trousers That Rock for Freezing Temps:
Klim Latitude Pants
Dainese Carve Master 2 Pants
Rev'it! Sand 4 Pants
4. Chilly Weather Riding Gloves
winter riding gloves
Riding on frosty days makes your hands extra prone to the chill. Thus, splurging on top-notch winter gloves is a must.
Winter riding gloves need to juggle keeping warm easy movement, and safeguarding your hands.
Features to Choose in Gloves:
Thermal Insulation: Scour the market for mitts sporting thermal insulators like Thinsulate or PrimaLoft. They're toasty yet not bulky. You can't go wrong picking ones with a fleece lining for extra heat.
Waterproofing: You want gloves that'll stop your hands from getting soggy and . Aim for those with a Gore-Tex or similar water-resistant layer.
Grip and Control: When you're out there with your bike, getting a solid grip on stuff like the throttle, brake, and clutch matters big time. Go for gloves that offer a solid grip and ample insulation. They should be your main thing to think on when shopping around. Extended Cuffs: Gloves designed like gauntlets boasting lengthy cuffs to overlap your jacket sleeves, serve well too. They're great at blocking the chill's sneaky entrance.
Suggestions for Cold-Weather Gloves:
Held Cold Champ Gloves
Klim Adventure GTX Gloves
Alpinestars Arctic Drystar Gloves
5. Cold-Weather Boots
cold-weather boots
In chilly weather, your feet can get pretty cold so keep them well-protected.
The main purpose of riding boots should be to keep warm, make sure they're waterproof, and offer safety.
Also, if you're going on long distance rides, you'll need your boots to be pretty comfy.
Boots With These Qualities Are Smart Picks:
Warmth in Boots: Pick boots with Thinsulate or something similar inside them. They'll ensure your feet stay warm but still let you move .
Keeping Feet Dry: It's a must to have something like Gore-Tex to make sure water stays out. Go for waterproof boots when you're out in snow, rain, or just plain wet spots.
Guarding Your Toes and Ankles: When your ride takes you off the beaten path, boots with tough toe and ankle guards are a big deal.
Not Slipping Around: Since it gets real slick in the cold, you'll want boots that have a tough sole with good grip.
Top Picks for Boots When It's Freezing:
Sidi Adventure 2 Gore-Tex Boots
Alpinestars Tech 7 Boots
Forma Adventure Boots
Think about grabbing boot covers to keep extra warm and dry in severe chill and dampness.
Helmets built for the frosty weather should provide ways to tweak air flow fits, and a reduction in how much the wind howls.
Elements Worth Checking Out:
Fight Visor Fog: When it’s chilly out, your visor might start to mist up. You should go after helmets with built-in anti-fog tech or grab some anti-fog inserts. Lots of winter headgear comes ready with nifty anti-fog solutions.
Chin Blocker: Hooking up a chin curtain makes sure the nippy breeze doesn’t sneak into your helmet and it'll keep your mug toastier.
Cozy Helmet Padding: Nailing down a helmet that boasts a chunkier padding or one that lets you swap out liners is smart. You'll snag way better snugness against the frost.
Layer Up Visors with Pinlock: Super liked in the world of winter helmets is the Pinlock System. It throws an extra sheet onto your visor to dodge any pesky fog build-up.
If you are planning for a long rides in freezing temperatures, a heated seat should be in your gear list.
Why it is necessary? Because cold can sap your energy and make your riding uncomfortable, add a new level of comfort.
You will feel a consistent warmth for your lower body while sitting on the heated seat. This can be especially beneficial for your endurance riding.
What a Heated Seat Can Satisfy you:
Increase your Comfort: Keeps your core warm, preventing stiffness during long motorcycle rides.
Easy Installation: Many adventure motorcycles can accept heated seat options. If there is no, you can add an aftermarket seat.
Adjustable Heat Settings: Most heated seats allow you to control the heat level based on your preferences and weather conditions.
Recommended Heated Seats:
Corbin Heated Seats
Sargent Heated Seats
OEM Heated Seats (offered by manufacturers like BMW, KTM, and Yamaha)
8. Protectors (Chest, Back, Spine, Knee, and Elbow)
When you are passing through slippery roads or facing a reduced traction in the winter, there are some safety risks. Therefore, some high-quality protectors are essential for your ride.
You can consider investing in some comprehensive protection before you start the cold-weather ride. It not only ensures safety during accidents but also adds warmth and comfort during your ride.
Protectors You Can Prepare:
Chest Protector: It protects your vital organs in the chest part. At the same time, it offers an extra layer of insulation against the cold. It’s essential for reducing impact injuries in case of a crash.
Back Protector: CE-rated back protectors provide impact resistance. It also supports your posture, reducing fatigue on long rides.
Spine Protector: This kind of protector is designed to protect the spine from serious injuries. Many spine protectors are lightweight and integrate seamlessly into adventure jackets.
Knee Guards: These protect your knees from impact and abrasion. Besides, they also provide insulation against the cold. Many of them have ergonomic designs that allow flexibility and comfort for long rides.
Elbow Guards: Elbows are especially vulnerable during falls. High-quality elbow guards offer impact protection while preventing wind chill and enhancing warmth.
Protectors Gear Options:
Integrated Armor: Some adventure jackets have built-in chest, back protectors. Also, there are pants come with elbow, and knee protectors.
Standalone Gear: For added safety, consider standalone CE-rated armor pieces. They can be worn under your riding gear for maximum protection.
9. Windshield
A good windshield is also indispensable for cold-weather riding. It will be especially perfect when facing high wind speeds or freezing temperatures.
Benefits of a Windshield:
Wind Deflection: Reduces the impact of cold air on your upper body. Thus it can help to keep you warmer and less fatigued.
Improved Visibility: Many windshields are designed to prevent fogging. With it, you can see more clearly in adverse conditions.
Reduced Drag: Protects your face and torso from wind chill and improves your riding comfort.
Recommended Windshields:
Puig Adventure Windshield
Givi D7706ST
OEM Windshields (available for most adventure bikes)
10. Gear to Stay Warm on the Road
motorcycle helmet balaclava or neck warmer
Though they might seem minor, accessories for cold weather matter when you gear up for winter rides. Make sure they're on your list of winter bike gear.
Go for a Balaclava or Neck Warmer
A neck warmer or balaclava really does the trick to keep your face and neck toasty. If you go for one that's windproof and lets your skin breathe, and maybe pick a merino wool or one made from man-made stuff, it's a total game-changer.
Take it from me, on those blustery rides, it's gonna be a lifesaver.
You'll find some balaclavas are just right for slipping under your helmet and won't cramp your style or squash your noggin.
Heated Stuff
When it's like super cold, the heated stuff is kinda like magic for your winter motorbike outfit.
Imagine heated gloves, vests, and even those things you put in your shoes—all keeping you cozy when it's icy out.
Plus, these battery-run heated goodies are getting easier to find. Loads of them have this cool feature where you can pick how toasty you wanna be, and they'll keep you warm for ages while you're zipping around.
Stuff for Your Hands or to Block the Wind
Handguards serve multiple purposes shielding your hands not just from rustling wind and flying debris, it lessens the bite of the cold too.
A bunch of adventure seekers often slap some handguards onto their two-wheelers aiming for additional shielding when the weather turns frosty.
11. Helmet Communication System for Winter Riding
Fodsports FX7 helmet communication system for winter riding - Cold-Weather Gear for Adventure Motorcycle Riding
Communication is a critical part of adventure riding, no matter you are riding alone or with a group. This is especially important in cold weather days where conditions can change quickly.
Navigation: You can receive GPS directions from your phone or GPS devices hands-free. You will not have to stop or expose yourself to the cold when losing direction.
Group Communication: Stay in touch with other riders in your group through Bluetooth intercom features. It can also support you make phone calls, activate voice commands on your phone.
Music and Entertainment: Most helmet intercoms support listen to music or FM radio. These functions can make your long winter rides more enjoyable.
Emergency Contact: Quickly make calls in case of an emergency without needing to remove your gloves or helmet.
Recommended Communication Systems:
Fodsports FX7: Features Bluetooth mesh intercom technology. Support 10 riders group communication. Excellent audio quality, and advanced noise control. IP67 waterproof feature.
Fodsports FX4 Pro: 4-6 riders medium groups communication system. Offers long battery life and reliable Bluetooth connectivity, even in harsh conditions.
Fodsports FX-S: Budget-friendly intercom, support 2-riders communication. IP67 waterproof design, and natural voice operation.
Installation Tip:
Most communication systems are compatible with different types of helmet. Ensure the system is securely installed and test it for sound clarity before heading out on your adventure.
Check Tire Pressure: Tire pressure may drop in cold weather, which affects traction. Always check tire pressure before heading out.
Warm Up Your Bike: Make sure to let your bike warm up before you start riding. If the motorcycle has been sitting in freezing temperatures overnight, this is a must-do step.
Stay Hydrated and Energized: Cold weather can cause your body dehydration. So be sure to drink water and eat energy-boosting snacks during your ride.
Be Mindful of Ice: Even when roads look clear, shaded areas may still have ice. This will be even more common especially early in the morning or in the evening. Always ride with caution to avoid slipping.
Take Breaks: Cold weather can be exhausting, so take frequent breaks to warm up your body and hands.
Though it may not be safe, adventure motorcycle riding in cold weather is still needed for some riders. With careful planning, proper gear, and a mindful approach, it can still be safe.
Check if you have layer your clothing, invest in quality gear, and follow safety tips before the ride. These gear and tips will make sure you can enjoy winter riding while staying warm, dry, and protected.
Besides, don’t forget to always test your gear before long rides, especially in extreme conditions.
Also, you should adjust as needed to ensure comfort throughout the journey.
With the right preparation, cold weather won’t stop you from hitting the open road or trail.
A motorbike ride is exciting but it is different to ride a motorcycle with a passenger. It matters to have a friend, family member, or partner on the bike, so it's important to keep them safe and comfortable while you control the motorcycle. To ride a motorcycle with a passenger you must focus, be prepared, and learn more than to ride by yourself.
This definitive guide will teach you how to drive a motorcycle with a passenger from the start to the finish. These tips will ensure a comfortable and safe ride for both you and your passenger.
1. Understand How a Passenger Affects Your Bike
the motorcyclist should understand how having a passenger affect the motorcycle first
It’s important to understand how having a passenger affects your motorcycle before you start planning ahead.
Motorcycles are engineered to support a certain amount of weight, and adding a passenger alters things like:
Weight Distribution: Adding weight shifts the center of gravity and has an impact on stability and handling.
Pedaling and Braking: Your bike will be heavier and will take more time to accelerate and brake.
Suspension and Tires: The added weight will buckle the suspension and possibly cause the tire to under-pressure.
For your and your passengers’ safety, check the condition of the motorcycle before taking a passenger.
Here is the checklist:
Tire Pressure: Since carrying people adds extra weight, increase tire pressure based on the motorcycle manual, please.
Suspension Settings: Some motorcycles have suspension which can be adjusted. If your motorcycle is, adjust it. If not, check your suspension to see if it is in good condition.
Brakes: The brake system will get more stress because of extra weight. Please check it and make it in top condition.
Passenger Seat and Foot Pegs: A comfortable seat doesn't mean losing safety. In fact, you can own all, attach the seat and footpegs in the correct location, and then enjoy your ride.
Note: A thorough inspection is not only about comfort but also about safety.
Clear communication is vital before and during the ride. Sometimes your passenger may become a motorcycle passenger for the first time and is unfamiliar with motorcycle riding. So take the time to explain what they should and shouldn’t do.
Key points of the explanation:
Mounting and Dismounting: Sudden movements can destabilize the motorcycle because of inertia. This can lead to terrible consequences as the passenger might fall out of the motorcycle. Remind the passenger when you get ready to start your motorcycle. And ask them to get off the motorcycle after getting your permission.
Body Position: Keeping the weight centered can help to avoid leaning excessively in any direction. Please guide the passenger to sit as close to you as possible.
keep the weight on the motorcycle
Holding On: Advise them to hold onto your waist, your jacket, or any designated grab handles instead of the bike itself, as it can be unstable.
Feet Position: To avoid tipping over, the feet of the passenger should be kept on the foot pegs at all times unless the motorcycle is stopped and the motorcyclist allows him or her to leave.
Safety equipment is essential for both riders and passengers. Riding gear protects against injuries and also makes the passenger more comfortable during the ride.
Ensure your passenger has the following:
Helmet: Ensure the helmet is the right size and passed DOT certification.
Jacket: A durable, protective motorcycle jacket with padding.
Gloves: Gloves can protect the passenger's hands and improve grip.
Pants and Boots: The passenger should avoid wearing loose clothing that can get caught on the motorcycle. Long, sturdy pants and boots that cover the ankles are better. You can learn the motorcycle boots types and choose the right pair.
the passengers are dangerous without safety gear
5. Practice Before Riding Together
Practice Before Riding Together
Practice is vital for a new rider who has never carried a passenger before. Because riding with a passenger changes the dynamics of the motorcycle, and it will take you time to adjust. A few practice rides in a safe, open area like a parking lot can help you build confidence before hitting the road.
Skills that need to be practiced:
Balancing: Experience the feeling of the extra weight and get used to it so that you can have a good ability to balance.
Starting and Stopping: Practice smooth starts and stops to avoid jerking your passenger or losing balance.
Turning: Different weights can lead to different feelings when cornering. You should learn how the added weight impacts cornering and adjust your lean angle and speed.
6. Mount and Dismount Safely
Mounting and dismounting can be tricky with a passenger.
Here are the steps to follow:
Stabilize the Bike: When the passenger gets on the motorcycle, you should keep the bike upright and hold the front brake.
Passenger First: The passenger should mount the motorcycle from the side, then step up onto the footpeg and swing their leg over.
Stay Balanced: To avoid tipping, the passenger should not move away from the motorcycle seat, and move slowly.
When dismounting the motorcycle, follow the same procedure in reverse.
Tip: Always communicate with your passengers to ensure they feel secure.
7. Start Slowly and Smoothly
The first few minutes of the ride are critical as a smooth start sets the tone for the rest of the ride.
Start slowly and gradually increase speed to prevent jolting your passenger. When you need to brake, apply it smoothly and evenly to avoid lurching forward.
To allow your passenger to adjust to the feeling, you should also take turns slowly and smoothly. In this process, you should not move suddenly until you both find your rhythm.
8. Adjust Your Riding Style
Riding with a passenger requires you to adapt your usual riding habits to ensure better control and safety on the road.
The changes include:
Increase Following Distance: The motorcycle will take longer to stop because of the extra weight. So you should leave more space between you and the vehicle ahead to stop.
Take Corners Carefully: The extra weight can make the motorcycle harder to corner. You should approach corners more slowly and lean gently to get more stable during turns.
take corners carefully to avoid an accident
Be Mindful of Wind Resistance: With two people on the motorcycle, wind resistance increases. As a result, the stability of the motorcycle will be affected, especially at higher speeds.
Plan Your Stops: You should know where and how you stop since uneven surfaces or loose gravel can make balancing with a passenger more challenging.
Riding with a passenger requires heightened awareness to prevent accidents and ensure a smooth ride. You are responsible for the passenger's safety as well as your own.
You should scan the road ahead and be alert for hazards such as potholes, debris, or sudden stops. Avoid riding in blind spots and ensure other drivers can notice you.
To improve passenger comfort, skipping aggressive braking, rapid acceleration, or sharp turns is also necessary.
In case of an emergency, knowing how to react is crucial, when riding with a passenger.
The first you need to do is to practice how to brake quickly without locking the wheels. At the same time, it is also vital to practice swerving to avoid obstacles while maintaining control.
Finally, don't forget to teach your passenger how to stay calm and hold on securely in case of sudden movements.
The passenger should hold on securely in case of sudden movements.
Conclusion
Riding a motorcycle with a passenger is a rewarding experience, but it requires preparation, communication, and skill.
Always remember: safety comes first. On your road to becoming a good two-up rider, practice and patience is essential.
By following the tips in this guide, you and your passenger can all enjoy a safe and comfortable ride.
Riding motorcycles is an exhilarating and liberating experience. But the risks along with it should not be ignored. Many motorcycle accidents are caused by external factors such as road conditions, rider error, and so on. But mechanical issues also play an important role in these crashes.
According to the relevant data on motorcycle accidents, many serious injuries or fatalities are caused by poorly maintained.
To ensure a safe riding experience, every motorcyclist should understand the common mechanical problems of motorcycles. So that we can take action to prevent crashes.
In this article, the most common mechanical issues of motorcycle crashes will be explored. You will know how these mechanical issues affect safety, and some tips to avoid them. Staying informed about these problems is crucial to every motorcyclist, no matter how long you have been riding.
For any motorcycle, the braking system is one of the most essential components.
If the motorcycle's ability to stop safely is compromised because of brake failure. Some terrible accidents may occur. Problems can easily occur if the brake system lacks maintenance.
The most common cause of brake failure is owner neglect.
Brake failure caused by the owner's negligence includes:
Worn Brake Pads: The most common cause of brake pads is prolonged use. At the same time, the brake pads are less effective. We should replace them regularly to make sure they provide adequate stopping power.
Leaking Brake Fluid: This process of transferring force from the lever to the brake mechanism cannot be separated from brake fluid. If brake fluid leaks, the pressure will drop, causing brake problems.
Warped Rotors: Bent or damaged rotors can increase stopping distance and reduce control of the motorcycle, causing uneven braking.
Air in Brake Lines: The hydraulic pressure may be reduced because of the air bubbles in brake lines. As a result, the brakes will be spongy or worse, ineffective.
Check your brake fluid level (top it up if necessary). To prevent contamination, you'd better replace it once a year(or every two years).
It is important to know whether the brake lines are leaks or cracks. Then, decide whether to replace it according to the actual situation.
Please check your motorcycle's rotors to see if they are warped. Then resurface or replace them if needed.
2. Tire Problems
As tires are the direct contact point between the motorcycle and the road, any tire problem can directly impact your ability to maneuver, stop, or accelerate.
Common tire-related problems include:
Underinflated Tires: Low tire pressure not only reduces grip but also increases the risk of tire blowout. At the same time, it will be more difficult to handle the motorcycle.
Overinflated Tires: Sometimes, the tire's contact patch with the road is reduced because of excessive pressure. The motorcycle's traction and stability will also be reduced.
Cracks or Dry Rot: Some sudden failures may caused by old or poorly maintained tires with cracks.
Worn Tread: On wet or slippery roads, worn-out tires fail to provide enough grip.
badly worn motorcycle tires
How to Avoid Tire-Related Crashes
To keep the tire pressure and check it regularly, follow the manufacturer recommendations in your motorcycle’s user manual, please.
Normally, the tread depth should not be lower than 2/32 of an inch (or as recommended by your region). Please check it and replace it if needed.
Don't forget to look for visible signs of damage, like cracks or bulges.
As rubber degrades over time, please replace the tires every 5-6 years, even though they look in good condition.
The transmission of power cannot be separated from chain and sprocket. As long as they have problems, there will be power loss or even a complete mechanical failure.
Overtightened Chain: The chain can not be too tight either because an overly tight chain will put more strain on the drivetrain. And the chains will be more susceptible to wear and failure.
Worn Sprockets: The chain on sprockets can be easier to skip because of the worn or damaged sprockets. And then lead to jerky or unpredictable power delivery.
rusty motorcycle chain
How to Avoid Chain and Sprocket Failures
Chain tension is essential as too loose or too tight can cause motorcycle failure. As a result, inspecting and adjusting the chain tension regularly becomes a necessity.
When the motorcycle is traveling at high speed, a traffic accident may occur, as long as there is a problem with the engine. So no one can deny that the motorcycle's heart is the engine.
Common engine issues include:
Overheating: Sometimes, the motorcycle suddenly loses power, probably because the engine got too hot and seized up.
Oil Leaks: When riding on the road, Oil leaks can cause the motorcycle to slip. And engine damage may caused by insufficient oil as well.
Spark Plug Problems: If the spark plugs become dirty or worn, misfires may happen while the power is reduced and the motorcycle becomes hard to control.
Clogged Air Filters: If the air filter is not clean, the engine performance will be reduced while the risk of stalling increases.
Remember it is also an important part of routine maintenance to clean the air filter or replace it.
Please replace the spark plugs in time if they appear dirty or worn.
5. Faulty Suspension
All of us should pay attention to the importance of the suspension system as motorcycles need to keep smooth and control.
Common suspension issues include:
Worn Shock Absorbers: A motorcycle's reduced ability to absorb bumps could be due to wear and tear or leaks of shock absorbers. When a motorcyclist is riding a motorcycle, he or she may feel the bumps because of this.
Misaligned Suspension: The steering and control functions of the motorcycle can be affected by improperly aligned suspension components. The most obvious feature is that the motorcycle will pull to one side.
Weak Springs: As the spring loses tension, it also reduces the suspension's ability to handle weight and road conditions.
How to Avoid Suspension Problems
Some signs of wear (leaks or sagging) on the suspension system should be checked regularly.
Check if the suspension components are misaligned, if so, ask a professional to adjust it.
If the shock absorbers and springs are worn or damaged, replace them, please.
Electrical systems are used by most modern motorcycles. They are used to operate critical components including the ignition, lights, and indicators. So if there are any electrical failures, some dangers will occur. In low visibility conditions like night, the potential for danger increases significantly.
Common electrical problems include:
Dead Battery: You can't start the motorcycle because of a weak or dead battery.
Faulty Wiring: Some intermittent failures such as light and indicator malfunctions are caused by damaged or corroded wiring.
Blown Fuses: A blown fuse can disable some essential components, such as the headlight or horn.
blow fuse of a motorcycle
How to Avoid Electrical Failures
You'd better replace your battery if it has been used for more than three years (or five years) or signs of weakness occur. Please test the battery regularly to check if it needs to be replaced.
Inspect the wiring and according to the damage to the wiring, such as frayed or corroded wires, decide whether to repair or replace the wiring.
Learning how to change fuses is important. Because you can change them in an emergency by yourself if there are spare fuses in your motorcycle.
7. Fuel System Problems
The fuel system delivers the correct amount of fuel to the engine. Any disruption in this process can lead to performance issues or even a complete engine shutdown.
Common fuel system problems include:
Clogged Fuel Lines: If there is debris or dirt in the fuel lines, the flow of fuel will be impeded. At the same time, the engine of the motorcycle will sputter or stall.
Dirty Carburetor or Fuel Injectors: The fuel delivery and engine performance can be affected by clogs with dirt or residue in the carburetor or fuel injectors.
Fuel Leaks: Leaks in the fuel system are wasteful and dangerous with increased fire risk.
Proper maintenance and regular inspections are necessary if you don't want to encounter a motorcycle accident caused by mechanical failures. We can also decrease the accident risk by staying vigilant and addressing issues before they get worse.
Not only does riding safely mean wearing the right gear or following traffic rules but also need to ensure your motorcycle is in top condition.
Remember, your motorcycle is a machine, and it requires care and attention, as any machine does. Make maintenance a priority, and then you'll have a safer ride and a longer motorcycle life.
As we all know, motorcycle riding is an exciting sport with many unexpected incidents and risks. As a motorcycle rider, it is really terrible to meet brake failure.
I believe every motorcyclist doesn't want to encounter brake failure which is every motorcyclist's nightmare. But you can make a difference by knowing what to do in such a terrible situation.
In this article, the guide will show you the tips to handle brake failure step by step. These tips are designed to keep you safe and help you regain control when the unthinkable happens.
Understanding Brake Failure
If you want to solve one problem you should know what the problem is first. Before further information solutions. let’s understand what brake failure means.
Brake failure occurs when your motorcycle's braking system stops working or doesn’t perform as expected.
The result? See the following photo! An accident may happen, and your body may get hurt and the motorcycle may be damaged.
motorcycle accident caused by brake failure
This can happen due to various reasons
Hydraulic system failure: There are three main reasons cause hydraulic system failure—air in the brake lines, fluid leak, and low brake fluid.
Worn-out brake pads: Worn-out brake pads are too thin to create friction.
Overheating: After prolonged or aggressive use, brakes may be overheated and will lead to "brake fade."
Mechanical failure: There are broken cables, faulty calipers, or damaged brake levers. All of these can cause Mechanical failure.
Note: Brake failure is rare when your motorcycle is well-maintained, but it’s always wise to be.
Tips to Handle Brakes Failure
I know it is terrible to face brake failure on a motorcycle, but staying calm is crucial. Here are some steps you should follow to handle the situation safely:
1. Stay Calm and Avoid Panic
When your brakes fail, staying calm is the first and most important thing you should do. Because it can lead to poor decisions to be panicky. The most common situation is abruptly swerving or losing control of the motorcycle. Don't worry. Let's take a deep breath and focus on taking corrective action.
Remember, panicking can change nothing. Instead, it can only cloud your judgment and make the situation worse. Just focus on controlling the motorcycle and remind yourself that there are ways to slow down without brakes.
Engine braking effectively decreases motorcycle speed without using the brakes. This technique eases off the throttle and downshifts gears to slow down the motorcycle.
The way to do it is to roll off the throttle and shift to a lower gear gradually. Don't downshift too quickly, or it will cause the rear wheel to lock up. And the motorcycle will be unstable.
Tips: To be familiar with the feeling, you should practice engine braking during your normal rides. It’s a skill every rider should master.
3. Pump the Brakes
press and release the brake lever
Sometimes, we can restore some functionality by pumping the brakes.
As the brake failure is caused by some temporary issue such as air in the hydraulic system.
Quickly press and release the brake lever (front brake). We can also brake the pedal (rear brake) multiple times. All the actions can help build pressure in the system.
Note: Pumping the brakes works best for hydraulic brake systems, especially if the issue is minor.
4. Use the Rear Brake if the Front Brake Fails
Although the rear brake can't provide stopping power the same as the front brake, it can still help reduce speed. So we can use the rear brake to slow down the motorcycle's speed when the front brake system fails.
use the rear brake to slow down the motorcycle's speed
In our daily rides, we should learn to balance both brakes so that we can get a feel for their individual stopping power.
Pay attention, when you use the rear brake, please apply it gently to avoid skidding. The rear wheel will lock up because of sudden or aggressive use.
Stalling can make the motorcycle harder to control. Every motorcyclist should pull the clutch lever in just before the motorcycle stops completely.
Especially when the motorcycle is slowing down with engine braking, engaging the clutch is necessary as you come to a complete stop. This action can prevent the engine from stalling.
When the brakes fail, we usually can't stop the motorcycle immediately. Keep calm and scan the road ahead to look for an escape route.
A safe place to slow down or stop can prevent accidents and reduce the impact of a crash. Open spaces, soft surfaces like grass or gravel, or an uphill road. All is OK. In this process, it is important to avoid collisions.
7. Use Natural Friction to Your Advantage
ride on loose surfaces to increase friction
An uneven road surface can slow down the motorcycle more effectively than a smooth one. Steer your motorcycle onto a surface that increases friction, such as gravel, sand, or grass as much as possible.
You should approach the road surface at a controlled speed without sharp turns or aggressive inputs to the handlebars, if possible.
Note: Be prepared to reduce stability when riding on loose surfaces.
8. Use the Kill Switch as a Last Resort
If all else ways fail and you’re still unable to slow down. You can use the kill switch to turn off the engine as a last resort.
Turning off the engine can make the motorcycle harder to control. Be ready to maintain balance. Then, flip the kill switch located on the handlebars.
Note: This action will stop the motorcycle from accelerating further, but it also disables power to the rear wheel. Please only use it if you’re traveling at a low speed or have no other options.
Warning others can help prevent collisions and ensure the drivers around you give you space. When you’re unable to stop the motorcycle quickly, remember to use hand signals, horn, or hazard lights (if available) to alert others.
Here are some signals we should know. Extend the left arm waving or use the motorcycle’s horn to indicate a problem.
Practicing emergency-stopping techniques (engine braking, using the rear brake effectively, and finding escape routes in traffic) can help us react instinctively and stay calm in real-life situations.
It is the best way to prepare for brake failure as well. We'd better practice in a safe, open area at least once a month to keep our skills sharp.
Preventing Brake Failure
As the saying goes, prevention is always better than cure. Not only should we know how to handle brake failure, but also we should know some tips to prevent it.
Here are some tips for maintaining motorcycles' braking system:
Check the brake pads, fluid levels, and hydraulic lines for wear or damage is essential. Don't forget to schedule regular maintenance for your motorcycle, such as brake inspections.
Studies have shown that worn-out brake pads are a common cause of brake failure. As soon as they wear down to the minimum thickness, please replace them.
replace brake pads on time to prevent brake failure
3. Check Brake Fluid Levels
As we all know, low brake fluid can lead to brake pressure loss. As a result, please check and top up the brake fluid regularly and follow the manufacturer’s recommendations to replace it.
4. Avoid Overheating the Brakes
As brake failure may caused by overheating with aggressive riding or prolonged use.
To avoid excessive braking, especially on downhill roads, use engine braking to reduce the load.
5. Ride wisely
If you ride wisely, and maintain your motorcycle properly, the brake's lifespan can be extended. For example, keep a safe speed and following distance, especially in wet or slippery conditions. This can prevent you from a harsh break. Also, pay attention to the max payload capacity of your motorcycle and avoid overweight. Proper maintenance and smooth riding help ensure your brakes perform reliably.
Conclusion
Although brake failure is every rider’s nightmare, we can still do something to make it not so bad.
By staying calm and using the abovementioned techniques, you can safely handle this situation and minimize risks.
Remember, preparation is key. Practice emergency stops, maintain your motorcycle regularly, and always stay alert while riding.
With the right skills and mindset, you can ride confidently—even in the face of unexpected challenges like brake failure.
Because it is an important skill not only to make your riding safe, but also for your riding enjoyment.
Whether you're navigating tight mountain curves or sweeping bends on a track, you will need it.
This guide provides detailed tips and techniques to help you improve your cornering skills and confidence.
Motorcycle Cornering Tips - Step by Step
1. Understand the Basics of Cornering
know the basics of cornering is the first step
Cornering involves balancing various factors: speed, lean angle, throttle control, and body position.
The primary goal is to maintain your stability and control while maneuvering through a curve.
Here are the key fundamentals:
Look where you want to go: Your motorcycle follows your eyes. So, when approaching the corner, remember to focus on the exit of the corner, not on obstacles.
Smooth inputs: Jerky movements in the throttle, brakes, or handlebars can destabilize your bike. You should practice more about smooth transitions, especially for beginner riders.
Maintain balance: A motorcycle stays upright due to gyroscopic forces and your control inputs. Ensure even weight distribution.
2. Prepare Before Entering the Corner
Prepare before entering the corner - Motorcycle Cornering Tips
Preparation starts well before you enter the corner.
Many novice motorcycle riders are not aware of this detail. This causes them to rush into the turn after entering the curve, which can result in a failed turn.
This can cause damage to the rider’s body or the motorcycle, and in serious cases, tragedy may occur.
Follow these steps to set yourself up for success:
Assess the corner: Identify the type of corner—tight, sweeping, or hairpin before you make the next move. Besides, you should also look for any potential hazards, such as gravel or wet patches.
Adjust speed: Ride at a slow speed so that you can safly reach and entry the corner. Use both brakes gently but effectively.
Position yourself: Align your motorcycle in the correct lane position. On right-hand corners, stay closer to the left. For left-handers, position yourself closer to the right.
Choose your line: Visualize the best path through the corner. Aim for a smooth arc that avoids sharp changes in direction.
3. Corner Entry
The entry phase is critical, so be careful when entering the corner. If you get this wrong, the rest of the corner may become challenging, or even fail. Here's how to nail it:
Ease off the brakes: Once you've slowed down, smoothly release the brakes as you lean into the turn. Remember again, release it smoothly! Holding the brakes can upset the bike's balance.
Countersteer: Push the handlebar in the opposite direction of the turn. For a left turn, push the left handlebar; for a right turn, push the right. This action initiates the lean.
Maintain a steady throttle: A neutral or slightly positive throttle keeps the bike stable. Besides, you should prevent it from standing up mid-corner.
4. Mid-Corner Techniques
Pay attention to the body position during mid-cornering
Once you're in the turn, the focus shifts to maintaining balance and control:
Body position: Shift your weight slightly toward the inside of the turn. What's more, remember to keep your upper body relaxed and your head aligned with the horizon.
Lean angle: Your tires will provide a stable grip for you and your motorcycle, just trust it. Modern motorcycle tires are designed to handle significant lean angles safely.
Throttle control: Apply smooth, gradual throttle to maintain momentum. Avoid abrupt changes that can unsettle the bike.
5. Corner Exit
Look ahead after you exit the corner
Exiting the corner correctly sets you up for the next stretch of road. Pay attention to the following details:
Look ahead: Focus on the road beyond the corner when you are about to exit the corner. You need to watch out for upcoming changes, like vehicles, people, obstacles, animals, or the next corner.
Roll on the throttle: When you have exited the corner, you can gradually increase the throttle. Then the motorbike will straighten again. This helps transfer weight to the rear wheel, enhancing traction.
Adjust the handlebar's direction: Pull the handlebars back appropriately according to the conditions of the curve. Make sure the vehicle's forward direction is always parallel to the road direction.
Stand the bike up: As you exit, bring the motorcycle back to an upright position.
The aboves are the basic cornering tips you must master, especially for beginner riders.
Advanced Motorcycle Cornering Techniques
A man is trying advanced motorcycle cornering techniques
Once you have mastered the basic turning skills, you can try some advanced turning techniques. They will take your cornering skills to the next level.
Mastering cornering is essential for safe and confident riding. Here are some advanced techniques to improve your cornering skills:
Trail Braking: This involves gradually releasing the front brake as you lean into a corner. Trail braking helps maintain stability, adjusts your speed smoothly. Besides, it shifts weight onto the front tire for better grip. You can start by practicing on gentle curves if you are just start learning advanced cornering skills. Then gradually increase the lean angle as your confidence grows.
Body Positioning: Shift your body weight to optimize traction and balance. Move your upper body inside the turn, aligning your head and shoulders with the bike's lean. Besides, keep your outside knee pressed against the tank for stability. And, grip the handlebars lightly to avoid upsetting the bike's balance.
Hanging off: For sharper corners or high-speed turns, shift more of your body off the bike toward the inside. This can reduce the lean angle needed for the same speed.
Throttle Control: Keep a smooth throttle application through a corner. This ensures steady acceleration and weight transfer to the rear tire, enhancing grip. More importantly, you should avoid abrupt inputs, otherwise can unsettle the bike mid-turn.
Counter-Steering: Push gently on the inside handlebar (e.g., right bar for a right turn) to initiate lean. Counter-steering is the most effective way to change direction quickly and precisely at higher speeds.
Look Through the Corner: Your bike follows your eyes. Focus on the exit point of the curve, not the road directly in front of you. This helps maintain a smooth line and prepares you for upcoming changes.
Late Apexing: Aim for a "late apex," entering the corner slightly wide and turning in later. This allows a straighter exit line, better visibility, and improved cornering speed.
Practice these techniques on familiar roads or controlled environments, gradually building proficiency. Confidence and precision come with time and repetition. Stay relaxed, and always prioritize safety.
Common Mistakes to Avoid
Even experienced riders make mistakes, so pay attention while cornering. Avoid these common pitfalls:
Target fixation: Staring at obstacles can cause you to ride straight toward them. Always look where you want to go.
Entering too fast: Overestimating your speed can lead to wide exits or loss of control. Always err on the side of caution.
Abrupt inputs: Sudden throttle, braking, or steering changes can destabilize the bike, especially mid-corner.
Overweight: Knowing how much your motorcycle can carry and do not exceed its weight limit. Being overweight can make it harder to control your motorcycle while cornering.
Practice Makes Perfect
Improvement comes with consistent practice. These are some tips you can consider when practicing:
Start slow: Focus on technique rather than speed when you are a rocky. With time going on and you practice more, you can build your confidence gradually.
Use training areas: Practice in controlled environments if you have not mastered the cornering skills. For example, the empty parking lots or track days.
Learn from others: Join some riding groups and learn from experienced riders is also considerable. Also, you can take advanced riding courses to gain new perspectives.
Analyze your rides: Reflect on your cornering performance after each try. Then you can identify some areas for improvement.
Find a Teacher: If necessary, find a rider who is experienced to teach you. You can take some advanced riding courses or find a friend to help you gain new perspectives. You can communicate with him through motorcycle intercoms, and give you live advice.
Safety First
Cornering can be dangerous if you have not done it correctly. So, always prioritize safety while corning.
Wear proper gear: Invest in quality helmets, gloves, jackets, pants, and boots. Protective gear can save your life in case of a fall.
Inspect your bike: Regularly check tire pressure, suspension, and brakes.
Abandon Your Dangerous Riding Habits: Never do dangerous riding in the corners. It is not only harmful to yourself but also irresponsible to other road participants.
Ride within your limits: Avoid pushing yourself too far, especially in unfamiliar areas.
Be weather-aware: Rain, snow, or gravel significantly reduces grip. Adjust your riding accordingly.
What is the speed for safe cornering?
The safe speed for cornering depends on several factors. These include the sharpness of the turn, road conditions, and your bike's handling capabilities.
A general rule is, when approaching the corner, control the motorcycle at a speed that you think you can control. Besides, slow down before the turn, then maintain or slightly increase speed as you lean through it.
On dry roads with good grip, most riders corner safely between 30-50 km/h (20-30 mph) on moderate bends. Always adjust for wet, sandy, or uneven surfaces.
Ride within your limits and always prioritize stability over speed.
Conclusion
Mastering motorcycle cornering tips is a journey, not a destination. You need to understand the principles, practice consistently, and stay safe.
Whether you're a beginner or an experienced rider, don't ignore these tips. Because they will help you tackle corners with confidence and finesse. Also, they can enhance your skills and bring you more riding thrills.
Remember, the road is unpredictable. So, stay alert, ride responsibly, and savor the ride.
Buying a used motorcycle is often more affordable than a new one. It also allows you to find some models which might no longer be in production. So it is really a wise decision to buy a used one.
However, there are some things you should pay attention to, if you do not want to cost more to repair the motorcycle than it’s worth. In this process, careful consideration is required. With this detailed checklist, everyone can choose a used motorcycle they want.
1. Define Your Purpose and Budget
The first thing you should do is to define your purpose. You should make the use of the motorcycle clear. It may include daily commutes, long road trips, off-road adventures, and occasional weekend rides. It depends on which type of motorcycle you need.
Next, you should set a realistic budget. You should not only account for the purchase price but also for costs like insurance, registration fees, maintenance, and gear.
To narrow down your options and prevent overspending, you should decide how much you’re willing to spend and stick to it
2. Research the Make and Model
research the motorcycle mode before choosing a used motorcycle
All motorcycles are created differently. Some motorcycles are known for their reliability, while others may have specific issues. Research the make and model you’re interested in is necessary. You can look for reviews, forums, and owner experiences to identify common problems or quirks.
Then you can check the availability of spare parts for older or less common models. If parts are hard to find or expensive, you may face issues down the line. Also, consider the bike’s resale value; some brands and models hold their value better than others.
Ask the seller about the history before you examine the motorcycle.
The most important questions to ask are:
Tracking of Ownership: How many owners does the bike have? A single-owner bike has a higher maintenance cost.
Accident History: Has the motorcycle ever had an accident? If yes, ask for details.
Service History: Maintenance is an integral part of keeping a motorcycle functioning at peak performance. Seek receipts or a service history logbook.
Reason to Sell: This can help you get a sense of what the bike is doing. When the vendor is hesitant or vague, tread carefully.
4. Inspect the Exterior Condition
You should start by inspecting the motorcycle’s overall appearance. Look for signs of wear and tear as it may indicate how well it has been cared for.
inspect the motorcycle exterior condition
Here’s what to check:
Paint and Bodywork: Look for scratches, dents, or mismatched paint. All of these may indicate repairs after an accident.
Rust: Inspect the frame, exhaust, and other metal parts. You should check to escape rust and corrosion.
Leaking Fluids: It is also important to check under the motorcycle for oil, coolant, or brake fluid leaks.
Welds and Modifications: Look for any irregular welds or poorly done modifications to escape damage or improper maintenance.
5. Check the Tires and Wheels
You can learn a lot through the condition of the tires and wheels.
check the motorcycle tire
Carefully inspect:
Tire Wear: Make sure the even wear to escape the issues with alignment or suspension. However, you should also check the tread depth to ensure the tires aren’t too worn out.
Tire Age: Even if the tread looks fine, old tires can become hard and brittle. Check the DOT code on the sidewall to find the manufacturing date; tires older than five years may need replacing.
Wheels: Look for cracks, dents, or damage to the rims. Spin the wheels to ensure they rotate smoothly and don’t wobble.
A motorcycle’s suspension is important to its handling, comfort, and safety.
Here’s what to look for:
Front Forks: Check if there are oil leaks around the fork seals. You can push down on the handlebars to test the suspension. If it compresses smoothly and returns to its original position without bouncing, it means the suspension has no problem
Rear Shock: Inspect the rear suspension for leaks or damage. Sit on the bike to see if it supports your weight properly.
check the motorcycle’s suspension carefully for safe
Note: Make sure the suspension components are properly aligned and not bent or out of place.
9. Inspect the Engine
The engine is the heart of the motorcycle. To save you from costly repairs, have a thorough inspection.
Here’s what to do:
Oil Condition: Check the oil level and color. Clean oil is a good sign, and it is better than dark or dirty oil.
Leaks: Check if there are oil leaks around the engine.
Exhaust Smoke: You'd better try to start the bike to observe the exhaust. Excessive white, blue, or black smoke can indicate engine problems.
Sound: You should listen if there are unusual noises like knocking, tapping, whining, and so on. These noises could signal internal issues.
The electrical system controls key functions of the motorcycle.
test the electrical system before buying a used motorcycle
Test the following:
Battery: Ensure the battery is in good condition and holds a charge. Look for corrosion on the terminals.
Lights: Check the headlight, taillight, brake light, and turn signals for proper operation.
Horn: Test the horn to ensure it works.
Starter: Start the bike multiple times to ensure the starter motor works reliably.
11. Have a Test Ride
A test ride is essential to evaluate the motorcycle’s performance.
During the ride, you also have something to pay attention to:
Engine Performance: You need to ensure that the engine starts easily and runs smoothly. Sufficient power in all gears is also necessary.
Clutch and Gears: You should make sure the clutch is for smooth engagement and the gears are for seamless shifting.
Braking: Ensuring the brakes respond quickly and effectively is important.
Handling: Check for unusual vibrations, wobbling, and difficulty in steering is necessary.
Comfort: Make sure the motorcycle feels comfortable and suits your riding style.
12. Verify the Documents
Before finalizing the purchase, please ensure all paperwork is in order.
Check the key documents:
Title: Never buy motorcycles with salvage titles. To avoid extra maintenance, you'd better verify that the seller has a clean title in their name
Registration: Make sure that the motorcycle is currently registered. And there are no fees or fines.
VIN: Cross-check the vehicle identification number (VIN) on the title and the bike itself to ensure they match.
Bill of Sale: Get a detailed bill of sale. It includes the seller’s and buyer’s information, the date, and the purchase price.
13. Negotiate the Price
Remember, once you’ve completed your inspection, any issues you’ve found are your leverage to negotiate for a more fair price. The attitude should be polite but firm. If you think the price is too high and the seller is unwilling to budge. Don’t hesitate to walk away. There are plenty of other motorcycles available.
negotiate the price is also important for you to choose a used motorcycle
14. Plan for Immediate Maintenance
After purchasing the motorcycle, plan for some immediate maintenance tasks.
These might include:
Replacing the oil and filters.
Checking and adjusting the chain.
Replacing brake pads or worn tires.
Inspecting the battery. If necessary, please replace it
Conclusion
It can be a rewarding experience to buy a used motorcycle. To avoid some unnecessary costs, you should be patient and pay attention to detail.
I believe this detailed checklist can help you avoid potential pitfalls and find a used motorcycle that is reliable, safe, and enjoyable to ride.
Always trust your instincts—if something feels off about the bike or the seller, it’s best to look elsewhere.
Riding a motorcycle at slow speeds is one of the most essential skills every rider must master.
Many riders like to focus on high-speed maneuvers and thrilling rides. But navigating a motorcycle safely and confidently at low speeds is equally critical.
Slow-speed riding comes into play in various situations during your daily rides. When there are traffic jams, parking lots, tight turns, or riding in congested areas, you will have to slow down.
Controlling the motorcycle at a slow speed may be harder for beginner riders. But don't worry, you will find ways here!
In this article, we will explore the key techniques, common challenges, and safety tips for mastering slow-speed motorcycle riding.
Why Is Slow-Speed Riding Important?
Many motorcycle accidents occur at low speeds, and it is especially more in urban areas. Riders will have to navigate through traffic, make U-turns, or negotiate tight corners.
Therefore, being proficient at low-speed riding is essential. It not only ensures safety but also enhances your overall confidence and control on the bike.
Slow-speed riding is also critical during motorcycle license tests and rider training programs.
Mastering this skill while training can help riders feel more secure, and avoid embarrassing falls. Besides, it can improve their ability to handle challenging situations on the road in the future.
Key Techniques for Riding A Motorcycle at Slow Speed
1. Maintain Proper Balance
learn to keep your motorcycle balance
Balance is crucial when riding a motorcycle at slow speeds. Slow riding requires precise weight distribution and body positioning. It is unlike at riding at higher speeds where momentum keeps the motorcycle upright.
Here’s how to maintain balance:
Use your legs: Keep your legs slightly bent and close to the bike, ready to support it if needed.
Relax your upper body: Avoid gripping the handlebars too tightly. A relaxed grip improves your ability to make subtle adjustments.
Look ahead: Keep your eyes focused on where you want to go rather than looking down at the ground.
master the motorcycle clutch and throttle control while riding a motorcycle slowly
Controlling the clutch and throttle is key to maintaining a steady speed. This also helps you better control and balance the motorcycle while riding at a low speed. Follow these tips:
Use the friction zone: The friction zone is the point where the clutch begins to engage. Feathering the clutch—partially engaging and disengaging it—gives you better control of your speed.
Smooth throttle input: Apply gentle throttle input to avoid sudden jerks or lurches. A steady hand is essential.
Practice coordination: Practice combining clutch and throttle movements in an open area. With more practice, you can develop muscle memory and control it more easily.
3. Use the Rear Brake First
use the motorcycle rear brake as the first option when riding in slow speed
The rear brake is your best friend during slow-speed maneuvers. It can provide a smoother and more controlled stopping power.
However, don’t apply too much force otherwise your rear tire will lock up and could cause you to lose control.
You can use two fingers to squeeze the front brake at the same time and if you want the motorcycle slowly stop.
Why not front brake first? Because the front brake can cause the bike to tip forward at low speeds.
Lightly dragging the rear brake while keeping the throttle steady when riding slowly. This is an easier way that can help you stabilize the motorcycle.
4. Practice Counterbalancing
practice counterbalancing on motorcycle so that you can control the motorcycle better
Counterbalancing is a technique that every motorcycle rider need to master.
Your body will leans in the opposite direction of the bike during tight turns or maneuvers. This helps keep the motorcycle balanced.
So, you must make sure your riding position is right on the motorcycle. Otherwise you may fall from the motorcycle when navigating through traffic, making U-turns, or negotiating tight corners
Here are the tips:
When making a slow turn to the right, lean your upper body slightly to the left while the bike leans to the right.
Keep your head and eyes up to maintain focus on your intended path.
5. Focus on Smooth Steering
remember to focus on smooth steering
Quick or jerky steering movements can destabilize the motorcycle. If you are riding at a slow speed, these quick steering movements will make you harder to control the motorcycle and even may cause accident.
Remember, do not do these while slow ride:
Use gentle handlebar inputs.
Keep your arms relaxed.
Avoid overcorrecting your movements.
6. Practice Slow-Speed Exercises
Do some figure-eight practises help improve your skills when riding a motorcycle at slow speed
Practicing specific exercises can greatly improve your slow-speed riding skills. Here are some recommended drills:
Figure-Eights: Ride in a figure-eight pattern to practice tight turns and counterbalancing.
Straight-Line Riding: Ride as slowly as possible in a straight line to develop balance and clutch control.
Weaving Cones: Set up a few cones or markers and practice weaving through them at low speeds.
Common Challenges in Slow-Speed Riding
1. Wobbling
Standard Riding Position 1
Wobbling is a common issue at low speeds riding. This often results from a lack of balance or overcorrection. This is also a problem that many beginner riders will face and try to avoid.
Many riders hesitate to lean their bikes during slow turns, fearing a fall.
Relax and don't be afraid of it! This is what may happen when you learn to ride a motorcycle slowly!
You can overcome this fear by practicing slow ride in a safe, open area at first. With your skills gradually increased, your confidence will also grows. At that point, you can try lean angle and slow ride together.
What's the keys to low speed turns?
low speed turns
Mastering low-speed turns requires focus on balance, speed control, and body positioning.
Look where you want to go—keep your eyes on the exit of the turn, not the ground. Counterbalance by leaning your bike into the turn while keeping your body upright the motorcycle. Steer the handlebars directly in the direction of the turn, as countersteering doesn’t work at low speeds.
Control your speed before entering the turn by gently braking. On motorcycles, use the rear brake lightly and keep the throttle steady or slightly accelerate through the turn. Use the clutch’s friction zone for precise control. Avoid braking mid-turn, as it can destabilize you.
Practice U-turns, figure-eights, and weaving through cones in an open area. Relax your grip, maintain balance, and trust your bike. Look up, move smoothly, and repeat until the technique feels natural.
Safety Tips for Slow-Speed Riding
Wear Proper Motorcycle Gear: Always wear a helmet, gloves, and protective clothing. Even at low speeds, falls can cause serious injuries.
Check Your Bike’s Condition: Ensure your tires, chains, brakes, and suspension are in good condition. Proper maintenance enhances control and safety.
Avoid Overloading: Excess weight can make slow-speed maneuvers more challenging. If carrying luggage, ensure it is evenly distributed. (Don't know how much weight can your motorcycle carry? read here)
Be Mindful of Road Conditions: Wet or uneven surfaces can make slow-speed riding tricky. Avoid sudden movements and use extra caution in such conditions.
Stay Your Motorcycle More Visible: Use your lights and wear reflective gear to ensure other road users can see you, especially in traffic.
Benefits of Mastering Slow-Speed Riding
Improved Confidence: Knowing you can handle your bike at low speeds boosts your overall riding confidence.
Better Control: Slow-speed skills make it easier to navigate through traffic, parking lots, and tight spaces.
Enhanced Safety: Reducing the risk of low-speed accidents contributes to safer riding experiences.
Versatility: Being adept at slow riding prepares you for various riding scenarios, from city streets to off-road trails.
Conclusion
Mastering the art of slow-speed riding is a valuable skill for every motorcyclist.
While it may seem challenging at first, but please do not give up. Through consistent practice and attention to technique, you will make a significant difference.
Remember to focus on maintaining balance, mastering clutch and throttle control while riding slow. Besides, use the rear brake as first choice, and practice counterbalancing are important.
By incorporating these strategies into your riding routine, you’ll become a more confident and capable rider.
After you mastered these skills, you will be ready to tackle any low-speed situation with ease.
Remember, the key to success is patience, practice, and staying safe on the road.
Engine oil is like the lifeblood of your motorcycle’s engine. It lubricates moving parts, reduces friction, keeps the engine cool, and helps prevent wear and tear. As a motorcyclist, one of the most important decisions is to choose the right engine oil for your motorcycle. But with so many options available in the market, selecting the right oil can be overwhelming, especially if you are not familiar with the technicalities.
In this comprehensive guide, we’ll break down everything you need to know about choosing the right engine oil for your motorcycle. We’ll cover the key factors, explain the types of oils available, and provide practical tips to help you make an informed choice.
1. Understand Your Motorcycle’s Requirements
The first step to choosing the right engine oil is understanding your motorcycle's specific needs.
You can find these details in your motorcycle’s user manual.
Key Things to Check in the Manual
Your motorcycle’s owner manual is the most reliable source for selecting the right engine oil. It provides specific recommendations tailored to your bike. Here’s what you need to look for and why it matters:
Viscosity Grade: The manual will specify a recommended viscosity grade, such as 10W-40 or 20W-50. This indicates how the oil behaves under different temperatures.
API or JASO Ratings: Look for the recommended standards for engine oil. These ratings ensure the oil meets specific performance and quality requirements.
Oil Type: The manual may specify whether to use mineral, synthetic, or semi-synthetic oil.
All the main motorcycle brands in the world have their own website, support team. Some even have offline distributors all over the world. If you are not sure what kind of engine oil your motorcycle needs, go to their online web, or the offline store to ask about this.
Note: Ignoring the manufacturer’s recommendation can lead to engine damage and reduced performance. Always prioritize the guidelines in the manual.
2. Know the Different Types of Motorcycle Engine Oils
we can choose the right engine oil after knowing different types of it
Motorcycle engine oils are divided into three main types: mineral, synthetic, and semi-synthetic. Each type serves different purposes and is suitable for specific motorcycles and riding conditions.
Let’s break them down simply and accurately.
2.1 Mineral Oil
Mineral oil is made from refined crude oil. It has fewer chemical additives and is considered the most basic type of engine oil.
Features and Benefits:
Affordable and widely available.
Provides sufficient lubrication for simple or older engines.
Ideal for low-stress riding and casual use.
Best Application:
For older motorcycles with simpler engine designs.
If you don’t put your engine under high stress (e.g., no high speeds or heavy loads).
Limitations:
Breaks down faster than other types, requiring more frequent oil changes.
Performs poorly in extreme temperatures or under heavy engine stress.
2.2 Synthetic Oil
Synthetic oil is engineered in a laboratory. It uses chemically refined base oil and advanced additives to provide superior performance and protection.
Features and Benefits:
Excellent lubrication, even under high heat or extreme cold.
Reduces friction and wear on engine parts, increasing engine life.
Stays stable for longer periods, meaning fewer oil changes.
Ideal for high-performance motorcycles and extreme riding conditions.
Best Application:
For modern, high-performance motorcycles, such as sports bikes or adventure bikes.
If you ride in extreme conditions, like hot summers, cold winters, or long-distance touring.
For riders who push their bikes to high speeds or RPMs.
Limitations:
More expensive than mineral oil.
Unnecessary for low-power or older motorcycles that don’t require high-performance oil.
2.3 Semi-Synthetic Oil
Semi-synthetic oil is a blend of mineral oil and synthetic oil. It combines the affordability of mineral oil with some of the advanced properties of synthetic oil.
Features and Benefits:
Offers better performance and durability than mineral oil.
More affordable than full synthetic oil.
Provides good protection for most commuter and mid-performance motorcycles.
Best Application:
For mid-range motorcycles used for daily commuting or moderate riding.
If you want better performance than mineral oil without the high cost of synthetic oil.
Limitations: Does not match the durability or extreme performance of full synthetic oil.
Mortorcycle
Oil Types
Best for
Advantages
Disadvantages
Mineral Oil
Older or low-power motorcycles
✅Affordable, adequate for casual use
❌Breaks down quickly, poor in extreme conditions
Synthetic Oil
High-performance motorcycles
✅Superior protection, lasts longer
❌Expensive, overkill for basic bikes
Semi-Synthetic
Mid-range or commuter motorcycles
✅Balanced performance and cost
❌Not as durable as full synthetic oil
Choosing the right engine oil matters because it directly affects engine performance, durability, and maintenance costs.
Always check your motorcycle’s owner manual for the recommended oil type, as using the wrong oil can damage your engine or reduce efficiency.
If you’re unsure, semi-synthetic oil is often a safe middle-ground choice for most motorcycles.
3. Choose the Right Viscosity Grade to Choose the Right Engine Oil
Viscosity refers to the oil’s thickness and its ability to flow at different temperatures.
The viscosity grade is usually expressed as a combination of two numbers, such as 10W-40.
The first number (e.g., 10W) refers to the oil’s viscosity in cold temperatures (W stands for winter).
The second number (e.g., 40) refers to the oil’s viscosity at high operating temperatures.
more about the viscosity grade
Why is viscosity important?
The right viscosity ensures that the oil flows properly through the engine, providing adequate lubrication without being too thick or too thin.
Using oil with the wrong viscosity can lead to poor engine performance, overheating, or increased wear.
How to choose the right viscosity
Follow the viscosity grade recommended in your motorcycle’s manual.
Consider the climate and riding conditions. For example: In colder climates, use oil with a lower “W” rating (e.g., 5W). In hotter climates, use oil with a higher second number (e.g., 50).
4. Understand API and JASO Ratings to Choose the Right Engine Oil
API ratings are expressed as “S” followed by another letter, such as SL or SN.
The further down the alphabet, the better the performance of the oil. For example, SN-rated oil offers better protection and efficiency than SL-rated oil.
JASO Ratings
JASO ratings are specifically designed for motorcycles and are more relevant than API ratings. The two main JASO ratings are:
JASO MA: Suitable for motorcycles with wet clutches. Provides excellent grip and prevents slippage.
JASO MB: Designed for motorcycles without wet clutches. Offers lower friction and better fuel economy.
Tip: Most motorcycles require JASO MA-rated oil. Always check your manual to confirm the correct rating.
5. Consider Your Riding Style and Conditions
Your riding style, habits, and the conditions you typically ride in can influence the type of engine oil you need.
For Daily Commuters
If you use your motorcycle for daily commuting or casual rides, you don’t need high-performance oil. A good-quality mineral or semi-synthetic oil with the recommended viscosity grade will suffice.
For High-Performance Riders
If you ride a high-performance motorcycle or frequently push your bike to its limits, synthetic oil is essential. It offers better protection at high RPMs and temperatures.
For Off-Road Riders
Off-road riders face more dust, dirt, and heat. Choose synthetic oil with excellent detergents and heat resistance to keep the engine clean and well-lubricated.
For Seasonal Riders
If you ride only during specific seasons, consider the climate. Use oil with a suitable viscosity grade for the temperatures you’ll encounter.
6. Look for Additives in Engine Oil
Engine oils often contain additives to enhance their performance. These additives improve lubrication, reduce wear, and keep the engine clean.
Here are some common additives to look for
Detergents: Keep the engine clean by preventing sludge and deposits.
Anti-Wear Agents: Protect engine components from wear and tear.
Viscosity Improvers: Ensure consistent performance across temperature ranges.
Anti-Corrosion Agents: Prevent rust and corrosion in the engine.
Tip: High-quality oils often have a balanced blend of additives. Check the label to see which additives are included.
7. Evaluate Oil Change Intervals to Choose the Right Engine Oil
change the oil regularly to make the motorcycle run fast
Different types of oil have different lifespans. Mineral oil needs to be replaced more frequently, while synthetic oil lasts longer. Changing the oil at the right intervals is crucial for maintaining engine performance.
General guidelines:
Mineral oil: Change every 2,000–3,000 miles (3,000–5,000 km).
Semi-synthetic oil: Change every 5,000–6,000 miles (8,000–10,000 km).
Synthetic oil: Change every 7,000–10,000 miles (11,000–16,000 km).
Tip: Always refer to your motorcycle’s manual for the recommended oil change intervals.
8. Buy from Reputable Brands
While cheaper oils may seem appealing, they often lack the necessary additives and quality control. Investing in high-quality oil from a trusted brand ensures better engine performance and longevity. We should stick to reputable brands to avoid long-term damage to your engine.
Choosing the right motorcycle engine oil is only half the battle.
Regular oil checks and maintenance are essential to keep your motorcycle running smoothly.
Here’s what you should do
Check the oil level regularly using the dipstick or inspection window.
Look for signs of contamination, such as a dark or dirty appearance.
Replace the oil filter when changing the oil to ensure proper filtration.
Conclusion
Choosing the right engine oil for motorcycles isn’t as complicated as it seems once you understand the basics.
By following your motorcycle manufacturer’s recommendations, selecting the right type and viscosity, and considering your riding habits, you can ensure optimal performance and longevity for your engine.
Don’t forget to invest in high-quality oil, maintain regular oil changes, and monitor your oil’s condition.
Remember, engine oil is a small investment that plays a big role in protecting your motorcycle. Taking the time to choose the right oil will save you money, improve your riding experience, and keep your bike running like new for years to come.
Cold weather can be tough on many machines, and motorcycles are no exception. If you’re wondering, “Will cold weather damage my motorcycle?” the answer depends on how you prepare and care for it.
This guide will help you understand how cold weather affects your bike in the winter. And, we will also provide detailed tips to protect and maintain it during winter.
How Cold Weather Affects Your Motorcycle?
1. Engine and Fluids
you should protect the motorcycle engine during cold weather
The motorcycle engine and its fluids are particularly vulnerable to cold temperatures. When temperatures drop, oil thickens, making it harder to circulate through the engine.
This can lead to poor lubrication, increased wear and tear, and difficulty starting the engine.
Similarly, coolant and brake fluids can also lose efficiency in extreme cold.
Cold weather is notorious for draining motorcycle batteries. The reason is that motorcycle battery has a harder time holding a charge in low temperatures.
If your bike is left outside or unused for extended periods, the battery might die completely. In the end, it will leave you stranded.
3. Tires
cold weather may cause tire pressure decrease
Tire pressure decreases in cold weather. Underinflated tires reduce grip, making riding dangerous.
Additionally, the rubber can harden in very low temperatures. This may reduce the motorcycle's traction and increase the risk of skidding.
4. Fuel System
Condensation can form in the fuel tank when temperatures fluctuate. This water can mix with fuel, causing poor performance or even engine damage.
For carbureted motorcycles, cold weather can make the carburetor more prone to freezing. If not handled properly, it may lead to starting problems.
5. Metal Components
Metal parts can contract in freezing temperatures. This is an unavoidable problem in winter.
This contraction can make fasteners loose over time and may even cause cracks in extreme cases.
Besides, salt on winter roads can also lead to corrosion. it can weaken the structural integrity of your motorbike.
Tips to Protect Your Motorcycle in Cold Weather
Now that you understand the risks, let’s explore how to protect your bike.
Here are practical steps to safeguard your motorcycle and keep it in good condition through the cold months.
1. Store Your Bike Properly
store your motorcycle properly in the winter days
Proper storage is one of the best ways to prevent cold weather damage in winter.
Use a Garage or Shelter: Keep your bike indoors if possible. A heated garage is ideal, but even an unheated space can shield it from frost and snow.
Invest in a Good Cover: If indoor storage isn’t an option, buy a high-quality, weather-resistant motorcycle cover. It can protect your motorcycle against moisture and freezing temperatures.
Use a Battery Tender: A battery tender or trickle charger keeps your battery charged when the bike isn’t in use. These devices prevent the battery from draining due to cold weather.
Disconnect the Battery: If you’re not riding for an extended period, disconnect the battery from your motorcycle. And, store it in a warm, dry place.
Use a Fuel Stabilizer: Adding a fuel stabilizer prevents condensation and keeps the fuel fresh. This is especially important for motorcycles stored during winter.
Keep the Tank Full: A full tank minimizes air space, reducing the chance of condensation forming inside the tank.
4. Check and Change Fluids
Switch to Winter Oil: You can use winter oil if your motorcycle operates in very low temperatures. The lower-viscosity oil can ensure easier circulation. (Note: Check your owner’s manual for the winter oil recommendations.)
Flush and Refill Coolant: Ensure your coolant mix is appropriate for freezing temperatures. A 50/50 mix of antifreeze and distilled water works well for most climates. If necessary, change the coolant before you store the motorcycle.
Regularly Check Pressure: Use a tire pressure gauge to monitor your tires. Inflate them to the manufacturer’s recommended levels to ensure proper grip and handling.
Avoid Prolonged Exposure to Cold Pavement: If possible, use a motorcycle stand or place them on a piece of wood. This can keep your tires off the frozen ground.
6. Clean and Lubricate
Wash Your Bike: Clean off dirt, salt, and grime after every ride in winter conditions. Salt is highly corrosive and can damage your bike if left untreated.
Apply Lubrication: Lubricate the chain, cables, and other moving parts to prevent rust and freezing. Use a high-quality motorcycle-specific lubricant for the best results.
7. Inspect for Damage
Regularly check your motorcycle for signs of damage. Look for rust, cracks, or loose components. Catching issues early can save you costly repairs down the road.
Essential Winter Riding Gear for You and Your Bike
essential winter riding gear
If you’re planning to ride in cold weather, staying warm and protected is just as important as maintaining your motorbike. Here’s what you need:
Rider Gear
Thermal Base Layers: Start with thermal underwear and base layers to trap body heat.
Winter Helmet: Wear winter motorcycle helmet can keep your head warm in those cold weather days.
Insulated Jacket and Pants: Choose gear with built-in insulation or layer up with windproof clothing.
Heated Gloves and Grips: Heated gloves or grips keep your hands warm, ensuring better control over your bike.
Balaclava or Neck Warmer: Protect your face and neck from icy winds with a balaclava or neck warmer.
Waterproof Boots: Insulated, waterproof boots keep your feet dry and warm during winter rides.
Motorcycle Accessories
Heated Seat: If you ride often in the winter, consider installing a heated seat for added comfort.
Hand Guards or Wind Deflectors: These keep cold air off your hands and improve comfort.
Windshield: A larger windshield reduces wind chill, making long rides more bearable.
Helmet Intercom: Use the motorcycle Bluetooth intercom so that you can answer phone calls hands-free, or communicate with other riders in your riding group. It is also an essential gear that can improve your riding safety.
GPS navigation device: You many need a GPS or map to give you the directions when you are riding at an unfamiliar place.
Bonus Tips for Winter Riding
Warm Up Your Bike: Let your motorcycle idle for a few minutes before riding. This ensures the engine oil circulates properly.
Ride Cautiously: Watch out for icy patches, wet leaves, and salt on the road. These can make riding slippery and dangerous.
Plan Your Routes: Stick to well-maintained roads and avoid areas prone to black ice or heavy snow.
FAQs
What If You’re Storing Your Motorcycle All Winter?
If you’re not planning to ride at all during the winter, here’s how to prepare your bike for long-term storage:
Stabilize the Fuel: Add a fuel stabilizer and run the engine for a few minutes to circulate it.
Lift the Tires: Use stands to prevent flat spots on tires.
Cover the Exhaust: Plug the exhaust with a clean rag or cover. This can prevent rodents or moisture from entering the motorcycle's exhaust.
Periodic Check-Ins: Even in storage, check your motorcycle periodically. Make sure everything remains in good condition.
A motorcycle engine can struggle when temperatures drop below 32°F (0°C). That's because the oil thickens and makes it harder for the engine to start and run smoothly.
Extremely cold weather, especially below 20°F (-7°C), can cause battery issues, fuel freezing (in carbureted bikes), and stress on engine components.
While modern bikes can handle cold starts, prolonged exposure without proper care (like using a battery tender or winter-grade oil) can lead to wear and tear.
Riding in such cold conditions can also reduce tire grip and make it unsafe overall.
Is cold start bad for motorcycles?
Cold starts can be hard on motorcycles, especially in very low temperatures.
When the engine is cold, the oil is thicker and doesn’t flow well, so parts don’t get proper lubrication right away. This can cause extra wear on the engine over time.
For carbureted bikes, cold starts can also lead to fuel issues. Modern motorcycles handle cold starts better, but repeated cold starts without warming up the engine properly can still cause damage.
To minimize harm, let the engine idle for a minute or two and use the correct oil for cold weather.
Do you need to warm up motorcycle engine?
Yes, you should warm up a motorcycle engine, especially in cold weather.
When the engine is cold, the oil is thick and doesn’t flow properly, so warming it up ensures all parts are lubricated.
Letting the engine idle for 1-2 minutes helps it reach a safe operating temperature. However, don’t overdo idling, as it can waste fuel and cause carbon buildup.
Modern fuel-injected bikes need less warm-up time compared to older carbureted bikes.
After warming up, ride gently for the first few miles to let the engine fully adjust to running conditions.
Final Thoughts
Cold weather doesn’t have to mean damage to your motorcycle. With proper preparation and care, you can protect your bike from the harsh effects of winter.
Whether you’re riding or storing it, the key is to stay proactive.
Follow these tips to keep your motorcycle in excellent condition and ready to hit the road when warmer weather returns.
Remember, a well-maintained bike not only lasts longer but also keeps you safer on the road. Take the time to winterize your motorcycle, and you’ll enjoy many more miles of adventure—no matter the season.
When winter arrives, motorcycle lovers often face one of the most debated questions: "Do I need to warm up my motorcycle engine in winter?"
While some riders swear by letting their engine idle for a few minutes before hitting the road, others believe it’s unnecessary. In fact, the right way to warm up can significantly impact your motorcycle's performance and longevity. This requires us to understand the scientific principles of preheating the engine.
This article will introduce why warming up your motorcycle engine in winter is important, how to do it correctly, and what to avoid in detail.
Motorcycles are designed to operate under specific conditions. And temperature plays a big role in their performance.
When temperatures drop, the engine and its components will be cold, which can affect how well they function.
Here are the key reasons why warming up your engine is critical:
1. Oil Viscosity and Lubrication
Motorcycle engines rely on oil to lubricate moving parts and reduce friction.
In cold weather, engine oil becomes thicker and less effective at circulating through the engine.
By warming up your motorcycle, you allow the oil to heat up and become less viscous. Then the engine oil can flow freely and protect critical components.
Without proper lubrication, parts like the pistons, crankshaft, and camshaft can experience excessive wear and tear.
Over time, this can lead to costly repairs and reduced engine life. A few minutes of warming up can prevent this issue and keep your engine in top shape.
2. Smooth Engine Performance
Cold engines don’t perform as efficiently as warm ones.
When you start your motorcycle in winter without warming it up, the engine may run rough, misfire, or even stall.
This is because the fuel-air mixture needs to be adjusted to accommodate the lower temperature.
Modern motorcycles equipped with fuel injection systems are better at managing this adjustment. And they benefit from a short warm-up period. But Older carbureted motorcycles need a proper warm-up to ensure smooth performance.
3. Prevents Engine Damage
Starting and revving a cold engine immediately can cause serious damage. When the engine is cold, metal parts expand at different rates as they warm up.
The engine could not be forced to work hard before these components have properly expanded and settled. Or it will lead to increased friction, stress, and even cracking in extreme cases.
Warming up your motorcycle gradually allows the engine to reach its optimal temperature. This also reduces the risk of damage and ensures all parts are functioning harmoniously.
How to Warm Up Your Motorcycle Engine in Winter
Now that we understand why warming up the engine is important, let’s go over the proper way to do it.
Warming up your motorcycle isn’t just about turning it on and letting it idle for an extended period.
There’s a right way to do it to avoid wasting fuel and causing unnecessary wear.
1. Start Your Engine and Let It Idle Briefly
Begin by starting the engine and letting it idle for 30 seconds to 1 minute. This initial idle allows the oil pump to circulate the oil throughout the engine.
However, modern motorcycles don’t require long idling periods, so avoid letting it sit for too long.
For carbureted motorcycles, you may need to use the choke to enrich the fuel mixture and help the engine start more easily.
Once the engine is running, gradually turn off the choke as it warms up.
2. Give It Light Throttle Input
After the initial idle, gently twist the throttle a few times to help the engine warm up more evenly.
Avoid revving the engine aggressively, as this can cause unnecessary stress on cold components.
Light throttle input encourages smoother fuel combustion and faster warm-up.
3. Ride Gently for the First Few Minutes
riding motorcycle gently to warm up the engine
One of the best ways to warm up your motorcycle is to start riding it at low speeds and avoid hard acceleration.
This puts less strain on the engine while allowing it to reach its operating temperature more effectively.
Riding gently warms up not just the engine but also other components like the transmission and tires.
Tips for Warming Up Your Motorcycle in Winter
Here are some additional tips to make sure your motorcycle warms up properly and stays in good condition during the cold months:
1. Use the Right Engine Oil
In winter, it’s essential to use the correct grade of engine oil recommended by your motorcycle manufacturer.
Many manufacturers specify different oil viscosities for summer and winter.
For colder temperatures, a lower-viscosity oil (e.g., 10W-40 or 5W-30) is often recommended because it flows more easily when cold.
Check your owner’s manual or consult with a mechanic to ensure you’re using the right oil for the season.
2. Keep Your Battery Charged
keep the battery charged
Cold weather can take a toll on your motorcycle’s battery, making it harder to start the engine.
A weak battery will struggle to provide the necessary power for ignition, especially when the engine is cold.
To avoid this, keep your battery fully charged using a trickle charger or battery tender during the winter.
A healthy battery ensures your motorcycle starts smoothly and warms up without issues.
If you’re not riding your motorcycle daily in winter, proper storage is essential. Keep your motorcycle in a garage or covered area to protect it from extreme cold.
Using a motorcycle cover can also help retain some heat and prevent frost from forming on critical components.
Keeping your motorcycle in a slightly warmer environment reduces the time it takes to warm up the engine.
Winter conditions can make your motorcycle more prone to wear and tear.
Before starting your engine, check for any signs of frost or ice on the fuel tank, cables, and brakes.
Ensure that the tires are properly inflated, as cold weather can cause tire pressure to drop.
A quick inspection ensures your motorcycle is ready for a safe and efficient ride.
5. Avoid Long Idling
While warming up your engine is important, excessive idling is counterproductive.
Letting your motorcycle idle for extended periods wastes fuel, increases emissions, and can even cause carbon build-up in the engine. Instead, focus on a short idle period followed by gentle riding to bring the engine to temperature.
Modern Motorcycles vs. Older Models: Does It Make a Difference?
The need to warm up your motorcycle engine in winter depends partly on the type of motorcycle you own.
Modern motorcycles with fuel injection systems automatically adjust the fuel-air mixture based on the temperature, making them less reliant on extended warm-up periods.
However, even these motorcycles benefit from a brief warm-up to ensure proper oil circulation.
Older, carbureted motorcycles, on the other hand, require more attention.
These motorcycles don’t have sensors to adjust the fuel mixture automatically. So warming them up is essential for smooth operation.
Common Mistakes to Avoid
When warming up your motorcycle in winter, be mindful of these common mistakes:
Revving the Engine Too Hard: Avoid revving the engine aggressively when it’s cold. This can cause unnecessary wear on internal components.
Letting It Idle for Too Long: Long idling wastes fuel and can lead to carbon deposits. A minute or two is usually sufficient.
Using the Wrong Oil: Always use the oil grade recommended for winter conditions to ensure proper lubrication.
Skipping Warm-Up Altogether: Riding a cold motorcycle without warming it up can lead to engine damage and poor performance.
Conclusion
So, do you need to warm up your motorcycle engine in winter?
The answer is a resounding yes, but it should be done the right way.
Warming up your engine ensures proper lubrication, prevents damage, and helps your motorcycle perform at its best in cold weather.
Start with a brief idle, avoid revving the engine, and ride gently for the first few minutes.
Pair this with proper maintenance, the right oil, and good storage practices, and your motorcycle will be ready to take on the winter months without a hitch.
Taking these steps not only protects your motorcycle but also enhances your riding experience.
Whether you’re a seasoned rider or a beginner, following these tips will keep your motorcycle running smoothly all winter long.
Finding the perfect gift for a snowmobiler is not hard to snowmobiling lovers. But it can be challenging if you're not familiar with their gear and hobbies.
Snowmobiling is a thrilling winter activity that requires specific equipment, accessories, and comforts. These are essential gear to make sure the snowmobiling experience is safe and enjoyable.
Whether you’re shopping for a beginner or a seasoned rider, there are many choices. These thoughtful gifts will show your enthusiasm for their passion.
To help you narrow down your options, here are the best gift ideas for snowmobile lovers. These gifts for snowmobilers range from practical gear to fun and unique accessories, you can find something that fits your budget and their needs.
Best Gifts for Snowmobilers You Can Choose
1. Heated Snowmobile Gloves
heated snowmobile gloves
Cold hands are one of the most common complaints among snowmobilers. Heated snowmobile gloves are a lifesaver for riders who spend hours in freezing temperatures.
These gloves come with built-in heating elements powered by rechargeable batteries. Thus it can keep the snowmobiler's hands warm even in extreme conditions.
Besides, look for gloves that are waterproof, windproof, and have adjustable heat settings. These functions and abilities will bring the maximum comfort for your friend.
2. Snowmobile GPS System
Fodsports waterproof 5 inch motorcycle GPS - snowmobile gift
Getting lost in snowy terrain is easier than you might think. A snowmobile-specific GPS system can be a game changer.
It is truly helpful for riders exploring new trails or remote backcountry areas.
These IP67 level GPS devices are designed to withstand cold, rainy and snowy weather.
Besides, they often include special trail maps, offline navigation, and tracking features.
This is an essential tool for both safety and convenience. If you are looking for snowmobile accessories gifts, the GPS device is one of the good ideas.
3. Snowmobile Helmet
snowmobile helmet - Best Gifts for Snowmobilers
A high-quality snowmobile helmet is a must-have for every rider. This might be the best gift idea, since it is truly essential to every snowmobiler.
If you’re looking to invest in a meaningful gift for him/her, consider getting a better one. Those lightweight, DOT-approved helmets with a heated visor to prevent fogging should be the first choice.
What's more, helmets with Bluetooth compatibility are an added bonus. This additional function allows snowmobilers to communicate or listen to music while riding.
4. Snowmobile Helmet Intercom
Fodsports intercoms can be a suitable gift for snowmobiler
If they ride with a group of snowmobilers of with a partner, give him a snowmobile intercom will be a perfect option.
A snowmobile helmet intercom allows riders to communicate with each other while on the trail. Its hands-free feature can largely improve the snowmobiling safety and convenience.
Fodsports snowmobile intercoms can be installed firmly onto various snowmobiling helmets. And it will not obstruct there view or influence their helmet comfort.
It helps the snowmobiler stay connected with friends or a guide while running through the snow. He/she can share information, and coordinate movements through this Bluetooth communication system.
The system also lets you listen to music, GPS directions, or take phone calls. Riders can realize this without removing the helmet, ensuring a safer, more enjoyable ride.
Snowmobile intercoms are ideal snowmobile gifts for men like father, boyfriend, and husband as well as women like girlfriend, wife, etc.
For riders who spend long hours on their snowmobiles, a heated seat cover is a game-changing gift.
These covers provide extra warmth and comfort during cold rides. Most are easy to install and are powered by the snowmobile's electrical system.
This is a luxurious yet practical gift that will make winter snowmobile rides much more enjoyable.
6. Snowmobile Cover
snowmobile cover - snowmobile accessories gifts
A durable snowmobile cover is an essential accessory that you can consider as a gift if he owns a snowmobile. It can protect the machine from snow, rain, and dirt when it’s not in use.
You can look for a cover made from waterproof, UV-resistant material. Besides, make sure that it can fits snugly over their snowmobile.
This gift will help extend the life of their equipment and keep it in great condition for years to come.
7. Portable Snow Shovel
snow shovel is an incredibly useful gift for snowmobilers
A compact, collapsible snow shovel is an incredibly useful gift for snowmobilers who venture into deep snow or backcountry trails.
It can help them dig out their machine if it gets stuck or clear snow from trails.
Those lightweight yet sturdy shovel that can be easily stored on the snowmobile will be your first option.
8. Snowmobile Goggles
a snowmobiler is wearing snowmobile goggles on the helmet
Snowmobile goggles are essential for protecting a rider’s eyes from snow, wind, and debris.
High-quality goggles with anti-fog, UV-protection, and scratch-resistant lenses are a perfect gift.
Besides, you can also consider goggles with interchangeable lenses for different light conditions. This kind of high-end goggles ensure the rider has clear visibility no matter the weather.
9. Snowmobile Storage Bag
A snowmobile storage bag is a practical gift that helps riders organize and carry their gear.
Usually, these bags can be attached to the snowmobile. And they are designed to hold everything from tools to snacks and extra layers.
Choose those waterproof, durable bag with multiple compartments for added convenience.
10. Hand and Toe Warmers
Hand and toe warmers are a simple yet thoughtful gift that every snowmobiler will appreciate.
These single-use heat packs are easy to carry and provide instant warmth. They’re perfect for keeping extremities warm during long rides in freezing temperatures.
You can even pair them with other gifts like gloves or socks for a complete cold-weather package.
11. Snowmobile Trail Maps or Guidebooks
For riders who love exploring new trails, a detailed snowmobile trail map or guidebook is an excellent gift.
Many regions have specific maps with marked trails, difficulty levels, and points of interest.
Pair this gift with a GPS or compass for an adventurous snowmobile outing.
12. Snowmobile Maintenance Kit
snowmobile maintenance kit
Every snowmobile needs regular maintenance to stay in top shape.
A maintenance kit with tools like a spark plug wrench, belt removal tool, and cleaning supplies is a practical gift that every rider will appreciate.
According to different types of snowmobiles, the maintenance kit may also vary. Choose the one that is suitable for the snowmobile he/she owns.
You can find pre-assembled kits or create your own by including commonly used tools and accessories.
13. Balaclava or Face Mask
A balaclava or face mask is a must-have for protecting a rider’s face from harsh winds and cold temperatures.
Look for one made from moisture-wicking, breathable material that fits comfortably under a helmet.
Some balaclavas even have built-in windproof panels for added protection.
14. Snowmobile Jacket and Pants
snowmobile jacket and pants are also a fantastic gift option for snowmobilders
If you’re shopping for a bigger gift, a snowmobile jacket or pants is a fantastic option.
Snowmobile-specific clothing is designed to be waterproof, windproof and insulated. It can provide ultimate protection against the elements.
Choose snowmobile cloth with features like ventilation zippers, reinforced seams, and reflective detailing. These functions can bring added safety and comfort to the snowmobilers.
An action camera like a GoPro is a dream gift for snowmobilers who want to capture their adventures.
These cameras are rugged, waterproof, and designed to withstand extreme conditions.
Pair the camera with a helmet or handlebar mount so they can record stunning footage while riding.
16. Snowmobile-Themed Apparel and Accessories
For a more casual gift for snowmobile riders, consider snowmobile-themed apparel. For example, T-shirts, hats, or hoodies featuring their favorite snowmobile brand.
You can also find fun accessories like keychains, mugs, or decals that showcase their love for the sport.
These gifts are perfect for showing off their passion even when they’re not on the trails.
Tips for Choosing the Perfect Gift:
Consider Their Needs: Think about what they might need for their snowmobile adventures. Practical gifts like gear, tools, and accessories are always appreciated.
Know Their Preferences: If they’re brand-loyal, stick to their favorite snowmobile brands when choosing items like apparel or accessories.
Snowmobiling is a thrilling winter hobby that is very popular in winter. Choose the right snowmobiler gift can make it even more enjoyable for the rider in your life.
Whether you choose a practical item like heated gloves or a fun accessory like a snowmobile-themed hoodie, these gift ideas are sure to delight any snowmobiler.
With a little thought and consideration, you can find a gift for your friend, family member, or your lover. These gifts will keep them safe, warm, and excited for their next ride.
Take your pick from this list, and make their snowmobiling adventures even more memorable this season!
Shopping for a motorcycle enthusiast can be tricky, especially if you’re not familiar with the gear and gadgets that make riding more enjoyable. Whether it’s the thrill of the ride, the joy of the open road, or the love for motorcycles themselves, finding the perfect Christmas gift for motorcycle riders can feel overwhelming.
Here is a guide of Christmas gifts for motorcyclists to help! Below, we’ve compiled a list of 15 unique and thoughtful gifts that any motorcycle rider would love to receive this holiday season.
From practical gear to fun accessories, this guide has something for every type of rider.
Unique Christmas Gifts for Motorcycle Riders
1. Motorcycle Helmet Bluetooth Intercom System
One of the most practical and exciting gifts for a motorcyclist is a Bluetooth intercom system for their helmet.
Whenever a bluetooth intercom is a great gift for any motorcycle rider, young rider or old rider, man rider or woman rider. So it is also a good Christmas present for motorcyclists.
These devices allow riders to communicate with passengers while riding, talk with other riders, and take calls without stopping.
Many Bluetooth systems also allow riders to listen to music or use GPS navigation hands-free.
Pros
Enhance safety by minimizing distractions.
Make group rides more enjoyable with easy communication.
Allow riders to stay connected without compromising their focus on the road.
Look for models that are compatible with most helmets, have a long battery life, and offer noise-cancellation features for clear audio even at high speeds.
Fodsports' FX7 is a good choice. The waterproof model includes a mesh network Bluetooth connection for phone calls, directions, and music while also allowing for rider-to-rider communications.
Personalized gifts always add a special touch. For motorcycle riders, customized accessories like engraved keychains, fuel tank decals, or even custom license plate frames can be meaningful and unique.
You can personalize these items with their name, a favorite quote, or a design related to their motorcycle’s brand.
prepare an engraved keychain as a gift for your motorcycle friend
Pros
Show thoughtfulness and effort.
Add a personal flair to their motorcycle or gear.
Create a sentimental keepsake they’ll treasure for years.
If you know their motorcycle model and style preferences, you can also consider gifting custom seat covers, handlebar grips, or saddlebags.
saddlebag for the motorcycle rider
3. Compact Motorcycle Tool Kit
It’s important for every rider to be prepared for unexpected breakdowns or minor repairs on the road.
A compact motorcycle tool kit is an essential item that every rider should have. These tool kits are designed for motorcycles.
They include wrenches, screwdrivers, tire repair pieces, and other tools.
Pros
Ensure riders are prepared for emergencies.
Compact and lightweight, making it easy to carry on the motorcycle.
Save time and money by enabling small repairs on the go.
compact motorcycle tool kit
Look for high-quality kits that come in a durable, weather-resistant case. Some kits even include multi-tools that combine several functions into one compact device.
4. Motorcycle-Themed Apparel
Riders love to showcase their passion for motorcycles, even when they’re not on the road.
Motorcycle-themed apparel, such as jackets, T-shirts, hoodies, or caps, makes an excellent gift. Look for clothing with cool graphics, slogans, or designs that reflect their love for riding.
motorcycle-themed T-shirt
Pros
Allow them to express their identity as a rider.
Practical and stylish for everyday wear.
Available in a wide range of designs to suit different tastes.
If you want to step it up, consider high-performance riding jackets or gloves that combine style with functionality, like reinforced leather or weather-resistant materials.
5. Motorcycle Phone Mount
A phone mount is a must-have accessory for modern riders.
It securely holds their smartphone on the handlebars, making it easy to use navigation apps, check directions, or even monitor ride stats.
Many mounts are designed to withstand vibrations and harsh weather conditions.
Pros
Keep the phone easily accessible without compromising safety.
Ideal for long-distance riders who rely on GPS.
Affordable and easy to install.
mobile phone on the motorcycle phone mount
Choose a sturdy, universal mount that works with a variety of phone sizes and handlebar types.
Some mounts even come with charging capabilities, making them even more convenient.
6. Heated Motorcycle Gear
Cold weather can make riding uncomfortable, but heated gear like gloves, vests, or socks can make all the difference.
These items are powered by rechargeable batteries and can be connected to the motorcycle’s power system to provide consistent warmth.
Pros
Keep riders warm and comfortable during winter rides.
Increase safety by preventing numbness and discomfort in cold weather.
Practical for riders who commute year-round or enjoy touring in colder climates.
motorcycle heated gloves
Look for gear that is lightweight, easy to wear, and adjustable for different temperature levels.
Riders will appreciate the added comfort on chilly rides.
7. Motorcycle Backpack or Tail Bag
A high-quality motorcycle backpack or tail bag is both practical and stylish.
These bags are designed specifically for riders, with features like aerodynamic designs, waterproof materials, and compartments for helmets or laptops.
Motorcycle Tailbag is also a good gift option for motorcycle riders
Pros
Provide a secure way to carry essentials while riding.
Durable and weather-resistant for all types of adventures.
Many options are sleek and stylish, blending form and function.
For extra versatility, look for bags that double as tail bags, which can be strapped directly to the motorcycle.
8. Custom Motorcycle Artwork
For a truly unique gift, consider commissioning custom artwork of their motorcycle.
Artists can create detailed illustrations or paintings of their motorcycle, which can be displayed at home, in the garage, or even at their workplace.
Pros
Celebrate their love for their motorcycle in a creative way.
Make a one-of-a-kind keepsake they’ll cherish.
Show that you went the extra mile to create something special.
motorcycle artwork
You can find artists who specialize in automotive art or explore digital design options if you’re looking for something modern and vibrant.
9. GPS for Motorcycles
A GPS is an incredibly useful tool for motorcycle riders, especially those who love long-distance trips or exploring unfamiliar routes.
Unlike smartphone navigation, motorcycle-specific GPS devices are designed to withstand weather conditions, vibrations, and the unique demands of riding.
Pros
Provide accurate, turn-by-turn navigation tailored for motorcyclists.
Weatherproof and resistant to vibration, making it durable for any ride.
Allow riders to plan scenic or motorcycle-friendly routes.
Look for GPS devices with features like glove-friendly touchscreens, Bluetooth connectivity for audio directions in helmets, and long battery life. Models from brands like Garmin or Fodsports are excellent choices for quality and reliability.
10. GoPro Camera for Capturing Rides
Motorcycle enthusiasts love to document their adventures, and a GoPro camera is the perfect tool for capturing high-quality footage.
These cameras are small, durable, and designed for action, making them ideal for mounting on helmets or motorcycles.
motorcycle with GoPro camera
Pros
Let riders relive their favorite trips and share them with others.
Durable and weatherproof for all types of riding conditions.
Easy to use, with features like stabilization and 4K video quality.
You can also include accessories like mounts, extra batteries, or memory cards to complete the gift.
11. Motorcycle Maintenance Subscription Box
Subscription boxes for motorcycle maintenance are a newer trend, but they’re incredibly useful.
These boxes deliver essential products like cleaning supplies, chain lubricants, and tools straight to the rider’s doorstep.
Pros
Keep their motorcycle in top condition without the hassle of shopping for supplies.
Make maintenance more convenient and fun.
A recurring gift that they’ll look forward to every month.
Look for boxes that offer high-quality products and customizable options based on the type of motorcycle they own.
12. Anti-Theft Devices for Motorcycles
Security is a top concern for motorcycle owners. Anti-theft devices such as disc locks, GPS trackers, or alarm systems make great gifts.
They can give riders peace of mind when leaving their motorcycle unattended.
anti-theft devices for motorcycles
Pros
Protect their valuable investment.
Simple to use and highly effective.
Provide added security when parking in public areas.
Consider devices with smart features, like smartphone connectivity or tamper alerts, for extra functionality.
13. Motorcycle Cup Holder
A motorcycle cup holder is a practical and convenient accessory for riders who enjoy staying hydrated on the road.
It provides a secure spot to hold a water bottle, coffee cup, or travel mug, ensuring easy access to drinks during long rides.
Pros
Keep beverages within easy reach, improving rider convenience.
Designed to securely hold cups or bottles, even on bumpy roads.
Fit most motorcycles and travel mugs.
Look for cup holders made from durable, weather-resistant materials with adjustable mounts for easy installation. Some models even include insulation to keep drinks hot or cold during the ride.
Bring their love for motorcycles into their home with unique décor items, such as wall art, sculptures, or clocks made from motorcycle parts.
These items are perfect for decorating their garage, office, or living space.
Pros
Celebrate their passion in a creative and stylish way.
Make a great conversation starter.
Add character to their home or workspace.
motorcycle-themed bedroom
You can find handcrafted items on platforms like Etsy or explore local stores for one-of-a-kind pieces.
15. Gift Cards for Motorcycle Gear or Accessories
If you’re unsure of what to buy, a gift card to a reputable motorcycle gear store can be an excellent option.
Riders can choose exactly what they need, whether it’s a new helmet, jacket, or accessories for their motorcycle.
Pros
Allow them to pick something they truly want.
Perfect if you’re unsure of their preferences or motorcycle specifications.
Easy to purchase but still thoughtful and practical.
motorcycle gear gift card
Conclusion
With these motorcycle Christmas ideas, finding motorcycle Christmas gifts for motorcycle lovers doesn’t have to be difficult.
Whether they’re a seasoned rider or a beginner, this list of 15 unique and thoughtful gifts offers something for everyone.
From practical items like heated gloves and tool kits to fun accessories like action cameras and themed decor, these gifts are sure to bring joy to any biker this holiday season.
Remember, when choosing a gift, consider the rider’s preferences, style, and the type of riding they do.
A little thoughtfulness goes a long way, and your gift will show them just how much you appreciate their passion for motorcycles.
In the world of motorcycle communication systems, Fodsports has become a trusted name. This intercom brand is known for producing high-quality yet affordable helmet intercoms.
Their latest release, the Fodsports FX-S, is no exception. The Fodsports FX-S is tailored for riders who need a dependable and budget-friendly 2-way intercom system. It offers a plethora of impressive features that stand out in the market.
Whether you're commuting through a busy city, ride with a friend, or navigating scenic highways, the FX-S makes communication with your partner seamless and enhances your overall riding experience.
Below, we’ll dive into the detailed features of the FX-S and explore why this new intercom is a game-changer for motorcyclists.
Fodsports FX-S: A Budget-friendly 2-Way Motorcycle Helmet Intercom
The Fodsports FX-S is a newly released sleek and versatile motorcycle communication headset. It is designed for riders who value style and performance.
There are two eye-catching color options: Gunmetal Black for a classic, bold look and Turquoise Blue for a fresh, vibrant touch.
Its two color schemes also make it very suitable for couples or friends to use together.
1. Bluetooth 5.4 Technology: Enhanced Connection with QCC Chip
Fodsports FX-S uses Bluetooth 5.4 technology
The Fodsports FX-S takes connectivity to the next level with Bluetooth 5.4 tech powered by the QCC chip. This advanced combination ensures that the FX-S has a faster pairing and stronger stability. Besides, the new tech also enables the FX-S has wider compatibility compared to older Bluetooth intercoms.
Faster Connection: Bluetooth 5.4 allows the FX-S to pair with your devices in a matter of seconds. Forget the frustration of waiting for a connection while gearing up for your ride.
Stability: Once connected, the FX-S ensures a reliable and stable Bluetooth signal. Even at higher speeds or in areas with interference, the chances of disconnection can be minimized.
Compatibility: Thanks to the QCC chip, the FX-S is compatible with a wide range of devices. These include smartphones (both Android and iOS), GPS systems, and even helmet intercoms from other brands.
This cutting-edge Bluetooth tech ensures you can focus on the road while you are riding with a partner. Don't worry, the FX-S will not have any connection issues.
The FX-S enables two-way communication with a range of up to 1000 meters (1 kilometer). This feature is perfect for riders who travel in pairs and need to stay connected during their journey.
Suitable for Couples: With 2 rider intercom ability, the FX-S is truly suitable for couples. It is also suitable for other two-way communication like ride skills teaching or other usage scenarios. For rider to pillion intercom option, the FX-S is also a good option.
1000 Meter Intercom: the FX-S can support as long as 1000 meters stable intercom distance. Honestly, this distance is large enough to meet almost all 2-way communication demands.
3. Stereo High-Definition Sound Quality
FX-S HD speaker feature
Sound quality is a crucial factor for any helmet intercom system. This is one of the key features that most riders consider when choosing helmet intercoms.
Fortunately, the FX-S delivers with a 40mm high-power moving coil unit speaker.
The FX-S speaker produces heavy bass and realistic sound. Thus ensuring that music, calls, and intercom on the FX-S are crystal clear.
Whether you're listening to your favorite playlist, taking a call, or following GPS instructions, the stereo high-definition sound quality ensures an immersive experience.
This feature makes the FX-S not only a communication device. It is also an excellent companion for enjoying music or podcasts on long rides.
4. CVC Noise Reduction Technology for Clear Calls
the noise reduction feature of Fodsports FX-S helmet intercom
Riding at high speeds can create significant wind and engine noise, making clear communication difficult. To tackle this, the FX-S employs CVC (Clear Voice Capture) noise reduction technology.
The FX-S is equipped with a professional noise reduction microphone that filters out background noise. This ensures that your voice is clear during calls and intercom conversations.
Besides, this technology also enhance your call/music/intercom quality. Even in noisy environments, your voice can be heard loud and clear without distortion.
For riders who frequently take calls while on the move or ride in noisy environments, this feature is particularly beneficial.
5. Waterproof IP67: Built for All Weather Conditions
Fodsports FX-S IP67 waterproof feature
Weather can be unpredictable, but the FX-S has you covered with its IP67 waterproof rating. With this device, you can ride with confidence in any season.
Whether it’s heavy rain, snow, or dust, the FX-S is designed to withstand harsh conditions and keep functioning perfectly. You can bring it during your ride in any weather.
The rugged construction also ensures the FX-S has a long-term durability. For adventurous riders who frequently encounter challenging weather conditions, FX-S is truly reliable.
6. Oversized Rotary Button Design for Easy Operation
The FX-S features an oversized rotary button, which is a very humanized design.
The large button is easy to locate and operate, even with gloves on.
You can adjust volume, answer calls, or switch between functions by this rotary button.
Besides, its intuitive design also makes the control so simple.
This user-friendly design ensures safety and convenience, especially during long rides.
Now you just need to focus yourself on the road, hold the handbars firmly, and enjoy the ride.
7. Power Display with Battery Level Announcements
The FX-S keeps you informed about its battery status while you are riding. This thoughtful feature helps you avoid unexpected power outages during your rides.
When the FX-S is connected to your smartphone, you can know its battery percentage directly on your phone screen.
Upon powering up, the FX-S will also announce its current battery level. So you’re always aware of how much charge is left in the FX-S.
8. Convenient TYPE-C Charging
Charging the Fodsports FX-S is a breeze, thanks to its universal TYPE-C interface. This modern charging solution adds to the overall convenience of the FX-S.
TYPE-C technology ensures faster and more reliable charging compared to older micro-USB ports.
Besides, the widely used TYPE-C interface means you can use the same charging cable as your smartphone or other devices. This will reduce the need for carrying extra cables.
9. Long Battery Life for Extended Rides
high capacity battery feature of Fodsports FX-S
One of the standout features of the FX-S is its impressive battery life.
The FX-S offers 15 hours of talk time or 15 hours of music playback or 15 hours of Bluetooth intercom usage on a single charge.
With up to 350 hours of standby time, you can go days without needing to recharge during casual use.
This extended battery life ensures the FX-S can keep up with even the longest rides.
10. Automatic Call Answering
For added convenience, the FX-S features an automatic call answering function.
If a call comes in, the FX-S will automatically answer it within 15 seconds, allowing you to focus on the road.
This hands-free functionality enhances safety, especially during group rides or in busy traffic.
Some riders may don’t want phone calls to interfere with their riding, they can turn off this function in the setting.
11. Work While Charging
The FX-S supports work-while-charging functionality, which is also a convenient design. You can continue using its features even when plugged in.
Whether you’re on an intercom call, listening to music, or navigating, you can keep using the FX-S while it charges via a power bank or other sources.
This feature is handy for long-distance riders who spend hours on the road.
12. Suitable for Various Helmet Styles
The FX-S is designed to fit a variety of helmet styles, including full helmets, half helmets, and modular helmets.
Besides, the flexible mounting system ensures easy installation on virtually any helmet.
Whether you’re a sportbike rider or a cruiser enthusiast, the FX-S adapts to your helmet style with ease.
13. Universal Pairing Capability
FX-S can pair with multiple bluetooth devices seamlessly
Fodsports FX-S offers universal pairing, enabling it to connect with multiple devices and intercoms.
You can pair the FX-S with intercoms from other brands to achieve smooth communication. Also, it can be paired with smartphones, GPS devices, and even Bluetooth-enabled speedometers.
This wide compatibility makes the FX-S a versatile choice for riders who use multiple devices.
No, the FX-S does not support music sharing between riders.
2. Can FX-S pair with other models from Fodsports?
Yes, the FX-S can pair with other Fodsports intercom models. Since the FX-S is a 2-way intercom, it can only pair with one intercom device each time.
3. Can FX-S Connect with my Smartphone?
Yes, it can be connected to your smartphone with Bluetooth. After they are connected, you can listen to music, make/receive phone calls, or follow GPS instructions.
Conclusion
The Fodsports FX-S is a feature-packed, budget-friendly helmet intercom for 2 riders. Based on these rider-friendly functions, it delivers exceptional value for its price. And it’s clear that the FX-S will help to enhance the rider's riding experience.
Whether you’re commuting daily or embarking on long journeys, the FX-S ensures you stay connected, entertained, and safe.
If you’re in the market for a reliable and affordable intercom that doesn’t compromise on quality, the Fodsports FX-S is undoubtedly worth considering.
Skiing is an exhilarating winter sport that combines adventure, speed, and breathtaking scenery.
Whether you're a seasoned skier or a beginner, safety should always be your top priority.
The ski slopes can be unpredictable, especially when you firstly come to an new slope. Without proper precautions, a fun day on the mountain can quickly take a dangerous turn.
In this ultimate guide, we’ll walk you through essential ski safety tips and strategies to stay safe while enjoying your time on the slopes.
Ski Safety Tips 2025
1. Prepare Before You Hit the Slopes
skiing gear checklist
Preparation is key to ensuring a safe and enjoyable skiing experience. Here are some steps to take before you even put on your skis:
a) Get the Right Gear
Helmet: Always wear a properly fitted ski helmet. It can significantly reduce the risk of head injuries in case of a fall or collision.
Ski Goggles: Protect your eyes from wind, snow, and harmful UV rays. Goggles also help you see clearly in changing light conditions.
Layered Clothing: Wear moisture-wicking base layers, an insulating mid-layer, and a waterproof outer layer. These cloths will help you stay warm and dry.
Ski Boots and Bindings: Ensure your boots are comfortable, and your bindings are adjusted to your skill level and weight by a professional.
Gloves or Mittens: Keep your hands warm and protected from frostbite.
Helmet Communication System: If ride with a friend or a group, use ski intercoms to make sure you can communicate with them.
b) Check Your Equipment
Inspect your skis, snowboard, or other equipment before you start. Look for cracks, loose bindings, or worn edges.
Renting skiing equipments from the ski slope? Then check them and make sure the gear is properly fitted and in good condition.
c) Know the Weather Conditions
Check the weather forecast for the day. Poor visibility, strong winds, or heavy snowfall can make skiing more challenging and hazardous. Avoid skiing in extreme conditions.
2. Warm Up and Stretch
Do some skiing warm up and stretches before starting skiing - ski safety tips
Cold muscles are more prone to injuries while you are doing sports activities. Before you start skiing, take 10–15 minutes to warm up by walking briskly or doing light exercises. Stretch your legs, arms, and back to improve flexibility and reduce the risk of strains or sprains.
3. Take a Lesson If You’re a Beginner
If you’re new to skiing, don’t skip professional lessons. Ski instructors can teach you proper techniques, help you understand the basics of balance and control, and show you how to stop safely. Learning how to fall correctly can also reduce the chance of injuries.
4. Follow the Skier’s Responsibility Code
Follow this skiing responsibility code while you are on the slope
Most ski resorts follow the Skier’s Responsibility Code, which outlines the rules for safe skiing. Here are the key points:
Stay in Control: Always ski within your skill level and speed. Being out of control can endanger both you and others.
Yield to Others: Skiers or snowboarders downhill (ahead of you) have the right of way. Avoid cutting them off.
Look Uphill When Merging: Check for oncoming skiers before entering a trail or starting after a stop.
Obey Signs and Markers: Pay attention to trail signs, warnings, and closures. Skiing on closed trails is not only dangerous but may also lead to penalties.
Avoid Stopping in Blind Spots: Don’t stop in the middle of a trail or on a slope where you aren’t visible to others.
5. Know Your Limits
It’s true that tempting to push yourself on the slopes. But skiing beyond your ability level can lead to accidents.
If anything happens on the slope, use the communication system to inform each other.
If you get separated and are not equipped with communication systems, agree on a meeting point beforehand. Make sure someone in your group knows your plans, especially if you’re venturing off-piste.
Skiing is a physically demanding activity, and exhaustion can sneak up on you.
Fatigue affects your reflexes and decision-making, increasing the risk of accidents.
Listen to your body and take breaks when you need them. And, end your day before you’re too tired to ski safely.
11. Watch Out for Other Skiers and Snowboarders
Crowded slopes can be tricky to navigate. So please be aware of your surroundings and maintain a safe distance from others.
Besides, you should avoid sudden stops or unpredictable movements, as they can lead to collisions.
12. Respect Nature and the Environment
Ski slopes are part of the natural environment, and it’s important to respect them.
Skiers should avoid littering, stick to designated trails, and stay away from wildlife.
What's more, if you’re skiing in backcountry areas, leave no trace behind.
13. Know What to Do in Case of an Emergency
Skiers make an "X" signal for help when there is a ski emergency
Despite your best efforts, accidents can happen on the slope sometimes. Here’s what to do if you or someone else gets injured:
Stay Calm: Assess the situation and avoid panicking.
Signal for Help: Use your ski poles to form an "X" in the snow or wave to get attention.
Move Safely: If possible, move to the side of the trail to avoid further danger. Don’t move someone who may have a serious injury, such as a broken bone.
Carry a Phone or Ski Intercom: Make sure you have a way to contact ski patrol or emergency services.
14. Protect Your Skin from the Sun
It’s easy to forget about sun exposure when you’re surrounded by snow, but UV rays are stronger at higher altitudes.
Besides, snow also reflects sunlight, increasing your risk of sunburn.
Skiers can apply a broad-spectrum sunscreen with an SPF of at least 30 to your face and exposed skin. Reapply every few hours, especially if you’re sweating.
15. Stay Alert on Chairlifts
Stay safe when you are on the chairlifts
Chairlifts are an integral part of skiing, but they also come with risks. Follow these tips to stay safe when you are on the chairlifts:
Sit Back and Hold On: Keep your back against the seat and hold onto the safety bar (if available).
Don’t Jump Off: Only get off the lift at the designated area.
Be Careful with Loose Gear: Make sure your skis, poles, or backpack straps don’t get caught on the lift.
Frequently Asked Questions
What is the first rule of skiing?
The first rule of skiing is to stay in control at all times. This means you should always be able to stop or change direction to avoid people, obstacles, or hazards on the slope.
What's more, you should ski at a speed that matches your skill level and the conditions around you. And, staying in control helps prevent accidents and ensures your safety as well as the safety of others.
Besides, always be aware of your surroundings and follow the rules of the ski resort or area.
Is skiing dangerous for beginners?
Skiing can be risky for beginners, but it’s not too dangerous if you take the right steps.
Most accidents happen when people try to ski beyond their skill level. Beginners should start on slopes with easier ski slope ratings. And, take lessons from a trained instructor, and wear proper safety gear like a helmet. Besides, staying in control and following the rules on the slopes will reduce risks.
While falls are common when learning, they’re usually minor. With practice and caution, skiing can be a safe and fun activity.
How dangerous is skiing compared to other sports?
Skiing is generally not as dangerous as some high-risk sports like football, rugby, or mountain climbing, but it has its risks.
Most skiing injuries are minor, like bruises or sprains, and happen due to falls or loss of control.
Serious injuries, like broken bones or head injuries, are rare to happen on the slope. But it can still occur, especially if skiers go too fast or don't follow safety rules.
Compared to sports like cycling or running, skiing has a slightly higher risk because of speed, weather, and terrain.
But, with proper training, equipment, and caution, skiing can be as safe as many other recreational sports.
Conclusion
Skiing can be one of the most thrilling and rewarding outdoor activities in the world. But skiing safety should never be overlooked.
Preparing properly, staying aware of your surroundings, and knowing your limits are important.
The above mentioned ski safety tips can minimize risks and maximize your enjoyment on the slopes.
Remember, the mountains are meant to be fun, and staying safe ensures you can keep coming back for more adventures.
Riding a motorcycle in snowy conditions can be a challenge for even the most experienced riders.
Snow, ice, and slush can make the road surface slippery. Slippery surfaces can significantly reduce traction. It can be difficult for the rider to maintain control of the motorcycle.
One of the most critical factors in riding safely in these conditions is the tires. Proper tire care and preparation can make a huge difference between a safe ride and a dangerous skid.
Winter-specific motorcycle tires are specially designed to handle snowy and icy conditions. They feature deeper tread patterns and softer rubber compounds that provide better grip in cold weather.
#1. Why Winter Tires Are Important
Winter tires are designed for cold, snowy, and icy weather. Regular tires harden and lose traction in cold weather.
But winter tires are different. They remain soft and flexible at low temperatures. This feature improves their grip on slippery roads.
Winter tires have a unique tread pattern that helps to shed snow, slush, and water. This reduces the risk of hydroplaning. Winter tires have a unique tread pattern that helps shed snow, slush, and water. This reduces the risk of hydroplaning.
Therefore, Winter tires are essential for safe braking, cornering, and control in winter weather. They provide the extra safety and stability you need in adverse conditions.
We should also choose tires with deep and wide tread patterns that can grab snow and ice while repelling slush and water.
The rubber should be made of a softer compound. Only rubber like this can stay flexible in freezing temperatures to maintain traction. It is also very necessary to make sure the tire meets the size and load specifications of the motorcycle.
Additionally, consider your typical riding conditions (light snow, ice, or slush) to choose the right tire type.
2. Check Your Tire Pressure Regularly
check your motorcycle tire pressure
Cold weather can cause tire pressure to drop, affecting motorcycle handling. Underinflated tire pressure reduces traction. Your motorcycle will be harder to control on slippery surfaces.
#1.Why Tire Pressure Matters
Tire pressure matters because it directly affects your motorcycle's grip, handling, and safety.
Insufficient air pressure increases the area of contact between the tire and the road. This can lead to instability and accelerated wear. Overinflated tires reduce contact with the road. The vehicle will skid more easily, especially on wet or snowy roads.
In cold weather, tire pressure can drop, which can further reduce traction. Maintaining the correct pressure ensures your tires perform optimally, providing better stability, control, and braking, especially in challenging conditions such as snow or ice.
#2. How to Check Tire Pressure
To check tire pressure, use a reliable tire pressure gauge.
First, ensure your tires are cool (check them before riding, as heat can affect the reading). Locate the valve stem on your tire, remove the cap, and press the gauge firmly onto the valve. Read the pressure displayed on the gauge and compare it to the recommended pressure in your motorcycle’s manual.
If the pressure is too low, add air; if it’s too high, release some air. Recheck and adjust until it’s correct, then replace the valve cap.
3. Inspect Tread Depth
inspect the motorcycle tire tread depth with a coin
Tread depth is crucial for maintaining traction on snow and ice. If your tires are worn out, they won’t be able to grip the road effectively, increasing the risk of slipping.
#1. How Tread Helps
Tire tread helps by providing grip and traction on the road, especially in challenging conditions like snow, rain, or mud.
The grooves and patterns in the tread channel water, slush, and debris away from the tire's surface, allowing it to maintain better contact with the road.
In snowy or icy conditions, deep tread improves stability and prevents slipping. Worn or shallow tread reduces traction, making it harder to brake, steer, or stay in control.
Proper tread depth ensures safer, more reliable riding in all conditions.
#2. How to Check Tread Depth
To check the tread depth, you can use a tread depth gauge or the simple “penny test.”
For the penny test, insert a penny into the tire's tread grooves with Lincoln’s head facing down.
If you can see the top of Lincoln’s head, the tread is too worn, and the tire needs replacing. For a more precise measurement, use a tread depth gauge and check multiple spots around the tire.
Tires should have at least 2/32 inches of tread, but deeper treads are safer, especially for snowy or wet conditions.
4. Consider Studded Tires
For extreme snowy or icy conditions, studded motorcycle tires can provide unparalleled grip. These tires have small metal studs embedded in the tread to bite into ice and hard-packed snow.
#1. Benefits of Studded Tires
Studded tires provide superior traction on icy and hard-packed snowy roads.
The small metal studs embedded in the tread dig into the ice, improving grip where regular tires may slip. They reduce the risk of sliding during acceleration, braking, and cornering in extreme winter conditions.
Studded tires are especially useful for riders who frequently encounter black ice or heavily compacted snow. However, they aren’t suitable for dry roads and may not be legal in all areas, so always check local regulations before using them.
studded tires
#2. Things to Keep in Mind
Studded tires are not legal in all regions, so check local regulations before using them. They can wear down quickly if used on dry pavement.
If you frequently ride on icy roads, studded tires are a worthwhile investment to increase safety.
5. Warm Up Your Tires Before Riding
Cold tires are less effective at gripping the road, as the rubber becomes stiff in low temperatures. Warming them up before riding can improve traction and handling.
#1. How to Warm Up Your Tires
To warm up your tires, start your ride slowly.
We should also avoid aggressive movements like sudden braking or rapid acceleration. For the first few miles, we should ride gently to generate heat through friction. As the tires warm up, flexibility and grip will improve.
In colder weather, this process takes longer, so be patient. If you are preparing for a long ride or a race, you can use a tire warmer.
A tire heater is an electrically heated wrap. It warms up the tires before you start riding, ensuring peak performance from the start.
Snowy conditions require slower speeds and more caution. Riding too fast or following too closely will shorten your reaction time and increase the likelihood of slipping.
#1. Why Speed Matters
High speeds reduce the time your tires have to grip the road. Slowing down gives you more control, especially when cornering or braking.
Speed matters because it directly affects your ability to maintain control.
Riding too fast reduces the time your tires have to grip the surface and increases the risk of slipping or skidding. High speeds make it harder to brake safely or steer smoothly, especially in poor traction conditions. Lower speeds can increase reaction time and reduce the likelihood of accidents.
#2. Tips for Safe Riding
Ride at a slower speed than usual to account for reduced traction.
Maintain at least twice the usual distance between you and the vehicle ahead.
Reduce your speed and increase your following distance to give your tires more time to react to the road.
While winter tires can handle light snow, deep snow can overwhelm even the best tires. Riding in heavy snow increases the risk of getting stuck or losing control.
riding in deep snow
#1. Why Deep Snow Is Dangerous
Deep snow is dangerous because it reduces friction, drastically reducing traction.
The buildup of snow around the tires can clog the tread, making it harder for the tires to grip the surface. This increases the risk of slipping, losing control, or getting stuck. Deep snow also hides hazards like ice, potholes, or debris, making riding unpredictable.
For safer riding, stick to cleared or well-maintained roads and avoid venturing into deep snow whenever possible.
#2. What to Do
Avoid riding in deep snow whenever possible.
Stick to cleared or salted roads for better traction.
By avoiding deep snow, you reduce the strain on your tires and improve your chances of staying safe.
9. Clean Your Tires After Riding
clean motorcycle tire entirely
Snow and ice can leave behind debris, salt, and dirt on your tires, which can affect their performance over time. Cleaning your tires after every ride ensures they stay in good condition.
#1. Why Cleaning Matters
Road salt eats away at the rubber, weakening the tire structure and shortening its life. Dirt and debris clog the tread, reducing traction.
Regular cleaning ensures your tires maintain optimal grip and performance. By keeping your tires clean and free of buildup, you enhance their durability and improve safety during winter riding.
#2. How to Clean Your Tires
Use warm water and a gentle brush to remove snow, salt, and dirt. Dry the tires completely to prevent freezing or cracking. Regular cleaning keeps your tires in top shape and ready for the next snowy ride.
10. Replace Old or Worn-Out Tires
an engineer is replacing a motorcycle tire
Even if your tires seem fine, they may not perform well in snowy weather if they’re old. Over time, the rubber hardens and loses its ability to grip the road.
Tires should be replaced when their tread depth falls below the minimum safe level.
Most tires are typically 2/32 of an inch deep; for snowy conditions where deeper tread is required, they should be replaced sooner.
If a tire shows visible damage, such as cracks, bulges, or cuts, it should be replaced as soon as possible. Failure to replace the tire promptly can compromise safety.
Age is also a factor - most tires should be replaced every 5-6 years, even if they appear to be in good condition. Old, worn, or damaged tires lose grip and traction, increasing the risk of skidding, especially in winter.
Old tires are less effective at gripping snow and ice, increasing the risk of slipping. Replacing them ensures you have the best possible traction for safe riding. Investing in new tires when needed is a simple yet essential step for winter safety.
Conclusion
Riding a motorcycle in snowy weather is no easy task, but with the right tire care and preparation, it can be done safely. The ten motorcycle maintenance tips for winter days will help you maintain control and reduce the risk of skidding.
Remember, your tires are your lifeline on the road, especially in winter conditions. Regular inspections and maintenance are not only for your motorcycle’s protection but also for your own. Ride safely and enjoy the unique experience of winter motorcycling with confidence!
Riding a motorcycle in winter can be both thrilling and challenging. The crisp air, snow-covered landscapes, and quiet roads make for an incredible experience.
However, the cold temperatures and harsh weather conditions require the right gear. Otherwise it may turn an enjoyable ride into an uncomfortable or even dangerous journey.
One of the most critical pieces of equipment for winter riding is your motorcycle helmet. A good winter motorcycle helmet not only keeps you warm but also ensures proper visibility and safety in extreme conditions.
In this ultimate guide, we’ll explore the best winter motorcycle helmets of 2024. We will figure out the key features, and the factors to consider when choosing one.
Whether you’re a commuter, an adventure rider, or a touring enthusiast, just keep reading. This article will help you make an informed decision to elevate your winter riding experience.
Why Is a Winter Motorcycle Helmet Important?
Riding in winter exposes you to freezing temperatures, wind chill, rain, snow, and sometimes even ice. A normal motorcycle helmet may not provide the necessary features to combat these harsh elements.
Here’s why a dedicated winter motorcycle helmet is crucial:
Cold Protection: Winter helmets are designed to keep you warm. They usually have insulated liners and reduced ventilation to prevent cold air from entering.
Fog Prevention: Cold weather often causes visors to fog up, reducing visibility. Winter helmets typically have anti-fog visors or Pinlock inserts to address this.
Weather Resistance: A winter helmet ensures protection from rain, snow, and wind. They are normally equipped with a well-sealed design.
Comfort: Extra padding and thermal lining keep you comfortable on long rides in low temperatures.
Safety: These helmets are built to handle winter-specific hazards. Thus they can provide better protection against slippery conditions and reduced visibility.
The Best Winter Motorcycle Helmets in 2024
Based on the latest reviews, features, and user feedback, here are the top winter motorcycle helmets for 2024:
1. Shoei Neotec 2
Shoei Neotec 2 - Best Winter Motorcycle Helmets
The Shoei Neotec 2 is a premium modular helmet that excels in cold-weather performance. Its build quality, comfort, and advanced features make it a top choice for winter riders.
Key Features:
Pinlock EVO lens for anti-fogging.
Integrated sun visor for enhanced visibility.
Advanced ventilation system with adjustable intakes.
Noise-reducing design to combat wind noise.
Removable and washable interior liner.
Why It’s Great for Winter:
The Shoei Neotec 2 combines a snug fit and excellent thermal insulation with top-notch fog prevention features.
The modular design also allows you to flip up the front for convenience during breaks.
2. AGV Sportmodular Carbon
AGV Sportmodular Carbon
The AGV Sportmodular Carbon is a lightweight yet robust helmet designed for all-weather riding. Its carbon fiber construction ensures durability without compromising on comfor
Key Features:
Pinlock-ready visor with 190-degree horizontal visibility.
Adjustable vents for customized airflow.
Moisture-wicking, hypoallergenic interior.
Integrated sun visor for glare reduction.
Aerodynamic design to minimize wind resistance.
Why It’s Great for Winter:
This helmet provides excellent insulation and fog prevention.
Its lightweight design reduces fatigue on long rides.
Adjustable vents for customized airflow.
It’s also compatible with additional winter accessories like neck skirts.
3. HJC RPHA 70 ST
HJC RPHA 70 ST - winter motorcycle helmet for cold weather
The HJC RPHA 70 ST is a versatile helmet that offers a great balance between price and performance. It’s packed with features that make it ideal for winter riding.
Key Features:
Pinlock-ready anti-fog visor.
Advanced ventilation system with multiple intake and exhaust vents.
Removable and washable Multicool interior lining.
Integrated sun visor with a smooth sliding mechanism.
Why It’s Great for Winter:
The HJC RPHA 70 ST offers excellent fog resistance and thermal comfort.
Competitive price.
Its snug fit and well-sealed design keep the cold out, even on the chilliest days.
4. Schuberth C5
Schuberth C5
The Schuberth C5 is a high-end modular helmet designed for touring and winter conditions. Known for its quiet performance, it’s one of the most comfortable helmets on the market.
Key Features:
Pinlock 120 anti-fog lens included.
Optimized aerodynamics for reduced wind noise.
High-quality thermal and moisture-wicking lining.
Ventilation system for controlled airflow.
Integrated communication system compatibility.
Why It’s Great for Winter:
Superior insulation ability.
Excellent fog prevention performance.
Quiet operation.
5. Bell Qualifier DLX MIPS
Bell Qualifier DLX MIPS
The Bell Qualifier DLX MIPS is a budget-friendly option that doesn’t compromise on safety or performance. It’s a full-face helmet with solid winter-ready features.
Key Features:
Anti-fog and scratch-resistant face shield.
MIPS (Multi-Directional Impact Protection System) for added safety.
Lightweight polycarbonate shell.
Contoured cheek pads for a snug fit.
Why It’s Great for Winter:
This helmet offers reliable fog prevention and wind resistance.
It has excellent value for money, an ideal option for riders on a budget.
6. Arai XD4
Arai XD4
The Arai XD4 is a highly-rated adventure helmet that performs exceptionally well in cold weather. It’s designed for dual-sport enthusiasts who ride in challenging conditions.
Key Features:
Pinlock-ready face shield to prevent fogging.
Removable and washable Dry-Cool interior.
Advanced ventilation system with adjustable vents.
Emergency release cheek pads for added safety.
Aerodynamic peak and visor for reduced wind resistance.
Why It’s Great for Winter:
The Arai XD4 offers outstanding thermal comfort and fog resistance.
Ideal for off-road and adventure riders facing unpredictable winter weather.
7. Klim Krios Pro
Klim Krios Pro
The Klim Krios Pro is a lightweight adventure helmet built for extreme conditions. It’s engineered to provide maximum comfort and protection during long winter rides.
Key Features:
Pinlock-ready shield with anti-scratch coating.
Koroyd technology for superior impact protection.
Carbon fiber shell for lightweight durability.
Compatible with heated visors and goggles.
Removable interior liner with moisture-wicking properties.
Why It’s Great for Winter:
The Klim Krios Pro offers excellent insulation and is compatible with heated accessories.
Perfect for riders who tackle frigid temperatures and snowy trails.
8. Scorpion EXO-AT950
Scorpion EXO-AT950 - best winter motorcycle helmet
The Scorpion EXO-AT950 is a versatile modular helmet designed for touring and adventure riding. It’s packed with winter-friendly features and offers exceptional value for money.
Key Features:
EverClear anti-fog face shield.
Modular design with a flip-up chin bar.
Dual-density EPS liner for added safety.
Integrated drop-down sun visor.
Removable and washable KwikWick II liner.
Why It’s Great for Winter:
This helmet combines excellent fog prevention with a warm, moisture-wicking interior.
Its modular design adds convenience for riders taking breaks during cold-weather rides.
9. Nolan N100-5 Plus
Nolan N100-5 Plus
The Nolan N100-5 Plus is a premium modular helmet that stands out for its comfort and winter-specific features. It’s a popular choice among touring riders.
Key Features:
Pinlock-ready visor with anti-scratch coating.
Dual-action chin bar opening system for safety.
Adjustable ventilation system with air intake and rear extractors.
Clima-Comfort interior padding for warmth and moisture-wicking.
Neck roll to block out cold air.
Why It’s Great for Winter:
Provide excellent insulation and a snug fit, ensuring comfort on long rides in cold weather.
Its neck roll and ventilation system make it particularly effective for winter use.
10. Caberg Duke II
Caberg Duke II
The Caberg Duke II is a budget-friendly modular helmet packed with features. It is trully a great companion for winter rides. Its compact design and lightweight build offer exceptional comfort.
Key Features:
Pinlock anti-fog visor included.
Quick-release micrometric buckle.
Scratch-resistant, drop-down sun visor.
Removable and washable liner.
Compact shell design for reduced wind resistance.
Why It’s Great for Winter:
The Caberg Duke II offers solid fog resistance and warmth at an affordable price.
Lightweight design and comfortable fit.
Great option for winter commuters and touring riders alike.
11. Fodsports FS90
Fodsports FS90
The Fodsports FS90 is a versatile full-face helmet that blends style, comfort, and safety for both city commuting and long-distance touring. With DOT and ECE 05 certified protection, multiple color and visor options, and rider-focused details, it’s designed to keep you safe and comfortable in all conditions.
Key Features:
DOT & ECE-approved ABS full-face shell for certified protection.
Dual visor system with Pinlock®-ready outer shield.
Built-in rechargeable rear LED safety light (4 modes, up to 40 hours runtime).
Advanced ventilation system with chin and crown vents + insect screens.
Pinlock®-ready visor helps prevent fogging in cold and humid conditions.
Adjustable vents allow you to seal in warmth when temperatures drop.
Breathable yet insulating interior for comfort on long, chilly rides.
Rear LED light improves visibility in low-light or foggy weather.
Top Features to Look for in a Top Winter Motorcycle Helmet
What makes a helmet suitable for cold-weather riding?
You should know about this before diving into the best winter motorcycle helmets. These features will guide you to make decisions when choosing your best helmet.
Here are the key features to consider when choosing a helmet for cold-weather riding:
1. Thermal Insulation
A winter helmet should have a well-insulated interior to retain warmth. I always put this feature as my first consideration factor when buying a winter helmet.
It's better to look for helmets with fleece or thermal liners that can trap heat and keep your head warm.
Besides, some helmets even offer removable liners, which will be even better. When the weather gets milder, you can switch the liners to a lighter option, then you can still use it on warm days.
2. Anti-Fog Technology
Fogging is a major issue in cold weather. Helmets with Pinlock-ready visors or built-in anti-fog coatings are a must.
According to many riders' experience, the Pinlock inserts are particularly effective for anti-frog. The reason is that they create a double-layered shield to prevent condensation.
3. Ventilation Control
Most helmets have ventilation, but the ventilation capacity of different helmets may vary.
You need to buy a helmet suitable for winter riding to avoid excessive ventilation that will cause cold air to enter the helmet.
A good winter helmet should have adjustable vents that can be closed when needed to keep warm.
4. Windproof Design
Wind chill can dramatically lower the temperature you feel while riding. For winter cold-weather rides, you should choose those helmets with a snug fit around the neck and chin areas.
Many winter helmets come with neck skirts or chin curtains to block out cold air.
5. Waterproof and Snowproof Shell
Winter riding often involves rain, snow, or slush. Therefore, a helmet with a waterproof or snowproof outer shell will be the best choice. It will keep you dry and comfortable, even in wet conditions.
6. Visibility Enhancements
Shorter daylight hours and poor weather conditions can reduce visibility in winter.
Choose helmets with integrated sun visors, reflective elements, or compatibility with heated visors. These enhancements in visibility will add safety to your ride in the winter.
7. Comfort and Fit
A helmet that’s too tight can cause discomfort on long rides, while one that’s too loose may let in cold air.
Make sure the helmet fits your head snugly but comfortably. Besides, those models with adjustable padding are also worth considering.
Winter Riding Tips for Helmet Maintenance
To ensure your helmet performs its best during winter, follow these maintenance tips:
Clean Regularly: Snow, salt, and dirt can accumulate on your helmet. Clean the visor and shell with a microfiber cloth and a mild cleaning solution.
Protect the Visor: Use anti-fog sprays or install Pinlock inserts to prevent fogging.
Dry Thoroughly: After riding in wet conditions, remove the liner (if possible) and let the helmet dry completely to prevent odors or mold.
Inspect Frequently: Check for any cracks, scratches, or loose fittings that could compromise safety or performance.
More Motorcycle Winter Riding Tips and Storage Tips
Many riders choose group ride in winter, which is indeed a good choice for safe winter riding.
When riding in groups in winter, using group ride helmet intercoms will be a better option. They can provide riders with real-time, convenient, hands-free communication.
You can install helmet intercoms with IP67 waterproof level on your winter motorcycle helmet, such as Fodsports FX7.
This latest Bluetooth mesh intercom from Fodsports uses Bluetooth 5.4 and has mesh communication technology.
It can meet the needs of long-distance communication as long as 2000m and keep the communication stable and clear.
Also, its dual-chip design enables it to listen to music while intercom, bringing more fun and enjoy to your winter riding.
Its high IP67 waterproof level makes this communication systems work normally and stably even in rainy and snowy days. In winter group riding, Fodsports FX7 will ensure that your riding communication is not affected.
Choosing the right winter motorcycle helmet can make all the difference when riding in cold weather.
Thermal insulation, anti-fog technology, windproof and waterproof designs, these are key factors. Helmets with these features can help you handle the unique challenges of winter riding.
Whether you prioritize comfort, visibility, or safety, there’s a helmet on this list to meet your needs.
The helmets mentioned in the above are among the top winter helmet options available in 2024. By investing in one of these helmets and maintaining it properly, you can ride confidently and comfortably throughout the winter season.
Snowmobiling is a thrilling outdoor activity enjoyed by people of all ages. But, like any motorized sport, it comes with rules and safety guidelines.
One of the most important aspects of snowmobiling is understanding the age requirements and regulations that apply in your area.
These rules ensure the safety of riders, protect the environment, and prevent accidents.
In this guide, we’ll break down everything you need to know about snowmobile age requirements.
Also, we will introduce some safety rules, and tips to make your snowmobiling experience enjoyable and safe.
A young child is riding snowmobile with an adult - Snowmobile Age Requirements and Rules
Why Are Age Requirements Important?
Snowmobiles are powerful machines that can weigh over 400 pounds and reach speeds of 100 mph or more.
So, operating one requires physical strength, coordination, and judgment.
For most younger people, they are not strong enough to handle its weight and strength.
Age requirements are put in place to:
Firstly, to ensure safety. Younger riders may lack the physical ability or experience to handle a snowmobile safely.
Secondly, to promote responsibility. Age restrictions ensure that riders understand the seriousness of operating a motorized vehicle.
Thirdly, to comply with laws. Following age requirements helps avoid fines or legal trouble.
Fourthly, to protect the environment. Rules prevent young, inexperienced riders from causing damage to trails, wildlife, and natural habitats.
General Age Requirements for Snowmobiling
children are riding snowmobiles under adult supervision
Age requirements vary depending on the country, or state where you are snowmobiling. Below is an overview of common rules:
United States Snowmobile Age Requirements and Rules
In the United States, snowmobile laws differ from state to state. Here are some general guidelines:
Minimum Age to Operate:
In most states, children under the age of 12 are not allowed to operate a snowmobile without adult supervision.
Some states, like Minnesota, allow children as young as 10 to operate a snowmobile after completing a safety course.
Supervised Riding:
Riders under a certain age (typically 16) must be supervised by an adult or ride under specific conditions.
Safety Course Requirements:
Many states require young riders (often those under 18) to complete a snowmobile safety course before operating a snowmobile.
Certificates of completion may need to be carried while riding.
Driver’s License Requirements:
Some states allow older teens (16 and above) to operate a snowmobile without supervision if they have a valid driver’s license.
Canada Snowmobile Age Requirements and Rules
Canada has more snommobile sports porpularity and vast snowmobile trail networks. Thus Canada's snowmobiling laws are stricter in some provinces.
Here’s what you need to know:
Minimum Age to Operate:
In general, children under the age of 12 are not permitted to operate a snowmobile on public trails.
In provinces like Ontario, the minimum age to operate a snowmobile on public land is 12. But, riders must complete a safety course.
Supervision Rules:
Riders under 16 typically need adult supervision in most provinces.
Safety Course Requirements:
Completion of a snowmobile safety training program is mandatory for young riders in provinces, such as Ontario and Quebec.
Driver’s License Requirements:
Some provinces require a valid driver’s license or a motorized vehicle permit to operate a snowmobile on public trails.
a father is helping his child organize snowmobiling equipment - Snowmobile Age Requirements
State and Provincial Snowmobile Laws
While we’ve covered general guidelines, it’s essential to know the specific laws in your area. Here’s a closer look at some of the laws in popular snowmobiling regions:
Children under 12 years old are not allowed to operate a snowmobile on public trails, routes, or corridors. But they can operate a snowmobile on private property under the supervision of a parent, guardian, or designated adult.
Riders aged 12 to 15 years old are allowed to operate a snowmobile on public trails.(state-approved snowmobile safety course required)
Riders aged 16 and older are allowed to operate a snowmobile on public trails without supervision
Minimum age to operate: No specific minimum age to operate a snowmobile in Wyoming. But riders under 18 are strongly encouraged to be supervised by an adult.
Riders under the age of 16 are recommended to complete a snowmobile safety education course.
A valid driver’s license is not required to operate a snowmobile in Wyoming.
Children under 12 should always be accompanied by a licensed adult or a responsible guardian.
All snowmobiles operating on Wyoming’s public lands or trails must have a valid snowmobile permit.
Riders under 14 must be supervised on public trails.
Key Snowmobile Safety Rules
an adult is teaching the children snowmobiling safety rules
In addition to age requirements, there are several safety rules that all snowmobilers must follow. These rules are designed to protect riders, other trail users, and the environment.
1. Always Wear Protective Gear
Helmet: A DOT-approved helmet is mandatory in most areas. It protects you from head injuries in case of an accident.
Warm Clothing: Wear insulated, waterproof clothing, gloves, and boots to protect against cold weather.
Eye Protection: Goggles or a helmet with a visor are essential to shield your eyes from snow, wind, and debris.
a father is communicating with a young snowmobiler
No matter if there is a law/requirement or not, parents should supervise young riders while they are snowmobiling. Because safety always takes precedence over the joy of riding a snowmobile.
If your child is eager to try snowmobiling, here are some tips to ensure their safety:
Start with a Smaller Snowmobile:
Youth snowmobiles are designed with lower speeds and smaller engines. This also makes them easier for kids to handle.
Enroll Them in a Safety Course:
A safety course will teach your child proper riding techniques, rules, and how to handle emergencies.
Supervise Their Rides:
Always accompany young riders, especially if they are new to snowmobiling.
Set Clear Rules:
Establish boundaries, such as designated trails and speed limits, to prevet risky behavior.
Snowmobiling can have an impact on the environment if not done responsibly. Follow these tips to minimize your footprint:
Stay on Marked Trails:
Riding off-trail can damage vegetation and disturb wildlife.
Respect Wildlife:
Avoid entering areas known to be habitats for animals while riding snowmobiles. Especially during winter period, they are vulnerable in these days.
Reduce Noise Pollution:
Use snowmobiles with properly functioning mufflers to limit noise.
Dispose of Waste Properly:
Never leave trash or fuel containers on trails.
Penalties for Violating Snowmobile Laws
Different countries, states and provinces have different penalties for youth riding snowmobiles. These may differ from age, fine amount, license, etc.
Failing to follow snowmobile laws can result in:
Fines: Penalties for underage riding, riding without a safety certificate, or trespassing can range from $100 to $500 or more.
License Suspension: In some areas, snowmobile violations can lead to the suspension of your driver’s license.
Confiscation of Snowmobile: Serious violations, such as repeated trespassing, can result in your snowmobile being impounded.
If you want to have more fun and enjoyment of snowmobiling, it is necessary to comply with the snowmobile requirements and laws in your area.
Before your child starts operating a snowmobile, check the requirements and laws in the area where you planning to ride. Make sure your snowmobile riding is legal, otherwise there will be penalties.
Conclusion
Snowmobiling is an exciting activity to both youth and adults. It offers adventure, fun, and a chance to enjoy nature.
To get the best snowmobiling experience, it’s crucial to follow age requirements and safety rules. Whether you’re a parent teaching your child to ride or an experienced snowmobiler exploring new trails, there is no exception.
Understanding the laws and guidelines in your area is essential. These laws and guidelines are not meant to restrict your ability to enjoy snowmobiling. In fact, they are there to protect you, your partners, and other fellow snowmobilers on the trail.
Remember to follow these snowmobile age requirements and rules when you take your child to the snowmobile places. And, take the necessary precautions while snowmobiling. Then you can ensure a safe and enjoyable ride for yourself and others.
Always remember: safety first, respect the environment. Enjoy the thrill of snowmobiling responsibly!
Cold weather won’t ruin the fun for those who love riding motorcycles. Some riders are driven to ride their motorcycles in the winter because of commuting. Whatever your situation, riding a motorcycle in the winter is doable.
However, we all know that riding a motorcycle in the snow and ice presents unique challenges. The right motorcycle must provide stability, traction, and reliability.
Here, we explore the best options for those who dare to take to the winter on two wheels.
Best Motorcycle for Snow and Ice Recommendations
1. Yamaha WR450F
a man is riding a Yamaha WR450F on the snow - best motorcycle for snow and ice options
Overview
The Yamaha WR450F is a famous motorcycle known for its adaptability and resilience. Thus making it a top choice motorcycle for snowy conditions. This off-road motorcycle is designed for rugged terrains. And it can also provide excellent performance in snow and ice.
The WR450F boasts a 450cc liquid-cooled, DOHC motorcycle engine. This provides a strong power-to-weight ratio, essential for maintaining control on slippery surfaces.
Besides, it features advanced suspension systems, with a fully adjustable fork and shock. Even on uneven and icy terrains, the suspension system can still ensure a smooth ride.
What's more, the bike can be fitted with studded tires, enhancing grip on snow and ice.
Performance in Snow
The Yamaha WR450F’s lightweight design and powerful motorcycle engine allow for nimble handling. Riders can easily navigate through deep snow and icy paths with confidence.
2. Ural Gear Up
two men riding the Ural Gear Up on the ice at the Lake Baikal (Source: Armadillo Merino)
Overview
The Ural Gear Up is a unique option, offering a sidecar for added stability. It was originally designed for the Russian military use. Thus it’s built to withstand harsh weather conditions like snowy and icy road conditions.
Here, we would like to mention its sidecar stability first. The sidecar provides balance, reducing the risk of slipping.
So, even on slippery surfaces like snowy and icy road, it can still get a well balance.
Besides, it can also carry extra gear or passengers. If you are planning a long winter ride journey, the Ural Gear Up should be one of your top choice.
Moreover, its engine performance is also impressive. With a 749cc engine, the Ural Gear Up delivers enough power to handle tough winter routes.
Additionally, the Gear Up is equipped with two-wheel drive. This feature is crucial for maintaining traction on ice and snow.
Performance in Snow
Its robust design and two-wheel drive make the Ural Gear Up ideal for snowy adventures. The sidecar allows for more contact with the ground, improving stability significantly.
3. KTM 450 EXC-F
a rider is riding a KTM 500 EXC-F on a snow and ice trail
Overview
The KTM 450 EXC-F is a favorite among off-road enthusiasts. Its exceptional engineering makes it a reliable companion for snow and ice adventures.
One of the reasons why the KTM 450 EXC-F stands out is its lightweight frame. This enhances maneuverability in slippery conditions.
Besides, it features a 450cc engine, providing a perfect balance of power and control.
KTM 450 EXC-F uses high-quality suspension systems and the potential for studded tires. This top-quality suspension and traction ensure superior grip on icy surfaces.
Performance in Snow
With its responsive handling and powerful engine, the KTM 450 EXC-F should be listed as one of the best motorcycles for snow and ice.
Generally, the KTM 450 EXC-F excels in navigating through treacherous winter landscapes.
4. Husqvarna FE 501
Husqvarna FE 501 ride in snow
Overview
The Husqvarna FE 501 is designed for extreme conditions. It combines power and agility, making it a perfect motorcycle for icy challenges.
On one hand, its 510cc engine offers robust power. This is truly crucial for tackling snow-covered trails.
On the other hand, its durability is also impressive among various motorcycles. It is built to withstand harsh conditions, its components are both reliable and durable.
Moreover, the bike's design allows for precise handling, an asset when riding on ice.
Performance in Snow
The Husqvarna FE 501’s power and durability make it a dependable choice for winter riding. It is capable of handling deep snow and slick ice with ease.
5. Timbersled Snow Bike Kit
Timbersled Snow Bike Kit ride in snow (Source: Timbersled)
Overview
Strictly speaking, the Timbersled Snow Bike Kit is not a motorcycle on its own. But it can transform dirt bikes into snow machines. This versatility makes it an attractive and best motorcycle option for winter riders.
The Timbersled Snow Bike Kit has a conversion kit. Rides can convert a standard dirt bike into a snow bike by replacing wheels with a ski and track system.
What's more, it also has wide compatibility and can work with a variety of dirt bike models. Thus making it can be able to offer flexibility for riders.
When the winter days are over, you can easily switch it back to traditional wheels.
Performance in Snow
The Timbersled kit provides excellent flotation and traction, especially on snowy trails. Therefore, it is possible to ride in deep snow where traditional motorcycles would struggle.
6. Honda CRF450RX
A Honda CRF450RX is going through a snow and ice trail
Overview
The Honda CRF450RX is known for its balance of power and control. This off-road motorcycle model is well-suited for winter conditions.
Firstly, a 450cc engine ensures efficient power delivery, helping maintain traction.
Secondly, its adjustable suspension system allows customization for snow and ice.
What's more, Honda’s reputation for reliability means this bike can handle tough environments.
Performance in Snow
The Honda CRF450RX’s precise engineering offers stability and control. Honestly, this is crucial for navigating icy roads and snowy trails.
7. BMW R 1250 GS Adventure
BMW R 1250 GS Adventure ride in snow and ice
Overview
The BMW R 1250 GS Adventure is a robust touring motorcycle. This makes it capable of tackling various terrains, including snow and ice.
The powerful engine of BMW R 1250 GS Adventure is a must-mention feature. Its 1254cc engine provides substantial power, ideal for long-distance winter rides.
Besides, the R 1250 GS Adventure is equipped with advanced electronics. The features like traction control and ABS enhance safety on slippery surfaces.
For winter rides, this motorcycle will provide you with impressive comfort and storage. Designed for comfort with ample storage, making it suitable for extended trips.
Performance in Snow
The BMW R 1250 GS Adventure may be heavier than typical off-road bikes for some rides. But its technology and power ensure it remains a formidable option for winter touring.
What Kind of Motorcycle is Good for Snow and Ice?
For snow and ice, a motorcycle with a lightweight, dual-sport or adventure design is ideal.
Here are some tips to help you find a suitable motorcycle for snow and ice:
Look for features like good ground clearance and a reliable engine.
Motorcycles with traction control systems are also beneficial.
Consider a snow bike conversion kit for added stability
Brands like Yamaha, KTM, and Honda offer models suitable for such conditions.
What is the coldest weather to ride a motorcycle?
Riding a motorcycle in cold weather can be challenging and potentially dangerous. Generally, temperatures below 32°F (0°C) are considered too cold for safe riding. Because there will be risks like ice, reduced tire grip, and wind chill. At these temperatures, exposed skin can quickly suffer from frostbite.
It's crucial to wear appropriate gear, including thermal layers, gloves, and a full-face helmet. Ensure your bike is well-maintained, with tires suitable for cold weather. Ultimately, personal comfort and safety should be the first factor you need to consider when riding in cold conditions.
Safety Ride on Snow and Ice: Group Riding Helmet Communication System
Riding a motorcycle on snowy or icy days needs more focus on the road and surroundings. Riding with a group will make you more safe and confidential to handle those hash roads.
For example, the Fodsports M1-S Plus, Fodsports FX8 Pro can support as many as 10 riders communication in a group. This is enough to meet most team communication needs.
The system will help you better communicate with your group. Plus with hand signals, you will not need to scream loudly at others when talking with them.
What's more, the system also supports you controlling your smartphone with voice assistant, so that you can listen to music, and answer phone calls. With this assistant system, you just need to place your hands on the motorcycle handlebar and pay attention to the trail. This is more safe for your ride, especially on cold winter days.
Choosing the right motorcycle for snow and ice depends on your specific needs, such as stability, power, and versatility. The above motorcycle models are the best options we analyzed according to their true performance in winter.
You can choose the Yamaha WR450F or KTM 450 EXC-F for excellent off-road capabilities. Also, the Ural Gear Up is a good choice since it provides unparalleled stability. For those looking to adapt their existing bikes, the Timbersled Snow Bike Kit offers a unique solution.
Regardless of your choice, always prioritize your safety. Invest in the right gear and ensure your motorcycle is properly maintained for winter.
With the right preparation, riding through snow and ice can be an exhilarating experience.
Winter's coming, and for most of us, that means it's time to park and store the motorbike. BUT, there are die-hard riders and folks who need to ride motorcycles in winter, no matter how cold it gets.
Some people might think winter riding is cool. But let's be real, it's tough.
Cold or cool, which will you choose?
It's not just about the freezing temperatures. Everything about riding changes when winter hits.
The cold, snow, and other nasty weather can mess with your bike and you.
So, you gotta get ready and be careful before setting out on a winter ride. A few must-have essential cold-weather riding gear can make your ride way better during the really cold months.
Whether you're a pro or this is your first winter ride, this blog's got you covered. Here are some necessary motorcycle winter riding tips to stay safe and actually enjoy your winter rides.
Motorcycle Winter Riding Tips
#1. Prepare your motorcycle
Check your motorcycle and get it prepared - motorcycle winter riding tips
Check your tires
Winter riding can be slippery or icy, so make sure your motorcycle tires have excellent traction.
Only if your tires have enough tread depth can you safely handle slippery and icy roads.
Winter tires for motorcycles are currently available in many online and offline stores. You can change your regular tires for winter ones when riding on those cold days. Winter tires can provide better grip in cold and slippery road conditions.
Besides, check the tire pressure before you go, making sure the pressure is normal and good to go.
Battery Health
Cold weather will drain your motorcycle battery faster than usual. Therefore, it is necessary to check the battery charge and condition regularly.
Moreover, the working time of motorcycle batteries will also decrease in winter. If you are about to embark on a long-distance ride, it is important to charge the battery before departure.
And, you should also pay attention to the battery life during the journey.
When the motorcycle is not in use, hook its battery up to a battery charger to maintain the power. Do not leave the battery in a depleted state for a long time, which will damage the battery and shorten its life.
Check all fluid levels, including oil, coolant, and brake fluid before you start the winter ride.
Use winter-grade oil, so your motorcycle engine runs smoothly in the cold. This kind of oil can protect and help your motorcycle start and run in cold weather.
Besides, ensure the coolant is rated for below-freezing temperatures to prevent engine damage.
Winter days are short, and the weather can be bad; the visibility is often reduced. So, a lighting check is also an important winter motorcycle riding tip.
Check and make sure all lights are functioning correctly. These include the headlights, brake lights, turn signals, daytime running lights, fog lights, and others.
If you think the light is not bright enough, you can consider upgrading to LED bulbs.
Lubricate Moving Parts
Cold weather can cause parts to stiffen. Keep your chain and other moving parts well-lubricated to ensure smooth operation. Check and adjust lubrication more frequently than in warmer months.
#2. Dress for the Weather to Stay Warm
essential motorcycle winter riding dress to stay warm
Layer Up
Wearing multiple layers is key to staying warm during cold day rides. But you need to choose gear that fits you well but isn’t too tight.
Breathable cloth that has room for airflow and can be layered is your first choice.
When riding on winter days, I prefer to wear this style:
Wear a moisture-wicking base layer first;
Then an insulating mid layer;
Finally, wear a waterproof and windproof outer layer.
This combination helps regulate your body temperature and keep you dry.
I must stress that waterproof and windproof gear is important for winter riding. They will protect your body from getting wet or freezing cold in the cold winter.
By the way, a friendly reminder: even if there’s no rain, snow, or extreme weather when you set out, bring these cold-weather clothes. Once you’re in these extreme conditions, they’ll keep your body warm.
Trust me, this winter motorcycle riding tip will always benefit you.
Heated Gear
Heated gear like gloves, vests, and grips is also a necessary winter riding tip. These are especially useful for maintaining your body temperature during long rides.
I love using heated gloves and heated grips because they keep my hands warm. With warm hands, I can better control the motorcycle handlebars.
If your hands are cold, you can't even grip the handlebars, and no way you can control the motorcycle properly.
Also, when buying these gears, you need to pay attention to the configuration of your motorcycle. Make sure your motorcycle can handle the electrical load of the heating gear.
Good boots
Your feet' protection matters just as much as your hands.
The hands need protection because they control the handlebars of the motorcycle. You feet need protection because they control the clutch, shift gears and brake.
Frozen feet mess with your clutch, shifting, and braking. This is no fun, totally unsafe.
I think you should be aware of this danger, but I would rather you never experience these unhappy moments.
Thus, wearing warm, waterproof and grippy boots is your best choice when riding in winter.
Not know how to choose the right boots for your next ride? Read here.
Balaclava and neck warmer
Balaclava or neck warmer can protect your face and neck from cold wind. These items help seal the gap between the helmet and jacket to prevent wind chill. Wearing these equipment will prevent the cold wind from entering your helmet and jacket, so your body will not feel cold.
Choose a full-face helmet
In the freezing winter, wearing a full-face helmet must be your first choice. It will fully protect your face and head. The cold wind will not make your head cold or even cause a cold.
I also prefer to pair my full-face helmet with a neck warmer, which will bring me a better effect.
Together, they will block the gap between the helmet and the jacket. The cold air and wind will not be able to sneak in and get close to your body.
#3. Equip Essential Motorcycle Winter Riding Gear
Another winter motorcycle safety tip is to prepare your cold-weather riding gear. Unlike summer riding, winter riding requires some additional equipment.
Thermos
A sip of warm water when you stop is the best. Prepare a thermos so that you can bring warm water when riding in winter.
It will help your body maintain its core temperature and prevent hypothermia.
Drinking warm water can also increase blood circulation slightly, which can help provide warmth to your cold extremities (such as fingers and toes).
Hand warmers
Hand warmers are also a good choice. They can help warm your hands. You can buy a small hand warmer, add hot water and put it into your large windproof gloves before going out. Most hand warmers can maintain temperature for several hours.
Snacks
In the winter, you need more calories to maintain body temperature, especially when riding in the winter. It is best to carry some small but high-calorie snacks such as chocolate, candy, beef jerky, nuts, etc. These small snacks can quickly replenish energy and keep you energetic and focused on riding.
Helmet communication system
Choose a waterproof motorcycle helmet communication system to keep you connected in the winter. For example, the Fodsports FX7, a Bluetooth mesh intercom with IP67 waterproof level, will be a perfect choice.
On one hand, they can achieve real-time smooth voice communication when you ride in a group. Thus making your ride more convenient and safer.
On the other hand, they can also connect with the voice assistant of the smartphone and smoothly make calls, listen to music or use other functions on the phone.
You don't need to take out your hands from your clothes to take out your phone and stand in the cold wind shivering to operate the phone.
add wind protection device to minimize cold airflow
Lowers
Adding lowers to your motorcycle can help block some of the cold wind, rain, and snow.
It mainly provides wind and mud protection for the rider's legs and boots. This can minimize cold airflow and prevent your legs and feet from being frozen by the constant invasion of cold airflow.
When choosing lowers, be sure to choose one that matches the shape of your motorcycle.
Some motorcycle equipment shops can provide custom services to make the lowers fit the engine guard perfectly, thereby minimizing the shaking during riding.
Windshield
The windshield is another device worth equipping for winter motorcycle riding.
Because different motorcycle model has a different shape, there are also various windshields.
Installing a quick-release removable windshield will be the best choice. They can provide the most fashion sense and function.
And, when the temperature rises and the warm season arrives, you can also remove it and store it for use next winter.
Winter riding requires a more cautious approach than other riding seasons. Therefore, adjust your riding style will be a smart winter motorcycle riding tip.
Remember to increase your motorcycle following distance when riding in winter. You will get more time to react to slippery conditions.
What's more, you should avoid sudden acceleration and braking, and make turns slowly to prevent skidding.
Be Aware of Road Conditions
Stay informed about the weather and road conditions before heading out.
Look out for black ice, which can be nearly invisible but extremely slippery.
And, you should avoid riding immediately after a snowfall until the roads are cleared.
Use Caution on Bridges and Overpasses
These structures freeze faster than regular roads due to airflow underneath.
So, remember to approach them with caution and avoid sudden movements. Otherwise could lead to a loss of traction.
Avoid Riding in Extreme Conditions
If conditions are too severe, consider postponing your ride.
Heavy snow, ice storms, and rainy days increase the risk of accidents and mechanical failures.
In the extremely low temperature and heavey wind days, cancel the ride is also a wise choice.
#6. Stay Your Motorcycle Visible
add reflective tape onto your motorcycle can also improve its visibility
Bright Clothing
Wear bright or reflective clothing can also enhance you and your motorcycle's visibility. This is crucial in winter when daylight is limited and adverse weather can reduce visibility even further.
Use Reflective Tape
Add reflective tape to your motorcycle and gear. This simple addition can significantly improve your visibility to other drivers. These tapes will be especially helpful in low-light conditions.
Detailed Tips to Make Your Motorcycle More Visible
Group riding will be one of the perfect motorcycle winter riding tips. Compared with other seasons, winter have more safety factors such as low temperature, rain, snow, ice, and slippery roads.
Riding with a group of friends will greatly increase the safety of winter motorcycle riding. When you ride together, use motorcycle intercoms that supports group communication. It will bring more safety and smooth communication to your rides.
When there is a problem on the road ahead or around you, you can communicate in real time through the intercom. Multiple pairs of eyes in the riding group will be able to foresee various unsafe factors earlier.
Or, when one of you needs help, you can also call your teammates through group intercom.
Fodsports FX8 Pro, Fodsports M1-S Plus and Fodsports FX8 are the best options for group communication. They can be easily installed on the helmet, and through one-click quick pairing, you can talk to other riders, share music or make calls. The FX8 Pro can even support listening to music while intercom, making your winter ride more enjoyable.
First of all, if you are a novice rider, we do not recommend riding in winter unless you have to. Because most novice riders who have been riding for less than a year have no experience riding in winter. If you ride on the road rashly, it is easy to cause safety accidents.
Of course, for experienced riders, don't take it lightly and let your guard down. Before riding in winter, you also need to practice to find the feeling you had when riding last winter.
Pay attention to vigilance
When riding in winter, drivers are more likely to be distracted. Besides, weather such as rain, snow, and fog will also affect your vision. Thus, riders need to be more focused and be aware of the blind spots of both yours and other vehicles.
Increase the distance between vehicles
Increasing the distance between you and other vehicles is one of the important winter motorcycle riding safety tips. Because in winter, you and other vehicles need more vision and braking distance than in other seasons.
Practice in a safe area
If you are a novice in winter riding, practice in a safe, controlled environment before heading to busy roads. Parking lots or quiet streets are ideal places to get familiar with different handling characteristics.
And, if you live in an area where there are snow and ice in the winter, you also need to be familiar with some snow and ice riding techniques. Because snow and ice riding techniques are still different from typical winter riding.
Take a winter riding course
If you are a novice, you can also consider signing up for a winter riding course. There, professional instructors will teach you a wealth of winter motorcycle riding tips.
These courses provide valuable skills for handling the bike in cold and slippery conditions, which can enhance your confidence and safety.
When riding in the winter, always make sure you can contact your family and friends. If an accident occurs, cold weather can make it more difficult to help, such as delaying the arrival of rescue forces.
Carry a fully charged phone
Always carry a fully charged phone with you in case of an emergency. If riding for longer periods of time, consider carrying a portable charger. These will ensure that you can call for help if needed.
Tell others about your route
Tell your family or friends about your planned route and estimated time of arrival. This way, if there is a problem, they can notify the authorities of your location.
#10. Prepare for Emergencies
Prepare an emergency kit
Carry an emergency kit that includes items such as a flashlight, first aid supplies, spare fuses, and basic tools.
In addition, you may need to pack extra cold weather gear because of the colder winter temperatures. Include a thermal blanket and some non-perishable snacks in case you get stranded.
Know basic repairs
Being familiar with basic motorcycle repairs is a good idea. Knowing how to fix a flat tire or jump-start your battery is useful if you run into problems on the trail. Otherwise, it can be dangerous to get stuck with your motorcycle in the snow during extreme winter weather.
two men ride motorcycles in the winter snow (Source: Royal Enfield)
Motorcycle Winter Riding Tips FAQS
How cold is too cold to ride a motorcycle?
When temperatures drop below freezing, around 32°F (0°C), due to the potential for ice on the roads. Riding a motorcycle under this temperature will become risky.
The wind chill can make it feel even colder, increasing the risk of frostbite and hypothermia. Besides, the motorbikes also become harder to handle as tires lose grip.
Some riders find anything below 40°F (4°C) uncomfortable without proper gear.
Ultimately, it's crucial to assess road conditions, your bike's capabilities, and your comfort level before deciding to ride in cold weather.
How long should I warm up my motorcycle in the winter?
In winter, warm up your motorcycle for about 1 to 5 minutes. This allows the engine oil to circulate properly, ensuring smoother performance.
Modern motorbikes generally don't need long warm-up times due to efficient fuel injection systems.
Just start the engine, let it idle briefly, and ride gently until it reaches optimal temperature. Besides, you should avoid revving the engine hard right away.
This practice helps prevent engine wear and ensures all components are ready for the cold ride ahead.
When should you not ride a motorcycle?
Avoid riding a motorcycle during severe weather conditions. For example, the heavy rain, snow, ice, or strong winds day, as these increase the risk of accidents.
Also, don't ride if you're feeling unwell, fatigued, or under the influence of alcohol or drugs. These will impair your reaction time and judgment.
Poor visibility, whether due to fog, heavy traffic, or nighttime darkness without proper lighting, is another reason to refrain.
Always prioritize safety and assess both your condition and the environment before deciding to ride.
Is it OK to leave a motorcycle outside in the winter?
Leaving a motorcycle outside in winter is not ideal, but it can be managed with precautions. Here are some tips you can follow:
Use a high-quality, waterproof cover to protect it from snow, rain, and ice. Ensure the cover is breathable to prevent moisture buildup, which can lead to rust.
Consider using a battery tender to maintain the charge
Keep tires off the ground to prevent flat spots.
Regularly check and lubricate moving parts to prevent corrosion.
If possible, store the motorbike in a garage or sheltered area for better protection.
Does snow damage a motorcycle?
Snow itself doesn't directly damage a motorcycle, but it can lead to issues.
Moisture from melting snow can cause rust and corrosion, especially on exposed metal parts.
Besides, the salt used on roads to melt snow can also corrode metal and damage the bike's finish.
If a motorcycle is left in the snow without protection, the battery might drain faster due to cold temperatures.
To prevent damage, use a waterproof cover and regularly clean and lubricate the bike.
Do I need to winterize my motorcycle?
Yes, you should winterize your motorcycle if you’re not riding it during the winter months. This process protects it from damage caused by cold weather and inactivity.
Key steps include:
Adding fuel stabilizer to prevent the gas from degrading
Charging the battery or using a battery tender
Changing the oil to avoid engine corrosion
Clean and lubricate the chain
Cover the bike with a breathable cover
Ensure tires are properly inflated to prevent flat spots.
Conclusion
Riding a motorcycle in winter can be a rewarding experience, offering unique sights and a sense of adventure.
However, it requires careful preparation and a cautious mindset.
By following these motorcycle winter riding tips, you can enjoy winter rides safely and comfortably.
Remember, the key to successful winter riding lies in preparation, awareness, and adaptability. Stay safe and enjoy the journey!
Have you wondered if other road participants can see you clearly on the road? Have you considered how to make your motorcycle more visible on the road?
Riding a motorcycle is an exhilarating experience for me in the past 10 years of riding life. It offers me a sense of freedom that's hard to match.
However, it comes with its own set of challenges to me, particularly when it comes to visibility on the road.
As a rider myself, I’ve learned a few tricks over the years to ensure that I’m seen by other drivers, enhancing my safety and peace of mind.
Here’s an ultimate guide to making your motorcycle more visible based on my years of riding experience.
How to Make Your Motorcycle More Visible?
1. Wear High-Visibility Gear
wear Brightly colored jackets to make you and your motorcycle more visible
One of the simplest ways to increase your visibility is by wearing high visible gear. Brightly colored jackets, helmets, and gloves can significantly improve your chances of being seen. This will be more effective especially in low-light conditions.
I think most riders should have a deep understanding of this tip. Since neon colors like yellow, orange, and green stand out against most road environments.
This color contrast allows other road users to easily notice you and avoid danger.
Besides, some jackets and helmets are also equipped with reflective elements on the cloth. These added features bounce light back to drivers, making you more noticeable at night.
I switched to a neon yellow jacket a few years ago, and the difference was immediate. Drivers seemed to notice me sooner, giving me more space on the road.
Believe me, it’s just a small investment for a big safety upgrade for your ride.
2. Upgrade Your Lighting
upgrade your motorcycle with led lights
Good lighting is crucial for visibility. Upgrading your motorcycle’s lights can make a huge difference.
There are 3 types of lights you need to consider to upgrade:
LED Headlights: Brighter and more efficient than halogen bulbs.
Auxiliary Lights: Added lights can increase your profile, making you more visible from a distance.
Brake Light Modulators: These make your brake lights flash briefly before going solid. The drivers behind you will notice you more easily.
When install the lights, make sure your lights are properly aligned. Do not blind other drivers, otherwise the effect of these lights will be counterproductive.
Besides, regularly check and clean your lights to maintain their brightness.
Sometimes I ride at dusk or night, so I installed an LED headlight on my motorcycle last year.
The result is impressive. On one hand, I can clearly feel that my nighttime visibility improved dramatically. On the other hand, the oncoming traffic seemed to spot me much sooner.
Honestly, these changes added a layer of safety during my night rides.
Of course, many riders are wary of upgrading their lights. The good news is that upgraded lights do attract oncoming traffic more easily. However, if you use your lights improperly and annoy other vehicles, you may do more harm than good.
In addition, you also need to pay attention to the motorcycle laws in your area to ensure that these light upgrades are compliant.
3. Use Reflective Tape
add reflective tape onto your motorcycle can also improve its visibility
Reflective tape is an inexpensive and effective way to enhance your motorcycle’s visibility. It can be applied to various parts of your bike.
Best Places to Apply Reflective Tape:
Rims: Adding reflective tape to your rims creates a glowing effect when in motion.
Body Panels: Strategic placement can increase your bike’s visibility from various angles.
Helmet: For added visibility from all sides.
Applying reflective tape to my bike’s rims was a game-changer. It created a striking visual effect, especially during evening rides.
The added visibility from the sides gave me peace of mind. Since the riders/drivers and I can notice each other, I can safely pass the vehicles on my motorcycle. Also, when a vehicle is running behind me, the driver/rider can notice me.
Your position on the road can greatly influence your visibility. Being strategic about where you ride within a lane helps other drivers see you more easily.
The best position for motorcycle riders is left or right of the lane center.
Some riders may wonder about this. Here is the reason: the oil often collects on the road.
What's more, stay at the left or right of the lane center can increase your visibility in rearview mirrors.
Besides, remember to avoid the blind spots of other vehicles on the road. If the other vehicles cannot notice you, especially larger vehicles, it can be dangerous to you. Many motorcycle accidents are caused by the rider runs to the blind spots of other vehicles.
By shifting your position slightly, you will notice that other drivers are more aware of your presence.
5. Use Your Horn Wisely
rightly use the motorcycle horn
While not a direct visibility enhancer, using your horn can alert drivers to your presence. It will be especially effective if they didn’t see you initially.
Don't use the horn blindly, otherwise it will not only create noise but also lead to counterproductive results.
The first way is to use short blasts to remind the driver or rider. A quick beep is often enough to get attention without being aggressive.
Moreover, when you are passing other vehicles, use your horn to alert drivers when you’re passing them. This will remind the road participants to notice you and leave enough space for you to overtake them.
In addition, when you are driving on a curve with poor visibility, be sure to honk your horn. This will alert drivers on the other side of the curve that you are about to appear. They will also slow down in advance and drive carefully in their own lanes.
Some riders may be hesitant to use the horn at first, worried about coming across as rude. But, a well-timed beep could prevent potential accidents, making it a valuable tool for staying safe.
6. Apply the brakes
apply the motorcycle brakes to improve your motorcycle visibility
When you are about to slow down or stop, remember to apply the brakes once or twice in advance.
Even if you slowly slow down by reducing the throttle until the motorcycle stops, remember to apply the brakes.
Because the brake lights behind your motorcycle will light up at this time, so that the vehicles behind you can notice you in time.
Don't apply the brakes suddenly, which is very dangerous. On the one hand, emergency braking may cause the motorcycle to become unstable and cause it to roll over. On the other hand, when you brake suddenly, if the vehicle behind you does not react in time, it is easy to cause a rear-end collision.
7. Ride with a Group
ride in a group to make your motorcycle more visible
Riding with others can naturally increase your visibility. A group of motorcycles is much harder to overlook than a single rider.
What's more, drivers tend to be more cautious around motorcycle riding groups.
You will find it more enjoyable and safer when you join a local riding group and ride with them. The presence of multiple bikes made us more visible, especially on busy highways.
motorcycle daytime running lights also help make your motorcycle more visible
Daytime running lights (DRLs) are an excellent way to ensure you’re seen even during the day. They’re designed to make vehicles more noticeable in daylight.
DRLs are effective tools to help distinguish your bike from other objects on the road.
Don't think the DRLs may waste electricity, there are modern DRLs consume minimal power.
By adding DRLs, many riders can notice a marked improvement in how quickly drivers notice you during the day. It’s a small change with a big impact.
9. Communicate with Body Language
Group Motorcycle hand Signals - How to Make Your Motorcycle More Visible
Your body language can also communicate your presence and intentions to other drivers.
When you are about to turn at a cross, or change the lanes, these body languages will be very effective.
Firstly, make sure to visibly check behind you when changing lanes.
What's more, you can use hand signals to indicate turns or stops.
Drivers and riders behand you will notice your action and get prepared.
These body languages are very simple, but it brings you more visiable in some aspects.
Incorporating clear body language into your riding routine helps prevent misunderstandings on the road. Drivers seemed to respond better when they could see your intentions.
10. Install Turn Signal Indicators
motorcycle with turn signal indicators
Installing additional turn signal indicators can also make your motorcycle more visible.
For example, you can install handlebar-end signals or mirrors with integrated signals on your motorcycle.
These extra signal indicators can enhance your visibility when changing lanes or turning.
There are many options you can choose in the motorcycle customization stores. These indicators can also add a sleek look to your motorbike.
Two years ago, I installed a handlebar-end signals onto my motorcycle. I felt more confident that drivers could see my intentions, especially during busy commutes.
11. Keep Your Bike Clean
A clean motorcycle is a more visible motorcycle. Dirt and grime can dull the reflective surfaces on your bike, reducing visibility.
So, remember to wash your motorcycle regularly, and keep the lights and reflective surfaces clean.
Besides, waxing is also a useful tip to make your motorcycle more visible. It helps maintain a shiny finish that reflects light.
Keeping your bike clean not only makes it look better but also enhances its visibility. It’s a simple habit that pays off in safety while you are on the road.
Conclusion
Enhancing your motorcycle’s visibility is a crucial part of safe riding. By incorporating these practical tips, you can significantly reduce the risk of accidents and enjoy your rides with greater peace of mind.
What's your pre-season snowmobile maintenance checklist? Have you checked and maintained your snowmobile rightly before the snow days?
As the snow starts to blanket the landscape, snowmobiles become popular in the next few months. Many snowmobile enthusiasts eagerly anticipate the thrill of riding through winter wonderlands. But, before hitting the trails, it's crucial to ensure your snowmobile is in top condition.
Proper pre-season maintenance for your snowmobile is essential. It not only enhances your snowmobile's performance, but also ensures safety, longevity, and reliability.
Pre-Season Snowmobile Maintenance Checklist - What To Do?
1. Thorough Cleaning
A clean snowmobile is easier to inspect and maintain. This way you can clearly see the parts that need maintenance and care.
Because dirt and grime can hide potential problems that are not easy to see. The following are some things you need to pay special attention to:
First, clean the outside of the snowmobile with a mild detergent and water. Those areas that are prone to dirt accumulation need special attention and it is best to clean them all.
The second is to clean the chassis. Check and clean any debris or mud from under the snowmobile. Don't let the mud blind you, otherwise you may not be able to easily see the problems with your snowmobile chassis.
After cleaning, let the snowmobile dry completely to prevent rust and corrosion. You can use a soft cloth to wipe off the water on the snowmobile. You can also use a snowmobile dryer to speed up the drying process.
The engine is the heart of the snowmobile. This is the part I check the most during my daily snowmobile maintenance.
You don’t want to have an engine failure in the middle of your next snowmobile ride, right? Because you’ll be left in the snow and freezing. So, checking the engine regularly can prevent problems during a ride.
In addition, if the engine is properly maintained and serviced, it can save you a lot of expensive repairs later.
There are four areas you need to pay special attention to:
Oil level: Make sure the oil level is at the recommended level. Check the coolant level and the engine oil. If necessary, top up both or completely drain and replace the thin engine oil.
Spark plugs: Remove and inspect the spark plugs to make sure they are functioning properly. Clean or replace them as needed.
Fuel system: Check for any leaks or damage. Remember to replace old fuel with fresh gasoline.
Air filter: Clean or replace the air filter to ensure optimal air intake.
3. Examine the Drive Belt
examine the snowmobile drive belt (Source: Ski-Doo)
The drive belt is vital to power transmission, so don't overlook it. Because it's also an important part of your snowmobile, a preseason inspection of the belt is essential. A worn or deformed belt can cause performance issues to your snowmobile.
Here are the main procedures:
Visual Inspection: Check the belt for cracks, wear, or signs of wear and deformation.
Tension Check: Check the drive belt for loose cords or defects. Make sure the belt tension is correct. Adjust them if necessary.
Cleaning: If the drive belt is glazed, you can use a scuff pad to remove it.
Replacement: If the belt is badly worn, replace it with a new one. Also, run the sled for a few minutes after replacement and observe the belt's operation.
4. Assess the Suspension System
the Ski-Doo snowmobile suspension system
A well-functioning suspension system ensures a smooth ride and better handling. Therefore, you can't leave the suspension system off your pre-season snowmobile maintenance checklist.
Darrin Harr is a meteorologist and snowmobile enthusiast. In his snowmobile blog, he specifically recommends that snowmobile owners carefully check the rear suspension of the sled. Because the rear suspension takes the lion’s share of abuse on your snowmobile, it is the most prone to problems.
See what you need to look out for:
Lower the suspension and check if it raises on its own. If it doesn't, the shock absorber or spring is faulty or not lubricated enough.
Watch the suspension arms and springs for cracks or signs of damage. Replace them if necessary.
Inspect the suspension for wear and listen for any unusual sounds or excessive shaking.
Check the rear wheel of the snowmobile for dents or deformation. Also, check that the front wheel has a good stabilizer bar and the steering rod is straight.
The clutch usually works with the accelerator and brakes. When performing a pre-season maintenance check on your snowmobile, pay attention to the clutch as well. Pay attention to the following details:
Inspect the clutch for wear or damage and replace it immediately if necessary.
Pay attention to the clutch pulley. If necessary, clean and scrub the clutch pulley with an abrasive pad.
Engage the clutch to ensure that it is functioning properly.
During a short test drive, pay attention to whether the clutch is working properly.
snowmobile brake system inspect - Don't forget it when doing pre-season snowmobile maintenance
A reliable brake system is essential for safety on the road. There is nothing more frustrating than pulling the brake lever on your snowmobile and the vehicle doesn't respond. Therefore, a brake system inspection must be included in your snowmobile checklist.
Here are the details to pay special attention to:
Brake pads: Watch for any signs of damage or wear. If worn, replace them in time.
Brake lines: Check for leaks or cracks. Make sure they are securely connected.
Brake fluid: Make sure your brake fluid level is up to standard. Observe the color of the brake fluid (it should not be dark brown, otherwise you may need to clean and refill the brake fluid). If necessary, top up the brake fluid and make sure there are no leaks. In addition, the brake fluid also needs to be changed regularly. Dirty brake fluid can corrode the brake system and affect the good operation of the snowmobile.
7. Track Examination
a man is doing a snowmobile track examination during the snowmobile maintenance check
Track inspection is a must on your pre-season snowmobile checklist. Tracks provide traction, and any damage can affect performance and safety.
Therefore, it is important to pay attention to the tracks when you maintain your snowmobile.
For track inspection and maintenance, follow these steps:
Visual inspection: Look for any hooks, tears, punctures, and missing contours.
Tension adjustment: Lift the rear of the snowmobile and use a tension gauge to check the deflection of the track. Different types of snowmobiles may have different track tension recommendations. Overall, make sure the track is properly tensioned and aligned.
Secure: If the track is bent too much, it needs to be tightened. Also, check all staples to make sure they are installed.
Lubricate: Lubricate the suspension wheels and axles.
Verify: Check that both sides of the track are evenly aligned. If not, it is easy to wear the track and accessories prematurely.
8. Electrical System Check
The electrical system powers important components like lights and ignition on your snowmobile. So it's important to check this part of your pre-season snowmobile checklist.
Overall, check and make sure the cables are moving freely. Don't let them get stuck or tangled together, which can make it difficult to inspect, repair, or replace them later.
The following electrical systems need a close inspection:
Battery: Make sure it's fully charged and the terminals are clean.
Ignition: Check for proper function and signs of wear. If it's abnormal or worn, replace it with a new one.
Lights: Test all lights (headlights, taillights, and indicators) to make sure they're working properly.
9. Ski and Runner Inspection
Sharpening the snowmobile carbides - Pre-season snowmobile maintenance
Properly functioning skis and rails ensure good handling and stability. It is also an important factor in whether you can get the best skiing experience. During snowmobile maintenance, you should carefully check them to determine whether they are in good condition.
Here are the main parts you need to inspect:
Ski Condition: Check the surface of the skis for cracks or damage. Make sure they are firmly fixed.
Wear bars: Check how much cutting edge is left on the wear bars. If the wear is serious, they need to be replaced. If the rails are bent, twisted, or parts are missing, replace them.
Carbides: While examining the skis, remember to check how much cutting edge your carbides have left. If they are flattened off, then it is necessary to replace them.
Alignment: Make sure the skis are not misaligned. Aligned skis ensure that you have the best control.
For a safe and enjoyable ride, control systems must be responsive. These systems will help you stay on top of your snowmobile when you encounter any situation. Therefore, you need to carefully evaluate your snowmobile's control system to ensure that it is always under control the next time you ride.
Pay attention to the following control systems:
Throttle: Make sure it moves smoothly and does not get stuck when you apply or release the throttle. Check that the throttle cable opens and closes correctly. Also, pay attention to whether it returns to its original position when you release the throttle.
Handlebars: Check for looseness or damage. Make sure the handlebars can swing smoothly from side to side.
Cables: Check for wear and lubricate for smooth operation.
11. Check Safety Gear
Safety gear is essential to protecting yourself on the trails. Anyway, checking your safety gear is also part of your pre-season snowmobile maintenance. It will keep you safe before your next snowmobile trip, which could be as early as next month.
Some safety gear are especially important and need to pay attention to:
Snowmobile Helmet: Inspect for any damage. Make sure it fits properly.
Snowmobile communication system: Make sure your snowmobile intercom works in good condition. Remember to check its battery and make sure it is fully charged.
Protective Clothing:Check for wear and tear. Ensure it provides adequate protection.
Emergency Kit: Stock your kit with essentials like a first-aid kit, flashlight, and tools.
While you are checking the safety gear, you can also check all the snowmobile must-haves. Always make them ready, then you can start your next snowmobile ride at any time you want.
12. Final Test Run
To be honest, even if you check all of the above, you may not be able to find some problem spots. Therefore, a test run is necessary during pre-season snowmobile maintenance. This will help you identify any problems that may have been overlooked.
During the test run, you need to pay attention to the following aspects:
Take a short ride: Find a safe area and take a short ride on the snowmobile.
Listen and feel: Pay attention to its sound and handling. Some problems can be distinguished from the sound, shaking and some other handling feelings.
Adjust: Make any necessary adjustments based on your riding experience.
Need a thorough snowmobile maintenance check before the next ride? The pre-season snowmobile maintenance checklist in this article will help you!
These tips will ensure you a safer and more enjoyable experience on the trails.
By following this checklist, you can minimize the risk of mechanical failures of your snowmobile. At the same time, they also help you maximize your snowmobile's performance.
Remember, regular maintenance is necessary. It not only extends the life of your snowmobile but also enhances your safety and riding pleasure.
Get your snowmobile ready now, and make sure it is ready for the adventures ahead. Let's embrace the winter season with confidence!
How can you safely pass other vehicles on a motorcycle? Do you do it rightly and safely while you are passing through others on the road?
Motorcycling offers an exhilarating sense of freedom on the open road. However, with this freedom comes the responsibility of navigating traffic safely, especially when it comes to passing other vehicles. Safe riding is important whether you're a novice rider or a seasoned motorcyclist. Understanding the nuances of overtaking can make a significant difference in your safety and riding experience.
In this guide, we'll explore the essential techniques, strategies, and considerations for safely passing other vehicles while on your motorcycle. From assessing road conditions to executing the perfect pass, we'll cover everything you need to know. These tips will help enhance your riding skills and confidence.
1. Understanding the Risks and Rewards of Passing
a motorcycle is trying to pass a car on the road
Overtaking other vehicles on a motorcycle can be a necessary maneuver. Don't be too afraid of overtaking, it is just a common action during your riding.
But, remember, it's not without its risks. Therefore, you must be cautious about this action.
Before deciding to pass, it's crucial to weigh the potential benefits against the possible dangers.
1.1 Evaluating the Need to Pass
Sometimes, the urge to overtake stems from impatience or a desire for a clear road ahead. However, it's essential to ask yourself if passing is truly necessary. Consider the following:
Is the vehicle ahead moving significantly slower than the speed limit?
Are you in a rush, or can you comfortably maintain your current position?
Will passing provide a substantial improvement in your journey time or comfort?
By critically assessing the situation, you can avoid unnecessary risks. Also, these answers will help you make more informed decisions about when to initiate a pass.
1.2 Recognizing Potential Hazards
motorcycle accident - potential hazard of passing other vehicles on a motorcycle (Source: Blank Kim Injury Law)
Before attempting to overtake, scan the environment for potential hazards. These may include:
Oncoming traffic
Intersections or driveways where vehicles might turn
Limited visibility due to hills, curves, or weather conditions
Being aware of these factors will help you determine if it's safe to proceed with passing or if it's better to wait for a more opportune moment.
If you are riding alone, make sure you understand the overtaking environment around you first. Then you can decide on the next move (choose to overtake or not).
When you are riding with a group of friends, it is necessary to communicate with each other on the motorcycle intercom about the road conditions ahead in a timely manner. These Bluetooth communication devices will improve your safety when passing through other vehicles.
1.3 The Psychology of Passing
It's important to acknowledge the psychological aspects of overtaking. Some riders may feel pressured to pass due to:
A desire to keep up with faster riders in a group
Ego or competitiveness
Anxiety about holding up traffic behind them
Recognize these feelings, but don't let them cloud your judgment. Your safety should always be the top priority.
2. Preparing for a Safe Pass
check your surroundings before initiating a pass - the riders view
Successful overtaking begins long before you actually make your move. Proper preparation is key to executing a safe and smooth pass.
2.1 Positioning for Visibility
Your lane position plays a crucial role in setting up a safe pass. Consider the following:
Maintain a position that allows you to see ahead of the vehicle you intend to pass
Stay you and your motorcycle visible in the mirrors of the vehicle ahead
Perform a quick head check to cover your blind spots
Be aware of any vehicles that may be attempting to pass you
This comprehensive awareness will help prevent conflicts with other road users during your passing maneuvers.
3. Executing the Perfect Pass
a motorcycle is passing a car on the road
With proper preparation complete, it's time to put your plan into action. Follow these steps to execute a safe and efficient pass.
3.1 Signaling Your Intentions
Clear communication is vital when overtaking. Use your turn signals to indicate your intention to change lanes or pass. This alerts both the vehicle you're passing and other road users to your planned maneuver.
3.2 Accelerating Smoothly
As you begin your pass, accelerate smoothly and decisively. Avoid sudden bursts of speed that might destabilize your motorcycle or startle other drivers. Maintain a steady throttle throughout the maneuver.
3.3 Maintaining a Safe Buffer
As you overtake, ensure you maintain a safe distance from the vehicle you're passing. This buffer zone provides room for unexpected movements. And, it will reduces the risk of collision.
3.4 Returning to Your Lane
Once you've cleared the vehicle you're passing, signal your intention to return to your original lane. Ensure you have enough space before merging back, avoiding cutting off the vehicle you've just passed.
4. Adapting to Different Road Types
motorcycle pass vehicle on the road
Different road types present unique challenges when it comes to passing. Let's explore how to approach overtaking in various environments.
4.1 Two-Lane Highways
Passing on two-lane highways requires extra caution due to oncoming traffic. Consider these tips:
Wait for designated passing zones
Ensure you have a clear view of oncoming traffic
Be prepared to abort the pass if conditions change
Remember, it's better to wait for a safe opportunity than to risk a dangerous pass.
4.2 Multi-Lane Highways
On multi-lane highways, passing can be more straightforward but still requires attention:
Use the left lanes for passing when possible
Be aware of vehicles entering and exiting the highway
Watch for drivers changing lanes unexpectedly
Always be predictable in your movements and maintain awareness of surrounding traffic.
4.3 Urban Streets
Passing in urban environments presents its own set of challenges:
Be cautious of pedestrians, cyclists, and turning vehicles
Watch for sudden stops or lane changes by other drivers
Consider if passing is necessary given frequent stops and turns
In urban areas, it's often safer and more efficient to maintain your position in traffic.
5. Handling Special Situations
be careful while you are trying to overtake trucks or other large vehicles on the road
Certain situations require extra care and consideration when passing. Let's examine some of these scenarios.
5.1 Passing Large Vehicles
When overtaking trucks, buses, or other large vehicles:
Be aware of extended blind spots
Account for potential wind turbulence as you pass
Allow extra space when returning to your lane
Large vehicles can obscure your view of the road ahead, so exercise additional caution.
5.2 Group Riding Scenarios
When riding in a group, passing requires coordination and communication. Use motorcycle helmet communication systems to keep connected with your partners while passing other vehicles:
Establish passing protocols before the ride
Pass one at a time, avoiding group passing maneuvers
Maintain your own judgment about when it's safe to pass
Don't feel pressured to pass simply because others in your group are doing so.
Avoid the temptation to use smartphones or other devices while riding
Remember that your skills and judgment are the most important safety tools
Technology should complement, not replace, your riding skills and awareness.
Conclusion
Mastering the skill of safely passing other vehicles on a motorcycle is necessary. It is an essential aspect of becoming a proficient and responsible rider.
Understanding the risks of passing other vehicles on a motorcycle and preparing thoroughly will make your action safer. While passing them, make sure you can execute passes them with precision.
Also, you need to learn and adapt to various conditions while passing other vehicles.
By mastering these skills, you can enhance your safety and enjoyment on the road.
Remember, every passing situation is unique. There's no shame in deciding not to pass if conditions aren't ideal. Patience, awareness, and good judgment are your best allies when it comes to overtaking safely.
As you continue to develop your passing skills, always prioritize safety over speed or convenience. By doing so, you'll not only protect yourself but also contribute to a safer riding environment for all road users.
Happy riding, and may all your passes be smooth and secure!
As the chill of winter approaches, it's time to think about storing your motorcycle. Essential motorcycle winter storage tips help protect your motorcycle in good condition in those cold days.
The author of this article has decades of experience riding, maintaining and servicing motorcycles. He will provide you with the most comprehensive motorcycle winter storage advice.
On one hand, these tips will protect your motorbike properly from the elements. On the other hand, it ensures it's ready to ride when the next spring arrives.
Besides, these tips will protect your motorcycle parts to a certain extent and avoid expensive parts replacement costs.
To make a long story short, let's start mastering the knowledge about storage your motorcycle in the winter days!
Motorcycle Winter Storage Tips: What to Do?
1. Clean Your Motorcycle Thoroughly
clean the motorcycle - motorcycle winter storage tips
Before storing your motorcycle, be sure to give it a thorough cleaning. If you usually leave your motorcycle outdoors, there will definitely be dust, grime, and salt stains on the motorcycle's body. Make sure to remove all of these.
Trust me, if you leave these substances on your motorcycle and let them sit with it, you'll regret it next spring!
The main cleaning methods and steps include the following:
01 Washing and Drying
Thoroughly wash your motorcycle using a motorcycle-specific cleaner. Pay more attention to cleaning hidden areas where dirt tends to accumulate, such as under the gas tank, the seat, and the fairing.
Rinse the motorcycle thoroughly with clean water, then use a hairdryer or motorcycle dryer to completely dry the entire body.
Afterward, check again and wipe away any remaining water with a soft cloth. Remember, it must be completely dry!
02. Corrosion and Rust Prevention
It's essential to thoroughly apply a corrosion inhibitor to the motorcycle body. You can also apply a high-quality hard wax paint protectant to the fairings (including the windshield, gas tank, side covers, and tail section).
Apply rust inhibitor to the engine, exhaust pipe, entire chassis (especially welded areas and hard-to-reach parts), shock absorber rods, and fork tubes. Even if some parts are already painted, apply the rust inhibitor.
If you find rust, don't ignore it, otherwise it may continue to spread throughout the winter. It's best to sand off the rust immediately and then apply touch-up paint or spray paint. Also, don't forget to apply a layer of rust-preventative paint before painting; it will definitely help.
03. Waxing
Waxing provides extra protection for your motorcycle.
Apply a good quality wax to all painted and chrome-plated surfaces! Including chrome parts.
When spring comes, when you check on your motorcycle, it will be shiny and new!
Additionally, if your motorcycle has a leather seat, remember to maintain it.
04. Lubrication
Clean and lubricate your motorcycle chain, cables, and other moving parts. This is to prevent these parts from rusting and ensure they function smoothly when spring arrives.
I also have a classic motorcycle in my garage. During winter maintenance, I have a habit of pouring a small spoonful of engine oil into each spark plug hole. I do this to ensure the piston rings don't get stuck in the cylinders later.
Additionally, I plug the exhaust pipe with an oiled rag. This prevents moisture from getting in.
2. Change the Oil and Filter
change the motorcycle oil and filter
If the motorcycle has been left over for a long time in the winter, remember to change the oil and filter.
Because the old oil can become acidic and be contaminated by solvents and sediment. This can cause the pistons, contact surfaces, and bearings to become corroded or damaged, and eventually become unrunnable. Here’s what you need to do:
Warm Up the Engine: Start the engine and let it run for a few minutes. This helps the oil drain more easily.
Replace Oil and Filter: Drain the old oil and replace it with fresh oil. Don’t forget to change the oil filter as well.
Run the Engine Again: After changing the oil, run the engine for a few minutes to circulate the new oil throughout the system.
Don't overlook this! These steps, though simple, are very important. This can save you from spending more money on motorcycle maintenance later.
3. Stabilize the Fuel
Fuel can degrade over time, leading to clogged injectors or carburetors. To prevent this:
Add Fuel Stabilizer: Fill your tank with fresh gasoline and add a fuel stabilizer. Follow the instructions on the stabilizer bottle for the correct amount.
Run the Engine: Let the engine run for a few minutes to ensure the stabilized fuel circulates through the entire system.
Fill the Tank: Make sure the tank is full to minimize moisture buildup inside.
take out your motorcycle battery and protect it - Store Your Motorcycle for Winter
Cold temperatures can drain your motorcycle's battery. Properly storing your motorcycle battery will help extend its lifespan. So how should we store motorcycle batteries?
You may also hear from some riders that you should start your motorcycle once a week and let it run for a while during the winter. In fact, that's not a good idea.
Here are ways to keep your battery charged:
Remove the battery: Disconnect the battery and remove it from the bike.
Store in a cool, dry place: Store the battery in a cool, but not freezing environment.
Use a battery charger: Install a battery charger to keep it charged throughout the winter. This prevents the battery from draining and ensures it's ready to go in the spring.
check and protect the motorcycle tire before winterize - checking tire pressure
Tires can develop flat spots if left stationary for too long. Here’s how to prevent this:
Inflate Tires: Inflate your tires to the recommended pressure.
Elevate the Bike: Use a motorcycle stand to keep the tires off the ground. If a stand isn’t available, move the bike slightly every few weeks to change the tire position.
Check for Cracks: Inspect the tires for any cracks or damage and replace them if necessary.
Of course, not all motorcycles need to be changed before winter storage. If you’ve already changed these fluids within a month and haven’t ridden them very far, then consider not changing them.
7. Cover Your Motorcycle
cover the motorcycle
A good cover can protect your motorcycle from dust, moisture, and pests. Here are things to consider:
Choose a quality cover: Buy a breathable waterproof cover will be the best option. Avoid plastic tarps as they absorb moisture. This can cause rust, corrosion, and mold on your motorcycle.
Choose the right size cover: Buy covers designed specifically for motorcycles that have the right shape and size. This will cover your motorcycle perfectly.
Cover the whole motorcycle: Make sure the cover fits the entire motorcycle tightly, including the wheels and exhaust pipe. Keep the battery charger out so you can see the battery's charge status.
8. Store in a Proper Location
store the motorcycle indoor with cover - winter motorcycle storage ideas
Where you store your bike is crucial. Consider the following:
Indoor storage: If possible, store your motorcycle in a garage or shed to protect it from the elements.
Well-ventilated location: A well-ventilated location indoors is best. This allows air to circulate and moisture to not collect under the cover.
On a stand: If your bike has a center stand, then you can use it. The best way is to prop it up and keep both wheels off the ground by a motorcycle stand.
Keep it out of direct sunlight: UV rays can damage paint and rubber parts over time.
Protect it from insects: Seal all openings to prevent rodents from nesting. You can also use mothballs or peppermint oil around your bike as an insect repellent.
Keep it away from chemicals: Do not place fertilizers or other chemicals around your motorcycle. These can corrode and damage your motorcycle.
9. Protect your motorcycle
lock your motorcycle to protect it from being stolen in winter
Security is important even when storing your motorcycle. Here are some tips you can do:
Lock it up: You can install a ground anchor where you store your motorcycle. Then lock your motorcycle to it with a sturdy lock or chain. Or, add a second lock to the garage door where you store your motorcycle.
Alarm system: If necessary, consider installing an alarm system for added security.
You may store the motorcycle for a few months in the winter days. Even in storage, your motorcycle needs some attention:
Monthly Inspections:Inspect your motorbike monthly for any signs of pests, moisture, or damage.
Start the Engine: If possible, start the engine occasionally to keep the parts lubricated.
Reassess Storage Conditions: Make sure the storage area remains dry and secure throughout the winter months.
Commonly Seen Motorcycle Winter Storage Mistakes
Starting your bike every week? Wrong!
Again, don’t start your bike every week when you store it in the cold. The garage is not the place to start your bike.
Starting your bike before it reaches operating temperature in the cold winter can damage your accessories. In the process, water can condense and flow to places it shouldn’t.
Running your bike out of gas? Wrong!
Don’t do this! When the tank is empty, it corrodes easily and can also cause the seals inside to dry out. This can damage your tank. The right way to do this is to fill the tank with gas and add a high-quality fuel stabilizer.
If you don’t do this, the fuel can easily crystallize and solidify into a solid. This can clog your bike’s carburetor and fuel injectors and damage them.
Storing a dirty bike? Wrong!
You can imagine what it would look like if you stored a bike with road grit, dirt, and bugs for a while. That would be terrible!
These dirt will corrode your bike's clear coat, anodized aluminum, polished metal surfaces, and stainless steel.
Especially in areas with salt or salt water on the roads, such as coastal areas, it is especially important to clean your motorcycle before storing it. These salty substances and air will damage the metal and rubber parts on the motorcycle.
Using a cheap cover or tarp to cover your motorcycle? Wrong!
Those cheap covers or tarps will only make your motorcycle storage worse!
They may slip, have damaged holes, accumulate water or seep water, and even scratch the paint on your motorcycle. What is the difference between this result and not covering your motorcycle?
Should I get prepared to store my motorcycle in the winter?
Yes, it is important to prepare your motorcycle for winter storage. Especially in cold regions, it is even more important to take precautions.
But if you live in a warm winter region, you don’t need to take too many precautions. Even if you live in a warm region, if you don’t frequently ride your motorcycle in winter, we recommend that you take measures to properly store your motorcycle.
Because if you don’t prepare your motorcycle for winter, it may cause many problems, such as:
Battery exhaustion
Tire deformation and damage
Corrosion and rust on the body and parts
Various oil circuit blockages and parts contamination
Gasoline degradation and damage to the fuel tank.
Can I store my motorcycle in an unheated garage?
Yes, you can store your motorcycle in an unheated garage, but take precautions to protect it.
Clean and dry the bike thoroughly to prevent rust. Add a fuel stabilizer to the tank and run the engine to circulate it. Remove the battery and store it in a warm place, or use a trickle charger. Inflate the tires to the correct pressure and consider using a cover to protect from dust and moisture.
These steps will help maintain your motorcycle in good condition.
Can I store my motorcycle outside in the winter?
Storing your motorcycle outdoors in winter is possible, but not ideal. If you must, here are some steps to help prevent your motorcycle from damage:
Use a high-quality, waterproof cover to protect it from snow and moisture.
Place the bike on a stand to avoid flat spots on the tires.
Add a fuel stabilizer and run the engine to circulate it.
Remove the battery and keep it indoors or use a trickle charger.
Ensure all fluids are topped off and consider spraying metal parts with a rust inhibitor.
What to do after my motorcycle has been stored for months in the winter?
After winter storage, you will start the motorcycle and begin riding it in the spring. But, wait a moment, you need to check your motorcycle thoroughly before starting it. These steps include:
Reinstall the battery and ensure it's charged.
Inspect and inflate the tires to the correct pressure.
Start the engine and let it warm up, listening for any unusual sounds.
Test all lights and signals.
Finally, take a short, cautious ride to ensure everything is working smoothly.
Conclusion
Properly storing your motorcycle during the winter ensures that it stays in good condition. By following these tips, you will protect your investment and have your motorcycle ready to go when the weather warms up.
It’s not hard to understand and master motorcycle winter storage tips. Reading your motorcycle’s owner’s manual, an article, or watching some YouTube videos can help you learn these tips.
Remember that a little effort now can save a lot of trouble later.
What are the different types of 4-wheelers? Which one is right for me?
When it comes to off-road adventure and versatile transportation, 4-wheelers stand out. They are popular choices for enthusiasts and utility users alike.
According to a report, over 1.2 million Americans own an ATV, and this number still keeps growing.
There are various four-wheelers in the market, which include ATVs (All-Terrain Vehicles) and quad bikes. These vehicles offer a range of options tailored for different uses and terrains.
Knowing the 4 wheelers types will help you choose the right vehicle for your next adventure.
Facing with different four-wheelers models, brands with different functions, how will you choose?
This guide will delve into the various types of 4-wheelers, their unique features, and the latest trends in the market.
Different Types of 4-Wheelers
1. All-Terrain Vehicles (ATVs)
1.1 Utility ATVs
Utility ATV by Honda - Different Types of 4-Wheelers (Source: Honda)
Sport ATVs are built for speed, agility, and performance. Four-wheelers of this kind are lighter and have more responsive handling, making them perfect for racing and recreational riding.
Features: High-performance suspension, powerful acceleration, and lightweight design.
Use Cases: Racing, trail riding, and competitive sports.
Pros and Cons:
Pros:
√ Performance: Designed for speed and agility, offering high performance on trails and tracks.
√ Lightweight: Typically lighter than utility models, enhancing maneuverability.
√ Suspension: Advanced suspension systems provide a smoother ride on rough terrain.
√ Exciting Ride: Ideal for thrill-seekers looking for adrenaline-pumping experiences.
√ Customization: Wide range of aftermarket parts available for performance enhancements.
Cons:
× Limited Utility: Not designed for heavy-duty tasks such as towing or hauling.
× Less Stability: The focus on speed can make them less stable. (Especially for inexperienced riders.)
× Comfort: Prioritizes performance over comfort. This can lead to a rougher ride on longer trips.
× Terrain Restrictions: Best suited for specific terrains like trails and tracks. (Not ideal for all conditions.)
× Higher Risk: The emphasis on speed and performance can increase the risk of accidents.
1.3 Youth ATVs
A young boy riding a DRR youth ATV in the mud trail (Source: DRR)
Youth ATVs Options:
2023 CAN-AM RENEGADE 70 EFI at about $2,999
2023 HISUN STRIKE 250R at about $5,599
2023 HONDA TRX90X at about $3,249
2023 KAWASAKI KFX50 at about $2,299
2023 POLARIS OUTLAW 110 EFI at about $3,599
Youth ATVS are designed specifically for younger riders. So they are smaller, lighter, and have less powerful engines. Safety features such as speed limiters and remote shut-off systems are often included.
Features: Adjustable speed settings, smaller size, and enhanced safety features.
Use Cases: Introducing children to off-road riding in a controlled manner.
Pros:
√ Safety Features: Equipped with speed limiters and remote shut-off systems to ensure safety.
√ Size and Weight: Smaller and lighter, making them easier for kids to handle.
√ Training: Great for teaching children how to ride and manage ATVs responsibly.
√ Fun and Adventure: Provides a sense of adventure and enjoyment tailored for younger riders.
√ Parental Control: Allows parents to monitor and control riding conditions and limits.
Cons:
× Limited Power: Less powerful engines, which might not satisfy older or more experienced kids.
× Growth Limitations: Children can quickly outgrow these models, necessitating upgrades.
× Terrain Restrictions: Not suitable for rough or challenging terrains.
× Durability: May not withstand rough handling or frequent use as well as adult models.
× Initial Cost: Can be expensive, especially considering the potential need for frequent upgrades.
Side-by-Side vehicles are also known as UTVs (Utility Task Vehicles). Four wheelers in this category are larger than traditional ATVs and can seat 2 or more people side by side. They are versatile and come in various designs tailored for specific tasks.
2.1 Utility SxS
A Kawasaki utility SxS riding on the farm
Utility SxS Best Options:
Polaris Ranger at about $17,990
John Deere Gator at about $13,499
Honda FourTrax Foreman Rubicon at about $7,599
Kawasaki Mule at about $12,599
Honda FourTrax Rancher 4×4 at about $7,249
These are akin to utility ATVs but offer more seating and storage. They are highly favored for work-related tasks due to their capacity and durability.
Features: Multiple seating options, large cargo beds, and enhanced towing capabilities.
Use Cases: Agriculture, construction, and transporting tools or equipment.
Pros:
√ Seating Capacity: Offers multiple seats, making it ideal for transporting passengers and gear.
√ Cargo Space: Large cargo beds provide ample storage for equipment and supplies.
√ Towing Capability: High towing capacity for hauling trailers and heavy loads.
√ Versatility: Suitable for a wide range of tasks, from farming to recreational use.
√ Stability: Wider stance offers better stability on uneven terrain.
Cons:
× Size: Larger size can limit access to narrow trails and tight spaces.
× Cost: Generally more expensive than single-rider ATVs.
× Fuel Efficiency: Larger engines may consume more fuel, leading to higher operating costs.
× Maintenance: More complex systems can require frequent maintenance and repairs.
× Maneuverability: Less agile compared to smaller ATVs, especially in tight or technical areas.
2.2 Sport SxS
Sport SxS - Different 4-Wheelers types
Sport SxS 4-wheelers options:
Kawasaki Teryx KRX 1000 eS at about $23,399
Kawasaki Ridge XR HVAC at about $31,999
Polaris RZR XP 1000 Sport at about $20,999
Polaris RZR Pro R Ultimate at about $40,999
Sport SxS vehicles focus on speed and maneuverability. They are popular in off-road racing and recreational activities.
Features: High horsepower, advanced suspension systems, and sporty design.
Use Cases: Off-road rallies, dune bashing, and adrenaline-fueled adventures.
Pros:
√ High Performance: Designed for speed and agility, perfect for racing and off-road adventures.
√ Advanced Suspension: Equipped with superior suspension systems for handling rough terrain smoothly.
√ Thrill Factor: Provides an exciting and adrenaline-pumping experience.
√ Customization Options: Wide range of aftermarket parts for tuning and performance enhancements.
√ Passenger Experience: Allows multiple passengers to enjoy the ride together.
Cons:
× Cost: Generally more expensive due to advanced features and performance capabilities.
× Fuel Consumption: Powerful engines can lead to higher fuel costs.
× Limited Utility: Not designed for tasks like towing or heavy hauling.
× Size: Larger size can restrict access to narrow trails.
× Maintenance: Requires regular upkeep to maintain performance and safety features.
2.3 Recreational SxS
A family riding a recreational sxs for outdoor activity
Recreational SxS best option:
2023 Yamaha Wolverine RMAX 2 1000 at about $23,999
2023 Can-Am Commander XT 700 at about $17,000
These models strike a balance between utility SxS and sport SxS. Thus this kind of 4 wheelers offers comfort and flexibility for families and groups.
Features: Comfortable seating, moderate cargo space, and adaptable performance.
Use Cases: Family outings, camping trips, and leisurely trail exploration.
Pros:
√ Comfortable Ride: Designed for a smooth and enjoyable ride with comfortable seating.
√ Versatility: Suitable for both leisure activities and light utility tasks.
√ Passenger Capacity: Can accommodate multiple passengers, making it great for family outings.
√ Balanced Performance: Offers a good mix of speed and handling for various terrains.
√ User-Friendly: Easy to drive, making it accessible for riders of different experience levels.
Cons:
× Moderate Power: Not as powerful as sport-specific models, which may limit extreme performance.
× Size: Larger size can be cumbersome on narrow trails.
× More Cost: Can be expensive, especially with additional features and options.
× Fuel Efficiency: May consume more fuel than smaller or single-rider alternatives.
× Limited Cargo: Less cargo space compared to utility-focused models.
3. Amphibious 4-Wheelers
An amphibious 4-wheelers riding at the sea beach
Amphibious 4-Wheelers Best Options:
Shaman 8 x 8 (~$250,000)
Predator 4x4 (€59,600-€66,000)
Trecol Husky ($69,000)
Storm MPV ($125,805)
Sherp ATV ( $115,000-$126,000)
Amphibious 4-wheelers are unique vehicles capable of traversing both land and water. They are ideal for environments where crossing water bodies is necessary.
Features: Sealed bodies, buoyant tires, and dual-mode operation.
Use Cases: Wetland exploration, fishing trips, and rescue operations.
Pros:
√ Dual Terrain Capability: Can traverse both land and water, offering unique versatility.
√ Adventure Opportunities: Ideal for exploring wetlands, rivers, and other aquatic environments.
√ Innovative Design: Features like buoyant tires and sealed bodies enhance functionality.
√ Utility Use: Useful for tasks in areas with mixed terrains, such as rescue operations.
√ Unique Experience: Provides a distinctive and exciting riding experience.
Cons:
× Complexity: More complex systems can lead to higher maintenance needs.
× Cost: Typically more expensive due to specialized design and features.
× Speed Limitations: Often slower on land compared to traditional ATVs.
× Weight: Heavier than standard models, which can affect maneuverability.
× Terrain Restrictions: Not suitable for all environments, particularly very rocky or steep areas.
4. Electric 4-Wheelers
electric 4-wheelers riding
Best Electric 4-Wheelers options:
Eco Charger Lithium Prestige at about $27,400
Eco Charger Eliminator 4WD at about $20,500
DRR EV Safari 4×4 at about $15,000
Eco-Rider Explorer G.T. at about $6,700
Tesla CyberQuad at about $1,900
With the surge in electric vehicle technology, electric 4-wheelers are becoming increasingly popular. This kind of 4-wheelers offer eco-friendly alternatives with reduced noise and emissions.
Features: Electric motors, rechargeable batteries, and quiet operation.
Use Cases: Urban use, eco-conscious recreational riding, and areas with strict noise regulations.
Pros:
√ Eco-Friendly: Zero emissions reduce environmental impact.
√ Low Maintenance: Fewer moving parts mean lower maintenance costs.
√ Instant Torque: Quick acceleration for a smooth driving experience.
√ Quiet Operation: Reduced noise pollution.
√ Energy Efficiency: Higher efficiency compared to internal combustion engines.
Cons:
× High Initial Cost: More expensive upfront than traditional motors.
× Limited Range: Shorter distance per charge compared to gasoline engines.
× Charging Time: Longer to charge than refueling a gas tank.
× Infrastructure: Limited charging stations in some areas.
× Battery Degradation: Performance may decrease over time.
Now, we have introduced you the most commonly seen types of 4-wheelers on the market. Each of them has their own features and use cases. So, you will need to consider according to their application and your specific demand.
Choosing the Right 4-Wheeler
When selecting a 4-wheeler, consider the following factors:
Purpose: Determine the primary use, whether for work, sport, or leisure.
Terrain: Assess the types of terrain you will mostly encounter, such as trails, mud, or dunes.
Budget: Establish a budget that includes potential maintenance and upgrades.
Experience Level: Choose a model that matches your skill level, especially if you are a beginner.
Different 4-Wheelers: Safety First
Safety is always the first while we are riding with different kinds of 4 wheelers.
Choose the right clothing for the weather, riding conditions, and your vehicle.
For example, if you're riding an ATV or unenclosed UTV, clothing that's breathable and moisture-wicking will be the best choice. You can choose long-sleeved shirts and pants, and they will protect your skin from external damage (such as sun, stones, debris, etc.).
Gloves and ATV boots are also indispensable equipment. Remember to wear a full-face or half-face four-wheelers helmet. A helmet with goggles can increase visibility and protect the head.
In addition, installing a Bluetooth communication system on the helmet will help you communicate with your companions smoothly and quickly. For example, Fodsports FX7 supports Bluetooth mesh communication, and the riders in the group are connected to each other, which can achieve very efficient communication. When any rider joins or leaves the group, the communication of others will not be affected.
What's more, it is important to familiarize yourself with the controls and capabilities of your 4-wheeler. If it is the first time you ride a new kind of 4-wheeler, be sure you have understand it before you start it up.
Remember to abide by local laws and guidelines for off-road vehicles. This is important to make sure the safety of you and other participants on the road.
Besides, avoid risky maneuvers and respect the environment and other riders.
4-wheelers offer an exciting and versatile way to explore the outdoors, complete work tasks, and enjoy recreational activities.
There are various different types of 4-wheelers suited for different purposes in the market. So, understanding the options available can help you make an informed decision.
Whether you’re seeking adventure, utility, or eco-friendly alternatives, there’s a 4-wheeler out there to meet your needs.
Always prioritize safety and responsible riding to make the most of your 4-wheeling experience.
What are the ratings for ski slopes that are suitable for you? Have you learned about it before you start skiing?
Skiing is a popular winter sport that attracts millions of enthusiasts worldwide. Whether you're a beginner or a seasoned pro, understanding ski slope ratings is crucial for a safe and enjoyable experience on the mountain. This guide will delve into the various aspects of ski slope ratings and tips while you are skiing on the slopes. Read and remember this blog, it will help you navigate the slopes with confidence.
1. What Are Ski Slope Ratings?
commonly seen ski slope ratings
Ski slope ratings are a system used to classify the difficulty levels of ski runs.
It is important to note that ski slopes are measured in percentages, not degrees. For example, 50% means 45 degrees, because 45 degrees is half of a vertical angle of 90 degrees.
So, when you head to a 25% slope, you can calculate that the slope is 22.5 degrees.
These ratings help skiers choose trails that match their skill level. Choosing the suitable slope rate ensures your skiing safety and maximizes your enjoyment.
The specific symbols and colors may vary slightly from country to country. But, the general system is fairly consistent worldwide.
2. Different Ratings of Ski Slopes in Different Areas
In fact, there is no international standard ski rating currently.
Therefore, the ski rating is different in ski resorts in different countries and regions.
You can simply understand that these grade differences are determined relative to other ski slopes in their resort.
Therefore, even if two different resorts have green ski-rating slopes, don't assume that the difficulty of these two ski slopes is the same. It can only be said that their difficulty is similar.
Generally, there are four main kinds of skiing rates according to area.
2.1 Ski slope difficulty ratings in Europe, excluding Scandinavia
Signs for different ski lifts and local villages in the Grand Massif ski area in the French Alps.(Source: iStock)
This set of ski trail ratings is mainly used in European countries including France, Poland, Spain, Bulgaria, the United Kingdom and others.
Ski Slopes and Symbol
Difficulty Level
Description
Green
Learning/beginner
These are usually places where there are no marked paths. They are generally large, open areas with gentle slopes at the bottom of the ski resort or between the main paths.
Blue
Easy
These sections are usually no more than 25% grade (but there are some short, wide sections with slightly steeper grades). And most are groomed.
Red
Intermediate
This level usually has a slope of no more than 40%, and the trails are steeper or narrower than the Blue Slopes. The trails are usually groomed unless the trail is too narrow.
Black
Advanced or expert
Black slopes are usually steep, may or may not be groomed. Black slopes in Austria, Italy and Switzerland are almost always groomed. In France, most black slopes are not groomed, and the boundary between red and black slopes tends to be higher.
Orange
Extremely difficult
Orange slopes are only found in Austria, Switzerland and some other regions. They are usually used to mark more difficult ski slopes than black.
Yellow
Skiroute,
itinéraire, or
freerideroute
These are usually ungroomed and unpatrolled ski slopes that are actually cross-country skiing. However, these slopes are marked and have avalanche protection measures. In Austria, there are also ski slopes that are usually marked with orange squares. It is also common to mark these slopes with red diamonds or red diamonds with black edges. The latter is more difficult.
Orange square
Red diamond
Red diamond with black edges
You may find that the European Alpine skiing slope classification is not strictly based on slope angle. Indeed, this is different from the strict classification based on slope angle in North America.
In Europe, a slope may be classified as more difficult if it is shallow but requires more skiing ability. Some slopes may also be classified as more difficult if they are shallow but narrow.
2.2 Scandinavia Ski Slope Rating System
In the Scandinavian area, like Norway, Sweden, and Finland, they have a different ski slope rating system. But do not worry, their color and shapes are almost the same as European areas. They generally divide the ski slope rate according to the slope angle.
Ski Slopes and Symbol
Difficulty Level
Description
Green circle
Very easy
Slopes that up to 9° (16%).
Blue square
Easy
Slopes that up to 15° (27%).
Red rectangle
Moderately difficult
Slopes that up to 25° (47%).
Black diamond
Difficult
Slopes that are over 25° (47%). Some extremely difficult areas also use the triple black diamond symbol.
Double black diamond
Very difficult
2.3 North America, New Zealand, Australia Ski Slope Rating System
ski slope rating board in America
The North America, New Zealand and Australia areas use a color-shape ski slope rating system.
Ski Slopes and Symbol
Difficulty Level
Description
Green circle
Easiest
This type of ski slope has a slope rating from 6% to 25% and is also the easiest slope. Most of them are wide and groomed.
Blue square
Intermediate
Blue square ski slopes are classified as moderately difficult. Generally, slopes of this difficulty are well groomed. Their slopes range from 25% to 40%. This is also the grade of most slopes in most ski resorts.
Black diamond
Advanced
Difficult
Most Black diamond ski slopes are very steep, with a grade of more than 40%. Therefore, they are among the most difficult trails. These trails may or may not be groomed.
Double black diamond
Very Difficult
These trails are more challenging than black diamond trails because of the steeper slopes. So they are more suitable for experienced skiers only.
Be aware of hazards such as narrow trails, exposure to wind, and obstacles such as steep slopes or trees.
Triple black diamond
Expert Only
These trails are more difficult than the double black diamond trails and are only for the most experienced skiers.
There will be narrow trails, exposure to wind, and obstacles such as steep slopes or trees.
The slopes of trails at this level are steeper than the double black diamond trails, and some can even reach 90%.
Therefore, please use good equipment even for the most experienced skiers.
Variations
Various
The use of a diamond and a square to indicate a grade between the blue square and the black diamond is commonly known as "blue-black". Some popular resorts in the United States use a combination of blue and black symbols to indicate intermediate to advanced trails.
Other ski trails use other combinations of graphics to indicate intermediate to difficult trails.
For example, orange diamonds, green circles within blue squares, and black diamonds within blue squares.
Terrain parks
Various
An orange rectangle with rounded corners usually represents a terrain park. Skiers can pass through a terrain park to get down the mountain without having to worry about hitting any obstacles.
Typically, the difficulty of this area goes beyond the traditional snow hills and features a variety of jumps, half-pipes, and other special "extreme" sports obstacles.
Of course, different levels of terrain parks have different difficulties. For example, a black diamond or double black diamond terrain park will have larger and more challenging obstacles than a blue square rated park.
2.4 Japan Ski Slope Rating System
Japan ski slope rating sign
The ski slope rating in Japan is simpler, just use color systems.
Ski Slopes and Symbol
Difficulty Level
Description
Green circle
Beginner
Simpler ski slopes, are suitable for beginners. Most of the green circle slopes are located near the foot of the mountain. Some of them follow a zigzag route down from the top of the mountain.
Red circle
Intermediate
Most Japanese ski slopes are rated red circle in difficulty.
Black circle
Expert
These are the steepest and most difficult slopes at the resort and are classified as expert slopes. The difficulty of these slopes compared to similar slopes at other ski resorts depends largely on the target audience.
What's more, the ski slope rating system in Japan is somewhat confusing.
Some ski resorts in Japan, which primarily cater to foreigners, use the North American or European color coding system.
While there are many ski resorts in Japan, most are small. If you compare Japan's slope classification to "equivalent" slopes in Europe or North America directly, you may be misled.
Which Ski Slope Rating Should I Get?
The above have listed the ski slope rates in detail. So before you start skiing, choose the one that is most suitable for you.
Know the basic ratings of ski slopes
If you are a beginner skier, just go to the Green areas! Learn about the basic techniques and gain confidence first.
For intermediate skiers who have obtained the basic ski skills, then you can consider going to the Blue Square slopes. They are also good for improving your skills and exploring more challenging runs.
More advanced skiers can consider the Black diamond slopes. Only attempt if you have strong skills and experience.
The Double Black Diamond slopes are for experts only. They are the most challenging slopes, with steep drops, obstacles, and unpredictable conditions.
Confirm with the instructor in the ski park
Different ski resorts have different terrains. Even two slopes with the same slope rate can give you different skiing experiences. Therefore, when you go to a new ski resort, it is best to ask the staff or instructor at the ski resort about the resort's conditions. They are more familiar with their own terrain.
Go with the skier who is more experienced than you
For beginner skiers, it is best to find an experienced skier to go with you. Some ski resorts have coaches who can give you guidance, which is a better choice. Of course, if you have a friend who is an experienced skier, it is even better to let him take you.
During the skiing, they can share skiing tips with you, guide you through obstacles and pay attention to the terrain. They can also give you timely feedback on your skiing posture or other details that need to be improved.
You can choose to use a ski helmet communication system to improve the fluency and convenience of your communication. Install it on your ski helmet and connect it with your companions to communicate. Compared with the need to communicate through shouting or gestures, normal verbal communication will give you a better skiing experience.
In addition, you can also connect it to your mobile phone via Bluetooth and connect it to other companions' walkie-talkies at the same time to achieve more convenient communication. Then you will be able to listen to music while skiing, and also can intercom with your partners.
Next, focus on skiing, follow your leader, and run on the ski resort together!
Sometimes, you may find yourself staring down a slope that’s too steep and you can't get any further. Don’t panic, the most important thing you should do now is to keep calm.
There are techniques, tactics, and mindset tricks that can help you get down safely. Below is a “go-to” checklist and explanations you can use on the mountain.
What “too steep” really means
Steep slopes demand more from your balance, turning, and speed control.
Even good skiers sometimes misjudge how steep a pitch is until they start it.
On very steep terrain, pure carving (leaning deeply on edges) often becomes unsafe — you’ll want to use more skidding or sliding techniques.
Icy patches, bumps, or hard snow make steep slopes even harder.
Step-by-step: What to do when confronted with a slope that feels too steep
Here’s a structured method:
Phase
What to focus on
01. Pause & assess
Stop (if safe) before committing. Look down and pick a “line” (path) you’ll follow.
02. Angle in / traverse before descent
Instead of pointing straight down, cross the slope at a shallow angle until you find a comfortable spot to start your first turn.
03. Use short/controlled turns (rotational separation)
Turn by pivoting your skis under your stable upper body. Keep your shoulders facing downhill, and let your legs “swing” across the slope. Make the turns small; the steeper it gets, the tighter your turns should be.
04. Skid/slide (controlled slipping)
Don’t always try to carve perfectly — allow your skis to skid or slide a bit. Use a low edge angle so they don’t grip too hard and send you shooting downhill.
05. Set strong pole plants
Plant your downhill pole before beginning each turn. Use it for balance and as a pivot point.
06. Stay centered/balanced
Avoid leaning back. Keep your weight more centered or slightly forward (over the skis) so you can respond with edges.
07. Use the “J-turn” or uphill pivot if needed to stop
If you need to stop in a hurry, turn your skis uphill in a “J” shape so their tips dig and slow you.
08. If it's beyond your comfort, retreat
It’s okay to back off, take a different route, or walk down part of the slope if possible.
Extra tips & mindset
Don’t hesitate too long at the top. Getting stuck or freezing up right there can make the descent harder mentally.
Practice “steep drills” on gentler slopes first. For example, practice pivoting, side slipping, or short turns on slopes you’re comfortable with. Then apply those on steeper terrain.
Mind your edges. On icy or hard snow, a sharp edge gives better bite, but too much edge angle can make you dig in and catch. Learning the balance is key.
Stay calm & confident. Fear causes stiff movements that reduce your control. Planning your moves and committing to them helps.
Always know your limit. If a slope feels truly out of your ability, don’t force it. Even advanced skiers will pick alternate routes around terrain that’s too demanding.
Take lessons with an instructor. A pro can show you the feel of these techniques in safe terrain and help you build confidence.
Frequently Asked Questions About Ski Slope Rating
Which slopes are for beginners?
Green Circle rating (North America) or just “Green” (Europe) on trail maps or signs are for beginners. They have gentle hills — slope angle or grade usually under 25%. They are the easiest ski slope rating.
The runs here are also wide and open, without sharp turns, bumps, or hazards. The snow is consistent and the surface is groomed. Beginners can practice basic skiing techniques like braking, steering, and turning in this area.
After you have mastered the basic skiing skills, you can head to the blue area.
Is 40% slope steep?
Yes — a 40% slope is quite steep for a ski run.
Here’s why:
A 40% grade means you drop 40 units vertically for every 100 units you move horizontally.
In most ski-resort grading systems, slopes with 40% and above are classified as difficult or black diamond terrain.
In angle terms, 40% corresponds to about arctan(0.40) ≈ 21.8° — not extreme cliff, but demanding, especially when icy, narrow, or in moguls.
So for most skiers, a 40% slope will feel challenging — it requires solid technique, confidence, and good control. If you’re comfortable on steep black diamond runs, that gradient will be manageable. If not, it’s safer to build up experience on gentler terrain first.
Conclusion
Ski slope ratings are an essential tool for all skiers. They help you choose the right trails, ensuring a safe and enjoyable skiing experience.
Whether you're just starting or tackling expert runs, knowing these ratings will enhance your time on the slopes.
Besides, consider the weather conditions and personal safety when planning your ski adventures.
Now, I believe you have a comprehensive knowledge of what are the ratings for ski slopes. They will help you have more fun and a better experience on your next ski journey.
Welcome to the best motorcycle tours in Australia! Let's take you on a journey through the most exhilarating Australian motorcycle tours.
As avid riders ourselves, we've scoured the continent to bring you the cream of the crop when it comes to two-wheeled adventures.
From coastal roads to rugged outback trails, Australia offers a diverse range of experiences for motorcycle enthusiasts seeking their next big thrill.
The best time to ride a motorcycle in Australia is from September to November and March to May.
In this guide, we'll explore some of the best motorcycle tours Australia has to offer.
We'll start with the iconic Great Ocean Road in Victoria. Then we will head to the untamed Gibb River Road in Western Australia. Besides, we'll also take you through Tasmania's wild Western Explorer Road.
Whether you're into guided tours or prefer to chart your own course, we've got options to suit every rider's style.
So gear up and get ready for an unforgettable ride through the Land Down Under!
The Great Ocean Road: Victoria's Coastal Wonder
The scenery along the Great Ocean Road
Firstly, we will embark on our journey along the Great Ocean Road. I must say, we are about to experience one of the world's most iconic touring routes.
This magnificent road spans 243 kilometers along Victoria's stunning coastline. So, it is considered one of the best motorcycle routes globally.
Based on our experience, it's a ride that offers everything an adventure seeker could want. From breathtaking ocean views to challenging twists and turns, you will face them all.
Route overview and highlights
The Great Ocean Road - best motorcycle tours in Australia
Our adventure begins in Melbourne, making this ride perfect for those seeking a comprehensive Australian experience.
The whole Great Ocean Road will stretch from Torquay to Port Fairy. During the whole tour, it offers a diverse range of landscapes and attractions along the way.
Some riders will cover the entire route in a single day, yes it's possible to finish it.
But, we recommend taking a more leisurely pace over two to three days to fully appreciate all it has to offer.
One of the highlights of this tour is the section between Lorne and Apollo Bay. This stretch features some of the most exhilarating bends and sweeping curves. Even the most experienced riders will feel satisfied.
The road hugs the coastline, providing constant views of the sparkling Southern Ocean.
It's tempting to ride this section multiple times, as each pass reveals new details of the stunning scenery.
Best time to ride
To make the most of your motorcycle tour on the Great Ocean Road, timing is crucial.
We suggest planning your trip for mid-week and starting early in the day.
This helps avoid the heavy tourist traffic that can clog the road, especially on summer weekends.
Besides, we also advise you to set out earlier in the morning. Then you'll have more freedom to enjoy the ride without constantly checking your mirrors for tourist coaches or cars.
The road surface is generally in good condition throughout the year. But, it's wise to be cautious of potential damp patches. For example, pay attention as you go through the Great Otway National Park.
If possible, we recommend you to plan the tour during the drier months. You can ensure optimal riding conditions during these months. It is also the best time to fully appreciate the coastal views without the interference of rain or fog.
Must-see stops along the way
The Great Ocean Road has many attractions that are worth exploring during your Australia motorcycle tour. Here are some must-see stops:
The 12 Apostles
The 12 Apostles - Australia motorcycle ride tour scenery
These iconic limestone stacks rising from the Southern Ocean are the most frequently cited attraction along the route. The area also offers a great selection of eateries and pit-stop opportunities.
Great Otway National Park
Motorcycle riding adventure through the Great Otway National Park's waterfall
If your itinerary allows, this park is a must-visit. There's a 57-mile trail showcasing rainforest, waterfalls, and glimpses into Australia's Aboriginal history. Keep an eye out for koalas as you ride through this lush area.
Lorne and Apollo Bay
motorcycle riding through Lorne and Apollo Bay
These charming coastal towns are perfect for overnight stays or lunch breaks. They offer beautiful beaches and a chance to immerse yourself in local culture.
Cape Otway Lighthouse
The Cape Otway Lighthouse
This historic lighthouse was built in 1848. It offers stunning ocean views and insights into the area's maritime history.
Torquay
This town is known as the surfing capital of Australia. It marks the official start of the Great Ocean Road and is worth exploring before you hit the road.
Remember, while the ride itself is exhilarating, it's essential to take regular breaks to fully appreciate the scenery and attractions.
The Great Ocean Road is not just about the destination. It's about the journey and the unforgettable experiences along the way.
So gear up, stay safe, and prepare for one of the most memorable motorcycle tours Australia has to offer.
Generally speaking, the Great Ocean Road is not that hard for riders to conquer it. For couples wish to have enjoyable riding tour and beautiful scenery, this route is a top option.
Remember to pack your riding gear like helmets, helmet communication systems, jackets, boots before you start the trip.
The Gibb River Road - Australia motorcycle adventure ride
As we venture into the heart of Western Australia's Kimberley region, we find ourselves on the legendary Gibb River Road. This 660 km stretch of rugged terrain is one of Australia's most iconic motorcycle tours.
It off a true outback adventure for those seeking to explore the wild and untamed landscapes of the country.
Preparing for remote riding
Gibb River Road motorcycle adventure tour Australia(Source: FarWayOut)
Before embarking on this epic journey, be well-prepared for the challenges that lie ahead.
The Gibb River Road is only accessible during the dry season, typically from May to October.
We recommend planning your trip carefully before you start the Australian motorcycle ride.
Consider factors like weather conditions and the availability of supplies along the route.
One of the most important aspects of preparation is checking your motorcycle.
Besides, the road can be unforgiving to some riders. There are corrugations, sand patches, and water crossings that can test both rider and machine.
So, carry spare parts, tools, and enough fuel to cover the long distances between service stations.
Speaking of fuel, it's worth noting that petrol prices along the Gibb can be steep. In some locations, the petrol may cost up to USD 2.00 per liter.
So, we suggest you carry extra fuel to avoid any unexpected situations. Because the distances between fuel stops can be significantly far.
Key attractions and gorges
Some breathtaking attractions during the Gibb River Road will make your ride worthwhile.
One of the highlights is Windjana Gorge National Park. You can explore ancient limestone cliffs and spot freshwater crocodiles basking in the sun.
Another must-see stop is Bell Gorge, often considered the most picturesque along the route. Here, we can witness waterfalls cascading down 100-meter cliffs into inviting swimming holes. It's the perfect spot to cool off and relax after a long day of riding.
For those seeking a unique experience, a detour to Mitchell Falls is recommended. Be careful, this will add about 500 km to your journey, so please think carefully before taking action. But in truth, the sight of these multi-tiered falls in this area is truly awe-inspiring.
Just remember to factor in the extra time and fuel required for this side trip.
Camping and accommodation options
Australia motorcycle adventure riders camping during the Gibb River Road tour (Source: Adventure Rider Radio)
When it comes to resting our heads at night, we have a range of options along the Gibb River Road.
For budget-conscious riders like us, free camping is a popular choice.
With the help of apps like WikiCamps and iOverlander, we can find secluded spots to pitch our tents and enjoy the starry outback sky.
For those seeking more comfort, there are some choices available also. Several stations and homesteads along the route offer accommodation.
El Questro Wilderness Park and Home Valley Station are some places worth to choose. They provide a chance to experience outback hospitality and learn about life in this remote region.
Some camping areas and accommodations may close towards the end of the season. So it's wise to check availability in advance.
Additionally, if we plan to visit national parks, we'll need to purchase a park pass. This can be done online or at visitor centers before starting the journey.
As we navigate the Gibb River Road, we're not just on a motorcycle tour. We're on an adventure through one of Australia's last frontiers.
The challenges we face during this route from river crossings to corrugated roads. But don't be afraid, they will only add to the sense of accomplishment when we complete this iconic route.
So, let's gear up, stay prepared, and start this unforgettable motorcycle journey through the Kimberley. Trust me, you will embrace the true spirit of outback exploration.
For this Australia motorcycle riding route, I sincerely advice you ride with a group of friends. If there is any emergency happens, you can take care of each other.
Tasmania's Wilderness Explorer: Western Explorer Road
Western Explorer Road tour best motorcycle ride in Australia
As we venture into Tasmania's wild west, we find ourselves on the Western Explorer Road. It is a motorcycle riding route that promises an unforgettable adventure through some of Australia's most pristine wilderness.
This remote road is also known as the C249. It offers a unique opportunity to get in touch with the Tasmania area. You can explore the heart of Tasmania's temperate rainforests and rugged landscapes.
Scenic routes through temperate rainforests
The Western Explorer Road takes us through the Tarkine. I believe that many people know that it is one of the world's largest temperate rainforests.
This ancient forest is a living remnant of Gondwanaland, with some plant species dating back millennia.
As we ride through this lush environment, we're surrounded by towering eucalypts, myrtles, and leatherwoods. These trees create a canopy of green that seems to stretch endlessly.
The road itself is a mix of sealed and unsealed sections, adding to the sense of adventure. While some parts of this route are paved, others are gravel. So, it requires careful navigation while you are riding, especially after rain.
The ever-changing landscape keeps us on our toes, with the route winds through dense forests and cross rivers. In general, it offers breathtaking vistas of button grass plains.
One of the highlights of this journey is the Julius River area. Here, you can take a break from riding.
Exploring the walking tracks that showcase the "green on green on green" of the temperate rainforest.
It's an excellent opportunity to stretch your legs. Just relax, and immerse yourself in the unique ecosystem part of Australia.
Wildlife spotting opportunities
The Tarkine region is not just about stunning landscapes; it's also a haven for wildlife. As we ride through this remote area, we have the chance to spot some of Tasmania's iconic species.
The region is home to one of the only surviving wild populations of endangered Tasmanian Devils. Thus making it a truly special place for wildlife enthusiasts.
While riding, we keep our eyes peeled for wallabies, which can often be seen grazing in the grasslands
It's important to note that wildlife is most active during dawn and dusk. So, ride carefully while you are riding in Western Australia, especially during these times.
And, sometimes you may need to adjust your riding schedule accordingly. Make sure to maximize our chances of spotting these unique creatures. This can help you avoid any unfortunate encounters with animals on the road.
Recommended side trips
Sumac Lookout
Several side trips on Western Explorer Road can enhance your motorcycle tour experience.
One such detour is to the Sumac Lookout. There, you can get a panoramic view of the rainforest canopy stretching out before you.
It's a perfect spot to appreciate the vastness of the Tarkine wilderness during your Australia motorcycle tour.
Another worthwhile stop is Lake Chisholm. There is a short ride off the main road that leads you to a walking track. It will take about 30 minutes to reach the shores of this picturesque lake. It's a tranquil spot that offers a stark contrast to the rugged terrain we've been riding through.
For those of us seeking more adventure during Australia motorcycle rides, the Milkshake Hills is an option. It provides an opportunity to explore a different ecosystem.
Here, you can take a break from our motorcycle and hike up to a vista point. You will get some sweeping views of the surrounding button grass plains.
As we continue our motorcycle tour through Tasmania's Western Explorer Road, we're constantly reminded of the raw beauty and untamed wilderness. To be honest, it is these beauty and wildness that make this part of Australia so unique.
The challenging roads, diverse landscapes, and abundant wildlife create an unforgettable riding experience. And, they truly captures the essence of adventure motorcycle tours in Australia.
What type of motorcycle is recommended for a journey across Australia?
Adventure bikes equipped with dual-sport tires are generally suitable for the diverse terrains of Australia. Because they offer comfort on long stretches and adaptability in parks and forests.
However, diverse motorcycles have all been used successfully for such trips. Such as the Hodaka Combat Wombat, 1972 Harley Sportster, postie bikes, and Honda Goldwings.
How much time does it take to complete a motorcycle tour around Australia?
Completing a motorcycle tour around Australia, covering all states and capital cities, typically requires about 50 days. This estimate is based on a journey that spans over 16,000 kilometers.
Can a foreigner ride a motorcycle in Australia?
Yes, a foreigner can ride a motorcycle in Australia. Firstly, you need a valid motorcycle license from your home country. And it should be in English or accompanied by an official translation or an International Driving Permit (IDP). Each state or territory might have specific requirements. So checking in advance with the relevant local authorities is a good idea.
Conclusion
Australia motorcycle tours offer breathtaking landscapes, challenging routes, and unforgettable experiences. From the coastal wonders of the Great Ocean Road to the lush wilderness of Tasmania's Western Explorer, each journey has its own unique charm.
These motorcycle tours provide thrilling rides to your journey. And it also give you a chance to connect with nature, spot wildlife, and explore remote corners of this vast continent.
For adventure seekers looking to hit the open road, Australia stands out as a top destination. The diverse range of Australia motorcycle tours caters to different skill levels and preferences. Believe me, there's something for every rider.
Whether you're after coastal views, outback adventures, or forest explorations, these motorcycle tours have got you covered.
So gear up, plan your route, and get ready to experience the Australia on two wheels.
Snowmobiling is an exhilarating winter sport that combines speed, adventure, and the beauty of snow-covered landscapes. To enjoy this activity safely and comfortably, having the right gear is essential. This guide will walk you through the snowmobiling must-haves for your next snowmobiling.
Quick view about the snowmobiling must have gear and essentials:
Start with a moisture-wicking base layer. These garments help regulate your body temperature and keep you dry.
Look for materials like merino wool or synthetic fabrics that draw sweat away from your skin.
02. Insulating Layers
The insulating layer is crucial for retaining body heat.
Fleece jackets or down vests are excellent choices. They provide warmth without adding too much bulk, allowing you to move freely.
03. Outer Layers
Your outer layer should be windproof and waterproof. A good snowmobile jacket and pants will protect you from the elements. Look for options with ventilation zippers to help regulate temperature during intense rides.
04. Gloves
Invest in high-quality snowmobile gloves. They should be insulated, waterproof, and have good grip. Consider gloves with touchscreen compatibility for easy smartphone use.
05. Boots
Snowmobile boots must be warm, waterproof, and offer excellent traction. Look for boots with a removable liner for easy drying after a day in the snow.
06. Socks
Wear thick, moisture-wicking socks. Wool or synthetic blends are ideal to keep your feet warm and dry.
snowmobiler wearing the helmet and goggle to make sure safety
07. Helmet
A helmet is non-negotiable. It protects your head in case of falls or collisions. Choose a DOT-approved snowmobile helmet with a full-face shield for maximum protection against wind and debris.
Goggles are essential for eye protection. They prevent snow, wind, and UV rays from impairing your vision. Opt for goggles with anti-fog and UV protection features.
09. Avalanche Beacon
If you plan to snowmobile in backcountry areas, an avalanche beacon is crucial. This device can help rescuers find you in case of an avalanche. Make sure you know how to use it properly.
10. Protective Gear
Consider wearing protective gear like knee pads, elbow pads, and a chest protector. These can reduce the risk of injury during falls or collisions.
3. Snowmobile Equipment
a yamaha srx 24 snowmobile - snowmobiling must haves (Source: Yamaha Motorsports)
11. Snowmobile
Ensure your snowmobile is in good working condition. Regular maintenance checks before heading out are vital. Pay attention to oil levels, brakes, and track tension.
Besides, there are different kinds of snowmobiles in the market. If you are a beginner, it is necessary to choose the one best suitable for you.
A compact first aid kit is a must. It should include bandages, antiseptic wipes, pain relievers, and any personal medications.
16. Survival Gear
Pack survival essentials like a space blanket, fire starter, and a multi-tool. These items can be invaluable if you find yourself stranded overnight.
17. Snacks and Water
Stay energized and hydrated. Bring high-energy snacks like protein bars, nuts, and dried fruit. A hydration pack or insulated water bottle is essential to prevent dehydration.
5. Communication Devices
A man is using Fodspots Bluetooth helmet intercom to communicate with his partner
18. Snowmobiling Helmet Communication System
Cell service can be unreliable in remote areas. Snowmobiling communication systems allow you to connect with your group even without cell coverage.
For added safety, consider a personal locator beacon. This device can send a distress signal with your location to search and rescue services.
6. Comfort and Convenience Items
20. Heated Gear
Heated gloves, jackets, and insoles can make cold rides much more comfortable. Look for battery-powered options that provide consistent warmth.
21. Backpack
A sturdy, waterproof backpack is essential for carrying your gear. Choose one with multiple compartments to keep items organized and accessible.
22. Camera or Action Cam
Capture your adventure with a camera or action cam. Look for waterproof models that can withstand cold temperatures. Also, there are helmet intercom with camera, such as the Fodsports FX30C Pro, which combine a communication system and a camera function. This will help you reduce the number of gear, and you will not need to worry about handing various devices on your helmet while snowmobiling.
7. Environmental Considerations
Tread Lightly
Respect the environment by sticking to designated trails. Avoid disturbing wildlife and pack out all trash.
Noise Reduction
Opt for quieter snowmobile models or install noise reduction kits. This minimizes your impact on the environment and enhances your enjoyment of nature.
Some warm clothing including gloves and boots, goggles for eye protection
First aid kit, a GPS or map for navigation, and tools for basic repairs.
Check the weather conditions and ensure you have adequate fuel before your snowmobiling trip.
Is snowmobiling hard on the body?
Snowmobiling can be physically demanding, involving constant movement and balance.
It requires strength and endurance, especially on rough terrain. Riders may experience muscle strain from steering and handling the machine.
Proper technique and conditioning can help minimize physical stress and improve the overall experience.
What are 5 safety tips to follow when snowmobiling?
Here are five safety tips for snowmobiling:
Wear Proper Gear: Always wear a helmet, goggles, and layered clothing to stay warm and protected.
Stay on Marked Trails: Follow designated paths to avoid hazards like thin ice or hidden obstacles.
Check Weather Conditions: Know the forecast to avoid getting caught in storms or extreme cold.
Maintain Your Snowmobile: Regularly inspect and service your snowmobile to ensure it's in good working condition.
Ride with a Buddy: Never go alone; having a partner increases safety in case of emergencies. Wear snowmobiling intercom during the adventure to make sure you and your friend can communicate.
Why do snowmobilers wear backpacks?
Snowmobilers wear backpacks to carry the snowmobiling essential items. These include extra clothing, tools for repairs, a first aid kit, food, water, and emergency supplies like a flashlight or GPS.
Backpacks ensure they are prepared for unexpected situations. Also, these essential gear allow them to enjoy their ride safely and comfortably.
Conclusion
Snowmobiling is a thrilling way to explore winter landscapes, but preparation is key.
With the right clothing, safety gear, equipment, and emergency supplies, you can enjoy the ride with peace of mind.
Remember, safety should always be your top priority. Equip yourself well, respect the environment, and have fun out there!
By following this guide, you’ll be ready for anything the snow throws your way.
Whether you’re a seasoned rider or a newbie, you should know these snowmobiling must-haves.
These essentials will enhance your snowmobiling experience, ensuring you stay warm, safe, and prepared for every adventure.
Now, it is time that you should check your gear for the next snowmobiling experience. If there are some snowmobiling essentials you have not owned, then consider add them in your package. Maybe you will not use it this time, but who knows, someday you may need it.
How do you communicate while snowboarding? Which is the best way to communicate with others while on the snowboard slope?
Snowboarding is an exhilarating sport that combines the thrill of speed with the beauty of nature. But, maintaining communication with friends or partners on the slopes is hard. This is also a challenge to many snowboarders.
When you’re coordinating your next run or alerting your group about changing conditions, communication is needed. This is where snowboard intercoms come into play.
Great for staying in touch over longer distances or in crowded areas where shouting isn't effective.
Hand Signals
★★★★☆
Use clear hand signals to indicate stopping, turning, or needing help. Agree on these signals before hitting the slopes.
Shouting
★★★☆☆
Use your voice to alert others, especially if you're approaching fast or need to stop.
Pre-Set Meeting Points
★★☆☆☆
Agree on specific spots to regroup if you get separated.
Visual Cues
★☆☆☆☆
Make eye contact or point to where you’re heading to ensure everyone understands your plan.
The most effective way to communicate while snowboarding is to use a snowboard intercom.
It is a device that uses wireless Bluetooth communication. And, it ensures that you and your companions can communicate in real time without any obstacles.
You can install a snowboard intercom on your snowboard helmet. Then you can focus on snowboarding and keep in touch with your companions.
When you are snowboarding with your companion or he is watching you snowboarding, you can communicate about the route, movements and others at any time.
Therefore, snowboard intercoms are the most efficient and convenient way to communicate. You can talk to your companions in real time. In case of an emergency, you can talk directly without shouting.
Most importantly, it helps prevent accidents, ensures that everyone knows the plan, and can alert others to danger.
Most intercom systems have a certain intercom distance. For example, some snowboard communication systems from Fodsports can achieve an intercom distance of up to 2000 meters. This can already meet the communication needs of most people.
In addition, waterproof performance is also an important indicator of snowboard intercom. You should give priority to snowboard intercom with IP67 or at least IP65 level. This is the only way to ensure that this electronic product works stably and normally in the snow.
Why Use Snowboard Intercoms?
Snowboard communication devices are designed specifically for use in cold and challenging conditions. They allow snowboarders to talk to each other over a certain distance without needing a cellular network. Here’s why they are a game-changer:
Hands-Free Communication
Most snowboard intercoms are designed to be used hands-free. This means you can keep your focus on the ride without having to fumble with a phone or remove your gloves.
Durability and Weather Resistance
These devices are built to withstand cold, snow, and moisture. They are typically rugged and designed to function well even in extreme weather conditions.
Long Range
Intercoms generally offer a range that is sufficient for most snowboarding scenarios. So you can communicate with someone even if they’re on a different part of the mountain.
It is not hard to find communication systems for snowboarding. There are various snowboard intercoms and walkie talkies for you to choose on the market.
These small in size, and lightweight intercom systems are always the best choice for snowboarding. Besides, some more advanced intercoms for snowboarders have additional functions, providing more possibilities.
For example, the Fodsports M1-S Pro I am using for snowboarding, has FM radio, music sharing, voice assistant, and other useful functions.
This is why I recommend snowboarders use a communication system while on the slopes.
Install the snowboard intercom onto your helmet, then you can have seamless communication with your friends.
You can also connect it to your smartphone to listen to music, make phone calls, send messages, etc.
The intercom and the phone are connected via Bluetooth, so there is no worry about no signals.
The intercom is not only connecting to your smart phone, it is also connecting with other intercoms. The Fodsports FX7 Bluetooth mesh intercom can support you to pair with 10 riders at the same time. While the Fodsports FX10C dynamic mesh intercom has unlimited connection number, which is truly impressive.
The mic and speaker are installed in the snowboard helmet, so you can focus on the slope and surroundings.
Some high-end intercoms use noise-reduction mic and speaker to cancel the wind noise. They can bring you pure and clean sound in your helmet, so that you and your partners can hear each other clearly.
Think about it, you will not need to shout loudly to your friends, or wave your hands to make some signals. Just speak on the microphone, the intercom will handle all your communication demand.
FAQS
What is the best communication for snowboarding?
The best communication for snowboarding combines hand signals and snowboard walkie-talkies. Hand signals work well for quick, clear messages on the slopes. Snowboard walkie-talkies are ideal for longer distances or when visibility is low. Together, they ensure everyone stays connected and safe during the ride.
How do people listen to music while snowboarding?
People listen to music while snowboarding using earbuds or intercoms for helmets. Wireless Bluetooth intercom options are popular for convenience and safety. Some helmets have built-in audio systems. It's important to keep the volume low to stay aware of surroundings and maintain safety.
How to choose the right snowboard intercom?
To choose the right snowboard intercom, consider the following factors:
Make sure it is IP67 or at least IP65 waterproof level;
Check the intercom range to assure an effective communication;
Snowboarding can take up a full day, so look for intercoms with long-lasting battery life.
Choose an intercom that is easy to operate, even with gloves on. Big buttons and simple controls are ideal.
Clear sound quality is crucial, especially in windy or noisy environments. Look for models with noise-cancellation features.
Some intercoms allow multiple users to connect in a group conversation. If you often snowboard in large groups, this feature might be beneficial.
If you already have a helmet or other gear, ensure the intercom is compatible with what you own.
Conclusion
Snowboard intercoms are useful tools for anyone serious about snowboarding with friends or family. Therefore, knowing how to communicate while snowboarding is essential and important.
They enhance safety, improve the overall experience, and help maintain coordination on the slopes.
When it comes to protecting yourself while riding, the importance of a helmet cannot be overstated. Both ATV helmets and motorcycle helmets serve the function of safeguarding your head. Despite their similar purpose, they also have some differences.
They are designed differently to meet the specific demands of their respective vehicles.
This guide will lead you to explore their differences and similarities. Also, we will introduce the key considerations when choosing between ATV and motorcycle helmets.
Understanding the Basics
ATV Helmets
ATV Helmet - Fox Racing V1
ATV(All-Terrain Vehicle) helmets are specifically designed for off-road activities. So, many people also call them off-road helmets or dirt road helmets.
They are built to withstand the unique challenges of riding on rough terrains. These often include dirt, mud, and debris.
ATV helmets typically have the following features:
Safety Standards: ATV helmets require DOT, ECE, or Snell for assurance of safety.
Ventilation System: They have multiple vents to ensure proper airflow and keep the rider cool.
Comfort Padding: The liners are removable and washable for comfort and hygiene.
Visor or Face Shield: With scratch-resistant and UV-protected visors, they provide clear vision.
Weight: ATV helmets use lightweight materials to reduce fatigue during long rides.
Size and Fit: There are adjustable straps and different ATV helmet sizes to ensure a snug fit.
Material: Durable outer shell materials like polycarbonate or fiberglass for impact resistance.
Noise Reduction: The design feature of the ATV helmet is to minimize wind noise during rides.
Goggle Compatibility: There is space and design to accommodate goggles comfortably.
Communication System Compatibility: Some ATV helmets have built-in or compatible mounts for communication devices.
Motorcycle helmets are primarily designed for on-road use. Safety protection is also its most important feature and function.
Also, they have some designs on aerodynamic efficiency and noise reduction, etc.
Most motorcycle helmets offer features including:
Safety Certifications: DOT, ECE, or Snell certified motorcycle helmets are the top choice. They have safer design and production standards.
Impact-Resistant Shell: They are made from materials like polycarbonate, fiberglass, or carbon fiber. These materials have higher impact resistance ability and longer durability.
Ventilation System: There are well-designed vents to keep airflow continuous and reduce heat.
Comfort Liner: Removable, washable, and moisture-wicking liners bring riders more comfort and hygiene.
Aerodynamics: Motorcycle helmets' streamlined design can minimize wind resistance and noise.
Face Shield: Anti-scratch, UV-protected, and sometimes anti-fog shields for clear visibility.
Weight: Lightweight design to reduce neck strain during long rides.
Retention System: Secure and adjustable chin straps to keep the helmet in place.
ATV helmet vs motorcycle helmet visor and face shield (Source: RiiRoo)
Visor and Face Shield:
ATV Helmets: They have larger, extended visors to protect against sun glare and debris. For example, the Fox Racing V1 helmet, which I use during my ATV ride, includes a substantial visor. This helps shield my eyes during intense trail rides.
Motorcycle Helmets: They have integrated face shields to protect against wind and road debris. The Shoei RF-1400, for instance, offers a full-face shield with anti-fog technology for clear vision at high speeds.
Ventilation:
ATV Helmets: Designed with multiple vents to keep riders cool during exertion. I also got the chance to try the Bell MX-9 MIPS helmet while riding an ATV with my friends. It includes an advanced ventilation system that allows for significant airflow. This is really crucial when riding in hot conditions.
Motorcycle Helmets: Focus on reducing wind noise while maintaining airflow. I have an Arai Signet-X helmet I usually wear. It balances ventilation with noise reduction, so it is an ideal choice for my long highway rides.
Weight and Material:
ATV Helmets: They are often lighter and made from materials like polycarbonate. These materials reduce the weight but still provide flexibility and impact resistance. Here, I recommend the O’Neal Sierra II helmet as an example, which is lightweight. Its 1590g super light weight helps reduce fatigue during off-road adventures.
Motorcycle Helmets: Might be slightly heavier due to added features like soundproofing. Still, some top options balance them well. The AGV Pista GP RR uses carbon fiber to provide strength without excessive weight. It perfectly caters to performance riders.
Safety Standards
DOT (Department of Transportation): Both ATV and motorcycle helmets must meet DOT standards in the US. This is to ensure the riders' basic safety requirements. For example, the HJC CL-17 helmet is DOT-approved, providing peace of mind for riders.
Snell or ECE:
Motorcycle Helmets: Often seek Snell or ECE certifications for higher impact protection. The Bell Qualifier DLX MIPS is ECE certified, there are also many other ECE helmet choices. They have rigorous testing beyond DOT standards.
ATV Helmets: May not always pursue these certifications, focusing instead on off-road conditions. But, some models like the Airoh Aviator 2.3 include ECE certification for added assurance.
Purpose and Usage
ATV helmet vs motorcycle helmet usage compare
ATV Riding: ATV helmets are designed for off-road conditions. They are usually equipped with features that prioritize protection from environmental elements. Helmets like the Thor Sector have reinforced chin bars to handle impacts from tree branches or falls.
Motorcycle Riding: Motorcycle helmets focus on on-road use, emphasizing aerodynamics and noise reduction. The Schuberth C4 Pro and some other helmets are crafted for quiet, streamlined travel. They are ideal for touring or commuting.
Comfort and Fit
Proper Fit: This is essential for helmet safety and comfort. Helmets should feel snug without pressure points. Brands like Arai and others offer different shell shapes to fit various head forms.
Padding and Liners: Most of the liners are removable and washable. This can bring the riders more comfort and hygiene. Some high-end helmets like the Klim F5 helmet feature a moisture-wicking liner. This is also a good way to enhance the comfort during long rides.
Weight: A lighter helmet reduces fatigue. The Icon Airflite, known for its lightweight design, is perfect for extended wear without strain.
Visibility and Vision
Field of View:
ATV Helmets: Provide a wide field of view, crucial for navigating unpredictable terrains. The 6D ATR-2 helmet offers a broad perspective, enhancing peripheral vision.
Motorcycle Helmets: They also provide good visibility, but they may focus more on reducing glare and fog. Let's take the Pinlock-ready visor on the Shoei GT-Air II as an example. It helps maintain clarity in various weather conditions.
Face Shields and Goggles:
ATV Helmets: Often paired with goggles for flexibility. Helmets like the Fly Racing Kinetic allow for easy goggle integration.
Motorcycle Helmets: Typically include built-in shields. The HJC RPHA 70 ST, for instance, features a retractable sun visor for quick adjustments.
How to Choose the Right ATV and Motorcycle Helmet
Purpose and Usage
ATV Riding: If you primarily ride off-road, an ATV helmet is preferable. Because its design is tailored for rough terrains and environmental conditions.
Motorcycle Riding: For highway and urban riding, a motorcycle helmet is an ideal choice. It has aerodynamic features and comprehensive protection.
Comfort and Fit
Proper Fit: Regardless of ATV helmet type or motorcycle helmet type, the helmet should fit snugly without being too tight. It should not move around on your head.
Padding and Liners: Both helmets offer removable liners for easy cleaning. Choose a helmet with comfortable padding for longer rides.
Weight: A lighter helmet can reduce fatigue, especially for long rides. Balance weight against necessary safety features.
Visibility and Vision
Field of View: ATV helmets often provide a wider field of view. This is an important factor in off-road scenarios.
Face Shields and Goggles: Consider whether you prefer a full face shield or the flexibility of goggles. The goggles are commonly used with ATV helmets.
Additional Features
Communication Systems: Motorcycle helmets come with built-in Bluetooth systems for communication and music. However, this feature is less common in ATV helmets.
Camera Mounts: If you want to record your rides, look for helmets that offer mounts for GoPros or other cameras. Also, there are helmet Bluetooth headset with camera, like the Fodsports FX30C Pro and Fodsports FX 60C.
Storage: Store helmets in a cool, dry place away from direct sunlight. This is a good way to prevent the material of the helmet from degradation.
Cost Considerations
Budget: Helmets range from budget-friendly options to high-end models. Higher price often means better materials and additional features. If you have a low budget, then you can consider those with a lower price. But always ensure the helmet meets safety standards.
Longevity: Investing in a quality helmet can ensure it lasts longer and provides better protection over time.
Conclusion
The ATV helmet and motorcycle helmet are different. Choosing between them depends largely on your primary riding environment and personal preferences.
Both types of helmets are engineered to provide essential protection. But their designs reflect the different demands of road versus off-road riding.
When selecting a helmet, prioritize safety, comfort, and the specific needs of your riding style.
Remember, the best helmet is one that fits well, meets safety standards, and suits your riding conditions.
By understanding these differences and considerations, you can make an informed choice. The right helmet will enhance your safety and enjoyment on the road or trail.
As an avid motorcycle enthusiast, I've been itching to share my thoughts on the Suzuki V-Strom 650. This versatile adventure bike has been turning heads in the riding community. There are some good reasons for this phenomenon. In this Suzuki V-Strom 650 review, we'll dive into what makes this motorcycle a standout choice for riders. If you are seeking a balance of on-road comfort and off-road capability, this blog will tell you all.
We'll start by taking a closer look at the V-Strom 650's key features and specifications. Then, we'll explore its real-world performance. We will discuss everything from its handling characteristics to its long-distance travel potential. Besides, we will also examine its comfort and practicality for daily use. Then, we'll wrap up by considering the V-Strom 650's place in the market. Finally, a conclusion about whether it's worth the investment for adventure-seeking riders.
Suzuki V-Strom 650 review
V-Strom 650 Model Overview
History and evolution
The Suzuki V-Strom 650 has a rich history dating back to 2004. It was first introduced as a middleweight sport tourer.
I've seen this bike evolve over the years, and it's impressive how Suzuki has managed to keep it relevant and competitive in the market.
The V-Strom 650 borrowed its engine from the 1999 Suzuki SV650. But it was fine-tuned to match the bike's characteristics.
In 2007, Suzuki made some notable updates to the V-Strom 650. These include the introduction of optional ABS, an increased wheelbase, and the addition of dual spark plugs for each cylinder.
The V-Strom 650 has undergone several updates to improve its performance and styling.
In 2012, Suzuki released a refreshed version of V-Strom 650. It features black resin body panels, a redesigned front fender, a raised seat, and reduced weight.
This update also brought improved torque and a revised suspension. These updates make it even more capable on various terrains.
Current model variants
Today, the Suzuki V-Strom 650 is available in three distinct variants. Each of them caters to different rider preferences and needs.
The base model is the V-Strom 650A. It offers a solid foundation for riders looking for a versatile adventure-touring motorcycle.
For those seeking a bit more off-road capability, there's the V-Strom 650XT. This variant comes equipped with upgraded spoke-style wheels, knuckle guards, and a lower engine cowl. These additions enhance its ability to handle rougher terrain while maintaining its on-road prowess.
The top-of-the-line model is the V-Strom 650XT Adventure, designed for serious long-distance touring. It features all the upgrades of the XT model plus a set of Suzuki side cases. These panniers make it easy to pack for extended trips, adding to the V-Strom's already impressive touring capabilities.
Key specifications
At the heart of the Suzuki V-Strom 650 is a 645cc DOHC V-twin engine. This engine has been continually refined over the years to deliver a balance of performance and efficiency.
It produces a respectable 70 horsepower and 46 lb-ft of torque. So, it can provide ample power for both highway cruising and tackling twisty back roads.
Another outstanding feature of the V-Strom 650 is its six-speed transmission. This makes sure that it is well-suited for both sporty riding and relaxed cruising.
Besides, its low-maintenance, long-life sealed O-ring drive chain ensures reliability on long journeys.
Also, I'd like to introduce the Suzuki V-Strom 650's Advanced Traction Control System. This system offers three modes (1, 2, and OFF) for the riders.
They can adjust the level of intervention based on road conditions and personal preference. It's a valuable safety feature that enhances confidence in various riding situations.
The V-Strom 650 boasts a generous 5.3-gallon fuel tank, which is big enough for most riding purposes. Combined with its efficient engine, this motorbike provides an impressive range between fill-ups.
I must say, this makes it an excellent choice for long-distance touring.
The V-Strom 650 has an overall length of 2275 mm (89.6 in.), a width of 835 mm (32.9 in), and a height of 1,405 mm (53.3 in). Besides, its seat height is 830 mm (32.7 in). Based on my test ride, this seat height is very comfortable for most riders. It strikes a balance between accessibility for short riders and a commanding view of the road.
I've put the Suzuki V-Strom 650 through its paces in various real-world scenarios. And I must say, it's an impressive machine.
Let's dive into the nitty-gritty of its performance, and dig into how excellent it is. Here, I will focus on its engine power, fuel efficiency, and handling characteristics.
Engine power and torque
The heart of the V-Strom 650 is its 645cc V-twin engine, which delivers a respectable 70 hp and 46 lb-ft of torque.
These numbers might not seem earth-shattering on paper and will attract some enthusiasts. But the real-world performance tells a different story.
Its power delivery is smooth and predictable, making it a joy to ride in various conditions.
One of the standout features of this engine is its versatility. Whether you're cruising on the highway or tackling twisty back roads, the V-Strom 650 has enough grunt to keep things interesting.
Besides, its torque curve provides ample low-end and mid-range power for everyday rides.
In my view, the V-Strom 650 handles highway passing maneuvers with ease, even when fully loaded.
However, everything is not perfect. Since this is a review blog, I must provide you with the most authentic and reliable test results.
It's worth noting that the V-Strom 650 has a slight lack of top-end power when the bike is heavily laden.
That is, for most riding scenarios, the power output is more than adequate.
Fuel efficiency and range
One area where the Suzuki V-Strom 650 truly shines is its fuel efficiency.
During my time with the bike, I've consistently achieved impressive mileage figures.
On average, you can expect to get around 50-55 mpg under normal riding conditions.
This translates to a range of approximately 250-280 miles on a full tank. For long-distance touring, this result is excellent.
But, as you know, the fuel efficiency can vary depending on riding style and conditions.
During a recent trip, I managed to squeeze out an impressive 62.8 miles per gallon on a 75km country ride, primarily using 4th and 5th gears.
However, when pushing the bike hard or riding at high speeds, you might see the fuel economy drop to the mid-40s mpg range.
The V-Strom 650's fuel efficiency is particularly impressive when compared to its larger sibling, the V-Strom 1000.
Suzuki claims the 650 model offers about 10 mpg more than the 1000cc version. My real-world observations align with it.
Handling characteristics
When it comes to handling, the Suzuki V-Strom 650 is a pleasant surprise.
Despite its adventure-touring design, it feels nimble and responsive on the road.
The bike's relatively light weight (about 470 lbs wet) contributes to its agile nature. Thus it is easy to maneuver in both urban and rural settings.
The suspension setup may not be the most sophisticated in its class. But it does a commendable job of soaking up road imperfections.
The spring-preload-adjustable 43mm front forks and link-type rear suspension with rebound damping adjustment provide a comfortable ride on various surfaces.
One aspect that impressed me was the V-Strom 650's stability at highway speeds.
Even when fully loaded with luggage, the bike remains composed and confidence-inspiring.
However, it's worth mentioning that some riders have reported sensitivity to crosswinds. This phenomenon is particularly obvious when fitted with side cases.
Off-road capability is another area where the V-Strom 650 holds its own.
While it's not a hardcore off-road machine, it can handle gravel roads and moderate trails with ease.
The bike's balanced weight distribution and predictable power delivery are outstanding. Therefore, it is a capable companion for light off-road adventures.
In all, the Suzuki V-Strom 650's real performance is a testament to its well-rounded nature.
It offers a compelling blend of power, efficiency, and handling that makes it suitable for a wide range of riding styles and scenarios.
Whether commuting, touring, or seeking light off-road adventures, you can rely on it. The V-Strom 650 proves to be a versatile and capable companion.
When it comes to comfort and practicality, the Suzuki V-Strom 650 has a lot to offer.
I've spent countless hours in the saddle to experience its true comfortness. And I can confidently say that this bike is built for long-distance touring.
Let's see what makes the V-Strom 650 a comfortable and practical choice for riders.
Ergonomics and rider comfort
The V-Strom 650's ergonomics are generally well-suited for most riders.
With a seat height of 835 mm, it's not the lowest bike out there. But it's designed in a way that allows riders as short as 5'8" to comfortably reach the ground.
The center-set footpegs and high handlebars contribute to a comfortable upright riding position. I believe that this will be an ideal choice for most riders who like long-distance touring motorcycles.
Another standout feature of the Suzuki V-Strom 650 is the long seat. It provides ample space for riders to find their optimal seating position.
This is particularly beneficial on extended rides, as it allows you to shift your weight and maintain comfort over time.
However, some taller riders might find the stock setup a bit cramped.
Still, there is a solution. I've found that raising the seat and lowering the pegs can make a significant difference.
Suzuki offers an accessory seat that adds 20 mm of height. This will not only provide more legroom but also add a bit of extra padding for comfort.
For those looking to further customize their riding position, the V-Strom 650 is acceptable.
There are aftermarket options like peg lowering kits that can drop the footpegs by an inch. This customization can give you a total of 1 3/4 inches of extra legroom.
This modification can make a world of difference on long rides.
Passenger accommodation
The V-Strom 650 isn't just comfortable for the rider. It also does a decent job of accommodating a passenger.
The pillion seat is well-cushioned, and the footpegs are positioned at a comfortable height.
This makes it a suitable choice for couples who enjoy touring together.
However, it's worth noting that the length of the seat can be a bit short for two larger riders.
If you and your passenger are taller or heavier, you might find yourselves wanting more space after a couple of hours in the saddle.
For those planning frequent two-up riding, there are some modifications you can consider.
For instance, some riders have opted for extended footpeg kits to provide more legroom for their passengers. This can significantly improve comfort on longer journeys.
Storage and luggage options
When it comes to storage, the V-Strom 650 shines. Its versatility as an adventure motorbike means it's designed with luggage capacity in mind.
The stock bike doesn't come with built-in storage. But there's a wide range of aftermarket options available to suit your needs.
One popular setup is a combination of side cases and a top box.
For example, you could opt for a set of 37-liter left and 45-liter right side cases, along with a top box.
This configuration provides ample storage for long trips or daily commuting.
If you prefer a more minimalist approach, you could go with just a top case.
A 35-liter top case is sufficient for daily use, capable of holding a full-face helmet or a few bags of groceries.
For longer trips, you can always add soft luggage or a tank bag to increase your carrying capacity.
However, it's important to note something about these luggage options for the riders.
While they greatly enhance the bike's practicality, they can affect its handling, especially when fully loaded.
So, you should always be mindful of weight distribution and adjust your riding style accordingly.
In General, the Suzuki V-Strom 650 offers a comfortable and practical package for both solo riders and those who enjoy two-up touring.
Its well-designed ergonomics, decent passenger accommodation, and versatile luggage options are impressive.
Honestly, it's a bike that's ready for everything from daily commutes to long-distance adventures.
FAQs
1. How reliable is the Suzuki V-Strom 650?
The Suzuki V-Strom 650, also known as the DL650, is highly regarded for its exceptional reliability. With regular maintenance and timely oil changes, this motorcycle consistently performs well. It has been proven to be a true workhorse, especially on long-distance journeys.
2. What is the typical lifespan of a Suzuki V-Strom 650?
A Suzuki V-Strom 650 can typically reach 70,000 miles without any significant issues. It performs reliably through various weather conditions, including extreme heat and cold.
3. What are the main differences between the V-Strom 650 and the V-Strom 650 XT?
The V-Strom 650 XT model differs from the standard V-Strom 650 by some additional features. For example, the handguards, a lower engine cowl, and spoke-style wheels equipped with tubeless radial dual-sport tires. The V-Strom 650 XT is priced at USD 9599.00, while the base model costs USD 9104.00.
4. What fuel efficiency does the V-Strom 650 offer?
The Suzuki V-Strom 650 is notably fuel-efficient, averaging about 78 miles per gallon. This allows for over 300 miles of travel between fuel refills. Therefore, it is an economical choice for riders.
Conclusion: The V-Strom 650's Place in the Market
The Suzuki V-Strom 650 has proven itself as a versatile and reliable adventure-touring motorcycle.
It blends comfortable ergonomics, efficient fuel consumption, and capable performance both on and off-road. Thus making it a strong contender in its class.
The bike's ability to handle daily commutes, weekend getaways, and long-distance tours with equal ease showcases its adaptability to various riding needs.
If you're looking for a well-rounded motorcycle that doesn't break the bank, the V-Strom 650 is worth considering.
While it may not excel in any single area, its jack-of-all-trades nature has an appeal to many riders.
The bike's reputation for reliability, coupled with Suzuki's extensive dealer network, adds to its value proposition.
In the end, the V-Strom 650 stands out as a practical choice for those who want a bike that can do it all without fuss.
As a passionate rider, I understand the thrill of hitting the open road with the wind in your face and the roar of the engine beneath you.
However, there's one aspect that can take your riding experience to new heights. That is the ability to enjoy your favorite tunes or podcasts while navigating the roads.
This is where motorcycle helmet audio systems come into play. Believe me, they can offer you a seamless blend of sound and safety.
In this comprehensive guide, we'll dive into the Fodsports motorcycle helmet audio systems. Let's explore their benefits, features, and the top options available on the market.
Whether you're a seasoned rider or a newbie to motorcycle adventures, it doesn't matter.
This article will equip you with the knowledge to choose the perfect audio system for your rides.
Benefits of using a helmet audio system while riding
Incorporating an audio system into your motorcycle helmet offers a multitude of advantages. It can largely elevate your overall riding experience. Here are some of the key benefits:
Enhanced Situational Awareness. A well-designed helmet audio system can actually improve your situational awareness. You can hear important audio cues from your surroundings while enjoying your music or audio content.
Reduced Fatigue. Long rides can be mentally and physically taxing. Having your favorite tunes or podcasts to keep you company can help reduce fatigue. Also, it makes those extended journeys more enjoyable.
Communication Convenience. Many helmet audio systems come equipped with Bluetooth connectivity. You can make and receive phone calls with fellow riders with you. Or you can communicate with them through integrated communication systems.
Improved Navigation. Some advanced audio systems integrate with GPS navigation apps, or at least can receive GPS directions from your phone. They can provide turn-by-turn voice guidance directly into your helmet. In this way, they ensure you never miss a turn or exit.
Best motorcycle helmet audio systems on the market
After extensive testing, we've compiled a list of the best motorcycle helmet audio systems from Fodsports.
Bluetooth Mesh Intercom.
Dual Bluetooth Chip Design.
10 Riders Group Audio, 2000m Distance!
HRSQ Mic and Speakers, CVC + ENC + DSP Noise Cancelation.
Listen to Music/GPS and Intercom At the Same Time.
IP67 Waterproof.
FM Radio, Music Sharing, Voice Commands.
The Fodsports FX7 is a Bluetooth mesh intercom designed for motorcycle enthusiasts. Although it is just released by Fodsports a few months ago, it quickly attracts many riders.
The most advanced technology of this helmet audio system is its dual-chip design. One chip operates Bluetooth audio, and the other one operates Bluetooth intercom.
Based on my test, this feature largely improved the FX7's working efficiency and stability.
Besides, it also features leading multi-rider mesh AD-HOC network tech. Any rider who joins or leaves the intercom group will not affect the other riders.
The FX7 supports seamless communication with up to 10 riders in a group. And it enables an intercom range of up to 2000 meters, which is ideal for long-distance trips.
The reason I put the FX7 into the list of the best motorcycle helmet audio systems is its audio quality.
On one hand, the Fodsports FX7 is equipped with HRSQ (high-resolution sound quality) microphone and speakers. This microphone and speaker kit make sure you will receive the purest sound and voice.
Moreover, the FX7 also has an IP67 waterproof level, making it able to handle all extreme weather.
Operating an intercom, music streaming, listening to FM radio, or GPS navigation, the FX7 handles all!
I must say, compared with various audio systems, the FX7 might be the best sound system for my helmet.
Here is a comprehensive review video about Fodsports FX7:
Overall, the Fodsports FX7 is a versatile and reliable communication tool for motorcyclists. It can enhance both safety and enjoyment for the riders on the road.
Fodsports FX8 Pro - Listen to Music/GPS and Intercom at The Same Time
Dual Bluetooth Chip Design.
Support Pairing with Fodsports Connect APP
10 Riders Group Communication, 2000m Distance!
Optional HRSQ Mic and Speakers, CVC + ENC + DSP Noise Cancelation.
Listen to Music/GPS and Intercom At the Same Time.
IP67 Waterproof.
FM Radio, Music Sharing, Voice Commands.
The system uses noise-canceling technology and a windproof microphone. They cut down on wind noise so that you can hear music and voices clearly even when the bike is moving fast.
Riding a motorcycle with friends can be great fun. You might want to listen to music, hear GPS directions, or just talk to each other.
This clever device makes all of this easy and safe.
It has two built-in Bluetooth chips, one for Bluetooth audio, the other for Bluetooth intercom.
This advanced design makes sure the FX8 Pro enable the riders to listening to music/GPS and intercom at the same time.
Another important feature of the FX8 Pro is its long range. It can connect up to 10 riders within about 2000 meters.
Even at high speeds, you and your friends can all stay in touch stably.
With just one click, you can directly pair with your friend's device, making the connection convenient and easy.
It also has many useful features like FM radio, and music sharing.
It works with voice assistants like Siri or Google Assistant and shows battery level on its display.
It is waterproof, so it can handle rain, even heavy showers. The battery lasts a long time and charges fully in about three hours.
All these features add up to make the Fodsports FX8 Pro stand out. It is a reliable device that makes motorcycle rides safer and more fun.
In 2025, Fodsports has released the FX8 Pro V2.1 version and Fodsports Connect APP. The new FX8 Pro V2.1 is now able to pair with the APP, riders can directly set and control the device in the APP.
Riders will not need to touch and set the buttons and dial knob on the FX8 Pro by hands. Just place your hands on the handlebars and ride safely.
Fodsports FX30C Pro - Best helmet audio system with camera and headset
Helmet audio syatem with camera - Fodsports FX30C Pro
2 Way Helmet Intercom with Camera, 1000m Intercom Range.
HD 1080P Camera & 360° Rotation Shooting.
Large Battery, Ideal for long rides.
IP65 Waterproof.
Music Sharing, FM Radio, Voice Commands.
The Fodsports FX30C Pro is a top-notch Bluetooth motorcycle intercom with a camera. It is designed for riders who value clear communication and high-quality audio.
It stands out as an excellent helmet audio system with an integrated camera and headset. Since the first time I got it, I have become a super fan of it.
Firstly, I would like to introduce its intercom function.
The FX30C Pro supports 2 motorcyclists’ intercoms up to 1000m. This enables you to share road problems or the joy of the appeal a lot more efficiently with your companion.
Besides, it allows you to pair it with your smartphone for hands-free calls, GPS navigation, and music streaming.
Yes, it is a 2-way helmet headset. Some riders who want more connection ability may feel it is too small in connection number.
But, with its camera function, do you think it is worth of buying? Definitely, I will say "Yes!"
A standout feature is its built-in HD camera, which records in 1080p. This lets you capture scenic rides and important moments on the road.
The camera is easy to operate, ensuring you can focus on riding.
I have a riding test in California this month, and the FX30C Pro's audio quality is impressive.
It is equipped with noise-canceling technology that reduces wind and engine noise. This ensures crystal-clear sound, even when I am riding at high speeds.
The FX30C Pro is user-friendly, with an oversized rotary button. This makes sure it is accessible and easy to handle even with gloves.
It's also IP65 water-resistant, making it reliable in varying weather conditions.
Let's learn about Fodsports FX30C Pro in the following video:
Overall, the Fodsports FX30C Pro combines a superior audio system and a camera. It is an ideal choice for motorcyclists who want both entertainment and safety features.
8 Riders Group Communication Intercom, 2000 Meters Distance!
Noise Reduction Function & Hi-Fi Stereo Sound Quality.
FM Radio, Music Sharing, Voice Command.
Universal Pairing.
The Fodsports FX8 Bluetooth motorcycle intercom is a top choice for riders who love music.
It features Bluetooth 5.0, ensuring a stable and clear connection to your partners. The intercom number can reach as many as 8 riders, making it a perfect choice for group riding intercom.
And, the intercom distance is also impressively 2000 meters. Even if you are leave behind with your partners for a long distance, the FX8 can still keep you connected.
Now, let's see why the FX8 is on my list of the best helmet speaker recommendations.
The FX8 also allows you to stream your favorite songs with high-quality sound while on the road.
Besides, the FX8 is designed with a powerful 40mm Hi-Fi Stereo speaker, offering crisp audio and deep bass. This makes it perfect for enjoying music even at high speeds.
What's more, its noise-canceling technology helps minimize wind and road noise. With this technology, your music experience is not interrupted.
The device also boasts an impressive 900 mAh battery life, lasting up to 20 hours on a single charge. This ensures you have uninterrupted music during long rides.
Its user-friendly interface allows easy control of volume and tracks while riding. Even if you are wearing gloves, you still can handle the FX8 easily.
Moreover, the FX8 supports hands-free calling, GPS navigation prompts, FM radio, and music sharing. These functions add to the FX8's versatility in use.
And, it is IP67 waterproof and durable. This makes it reliable in various weather conditions.
The following is a reviewing video to show you how excellent the Fodsports FX8 helmet intercom is:
Overall, the Fodsports FX8 offers excellent sound quality and convenience. I can recommend it as one of the best motorcycle helmet speakers on the market.
For music-loving motorcyclists, the Fodsports FX8 is an ideal choice.
It offers great value without compromising on essential features. The FX6 allows riders to communicate with up to 6 people at a time. This makes group ride communication more enjoyable and coordinated.
Besides, its Bluetooth 5.0 technology ensures stable connections and clear audio quality.
One of the standout features is its impressive range of up to 1000 meters in open terrain. This makes it suitable for both city commutes and long highway rides.
The FX6 is equipped with advanced noise-canceling technology, providing you crystal clear sound. With this tech, the FX6 can reduce wind and road noise for clearer conversations.
It also supports hands-free calling, GPS navigation, FM radio, and music streaming. Riders can easily stay connected without distractions.
The device is easy to install and fits most helmet types. Its large buttons are designed for effortless use, even with gloves on.
The battery life is another strong point, offering up to 8 hours of intercom time and a standby time of 300 hours.
In general, the Fodsports FX6 combines affordability with functionality. It is an excellent choice for riders seeking a reliable and cost-effective communication system.
The Fodsports M1-S AIR is an excellent Bluetooth intercom designed for motorcycle enthusiasts. It's perfect for two to six riders intercom who want seamless communication on the road.
This device offers a reliable connection with a range of up to 1000m, ensuring you stay in touch even at a distance.
With Bluetooth 5.0 technology, the M1-S AIR provides clear audio quality.
Don't just think of it as a 2 way communication system, it also supports various functions for riders. Hands-free calling, music streaming, and GPS navigation prompts, FM Radio, it has all.
With these functions, your ride tour with your partner will be more enjoyable and safe.
I recommend couples use it since its intercom stability and sound quality is quite impressive.
What's more, the M1-S AIR intercom can connect with most Bluetooth-enabled devices. This makes sure it can offer versatility and convenience.
Besides, the Fodsports M1-S AIR is designed to be user-friendly, easily fit most helmet types.
It features noise cancellation technology microphone and speakers. With them, the wind and engine noise is reduced, ensuring clear sound even at high speeds.
Based on my test, the M1-S AIR truly brings great sound upgrade for my helmet.
The M1-S AIR has a long battery life, offering up to 15 hours of talk time and 300 hours on standby. It is also waterproof, so you can ride in any weather without worry.
Look what reviewers say about this helmet intercom:
Overall, the Fodsports M1-S AIR is a top choice for two-rider communication.
Its combination of range, audio quality, and durability makes it a reliable partner for any motorcycle journey.
If you are looking for a low budget 2-way intercom for you and your friend, the Fodsports FX-S is worth considering.
This budget-friendly Bluetooth intercom is just released by Fodsports in December 2024. It is just the best time to catch the newest fashion to own it.
The Fodsports FX-S is the latest budget-friendly 2-way Bluetooth intercom, launched in December 2024.
It is designed for riders looking for reliable communication without spending too much.
The FX-S supports a stable Bluetooth 5.4 connection, ensuring clear audio for up to 1000 meters.
It lets two riders talk seamlessly while on the move. For couples, friends or father and son riding communication, it will be a perfect choice.
It provides 2 appearance colors: Gunmetal black and Turquoise Blue. Male riders may choose the Gunmetal black one, and the female rider can choose the Turquoise blue one. Both these two colors are with high-end and beautiful looking.
Besides, the FX-S intercom features noise-canceling technology to minimize wind and engine noise. This can make sure the FX-S can still provide clear conversations even at high speeds.
The FX-S is lightweight, durable, and easy to install on most helmets. It also includes a user-friendly big rotatory button, truly a humanized design. You can use this button to achieve simple controls for intercom, volume change, calls, and music.
With an impressive battery life of up to 15 hours, the FX-S is perfect for long rides.
Even though the FX-S is budget-friendly, it does not mean it is poor in performance.
It is equipped with an IP67 waterproof level, strong enough to handle rain, snow, moisture or dust. Therefore, even in rainy and snowy weather, you can use it with confidence.
It's a great choice for anyone seeking affordability and quality in a Bluetooth intercom.
Frequently Asked Questions
What is the best motorcycle helmet to listen to music?
The Fodsports FX8 is a great motorcycle helmet option for listening to music. It features an advanced Bluetooth 5.0 system, ensuring a stable connection and clear audio quality.
Besides, the helmet comes with noise-canceling technology. This helps reduce wind and road noise, making your music experience more enjoyable.
It also supports hands-free calls and voice commands, adding convenience and safety while riding. With its long battery life, you can enjoy up to 20 hours of music or talk time.
The Fodsports FX8 is a solid choice for riders who want a seamless audio experience on the road.
What is the best Bluetooth headset for a motorcycle helmet?
The best Bluetooth headset for a motorcycle helmet in 2024 is the Fodsports FX7.
It offers excellent sound quality and noise cancellation, ensuring clear communication even at high speeds.
With a long battery life, the FX7 is perfect for long rides. It features a dual-chip design and AD-HOC network, making the connection more stable.
The headset supports up to 10 riders' mesh intercom, making group rides more enjoyable. IP67 Durable and weather-resistant, it's a reliable choice for any motorcyclist.
Can I listen to music in my motorcycle helmet?
Yes, you can listen to music in your motorcycle helmet. Many helmets come with built-in Bluetooth systems, allowing you to connect your smartphone or music device wirelessly. If your helmet doesn't have this feature, you can add a Bluetooth headset for helmets. These systems usually include speakers and a microphone for hands-free operation.
Conclusion: Finding the perfect audio system for your riding needs
Choosing the best motorcycle helmet audio system is a personal decision. It depends on your specific riding needs, preferences, and budget.
You may prioritize exceptional sound quality, advanced noise-canceling capabilities, or long-range communication.
But there's an audio system out there that can elevate your riding experience.
Remember to consider factors such as compatibility, durability, and ease of use when making your selection.
You can also consult with experienced riders, read reviews, or seek guidance from reputable dealers. They will help you get more information and ensure you make an informed decision.
Ready to take your riding experience to new heights? Visit Fodsports official website and explore our extensive selection of top-rated motorcycle helmet audio systems.
Our team is here to assist you in finding the perfect audio solution that meets your unique needs. Upgrade your helmet today and embark on your next adventure with the ultimate audio companion.
Which is the best Royal Enfield motorcycle in the world? How will you choose when facing with various Royal Enfield motorcycles?
Introduction
From its inception in 1901, Royal Enfield has etched an indelible mark on the global motorcycle landscape.
This venerable brand has steeped in a rich legacy spanning over a century and it has consistently pushed boundaries. Now, it has delivered many motorcycles that epitomize endurance, versatility, and timeless style.
In this comprehensive guidance, we delve into the crème de la crème of Royal Enfield's illustrious lineup.
We will unveil the models that have captured the hearts of enthusiasts worldwide. Some of them solidified the brand's reputation as a purveyor of iconic two-wheeled marvels.
1. Royal Enfield Interceptor 650: The Epitome of Retro-Modern Refinement
Royal Enfield Interceptor 650 - best Royal Enfield motorbike for daily use and touring
Introduced in 2018, the Royal Enfield Interceptor 650 marked a pivotal moment in the brand's evolution. This bike seamlessly blends contemporary engineering with retro-inspired aesthetics.
This best Royal Enfield motorbike for daily use and touring is one of the most famous Royal Enfield models. It captivated riders with its impeccable blend of performance, comfort, and undeniable charisma.
A Parallel-Twin Marvel
At the heart of the Interceptor 650 beats a 648cc parallel-twin engine. I must say, it is a masterpiece of engineering that delivers an exhilarating 47 hp and a robust 38 lb-ft of torque.
This powerplant is a testament to Royal Enfield's commitment to innovation. It not only offers a refined and responsive ride but also belies its retro-inspired styling.
Ergonomic Brilliance
One of the standout features of the Interceptor 650 is its ergonomic brilliance.
It has an upright riding position, elevated handlebars, and forward-positioned footpegs. These features ensure a comfortable and commanding stance.
Therefore, it is an ideal companion for daily commutes and extended touring adventures.
Modern Amenities, Timeless Charm
While the Interceptor 650 exudes a retro charm, it is far from antiquated. This best Royal Enfield motorbike for long drive also incorporates modern amenities for riders.
For example, the ABS, a digital instrument cluster, and fuel injection. All these modern features seamlessly blend cutting-edge technology with classic aesthetics.
Customization Potential
The Interceptor 650's versatility extends beyond its performance and comfort.
Its minimalist design serves as a blank canvas for enthusiasts, inviting them to unleash their creativity through an array of customization options. Thus transforming this already remarkable motorcycle into a truly personalized masterpiece.
2. Royal Enfield Himalayan 411: The Adventure-Seeking Trailblazer
Royal Enfield Himalayan 411
For those seeking an adrenaline-fueled off-road experience, the Royal Enfield Himalayan 411 stands as a beacon of adventure and capability.
The Himalayan 411 is the best motorcycle in Royal Enfield for adventure touring. It is designed to conquer the most formidable terrains.
Nowadays, it has carved a niche for itself among thrill-seekers and explorers alike.
Rugged and Purposeful Design
The Himalayan 411 exudes a rugged and purposeful design. You can find this from its robust half-duplex chassis to its adventure-ready suspension.
Another worth mentioning is its high ground clearance and commanding riding position. The riders can tackle even the most challenging trails with confidence and ease.
Capable and Versatile Powerplant
Powering the Himalayan 411 is a 411cc single-cylinder engine that delivers 24.3 hp and 23.6 lb-ft of torque.
These figures may seem modest, but the engine's true strength lies in its versatility. It provides ample torque and responsiveness to conquer diverse terrains.
Adventure-Focused Features
Royal Enfield has equipped the Himalayan 411 with a host of adventure-focused features. These include the handguards, crash bars, and luggage racks.
With them, riders can embark on long journeys without worrying about practicality or convenience.
Affordability and Accessibility
One of the most compelling aspects of the Himalayan 411 is its affordability. This makes adventure touring accessible to a broader range of enthusiasts.
With its capable performance and robust design, this Royal Enfield bike for touring offers an unparalleled value proposition in the adventure touring segment.
3. Royal Enfield Continental GT 650: The Café Racer Renaissance
Royal Enfield Continental GT 650 - best Royal Enfield motorcycle for daily use and touring
The Royal Enfield Continental GT 650 pays homage to the iconic café racer culture of the 1960s. It has ignited a renaissance in the world of retro-styled performance motorcycles.
According to my riding test, the Continental GT 650 is the best Royal Enfield motorcycle for daily use and touring.
The reason? It encapsulates the essence of speed, style, and unadulterated riding pleasure.
A Parallel-Twin Powerhouse
The Continental GT 650 shares its parallel-twin engine with the Interceptor 650.
This engine can deliver an exhilarating 47 horsepower and 38 lb-ft of torque.
But, its café racer styling, with clip-on handlebars, a single seat, and upswept exhausts imbues it with a distinct personality. These features and advantages resonate with speed enthusiasts.
Agile and Responsive Handling
The Continental GT 650 is not merely a showpiece; it is a true performer on the road.
Its agile handling and responsive nature make it a joy to navigate through twisties and urban landscapes. Riders can experience the thrill of a café racer without compromising on practicality.
Retro Aesthetics, Modern Performance
While the Continental GT 650 pays homage to the café racers of yesteryear, it is far from antiquated.
Royal Enfield has integrated modern features such as ABS, slipper clutch, and fuel injection on the Continental GT 650.
This ensures that the Continental GT 650 delivers a riding experience that is both exhilarating and safe.
Customization Potential
Like the Interceptor 650, the Continental GT 650 offers a wealth of customization possibilities. From performance upgrades to aesthetic enhancements, riders can achieve all.
This motorcycle serves as a blank canvas for riders to express their individuality and create a truly unique ride.
4. Royal Enfield Classic 350 and Classic 500: Timeless Icons Redefined
Royal Enfield Classic 350 - best daily use and touring motorcycles in Royal Enfield
The Royal Enfield Classic series, comprising the Classic 350 and Classic 500. They represent the brand's unwavering commitment to preserving its heritage while embracing modernity.
These are some of the best daily use and touring motorcycles in Royal Enfield. And, they captivated generations of riders with their timeless charm and enduring appeal.
Retro Styling, Modern Engineering
Both the Classic 350 and 500 are a harmonious fusion of retro styling and modern engineering.
Their classic outline, chrome accents and retro detailing transport riders back to a bygone era. While their contemporary underpinnings ensure a refined and reliable riding experience.
Versatile Powerplants
The Classic 350 has a 349cc single-cylinder engine that delivers a respectable 20.2 hp and 19 lb-ft of torque. This engine makes it an ideal choice for urban commuting and light touring.
The Classic 500 boasts a larger 499cc single-cylinder powerplant, producing 27.2 hp and 30.5 lb-ft of torque. With this engine, this motorbike offers a more spirited performance for longer journeys.
Comfort and Practicality
Comfort and practicality are at the forefront of the Classic series' design philosophy. These best Royal Enfield bikes for long drives feature many comfortable equipment.
For example, the plush seating, well-positioned footpegs, and a relaxed riding stance. With them, riders can enjoy extended saddle time without fatigue.
Customization Possibilities
Like many Royal Enfield models, the Classic series also accepts customization. Enthusiasts can unleash their creativity through a wide range of customization options.
From aesthetic enhancements to performance upgrades, there are many details you can upgrade.
The Classic series provides a canvas for riders to express their individuality and create a personalized ride.
5. Royal Enfield Meteor 350: The Affordable Cruiser Sensation
Royal Enfield Meteor 350
The Royal Enfield Meteor 350 bridges the gap between classic styling and modern practicality. And it has emerged as a sensation in the affordable cruiser segment.
To be honest, I must list it as one of the best Royal Enfield bikes. Because it offers a compelling blend of style, comfort, and value.
It is an attractive choice for riders seeking an accessible entry into the world of cruising.
Refined and Responsive Engine
At the heart of the Meteor 350 lies a 349cc single-cylinder engine. This motorcycle engine delivers a respectable 20 horsepower and 20 lb-ft of torque.
Some riders may think these figures may seem modest but don’t jump to conclusions too fast.
Whether navigating city streets or exploring open roads, the Meteor 350 is acceptable.
The engine's refined nature and responsive power delivery ensure a smooth and enjoyable riding experience.
Comfort-Focused Design
Royal Enfield has placed a strong emphasis on rider comfort with the Meteor 350.
Its ergonomic design includes low seat height, upright riding position, and well-positioned footpegs. These ensure that riders can enjoy extended saddle time.
I got a chance to ride the Meteor 350 on Los Angeles's streets a month ago. After 3 hours of ride, I did not experience any fatigue or discomfort.
Modern Amenities and Practicality
Despite its affordable price point, the Meteor 350 does not compromise on modern amenities and practicality.
It is equipped with features such as ABS, a digital instrument cluster, and a USB charging port. All these features make it a practical choice for daily commuting and light touring.
6. Royal Enfield Bullet 350: The Legendary Icon Endures
Royal Enfield Bullet 350
If not mentioning the iconic Bullet 350, then the discussion of Royal Enfield's best motorcycles would not be complete.
This legendary model is the longest-running production motorcycle in the world. It has transcended its humble beginnings to become a symbol of endurance, reliability, and timeless style.
Timeless Design, Enduring Appeal
The Bullet 350's design has remained virtually unchanged for over seven decades. But this is a testament to the enduring appeal of its classic silhouette.
Its distinctive lines, adorned with chrome accents and a signature thump are classical. This evokes a sense of nostalgia and transports riders back to a simpler era of motorcycling.
Reliable and Capable Powerplant
Powering the Bullet 350 is a 346cc single-cylinder engine that delivers a modest 19.1 hp and 20 lb-ft of torque.
These figures may seem unimpressive by modern standards. But the engine's reliability and capable performance earned lots of loyal followers. They appreciate the simplicity and character of this best long-drive Royal Enfield bike.
Comfortable and Practical
Despite its vintage appearance, the Bullet 350 offers a comfortable and practical riding.
Its upright riding position, plush seating, and spacious accommodations are outstanding advantages.
With these features, the Bullet 350 is an ideal choice for daily commuting and light touring. And, its robust construction ensures that it can withstand the rigors of long-distance journeys.
A Living Legend
The Bullet 350 is more than just a motorcycle; it is a living legend. It has transcended its utilitarian purpose to become an icon of motorcycling culture.
Its enduring appeal and timeless design have earned it a place in the hearts of enthusiasts. This solidifies its status as one of the best motorcycles in Royal Enfield's lineup.
7. Royal Enfield Himalayan Odyssey: The Adventure That Sparked a Movement
Royal Enfield Himalayan Odyssey
The Himalayan Odyssey is not a production Royal Enfield model. But it deserves a mention for its pivotal role in shaping the brand's adventure touring legacy.
Letting a group of 40 Himalayan Odyssey motorcycles traversing the world's highest motorable pass is an ambitious undertaking.
It ignited a passion for adventure touring. And, inspired many new riders to explore the world's most challenging terrains.
A Catalyst for Adventure
The Himalayan Odyssey was more than just a daring expedition. It was a catalyst for a global movement that celebrated the spirit of adventure and exploration.
By demonstrating the capabilities of Royal Enfield's motorcycles in the harshest of environments, the brand captured the imagination of riders. Besides, it paved the way for the development of its iconic adventure touring motorcycle models.
Inspiring a Unique Tourism Industry
The success of the Himalayan Odyssey also gave rise to a unique international tourism industry. Various companies organize guided tours on the same motorcycles that conquered the Himalayas.
This not only showcased the brand's commitment to adventure. It also provided riders with an opportunity to experience the thrill of traversing the world's most challenging terrains.
A Testament to Engineering Excellence
The Himalayan Odyssey not only brings cultural impact to the riders. It also served as a testament to Royal Enfield's engineering excellence.
The result of navigating the treacherous terrain of the Himalayas was sucessfull. The brand demonstrated the durability, reliability, and capability of its motorcycles. And, more importantly, solidified its reputation as a purveyor of adventure-ready machines.
8. Royal Enfield Super Meteor 650: The Cruiser Redefined
Royal Enfield Super Meteor 650
The Super Meteor 650 Combines is the brand's signature retro styling with modern engineering. And it represents a bold step into the world of premium cruisers
This best motorcycle in Royal Enfield for long drive has been meticulously crafted. It delivers a refined and exhilarating riding experience. At the same time, it also pays homage to the brand's rich heritage.
A Parallel-Twin Powerhouse
At the heart of the Super Meteor 650 lies a potent 648cc parallel-twin engine. This engine can generate an impressive 47 horsepower and 38.3 lb-ft of torque.
This powerplant is shared with the acclaimed Interceptor 650 and Continental GT 650. It provides a perfect balance of power and refinement, ensuring a smooth and responsive ride.
Confidence-Inspiring Handling
As you know, most cruisers are often associated with laid-back riding. But the Super Meteor 650 defies convention with its confidence-inspiring handling.
Its low center of gravity couples a well-designed chassis and suspension setup. This ensures precise maneuverability and stability, even at higher speeds or on winding roads.
Comfort and Convenience
Royal Enfield has placed a strong emphasis on rider comfort with the Super Meteor 650.
Its spacious seating, well-positioned footpegs, and relaxed riding stance are outstanding. Riders can embark on extended journeys without experiencing fatigue or discomfort.
Besides, the motorcycle boasts a generous fuel tank capacity. This can further enhance its long-distance touring capabilities.
Customization Potential and Premium Features
Like many Royal Enfield models, the Super Meteor 650 offers a wealth of customization possibilities. Riders can personalize their motorcycles to suit their individual preferences.
Furthermore, the motorcycle is available with a range of premium features. For example, Brembo brakes, Showa suspension, and a TBT navigation system. These advantages elevate the riding experience to new heights.
9. Royal Enfield Hunter 350: The Affordable Option
Royal Enfield Hunter 350
The Royal Enfield Hunter 350 caters to the needs of urban riders and those seeking affordable entry roadsters. It has quickly established itself as a standout in the brand's lineup.
This Royal Enfield bike for daily use and touring offers a blend of style, agility, and practicality. Thus making it an attractive choice for riders seeking a versatile and engaging ride.
Agile and Nimble Handling
The Hunter 350's compact dimensions and lightweight construction contribute to its agile and nimble handling.
Its short wheelbase, low center of gravity, and responsive steering are impressive. Navigating through city streets and winding backroads becomes a joy.
Truly, it provides riders with a sense of control and confidence.
Responsive and Efficient Powerplant
Powering the Hunter 350 is a 349cc single-cylinder engine. It delivers a respectable 20.1 horsepower and 19.9 lb-ft of torque.
These figures may seem modest. But the engine's responsive nature and efficient power delivery ensure a lively and engaging ride. Whether commuting or embarking on recreational adventures, this power output will satisfy you.
Sporty Styling and Practicality
The Hunter 350's sporty styling and compact dimensions belie its practical nature. This bike features a comfortable upright riding position, a well-padded seat, and ample storage space. Thus making it a versatile choice for daily commuting and weekend excursions alike.
Affordable and Accessible
One of the Hunter 350's most compelling attributes is its affordability.
Royal Enfield has managed to strike a perfect balance between performance, style, and value. It is an accessible choice for riders on a budget or those seeking an entry-level roadster.
10. Royal Enfield Scram 411: The Scrambler for All Terrains
Royal Enfield Scram 411
The Royal Enfield Scram 411 blends the brand's signature retro styling with off-road capability. It has carved a niche for itself as a versatile and capable scrambler.
This best daily-use light off-roading motorcycle offers riders the best of both worlds. Riders can tackle urban environments and light trails with equal ease.
Dual-Purpose Design
The Scram 411's design philosophy revolves around versatility and adaptability.
Its upright riding position, long-travel suspension, and high ground clearance are outstanding. This makes it equally adept at navigating city streets and tackling light off-road trails.
Besides, its robust construction and capable powerplant ensure that riders can confidently explore the great outdoors. Believe me, this will not compromise its performance or reliability.
Capable and Efficient Powerplant
The Scram 411 has a 411cc single-cylinder engine that delivers a respectable 23.9 hp and 23.6 lb-ft of torque.
The engine's broad powerband and efficient power delivery ensure a lively and engaging ride.
Whether navigating city streets or conquering light off-road trails, it can easily handle it.
Confidence-Inspiring Handling and Braking
Royal Enfield has equipped the Scram 411 with a robust suspension setup.
It features long-travel front forks and a rear monoshock. This ensures a smooth and controlled ride over various terrains.
Also, the motorcycle boasts a capable braking system. The front and rear disc brakes are complemented by dual-channel ABS.
So, it provides riders with confidence-inspiring stopping power in all conditions.
Customization Potential and Versatility
The Scram 411 offers a wealth of customization possibilities. Riders can personalize their motorcycles to suit their individual preferences and riding styles.
Whether it's aesthetic enhancements or functional upgrades, it is all available.
This versatile scrambler serves as a blank canvas for riders to unleash their creativity.
Frequently Asked Questions About the Best Royal Enfield Motorcycle
Which is the best motorcycle in Royal Enfield?
The Royal Enfield Interceptor 650 is often considered the best in their lineup. It combines classic styling with modern performance.
With a smooth 648cc parallel-twin engine, it delivers a balanced ride both in the city and on highways. The bike is praised for its comfortable ergonomics, reliability, and budget-friendly cost. Besides, it has a retro look with modern touches. These features makes it a favorite among enthusiasts and new riders alike.
Which is the best selling bike in Royal Enfield?
The best-selling Royal Enfield bike is the Classic 350. Known for its retro design and robust build, it appeals to a wide range of riders.
The Classic 350 offers a comfortable ride and reliable performance. This makes it a favorite choice among various Royal Enfield enthusiasts. Its timeless aesthetics and modern features strike a balance that attracts both young and experienced riders. This popularity keeps it at the top of Royal Enfield’s sales charts.
Which Royal Enfield bike is best for long ride?
The Royal Enfield Himalayan should be the best choice for long rides.
It features comfortable upright seating, long-travel suspension, and a robust 411cc engine. These make it ideal for tackling varied terrains and distances.
And, its high ground clearance and efficient fuel economy are suitable for touring. Besides, its design supports both on-road and off-road adventures. This offers versatility and reliability for extended journeys.
Which is the most comfortable Royal Enfield bike?
The Royal Enfield Himalayan is often considered the most comfortable Royal Enfield bike. It's designed for long rides and varied terrains, featuring an upright seating position and well-cushioned seat.
And, its suspension system is adept at handling rough roads, providing a smooth ride. What's more, its ergonomic design reduces rider fatigue. These features make it ideal for both city commutes and long-distance touring.
If comfort is your priority, the Himalayan is a top choice.
Conclusion
Each Royal Enfield motorcycle lineup represents a unique chapter in the brand's story. And, they showcase the evolution and its relentless pursuit of perfection.
These best Royal Enfield motorcycle options offer something for everyone.
These two-wheeled marvels are more than just modes of transportation. They are expressions of passion, freedom, and the unbreakable bond between rider and machine.
As Royal Enfield continues to forge ahead, pushing boundaries and redefining what it means to be a motorcycle brand,
One thing is certain: its legacy will continue to inspire generations of riders to come. And it will ignite a passion for exploration, adventure, and the pure joy of riding.
There are more best motorcycle to motorcycle communication systems than ever in 2025. Riders can seek them much more easily than before.
Nowadays, modern intercoms offer crystal-clear audio, long-range capabilities, and seamless integration with helmets.
These devices enable riders to stay in touch with their group, listen to music, take calls, and get GPS directions. At the same time, riders can keep their hands on the handlebars and eyes on the road.
This guide explores Fodsports's top motorcycle communication systems available this year. We will mainly focus on their most advanced and latest offerings.
Readers can also learn about key features to look for when choosing an intercom. For example, the sound quality, battery life, extra functions, and rider-to-rider range.
Top Motorcycle Communication Systems of 2025 from Fodsports
Fodsports has established itself as a leading brand in motorcycle communication systems. This intercom brand offers innovative solutions for riders seeking the best motorcycle to motorcycle communication.
Let's explore their top offerings for 2025, each designed to enhance rider connectivity and safety.
Fodsports FX7 - Latest Bluetooth Mesh Intercom in 2024
Fodsports FX7 best motorcycle to motorcycle communication system with mesh
Bluetooth Mesh Intercom.
Dual Bluetooth Chip Design.
10 Riders Group Audio, 2000m Distance!
HRSQ Mic and Speakers, CVC + ENC + DSP Noise Cancelation.
Listen to Music/GPS and Intercom At the Same Time.
IP67 Waterproof.
FM Radio, Music Sharing, Voice Commands.
The Fodsports FX7 is a Bluetooth mesh helmet intercom, released by Fodsports in July 2024. To be honest, it represents a significant leap forward in motorcycle intercom technology.
Its dual-chip design sets it to stand out among various intercom systems in the market. One chip is dedicated to Bluetooth audio processing and another for intercom functionality.
This innovative approach ensures the FX7 has a more stable and efficient performance. Whether you're communicating with other riders or enjoying music, the FX7 can handle it efficiently.
The Fodsports FX7 is equipped with industrial-leading Bluetooth 5.4 technology. This communication system can support up to 2000 meters large distance intercom range.
Another FX7's standout feature is its multi-rider mesh AD-HOC network.
This tech allows riders to join or leave the group without affecting others' connections. Thus it can maintain seamless communication throughout the ride.
The FX7 supports up to 10 riders communication in a group intercom, making it ideal for large group rides or motorcycle clubs.
The FX7 also boasts excellent sound quality with HIFI microphones and speakers. Besides, it is complemented by CVC and ENC noise-reduction technology.
This combination delivers crystal-clear audio even in noisy environments.
With an IP67 waterproof rating, the FX7 is built to withstand various weather conditions. For every rainy, snowy, or other extreme weather ride, you will not need to worry about it.
In May 2025, Fodsports released T1, a new 2-rider motorcycle helmet communication system.
The Fodsports T1 is a high-performance motorcycle-to-motorcycle communication system. It is designed for riders seeking clarity, range, and ease of use.
With Bluetooth 5.4 technology, it ensures a stable connection between 2 riders in 1000m.
For couples riding or 2 friends riding, the T1's intercom distance will definitely meet your demand.
I have also tested the T1 with my friend John when I got it last week. We can keep clear communication even when we ride at 100km/h.
The core reason is that the T1 is equipped with CVC and ENC noise reduction tech.
And, its HiFi speakers also help a lot in providing the best sound quality.
Fodsports also offers 5 replaceable stickers in the package.
You can choose a sticker that matches your riding style or helmet style and stick it on the surface of T1.
This allows T1 to blend perfectly with your helmet and make it look better overall.
The IP67 waterproof ability makes Fodsports T1 more durable and can withstand harsh weather.
Its long battery life (up to 20 hours) keeps you connected on extended trips.
When pairing the Fodsports T1 with your smartphone, its battery level can be shown on the phone.
In this way, you can check the battery status of T1 at any time and charge it in time if necessary.
Other abilities of Fodsports T1 include FM radio, music sharing, battery level displaying on the phone, etc.
Overall, this new product released by Fodsports in 2025 has outstanding performance in terms of function and performance. It can be said that Fodsports T1 will be a star product in the helmet communication market in 2025.
The M1-S Pro is a versatile Bluetooth motorcycle helmet kit that is very famous in the market. It is also one of Fodsports's best-selling motorcycle communication systems.
Based on my test, it offers a balance of performance and user-friendliness.
It supports group intercom for up to 8 to 10 riders within a 2000-meter range. For communication between riders, this intercom number and distance is truly large enough.
This helmet communication system also features advanced noise-cancelation technology and high-fidelity speakers. Even if the riders are riding at high speed, the M1-S Pro can still provide clear communication
The M1-S Pro's long working time is also impressive. Its 900 mAh battery can offer up to 20 hours of intercom time and 300 hours of standby time.
In 2025, Fodsports released the Fodsports Connect APP, which supports riders to pair with the M1-S Pro, then control it.
Through the APP, riders can pair intercoms with a single click, add other riders' devices to the friend list, control the music, etc.
The newest V3.0 version M1-S Pro can directly work with this APP.
For the V2.0, V2.1 version M1-S Pro, they will need a firmware upgrade to support this.
As for those old versions of M1-S Pro(earlier than V2.0), they are using a different Bluetooth chip, so this feature is unavailable.
8 Riders Group Communication Intercom, 2000 Meters Distance!
Noise Reduction Function & Hi-Fi Stereo Sound Quality.
FM Radio, Music Sharing, Voice Command.
Universal Pairing.
The Fodsports FX8 is a robust motorcycle intercom system that is suitable for group communication.
It is designed for riders who prioritize clear communication and long-range connectivity.
It supports up to 8 riders in a group intercom within a 2000-meter intercom range. For both small and large group intercom demand, the FX8 is all suitable.
The FX8 features a unique design that enhances communication signals. This innovative design allows riders to share their experiences seamlessly.
Thanks to its IP67 waterproof design, the fx8 Bluetooth intercom can handle all weather conditions.
Besides, its built-in smart chip ensures high compatibility with various devices. Whether it is GPS units, music players, or other Bluetooth headsets, the FX8 can all pair with.
The FX8 also features various essential functions for riders. For example, music-sharing, FM Radio, language switching, hands-free & multi-function keys, etc.
Mesh Intercom, Bleutooth 5.0, 2000m Intercom Range.
10 Mesh Intercom Channels, Unlimited Connection Number.
Listen to Music/GPS and Talk with Other Riders At The Same Time.
High Quality sound, IP65 waterproof.
Music Sharing, Voice Commands, FM Radio.
The FX10C utilizes advanced dynamic mesh intercom technology. It is always on the list of the best mesh motorcycle intercom on the market.
It can create a self-healing and self-optimizing network among connected devices.
This technology enables reliable communication even when riders are spread out over a large area or encounter obstacles.
The FX10C supports an intercom range of up to 1 km in open terrain and supports 10 mesh intercom channels.
Under mesh intercom mode, the intercom number is unlimited. If paired with common Bluetooth intercoms, it can also support stable two-way communication.
Besides, the FX10C has a big button design, making it convenient for riding operations.
For large group rides the FX10C is an ideal choice to ensure seamless communication.
It also offers the convenience of listening to music and navigation while intercom with other riders.
The Fodsports FX6 is a cost-effective option for riders seeking reliable motorcycle to motorcycle communication.
It supports up to 6 riders in a group intercom with a range of 1000 meters. For one-to-one helmet intercom, it can also support up to 200 meters intercom range.
Besides, the FX6 features a user-friendly design with convenient large buttons. Riders can easily control and set the FX6 even with gloved hands.
The FX6 is equipped with CVC noise reduction technology and a wind-noise-proof microphone. This assures that the FX6 can provide clear communication in various riding conditions.
Fodsports FX6 also can support music streaming, GPS navigation instructions, FM Radio, etc.
Moreover, its 500 mAh battery provides up to 10 hours of talk time, making it suitable for long rides.
In all, Fodsports offers a range of motorcycle communication systems to suit different needs.
You can find intercoms with advanced mesh tech, long battery life, or budget options.
Believe it or not, the Fodsports intercom system is designed to enhance your riding.
The FX-S is a latest Bluetooth intercoms that has just been released by Fodsports in December 2024. It can support a smooth and convenient communication among 2 riders.
I recently got my hands on the Fodsports FX-S about 2 weeks ago.
Due to the recent cold weather, I did not do too many tests with this FX-S. But, I’m really impressed with its performance considering of this low-budget cost.
I chose one in gunmetal black and one in turquoise blue. Both of these two appearance colors have very nice looks.
On the one hand, I can use two intercoms to match different colored helmets. Also, when my wife and I ride, two different intercoms can give us different styles.
Setting it up was easy—just attach the main unit to your helmet, connect the microphone and speaker, and you’re ready to go.
In the package, Fodsports provided both hard mic and soft mic, also there are installation accessories. This make sure this intercom can suit for various helmet styles.
The Bluetooth 5.4 connection is solid and stable while I use the FX-S to communicate with my wife. I’ve had no issues with dropping signals during rides.
One of the best features of the Fodsports FX-S is its intercom performance. It lets me talk to a fellow rider up to 800 meters away, which is great for group rides.
The sound quality is clear, even at higher speeds, thanks to the built-in CVC noise-canceling technology.
Wind and engine noise are really minimized, making conversations much easier.
The controls are simple to use, since the FX-S has a big rotatory button. I tried to operate the FX-S while I am riding, and the result is, it is very easy.
Even in winter, I can easily operate the buttons and dial knob on the FX-S with gloves.
You can adjust the volume, make calls, and switch between music and intercom with just a few presses.
The battery life is impressive too. I’ve been able to use it for 10-12 hours without charging, which is perfect for longer trips.
Overall, the Fodsports FX-S delivers great value. It’s lightweight, easy to install, and the sound quality is top-notch for its price.
If you are looking for a budget intercom for 2 riders, the FX-S will be a worth considering option.
Key Features to Look for in Motorcycle Intercoms
It is sometimes hard to select the best motorcycle to motorcycle communication system. A good communication system can largely enhance the riding experience.
Riders should consider several key features to ensure they choose a device that meets their needs.
Bluetooth vs Mesh Technology
Bluetooth and mesh technology are two primary options for motorcycle intercoms.
Bluetooth is popular due to its widespread adoption and compatibility with various devices. It allows riders to connect their intercoms to smartphones, GPS navigators, and other Bluetooth devices.
However, Bluetooth has limitations in terms of range and connectivity.
Mesh technology, on the other hand, offers several advantages over traditional Bluetooth.
Mesh intercom systems create a web-like network among connected devices. Thus it allows for more flexible and reliable communication.
This technology enables riders to maintain connectivity even when spread out over larger areas or when encountering obstacles.
Mesh intercoms also support larger group sizes. For example, the Fodsports FX10C has no intercom number limitation while mesh intercom.
Battery Life and Range
Battery life is a crucial factor to consider when choosing a motorcycle intercom.
Long battery life ensures that riders can stay connected throughout extended journeys without worrying about power loss.
Look for devices that offer at least 15 hours of talk time or more. Some advanced models, like the Fodsports M1-S Pro, can provide up to 20 hours of talk time.
The intecom range is another essential consideration, especially for group rides.
Bluetooth intercoms typically offer shorter ranges. But mesh technology can provide significantly longer communication distances.
Some mesh intercom systems, like Fodsports FX7, boast an intercom range of up to 2 kilometers.
The larger intercom distance also allows riders to maintain contact even when spread out over greater distances.
Audio Quality and Noise Cancelation
Clear audio quality is vital for effective communication while riding.
Riders can look for intercoms with high-quality speakers and microphones. Since this technology can deliver crisp sound even in noisy environments.
Many modern intercoms feature advanced noise cancelation technology. It can filter out wind noise and other ambient sounds, ensuring clear communication at high speeds .
Some intercom systems, like Fodsports FX8, equip high-resolution sound quality microphones and speakers. Plus with CVC noise-reduction tech, both the intercom and music playback sound quality are superior.
Ease of Use and Controls
User-friendly controls are essential for safe operation while riding.
Riders can choose those intercoms with intuitive interfaces and easily accessible buttons or knobs. These intercoms are easier to control and operate even when wearing gloves.
The helmet communication systems with voice-activated controls have gained popularity in recent years. With this function, the riders are able to operate their intercoms hands-free.
Most Fodsports intercoms can support riders to use the Voice Assistant function to answer phone calls, control music, etc.
It is obvious that this feature largely enhances the riders' safety. They can keep their hands on the handlebars and focus on the road.
These key features can help riders to select the best motorcycle to motorcycle communication system that suits their needs.
These are also important factors to enhance their riding experience and ensure clear, reliable communication on the road.
Frequently Asked Questions
How do you communicate between two motorcycles?
Motorcyclists can communicate using Bluetooth intercom systems, which allow helmet-to-helmet audio communication. Riders can also use hand signals for basic messages. Some use smartphone apps or walkie-talkies with headsets for longer distances. Safety and clarity are key when choosing a communication method.
Do different motorcycle intercoms work together?
Different motorcycle intercoms can sometimes work together if they support a universal pairing feature. However, compatibility varies by brand and model. It's best to check the specifications of each device to ensure they can connect. Universal pairing allows communication between different intercom brands.
What do bikers use to communicate?
Bikers use Bluetooth intercom systems, hand signals, and smartphone apps to communicate. Bluetooth systems allow helmet-to-helmet audio chats, while hand signals convey basic messages. Some also use walkie-talkies with headsets for longer distances. These methods help ensure safety and coordination on the road.
Are motorcycle intercoms worth it?
Motorcycle intercoms are worth it for riders who frequently travel in groups, need navigation, or want to listen to music safely. They enhance communication, improve safety, and provide convenience. The investment depends on personal riding habits and the need for seamless communication.
Conclusion
The world of the best motorcycle to motorcycle communication has seen groundbreaking changes. In 2025, the intercom devices offer crystal-clear audio, long-range capabilities, and seamless integration.
Fodsports has made its mark in this field, providing many intercoms to suit different needs and budgets.
From the dual-chip design FX7 to the cost-effective FX6, riders have plenty of options.
These systems have a big impact on rider safety and enjoyment and allow easy communication and access to navigation and music.
When choosing an intercom, riders should think about key features. For example, the battery life, range, and audio quality. It's also crucial to consider helmet compatibility and smartphone integration.
With the right motorcycle communication system, riders can stay connected, safe, and entertained on the road. And finally, enhance their overall riding experience.
What's the best touring motorcycle in 2024? Which one is most suitable for your demand?
Introduction
Touring motorcycles are the perfect companions for long-distance journeys. They offer comfort, power, and storage, making them ideal for exploring new places.
In 2024, manufacturers have introduced some remarkable touring motorcycle models. They cater to different needs and preferences.
Whether you're a beginner, traveling with a partner, a senior rider, or seeking adventure, there’s a touring motorcycle for you.
What is a Touring Motorcycle?
Touring motorcycles are designed for long rides. They have features like comfortable seats, large fuel tanks, and ample storage space.
These bikes often include advanced technology such as GPS and infotainment systems.
The advantages of touring motorcycles include enhanced comfort, better wind protection, and the ability to carry luggage. Therefore, touring motorbikes are always perfect options for extended journeys.
18 Best Touring Motorcycle of 2024
Different riders have different riding demands. So it is hard to define which touring motorcycle is the best option for you.
We will introduce the touring bike choices based on the rider's body height, age, and riding purposes, etc.
Best Touring Motorcycles for Beginners
1. Honda CB500X
Honda CB500X - best touring motorcycle choice for beginners
The Kawasaki Versys-X 300 is a versatile and beginner-friendly touring bike.
With a 296cc engine, the Versys-X 300 offers a smooth ride and good fuel efficiency.
Its lightweight frame and long-travel suspension also make it stand out. According to my test riding, this motorbike is easy to maneuver on various terrains.
Besides, the bike also features a comfortable seat and a windscreen for added protection.
The Suzuki V-Strom 650 is a solid option for new riders.
It has a 645cc engine that balances power and efficiency. The bike features a comfortable seat and adjustable windscreen, making long rides enjoyable.
It also includes advanced safety features like traction control, which is also the reason I recommend it. These features ensure a secure riding experience when you are having a touring ride.
The BMW R 1250 RT is a luxurious touring motorcycle ideal for two.
It boasts a 1254cc engine with smooth performance and excellent fuel efficiency.
The bike includes heated seats, a premium sound system, and a large storage compartment. All the equipment can provide comfort and convenience for couples on long trips.
3. Honda Gold Wing
Honda Gold Wing - top choice touring motorcycle for couples who love touring
Wet weight (including full oil and fuel tank): 220 kg
Fuel tank capacity: 18.7 L
Oil tank capacity: 3,5 L
The Yamaha Tracer 9 GT is ideal for senior riders.
The main reason I recommend it is its light weight design and ergonomic seating position.
This can help reduce fatigue on long rides and bring more suits for senior riders.
Besides, it comes with a 890cc engine and advanced electronic aids like cruise control and heated grips. These technologies can improve the comfort and safety for seniors.
The KTM 1290 Super Adventure R is built for adventure.
It features a 1301cc engine and robust suspension, making it perfect for off-road and on-road touring.
Besides, the bike includes advanced electronics like traction control and cornering ABS. Hence, this touring motorbike provides a safe and thrilling adventure experience.
2. BMW F 850 GS
BMW F 850 GS - versatile adventure touring motorcycle
Specs:
Power: 93.7bhp @ 8250rpm
Torque: 67.9 lbft @ 6250rpm
Engine type: liquid-cooled 8v parallel twin
Engine size: 853cc
Bore/stroke: 84 x 77mm
Compression ratio: 12.7:1
Fuel system: Ride by wire, fuel injection
Clutch: Multi-plate with anti-hopping
Gearbox: 6-speed
Wet weight: 229kg
Fuel tank capacity: 15-litres
Consumption (claimed): 4.1-litres / 100km
The BMW F 850 GS is a versatile adventure touring motorcycle.
It has an 853cc engine and a rugged build, suitable for various terrains.
The bike features adjustable suspension, advanced GPS capabilities, and ample luggage capacity.
For long-distance adventures, the BMW F 850 GS is an ideal motorcycle for touring.
3. Honda Africa Twin
Honda Africa Twin
Specs:
Mileage (Overall): 20 kmpl
Displacement: 1082.96 cc
Engine Type: Liquid-cooled, 4 Stroke, SI Engine
No. of Cylinders: 2
Max Power: 99.2 PS @ 7500 rpm
Max Torque: 103 Nm @ 6000 rpm
Front Brake: Double Disc
Rear Brake: Disc
Fuel Capacity: 24.5 L
Saddle Height: 810-830 mm
Kerb Weight: 239 kg
The Honda Africa Twin is a legendary adventure touring bike.
With a 1084cc engine, it offers powerful performance and excellent off-road capabilities.
Moreover, the bike includes features like a dual-clutch transmission and multiple riding modes.
All these technologies ensure its adaptability and comfort on any journey.
The Kawasaki Ninja 1000SX combines sportiness with touring capability. It is one of the best sport-touring motorcycles in the market.
It has a 1043cc engine that delivers thrilling performance. The bike features an aerodynamic design, comfortable seating, making long-distance touring more enjoyable.
Besides, it also features advanced electronics like ride modes and cruise control. For spirited long rides, the Kawasaki Ninja 1000SX is a perfect option.
2. Yamaha FJR1300
Yamaha FJR1300 - powerful sport touring motorcycle
Specs:
Engine: 1,298 cc (79.2 cu in) transverse inline-4, liquid-cooled, DOHC, four valves per cylinder, electronic fuel injection
Bore/stroke: 79.0 mm × 66.2 mm (3.11 in × 2.61 in)
Compression ratio: 10.8:1
Power: 105.5 kW (141.5 hp) @ 8,000 rpm
Torque: 134.4 N⋅m (99.1 lbf⋅ft) @ 7,000 rpm
Transmission: 5-speed manual (6-speed from 2016), shaft-drive AE/AS: Electronic clutch
Seat height: 805 mm (31.7 in)
Weight: 264 kg (582 lb) 291 kg (642 lb)
Fuel capacity: 25 L (5.5 imp gal; 6.6 US gal)
The Yamaha FJR1300 is a powerful sport touring motorcycle.
It boasts a 1298cc engine and offers a smooth, dynamic ride.
The bike features an electronically adjustable windshield, heated grips, and hard saddlebags.
All the equipment provides both comfort and practicality for sport touring enthusiasts.
What is the best touring motorcycle for beginners?
The Honda CB500X is a top choice for beginners due to its manageable size and ease of use.
Which touring motorcycle is best for couples?
The Honda Gold Wing offers great comfort and features for couples on long rides.
Are there touring motorcycles suitable for seniors?
Yes, the Yamaha Tracer 9 GT is excellent for seniors with its ergonomic design and comfort features.
What’s the best adventure touring motorcycle?
The KTM 1290 Super Adventure R stands out for its off-road capabilities and powerful performance.
Which sport touring motorcycle offers the best balance?
The Kawasaki Ninja 1000SX provides a perfect blend of sportiness and touring comfort.
What is the most comfortable touring motorcycle?
The Honda Gold Wing is often considered the most comfortable touring motorcycle. Thanks to its plush seating, smooth ride, advanced technology, and ample storage for long-distance travel.
Which motorcycle is best for Travelling?
The BMW R 1250 GS is ideal for traveling. It offers a smooth ride, advanced features, comfortable seating, and versatility for both on-road and off-road adventures.
What type of motorbike is best for long-distance?
Touring motorcycles are best for long-distance travel. They have comfortable seating, ample storage, and advanced features for a smooth and enjoyable ride over extended journeys.
Conclusion
Touring motorcycles in 2024 offers something for everyone, from beginners to seasoned riders.
Whether you're looking for comfort, adventure, or affordability, the right bike can make all the difference.
With options for different touring motorcycles mentioned above, you can find the perfect bike that matches your needs.
Do you know what mesh motorcycle communication is? How to choose the best mesh intercom for your motorcycle intercom?
Introduction
Riding a motorcycle is an exhilarating experience, but communication can be a challenge.
In this article, I will lead you to enter the mesh motorcycle communication systems. These innovative technologies allow riders to stay connected effortlessly.
We'll explore the world of mesh communication, focusing on the main types, the best systems from Fodsports, and the benefits they offer.
The Main Mesh Communication Ways
Actually, there are two kinds of mesh communication in Fodsports mesh intercoms. That is Dynamic mesh communication and Bluetooth mesh communication.
Dynamic Mesh Communication(DMC)
Dynamic Mesh Communication (DMC) is a cutting-edge technology for motorcycle communication.
It allows riders to connect in a flexible network, where each rider acts as a node. If someone leaves or joins, the system automatically adjusts, keeping the connection stable.
Traditional Bluetooth intercom relies on a chain connection. In contrast, the DMC offers seamless interaction for large groups.
With DMC, riders enjoy clear audio, easy setup, and enhanced reliability. This makes it ideal for group rides, ensuring everyone stays connected without interruption.
Fodsports FX 10C is one of the most outstanding dynamic mesh intercoms in the market.
Bluetooth Mesh Intercom
Bluetooth Mesh Intercom is a communication system that uses Bluetooth tech to connect multiple devices. It combines the reliability of Bluetooth with the flexibility of mesh networks.
It creates a network where each rider can talk to others without the need for a direct chain link.
Besides, it allows for a stable, long-range connection without constant re-pairing.
This means if one rider disconnects, the others stay connected and will not get influenced. It's perfect for both small and large groups, offering clear audio and easy pairing.
Bluetooth Mesh Intercom is reliable and user-friendly. Now, it is a popular choice for riders who want a stable connection without the complexity of Dynamic Mesh.
About the best Bluetooth mesh intercom, the Fodsports FX7 is always on the list.
Best Mesh Motorcycle Communication System from Fodsports
Fodsports is renowned for offering high-quality communication systems. Let's look at their standout models.
Fodsports FX7: Latest Bluetooth Mesh Intercom
Fodsports FX7 Bluetooth Mesh Intercom - Best mesh motorcycle communication system
Price: $129.99 for a single pack and $258.99 for a dual pack
Range: About 2000 meters
Riders: Connects up to 10 riders
Battery Life: Up to 15 hours
Bluetooth: Bluetooth 5.4
Waterproof: IP67
The Fodsports FX7 is equipped with the latest Bluetooth mesh technology. It is released by Fodsports in July 2024.
This Bluetooth mesh communication system can support 2 to 10 riders group intercom. For both small and large group riding that needs seamless connection, the FX7 is a top option.
Although it entered the market for a short time, it quickly attracted a lot of attention among riders.
The dual-chip design of Fodsports FX7
Firstly, I must praise its dual-chip design. The FX7 has two Bluetooth chips inside, one for Bluetooth intercom, and another for Bluetooth audio.
This allows for faster processing, providing clearer audio and reducing lag during communication.
Besides, this also supports the FX7 can do multiple functions simultaneously. For example, it can support you in listening to music while you are intercom.
Additionally, it enhances connectivity stability, ensuring a more reliable connection between riders.
Multi-rider Mesh AD-HOC network technology of Fodsports FX7
Another worth mentioning technology of Fodsports FX7 is its multi-rider mesh AD-HOC network. With this tech, any rider who leaves or joins the intercom group will not affect the others.
The audio and sound quality is also the reason why the Fodsports FX7 is outstanding.
Firstly, it has CVC+ENC noise-reduction tech that can minimize background noise. This ensures the rider has clear communication even in noisy environments.
Is that the only sound quality improvement in FX7? No!
Hifi sound quality of FX7 Bleutooth mesh motorcycle communication system
It is also equipped with a HIFI sound quality microphone and speaker. The microphone and speaker can deliver crisp and rich audio, enhancing music and voice clarity.
Together, the FX7 provides an immersive and distraction-free riding experience to the riders.
They can enjoy conversations and entertainment without interference from wind or engine noise.
Overall, this combination enhances the communication quality and rider enjoyment.
My riding test of Fodsports FX7
In Early August, I took the FX7 with me while exploring the Yellowstone National Park with riders. I tried to test if it is really as excellent as the product page described.
According to my test, the FX7 intercom can easily support about 2 km long distance intercom. To be honest, the intercom will get interrupted while going through dense forests or mountain obstacles. When we back into the Bluetooth connection range, it automatically
But you know, that is the common problem that all Bluetooth devices have. I don't think it is a problem.
Despite going through dense forests or distances larger than 2000 meters, it kept perform well.
I also tested the waterproof performance of the FX7.
As we rode from West Thumb to Bridge Bay Campground along the edge of Yellowstone Lake, we encountered light to moderate rain.
For about half an hour, we kept riding and communicating in the rain, and it kept working normally. Just as described, it is truly a IP67 waterproof motorcycle helmet intercom.
There are many other functions that Fodsports FX7 supports. For example, FM radio, GPS navigation instruction from your smart phone, music sharing, etc.
Here is the Fodsports FX7 release report where you can know all its features and advantages:
Price: $139.99 for a single pack and $279.99 for a dual pack
Range: About 1000 meters
Riders: 2-10 riders, not limited if with FX 10C
Battery Life: Up to 15 hours
Bluetooth: Bluetooth 5.0
Waterproof: IP65
The Fodsports FX10C is a true mesh intercom that has dynamic mesh communication tech.
It allows for spontaneous connections and disconnections without disrupting the network. This dynamic nature makes it ideal for larger groups.
FX 10C mesh channels showing
Firstly, it supports 10 mesh intercom channels, so you can freely switch channels.
Besides, when pairing with other FX10C, the intercom number is not limited. That means, no matter how large your group is, you can all use FX 10C to connect and communicate freely.
This mesh intercom can also support listening to music and navigation while intercom. With this, your ride will have more fun and enjoyment.
Just like Fodsports FX7, the FX 10C also supports music sharing between two users.
If you have a favorite music want to share with the passenger back on the pillion or rider accompanying you, the FX10C can realize this!
The Fodsports FX10C big button design
Another ergonomic design of Fodsports FX10C is its big button. This assures you can operate it conveniently while riding, even if you are wearing gloves.
The waterproof performance of FX 10C may not be as outstanding as the FX7, but it still has an IP65 level.
Music sharing, FM radio, GPS navigation instructions from your phone, all available on FX 10C.
My riding test of Fodsports FX 10C
Testing the Fodsports FX 10C on the Pacific Coast Highway was incredible.
The dynamic mesh communication system worked flawlessly and stably. It kept me connected with fellow riders even in remote areas.
Besides, the audio quality was crystal clear, making conversations easy and enjoyable. Its noise cancellation feature cut through the wind, so I never missed a word.
The long battery life meant I stayed connected all day without interruptions.
Navigating the scenic twists and turns was safer and more fun with this reliable device.
The FX 10C truly enhanced my riding experience, providing both safety and convenience on the open road.
Let's see what reviewer talk about the Fodsports FX 10C:
Benefits of Mesh Motorcycle Helmet Communication
Mesh motorcycle helmet communication offers several benefits compared to traditional Bluetooth intercoms:
Enhanced Safety: Stay connected with fellow riders more stable and convenient. Riders can communicate and share real-time updates on road conditions.
Improved Connectivity: Mesh networks automatically connect multiple riders without the need for pairing. This allows for a more flexible communication system.
Dynamic Grouping: Riders can join or leave the group without disrupting the connection. This is much easier than managing Bluetooth pairings.
Extended Range: Mesh systems can extend the communication range by relaying messages through other connected riders. This makes it able to provide wider coverage than traditional Bluetooth communication systems.
Scalability: Mesh supports larger groups. They allow more riders to communicate simultaneously without sacrificing quality.
Clearer Audio: Mesh technology often provides clearer and more consistent audio quality. This helps reduce the interference and dropouts common in Bluetooth.
These benefits make mesh systems a more reliable and user-friendly choice for group rides. And, the mesh motorcycle communication systems largely enhance riders' communication and safety.
What is the Difference Between Bluetooth and Mesh?
Bluetooth motorcycle intercom:
Intercom Numbers and Distance: Best for small and medium groups (typically 2 – 8 riders) riding close together (range ~1 km).
Connection is a daisy-chain: if one rider drops, the whole group can break and needs manual reconnection.
Universal compatibility: works across brands via Bluetooth pairing, and connects easily to phones or GPS.
Mesh communication is a wireless technology that allows riders to connect and talk with each other.
Traditional Bluetooth communication requires pairing devices one-on-one. But mesh communication creates a network where multiple riders can join and leave easily.
This system lets them communicate over longer distances. Even if some riders go out of range, the network stays connected. Once the rider is back into the connection range, they will automatically reconnect.
It’s useful for group rides, providing clear and reliable communication for all riders.
Dynamic Mesh Communication (DMC) offers several advantages over traditional Bluetooth communication:
Flexibility: DMC allows for dynamic joining and leaving of the network.
Scalability: Supports a larger number of connections.
Stability: Provides a more stable connection with automatic re-routing.
DMC is generally superior, but Bluetooth intercoms still offer reliable performance for riders.
Bluetooth is widely used and allows for direct communication between paired devices. It's suitable for short distances and is generally reliable for small groups.
In general, Bluetooth intercom is more common and compatible with many devices. And DMC provides better group communication flexibility and range.
Your choice depends on the size of your riding group and the distance you need to cover.
Conclusion
Mesh motorcycle communication systems have revolutionized how riders stay connected.
Both the Fodsports FX7 Bluetooth mesh intercom and the FX 10C DMC are worth buying.
Embrace the power of mesh technology and enhance your motorcycle journeys today!
Do you know the essential ATV safety tips? How to ride an ATV safely?
Introduction
All-Terrain Vehicles (ATVs) provide exciting off-road experiences, perfect for adventure enthusiasts. However, safety should always be a top priority due to the inherent risks involved.
This comprehensive guide will cover the most important ATV safety tips for all ATV riders. With these tips, you can have a secure and enjoyable ATV ride.
We will introduce them in detail so that both beginners and experienced riders can keep in mind.
16 Most Essential ATV Safety Tips
1. Wear Proper Gear
ATV riding gears - ATV safety tips
Your first line of defense is the right protective gear. A DOT-compliant helmet is crucial to protect your head from serious injuries.
Besides, you should pair with gloves, boots, long sleeves, goggles, and helmet communication systems. Because each piece of these gear serves a specific purpose.
For example, the gloves improve grip and protect hands, boots prevent foot injuries. The goggles shield your eyes from debris, while the helmet intercom assures you to contact your partners.
Before hitting the trails, consider taking an ATV safety course if necessary.
These courses teach fundamental skills like navigating obstacles, controlling the vehicle, and others.
What's more, you should also have some basic knowledge about handling emergency situations.
Training builds confidence and reduces the likelihood of accidents. Do not ignore this, it is invaluable for all riders.
3. Inspect Your ATV
Before each ride, conduct a thorough inspection of your ATV.
Check the brakes, throttle, lights, and tire pressure. Make sure there are no loose parts or leaks.
Besides, regular maintenance of your ATV is also essential. This can not only extends the life of your ATV. It is also the one of the best tips to ensure your safety by preventing unexpected breakdowns on the trail.
Be honest about your skill level and ride within your capabilities. Choose trails that match your experience.
As you gain confidence and skills, gradually tackle more challenging terrain.
Remember, pushing beyond your limits can lead to accidents and injuries.
5. Avoid Paved Roads
ATVs are designed for off-road use. Riding on paved roads increases the risk of collisions with cars and other vehicles.
If you must cross a road, do so at a safe, designated crossing point. And most importantly, ensure visibility to oncoming traffic.
6. Never Ride Alone
riding ATV in a group - ATV riding safety method
Riding with a buddy enhances safety. In case of an accident or mechanical issue, having someone with you ensures help is readily available.
Remember to take helmet intercom system with you and your partners. It will bring you more safely, efficient and convenient communication during the trip.
Moreover, always inform someone about your riding plans and estimated return time.
7. Don’t Ride Under the Influence
Operating an ATV requires full attention and quick reflexes. Never ride an ATV if you are under the influence.
Alcohol and drugs impair your ability to make sound decisions and react swiftly. Stay sober to ensure a safe and enjoyable ride.
8. Use Appropriate Speed
Speed thrills but also kills. Always adjust your speed to match the trail conditions and your comfort level.
On unfamiliar or rugged terrain, slow down to maintain control and avoid accidents.
Additionally, never overspend. This is not only responsible for your safety but also for the other participants on the road.
9. Be Aware of Surroundings
Stay alert to your environment at all times.
Watch out for obstacles like rocks, branches, and uneven terrain. Besides, be mindful of other riders and wildlife.
Stick to designated trails to preserve natural habitats and prevent trail closures.
And, avoid cutting through fields or forests, which can damage ecosystems and endanger wildlife.
11. Start Slow
If you are a beginner rider, you should start on easy, flat trails to build confidence.
As your skills improve, you can try to gradually tackle more challenging terrain
Patience and practice are key to becoming a proficient rider.
12. Practice Emergency Stops
You should also learn how to perform quick stops safely. Since you do not know when and where there will be an emergency which you need to stop suddenly.
You can practice to master this essential skill in a controlled environment. Knowing how to stop suddenly can prevent collisions and accidents.
13. Adjust to Conditions
Weather and trail conditions can change rapidly according to different places and dates.
When you are riding at wet, muddy, or icy trails, keep slower speeds and careful handling.
What's more, you should also adapt your riding style to suit the conditions for maximum safety.
14. Plan Your Route
Before heading out, plan your route and share it with someone trustworthy.
Use Fodsports intercoms can also make sure you have smooth and stable communication with your partners.
Knowing your path reduces stress and enhances safety.
15. Carry Basic Tools
Bring a toolkit while you are riding for long distance since there might be some minor repairs. These essential tools include items like a tire patch kit, wrenches, and screwdrivers.
Being prepared for minor breakdowns prevents being stranded in remote areas.
16. Stay Hydrated
Your body may need some water replenishment especially when you are riding in an ATV in hot weather.
So you can carry enough water and take breaks to make sure your body stays hydrated.
Do not let dehydration happen. Because this can impair your focus and reaction time, increasing the risk of accidents.
Kid ATV Safety Tips
Kid Riding ATV Safety Tips
ATVs can be powerful and challenging to control, especially for young riders.
Therefore, kids should follow ATV safety tips to prevent accidents and injuries.
Follow these tips to make sure their ATV adventures are secure and confident.
Age-Appropriate Vehicles
Children should ride ATVs that fit their size and age. If there is a kid riding with you, pay attention to choose a small-size ATV for him/her. Many ATV producers provide ATVs for kids, you can buy or rent one for the kid.
Oversized ATVs can be difficult for kids to control, increasing the risk of accidents.
Besides, the manufacturers also provide recommendations to ensure safety. Remember to follow the instructions and recommendations while riding the ATV.
Supervision is Key
Always supervise children while they ride. Because they have less ability to handle problems when they do happen.
Ensure they follow safety rules and ride at safe speeds, and be careful with the road conditions.
Following 4-wheeler ATV safety tips is essential to prevent accidents and injuries. These tips help riders understand their vehicle's controls, maintain balance, and handle different terrains safely.
The following are some essential safety tips for 4-wheeler ATVs:
Understand Your Vehicle
Each ATV model has unique features and controls.
If you are not familiar with it, you may need to find the specific vehicle's manual before riding it.
Understanding your ATV's operation ensures better control and handling.
Balance and Stability
Maintaining balance is crucial, especially on slopes and turns.
Remember to slow down the speed while you are going through the slopes and turns. This will help you control the ATV easier.
Besides, shift your weight appropriately to keep the ATV stable. For uphill rides, lean forward; for downhill, lean back.
Proper weight distribution prevents tipping and makes sure you have a more comfortable ride.
Tire Pressure
Regularly check and maintain tire pressure. Properly inflated tires ensure better traction and handling, reducing the risk of losing control on rough terrain.
8 ATV Hand Signals You Should Know Source: www.offroad-ed.com
Communicate with fellow riders using ATV hand signals. This is crucial during group rides to indicate stopping, turning, or hazards ahead. Clear communication prevents misunderstandings and accidents.
A: It's best to avoid riding at night since the limited visibility increases the risk of accidents. If necessary, ensure your ATV has proper lighting and ride cautiously.
Q: Do I need a license to ride an ATV?
A: Licensing requirements vary by location, so you need to check local regulations before riding. Some areas require permits or safety courses for legal operation.
Q: What should I do if I encounter wildlife?
A: Slow down and give animals plenty of space, and avoid startling them or getting too close. Respect wildlife to ensure safety for both you and the animals.
Q: How often should I service my ATV?
A: Regular maintenance is crucial. Follow the manufacturer's recommended service schedule. Routine checks and servicing keep your ATV in optimal condition and prevent mechanical failures.
Q: What are the safety features on an ATV?
A: ATVs come with essential safety features like headlights for visibility, sturdy brakes for quick stopping, and a throttle limiter to control speed. They often have protective guards to shield the rider from debris. And, it has a kill switch for emergency engine shutdown. Besides, some models include safety flags for better visibility on trails.
Q: What is the most common hazard of operating an ATV?
A: The most common hazard of operating an ATV is rollovers. Due to their high center of gravity, ATVs can tip over easily on uneven terrain or during sharp turns. This can lead to serious injuries. Proper training and cautious riding are essential to prevent accidents.
Q: What is the most important to remember when braking ATV?
A: When braking an ATV, it's important to apply both front and rear brakes evenly to maintain control. Gradually reduce speed to avoid skidding, especially on loose or slippery terrain. Always keep a safe distance from obstacles and other riders to allow for smooth, controlled stops.
Q: What should you do before riding an ATV?
Here are the essentials you need to do before riding an ATV:
Before riding an ATV, always inspect the vehicle. Check the brakes, throttle, tire pressure, and lights.
Ensure all protective gear, like an ATV helmet, helmet intercom and gloves, is worn.
Familiarize yourself with the terrain and plan your route.
Inform someone of your plans and ride with a buddy for safety.
Conclusion
ATVs offer unparalleled adventure, but safety must always come first.
By following these comprehensive ATV safety tips, you can enjoy your rides while minimizing risks.
Remember, safety gear, proper training, and awareness are your best tools for safe riding.
Prioritize safety to ensure every ride is a thrilling and secure experience.
What is the most reliable UTV in the market? Who makes the most dependable UTV? Many people will ask and search about this when they are planning to buy a UTV.
Introduction
Utility Task Vehicles (UTVs) have become a staple for outdoor enthusiasts, farmers, and anyone needing a trustful off-road vehicle. With the plethora of options available in 2024, choosing the most reliable UTV can be hard. This guide will explore what makes UTVs reliable and highlight the top choices for 2024.
Most UTVs are equipped with robust engines and high ground clearance. Thus making them ideal for navigating rough terrains.
Besides, UTVs often include safety features like roll cages and seat belts. These can enhance protection during off-road adventures.
These vehicles are popular in agricultural settings, construction sites, and outdoor sports. That's because of their ability to carry heavy loads and tow equipment.
Moreover, UTVs have ample cargo space, making them perfect for transporting tools, supplies, or gear.
There are various UTV models that cater to different needs in the market. You can find a powerful two-seater for fast-paced trails or a spacious six-seater for family outings.
With their blend of utility and performance, UTVs offer a reliable solution for diverse outdoor activities.
The Can-Am Maverick X3 is a top-tier 2-seater UTV known for its reliability and performance.
It boasts a powerful 900cc engine that provides impressive speed and agility on various terrains.
Its robust suspension system is also impressive, which is also one of the reasons I recommend it. Even on rough trails, the riders can still get a smooth and stable ride.
Besides, its design is sleek and aerodynamic, enhancing both aesthetics and functionality.
The interior is comfortable and equipped with user-friendly controls for an enjoyable driving experience.
Safety is a priority, the Can-Am Maverick X3 features a strong roll cage and durable seatbelts.
The Maverick X3 is ideal for adventure enthusiasts seeking thrill and reliability in a UTV.
While it has cargo area, the capacity is not large. If you are going to ride this UTV, remember to control the cargo.
Whether you're exploring dunes or muddy paths, you can rely on this vehicle. The Can-Am Maverick X3 is built to deliver exceptional performance and fun.
Main Specs:
Engine: 900cc turbocharged
Horsepower: 200 HP
Suspension: 24 inches travel
Pros:
Exceptional horsepower
Great handling on rough terrains
High-quality build
Cons:
Requires frequent maintenance
Limited cargo space
3. Yamaha Wolverine RMAX2 1000
Yamaha Wolverine RMAX2 1000 2-seater most reliable UTV
The Yamaha Wolverine RMAX2 1000 is a reliable 2-seater UTV. I got the opportunity to try this 2 seater side by side in one of my friend's UTV center this year.
From my experience, its reliability and performance can handle rough terrains effortlessly.
The 999cc engine is powerful and responsive in almost all riding environments.
Besides, I found the FOX suspension provides a smooth ride, comfortable and smooth.
The cabin is comfortable, with intuitive and user-friendly controls. Even though it was the first time I rode the Wolverine RMAX2 1000, it was still very easy for me.
What's more, its power steering makes driving easy, even on challenging trails. And the selectable drive modes adapt well to different conditions.
According to my friend's introduction, its durable tires and strong chassis are also outstanding.
This makes sure this UTV can handle both work and play under different circumstances.
Generally speaking, Yamaha’s engineering ensures dependable performance, let's clap for them.
For off-road adventures, the Wolverine RMAX2 1000 is a fantastic choice.
The Honda Pioneer 1000-5 stands out as an exceptional 4-seater UTV.
During my tour in California's Lighthouse region, its performance truly impressed me. Now I will show you why I recommend this reliable UTV to you.
First, its powerful 999cc engine delivers smooth and responsive power, making it perfect for both rugged trails and open roads.
Its comfortable seating allows for a relaxed ride, which is one of the main reasons I prefer it. The Pioneer 1000-5 can accommodate up to five passengers effortlessly.
What's more, its handling is precise, with superior suspension that absorbs bumps with ease. This ensures a stable and enjoyable journey, even on challenging terrains.
The UTV's versatility shines through its multiple configurations. This allows the Pioneer 1000-5 can adapt to various needs, whether for adventure or utility.
Honda's attention to safety and reliability is another factor I chose for this UTV. It provided peace of mind while I was exploring the trail, further enhanced its appeal.
Overall, the Pioneer 1000-5 is a top choice for anyone seeking a reliable 4-seater UTV experience.
Main Specs:
Engine: 999cc
Horsepower: 72 HP
Suspension: 10 inches travel
Pros:
Excellent reliability and durability
Convertible seating
Strong towing capacity
Cons:
Lower horsepower
Basic interior features
2. Kawasaki Teryx4
Kawasaki Teryx4 dependable 4-seater UTV
The Kawasaki Teryx4 is a dependable 4-seater UTV perfect for adventurous rides. My experience during a tour in Northern Utah highlighted its strengths.
It offers a smooth ride even on rugged trails, thanks to its durable suspension system.
The Teryx4's powerful engine provides excellent performance, making steep climbs easy.
Its spacious seating ensures comfort for all passengers, and the cabin design is both practical and user-friendly.
The UTV's sturdy build inspires confidence, tackling rough terrain with ease and safe. Its compact size allows for agile maneuvering, crucial in tight spots.
The Teryx4 also features ample storage, ideal for carrying gear on long trips.
I'd like to say that the Kawasaki Teryx4 stands out as one of the best working UTV that you can depend on. For outdoor enthusiasts seeking both reliability and excitement, it is worth trying.
Main Specs:
Engine: 783cc
Horsepower: 50 HP
Suspension: 8 inches travel
Pros:
Affordable price
Sturdy build
Easy handling
Cons:
Lower speed and power
Limited storage options
3. Polaris General 4 1000
Polaris General 4 1000
The Polaris General 4 1000 is a fantastic choice for a 4-seater UTV. I found it especially well-performed during my riding journey on Oregon's diverse trails.
This vehicle combines power and versatility with its 100-horsepower engine. With this strong power, whether it is working or entertainment, this UTV can handle them with ease.
Its high ground clearance and durable suspension handle rough terrain with ease. And, the spacious cabin offers comfortable seating for four, with ample storage for gear.
Riding the General 4 1000 in Oregon is a thrilling experience. It smoothly navigated through dense forests, rocky paths, and sandy dunes while I rode it.
The responsive handling and powerful acceleration make it easy to tackle steep hills and tight corners.
The ride is comfortable, even though I was riding it on hours of long journey. Thanks to its plush seats and excellent shock absorption, my ass still feels good when I finish the tour.
Overall, the Polaris General 4 1000 provides an exciting and reliable off-road adventure.
Main Specs:
Engine: 999cc
Horsepower: 100 HP
Suspension: 12 inches travel
Pros:
Balanced performance and comfort
Versatile use
Spacious interior
Cons:
Mid-range price
Average suspension travel
4. Can-Am Defender MAX
Can-Am Defender MAX
The Can-Am Defender MAX is a worth buying 4-seater UTV, especially for those exploring rugged terrain.
It's designed with durability and performance in mind, featuring a powerful engine and excellent suspension.
Besides, the spacious cabin provides comfort for all passengers, making long rides enjoyable.
Its key features include a robust Rotax engine, a versatile cargo bed, and advanced off-road capabilities.
You'll appreciate its reliable traction and smooth handling on challenging trails.
It is also equipped with smart safety features, ensuring peace of mind during your tour.
Riding through Colorado, the Defender MAX impressed me with its stability and power.
It handled rocky paths and steep inclines effortlessly. The comfortable seats and intuitive controls made the ride enjoyable and stress-free.
In all, it's a reliable companion for both work and play in diverse terrains.
The Polaris Ranger Crew XP 1000 is a standout 6-seater UTV, ideal for both work and adventure.
Known for its reliability, it handles various rugged terrain with ease.
Key features include a powerful 999cc engine, which offers smooth performance and impressive towing capacity.
Besides, the spacious cabin ensures comfort for all passengers. And, the robust suspension tackles rough trails effortlessly.
From my riding experience in Arizona, the Ranger Crew XP 1000 feels solid and dependable.
It navigates rocky paths and steep inclines with confidence, providing a stable and enjoyable ride.
What's more, the responsive handling and comfortable seating also surprised me. I took a long ride with my friends in Arizona, and the result was pleasant, even in challenging conditions.
Honestly, this UTV combines practicality with excitement according to my riding experience. It can be a top choice for both utility and recreation.
Main Specs:
Engine: 999cc
Horsepower: 82 HP
Suspension: 11 inches travel
Pros:
High towing capacity
Comfortable for long rides
Durable design
Cons:
Large size can be cumbersome
Higher maintenance costs
2. Can-Am Defender MAX XT
Can-Am Defender MAX XT
The Can-Am Defender MAX XT is a trustful 6-seater UTV, perfect for adventurers in a lot of places. It's designed for those who need durability and performance.
Key features include its powerful engine, offering excellent torque and smooth handling.
The spacious cabin of Can-Am Defender MAX XT ensures comfort for all passengers. And, the sturdy suspension tackles rough terrains with ease.
From my experience riding in Idaho, the Defender MAX XT impressed me with its stability and control even on challenging trails.
The comfortable seats and ample legroom made long rides enjoyable. Its versatility allowed us to navigate through forests and rocky paths effortlessly.
In general, it's a trustworthy 6-seater UTV for both work and play, providing a safe and enjoyable ride for everyone on board.
Main Specs:
Engine: 976cc
Horsepower: 82 HP
Suspension: 11 inches travel
Pros:
Strong build quality
Smooth ride
Ample cargo space
Cons:
Expensive
Lower fuel efficiency
3. Yamaha Viking VI EPS
Yamaha Viking VI EPS
The Yamaha Viking VI EPS is one of the best 6-seater UTV, especially for riding in the rugged terrains.
Its powerful engine and smooth handling make it perfect for navigating challenging trails.
The spacious cabin provides ample room for six passengers, ensuring comfort on long rides.
With its Electric Power Steering (EPS), steering is precise and effortless, even on rocky paths.
The Viking VI's durable build is designed to withstand tough conditions. Its impressive suspension system offers a smooth ride over rough terrain.
There are seat belts and headrests for all passengers, I really want to praise the designer.
The UTV also features a reliable cargo capacity. Based on my test, Viking VI's cargo capacity can be up to 272kg. This makes it an ideal UTV option for carrying gear on outdoor adventures.
If you are planning for a group adventure in the backcountry, you can consider choosing the Viking VI.
Main Specs:
Engine: 686cc
Horsepower: 47 HP
Suspension: 8 inches travel
Pros:
Reliable and affordable
Comfortable seating for six
Good fuel economy
Cons:
Lower power output
Basic features
Frequently Asked Questions
What brand of UTV is the most reliable?
When choosing a reliable UTV, several brands stand out:
Honda is known for its durability and low maintenance.
Polaris offers versatile models with strong performance.
Yamaha is praised for its engine reliability and smooth ride.
Can-Am provides powerful engines and advanced features.
Kawasaki is recognized for its rugged build and dependability.
Each brand has its strengths, so consider your specific needs, like terrain and usage. Reading customer reviews and expert opinions can help.
Regular maintenance also plays a key role in reliability, regardless of the brand you choose.
What is the best working UTV?
The Polaris Ranger is often considered one of the best working UTVs. It's known for its versatility and strong performance. With a powerful engine and excellent towing capacity, it handles tough jobs well.
The Honda Pioneer is another great option, praised for its durability and low maintenance. It offers a smooth ride and reliable performance.
The Can-Am Defender is also popular for work tasks, featuring impressive power and advanced features.
Each of these models has strengths. So consider factors like terrain, load capacity, and specific needs when choosing them.
Which side-by-side lasts the longest?
The Honda Pioneer is often considered one of the longest-lasting side-by-sides. It's known for its durable construction and reliable engine. Honda's reputation for quality and low maintenance contributes to its longevity.
Also, regular maintenance and proper care are also essential methods to prolong their life.
What Should I Consider When Buying a UTV?
Purpose: Determine if you need it for work, recreation, or both.
Capacity: Consider the number of passengers and cargo space.
Terrain: Think about the type of terrain you'll be navigating.
Budget: Set a budget that includes potential maintenance costs.
How Often Should I Maintain My UTV?
Regular maintenance every few months is crucial. Check oil levels, brakes, tires, and the electrical system to ensure safety and longevity.
Are UTVs Street Legal?
This depends on local laws. Some regions allow UTVs on roads with modifications like lights, mirrors, and signals.
Conclusion
Choosing the most reliable UTV in 2024 depends on individual needs and preferences. Whether you’re looking for a powerful two-seater or a spacious six-seater, the options listed here provide reliability and performance.
Consider factors like purpose, terrain, and budget to make the best choice. With the right UTV, you can enjoy both work and adventure to the fullest.
Are you tired of searching for motorcycle intercom helm full face options before a riding tour? Look at this test review article! We will share with you the best options to meet all your demands.
Introduction
Riding a motorcycle offers a thrilling sense of freedom and adventure. However, it can also be isolating.
Hence, we invite you to enter the world of motorcycle intercoms. It allows you to stay connected with fellow riders, make phone calls, and listen to music while on the road.
For those with full-face helmets, choosing the right intercom can enhance your riding experience significantly.
In this comprehensive guide, we’ll explore the best intercom options for full-face helmets. We will share with you our opinions based on our own test on the top models from Fodsports.
How to Choose Motorcycle Intercom Helm Full Face
Selecting the right intercom for your full-face helmet involves several considerations:
Compatibility: Ensure the intercom fits well with your fullface helmet model. Some intercoms are designed to fit specific helmet styles, so check for compatibility. While all Fodsports intercoms, which supply soft mic in the kit, are suitable for full-face helmets.
Sound Quality: Look for intercoms with high-quality audio output. Wind noise reduction and noise cancellation features are essential for clear communication.
Range: Depending on your riding style, you may need an intercom with a long communication range. Consider how far apart you and your riding companions typically travel.
Battery Life: Long battery life is crucial, especially for long rides. Normally, you may ride 6-8 hours a day during a day's motorcycle tour, I think most riders are in this range. But you should leave some spare battery for the intercom in case of emergency. So I recommend you to look for intercoms that offer at least 10-15 hours of talk time.
Ease of Installation: Some intercoms are easier to install than others. Check if the device comes with straightforward installation instructions or tools.
Additional Features: Features like Bluetooth connectivity, FM radio, GPS voice prompts, and waterproofing. These extra functions can enhance your riding experience.
Fodsports FX7 - Best Full Duplex Motorcycle Intercom with Bluetooth Mesh
Fodsports FX7 - Full Duplex Motorcycle Intercom with Bluetooth Mesh
Bluetooth Mesh Intercom.
Dual Bluetooth Chip Design.
10 Riders Group Audio, 2000m Distance!
HRSQ Mic and Speakers, CVC + ENC + DSP Noise Cancelation.
Listen to Music/GPS and Intercom At the Same Time.
IP67 Waterproof.
FM Radio, Music Sharing, Voice Commands.
Price: $129.99 for a single pack and $258.99 for a dual pack
Fodsports FX7 is the latest full duplex motorcycle Bluetooth mesh helmet intercom. It is just released by Fodsports in July 2024, with dual-chip design.
In 2026, Fodsports will release the new version Fodsports FX7, which can support pairing with Fodsports Connect App.
I recommend it because it truly changed the intercom market with its advanced tech. Let's see what makes it outstanding:
Dual-chip design, full duplex ability. One chip handles Bluetooth intercom process, the other one handles Bluetooth audio process. This makes the FX7 more stable and efficient, whether you are communicating with other rides or listening to music.
Multi-rider mesh AD-HOC NETWORK. With this technology, any rider join or leave the group will not affect the others. The other riders can still keep communication without worrying about losing connection.
QCC chip Bluetooth 5.4 technology. With it, the FX7 has stronger compatibility, more stable connection, and lower power consumption.
2 to 10 way large group communication. No matter you are riding just with a friend, or participating in a large group, the FX7 will meet your demand.
Best sound quality. HiFi sound quality microphones and speakers, plus CVC+ENC noise-reduction, the FX7 brings you the purest audio.
An Intercom that Suits Full Face Helmets. Fodsports provides a clamp with velcro, a clamp without velcro, and a metal clip in the FX7 packing box. You can stick it onto your full face helmet with the clamp with velcro. Or, you can use the metal clip and the clamp without velcro to lock it on your helmet. Both are easy and convenient.
My Riding Test
Fodsports FX7 - Full Duplex Motorcycle Intercom with Bluetooth Mesh
The FX7 full duplex motorcycle intercom with Bluetooth mesh performed impressively during my California Pacific Coast Highway road trip.
Firstly, I must say, its communication stability was excellent. It keeps maintaining clear sound even in areas with significant traffic noise.
Besides, the 2000-meter intercom range is true and reliable. I can keep seamless communication with my partner even though we are more than a kilometer apart. During the riding tour, there are no noticeable dropouts.
The audio and sound quality are top-notch, clear and crisp. This is also one of the reasons why I think the FX7 should be recommended. Sometimes we are riding at high speed, the conversations are still very clean and stable, with no noise.
Overall, the FX7 provided a stable and high-quality communication experience. It enhanced our ride significantly.
For group rides, it is an indispensable tool to ensure everyone stayed connected and informed during the journey.
Fodsports T1 is the newest 2-way helmet intercom release by Fodsports in 2025.
If you're looking for a reliable and affordable intercom for your full-face helmet, the Fodsports T1 is a great choice. It's designed for riders who want clear communication without spending too much.
Here are some outstanding features of the Fodsports T1:
Bluetooth 5.4: The T1 offers Bluetooth 5.4, which ensures a stable connection. And, it also supports universal pairing, you can easily pair the Fodsports T1 with phones and GPS devices.
3 Pairing modes switch with one click: Fodsports T1 supports 3 pairing modes: Two-person intercom mode; Third-party intercom mode; Music sharing mode.
2-Way intercom: It supports a two-way intercom up to 1000 meters, so you can stay connected with your riding partner.
CVC + ENC noise-reduction tech: The device also has CVC + ENC noise reduction, making conversations clear even at high speeds.
With over 20 hours of talk time and USB-C fast charging, it's ready for long rides.
My Riding Test
Based on my own experience, the T1 performs well on the road.
I used it on a weekend ride with my wife along a road trip near California.
The audio was clear, and the battery lasted all day.
Even with earplugs, I could hear music and calls without issues.
The buttons are easy to use with gloves, and the intercom stayed connected without drops.
Overall, the Fodsports T1 is a solid intercom for full-face helmets, offering great features at an affordable price.
Here is an installation guidance video about Fodsports T1 installing onto the full face motorcycle helmet:
Fodsports FX8 - Full Face Helmet Bluetooth Headset for Group Communication
8 Riders Group Communication Intercom, 2000 Meters Distance!
Noise Reduction Function & Hi-Fi Stereo Sound Quality.
FM Radio, Music Sharing, Voice Command.
Universal Pairing.
Price: $85.99 for a single pack and $169.99 for a dual pack
The Fodsports FX8 is another excellent choice for group communication.
During the past year, the Fodsports FX8 series has sold more than 100,000 units. It is one of the best-selling full face motorcycle helmet intercoms from Fodsports.
Here are some key features that make it welcome in the market:
8-Way Intercom. It supports connecting with up to 8 riders, making it perfect for group adventures.
Smart Noise Reduction. Enjoy clear conversations with DSP and CVC noise cancellation technologies.
Hands-Free Operation. Easily control your device with voice commands and one-touch functions.
Extended Range. With a range of up to 2000 meters, the FX8 ensures reliable communication between riders.
User-Friendly Design. The FX8 is easy to install and compatible with most full-face helmets.
FX8 intercom Bluetooth headset side on road helmet
My Riding Test
The FX8intercom helm full face Bluetooth headset satisfied us during a motorcycle trip in Nevada.
Its intercom stability was excellent, maintaining clear communication without dropouts. The ability to connect up to 8 riders was seamless, making group rides more enjoyable.
We tested the 2000-meter intercom range, and it held up well in open areas. Honestly, it slightly diminished in dense terrain, but this is not a problem.
The connection stability of all Bluetooth devices will be influenced if there are obstacles between them.
Besides, we encountered light rain during the ride, we had the opportunity to test the FX8's waterproof performance.
Finally, the IP67 waterproof rating was put to the test during the rain. And it performed flawlessly, keeping the electronics safe.
What's more, the audio and sound quality were top-notch, with crisp and loud output, even at high speeds. The wind noise reduction worked effectively, ensuring clear conversations.
The FX8 provided reliable and enjoyable communication, enhancing our group ride significantly.
10 Riders Group Intercom, 2000 Meters Distance!
Optional HRSQ Mic and Speakers, Better Sound Quality.
Microphone Mute.
Music Sharing, FM Radio, Voice Command.
Compatible with Full Face Motorcycle Helmets.
Price: $105.99 for a single pack and $210.99 for a dual pack
The Fodsports M1-S Plus is another featured motorcycle intercom for full face helms.
As Fodsports's star product, the M1-S Plus also satisfied many intercom users and has won a large reputation in the market.
The Fodsports M1-S Plus is a versatile full-face helm intercom known for its features like:
Group Connectivity. Connect with up to 8 riders and seamlessly switch between intercom and music. In 2024 autumn, Fodsports released the new version M1-S Plus, which can support up to 10 riders group intercom.
Superior Sound Quality. The M1-S Plus is equipped with a CSR Noise Reduction chip, making the riders able to talk in a natural voice. Enjoy high-definition sound with advanced noise control and wind noise reduction.
Long Battery Life. With a 900 mAh battery in M1-S Plus. it can support up to 20 hours of talk time or 300 hours of standby time. The Fodsports M1-S Plus is perfect for long journey ridings.
Waterproof Design. Ride confidently in any weather with its IP65 waterproof rating.
Multiple extra functions. Music sharing with passenger/ rider, FM radio, voice command, GPS navigation from your smartphone...
M1-S Plus Riding Test
Intercom Helm Full Face Best Choice Fodsports M1S Plus
The Fodsports M1-S Plus intercom is an excellent choice for group rides. During our trip from Las Vegas to Phoenix, it worked exceptionally well.
The 8-rider group intercom feature was stable, even in challenging terrains. With a 2000-meter range, communication remained clear across long distances.
The CSR chip's noise reduction technology significantly improved audio quality. And it helps filter out wind and engine noise so that I can talk with my partners in a natural voice.
This made conversations crisp and enjoyable, enhancing the overall riding experience.
The music-sharing function was a highlight, allowing us to enjoy the same playlist seamlessly.
Pairing devices was straightforward, and the connection stayed strong throughout the journey.
Overall, the M1-S Plus proved to be reliable and effective, making it a top choice for long-distance riding trips. Its features cater well to both casual riders and serious touring enthusiasts.
2 to 6 Riders Talk, 1000 Meters Distance!
Advanced Noise Reduction, Crystal Clear Sound.
Support FM Radio, Voice Command.
Waterproof Design.
Suitable for Helmets with Full Face, Modular Helmets And Open Face.
Price: $71.99 for a single pack and $134.99 for a dual pack
If you usually ride with medium groups with 4 to 6 riders, the Fodsports FX6 is a nice fullface helm intercom you can choose.
Only $71.99 for a single pack, it is cost-effective for riders looking for budget helmet intercoms.
The Fodsports FX6 is perfect for medium-sized groups, offering:
6-Way Intercom. Connect with up to 6 riders, providing flexibility for medium group rides.
Excellent Noise Control. With up to 30DB noise control, riders can experience high-quality sound even ride in high speed.
Extendable Battery Usage.The FX6 can support 8 hours of intercom talk, or 10 hours of hands-free call, or 15 Hours of non-stop music. No compromise on road trips.
Large button design. Safe and convenient to operate the FX6 even wearing with your gloves.
Weatherproof Design. Built to handle various weather conditions. It is a reliable choice for all-season riding.
My FX6 riding test
Fodsports FX6 - 6 Riders Medium Group Motorcycle Intercom Helm Full Face
The Fodsports FX6 did a very excellent job during a ride from Utah to Colorado in June this year.
Its ability to maintain stable communication among six riders was outstanding. Even in mountainous terrain, the connection held strong, making group coordination seamless.
The large button design was a lifesaver, allowing easy operation without removing gloves. This convenience was especially appreciated during quick adjustments.
Besides, its noise control effectively minimizes wind and road noise while we are riding fastly. Truly, the clear sound enhanced our overall riding experience.
Streaming music and audio from my phone was smooth, I also tested this function. The clear sound quality that enriched long stretches of the journey.
The FX6 is a reliable companion, balancing functionality and user-friendliness perfectly. Whether navigating tricky passes or enjoying the open road, this intercom system delivers on all fronts.
Price: $65.99 for a single pack and $129.99 for a dual pack
The Fodsports FX4 Pro is an excellent motorcycle headsets for full face helmets.
For those seeking a motorcycle intercom with budget-friendly option, the FX4 Pro delivers excellent value.
It offers clear communication, robust noise cancellation, and a long battery life. With its waterproof design and easy setup, it's perfect for riders seeking reliable connectivity and enhanced safety on the road.
FX4 Pro Main Features:
4-Way Intercom. Ideal for smaller groups, allowing communication between up to 4 riders.
Reliable Connectivity. Enjoy stable and clear connections with Bluetooth 5.0 technology.
Noise Cancellation. Features wind noise microphone canceling technology & Hi-Fi Stereo 40MM sound quality speakers. Perfectly reduce the ambient noise and enhance the audio clarity.
Durable Build. The FX4 Pro is designed to withstand tough conditions, thanks to its IP67 water-resistant construction.
Affordability. Offers essential features at a competitive price for riders. Thus making it a smart choice for budget-conscious riders.
My riding experience with Fodsports FX4 Pro
Fodsports FX4 Pro Small Group Helm Full Face Intercom
The Fodsports FX4 Pro excelled during my Idaho to Oregon journey with 3 other club friends. It managed stable intercom for our group of four riders, keeping clear even at high speeds.
The universal pairing feature makes it easy to connect with other brands, showing impressive compatibility.
Besides, the FX4 Pro's access to iOS and Android voice commands was seamless and hands-free. We can make calls and play music with it effortlessly.
What's more, its noise cancellation was top-notch, effectively blocking out wind and engine sounds. This ensured crystal-clear conversations between me and my friends.
The IP67 waterproof rating was put to the test with rain when we were riding from Baker City to La Grand. However, the device remained fully functional without any issues.
Overall, the FX4 Pro provided reliable and immersive communication during this journey. Thanks to it, our trip was more enjoyable and connected.
Support 2 to 6 Riders Communication, 1000m Range!
Large Battery Capacity, Works Longer Time.
FM Radio, Music Sharing, Voice Prompt.
Perfect Intercom for Full Face Helmets.
Price: $65.99 for a single pack and $131.99 for a dual pack
The Fodsports FX8 Air is an excellent 2 to 6 way helm full face intercom, perfect for you and your small group friends. (2025 updated information)
It offers crystal-clear audio, easy Bluetooth connectivity, and a long battery life.
The device ensures seamless communication over long distances, making it ideal for 2 way communication.
For those who often ride with a partner, the Fodsports FX8 Air is a great option:
2-6 Way Intercom. Designed specifically for two to six riders' communication, offering a straightforward intercom solution.
Long Intercom Distance. The FX8 Air's 1000-meter intercom range makes sure you can easily contact your partner. This distance is long enough for 2 to 6 riders to intercom under various circumstances. (Since it support 1000 meters intercom distance, we recommend rides short the distance with each other. This can make sure your intercom more stable.)
Clear Sound. Features advanced noise control technology for crisp and clear audio.
3 sound effects. The FX8 Air provides treble, midrange and bass sound effects for riders to choose. Each sound effect will bring you a different feel.
User-Friendly. Simple controls and voice commands make it easy to use while riding. Easy to install and comfortable to wear, perfect full face helmet bluetooth headset.
Durable Design. The FX8 Air is water-resistant, ensuring reliable performance in diverse conditions.
Fodsports FX8 AIR Riding Test Experience
Fodsports FX8 Air - 2 Riders Helm Full Face Intercom
During a Seattle to Portland ride with my wife, I tested the latest version FX8 Air(V1.3) helm full face intercom with another 4 riders. It performs very satisfactorily based on my and my wife's using experience.
Its ability for five riders to communicate simultaneously is outstanding, making conversations seamless.
Powered by the CSR chip and A2DP EDR Bluetooth technology, the connection remained stable throughout the journey.
The 900 mAh battery lasted the entire trip, which was a major plus.
Besides, its anti-noise mic and CVC digital noise reduction function also take effect. Together, they minimized the wind and road noise and ensured us clear communication.
Additionally, its waterproof design handled the occasional rain without any issues. To be honest, this will maintain its functionality and reliability.
Overall, the FX8 Air is a solid choice for these small group riders. If you need dependable communication and noise management on long journeys, the FX8 Air is worth it.
Price: $65.99 for a single pack and $131.99 for a dual pack.
Fodsports M1-S Air is a member of the Fodsports M1-S series. The earlier V1.0 and V1.1 versions are mainly used for 2-rider intercom.
In 2024 autumn, Fodsports released the new version V1.2 M1-S Air. This time, the Bluetooth get upgraded and make this model can support up to 6 riders communicate in a group.
The Fodsports M1-S Air is an affordable choice for couples who ride together.
Although it is cheap, it still has some useful features and functions:
2-6 Way Communication. The M1-S Air (new version) supports 2 to 6 riders talking at the same time. It is perfect for small groups, offering direct communication between these helmets.
Music sharing. Riders can share the same music with the passenger/ rider with the M1-S Air, making your riding tour more enjoyable.
Budget-Friendly. Offers essential features at a price that won't break the bank.
Clear Audio. Equipped with QCC chip noise cancellation technology for enhanced sound clarity. Riders can talk in a natural voice.
Multiple functions: FM Radio/GPS navigation and Communication.
Easy Installation: Fits most full-face helmets with ease, providing a simple setup process.
Reliable Performance. Waterproof and durable, making it suitable for all weather conditions.
Riding Experience
Fodsports M1-s Air on full face helm
The Fodsports M1-S Air is an impressive low-cost helmet intercom, perfect for couples and medium groups.
During our ride through Yellowstone National Park, the intercom's performance was remarkable.
It supports two to five riders seamlessly, allowing clear communication even in windy conditions.
Honestly, if there are 6 riders together paired with M1-S Air, they might be a little unstable. So I recommend 5 riders use the M1-S Air.
Thanks to the QCC chip noise cancelation technology in the M1-S Air. It ensures effective noise reduction, minimizing background noise for a more enjoyable conversation.
The 900mAH battery lasted the entire day, handling music sharing and GPS navigation without a hitch.
Its FM radio feature provided entertainment for me and my wife during the long stretches. We appreciated the ease of switching between functions, enhancing our riding experience.
The IP65 waterproof rating was tested during unexpected rain, and it held up excellently.
Overall, the M1-S Air offers great value with its robust features and reliable performance. I can recommend it as a fantastic choice for adventurous couples.
Fodsports FX-S - Budget 2-Way Intercom for Full Face Helm
The Fodsports FX-S is a newly released 2 way helmet intercom in December 2024.
Firstly, in the FX-S package, Fodsports provides a soft microphone. With this mic, the FX-S is able to fit almost all full-face helmets.
What make me surprised is that this budget intercom still uses Bluetooth 5.4 technology. If you search on the internet, you will find that it is the latest version of Bluetooth technology as of 2024.
Besides, the Fodsports FX-S offers clear, reliable communication between 2 riders. And the intercom distance can be around 1000m.
The FX-S also features CVC noise-canceling technology by a QCC chip. This advanced tech can block out wind and engine noise for better audio quality, even at high speeds.
What's more, the FX-S also has a simple and humanized large knob design. Riders can easily control volume, switch between calls and music, and adjust settings during your ride.
Automatical answer phone calls, IP67 waterproof, long working life, universal pairing... There are more you can get from the FX-S.
Riding Experience
Fodsports FX-S with 2 appearance color
I’ve been using the FX-S for about 2 weeks. Its functions and performance make me regard it as a game-changer in the helmet communication market.
The setup was quick and easy, and I was able to connect with a riding buddy almost immediately.
The sound quality is surprisingly clear, even on busy roads.
Battery life lasts me all day, and I love how comfortable it feels on my helmet.
How do I install an intercom on a full-face helmet?
Most intercoms come with detailed installation instructions. For example, all Fodsports intercoms provide installation accessories and a user manual in the kit. You can follow the steps to install the clips, speaker/mic mounting velcros and others.
Generally, you’ll need to secure the speakers inside the helmet and attach the microphone. Then you need to mount the control unit on the outside.
Ensure all components are firmly in place and test the system before riding.
Can I use these intercoms with any full-face helmet?
Yes, Fodsports intercoms are designed to fit a variety of full face helmets. There are essential installation tools, accessories and guidance paper in the kit. With them, you can easily install Fodsports full face helmet communication systems.
Are these intercoms waterproof?
Yes, most Fodsports intercoms are IP65 water-resistant or even higher IP67 waterproof. They are designed to withstand rain and other weather conditions. But you also need to avoid exposing them or soaking them in water for a long time(for hours).
How long does it take to charge these intercoms?
Charging times vary, but most intercoms take about 2-3 hours to fully charge. It's advisable to charge them fully before long rides to ensure continuous connectivity.
Conclusion
Selecting the right full-face helmet intercom can transform your riding experience. A right and suitable intercom will keep you connected, entertained, and safe on the road.
Whether you're riding solo, with a partner, or in a group, Fodsports offers a range of intercom systems tailored to different needs and budgets.
From the versatile FX7 and FX8 to budget-friendly options like the FX4 Pro and M1-S Air, there's an intercom for every rider.
Explore these options and choose the one that best fits your riding style and preferences. Stay connected and enjoy the ride!
What are the Harley Davidson cheapest bike options in the market? Are you looking for budget-friendly Harley-Davidson bikes?
Introduction
Harley-Davidson is an iconic name in the motorcycle world. Known for its powerful engines and classic designs, it often comes with a hefty price tag.
But what if you're looking for something more budget-friendly?
This blog will guide you through the cheapest Harley-Davidson bikes of 2024.
Whether you're a new rider or a seasoned enthusiast, you'll find something that fits your budget.
About Harley-Davidson
Harley-Davidson has been a leader in the motorcycle industry since 1903. Founded in Milwaukee, Wisconsin, it quickly became a symbol of freedom and adventure.
Nowadays, Harley-Davidson has a loyal fan base worldwide.
Despite its reputation for luxury, the brand offers several affordable motorcycle models for riders.
These budget motorbikes still maintain the iconic Harley spirit and provide high performance.
OK, let's explore the Harley Davidson cheapest bike for sale in the market this year.
Top 10 Cheapest Harley Davidson Bike Options of 2024
1. Harley-Davidson Iron 883
Harley-Davidson Iron 883
Price: $11,249
The Harley-Davidson Iron 883 is a classic in the Sportster lineup. This budget Harley-Davidson bike is known for its minimalist, raw appeal.
This bike is perfect for riders who appreciate the essence of Harley-Davidson without the frills.
With its 883cc air-cooled Evolution engine, the Iron 883 delivers a reliable and smooth performance ideal for city cruising.
Besides, its low seat height and narrow frame make it easy to handle, especially on urban roads.
The blacked-out styling and vintage look give the Iron 883 its distinctive, rebellious character.
I must say, the Iron 883 is designed for those who love the feel of the open road. It's an excellent choice for new riders and seasoned veterans alike.
Generally, the Iron 883 is a combination of timeless design and modern reliability.
Thus it is a top choice for those wanting to experience the Harley lifestyle without breaking the bank.
Harley-Davidson Iron 883 Key Specs
Engine size: 883cc
Engine type: Air-cooled Evolution V-twin
Frame type: Tubular steel cradle
Fuel capacity: 12.5 litres
Seat height: 760mm
Bike weight: 256kg
Front suspension: Telescopic fork
Rear suspension: Twin shock, non adjustable
Front brake: Dual-piston single disc
Rear brake: Dual-piston single disc
Front tyre size: 100/90 19
Rear tyre size: 150/80 16
Average fuel consumption: 49 mpg
Max power: 51 bhp
Max torque: 50.2 ft-lb
Tank range: 135 miles
Torque: 70 Nm
Kerb Weight: 260 Kgs
Brakes: Disc
2. Harley-Davidson Street 750
Harley-Davidson Street 750 - Harley Davidson cheapest bike
Price: $7,599
The Harley-Davidson Street 750 is a cheap motorbike designed for the urban jungle.
It’s equipped with a liquid-cooled Revolution X engine, ideal for navigating city streets with ease.
The Street 750's nimble frame and responsive suspension allow for quick and easy maneuvering. This makes sure it is perfect for stop-and-go traffic.
Its sleek, blacked-out appearance gives it a modern, edgy look that appeals to young riders.
On one hand, the Street 750's lightweight design makes it approachable for beginners. On the other hand, it still offers enough power for more experienced riders.
With a focus on agility and comfort, the Street 750 is a versatile option that doesn’t compromise on the iconic Harley-Davidson style.
If you are looking for the Harley Davidson cheapest bike, the Street 750 is always on the recommendation list on various websites.
Whether you’re commuting to work or taking a weekend ride, this bike suits all. In my opinion, it offers a thrilling yet practical experience for urban dwellers.
Harley-Davidson Street 750 Key Specs
Displacement: 749 cc
Fuel Tank Capacity (litres): 13.1 L
No. Of Cylinder: 2
Valve Configuration: DOHC
Bore X Stroke: 85 mm x 66 mm
Engine Type: V-Twin, Liquid-Cooled, Revolution X
Maximum Torque: 59 Nm
Cooling System: Liquid Cooled
Drive Type: Belt Drive
No. Of Strokes: 4-Stroke
Valves Per Cylinder: 4
Lubrication System: Wet Sump
Exhaust Pipes: 2 in 1 Exhaust
Compression Ratio: 11.0:1
RPM at Maximum Torque: 4000 rpm
Category: Cheap Cruiser motorcycle
Seat Height: 720 mm
Height: 710 mm
Dry Weight: 223 kg
3. Harley-Davidson Street Bob 114
Harley-Davidson Street Bob 114 - most affordable Harley-Davidson bikes
Price: $16,599
The Street Bob 114 is an affordable cruiser motorcycle option for those seeking a powerful and stylish ride.
This motorbike is known for its minimalist bobber design. It features a Milwaukee-Eight 114 engine, delivering impressive power and torque.
Its stripped-down look with mini-ape handlebars and spoked wheels gives it a classic yet rebellious charm.
Lightweight and agile, this bike offers an engaging riding experience. According to my test riding, it is very perfect for both city streets and open highways.
The Street Bob is ideal for riders who want a no-frills motorcycle with plenty of personality. It's also a great platform for customization, allowing you to make it truly your own.
It is one of the most affordable Harley-Davidson bikes that combines performance and style.
For anyone looking to experience the Harley-Davidson without less cost, the Street Bob 114 is a fantastic choice.
Harley-Davidson Street Bob 114 Key Specs
Engine: Milwaukee-Eight™ 114
Bore: 102 mm
Stroke: 114.3 mm
Displacement: 1,868 cc
Compression Ratio: 10.5:1
Fuel System: Electronic Sequential Port Fuel Injection (ESPFI)
Exhaust: 2-into-2 offset shotgun; catalyst in muffler
Seat Height, Unladen: 680 mm
Fuel Capacity: 13.2 l
Oil Capacity (w/filter): 4.7 l
Kerb weight: 297kg (in running order)
Horsepower: 94 HP / 70 kW @ 5020 rpm
Fuel Economy: 5.5 l/100 km
4. Harley-Davidson Forty-Eight
Harley-Davidson Forty-Eight - Harley Davidson cheapest bike for sale
Price: $12,299
The Harley-Davidson Forty-Eight stands out with its iconic bulldog stance and fat front tire. It is a Harley Davidson cheapest bike for sale option in the market.
The Forty-Eight equipped a 1200cc Evolution engine, providing a robust and smooth ride.
Besides, its classic peanut fuel tank and low-slung profile give it a distinctive look. This special design harkens riders back to the custom culture of the past.
Its compact design and responsive handling are also an outstanding feature worth mentioning. This makes it perfect for urban environments and short road trips.
Overall, this motorbike is a unique blend of vintage styling and modern performance. For riders who prefer a blend of old-school charm and contemporary engineering, the Forty-Eight is an ideal option.
With its bold appearance and powerful performance, it’s a bike that commands attention and delivers an exhilarating ride.
The Harley-Davidson Iron 1200 blends the classic Sportster design with modern power and style.
It features a 1200cc, 2-cylinder, Air-Cooled, 4-valve, Evolution engine. This engine offers a significant boost in performance compared to its smaller sibling, the Iron 883.
One of its features is its retro graphics and mini-ape handlebars. It brings a touch of nostalgia, evoking the custom bikes of the past.
Generally speaking, the Iron 1200 is designed for riders who want both power and style. Many riders are attracted by its distinctive look and thrilling riding experience.
What's more, its lightweight frame and low seat height make it accessible for a wide range of riders.
Whether you're carving through city streets or cruising along back roads, the Iron 1200 provides an engaging and enjoyable experience.
The 2005 Harley-Davidson Heritage Softail is a classic cruiser, the Harley Davidson cheapest bike. This motorbike is known for its vintage style and modern comfort.
As one of the more affordable options in Harley's lineup, it offers a great balance of performance and value.
It features a Milwaukee-Eight 107 engine, providing smooth power and torque for the ride.
Its classic design includes nostalgic elements like chrome accents and comfortable leather saddlebags.
As a cruiser motorbike, it is truly perfect for long trips. The softail frame ensures a smooth ride, absorbing bumps and enhancing comfort.
With retro aesthetics and modern tech, the Heritage Softail appeals to both new and experienced riders.
Its affordability, plus these key features, makes it a top choice in the market. For riders looking to experience the iconic Harley-Davidson, the Heritage Softail is worth it.
In conclusion, the Heritage Softail offers a timeless design and reliable performance. Thus making it a great investment for any motorcycle enthusiast.
The Harley-Davidson SuperLow is a welcoming entry into the world of Harley.
Known for its comfortable ride and excellent handling, it's perfect for those new to motorcycling or looking for a relaxed ride.
The SuperLow's 25.5-inch low seat height and balanced design make it easy to maneuver. This inspires confidence in both new and experienced riders.
It's powered by an 883cc engine that delivers smooth and consistent performance.
Besides, the bike’s ergonomic design ensures long-distance comfort, making it perfect for touring riding. Nowadays, many riders are using it for city commutes and weekend getaways.
With its classic styling and approachable nature, the SuperLow offers a genuine Harley experience without overwhelming the rider.
It's an ideal cheap Harley Davidson bike choice for those seeking a reliable and stylish ride.
Harley-Davidson SuperLow Key Specs
Displacement: 883 cc
Max Power: 50 bhp @ 5500 rpm
Max Torque: 69 Nm @ 3500 rpm
Mileage - ARAI: 20 kmpl
Riding Range: 340 km
Transmission: 5 Speed Manual
Transmission Type: Belt Drive
Cylinders: 2
Bore: 76 mm
Stroke: 97 mm
Valves Per Cylinder: 2
Cooling System: Air Cooled
Fuel Tank Capacity: 17 litres
Reserve Fuel Capacity: 6.5 litres
Kerb Weight: 260 kg
Seat Height: 695 mm
8. 2022 Harley-Davidson Low Rider S
2022 Harley-Davidson Low Rider S
Price: $17,500
The 2022 Harley-Davidson Low Rider S is a standout in the 2024, as well as a budget Harley Davidson bike. This motorbike is known for its blend of classic style and modern performance.
As one of the more affordable models, it offers great value for riders seeking the Harley experience without a high price tag.
Key features include the Milwaukee-Eight 117 engine, delivering robust power and smooth handling.
Besides, its retro-inspired design, dual tank gauges and throwback graphics are also beautiful. For riders who love a classic look Harley-Davidson, the Low Rider S really appeals to them.
Its comfortable riding position and adjustable rear suspension are features that surprise me. Whether you are using it for city cruising or longer rides, the Low Rider S can meet your needs.
Compared with the 2024 latest Low Rider S, you can choose the 2022 edition if budget is a factor you need to consider.
Its affordability, iconic styling and reliable performance make it a top choice for riders.
It captures the essence of Harley-Davidson, providing an authentic riding experience that's both thrilling and budget-friendly.
Whether you're a new rider or a seasoned enthusiast, the Low Rider offers an exciting entry into the world of Harley-Davidson.
2022 Harley-Davidson Low Rider S Key Specs
Engine: Milwaukee-Eight 117, 1923 cc, pushrod OHV
Bore x Stroke: 103.5 x 114.3 mm (4.075″ x 4.5″)
Power: 103 hp (77 kW) at 4750 rpm
Torque: 169 Nm (125 ft-lb) at 3500 rpm
Compression Ratio: 10.2:1
Induction: Electronic Sequential Port Fuel Injection (ESPFI)
Exhaust: 2-into-2 offset shotgun; catalyst in muffler
Transmission: Six-speed Cruise Drive
Lean angle: 31.3 degrees
Seat Height: 710 mm
Ground Clearance: 145 mm
Rake: 28 degrees
Fork angle: 28 degree
Trail: 145 mm
Wheelbase: 1615 mm
Tyres: 110/90-19 (F), 180/70-16 (R)
Fuel Capacity: 18.9 litres
Weight: 308 kg
Gross weight rating: 526 kg
9. Harley-Davidson Deluxe
Harley-Davidson Deluxe
Price: $18,399
Though on the higher end, the Deluxe offers a retro style with modern comfort. You may think it is expensive, but it is truly a budget Harley Davidson bike in the high-end motorcycle field.
The Harley-Davidson Deluxe combines retro styling with modern comfort and performance.
Its Milwaukee-Eight 107 engine ensures a powerful ride.
And, its nostalgic design elements, like wide whitewall tires and chrome accents, make it a standout on the road.
The Deluxe is designed for those who appreciate classic aesthetics with contemporary functionality.
Besides, its comfortable seating and smooth handling make it perfect for long rides and scenic cruises.
In all, it offers a luxurious riding experience without losing the traditional Harley charm.
It's an ideal choice for riders who want a touch of elegance and history in their ride. Try it, and make your every journey a stylish adventure.
Harley-Davidson Deluxe Key Specs
Engine Type: Milwaukee-Eight® 107
Engine Stroke: 4.374 in.
Torque (Ft Lbs): 109 ft-lb (148 Nm)
Torque RPM: 3000
Bore (in): 3.937 in.
Displacement (cc): 107 cu in (1,746 cc)
Compression Ratio: 10.0:1
Fuel system: Electronic Sequential Port Fuel Injection (ESPFI)
Exhaust: 2-into-2 shorty dual; catalyst in muffler
Wheelbase (in): 64.2 in.
Ground Clearance (in): 4.5 in.
Oil Capacity: 5 qt. (4.7 l)
Rake: 30
Seat Height, Laden: 25.9 in.
Seat Height, Unladen: 26.8 in.
Trail: 5.7 in.
Weight, as shipped: 668 lb. (303 kg)
Weight, in running order: 697 lb. (316 kg)
Fuel Capacity (gal): 5 gal. (18.9 l)
Brakes, Caliper Type: 4-piston fixed front and 2-piston floating rear
10. Harley-Davidson Sport Glide
Harley-Davidson Sport Glide
Price: $19,999
The Harley-Davidson Sport Glide is a versatile powerhouse with a cost-friendly price in the high-end bike market.
It combines touring capability with cruiser style which can handle various road conditions.
Equipped with the Milwaukee-Eight 107 engine, it offers a smooth and powerful ride.
Besides, the Sport Glide comes with detachable saddlebags and a front mini-fairing. This can provide a lot of convenience for long-distance travel.
Moreover, its sleek design and comfortable features make it ideal for extended journeys. While the agile handling ensures it’s just as enjoyable in urban environments.
The Sport Glide is perfect for riders who want a multi-functional bike that doesn’t compromise on style or performance.
Whether you're planning a road trip or a quick city ride, the Sport Glide adapts to your needs with ease.
Harley-Davidson Sport Glide Key Specs
Engine: Milwaukee-Eight 107
Displacement: 107 cubic inches
Compression ratio: 10.0:1
Fuel system: Electronic Sequential Port Fuel Injection (ESPFI)
Exhaust: 2-into-1; catalyst in muffler
Engine Torque: 108 ft-lb
Engine torque (RPM): 2750
Lean Angle Right: 27.9 degrees
Lean angle left: 28.7 degrees
Fuel economy: 47 mpg (est city/hwy)
Seat Height, Laden: 25.7 in
Fuel Capacity: 5 gallons
Oil Capacity: 5 quarts
Weight in running order: 699 pounds
Luggage capacity (volume): 1.9 cubic feet
Frequently Asked Questions About Harley Davidson Cheapest Bike
What is the price of the cheapest Harley-Davidson?
Typically, the Harley-Davidson Street series is always the cheapest model. They always start at a lower price point compared with other series.
However, Harley motorcycles can vary significantly in price based on the model and features.
You can check the official Harley-Davidson website or visit a local dealer for the most up-to-date pricing.
Besides, the prices can change due to location, taxes, additional options and customizations.
Is an 883 a good beginner bike?
Yes, the Harley-Davidson Sportster Iron 883 can be a good beginner bike for some riders. It has manageable power and a lower seat height, which can be helpful for new riders.
But, it’s heavier than some other beginner bikes, so you need to consider your comfort level with the weight.
If possible, you can have a test ride and take a motorcycle safety course to build confidence.
Are Harley-Davidson bikes reliable?
Yes, Harley-Davidson bikes are generally considered reliable, especially with regular maintenance. They are known for their durability and strong engines.
But, reliability can vary by model and how well the bike is maintained. So, regular servicing and proper care are important to ensure they run smoothly for years.
Can beginners ride Harley-Davidson bikes?
Absolutely! Beginners can ride Harley-Davidson bikes. Models like the SuperLow and Street 750 are great for beginners due to their manageable size and weight.
However, Harley-Davidsons are generally heavier than typical beginner bikes. So it's important to consider your comfort level and control ability.
Conclusion
Harley-Davidson offers a wide range of affordable bikes that cater to various riders.
From the urban-friendly Street 750 to the classic Softail, there's something for everyone. These models maintain the brand's iconic style and performance without breaking the bank.
If you're looking for the cheapest Harley-Davidson 2024 models, these options are a great place to start.
You should also keep an eye on the market and explore different models. Because in different areas and seasons, the price will also be different.
Wish you can find your dream Harley-Davidson without stretching your budget!
Motorcycling is a thrilling experience, offering a sense of freedom unmatched by other modes of transport. However, communication on the road can be challenging. Two way helmet communication systems provide an effective solution, enhancing both safety and enjoyment.
Let's see the best 2-way helmet communication devices from Fodsports:
Fodsports FX7: Newest Bluetooth mesh intercom for rider and passenger
Fodsports M1-S AIR: best 2-6 rider communication system
Fodsports T1 Pro: 2-6 riders helmet communication system with full functions
Fodsports FX8 AIR: Best budget helmet communication device
Fodsports M1-S PRO: 2 to 10 way motorcycle intercom with more ability
Fodsports T1: Best 2 way helmet intercom with full functions
They are all tested by our riding team in different riding environments. In the following part, we will introduce them in detail and share our own riding experience and review.
Detailed Reviews of Fodsports Two Way Helmet Communication Systems
Fodsports FX7: Newest Bluetooth mesh intercom for rider and passenger
The Fodsports FX7 - best two-way helmet communication devices
Bluetooth Mesh Intercom.
Dual Bluetooth Chip Design.
10 Riders Group Audio, 2000m Distance!
HRSQ Mic and Speakers, CVC + ENC + DSP Noise Cancelation.
Listen to Music/GPS and Intercom At the Same Time.
IP67 Waterproof.
FM Radio, Music Sharing, Voice Commands.
Price: $129.99 for a single pack and $258.99 for a dual pack
Fodsports FX7 is the latest helmet communication device. Although it has just launched in the market, it has still received a large amount of attention and response.
As you can see, it is a Bluetooth intercom with mesh technology with several advanced technologies. So its price may be a little high if budget is the main factor you are considering.
But if you have tried it, you will find it is really budget-friendly and worth owning.
Features
Range: 2000 meters
Battery Life: 15 hours of music time / Bluetooth intercom time
HRSQ(high-resolution sound quality) microphone and speakers
Durability: IP67 waterproof, full weather-resistant construction
Helmet Compatibility: pair with all types of motorcycle helmet
Pros
√ Latest Bluetooth mesh intercom
√ Secret motorcycle 2-way communicatior for riders
√ Reliable and high-resolution sound quality
√ Long-distance intercom stability
Cons
Might be a little high in price for some riders
The FX7 supports 3 kinds of intercom modes, Here, I want to focus on its two-rider intercom mode.
When in this mode, the FX7 can achieve secure communication only between 2 riders. No other Bluetooth devices can be allowed to join your connection if you are in this mode.
So, it will be private and safe for you to communicate with your friend or family member.
Besides, the FX7 also supports sharing music between two riders in the front and back seats. I have tested this function during my ride in Los Angeles. It is truly fun and enjoyable during my riding tour with my wife on the pillion.
The Fodsports FX7 is equipped with many 2024 advanced tech to make sure it stands out in the market. For example, Bluetooth 5.4, CVC + ENC and microphone noise reduction, 2000 meters intercom distance, etc.
All its leading techs make it one of the best two-way helmet communication devices in 2024.
Price: $65.99 for a single pack and $131.99 for a dual pack(V1.2)
As the most popular entry-level helmet intercom, the M1-S AIR supports 2 to 6 riders talking simultaneously.
The earlier V1.0 and V1.1 versions of M1-S Air can only support 2 riders intercom. But now, the newly released V1.2 version M1-S Air is able to support up to 6 riders communication.
Besides, it can support sharing the same music with the passenger/rider during the tour. This truly brings more satisfaction to both the rider and passenger on the road.
Features
Range: 1000 meters
Battery Life: 15 hours of Bluetooth intercom time
Connectivity: Bluetooth 5.0, supports 2 to 6 riders
√ Best for 2 riders communication and small group intercom
√ Excellent audio and sound quality
√ Various necessary functions for riding
√ 900 mAh large capacity battery
√ Truly budget-friendly
Cons
The earlier version only support intercom between 2 riders/passengers
Although Fodsports M1-S AIR intercom for two to six way communication is positioned as an entry intercom, it is still equipped with multiple technologies.
The QCC chip with noise reduction feature enables you can talk with your partner in a natural voice.
The Fodsports M1S AIR has three sound effects, HiFi Bass, Popular Golden Classic, and Pure Human Voice. Each sound effect will bring you clear and pure sound quality.
Just $60.99 (before using a coupon code), you will get seamless communication with your friend. That's truly cost-effective and worth buying.
Is that all? No!
Voice command, FM Radio, music sharing between rider/passenger, automatically answer phone calls... You can get them all with this M1-S AIR.
If you usually need two way helmet communication (intercom between 2 riders, or rider and passenger), the Fodsports M1-S Air is the best option.
Price: $64.99 for a single pack and $129.99 for a dual pack
Fodsports T1 Pro is a versatile helmet Bluetooth intercom designed for small group rides. This product has just been released by Fodsports in May 2025.
It supports one-click 4 riders connection and enables up to 6 riders to join in one network. So you can chat with your friends while cruising.
Key Features
Bluetooth 5.4 Technology: Fast, stable connection with low latency
Group Intercom (2–6 Riders): Chat in small groups without dropouts
2000 m Intercom Range: Stay connected over longer distances
HiFi Stereo Sound: 40 mm speakers deliver rich audio
CVC + DSP Noise Reduction: Clear voice calls even in wind
FM Radio (76–108 MHz): Built-in radio for music and news
IP65 Waterproof & Dustproof: Reliable in all weather conditions
Voice Prompts & Assistant: Hands-free operation and status alerts
Replaceable Stickers: Personalize your headset easily
Pros
√ Excellent range and multi-rider support for group rides
√ Superior audio quality with noise-reduction tech
√ Handy FM radio and music-sharing functions
√ Robust, weatherproof design for all-day riding
√ Replaceable stickers for more styles
Cons
× The 5th and 6th riders will need manual operation to join the group
It uses the latest Bluetooth 5.4 chip for fast, stable pairing and clear audio, even at highway speeds.
The T1 Pro offers a long communication range. It enables 1000m intercom disance for 2 riders communication. As for 4 - 6 riders communication, the intercom distance can be increased up to 2000m.
This means that you won’t lose contact when someone pulls ahead.
It is equipped with HiFi stereo sound from 40 mm speakers and professional CVC + DSP noise reduction. Whether you are listening to music, GPS direction, making phone calls, or intercom, it always comes through crisply.
You also get a built-in FM radio (76–108 MHz) to tune into your favorite stations on the road.
The unit is IP67-rated waterproof and dustproof, so it keeps working through rain or dust.
Plus, replaceable stickers let you customize the look of your headset.
Fodsports FX8 AIR: Best budget helmet communication device
Fodsports FX8 AIR Best budget helmet communication device
For riders looking for a low-cost intercom system, the FX8 AIR offers a balance of performance and affordability.
Just like the Fodsports M1-S AIR, the FX8 AIR also supports 2 riders intercom at the same time.
2025 Update: The newest version V1.3 version Fodsports FX8 Air has uptaded the Bluetooth chip. Now the new FX8 Air can support 2 to 6 riders intercom.
It also enables a 1000-meter intercom range, easily meeting your long-distance communication demand.
And, its 900 mAh capacity battery also makes sure you will not need to worry about it stopping work. According to my test, it can support at least 15 hours of intercom or music sharing.
Features
Range: 1000 meters
Battery Life: up to 15 hours
Connectivity: Bluetooth 5.0, 2 way helmet intercom and 2-6 small group intercom
Sound Quality: Anti-noise mic, CVC digital noise reduction function
Durability: IP65 waterproof level
Helmet Compatibility: Full face helmets, half helmets, open face helmets, etc
Pros
√ Cost-effective option, low budget best option
√ Three high-end sound effects: HiFi Bass, Popular golden classic, Pure human voice
√ Support voice command and FM Radio
Cons
× Only support intercom within 1000 meters
With only $65.99, you can get this functional but budget 2-way motorcycle intercom device.
I sincerely advise you to pay $131.99 to get a dual pack, because it will be the best deal.
Then, sit on the motorcycle with your partner and other friends, start the engine, and go on a riding tour where you have not explored.
Last month, I had a motorcycle tour at the Blue Ridge Parkway with my wife, using the Fodsports FX8 AIR as the intercom device.
Honestly, it is truly stable in connection. Even when we were driving through the jungle bends, the FX8 AIR always ensured that we had smooth communication.
Aside from the fact that it only cost $65.99 for each, I can hardly find fault with it.
Price: $89.99 for a single pack and $179.99 for a dual pack
If you are looking for a high-end motorcycle two way communication system, the Fodsports M1-S Pro is the best choice.
This Fodsports top intercom supports 2 to 10 riders intercom, easily meets most of your demands.
If riding with 1 partner, the M1-S Pro can ensure stable, long-distance, and seamless communication. For two way intercom, the M1-S Pro can easily handle it.
When you are riding with multiple riders, it can also make sure you stay in the group continuously. Don't worry, its 2000-meter-long intercom range will help you, even if you are left behind far away.
Besides, its advanced CVC noise reduction technology can eliminate noise and protect your hearing.
2025 Update:
Fodsports released the latest V3.0 M1-S Pro and Fodsports Connect APP. The new M1-S Pro can support pairing with the APP, riders can set and control the M1-S Pro easily and conveniently.
V2.0 and V2.1 versions of M1-S Pro can also achieve this through a firmware upgrade.
In June this year, I took a journey riding through the Pacific Coast Highway.
For several times, I drove my motorcycle at high speed for more than 20 minutes to test the audio and sound quality of the M1-S Pro.
The result is excellent, the voice quality of the M1-S Pro is not affected even when riding in high speed.
This is also one of the reasons I recommend it to you.
Features
Range: 2000 meters 2-way motorcycle intercom
Battery Life: 20 hours talk time / 300 hours standby time
2 Way Helmet Communication for Riders, 1000 Meters Distance!
CVC + DSP Noise Reduction Tech.
HiFi Stereo Sound, IP67 Waterproof.
Appearance Style Change Available.
Music Sharing, Voice Command and More.
Price: $49.99 for a single pack and $99.99 for a dual pack
For riders looking for an advanced tech yet budget 2-way helmet intercom, the Fodsports FX-S is the best choice.
It is just released by Fodsports in December 2024, with the Bluetooth 5.4 technology. Although it is a budget-friendly intercom, it still uses the most advanced Bluetooth technology currently.
For this reason, I must say the FX-S should be listed in the best 2-way intercom in the market in 2025.
Firstly, the FX-S provides 2 appearance colors, gunmetal black and Turquoise Blue. You can choose the one that is more suitable for your helmet's color or the one you prefer.
Besides, the FX-S can support a stable and smooth connection between 2 riders as far as 1000 meters. For most 2-riders touring motorcycle intercom or adventure ride intercom, this distance is far enough for use.
Moreover, the FX-S also has professional CVC noise reduction technology in its chip. This make sure it can bring pure and clear sound and voice for the riders. Even ride in high speed, it can still make sure a clean voice.
Google assistant, Siri, and other voice commands are also available to use when you pair it to your phone.
Features
Support 2 riders talk at the same time
1000m intercom range
Professional CVC noise reduction technology
Bluetooth 5.4 Technology
Automatic Answering Calls
Support work while charging
Universal pairing
IP67 Waterproof
Pros
√ 2 beautiful colors to choose
√ Budget-friendly in cost
√ Worth to have considering its techs
Cons
× No music sharing
× No FM radio
Key Features to Consider in 2 Way Helmet Communication Systems
When selecting a motorcycle helmet intercom 2 way headset, several factors should guide your decision. These include sound quality, range, battery life, ease of use, connectivity, and durability.
1. Sound Quality
Clear audio is crucial for effective communication, whether you’re talking to other riders, receiving GPS directions, or listening to music. So this should be the most important feature you need to consider firstly.
Look for systems equipped with advanced noise-cancellation technology and HiFi Stereo sound quality. These techs will help minimize wind and road noise while you are riding, finally improve the audio and sound.
2. Intercom Range
The communication range of two way headsets for motorcycles is especially important for both solo riders, two riders and group rides. A longer range ensures you can stay connected with other riders over greater distances. Consider your typical riding environment when evaluating this feature.
3. Battery Life
A long-lasting battery is essential for ensuring your device remains operational during extended rides. Aim for systems offering at least 10 hours of talk time to cover a full day of riding without needing a recharge.
4. Ease of Use
The system should be easy to install and operate, with intuitive controls accessible even with gloves. Consider models with voice command features for hands-free operation.
5. Universal Connectivity
Modern communication systems often connect with multiple devices. For example, Fodsports intercoms have universal pairing ability to various Bluetooth devices. Whether you are using a smartphone, GPS unit, or other Bluetooth systems, the Fodsports intercoms can all connect.
6. Durability
Riding exposes your equipment to the elements. So I advise you to choose a system that is water-resistant and capable of withstanding harsh weather conditions. These Fodsports IP65 and IP67 waterproof intercoms can ensure a reliable performance year-round.
Which kind of 2 way motorcycle intercom is best for riders? mesh intercom or Bluetooth intercom?
Choosing between mesh and Bluetooth intercoms depends on your needs.
Bluetooth intercoms are reliable and widely used. They offer good sound quality and are often more affordable. However, they usually require manual pairing and have a limited range. They’re great for small groups or solo rides.
Mesh intercoms provide better connectivity and flexibility. For example, the Fodsports FX7 can automatically connect with other units in the group. And, any rider joining or leaving the group will not influence other riders. Besides, they often offer a larger range and seamless communication. They’re ideal for larger groups or riders who frequently change companions.
If you often ride in groups and need easy, flexible communication, a mesh intercom is the better choice. For simpler needs or budget considerations, a Bluetooth intercom might be sufficient. Each type has its own benefits, so consider what suits your riding style best.
Conclusion
Finding the right two way helmet communication system is key to enhancing your ride. The Fodsports intercoms offer a range of options to suit different needs and budgets.
These motorcycle helmet communications deliver exceptional performance, making them perfect for riders.
Investing in a reliable 2 way communication device for motorcycles not only improves safety. It also adds a new dimension to your rides.
Stay connected and enjoy the freedom of the open road with the right helmet communication system.
The realm of entry-level sportbikes has witnessed a surge of contenders vying for the throne. Each of them promises an unparalleled blend of exhilaration and accessibility.
Among these formidable challengers stands the Yamaha YZF-R3. It has garnered significant attention for its striking aesthetics and tantalizing performance credentials.
In this comprehensive exploration, we delve into the heart of this lightweight two-cylinder marvel.
We will deeply dissect its acceleration prowess, top-speed capabilities, and the factors that contribute to its thrilling ride experience.
Kawasaki and Honda had already established their presence in the low-capacity sportbike segment. But Yamaha recognized the growing demand for accessible performance machines.
Yamaha's legendary 'R' series revered models like the R1 and R6 have won success in the market. Capitalizing on them, Yamaha sought to introduce an entry-level offering that would resonate with aspiring riders.
Finally, the Yamaha YZF-R3 appears in the world.
3. The Birth of the YZF-R3: A Formidable Contender Emerges
In 2015, Yamaha unveiled the YZF-R3. It is a motorcycle that aimed to dethrone the reigning champion in the entry sportbike category – the Ninja 300.
Compared to the Ninja 300's 296cc engine, the YZF-R3 boasts a larger 321cc parallel twin-cylinder engine. This makes sure the R3 is able to deliver an edge in power and torque output.
Despite its larger displacement, Yamaha's engineering prowess shone through. Because, the R3 tipped the scales at a svelte 167 kg dry weight, undercutting its main rival by a substantial 7 kg.
4. Main Specifications
Parent company
Yamaha Corporation
Production
2015–present
Assembly
Indonesia: Karawang, West Java (Yamaha Indonesia Motor Manufacturing)
Brazil: Guarulhos, São Paulo (Yamaha Motor da Amazônia) (since 2022)
Class
Sport bike
Engine
320.3 cc (19.55 cu in) liquid-cooled 4-stroke 8-valve DOHC 180° inline-twin
Front: Single 298 mm hydraulic disc
Rear: Single 220 mm hydraulic disc
Tires
Front: 110/70-17H
Rear: 140/70-17H
Rake, trail
25°, 95 mm (3.7 in)
Dimensions
L: 2,090 mm (82 in)
W: 720 mm (28 in)
H: 1,135 mm (44.7 in)
Seat height
780 mm (31 in)
Weight
167 kg (368 lb) (wet)
Fuel capacity
14.0 L (3.1 imp gal; 3.7 US gal)
Oil capacity
2.1–2.4 L (2.2–2.5 US qt)
Fuel consumption
4.2–4.9 L/100 km; 67–58 mpg‑imp (56–48 mpg‑US)
Related
Yamaha MT-03
Yamaha YZF-R25
5. All‑New Updates Yamaha Has Introduced on the 2025 YZF‑R3
Here’s a breakdown of the all‑new updates Yamaha has introduced on the 2025 YZF‑R3:
Design & Styling
New Generation R‑Series Bodywork: The 2025 R3 inherits styling cues from Yamaha’s YZR‑M1 MotoGP® and the recently revealed YZF‑R9. It has a more aggressive front fairing, sleeker side panels and a pronounced tail wing. Compared to the outgoing model, it has a sharper, more race‑inspired silhouette.
Lighting
Modern Full LED Package: Four-element DRLs flank a single projector-style LED headlight. Moreover, it is complemented by new LED turn‑signals and tail light. This not only modernizes the bike’s look but also improves nighttime visibility.
Electronics & Connectivity
Y‑Connect Smartphone Integration: Yamaha Motorcycle Connect (“Y‑Connect”) allows Bluetooth pairing on an R3. It is the first time that the R3 can pair with your phone (iOS/Android). Riders can view incoming calls, texts and email alerts on the dash, receive service‑reminder notifications. What's more, Riders can directly record their riding data in the free Y‑Connect app. These include the distance, fuel economy, acceleration events and even bike location.
All‑New LCD Instrument Cluster: A crisp, reverse‑type LCD screen is on the 2025 R3 now. It can display both traditional vehicle metrics and Y‑Connect notifications. A conveniently placed USB‑A outlet beside the gauge lets you keep your phone or heated gear powered on the go.
Drivetrain & Performance
Assist & Slipper Clutch: It is new to the R3. This lightweight assist/slipper unit reduces lever effort (easing fatigue on long rides). Simultaneously, it manages the engine‑braking forces for smoother, more controlled downshifts.
Engine & Chassis Carry‑Over: The high‑revving 321 cc liquid‑cooled parallel‑twin remains unchanged. It delivers the same ~42 hp through a 6‑speed gearbox. Chassis highlights still include:
Inverted KYB® front forks
KYB® Monocross rear shock
light‑alloy DiASil cylinders
compact mass‑centralized exhaust
Ergonomics & Color Options
Refined Ergonomics: The seat has been narrowed and side covers slimmed to improve rider mobility. Besides, the barrier also changes lower for shorter riders (seat height: 30.7 in).
Factory Colors: Available in Team Yamaha Blue, Matte Black, or Lunar White/Nebular Blue.
Analysis
The style of the 2025 YZF‑R3 is lifted straight from Yamaha’s flagship R‑series machines. It also combined with cockpit tech (Y‑Connect + LCD dash) and an assist & slipper clutch. This makes the 2025 YZF‑R3 close the gap to its bigger‑displacement siblings. And, it offers beginner‑friendly performance wrapped in genuinely sporty apparel. These updates give the R3 both fresh showroom appeal and enhanced real‑world functionality.
6. Engine Performance
Yamaha YZF-R3 engine
At the core of the Yamaha YZF-R3 lies a potent 321cc parallel twin-cylinder engine. It can deliver a respectable 37 horsepower at 10,500 rpm and 20 lb-ft of torque at 9,000 rpm at the rear wheel.
These figures position the R3 squarely in the mid-range of the 250-500cc beginner sports motorcycle class. Thus, this engine offers a compelling balance of power and tractability.
One of the standout features of the R3's engine is its ability to produce peak torque remarkably close to its peak power output. It is only a 1,500 rpm difference separating the two.
This characteristic translates into a broad and accessible powerband. And, ensures that the engine's sweet spot remains within reach across a wide range of riding scenarios.
7. Acceleration Prowess
acceleration prowess of Yamaha YZF-R3
The Yamaha YZF-R3's acceleration capabilities are impressive, especially when considering its entry-level positioning.
From a standstill, the R3 can sprint from 0 to 60 mph in a blistering 5.1 seconds. Besides, its 0 to 100 mph benchmark is achieved in a remarkable 17.13 seconds.
These figures outpace its direct rivals like the Ninja 300, but it is not the end. It is also challenging the performance of larger, more powerful machines such as the restricted A2/LAMS CBR650R.
The R3's quarter-mile performance is also noteworthy, with a time of 14 seconds flat and a terminal speed of 95 mph.
This level of straight-line performance is sure to ignite the adrenaline of even the most seasoned riders. With skills progress, the YZF-R3 will offer more tantalizing tastes of the exhilaration.
8. Top Speed of the Yamaha YZF-R3
the top speed of Yamaha YZF-R3
The outright top speed is often not the primary focus for starter sportbikes. But, the Yamaha YZF-R3 surprises with its capability to reach dizzying heights.
With a rider tucked in and holding on tight, the R3 can achieve a top speed of 112 mph(181 km/h). This is a figure that exceeds expectations for a machine in its class.
Under favorable conditions, such as a tailwind or a slight decline, the R3 can even flirt with the 120 mph mark, kissing the limiter in sixth gear.
9. Gearing and Shift Points
To extract the most from the Yamaha YZF-R3's performance potential, it's essential to understand its gearing and optimal shift points.
The R3's gearbox is designed to deliver consistent acceleration times when upshifting between 10,500 and 12,000 rpm. Thus allowing riders to find their preferred sweet spot without sacrificing performance.
The R3's acceleration figures can vary based on factors such as rider weight, wind conditions, and terrain. This is a common feature among many low-displacement motorcycles.
A lighter rider or a tailwind can enhance acceleration times. But a heavier rider or a headwind may slightly diminish performance.
However, the R3's lightweight and responsive nature reduced this impact. Even minor variations in conditions will have a less pronounced impact compared to higher-powered machines.
10. Handling and Agility: Mastering the Corners
handling and agility performance of YZF-R3
The straight-line performance of the Yamaha YZF-R3 is undoubtedly impressive. But, the true thrill of YZF-R3 lies in its ability to carve through corners with precision and agility.
The bike's lightweight construction and well-balanced chassis contribute to its nimble handling characteristics. So the riders can confidently navigate twisty roads and tight urban environments.
11. Braking Performance
Complementing the R3's acceleration and handling prowess is its capable braking system.
Some critics have noted that the front brake could benefit from additional bite, particularly during aggressive riding. But, I'd like to say, the overall braking performance remains reassuring and confidence-inspiring.
Yamaha has addressed this concern by offering aftermarket upgrades like steel-braided brake lines. This can further enhance the braking feel and responsiveness.
Besides, the R3's lightweight construction aids in its ability to shed speed effectively. Riders can scrub off velocity with confidence when approaching corners or navigating urban areas.
12. Suspension Setup
suspension setup of YZF-R3
The Yamaha YZF-R3's suspension setup strikes a balance between comfort and performance. This makes sure it definitely caters to the diverse needs of entry-level riders.
The YZF-R3's suspension may lack the extensive adjustability found on higher-end models. But its well-tuned characteristics provide a compliant ride quality for daily commuting and recreational riding.
For those seeking more advanced performance, the R3's suspension can also be upgraded. Riders can fine-tune the bike's handling to suit their preferences and riding styles.
13. Ergonomics and Comfort
One of the standout features of the Yamaha YZF-R3 is its ergonomic design. That's because it prioritizes comfort without compromising its sporting aspirations.
The slightly raised clip-on handlebars and upright seating position contribute to a less aggressive riding posture. Also, this can reduce strain on the wrists and lower back during extended journeys.
Besides, the R3's narrow tank and low 30.7-inch seat height enhance accessibility for riders of varying heights.
So, it is an appealing choice for those seeking a confidence-inspiring and comfortable starter sports bike.
14. Styling and Aesthetics
Yamaha's designers have masterfully blended form and function with the YZF-R3. Finally, they created a motorcycle that commands attention wherever it goes.
The bike's aggressive styling cues, inspired by its larger 'R' series siblings, exude a sporty and muscular presence that belies its entry-level positioning.
From the aerodynamic fairing to the sleek and sculpted tank, every aspect of the R3 exudes a sense of purpose and dynamism.
This visually striking appearance directly appeals to the aesthetic sensibilities of riders. What's more, it reminds us of the exhilarating performance that lies beneath the surface.
15. Customization and Personalization
The Yamaha YZF-R3 offers a vast array of aftermarket accessories and customization options.
Rides can choose performance upgrades like exhaust systems and engine tuning. Also, cosmetic enhancements like graphics kits and color-matched components are also acceptable.
Riders can tailor their R3 to reflect their unique personalities and riding preferences.
This level of customization enhances the bike's performance and appearance. Moreover, it fosters a deeper connection between the rider and the machine.
With these customization, the R3 will transform into a truly personalized extension of one's individuality.
16. Pros and Cons
Pros
User-Friendly: Great for beginners with its manageable power and easy handling.
Lightweight: Offers nimble maneuverability, ideal for city riding.
Reliable: Known for durability and low maintenance issues.
Sporty Design: Attractive styling with a modern look.
Affordable: Competitive price for a sportbike, with good resale value.
Cons
Limited Power: May not satisfy those seeking high-speed thrills.
Comfort: Long rides can become uncomfortable due to the sporty seating position.
Basic Features: Lacks some advanced tech found in higher-end models.
Wind Protection: Limited fairing may not offer full wind protection on highways.
17. Frequently Asked Questions
#1. Is the Yamaha YZF-R3 fast?
Yes, the R3 is fast enough to be exciting, but still approachable for newcomers.
The Yamaha YZF-R3 is a popular entry-level sportbike known for its speed and agility. Its 321cc twin-cylinder engine provides a good balance of power for new and experienced riders.
This sportbike can reach a top speed of around 112 mph (181 km/h). Thus making it fast enough for most road conditions and some track riding.
Besides, its lightweight design and responsive handling make it easy to maneuver. Even if you are riding it in city traffic or on twisty roads, it is still easy to control.
It's a great choice for those looking to start with a manageable, yet thrilling motorcycle.
The Yamaha R3 can seem expensive due to several factors:
It's built with high-quality materials and advanced engineering to ensure reliability and performance.
The bike features a sporty design and modern technology, such as ABS and a digital display, which add to its cost.
Yamaha is a reputable motorcycle brand known for durability and strong resale value. This also contributes to the price.
Manufacturing and import costs, taxes and dealer fees can increase the overall price.
While it may seem costly, the R3 offers a solid balance of performance, style, and brand assurance.
#3. Is R3 a super bike?
The Yamaha YZF-R3 is not classified as a superbike.
Superbike typically refers to high-performance motorcycles with engines over 1000cc. These bikes are designed for extreme speed and power.
The R3, with its 321cc engine, is an entry-level sportbike.
It's designed for beginner to intermediate riders who want a sporty feel without the overwhelming power of a superbike.
The R3 offers a good balance of performance, agility, and ease of handling. It's great for city riding, commuting, and learning the basics of sport riding.
While not a superbike, the R3 provides an exciting and accessible experience for many riders.
#4. Is the Yamaha YZF-R3 comfortable?
Yes. The Yamaha YZF-R3 is relatively comfortable for a sportbike.
It has a more upright seating position compared to more aggressive sport models. This helps reduce strain on the wrists and back.
The seat is designed to be accommodating for both short rides and longer commutes.
Its lightweight and nimble handling make it easy to control in city traffic, enhancing overall comfort.
But, like many sportbikes, long rides might still lead to some discomfort due to its sporty stance.
For daily use and shorter trips, the R3 strikes a good balance between performance and comfort. That's why it is a popular choice for many riders.
#5. Is the Yamaha R3 reliable?
Yes, the Yamaha R3 is known for its reliability. Yamaha has a strong reputation for building durable and dependable motorcycles.
The R3's 321cc engine is well-engineered for consistent performance and longevity. Regular maintenance, such as oil changes and chain adjustments, helps keep it running smoothly.
Many riders appreciate its solid build quality and minimal issues over time. Parts and services are generally accessible, making upkeep manageable.
Overall, the R3 is a reliable choice for both new and experienced riders. Because it offers peace of mind with its dependable design and proven track record.
18. Conclusion:
The Yamaha YZF-R3 is a testament to the brand's commitment to delivering accessible performance and unparalleled riding excitement.
It is equipped with potent engine, impressive acceleration capabilities, and agile handling characteristics. Based on these advanced techs, this entry-level sportbike offers a tantalizing taste of the thrills. Riders can progress along their two-wheeled journey with this best sports motorcycle.
If you're a newcomer seeking an exhilarating introduction to the world of sportbikes, try the YZF-R3. If you are an experienced enthusiast seeking a lightweight and nimble companion for urban exploration or weekend adventures, it can also meet your demand.
Anyway, the Yamaha YZF-R3 promises to deliver an unforgettable ride experience.
Embrace the thrill, and unleash your passion now! Join the ranks of those who have discovered the exhilarating world of the Yamaha YZF-R3.
What are the best motorcycle trails in the US? Have you ever traveled on these roads?
The United States is a paradise for motorcycle enthusiasts. It offers various motorcycle trails that promise thrilling rides and breathtaking views.
Whether you're a seasoned rider or a beginner eager to explore, there's a trail for everyone.
In this blog, we'll introduce some of the most famous and popular motorcycle rides in the USA.
For each trail, we'll discuss the best type of motorcycle to use, the scenery you can expect, and activities along the way. Also, we will inform you of the ride duration, and important tips to ensure a safe and enjoyable journey.
Besides, we will share some frequently asked questions about the best motorcycle trails in the United States.
10 Best Motorcycle Trails in US
1. The Tail of the Dragon (Deals Gap)
The Tail of the Dragon (Deals Gap) - Best Motorcycle Trails in US
Overview
The Tail of the Dragon is located on the border of North Carolina and Tennessee. It's famous for its 318 curves in just 11 miles, making it a thrilling challenge for riders.
Also known as Deals Gap, the Tail of the Dragon is a mountain pass between the North Carolina and Tennessee state lines. This is a popular area for motorcycle and sports car enthusiasts.
Riders usually enter Tennessee through Deals Gap and ride along the "Tail of the Dragon". The road is known for its 318 curves in 11 miles (18 kilometers).
Among them, there are several tightest curves to watch out for. They are:
Part of this motorcycle trail also serves as the southwest boundary of the Great Smoky Mountains National Park. So there is no development on this section of the trail.
Much of this motorcycle trail passes through forested areas, so riding it in the summer is not too hot.
There are several scenic overlooks and stops along the way. You can stop to rest, check your vehicle, and take pictures.
The speed limit on this stretch of road has been 30 mph (48 km/h) since 2005. So watch your speed.
Be aware that emergency response times for motorcycle accidents on this stretch of road may exceed an hour.
Because Blount County Rescue Squad is stationed on Dragon Street on summer weekends.
Best Motorcycle
Sport motorbikes are ideal due to their agility. But any well-maintained motorcycle can handle the curves.
Scenery
The trail winds through the Great Smoky Mountains, offering lush forests and stunning vistas.
Activities
Stop at the Deals Gap Motorcycle Resort for souvenirs and refreshments. Enjoy photography at popular spots like the Tree of Shame.
Ride Duration
Approximately 1 hour, but plan for additional time to stop and enjoy the views.
Tips
Watch for sharp curves.
Stay in your lane.
Beware of wildlife.
2. Blue Ridge Parkway
Blue Ridge Parkway - the most visited unit in the National Park System
Overview
The Blue Ridge Parkway is a national parkway and All-American Highway in the United States. It stretches 469 miles (755 km) through 29 counties in Virginia and North Carolina.
As one of the best motorcycle trails in US, it has always been the most visited unit in the National Park System for years.
You will experience amazing vistas and up-close views of the rugged mountains and idyllic scenery of the Appalachian Highlands.
Along the way, you can also hike, listen to concerts, picnic, and camp. It is a lot of fun to travel this road with friends or family.
It should be noted that this section of the road is not maintained in the winter. The sections that pass through particularly high altitudes and tunnels are usually impassable. So they are closed from late fall to early spring.
If you want to ride in this area, it is best to go in the spring and summer.
The speed limit on this section of the road never exceeds 45 mph (72 km/h), and some sections are lower.
When passing through the Blue Ridge Parkway, be sure to control your speed and drive safely.
Best Motorcycle
Cruiser motorcycles and touring bikes are perfect for this smooth and scenic route.
Scenery
Expect panoramic views of the Blue Ridge Mountains, valleys, and rolling hills.
Activities
Visit the Folk Art Center, hike trails, and explore local wineries.
Ride Duration
A full ride can take 2 to 3 days, depending on stops.
Pacific Coast Highway (Highway 1) - the best motorcycle trails in California
Overview
Running along California’s coastline, this highway offers a stunning ride from San Francisco to Los Angeles.
The Pacific Coast Highway (PCH) stretches for more than 900 kilometers (600 miles). The entire route encircles California's rugged and beautiful coastline. It is one of the most scenic roads in the world.
Many organizations and individual riders have included this route in the list of the best motorcycle trails in the USA. This is enough to show how popular this route is.
When riding this route, you should slow down, stop, and take time to appreciate the scenery along the way. If you like, you can also spend the night along the way.
It is recommended to prepare 6-7 days of vacation in advance to travel this most beautiful trail.
You can enjoy the mountains, towering trees, and endless skies along the way.
The rugged coastline, steep cliffs and pristine beaches are also the most attractive and magnificent scenery of PCH.
Whether it is pioneer outposts, surf villages, farm fresh food, local wines, roadside kitsch, Hollywood glitz and bohemian style, this road has it all.
California's climate is relatively mild, so the Pacific Coast Highway is suitable for riding all year round. It is recommended to appreciate the characteristics of California from late spring to late fall. July and August are California's busiest tourist seasons.
Best Motorcycle
Touring motorbikes and cruisers for comfort on long stretches.
Scenery
Marvel at cliffs, beaches, and the Pacific Ocean. Don't miss the Bixby Creek Bridge.
Activities
Stop at Big Sur, explore Hearst Castle, and enjoy local seafood.
Ride Duration
About 10 to 12 hours, best split over a couple of days.
Tips
Traffic can be heavy in summer.
Watch for fog.
4. Route 66
Route 66 motorcycle trail
Overview
Route 66, often called the "Main Street of America," is a legendary highway that stretches from Chicago, Illinois, to Santa Monica, California.
Covering 2,448 miles, it captures the spirit of American road trips. The route was established in 1926 and became a symbol of freedom and adventure.
It passes through eight states and offers a diverse range of landscapes, from the flat plains of the Midwest to the deserts of the Southwest.
Riding Route 66 is like stepping back in time. You'll see vintage motels, classic diners, and quirky roadside attractions.
The highway takes you through small towns that showcase America's rich cultural history.
The Beartooth Highway is a thrilling ride located in Montana and Wyoming. Spanning 68 miles, it is often hailed as one of the most beautiful motorcycle trail roads in America.
This highway is part of U.S. Route 212 and takes you to elevations over 10,000 feet. It offers breathtaking views of snow-capped peaks, alpine lakes, and lush forests.
Riding the Beartooth Highway is an adventure through diverse and stunning landscapes. You'll experience sharp switchbacks and steep climbs, making it perfect for those seeking a thrilling ride.
The road is usually open from late May to mid-October, as snow often blocks it during other months.
Along the way, you can stop at several scenic overlooks to capture the majestic views.
The highway also provides access to Yellowstone National Park, offering additional exploration opportunities.
Adventure bikes are ideal for this route due to its high altitude and potential weather changes.
This ride is not just about the journey; it's about the connection to nature and the sense of freedom on the open road.
Beartooth Highway is a must-ride for any motorcycle enthusiast looking for beauty and excitement.
Best Motorcycle
Adventure bikes for handling high altitudes and potential weather changes.
Scenery
Snow-capped peaks, alpine lakes, and wildlife.
Activities
Take photos at the summit, explore Yellowstone National Park nearby.
Ride Duration
2 to 3 hours without stops.
Tips
Check weather conditions; snow is possible even in summer.
Fuel up before starting.
6. Natchez Trace Parkway
Natchez Trace Parkway
Overview
The Natchez Trace Parkway is a scenic 444-mile route that stretches from Natchez, Mississippi, to Nashville, Tennessee.
This historic trail follows a path once used by Native Americans, European settlers, and explorers.
It's now a peaceful, two-lane road perfect for leisurely motorcycle rides.
The parkway is known for its beautiful, unspoiled landscapes. You'll ride through lush forests, rolling hills, and open fields.
The route is dotted with historical sites, including ancient burial mounds and Civil War battlefields.
It's a great way to explore the rich history and natural beauty of the southern United States.
The speed limit is a relaxed 50 mph, allowing you to fully enjoy the surroundings. Cruisers are ideal for this smooth and easy ride.
Along the way, you can stop for picnics, hike trails, and visit visitor centers to learn more about the area's history.
The Natchez Trace Parkway offers a unique blend of tranquility and adventure. With limited commercial traffic and no billboards, it's a serene escape into nature.
This ride is perfect for those looking to unwind and connect with the past.
Best Motorcycle
Cruisers for a smooth and relaxing ride.
Scenery
Enjoy forests, swamps, and historical landmarks.
Activities
Visit the Tupelo National Battlefield, explore hiking trails, and picnic at scenic spots.
Ride Duration
2 to 3 days with stops.
Tips
Limited gas stations, so plan fuel stops.
Watch for wildlife.
7. Going-to-the-Sun Road
Going-to-the-Sun Road
Overview
The Going-to-the-Sun Road is a stunning 50-mile route in Montana’s Glacier National Park.
It’s a must-ride for motorcycle enthusiasts, that's why I list it as one of the best motorcycle trail in the United States. It offers breathtaking views of rugged mountains, lush forests, and glacial lakes.
This road traverses the Continental Divide at Logan Pass, reaching elevations over 6,600 feet.
The journey takes you through diverse landscapes, with opportunities to see wildlife like mountain goats and bighorn sheep.
The road is open seasonally, usually from late June to mid-September, due to snow.
Riding this route is an unforgettable experience. The narrow, winding road provides thrilling twists and turns.
Adventure bikes are well-suited for navigating the terrain. As you ride, you’ll pass iconic spots like the Weeping Wall and Bird Woman Falls.
There are numerous pullouts where you can stop to take photos and soak in the views. It’s also a gateway to hiking trails and visitor centers within the park.
The Going-to-the-Sun Road offers a perfect blend of adventure and natural beauty.
It’s a unique opportunity to explore one of America’s most spectacular national parks on two wheels.
Best Motorcycle
Adventure bikes for navigating potential rough patches.
Scenery
Breathtaking views of glaciers, valleys, and wildlife.
Activities
Hiking, wildlife photography, and visiting Logan Pass Visitor Center.
Ride Duration
2 to 3 hours, with additional time for exploration.
Tips
Open seasonally, usually from late June to mid-September.
Prepare for weather changes.
8. Cherohala Skyway
Cherohala Skyway
Overview
The Cherohala Skyway is a breathtaking 43-mile scenic drive connecting Tennessee and North Carolina.
It’s a favorite trail among motorcycle enthusiasts for its sweeping curves and stunning vistas.
The skyway reaches elevations of over 5,400 feet. During the trail, you can view the scenery Cherokee and Nantahala National Forests.
This route is known for its smooth roads and gentle turns, making it perfect for a relaxing ride.
Touring motorbikes are ideal for enjoying the long, winding stretches.
As you journey, you’ll encounter overlooks with panoramic views of mountains and deep valleys.
The ride provides a sense of tranquility, with less traffic and commercial development.
It’s a great escape into nature for riders who want to get a true relax. You will have the opportunities for picnicking and photography at various pullouts.
The Cherohala Skyway is open year-round. But I advise you to check weather conditions during winter months due to possible snow.
The changing seasons bring vibrant foliage in fall and lush greenery in spring and summer.
This skyway offers a perfect blend of adventure and serenity. Thus making it a must-ride for those seeking natural beauty and a peaceful journey on two wheels.
Best Motorcycle
Touring bikes for comfort on long, winding roads.
Scenery
Ridge-top views and deep forested valleys.
Activities
Stop at overlooks, enjoy picnics, and take in the scenery.
Ride Duration
About 1.5 to 2 hours.
Tips
Few amenities along the route, so plan accordingly.
Watch for changing weather.
9. Highway 12 (Utah)
Highway 12 (Utah) - the best scenic route via motorcycle in Utah
Overview
Highway 12, also known as the "All-American Road," is a spectacular 124-mile route in Utah. I recommend this motorcycle trail as the best scenic route via motorcycle in Utah.
It connects Bryce Canyon and Capitol Reef National Parks, making it a favorite among motorcycle enthusiasts.
This road offers a diverse range of landscapes, from red rock formations to lush forests.
Riding Highway 12 is an unforgettable experience. You'll pass through stunning areas like Grand Staircase-Escalante National Monument and Boulder Mountain.
The scenery changes dramatically, with vibrant colors and unique geological features.
Adventure and touring bikes are well-suited for this journey, providing comfort and flexibility on varied terrain.
The road includes thrilling twists and turns, offering excitement for riders.
Along the way, there are numerous opportunities for exploration. You can hike trails, visit viewpoints, and enjoy local dining in charming towns like Escalante and Boulder.
Highway 12 is open year-round, but spring and fall offer the best weather for riding. Be sure to carry water and check for any park access fees.
This route is a perfect blend of natural beauty and adventure. Thus making it a must-ride for anyone seeking a memorable journey through Utah’s incredible landscapes.
Best Motorcycle
Adventure and touring bikes for diverse terrain.
Scenery
Red rock formations, canyons, and desert vistas.
Activities
Explore Bryce Canyon and Capitol Reef National Parks.
Ride Duration
5 to 6 hours, with stops for sightseeing.
Tips
Carry plenty of water.
Check park access and fees.
10. Skyline Drive
Skyline Drive
Overview
Skyline Drive is a scenic 105-mile road, the best motorcycle Rides in Virginia. It runs through Virginia’s Shenandoah National Park.
It’s a popular destination for motorcycle riders, offering stunning views of the Blue Ridge Mountains.
The drive features 75 overlooks where you can stop and take in the breathtaking scenery.
This trail is perfect for cruisers and touring motorbikes, providing a smooth and leisurely ride.
As you travel, you’ll be surrounded by lush forests, especially vibrant with fall foliage or spring blooms.
The speed limit is 35 mph, allowing you to fully enjoy the peaceful atmosphere.
Wildlife sightings are common, including deer, black bears, and a variety of birds.
The drive also provides access to numerous hiking trails and picnic areas. For outdoor enthusiasts, this motorcycle trail is an ideal route worth to go.
Skyline Drive is open year-round, but sections may close temporarily in winter due to snow.
An entry fee is required to enter Shenandoah National Park, so plan accordingly.
For anyone looking to explore the wonders of Virginia on two wheels, the Skyline Drive is an essential option.
Best Motorcycle
Cruisers and touring bikes for a comfortable journey.
Scenery
Forested mountains, wildlife, and scenic overlooks.
Activities
Hiking, camping, and visiting the park's visitor centers.
Ride Duration
3 to 4 hours without stops.
Tips
Entry fee required for Shenandoah National Park.
Watch for deer and other wildlife.
Frequently Asked Questions about the Best Motorcycle Trails in US
1. What is the best state to ride a motorcycle in?
The best state to ride a motorcycle in is often considered to be California.
It offers diverse landscapes, from coastal highways to mountain roads, providing breathtaking views and thrilling rides.
The Pacific Coast Highway is a favorite for its scenic ocean vistas.
California's mild climate allows for year-round riding, which is a major plus.
Besides, the state has a large motorcycling community and many events that enhance the experience.
The traffic can be heavy in some areas of California. But the variety of routes and beautiful scenery make it a top choice for many motorcyclists.
2. What is the longest motorcycle trail in the US?
The longest motorcycle trail in the US is the Trans-America Trail (TAT). It spans approximately 5,000 miles from the East Coast to the West Coast.
The trail starts in North Carolina and ends in Oregon, covering a variety of terrains. Riders experience everything from mountains to deserts.
The TAT is mainly off-road, offering a unique adventure through rural and remote areas. It’s popular among adventure riders who enjoy a challenging and scenic journey.
The trail includes dirt roads, gravel paths, and some paved sections. These different trail types provide a diverse riding experience across the country.
3. What is the best time of year to ride these trails?
The best time to ride most motorcycle trails in the U.S. is during spring and fall. During these seasons, you'll experience mild weather and less traffic.
Spring offers blooming flowers and fresh greenery. And, fall provides stunning foliage with vibrant colors.
Summer can be crowded, especially on popular routes like the Blue Ridge Parkway and Pacific Coast Highway.
In winter, roads like the Going-to-the-Sun Road and Beartooth Highway might be closed due to snow.
Always check local conditions before your trip to ensure a safe and enjoyable ride.
4. Are there any safety precautions I should take?
Safety is crucial when riding on these trails. Here are some safety precautions you should pay attention to:
Always wear protective gear, including a helmet, gloves, and durable clothing.
If you are riding with several riders as a group, it is better to use helmet communication systems. For example, I usually use Fodsports 6-8 riders helmet intercoms, they are good options for group intercoms.
Moreover, before your ride, check your motorcycle’s brakes, tires, and lights.
Keep an eye on the weather forecast and be prepared for sudden changes, especially in mountainous areas.
Stay within speed limits and be cautious on curves and steep inclines.
Watch for wildlife, particularly in forested areas.
Carry a first-aid kit and emergency supplies, and let someone know your route and expected return time.
Riding with a buddy can add an extra layer of safety.
5. Do I need a special license to ride a motorcycle in the US?
Yes, to ride a motorcycle in the U.S., you need a motorcycle endorsement on your driver's license. This typically requires passing a written test and a skills test.
Requirements can vary by state, so check the specific regulations where you plan to ride. Some states offer motorcycle safety courses, which can be beneficial for new riders.
Completing such a course might also waive the skills test and provide insurance discounts.
If you're visiting from another country, ensure your international driving permit is valid for motorcycles.
6. Can I rent a motorcycle for these trails?
Yes, renting a motorcycle is a great option if you don't have your own. Many rental companies are located near popular trails and cities.
They offer a variety of bikes to suit different riding styles, from cruisers to sports bikes.
Make sure to book in advance, especially during peak riding seasons. Check the rental agreement for mileage limits, insurance coverage, and any additional fees.
You'll need a valid motorcycle license and a credit card for the rental.
Renting allows you to explore different trails without the hassle of transporting your own bike.
7. Are there accommodations along these routes?
Yes, you’ll find a range of accommodations along these routes, from campgrounds to luxury hotels.
Many trails pass through small towns with charming bed and breakfasts.
National parks often have campgrounds, but they can fill up quickly during peak seasons, so it's wise to book ahead.
Some routes, like Route 66, feature vintage motels that offer a nostalgic experience.
Research accommodations in advance to ensure availability and to find places that match your budget and preferences.
Conclusion
Exploring these best motorcycle trails in US offers the adventure of a lifetime.
With stunning landscapes and unique experiences, each trail invites you to discover the beauty of the USA on two wheels.
Remember to ride safely, respect nature, and enjoy the journey!
Introduction to rider to pillion intercoms
As a motorcyclist, I understand the thrill of exploring the outdoors on motorcycles. It is truly a great pleasure to hit the open road, feel the wind in your hair, and explore unknown areas.
However, communication between the rider and the pillion (passenger) can be challenging when riding. Shouting over the roar of the engine and the rush of wind can be frustrating and even dangerous.
Fortunately, rider to passenger intercoms have emerged as a game-changer and won popularity now.
They allow riders to achieve seamless communication and enhance their overall riding experience.
In this guidance, we'll dive into the world of budget rider to pillion intercoms. We will explore their benefits, factors to consider, and introduce you to the renowned Fodsports brand.
Also, there will be several in-depth reviews of some of their top-performing models.
These will help you make an informed decision when selecting the perfect intercom for your needs.
Benefits of using a rider to pillion intercom
Investing in a rider-to-pillion intercom can enhance your riding experience in many ways:
Effortless Communication:
With a high-quality intercom system, you can easily communicate with your pillion. You can share insights and directions, or enjoy casual conversation without straining your vocal cords.
Enhanced Safety:
Clear communication between rider and pillion can help enhance your safety on the road. You can share important information or warnings in time.
Shared Experiences:
A rider and passenger intercom enables you to share the joy of the journey with your passenger. You can point out scenic vistas, discuss the route, or enjoy the camaraderie of the ride together with the intercom.
Music and Audio Sharing:
Many modern intercoms are able to stream music or audio from your smartphone or other devices. With them, you and your pillion can enjoy your favorite tunes or podcasts while on the go.
Overview of Fodsports as a reliable intercom brand
Fodsports is a leading brand in the world of motorcycle communication systems. This brand is renowned for its innovative products and commitment to quality.
Rider safety and convenience are the most important factors Fodsports always focuses on.
Fodsports has consistently delivered reliable and feature-rich intercoms that cater to the needs of both budget-conscious and premium riders.
In this guide, we'll explore some of Fodsports' best motorcycle intercom for rider and passenger.
We will review them according to their unique features, capabilities, and value propositions.
Whether you're a seasoned rider or new to the world of intercoms, there must be one that can suit your demand.
Fodsports T1: A New Rider to Pillion Helmet Intercom with More Abilities
One of the reasons I recommend it is its replaceable stickers. Fodsports offer 5 colorful stickers in the package. You can choose the color that suits your helmet color, making the overall appearance more beautiful and attractive.
With only $54.99, you can get all the functions and abilities you usually need.
Last weekend, my wife and I went for an outdoor ride and decided to try out our new Fodsports T1 devices on our helmets.
The installation was quick and simple. Fodsports offer all the installation accessories in the packaging box. We clipped the unit onto each helmet and attached the microphone near our mouths.
We noticed clear, crisp sound quality, even at speeds up to 80 miles per hour.
We tested the intercom stability over winding country roads and it stayed connected without any dropouts.
The built-in noise cancellation did a great job filtering wind noise, and the long-lasting battery easily powered our six-hour ride.
Next, we tried the FM radio function. Tuning into local stations was easy, with solid reception and minimal static.
It also paired effortlessly with our smartphones for music playback. And, the music sharing is also perfect. We listened to many Taylor Swift songs together.
Overall, the Fodsports T1 proved reliable, comfortable, and perfect for hands-free communication.
Value for Money
The Fodsports T1 is a great value-for-money choice for couples and 2-riders. If you want reliable communication without breaking the bank, the T1 can be your first option.
At just $54.99, it offers a clear two-way intercom up to 1000 meters—ideal for riding with a buddy.
You get Bluetooth 5.4, noise reduction, music sharing, FM Radio, and IP67 waterproof. With so many features available, it is usually found in pricier models.
The battery lasts up to 25+ hours, making it perfect for long rides. Simple to use and install, it brings solid performance at an affordable price.
For budget-conscious riders, the T1 delivers excellent quality and essential features without the high cost.
Bluetooth Mesh Intercom.
Dual Bluetooth Chip Design.
10 Riders Group Audio, 2000m Distance!
HRSQ Mic and Speakers, CVC + ENC + DSP Noise Cancelation.
Listen to Music/GPS and Intercom At the Same Time.
IP67 Waterproof.
FM Radio, Music Sharing, Voice Commands.
Sharing music between you and the passenger sitting in your back seat
User Experience:
I recently tried the Fodsports FX7 Bluetooth mesh intercom while riding along the Pacific Coast Highway in California. The experience was great.
The intercom provided clear sound quality and stable connections throughout the ride.
Setting it up was straightforward, and it easily connected with my friends’ devices.
Intercom between 2 FX7 are using Bluetooth mesh communication. Since there is mesh tech, it connection stability is much more better. Even when we ride at high speed(nearly 120 km/h), the connection and intercom quality are still clear and stable.
Also, I tried its intercom function between the FX7 and M1-S Plus on my wife's another helmet.
Actually, this time they are using Bluetooth tech to pair and connect.(Because the M1-S Plus is not a mesh intercom)
She sat on my back seat while we were riding. The audio quality is perfect, clear and stable even at nearly 110 km/h high speed.
The battery lasted the entire day, which was impressive. We enjoyed seamless communication even in areas with slight elevation changes.
The Pacific Coast Highway offered stunning ocean views, and the FX7 made it easy to share the experience with others.
Its noise-canceling feature worked well against the wind. Overall, this motorcycle intercom for rider and passenger enhanced our ride, making it more enjoyable.
Value for Money:
The Fodsports FX7 offers exceptional value for its price point among those mesh intercoms. It is an attractive option for budget-conscious riders who demand quality and performance.
Starting at $129.99 for its single pack (before using a coupon code), you will get the most budget Bluetooth mesh intercom in the market.
With its robust feature set and reliable performance, there is no reason we should ignore it.
We recommend this intercom system as the best motorcycle intercom for riders and passengers.
For riders seeking a budget-friendly rider to pillion intercom, the Fodsports M1-S Air is an excellent alternative.
This entry-level 2-6 rider intercom from Fodsports provides a reliable and affordable communication solution.
If you usually ride alone or just with one partner, it is worth owning it. It will bring you most of the essential functions with the best budget.
M1-S Air Key Features:
Support 2 to 6 riders talk at the same time
Share The Same Music With the Passenger/ Rider
QCC chip with Bluetooth 5.0 tech
HIFI sound quality
CVC Noise Reduction Talk In Natural Voice
3 Sound Effects, Voice Command, Voice Prompt
Listen to FM Radio, 76-108MHz
Receive GPS instructions from your smartphone / GPS navigator
IPX65 Waterproof
900mAH battery capacity works longer time
User-friendly audio motorcycle helmet
User Experience:
Using the Fodsports M1-S Air helmet intercom with my friend Frank was a great experience.
The device made communication easy while we rode through the stunning Valley of Fire State Park in Nevada.
Besides, the sound quality of M1-S Air is clear and with no noise or disconnection even at 70 mph high speeds. And the 900 mAh big battery makes sure it can last throughout our journey.
I must say, the noise cancellation capabilities may not be as advanced as its higher-end models, M1-S Plus. But, the M1-S Air still provided a satisfactory level of audio quality.
Moreover, the simple controls allowed us to focus on the road without distractions. We enjoyed discussing the scenic views and planning our next stops without needing to pull over.
As a motorcycle intercom for riders and passengers, it allowed seamless communication, enhancing both safety and enjoyment.
Overall, the Fodsports M1-S Air made our ride more enjoyable and safe as we explored the vibrant red rock formations and winding roads.
Value for Money:
The Fodsports M1-S Air is an excellent rider to pillion intercom choice for riders on a tight budget. Starting at 60.99 for its single pack, and you will get essential features and rugged construction, the M1-S Air is really affordable.
I recommend it as an attractive option for those who prioritize functionality and affordability.
Fodsports FX4 Pro: The advanced features of a mid-range rider to pillion intercom
2 to 4 Riders Group Conversation
1000 Meters Mid-range Rider to Passenger Headset!
3.5mm Headphone Jack for More Use.
IP67 waterproof, FM Radio, Voice Command.
If you're seeking a more advanced rider to passenger intercom with a range of cutting-edge features, the Fodsports FX4 Pro is a compelling choice.
This 4-6 riders intercom combines top-notch performance with a user-friendly design. For riders who demand the best budget rider to pillion intercoms, FX4 Pro is an excellent investment.
Have a conversation with your passenger on your back pillion or other riders.
Stream music or any audio from your phone to your helmet.
Wind noise microphone cancelling
Hi-Fi Stereo 40MM speakers
Hands-free access to voice commands
850mAh Long Battery Life
Make or receive a phone call hand-free.
Listen to the FM radio
User Experience:
The Fodsports FX4 Pro is a great Bluetooth helmet intercom for 4-6 riders medium group riding.
My riding club partners, Henry and Martin, and I recently used it on a scenic route through the Columbia River Gorge in Oregon.
Thanks to its intuitive and user-friendly design, the FX4 Pro is easy to connect with other Bluetooth devices. And, I must say, it is very functional and convenient to use.
Besides, the intercom made communication easy and clear. When I need to communicate with Henry, who rode another motorbike following me, it is very efficient.
Sometimes my wife on the pillion wants to talk to me or share music with me, we all achieve it through the FX4 Pro.
The sound quality is excellent, we can share directions and enjoy music seamlessly.
Besides, its 850 mAh battery life is impressive, lasting throughout our day-long ride.
We appreciated the hands-free feature, which kept us focused on the road.
8 Riders Group Communication Intercom, 2000 Meters Distance!
Noise Reduction Function & Hi-Fi Stereo Sound Quality.
FM Radio, Music Sharing, Voice Command.
Universal Pairing.
The Fodsports FX8 is a remarkable intercom system designed for motorcycle riders.
It's perfect for those who need efficient communication between a large group of riders and their pillions.
With BT5.0 tech, it ensures clear and stable connections and various extra functions.
Anyway, the Fodsports FX8 is a standout choice for its price range.
FX8 Key Features:
8 Riders Group Intercom
CVC noise reduction technology
Hi-Fi Stereo Sound Quality
Hands-free & Multi-function keys
Bluetooth 5.0
900 mAh ultra-capacity lithium battery
FM Radio/GPS and Communication & IPX5 Waterproof
Music Sharing Function
Language Switching Function
Three kinds of sound effects function
Have a conversation with your passenger on the pillion or other riders
User Experience:
On a recent riding tour in California, I had the chance to use the FX8. I ride with another 7 riders the my riding club I join into.
I am equipped with the FX8, and they have Fodsports M1-S Pro, FX8 Pro and devices from other intercom brands.
My FX8 is easy to pair with their devices, even though they are using devices from other brands.
Besides, the intercom sound and music sound are also very perfect. That's because it is equipped with CVC noise reduction tech and Hi-Fi Stereo sound quality mic.
Based on my test, the FX8 can achieve around 1000 meters on a long-distance intercom.
It is not only an option for budget rider and passengers intercoms. It is also one of the essential motorcycle gear when you are riding with a large group.
All its advanced functions allow us to communicate effortlessly while enjoying the scenic routes.
Value for Money:
Considering its features and performance, the Fodsports FX8 offers exceptional value for money.
It combines reliability and affordability, making it a smart investment for any rider.
With its user-friendly design and robust features, it provides everything you need for a safe and enjoyable riding experience without breaking the bank.
Customer reviews and feedback on Fodsports intercoms
To better know about Fodsports intercoms, it's essential to consider customer reviews and feedback. Here's a snapshot of what riders have to say about the various Fodsports models:
Fodsports FX7:
"I was hesitant about investing in a budget motorcycle intercom, but the Fodsports FX7 exceeded my expectations. The audio quality is crystal clear, and the Bluetooth mesh tech makes group rides a breeze. Highly recommended for riders on a budget." - John D.
Fodsports M1-S Air:
"While the M1-S Air may lack some of the advanced features, it still delivers reliable performance and clear audio quality. If you're looking for a capable 2-6 rider intercom without breaking the bank, the M1-S Air is a solid choice." - Michael T.
Fodsports FX4 Pro:
"The Fodsports FX4 Pro is a game-changer for rider-pillion communication. The advanced noise cancellation and voice control features make it a joy to use. And, the extended battery life ensures uninterrupted communication during long rides. Worth every penny!" - Sarah W.
Fodsports FX8:
"As an 8 rider group intercom, the Fodsports FX8 has exceeded my expectations. It's easy to set up, offers decent audio quality, and the IP67 rating ensures it can withstand the elements. A great value for the price compared with intercoms from other brands." - Emily R.
These customer reviews and feedback highlight Fodsports as a trusted brand in the rider to pillion intercom market.
Each model offers a unique combination of features, performance, and value to cater to various rider needs and budgets.
Conclusion and final recommendations for the best budget rider to pillion intercom
Finding the best budget rider and passenger intercoms can be a daunting task. But with the right information, you can make an informed decision that aligns with your specific needs and budget.
If you're seeking a budget option with essential features and reliable performance, choose Fodsports M1-S Air or FX4 Pro.
And, the Fodsports FX7 and FX8 are better choices for riders seeking advanced features and performance.
Fodsports has proven itself as a trusted brand in the rider to pillion intercom market. These intercoms offer a range of options to cater to various rider needs and budgets.
Ready to take your riding experience to the next level and enhance communication with your pillion?
Come and visit the official Fodsports website today.
Explore their range of rider to pillion intercoms, compare features, and take advantage of their competitive pricing.
Don't let communication barriers dampen your adventures! Invest in a Fodsports intercom and enjoy seamless connectivity on every ride.
Remember, the best rider to pillion intercom is the one that meets your specific requirements, budget, and riding style.
With this comprehensive guide, you now have the knowledge and insights to make an informed decision.
Now, let's unlock a world of effortless communication on the open road.
What are the best adventure motorbikes in the market for this year? Which bike is the king of adventure? Let's explore them from this article!
Adventure motorbikes, often called ADV bikes, are the perfect blend of versatility and excitement.
These adventure bikes are designed to conquer both paved roads and rugged terrains. So, these bikes are ideal for riders seeking exploration and thrill.
In 2025, the adventure motorbike world offers a range of options, you can find various options.
Each of them is equipped with unique features tailored to different riding experiences.
Whether you're planning a long-distance journey or a weekend off-road escapade, there's a bike to match your needs.
In this article, we'll explore the top adventure motorbikes of 2025 for you to learn about this motor type.
We will highlight their key specifications, pros, and cons to help you find your perfect ride.
A Quick View of the Best Adventure Motorbikes in 2025
Top Heavyweight Adventure Bikes (1000cc+)
BMW R 1300 GS Adventure
Ducati Multistrada V4 S
KTM 1390 Super Adventure S Evo
Harley-Davidson Pan America 1250 Special
Top Middleweight Adventure Bikes (600cc–950cc)
Triumph Tiger 900 Rally Pro
Yamaha Ténéré 700
Ducati DesertX Discovery
Honda XL750 Transalp
Top Lightweight & Budget Adventure Bikes (Below 600cc)
CFMoto Ibex 450 (450MT)
KTM 390 Adventure R
Royal Enfield Himalayan 450
What is an Adventure Motorbike?
Adventure motorbikes, often called ADV bikes, are designed to handle both paved roads and rugged terrains.
They are built for versatility, offering features like robust suspension, durable frames, and high ground clearance.
These bikes are perfect for long-distance touring, city commuting, and off-road adventures. Besides, most of the ADV motorbikes are equipped with luggage-carrying capabilities.
Pros and Cons of Adventure Motorbikes
Pros
Versatility: Adventure bikes are designed for both on-road and off-road riding. Thus they can offer flexibility in various terrains.
Comfort: These bikes often come with comfortable seating and ergonomics. For long-distance travel, adventure motorbikes are very suitable.
Durability: ADV motorbikes are usually built with robust materials. So they are designed to withstand tough conditions and rough handling.
Storage Options: Many adventure motor models come with panniers or have options for additional luggage. This feature makes them ideal for travel and touring.
Advanced Features: They are often equipped with advanced technology like ABS, traction control, and adjustable suspension. These features can improve your riding safety and performance.
. High Ground Clearance: Suitable for uneven terrains and obstacles, providing greater versatility off-road.
Cons
Height: Some of the adventure bike models can be tall. It might be challenging for shorter riders when stopping or maneuvering at low speeds.
Weight: They are generally heavier than other types of motorcycles. This can be a drawback in technical off-road situations.
Cost: Adventure bikes can be expensive to purchase and maintain. Because they usually have complex engineering and advanced features.
Fuel Consumption: Larger engines and heavy build can lead to higher fuel consumption. Compared with smaller motorcycles, this is one of its disadvantages.
Complex Maintenance: Advanced features and technology can require specialized maintenance. Potentially, the service costs will be higher than other kind of motorbikes.
Limited Off-Road Performance: While versatile, they may not perform as well as dedicated off-road bikes in extreme off-road conditions.
Top Heavyweight Adventure Bikes (1000cc+)
If you're serious about hitting the road or tearing up some trails, those big 1000cc-plus adventure bikes are where it’s at in 2025.
These machines blend commanding engine performance, advanced electronics, and rugged chassis design. So, they are able to handle everything from high-speed highway miles to remote dirt tracks with confidence and comfort.
Basically, they can suit you for both globetrotting escapades or just want a bike that can handle really tough terrain. Their serious power, go forever tank, sweet suspension, and all the coolest tech will keep you rolling.
#1. 2025 BMW R1300GS
BMW R1300GS - won the "2025 Best Adventure Motorcycle" award from Cycle World magazine
In 2025, the R 1300 GS Adventure was widely considered by experts and motorcycle enthusiasts to be the benchmark in its class. It also won the "2025 Best Adventure Motorcycle" award from Cycle World magazine.
This flagship model has been completely redesigned and features BMW's most powerful boxer engine to date: a 1300cc engine delivering 145 horsepower and 110 lb-ft of torque.
This configuration makes it BMW's most powerful production boxer engine ever, providing powerful yet manageable power on both low-speed off-road trails and highways.
A large 7.9-gallon fuel tank provides a range of over 300 miles.
Electronically adjustable windscreen and standard heated grips provide enhanced rider comfort.
The new EVO Telelever front suspension and EVO Paralever rear suspension offer unparalleled stability, virtually eliminating "dive" during hard braking.
An optional system automatically lowers the bike by 1.2 inches when parked, making this 593-pound machine accessible to a wider range of riders.
In addition, it features an Automatic Shift Assistant (ASA). This new optional semi-automatic transmission offers a clutchless manual mode or a fully automatic "drive" mode, ideal for reducing fatigue on long journeys.
The BMW R1300GS combines power, technology, and comfort. Thus making it a top choice for serious adventurers looking to explore diverse landscapes with confidence.
#2. Ducati Multistrada V4 S
Ducati Multistrada V4 S -- won Motorcycle News' 1000cc+ Adventure Bike of the Year
The Ducati Multistrada V4 S is considered a "superbike" in the adventure motorcycle segment. It recently won Motorcycle News'1000cc+ Adventure Bike of the Year.
This high praise is due to its exceptional performance and advanced technology.
At its heart is a high-revving 1,158 cc V4 Granturismo engine, producing approximately 170 horsepower.
For the 2025 model year, Ducati has optimized this powerful engine, adding a rear cylinder deactivation function (now activatable while riding).
This improvement results in a 6% increase in fuel efficiency and significantly reduces engine heat transmitted to the rider.
Another unique aspect of the V4 S is its advanced electronics and suspension system. It features semi-active Skyhook suspension, which adjusts damping in real-time based on road conditions, adapting to both smooth highways and rough terrain.
Additionally, the bike automatically lowers its ride height at speeds below 6 mph. This technology makes this tall motorcycle easier to handle at low speeds.
The V4 S's advanced radar suite also makes its safety technology class-leading. This is standard on the S model and includes adaptive cruise control, blind-spot detection, and a new forward collision warning system.
Furthermore, its riding interface is highly modern, featuring a large 6.5-inch TFT instrument panel with full map navigation and multiple riding modes including Sport, Touring, Enduro, Urban, and Wet.
While the Ducati Multistrada V4 S is primarily geared towards road riding, its upgraded Enduro riding mode and 19-inch front wheel allow it to handle gravel roads and light off-road sections.
#3. KTM 1390 Super Adventure R
KTM 1390 Super Adventure R
The 2025 KTM 1390 Super Adventure R is the undisputed new king of extreme adventure riding. Evolved from the legendary 1290 model, this motorcycle boasts unprecedented power and off-road capabilities.
As the pinnacle of KTM's off-road adventure series, it's designed for riders who demand ultimate performance on the world's most challenging terrains.
It's built for riders who want a "track-ready" machine, capable of effortlessly conquering both high-speed asphalt and the most demanding off-road sections.
It features a 1350cc, 75-degree V-twin engine producing approximately 171-173 horsepower (hp) and 145 Nm of torque, offering both strong low-end and high-end performance. This power unit utilizes KTM's CAMSHIFT™ variable valve timing technology. This broadens the usable powerband, improving responsiveness on both rough mountain roads and open highways.
The 1390 R utilizes a high-strength chrome-molybdenum steel frame, optimized for tackling rough terrain. Its 48 mm WP XPLOR front forks and WP XPLOR PDS rear shock absorber provide approximately 220 mm of suspension travel. This effectively absorbs off-road impacts while maintaining confident handling on highways.
The bike is equipped with a 21-inch front wheel and an 18-inch rear wheel, both featuring off-road-designed spoked rims, providing excellent grip and handling on gravel, sand, and rocky surfaces.
Another highlight is its 8-inch vertical touchscreen instrument panel, featuring built-in navigation, riding modes, and connectivity functions. It's easily operable even with thick off-road gloves.
With its large-displacement engine, powerful off-road suspension, and modern electronics, the 2025 KTM 1390 Super Adventure R is widely considered one of the top choices for experienced adventure riders.
This motorcycle has firmly established itself as a top contender in the heavy adventure motorcycle segment, proving that Milwaukee can build more than just traditional cruisers.
As a professional, I consider this motorcycle one of the most versatile models of 2025, combining the essence of an American V-twin engine with extremely high standard specifications.
At its heart is the Revolution Max 1250 liquid-cooled V-twin engine, delivering 150 horsepower and 95 lb-ft of torque.
The most prominent feature of the 2025 model is its power delivery: a Variable Valve Timing (VVT) system ensures a broad and flexible powerband. This allows for effortless handling on rough off-road terrain and impressive power on open highways.
What truly sets the Pan America 1250 Special apart is its advanced chassis and technology suite. It features electronically adjustable semi-active suspension that continuously adapts to changing terrain, maintaining stability and comfort on both highways and unpaved roads. The optional Adaptive Ride Height (ARH) feature automatically lowers the seat height by up to 1 inch when stopped for easier footing and raises it at speed for optimal ground clearance.
Cornering safety enhancements, lean-sensitive traction control, and Brembo brakes specifically tuned for mixed terrain significantly improve safety and rider confidence.
A 6.8-inch TFT touchscreen display with Bluetooth connectivity allows riders to easily control riding modes, navigation, and phone functions, even while wearing gloves.
Overall, the Pan America 1250 Special combines power, long-distance touring capabilities, and modern electronics with Harley-Davidson's robust design heritage, making it a reliable and competitive option in the 1000cc+ adventure motorcycle segment for 2025.
Top Middleweight Adventure Bikes (600cc–950cc)
#1. Triumph Tiger 900 Rally Pro
Triumph Tiger 900 Rally Pro
If you are looking for the best adventure motorcycles, then don't miss the Triumph Tiger 900 Rally Pro. It is truly a top-tier adventure motorcycle known for its versatility and performance.
First, its 888cc liquid-cooled, 12-valve, DOHC, inline 3-cylinder engine has attracted many adventurers. With this engine, the Triumph Tiger 900 Rally Pro can deliver 94 horsepower and 64 lb-ft of torque.
Besides, its six-speed transmission and a slipper clutch ensure smooth gear changes.
The Rally Pro version includes Brembo Stylema brakes, Showa suspension, and tubeless spoked wheels. These high-end components make it perfect for off-road and on-road adventures.
What's more, it offers multiple riding modes for your adventure motorcycle tour. These include Road, Rain, Sport, Off-Road, Off-Road Pro, and a customizable Rider mode.
With TFT display to provide information, advanced tech such as ABS and traction control, there are more...
During a California adventure tour, I had the opportunity to ride the Tiger 900 Rally Pro. The bike handled beautifully on both highways and dirt paths.
Its power delivery was smooth, and the suspension absorbed bumps effortlessly.
Riding through winding roads, the bike felt stable and responsive, giving me confidence to tackle various terrains.
The adjustable windscreen and comfortable seat made long rides enjoyable.
On off-road sections, the bike's capabilities shined, with traction control and ABS enhancing safety.
The intuitive TFT display kept me informed without distraction.
In general, I recommend the Triumph Tiger 900 Rally Pro as one of the best adventure motorbikes on this list.
The Yamaha Tenere 700 is a standout adventure motorcycle known for its versatility and rugged performance.
It features a 689cc parallel-twin engine, delivering a smooth and responsive ride. The bike produces around 72 horsepower and 50 lb-ft of torque.
For both on-road and off-road adventures, this motorbike always promiss you ample power.
Its lightweight frame and compact design make it agile and easy to handle in various terrains.
The Tenere 700 comes with long-travel suspension, providing excellent shock absorption and stability on rough trails. Its 21-inch front and 18-inch rear wheels further enhance its off-road capabilities.
The bike's seat height is 35.8 inches, offering a commanding view of the terrain ahead.
It also features a rally-style cockpit with a clear LCD display, riders can get essential information at a glance.
Moreover, the Tenere 700 is equipped with switchable ABS, allowing riders to tailor braking performance to their needs.
With a fuel capacity of 4.2 gallons, it offers a good range for long journeys.
The bike's design focuses on durability and simplicity, which is ideal for adventure riders.
The Yamaha Tenere 700 is praised for its balance of power, comfort, and off-road prowess.
That's why it is one of the top choice for adventure motorcycling enthusiasts.
#3. Ducati DesertX Discovery
Ducati DesertX Discovery
The Ducati DesertX Discovery has established itself as a top contender in the mid-weight adventure motorcycle segment. Based on Ducati's acclaimed mid-weight adventure platform, it comes fully equipped and ready for adventure straight from the showroom floor.
While the hardcore DesertX Rally model is aimed at extreme off-road enthusiasts, the DesertX Discovery adds essential factory accessories, making it one of the most versatile motorcycles of 2025.
This Italian adventure bike is powered by the proven 937cc liquid-cooled Testastretta 11° L-twin engine, producing 110 horsepower and 68 lb-ft of torque.
The DesertX Discovery excels on both paved roads and off-road terrain. It's the perfect choice for riders seeking exceptional performance in a rugged, adventure-ready motorcycle.
Compared to the standard DesertX, the Discovery boasts a more comprehensive adventure equipment package. Standard upgrades include reinforced handguards, engine and radiator protection, a taller touring windscreen, heated grips, a center stand, and turn-by-turn navigation via Ducati Link.
All of these features are designed to enhance comfort, safety, and long-distance riding capabilities, providing a comfortable experience right out of the box.
The Discovery's chassis and suspension are designed for dual-purpose use. It features adjustable KYB long-travel suspension and 21-inch front/18-inch rear spoked wheels fitted with Pirelli Scorpion Rally STR tires.
This provides reliable handling on gravel, dirt, and highways.
The motorcycle's electronic rider aids are also impressive. Multiple riding modes, cornering ABS, traction control, cruise control, Ducati Wheelie Control, and a clear 5-inch TFT display provide all the information you need at a glance.
Overall, the Ducati DesertX Discovery combines strong off-road capabilities, touring comfort, and everyday practicality. For 2025, it is widely considered one of the top mid-weight adventure motorcycles available.
#4. Honda XL750 Transalp
Honda XL750 Transalp
Main Specs:
Engine: 755cc Liquid-cooled OHC 4-stroke 8-valve Parallel Twin with 270° crank and uni-cam
Seat height: 33.5 inches (850mm)
Top speed: 127 mph (205 km/h)
Weight: 459 lb. (208 kg)
Class: Middle Weight Adventure touring
Fuel capacity: 16.9 L (4.46 US gal.)
The Honda XL750 Transalp is a standout in the middleweight adventure bike category.
It features a 755cc parallel-twin engine, delivering smooth power and impressive torque. This makes it perfect for both on-road and off-road adventures.
The bike also boasts a comfortable seat and an upright riding position, which is ideal for long rides.
Its suspension system is designed to handle rough terrains, you can easily deal with those difficult routes.
And, the bike's lightweight frame ensures easy maneuverability. For most adventurers, XL750 is easy to control.
Richard, my team partner, recently took the XL750 Transalp on a ride along U.S. Route 50 in Nevada."
He found the bike's performance exceptional, especially in maintaining stability and comfort during long stretches.
The bike handled well in the varied terrain, from smooth asphalt to gravelly paths.
The Transalp’s fuel efficiency was a bonus, allowing riders to travel longer distances between stops.
Besides, the bike’s windscreen and fairing provided good protection against the elements. Believe me, you will find your journey more enjoyable with it.
Moreover, Richard appreciated the bike's user-friendly controls and responsive handling.
Overall, the Honda XL750 Transalp proved to be a reliable and versatile companion for adventure explore.
Top Lightweight & Budget Adventure Bikes (Below 600cc)
#1. CFMoto Ibex 450 (450MT)
CFMoto Ibex 450 - most affordable lightweight adventure motorcycles
The CFMOTO Ibex 450 has revolutionized the lightweight adventure motorcycle market and has quickly become one of the most attractive lightweight adventure motorcycles for 2025.
It's one of the most affordable motorcycles of 2025, especially for riders who want strong off-road performance without breaking the bank.
It's powered by a 449cc liquid-cooled parallel-twin engine with a 270° crankshaft, producing approximately 44 horsepower and 32.5 lb-ft of torque.
This is sufficient for exhilarating off-road riding and comfortable highway cruising, all in a compact and easy-to-handle package.
Despite its affordable MSRP (around $6,500), the Ibex comes equipped with features usually found on premium adventure motorcycles.
These include a 5-inch TFT display with Bluetooth connectivity, switchable ABS and traction control, an adjustable windscreen, handguards, a skid plate, and LED lighting.
These features make it a versatile motorcycle, equally capable of handling mixed-terrain touring and everyday riding.
The key to the Ibex 450's standout performance in its class lies in its adventure-focused chassis and suspension system.
It features fully adjustable KYB suspension with 8 inches of travel front and rear, and tubeless spoked wheels with a 21-inch front and 18-inch rear.
This provides riders with exceptional grip and handling stability on gravel, dirt, and forest trails.
If you want to experience true adventure without the high cost and heavy weight of larger displacement motorcycles, the CFMOTO Ibex 450 is the ideal choice. In 2025, it's recognized as one of the best value-for-money adventure motorcycles under 600cc on the market.
#2. KTM 390 Adventure R
KTM 390 Adventure R
The KTM 390 Adventure R has officially arrived, establishing itself as the most capable off-road machine in the lightweight adventure bike segment.
It is widely considered the top-tier lightweight and affordable adventure motorcycle in the 400cc class, combining powerful performance with true off-road capability.
The 2025 "R" model is a completely redesigned machine from the ground up, inspired by KTM's Dakar Rally-winning race bikes.
It sets a new benchmark with its improved 399cc LC4c single-cylinder engine, producing 44 horsepower and 28.8 lb-ft of torque.
Compared to many of its competitors under 600cc, the Adventure R's biggest differentiator is its professional adventure chassis and suspension system.
It features fully adjustable WP Apex suspension with approximately 230mm of travel, and 21-inch front/18-inch rear spoked wheels.
This combination provides reliable handling across a variety of terrains, from gravel roads to fire roads and light single-track.
Surprisingly, the Adventure R also integrates many modern rider aids typically found on larger motorcycles. These include a clear 5-inch TFT display, ride-by-wire throttle, multiple riding modes (Street, Off-road, Rain), lean-angle sensitive ABS and traction control, and even optional cruise control.
So, you might ask, it must be expensive, right? No, its suggested retail price is only approximately $6,900.
Therefore, for riders who want true multi-purpose performance without breaking the bank, the KTM 390 Adventure R is undoubtedly one of the best lightweight adventure motorcycles under 600cc.
#3. Royal Enfield Himalayan 450
Royal Enfield Himalayan 450
The 2025 Royal Enfield Himalayan 450 redefines the lightweight adventure motorcycle segment and is widely considered one of the most powerful and affordable lightweight adventure motorcycles of 2025.
As a professional, I consider it the gold standard for "pure motorcycle riding." It offers everything needed for global adventures at a price significantly lower than its European competitors, with a suggested retail price starting at approximately $5,799.
It's powered by a 452cc liquid-cooled single-cylinder "Sherpa" engine, producing approximately 40 horsepower and 40 Nm of torque.
The Royal Enfield Himalayan 450 delivers smooth, usable power in urban, highway, and off-road environments. Therefore, it's perfect for riders who want true adventure capability without spending a fortune or dealing with excessive complexity.
Royal Enfield has equipped the Himalayan 450 with technology and features usually only found on larger motorcycles.
You'll enjoy a full-color TFT display with Google Maps navigation and smartphone connectivity, ride-by-wire throttle with multiple riding modes, and switchable rear-wheel ABS for off-road control, among other features.
The motorcycle features long-travel suspension and adventure-oriented ergonomics, with a 21-inch front wheel and 17-inch rear wheel fitted with robust tires.
This allows for confident handling on gravel, mud, and rocky trails while maintaining comfort on paved roads.
Furthermore, it boasts a 17-liter fuel tank, typically providing a real-world range of over 400 kilometers, making it ideal for multi-day trips.
If you're on a budget but want a motorcycle capable of global travel, this lightweight and economical adventure motorcycle is the perfect choice.
FAQs
What's the best adventure motorcycle for tall riders?
For riders ~6′+ or taller, big adventure motorbikes with 34″+ seat heights are better options. They can provide the most legroom, upright comfort, and versatility for long journeys and off-road riding.
Here are some of the best adventure motorcycles for tall riders based on seat height, comfort, and expert recommendations:
BMW R1250GS Adventure: Legendary long-distance ADV with adjustable high seat (~35″+) and roomy riding position ideal for riders over 6′.
Honda Africa Twin: Great ergonomics and adjustable seat (~34.3″); excellent balance of size, comfort, and off-road ability.
Yamaha Tenere 700: Middleweight option with tall seat (~34.6″), narrow profile and great off-road performance.
KTM 890 Adventure: Sporty, tall ADV (~35″ seat) with advanced tech and handling.
Triumph Tiger 1200 Rally Pro: One of the tallest adventure bikes (~35.4″+) for very tall riders seeking maximum legroom.
What's the best adventure motorcycle for short riders?
Shorter riders (especially under ~5′7″) should look for lighter, lower-seat ADVs around 30–33 inches seat height for confidence at stops and easier control.
The following are some of the best adventure motorcycles for shorter riders based on seat height, ease of handling:
BMW G 310 GS – Compact ADV with a low seat (~32″), light & easy to ride.
Kawasaki Versys-X 300 – Lightweight and adventure-ready with a seat around ~32″, great for beginners.
Royal Enfield Himalayan 450 – Rugged, simple bike with a manageable ~32–33″ seat height.
Triumph Tiger 900 GT Low – Factory-lowered version of Tiger with ~30–31″ seat height, premium features.
Suzuki V-Strom 250 – Small engine ADV with a ~31.5″ seat height and easy handling.
What's the best adventure motorcycle for new riders?
For beginners, lightweight, low-power adventure bikes (250–400 cc) are usually the best choice. These models provide balance, predictable handling, and confidence whether learning on pavement or easy trails.
Here is a trustworthy snapshot of the best adventure motorcycles for new riders:
BMW G 310 GS – Compact, manageable 313 cc ADV with a moderate seat and ABS; great first adventure bike that’s stable on road and gravel.
Honda CRF300L / CRF300LS – Light, simple, long-travel suspension; ideal if you want real off-road ability without intimidation.
Kawasaki KLX230S – Easy-to-ride dual-sport with forgiving power and low weight.
Yamaha TW200 – Ultra-low seat and fat tyres make slow-speed control easy; less highway focus but fun and confidence-building.
KTM 390 Adventure & Versys-X 300 – Small-engine ADVs with more street power and modern features if you want a bit more performance.
What's the best adventure motorcycle for an A2 licence?
For A2 licence holders, look for adventure bikes around 350–500 cc and ≤ 35 kW power. They provide manageable performance, good comfort, and versatile riding for both on-road and light off-road adventures.
Here are some adventure motorcycles that are ideal for riders with an A2 licence (must be ≤ 35 kW / 47 bhp or built A2-compliant):
Honda NX500 – Smooth 471 cc twin with ~47 bhp, great comfort, and capable on road/gravel alike—one of the most recommended A2 adventure bikes.
Royal Enfield Himalayan 450 – Rugged and simple 452 cc ADV with ~40 bhp; good balance of off-road ability and price.
CFMoto 450MT – Lightweight (~175 kg), easy to ride, and modern features make it ideal for new A2 riders.
KTM 390 Adventure – Light, agile 399 cc ADV (~45 hp) that’s fun and confidence-inspiring for touring and mild off-road.
Zontes ZT350-17 – Smaller 350 cc adventure bike with tech features and easy handling.
What's the best adventure motorcycle for touring?
For long touring, big adventure bikes with strong engines, comfortable ergonomics, and tech like cruise control and robust suspension are the perfect ones. They make rides easier and more enjoyable on long paved and unpaved journeys.
I will recommend that you consider the followings:
BMW R 1300 GS – A top choice worldwide, blending comfort, strong engine, advanced electronics, and stability for highways and gravel alike.
Triumph Tiger 1200 Rally Pro – Big tank, shaft drive, rider aids, excellent for loaded touring.
KTM 1290 Super Adventure – Powerful (~1300 cc) with great suspension and tech for long hauls.
Honda Africa Twin CRF1100L – Reliable, comfortable, and capable on varied terrain.
Suzuki V-Strom 1050DE – Balanced touring/road comfort with proven reliability.
What's the best adventure motorcycle for pillions?
For two‑up adventure touring, choose bikes with wide seats, strong suspension, and good wind protection. The big GS, Tiger 1200, Versys 1100 and V‑Strom series are consistently recommended for pillion comfort.
Top Adventure Bikes for Two‑Up Riding:
BMW R 1300 GS Adventure – Excellent balance of power, smooth ride and suspension that adjusts for a rider + passenger; comfy passenger seat with optional backrest.
Triumph Tiger 1200 Rally Explorer / GT – Big ADV with heated seats, adjustable suspension and large luggage options — great for long two‑up tours.
Kawasaki Versys 1100 / Versys 650 – Versys line has broad, well‑cushioned pillion seating and stable handling for two‑up highway rides.
Suzuki V‑Strom 1050DE / 650 – Comfortable midsize adventure bikes with upright ergonomics and good weather protection for passengers.
Harley‑Davidson Pan America 1250 – Strong torque, optional electronic suspension lowering making boarding easier for pillions.
Conclusion
The best adventure motorbikes in 2025 offer riders an exciting blend of performance, technology, and versatility. Each bike has unique features that cater to different riding styles and preferences. From powerful engines to advanced electronics, these bikes are built to handle a variety of terrains and conditions.
Choosing the right motorbike depends on your needs and the type of adventure you seek. Consider factors like engine size, suspension, and technological enhancements. Your choice should match your riding experience and the routes you plan to explore.
By knowing what each bike offers, you can make an informed decision and find the perfect ride for your rides. Embrace the open road and the thrill of discovery with these outstanding machines.
What are the best half helmet communication system for motorcycle riders in 2025?
Have you found your best half helmet communication system?
Have you ever heard "Sorry, our helmet communication system does not fit your half helmet"?
Are there communication systems suitable for half helmets? Yes, there are.
When riding a motorcycle, communication is key. For those wearing half helmets, finding the right communication system is essential when riding with others.
Having a reliable communication system can make your ride smoother and more enjoyable.
Whether you're on a long road trip with friends or just commuting, they are always efficient tools.
In this article, I will introduce several best half helmet communication system from Fodsports.
As a well-known motorcycle intercom brand, Fodsports has released many functional and advanced products.
Keep exploring, I will bring you into the half-helmet communication world.
Best Half Helmet Communication System of 2025
Quick View of the Best Half Helmet Communication Systems:
The Fodsports T1 is a new Bluetooth intercom released by Fodsports in May 2025. It is a worth buying intercom for half helmets if you usually ride with one partner.
The budget-friendly, but full of functions, is the main reason why I list it as the first recommendation.
Main features of T1:
Bluetooth 5.4 Technology
Support 2 Riders Talk At the Same Time
One-Click 3 Modes Switching
1000m Intercom Range
Professional CVC + DSP noise reduction technology
HiFi Stereo Sound Quality
5 Stickers for Appearance Style Change
Music Sharing Between 2 T1
Automatic Answering Calls
FM Radio
Universal pairing
IP67 Waterproof
Recently, I got a pair of Fodsports T1 for testing.
I've been using the Fodsports T1 Bluetooth intercom with my half helmet, and it's easily one of the best I've tried.
The sound quality is super clear, even when riding at high speeds, and the noise cancellation works great.
It connects quickly to my phone, and I can listen to music, GPS on the phone. Sharing music to my wife's T1 is also easy to operate and stable.
With just a single battery charge, the T1 lasts all day.
What I love most is how easy it is to use, even with gloves on.
It fits perfectly with my half helmet setup and stays in place.
Reasons Why I Recommend Fodsports T1?
With only $54.99 for a single pack, you can get a 2-way intercom with multiple functions. If you're looking for a reliable intercom for open-face riding, the Fodsports T1 is definitely worth it.
Fodsports T1 Pro - 2025 Newest 4-6 Riders Group Intercom
Compared with T1, the T1 Pro upgraded the intercom distance and intercom numbers. And, it can support group intercom mode.
For 2 riders communication, the T1 Pro can support 1000 meters intercom distance. As for 4 to 6 riders group communication, the intercom distance can be enlarged to 2000 meters.
It can support 4 riders quick pairing with a single click. And the 5th and 6th riders can still join the riding group, but will need extra manual operation.
Main features of T1 Pro:
Bluetooth 5.4 Technology
Support 2 to 6 Riders Talk At the Same Time
One-Click 4 Modes Switching
1000m Intercom for 2 Riders, 2000m Intercom for 4-6 Riders
Professional CVC + DSP Noise Reduction Technology
HiFi Stereo Sound Quality
5 Stickers for Appearance Style Change
Music Sharing Between 2 T1 Pro
FM Radio
Automatic Answering Calls
Universal pairing
IP67 Waterproof
Riding with the Fodsports T1 Pro has been a great experience for me and my friends.
It works really well with half helmets and is perfect for group rides. We usually ride in a group of 4 to 6, and the intercom keeps us all connected clearly, even at high speeds.
The sound quality is clear, and the battery lasts long enough for a full day of riding.
It’s easy to use, even with gloves on, and the noise reduction helps a lot in wind.
For medium group rides, the T1 Pro has become one of the best Bluetooth intercoms I recommend.
Fodsports FX7 - Bluetooth Mesh Intercom Suitable for Large Group Intercom
Fodsports FX7 Bluetooth mesh intercom - best half helmet communication system
Bluetooth Mesh Intercom.
Dual Bluetooth Chip Design.
10 Riders Group Audio, 2000m Distance!
HRSQ Mic and Speakers, CVC + ENC + DSP Noise Cancelation.
Listen to Music/GPS and Intercom At the Same Time.
IP67 Waterproof.
FM Radio, Music Sharing, Voice Commands.
Music Sharing Between Two Riders Siting on Front and Back Seat
Large Battery Life
Music Sharing, FM Radio, Voice Command Function
IP67 Waterproof Level
2000 Meters Long Distance Intercom
Pair with Half Helmets (also suits full helmets)
I got the opportunity as the Fodsports Ambassador to experience this latest intercom in advance.
Installing the Fodsports FX7 on my half helmet was surprisingly easy. Fodsports provided installation clips and necessary accessories in the packing kit box.
The comfort was great, as the speakers sat nicely against my ears without causing any pressure. The microphone was clear and picked up my voice even with background noise.
Using it while riding was seamless, and the sound quality was impressive. Thanks to its noise-cancellation technology, the audio is crisp and pure.
Overall, the FX7 enhanced my rides, keeping me connected with my group without any hassle. It’s a solid choice for anyone needing a reliable communication system on your half helmet.
Why Choose FX7?
If you frequently ride in large groups and need a reliable, long-range system, the FX7 is a fantastic choice. Its durability and sound quality make it a favorite among riders.
Fodsports FX8 Pro: Ideal for 8-10 Riders Intercom on Half Helmets
FX8 Pro motorcycle Bluetooth intercom suitable for half helmet
Dual Bluetooth Chip Design.
10 Riders Group Communication, 2000m Distance!
Support Pairing with Fodsports Connect APP.
Optional HRSQ Mic and Speakers, CVC + ENC + DSP Noise Cancelation.
Listen to Music/GPS and Intercom At the Same Time.
IP67 Waterproof.
FM Radio, Music Sharing, Voice Commands.
The old version FX8 Pro, can support 6-8 riders intercom.
In 2024 autumn, Fodsports released the new version FX8 Pro by upgrading its Bluetooth chip. Now, the new FX8 Pro can support up to 10 riders communication, making it ideal for large group riding talk.
In 2025, Fodsports upgraded the FX8 Pro again. Now, their latest version FX8 Pro V2.1 can support pairing with Fodsports Connect APP.
Through the APP, riders can easily set and control the intercoms, music audios, FM Radios, etc easily.
For intercom using, riders can pair with other intercoms with a single click in the APP. What's more, you can also add your friend's device into the friend list in the APP. Next time, just click it, you will be able to pair with your friend's device easily.
The music settings in the APP also allow riders to switch songs, change volume, etc.
The APP also support riders to store up to 6 of their favorite FM Radio channels. Next time when they want to listen to FM Radio, they can directly choose their favorite channel.
As one of the star intercom systems of Fodsports, it has attracted great attention since it appeared in the market.
It is also one of the top options I recommend as the best helmet communication for half helmet riders.
FX8 Pro motorcycle intercom supports a max communication distance of 2000 meters.
Main features of FX8 Pro:
8 to 10 Riders Group Intercom & Universal Pairing
Share The Same Music With the Passenger/ Rider
Support Fodsports Connect APP
Dual Chip Design
Noise-Reduction Technology
Three Music Effects: HiFi Bass, Popular Golden Classic, and Pure Human Voice
One-click quick pairing for 8 riders
Ambient Mode & Voice Command, Voice Prompt
Built-in FM
IP65 Waterproof
Provide both hard/boom microphones for half helmet
Also has soft microphones for full helmet
Language switch (English/Japanese)
Why Choose FX8 Pro for your half helmet?
Last year, I bought the Fodsports FX8 Pro for one of the half helmets I mostly use, and it fit perfectly.
After one year of use, the unit was still securely installed on the half helmet and did not have any problems.
The hard(boom) microphone worked great, picking up my voice clearly, even with wind noise.
During rides, the audio quality was impressive, with crisp sound and effective noise cancellation.
Overall, using the FX8 Pro made communication smooth and enjoyable. It's a fantastic option for half helmet motorcycle enthusiasts wanting to stay connected while riding.
If you want a balance between performance and convenience, FX8 Pro is the right choice! Its strong audio quality and solid battery life are big pluses.
Fodsports V6S: Best for 4-6 Small Group Intercom on Half-Helmet
The Fodsports V6S is designed for smaller group communication, accommodating 4-6 riders. It's an excellent option for those who often ride with a close-knit group of friends.
Some riders prefer to ride with a single partner or solo rides with occasional communication. Then I recommend the Fodsports M1-S Air, a perfect 2-rider helmet intercom.
Some Fodsports customers who own the old M1-S Air know that it is a 2-way intercom.
Yes, that's the past!
Now, the new version M1-S Air(V1.2) can support up to 6 riders communication!
New version(V1.2) can also support 4-6 riders group talk
Music sharing with the passenger/ rider
QCC chip Noise-reduction talk in a natural voice
3 sound effects, voice commands, voice prompt
FM Radio/GPS and Communication
IPX65 Waterproof
900mAh battery capacity works longer time
User-friendly and low-cost audio motorcycle helmet intercom
Why I Recommend M1-S Air
I bought the pink color Fodsports M1-S AIR for my wife's half helmet last year. It is really beautiful to pair with my wife's white helmet, perfectly fitted.
She is satisfied with the speakers, very comfortable and sits nicely against her ears. The boom microphone also works well, capturing her voice clearly even with wind noise.
I rode with her on the weekend about 15 times in the past year. So far, the M1-S Air keeps working well and does not bring us dissatisfaction.
If you want to buy a 2-rider intercom for your female partner, you can consider the pink one. It is really beautiful and fashionable, and can pair with most half helmets with different appearance colors.
Now that the new M1-S Air is on the market, I am planning to buy a few more with my friends. The next time I ride with them, we can use the latest M1-S Air to intercom together.
What to Consider When Choosing a Communication System for Half Helmets?
When choosing a half helmet communication system, pay attention to the following aspects:
Compatibility: Ensure the intercom system is compatible with half helmets. Not all systems fit well, so look for ones that specify this feature. Normally, a boom microphone is always essential.
Sound Quality: Wind noise can be a big issue. Choose a system with good noise cancellation and clear audio.
Ease of Use: Consider systems with intuitive controls, especially if you'll be adjusting settings while riding.
Battery Life: Long battery life is crucial for extended rides. Look for systems that offer at least 10-12 hours of talk time.
Range: Depending on your riding habits, range can be a critical factor. Systems vary from a few hundred meters to several kilometers.
Group Size: Think about how many riders you'll typically be communicating with. Some systems are better for larger groups, while others suit smaller ones.
Weather Resistance: Ensure the system can withstand various weather conditions. The IP65 and IP67 waterproof levels will be important if you may ride on rainy or snowy days.
Now, let's dive into some of the best communication systems for half helmets available in 2025.
Choosing the best half helmet communication system can greatly enhance your riding experience.
Consider your typical group size, the intercom distance, and other features like sound quality and battery life.
Also, you need to make sure the communication system is compatible with your half helmet.
Each Fodsports model offers unique advantages, suits for different group sizes and demands.
From the FX7 Bluetooth mesh intercom for large group intercom to the M1-S Air for 2-riders intercom, there is one that suits you.
No matter your choice, investing in a reliable communication system will keep you connected, safe, and enjoying the ride.
Best motorcycle intercom with camera - Fodsports FX30C Pro review and test experience
When it comes to enhancing your riding experience, a high-quality motorcycle intercom with a camera can make all the difference. Let's enter the Fodsports FX30C Pro, the best motorcycle intercom with camera option. It is a cutting-edge device designed to bring convenience, safety, and entertainment to your rides.
In this review, I'll delve into the features of the FX30C Pro and share my personal tests and experiences.
Keep reading, I will demonstrate to you why this intercom is the best choice for riders.
2 Way Helmet Intercom with Camera, 1000M Distance!
120° Wide-angle Lens, HD 1080P Camera & 360° Rotation Shooting.
Large Battery, Ideal for Long Rides.
Music Sharing, FM Radio, Voice Command.
Video Shooting Ability of Fodsports FX30C Pro, the Best Motorcycle Intercom with Camera
One of the standout features of the Fodsports FX30C Pro is its video shooting ability.
As a rider who loves documenting my journeys, this feature is truly helpful for me.
It is a combination of an intercom and a video camera. That's why it immediately caught my attention when I first noticed it.
The FX30C Pro allows you to capture every exhilarating moment of your ride with ease.
I can document my adventures without needing an additional camera.
Whether you're cruising through scenic landscapes or navigating challenging terrains, the FX 30C Pro is always reliable.
My Test about this function
On a recent trip through the mountains in California, I mounted the FX30C Pro on my helmet. And I was amazed by the quality of the footage.
The camera captured crystal-clear videos, and the voice is also very pure.
So I can relive those moments and share them with friends and family.
The convenience of having a built-in camera means fewer gadgets to worry about and more focus on the ride.
HD 1080P Camera: Crystal Clear Recording
The FX30C Pro is equipped with an HD 1080P camera, providing excellent video quality.
I believe you know that 1080p high definition is the top display format for digital TVs.
It is still the mainstream choice because it balances image quality and file size.
High definition means high clarity. This is important for riders to capture detailed scenery and important moments during their ride.
When riding at high speed, the high-definition video-capturing ability is more crucial.
During my California riding trip, I used the FX30C Pro's camera function both in day and night.
In the daytime, the camera captured vibrant colors and sharp details, and the video quality is quite clean.
I also tested its camera ability at night. Surprisingly, it worked and did very well.
The camera's performance was equally impressive, with minimal noise and clear visibility.
Thanks to this motorcycle intercom with camera, I got several stunning landscape videos.
When I go back from the trip, I can't wait to see how these videos.
I transferred these videos to my computer and wanted to see how they would look on my 27-inch screen.
Finally, it is quite adjective, the footage remains sharp and good.
This versatility makes the FX30C Pro a reliable companion for all types of rides.
Fodsports FX30c Pro camera shooting feature
360° Rotation Shooting: Versatile Angles
The FX30C Pro is able to rotate the camera 360°, which is really a game-changer. You can adjust the camera angle to capture different perspectives freely and conveniently.
Whether it's a forward-facing view, a rearview, or even a side angle, the FX30C Pro will camera as you want.
This flexibility ensures that you can document your ride from various angles on the road.
I would like to say, it adds lots of dynamic elements to my videos.
360° rotation shooting feature of Fodsports FX30C Pro - motorcycle helmet intercom with camera
Testing the function of this motorcycle intercom with camera
While riding through a winding coastal road, I experimented with different camera angles.
Sometimes, I turn it towards the front, so that I can capture the beautiful scenery in front of me.
Also, when I turn my head towards the ocean, the FX30C Pro also helps grasp these breathtaking views.
Also, I turn this intercom towards the back occasionally. It will help me record some of the curves in the road, or when I leave a straight stretch of road.
Believe me, when you turn the camera towards the back, you can also get some amazing pictures.
Sound Effects
The camera functions of Fodsports FX30C are not the only advantages. Its essential function is still a motorcycle helmet intercom.
This intercom with camera also brings surprise to me with its sound quality.
It offers three distinct sound effects: "HiFi Bass", "Popular Golden Classic", and "Pure Human Voice".
I tested these sound effects during different riding conditions. Both of them are all pretty excellent.
1. The "HiFi Bass" effect added a rich and immersive audio quality to my music, perfect for long highway rides.
2. The "Popular Golden Classic" effect provided a balanced sound, also outstanding. I think it will be an ideal sound option for casual rides around town.
3. The "Pure Human Voice" effect was excellent for intercom conversations. This mode ensures clear and crisp communication with my riding partner.
Both of these sound effects enhance your audio experience. You can choose the one that best suits your preferences and the environment you're riding in.
2 Riders Bluetooth Intercom: Stay Connected
Staying connected with your riding partner is crucial for safety and coordination.
The FX30C Pro supports Bluetooth intercom for 2 riders within a range of 1000 meters.
This feature allows you to communicate effortlessly with your partner.
Plus, with the video-shooting function, I sincerely advise you to bring it with you when riding with your wife/girlfriend.
Let it help you record the beloved and the romantic memories that belong to you and her/him.
Also, it is suitable for a 2-rider small group intercom communication demand. I paired the FX30C Pro with my friend's intercom during my last weekend's ride.
The connection was seamless, and the audio clarity was impressive, even at a distance. And we were able to communicate effectively without any interruptions.
Whether you're planning your next stop or alerting each other about road conditions, this intercom will keep your intercom stable.
Waterproof IP65: Ride in Any Weather
FX30C Pro IP65 waterproof camera motorcycle intercom
Weather conditions can be unpredictable, but the FX30C Pro is prepared for anything.
With its IP65 waterproof rating, this intercom is designed to withstand rain, dust, and other environmental challenges.
This durability ensures that your device remains functional and reliable in different weather.
I tested the waterproof capabilities during a rainy ride in early July. Despite the heavy downpour, the FX30C Pro continued to function flawlessly.
The camera and intercom performance were unaffected. Still, they keep working and do not cause any problems.
According to my personal test, this device can handle adverse weather conditions.
CVC Noise Reduction: Clear Communication
Communication clarity is essential, especially when riding at high speeds.
The FX30C Pro features CVC noise reduction, an advanced modern audio technology.
It minimizes background noise and ensures that your conversations remain clear and intelligible.
I tried to test the sound quality when I was riding at a 110 mph high speed on the Pacific Coast Highway.
The result is perfect, I can still hear my riding partner clearly. Thanks to the noise reduction tech, it effectively filters out the wind and engine noise.
This feature is a significant advantage, particularly for riders who frequently motorcycle travel on highways or in noisy environments.
2000mAh Long Battery Life: Ride Longer
Battery life is a critical factor for any electronic device. The FX30C Pro excels in this aspect with its 2000mAh battery.
This long-lasting battery ensures that your intercom and camera can keep up with your longest rides.
You will not need to worry about it being out of power or needing frequent recharges.
I embarked on a full-day ride from LA to San Francisco to test the battery life. And I kept using it during the whole journey.
Despite using the camera and intercom extensively, the FX30C Pro lasted throughout the day without any issues.
When I approached the Golden Gate Bridge after 6 hours, the FX30C Pro still had nearly 60% of its battery.
The FX30C Pro provides a battery percentage display on your phone, which is truly helpful.
Riders can keep track of and monitor the battery level in real time during long rides.
This also helps to plan your breaks and charging stops effectively, ensuring that your device is always ready for action.
Support Listen to FM Radio: Entertainment on the Go
For those who enjoy listening to the radio while riding, the FX30C Pro supports FM radio.
This is another reason I recommend the FX30C Pro as one of the best motorcycle intercom with camera.
This feature adds a layer of entertainment to your rides. Just tune in to your favorite stations and stay updated with news, music, and more.
Whether it is a long-distance ride or a short ride, this tour will always bring you lots of fun.
I tested the FM radio feature of FX30C Pro during a leisurely ride around town.
The reception was strong, and the audio quality was excellent. Truly, it was a pleasant addition to my ride.
Support Voice Command: Hands-Free Operation
Safety is paramount while riding.
The FX30C Pro supports voice commands, allowing you to use it to wake up various functions of the phone.
Just trigger ” Hey, Siri” or S Voice, and then you will be able to make calls, play music, request GPS navigation, etc.
Without the necessity to touch the phone, this is a safer way to keep your hands on the handlebars.
Also, you can focus on the road and the amazing scenery around you.
This feature ensures that you can focus on the road while still accessing essential functions.
I tested the voice command feature for basic functions like playing music and answering calls.
The voice recognition was accurate, and the commands were executed promptly.
This functionality significantly enhances safety by minimizing distractions and allowing for hands-free operation.
Conclusion: The Ultimate Riding Companion
After extensive testing and real-world use, it's clear that the Fodsports FX30C Pro stands out as the best motorcycle intercom with camera.
It combines high-quality video recording, riding communication, and other versatile features.
These robust performances make it an invaluable companion for any rider.
Whether you're a seasoned adventurer or a casual rider, the FX30C Pro can meet your demand.
It improves your riding by capturing memories, ensuring clear communication and other functions.
2 Way Helmet Intercom with Camera, 1000M Distance!
120° Wide-angle Lens, HD 1080P Camera & 360° Rotation Shooting.
Large Battery, Ideal for Long Rides.
Music Sharing, FM Radio, Voice Command.
Sports motorcycles are known for their high performance, speed, and agility. These bikes are designed for enthusiasts who crave the thrill of riding and the adrenaline rush that comes with it. In this article, we will explore the best sports motorcycles of 2024 from several aspects.
Let's have a general look at the best sports motorcycle for touring, for beginners, for short riders, and for tall riders.
We will also introduce some of the top brands in the sports motorcycle industry. Let's dive in!
What Are Sports Motorcycles?
Sports motorcycles, often referred to as sportbikes, which is very popular worldwide.
They are specifically engineered for speed, handling, and performance. Besides, they feature powerful engines, lightweight frames, and advanced suspension systems.
And, these bikes are usually equipped with aerodynamic fairings and aggressive riding positions. These equipments help enhance their performance and reduce wind resistance.
Key Features of Sports Motorcycles
Powerful Engines
Sports motorcycles often come with high-revving engines that deliver impressive horsepower and torque.
Lightweight Frames
These bikes are built with lightweight materials such as aluminum or carbon fiber. Thus the whole weight decreased and get improvement in agility and handling.
Advanced Suspension Systems
Sports motorcycles feature sophisticated suspension setups. This is to ensure their stability and comfort at high speeds.
Aerodynamic Design
The design of sports motorcycles includes fairings and bodywork that reduce drag and improve aerodynamics.
Aggressive Riding Position
The riding position on a sports motorcycle is typically more aggressive. The riders are usually leaning forward to reduce wind resistance and improve control.
A Full List of the Best Sports Motorcycles in 2024
Below is a list summarizing the best sports motorcycles in 2024:
These motorcycles may have different engine sizes and specifics, and suit different riders. Therefore, the motorcycles in this list are not ranked in any particular order. If there is a model that you like, you can learn more about it.
Best Sports Touring Motorcycle
Sports touring motorcycles are top options for riders chasing both speed and comfort. It combines the performance of sports bikes and the comfort and practicality of touring bikes.
If you want to enjoy long distance travel but don't want to sacrifice speed and agility, they will be the best ones.
Sports Touring Motorcycle Best Option 2024
Kawasaki Ninja 1000 SX
Suzuki GSX-S1000 GT/GX
BMW R 1250 RS
Kawasaki Ninja 1000 SX
Kawasaki Ninja 1000 SX (Source: MotoDeal)
The Kawasaki Ninja 1000 SX is a sporty yet comfortable motorcycle perfect for both long trips and daily commutes.
Its 1,043cc engine delivers strong, smooth power, making it fun to ride on highways and twisty roads.
Besides, this motorbike is equipped with an adjustable windshield and comfortable seat. This sporty design provides good wind protection and rider comfort.
For touring, the Ninja 1000 SX has integrated saddlebags for your gear, very functional. And, the electronic cruise control helps on your long-distance rides.
It also features advanced electronics like traction control and riding modes. These will greatly enhance your safety and adaptability during the tour.
The bike's suspension is adjustable, ensuring a smooth ride on various road conditions.
The Ninja 1000 SX combines performance and practicality, making it a great sports touring motorcycle. It is suitable for both sports and touring enthusiasts.
The Suzuki GSX-S1000 series are sports-touring motorcycles that balance performance and comfort. This motorcycle is equipped with a 999cc engine, delivering plenty of power. If you are looking for spirited rides on highways and twisty roads, it is the right choice.
The bike's throttle response is smooth, making it easy to handle both in city traffic and on open roads.
I have tested raiding this sports touring motor during my trip from LA to San Diego this year.
Its comfortable and upright riding position is truly an ideal and ergonomic design. For long-distance touring, it brings true enjoyment and satisfaction to me.
Besides, the seat is well-padded, and the handlebar position reduces strain on my wrists and back. This makes it great for long trips without causing much fatigue.
What's more, it comes with integrated hard saddlebags. I really appreciate these bags, as they provide ample storage for my gear.
The bike also includes advanced electronics like traction control, ABS, and multiple riding modes. These enhance my safety and adaptability to handle different riding conditions.
The full-color TFT display is also a worth mentioning feature of Suzuki GSX-S1000 GT/GX. It offers clear and easy-to-read information, which is especially helpful during longer rides.
The suspension of the Suzuki GSX-S1000 is fully adjustable, ensuring a smooth and stable ride. Whether on a bumpy back road or a smooth highway, this suspension always brings you a surprise.
The aerodynamic design, with its sleek fairing and windshield, offers good wind protection. Even when you are touring at a high speed, you can still feel very comfortable.
Overall, the Suzuki GSX-S1000 GT/GX is a versatile bike that combines sporty performance with touring comfort. It is a great choice for riders who want the best of both worlds.
BMW R 1250 RS
BMW R 1250 RS
The BMW R 1250 RS is a sports touring motorcycle that offers a blend of power and comfort.
It features a 1,254cc boxer engine, providing strong, smooth acceleration. For both city and highway riding, this sports motorcycle lets your riding be powerful.
The bike's engine has plenty of torque, making it easy to overtake and handle various road conditions.
The R 1250 RS has a comfortable riding position, this is one of the reasons I recommend it. Its adjustable seat and handlebars can reduce strain on long rides.
And, its large and clear TFT display easily shows you information like speed and navigation.
For touring, the bike comes with options for hard saddlebags, offering ample storage space for your gear.
It is also equipped with advanced electronics like Dynamic Traction Control, ABS, and multiple riding modes. The suspension is also adjustable, ensuring a smooth ride on different road surfaces.
Moreover, the bike's aerodynamic design and adjustable windshield provide good wind protection.
I have tried riding it at 110 mph on the California State Route 1. Based on my own experience, the BMW R 1250 RS is a true sports tourer worth owning.
Best sports motorcycle for beginners
Quick view of the best beginner sports motorcycle:
Kawasaki Ninja 400
KTM RC 390
Honda CBR500RR
For beginners, it's important to choose a sports motorcycle that is suitable for you. Remember the following aspects when choosing a beginner sports motorcycle:
Normally, I advise newbie riders to choose a motorcycle with a 300cc to 500cc engine size.
Besides, the lightweight and easy to handle, yet stable at speed one is an ideal sports motorcycle for beginners.
Moreover, consider the seat height according to your body height. Make sure the seat is low enough to allow both of your feet to touch the ground comfortably.
Here are the top picks for beginner sports motorcycles in 2024.
Kawasaki Ninja 400
Kawasaki Ninja 400 - Best sports motorcycle for beginners
The Kawasaki Ninja 400 is a fantastic choice for beginner riders and is known for its balance of power and ease of handling.
With a 399cc parallel-twin engine, it delivers 49 horsepower. This is enough power to be fun but not overwhelming for new riders.
The bike is lightweight, weighing in at 368 pounds, which makes it easy to maneuver.
Its seat height is 30.9 inches, making it accessible for most riders.
The Ninja 400 also has a sleek, sporty design that appeals to many.
See, it completely meets the buying criteria for a beginner sports motorcycle that I mentioned in the above paragraphs.
Overall, it's a reliable, fun, and user-friendly sports motorcycle.
KTM RC 390
KTM RC 390 - beginners sports motorcycle
The KTM RC 390 is a great choice for beginners looking to dive into the world of sports motorcycles.
It’s known for its sharp looks and vibrant colors, making it stand out. The bike is lightweight, which helps new riders handle it easily.
Its 373cc engine delivers a balance of power and control, which suits both city rides and highway trips.
Some riders may think the KTM RC 390 is more aggressive compared to standard bikes. However, that's what a sports motorcycle should be!
Besides, the RC 390 has a comfortable seat, bringing you super comfort even after a long ride.
I must say, the braking system of the KTM RC 390 is reliable, with ABS for added safety. I tried to break it when I sped it to high, and the stop was very comfortable and stable.
The bike’s suspension is firm, offering stability during cornering and at higher speeds.
Fuel efficiency is decent for a sports bike, so you won’t be stopping at gas stations too often.
The digital display is clear and provides all the necessary information like speed, fuel level, and gear position.
Generally, the KTM RC 390 is an excellent entry-level sports bike for new riders. It combines performance, style, and practicality.
Honda CBR500RR
Honda CBR500RR
The Honda CBR500R is a fantastic option for beginner riders wanting a sporty experience. It has a sleek and modern design that appeals to many.
Powered by a 471cc twin-cylinder engine, it offers smooth and manageable power. As a middle-range engine-size sportbike, it is perfect for those new to sports bikes.
This bike provides a comfortable riding position that is less aggressive and more upright. And, the 30.9 in(785mm) seat height is suitable for most newbie riders to handle and control this motorcycle.
The bike’s weight, 192 kg (432lb) is manageable and friendly to most beginner riders. You can easily handle and control this lightweight sports motorcycle even in traffic.
Overall, the Honda CBR500R is a reliable and practical sports motor choice for beginners.
Short riders often face challenges when finding a comfortable and manageable sports motorcycle.
When choosing a sports motorcycle for short riders, consider the seat height first.
Remember, this is the prior factor you need to consider. If necessary, come to the offline store to have a test drive yourself.
A lower seat height helps ensure both feet can touch the ground.
Besides, look for a lightweight bike for easier handling. The bike's weight distribution and balance are crucial for stability.
And, check for a manageable handlebar reach to maintain comfort and control when you are riding.
Here are some of the best options of sports bikes for short riders in 2024.
Honda CBR300R
Honda CBR300R Sports motorcycle
Compared with the Honda CBR500R, the CBR300R is smaller and easier for short riders to control.
The Honda CBR300R is an excellent sports motorcycle for short riders.
It features a 286cc single-cylinder engine, delivering smooth and manageable power.
Basically, it is able to handle the daily commute and weekend canyon runs with equal aplomb.
The bike is lightweight, making it easy for short riders to handle, especially in tight spots and city traffic.
Its 30.7-inch low seat height allows shorter riders to place their feet firmly on the ground. This assures that most riders can control and handle this motor stably and confidently.
For short riders, the CBR300R is a compelling choice for short sports motorcycles.
Indian FTR Sport
Indian FTR Sport - Best short riders sports motorcycle
The Indian FTR Sport is a dynamic motorcycle designed with a blend of performance and style. It is an excellent choice for short riders seeking an exhilarating ride.
Powered by a 1203 cc V-twin engine, the FTR Sport delivers robust performance with 120 horsepower and 87 lb-ft of torque.
This power ensures a thrilling riding experience for most riders. Since it has such a high power, I recommend short riders who are more experienced to experience it.
One of the key advantages for short riders is its relatively low seat height of 32 inches. It provides better ground reach and enhances confidence when stopping or maneuvering at low speeds.
Besides, the bike's agile handling, lightweight chassis and sporty suspension setup are friendly to short riders. These allow for precise control and responsive cornering even if a short rider is riding it.
For both urban commuting and weekend adventures, the Indian FTR Sport is the perfect option.
Overall, the Indian FTR Sport combines power, agility, and rider-friendly ergonomics. It is an ideal sports motorcycle for shorter riders who crave performance without compromising comfort.
The Yamaha YZF-R3 is a versatile sports motorcycle that excels in both performance and accessibility.
It is powered by a 321 cc twin-cylinder engine, the YZF-R3 delivers a smooth and responsive ride with 42 hp. This short-rider sports motorcycle is quite thrilling yet manageable in performance.
With a low seat height of 30.7 inches, the YZF-R3 allows for easier ground reach and boosts rider confidence. No matter it is in stop-and-go traffic or when parking, you can always easy to place both of your feet on the ground.
The lightweight design of the YZF-R3, combined with its agile chassis and sporty suspension, offers excellent handling and stability.
The YZF-R3 also comes equipped with modern features to enhance both safety and convenience.
For example, the digital LCD instrument panel, LED lighting, and advanced braking systems, including ABS.
The ergonomic design of the Yamaha YZF-R3 is another aspect I would like to stand for. This ensures comfort for longer-distance rides without compromising the aggressive sportbike stance.
Overall, the Yamaha YZF-R3 is an ideal sports motorcycle for short riders. For both city commuting and weekend rides, this bike is always a fantastic option.
Choosing the best sports motorcycle for tall riders involves a few key factors.
Tall riders can look for models with a high seat height, usually 32 inches or more.
Besides, you can check for adjustable handlebars and footpegs to ensure a comfortable riding position.
Have a test ride to see if your knees fit well and you don’t feel cramped.
Generally, these sports bikes offer good ergonomics for taller riders. Remember, you should always prioritize comfort and control to enhance your riding experience.
The 2024 best sports motorcycles for tall riders
Yamaha R1
Kawasaki Ninja ZX-10R
Honda CBR 1000RR
Yamaha R1
Yamaha R1
The Yamaha YZF-R1 is a high-performance sports motorcycle known for its power and agility.
It features a 998cc inline-four engine that produces around 200 horsepower. This advanced motorcycle engine provides thrilling acceleration and top speeds.
The bike's top-level six-axis IMU, traction control, and slide control enhance its handling and safety.
For tall riders, the YZF-R1 offers a comfortable 33.7-inch seat height riding position. This height allows for better legroom and a more relaxed posture.
The bike's ergonomics are designed to balance comfort and performance. Even if you are riding this motorbike for long distances, it is still less tiring and comfortable.
The R1's lightweight chassis and adjustable suspension contribute to its excellent cornering capabilities.
Its aerodynamic design reduces drag and improves stability at high speeds. Additionally, the bike comes with powerful brakes for reliable stopping power.
The Yamaha YZF-R1 is a top choice for tall riders seeking a thrilling ride with advanced features and solid comfort.
Kawasaki Ninja ZX-10R
Kawasaki Ninja ZX-10R
The Kawasaki Ninja ZX-10R is a high-performance sportbike in the world of motorcycles,
It is particularly well-regarded because of its success in superbike racing. Here are some key features and details about the Ninja ZX-10R:
It is powered by a 998cc inline-four engine producing around 203 horsepower. Its torque is around 114 Nm and the transmission is 6-speed with a quick shifter.
The ZX-10R has been a dominant force in the World Superbike Championship, with multiple titles won by riders like Jonathan Rea.
For tall riders, the Ninja ZX-10R offers a comfortable riding position with a seat height of 32.9 inches.
This provides adequate legroom and helps maintain a comfortable posture during long rides.
The ergonomics are designed to offer a good balance between comfort and aggressive riding.
If tall riders are looking for a high-performance sports bike with advanced features, the Ninja ZX-10R is an excellent choice.
Honda CBR 1000RR
Honda CBR 1000RR
The Honda CBR 1000RR, also known as the "Fireblade," is Honda's premier sports motorbike.
This giant monster truly blends power, agility, and cutting-edge technology together.
It featured a 999 cc inline-four engine, producing around 189 horsepower.
Traction control, wheelie control, selectable torque control, multiple riding modes, full-color TFT display. These advanced electronics and technologies also help enhance its leading position among sportbikes.
The seat height of the Honda CBR 1000RR is approximately 32.8 inches (833 mm), very suitable for taller riders.
Besides, its riding position is more relaxed compared to other superbikes, offering more legroom.
Some CBR 1000RR models also feature adjustable footpegs and handlebars, providing more comfort.
The CBR 1000RR is an excellent choice for both track and street use. For taller riders who seek comfort without compromising performance, the CBR 1000RR is the top option.
In 2024, the motorcycle market offers a wide range of best sports motorcycle options. They provide different engine sizes, competitible performance to suit different needs and preferences.
Whether you're looking for a sports touring motorcycle, a beginner-friendly bike, or a model suited for your height, there's something for everyone.
Yamaha, Kawasaki, Honda, Suzuki, and BMW continue to lead the industry with their innovative and high-performance motorcycles.
Choose the one that best fits your requirements and enjoy the thrilling experience that only a sports motorcycle can provide.
Fodsports FX7 vs FX 10C: which one will you choose?
Fodsports, a well-known name in the intercom world, offers two popular mesh intercom models: the FX7 and the FX 10C. Both are mesh intercoms, but they have unique features that set them apart.
The FX7 is the latest Bluetooth mesh intercom from Fodsports, released in July 2024. It is packed with advanced technology for a seamless communication experience.
The FX 10C is a high-end mesh intercom that has been a favorite among riders for its performance and ease of use.
In this blog, we'll compare the FX7 and FX 10C to help you decide which one is the best fit for your riding needs.
Bluetooth Mesh Intercom.
Dual Bluetooth Chip Design.
10 Riders Group Audio, 2000m Distance!
HRSQ Mic and Speakers, CVC + ENC + DSP Noise Cancelation.
Listen to Music/GPS and Intercom At the Same Time.
IP67 Waterproof.
FM Radio, Music Sharing, Voice Commands.
About FX7, I would like to say some more words about several of its main features.
Firstly, its dual Bluetooth chip design is outstanding in the market.
One of the chips will focus on Bluetooth audio, the other one will handle Bluetooth intercom.
The task separation design makes sure both the audio and intercom functions operate efficiently and seamlessly.
Secondly, the 3 quick pairing modes of Fodsports FX7 are also very functional.
The two-rider intercom mode supports a secure intercom between 2 riders. When you and your partner use this mode, no others can enter your intercom. Whether you're riding with a partner or a friend, this mode ensures a private and clear communication line.
Another pairing mode is the multi-rider intercom friends mode. It is designed for group communication among multiple riders. Under this mode, you can ask the riders who are familiar to join and form a group. The others who are not in this group will not be able to join in.
The multi-rider intercom mode allows all riders to automatically join your group to intercom.
Thirdly, I must stand for the Fodsports FX7's audio and sound quality.
Equipped with CVC+ENC noise reduction tech, plus with HIFI microphone and speaker, the FX7 will bring you a clear and pure sound effect.
The stereo high-resolution sound quality has been adjusted by Fodsports' professional audio debugging technical team and senior tuners.
Fourthly, the multi-rider mesh AD-HOC NETWORK is also a worth-mentioning feature.
Fodsports FX7 multi-rider AD-HOC network feature
When a group of riders intercom with FX7, any rider who leaves or enters the group will not affect the intercom with other friends.
This is because all the riders are connected with each other in this group. No matter who leaves, the other riders are still connected and will not be influenced.
FX7 brings much more to riders. Due to space limitations, I will not introduce them one by one here.
Interested riders can go to the Fodsports FX7 page for more details. You can also read the following introduction articles about the FX7 product launch:
Mesh Intercom, Bluetooth 5.0, 2000m Intercom Range.
10 Mesh Intercom Channels, Unlimited Connection Number.
Listen to Music/GPS and Talk with Other Riders At The Same Time.
High-quality sound, IP65 waterproof.
Music Sharing, Voice Commands, FM Radio.
The Fodsports FX 10C is a popular mesh intercom that has been sold worldwide. It is a true intercom with mesh technology.
The FX 10C is designed for motorcyclists who want reliable communication on the road. Packed with user-friendly features, the FX10C is perfect for both casual riders and serious enthusiasts.
Here are the main features of Fodsports FX 10C mesh intercom:
The most outstanding feature of the Fodsports FX 10C mesh intercom is its dynamic communication ability.
Its intercom number is not limited. This means that no matter how many riders are riding together, they can all pair and stay connected by FX 10C.
Besides, it can support as many as 10 mesh intercom channels, so the riders can freely switch channels.
With the Fodsports FX10C, you can communicate with other riders over long distances.
It offers a range of up to 1 kilometer in open terrain. This makes it ideal for group rides, allowing everyone to stay in touch even when spread out.
The FX 10C's sound quality is another top feature I want to applaud.
It features noise-canceling technology that filters out background noise, ensuring clear and crisp audio.
Even when you are riding at high speed, your intercom quality and clearance will not be reduced.
The wind noise, engine noise, and other environmental noise will be reduced to make sure your intercom audio is pure and clear.
You can enjoy conversations, music, and GPS directions in high sound quality.
The FX 10C also supports you to listen to music and navigation while you are intercom.
Some riders prefer to listen to music while riding. But the music may stop when you are intercom with other riders.
However, the Fodsports FX 10C supports this! You can keep on listening to music, the GPS navigation guidance, and communicate with your accompanies at the same time!
Fodsports FX7 vs FX 10C Comparison
The FX7 and FX 10C are all mesh communication systems. But they have several special features and advantages.
Mesh technology
The first one is the mesh technology difference between them.
The Fodsports FX7 uses Bluetooth mesh, while the FX 10C uses mesh intercom technology.
They have different pairing ways and networking methods. I believe you can understand from the above two photos. They show how FX7 and FX 10C connect with other intercom devices.
Fodsports FX7 vs FX 10C connection way compare
Connection Stability
Theoretically, the mesh intercom method of FX 10C can support countless intercoms connected together. For large group riding, such as more than 10 riders, FX 10C has a great advantage.
These riders intercom in series with each other, so even if everyone is far apart, FX 10C can stay connected to others in the group through the intercom connected to it. However, if one rider leaves the group, the other riders in this group may be influenced.
FX7 is different from FX 10C. FX7 is connected to every rider in the group. This ensures that it can communicate with each rider individually.
When any rider in the group leaves or joins, it will not affect the communication between the other riders.
I have tested the Fodsports FX7 with my friends; it can pair as many as 10 riders. But I recommend that you control the intercom number to 8 riders at most.
As you know, the intercom stability and quality may go down with the intercom numbers increase. The more intercom numbers, the lower the stability. That's why I do not recommend you pair with too many riders together. (Both FX7 and FX 10C)
Functions
Both Fodsports FX7 and FX 10C have their own special functions.
Firstly, I will show the common functions they both have:
As I have mentioned above, FX7 is equipped with AD-HOC Network technology.
If a rider falls behind during riding and loses intercom, the intercom communication between the other riders will not be affected.
When the rider returns to the group, he will automatically join the group. During the joining process, the communication between the other riders will not be affected at all.
🔥2. Power Display on Your Phone
The Fodsports FX7 gets an upgrade on the power display.
When pairing the FX7 with a smartphone, the battery percentage will be directly displayed on the phone. You can monitor the battery level of your FX7 easily and conveniently.
🔥3. Waterproof level
The FX 10C is equipped with an IP65 waterproof level, while the FX7 has a higher IP67 waterproof level.
I have tested placing a Fodsports FX7 in a water tank to test its waterproof performance. I connect it to my smartphone and let it play music continuously. (So that I can know it is still working normally when I am doing other things.)
It still kept playing the music normally until my phone ran out of battery about 3 hours later. And then I stopped the test.
From this test, I believe that you can know how excellent the FX7's waterproof performance is!
FX7 vs FX 10C - Which Mesh Intercom is Best?
Actually, both the Fodsports FX7 and FX 10C are Fodsports's featured motorcycle helmet mesh intercoms. They have their own features and advantages. By reading about this Fodsport FX7 vs FX 10C comparison article, you can choose according to your specific demand.
If you usually ride in wet environments or on rainy/snowy days, I recommend you choose the FX7. Its IP67 rating allows you to use it with confidence in rainy and snowy weather.
If you ride in a larger group, like more than 10 riders, I recommend that you choose the FX 10C. This mesh intercom will make sure you always stay in connection with other riders in large groups.
So, evaluate your riding style and group size to make the best choice. The FX7 and FX 10C can all offer excellent features tailored to different needs.
Have you wondered what is the most powerful single-cylinder motorcycle for sale?
When it comes to powerful motorcycles, most people think of multi-cylinder engines. However, single-cylinder bikes, also known as "thumpers," are not far behind.
Single-cylinder motorbikes have carved out a niche with their unique blend of simplicity, torque, and raw power.
Today, we dive into the world of the most powerful single-cylinder bikes. Mainly, we will focus on the Ducati Superquadro Mono Engine - Hypermotard 698, which tops the charts.
Also, we will list some of the competitors that are also outstanding in performance.
What Makes Single-Cylinder Bikes Special?
Single-cylinder engines are known for their straightforward design. They offer excellent low-end torque and are often lighter and more agile than multi-cylinders.
This makes them ideal for off-road and motocross riding.
However, don't let their simplicity fool you. Some single-cylinder bikes pack a serious punch.
Ducati Superquadro Mono: The King of Thumpers, Most Powerful Single-Cylinder Motorcycle
Ducati Superquadro Mono, the most powerful single-cylinder engine
At the end of October 2023, Ducati unveiled Ducati Superquadro Mono, the most powerful single-cylinder engine.
This bike is a marvel of engineering, combining raw power with advanced technology.
I would like to say, this bike is not just another addition to their lineup. It also represents a significant leap in single-cylinder motorcycle technology.
Key Specifications of Ducati Superquadro Mono
Engine Configuration: Four-Stroke Single-Cylinder
Capacity: 659cc
Bore x Stroke: 116 x 62.4 mm
Horsepower: 77.5 horsepower at 9,750 rpm; 85 horsepower at 9,500 rpm with Termignoni racing exhaust
Torque: 46.4 pound-feet at 8,050 rpm; 49.4 pound-feet with Termignoni racing exhaust
Transmission: Six-speed
Compression ratio: 13.1:1
Unmatched Power and Performance
Ducati Superquadro Mono - the most powerful single cylinder motorcycle
The Ducati Superquadro Mono boasts a staggering 85 horsepower when equipped with the Ducati Racing Exhaust.
Even without this upgrade, the engine delivers an impressive 77.5 horsepower at 9,750 rpm and 46.4 pound-feet of torque at 8,000 rpm.
This makes it the most powerful single-cylinder production motorcycle in the world.
Advanced Engineering
What sets the Superquadro Mono apart is its advanced engineering. The 659cc engine is designed with precision, ensuring optimal performance and durability.
Besides, Ducati has utilized cutting-edge materials and technologies on this engine. These ensure that this bike can performs exceptionally well and reliable under various riding conditions.
Lightweight and Agile
Most single-cylinder bikes is lightweight, the Superquadro Mono is no exception.
Its design ensures that the bike remains agile and easy to handle. Thus making it perfect for both city rides and spirited track sessions.
What's more, the bike's lightweight construction also contributes to its impressive power-to-weight ratio.
All these overally enhanced the performance of this engine.
Ducati Superquadro Mono engine - Hypermotard 698 parts
Perfect for Enthusiasts
For motorcycle enthusiasts, the Ducati Superquadro Mono offers a unique blend of power, agility, and advanced engineering.
If you're looking for a high-performance bike, the Superquadro Mono is an excellent choice. It is suitable for both seasoned riders and the newcomers.
Its powerful engine ensures thrilling rides. Meanwhile, its sophisticated design provides comfort and ease of use.
Why It Stands Out
Performance: No other single-cylinder bike comes close to the power and performance of the Hypermotard 698.
Build Quality: Ducati is known for its high-quality craftsmanship, and this bike is no exception. Every part is meticulously designed and built to last.
Riding Experience: The bike is not just powerful; it's also incredibly fun to ride. Whether you're on a track or a winding road, the Hypermotard 698 delivers a thrilling experience.
The Ducati Superquadro Mono isn't just about raw numbers. Its design ensures a smooth power delivery and excellent handling, making it a versatile choice for both city rides and off-road adventures.
The 659cc engine, when paired with the Ducati Racing Exhaust, can produce up to 85 horsepower. That's why it is the most powerful single-cylinder engine available today.
The Competition
While the Ducati Superquadro Mono leads the pack, several other single-cylinder bikes also offer impressive performance.
Here, we will introduce several competitors of Ducati Superquadro Mono.
They may not be as impressive as the Ducati Superquadro Mono, but they are still the best single-cylinder motorcycles in the world.
KTM 390 Engines
KTM Duke 390
Power: 44 horsepower
Displacement: 373cc
The KTM 390 series, including the Duke 390 and RC390, are top choices for beginner riders.
Launched in 2013, these bikes boast a 373cc single-cylinder engine with 44 horsepower. They offer excellent handling with WP APEX suspension and high-tech BYBRE braking systems.
Besides, they are affordable and easy to maintain. For most riders looking to build confidence on the road, the KTM 390s are perfect options.
Most of the motorcycle with KTM 390s engine are designed light in weight and responsive performance. So these bikes can provide a thrilling ride without overwhelming new riders.
The KTM 390 series delivers fun and reliability for both city commuting and weekend adventures.
Husqvarna FE 501S
Husqvarna FE 501S
Power: 44.5 horsepower
Displacement: 511cc
The Husqvarna FE 501S is a powerhouse in the off-road motorcycle world, launched in 2020. It features a 511cc single-cylinder engine producing 44.5 horsepower.
For tackling tough trails, Husqvarna FE 501S is the top option.
Known for its agility, the FE 501S has a low center of gravity and lightweight design, weighing only 239 pounds.
Besides, the bike's WP Xplor suspension ensures a smooth ride over rough terrain.
The Husqvarna FE 501S equiped with a carbon composite subframe for added strength and reduced weight.
It is ideal for riders seeking performance and maneuverability in off-road adventures.
Kawasaki KX450
Kawasaki KX450
Power: 53 horsepower
Displacement: 449cc
The Kawasaki KX450 is a top-tier motocross bike, introduced in 2019.
It boasts a 449cc single-cylinder engine producing 53 horsepower, designed for high performance on the track.
The KX450 is known for its race-ready features. It has fully adjustable front and rear suspension, a new cylinder head, and Brembo brakes.
With Kawasaki Traction Control and riding modes, it's adaptable to various conditions.
Lightweight and powerful, this bike is a favorite for serious motocross enthusiasts and trail riders. It offers exceptional agility and control on the track.
Whether racing or trail riding, the KX450 delivers unmatched performance and reliability.
Honda XR 650R
Honda XR 650R
Power: 61 horsepower
Displacement: 644cc
The Honda XR 650R, often dubbed the "King of the Desert," is a legendary dual-sport motorcycle.
It features a 644cc single-cylinder engine producing 61 horsepower. This make sure it excels in both power and durability.
Known for its off-road prowess, the XR 650R has a robust frame and reliable suspension. When you need to ride at rugged terrains, the Honda XR 650R is your go-to bike.
Lightweight and easy to handle, it offers riders excellent control and stability. Whether you're tackling tough trails or cruising on highways, the Honda XR 650R stands out for its versatility and performance.
It is perfect for adventure enthusiasts, and remains a classic favorite.
If you're looking for the most powerful single-cylinder motorcycle, the Ducati Superquadro Mono Engine - Hypermotard 698 is the ultimate choice.
It combines unmatched power, advanced engineering, and a thrilling riding experience. This bike is a testament to what is possible with single-cylinder engines.
Don't just take our word for it. You should experience the power and excitement of the Hypermotard 698 yourself. Then you will truly know how powerful this motorcycle engine is.
In a world where adrenaline junkies seek the ultimate rush, the pursuit of speed knows no bounds. Motorcycles, these two-wheeled marvels, have pushed the boundaries of engineering, aerodynamics, and human endurance. Many motorcycle brands have create machines that defy the very limits of velocity. From the racetrack to the open road, many motorcycles are chasing their fastest speed. These mechanical masterpieces have captured the hearts and imaginations of speed enthusiasts worldwide. In this article, we will explore the fastest motorcycle in the world. Get ready, we will bring you to expeience the highest motorcycle speed.
Quick view about the Top 10 fastest motorcycle in the world:
Fastest motorcycles worldwide
Top Speed
MTT 420-RR
Fastest speed at 273 mph (440 km/h)
Kawasaki Ninja H2R
Verified top speed of 240 mph (380 km/h) and an unconfirmed 250 mph (402 km/h) mark
Kawasaki Ninja H2
209 mph (336 km/h) highest speed
Lightning LS-218
Fastest speed of 218 mph (350 km/h)
Ducati 1299 Panigale R Final Edition
Top speed of 202 mph (325 km/h)
Ducati Panigale V4 R
Highest speed of 199 mph (320 km/h)
Aprilia RSV4 Factory 1100
Top speed of 199 mph (320 km/h)
BMW S 1000 RR
Reach at 188 mph (302 km/h)
Kawasaki Ninja ZX-14R SE
186 mph (299 km/h)
Suzuki Hayabusa
185.79 mph (299 km/h)
1. MTT 420-RR - Redefining Speed: The Pinnacle of Motorcycle Engineering
MTT 420-RR - fastest motorcycle in the world top 1
MTT 420-RR Main Specifications:
Engine: Rolls Royce Allison – 250-C20 Series Gas Turbine
Power: 420 HP @ 52,000-rpm
Torque: ~500 ft/lbs @ 2,000-rpm
Transmission: 2-Speed – Automatic
Lubrication: Dry-sump / 3.5 Qts. Turbine Oil
Frame: Aluminum Alloy
Weight: ~500 lbs
RPM: 6,000 RPM
N1 Speed: 54,000 RPM
Fairings: Carbon Fiber
Rake: 27 Degrees
Colors: Infinite Custom Colors
Fuel: Diesel and Kerosene
Fuel Capacity: 8.5 Gallons (34-liters)
Reserve Tank: 1.5 Gallons (6-liters)
Wheels: 17 Inch Carbon Fiber – Dymag
Wheel Base: 68 Inch
Front Tire: 120 60ZR17 – Pirelli
Rear Tire: 200 50ZR17 – Pirelli
Speed: Fastest speed at 273 mph (440 km/h)
The world fastest bike top 1 is the MTT 420-RR.
At the forefront of this exhilarating realm stands the MTT 420-RR. It is a turbine-powered behemoth that has etched its name in the annals of motorcycle history.
Boasting a mind-boggling top speed of 273 mph (440 km/h), this custom-built marvel is a testament to the relentless pursuit of engineering excellence.
This motorcycle is powered by a Rolls-Royce Allison gas turbine engine, a true force to be reckoned with. It generates a staggering 313kW (420hp) and 500 ft/lbs of torque.
The Price of Exclusivity
While the MTT 420-RR represents the top of speed, its exclusivity comes at a staggering price tag.
Each unit meticulously crafted to order and costing upwards of USD$250,000. So, this bike is a rare gem reserved for the most discerning and affluent speed aficionados.
Its status as the Guinness World Record holder for the most expensive motorcycle in production only adds to its allure and mystique.
Acceleration Redefined
Beyond its blistering top speed, the MTT 420-RR's acceleration is nothing short of breathtaking.
With the ability to catapult from 0 to 60 mph in a mere 2.5s, this turbine-powered marvel defies the laws of physics.
I would like to say, even the most seasoned riders in awe of its raw power and unrelenting thrust.
2. Kawasaki Ninja H2R: The Apex of Production Motorcycles
Kawasaki Ninja H2R - fastest production bike on the market
Kawasaki Ninja H2R Main Specifications:
Class: Track-only sport bike
Engine: Supercharged (two-speed centrifugal) 998 cc DOHC 4-valve inline-4 four-stroke
Bore / stroke: 76.0 mm × 55.0 mm (2.99 in × 2.17 in)
Compression ratio: 8.3:1
Top speed: 400 km/h (249 mph)
Power: 326 hp (243 kW) @ 14,000 rpm
Torque: 156 N⋅m (115 lb⋅ft) @12,500 rpm
Transmission: 6-speed
Frame type: Steel trellis
Suspension: Front: Fully adjustable KYB telescopic fork with steering damper; Rear: single-sided swingarm with monoshock
Brakes: Front: 2 x 330 mm Brembo disc with radial-mount monoblock calipers; Rear: 250 mm Brembo disc with radial-mount caliper
Tires: Front: 120/60 R17 racing slicks; Rear: 190/65 R17 racing slicks
Rake, trail: 25.1°, 110 mm (4.3 in)
Wheelbase: 1,450 mm (57.1 in)
Seat height: 32.7 in (830 mm)
Weight: 215.9 kg (476.0 lb) (wet)
Fuel capacity 17.03 L (3.75 imp gal; 4.50 US gal)
While the MTT 420-RR stands as a beacon of exclusivity, the Kawasaki Ninja H2R has carved its own niche as the fastest production bike on the market.
This track-only masterpiece has a verified top speed of 240 mph (380 km/h) and an unconfirmed 250 mph (402 km/h) mark. It has set the bar for what is achievable in the realm of mass-produced motorcycles.
A Symphony of Power and Aerodynamics
At the heart of the Kawasaki Ninja H2R beats a 998cc in-line four-cylinder supercharged engine. It unleashes a staggering 228kW (310hp) at a mind-numbing 14,000 rpm.
This raw power is complemented by a meticulously crafted aerodynamic design. That's why it ensures that every ounce of thrust is harnessed to propel the bike to unprecedented velocities.
Kawasaki Ninja H2
Kawasaki Ninja H2 Main Specifications:
Class: Street-legal sport bike
Engine: Supercharged (two-speed centrifugal) 998 cc DOHC 4-valve inline-4 four-stroke
Bore / stroke: 76.0 mm × 55.0 mm (2.99 in × 2.17 in)
Suspension: Front: 43 mm telescopic fork, preload-adjustable; Rear: Single shock, preload-adjustable
Brakes: Front: 2 x 330 mm Brembo disc with radial-mount monoblock calipers; Rear: 250 mm Brembo disc with radial-mount caliper
Tires: Front: 120/70ZR17; Rear: 200/55ZR17
Rake, trail: 24.5°, 100 mm (4 in)
Wheelbase: 1,450 mm (57.1 in)
Dimensions: L: 2,090 mm (82.1 in)
Seat height: 32.5 in (830 mm)
Weight: 240.0 kg (529.0 lb) (wet)
Fuel capacity 17.03 L (3.75 imp gal; 4.50 US gal)
I believe many people have watched the movie Top Gun. In 2022 "Top Gun: Maverick", the Kawasaki Ninja H2 Carbon rode by Tom Cruise made this motorcycle attracted many motorcycle enthusiasts.
While the Kawasaki Ninja H2R's performance is undoubtedly awe-inspiring, it is not a machine to be trifled with.
Prospective owners must navigate a series of hoops and pledges. Also, they need to promise to confine their riding exploits to closed-course environments.
For those seeking a more street-legal thrill, the Kawasaki Ninja H2 offers a tantalizing alternative. It has set its own speed records at an impressive 209 mph (336 km/h).
Wheels and Tires: Front: Lightning forged aluminum 3.5″ x 17″, 120/70ZR17. Rear: Lightning forged aluminum 6.0″ x 17″, 190/55ZR17.
Regenerative Braking: Programmable
Seat Height: 32 inches
Transmission: Direct drive motor.
Weight: 495 lbs
Charging time: 30 mins on a DC fast charger. 120 minutes on level 2 charger.
In a world dominated by internal combustion engines, the Lightning LS-218 has emerged as a trailblazer. It claims the title of the fastest street-legal motorcycle.
This beast is powered by an IPM liquid-cooled 10,500 rpm electric motor. This sleek and silent machine can accelerate from 0 to 60 mph in a blistering 2.2 seconds.
Believe me, these gasoline-powered counterparts will be left behand in the proverbial dust.
Efficiency Meets Performance
The Lightning LS-218's electric prowess extends beyond mere speed.
Some motorcycle funs may know about the Pikes Peak International Hill Climb. In 2013, a race-modified version of this bike defeating both gasoline and electric rivals on the race.
How can I say about this? Truly, it defied conventional wisdom.
Soon, it becomes the first vehicle of any kind to win a professional road race using solar power.
This remarkable feat underscores the Lightning LS-218's commitment to efficiency without compromising performance.
Redefining Street-Legal Speed
With a top speed of 218 mph (351 km/h), the Lightning LS-218 has redefined what it means to be a street-legal motorcycle.
Its sleek design and cutting-edge technology have captured the imagination of speed enthusiasts and environmentalists alike.
Thus, it offers a tantalizing glimpse into the future of high-performance electric vehicles.
4. Ducati's Reign: The Panigale Lineage
When it comes to the fastest motorcycles in the world, Ducati must have a position. No list would be complete without paying homage to the masterminds at Ducati.
From the 1299 Panigale R Final Edition to the Panigale V4 R, they all have the fastest speed.
These bikes have set the standard for performance, style, and sheer audacity on the racetrack.
The 1299 Panigale R Final Edition: Ducati's Twin-Cylinder Mastery
Ducati 1299 Panigale R Final Edition
The Ducati 1299 Panigale R Final Edition is a true embodiment of speed and elegance.
With a top speed of 202 mph (325 km/h), this bike is a testament to Ducati's mastery of twin-cylinder engineering. It boasts a Superquadro L-twin cylinder engine that delivers a mind-bending 154kW (209hp) at 11,000 rpm.
The 1299 Panigale R Final Edition is Ducati's most powerful twin-cylinder creation.
Ducati 1299 Panigale R Final Edition Main Specifications:
Transmission: 6 speed with Ducati Quick Shift (DQS) up/down EVO 2
Final Drive: Chain; Front sprocket 15; Rear sprocket 42
CHASSIS
Suspension Front: Fully adjustable 43 mm Öhlins NPX 25/30 pressurized fork with TiN treatment.
Suspension Rear: Fully adjustable Ohlins TTX 36 unit with hydraulic spring preload adjuster. Aluminium single-sided swingarm. Adjustable pivot position +/- 3 mm
Brakes Front: 2 x 330 mm semi-floating discs, radially mounted Brembo Monobloc Stylema® (M4.30) 4-piston callipers with Bosch Cornering ABS EVO. Self bleeding master cylinder.
Brakes Rear: 245 mm disc, 2-piston calliper with Bosch Cornering ABS EVO
In the world of high-performance motorcycles, rivalries are as intense as the machines themselves.
Ducati's dominance has been challenged by the formidable Aprilia RSV4 Factory 1100.
It matches the Panigale V4 R's top speed of 199 mph (320 km/h). In generally, the Aprilia RSV4 Factory 1100 offers its own unique flavor of Italian engineering excellence.
The Longitudinal 65° V-4 Engine: A Masterclass in Power Delivery
At the heart of the Aprilia RSV4 Factory 1100 beats a Longitudinal 65° V-4 cylinder engine.
This motorcycle engine is a masterclass in power delivery and performance. It can produce an impressive 159.5 kW (217 hp) at 13,000 rpm and 125 Nm of torque at 10,500 rpm.
To be honest, this engine is a symphony of precision engineering and raw power.
Aerodynamic Artistry
The engine is undoubtedly the star of the show, I have no doubt about this.
But, the Aprilia RSV4 Factory 1100's aerodynamic design is a work of art in its own right.
This motorbike's sleek lines and aggressive stance is crafted to slice through the air with minimal resistance. That's a testament to Aprilia's commitment to performance and style.
Aprilia RSV4 Factory 1100 Main Specifications:
Engine: 1.099cc, Aprilia longitudinal 65° V-4 cylinder, 4-stroke, liquid cooled, double overhead camshafts (DOHC), four valves per cylinder
Engine Power: 217 HP (159.5 kW) at 13,000 rpm
Torque: 92.19 ft-lbs (125 Nm) at 10,500 rpm
Transmission: Extractable 6-speed – Gear lever with Aprilia Quick Shift electronic system (AQS)
Suspension Front: Sachs fork, Ø 43 mm stanchions, adjustable spring preload, compression and rebound, 127 mm travel
Suspension Rear: Sachs monoshock adjustable: hydraulic compression and rebound damping and spring pre-load, 130 mm travel
Brakes Front: Dual 330-mm diameter floating stainless steel disc with lightweight stainless steel rotor and aluminum flange with 6 pins.
Brembo Stylema® monobloc radial calipers with 4 Ø30mm opposing pistons. Sintered pads. Radial pump and metal braided
brake hose
Brakes Rear: Ø 220 mm disc. Brembo caliper with two 32 mm separate pistons. Master cylinder with built in reservoir and metal braided
hose
Fuel Tank Capacity: 4.75-gal (including 1.05-gal reserve
Color
Headlight: LED
Seat Height: 33.5 inches
Wet Weight: 445-lbs
6. BMW S 1000 RR: German Precision Meets Superbike Prowess
BMW S 1000 RR
When it comes to the fusion of engineering excellence and performance, few brands can match the pedigree of BMW.
The S 1000 RR is a prime example of fastest motorcycle around the world. This motorcycle born from the crucible of the 2009 Superbike World Championship.
Now, it is available for the discerning rider seeking uncompromising speed and handling.
A Lightweight Masterpiece
At the core of the BMW S 1000 RR's prowess lies its lightweight frame and updated 999 CC 16-valve engine.
This potent combination, coupled with an optimized power curve and Dynamic Damping Control suspension, bring us a monster.
BMW S 1000 RR is able to accelerate from 0 to 60 mph in a mere 2.7 seconds, leaving lesser machines in its wake.
German Engineering at its Finest
What sets the BMW S 1000 RR apart is the meticulous attention to detail and unwavering commitment to precision. That is the synonymous with German engineering.
Every component is well designed and crafted. From the finely tuned suspension to the aerodynamic bodywork, all with perfect details.
Trust me, it will deliver you a both exhilarating and confidence-inspiring riding experience.
Front brakes: Dual 320 mm (12.6 in) discs with radially-mounted 4-piston caliper
Rear tyre: 190/55-17
Rear rim: 6.0*17
Rear brakes: Single 220 mm (8.7 in) disc brake with single-piston caliper
Length: 2,056 mm (80.94 in)(2010 to 2014); 2,050 mm (80.71 in) (2015 to 2018); 2,073 mm (81.6 in)(2019 to present)
Width: 826 mm (32.5 in)(2010 to 2018); 846 mm (33.3 in)(2019 to present)
Height: 1,138 mm (44.80 in)(2010 to 2014); 1,140 mm (44.88 in)(2014 to 2018)
Seat height: 820 mm (32.3 in)(2010 to 2014); 815 mm (32.1 in)(2015 to 2018); 824 mm (32.4 in)(2019 to present)
Wheelbase: 1,422 mm (55.98 in)(2010 to 2014); 1,425 mm (56.10 in)(2015 to 2018); 1,441 mm (56.7 in)(2019 to present)
Wet weight: 204 kg (450 lb)(2010 to 2018); 197 kg (434 lb)(2019 to present)
Fuel capacity: 17.5 L (3.8 imp gal; 4.6 US gal)(2010 to 2018); 16.5 L (3.6 imp gal; 4.4 US gal)(2019 to present)
7. Kawasaki Ninja ZX-14R SE: The Apex of the Ninja Lineage
Kawasaki Ninja ZX-14R SE
When it comes to the high-performance motorcycles, the name Kawasaki should be mentioned.
Kawasaki is synonymous with speed, power, and unwavering commitment to pushing the boundaries of what is possible. The Ninja ZX-14R SE is a testament to this legacy, representing the absolute pinnacle of the iconic Ninja lineup.
A Powerhouse on Two Wheels
The Ninja ZX-14R SE is bolstered by a monstrous 1441 CC in-line four-cylinder engine. It can delivers a staggering 154.5 kW (210 hp) at 10,000 rpm and 158.2 Nm of torque at 7,500 rpm.
Comparing with other motorcycles, the Ninja ZX-14R SE is a true powerhouse on two wheels.
Besides, its three-level traction control system ensures that this raw power is harnessed with precision. Thus is allows for smooth and controlled acceleration at any speed.
From 0 to 60 in the Blink of an Eye
The Ninja ZX-14R SE's acceleration performance is nothing short of breathtaking.
It has the ability to catapult from 0 to 60 mph in a mere 2.6 seconds. This blistering acceleration is complemented by a top speed of 186 mph (299 km/h).
Together, they solidify the Ninja ZX-14R SE's status as a true speed demon on the open road.
Electronic Rider Aids: Kawasaki TRaction Control (KTRC), Power Mode, ABS
Transmission: 6-speed, Return Shift
Final Drive: Sealed chain
Suspension Front: 43mm inverted cartridge fork with adjustable preload, 18-way compression and 15-way rebound damping adjustment/4.6 in
Suspension Rear: BBottom-link Uni-Trak® and gas-charged shock with adjustable preload, stepless rebound and
compression damping adjustments, adjustable ride height/4.9 in
8. Suzuki Hayabusa: The Legend That Sparked a Revolution
Suzuki Hayabusa
When discussing the fastest motorcycles in the world, we must mention about Suzuki Hayabusa.
This mechanical marvel was first introduced in 1999. Directly, it shattered speed records for production models, and ignited a "speed war" among manufacturers.
And finally, it prompts the industry to implement a self-imposed speed limit.
The Gentlemen's Agreement: A Temporary Truce
In the wake of the Hayabusa's unprecedented performance, a "Gentlemen's Agreement" was forged.
Motorcycle manufacturers agree to cap the top speed of 1000cc motorcycles at 300 km/h (186 mph) for models produced in the year 2000 and beyond.
While this agreement has since been dissolved, its impact on the industry is undeniable.
The Third Generation: A Refined Legend
Today, the third-generation Suzuki Hayabusa remains a force to be reckoned with. It boasts a top speed of 299 km/h (185.79 mph) and a potent 140kW of power at 9,700 rpm.
Its top speed may be limited by today's electronical technology settings. But, the Hayabusa's legacy as a trailblazer in the world of high-performance motorcycles is etched in stone.
This serves as a reminder of the relentless pursuit of speed and innovation.
Suzuki Hayabusa Main Specifications:
Engine: 1,299 cc (79.3 cu in), 4-stroke inline-four, liquid-cooled, DOHC, 16-valve, Keihin/Denso fuel Injection, wet sump
Bore / stroke: 81.0 mm × 63.0 mm (3.19 in × 2.48 in)
Compression ratio: 11:1
Top speed: 1999-2000: 303–312 km/h (188–194 mph);
2001–2007: 299 km/h (186 mph)
The MTT 420-RR holds the title of the world's fastest motorcycle, with a verified top speed of 273 mph (440 km/h). This turbine-powered marvel is a true engineering masterpiece. And it showcase the pinnacle of what is achievable in the realm of motorcycle design and performance.
2. What is the fastest production bike ever?
The Kawasaki Ninja H2R and the MTT 420-RR itself are considered the fastest production bikes ever. Both machines have been reported to reach top speeds of around 250 mph (402 km/h). The limiting factor often being the tires' ability to withstand such extreme velocities. Remember the movie Top Gun? Kawasaki Ninja H2R is the famous Top Gun motorcycle riding by Tom Cruise in that movie.
3. What is the top speed of the legendary Suzuki Hayabusa?
The Suzuki Hayabusa is a motorcycle that sparked a revolution in the industry. It can reach a top speed of 303 to 312 km/h (188 to 194 mph). The Hayabusa's legacy as a trailblazer in the world of high-performance motorcycles is undeniable.
4. How fast is the fastest motorcycle?
The MTT 420-RR currently holds the record for the fastest motorcycle in the world, with a verified top speed of 273 mph (440 km/h). This remarkable feat is a testament to the relentless pursuit of speed and engineering excellence in the world of motorcycles.
5. Are these high-speed motorcycles street-legal?
Many of the fastest motorcycles in the world are not street-legal in their full race specification.
These machines are designed primarily for track use. In the track, their performance can be unleashed without the constraints of road regulations and safety considerations.
6. What makes these bikes so fast?
The incredible speed of these motorcycles is the result of a perfect harmony between those components.
These include the high-horsepower engines, lightweight materials, aerodynamic designs, and advanced electronic aids.
Each component is meticulously engineered to extract every ounce of performance. Together, these components push these bikes to unprecedented velocities.
Conclusion
In the world of motorcycles, the pursuit of speed is an unrelenting quest. And, it is a dance between human ingenuity and the boundaries of physics.
These fastest motorcycles represent the pinnacle of engineering excellence and the unwavering desire to push the limits of what is possible.
As technology continues to evolve and new frontiers are explored, there will more fast speed motorcycles.
The thrill of speed will continue to captivate the hearts and minds of riders and enthusiasts alike. Moreover, they will inspire the creation of ever-faster and more advanced motorcycles.
So, hold on tight, let the roar of these mechanical marvels be the soundtrack to your pursuit of the ultimate thrill.
Top Gun Motorcycle - Standing out on the Silver Screen
Motorcycles have long been an integral part of Hollywood's action-packed narratives. From the thunderous roar of engines to the adrenaline-fueled chase sequences, you can always find them. That's the allure of two-wheeled motorcycles.
These sleek, powerful machines embody the spirit of adventure, freedom, and rebellion. And, they have captivated audiences with their raw energy and undeniable cool factor. Among the most iconic two-wheeled stars to grace the silver screen, the motorcycles featured in the "Top Gun" franchise stand out. As true legends, they etched their names in cinematic history.
The Legacy of the Kawasaki GPZ900R Top Gun Motorcycle
What is the motorcycle in Top Gun?
In the original "Top Gun" film, released in 1986, Tom Cruise's character, Maverick, was seen racing an old Kawasaki superbike, the GPZ900R.
This motorcycle, affectionately known as the "GPZ," was a game-changer in its era. It is widely regarded as the predecessor of modern sportbikes. Developed in secret over six years, the GPZ900R burst onto the scene in 1985.
Immediately, it won the Isle of Man TT race. Fastly, its cutting-edge technology and blistering performance amaze tens of thousands enthusiasts.
Top Gun Maverick - Tom Cruise Riding Kawasaki GPZ900R
A Technological Marvel
At that time, the Kawasaki GPZ900R was a true technological marvel. It is powered by a 908cc 16-valve inline-4 motorcycle engine with liquid cooling, it produced an astonishing 115 horsepower at 9,800 rpm.
In the mid-1980s, this is a feat that was almost unheard of for a production motorcycle.
But the GPZ900R's innovations didn't stop there.
It was also the first production bike to feature liquid cooling, four valves per cylinder with an overhead valve design, and a variable damping system in the forks, marketed as anti-dive forks.
Record-Breaking Performance
The GPZ900R's performance was nothing short of remarkable.
It could accelerate from a standstill to the quarter-mile in under 11s (a staggering 10.976s, to be precise). At that time, this level of performance was unmatched by any other production motorcycle.
Besides, the GPZ900R became the world's first production motorcycle to cross the 150-mph mark, boasting a top speed of 155 mph.
It's no wonder that Maverick, accustomed to flying supersonic fighter jets, chose this bike for his high-speed antics.
Top Gun motorcycle Kawasaki GPZ900R
A Cultural Icon
Beyond its technical prowess, the Kawasaki GPZ900R etched its name in pop culture history with its appearance in "Top Gun."
Its sleek design, aggressive stance, and unmistakable presence on the big screen captured the hearts and imaginations of motorcycle enthusiasts worldwide.
The GPZ900R became a cultural icon in the past decades. It inspired a generation of riders and solidifying its place as a legend in the world of motorcycles.
The Resurrection: Top Gun Maverick
Over three decades after the release of the original "Top Gun," the highly anticipated sequel, "Top Gun: Maverick," hit the big screens in 2022.
Again, it ignites the passion for high-octane action and adrenaline-fueled storytelling.
And just like its predecessor, the new film featured not one but two iconic motorcycles. This is not only paying homage to the past, but also embracing the future.
Tom Cruise Top Gun motorcycle riding
The Return of the GPZ900R
In a nostalgic nod to the original film, the Kawasaki GPZ900R made a triumphant return in "Top Gun: Maverick."
Two meticulously restored Ninja GPZ 900R legendary motorcycle were provided to the production team.
Finally, the audiences relive the thrill of seeing Maverick astride this iconic machine once again.
The Arrival of the Ninja H2 Carbon
The GPZ900R represented the past. While the 2022 Kawasaki Ninja H2 Carbon embodied the future of high-performance motorcycles.
In the film, four supercharged Ninja H2 Carbon machines were used. Together, these machines showcasing the pinnacle of modern engineering and design.
This carbon-clad beast, with its ultra-lightweight fairing and a staggering 228 horsepower inline-four engine. To be honest, it is the perfect choice to replace the iconic jet-racing scene from the original movie.
A Supersonic Spectacle
The Ninja H2 Carbon's presence in "Top Gun: Maverick" was more than just eye candy. It was also a testament to the relentless pursuit of speed and performance.
With a top speed of 226.9 mph, as recorded by CycleWorld, the H2 Carbon is a true marvel of engineering.
Its sibling, the supersonic H2R, holds the national landspeed record of 226.5 mph.
These numbers further solidify Kawasaki's reputation as a manufacturer of cutting-edge, high-performance motorcycles.
Top Gun movie Tom Cruise
The Enduring Influence of Top Gun Motorcycle
"Top Gun: Maverick" not just win its box office success and critical acclaim. It has had a profound impact on the motorcycle industry and enthusiast community.
The inclusion of iconic bikes like the GPZ900R and the Ninja H2 Carbon has reignited the passion for these machines. And, it also sparked a renewed interest in their history and significance.
A Resurgence of Nostalgia
The return of the GPZ900R has ignited a wave of nostalgia among motorcycle enthusiasts who grew up idolizing this iconic bike.
Many motorcycle collectors and enthusiasts are scouring the market for pristine examples of the GPZ900R. They eager to own a piece of motorcycle history that graced the silver screen.
Inspiring a New Generation
Meanwhile, the presence of the cutting-edge Ninja H2 Carbon has captured the imagination of a new generation of riders.
Its sleek design, incredible performance, and Hollywood stardom have attracted many motorcycle enthusiasts.
Finally, it became a coveted machine among those seeking the ultimate in two-wheeled thrills.
Once again, the "Top Gun" franchise demonstrated its ability to inspire and captivate audiences. In the motorcycle world, Top Gun Motorcycles left an indelible mark, and it will stay in our mind for a long time.
Top Gun Motorcycle Price
The Kawasaki GPZ900R is an iconic sporting activity bike from the 1980s. The cost of sporting activity motorcycle is always higher than those entry level beginner motorcycles.
Finding a specific price for it today can vary widely based on its condition, mileage, and whether it has been restored or modified.
As of recent years, a well-maintained Kawasaki GPZ900R from that era can range anywhere from $5,000 to $15,000 USD. Collectible models in excellent condition or those with significant provenance might fetch higher prices.
As for the second Top Gun motorcycle, the Kawasaki Ninja H2 Carbon, it is easily available on the market. In 2024, the price for a new Kawasaki Ninja H2 Carbon typically ranges from $34,000 to $36,000 USD. Depending on the dealership and any additional options or accessories, the price may vary.
The Future of Motorcycles on the Big Screen
As the curtain falls on "Top Gun: Maverick," the legacy of these iconic Top Gun motorcycles lives on.
Their impact on popular culture and the motorcycle industry is undeniable. And their influence will continue to shape the way we perceive and appreciate these two-wheeled marvels.
With each new Hollywood blockbuster featuring motorcycles, a new generation of enthusiasts is born. These movies are carrying the torch of passion and excitement for these machines.
The future of silver screen motorcycles is bright. We can only imagine the incredible machines and heart-stopping scenes that await us in the years to come.
Whether you're a die-hard fan of the "Top Gun" franchise or a newcomer to the world of motorcycles, it doen't matter.
One thing is certain: these iconic rides have left an indelible mark on our collective consciousness. They will inspire us to chase our dreams, embrace the thrill of the open road.
And, never stop pushing the boundaries of what's possible.
In the realm of two-wheeled freedom, few vehicles evoke the spirit of the open road quite like cruiser motorcycles. These iconic machines always has low-slung stance, rumbling engines, and classic styling. All these features and advantages have captured the hearts of riders worldwide. In 2024, the allure of those best cruiser motorcycles remains as captivating as ever. Many motorcycle brands have unveiled lots of models that blend power, comfort, and timeless aesthetics.
In this article, we will introce the top options of cruiser motorcycles in the market. We will introduce them for both short riders and tall riders. You can choose according to your demand and preferance.
Before viewing the best cruiser motorcycles of 2024, it's essential to understand some basic knowledge about this kind of motorcycle.
What is a Cruiser Motorcycle?
Cruiser motorcycles are designed for comfortable long-distance riding. They usually feature a low seat height, relaxed riding position, and a focus on style and ease of handling. This is their core advantage comparing with other types of motorcycle.
Besides, they often equipped with larger engines, they emphasize torque over high-speed performance. Many riders like the throaty rumble of a V-twin powerplant on the cruisers. These engines not only deliver robust torque and smooth power delivery but also contribute to the unmistakable sound. Nowadays, this sound has become synonymous with the cruiser lifestyle.
Cruisers are ideal for leisurely rides and highway cruising, offering a classic, laid-back motorcycling experience.
The Appeal of Cruiser Motorcycles
Beyond their distinctive styling and performance, cruiser motorcycles offer a unique allure. This resonates with riders across various backgrounds.
For some riders, it's the sense of freedom and independence that comes with hitting the open road. While others are drawn to the rich heritage and cultural significance that these bikes embody.
Cruisers are also renowned for their versatility. They can seamlessly transitioning from daily commutes to weekend adventures and cross-country journeys.
I really appreciate their comfortable ergonomics and ample storage options. For me, just like most riders, it is the ideal motorcycle for long-distance touring.
Besides, their agile handling and responsive power delivery ensure an exhilarating ride, regardless of the terrain.
Factors to Consider When Choosing a Cruiser Motorcycle
With such a diverse range of options available, selecting the perfect cruiser motorcycle can be a daunting task. To help narrow down your choices, here are some key factors to consider when purchasing them:
Engine Displacement and Performance
Cruiser motorcycles come in a wide range of engine sizes in the market.
From compact and nimble 500cc to thunderous 1,800cc behemoths, you can find them. When choosing your ideal cruiser, consider your riding preferences and experience level.
Larger engines offer more torque and acceleration, but they are harder to control. While smaller displacements may be better suited for urban environments or novice riders.
So, consider your own riding skills and ability first, and then make the right choice. Large engine does not mean better, the most suitable one should be your best option.
Ergonomics and Comfort
Comfort is paramount when it comes to cruiser motorcycles. Most time when you are riding a cruiser, you'll spend extended periods in the saddle.
Thus, you need to pay attention to the riding comfortness when you are choosing a cruiser. The seat height, handlebar positioning, and footpeg placement are main factors you should pay attention to.
You can try sitting or riding them, make sure you are relaxed and the riding position is ergonomic.
Besides, some cruisers provide features like adjustable suspension and windshields. They are also worth consider, as these features can further enhance your comfort on long rides.
Style and Aesthetics
Cruiser motorcycles are as much about style as they are about performance. From sleek and modern designs to classic and retro-inspired aesthetics, there's a cruiser to suit your taste.
Consider the overall look and feel of the bike, make sure it resonates with your personal style.
These include the paint schemes, chrome accents, and design elements.
"There are a thousand Hamlets in a thousand people."
So, choose a motorcycle that pleases yourself, don't blindly follow what others say.
Brand Reputation and Reliability
When investing in a cruiser motorcycle, it's essential to consider the brand's reputation. It is best to choose a motorcycle brand that is known for its quality, reliability, and after-sales support.
Also, you should research common issues, maintenance costs, and customer satisfaction ratings of the brand. Make sure you're making an informed decision before finally choose the cruiser brand.
Pricing and Value
Cruiser motorcycles have a wide range of price points in the market. There are both budget-friendly options and high-end, premium models.
Thus, you will need to determine your budget and focus on the features and capabilities that matter most to you. Bese on these aspects, you will get the best value cruiser motorcycle for your investment.
The Best Cruiser Motorcycles of 2024
With these factors in mind, I believe you can know better about how to choose the ideal cruiser for yourself.
Now, let's explore some of the most highly anticipated and top-performing cruiser motorcycles for the 2024 model year.
1. 2024 Harley-Davidson Street Bob 114
2024 Harley-Davidson Street Bob 114
Main parameters:
Bike Type: Cruiser motorcycle
Curb Weight: 653 lbs
Transmission Type: Manual
Gas Tank Capacity: 3.5 gal
Engine Type: V Twin
Seat Height: 26.8 in
Carburetion: Fuel Injected
The 2024 new Harley-Davidson Street Bob 114 is powered by a powerful Milwaukee Eight-114 engine. This engine is lightweight, but it's powerful. Currently, the Street Bob 114 is one of the lightest Softail models equipped with this engine.
The electronic throttle, LED lighting, and redesigned frame are all very friendly upgrades.
Standard features include digital instrumentation and keyless ignition. Four-piston front brakes and dual-piston rear brakes are standard, as is a safety system. ABS is optional.
Overall, the Street Bob is the lightest and most affordable Harley-Davidson softtail cruiser. The low seat height helps accommodate a variety of riders, especially short riders.
Whether commuting to get off work or embarking on an off-road adventure, you can choose the Street Bob 114. It gives you a smooth and comfortable riding experience.
2. Indian Chief Dark Horse
Main Features:
Bike Type: Cruiser
Curb Weight: 764 lbs
Transmission Type: Manual
Gas Tank Capacity: 5.5 gal
Engine Type: V Twin
Seat Height: 26 in
Carburetion: Fuel Injected
You will get everything you need. I have ridden the Indian Chief Dark Horse cruiser motorcycle many times. This minimalist cruiser gives you great fit, power and control.
Here is the configuration of the basic Indian Chief Dark Horse:
Six-speed gearbox
5.5-gallon fuel tank
16-inch alloy wheels
ABS
Four-piston front brakes
Dual-piston rear brakes
Cruise control
Keyless ignition
I have to mention that Dark Horse pays great attention to details. When I first saw this cruiser, I noticed that the welds on its body were very clean. I believe that the treatment of these small details is enough to prove the quality and workmanship of Indian motorcycles.
The weight of 304 kg is also in the weight range of most cruiser-style motorcycles. For most riders, it is easy to control this motorcycle. Moreover, its low seat height of only 662 mm/26.0 inches makes it easy for even short riders to handle it. Mid-set foot pegs, ample seating space, comfortable seat, wide handlebars...it has everything you want!
Overall, the Indian Chief Dark Horse cruiser is a comfortable and enjoyable ride. You’ll have fun controlling it and handling it!
The BMW R 18 is a testament to the continued success of the BMW Motorrad soul. The BMW R 18 Roctane is the fifth 1.8-liter heavy cruiser model.
The R 18 Roctane lacks protective bodywork and high handlebars, but BMW still defines it as a touring conversion. But most R 18 enthusiasts think of it as a R 18 B (Bagger) without a fairing.
It is equipped with an air-cooled 1,802cc engine and 116.5 lb-ft of torque, which is simply powerful.
Besides, the R 18 provides a black finish, a large 21-inch front wheel, a mini apehanger handlebar and a hard-shell luggage. These premium features make it stand out from the crowd of cruiser motorcycles.
In addition, the 720 mm (28.3-inch) racing seat makes this cruiser easy to handle for many riders.
The R 18 is available in a variety of new paint colors for riders to choose from. For many riders who like to express their style in a unique way, this is definitely something they will envy.
I took the standard R 18 for a long trip on the roads of California. By the end of the trip, my butt was numb and uncomfortable.
But once I sat in the racing seat of the Roctane version, I knew it was a different story. I think I could have ridden the same road for more than 100 miles without discomfort.
4. Kawasaki Vulcan S
Kawasaki Vulcan S cruiser motorcycle
Outstanding Parameters:
Bike Type: Cruiser
Curb Weight: 491.7 lbs
Transmission Type: Manual
Gas Tank Capacity: 3.7 gal
Engine Type: Parallel Twin
Seat Height: 27.8 in
Carburetion: Fuel Injected
The Kawasaki Vulcan S series is the quintessential Kawasaki sport cruiser motorcycle. It is also one of our recommendations for the best cruiser motorcycles of 2024.
Unlike other cruisers of the same type, it perfectly blends sport performance and classic cruiser aesthetics. And its appearance combines avant-garde style with retro elements. The aggressive yet elegant appearance will appeal to riders who want to stand out.
The Vulcan S is equipped with a powerful 649cc parallel twin engine with 46.3 lb-ft of torque. The power of this engine is smooth and responsive, making every ride an exhilarating experience. Whether it is commuting or a leisurely day trip, this cruiser is a very suitable choice.
The basic configuration of this motorcycle includes:
Six-speed transmission
Dual-piston front brake
Single-piston rear brake
18-inch front tire
17-inch rear tire
3.7-gallon fuel tank.
The innovative ERGO-FIT® system allows the Vulcan S to provide up to 18 different configurations. Any rider can customize this model to their height and reach. From the seat, footpegs, and handlebars, you can find the best fit for comfort and control.
If you are 5'6" or less, you can set the seat height to a lower level. If you are over 6'1", you can choose to raise the seat height.
We also have to praise the performance of the Vulcan S. This cruiser with standard Ninja® DNA is very light and responsive. It is also equipped with optimal traction and smooth, adjustable rear shock.
I also personally rode this cruiser motorcycle from Huntington Beach in Los Angeles to Oceanside. I felt comfortable and the vehicle was easy to control during the ride. Overall, this cruiser is worth owning.
5. Honda Rebel 1100
Honda Rebel 1100
Honda continues to roll out their Honda Rebel 1100 series of cruiser motorcycles in 2024. The main models are the CMX1100 Rebel and the touring CMX1100T Rebel.
There are no mechanical changes or major updates to these two motorcycles. But it still can't stop most riders from putting it on the list of the best cruiser motorcycles in 2024.
The Honda Rebel 1100 still retains its acclaimed bobber styling. Don't let its simple appearance fool you, it is a cruiser with real performance.
The powerful 80 horsepower 1,084cc parallel twin-cylinder engine is really wild enough. After being tuned, it can provide super bottom and mid-range torque, which makes its power output enough to meet most long-distance riding needs.
In 2023, the Honda Rebel 1100 performed very well in the European custom motorcycle sales rankings. Its popularity on this side of the Atlantic is second only to its younger brother Rebel 500 series.
Honda Rebel 1100 Key Benefits:
mid-mount controls
throttle-by-wire
easy handling
adjustable engine power, and traction control
DCT transmission option
To sum it up, this biggest Rebel is still a top-choice cruiser motorcycle option worth every penny.
The new Speedmaster uses the same 1,200cc parallel twin engine as the T120 and Bobber. And, its 76 bhp and 106 Nm of torque ensure that you always have plenty of power when riding this cruiser.
With a low seat height, a comfortable riding position and high-spec brakes and suspension, you can cruise down any interstate with ease.
For many motorcycle riders, the classic looks of the new Triumph Bonneville Speedmaster will pull at their heartstrings. But this cruiser is more than just a show, there’s a lot of new technology hidden under the hood.
The Yamaha FJR1300AE is our top pick for a high-performance sport cruiser.
This motorcycle has a 1,298cc inline-four engine and a six-speed gearbox with assist and slipper clutch.
Another plus is the smooth, trouble-free transmission (it uses a shaft drive). As long as you don't take it to the track, the shaft drive will never go out of style.
The modern design and rider-centric design make this motorcycle a top choice in the cruiser market.
You won't feel pain or numbness in your hands when riding this motorcycle. Some riders may find it uncomfortable to ride this cruiser because their knees are bent too much. But from what I have experienced, raising the seat height slightly can solve this problem.
Compared with other brands of cruiser motorcycles, it is not inferior at all.
If you are looking for long-distance riding comfort and want a high-performance cruiser at the same time, choosing the Yamaha FJR1300AE is a good idea.
Conclusion: Best Cruiser Motorcycles 2024
2024 Harley-Davidson Street Bob 114
Indian Chief Dark Horse
BMW R 18 Roctane
Kawasaki Vulcan S
Honda Rebel 1100
Triumph Bonneville Speedmaster
Yamaha Sport Touring FJR1300AE
Cruiser Motorcycles Pros and Cons
Pros of Cruiser Motorcycles
Comfortable Riding Position: The low seat height and forward footpegs provide a relaxed, comfortable ride.
Stylish Design: Cruisers have a classic, timeless look that appeals to many riders.
Good for Long Rides: Designed for long-distance travel with a focus on comfort.
Easy to Handle: Generally, cruisers have a low center of gravity, making them easier to handle, especially at low speeds.
Torque-Rich Engines: Strong low-end torque makes for smooth and powerful acceleration.
Customization: Many options for customization, allowing riders to personalize their bikes.
Cons of Cruiser Motorcycles
Weight: Cruisers are often heavier, which can be challenging for some riders to maneuver.
Limited Performance: Not designed for high-speed performance or aggressive riding styles.
Fuel Efficiency: Larger engines can result in lower fuel efficiency compared to other motorcycle types.
Ground Clearance: Low ground clearance can be a disadvantage on rough or uneven roads.
Less Agile: Heavier weight and relaxed geometry can make them less agile in tight corners.
Cost: High-quality cruisers can be expensive, especially when considering potential customization.
Frequently Asked Questions
Are cruiser bikes good for long rides?
Yes, cruiser bikes are great for long rides. They offer a comfortable seating position with a low seat height and easy-to-reach handlebars, which helps reduce fatigue.
Cruisers have larger engines that provide smooth power for highway cruising. Cruiser motorcycles focus on comfort and style, making them perfect for long-distance travel. Many riders choose cruisers for road trips because of their relaxed riding position and stable handling.
Overall, if you’re planning a long ride, a cruiser bike can provide a comfortable and enjoyable experience.
Are cruiser motorcycles still popular?
Yes, cruiser motorcycles remain popular. They attract riders who enjoy a classic, relaxed riding experience.
Brands like Harley-Davidson and Indian Motorcycle continue to see strong sales. They are still pushing out many cruiser motorcycle models specifically designed for comfort and style.
Besides, cruisers appeal to both new and experienced riders for their easy handling and timeless look. The trend of customizing cruisers also keeps them in demand.
It is true that many other motorcycle types are also rising. But cruisers retain a loyal following, making them a staple in the motorcycle community.
Introduction: The excitement of getting your first bike
Getting your first motorcycle is an exhilarating experience. Every rider will cherish his/her first motorcycle. But, as for every beginner rider, you will have to make an important decision: Should I buy a new motorcycle for my first bike? Or should I choose an second hand motorcycle? New vs used motorbike, which one is better for beginner riders?
This choice can significantly impact your overall riding experience, safety, and budget. As a first-time rider, it's essential to weigh the pros and cons of each option carefully. In this comprehensive guide, we'll explore the factors you should consider when deciding new or used motorbike for your first ride.
Factors to consider when deciding on the size of your first bike
To ensure a safe and enjoyable riding, the size of your first motorcycle will be important.
As for beginner riders, I advise you to start with a bike that is manageable and suits your skill level.
I also gradually trained myself from a motorcycle novice to an experienced rider.
Here, I remind you to consider the following key factors for your first motorbike's size:
Engine Displacement.
The engine displacement is measured in cubic centimeters (cc). It is a good indicator of a motorcycle's power and potential speed.
I recommend new riders to start with a smaller displacement engine ranging from 250cc to 500cc. These small engine size motorcycle options are easier to control and less intimidating.
The motorcycle weight and seat height will impact your ability to handle the bike. For beginners, do not choose those heavy and high motorcycles.
Believe me, they will be a challenge for you. You will feel they are hard to control when starting, stopping, or navigating tight turns.
Riding Experience and Skill Level.
Most beginner riders do not have too much experience. So, it will be better if you start with a smaller and easy-manage motorbike. As your skills and confidence grow, you can consider upgrading to a larger and more powerful one.
In general, I advice you to start with a bike that you can control it comfortably. With time going on, you will suit the riding tips and skills. Then you can consider trying larger and higher motorcycle. If it is a large and heavy motorcycle for your first motorcycle, I am sure you will kick it away within a month! You cannot handle it, and it will consume your patience and love for motorcycles.
Pros and cons of buying a new motorcycle for your first bike
buy a new motorcycle
Purchasing a brand-new motorcycle can be an alluring prospect for many first-time riders. Owning a pristine machine straight from the factory, with the latest technology and features, is truely appealing. But, it's crucial to consider both the advantages and disadvantages of this choice.
Advantages of buying a new motorcycle:
Reliability and Warranty. A new motorcycle comes with a manufacturer's reliability and warranty, providing peace of mind. And, most importantly, they protect against potential defects or issues. This can be beneficial for first-time riders who have less extensive mechanical knowledge.
Latest Technology and Features. New motorcycles often incorporate the latest advancements in technology. For example, advanced braking systems, traction control, and fuel-efficient engines. These features can enhance your riding experience and improve safety for novice riders.
Customization Options. When you purchase a new motorcycle, you have the opportunity to customize it according to your preferences. From color choices to additional accessories and components, you can set as you want.
No Previous Owner History. With a new bike, there is to worry about the previous owner's maintenance habits or any potential issues.
Higher Cost. Brand-new motorcycles typically come with a higher price tag compared to used models. This can be a significant financial burden for some first-time riders.
Depreciation. Like most vehicles, motorcycles experience rapid depreciation in their first few years of ownership. As soon as you ride your new bike off the dealership lot, its value will start to decrease.
Limited Selection. Depending on your budget and preferences, the selection of new motorcycles within your price range may be limited. From this aspect, your choice will potentially be restricted more or less.
Benefits of purchasing a used motorcycle for your first bike
Buying a new motorcycle can be an attractive option to many riders. But, purchasing a pre-owned bike can offer several benefits, especially for first-time riders. Here are some advantages of choosing a used motorcycle:
Cost Saving. This could be the most significant advantages of buying a used motorcycle. Pre-owned bikes are typically much more affordable than their brand-new counterparts. So you are be able to get a higher-end model within your budget.
Slower Depreciation. A motorcycle's depreciation occurs in the first few years of ownership. So, buying a used bike will avoid the initial steep depreciation curve.
Wider Selection. There are a large selection of pre-owned motorcycles available in the market. You'll have a wider selection to choose from. From this aspect, you will have more chances of finding a bike that suits your needs and preferences.
Lower Insurance Costs. The replacement cost of second hand motorcycles is lower than new motorcycles. So, the insurance cost for used motorcycles are generally lower than those for new models.
Opportunity to Learn Maintenance. For new riders owning a used motorcycle, you will get the chance to learn motorcycle maintenance. These basic maintenance and repair skills also help you learn more motorcycles. In the long run, it can be valuable.
Key considerations when buying a used motorbike
buy a used motorcycle
Purchasing a used motorcycle can be a cost-effective option. But, it's crucial to approach the process with caution and due diligence. If you are not familiar with the motorcycle knowledges, I advice you to ask a friend who is familiar with motorcycle to help you. Also, I will list some key tips you should keep in mind when purchasing second hand motorcycle:
Inspection and History
Before making a purchase, it's essential to have the motorcycle thoroughly inspected. You can do this by yourself if you are professional and familiar with motorcycle. But I believe most beginner rider does not have this skill. So, go find a qualified mechanic or a trusted expert to help you.
Besides, request the motorcycle dealer to provide you the bike's maintenance records. This is very important data for your to know better about the history of this used motorcycle.
I leave in California, I have experience dealing with some dealers. Some California motorcycle dealers can also provide other documentations for you to review. Anyway, check it carefully, and make sure you clearly know its history.
Mileage and Condition
The mileage and overall condition of the motorcycle should be carefully evaluated. Sometimes, high mileage doesn't necessarily mean a bike is in poor condition. But, you should know, it can be an indicator of potential wear and tear. So, pay attention to check the mileage and condition of the second hand motorcycle is necessary.
Modifications and Customizations
If the motorcycle has been modified or customized, be careful. Make sure these changes will not influence its performance, safety, and potential warranty issues.
Test Ride
Whenever possible, insist on taking the motorcycle for a test ride by yourself. By testing it, you can truly feel its handling, responsiveness, and overall performance. Also, this will allow you to find any potential issues or concerns before making a purchase.
Dealer's Reputation
Research the seller's reputation, whether it's an individual or a dealership. Usually, these reputable sellers will be transparent about the bike's condition and history. They may even offer some form of warranty or guarantee.
Cost comparison: New vs used motorbikes
When it comes to purchasing your first motorcycle, the cost is often a significant factor to consider. Here's a general cost comparison between buying a new and a used motorbike:
Insurance Premiums: Insurance premiums for new motorcycles are typically higher. They have higher replacement cost.
Accessories and Customizations: If you choose to add any accessories or customizations, the costs can quickly add up. (Such as aftermarket exhaust systems, luggage racks, or custom paint jobs, etc.)
Used Motorcycle Costs:
Purchase Price: The purchase price of a used motorcycle can vary significantly. Factors include the motorcycle's brand, model, age, and condition. But they are generally less than the cost of a new motorcycle.
Sales Tax and Registration Fees: purchasing a used motorcycle will still apply these fees. But they will be based on the lower purchase price.
Insurance Premiums: Insurance premiums for used motorcycles are generally lower than new motorcycles.
Potential Repair and Maintenance Costs. Well-maintained used motorcycle may not require immediate repairs. But there might be potential maintenance and repair costs. Used motorcycles that have higher mileage or are older will cost more.
While the upfront cost of a used motorcycle may be lower, there could be additional expenses. These include potential repairs, maintenance, and other issues. According to different age and conditions, the cost may also rise.
Tips for buying a new or used motorcycle
New motorcycles and used motorcycles have their own pros and cons. When you are deciding to purchase them, there are some tips and best practices I can recommend you to follow. These tips and methods will ensure you a smooth and successful buying experience.
Tips for buying a new motorcycle:
Do Research and Compare Models in advance. Research different motorcycle brands, models, and specifications before make the final decision. Find the one that best suits your needs, preferences, and budget.
Test Ride Multiple Options. Test ride different motorcycle brands and models. Then determine which one is the most comfortable and suitable for you.
Negotiate and Consider Your Financing Options. Don't be afraid to negotiate the price and service with the motorcycle dealers. You can also explore financing options offered by the dealership or third-party lenders. But this should be within your budget.
Review the Warranty and Service Plans. Carefully review the manufacturer's warranty and any available service plans or extended warranties. Make sure you have adequate coverage in the future.
Tips for buying a used motorcycle:
Conduct a Thorough Inspection to the second hand motorcycle. As mentioned earlier, ask a qualified mechanic or a trusted expert to help you inspect the motorcycle. Make sure you have identify any potential issues or areas of concern.
Verify the Bike's History from the motorcycle dealer. You should request and review the motorcycle's maintenance records, registration documents. Also, ask the motorcycle dealer to provide you with any available documentation to understand its history and ownership.
Consider Purchasing from a Reputable Dealership. Reputable dealerships often provide some level of warranty or guarantee. They can also provide you the access to service and maintenance records. Private sellers may offer lower prices, but there may be some potential issue in the future.
Negotiate the Price. There is a lot of room for negotiation on second-hand motorcycles. Don't be afraid to negotiate the price with these used motorcycle dealers. If you've identified any issues or areas that need attention during the inspection, you will get a chace to bargain.
Obtain a Motorcycle History Report from the Dealer. Consider obtaining a motorcycle history report, similar to a vehicle history report. Then you can get a comprehensive overview of the bike's past, including any reported accidents or major repairs.
Now I have analyzed these tips you should follow when buying new motorcycle or used motorcycle. These tips will increase your chances of making an informed and satisfactory purchase.
Consider reaching out to experienced riders or joining online forums and communities if you are unfamiliar with motorcycle.
Also, you can visit local motorcycle dealerships and talk to knowledgeable sales representatives. They will guide you through the process and help you make an informed decision.
Conclusion: Making the right choice for your first bike
Choosing between a new or used motorcycle for your first bike is a personal decision. It depends on various factors, including your budget, preferences, and riding goals. New vs used motorbike, which one will you choose? The key is to carefully consider your needs, skill level, and safety as a first-time rider. Make an informed decision, and embrace the adventure that awaits you on the open road.
Introduction to motorcycle dealers in California
California has diverse landscapes and endless stretches of scenic highways. For many motorcycle riders and travelers, it is a paradise. When you are preparing to buy a motorcycle for your next trip in California, you may need to choose a motorcycle dealer to cooperate with. This is crucial for ensuring you have a smooth and enjoyable riding experience.
In this comprehensive guide, we'll delve into the world of motorcycle dealers in California. We will explore the advantages of those reputable dealers to various motorcycle brands. You can choose according to your budget, preference, and location in California. From the iconic Harley-Davidson to the sleek and powerful Kawasaki, we've got you covered.
Why choose a motorcycle dealer?
Purchasing a motorcycle from a dealer is better than from private sellers or online marketplaces. Here are a few compelling reasons why choosing a dealer is the way to go:
Expertise and Knowledge. Motorcycle dealers employ professional and knowledgeable staff. They can guide you through the entire purchasing process. From selecting the right model to the maintenance and customization, they can help you all.
Warranty and Service. Authorized dealers provide comprehensive warranty coverage and access to genuine parts and services. This can ensure your motorcycle remains in top condition for years to come.
Financing Options. Many dealers offer attractive financing options. Thus making it easier to acquire your dream motorcycle without breaking the bank.
Trade-In Opportunities. If you're looking to upgrade or switch to a different model, dealers often provide fair trade-in values for your current motorcycle.
Factors to consider when choosing a motorcycle dealer in California
There are numerous motorcycle dealers scattered throughout California. So, it can be challenging to determine which one best suits your needs. Anyhow, you should pay attention to these key factors when choosing California motorcycle dealers:
Confirm the Brand and Specialization. Decide on the motorcycle brand you prefer as the first step. Some motorcycle dealers only specialize in specific brands and models. Also, you should have a deep understanding of the motorcycle in advance.
Learn About Its Reputation and Customer Service. Research the dealer's reputation by reading online reviews, checking ratings. You can also seek recommendations from fellow riders who are familiar with the dealer. Excellent customer service should be a top priority when comparing among the dealers.
Confirm the Inventory and Selection. Evaluate the dealer's inventory about your ideal motorcycle. Make sure they carry the models, colors, and configurations you're interested in. If they have the ability to order the idealed motorcycle for you, it is also acceptable.
Pricing and Negotiation. Compare prices across multiple dealers to ensure you're getting a fair deal. Don't be afraid to negotiate, as many dealers are willing to work with you to secure your business.
Location and Convenience. Consider the dealer's proximity to your location, as well as their hours of operation and accessibility. Make sure you can have convenient experience before and after buy the motorcycle.
Top Harley Dvidson Dealerships in California
Harley-Davidson motorcycle dealer in California near Burbank
Here is a full list of Harley Dealers in California. We analyzed this list from Harley-Davidson official website. These are officially authorized dealers of Harley. You can choose according to your location and contact them directly.
Number
Name
Address
Contact Number
1
California Harley-Davidson
1517 Pacific Coast Hwy,
Harbor City, CA
(310) 539-3366
2
Bartels Harley-Davidson LAX
300 World Way,
Los Angeles, CA
(310) 823-1112
3
Bartels Harley-Davidson
4141 Lincoln Blvd,
Marina Del Rey, CA
310-823-1112
4
Huntington Beach Harley-Davidson
15080 Goldenwest Cir,
Westminster, CA
(833) 743-0496
5
Los Angeles Harley-Davidson
2635 W Orangethorpe Ave,
Fullerton, CA
(714) 871-6563
6
Hollywood Harley-Davidson
3717 San Fernando Rd,
Glendale, CA
(818) 246-5618
7
Harley-Davidson of Glendale
3717 San Fernando Rd,
Glendale, CA
818-246-5618
8
Laidlaw's Harley-Davidson Sales
1919 Puente Ave,
Baldwin Park, CA
(626) 851-0412
9
Mulholland Harley-Davidson
24050 Ventura Blvd.,
CALABASAS, CA
(747) 494-9101
10
Orange County Harley-Davidson
8677 Research Dr,
Irvine, CA
(949) 727-4464
11
Harley-Davidson of Santa Clarita
21130 Centre Point Pkwy,
Santa Clarita, CA
(661) 964-0506
12
Riverside Harley-Davidson
7688 Indiana Ave,
Riverside, CA
(833) 743-0516
13
Ventura Harley-Davidson
1326 Del Norte Rd,
Camarillo, CA
(805) 981-9904
14
Antelope Valley Harley-Davidson
1759 W Ave J12,
Lancaster, CA
(661) 948-5959
15
Quaid Harley-Davidson
25160 Redlands Blvd.,
Loma Linda, CA
909-796-8399
16
Old Town Temecula Harley-Davidson
28964 Old Town Front St.,
Temecula, CA
(951) 506-6903
17
Death Valley Harley-Davidson
14522 Valley Center Dr,
Victorville, CA
(760) 951-1119
18
Biggs Harley-Davidson
1040 Los Vallecitos Blvd,
San Marcos, CA
(760) 481-7300
19
San Diego Harley-Davidson
4645 Morena Blvd.,
San Diego, CA
(858) 616-6999
20
San Diego Harley-Davidson
849 W Harbor Dr,
San Diego, CA
(619) 234-5780
21
Palm Springs Harley-Davidson
19465 N Indian Canyon Dr,
North Palm Springs, CA
760-329-1448
22
El Patron Harley-Davidson
621 El Cajon Blvd,
El Cajon, CA
(619) 444-1123
23
Coronado Beach Harley-Davidson
3201 Hoover Ave,
National City, CA
(619) 477-4477
24
Bakersfield Harley-Davidson
35089 Merle Haggard Dr,
Bakersfield, CA
(661) 325-3644
25
Santa Maria Harley-Davidson
2022 Preisker Ln,
Santa Maria, CA
(805) 928-3668
26
Visalia Harley-Davidson
30681 N. Hwy 99,
Visalia, CA
559-733-4647
27
Mathews Harley-Davidson
548 N Blackstone Ave,
Fresno, CA
559-233-5279
28
Fresno Harley-Davidson
4345 W Shaw Ave.,
FRESNO, CA
(559) 275-8586
29
Mitchell's Modesto Harley-Davidson
500 N Carpenter Rd,
Modesto, CA
209-522-1061
30
San Jose Harley-Davidson
1551 Parkmoor Ave,
San Jose, CA
(408) 998-1464
31
Monterey Harley-Davidson
700 Canery Row,
Monterey, CA
(831) 731-5067
32
House of Thunder Harley-Davidson
16175 Condit Rd,
Morgan Hill, CA
(408) 776-1900
33
Eagle's Nest Harley-Davidson
13900 S Harlan Rd,
Lathrop, CA
(209) 941-0420
34
East Bay Harley-Davidson
7576 Southfront Rd,
Livermore, CA
(925) 606-0100
35
Oakland Harley-Davidson
151 Hegenberger Rd.,
Oakland, CA
(510) 635-0100
Kawasaki dealerships in California
Kawasaki motorcycle dealship store
Kawasaki is renowned for its high-performance motorcycles. California has no shortage of outstanding dealerships catering to this iconic brand. This is the Kawasaki motorcycle dealer list in California.
Suzuki is known for its reliable and affordable motorcycles. California has several dealerships that cater to this brand. Here is a list of them I have organized on Suzuki website:
Honda is a household name in the motorcycle industry. This brand also take large market share in California motorcycle market. There are several outstanding dealerships offering a wide range of Honda models in California.
Number
Name
Address
Contact Number
1
DESERT SPORT CENTER, INC.
413 N China Lake Blvd
Ridgecrest, CA
(760) 375-2540
2
DEL AMO MOTORSPORTS OF SOUTH BAY
1890 Auto Park Pl
Chula Vista, CA
(619) 927-8527
3
SANTA MARIA Honda
2022 Preisker Ln
Santa Maria, CA
(805) 928-3668
4
SANTA BARBARA MOTORSPORTS
6466 Hollister Ave
Goleta, CA
(805) 845-2580
5
CAL COAST MOTORSPORTS
5455 Walker St
Ventura, CA
(805) 642-0900
6
TRI-COUNTY POWERSPORTS
6176 Condor Dr
Moorpark, CA
(805) 553-1933
7
KEN & JOE'S
21618 Golden Triangle Rd Ste 104
Santa Clarita, CA
(661) 254-2929
8
Honda OF GLENDALE
1331 E Colorado St
Glendale, CA
(818) 246-2461
9
DEL AMO MOTORSPORTS REDONDO BEACH
2500 Marine Ave
Redondo Beach, CA
(424) 390-7971
10
BERT'S MEGA MALL
1151 N Azusa Ave
Covina, CA
(626) 974-6600
11
SO CAL Honda POWERSPORTS
2055 E 223rd St
CNORTH KERN MOTORSPORTS
arson, CA
(310) 834-6632
12
DEL AMO MOTORSPORTS OF LOS ANGELES
15725 Lakewood Blvd
Paramount, CA
(562) 377-7953
13
NORTH KERN MOTORSPORTS
310 High St
Delano, CA
(661) 721-1400
14
FRED CUMMINGS MOTORSPORTS
2211 Chester Ave
Bakersfield, CA
(661) 324-9695
15
HIGH POINT POWERSPORTS
321 E Imperial Hwy
La Habra, CA
(714) 879-8242
16
HUNTINGTON Honda
17555 Beach Blvd
Huntington Beach, CA
(714) 842-5533
17
ORANGE COUNTY Honda
650 W Katella Ave
Orange, CA
(714) 771-9777
18
DEL AMO MTRSPRTS OF ORANGE COUNTY
2401 Pullman St
Santa Ana, CA
(949) 876-8260
19
MOUNTAIN MOTORSPORTS
1025 N Mountain Ave
Ontario, CA
(909) 988-8988
20
CORONA MOTORSPORTS
363 American Cir
Corona, CA
(951) 735-2030
21
MALCOLM SMITH MOTORSPORTS
7599 Indiana Ave
Riverside, CA
(951) 687-1300
22
CHAPARRAL MOTORSPORTS
555 S H St
San Bernardino, CA
(909) 889-2761
23
Honda OF REDLANDS
215 E Redlands Blvd
Redlands, CA
(909) 793-2833
24
TEMECULA MOTORSPORTS, INC.
26860 Jefferson Ave
Murrieta, CA
(951) 698-4123
25
COYNE POWERSPORTS
2301 W Ramsey St
Banning, CA
(951) 922-3200
26
RIDENOW SO-CAL
1725 Hacienda Dr Ste C
Vista, CA
(760) 433-4333
27
ESCONDIDO CYCLE CENTER
1415 Montiel Rd
Escondido, CA
(760) 745-1615
28
POWAY POWERSPORTS
14168 Poway Rd Ste 102
Poway, CA
(858) 842-4866
29
MOTOWORLD OF EL CAJON
315 N Magnolia Ave
El Cajon, CA
(619) 442-0941
Source: Honda
Best Used Motorcycle Dealers in California
While many riders opt for brand-new motorcycles, others prefer the value and character of a used motorbike. California also has several reputable used motorcycle dealers:
Cycle Trader (Multiple Locations)
Cycle trader provides a vast inventory of used motorcycles from various brands. It is a go-to destination for those seeking a pre-owned ride.
SoCal Motorcycles (Los Angeles, CA)
This dealership specializes in high-quality used motorcycles. offering a wide selection and thorough inspections to ensure customer satisfaction.
NorCal Motorsports (Sacramento, CA)
It serves the Northern California region, providing a comprehensive range of pre-owned motorcycles. And, it is backed by a commitment to quality and transparency.
Motorcycle dealer fees in California
When purchasing a motorcycle from a dealer in California, it's essential to be aware of the various fees that may be included in the final price. These fees include:
Destination Charge
This fee covers the motorcycle transportation cost from the manufacturer to the dealership. According to different distance, motorcycle weight and other factors, the fee may differ. You need to confirm with the motorcycle dealer in detail.
Documentation Fee
It is also known as a "doc fee". This charge will cover the administrative costs associated with processing the sale.
Sales Tax
California imposes a sales tax on motorcycle purchases. It varies depending on the county and city where the dealership is located. You can learn more about sales tax costs by consulting dealers in different counties.
Some dealers may offer extended warranties, maintenance plans, or other add-on services. You can ask them to offer you freely or provide an additional cost.
It's important to carefully review all fees and charges with the dealer to ensure transparency. This can avoid any surprises during the purchasing process.
Conclusion
California motorcycle dealers offer various motorcycle brands and riding styles. From the iconic Harley-Davidson to the powerful Kawasaki, there must be one suits you. It is crucial to find the right dealer for ensuring a smooth and enjoyable riding experience.
Remember to check the dealer's brand specialization, reputation, inventory, pricing, and location before purchasing. Make an informed decision and find the perfect dealership to suit your needs. Those reputable motorcycle dealer offers better pre and after-sales service. You can get benefits including expertise, warranty coverage, financing options, and trade-in opportunities.
As a passionate motorcyclist, I understand the thrill and excitement that comes with owning and riding a motorbike. However, there may be times when you need to transport your beloved motorbike. You may have to move the motorbike from one location to another. Maybe it's for a long-distance move, a repair, or a special event. But do you know how to transport a motorcycle? What is the best vehicle to transport a motorcycle?
Transporting a motorcycle can be a daunting task, especially if you're unfamiliar with the process. In this guide, I'll walk you through various motorcycle transportation methods and tips. These solutions will ensure a smooth and secure transport for your prized possession.
Hire a professional motorcycle transport service
professional motorcycle transportation service
Yes, you can consider hiring a professional motorcycle transport service sometimes. It is a convenient and stress-free option for moving your motorbike.
But, you should also consider your practical demand. If you have less experience about transporting the motorcycle .
If you are just move your motorcycle for a short distance, and you do have some experience on this, then there is no need to hire them.
You can consider about them if you're facing any of the following scenarios:
Long-distance relocation;
Lack of appropriate transportation means;
Limited time or resources;
Unfamiliarity with the transportation process;
Concern for potential damages or accidents;
Here are some key benefits of using a professional motorcycle transport service:
Expertise. These companies employ experienced professionals. They are well-versed in handling and transporting motorcycles of various sizes and types.
Specialized equipment. They use purpose-built trailers, ramps, and tie-down systems designed specifically for motorcycle transport. These equipment will minimize the risk of damage during transit.
Insurance coverage. Reputable transport companies carry comprehensive insurance policies. This protects your motorcycle against potential damages or losses during the transportation process.
Convenience. You can save time and effort by letting professionals handle the entire process, from pickup to delivery. Then you can focus on other aspects of your move or event.
Peace of mind. Entrusting your motorcycle to experienced professionals can provide you with peace of mind. Your valuable asset is in capable hands, you will not worry about it.
It is clear that professional transport services may come at an extra cost. But, the benefits they offer can outweigh the expenses.
When you need to transporting your motorcycle over long distances, you can consider this way first. Also, it is better option if you lack the necessary resources or expertise.
Safely transport a motorcycle with a car
Sometimes, you will have to transport your motorcycle over a relatively short distance. If you have the access to get a suitable car, you can consider transporting it yourself.
But, it's crucial to follow proper safety protocols and take necessary precautions before and during the transportation.
Here are some essential steps to safely transport a motorcycle with a car:
Choose the right vehicle. Ensure that your car has enough space and load capacity to accommodate the weight and dimensions of your motorcycle. SUVs, vans, or pickup trucks with open beds are typically better suited for this task.
Use a high-quality motorcycle trailer or ramp. A sturdy, well-designed trailer or ramp is essential for loading and unloading your motorcycle safely. Look for trailer or ramp options with adjustable ramps, tie-down points, and anti-tilt mechanisms. They can avoid accidents when loading and unloading your motorcycle.
Secure the motorcycle properly. Once your motorcycle is loaded, use high-quality tie-down straps or chains to secure it firmly in place. Distribute the straps evenly across the motorcycle to prevent shifting or tipping during transport.
Check the lights and signals. Ensure that the trailer's lights, turn signals, and brake lights are functioning correctly. These lights and signals will make sure the trailer is visible to other drivers on the road.
Adjust your driving style. When transporting a motorcycle, you'll need to drive at a slower pace. Besides, remember to anticipate longer braking distances. When taking turns, be cautious to account for the added weight and dimensions of your load.
Remember to follow these steps and exercising caution. Then you can safely transport your motorcycle with a car while minimizing the risk of damage or accidents.
Transporting a motorcycle in a pickup truck
If you have a pickup truck, transporting your motorcycle can be a convenient and cost-effective option. But, it's also essential to take the necessary precautions. Make sure you can move your motorcycle safely and will not influence the other road users.
Here are some tips for transporting a motorcycle in a pickup truck:
Secure the motorcycle properly. Make sure the motorcycle are firmly secure in the truck bed. High-quality tie-down straps or chains will be best gear to use. Most importantly, distribute the straps evenly across the motorcycle. Otherwise it may shift or turn over during transport.
Use a motorcycle-specific ramp or loading dock. Well-designed ramp or loading dock are also essential equipment to load and unloade your motorcycle. With their help, it will be much easier and safer. Look for options with adjustable heights and non-slip surfaces.
Cover the truck bed. Consider using a truck bed cover or tarp during the motorcycle transportation. They will protect your motorcycle from road debris, weather elements, and potential theft during transport.
Driving Carefully. Remember to drive safely and anticipate longer braking distances. Besides, take turns more carefully to account for the added weight and dimensions of your load.
Check local regulations. Some areas may have specific laws or regulations about transporting motorcycles in pickup trucks. You may need specific tie-down methods or additional safety equipment. Be sure to familiarize yourself with the local laws before embarking on your journey.
These tips and methods will help you better place and move your motorcycle in right way. But you still need to be careful when loading and unloading your motorcycle. Otherwise may cause damage or accident to you and your motorcycle.
Transport a motorcycle in a van
If you have a van or a large SUV, you can also use it to transport your motorcycle. This is also a widely used and convenient motorcycle transportation method. Just like other transportation ways, the necessary precautions is needed.
The followings are some tips for transporting a motorcycle in a van:
Use a motorcycle-specific ramp or loading dock. When transporting a motorcycle in a van, a motorcycle ramp or loading dock is always a must. As you can see, other transportation methods also need it. It is better to choose a sturdy, well-designed ramp or loading dock. They can make it easier and safer when loading or unloading the motorcycle. Options with adjustable heights and non-slip surfaces are also good.
Secure the motorcycle properly. Use high-quality tie-down straps or chains to secure the motorcycle firmly inside the van. Still, you will have to distribute the straps evenly across the motorcycle. By this way, you can prevent the motorcycle from shifting or tipping during transport.
Protect the interior. Remember to cover the floor of the van with a protective layer, such as a tarp or rubber mat. It can prevent scratches or damage to the interior from the motorcycle's tires or other components.
Drive carefully. Do not overspeed when transporting a motorcycle in a van. Besides, pay attention to the other vehicles, leave enough braking distances. When turning or crossing an intersection, be more cautiously.
Ensure proper ventilation. If transporting a motorcycle inside a van for an extended period, you will need some extra tips. Make sure there is adequate ventilation to prevent the buildup of exhaust fumes or other harmful gases.
Consider weight distribution. Check the position where you secure your motorcycle. Ensure that the weight is evenly distributed inside the van to maintain proper balance and handling.
It is not hard to transport a motorcycle in a van. You need to pay attention to these tips. The goal is to safely transport the motorcycle to your next destination.
Transporting a motorcycle on a trailer
Transporting a motorcycle on a trailer can be a safe and efficient way to move your bike from one location to another. It is also a usually used motorcycle transportation way.
Choose the right trailer. There are specifically designed trailer for motorcycle transportation, you can select one. Also, you can choose thoese has the appropriate weight capacity and dimensions to accommodate your motorcycle. Consider factors such as the trailer's size, load capacity, tie-down points, and ramp design.
Prepare the trailer. Before start using the trail, ensure that the trailer is in good working condition. Check if it has properly inflated tires, functioning lights, and a secure hitch connection to your towing vehicle. Besides, clean the trailer bed and apply a non-slip surface or mat before load the motorcycle onto. This is to prevent the motorcycle from sliding during transport.
Load the motorcycle onto the trailer. Position the ramp securely against the trailer bed, ensuring it is stable and at the appropriate angle for loading. Then Carefully ride or push the motorcycle onto the trailer. Make sure the motorcycle is aligned with the tie-down points or wheel chocks.
Secure the motorcycle. It is essential to use tie-down straps or chains to secure the motorcycle firmly to the trailer. Make sure the straps are distributed evenly across the motorcycle. Do not let it rub against any sensitive components. If necessory, consider using extra wheel chocks or stands to further stabilize the motorcycle.
Inspect the setup regularly. If you are transporting a motorcycle for longer journeys, remember to stop periodically to check the trail. Make sure the tie-down straps, lights, and overall stability are working normally.
Unload the motorcycle carefully. Upon reaching your destination, carefully reverse the loading process. Positioning the ramp securely and removing the tie-down straps or chocks. Then slowly ride or push the motorcycle off the trailer. Be cautious of any potential hazards or uneven surfaces when unload the motorcycle.
How much does it cost to transport a motorcycle?
On average, it costs about $600 to ship a motorcycle, but the price can vary depending on the distance and method of transportation.
For example, if you ship a motorcycle across the US, it will cost about $1,100. But if it is a shorter distance, it may be done for $200.
In Canada, if you ship a motorcycle less than 1,000 miles, the cost is about $180-300. For transportation distances over 1,000 miles, expect to pay $400-600 or more.
In general, factors such as the distance, model, size, and weight of the motorcycle will affect the price of motorcycle shipping.
Factors influence the motorcycle transportation cost
Transportation Distance: Longer distances typically result in higher costs.(due to increased fuel consumption,labor, and potential overnight stays)
Transport Method: Professional transport services, rental trucks or vans, and specialized motorcycle trailers or dollies can vary in price.
Motorcycle Size and Weight: Larger and heavier motorcycles may require specialized equipment or additional resources for transport. And the motorbike's dimensions, weight, and any modifications or accessories will also influence the cost.
Additional services: Door-to-door delivery, expedited shipping, insurance coverage, or specialized handling for high-value or rare motorcycles.
Timing and scheduling: The timing of your transport request can also influence the cost. Peak seasons, holidays, or last-minute bookings may result in higher rates.
Insurance and liability coverage: The level of insurance coverage and any additional liability protection can impact the overall cost
Fuel prices: Fluctuations in fuel prices can directly affect the cost of transporting a motorcycle.
When looking for motorcycle transportation service, it is better to compare prices and services from multiple sources. This can help you find the most cost-effective solution that meets your specific requirements.
How to Choose Motorcycle Transportation Service?
You can find many companies and agencies that offer motorcycle shipping services on Google or in your local area. When choosing, the most important thing is to ensure that the transportation is smooth, safe, and stress-free. With so many options, it is important to determine which service is best for your needs.
When choosing a motorcycle shipping service, there are a few key factors to keep in mind:
The shipping company's or agency's shipping reputation and experience.
Confirm whether the company has the professional equipment and technology to safely transport your motorcycle.
Ask if insurance is available, what it covers, and how much it costs.
Confirm whether door-to-door delivery is available.
Convenience and promptness in tracking and communication during the shipment.
Availability of additional services (based on your needs).
Pricing and payment options.
Sometimes, it's not easy to find a reputable motorcycle shipping service. You can start by asking fellow riders, motorcycle clubs, or dealers in your area for recommendations. Additionally, you can find a service provider by researching online. For example, reading reviews and checking industry associations or certifications. These methods can all provide you with valuable insights.
Remember that shipping a motorcycle is a significant investment. Choosing the right shipping service can give you peace of mind and ensure that your beloved motorcycle arrives safely.
It can be a daunting task to you about how to transport a motorcycle. But with the right knowledge and preparation, you can ensure a smooth and safe experience for your motorcycle. You can choose to hire a professional transport service, transport your motorcycle yourself using a trailer or truck. Of course, you can also explore other methods of motorcycle transportation. The most important thing is to prioritize safety and take the necessary precautions.
Remember that your motorcycle is more than a means of transportation, it is a prized possession. So, it deserves extra care and attention during the transportation process. You should follow the tips and guidelines in this guide to transport your motorcycle. With these methods and tips, you can confidently tackle motorcycle transportation and ensure that your prized possession arrives at its destination safe and sound.
Is trike better than motorcycle? Are 3 wheel motorcycles easy to ride? Are trikes safer than motorcycle?
Many people will ask about these questions when they are considering by a trike.
Trikes, refers to the motorcycles with 3 wheels. In recent years, it has become a new contender in the realm of two-wheeled adventures.
It emerges and captivates riders with its unique blend of stability, style, and sheer exhilaration.
So, is it better than 2-wheel motorcycles? You may think it is unsafe, or practical. In fact, riding a three-wheeler is fun and exciting sometimes. Anywhere and anytime, it can bring you the enjoyment you ever wish for.
I also have tried a 3-wheel motorcycles, it is really pleasure when I am sitting and controlling it. I also talked to some three-wheeled motorcycle owners and asked them about their opinions on this type of vehicle.
In the following, I will introduce some key advantages of trikes comparing with ordinary motorcycles.
Is Trike Better Than Motorcycle?
Motorcycle vs Trikes - Is trike better than motorcycle?
1. The Stability Factor: Confidence on Three Wheels
One of the most significant advantages of opting for a 3-wheel motorcycle is its unparalleled stability.
All the two-wheeled counterparts, which need a delicate balance and constant adjustment. I believe many riders are tired of this, especially for those beginner riders.
The trikes offer a rock-solid foundation that instills confidence in even the most apprehensive riders.
They have two wheels in the front and one in the rear (or vice versa), and boast a low center of gravity. Thus can ensure a smooth and controlled ride, even at higher speeds or during sharp turns.
Moreover, the added stability of a three-wheeler motorcycle eliminates the fear of tipping over.
I believe it is a common concern among those new to the motorcycling world, right?
This increased sense of security enhances the overall riding experience. Also, it opens up a world of possibilities for riders of all ages and skill levels.
2. A Style Statement on the Road
Aside from their practical advantages,trikes have become a true style statement on the open road.
Their unique design and sleek silhouettes turn heads wherever they go. Consider you are riding a trike on the street. Your appearance will quickly attract the attention of many neighbors. Many fellow riders and automotive enthusiasts like this kind of vehicle.
Brands like Vanderhall have taken this concept to new heights. They have crafted many trikes that seamlessly blend the best elements of motorcycles and convertibles.
It doesn't matter whether you're cruising through winding country roads or navigating the urban. A trike motorcycle will guarantee that you'll stand out from the crowd.
Its distinctive appearance reflects your individuality but also serves as a conversation starter. And, you can connect with like-minded enthusiasts and share the joy of the open road.
3. Comfort Redefined: The Luxurious Ride
Riding a 3-wheel motorcycle is not just about adrenaline-fueled thrills. It's also about embracing comfort on a whole new level.
I have tried several 3 wheel motorcycles, and I believe that they are more comfortable.
Many trike models feature reclined seating positions, complete with backrests and headrests. This design ensures that you will free from discomfort even riding long journeys.
Besides, the side-by-side seating arrangement in most trikes is also an outstandsing advantage. This allows you to easy communication with your passenger.
For couples or friends seeking a shared adventure, trikes will be a perfect choice.
You can enjoy the ride while engaging in lively conversations and creating lasting memories.
4. Accessibility for All: Embracing Riders of All Ages and Abilities
Trikes have the ability to cater to riders of all ages and abilities. This is one of the most compelling aspects of this vehicle.
motorcycle trike for senior (Source: The New York Times)
For youth and olders, this advantage will become more obvious. Their physical may hard to support them to control the traditional two-wheeled motorcycles.
But, with a trike, they can continue to indulge their passion for the open road without compromising on safety or comfort.
The stability and ease of mounting and dismounting a three-wheeler motorcycle are also adjective. This makes it an attractive option for those with limited mobility or balance concerns.
And, the confidence boosting nature of these vehicles often encourages hesitant riders to take the plunge. They can experience the freedom and exhilaration of riding more accessible and inclusive.
5. Fuel Efficiency
Nowadays, environmental consciousness and cost-effective transportation are paramount. 3-wheel motorcycles offer a compelling solution to solve this.
Most 3 wheels motobike are fuel efficiency. They can offer a fuel consumption of around 65 miles per gallon. For most daily commutes or cross-country adventures, 3-wheel motobikes are an economical choice.
Moreover, their sleek designs and compact size ensure they can effortlessly navigate in urban areas. For reducing emissions and alleviating traffic congestion, they are really helpful.
three wheel trike motorcycle riding in city road
6. A Versatile Range: From Cruising to Off-Roading
The world of 3-wheel motorcycles is as diverse as the riders who embrace them.
There are various trikes for different demands. Are you a seasoned adventurer seeking thrills on rugged terrain, a trike can meet your demand. Or are you a laid-back cruiser yearning for leisurely rides through scenic landscapes? A trike will suit your preference.
If you are professional off-road rider, you can choose those specialized three-wheelers. They are designed to tackle even the most challenging terrains. This kind of high level trike offers robust suspension systems and knobby tires that grip the earth with unwavering tenacity.
Also, if you are seeking a more refined cruising experience, there are sleek and stylish models in the market.
7. The Allure of Customization: Crafting Your Dream Ride
Do you want to own a customized vehicle according to your own heart content? A 3-wheel motorcycle can help you realize this.
Do you need eye-catching paint and chrome accents? Or some performance upgrades and aftermarket accessories? Believe me, the possibilities of trike motorcycles are endless.
Many trike enthusiasts take great pride in personalizing their rides. They transform these personalization into unique expressions of their individuality and style. Whether you're a seasoned mechanic or a newcomer to the world of customization, the joy of crafting your dream ride is an experience like no other.
8. The Social Aspect: Joining a Vibrant Community
Most riders who rides a 3-wheel motorcycle is not just about the machine itself. It's also about becoming part of a vibrant and welcoming community. There are many trike organizations and assiciations all over the world.
You can join with these trike enthusiasts to share your passion and swap stories. Most importantly, you can embark on unforgettable trip with these group rides.
It doen't matter if you're seeking advice on maintenance, exploring new routes, or simply enjoying the company of like-minded individuals. The trike community embraces newcomers with open arms. You can foster friendships and cherished memories with them.
Pros and Cons of Getting a Trike Motorcycle
Althgough I have listed the advantages of 3 wheels trike. But still it has some disadvantages you need to pay attention to.
Pros of Trike Motorcycles
Cons of Trike Motorcycles
Stability: Less likely to tip over.
Comfort: More comfortable for long rides.
Storage: Often has more storage space.
Safety: Better balance at low speeds.
Accessibility: Easier to ride for those with balance issues.
Cost: Generally more expensive.
Size: Takes up more space.
Maneuverability: Less agile than 2-wheel bikes.
Fuel Efficiency: Usually lower mileage.
Learning Curve: Turning feels different and takes getting used to.
So, when you are deciding to getting a 3-wheel trike motoycycle, consider about these pros and cons first. These information will help you make rational decisions that meet your actual needs more.
3-wheel motorcycles offer a unique and exhilarating riding experience, but don't forget the safety when you are riding.
I have mentioned safe driving many times. You should know how important it is.
Many states and jurisdictions have specific regulations regarding the operation of these vehicles. So, it's essential to familiarize yourself with the local laws and licensing requirements.
Besides, investing in proper safety gear is essential for ensuring a safe and enjoyable ride.
For example, helmets, helmet intercom systems, protective clothing, and reflective accessories. Responsible trike owners understand the importance of defensive driving, maintaining their vehicles in top condition, and respecting the rules of the road.
Conclusion
3-wheel motorcycles offer a unique blend of stability, style, and sheer exhilaration. From the confidence-boosting stability and unparalleled comfort to the fuel efficiency, these vehicles have captured the hearts and imaginations of riders worldwide.
Trikes are suitable for both seasoned biker seeking a new adventure and a newcomer yearning to experience the thrill of the open road. They can promise an unforgettable journey for you when riding on the road.
Frequently Asked Questions
How much does a trike cost?
The cost of trikes varies widely based on features and quality. Beginner trikes typically range from $3,000 to $10,000. For professional trikes, prices can soar from $15,000 to $50,000 or more.
Featured Trikes:
Harley-Davidson Freewheeler: Approximately $30,000
Polaris Slingshot: Starting around $20,000
Can-Am Spyder F3: Starting at $18,000
Honda Gold Wing Trike: Around $35,000
These prices can fluctuate based on customization, location, and dealer offers. So, you have to check with local dealers for the most accurate pricing and available features.
Is it easier to ride a 3 wheel motorcycle?
Yes, riding a 3-wheel motorcycle is easier for many people. Firstly, it offers more stability, especially at low speeds and when stopping. And, you don't need to balance as much as on a 2-wheel bike. It's also more comfortable for long rides, as it reduces the risk of tipping over. But, for many riders newly touch this kind of vehicle, the turning can feel different and takes some getting used to. Overall, it's a good option for those who want a safer and more stable ride.
What is the best 3 wheel motorcycle to buy?
The best 3-wheel motorcycle depends on your needs. People with different ages has different trikes for use.
Best trike for adults: the Can-Am Spyder F3 offers a sporty ride. Also, the Harley-Davidson Tri Glide Ultra is also good option. It provides very good comfort and luxury.
Best 3-wheel motorcycle for toddlers: the Fisher-Price Harley-Davidson Trike is a fantastic option. For seeking safety and fun, you can choose it.
Best trike for seniors: the Honda Gold Wing Trike provides excellent stability and comfort. It makes your long rides enjoyable and safe.
Each of these trikes is designed to cater to specific age groups and preferences. You can choose according to your demand.
Are 3 wheel bikes safe for seniors?
Yes, 3-wheel bikes are generally safe for seniors. The 3 wheels motobikes offer more stability than 2-wheel bikes. Thus reducing the risk of falls, especially at low speeds or when stopping. The extra wheel provides better balance and security. The Honda Gold Wing Trike and Can-Am Spyder RT are popular trikes for senior. These models come with features such as comfortable seating, easy handling, and advanced safety options like anti-lock brakes. Therefore, 3-wheel bikes a great choice for seniors who want to enjoy riding without worrying about balance issues. Remember, always ensure proper training and wear safety gear for the best experience.
How to ride a motorcycle? Is it hard for me to ride a motorcycle? Most novices will have such questions when they first start or try to ride motorcycles.
Yes, riding a motorcycle can be one of the most exhilarating experiences on two wheels. To the experienced riders, you may think it is very easy to ride a motorcycle. But to rookies, it may truly be a bit daunting when they first sit on the bike.
Don't worry! This guide will walk you through the basics of how to ride a motorcycle. We will use simple language and easy-to-follow steps to describe this so that all the beginner riders can learn easily.
Introduction
Are you ready to hit the open road but unsure where to start? Learning to ride a motorcycle is a thrilling journey that combines skill, balance, and confidence. This guide will break down the process into manageable steps to help you get started safely and effectively.
Now, let's begin step by step.
Getting Started Before Riding A Motorcycle
Choose the right motorcycle
When you are just starting to learn how to ride a motorcycle, you need to choose a motorcycle that is the right size and suitable for you.
Practicing with a motorcycle that is easy to use and can be easily controlled will achieve twice the result with half the effort. It will also increase your interest in learning. In this way, you can also master the basic essentials of riding a motorcycle in a shorter time.
After all, you are just starting to ride, so don't think about conquering those big and bulky models at this time. This will only backfire.
So, how to choose a motorcycle suitable for beginners?
Most of the motorcycle brands has suitable motorcycle for beginners. Honda, Harley-Davidson, Suzuki, Kawasaki, whatever you choose. There are many reviews and videos talking about the best motorcycle for beginners. Read about it, and compare between them.
Here are a few points that beginners need to pay attention to when choosing a motorcycle:
01. Motorcycle Body Height. Choose a motorcycle with a lower body height to ensure that when you sit on the motorcycle. Make sure your feet can be put down and touch the ground smoothly. This makes it easier for you to support the motorcycle.
02. Easy to Control. Novices should choose a light motorcycle that is easy to control. These lighter motorcycles are easier to control, so that you can more easily control the direction and balance when practicing driving.
03. Suitable Motorcycle Type. Choose a motorcycle according to your future riding needs. If you only ride on city roads, then a small-displacement, standard motorcycle or scooter is enough. If you plan to ride on both pavement and off-road trails in the future, then you can choose off-road and sport bikes.
I have been riding motorcycles for 6 years and have ridden almost 150,000 kilometers so far. In my opinion, the most important thing for new riders is to choose a motorcycle that you like and that suits you. Because when you ride on the road, all kinds of things can happen. If you don’t choose the right motorcycle at the beginning, then your entire ride will not be a good experience.
Essential Gear
OK, you've chosen your motorbike. Now there are other things you need to prepare.
The right riding gear is also something you need to prepare. I've talked to many professional riders and asked them about the equipment they recommend for new riders. In summary, the following are the equipment you should and must prepare:
Helmet: Make sure the helmet meets the regulations of the Ministry of Transportation. For example, a DOT-approved helmet is always a good option. Besides, for beginner riders, I sincerely advise you to choose a helmet with more coverage. You will need full face coverage to protect you in case you fall from the motorcycle. (Further read: The Best Beginner Motorcycle Helmet)
Eye protection: Some helmets come with goggles, so you don't need to buy them separately. It protects your eyes. It also prevents strong light from affecting your driving vision. If there is no goggles on the helmet, wear them. Don't underestimate them, they are really useful.
Full-finger gloves: Motorcycle-specific gloves are recommended for new riders. They can provide extra protection for your knuckles and palms. Motorcycle gloves not only improve handling comfort but also reduce the damage caused by accidents. Besides, they can reduce the pressure on the hands by absorbing impact, making riding more comfortable.
Riding jacket and pants: It is also necessary to choose a jacket that fits well. Motorcycle-specific jackets often protect vulnerable areas such as shoulders, elbows and backs. Motorcycle-specific pants can provide extra protection for your knees. Common motorcycle jackets and special pants are usually made of wear-resistant materials.
Over-the-ankle boots or shoes: Boots and shoes are essential gear for protecting your feet. Professional cycling shoes have better wrapping around the ankle than ordinary shoes. This prevents the ankle from being injured again due to a fall. Good cycling shoes can also make the ankle more comfortable and provide better protection for the feet. If you ride in the summer or when the temperature is high, choose cycling shoes with good ventilation. They can keep you cooler and more comfortable while riding.
how to ride a motorcycle step by step (Author: Best Beginner Motorcycles)
Once you have The followings are the main steps about how to ride a motorcycle.
1. Mounting the Motorcycle
Step Over: Stand on the left side of the motorcycle. Hold the handlebars and swing your right leg over the seat.
Sit Comfortably: Sit upright with both feet flat on the ground. Ensure you can reach all the controls comfortably.
2. Starting the Motorcycle
Turn the Key: Insert the key and turn it to the "on" position.
Check the Kill Switch: Make sure the kill switch is in the "run" position.
Press the Starter Button: With the clutch pulled in, press the starter button to start the engine.
3. Getting Moving
Engage the Clutch: Pull the clutch lever in with your left hand.
Shift to First Gear: Use your left foot to push the gear shifter down into first gear.
Throttle and Release the Clutch: Slowly twist the throttle while gradually releasing the clutch. The motorcycle will start to move forward.
4. Shifting Gears
Increase Speed: As you gain speed, you’ll need to shift to higher gears.
Pull in the Clutch: When you’re ready to shift, pull in the clutch.
Shift Up: Use your left foot to lift the gear shifter up to the next gear.
Release the Clutch: Gradually release the clutch while giving the throttle a slight twist.
5. Stopping the Motorcycle
Throttle Down: Gradually close the throttle to slow down.
Brake Smoothly: Use both the front and rear brakes to come to a stop.
Downshift: As you slow down, downshift to lower gears.
Clutch In: Pull in the clutch as you come to a complete stop.
Neutral: Shift to neutral if you’re going to be stopped for a while.
Pure text may not help you better understand how to ride a motorcycle. I recommend you watch this video, which will help you understand the main steps of riding a motorcycle visually.
Tips for Beginner Motorcycle Riders
Take a motorcycle safety course.
Riding a motorcycle is not like riding a bicycle. It is more complicated, faster, and harder to control than a bicycle.
If you have no previous experience riding a motorcycle, be sure to take a motorcycle safety course. This is not only responsible for your future safety, but also for other road users.
A motorcycle driving course will teach you some correct riding skills and safety knowledge. Usually the course will include classroom knowledge and practical riding courses on the road.
motorcycle riding course
Some courses are suitable for new riders with little or no experience. They usually teach some basic rider courses. For beginners, it is enough.
You can go to the motor vehicle and traffic department of your local government to find out if there are courses in your area.
Moreover, these courses are provided with motorcycles and are usually suitable for beginners, so you can learn smoothly.
When you have completed the classroom learning and practical road practice, when the time is right, you can go to take the test and get your driver's license.
Practice Makes Perfect
Find a safe, open area to practice how to ride the motorcycle. Parking lots are great for beginners. They have a large space for you to ride and will not cause much damage if there is an accident. Also, you can choose those roads with less traffic to practice.
Too many participants on the road may make you more nervous. In places with less traffic, your mind will be calmer and you will be able to master riding skills faster.
You can Practice starting, stopping, and turning until you feel comfortable.
Balance and Control
Focus on Where You Want to Go: Your motorcycle will follow your eyes. Look through turns and keep your head up. Many motorcycle accidents are caused by distraction or not paying attention to traffic conditions on the road. Remember to follow the motorcycle riding safety standards.
Smooth Movements: When riding a motorcycle, be smooth to handle with the throttle, clutch, and brakes. It is not easy for beginners to control them well, but practice makes perfect. Ride Slowly and patiently do more practice, and you will get the hang of it. Most importantly, do not do jerky movements, because it can lead to loss of control.
Safety First
Stay you and your motorcycle Visible: Wear bright clothing and always use signal lights. Conspicuous clothing allows other road users to notice you more quickly and keep a safe following distance. Signal lights can inform surrounding vehicles of your next driving choice, which can avoid many unnecessary accidents.
Drive Carefully: At the same time, you also need to pay attention to the driving environment around you, including vehicles in the same direction, oncoming direction, and from other directions at the intersection. Always pay attention to other drivers and assume that they don't see you.
Check your bike: Check your motorcycle regularly for any maintenance issues. Novices may not be particularly familiar with the parts and performance of motorcycles, but you can do some basic daily maintenance and motorcycle clean works. But it may need some essential maintenance tools when you maintain it. Of course, you can also send your motorcycle to a professional motorcycle maintenance agency and let them help you maintain it.
Frequesntly Asked Questions
1. How hard is it to ride a motorcycle for the first time?
Riding a motorcycle for the first time can be challenging for many beginners. But you still can manage it if there is proper guidance.
The most important things are balancing the bike, coordinating the clutch and throttle, and shifting gears. But you know that it is not easy to learn it for the first time.
You will get nervous when you are learning how to ride a motorcycle for the first time, it is normal. Please be patient and find a safe environment to practice, most beginners can get the hang of it quickly.
Also, you can take a basic rider course, with a teacher guiding you, and you can boost your confidence and safety.
Remember, everyone starts as a beginner, so don’t be discouraged by initial difficulties.
2. How do you move a motorcycle for beginners?
Beginners may not be familiar with how to move the motorcycle. Here are the main steps to move a motorcycle:
Mount the Bike: Sit comfortably with both feet on the ground.
Start the Engine: Turn the key, ensure the kill switch is on, and press the starter.
Engage the Clutch: Pull the clutch lever in with your left hand.
Shift to First Gear: Use your left foot to press down on the gear shifter.
Throttle and Release: Slowly twist the throttle while gently releasing the clutch.
Balance and Move: As the bike starts to move, balance and steer gently.
3. What is the hardest thing to learn for beginners on riding a motorcycle?
For beginners, the most difficult thing to learn when riding a motorcycle is to coordinate the clutch and the throttle.
Because the coordination of these two will directly affect the stability of the motorcycle when starting and stopping. Especially when driving at low speed, you need to control the balance of the body while mastering the clutch and the throttle.
In addition, how to smoothly shift gears and reverse steering when turning also requires a long time of training.
For most motorcycle novices, this is indeed difficult. However, please don't be discouraged, keep a calm mind, and practice patiently a few more times.
Slowly experience the feeling it brings you when you operate the motorcycle. When you feel that the sound of the car is very stable, remember the strength, direction and steps you just operated. You will be able to master these soon.
Or, you can also take a motorcycle safety course. The instructor will also teach you some tips to help you master these basic skills better.
Conclusion
Learning to ride a motorcycle is a rewarding experience that brings freedom and adventure. For beginners, be sure to follow these basic steps and practice regularly. The more you practice, the more you will develop the skills and confidence you need to ride safely.
The most important advice I can give you as a beginner is always to ride safely and practice more. Remember that safety is of the utmost importance, so always wear your gear and ride responsibly.
Harley-Davidson is a name synonymous with the spirit of freedom and the open road. It has been known worldwide as one of the most iconic motorcycle brands. This motorcycle brand offers a diverse range of bikes catering to various riders' needs and preferences. Whether you are a beginner or experienced rider, there will be some best Harley-Davidson motorcycles for you. In this article, we will explore some of the best Harley-Davidson motorcycles tailored for different purposes. You may find the perfect bike to suit your riding style and requirements in our content.
Different rider has different riding preferance and demand. So, we will list the best options in several parts according to different riders and riding demands. You can read according to your specific purpose.
Best Harley-Davidson for Beginners
For beginners, a motorcycle that is light, easy to handle, and has manageable power is ideal. Harley Davidson has many great choices for you to start with. These bikes offer a comfortable riding position and enough power to be fun without being overwhelming.
Harley-Davidson Street 500
Harley Davidson Street 500 - best Harley Davidson motorcycle for starters
The Street™ 500 is one of Harley-Davidson's best cruisers for beginners.
You'll find that the Street 500 is the motorcycle used for practice at the Harley-Davidson Rider Academy. This is enough to show how friendly this bike is to beginners.
Overall, it is a lightweight cruiser with a low center of gravity and easy to handle.
First, its water-cooled, fuel-injected V-twin 494cc engine provides plenty of power and torque while maintaining good fuel efficiency.
In addition, the low seat height is perfect for shorter riders. For riders who often have daily commuting or weekend riding needs, it can meet your needs.
For many beginner cruiser riders who want to own an iconic brand but want an easy-to-handle motorcycle, the Street 500 is an ideal choice.
Harley-Davidson Iron 883 Motorcycle
Harley-Davidson Iron 883 Motorcycle
The Harley-Davidson Iron 883™ certainly has a spot on the list of favorite motorcycles for beginners. This cruiser has always been a Harley-Davidson staple with its streamlined design and easy handling.
The Iron 883 motorcycle is equipped with an 883cc V-twin engine - a true Harley engine. This allows the motorcycle to provide easy-handle power and torque and precise handling on the road. Like the Street 500 motorcycle, it also has a 25.7 inches height seat that suits shorter riders.
Viewing from its appearance, the simple design provides a classic look. And, its black styling and bobber-style fenders create a sleek, aggressive appearance, but still versatile and fun to ride.
Compared to other entry-level cruisers, it is a practical, no-gimmicks fun machine.
For tall riders selecting a Harley Davidson, focus on seat height, legroom, and long-ride comfort. Models with higher seats can offer a better legroom and comfortable riding experience. Besides, forward controls motorbikes and an ergonomic design help tall riders reduce fatigue. Also, you can do some rides to test the motorbike's comfort and fitness.
Here are two classical Harley's motorcycle suitable for tall riders:
Harley Davidson Road King
Harley-Davidson Road King - Best Harley Davidson Motorcycles for Tall Riders
For taller riders, the Road King is a great choice. It has a 28.2-inch seat height and a wide enough seat. Its well-positioned foot controls provide extra comfort for longer limbs.
In addition, its adjustable suspension system is very suitable for different heights and riding styles.
Overall, the Road King is large enough so that tall riders will not feel like they are sitting on a child's bike.
Also, the removable windshield is worth praising. It provides flexible wind protection without affecting visibility.
In general, the Road King seamlessly blends traditional aesthetics with modern ergonomics.
Harley Davidson Breakout
Harley Davidson Breakout
The Breakout 107 and Breakout 114 are worthy models for tall riders. Their seats provide ample room for rearward movement, and the stretched riding position is perfect for taller cruiser riders.
In addition, their high seats support your lower back and make riding comfortable. The forefoot controls are nice for long legs, and the Softail frame makes your ride smooth and easy.
The latest Breakout retains the traditional look but adds a lot of hidden technology to keep it stylish. Best of all, their emissions meet regulations.
For those looking for a laid-back cruiser with personality, the Breakout is worth considering.
Best Harley Davidson Motorcycles for Short Riders
For short riders, it is better to choose the Harley-Davidson models have a low seat height. They are easier to get on and off if you are not tall.
Besides, lightweight and narrow profile ones can enhance your control and stability.
Still, we advice you to have a test rides to help you find the best fit one.
Harley Davidson Softail
Harley Davidson Softail
The Harley-Davidson Softail series is popular among smaller riders. They have low seats, which makes them friendly to shorter riders.
For example, the Harley-Davidson Softail Slim model is the shortest model made by Harley. Its seat height is only 23.8 inches (60.5 cm).
The Harley-Davidson Softail Deluxe in the same series has a seat height of only 24.5 inches.
Generally, its low center of gravity makes this series of motorcycles easy to handle for most smaller riders.
Moreover, the Harley-Davidson Softail series motorcycles are affordable. They are the most affordable cruiser models of Harley-Davidson.
Harley Davidson Nightster
Harley Davidson Nightster
The Harley-Davidson Nightster should be listed among the best harley davidson for short riders.
On one hand, the motorcycle weighs only 481 pounds when riding, which is easy to handle. And it has a seat height of 27.1 inches and mid-mounted foot controls.
These two aspects are definitely tempting for shorter riders.
In addition, its mid-mounted foot controls put the foot pedals with brake and shift levers closer to the seat. Let's applaud this ergonomic design.
Many shorter riders will make this model one of their first choices.
Best Harley-Davidson Motorcycle for Touring
For touring, it’s best to prioritize comfort, storage capacity, and long-distance capabilities. Because these details have a big impact on your riding pleasure.
Comfortable seats and advanced suspension will reduce bumps. Motorcycles with saddle bags and travel bags can accommodate more necessary gear.
If they also come with enhanced features such as infotainment systems, cruise control, and wind protection, it would be even better.
The following Harley-Davidson motorcycles are designed for stability and comfort for long-distance touring.
Harley-Davidson Electra Glide
Harley-Davidson Electra Glide
The Harley-Davidson Electra Glide is the epitome of touring motorcycles. This model borrows the simple design of the Road King, but has done a lot of work on comfort and modern touring features.
Touring body, floorboards, hard saddle bags, single touring seat, large V-twin engine, engine guards... All you want, the Electra Glide has it.
Its smooth driving and plenty of comfort are what this motorcycle was designed for. Plus with plenty of storage space, it is very suitable for long-distance and off-road travel.
Today, Electra Glide has become a highly respected Harley-Davidson touring motorcycle model.
Harley-Davidson Road Glide
Harley-Davidson Road Glide
The Road Glide is one of the best touring motorcycles from Harley-Davidson. It has a unique “shark nose” frame-mounted fairing and aggressive styling.
This perfect design provides excellent wind protection and stable handling for this motorcycle. Even when cutting through wind at high speeds, there is no buffeting.
The Road Glide is equipped with the same engine, frame, saddlebags, seat, and even touchscreen infotainment system as the Street Glide. These devices are very complete for long-distance riders.
Its comfortable seat makes it suitable for long-distance touring. Even if you ride for hours, you will not feel too uncomfortable.
It is these advantages that make the Road Glide more popular than other motorcycles in some parts of the US.
For long-distance riders who are looking for a combination of performance and style, the Road Glide is the best choice.
Best Harley-Davidson Motorcycles for Performance
The best Harley-Davidson performance models excel in their engine power, handling, and speed.
The Harley-Davidson Sportster S and Twin Cam series stand out with powerful engines and agile handling.
The Sportster S has a Revolution 1250cc engine that delivers high performance and speed.
The Twin Cam series features a Twin Cam engine that delivers impressive torque and acceleration.
Both models feature sport-tuned suspension and lightweight design for increased maneuverability.
Harley-Davidson Sportster S
Harley-Davidson Sportster S
In 2021, Harley-Davidson introduced the redesigned Sportster S serie. It revolutionized the performance motorcycle market which was dominated by Japan motor brands.
The Sportster S has a liquid-cooled 1250cc Revolution V-twin engine that produces 121 horsepower and 94 lb-ft of torque. With a weight of 500 pounds, this high-performance engine allows it to reach a top speed of 143 MPH!
Also, this motorcycle has forward controls, multiple riding modes, GPS and Bluetooth compatibility. I would like to say, this motorcycle combies speed, technology and performance together. And, undoubtedly, it sets a new standard for performance motorcycles.
The Harley-Davidson Sportster S has the same powerful styling as before. It also has several other unique designs, such as:
a single-compartment headlight;
compact fuel tank;
single-compartment instrument panel;
flat handlebars;
rider-specific saddle;
dual-compartment exhaust pipes;
wide-profile tires.
Twin Cam
Harley-Davidson Twin Cam
Twin Cam is a series of Harley-Davidson motorcycles. There are several outstanding performance motorcycles in this series.
The Twin Cam 95 (1,550 cc), Twin Cam 96 (1,584 cc), Twin Cam 103 (1,690 cc) and Twin Cam 110 (1,800 cc) are the best among them.
The displacement of motorcycles in this series ranges from 1500cc to 1800cc, and there are many options for you to pursue.
Among them, the most eye-catching is the 1800cc Twin Cam 110 engine. It has long dominated the performance motorcycle market between 2007 and 2017.
Their roar provides an exhilarating experience for riders. For riders who like to pursue extra impact, Twin Cam is a great choice for performance motorcycles.
As you can see, every time you hit the throttle of Twin Cam, the rider's passion will be ignited.
Conclusion
In summary, the best Harley-Davidson motorcycles offers a wide range of options to suit different needs. From beginners to experienced riders, there's a bike for everyone. Tall riders will find comfort in models like the Road King and Breakout. Short riders can enjoy the easy handling of the Softail and Nightster. For long-distance travel, the Electra Glide and Road Glide provides unmatched comfort and features. Performance enthusiasts will appreciate the power of the Sportster S and Twin Cam. Harley-Davidson continues to be a top choice because of its versatility and reliability. No matter your riding style, there's a Harley-Davidson that fits your needs perfectly.
Have you ever wondered just how fast can a 50cc motorbike go? This kind of small but mighty machines are a popular choice for many people. Many new riders, city commuters, and anyone looking for a fun, economical way to get around are choosing 50cc motors. Despite their small engine size, 50cc motorbikes pack a surprising punch.
In this blog, we’ll explore the speeds you can expect from these bikes, what factors influence their performance, and how they stack up against larger motorcycles. Whether you’re considering buying one or just curious about their capabilities, we’ve got all the details you need. So, let’s dive in and discover the world of 50cc motorbikes!
What is a 50cc Motorbike?
"50cc" refers to the engine displacement of a motorbike, specifically the volume of the engine's cylinders.
Measured in cubic centimeters (cc), it indicates the total space within the cylinders where fuel and air mix and combust to produce power is "50cc".
A 50cc engine has a displacement of 50 cubic centimeters is usually lower speeds and fuel efficiency. So they are ideal for short commutes and city riding.
Scooters and mopeds are the most common types of 50cc motorbikes. They are easy of use, fuel efficiency, and comportable when riding. Besides, they are lightweight, thus making them easy to maneuver in traffic.
These are them reasons why people like to choose 50cc motors in short-distance and city ride.
How Fast Can A 50cc Motorbike Go?
Typical Speed Range
Typically, a 50cc motorbike can reach speeds between 25 to 45 mph (40 to 72 km/h). This is the legal speed.
In many markets, these motorcycles are limited in the engine they can have.
However, a 50cc scooter can reach a top speed of 60 mph (96 km/h), while most scooters can easily reach 40 mph (65 km/h).
The exact speed can vary based on factors such as the bike's make and model, rider weight, and terrain.
Despite their limited speed compared to larger motorcycles, 50cc bikes provide sufficient pace for navigating city streets and residential areas efficiently.
Legal Speed Limits
The legal speed limits for 50cc motorbikes also play a significant role in how fast they can go.
In many regions, 50cc motorbikes are restricted by law to ensure safety on public roads.
For example, in the European Union, 50cc scooters are often limited to a top speed of 28 mph (45 km/h).
In the United States, the speed restrictions can vary by state, but many follow similar guidelines, capping the speed of 50cc motorbikes to around 30 mph (48 km/h).
These regulations help maintain safety for both riders and other road users, ensuring that 50cc motorbikes are used within their designed capabilities.
Besides, please note that there are license and age requirements for the maximum speed of a 50cc motorcycle.
For those under 17 with a CBT license, the maximum speed can only reach 28 miles per hour in many regions.
If you are under 17 and want to pursue the top speed of a 50cc motorcycle, I advise you not to do it.
Because your current age does not allow you to drive a motorcycle at high speed.
For others, please also check the maximum speed that your current driving qualifications allow you to reach.
Factors Influencing Speed
Engine Performance
The performance the motorcycle engine is a major factor in determining its speed. While all 50cc engines have the same displacement, their design, tuning, and quality can vary.
A well-tuned engine with high-end components can deliver better performance. So it can bring a higher speed then other ordinary engines.
Besides, the regular maintenance of your motorbike's engine also helps keep its speed. For example, you should check the engine's oil and air filter every once in a while (monthly or quarterly).
If there is problem, it will be necessary to change them. These maintenance work can keep the engine running efficiently.
Weight
The weight of both the rider and the motorbike itself significantly impacts speed.
Heavier riders or extra cargo can slow down the bike. That's because, the engine has to work harder to move the extra weight.
Similarly, the overall weight of the motorbike also influence the motorbike speed. For example, the additional accessories and storage boxes will affects its ability to accelerate and maintain higher speeds.
Terrain
The type of terrain you ride on influences the speed of a 50cc motorbike.
Flat, smooth roads allow for higher speeds, while hilly or rough terrains can slow the bike down.
If riding at a steep inclines, it will require more power to climb, which can reduce the bike's top speed. In contrast, if it is a downhill terrain, the motorbike's speed may temporarily increased.
Weather Conditions
Weather conditions can also play a role in how fast a 50cc motorbike can go.
When you are riding into the wind, the strong headwinds can slow down the bike by creating resistance.
But, if it is tailwinds, then it can help your motorbike go faster.
Besides, rain or wet conditions can reduce traction and safety, the riders have to reduce the speed.
Also, in cold weather, the engine performance can also be affected. This will also limite the motorbike's speed.
Remember to pay attention to these factors when you are riding motorbikes. They can help you get the most out of your 50cc motorbike while riding safely and efficiently.
Best 50cc motorcycle models
Here is a list of several mostly recommended 50cc motorbikes in the market:
31.07mph (50 km/h restricted)
65.24mph (105 km/h derestricted)
Aprilia SR50
56-60mph (90-96km/h)
Kymco Agility 50
30mph (48 km/h)
Lexmoto Aspire 50 E4
30mph (48 km/h)
Sherco SM 50
30mph (48 km/h)
Yamaha Aerox
34mph (54.7 km/h)
Here is a video about the Honda Vision 50 top speed riding esperience:
Also, there is a Lexmoto Hunter 50 ride test, so that you can know about the true experience of how fast can a 50cc motorbike go.
Should you de-restrict a 50cc, Is it safer and what are the risks?
I think this question might be one the mostly asked questions on 50cc motorbikes. OK, let's discuss about this question. I will list some ways to upgrade your 50cc motorbike's performance. Also, there is some ricks, especially the legal considerations you need to pay attention to.
De-restrict and Performance Upgrade
Yes, there is some aspects you can do to un-district the 50cc motorbike speed.
First way is upgrade the engine's performance.
One common upgrade is installing a high-performance exhaust system. This can improve airflow and increase power.
Or you can replace the stock air filter with a high-flow version. This will allow the motorbike's engine to breathe better and run more efficiently.
Besides, upgrading the carburetor can also enhance fuel delivery and improve acceleration.
Another way is to turn the engine.
You can adjust the fuel-to-air ratio, optimize the ignition timing, and ensure the engine components are in top condition.
A well-tuned engine can run more smoothly and efficiently, resulting in better speed and performance.
The third way is upgrade the tires and suspension.
High performance tires can increase grip and stability, allowing for higher speeds safely.
Enhancing the suspension system can improve handling. This is especially useful and safer when you are riding at higher speeds or on rough terrain. Besides, it can also provide a more comfortable ride, reducing fatigue on longer trips.
Legal Considerations
Legal implications is an important factor to consider before making any modifications.
Many regions have strict regulations regarding motorbike modifications, especially for 50cc models.
Upgrading the engine or exhaust system can sometimes make the bike non-compliant with local laws. Thus can potentially result in fines or other penalties.
So, you should check your local regulations before modificate your motorbike. If necessary, consult with a professional mechanic to ensure your modifications are safe and legal.
Frequently Asked Questions
Is a 50cc bike worth it?
A 50cc motorbike can be worth it if you need an affordable, fuel-efficient, and easy-to-ride vehicle. They mainly used for short commutes and city travel.
On one hand, they are lightweight, maneuverable, and often require less licensing. So they are ideal for beginners.
However, they have limited speed and power. Consider from this aspect, they are unsuitable for highways or long-distance rides.
For quick trips around town and value simplicity and low running costs, a 50cc bike is a great choice. For more speed, power, and comfort, you might want to consider larger bikes.
What is the fastest 50cc motorbike?
So far, The fastest onland record of 50cc mototcycle is over 233 kmph (about 145 mph). It is hitted by a metal fabricator on the Bonneville Salt Flats in 2008.
However, since this speed is achieved with a turbocharged streamlined engine, it is not the same as a regular 50cc motorcycle. Most production 50cc motorcycles cannot reach this speed.
In fact, there is not much information about the fastest 50cc scooters.
Most riders who are looking for speed will go for a larger displacement motorcycle instead of a 50cc one.
Typically, a production 50cc motorcycle will have a top speed of around 50 km/h (30-35 mph). However, some riders will add performance parts to increase the top speed. Therefore, most claims about the top speed of a 50cc motorcycle are somewhat misleading.
Single cylinder motorcycle engines are the mostly used engine on motorcycle. Have you wondered why? That's because they are popular for their simplicity and efficiency. Many smaller bikes, dirt bikes, and some commuter motorcycles are using this single cylinder engines. In this blog, we will explore the features, benefits, and drawbacks of single-cylinder motorcycle engines. We will also look at how they compare to other engine types and why they remain a popular choice for many riders.
What is Single Cylinder Motorcycle Engine?
A single-cylinder engine, as the name implies, is a piston engine with only one cylinder. Many people also call it a thumper.
This motorcycle engine is the simplest of all engines. It has only one cylinder and is the basic form of the engine.
Single-cylinder engines can be roughly divided into two types: 4-stroke engines and 2-stroke engines.
This engine is the most common engine layout in motorcycles. You can see single-cylinder engines on many motorcycles, especially regular motorcycles.
The more classic Honda Super Cub uses a 49 cc (3.0 cubic inch) four-stroke single-cylinder engine. Today, it has become the highest-selling motorcycle in terms of total sales.
Compare between Single-Cylinder Engines And Other Types of Engine
Normally, there are single-cylinder engine, twin-cylinder engine, triple-cylinder engine and four-cylinder engine in the market.
Here is a table to show the key characteristics, advantages, and disadvantages of different types of motorcycle engines.
Features
Single-Cylinder Engine
Twin-Cylinder Engine
Triple-Cylinder Engine
Four-Cylinder Engine
Configuration
One cylinder
Two cylinders in various configurations
Three cylinders in a row
Four cylinders in a row or V-configuration
Power Output
Moderate
Higher than single-cylinder
Balanced power
High power
Torque
High at low RPM
Balanced across RPM range
Smooth and linear
High at high RPM
Complexity
Simple
Moderate
More complex
Most complex
Maintenance
Easy
Moderate
More frequent
Requires more frequent and skilled service
Weight
Light
Moderate
Moderate
Heavier
Fuel Efficiency
High
Moderate
Moderate
Lower
Vibration
High
Lower than single-cylinder
Low
Very Low
Cost
Generally lower
Moderate
Higher
Highest
Typical Applications
Dirt bikes, small commuter bikes
Sportbikes, cruisers, adventure bikes
Sportbikes, high-performance bikes
High-performance sportbikes, touring bikes
Advantages
Lightweight, simple, easy to maintain
Good balance of power and torque, versatile
Smooth power delivery, good performance
High power output, smoothness, high RPMs
Disadvantages
High vibration, limited power range
Heavier, more complex than single-cylinders
More complex, higher maintenance needs
Heaviest, most complex, lower fuel economy
Sound
Thumpy, characteristic single-cylinder sound
Varied (depends on configuration: parallel, V)
Unique, distinctive triple sound
Smooth, high-pitched, inline-four sound
After reading this table you might have a general understanding about these engines.
As you can see, single cylinder engines do have several features that are better than other engine types.
But it does not mean that a engine with 1 cylinder can always be the best option.
Choose the one best suit your needs is always the best and most cost-saving option.
Pros and Cons of Single Cylinder Motorcycle Engines?
Every kind of engine has its pros and cons. Here, we will show you the pros and cons of single cylinder ones.
This will give you an in-depth lesson to let you know about it ultimately.
Pros of Single Cylinder Engines
Cons of Single Cylinder Engines
01. They have relatively simpler structure, thus relatively easier to be produced.
01. Their output power is relatively lower than other types of motorcycle engines.
02. Their simple layout and design make it easier to work on and maintain.
02. Large vibration during working.
03. They need lower maintenance and repair cost.
03. Intermittent power delivery.
04. The ability to provide high power and appropriate low-end torque in limited space.
04 Lack of power delivery and high-rpm comfort.
05. Only need one carburetor, a single exhaust pipe, a single valve teach, one piston, and a single-cylinder head.
05. Less pleasant exhaust note. (some riders may not like this sound.)
06. Usually lighter in weight than multi-cylinder engines.
06. Almost inevitably has a lower power-to-weight ratio.
07. Cost friendly, less expensive than other kinds of engines.
07. Limited capacity or displacement size (usually 650cc).
08. Light weight make the whole motorcycle easier to maneuver and handle smoothly.
How does a single cylinder motorcycle engine work?
The working process of a single-cylinder engine can be divided into four stages: intake, compression, power and exhaust.
Intake stage. The piston moves downward to inhale fresh air and fuel mixture for preparation. In the mean time, the valve opens and inhales the mixture into the cylinder through the air flow.
Compression stage. The intake valve closes, the piston moves upward, compresses the mixed gas in the cylinder, and generates compression heat. This process is important as the temperature of the mixed gas increases when the mixture is compressed. This process helps to cause ignition.
Power stage. During engine operation, the ignition system activates the spark plug at the top to ignite the mixed gas. The heat energy generated by the combustion process instantly increases the pressure, pushes the piston down. Then transmit to the crankshaft through the connecting rod, causing it to rotate and output power.
Exhaust stage. When the piston reaches the bottom dead center, the exhaust valve opens and exhaust gas is generated. After the exhaust valve opens, fresh mixed gas enters the cylinder again. The whole process is repeated over and over again, generating continuous engine power.
The working process of a single-cylinder engine is cyclical. The energy converse and transmist through continuous intake, compression, combustion and exhaust.
18 Best single cylinder engine motorcycle
Many motorcycle brands has single-cylinder engine motorcycle. Here, we will give you a list of the best 18 of them after I have a full analize and comparision.
Best Single-Cylinder Bikes
Photo
Manufacturer
Displacement
Power
Torque
Curb Weight
KTM Duke 390
KTM
373cc
44.8 hp
28.8 lb-ft
364 lbs
Kawasaki Z125
Kawasaki
125cc
8.3 hp
7.1 lb-ft
224 lbs
Royal Enfield Scram 411
Royal Enfield
411cc
24 hp
23 lb-ft
407 lbs
Suzuki DR-Z400S
Suzuki
398cc
33.4 hp
25.6 lb-ft
317 lbs
Honda Grom
Honda
124cc
9.7 hp
7.7 lb-ft
224 lbs
BMW G 310 GS
BMW
313cc
34 hp
20 lb-ft
386 lbs
Royal Enfield Meteor 350
Royal Enfield
411cc
20.2 hp
19.9 lb-ft
421 lbs
Kawasaki KLR 650
Kawasaki
652cc
40 hp
39 lb-ft
456 lbs
Husqvarna Svartpilen 401
Husqvarna
373cc
44 hp
27.3 lb-ft
335 lbs
KTM RC 390
KTM
373cc
44 hp
27 lb-ft
379 lbs
Yamaha YZF-R15
Yamaha
148cc
17 hp
11.1 lb-ft
313 lbs
Aprilia RS125
Aprilia
124.8cc
34 hp
18.4 lb-ft
317 lbs
Kawasaki KX500
Kawasaki
499cc
66 hp
48.4 lb-ft
220 lbs
KTM 690
KTM
693cc
74 hp
55 lb-ft
306 lbs
BSA Gold Star
BSA
348cc
27 hp
37.5 lb-ft
436.5 lbs
What's the biggest single cylinder motorcycle engine?
When talking about the biggest engings with single cylinder, the Suzuki DR Big is on the list. It is the "World's largest production single-cylinder engine", generated by Suzuki in 1990s. It has win this title for over 30 years. By now, there is no other engine manufacturer has supassed the engine cubic capacity that this engine has achieved.
Besides, we also need to mention about Superquadro Mono, the most powerful single-cylinder engine in the world. This engine is the new member of Ducati engines family. It is a 659cc short-stroke single cylinder engine with desmodromic distribution. Generally, it is the best performance road-going single-cylinder engine.
Main parameters of Superquadro Mono
Parameters
Information
Engine Configuration
Single-Cylinder, vertical
Engine Displacement
659cc
Compression Ratio
13.1:1
Maximum power
57 kW (77.5 hp) at 9,750 rpm – 85 hp at 9,500 rpm with Termignoni racing exhaust
Maximum torque
63 Nm (6.4 Kgm) at 8,050 rpm – 6.8 Kgm with Termignoni racing exhaust
Homologation
Euro 5+
Cylinder barrel
Aluminium
Gearbox
6-speed gearbox with the possibility of fitting the Ducati Quick Shift (DQS) Up & Down
Weight
332.9 lbs
Frequently asked questions
Is 1 cylinder good for motorcycle?
Yes, a 1 cylinder engine can be a good choice for many motorcycles. 1 cylinder engines are often lighter, more simpler structure, budget friend, and easier to maintain. Besides, 1-cylinder engines also typically offer good low-end torque. Thus making them fun to ride in stop-and-go traffic. For city commuting and short trips, they are good choice.
However, they might lack the smoothness and power of multi-cylinder bikes. This is more obvious on 1-cylinder engine motorcycles at high speeds. So, if you need a bike for daily use and short distances, a 1-cylinder motorcycle can be a solid option.
Why mostly bikes are single cylinders?
Most bikes are single-cylinder because they are simpler, lighter, and cheaper to make.
Firstly, single-cylinder motorcycle engines have fewer parts than other types of engines. This makes them easier to maintain and repair.
Besides, they also tend to be more fuel-efficient, which is great for daily commuting.
Wha's more, single-cylinder bikes are usually lighter, easier to handle, so they are really nice and friendly for new riders.
And, they provide good torque at low speeds, which is useful for city riding.
They may not have the high power of multi-cylinder engines. But their simplicity and cost-effectiveness make them a popular choice for many riders.
How will you prepare for a long motorcycle ride trip? Long-distance motorcycle trips are always full of fun and adventure. However, it is very important that you need to make a comprehensive preparation. It is not like riding near your home or a short-distance trip. In this article, we will present you an ultimate guidance about the preparation for your long motorcycle road trip. From planning the route, motorcycle maintenance, safety precautions, gears, and budget, you will have all.
Now, let's begin this step by step.
1. Planning Your Route
A long motorcycle trip is not like driving for several hours. The route will be the first thing you need to consider. Don't be lazy during the planning, otherwise you will suffer a lot on your long cycling journey. Here are some tips and tricks you can learn:
Researching scenic and safe routes.
One of the purposes of our cycling trip is to enjoy the beautiful scenery. So, choose scenic motorcycle road as your route will be the first option.
For example, there are many California motorcycle riding routes for you to choose from. Also, the Route 66 tour, which goes from Chicago to Santa Monica, is another classical motorcycle tour.
Besides, safety is always the first important thing. Remember to choose those famous routes. Because these routes have been ridden by many people, you can easily find guides for these routes. This will be safer for you if you are not familiar with these roads.
Using GPS and maps for navigation
GPS and maps are essential gear when you are riding. Some motorcycle routes have detailed maps to show you the sceneries, restaurants, and other information. These information will help you better arrange your time and routes.
Identifying rest stops and gas stations is crucial for a smooth motorcycle road trip. Plan your route to include regular stops every 100-150 miles to refuel and rest.
Use GPS or apps like Google Maps to locate gas stations and rest areas along your route. This ensures you won’t run out of fuel and gives you a chance to stretch, hydrate, and stay alert during the ride.
Planning for potential detours and road conditions
Planning for potential detours and road conditions is essential for a hassle-free long motorcycle trip.
Remember to check the weather forecasts and road reports before your journey.
Besides, you should have alternative routes ready in case of road closures or construction.
Also, you can use apps like Waze for real-time traffic updates.
These ensure you can adapt quickly, stay safe, and keep your trip enjoyable and on schedule.
2. Motorcycle Maintenance List When Prepare for A Long Motorcycle Ride
Pre-trip inspection checklist
Tires: Remember to check the tire pressure and tread. If necessary, change new tires.
Fluids: Confirm that the oil, coolant, and brake fluid are enough. If your motorcycle has not been use for a long time, change these fluids.
Brakes: Make sure the pads and rotors perform well. If they are badly worn, replace them with a new set.
Chain/Belt: Check the chain tension and lubrication, clean the dust, and oil the chain. If necessary, replace a new chain.
Lights and Signals: Check the functionality of lights and signals, and make sure they will not break down.
If the motorcycle has been stored for months, take it to a professional for a thorough check-up. There might be some small problems that you cannot find or notice.
Ask them to help you check if there are any necessary repairs or adjustments. This is essential to make your long-ride tour safe and comfortable.
Carrying essential tools and spare parts
Carrying essential tools and spare parts is vital for any long motorcycle ride.
Pack a basic toolkit, tire repair kit, and spare fuses. Include items like a multi-tool, duct tape, and zip ties.
These tools will help you handle minor repairs on the road, ensuring you can continue your journey smoothly.
3. Packing Essentials
Packing essentials ensures you're prepared for any situation, enhancing comfort, safety, and convenience on your long-distance road trip.
Proper gear, personal items, and tools make your journey more enjoyable and stress-free.
The following is a summary of must-have motorcycle safety gear for your long trip:
Here is a full packing essentials list for long distance motorcycle ride. You can check them and prepare according to your demand.
long motorcycle ride packing essentials (Resource analyzed from Motorcycle Legal Fundation)
4. Safety precautions
Safety is the top consideration when if you are beginning to prepare for a long motorcycle ride. Proper safety measures can prevent accidents. And they keep you and other participates on the road get protected in case of unforeseen events.
Always wear your protective gear
Choose a DOT(United States Department of Transportation) approved helmet to protect your head. Gloves will protect your hands from wind, debris, and accidents.
As for jackets and pants, I advise you to choose those made of durable, abrasion-resistant materials like leather or reinforced textiles.
Besides, choose sturdy, over-the-ankle boots to protect your feet and ankles.
Stay Visible
Use reflective vests, strips, or decals on your clothing and bike to enhance visibility, especially at night.
Ensure all lights (headlights, brake lights, turn signals) are functioning properly. If necessary, consider adding auxiliary lights for better visibility.
Carry waterproof clothing to stay dry during unexpected rain.
Besides, if you are riding through climate change areas or areas with large altitude differences, you can dress in layers to adjust to changing temperatures throughout the day.
Get prepared for different weather conditions and make sure you can have a comfortable riding trip.
Regular Breaks
Take breaks every couple of hours to rest, hydrate, and stretch. This helps prevent fatigue and keeps you alert.
Besides, you should avoid riding when you're tired or feeling unwell. It's better to delay your trip than risk an accident.
long-distance motorcycle riding on the road
5. Navigation and Communication
GPS navigation units and motorcycle communication systems are most definitely devices for motorcycles. GPS guides you to your destination efficiently.
Motorcycle communication systems help you intercom with your partners conveniently. Remember the following when riding for long distances:
Use a reliable GPS or smartphone app
Fodsports provides several GPS navigator devices that can help you get turn-by-turn navigation on the back of your motorcycle. There are 4.3 inch GPS and 5 inch GPS navigation devices available for motorcycle. You can choose according to your demand.
Also, there are smartphone GPS apps available on Apple, Samsung, and Google app stores. You can install them onto your cellphone to give you guidance.
Keeping a physical map as a backup
Although the physical map is not very commonly seen nowadays, it still has an important function.
When you are riding in no man's land or where the signal is weak, a physical map will help you a lot.
It is lightweight, just keep it in your package, and it may help you someday.
Staying connected with family or a riding group
When you are riding along during a long motorcycle trip, remember to tell your family and stay connected with them.
You can call them or message them when you are having a rest. Share with them some photos you take during the journey. This make sure that they know you are safe on the road.
If you are riding with your friends or other accompanies, stay connected with your group. And, do not go alone to the area you are not familiar. Otherwise they will look for you everywhere.
Using communication devices (Bluetooth intercoms)
Bluetooth communication devices are really efficient during the ride trip. They can offers frictionless communication between rider-to-rider and rider-to-passenger.
With a Bluetooth helmet intercom system like Fodsports M1S Pro, you can reduce the need to use hand signals or scream. So riders can keep their hands on the bars.
6. Accommodation and Lodging
Sleeping is an important aspect you need to prepare for a long motorcycle road trip.
Some riding routes have hotels, motels, or campsites along the way, you can book them according to your time schedule. They may vary in cost, so consider according to your budget.
Besides, do not forget your motorcycle. Make sure there is an area for you to park your motorcycle there.
If you are riding through a no-man area or prefer to stay overnight in the wild, the tent and sleeping bag will be very essential.
7. Travel Documentation and Legalities
If you prepare for a cross country motorcycle trip, make sure all your travel documents are up to date.
Besides, you need to learn about the traffic laws and regulations of your destination and the places you will pass through.
Also, different regions may have different insurance requirements. You need to comfirm this at the same time.
8. Budget and Financial Planning
Budget is another aspect you need to prepare when you are planning a motorcycle for long distance trip.
First, you should estimating the fuel, food, and accommodation costs during your trip.
Do not put all your budget on them, it is important to set aside an emergency fund. This fund will help you out in difficult times.
Also there might be some additional expenses during the trip. So, please keep track of your expenses during the trip. Make sure you have enough money to get home.
Conclusion
Preparing for a long motorcycle road trip involves careful planning and attention to detail.
By mapping out your route, checking your bike’s maintenance, and packing the right essentials, you set yourself up for a smooth journey. Safety precautions like wearing the right gear, staying visible, and being prepared for various weather conditions are crucial. Regular breaks and knowing your limits help keep you alert and focused on the road. Don't forget to plan for accommodations and ensure you have all necessary travel documents.
With proper preparation, you can enjoy the freedom and adventure of a motorcycle road trip while staying safe and comfortable. Remember, the journey is just as important as the destination, so take your time, stay safe, and enjoy the ride.
Also, we'd love to hear from you! Share your own tips and experiences about long motorcycle road trips in the comments. Your insights can help fellow riders make their journeys even better.
Do you regularly maintain your ATV based on an ATV maintenance checklist? Some people may have the checklist an following it to maintain their ATV. While others may not have this, they just fix problems when they appears. In this blog, we’ll share a simple ATV maintenance checklist. Follow these steps to check your ATV before and after rides, weekly, monthly, and yearly.
Taking care of your ATV is important for safe and fun rides. Regular maintenance keeps your ATV running smoothly and helps avoid costly repairs. Whether you’re a new rider or an experienced one, this guide will help you keep your ATV in top shape. Let’s dive in and make sure your ATV is always ready for the next adventure!
For different time and period, the atv maintaining is different.
Some parts that are often worn need to be checked and maintained regularly. When necessary, you will need to replace new parts.
While other longer lifespan parts do not need to check or replace frequently. You can inspect them monthly or quarterly.
checking the ATV parts - ATV maintenance checklist (Source: Depositphotos)
Here’s a comprehensive checklist to help you keep your ATV in top condition:
ATV Maintenance Checklists
What To Do
Fluids
Regularly check and top off engine oil, coolant, brake fluid, and fuel levels.
Follow manufacturer recommendations for oil and filter changes.
Tires
Check tire pressure and tread depth before each ride, ensuring proper inflation for optimal grip and handling.
Throttle and Controls
Check the throttle grip, clutch lever, brake lever & pedal, gear shifter, handlebars and controls.
Make sure they are working smoothly.
Brakes
Inspect brake pads, shoes, and lines for wear and proper function.
Ensure brake fluid levels are adequate and brakes are properly adjusted.
Air Filter
Inspect and clean or replace the air filter regularly, especially in dusty conditions, to maintain engine performance.
Spark Plugs
Replace spark plugs as needed to prevent engine misfires and loss of power.
Battery
Check battery terminals for corrosion and ensure proper fluid levels (if applicable).
Cooling System
Inspect radiator, hoses, and coolant level for leaks and proper operation.
Driveline
Inspect for wear and proper lubrication. (Chains and sprockets)
If your ATV uses a drive belt, inspect it for wear and proper tension.
Lights and Switches
Ensure all lights (headlights, brake lights, etc.) and switches are functioning correctly.
Steering
Check for unobstructed movement and proper adjustment.
Cleanliness
Regularly clean the ATV to remove dirt, debris, and corrosive materials that can damage components.
Lubrication
Lubricate zerks, ball joints, bushings, and bearings as needed.
Bolts and nuts
Check if there are any bolts or nuts are loosen. Fasten them to avoid potential accident.
CV Boots and Joints
Make sure there are no cracks or tears on the CV boots. Lubricate the joints if necessary.
Exhaust System
Inspect the exhaust system for leaks and damage.
Essential Gear
Get all the gear ready before starting the journey.
Some people might be confused by this checklist: "Do I need to check so many details?"
If I spent a few hours checking all of this, I wouldn't even have started my trip today!
Actually, you don't need to check every single thing every time. Some things are essential before every trip, while others only require regular inspections.
Read on. I'll break down this ATV maintenance checklist into daily, weekly, monthly, quarterly, and annual inspections based on safety and maintenance needs.
Using this checklist and your ATV's maintenance history over the past year, you'll know what maintenance you should focus on now and in the coming months.
Before Each Ride
The checklist for ATV before your ride is necessary. These are the most important and they will directly influence your riding safety. Actually, I would analyze them as the must-do ATV maintenance checklist.
Check Fuel Level: Make sure there is enough fuel for your trip.
Inspect Tires: Check tire pressure and look for any signs of damage or excessive wear.
Lights and Signals: Test all lights and signals to ensure they are working properly.
Brakes: Test the brakes for proper function and responsiveness.
Throttle and Controls: Ensure the throttle operates smoothly and that all control cables move freely.
Fluid Leaks: Look for any signs of oil, coolant, or fuel leaks.
Check the gears: Check and clear your helmet(use disinfectant and a clean rag to wipe it). Make sure the helmet intercom systems are firmly installed on the helmet. Prepare the other essential gear properly before you start the ride.
Use Fodsports M1S Plus to enhance your ATV riding experience. It is IP65 waterproof, thus it won’t betray you on rainy days. For ATV riding in extreme environment, it also performs very good. Besides, it is perfrect for group intercom, music sharing, listen to FM radio during your riding.
Weekly Checklist
A weekly inspection is also essential. These will not take you a lot of time, but these details will influence your riding experience. During weekly maintenance, you will need to check the followings.
Oil Level: Check the engine oil level and top off if necessary.
Coolant Level: Ensure the coolant is at the proper level.
Air Filter: Inspect the air filter and clean or replace it if it's dirty.
Battery: Check battery terminals for corrosion and ensure the battery is charged.
Chain and Sprockets: If applicable, inspect the chain for proper tension and lubrication. Check the sprockets for wear.
Clean the exterior: Dirt and debris can cause corrosion and clog the engine. Clean the exterior of mud, leaves, and sand with soap and water.
Fastern the bolts: Remeber to check if there is any bolts and nuts are loose. Fasten them avoid potential accident and protect your safety.
Related reading for your weekly ATV maintenance checklist:
Maintain you ATV each quarter can largely extend its life and performance. This will not take much of your effort to keep it comply with the standards! Do the followings to improve your riding safety and experience in the next quarter:
Oil and Filter Change: Change the engine oil and oil filter. It is better to follow to the manufacturer’s recommendations.
Coolant System: Inspect the coolant system for leaks. Replace the coolant if necessary.
CV Boots and Joints: Inspect the CV boots for cracks or tears and check the joints for proper lubrication.
Exhaust System: Inspect the exhaust system for leaks, damage, and proper mounting.
Annually Full Inpection and maintenance for your ATV.
An annual maintenance will not cost you a lot of money. Instead, it keeps your ATV in top condition all year long. Proper maintenance will keep your ATV going for many years without expensive repairs. Here are the annual maintenance tips and checklists for your ATV:
Full Inspection: Perform a comprehensive inspection of the entire ATV. These include checking the frame, engine, transmission, and electrical system.
Professional Service: Consider taking your ATV to a professional for a thorough check-up. Ask them to help you check if there are any necessary repairs or adjustments.
Replace Fluids: Replace brake fluid, coolant, and other critical fluids. This is also a useful maintenance tip recommended by most ATV manufacturers.
Some Frequently Asked Questions
What regular maintenance should be done on an ATV?
Regular ATV maintenance is essential to keep it running well.
Before each ride, check the fuel level, tire pressure, lights, and brakes.
What's more, look at the oil and coolant levels, clean the air filter, and inspect the battery and chain. Besides, remember to check the spark plug, brake pads, and suspension each month.
Every few months, change the oil and oil filter and check the CV boots and joints. Annually, do a full inspection and replace any worn parts.
Cleaning your ATV regularly also helps prevent problems. Keeping up with these tasks ensures your ATV stays in great shape.
Are ATVs high maintenance?
Yes, ATVs require regular maintenance, but their maintenance cost is not high.
Like other kind of vehicle, keeping an ATV in good shape means you will need to do routine checks and services.
This includes checking tire pressure, oil levels, and brakes regularly. Monthly tasks like changing the oil and cleaning the air filter. These checks and maintenance will help prevent bigger issues for your ATV.
While it might seem like a lot, these steps are usually quick and simple. By staying on top of maintenance, you can avoid major repairs and keep your ATV running smoothly. So, with a little effort, ATVs can be quite manageable and reliable.
How often should you change oil on an ATV?
You should change the oil on your ATV every 25-40 hours of riding, or after 250 miles of riding(whichever comes first). For new ATVs, it's recommended to do the first oil change after the initial 10 hours of use to remove any break-in debris. After the break-in period, you should change the oil every 200 hours or 2000 miles of riding.
Besides, different ATV models may have different oil changing requirements. So you should also check the user manual and specific recommendations of your ATV. If necessary, contact the ATV manufacturer to give you professional advice.
Regular oil changes are crucial for maintaining engine performance and longevity. Clean oil helps keep the engine lubricated, reduces wear, and prevents overheating.
How often should I service my quad?
You should service your quad or ATV every 50-100 hours, or every 100 miles of riding, whichever comes first. Regular services should include checking and changing the oil, inspecting the brakes, cleaning or replacing the air filter, and checking the tire pressure. It’s also important to inspect the battery, drive chain, and suspension components.
For new quads, a service after the first 10 hours of use is recommended to ensure everything is working properly. Always refer to the user manual for specific maintenance schedules. Regular servicing keeps your quad running smoothly and extends its lifespan.
Conclusion
Regular maintenance is the key to keeping your ATV in top performance and status. It is also an important measure to ensure you have safe, enjoyable rides.
By following a consistent ATV maintenance schedule, you can catch small issues before they become big problems. Solve these small issues can extend the lifespan of your ATV, and maintain its performance. The ATV maintenance checklist mentioned above plays a crucial role in your ATV's health. So, please remember to follow these checklists and schedules.
Also, consulting the user manual is also necessary if you are not sure about some specific requirements. The user manual will give specific guidelines for your maintenance activities. With proper care, your ATV will be ready for any adventure that comes your way.
Mesh motorcycle intercom technology is a game-changer in the ever-evolving realm of motorcycle communication. It is a cutting-edge solution that promises to enhance group riding experiences like never before. And, it is poised to redefine the way riders connect and collaborate on the open road. In this article, we will introduce Fodsports FX10C, a top option of the best mesh intercom for motorcycle helmets in 2025.
What is mesh motorcycle intercom?
A motorcycle mesh intercom is a communication system that allows riders to talk to each other wirelessly using a mesh network. Unlike traditional Bluetooth intercoms, mesh intercoms create a dynamic, self-healing network. If one rider drops out of the range, the system can automatically re-route the connection through other riders. In this way, mesh intercoms can maintain continuous communication. Mesh intercoms offer greater range, more stable connections, and seamlessly connect multiple riders. These features make group rides safer and more enjoyable.
Mesh Intercom, Bleutooth 5.0, 1000m Intercom Range.
10 Mesh Intercom Channels, Unlimited Connection Number.
Listen to Music/GPS and Talk with Other Riders At The Same Time.
High Quality sound, IP65 waterproof.
Music Sharing, Voice Commands, FM Radio.
The Fodsports FX10C is a motorcycle mesh intercom designed for seamless group communication. Under mesh intercom mode, the rider's number is unlimited. It offers a stable, long-range connection through its dynamic mesh network. Also, FX10C supports various functions like FM radio, voice commands, music sharing, and more. The FX10C enhances riding safety and enjoyment, making it an excellent choice for group rides.
The followings are the main features of Fodsports FX10C:
10 mesh channels: Fodsports FX10C supports 10 mesh communication channels. The riders freely switch channels.
Unlimited intercom number: Fodsports Bluetooth mesh intercom technology, all the riders in your group can intercom smoothly. The group number is not limitted.
Listening to music and navigation while intercom: Keep the communication between you and other riders online. At the same time, you can still listen to music, hear the GPS navigation notification and others.
Music sharing between two riders: Share your favorite music with your partners.
Ergonomic design: Big button design, convenient for riding operation.
IP65 waterproof: Ensuring reliable performance in various weather conditions.
Phone call answering switch: Support switching between manual/automatic answering of calls
Durable battery: 800 mAh rechargeable batery, support 15 hours music time / phone time / intercom time. Standby time lasts 200 hours.
Listen to FM Radio: receive the latest news, make your journey more enjoyable.
Noise reduction technology: improve the voice and sound quality, make sure clear audio even when riding in high speed.
Support various motorcycle helmet type: provide both soft mic and hard mic in FX10C intercom kit. Thus making it compatible with all kinds of helmets.
Instruction when charging: red light flashes when charging, blue light shows when charging completed.
FX10C Mesh communication technology helmet Bluetooth intercom
Fodsports FX10C represents a paradigm shift in motorcycle helemt communication. It offers a dynamic, robust, and limitless network that transcends the constraints of traditional intercom. Besides, the FX10C mesh motorcycle intercom creates an intelligent, self-healing network. In this network, each rider's device acts as a node, relaying signals through neighboring units. Thus this innovative architecture ensures that every rider remains connected in various environments.
Is mesh better than Bluetooth?
Yes, mesh is generally better than traditional Bluetooth for motorcycle intercoms. Mesh networks offer more stable and flexible connections than Bluetooth. Thus mesh technology intercoms allow multiple riders to communicate seamlessly. Besides, if the rider is out of the intercom range, the mesh network can still re-route the connection through other riders. Bluetooth cannot achieve this. What's more, mesh also supports larger groups and greater ranges compared to Bluetooth.
Here is a compare the difference between Bluetooth and mesh tech intercom:
Camping has always been a beloved outdoor pursuit. It allows nature enthusiasts to immerse themselves in the great outdoors. For those seeking an adrenaline-fueled experience, ATV (All-Terrain Vehicle) camping offers an unparalleled opportunity. You can explore the untamed wilderness while indulging in the thrill of off-road adventures during your ATV camping tour. This comprehensive guide will equip you with the knowledge and strategies to embark on an unforgettable ATV camping excursion. Hence, these are essential knowledge to ensure a seamless and exhilarating journey.
Choosing the Perfect Campground Near You
The first step in planning an ATV camping trip is selecting the ideal campground. Here I advise you to choose the campground that caters to your needs and preferences. Besides, it is better to select the campgrounds that are near your home or your current location.
Another detail we need to pay attention to is that not all campgrounds accommodate ATVs. So it's crucial to research thoroughly and ensure the chosen location is ATV-friendly.
Factors to Consider
Accessibility. Determine whether your ATV is street-legal or if you need to transport it to the campground. Some facilities offer on-site rentals, which can be a convenient option.
Trail Connectivity. Opt for campgrounds that provide direct access to ATV trails. This can maximize your riding time and minimize the need for extensive transportation.
Regulations. Familiarize yourself with the campground's rules and regulations. For example, the ATV usage, trail hours, and any restrictions on specific areas or activities.
Amenities. Evaluate the available amenities, such as restrooms, showers, picnic areas, and electrical hookups. With these amenities, you can have a more comfortable camping experience.
Pet Policies. If you plan to bring your furry companion, inquire about the campground's pet policies. Otherwise may cause some surprises.
Popular ATV Camping Destinations
While the options are plentiful, here are some renowned ATV camping destinations to consider:
Proper packing is crucial for a successful ATV camping trip. With limited storage space, it's essential to prioritize essential items. Besides, you also need to leave room for additional gear and provisions.
What's more, consider packing a stove or grill, cooking supplies, a cooler, utensils, and dishware. These are also essential ATV camping gear to enhance your culinary experience.
ATV Essentials
Well-maintained ATV with proper safety gear (helmet, helemt intercoms, gloves, boots, and protective clothing)
Winch and tow hitch (for hauling your ATV or navigating challenging terrain)
Off-road communication system (e.g., helmet communication like the Fodsports M1S Plus). It ensures seamless communication with your companions while riding.
The safety and security of your belongings and fellow campers are important during ATV camping trip. Here are some precautions you need to pay attention to.
Securing Your Valuables
Invest in a lockbox or utilize your vehicle's secure storage compartments. You can use them to store valuables when away from the campsite.
Avoid leaving food or scented items out in the open. They may attract unwanted wildlife visitors.
Use a secure ATV lock to protect your vehicle from theft when not in use.
Emergency Preparedness
Note the nearest exit points and emergency contact information. If there is an incident or injury, you can exit the camping area efficiently and quickly.
Track your location and proximity to local landmarks to aid in rescue efforts if needed.
Carry a well-stocked first-aid kit and familiarize yourself with basic first-aid procedures.
Careful planning is essential to ensure a seamless and enjoyable ATV camping experience. Consider the following factors:
Types of ATV Camping Trips
Campground-based: Stay at an ATV-friendly campground with direct access to trails. They allow you to explore different routes each day.
Trail-based: Embark on a multi-day journey, camping at designated sites along the trail or in permitted areas.
Off-grid: For the ultimate adventure, venture into remote wilderness areas and establish your campsite in legal, designated locations.
Trip Duration
The length of your ATV camping trip will dictate the amount of supplies and provisions you need to pack. Weekend camping requires less planning than extended week-long excursions, so it is easier. As for week-long ATV camping, you'll need to factor in resupplying stops and extra storage solutions.
Distance and Accessibility
Consider the distance to your chosen campground or trailhead. If it's within a reasonable driving distance, you may be able to transport your ATV directly. For more remote locations, you might need to rent an ATV or tow a trailer to haul your vehicle.
atv camping trip tour
Enhancing Your ATV Camping Experience
To maximize your comfort and enjoyment during your ATV camping trip, there are some things to do. Here are some accessories and upgrades that you can consider investing for your vehicle.
Versatile Storage Solutions
Equip your ATV with roof racks, bed racks, and lockable storage containers. I have installed them on my ATV. Honestly, they can increase your carrying capacity and securely transport your gear.
Coolers and Power Solutions
Invest in a cooler to keep your food and beverages fresh for extended periods. Additionally, portable power solutions like generators or solar panels are other suitable options. They can provide electricity for charging devices and running small appliances.
Winches and Hitches
A sturdy winch can be invaluable especially when your ATV gets stuck in the mud. It will help extract your ATV from challenging terrain or load it onto a trailer. Similarly, a hitch can allow you to tow a small trailer or haul additional gear.
Comfort and Entertainment
Upgrade your ATV with an helmet intercom communication system for enjoying music when riding. Or install heating and air conditioning systems for a comfortable cabin environment. Besides, consider adding lighting, windows, doors, roofs, and rear panels for your ATV. These are all considerable solutions to enhance protection and visibility.
Responsible Camping Practices
As ambassadors of the great outdoors, it's crucial to adopt responsible camping practices. Remember to minimize our impact on the environment and ensure the preservation of these natural spaces. This is for our future generations.
Leave No Trace
Adhere to the principles of Leave No Trace. These include proper waste disposal, minimizing campfire impacts, respecting wildlife, and leaving the area as pristine as you found it.
Noise Reduction
Be mindful of noise levels, especially in areas shared with other campers or wildlife. Avoid excessive revving of engines or playing loud music that may disturb the tranquility of the surroundings.
Trail Etiquette
When riding on trails, always yield to hikers and other non-motorized users. Maintain a safe speed and be prepared to stop or slow down when encountering others on the trail.
Respect for Wildlife
Observe wildlife from a respectful distance and avoid disturbing their natural habitats. What's more, never feed or approach wild animals. This can disrupt their natural behaviors and potentially put you in harm's way.
Need ATV helmet intercom systems? Fodsports have!
Need ATV helmet intercom systems? Fodsports has you covered! Fodsports is a trusted brand specializing in high-quality Bluetooth intercom systems for riders. Their products are designed to offer clear communication and robust connectivity, even in challenging conditions. Whether you're riding an ATV solo or with a group, Fodsports intercoms ensure you stay connected and safe. Their intercom devices have features like noise reduction, long battery life, easy installation, and more. Thus they are perfect for adventurous rides. Popular Fodsports models like the M1S Pro and FX30C Pro are ideal for ATV camping. Choose Fodsports for reliable and top-notch intercom systems!
ATV riding involves driving an All-Terrain Vehicle (ATV). This is a kind of four-wheeled motorized vehicle designed for off-road use. ATVs are built to handle a variety of terrains including dirt trails, mud, sand, and rocky paths. They are popular for recreational activities, farming, and outdoor adventures. Besides, riders can enjoy the thrill of navigating challenging landscapes and exploring nature. ATVs are equipped with robust suspension systems and powerful engines. Thus making them capable of tackling rough and uneven terrain. Safety gear, such as helmets and protective clothing, is essential for a safe riding experience.
Is it safe to ATV?
ATV riding can be safe if proper precautions are taken.
Here are some tips to make sure ATV riding safety:
Always wear essential safety gear, including a helmet, gloves, and protective clothing.
Follow local regulations and guidelines, and never ride under the influence of alcohol or drugs.
Take a safety course to learn proper techniques and handling.
Avoid riding alone in remote areas and use designated trails.
By practicing responsible riding and staying aware of your surroundings, you can enjoy a safer ATV experience.
How hard is riding on an ATV?
Riding an ATV can vary in difficulty based on your experience and the terrain. For beginners, it might be challenging to learn the controls, balance, and proper riding techniques. Smooth, flat trails are easier to handle. But, they need more skill and strength for rough, uneven terrains. As you gain experience, riding becomes easier and more enjoyable. Taking a safety course can help you learn the basics and build confidence. Overall, with practice and proper instruction, most people can become proficient ATV riders and enjoy the adventure.
From tight woodland trails to rugged mountain paths, dirt bike riding lies in conquering diverse terrains. However, it is hard to find the perfect trail dirt bike that suits your riding style and preferences. Fear not, as we will start embarking on an adventure. Let's uncover the ultimate trail dirt bikes to elevate your off-road riding experiences.
Whether you're a seasoned pro or a budding enthusiast, this guide will help you. We will navigate you through the intricacies of 2-stroke and 4-stroke trail bikes, and specialized models. Also, we will introduce the factors to consider when making your choice. Now, get ready to explore the best trail dirt bikes that will ignite your passion for off-road adventures.
The Tale of Two Strokes: 2-Stroke vs. 4-Stroke Trail Bikes
2-stroke trail bikes vs 4-stroke trail bikes
When it comes to trail dirt bikes, the debate between 2-stroke and 4-stroke engines continues to rage on. Each type offers distinct advantages and features, thus attracting various funs. The choice mainly depends on your riding preferences and the terrain you plan to conquer.
The Lightweight Thrill: 2-Stroke Trail Bikes
2-stroke trail bikes are renowned for their agility and snappy power delivery. They are a favorite among adrenaline junkies who crave an electrifying ride. These lightweight machines are ideal for navigating tight, technical trails and wooded sections. In these trails, maneuverability is key.
One of the most significant advantages of 2-stroke trail bikes is their lower maintenance costs and simplified design. Unlike their 4-stroke counterparts, these bikes don't require complex valve systems. Therefore, they are more affordable to maintain. Additionally, their lightweight construction allows for effortless handling, especially in demanding terrain.
Popular 2-stroke trail bike models include the following:
Honda CRF250F, renowned for its electric start and fuel injection.
KTM 250 XC, praised for its agility and soft suspension setup.
Kawasaki KLX230R, known for its low-maintenance requirements.
The Enduring Powerhouses: 4-Stroke Trail Bikes
Are you seeking a trail bike that excels in fuel efficiency, durability, and broad power delivery? 4-stroke models might be the perfect fit for you. They are designed to tackle various terrains, from sandy deserts to muddy two-track trails. So they can offer a smooth and controlled riding experience.
One standout feature of 4-stroke trail bikes is their impressive fuel efficiency. It allows you to explore further without frequent refueling stops. Additionally, their longer rebuild intervals mean less frequent maintenance. In the long run, 4-stroke trail bikes are a cost-effective choice.
Among the top contenders in the 4-stroke trail bike category are the the following:
Yamaha WR250F, renowned for its exceptional performance and reliability.
KTM 350 EXC-F, a powerhouse that excels in all types of off-road riding.
In all, these bikes strike the perfect balance between agility and power. Thus they can ensure a thrilling yet controlled ride on the trails.
Choosing the best trail dirt bike is not a one-size-fits-all endeavor. Several factors come into play when you are deciding to purchase them. These include the terrain types, your skill level, size considerations, and the suitability of 4-stroke bikes for specific trails.
Terrain Types: From Wooded Trails to Desert Landscapes
The terrain you plan to conquer plays a crucial role in determining the ideal trail dirt bike.
If you're an avid rider of wooded trails or mountainous regions, choose a lightweight and nimble bike. They are perfect for navigating tight turns and technical sections.
If you prefer exploring open desert-like conditions or fast-paced trails, choose other types. A mid-size or full-size bike with ample power and stability could be a better fit.
Skill Level Progression: Building Confidence on the Trails
As with any adventure sport, it's essential to start with an easy-to-ride dirt bike. Then you can gradually progress to more advanced models as your skills improve. Therefore, we advise you to choose a bike that aligns with your current skill level. This will not only enhance your confidence but also ensure a safer and more enjoyable riding experience.
For beginners, start with a smaller or mid-size bike with an adjustable seat height. It allows you to touch the ground comfortably and maintain control. As your skills and confidence grow, you can transition to the ones with a higher level. You can try more advanced enduro trail bikes or specialized models tailored for specific terrains.
Proper bike sizing is crucial for maintaining control and confidence on the trails. A bike that's too large or too small can compromise your riding experience. More seriously, it may lead to accidents. When selecting a trail dirt bike, opt for a size that allows you to comfortably touch the ground while seated. This is an important factor in ensuring your riding stability and maneuverability.
Additionally, consider adjustable seat heights or mid-size options. These can be tailored to your specific height and inseam measurements. Remember, a well-fitted bike will not only enhance your control but also minimize fatigue during long rides.
Suitability of 4-Stroke Bikes for Specific Trails
4-stroke trail bikes have many advantages, such as fuel efficiency and broad power delivery. But, please remember that they might not be the ideal choice for certain types of trails. On tight and technical single-track trails, motocross (MX) bikes may not be the best option. This is due to their weight and size.
Taking the time to understand the advantages of 4-stroke bikes will be helpful. For example, their longer rebuild intervals and smoother power curve. Besides, you can research popular 2-stroke trail bikes in your spare time. Then you can compare their strengths and weaknesses against their 4-stroke counterparts. By these, you can make an informed decision based on your riding preferences and the trails you frequent.
Specialized Trail Dirt Bike Models: Tailored for Specific Terrains
For riders seeking a truly customized experience, specialized trail dirt bike models appeared.
They offer a tailored solution for conquering specific off-road environments. These bikes are meticulously engineered to excel in particular terrains. Thus ensuring optimal performance and maximizing your enjoyment on the trails.
Tight Single-Track Specialists
Some riders prefer trail riding by navigating tight, wooded trails or winding single-track paths. Specialized models like the Yamaha WR250F or the KTM 250 XC-F might be the perfect companions. These bikes are designed with lightweight construction, nimble handling, and softer suspension setups. So you can weave through technical sections with ease.
Open Desert and Mountain Terrain Conquerors
Exploring open desert landscapes or conquering rugged mountain trails is also thrilling. Some specialized models like the Honda CRF450X or the KTM 350 EXC-F could be the ideal choices. These bikes boast powerful engines, wide-ratio transmissions, and robust suspension systems. Thus ensuring you can tackle steep climbs and maintain control on fast, open terrain.
Motocross-Inspired Trail Bikes
Some motocross enthusiasts want to seek a bike that combines the agility and power of a motocross machine. And want to add the durability and features required for trail riding. Here it is. Models like the Honda CRF250RX or the Kawasaki KX250X might be the perfect fit. These bikes offer the best of both worlds, perfect for motocross rides. With them, you can experience the thrill of motocross while navigating challenging off-road conditions.
Best 2-Stroke Trail Dirt Bikes: Unleashing the Lightweight Thrill
For those seeking a lightweight and agile ride, 2-stroke trail dirt bikes are the top options. They offer an unparalleled level of excitement and responsiveness. Here are some of the top contenders in this category:
Honda CRF250F - best dirt bike for trail riding
Honda CRF250F
The Honda CRF250F is a popular choice among trail riders. Thanks to its electric start, fuel injection system, and reliable starting capabilities. With a low seat height, this bike is accessible to riders of all sizes. That's why it is a versatile option for both beginners and experienced enthusiasts.
KTM 250 XC - best dirt bike for mountain riding
KTM 250 XC best dirt bike for mountain riding
Known for its agility and lightweight design, the KTM 250 XC is a true off-road powerhouse. Its softer suspension setup ensures a comfortable ride for various road environments. Besides, it can effortlessly absorb bumps and provide superior control on technical trails. For mountain riding, this dirt bike will definitely come in handy.
Kawasaki KLX230R
Kawasaki KLX230R
The Kawasaki KLX230R is a standout choice for those seeking a low-maintenance 2-stroke trail bike. Many riders are fascinated by its electric start and user-friendly design. Honestly, this bike is perfect for riders who prioritize convenience without sacrificing performance.
Sherco SE
Sherco SE dirt trail motorbike
If you're in the market for a reliable and durable 2-stroke trail bike, the Sherco SE should be on your radar. This bike is renowned for its excellent power-to-weight ratio and smooth power delivery. Thus making it a true all-terrain warrior.
4-Stroke Best Trail Dirt Bikes: Power and Efficiency Combined
Many riders prioritize fuel efficiency, broad power delivery, and extended riding sessions. The 4-stroke trail dirt bikes are the best choices for them. They offer a compelling combination of performance and practicality. Here are some of the top contenders in this category:
Yamaha WR250F
Yamaha WR250F (source: Ron Lawson)
The Yamaha WR250F is a true icon in the world of best trail dirt bikes. It can provide exceptional performance and reliability during your dirty bike riding tour. With its 250cc 4-stroke engine, this bike delivers the perfect balance of power and agility. Hence allowing you to tackle a wide range of trails with confidence.
KTM 350 EXC-F
KTM 350 EXC-F
The KTM 350 EXC-F is a superstar that excels in all types of off-road riding. Equipped with a 350cc engine, this bike provides ample power for conquering steep climbs and navigating technical sections. Besides, its lightweight design ensures nimble handling. That's why many riders recommend it as the best scrambler for off road.
Honda CRF450RX
Honda CRF450RX
Some dirt bike fans prefer a blend of motocross-inspired performance and trail-ready capabilities. Then Honda CRF450RX will be a compelling choice. This bike is equipped with a powerful 450cc engine and robust suspension system. So it will be easy using this bike to conquer the most challenging off-road terrain with ease. Therefore, for best scramblers for off road, Honda CRF 450RX must in the list.
Husqvarna FE 501 - best motorcycle for dirt roads
Husqvarna FE 501 best motorcycle for dirt roads
For riders seeking an uncompromising blend of power and agility, the Husqvarna FE 501 is a true standout. This bike has a 501cc engine that delivers an exhilarating ride. Its lightweight construction and advanced suspension system are also outstanding. Even if you are riding on the most demanding trails, this dirt bike still can handle them precisely.
Trail Dirt Bike Riding Safety: Prioritizing Protection
Trail dirt bike riding is an exhilarating pursuit, that's true. But it's crucial to prioritize safety and take the necessary precautions to ensure a secure and enjoyable riding. Here are some essential safety considerations:
Protective Gear: Helmet, Armor, and More
Investing in high-quality protective gear is non-negotiable for trail dirt bike riding. A DOT-approved helmet, designed specifically for off-road use, is an absolute must-have. Additionally, consider investing in protective armor, such as knee and elbow guards. These gear are useful to minimize the risk of injuries in the event of a fall or collision.
Communication Devices: Staying Connected on the Trails
Riding solo on remote trails can be risky. That's why it's crucial to have a reliable helmet communication device on hand. Helmet intercoms from the helmet communication system brand Fodsports or other brand's devices can be invaluable in case of an emergency. They will keep you to stay connected with your riding buddies or call for assistance if needed.
Remember to respect trail etiquette and practice responsible riding habits. This is essential for ensuring the safety of yourself and others on the trails. Follow established trail rules, yield to hikers and other trail users, and always ride within your skill level. Additionally, be mindful of your impact on the environment and leave no trace behind.
Maintenance and Customization: Keeping Your Trail Dirt Bike in Top Condition
Regular maintenance and customization of your trail dirt bike are essential. This is to ensure your bike remains in peak condition and continues to deliver thrilling performances. Here are some tips to keep in mind:
Regular Maintenance Schedules
Adhering to the recommended maintenance schedules outlined in your bike's owner's manual. It is crucial for prolonging its lifespan and ensuring optimal performance. These maintenance schedules include:
inspections of critical components like brakes, suspension, and tires.
Aftermarket Upgrades and Modifications
Customizing your trail dirt bike with aftermarket upgrades and modifications are useful way to maintain it.
This maintenance can enhance its performance, handling, and overall riding experience. From exhaust systems and suspension upgrades to performance-enhancing engine modifications, the possibilities are endless. Besides, consult with professionals and follow manufacturer guidelines if you are unfamiliar. Most importantly, make sure any modifications are safe and legal.
DIY Maintenance and Repairs
Some riders have a knack for mechanics and a desire to save on maintenance costs. So learning basic DIY maintenance and repair skills can be invaluable. From changing tires, check tire pressure, and adjusting chain tension to performing minor engine repairs, there are many to learn. Mastering these skills can empower you to keep your trail dirt bike in top condition. And finally, its lifespan will be extended.
Frequently asked questions(FAQ)
What is a trail dirt bike?
A trail dirt bike is a motorcycle designed for off-road riding. It is built to handle rough terrains like dirt trails, forests, and mountains. These bikes are lightweight and have robust suspension systems. This allows them to absorb shocks from uneven surfaces. They also feature knobby tires for better grip on loose or muddy ground.
Trail dirt bikes have higher ground clearance. This helps them navigate obstacles like rocks and roots. They are typically powered by smaller, high-revving engines. Trail bikes provide both beginners and experienced riders with a thrilling outdoor experience. They are perfect for exploring nature and enjoying the adventure of off-road trails.
Why are trail dirt bikes so heavy?
Trail dirt bikes are heavy due to their robust construction. They are built to withstand tough off-road conditions. The frame is strong and durable, often made of steel or heavy-duty aluminum. What's more, they have large suspension systems to absorb shocks from rough terrains. The engines are also designed to be powerful and durable, adding weight. Additionally, features like larger fuel tanks and protective gear (skid plates, guards) contribute to the overall weight. This ensures reliability and performance in challenging environments.
Is it easy to ride a dirt bike?
Riding a dirt bike can be easy for some, but it depends on experience and skill. Beginners might find it challenging at first. Balancing and controlling the bike on rough terrains requires practice. Learning to use the clutch, throttle, and brakes properly is essential. Protective gear is important for safety. With time and practice, it becomes easier and more enjoyable. Taking beginner courses can help. Overall, it takes patience and practice to become comfortable riding a dirt bike.
What kind of dirt bike is best for trail riding?
For trail riding, a lightweight, versatile dirt bike is best. It is better to look for bikes with a strong yet manageable engine, typically between 250cc and 450cc. Good suspension is crucial for handling rough terrains. And, a high ground clearance helps navigate obstacles like rocks and roots. Knobby tires provide better traction on loose or muddy trails. Besides, an electric start and a comfortable seat can enhance the riding experience. The Honda CRF250F, Yamaha WR250F, and KTM 350 EXC-F are popular models for trail riding. These bikes balance power, agility, and comfort.
What size dirt bike should I get for trail riding?
The size of the dirt bike for trail riding depends on your experience and body size. For beginners or smaller riders, a bike with an engine size between 125cc and 250cc is ideal. These bikes are lighter and easier to handle. More experienced riders might prefer bikes with 250cc to 450cc engines for more power and performance. Generally, you need to ensure the seat height is comfortable and allows you to touch the ground with your feet. Test riding different sizes can help you find the best fit.
Can a motocross bike be used for trail riding?
Yes, a motocross bike can be used for trail riding, but there are some considerations. Motocross bikes are designed for track racing, so they have stiff suspension and high power. This can make them challenging to control on rough, uneven trails. They also lack features like a headlight and kickstand, which are useful for trail riding. However, with proper adjustments and modifications, such as softer suspension settings and adding trail-friendly accessories, a motocross bike can be adapted for trail use.
Is a 2 stroke dirt bike good for trail riding?
Yes, a 2-stroke dirt bike can be good for trail riding. They are lightweight and have a high power-to-weight ratio, making them agile and responsive. This is beneficial for navigating tight trails and steep inclines. However, 2-stroke engines require more frequent maintenance and have a peaky power delivery, which can be challenging for beginners. They also tend to be louder and less fuel-efficient. For experienced riders who enjoy a lively performance, 2-stroke bikes are a great choice for trail riding.
Need motorcycle helmet intercom systems for your next dirt bike riding adventure? Choose Fodsports!
Fodsports M1S Plus for trail dirt bike riding intercom
Fodsports is a trusted brand known for high-quality Bluetooth helmet intercom systems. Their devices offer clear communication and strong connectivity, even in tough conditions. Whether you're riding solo or with a group, Fodsports intercoms keep you connected. They feature noise reduction, long battery life, and easy installation. Popular models like the M1S Plus and FX10C are perfect for staying in touch and enjoying your ride. Enhance your dirt biking experience with the reliable performance of Fodsports intercom systems. Stay connected, safe, and entertained on every ride!
Conclusion: Embracing the Trail Dirt Bike Lifestyle
In the world of off-road adventures, the trail dirt bike reigns supreme. It offers a unique blend of adrenaline-fueled thrills, freedom, and connection with nature. Finding the perfect trail dirt bike is a journey in itself. Choose the one that fits your riding style, terrain preferences, and skill level.
Gear up, choose your ultimate trail companion, and embark on an unforgettable adventure. It will ignite your passion for off-road exploration.
Remember, the best trail dirt bike is the one that resonates with your soul, fuels your thirst for adventure, and propels you toward new horizons. Embrace the journey, ride responsibly, and let the trails be your canvas for creating unforgettable experiences.
As an avid motorcyclist, the ability to stay connected while on the road is a game-changer.
If you're exploring scenic routes with your riding buddies or embarking on a solo adventure, the intercom helmet kit is needed.
A reliable helmet Bluetooth intercom kit can enhance your experience. It enables seamless communication, music streaming, and hands-free navigation.
This comprehensive guide will introduce the top-rated Fodsports motorcycle communication kit systems. Let's explore their features and how to choose the perfect kit for your needs.
Fodsports FX7: The Latest Bluetooth Mesh Intercom System Kit
Mesh Intercom, Bluetooth 5.4
10 Riders Group Communication, 2000 Meters Distance!
Listen to Music/GPS and Intercom At The Same Time.
HRSQ Mic and Speakers, CVC + ENC + DSP Noise Cancelation.
IP67 waterproof.
Music Sharing, FM Radio, Voice Command.
The Fodsports FX7 is a Bluetooth mesh intercom released by Fodsports in July 2024. It is equipped with the latest and most advanced Bluetooth mesh intercommunication technologies.
Dual Bluetooth Chip Design
FX7's dual Bluetooth chip design
The Fodsports FX7 is equipped with dual Bluetooth chips, which largely improves the intercom's efficiency.
When the FX7 is working, one chip will handle the Bluetooth audio tasks, while the other one will focus on the Bluetooth intercom tasks.
Based on this design, the FX7 can handle multiple processes at the same time and still be efficient.
Thus, the intercom stability, audio quality, and voice clarity all get improved significantly.
Multi-Rider Mesh AD-HOC Network
One of the standout features of the FX7 is its multi-rider mesh AD-HOC network. This technology enables a group of riders to connect effortlessly.
If there is a rider out of the group while intercom, the other riders will not be influenced. They can still keep on communicating seamlessly.
Once the rider is back within the intercom distance, it will automatically join the intercom group again. During this period, still, the other rider's intercom will not get interrupted.
To be honest, this may be the latest and best Bluetooth mesh intercom kit in 2025.
Multi-Tasking Audio
FX7 Bluetooth mesh intercom multi-tasking audio
With the FX7, you can easily handle multiple audio tasks at once.
You may need to intercom with riders while listening to music or GPS navigation. The FX7 will allow you to realize this.
Multiple tasks operate at the same time, and each task works stably and will not disturb the other.
This ensures that you never miss important information while enjoying your ride and music.
10 Riders Group Intercom
The FX7 supports a group intercom feature that can connect up to 10 riders.
This extensive 2000-meter range allows for clear and consistent communication among the group.
If you are riding with multiple friends as a group, the Fodsports FX7 is truly the most essential gear.
3 Quick Pairing Modes
The Fodsports FX7 supports three quick pairing modes:
Two-rider intercom mode
Multi-rider intercom friends mode
Multi-rider intercom mode
Each mode has its own features and functions, suitable for different communication environments. Riders can choose the mode according to specific intercom demand.
These options allow you to connect quickly and easily, whether you’re pairing with one rider or a group.
Excellent Sound Quality
Hifi sound quality of FX7
The Fodsports FX7 is equipped with an HRSQ(high-resolution sound quality) microphone and speaker.
This feature ensures crystal-clear audio, whether you’re listening to music or communicating with fellow riders.
The enhanced sound quality makes every ride more enjoyable and immersive.
Besides, the FX7 is equipped with CVC + ENC technology and effective microphone noise reduction.
These features work together to minimize background noise, providing clear and uninterrupted communication.
Even in noisy environments, your voice comes through loud and clear.
IP67 Waterproof
Designed to withstand harsh weather conditions, the FX7 boasts an IP67 waterproof rating.
This means it can handle rain, dust, and splashes without any issues.
No matter the weather, you can rely on the FX7 to perform consistently.
Fodsports M1S Pro Bluetooth Motorcycle Helmet Kit: A Comprehensive Review
M1S Pro Bluetooth Intercom Headsets
$89.99 $139.99
Code:
DJOW9
Limited Time Promo! Extra 10% Off Code! Save Now!
Support up to 10 Riders Group Talk, 2000 Meters Distance!
High Quality sound, IP65 waterproof.
Compatiable with Fodsports Connect APP
Let's Go!
Among many Bluetooth motorcycle helmet kits in the market, the Fodsports M1S Pro stands out as a top choice.
This feature-rich communication system offers a perfect blend of performance, versatility, and user-friendliness.
Thus making it an excellent choice for both solo riders and group tours.
Design and Durability
The Fodsports M1S Pro boasts a sleek and compact design. This makes sure it allows for seamless integration with most helmet types.
In the intercom kit, Fodsports provides both a soft mic and a boom mic. So, whether you are using a full-face helmet or half helmet, they can integrate into it perfectly.
Besides, M1S Pro has durable construction, featuring high-quality materials and weather-resistant components. Thus can ensure reliable performance even in challenging riding conditions.
Connectivity and Range
M1S Pro Bluetooth Motorcycle Helmet Kit Connectivity and Range
One of the standout features of the M1S Pro is its impressive connectivity and range.
The old M1-S Pro intercom system can support 6-8 riders intercom. In the 2024 autumn, Fodsports has upgraded the M1-S Pro with a new Bluetooth chip. Now it is available to support up to 10 riders communication.
So it is perfect for group intercom.
Utilizing Bluetooth 5.0 technology, this motorcycle Bluetooth kit offers a stable and reliable connection.
It can support 10 riders at the same time within 2000 meters. And the maximum effective communication distance between two motorcycles is 500 meters.
Additionally, it supports universal connectivity. You can seamlessly connect with riders using different brands or models of intercoms.
Audio Quality and Noise Cancellation
Fodsports M1S Pro bluetooth motorcycle helmet kit audio quality and noise cancellation tech
This advanced noise-cancellation and high-fidelity mic and speaker improves M1S Pro to a higher level. The riders can receive crystal-clear communication, even in noisy environments or at high speeds. There is no need to raise your voice or strain to hear your riding companions.
Battery Life and Charging
The M1S Pro is equipped with a specially designed lithium 900 mAh rechargeable battery. With it, the M1S Pro can support 16 hours of music, 20 hours of intercom, and 300 hours of standby time on a single charge.
Furthermore, it supports fast charging, and just need nearly 3 hours.
So, when the battery nearly runs out, you can quickly replenish the battery during pit stops or breaks. This is important to ensure you have uninterrupted communication throughout your rides.
Versatile Features
One of the standout aspects of the Fodsports M1S Pro is its versatility. In addition to facilitating rider-to-rider communication, this intercom kit offers a range of extra features. These are all useful and excellent features that can enhance your riding experience:
Music Sharing. M1S Pro supports music sharing. You can share your favorite tunes with your riding buddies through the intercom system.
GPS Integration. Connect your phone or GPS device to receive turn-by-turn navigation instructions directly in your helmet. You will never miss a turn or get lost on unfamiliar routes.
Hands-Free Control. With voice commands, you can answer calls, adjust volume, or access other features. You will not need to take your hands off the handlebars, promoting safer riding.
User-Friendly Interface
The Fodsports M1S Pro is designed with user-friendliness in mind. It features a straightforward interface and intuitive controls.
No matter you're a tech-savvy rider or new to helmet communication systems, the M1S Pro is easy to set up and operate.
From the moment you hit the road, M1S Pro will ensure you seamless and enjoyable motorcycling.
Mesh Intercom, Bluetooth 5.0.
10 Mesh Intercom Channels, 1000 Meters Distance!
Listen to Music/GPS and Intercom at The Same Time.
Music Sharing, FM Radio, Voice Command.
For riders who frequently embark on group tours, the Fodsports FX10C is a game-changer. This advanced helmet bluetooth intercom kit harnesses the power of mesh intercom technology.
Thus this helmet bluetooth kit can ensure seamless communication and connectivity among a large group of riders. Even in challenging terrain or over long distances, its mesh tech still performs well.
Mesh Intercom Technology
FX10C Mesh communication technology helmet Bluetooth intercom kit
At the heart of the Fodsports FX10C lies its innovative mesh intercom capabilities.
As we know, traditional Bluetooth connections can be limited in intercom range and stability.
But mesh intercom creates a self-healing and self-optimizing network among all connected devices.
This technology enables reliable and uninterrupted communication between riders.
Even when riders are spread out over a large area or encounter obstacles like buildings or hills, the intercom sound and quality are still clear.
Extended Range and Rider Capacity
One of the standout features of the FX10C is its impressive range and rider capacity.
The maximum intercom range can be up to 1 kilometer in open terrain.
Besides, this helmet bluetooth kit ensures 10 mesh intercom channels clear communication simultaneously.
Fodsports has considered that outdoor sports will inevitably encounter rain and snow.
So, the FX10C supports IP65 waterproofing under its robust housing and water-resistant components.
This makes sure it still works in heavy rain and challenging weather conditions!
User-Friendly and Ergonomic
Despite its advanced features, the Fodsports FX10C is remarkably user-friendly.
Thanks to its big button design, rides will be very convenient to click it when riding at speed. Even if you are wearing gloves, you can accurately touch the correct buttons and operate it.
Additionally, the FX10C supports universal connectivity. You can connect with riders using different brands or models of intercoms.
Mesh intercom and extended intercom range are not the only features of FX10C helmet bluetooth kit. It also offers a range of extra features that enhance the overall riding experience:
Two-way helmet communication. FX10C supports two way Bluetooth intercom, thus making it convenient for motorcycle communication.
Music sharing between two riders. Connect your smartphone to listen to music, and then share it with your accompany. The whole motorcycle tour will be more funny.
Hands-Free Control. With voice commands like Siri and other voice access, you can use FX10C to control your phone. Answering calls, adjusting volume, or accessing other features will be so easy! Just keep your hands on the handlebars and pay attention to the road. That's more safe and convenient.
FM Radio. Stay entertained and informed with the built-in FM radio in FX10C. You can tune in to your favorite stations or catch up on the latest news and traffic updates.
To be honest, FX10C has advanced mesh intercom tech, and extended intercom range. Its large rider capacity also makes it a perfect option for group rides. Besides, its durable construction, multiple functions, and user-friendly interface are also outstanding. Thus making it a reliable choice for riders who value seamless intercom and connectivity.
Fodsports M1S AIR Helmet Bluetooth Intercom Kit: Compact Brilliance for 2 Riders
2 to 6 Riders Intercom, 1000 Meters Distance!
3 Sound Effects, Noise Reduction Tech.
Large Battery, Long Working Time.
IP65 waterproof, Universal Pairing.
Music Sharing, FM Radio, Voice Command.
For seeking a compact helmet bluetooth intercom kit between 2 riders, the Fodsports M1S AIR is a standout choice. This sleek and minimalist communication system packs a punch. Thus offering impressive features and performance in a discreet and unobtrusive design.
Compact and Lightweight Design
One of the defining features of the Fodsports M1S AIR is its compact and lightweight design. Weighing in at just 60g, this motorcycle bluetooth kit is virtually unnoticeable when integrated into your helmet. So, it ensures you a comfortable and distraction-free riding experience.
2 riders talk at the same time
Fodsports M1S AIR offers a full duplex call for two riders through Bluetooth 5.0. If you are riding with your boyfriend/girlfriend, this helmet bluetooth kit will provide you secret and safe intercom.
Stable connection
Fodsports M1S AIR uses advanced Bluetooth 5.0 technology. This advanced Bluetooth tech ensures stable and reliable connectivity with your paired devices. Whether you're connecting to your phone or other device, the M1S AIR delivers seamless performance.
Advanced Audio Quality
Fodsports M1S AIR uses a built-in QCC chip to ensure the noise reduction ability of the mic and speakers. This ensures you can talk in a natural voice with your accompany.
Speak loudly in noisy environments or at high speeds? NO! Just speak normally, and your friend will listen to you clearly.
Additional Features
The Fodsports M1S AIR offers more features that enhance the overall riding experience:
GPS Integration. Connect your phone or GPS device to receive navigation instructions in your helmet. You will not have to watch the navigation device frequently, making your ride more safe.
Music Sharing. Share your favorite music with your partner, both of you will get more enjoyment while on the road.
Hands-Free Calling. Answer calls or other options with ease using voice commands. You can stay connected while keeping your hands on the handlebars.
FM Radio. The built-in FM radio in Fodsports M1S AIR allows you to tune in to your favorite stations. Also, you can catch up on the latest news and traffic updates.
Fodsports M1S AIR is a top choice for riders seeking a discreet and high-end intercom kit. Its advanced features make it a reliable companion for your two-way communication intercom. In general, it is truly one of the top helmet to helmet communication options.
Fodsports FX4 Pro Motorcycle Bluetooth Kit: A Powerhouse for Touring Enthusiasts
For riders who crave adventure and embark on long-distance tours, here is an option for you.
The Fodsports FX4 Pro is a powerhouse motorcycle bluetooth kit that delivers top reliability intercom ability. It is designed with the rigors of extended rides in mind. Thus I can recommend this intercom system as a must-have for touring enthusiasts.
FX4 PRO 4 way group helmet intercom kit main features
Impressive Range and Connectivity
The Fodsports FX4 Pro's impressive range and connectivity stability are outstanding. With advanced Bluetooth 5.0 technology, this kit offers a range of nearly 1 kilometer. It can keep a seamless connection even when riders are spread out over long distances.
4 Riders Group Bluetooth Intercom & Universal Pairing
Group intercom communication kit - Fodsports FX4 Pro
Fodsports FX4 Promotorcycle bluetooth kit is perfect for 4 riders' group communication. If you want to go out motorcycling with your family or small group friends, the FX4 Pro is enough for you to use. Besides, its universal pairing feature makes sure it can easily pair with other Bluetooth devices.
Advanced Audio Quality and Noise Cancellation
FX4 Pro uses 40MM wind noise microphone canceling & Hi-Fi stereo sound quality speaker. This makes sure it can provide crystal-clear communication and audio playback. Even when you are cycling in noisy environments or at high speeds, the sound quality remains good.
Versatile Connectivity and Features
Fodsports FX4 Pro helmet intercom kit is designed for touring enthusiasts. But it also offers versatile connectivity options that enhance your riding experience:
Voice Assistant. You can use the Siri or S voice assistant to make calls via this stereo helmet bluetooth kit. Keep your hands on the handlebars, and focus on riding safely.
Battery notification. Double-click the function button, the FX4 Pro will broadcast its battery status to you. This will help you know its status before you are going to have a long-distance ride.
Hands-Free Control. The Fodsports FX4 Pro supports voice commands and intuitive controls. You can answer calls, adjust volume, or access other features without using your hands. So, keep your hands on the handlebars, and keep a safer ride.
FM Radio. Keep pressing the "V+" button for 3 seconds, and you can enable the FM function of FX4 Pro. You can stay informed about traffic, weather, or other important updates while you are riding.
In general, the Fodsports FX4 Pro motorcycle bluetooth kit is a tour de force for touring enthusiasts.
Whether you're embarking on a cross-country adventure or exploring remote landscapes, it is worth taking it with you.
This motorcycle bluetooth kit provides reliable connection and performance to help you stay connected in the journey.
The Importance of Bluetooth Intercom Kits for Helmet
Riding a motorcycle is an exhilarating experience, but it can also be isolating at times. With a bluetooth motorcycle helmet kit, you can break free from this isolation. You will easily stay connected with your fellow riders or loved ones. These innovative devices not only help clear communication but also offer a range of extra features. Many riders believe that these can enhance your riding experience.
Investing in a quality helmet bluetooth intercom kit can provide numerous benefits. This is no different whether you're a seasoned rider or a newcomer to the motorcycling world.
Improved Safety. Staying connected with your riding companions allows you to share important information about potential hazards, road conditions, or navigation instructions. This ensures a safer ride for everyone.
Enhanced Camaraderie. Riding with friends or family is even more enjoyable. You can share jokes, stories, and experiences in real-time. It is also a good way to strengthen the bonds of camaraderie.
Hands-Free Convenience. All Fodsports helmet bluetooth kits can support voice commands. You can answer calls, access your music library, or receive turn-by-turn navigation instructions from it. All these things will be handled without taking your hands off the handlebars.
Versatility. Fodsports helmet bluetooth intercom kits offer compatibility with various devices. So they allow you to connect your smartphone and other devices for a truly integrated experience.
As you embark on your journey to find the perfect bluetooth motorcycle helmet kit, it's essential to understand the different features and capabilities available. Carefully consider your specific needs and preferences before placing the order. Then you can make informed decisions that will enhance your riding for years.
Factors to Consider When Choosing a Helmet Bluetooth Intercom Kit
With lots of options available in the market, selecting the right intercom kit can be a daunting task. To ensure you make the best choice, consider the following factors:
1. Connectivity and Range
One of the most crucial aspects of a bluetooth motorcycle helmet kit is its connectivity and range.
As for this factor, I advise you to look for kits that offer universal compatibility. These kits allow you to connect with riders using different brands or models.
Besides, consider the maximum range the kit can provide. A larger intercom range ensures seamless communication even when you're riding in a group or over long distances.
2. Battery Life and Charging
Battery life is a critical factor, especially for those who embark on extended rides or tours.
It will be better to purchase these helmet intercom kits with longer batteries. Fodsports intercom kits with long-lasting batteries can provide up to 15-20 hours of talk time or music streaming.
And, consider the charging time and the availability of backup batteries before making a decision. Anyway, battery life and charging influence your experience of getting uninterrupted communication.
3. Audio Quality and Noise Cancellation
Riding a motorcycle can be a noisy experience as the wind and engine sound is loud. Thus making it challenging to communicate clearly.
Therefore, I advise you to prioritize motorcycle communication kits with advanced noise-cancellation technology.
Fodsports has launched high-resolution sound quality helmet headset speaker and microphone for several Fodsports intercoms. These high-end mics and speakers can ensure crystal-clear audio, even at high speeds or in windy conditions.
4. Ease of Use and Compatibility
User-friendliness is crucial, especially when operating the intercom kit while riding. Intercom kits with intuitive controls, voice commands, and easy-to-navigate menus will be the best option.
Besides, ensure compatibility with your existing devices, such as smartphones, motorcycle GPS navigators, etc.
5. Durability and Weather Resistance
Motorcycle riding can expose your gear to many extreme environmental conditions. For example, rain, dust, and extreme temperatures.
Therefore, you need to choose a reliable helmet bluetooth intercom kit. Consider intercoms that are designed to withstand these elements.
Fodsports Bluetooth helmet headset kits have robust construction and weather-resistant materials. That's why they perform better even in extreme weather and environment.
6. Additional Features
Yes, I believe the primary function of a bluetooth motorcycle helmet kit is to facilitate communication. But many kits offer extra features that can enhance your riding experience.
Consider motorcycle bluetooth kits with built-in FM radios, music-sharing capabilities, and GPS integration.
Some advanced intercom kits like Fodsports FX30C Pro and Fodsports FX 60C even have a camera function. These functions will help reduce the motorcycle gear you pack in your backpack.
By carefully evaluating these factors, you can narrow down your choices. Select a helmet bluetooth intercom kit that meets your specific needs and preferences. They will definitely ensure a seamless and enjoyable riding experience for your motorcycle tour.
Conclusion
In conclusion, the best motorcycle helmet Bluetooth intercom kits of 2025 offer a range of features for every rider.
The Fodsports M1S Pro stands out for its connection range and audio quality. The FX10C impresses with its excellent mesh communication tech and extended rider capability. The M1S AIR is praised for its stable connection and advanced noise control tech. The FX4 Pro combines stability, universal pairing, and extra functions.
Each of these models enhances the riding experience, ensuring safety and communication on the road.
Choose the one that fits your needs best and enjoy a connected ride.
Helmet to helmet communication systems have revolutionized the way we interact while riding. And it fosters a heightened sense of connection and safety. In this comprehensive guide, we'll explore the realm of the best Fodsports helmet to helmet intercom devices.
If you are an avid solo rider reveling in the freedom of the open road, this guide will inform you a lot. Also, if you are a group enthusiast cherishing the camaraderie of shared adventures, you will also find some useful devices.
Now, let's unveil their benefits, key considerations, and the top helmet communication systems.
The Allure of Seamless Communication on the Road
Embarking on a motorcycle journey is more than just a mode of transportation. It's an immersive experience that awakens the senses and ignites the spirit of adventure.
But the thrill of the ride can be amplified when shared with fellow enthusiasts or trusted pillion partners.
Now, helmet-to-helmet communication systems bridge the gap. They enable effortless real-time dialogue and foster a deeper sense of unity on the road.
You can share insights and warnings through the intercom system between your helmets.
Even, you can say some jocks to make your motorcycling have more fun.
With this, there is no need for you to use motorcycle hand signals or constant stops to discuss the next step.
Besides, they can provide you with information about potential hazards or route adjustments.
Thus, these Fodsports helmet communication systems are enhancing the social aspect of riding. They also contribute to heightened safety.
Moreover, these versatile devices transcend mere communication, bringing motorcycling more entertainment and convenience.
Imagine that you are streaming your favorite tunes or podcasts directly into your helmet.
Or receiving turn-by-turn navigation prompts without ever taking your eyes off the road.
The possibilities are endless, and the benefits are undeniable.
Unveiling the Top Contenders: Best Helmet to Helmet Communication Systems
There are a myriad of options available in the market. It can be challenging to navigate and identify the best helmet to helmet communication systems. To aid your decision-making process, we've curated a selection of top contenders from Fodsports. They have garnered widespread acclaim and recognition for their exceptional performance and features.
I’ve been using the Fodsports FX7 helmet communication system for several months, it is truly impressive in performance. And I genuinely believe it’s one of the best on the market for rider-to-rider intercom.
What stands out most is the Bluetooth mesh technology. Based on my on-road test with several friends(all use the FX7), it supports a mesh network for up to 10 riders with about 2000 meters range.
If someone drops out of range or leaves the group, the rest of us stay connected without interruption.
And, more surprisingly is, if the rider back to the range, the FX7 can automatically connect it and recover the conversation.
During this period, all other riders' communication will not be influenced.
Another advantage I'd like to mention is its dual-Bluetooth chip design. One chip handles audio (music and navigation) while the other takes care of the intercom link.
So I can communicate with my friends and listen to music or GPS instructions at the same time.
I also appreciate the sound quality: high-resolution speakers and a microphone system with CVC + ENC noise reduction. This configuration is absolutely fantastic! The voices of my friends and mine come through clearly, even at freeway speeds.
Plus it’s built tough — an IP67 waterproof rating means I don’t worry about rain or dust messing with it.
All in all, for anyone who rides with a partner or in a group and wants to stay in touch while also enjoying music, navigation and helmet-to-helmet chat, I’d say the FX7 is a very strong choice.
Bluetooth Mesh Technology.
10 Riders Group Communication, 2000m Distance!
Listen to Music/GPS and Intercom At the Same Time.
CVC + ENC and Microphone Noise Reduction
IP67 Waterproof.
Music/GPS Sharing and Intercom At the Same Time.
If you normally motorcycle with your girlfriend/wife or a small group of friends, it is very suitable. Just communicate between you and them; the channel is safe and secret.
Besides, the Fodsports FX8 AIR can support around 1000m of intercom communication distance.
If your friend is far away behind you, just make sure the distance between you and him/her is not too far, the intercom system will keep working.
I have tried Fodsports FX8 AIR many times. I'd like to say that its connection is really seamless, and the sound is very clear.
Thanks to its built-in CVC chip, the noise reduction tech satisfied me a lot. Even when I am riding at high speed, the sound quality still performs well.
Another feature I would like to mention is its voice command function. Just click the button, and you will be able to connect it to your phone, whether it is an IOS or Android system. You can make calls, play music, and receive GPS support easily.
For just $65.99, you will get all these functions and features. Think about it!
In all, it is one of the best budget helmet-to-helmet intercom systems for 2 riders communication.
Support up to 6 Riders Group Talk, 1000 Meters Distance!
Large Battery Capacity, Long Working Time.
3 Sound Effects; Treble; Midrange; Bass.
Anti-Noise Mic, CVC Noise Reduction.
IP65 waterproof.
FM Radio, Music Sharing, Voice Command.
Fodsports V6S: Versatility and Connectivity for Small Group Intercom
Bluetooth helmet to helmet communication - Fodsports V6S
If you frequently ride in small groups and seek versatile communication, the Fodsports V6S is an option worth considering.
This system boasts the ability to pair up to six devices simultaneously. The group intercom distance can be 1000 to 1500 meters in the rider group.
Yes, I'd like to say this distance is large. But Fodsports V6S still performs very well in sound quality and connection stability.
Another worth mentioning feature of this helmet to helmet intercom is its built-in FM Radio. The radio supports the FM full frequency band (76~108MHz).
You can definitely find the channel you like. With this function, you can receive the latest news and information during your tour.
Just like Fodsports FX8 AIR, the V6S also has a built-in CSR chip to help improve its voice and sound quality.
With this, ambient noise such as wind noise and engine noise is not annoying. Even though you are cycling at high speed, the voice quality will not be affected.
Moreover, the V6S is compatible with a wide range of helmet types. Whether you have a full-face helmet, modular, motocross, or even an open-face helmet, FX6 can be installed on them.
So, every rider in your group can seamlessly integrate the FX6 into their helmets.
Its 800mAh battery provides an impressive operating time of up to 25 hours or standby up to 350 hours.
You can embark on extended group rides without worrying about losing connectivity.
6 Riders Pairing, 2 Riders Talk Each Time, 1000m Distance!
Noise Reduction & Waterproof.
3.5mm Headphone Jack for More Application.
FM Radio, Music Sharing, Voice Commands.
best helmet to helmet intercom mesh communication - Fodsports FX10C
For riders seeking the pinnacle of helmet to helmet communication technology, the Fodsports FX10C stands as the ultimate powerhouse.
This is a cutting-edge mesh intercom system from the top helmet communication brand, Fodsports. It combines exceptional performance, advanced features, and unparalleled connectivity.
I recommend the FX10C because it delivers an unrivaled communication experience on the road.
FX10C can support 10 mesh intercom channels, you can freely switch channels. Its advanced mesh networking capabilities facilitate group intercom. Thus making it an ideal choice for large group rides or extended adventures.
And, the connectivity between you and your riding companions is seamless. Even in challenging environments or extended distances, the voice and sound remain pure.
Another standout feature is that it supports listening to music and navigation while intercom. Just communicate with your partners without stopping the music; this will be enjoyable.
Additionally, the system boasts a sleek and ergonomic design. It can seamlessly integrate with different helmet types without compromising comfort or safety.
Mesh Intercom, Bluetooth 5.0 Tech.
Up to 10 Channels, Unlimited Intercom Numbers.
1000M Distance.
Listening to Music and Navigating while Intercom.
Music Sharing, Voice Commands, FM Radio.
Installation and Integration Fodsports: Seamless Connectivity at Your Fingertips
Once you've selected the best helmet to helmet system from Fodsports for your needs, the next step is to install and use it.
You must ensure a seamless installation so that you can get the best experience. All Fodsports Bluetooth helmet intercoms will provide the necessary accessories in the helmet Bluetooth Kit. Just follow the instructions and the user manual in the box, and you will know how to install them.
It's essential to carefully follow the instructions and seek professional assistance if necessary. Proper installation not only ensures optimal performance but also safeguards the integrity of your helmet and its safety features.
Additionally, consider the system's ease of use and ergonomics during the installation process. Make sure the controls are easily accessible and the system does not interfere with your helmet's comfort or visibility.
Then, you'll be able to enjoy a seamless and distraction-free riding experience.
Maximizing the Benefits of Fodsports Helmet to Helmet Intercoms: Tips for Optimal Utilization
Yes, I know Fodsports' helmet to helmet intercom systems offer a wealth of benefits. But, maximizing their potential requires a thoughtful approach and adherence to best practices. Here are some tips to help you get the most out of your Fodsports helmet communications:
Familiarize yourself with the system's features and controls
It is better to take the time to understand the functions and capabilities of the Fodsports intercom system. This ensures you can seamlessly navigate through its menus and settings while cycling.
Prioritize safety
Yes, the ability to communicate and access entertainment features is invaluable. But never allow yourself to become distracted or compromised while operating your motorcycle. Always maintain situational awareness and prioritize safe riding practices.
Experiment with noise cancellation settings
Different riding environments require adjustments to the noise cancellation settings. This is to ensure optimal audio clarity. Don't be afraid to experiment with this. Once you find the configuration that works best for your specific needs, your tour will be more enjoyable.
Utilize voice commands
Fodsports Bluetooth helmet-to-helmet communication systems offer voice command capabilities. So, you can control various functions without taking your hands off the handlebars. I sincerely advise you to get familiar with the voice commands function. By integrating them into your riding routine, you will get added convenience and safety.
Stay charged
Before starting extended rides, ensure that the Fodsports communication system is fully charged. Also, consider investing in a portable power bank or a motorcycle charging solution. This aims to keep your device powered up throughout your journey.
Share the experience
Encourage your riding companions to invest in compatible communication systems. This can foster a truly immersive and connected experience on the road. You can Share insights, warnings, and even jokes during the tour. In these ways, you can enhance the camaraderie and overall enjoyment of your group rides.
These are useful and experienced tips and best practices you can follow. With these, you'll be able to fully harness the power of helmet to helmet communication systems. And elevate your riding experience to new heights while maintaining a focus on safety and enjoyment.
Factors to Consider When Choosing the Ideal Helmet to Helmet Communication System
The prospect of seamless communication on the road is alluring. But selecting the ideal helmet to helmet communication system requires careful consideration. Here, we will list several key factors that you should pay attention to. By evaluating these elements, you can ensure that your investment aligns with your needs and preferences. And, most importantly, enhancing your overall riding experience.
Helmet Compatibility and Integration
The first and foremost consideration is compatibility with your existing helmet. Some communication systems are designed to integrate with specific helmet models.
They can offer you a sleek and streamlined installation. But they are more expensive and usually customized.
Fodsports helmet to helmet communication intercoms are universal. So we allow for versatile mounting options across various helmet types.
Don't worry about the helmet type you are using now.
Fodsport's intercom systems are compatible with both full-face, modular, and open-face helmets.
More importantly, make sure that the system you choose can be securely mounted on the helmet. And, do not compromise the helmet's safety or comfort features.
Besides, consider the mounting location and its impact on aerodynamics and noise levels at higher speeds.
Communication Range and Connectivity
The communication range and connectivity options are critical factors. It determines the system's effectiveness in facilitating group conversations or rider-to-pillion communication.
Bluetooth helmet-to-helmet intercom is the predominant standard, offering reliable short-range connectivity.
However, for long-distance and complicated environments intercoms, mesh intercoms are the best choice.
When evaluating communication range, consider your typical riding scenarios and group sizes. If you frequently ride in larger groups or prefer extended solo adventures, a longer-range system and mesh intercoms may be better.
Audio Quality and Noise Cancellation
There is a cacophony of environmental sounds during riding, from the roar of the engine to the howling wind. To ensure clear and intelligible communication is essential.
So, choose a system that prioritizes audio quality and incorporates advanced noise-cancellation tech. I believe you do not like to hear the noisy wind and engine sounds when you are talking with your partner on the road.
This not only enhances the clarity of voice communication between you and your companion. It also improves the overall listening experience when streaming music or audio content.
Ease of Use and Ergonomics
Riding a motorcycle demands unwavering focus and attention. So, ease of use and ergonomics are paramount factors when selecting helmet-to-helmet intercoms.
Choose a system with intuitive controls that can be operated seamlessly while motorcycling. This makes sure that you will not compromise your ability to maintain a firm grip on the handlebars.
Besides, voice command capabilities and tactile controls are desirable features for most motorcyclists. With these features, you can easily access the intercom even if you are wearing gloves.
I really appreciate that Fodsports has integrated this function into their helmet communication systems.
What's more, consider the system's overall ergonomic design when choosing your ideal helmet-to-helmet system. And ensuring that it doesn't interfere with the helmet's comfort or safety features.
Battery Life and Charging Convenience
Lengthy rides and extended group adventures demand communication systems with robust battery life to ensure uninterrupted connectivity. Thus, you need to evaluate the advertised battery life of the systems you're considering. And, it is better to take both standby and active usage scenarios into consideration.
Additionally, consider the charging options and convenience offered by each system. Quick-charging capabilities and the availability of portable power banks can be invaluable assets. This can keep your system powered up even during extended rides or remote adventures.
Additional Features and Versatility
The core functionality of helmet to helmet intercoms is facilitating conversations, that's true. However, many modern systems offer lots of extra features that can enhance your riding experience.
For example, you can consider systems that offer integrated FM radio capabilities. This feature allows you to tune in to your favorite stations while on the go.
Furthermore, some systems incorporate advanced features like voice control, smartphone integration. And some even with crash detection capabilities. These added functionalities not only contribute to convenience but also prioritize safety.
Accept these features! They ensure that you can focus on the road ahead without distractions.
FAQS
What is the best helmet to helmet communication?
There are four popular Fodsports helmet-to-helmet communication systems: FX8 Air, FX4 Pro, M1-S Pro, and FX10C.
The FX8 Air provides a reliable and clear connection between 2 to 6 riders. And, the FX4 Pro supports up to 4 riders and offers excellent audio quality. The M1-S Pro is an excellent 10 riders helemt to helmet intercom device with excellent performance. Last, the FX 10C is a mesh communication system that allows mesh intercom and delivers satisfactory sound performance.
All four models from Fodsports feature easy installation, long battery life, and waterproof design. Thus making them suitable choices for motorcycle enthusiasts seeking effective helmet communication.
How to pair a helmet with intercom?
To pair a helmet with an intercom, follow these steps:
Turn on the intercom and ensure it is in pairing mode.
Activate the pairing mode on the helmet's communication system.
Wait for the devices to detect each other.
Once detected, select the intercom on the helmet.
Wait for the pairing process to complete and for the devices to establish a stable connection.
Test the communication by speaking into the intercom and listening through the helmet's speakers.
Can Bluetooth motorcycle helmets talk to each other?
Yes, Bluetooth motorcycle helmets can talk to each other. These helmets are equipped with built-in Bluetooth communication systems. The system allows riders to establish a wireless connection between their helmets. This enables helmet-to-helmet communication, allowing riders to talk to each other while riding.
The Bluetooth technology in these helmets enables clear audio transmission and reception. Thus making it convenient for riders to communicate with their fellow riders. And the riders will not need handheld devices or external intercom systems.
How to measure head for motorcycle helmet?
To measure your head for a motorcycle helmet, these are the main steps:
Take a flexible measuring tape and place it around your head, just above your eyebrows and ears.
Ensure the tape is level and snug but not too tight.
Note the measurement in centimeters or inches.
Use the measurement to determine your helmet size by referring to the manufacturer's size chart.
Typically, helmet sizes range from XS (extra small) to XXL (extra extra large).
Select the helmet size that corresponds to your head measurement for a proper and comfortable fit.
How to install intercom on helmet?
Here are the main steps to install an intercom on a helmet:
Identify the mounting location on your helmet, usually near the left or right ear area.
Clean the mounting area to ensure proper adhesion.
Attach the intercom's mounting bracket or adhesive pad to the helmet securely.
Align the intercom unit with the mounting bracket or adhesive pad and firmly press it into place.
Route the intercom's wires discreetly along the helmet's interior, avoiding any obstructions.
Connect the intercom's speakers and microphone according to the manufacturer's instructions.
Test the intercom's functionality before riding to ensure proper installation and audio clarity.
Conclusion: Embracing the Connected Riding Experience
In the ever-evolving motorcycling world, helmet to helmet communication systems have emerged as game-changers. And it fosters a deeper sense of connection, safety, and enjoyment on the road.
Carefully check factors like helmet compatibility, intercom range, audio quality, ease of use, and other features before buying. You will get the best helmet to helmet communication system that aligns with your preferences.
From low-budget Fodsports FX8 Air to premium FX10C mesh intercom, there will be one for you. The market offers a diverse range of choices to suit every rider's requirements.
As Fodsports continues to evolve, we can witness more groundbreaking innovations from this brand.
Finally, the decision to invest in a helmet to helmet communication system is a personal one. But for those seeking to elevate their riding experience and forge deeper connections on the road, it's an investment. It promises to pay dividends in the form of unforgettable adventures and heightened safety.
(Updated: Nov. 13th, 2025)
Bluetooth earpiece for motorcycle helmets have appeared in the world. They have revolutionized the way riders navigate, communicate, and enjoy their favorite music. It changes the way that riders staying connected and entertained with partners on the road. In this comprehensive guide, we'll explore the best motorbike helmet earpiece from Fodsports.
Embracing the Freedom of Bluetooth Communication
Nowadays, tangled wires and cumbersome headsets almost disappeared. No one are using them.
Helmet bluetooth earpiece stands onto the stage in recent years.
They offer a seamless, wireless connection to your devices. Thus allowing you to stay connected without compromising your safety or mobility.
With these innovative accessories, you will get hands-free cycling experience.
Answering calls, streaming music with your partners, or even communicate with fellow riders, just do it.
All you need is keeping your hands firmly on the handlebars.
I am sure that you will feel this is much more safer for your motorcycling.
So, why not using a earpiece for motorcycle helmets to get more enjoyment during your cycling tour?
Fodsports M1S Plus Bluetooth earpiece for motorcycle helmet
Among all the momtorcycle helmet headset/earpieces from Fodsports, M1S Plus is a must mentioning device. Here, I would like to introduce you the most advanced features of this helemt earpiece.
Firstly, in the earpiece kit, Fodsports provides two microphones. One is soft microphone for full-face helmets. The other one is soft microphone for half helmets.
Besides, the CSR chip noise reduction technology make sure you can talk in natural voice.
As a gues poster and intercom products reviewer. I must say, I realy love the M1S Plus's sound and voice quality since I use it.
What's more, its group intercom can support as much as 8 riders. This can meet almost all riders' demand.
In addition, the built-in CSR noise reduction chip also helps a lot. It can reduce wind noise and engine noise, and make sure the voice quality.
There are too much I would like to say about it. Just see the table here:
Parameters
Pros
Cons
Music share: available
Share the same music with passenger/ rider
Some customer says the sound volume could be louder
V6S bluetooth earpiece for helmet best budget option
The Fodsports V6S is a budget-friendly Bluetooth helmet earpiece by the helmet communication brand Fodsports.
Just like other Fodsports' motorcycle earpieces for helmet, V6S also provide both hard mic and soft mic in the kit.
Therefore, it is suitable for both open-face motorcycle helmets and full-face helmets.
Besides, its small size and lightweight construction make it easy to install and use. This will not interfer with your helmet's fit or comfort.
Here, I must introduce you one of the key advantages of the V6S, that is its advanced noise-canceling technology.
This ensures the earpieces can keep providing clear and distortion-free audio. Even at high speeds motorcycling, the sound and voice are still very perfect.
With this advanced helemt earpiece, you can enjoy hands-free calls, music, and navigation.
Moreover, the V6S supports up to 6 riders, enabling seamless group communication on the road.
Its Bluetooth 5.0 connectivity provides a reliable and stable connection, with a range of nearly 1,000 meters.
With intuitive controls and voice commands, the V6S makes it simple to manage all your communication needs. There is no need to take your hands off the handlebars.
And, its long-lasting battery life ensures you can stay connected throughout your riding adventures.
Overall, the Fodsports V6S is a compact and feature-rich motorcycle communication system that enhances the riding experience.
Parameters
Pros
Cons
Voice command: available;
FM Radio: yes
6 Riders Connected & 2 People Toggle Intercom
Cannot support listen to GPS and intercom functions at the same time
What can you use the Fodsports motorcycle helmet bluetooth earpiece for?
Fodsports motorcycle helmet Bluetooth earpieces offer several functions and applications. Here are some of their key uses and expanded explanations:
Hands-free Communication
This is the primary purpose of the Fodsports Bluetooth earpieces.
Fodsport M1S Plus, V6S, as well as other earphones all have this function.
Riders can make and receive phone calls without having to reach for their phones or remove their helmets. The earpiece connects to a mobile phone via Bluetooth technology.
Thus the riders can stay connected while keeping their focus on the road.
Intercom Communication
The Fodsports motorcycle earpieces also serve as an intercom system. It enables the communication between riders or between a rider and a passenger are clear and smooth.
Riders can enjoy their favorite music through the Fodsports Bluetooth earpieces. By connecting it to a smartphone or other Bluetooth-enabled devices, riders can stream audio and listen to it in their helmets.
Both Fodsports M1S Plus and V6S can support music sharing between 2 riders.
This feature enhances the riding experience, making long trips more enjoyable and entertaining.
GPS Navigation
GPS Navigation is a useful function during riding, especially when in unfamiliar places.
Fodsports motorcycle earpieces can pair with the GPS navigation system on your phone. M1S Plus can even provide GPS voice guidance while you are intercom with your partners.
So, the riders can receive turn-by-turn directions directly in their helmets. You will not need to look at your cellphone screen while riding.
With Fodsports M1S Plus receiving audio instructions, you can focus on the road.
That's not only enhancing your safety but also improving your riding convenience.
Voice Control and Virtual Assistants
All Bluetooth earpieces from Fodsports support iPhone Siri or S Voice (Samsung) voice commands.
Just using voice commands, you will be able to make calls, play music, adjust the volume, or ask for directions.
There is no need to touch any buttons or controls while you are motorcycling. This is what Fodsports cares about and also what Fodsports is doing.
Keep your hands firmly on the motorcycle handle, and stay focused on the road and scenery. Others, let Fodsports do for you!
Noise Cancellation
Fodsports M1S Plus and V6S motorcycle helmet earpieces have noise-reduction technology.
The key is that they have a built-in CSR chip, which can reduce wind noise and engine noise.
When you are motorcycling at high speed, this noise reduction feature benefits you a lot!
Without these external noises, the earpiece enables clearer communication and a better audio experience.
Group intercom
The earpiece for motorcycle helmets from Fodsports can support group intercom. The Fodsports M1S Plus can support as many as 8 riders' group communication. Besides, the intercom distance with 7 others can be as far as 2000 meters away in total ( 500m for one intercom).
In summary, the Fodsports motorcycle helmet Bluetooth earpiece provides various functions.
Hands-free communication, intercom capabilities, music, and audio playback, whatever you want.
GPS navigation, voice control, noise cancellation, and group intercom, all is for you.
To be honest, these features are all useful and important in enhancing your convenience, safety, and entertainment.
Installation and Setup Fodsports Bluetooth earpiece for motorcycle helmets: A Step-by-Step Guide
It is important to properly install and set up your Fodsports Bluetooth earpiece to the helmet. Be patient to read the following guidance I introduce to you. This is to ensure you can get optimal performance and a seamless user experience. Let's see these step-by-step instructions with your motorcycle helmet earpiece.
Step 1: Prepare Your Helmet
Begin by carefully removing any removable pads or liners from your helmet's interior. This will provide easy access for the earpiece components and ensure a secure fit.
Step 2: Position the Speakers and Microphone
Fodsports Bluetooth motorcycle earpieces come with a soft microphone and a boom microphone. In general, the soft microphone is used for full-face helmets. While the boom microphone is used for open-face or flip-face (convertible) helmets. Choose the microphone according to your helmet type.
Position the speakers near your ears, ensuring a comfortable and snug fit. Then you need to secure the microphone in a position that captures your voice clearly. Make sure it will not obstruct your field of vision or cause discomfort.
Step 3: Mount the Main Unit
The main control unit of Fodsports' helmet bluetooth earpiece typically uses clips to attach to the exterior of the helmet. You should follow our instructions to ensure a secure and stable mounting.
Step 4: Connect and Pair
Once the hardware is installed, connect your Bluetooth earpiece to your devices. Fodsports has provided a user manual in the each of earpiece kit to guide you on how to connect. Also, at Fodsports intal guides page, you can find electronic type user manuals.
Besides, the Fodsports YouTube channel provides video guidance about connecting and pairing Fodsports motorcycle helmet earpieces.
Then, you'll be ready to enjoy hands-free communication, music streaming, and voice assistance on the go.
Step 5: Adjust and Customize
After the initial setup, take some time to fine-tune the earpiece's positioning and settings. Make sure you can get optimal comfort and performance. You can adjust the speaker and microphone placement as needed. Also, you can explore customized options. Overall, the bluetooth earpiece for helmet from Fodsports always surprises you.
Frequently Asked Questions
As with any new technology, there are bound to be questions and concerns. Here are some frequently asked questions about Bluetooth earpieces for motorcycle helmets. These answers are informative, they will help you better know the Bluetooth helmet earpieces.
How do Bluetooth earpieces for motorcycle helmets work?
Bluetooth earpieces for motorcycle helmets use Bluetooth technology to connect to your devices. They can connect with various items like smartphones, GPS units, or other compatible gadgets. They enable hands-free intercom and communication when you are motorcycling. Also, you can control various functions using voice commands or buttons on the earpiece.
Are Bluetooth earpieces for motorcycle helmets better than regular earbuds?
Absolutely! Bluetooth earpiece for motorcycle helmets are designed for the unique challenges of riding. They offer superior noise cancellation, secure mounting, and hands-free operation. Thus making them far more practical and safer than regular earbuds.
Can Bluetooth earpieces be used with any type of motorcycle helmet?
Most Bluetooth earpieces are compatible with different helmet types. But it's essential to check the manufacturer's specifications. Some models may be designed specifically for full-face helmets. While others are better suited for modular or half-face helmets. Fodsports helmet earpieces can support both full-face helmets and half-face helmets. They provide both a soft mic and a hard mic(boom mic) in their motorcycle helmet earpiece kit.
How long do Bluetooth earpiece batteries typically last?
Battery life can vary depending on the model and usage patterns. But most high-quality Bluetooth earpiece for motorcycle helmets offer longer working time. For example, Fodsports M1S Plus can support almost 20 hours of talk time or 300 hours of standby time.
In the exhilarating world of motorcycling, clear and seamless communication is important. It is essential for an unparalleled riding experience. Gone are the days when riders had to resort to hand gestures or shouting over the roar of engines. Two way motorcycle communication systems have revolutionized the way riders interact. These systems are fostering a safer and more enjoyable journey. This comprehensive guide delves into the intricate realm of these advanced communication devices. I will equip you with the knowledge to make an informed choice and elevate your riding adventures.
Understanding Two Way Motorcycle Communication Systems
Motorcycle 2 way communication systems are wireless devices. It is designed to help real-time conversations between riders or between riders and passengers.
These cutting-edge gadgets leverage the power of Bluetooth technology.
They can achieve seamless voice transmission and even music streaming and GPS navigation.
By eliminating the barriers of distance and noise, these systems offer excellent connectivity on the road.
The Evolution of Motorcycle Communication Technology
The journey of motorcycle communication has been a remarkable one. From wired intercoms to wireless systems, motorcycle communications are upgraded quickly.
As technology advanced, Bluetooth emerged as the driving force.
It offers a reliable and convenient means of wireless transmission.
With each iteration, these systems have become more robust. And, boasts improved audio quality, extended range, and enhanced battery life.
Top Two Way Helmet Communication Options
In the ever-evolving market of motorcycle communication devices, several brands have emerged as industry leaders. They offer cutting-edge solutions tailored to the needs of riders.
Among these, Fodsports stands out as a prominent name. It is renowned for its innovative and high-quality products.
Fodsports T1: 2025 Newest 2 Riders Communication System
The Fodsports T1 motorcycle communication system stands out as an exceptional two-way helmet intercom in 2025.
Just released in May 2025, the Fodsports T1 is truly a 2 riders communication system with full functions.
It offers a blend of affordability and advanced features tailored for riders.
Designed to facilitate seamless communication, the T1 supports 2 riders within a 1000-meter range. This distance is far enough for most 2 riders communication demand.
Equipped with intelligent CVC + ENC noise reduction technology, the T1 delivers clear audio quality.
This allows riders to converse effortlessly without the interference of wind or engine noise.
Its compatibility with various helmet types and other Bluetooth headset brands adds to its versatility. Thus making it a practical choice for diverse riding setups.
Beyond intercom capabilities, the T1 offers various extra features.
For example, music sharing, FM Radio, and hands-free voice commands. All these functions and abilities enhance the overall riding experience.
Besides, its user-friendly interface ensures easy pairing with smartphones. Thus enabling riders to make calls or listen to music without distractions.
When pairing with the phone, the battery status of T1 will also show on the phone.
With a durable design and long battery life, the Fodsports T1 is built to withstand the rigors of the road. Its 25+ hours working time provides a reliable performance ride after ride.
For motorcyclists seeking a cost-effective yet feature-rich communication solution, the T1 emerges as a top contender in the realm of helmet intercom systems.
Pros
Cons
Newest Bluetooth 5.4
Only support 2 riders communication
IP67 Waterproof
Music Sharing Between 2 Riders
Power Display On the Phone
FM Radio, Voice Command All Available
Fodsports M1S AIR: The Ultimate Rider-to-Rider Communication Solution
Fodsports M1S AIR two way motorcycle communication system
The Fodsports M1S AIR is a game-changer in the world of two way motorcycle communication.
The earlier version(V1.0 and V1.1), maybe some friends has already own, can support only 2 riders communication.
But now, Fodsports has upgraded its Bluetooth chip. The latest V1.2 M1-S Air can support 2-6 riders now!
This advanced system boasts a remarkable transmission range of up to 1000 meters. Thus ensuring seamless connectivity even in challenging riding conditions.
And, it is equipped with Bluetooth 5.0 technology and a powerful noise-canceling algorithm. So it delivers exceptional audio quality, allowing riders to communicate with crystal clarity.
Besides, its intuitive voice control functionality is also worth mentioning. This is one of the standout features of the M1S AIR. It enables hands-free operation and seamless integration with voice assistants like Siri and Google Assistant.
Additionally, its IP67 waterproof rating and durable construction are also outstanding. This ensures Fodsport's M1S AIR still performs well even in the harshest weather conditions.
Pros
Cons
Ease of use
Integrated battery, so have to 'charge' whole helmet
Compatitable with various intercom series
Advanced noise-canceling technology
FM Radio/GPS and Communication
IP65 Waterproof, long battery lifespan
Fodsports FX10C: Elevating Group Riding Experiences
Mesh Intercom, Bleutooth 5.0, 2000m Intercom Range.
10 Mesh Intercom Channels, Unlimited Connection Number.
Listen to Music/GPS and Talk with Other Riders At The Same Time.
High Quality sound, IP65 waterproof.
Music Sharing, Voice Commands, FM Radio.
For those who thrive on group riding adventures, the Fodsports FX10C is a must-have. This cutting-edge two way motorcycle communication system utilizes advanced Mesh technology.
It enables seamless communication among up to 10 mesh intercom channels simultaneously. With a remarkable transmission range of up to 1000 meters, the FX10C ensures that no rider is left behind.
With Fodsports FX10C, it will foster a cohesive and enjoyable group experience.
Designed with rider comfort in mind, the FX10C features a sleek and lightweight construction. Thus making it easy to mount on various helmet styles.
Moreover, its intuitive controls and voice prompts further enhance the user experience. The riders can focus on the road ahead while staying connected with other adventurers.
Pros
Cons
Mesh intercom communication
Mesh Intercom only supports among Fodsports FX10C
Up to 10 mesh intercom channels
Intercom number is not limited among Fodsports intercoms
Two-way Bluetooth intercom
Big button design, convenient for riding operation
Fodsports FX2: Affordable Excellence for Two-Way Communication
Fodsports FX2 two way helmet communication headset
Some riders are seeking an affordable yet reliable solution for two-way communication. Here, I will recommend an excellent choice, the Fodsports FX2.
This compact and lightweight system can provide a clear and uninterrupted two-way intercom.
Moreover, it is really a budget-friendly choice. If you need communication between a rider and a passenger or between two riders, FX2 is the best option.
Despite its low budget price point, the FX2 does not compromise on performance.
It boasts a respectable transmission range of up to 500 to 1000 meters. And, it incorporates advanced noise-canceling technology to deliver crystal-clear audio quality.
Additionally, its long battery life is also excellent. It can support as long as 12 hours of intercom time and 350 hours of standby time.
All these advantages make it a practical choice for both short and long-distance rides.
Pros
Cons
Three-person pairing, two-way intercom
Only 2 people can talk at the same time in the group
Intercom communication distance can reach 1000 meters
Voice assistant function
15 hours continuous music listening
Answer calls automatically
Choosing the Right Two-Way Motorcycle Communication System
When selecting the perfect two way motorcycle intercom, several factors come into play.
From the type of device to the transmission range and audio quality, you need to consider them all.
Each aspect plays a crucial role in ensuring seamless and enjoyable motorcycling.
Types of Motorcycle helmet two way communication
Helmet-Mounted Intercoms: These compact devices are designed to be securely mounted on your helmet. Thus offering a hands-free communication experience. They are favored for their ease of use, multi-function, and compatibility with various helmets.
Bluetooth Headsets: Similar to intercoms, Bluetooth headsets offer a wireless communication solution. They are often praised for their comfortable fit and versatility. The reason is that they can be used with different helmets.
Walkie-Talkies: It is not as popular for motorcycle communication. But walkie-talkies can still be an option for some riders. However, their bulky design and the need for manual operation are the weaknesses. These disadvantages can pose safety concerns during high-speed riding.
Wireless Transmission: Bluetooth vs. Mesh Technology
Bluetooth has long been the industry standard for wireless communication in motorcycle systems. However, a newer technology called Mesh has emerged in recent years.
Mech intercom offers an automated and seamless connection for larger groups of riders.
Yes, I believe that Bluetooth is more widely compatible and budget-friendly. But mesh communication may be a better choice for group intercom.
If you are seeking a reliable solution for larger riding groups, I advise you the mesh intercom.
Besides, in potential signal obstruction areas, mesh communications are also better in performance.
Manual Control vs. Voice Activation
Most motorcycle helmet two way communication systems offer both manual and voice-activated control options.
Manual control motorcycle communication systems are often controlled through buttons or knobs. They provide a tactile experience to the users.
However, voice activation communication systems are more advanced in technology. They leverage advanced voice recognition technology for hands-free operation.
The choice between the two depends on personal preference and riding conditions. As voice activation may be prone to misinterpretation in noisy environments.
Prioritizing Audio Quality and Noise Cancellation
Exceptional audio quality is a non-negotiable factor when choosing motorcycle helmet intercom 2 way headsets.
One of the key advantages of modern two-way motorcycle communication is the ease of installation and setup.
Many manufacturers have streamlined the process of the installation and setup steps. This ensures that riders can effortlessly integrate these devices into their riding gear.
Most helmet-mounted intercoms and headsets come with secure mounting systems.
For example, Fodsports helmet communication systems use clamps or adhesive pads for installation. They are designed to firmly attach to your helmet.
This makes sure the communication systems will not compromise the helmet's safety.
Additionally, many systems offer intuitive pairing processes. You can easily connect with other riders or devices.
To ensure a seamless setup experience, remember to review the manufacturer's instructions. And, you need to follow the manufacturer's guidelines.
Some systems may require additional accessories or adapters. It depends on your helmet type or specific requirements.
Maintenance and Care: Ensuring Longevity
Like any valuable investment, proper maintenance and care are essential. This ensures the longevity and optimal performance of your two way helmet communication.
Manufacturers typically provide guidelines on cleaning and storage. Also, there are recommendations for battery replacement or firmware updates.
Remember to regularly clean the communication device, especially the microphone and speakers. This can help prevent the buildup of dust and debris, which can impact audio quality.
Additionally, storage the system in a dry and cool environment when not in use. In this way, you will find your communication system's lifespan extended.
It is also crucial to follow the manufacturer's recommendations for battery replacement. I advise you to use the correct battery type and adhere to the recommended replacement schedule.
These methods can prevent issues such as reduced battery life or system malfunctions.
FAQS
How do you communicate between two motorcycles?
To communicate between two motorcycles, you can use two-way helmet communication system.
First, pair the intercoms using Bluetooth. Once connected, you can talk to the other rider by pressing the intercom button and speaking. The audio is transmitted wirelessly between the two intercoms, allowing you to have a clear conversation.
This hands-free communication is great for coordinating with your riding partner, sharing updates, or just chatting during the ride.
The intercom range is up to 500 to 1000 meters according to different conditions. This ensures you can stay connected even when riding at a distance.
How do motorcycle Bluetooth headsets work?
Motorcycle Bluetooth headsets work by connecting wirelessly to your smartphone or other Bluetooth devices.
Once paired, you can make and receive calls, listen to music, or access voice assistants. All these can be done hand-free, you will not have to take your hands off the handlebars.
The headset's microphone picks up your voice, and the speakers allow you to hear the audio clearly. Even at high speeds, the Bluetooth headset still can intercom smoothly.
The Bluetooth connection provides a reliable, hands-free communication solution. Thus enhancing your riding experience and keeping you focused on the road.
Can Bluetooth motorcycle helmets talk to each other?
Yes, Bluetooth motorcycle helmets can talk to each other.
By pairing the Bluetooth intercoms built into the helmets, riders can communicate wirelessly while riding. This allows you to have hands-free conversations with other riders in your group.
Also, you can share music and information, coordinate maneuvers, or simply chat. The Bluetooth connection ensures a reliable link, even at a distance.
As long as both riders have compatible Bluetooth helmet systems, they can seamlessly interact with each other. This makes the group rides more enjoyable and safer.
Conclusion
Motorcycle 2 way communication systems have revolutionized the way riders interact. And, it fosters a safer and more enjoyable riding experience.
From helmet-mounted intercoms to advanced Bluetooth headsets, there are many choices. Also, they are available to cater to a wide range of preferences and riding styles.
By understanding the various factors to consider, such as transmission range, audio quality, and helmet compatibility, riders can make an informed decision and invest in a system that truly enhances their adventures on the open road.
Brands like Fodsports, with their innovative solutions like the M1S AIR, FX8 AIR, and FX2, are at the forefront of this technological revolution. It offers cutting-edge products that cater to the diverse needs of the motorcycle community.
Having the right motorcycle intercom system for music can elevate your riding experience. It allows you to listen to your favorite tunes while on the road.
Whether you're embarking on a cross-country adventure or a leisurely weekend ride, that will be enjoyable.
But, with many options available, selecting the perfect headset may be hard for you.
In this comprehensive guide, we'll explore the key factors to consider when choosing a motorcycle intercom for music.
Also, we will provide you with a curated list of top-performing models.
These models will cater to various preferences and budgets for motorcyclists.
How to listen to music in a motorcycle helmet?
To listen to music in a motorcycle helmet, you can use Bluetooth intercom systems.
Pair your intercom device, such as the Fodsports BT S3, with your smartphone or music player via Bluetooth.
Connect the intercom to your helmet, ensuring the speakers are properly positioned. This is important for getting optimal audio quality.
Once connected, use the intercom's intuitive controls to manage your music playback.
Adjust the volume, skip tracks, and even activate voice commands to control your playlist.
The intercom's noise-canceling technology ensures the music is audible even at high speeds.
You can enjoy your tunes while maintaining awareness of your surroundings for safe riding.
Choosing the best motorcycle intercom for music - What are the main Factors to consider?
Here are the key factors to consider when selecting a motorcycle intercom for listening to music:
Audio Quality: Look for an intercom with high-fidelity speakers and noise-canceling capabilities. These are important factors to make sure you can get a clear music playback.
Bluetooth Connectivity: Ensure the motorcycle intercom can seamlessly pair with your devices. Most smartphones and music players support Bluetooth 5.0 or newer editions. This is a key factor for wireless audio streaming.
Intercom Range: Consider the maximum distance the intercom can maintain group communication. For example, most Fodsports helmet intercom systems support 500 to 1000m smooth intercom.
Battery Life: Opt for an intercom with long-lasting battery life. They can support longer power for your music and calls throughout your ride.
Ease of Use: Choose an intercom with intuitive controls. This will make it easier and safer for you to manage music playback while riding.
Helmet Compatibility: Verify the intercom's design works with your specific helmet model.
Weather Resistance: Choose an intercom with a rugged, waterproof construction. This is necessary for reliable performance in various riding conditions.
Top Motorcycle Intercoms for Music Enthusiasts
Now that we've covered the essential factors to consider, let's explore further.
The following are some of the best motorcycle intercoms for listening to music lovers on the market.
FX7: Latest Bluetooth Mesh Intercom with Music Sharing
Fodsports FX7 Bluetooth mesh motorcycle intercom for music
Bluetooth Mesh Intercom.
Dual Bluetooth Chip Design.
10 Riders Group Audio, 2000m Distance!
HRSQ Mic and Speakers, CVC + ENC + DSP Noise Cancelation.
Listen to Music/GPS and Intercom At the Same Time.
IP67 Waterproof.
FM Radio, Music Sharing, Voice Commands.
Its mesh intercom system allows seamless communication between multiple riders, with a range of up to 2 kilometers.
One of the most advanced techs of the FX7 is its dual-chip design. Equipped with 2 chips, one for Bluetooth audio and the other for Bluetooth audio. This makes the FX7 more effective in making more progress at the same time.
Also, the FX7 has other leading tech including CVC+ENC Noise Reduction, quick pairing modes, multi-rider mesh AD-HOC network, etc.
One of the standout features of the FX7 is its ability to share music between the front and back seat riders. This feature enhances the riding experience, allowing both riders to enjoy the same audio simultaneously.
The device is also IP67 waterproof, making it suitable for all weather conditions.
Based on my using experience, it is truly the best Bluetooth mesh intercom released in 2024. I truly want to clap for its user-friendly interface and robust performance.
For both casual and serious riders, the FX7 is a true excellent choice that is worth to buy.
Fodsports T1 Pro: 4-6 Riders Group Intercom with Full Functions and Abilities
The Fodsports T1 Pro is an advanced Bluetooth intercom system that has just been released in May 2025. It is designed for seamless communication among 4 to 6 riders.
For 2 riders communication, the T1 Pro offers a reliable connection with a range of up to 1000 meters.
As for 4-6 riders group communication, the distance can be extended up to 2000 meters.
What's more, the T1 Pro can support a one-click quick pairing among 4 riders. The 5th and 6 riders will need an extra manual operation to join the group.
With Bluetooth 5.4 tech and HiFi microphone and speakers, the T1 Pro ensures clear conversations even at high speeds.
The device features noise-canceling technology that minimizes wind and engine sounds, providing crisp audio quality during rides.
Another standout feature of the T1 Pro is its music sharing capability. It allows two riders to enjoy the same music simultaneously while they are both using the T1 Pro.
This function enhances the riding experience by letting companions share their favorite tunes while on the road. The T1 Pro delivers high-definition stereo sound with rich bass, ensuring an immersive listening experience.
Additionally, the T1 Pro supports many other functions and abilities.
It enables hands-free operation through voice commands, enabling riders to control music playback, answer calls, and access GPS directions. Riders will not need to take their hands off the handlebars.
Its waterproof design ensures durability in various weather conditions, making it a reliable choice for group rides.
Overall, the Fodsports T1 Pro combines robust intercom capabilities with superior audio features, making it an excellent choice for riders seeking both communication and entertainment on their journeys. It is one of the best cheap intercom for music.
8 Riders Group Communication Intercom, 2000 Meters Distance!
Noise Reduction Function & Hi-Fi Stereo Sound Quality.
FM Radio, Music Sharing, Voice Command.
Universal Pairing.
The Fodsports FX8 is a budget-friendly listen to music motorcycle helmet intercom option that punches well above its weight class in terms of performance.
This intercom system is equipped with advanced audio processing and high-fidelity speakers.
Thus it boasts impressive sound quality for both music listening and Bluetooth communication.
Keep pressing the "M" button for 3 seconds, you will be able to share music with your companions.
Single-click the "M" button, you can change three EQ sound effects as you like.
Just choose the one you prefer when you are listening to music.
Additionally, Fodsports FX8 robust noise-cancellation capabilities are worth mentioning.
This ensures that your music remains crisp and clear, even in the face of intense wind and engine noise.
Name
Parameter
Name
Parameter
Intercom Brand
Fodsports
Item model number
FX8
Batteries
Lithium Polymer batteries
Battery capacity
900 mAh
FM Radio
Available
Intercom quantity
8 riders intercom
Bluetooth
5.0
Hands-free option
Yes
Noise Reduction Function
Yes
Intercom Range
2000m
Music Sharing
Yes
Language Switching
Available
Single Pack Price
$95.99
Dual Pack Price
$189.99
Fodsports FX8 AIR: Low Budget
Fodsports FX8 AIR Motorcycle Bluetooth Headset for music
The Fodsports FX8 AIR is another best helmet intercom for music which offers a seamless music listening experience.
With Bluetooth 5.0 connectivity, you can pair your smartphone and stream music directly through the intercom.
Besides, the FX8 AIR features high-quality speakers that provide clear, rich audio even at high speeds. Thanks to its advanced noise-canceling technology.
You can control your music playback using the button interface on the intercom.
Single-click the "M" button, you can activate the voice command function. Adjusting the volume, skipping tracks, or playing/pausing your tunes, just do it!
You will be able to finish these without taking your hands off the handlebars.
The intercom's 900 mAh long-lasting battery ensures uninterrupted music enjoyment throughout your ride.
The Fodsports FX8 AIR delivers an immersive musical experience during your cycling tour. It is the perfect option for the best budget intercom for music.
10 Riders Group Intercom, 2000 Meters Distance!
Optional HRSQ Mic and Speakers, Better Sound Quality.
Microphone Mute.
Music Sharing, FM Radio, Voice Command.
The MIS PLUS is a versatile motorcycle intercom for music that seamlessly integrates with various devices. So you can stream music directly from your phone or your bike's entertainment system.
The M1S Plus features high-quality speakers that produce clear, dynamic audio, even if you are riding fast. That's because it is equipped with excellent noise-canceling technology.
Besides, you can also share the same music with the passengers/ riders between two M1S PLUS units.
You can easily control your music playback using the button controls on the device. The big button is very friendly, you can easily press it without taking off your gloves.
With its intuitive controls and long-range connectivity, this intercom ensures that you never miss a beat, no matter how far you roam.
Name
Parameter
Name
Parameter
Intercom Brand
Fodsports
Item model number
M1-S PLUS
Stand Out Feature
Active Noise Cancellation; Mute Microphone; Built-in FM; music share
Bluetooth Version
5.0
Riders Connected
8 to 10 riders one click pairing
Control Type
Voice control
Intercom Distance
500 - 1000m
Compatible Helmets
All Types
FM Radio
Yes
Waterproof
IP65
Music Sharing
Yes
Microphone
Hard mic/soft mic both
Single Pack Price
From $105.99
Dual Pack Price
From $210.99
Fodsports M1S Plus is on sale. You can get a 20% off by using the coupon code "20M1SPL" when purchasing through Fodsports official website.
For those seeking the pinnacle of audio performance, the M1S AIR from a renowned brand, Fodsports, is a top contender. This premium intercom system uses advanced audio codecs and high-end components. Thus it delivers an unparalleled music listening experience. Its noise-cancellation technology is the reason why I recommend it as one of the best motorcycle intercoms for music.
Fodsports M1S AIR Bluetooth headset has three sound effects: HiFi Bass, Popular Golden Classic, and Pure Human Voice.
You can now enjoy streaming music at high speeds with unmatched clarity.
M1S AIR also supports music sharing, and it provides Voice Commands and Voice prompts. Besides, its 900 mAh battery capacity is also worth mentioning advantage. This will support your long-time music listening or intercom for each charge.
Your music will remain crystal-clear, even in the most challenging environments.
Name
Parameter
Name
Parameter
Intercom Brand
Fodsports
Item model number
M1S AIR
Stand Out Feature
2 to 6 riders intercom; Share music; 3 Sound Effects; FM Radio
Bluetooth Version
5.0
Riders Connected
2 to 6 riders pairing
Control Type
Voice Command; Voice Prompt
Intercom Distance
500 - 1000m
Compatible Helmets
All Types
FM Radio
Yes
Waterproof
IP65
Music Sharing
Yes
Microphone
Hard mic/soft mic both
Single Pack Price
$60.99/$65.99
Dual Pack Price
$118.99/$131.99
FX30C PRO: Long-Range Connectivity and Durability
FX30C PRO Bluetooth motorcycle music headset with camera
2 Way Helmet Intercom with Camera, 1000m Intercom Range.
HD 1080P Camera & 360° Rotation Shooting.
Large Battery, Ideal for long rides.
IP65 Waterproof.
Music Sharing, FM Radio, Voice Commands.
The FX30C PRO from Fodsports is a rugged and reliable motorcycle intercom for the adventurous rider. It can be listed as the best music headphones for motorcycle helmet I have ever used.
Yes, the camera function is its most advanced feature and function. But it also has excellent performance on the sound and voice.
If you want to share music with your companion when motorcycling, FX30C PRO will meet your demand.
I was really shocked by its stunning HD Stereo Music when I first used this motorcycle intercom for music.
Besides, it offers 3 sound effects, “HiFi Bass”, “Popular Golden Classic” and “Pure Human Voice”. I believe you will love it!
Mostly, the intercom voice and sound are crystal clear, even in noisy environments.
Another feature I would like to introduce is its 2000 mAh battery. You can intercom for 32 hrs, listen to songs for 36 hours, or document video clips for 6-7 hours for each charge.
Think about this!
Name
Parameter
Name
Parameter
Intercom Brand
Fodsports
Item model number
FX30C PRO
Stand Out Feature
HD 1080P camera & 360° rotation shooting; Share Music; HD Stereo Music, 3 sound effects.
Bluetooth Version
5.0
Riders Connected
2 riders pairing
Control Type
Voice Command
Intercom Distance
500 - 1000m
Compatible Helmets
All Types
FM Radio
Yes
Battery
2000 mAh
Music Sharing
Yes
Microphone
Hard mic/soft mic both
Price
$139.99
FAQS
Can You Play Music on Intercom?
Yes, most of the modern intercoms for motorcycle helmets are able to pair with a smartphone and play music!
Because the intercoms use Bluetooth tech and has universal pairing ability, your smartphone can find and pair them through Bluetooth.
Just turn on the intercom, turn on the Bluetooth on your smartphone, find the intercom, and pair your phone with the intercom. Then you open the music APP in your phone, play a music, you will be able to hear the music voice in the Bluetooth intercom's speakers.
How to Share Music in Intercom?
Music sharing is usually available between 2 same model intercoms. Some different models with good compatibility can also support music sharing.
I will take Fodsports FX7 music sharing function as the example:
First, you need to make sure these 2 intercoms are connected.
Second, use one FX7 to find and pair with your smartphone. (Long press the function button on FX7 for 3 seconds; Open your smartphone's Bluetooth, find the FX7 in the Bluetooth list and pair)
Play a music in your smartphone.
Single click the FX7's ON/OFF button, you will be able to share music to the second FX7.
Through music sharing in intercom, two riders can listen to song together.
Can You Listen to Music and Intercom on Fodsports?
Yes! Fodsports have several models that can support you listen to music and intercom at the same time.
The Fodsports FX7, FX8 Pro, and FX 10C can support wireless audio mixing, they can directly support you listen to music and intercom at the same time.
What's more, with a wired 3.5mm to 2.5mm cable, the Fodsports M1-S Pro, M1-S Plus, M1-S Air, FX8, and FX8 Air can also support listening to music and intercom at the same time. This cable is already provided in the product box.
How Do I Enable Dual Audio Mode?
Dual audio mode is usually available on intercoms that have dual Bluetooth chips, or intercoms with dual audio handling ability.
To achieve this, you can use Fodsports FX7, FX8 Pro, and FX 10C. The are able to support you operate dual audio, like intercom audio and music/GPS audio at the same time.
If you can accept using a wired cable, you can also consider using the Fodsports M1-S Pro, M1-S Plus, M1-S Air, FX8, and FX8 Air. They also enable dual audio mode, but will need an extra wired cable. (The cable is already in the product box.)
Conclusion: Riding in Harmony with Your Music
Selecting the right motorcycle intercom for music is a crucial decision. It can significantly enhance your riding experience.
Consider factors like sound quality, noise cancellation, battery life, and comfort before purchasing. It is better to find the perfect system that caters to your specific needs and preferences.
Are you a budget-conscious rider seeking an affordable option? Or an audiophile in search of the ultimate listening experience?
It doesn't matter. The market offers a wide range of choices to suit every rider's unique requirements.
Embrace the freedom of the open road and let your favorite tunes accompany you on every journey. And, more importantly, create a harmonious blend of music and adventure.
Capturing the essence of motorcycles through photography is an exhilarating pursuit. This is not mattering you're a passionate rider or simply an admirer of these magnificent machines.
Motorcycle photography offers a realm of endless creative possibilities. You can capture the freezing split-second moments of adrenaline-fueled action. Also, there are the sleek lines and intricate details of a bike's design you can seize.
In this comprehensive guide, we'll delve into the art of capturing motorcycles in motion. And, we will explore techniques, gear essentials, and invaluable motorcycle photography tips. I believe this guidance will elevate your skills and create stunning visual narratives.
Remember to bookmark this page if you like the content.
The Allure of Motion: Embracing the Dynamic Nature of Motorcycles
Motorcycles are inherently dynamic. It embodies a sense of freedom and exhilaration that captivates riders and observers. As a photographer, your goal is to harness this energy and translate it into powerful, evocative images. The image will transport viewers into the heart of the action.
Whether you're shooting on the open road, at a racetrack, or in a controlled environment, remember this:
Embracing the dynamic nature of motorcycles is key to capturing their essence.
Motorcycle photography ideas - Capture motorcycle in motion
Gear Essentials: Choosing the Right Tools for Motorcycle Photography
Exceptional gear is not an absolute necessity for creating compelling motorcycle photography. But, having the right tools is important. They can enhance your ability to capture the essence of these powerful machines. For starters, a camera with fast autofocus capabilities and a high burst rate is enough. It can freeze fast-paced action and helps starters quickly master photography skills. If you are professional, a versatile lens range, spanning from wide-angle to telephoto must be your favorite tool. They will provide the flexibility to capture various perspectives and angles.
the essential motorcycle photography gear
Camera Bodies: Speed and Precision
When capturing the rapid movement of motorcycles, speed and precision are paramount. Consider investing in a camera body with the following features:
advanced autofocus tracking capabilities;
a high burst rate (ideally 8-10 frames per second or higher)
a robust buffer for continuous shooting.
These features will enable you to freeze the action with pinpoint accuracy. Most importantly, ensuring tack-sharp images even in the most dynamic situations.
Lenses: Versatility and Reach
The right lens can make all the difference in motorcycle photography. A versatile zoom lens, such as a 24-70mm or 70-200mm, will provide the flexibility to capture a wide range of perspectives. From intimate details to sweeping landscapes, you will get all of them. For even greater reach, consider a telephoto lens. For example, a 100-400mm or 150-600mm. It will allow you to capture stunning close-ups and compress the background for a more dramatic effect.
Accessories: Stability and Mobility
Stability is crucial when shooting motorcycles in motion. The reason is that even the slightest camera shake can result in blurred images. I advise you to invest in a sturdy tripod or monopod to minimize camera movement. When using longer focal lengths or slower shutter speeds, it will be very helpful. Additionally, consider accessories like camera straps, bags, or vests. These accessories allow for easy mobility and quick access to your gear. So you can capture those fleeting moments with ease.
Mastering Exposure: Freezing or Blurring the Action
One of the most critical aspects of motorcycle photography is mastering exposure to achieve the desired effect. You may want to freeze the action with razor-sharp clarity. Or you want to intentionally blur the motion to convey a sense of speed and dynamism. Whatever, understanding the interplay between shutter speed, aperture, and ISO is essential.
Freezing the Action
To freeze the action and capture crisp, detailed images of motorcycles, you'll need a fast shutter speed. This is especially important when capturing a motorcycle in motion.
As a general guideline, aim for shutter speeds ranging from 1/800th to 1/1600th of a second or higher. This depends on the speed of the subject and the amount of ambient light available. This will ensure that even the smallest details, such as tire treads and brake discs, are rendered with stunning clarity.
Blurring the Action
Maybe you want to convey a sense of speed and motion. Then consider a slower shutter speed and panning your camera to follow the movement of the motorcycle. This technique, known as "panning," will blur the background while keeping the subject relatively sharp. The image will create a dynamic and visually striking effect. Experiment with shutter speeds ranging from 1/30th to 1/125th of a second. And, adjust your panning technique and camera settings. These settings can help you to achieve the desired level of blur.
Composition and Perspective: Crafting Compelling Visuals
Composition and perspective play a crucial role in creating visually compelling motorcycle photographs. Here are three basic motorcycle photography ideas for composition and perspective:
Carefully consider the placement of your subject within the frame
Use leading lines
Include environmental elements in the image.
With these ideas, you can elevate your images from mere snapshots to works of art.
motorcycle photography composition and perspective
Framing and Composition
When composing your shots, pay attention to placing the motorcycle within the frame. Consider the rule of thirds, which suggests placing your subject along one of the intersecting lines or points of the imaginary grid. This can create a more dynamic and visually appealing composition. Additionally, you can try different angles and perspectives. This tip is to add depth and interest to your images.
Leading Lines and Environmental Elements
Incorporate leading lines, such as winding roads, curving tracks, or architectural elements. Leading lines can guide the viewer's eye toward the subject and create a sense of depth and movement. What's more, consider including environmental elements like landscapes, cityscapes, or distinctive landmarks. These elements can provide context and enhance the overall visual narrative.
Negative Space and Minimalism
Embrace the power of negative space and minimalism to create striking, minimalistic compositions. This is also a widely used motorcycle photography idea.
You can position your subject against a clean, uncluttered background for photographing. The image will draw the viewer's attention directly to the motorcycle's lines, details, and form. Thus creating a visually striking and impactful image.
Capturing the Details: Showcasing the Craftsmanship
Motorcycle photography is not just about capturing the thrill of motion. It also showcases the intricate details and craftsmanship that go into these machines. Every aspect of a motorcycle can be a subject for artistic expression. From bodywork to engine components, use these motorcycle photography tips to capture them.
capturing the details of a motorcycle. Copyright: Martin Alfaro
Close-up and Macro Photography
Close-up and macro photography is also another widely used photography idea for motorcycling. This can help you capture the finer details of a motorcycle. You can isolate specific elements, such as exhaust pipes, brake calipers, or intricate engine components. Also, you can showcase their unique textures, shapes, and patterns. I advise you to carefully control the depth of field and lighting when photographing. Then you can create visually stunning images. Remember to highlight the exceptional craftsmanship and engineering that goes into these machines.
Lighting and Reflections
Lighting and reflections are some of the most useful motorcycle photography ideas. It plays a significant role in enhancing your motorcycle photographs' visual impact. Consider using different lighting setups, such as studio lighting or natural light. The light can help accentuate the curves, contours, and textures of the bike. Plus, consider incorporating reflections from puddles, mirrors, or other reflective surfaces. Believe me, they can create unique and visually striking compositions. Of course, you need to consider the motorcycle photography angles when using lights and reflections. Different lights, reflections, and photography angles always bring you different results.
Storytelling and Emotion: Capturing the Essence of the Ride
Motorcycle photography is not just about capturing static images. It's telling a story and evoking emotions that resonate with riders and non-riders alike. You need to consider the environment, the rider's body language, and the overall mood. By capturing a running motorcycle, you can create powerful visual narratives. This can transport viewers into the heart of the riding experience.
Motorcycle Photography Environment
The environment in which you photograph a motorcycle is a crucial role in telling a compelling story. Consider photographing the motorcycle in iconic locations. You can choose winding mountain roads, desert landscapes, or urban settings. These places can create a sense of adventure and exploration. Besides, pay attention to elements like weather conditions, time of day, vehicles, or people. These elements can add depth and context to your images. Remember to take images from different photography angles. You will find them totally different in visual experience.
Capturing the Rider's Emotion
The rider's body language and facial expressions can convey emotion and energy. So, this is another motorcycle photography tip to add an extra layer of depth to your photographs. Capture the thrill of the ride, the focus and determination of the rider. Or the sense of freedom and exhilaration that comes with being on the open road. Remember to carefully time your shots and observe the rider's movements. You can create images that resonate with viewers on an emotional level.
Lifestyle and Editorial Photography
Motorcycle photography can also extend beyond capturing the machines themselves. Here, we will provide you with another photography idea during motorcycling.
Consider incorporating lifestyle and editorial elements into your work. For example, portraiture, action shots, or behind-the-scenes glimpses of the riding community. These types of images can add a human element to your portfolio. Thus this image can tell stories about the people, cultures, and passions that surround the world of motorcycles.
Safety Motorcycle Photography Ideas and Tips
Pursuing captivating motorcycle photography can be exhilarating, that's true. However, it's crucial to prioritize safety for both yourself and the riders working with you. Remember the following safety motorcycle photography ideas and tips.
Always follow proper safety protocols, and communicate clearly with riders. And, most importantly, never compromise on responsible practices for the sake of a shot.
Communication and Coordination
Before any shoot, establish clear communication with the riders and support crew involved. Discuss the planned shots, routes, and potential hazards before starting work. In addition, ensure everyone is on the same page on safety protocols and expectations. What's more, coordinate the means of communication. Here, we advise you to use Fodsports Bluetooth helmet intercom. It keeps you intercom and communication smoothly evening when you are cycling fastly. Just let the helmet intercoms connect you and the riders. You will free you hands and focus on photographing excellent images. It is also an essential gear to maintain a smooth and safe workflow during the shoot.
Location Scouting and Risk Assessment
Carefully scouting potential shooting locations in advance is another necessary tip. You should identify potential hazards, traffic patterns, and any necessary permissions required. Besides, assess the risks associated with each location and develop contingency plans to mitigate potential issues. For example, having designated spotters or establishing safe zones for photographers and riders.
Rider Safety and Gear for Motorcycle Photography
Ensure that all riders are properly equipped with the necessary safety gear. Including helmets, motorcycle comm system, protective clothing, and any other required equipment. Never compromise on rider safety for the sake of a shot. And, be prepared to call off or reschedule a shoot if conditions become unsafe.
Image
Product Name
Details
Price
Shop
FX10C
MESH Technology;
Bluetooth 5.0;
10 mesh intercom channels;
Enjoy music and navigating while intercom;
Music share between 2 riders.
Choose a visually appealing location with suitable lighting.
Clean the motorcycle thoroughly and remove any distractions.
Use a high-quality camera or smartphone with a good lens.
Experiment with different angles and perspectives to highlight the bike's features.
Pay attention to composition and framing.
Utilize natural light or consider using additional lighting for better results.
Capture both close-up details and full bike shots.
Edit the photos afterward to enhance colors and sharpness if desired.
What lens is best for motorcycle photography?
For motorcycle photography, choose a versatile lens like a wide-angle lens or a zoom lens. A wide-angle lens, such as a 24mm or 35mm, allows you to capture the entire motorcycle and its surroundings. And, a wide-range lens can emphasize the sense of speed and context. A zoom lens, like a 70-200mm, provides flexibility to shoot close-up details or frame the bike from a distance. Ultimately, the choice depends on personal preference and the desired style of photography.
Who are the famous motorcycle photographers?
Some famous motorcycle photographers include:
Michael Lichter: Known for capturing the spirit of motorcycle culture and the Sturgis Motorcycle Rally.
Horst A. Friedrichs: Renowned for his stylish and documentary-style motorcycle photography.
Jeff Koons: A renowned artist who has incorporated motorcycles into his artwork and photography.
Simon Davidson: Known for his powerful and atmospheric motorcycle portraits.
Franck Allais: Recognized for his creative and artistic approach to motorcycle photography.
Erik Jutras: A talented photographer specializing in motorcycle racing and action shots.
What focal length is for motorcycle photography?
For motorcycle photography focal length, 24mm to 200mm is commonly used. A wider focal length, such as 24mm or 35mm, allows you to capture the entire motorcycle and its surroundings. They are perfect for showcasing the motorcycle in its environment. A longer focal length, such as 70-200mm, can be used to isolate specific details or shoot from a distance. They can capture close-up shots of the motorcycle or emphasize specific features. The choice depends on the desired composition and the photographer's creative vision.
Conclusion
Motorcycle photography is like any artistic pursuit. It is a journey of continuous learning and inspiration. This captivating art form combines technical prowess, creative vision, and photography machines.
By mastering the techniques outlined in this comprehensive guide, you'll be well-equipped to capture the essence of motorcycles in motion, crafting visually stunning images that resonate with both riders and non-riders alike. Remember, the journey is as exhilarating as the destination. So embrace the challenges, continuously learn, and grow. Let your passion for these magnificent machines guide your artistic expression.
Motorcycling offers an unparalleled sense of freedom and adventure. You can feel the adrenaline-fueled thrill when carving through winding roads. Also, there is the exhilarating exploration of off-road terrains. However, this exhilarating pursuit also carries inherent risks. Thus making the choice of protective gear paramount. Among these essentials, the motorcycle helmet stands as the most important motorcycling gear. It is the guardian of your most precious asset – your life.
In this comprehensive guide, we delve into the intricate realm of motorcycle helmet safety standards. We will dissect the certifications and testing methodologies that define the pinnacle of head protection.
Brace yourself as we unravel the complexities of these stringent benchmarks. We will help equip you with the knowledge to make informed decisions and focus on your well-being on every ride.
An Overview of Helmet Safety Certifications
The pursuit of safety on two wheels is a global endeavor. Many organizations are dedicated to establishing rigorous standards for motorcycle helmet performance.
Each certification carries its own set of stringent tests. They will evaluate factors like impact resistance, penetration protection, and retention system efficacy.
Now, let's explore the key players and their respective standards:
Helmet Standards
Regions
Requirements
Latest Effective Vesion
Level
DOT
US
Mandatory
FMVSS 218
Minimum legal safety requirement
ECE
EU & 50+ other countries
Mandatory
ECE 22.06
A thorough and robust standard
Snell
Worldwide
voluntary/racing
SNELL M2025
A gold standard for safety
FIM
Pro Racing
Mandatory
FRHPhe‑02
Highest standard currently available
SHARP
UK
Rating only
Ongoing rating revisions
A consumer safety rating that complements the mandatory ECE.
1. DOT (Department of Transportation)
This standard is mandated by the United States government. The DOT certification is a legal requirement for all motorcycle helmets sold within the US. It is governed by the Federal Motor Vehicle Safety Standard No. 218 (FMVSS 218).
This certification ensures that helmets meet specific criteria for impact attenuation, penetration resistance, retention system integrity, and peripheral vision.
2. ECE (Economic Commission for Europe)
The ECE certification is a widely recognized standard. There are over 50 countries in Europe have adopted this motorcycle safety standard.
The latest iteration of ECE 22.06 certification subjects helmets to a comprehensive battery of tests. These include impact resistance at various angles, accessory compatibility, and environmental durability evaluations.
3. Snell Memorial Foundation
The Snell Memorial Foundation is dedicated to advancing helmet safety. It is a private, non-profit organization established in honor of racing driver Pete Snell.
The current Snell M2020 standard is considered one of the most stringent in the industry. It incorporates rigorous tests for impact absorption, penetration resistance, and face shield ballistics.
4. FIM (Fédération Internationale de Motocyclisme)
The FIM standard is tailored specifically for professional motorcycle racing. It is the highest level of protection for riders competing at the pinnacle of the sport.
The 2019 FRHPhe-01 certification is its latest standard. It focuses on mitigating rotational forces and oblique collisions. And, ensure the utmost safety for racers pushing the limits.
5. SHARP (Safety Helmet Assessment and Rating Programme)
This is a motorcycle safety standard developed by the United Kingdom government.
The SHARP rating system takes a unique approach by sourcing helmets directly from retail outlets. Thus ensuring that the tested products match those available to consumers.
SHARP employs a 5-star rating scale standard. It mainly evaluates factors such as impact absorption, field of vision, and ventilation.
motorcycle helmet standards safeguard your well-being
Unveiling the Intricacies: A Comparative Analysis of Helmet Safety Standards
Each certification upholds its own set of rigorous testing protocols. But, understanding the nuances and differences between these standards is necessary. It is crucial to determine the optimal level of protection for your riding style and preferences.
Impact Testing: The Cornerstone of Helmet Safety
Impact test always stands at the core of every helmet safety certification. This is a critical evaluation of the helmet's ability to absorb and dissipate the forces generated during a collision. However, the specifics of these tests can vary significantly between standards.
The DOT certification employs a flat and rounded anvil to simulate impact scenarios. While the ECE 22.06 standard takes a more comprehensive approach. It introduces angled impacts and higher drop heights to better mimic real-world crashes.
The Snell Memorial Foundation's impact testing is renowned for its stringency with multiple impact scenarios. Their test also includes a continuous water spray test to simulate adverse weather conditions.
Similarly, the FIM standard subjects helmets to rigorous oblique collision simulations. That's to ensure protection against the rotational forces commonly encountered in racing accidents.
Penetration Resistance: Safeguarding Against Piercing Threats
Motorcycle helmets not only need to withstand blunt impacts. It also needs to protect against penetrating objects such as road debris or shattered windshields. Each certification addresses this concern through dedicated penetration tests, albeit with varying methodologies.
The DOT standard employs a six-pound pointed object dropped from a height of over ten feet to assess the helmet's resistance to penetration.
ECE certification takes a more comprehensive approach, testing multiple areas of the helmet. For example, it will test the chin guard to ensure comprehensive protection.
Snell Memorial Foundation's penetration tests are particularly stringent, including a face shield evaluation. It will use an air rifle to fire a lead pellet at the visor, simulating high-velocity impacts.
Retention System Integrity: Ensuring a Secure Fit
Even the most advanced impact-absorbing helmet can be rendered ineffective if it becomes dislodged during a crash.
So, helmet safety certifications strongly emphasize evaluating the retention system's ability to keep the helmet securely in place.
The DOT standard assesses the retention system by subjecting it to weight-based tests. That's to ensure that the straps do not stretch beyond a specified limit.
Similarly, the ECE certification employs a testing machine that jerks the helmet backward. This is to verify the integrity of the chin strap under dynamic forces.
Snell Memorial Foundation takes retention system testing to the next level with its dynamic retention test. The chin strap must withstand the impact of a falling weight without excessive stretching or failure.
Environmental Durability: Ensuring Performance in Adverse Conditions
Motorcycle helmets are subjected to a wide range of environmental factors. Extreme temperatures, exposure to solvents, and UV radiation are all common factors. To ensure consistent performance, ECE incorporates tests that simulate these conditions. It exposes helmets to solvents, ultraviolet light, and varying temperatures. Then it will evaluate their performance.
Peripheral Vision and Ventilation: Enhancing Comfort and Safety
Normally, impact protection is the primary focus of helmet safety certifications. But factors like peripheral vision and ventilation play a crucial role in ensuring rider comfort and safety. DOT and ECE standards mandate specific requirements for unobstructed vision and adequate airflow. On one hand, these standard ensures that helmets do not compromise the rider's situational awareness. On the other hand, these standards also make sure there is no heat stress during extended rides.
Navigating the Hierarchy: Comparing and Contrasting Safety Standards
With a multitude of certifications available, so which one is the best one?
You may wonder which standard reigns supreme in stringency and safety assurance.
Actually, each certification has its strengths and weaknesses. But, industry experts and seasoned riders have developed a general consensus:
Firstly, let's see the Snell Memorial Foundation's M2020 standard. It is widely regarded as the pinnacle of motorcycle helmet safety certifications. Its rigorous testing protocols encompass multiple impact scenarios and penetration resistance evaluations. Also, it had stringent retention system assessments. Thus set it apart as the gold standard for head protection.
However, it's important to note that the ECE 22.06 and FIM standards are not far behind. They offer comprehensive testing methodologies tailored to specific riding environments and disciplines.
Finally, the certification choice should align with your riding style, preferences, and safety. A helmet that meets the stringent requirements of multiple certifications is always better. It can provide the highest level of protection and peace of mind on the road.
Factors Influencing Helmet Safety and Performance
Certifications serve as a guiding beacon in the realm of helmet safety. But, several extra factors contribute to the effectiveness and longevity of your protective gear.
Shell Construction: The Foundation of Impact Absorption
The helmet shell is crafted from materials like carbon fiber, fiberglass, or polycarbonate. It serves as the first line of defense against impacts. Each material has unique advantages and trade-offs in strength, weight, and cost.
Carbon fiber is popular for its exceptional tensile strength and lightweight properties. So, it is a top choice among premium helmet manufacturers. Carbon fiber helmets are now more and more popular in high-level motorcycling races.
Fiberglass is not as strong as carbon fiber. But it excels in impact dispersion and affordability. Thus making it a common material for mid-range helmets.
Polycarbonate is less robust than its counterparts. However, it offers a cost-effective solution for entry-level helmets. Thus it can provide adequate protection for shorter rides and lower speeds.
EPS (Expanded Polystyrene) Liner: The Unsung Hero
Beneath the helmet's shell lies the true hero of impact absorption – the EPS (Expanded Polystyrene) liner. This lightweight foam material is engineered to dissipate the energy of an impact. Thus it can protect your head from the devastating forces of a collision.
Not all EPS liners are created equal. They have varying densities and multi-density configurations tailored to specific impact scenarios. Premium helmets often incorporate a combination of denser and more collapsible foam layers. So it can ensure optimal protection across a wide range of impact intensities and angles.
Ventilation and Aerodynamics: Comfort and Performance Intertwined
Comfort and aerodynamic performance are important in ensuring a seamless and enjoyable riding experience. Effective ventilation systems, air vents, and aerodynamic shell designs always work in harmony. They can minimize wind noise, and prevent heat buildup. Also, it reduces fatigue during extended rides.
Manufacturers like AGV are famous for their commitment to innovation. They have pioneered advanced ventilation schemes and wind tunnel-tested aerodynamic profiles. This strikes the perfect balance between protection and performance.
Retention System and Proper Fit: The Key to Unwavering Security
Even the most advanced helmet is ineffective if it fails to remain securely in place during a crash. This is where the retention system plays a vital role. (The retention system typically comprises a chin strap and a quick-release mechanism.)
FIM mandates the use of a robust Double D-ring closure system to ensure a secure and reliable fit. However, it's equally important to prioritize proper helmet sizing and adjustment. Because a snug, comfortable fit is essential for maximum protection and stability.
Face Shield and Visor: Enhancing Visibility and Protection
The face shield and visor are often overlooked components of a motorcycle helmet. However, they are critical barriers against wind, rain, debris, and other environmental hazards. Premium helmets incorporate polycarbonate face shields. This kind of helmet is popular for its clarity, scratch resistance, and durability.
Certifications like the Snell Memorial Foundation go a step further by subjecting face shields. They will do rigorous ballistic tests to ensure they can withstand high-velocity impacts.
The Ultimate Choice: Selecting the Safest Motorcycle Helmet
The above is a comprehensive understanding of helmet safety standards and construction materials. Now you can make an informed decision when selecting your next motorcycle helmet.
However, the choice extends beyond certifications and specifications. This is a deeply personal decision. You should align with your riding style, preferences, and commitment to safety.
When embarking on your search, consider the following factors:
Follow the riding discipline. Are you a dedicated street rider, an off-road enthusiast, or a professional racer? Each discipline demands specific helmet features and certifications to ensure optimal protection.
Consider your budget. Yes, safety should never be compromised. But, motorcycle helmets can range from affordable entry-level options to premium, high-end models. Determine your budget and consider certifications and features accordingly.
Pay attention to fitness and comfort. A fitted helmet is not only comfortable but also effective in protecting your head during impact. Take the time to try on different sizes and styles to find the perfect fit.
Choose from reputable brands. I sincerely recommend you invest in helmets from reputable manufacturers. They have a proven track record of safety and innovation. For example, helmet brands like AGV, Shoei, and Arai. They are famous for their commitment to cutting-edge technology and rigorous testing protocols.
Your personal style. Helmet safety should always take precedence, but there's no reason to sacrifice personal style. Many manufacturers offer a wide range of designs and color schemes. So, you can express your individuality while remaining protected.
Remember, the choice of a motorcycle helmet is not just a purchase. It's also an investment in your safety and well-being. Again, I advise you to purchase certified and well-constructed helmets. You're not only protecting your head but also safeguarding your ability to continue enjoying the thrill of the ride for years to come.
Frequently Asked Questions (FAQs) About Motorcycle Helmet Safety Standards
Is ECE 22.05 better than Dot?
The ECE 22.05 and DOT standards are both widely recognized motorcycle helmet safety standards. Both standards aim to provide a certain level of protection. However, they have different testing methods and criteria.
DOT standard is mainly for minimum helmet performance. The ECE standard is higher in protection testing standards. It's recommended to select a helmet that meets the safety standards in your region.
How to tell if a helmet is ECE certified?
To determine if a helmet is ECE certified, look for a label or sticker on the helmet's interior or exterior. The label should display the ECE logo followed by a number, such as "ECE 22.05" or "ECE 22.06". This indicates that the helmet has met the safety standards set by the Economic Commission for Europe. Also, you can verify the certification by contacting the helmet manufacturer for confirmation.
What is the safest type of motorcycle helmet?
Full-face helmets are generally considered the safest type of motorcycle helmet. They provide full coverage, including protection for the chin and face. The full-face design helmet offers better impact protection. Thus it can minimize the risk of injury to the head and face in case of an accident. Also, full-face helmets provide better protection against wind, debris, and weather conditions. It's important to ensure the helmet meets safety standards and fits properly.
How often should I replace my motorcycle helmet?
Most manufacturers and safety organizations recommend replacing motorcycle helmets every five years. The helmet's materials and internal structures can degrade over time.
Besides, you should immediately replace a new motorcycle helmet after any significant impact. It may become compromised after an impact, even if no visible damage is present.
Can I use an ECE helmet in the USA?
Yes, you can use an ECE (Economic Commission for Europe) certified helmet in the USA.
The Department of Transportation (DOT) certification is the standard requirement in the US. But ECE certified helmets are generally accepted and legal for use in the US.
Also, you should check with local authorities or refer to specific state regulations to confirm the helmet requirements in your region.
Are you ready for the adventure of a Route 66 motorcycle tour? Now is the time to embark on a thrilling motorcycle tour along Route 66. It is an iconic American road that stretches over 2,400 miles from Chicago to Santa Monica. This legendary route offers a unique blend of history, culture, breathtaking landscapes, and unforgettable experiences. In this comprehensive guide, we will provide you with all the information you need to plan. Enjoy a remarkable Route 66 motorcycle tour!
Why Choose Route 66?
Route 66, also known as the "Mother Road," holds a special place in American history.
Established in 1926, this historic highway connected small towns and cities across 8 states.
For many years, Route 66 has been an essential route for travelers seeking adventure.
It officially decommissioned in 1985. But, Route 66 has experienced a revival in recent years.
Thus it is attracting more and more tourists from around the world.
Riding along Route 66 on a motorcycle is fantastic. You will immerse yourself in the rich cultural heritage and stunning landscapes on this iconic road.
Classic neon signs, roadside attractions, mid-century architecture, and friendly locals...
You will view them all.
Every twist and turn of the Mother Road offers a glimpse into America's past and present.
Choosing the Right Motorcycle for Your Route 66 Motorcycle Tour
Before you hit the road, it's important to choose the right motorcycle for your Route 66 adventure.
Some riders prefer the classic charm of a Harley-Davidson cruiser. While others may opt for a more versatile adventure motorcycle like the Pan America.
Whatever your preference, make sure your bike is comfortable for long-distance riding. Besides, make sure it has enough storage space to carry your gear.
If you don't own a motorcycle, there are several rental options available.
Some motorcycle rental companies offer rental services in both Chicago and Los Angeles. They allow you to embark on a one-way journey along Route 66.
What's more, some peer-to-peer rental platforms also provide a wider range of models at lower price points.
Whichever option you choose, ensure that your rental includes insurance coverage and necessary safety equipment.
Some people may consider buying himself/herself a motorcycle for the tour.
I tell you from my own experience, don’t spend blindly. If you are a motorcycle fan, or you will motorcycling frequently in the future, it is worth buying one.
If you have enough budget, consider buying a new motorcycle. If you don’t have that kind of budget, then consider buying a second-hand/used motorcycle.
If just for a single-time route motorcycle tour, I sincerely advise you to rent one.
Essential Gear and Packing Tips for Your Route 66 Tour
When packing for your Route 66 motorcycle tour, it's important to be prepared for varying weather conditions and long hours on the road.
To combat cold weather, consider investing in heated gear. For example, heated jackets, gloves, and socks.
These are essential gear to ensure you stay warm and comfortable during chilly rides.
Basic Toolkit
Route 66 motorcycle tour is a 2400 miles long way. Sometimes you will cycling in the wild.
Thus, carrying a basic toolkit that fits your specific bike is necessary. They can help you to handle any unexpected mechanical issues.
Besides, regularly check your bike's condition throughout the journey. For example, brakes, fluid levels, tire pressure, lights, and bolts.
Water and Snacks
Yes, there are plenty of restaurants and gas stations along Route 66.
However, I sincerely advise you to carry water and snacks. These are prepared for any emergency or when riding through remote areas.
Navigation and Communication
Ensure you have a reliable GPS device or smartphone app for navigation. Consider using Bluetooth intercom systems during the Route 66 tour. You need to stay connected with your riding companions and receive turn-by-turn directions.
Image
Product
Details
Price
Shop
Fodsports FX 10C
FX 10C
MESH Technology;
Support Bluetooth 5.0;
10 mesh intercom channels;
Listening to music and navigating while intercom;
Sharing music between two riders.
Planning your Route 66 itinerary is an exciting part of the journey. The entire route takes around 15 days to complete.
So it's important to customize your itinerary based on your preferences and time constraints.
Here's a suggested state-by-state itinerary to help you make the most of your Route 66 motorcycle tour:
Illinois
Route 66 begin sign - start the Route 66 motorcycle tour
Start your adventure in Chicago, the eastern terminus of Route 66.
Explore the city's vibrant attractions, such as the Willis Tower Skydeck and Millennium Park.
Then, heading west on the Mother Road. Don't forget to take a photo with the iconic "Begin" sign along East Adams Street.
The 'Historic 66 Begin' sign is at the northwestern corner of Adams St and Michigan Ave, across from the Art Institute.
As you ride through Illinois, make stops at iconic Route 66 landmarks.
There are the Gemini Giant Muffler Man in Wilmington and the Bunyon with a Hot Dog Muffler Man in Atlanta.
You can enjoy classic American cuisine at the Launching Pad diner in Wilmington.
Besides, the Route 66 Arcade Museum in Atlanta is also worth exploring.
Missouri
Crossing into Missouri, you'll encounter the legendary Gateway Arch in St. Louis.
Gateway Arch National Park in Missouri - Route 66 scenery
Here, I recommend you take a detour to visit the Gateway Arch National Park. You will enjoy the breathtaking view of the Mississippi River there.
Besides, the historic neighborhoods of St. Louis are also worth exploring. The vibrant music scene and mouthwatering BBQ ribs there are very famous.
As you continue west, make stops at attractions like the world's 2nd largest rocking chair in Fanning. And, there is the Uranus Fudge Factory and General Store.
Moreover, don't miss the chance to visit Gary's Gay Parita. It is a replica of a 1930 Sinclair gas station filled with Route 66 memorabilia.
Kansas
The Cars on the Route 66 tour in Galena
The Kansas section of Route 66 is short. However, it offers unique attractions worth exploring.
Here I recommend the Cars on the Route in Galena, a restored Kan-O-Tex service station. It is known for inspiring the character Tow Mater in the movie "Cars."
Ride across the Rainbow Bridge near Galena and make a detour to the Tri-State Marker. You will stand in three states at once.
Oklahoma
Entering Oklahoma, you'll experience the true essence of Route 66.
Visit the Blue Whale of Catoosa, a famous roadside attraction. And, explore the Buck Atom's Cosmic Curios and its Space Cowboy Muffler Man in Tulsa.
Then, take a break at the Seaba Station Motorcycle Museum and indulge in a soda at the nostalgic POPS Soda Ranch.
Continue west through Oklahoma, making stops at iconic landmarks like Lucille's Service Station and the Sandhills Curiosity Shop.
Just immerse yourself in the history and culture of Route 66 in Oklahoma. This is a state with a rich Native American heritage and stunning landscapes.
Texas
As you enter the Lone Star State, prepare for a true Texas experience.
Ride through the vast plains of the Texas Panhandle. And, make a stop at the Tower Conoco Station and U-Drop Inn in Shamrock, a stunning art deco masterpiece.
Don't miss the chance to visit the iconic Cadillac Ranch near Amarillo and try your luck at eating a free 72 oz steak.
New Mexico
Santa Fe in New Mexico
Riding into New Mexico, you'll be captivated by the enchanting landscapes and vibrant culture.
Visit Santa Fe, one of the oldest cities in the United States. There, you will explore its Southwestern architectural style.
Next, take a day to rest and enjoy the unique attractions Santa Fe has to offer.
I will recommend you to take hot air balloon rides and horseback riding.
Arizona
Crossing into Arizona, you'll witness the awe-inspiring beauty of the Grand Canyon.
Take a helicopter flight over the South Rim. Then you will view a breathtaking aerial view.
Or explore the Petrified Forest and Painted Desert along the way.
I suggest you make stops at Route 66 towns like Holbrook, Winslow, and Seligman.
Don't miss the chance to visit the quirky town of Oatman.
California
Route 66 end of the trail at Santa Monica Pier
As you approach the end of your Route 66 journey, ride through the Mojave Desert in California.
Marvel at the striking landscapes, including volcanic formations and Joshua trees. Also, enjoy the vibrant atmosphere of Los Angeles.
Then, celebrate your accomplishment at the Santa Monica Pier, where Route 66 ends.
Also, if you like to continue your journey, you can also ride other routes in California.
Find a companion to experience the Route 66 tour with you
Route 66 motorcycle tour is a long journey. It is unwise to take the tour alone.
Consider joining a guided motorcycle tour to make the most of your experience. Besides, there are also some motorcycle clubs you can join to ride together. Or, ask your friends to come with you.
You can help each other, and take photos of each other.
May Motorcycle Awareness Month is a dedicated period. It aims to raise awareness about motorcycle safety.
And, it promotes the importance of sharing the road with motorcycles.
It is usually observed during May in many countries.
During Motorcycle Awareness Month, various organizations and groups will work together.
These motorcycle clubs, safety agencies, and riders' groups collaborate to educate the public.
They will teach about the unique challenges faced by motorcyclists
Besides, they also encourage drivers to be more attentive and considerate on the road.
The awareness campaigns often involve some initiatives, including:
sharing safety tips;
organizing public events;
conducting rider training programs;
promoting visibility through the use of reflective gear;
highlighting the significance of proper motorcycle gear and helmet usage.
The goal of May Motorcycle Awareness Month is to foster a safer environment for motorcyclists. This can reduce motorcycle accidents, injuries, and fatalities.
By increasing awareness and understanding among all road users,
the aim is to enhance mutual respect, improve driver behavior,
and most importantly, ultimately save lives.
Motorcycling - Why is it dangerous?
Motorcycling is considered dangerous due to several factors supported by available data:
Vulnerability:
Motorcyclists are more exposed to the air. Unlike cars, they lack a protective structure. Thus making them more susceptible to severe injuries or fatalities in the event of a crash.
Motorcyclists have a higher fatality rate per mile traveled compared to car occupants.
In 2022, there were 6,218 motorcyclists killed in the US — 15% of all traffic fatalities.
Since 2015, motorcycle accident fatality cases in the US have been increasing largely.
It has reached levels above 5,000 victims every year.
Motorcyclists are 28 times more likely to be killed in a fatal crash compared to other motorists on the road.
They are also 4 times more likely to be injured in a collision.
Lack of Crash Protection
Motorcycles lack safety features compared to cars. For example, they have no seat belts and airbags.
And, some do not wear a motorcycle helmet when they are motorcycling.
Also, they lack the structural integrity of an enclosed vehicle. These increases the risk of injury during a collision.
Speeding and Risky Behavior
Studies have shown that motorcyclists are more prone to engage in speeding.
Over 34% involve a motorist traveling at excess speed.
Rural roads, highways and freeways, straightaways, and mountainous areas are the most happen places
Besides, some reckless riding and other risky behaviors are also can be seen on the street.
These actions can increase the chances of accidents.
Impaired Riding
Alcohol and drug impairment is another factor. It caused a large amount of motorcycle accidents. Study shows 28% of motorcyclists involved in fatal crashes had a blood alcohol concentration (BAC) above the legal limit.
Looks horrible?
I know, I know these data show you the risks of motorcycling. It may make you feel dissatisfied or disgusted with motorcycling.
We should note that there are many ways we can avoid these accidents from happening.
That's the aim of May Motorcycle Awareness Month.
That's why we write this article!
Now, let's see how we can avoid this.
May Motorcycle Awareness Month advice for safety riding
I have analyzed some short motorcycle safety tips for you in the following:
Wear a helmet:
Always wear a DOT-approved helmet to protect your head in case of an accident.
Protective gear:
Wear appropriate protective gear. Such as a jacket, pants, gloves, boots, and motorcycle helmet Bluetooth headset. These are necessary motorcycle gear to safeguard against injuries.
Be aware of your surroundings. Remember to anticipate potential hazards, and maintain a safe distance from other vehicles.
Obey traffic laws:
Follow all traffic rules. Pay attention to the speed limits, signaling, and lane positioning.
Ride sober:
Never ride under the influence of alcohol or drugs. Because it impairs your judgment and reaction time.
Regular maintenance:
Keep your motorcycle in good condition. You will need to perform regular maintenance checks on your motorcycle. For example, the tires, brakes, lights, and fluid levels.
Continuous learning:
Take advanced rider training courses. These can improve your skills and knowledge of safe riding techniques.
Stay focused:
Avoid distractions such as texting or using your phone while riding.
Weather conditions:
Adjust your riding style to suit weather conditions. And, be cautious of slippery surfaces.
Remember, safety should always be the top priority when riding a motorcycle.
US motorcycle helmet wearing request
In America, there are different helmet-wearing requests in different states.
Here, we will list all the requests in a table.
Requests details
States
States require motorcyclists to wear helmets
Alabama
California
District of Columbia
Georgia
Louisiana
Maryland
Massachusetts
Mississippi
Nebraska
Nevada
New Jersey
New York
North Carolina
Oregon
Tennessee
Vermont
Virginia
Washington
West Virginia
States have no motorcycle helmet requirements
Illinois
Iowa
New Hampshire
States require helmet use under a certain age
Here are the rules by state for when helmets are mandatory.
17 and under: Alaska, Arizona, Colorado, Connecticut, Hawaii, Idaho, Indiana, Kansas, Maine, Minnesota, Montana, New Mexico, North Dakota, Ohio, Oklahoma, South Dakota, Wisconsin, Wyoming 18 and under: Delaware, 20 and under: Arkansas, Florida, Kentucky, Michigan, Pennsylvania, Rhode Island, South Carolina, Texas, Utah, 25 and under: Missouri
FAQS about motorcycle safety
What are the basics of motorcycle safety?
The basics of motorcycle safety include several details. You need to wear a helmet, and helmet headset, and use protective gear.
When motorcycling, remember to obey traffic laws, and ride defensively.
Besides, maintain a safe distance from vehicles, avoid distractions, and stay visible.
What's more, perform regular maintenance, and keep improving riding skills through training.
How to check the motorcycle's safety?
Normally, the above aspects will need to be checked before motorcycling:
Regularly maintain the motorcycle, including oil and fluid checks, chain or belt tension, and suspension condition.
How much does a motorcycle safety course cost?
On average, motorcycle safety courses can range from $100 to $300. But, the course cost can vary depending on the location and the organization offering the course. You'd better check with local training providers or motorcycle safety organizations. They can provide a specific price for motorcycle safety in your area.
Where to get a motorcycle safety inspection?
You can get a motorcycle safety inspection at:
authorized service centers;
motorcycle dealerships;
licensed inspection stations.
It is better to check with your local Department of Motor Vehicles (DMV) or transportation authority in advance.
They can provide you with a list of approved inspection locations in your area.
Motorcycle Communication
Among the standout features of mesh technology in motorcycle intercom systems is its capacity to instantly reconnect motorcyclists that have temporarily shed signal or are headed out of range.
Once back within the reliable array, the system seamlessly reconnects bikers, guaranteeing continuous communication.
Exactly How Motorcycle Headgear Communications Job
Safety helmet communication systems utilize both Bluetooth innovation and also a more recent, much more incorporated technology called DMC-Dynamic Mesh Communications.
DMC modern technology offered by sector giants Cardo as well as Sena is the future of Motorcycle-to-motorcycle interaction, however, currently, are much more expensive than their cost-effective Bluetooth equivalents.
Bluetooth interactions for bike helmets pair conveniently, just like your phone couples with your car, speaker, or earphones.
They are currently commonly sold as lightweight devices that set up easily within your headgear, or are currently incorporated right into a safety helmet!
Just attach it to your mobile device or another Bluetooth comm, and also voila!
You’re cruising along bumping tunes, following GPS directions, and pointing out that rad cactus ahead to your pillion rider or your packmate.
The fairly more recent DMC systems have enhanced Bluetooth by giving links between even more motorcyclists at an additional range without disrupting links when packmates go in or out of range.
Troubles with Bluetooth develop because the interaction lines are integrated into a chain- if one rider disconnects from the chain, all links are lost as well and you need to start over.
You can not connect to as many people as you'd such as on a packed flight as well as even the most expensive models have a series of just over a half-mile.
Mesh interaction technology is just better, albeit costing a substantial sum.
You're going to pay a premium for a much better range and connection. Yet these more expensive devices additionally come geared up with primo quality audio speakers as well as microphones, much better-installing systems, as well as the capacity to seamlessly leave the variety and also go back to the group link.
Fodsports FX10C mesh motorcycle intercom communication
Among the standout functions of mesh modern technology in motorbike intercom systems is its ability to immediately reconnect motorcyclists who have momentarily lost signal or gone out of variety.
Once back within the effective range, the system seamlessly reconnects motorcyclists, guaranteeing continual interaction.
Additionally, mesh modern technology gives high-level security, ensuring that just paired gadgets can sign up with the interaction network, enhancing personal privacy and protection.
Flexibility and also Convenience
The intercom system supports different functionalities, including group interaction, FM radio, song playback, as well as shared audio, permitting bikers to remain linked and also delighted throughout their journey.
In addition, the system supports simultaneous interaction and also charging, making sure of continuous use throughout long rides.
They are highly suitable for outside activities such as climbing up, skiing, and also other journey sporting activities where communication and also sychronisation are critical.
Additionally, they offer well in industrial and commercial industries, including security, trains, and various other industries where reliable communication systems are important.
Motorcycle intercoms and communication systems are verified to be secure and road-lawful.
Bluetooth motorcycle speakers allow ecological noise into the headgear, keeping the biker's hearing a sharpened safety tool.
Much less time on the side of the roadway for a whole pack, over one guy's mis-strapped bag, is more secure for everyone, as is everybody's capability to easily communicate instructions or perhaps obstructions in the roadway or traffic quits.
Get cued as much as these motorbike helmet interactions systems, as well as stay securely available!
Are you wondering if there is something like "The best time to buy a motorcycle"?
Well, there is! The best time to buy a motorcycle is when the prices are right. In other words, motorcycle consumers must know the timing of bike promotions.
When is the best time to buy a motorcycle?
❄️Winter
Most people appear to concur that the very best time, as a whole, is the wintertime. This is because of the weather conditions generally getting colder as well as people not riding as much. Also, hardcore riders are not thinking of getting on their motorbikes right now of year. This is mostly true in cold locations.
Yet if you're in the marketplace for a new motorbike, winter is to your advantage. You just could not have the ability to take a test ride past the parking lot. February in particular has lowered demand, which generally relates to steeper discount rates as well as more working out power.
While suppliers will certainly adjust their sales targets for the winter months, they're still out there to sell motorbikes and scooters. And, they still get encouraged by making a sale. So they frequently minimize rates to urge plunging sales.
🛒New Model Release
If you understand a new model is appearing yet you'd be entirely satisfied with the existing design, you're in a good placement.
Anytime a newer version hits the showroom flooring, the old designs need to go somewhere. Discount rates are offered on current stock prior to new designs are introduced.
Discover when your favored brand releases its new versions and also await their associated price-cut deals on existing stock.
Even if there are no formal price-cut supplies in these periods, these are great times to deal with your supplier.
🛏️On A Weekday
Motorbike dealerships are normally busier on the weekend breaks than on weekdays. Hence, several car dealerships use sales and bargains to help bring clients in the door from Monday to Thursday. Inspect your regional car dealerships and learn whether they do weekday sales. Following them on social media sites is a great way to remain notified of when they have a sale that may interest you.
If your regional motorcycle dealer isn't promoting any type of weekday sales, try strolling in the door on a weekday anyway. You'll certainly obtain more focus and more pampering from the sales personnel. This can be wonderful if you're not exactly sure what you desire or are navigating purchasing your first motorbike.
🎄Some Holidays
▪️Black Friday:
Several of the biggest bargains of the year occur on Black Friday. It is the perfect purchasing day because sales are assured. It likewise drops within the Winter months when an organization is sluggish for bike dealerships. In addition, exclusive vendors are more willing to bargain offers to make a quick sale for some added vacation money.
▪️Labor Day:
Labor Day is a massive holiday in the vehicle industry. You can generally discover large amounts throughout Labor Day Weekend Break. These sales are usually advertised weeks in advance. If you play your cards right, you can conserve up in anticipation.
▪️After Xmas:
After the holidays, suppliers want to remove excess supply. This might motivate deals at the beginning of the year on older versions.
In order to advertise sales, dealerships may offer a price cut on a certain day of the week to allow customers in.
Mid-week sales are hard to anticipate since they are most commonly on impulse decisions. The most effective action is to remain attached by following your regional dealers and also favoring the internet vendors on social media sites.
The most awful time to purchase a motorcycle is when the demand for bikes is high. Naturally, this is during the driving period. The bike season usually begins with the first days when the weather starts to improve after the winter. Simply speaking, during the late springtime, as well as throughout summertime.
Because the summer seasons are optimal for the motorcycle season, many individuals want to buy a motorbike. This often drives motorcycle price rates up. The only benefit of buying a motorbike during the summertime is that there will be more selection of motorbikes. So you are most likely to find something worth purchasing.
During the summertime, the seller will certainly have better utilize in discussing the price because of the higher demand. Thus placing the customer at a disadvantage. Even more, people will agree to pay the complete asking price, and also, therefore, even more motorcycles will be sold at or over their value.
▪️What is the worst time to buy a new motorcycle?
The worst time to purchase a new motorcycle is when brand-new motorbikes appear. A new motorbike that has just been introduced will, normally, command higher rates since it is the latest and also the most enticing design.
Besides, new motorbikes are revealed during the loss as well as winter. But a lot of these motorbikes may not show up in dealerships till early to late springtime.
Preordering a motorbike might occasionally result in much better offers. However, from early springtime, until completion of the summertime may not be a great time to acquire a new bike.
▪️What is the worst time to get a used motorcycle?
The worst time to acquire a used motorcycle typically is throughout the springtime up until the optimal of the summer season.
In other words, this is not more than purchasing a new motorbike.
In springtime, customers will typically understand the approaching motorbike season. And, they will certainly not want to approve or perhaps think about asking for lower offers.
Motorcycle use rate will start to go down with the end of the driving period. Used and older version motorcycles can also be impacted with more recent motorcycle designs appear.
Know what you can take care of
Ready to acquire the bike of your dreams? For starters, you'll need to perform some research to effectively narrow down your options. Whichever choice you pick ought to not only suit your style but also should be appropriate for your planned use. Here are a few added things to consider.
▪️Weight: The bigger the bike, the harder it is to manage. So big motorcycles might not be the best choice for a rookie.
▪️Power: This may not be as significant if you don't prepare to strike a motorcycle at high speed.
▪️Seat elevation: If balance is an issue and you prefer to have both feet on the ground when you come to a complete stop, consider this element of your bike carefully.
▪️Tank size: If you plan on using your motorcycle extensively or taking long trips, a small fuel tank can quickly become a problem.
▪️Establish a budget plan.
Since the prices are quite high, you need to consider your options and think carefully about your budget.
There are more things to consider besides the bike itself: What is your current budget? Do you plan to spend a lot of money on the motorbike? If you have saved up enough to buy your dream motorbike, then go for it.
If you still need funds to pay for the motorbike, then consider other bikes that better fit your budget. If you are not sure how much you can spend, check how much money you receive each month and how much you can expect to receive each month.
▪️Do not fail to remember to discuss.
Whether you're buying new or used, don't forget to do your homework and confirm the suggested list price. You should make a reasonable offer.
Motorcycle Bluetooth headset are wonderful little pieces of technology mounted on safety helmets that are also designed to make your riding life easier.
Certain, part of the beauty of riding is being alone, but on team scenic tours and taking a trip with a pillion-- having a link to others saves wrong turns, frantic hand signals, a jab in the ribs as well as time.
And on lengthy boring trips you can listen to songs from your mobile, play radio, take telephone call as well as attach to your Sat-Nav.
If you like the audio of that after that this guide will certainly help you determine which sort of gadget you require as it showcases several of the very best units on the marketplace in the budget, mid-range and also premium classifications.
Additionally, you'll find a lot of these Bluetooth headsets are compatible with our option of the best touring and experience bike helmets.
Whether you're riding solo, pillion or in a group, intercoms make motorcycling more pleasurable along with a great deal much safer.
I have actually ridden around the UK and Europe and a lot of the moment my spouse and I have actually been riding with each other.
Having safety helmet intercoms permits us to chat as we ride, along with mention prospective threats in case the various other individual hasn't seen them yet.
We likewise use them on the track- he's showing me to go much faster.
So, if you ever ride with other people, they're a great way of remaining in touch without requiring motorcycle hand signals or rapid discussions at traffic lights.
A bike intercom system can likewise be used to get in touch with your phone, either to take/ make phone calls or to listen to music.
Directly, I don't such as paying attention to music as I ride, but I understand lots of bicycle riders do, so we've reviewed some intercom systems which do that for you.
You can also obtain ones which get in touch with your bike rested nav.
Sound Top quality
When acquiring a motorbike intercom, your main goal is clear and seamless communication with your riding pals, right?
To attain this, choosing anything less than phenomenal audio high quality is just not a choice.
Pay attention to intercoms that offer advanced sound innovations like DSP (Digital Signal Handling) and noise as well as resemble cancellation abilities.
These features contribute in shutting out unwanted noise from your motorbike engine, wind, as well as surrounding website traffic, guaranteeing maximum quality in your communication.
Make sure that your intercom provides crisp, clear audio top quality, also at broadband.
It must stand up to the riding obstacles, keeping a regular and also apprehensible audio experience despite the riding problems.
Furthermore, prioritize intercoms outfitted with high-def audio speakers that supply powerful bass.
It contributes to audio quality and also improves your general music-listening experience, submersing you in your preferred tunes as you cruise later on.
Durability
We've all been misleaded by excellent product pictures. Specialist item pictures can hide inadequate develop quality.
When you obtain your headset, take note of the construct top quality.
Prevent anything that seems like lightweight, inexpensive plastic.
Connection as well as Compatibility
You'll intend to recognize the number of headsets your unit can couple with.
Bear in mind that some headsets are only suitable with various other devices that coincide brand name.
Make sure your device will play nice with the various other members of your regular riding staff.
Ease of Use
Regardless of what people will tell you, it is possible to make a feature-rich tool instinctive to make use of as well.
People evaluations are mosting likely to be your buddy in this field. Make note of words they utilize like "easy to use", "straightforward" or on the other hand, "difficult", "particular" and also "problem".
Noise Canceling
While your safety helmet will certainly provide a suitable quantity of noise decrease, some wish to take things also better in relation to a quieter ride.
If this is important to you, make sure to examine it on the open roadway prior to tossing the box.
Conclusion
A Motorcycle Bluetooth Intercom Headset is a small and also light-weight device created especially for bikers, enabling them to interact with their fellow motorcyclists and guests effortlessly or perhaps connect with other Bluetooth-enabled gadgets.
When it comes to motorcycle safety, the helmet is an essential component that cannot be overlooked.
It serves as the first line of defense against head injuries and plays a crucial role in saving lives during accidents.
Over the years, technological advancements have introduced various helmet materials, with carbon fiber gaining immense popularity among motorcycle enthusiasts.
The unique properties of carbon fiber, such as lightweight construction, high strength, enhanced impact absorption, rigidity, and resistance to heat and chemicals, make them stand out in the realm of helmet materials.
Let's dive deeper into these aspects to understand why carbon fiber motorcycle helmets are considered better than their counterparts.
Lightweight and High Strength:
One of the key advantages of carbon fiber helmets is their lightweight nature combined with exceptional strength.
Carbon fiber is a composite material made of carbon fibers infused with resin.
This composition provides a high strength-to-weight ratio, allowing manufacturers to create helmets that are both incredibly strong and significantly lighter than helmets made from other materials such as fiberglass or polycarbonate.
The lightweight characteristic of carbon fiber helmets offers numerous benefits to riders.
Firstly, it reduces strain on the neck and shoulders, minimizing fatigue during long rides.
Secondly, a lighter helmet enhances comfort and reduces the likelihood of neck-related injuries in the event of an accident.
The combination of strength and lightweight design makes carbon fiber helmets an excellent choice for riders seeking optimal protection without compromising comfort.
Enhanced Impact Absorption:
Carbon fiber motorcycle helmets excel in impact absorption due to the material's inherent properties.
The carbon fibers within the helmet's structure are capable of distributing and dissipating impact energy effectively, reducing the force transmitted to the rider's head.
This ability to absorb and disperse impact energy can significantly reduce the risk of severe head injuries, including concussions and skull fractures.
Furthermore, the construction of carbon fiber helmets often involves multiple layers of carbon fiber weaves, strategically positioned to optimize impact protection.
These layers enhance the helmet's ability to withstand high-speed impacts, making it a preferred choice for riders engaged in racing or other high-performance activities.
Rigidity and Structural Integrity:
Carbon fiber offers exceptional rigidity, which plays a vital role in maintaining the structural integrity of the helmet.
The rigid nature of carbon fiber allows helmet manufacturers to create designs that offer superior protection by maintaining their shape even under extreme conditions.
Additionally, the rigidity of carbon fiber helmets helps minimize the potential for helmet deformation during impacts.
This is crucial because any distortion to the helmet's shape can compromise its protective capabilities.
Carbon fiber helmets provide riders with the assurance that their headgear will retain its form and perform optimally when faced with unexpected accidents or collisions.
Heat and Chemical Resistance:
Carbon fiber motorcycle helmets possess excellent resistance to heat and chemicals, further contributing to their durability and longevity.
Unlike other materials, carbon fiber does not deform or lose its structural integrity when exposed to high temperatures.
This property ensures that the helmet maintains its protective qualities even in extreme conditions, such as intense sunlight or fire-related accidents.
Moreover, carbon fiber helmets exhibit resistance to chemicals and solvents commonly encountered on the road, such as fuel, oil, and cleaning agents.
This resistance prevents degradation of the helmet's material, ensuring its reliability and performance over an extended period.
Conclusion:
In conclusion, carbon fiber motorcycle helmets offer a range of advantages that set them apart as the superior choice for riders prioritizing safety and performance.
With their lightweight design and high strength, carbon fiber helmets provide riders with optimal protection without compromising comfort.
The ability of carbon fiber to absorb and disperse impact energy efficiently reduces the risk of severe head injuries, promoting rider safety.
Furthermore, the rigidity and structural integrity of carbon fiber helmets ensure their optimal performance under extreme conditions, maintaining their protective capabilities.
Lastly, their heat and chemical resistance contribute to their durability and longevity, making them reliable companions for riders on the road.
Investing in a carbon fiber motorcycle helmet is a wise decision for riders who value their safety and seek the highest level of protection available.
With their advanced features and superior performance, carbon fiber helmets have redefined the standard for motorcycle headgear.
Whether it's for casual riding or high-performance activities, riders can trust in the exceptional qualities of carbon fiber helmets to safeguard their heads during their thrilling adventures on the open road.
In the world of communication technology, advancements are constantly being made to improve the way we connect with others.
One such innovation is the mesh intercom, a wireless communication system that has gained popularity in recent years.
This article aims to explain what mesh intercom is and delve into its benefits. By the end, you'll have a comprehensive understanding of this technology and its potential applications.
Unlike traditional intercom systems that rely on a central base station or point-to-point connections, mesh intercom operates on a decentralized network architecture.
This unique approach creates a mesh of interconnected devices, where each device acts as a node capable of transmitting and receiving audio and data signals.
When a user initiates communication, their device broadcasts the signal to all other devices within range.
Each device, in turn, receives the signal and retransmits it, ensuring it reaches the intended recipients.
This self-healing and self-organizing network structure ensures reliable and robust communication even if some devices become unavailable or disconnected.
Secondly, the mesh intercom offers unparalleled flexibility and mobility. I
ts wireless nature allows users to move freely within the network's range without losing communication.
Whether it's outdoor adventures, sports events, film productions, or military operations, mesh intercom ensures uninterrupted communication, enabling teams to stay connected and coordinated.
Another significant benefit of mesh intercom is its built-in redundancy and reliability.
With its decentralized architecture, the network can adapt and reroute signals through alternate paths if a device fails or becomes disconnected.
This redundancy ensures that communication remains robust, even in challenging environments or areas with poor connectivity.
Mesh intercom also excels in ad-hoc communication, enabling users to establish connections on the fly without prior configuration or planning.
This flexibility is invaluable in spontaneous group activities or situations where immediate communication is necessary.
Outdoor adventurers can quickly establish communication channels to coordinate their activities or respond to unexpected circumstances.
Mesh intercom uses a specific set of protocols and algorithms to establish and maintain communication between devices.
Each device in the network is equipped with a transceiver that can send and receive audio and data signals.
When a user initiates communication, their device broadcasts the signal to all other devices within range.
Each device, in turn, receives the signal and retransmits it to ensure it reaches the intended recipients.
This self-healing and self-organizing network architecture ensures reliable and robust communication even if some devices become unavailable or disconnected.
Benefits of Mesh Intercom:
Scalability: One of the major benefits of mesh intercom is its scalability. As new devices join the network, they automatically become part of the mesh and contribute to the communication infrastructure.
This makes it easy to expand the network without the need for additional infrastructure or complex configuration.
Flexibility and Mobility: Mesh intercom offers high mobility and flexibility as it operates on a wireless network.
Users can move freely within the network's range without losing communication.
This makes it ideal for various scenarios such as outdoor adventures, sports events, large-scale conferences, and even military operations where mobility is crucial.
Redundancy and Reliability: The decentralized nature of mesh intercom provides built-in redundancy, ensuring reliable communication.
If one device fails or becomes disconnected, the network automatically reroutes the signal through alternate paths.
This redundancy makes mesh intercom highly reliable, even in challenging environments or areas with poor connectivity.
Extended Range: Mesh intercom can cover larger areas compared to traditional intercom systems.
By utilizing multiple devices as relay points, the communication range can be extended significantly.
This is particularly useful in scenarios like music festivals, construction sites, or emergencies where communication needs to reach a wide area.
Privacy and Security:Mesh intercom systems often employ encryption and authentication mechanisms to ensure privacy and security of communication.
This is crucial, especially in professional environments where sensitive information may be shared.
Cost-Effectiveness: Deploying a mesh intercom system can be cost-effective compared to traditional wired intercom systems.
It eliminates the need for expensive infrastructure, such as dedicated cables or base stations, making it a more affordable option, especially for temporary or mobile communication setups.
In conclusion, mesh intercom is a groundbreaking wireless communication system that offers numerous benefits and applications.
Its decentralized architecture, scalability, flexibility, reliability, extended range, and ad-hoc communication capabilities make it a versatile solution for a wide range of scenarios.
From outdoor adventures to construction sites, from emergency response operations to large-scale events, mesh intercom empowers individuals and teams with seamless, real-time communication.
By improving coordination, enhancing safety, boosting productivity, and facilitating efficient information sharing, mesh intercom plays a pivotal role in transforming the way we communicate and collaborate.
As technology continues to evolve, mesh intercom will likely see further advancements and refinements, opening up new possibilities for its implementation.
From integrating with other communication devices to incorporating advanced features like voice recognition or language translation, the potential for mesh intercom is vast.
Its ability to adapt to challenging environments and provide reliable communication makes it a valuable tool in various industries, ranging from public safety and military operations to entertainment and hospitality.
With its multitude of benefits and its potential for growth, mesh intercom stands as a testament to the power of innovation in enhancing our connectivity and enabling effective communication.
As we embrace the possibilities of this cutting-edge technology, we can look forward to a future where seamless and efficient communication is at our fingertips, empowering us to collaborate, share information, and connect on a whole new level.
Motorcycle Bluetooth Helmet Mesh Intercom
The FX 10C is Fodsports’s first intercom system that used Bluetooth as well as its proprietary “mesh” technology.
The mesh technology is supposed to basically simplify the pairing and connection of a group of riders by allowing the connections to self-heal and re-connect automatically and allowing the connections to daisy-chain for a greater range.
Fodsports also outfitted this unit with traditional Bluetooth to allow it to connect with Bluetooth-only units as well.
As soon as it arrived, I reached out to a few friends who has Fodsports FX 10C units so I could test the one-button press connection. It works as advertised.
I came up to the group, pressed the mesh button one time, and within moments our group was talking.
It was the easiest intercom pairing I have ever experienced.
It was almost as easy to connect to a competitive brand Bluetooth communications unit by carefully following the step-by-step instructions.
Connecting with a non-Fodsports unit is basically the same as connecting a second mobile phone.
While you have limited range and the non-Fodsports unit has limited functionality, you can talk.
Fodsports FX 10C Mesh Motorcycle Intercom
$139.99 $229.99
Code:
DJOW9
Limited Time Promo! Extra 10% Off Code! Save Now!
Mesh Intercom, Bleutooth 5.0, 2000m Intercom Range.
10 Mesh Intercom Channels, Unlimited Connection Number.
Listen to Music/GPS and Talk with Other Riders At The Same Time.
High Quality sound, IP65 waterproof.
Music Sharing, Voice Commands, FM Radio.
The FODSPORTS FX 10C Motorcycle Bluetooth Helmet Mesh Intercom sets itself apart with its cutting-edge communication capabilities.
Equipped with Bluetooth 5.0 technology, it allows multiple riders to connect simultaneously.
It can set up to 10 channels, but the intercom numbers are unlimited. This means, as long as all riders use the FX 10C, they can all pair together and communicate.
The Mesh Intercom feature enables riders to create a dynamic and interconnected network, allowing for seamless communication among all connected riders.
This eliminates the need for a traditional linear connection, ensuring that riders can stay connected even if one rider goes out of range or loses signal.
The mesh technology also provides a stable and reliable connection, reducing background noise and ensuring crystal-clear communication.
With the FODSPORTS FX 10C, riders can effortlessly communicate with their fellow riders, making group rides communication safer and more enjoyable.
Whether it's coordinating turns, warning others of road hazards, or simply sharing the joy of the ride, the intercom system facilitates smooth and hassle-free communication.
Riders can easily switch between different communication modes, such as group intercom, one-on-one intercom, or even intercom with non-motorcycle Bluetooth devices like smartphones or GPS systems.
Fodsports FX 10C Bluetooth mesh intercom dual pack
One of the standout features of the FODSPORTS FX 10C is its exceptional audio quality.
The intercom system uses high-fidelity speakers and CVC noise reduction technology to deliver clear and natural sound, even at high speeds or in noisy environments.
This ensures that riders can hear and understand each other with ease, promoting safer group riding experiences.
The noise reduction technology employed in the FODSPORTS FX 10C helps to eliminate unwanted background noise, such as wind noise, engine noise, or traffic noise.
This feature significantly enhances the audio clarity, allowing riders to have clear conversations without any distortion.
The high-quality bluetooth motorcycle speakers produce rich and immersive sound, enabling riders to enjoy music, GPS navigation instructions, or phone calls with exceptional audio performance.
Additionally, the intercom system supports music sharing, allowing riders to enjoy their favorite tunes together.
By connecting their devices via Bluetooth, riders can synchronize their music playback, creating a shared auditory experience.
This not only adds to the enjoyment of the ride but also promotes camaraderie and bonding among riders.
Versatility and User-Friendly Design
The FODSPORTS FX 10C is designed with versatility and user-friendliness in mind.
It is compatible with most motorcycle helmets and can be easily installed without requiring any specialized tools.
The control panel is conveniently located on the side of the helmet, allowing riders to access essential functions without taking their hands off the handlebars.
The buttons are large and glove-friendly, ensuring that riders can operate the device effortlessly, even while wearing gloves.
The intercom system features intuitive voice prompts and voice commands, which further enhance the user experience.
Riders can simply use their voice to initiate or answer calls, control music playback, adjust volume, or activate other functions.
This hands-free operation reduces distractions and allows riders to focus more on the road, enhancing overall safety.
Furthermore, the FODSPORTS FX 10C is water-resistant, making it suitable for riding in various weather conditions.
Rain or shine, riders can rely on the intercom to provide uninterrupted communication.
The water-resistant design ensures that the device remains functional even in wet conditions, giving riders peace of mind and reliability regardless of the weather.
Safety Features and Long Battery Life
Safety is paramount in the world of motorcycling, and the FODSPORTS FX 10C incorporates several features to ensure a safe riding experience.
The intercom system supports hands-free operation, enabling riders to stay connected without compromising their focus on the road.
Voice prompts and voice commands allow for easy operation, reducing distractions and promoting safer riding practices.
In terms of battery life, the FODSPORTS FX 10C impresses with its long-lasting performance.
With its built-in rechargeable 800mAh battery, the intercom can provide up to 15 hours of talk time and 300 hours of standby time on a single charge.
This long battery life ensures that riders can rely on the intercom for extended periods, whether it's for long-distance trips or day-to-day commuting.
Furthermore, the intercom system supports quick charging, allowing riders to recharge the device rapidly and get back on the road without delay.
Integration with Smart Devices and Expandability
The FODSPORTS FX 10C is not just limited to motorcycle-to-motorcycle communication.
It also offers seamless integration with other smart devices.
Riders can connect their smartphones, GPS systems, or other Bluetooth-enabled devices to the intercom, allowing them to receive GPS navigation instructions, listen to music, or even make and receive phone calls while riding.
This integration enhances convenience and expands the functionality of the intercom, making it a versatile tool for modern motorcyclists.
Moreover, the FODSPORTS FX 10C is designed with expandability in mind.
Riders have the option to connect additional devices such as other brands and models of helmet walkie-talkies, smartphones, laptops, etc, further enhancing their riding experience.
This flexibility allows riders to customize their setup according to their preferences and specific needs.
The FODSPORTS FX 10C Motorcycle Bluetooth Helmet Mesh Intercom is revolutionizing the way motorcyclists communicate on the road.
Its advanced communication capabilities, crystal-clear audio quality, user-friendly design, and emphasis on safety make it an exceptional choice for riders of all levels.
With the ability to connect with multiple riders simultaneously and the reliability of mesh technology, the FODSPORTS FX 10C sets a new standard for motorcycle intercom systems.
As technology continues to evolve, innovations like the FODSPORTS FX 10C will undoubtedly play a significant role in enhancing safety and convenience for riders worldwide.
The unparalleled communication capabilities, crystal-clear audio quality, versatility, and integration with smart devices make the FODSPORTS FX 10C a valuable companion for motorcycle enthusiasts.
Stay connected, enjoy the ride, and explore the possibilities with the FODSPORTS FX 10C Motorcycle Bluetooth Helmet Mesh Intercom.
Fodsports FX 10C Mesh Motorcycle Intercom
$139.99 $229.99
Code:
DJOW9
Limited Time Promo! Extra 10% Off Code! Save Now!
Mesh Intercom, Bleutooth 5.0, 2000m Intercom Range.
10 Mesh Intercom Channels, Unlimited Connection Number.
Listen to Music/GPS and Talk with Other Riders At The Same Time.
High Quality sound, IP65 waterproof.
Music Sharing, Voice Commands, FM Radio.


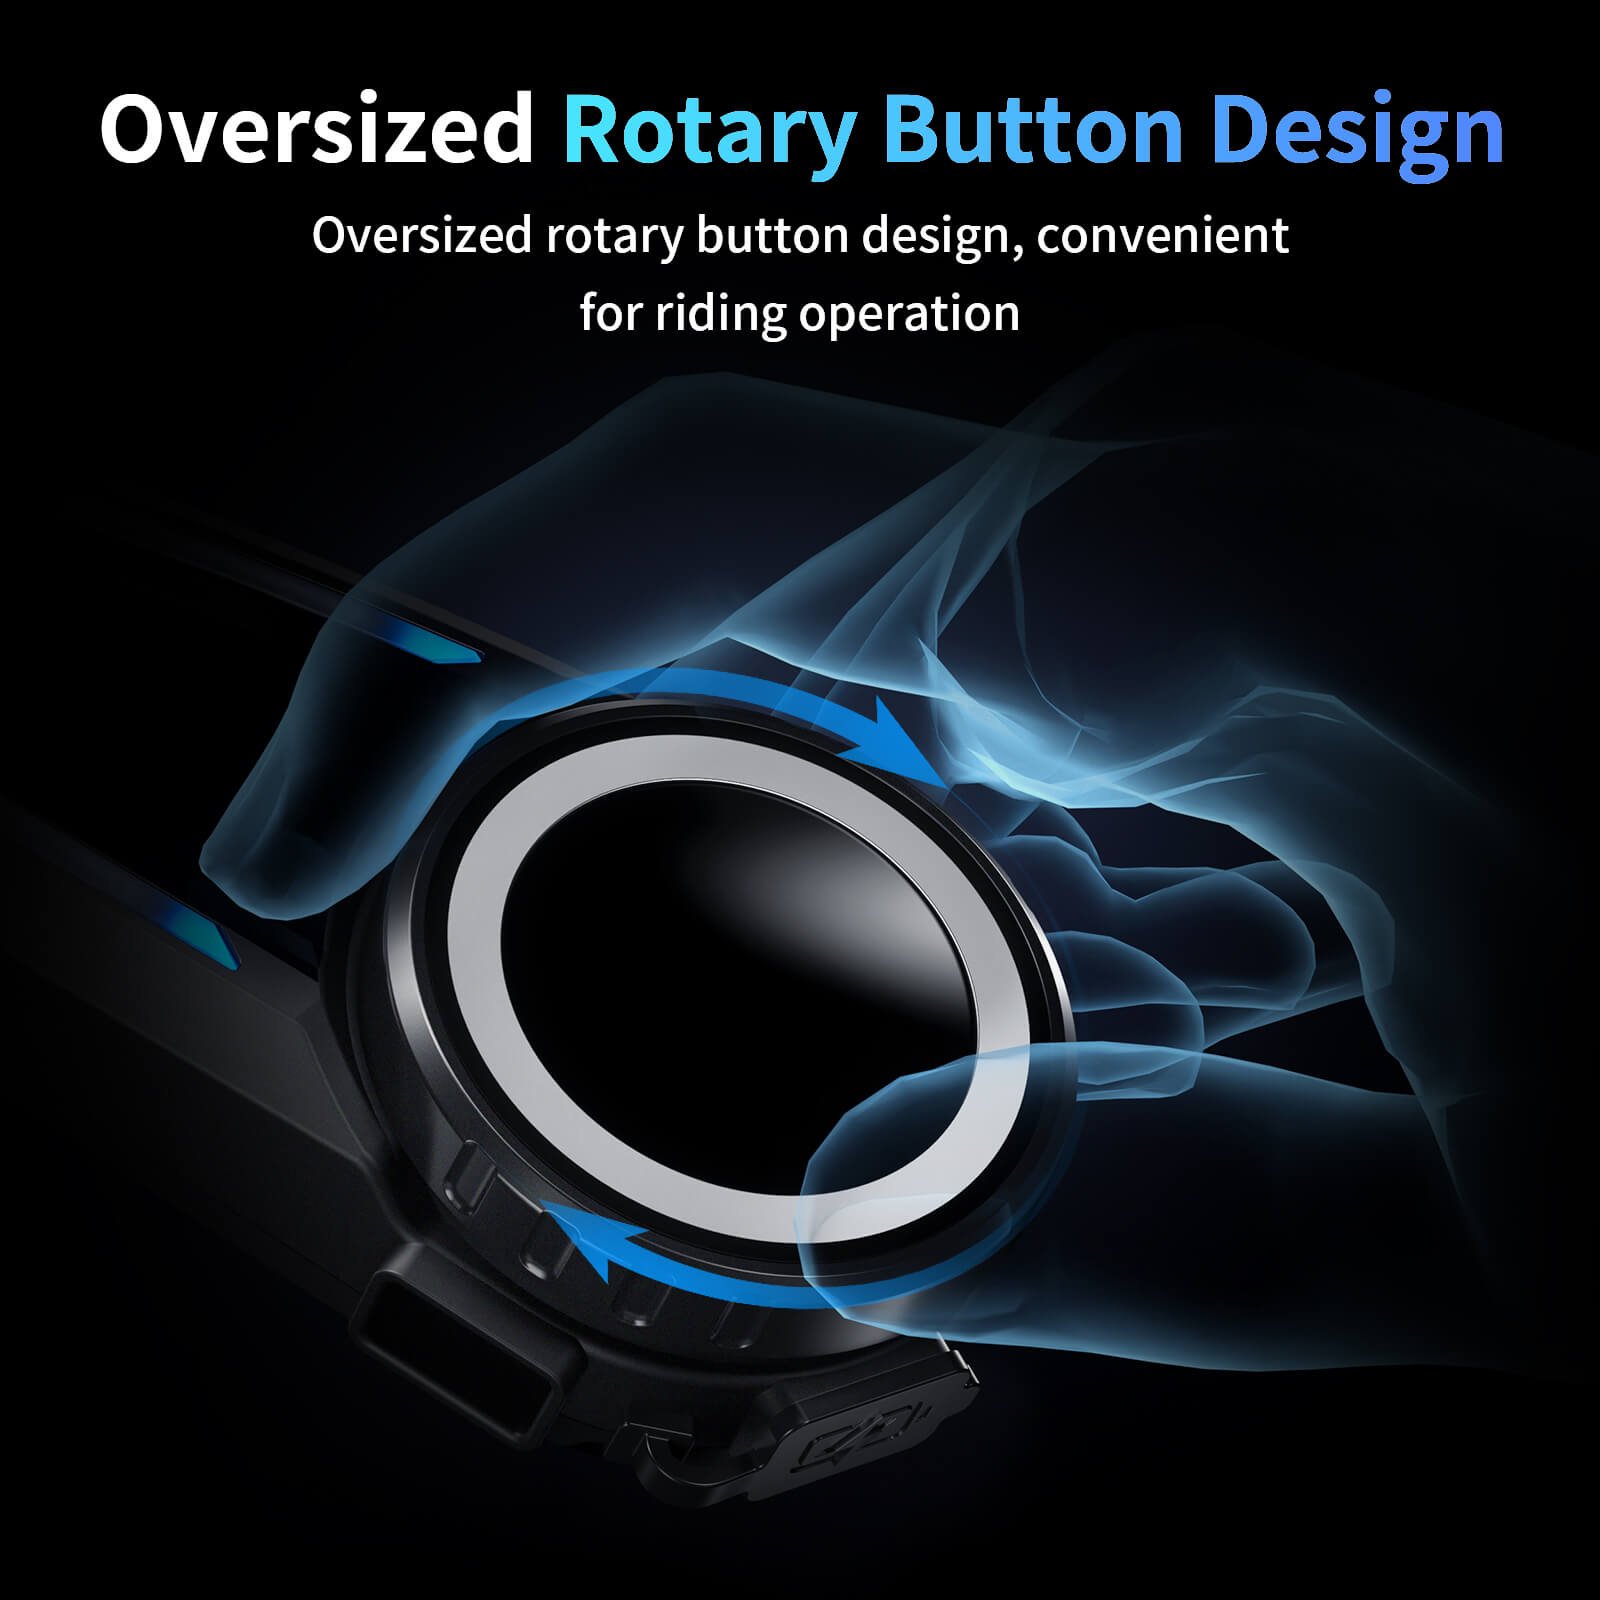


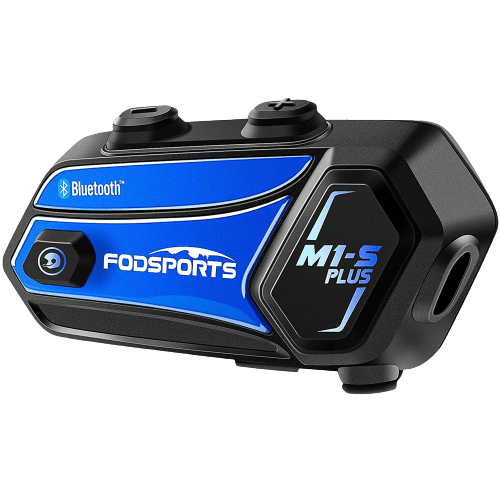

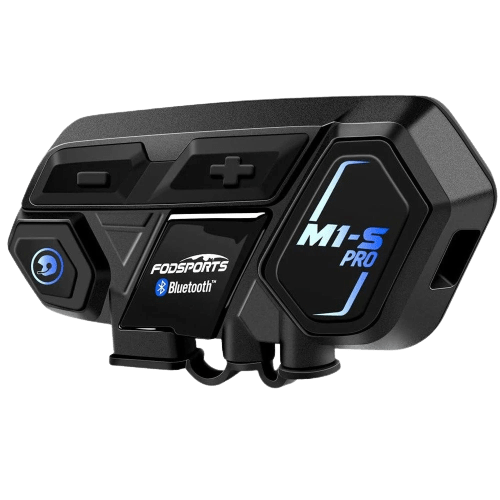
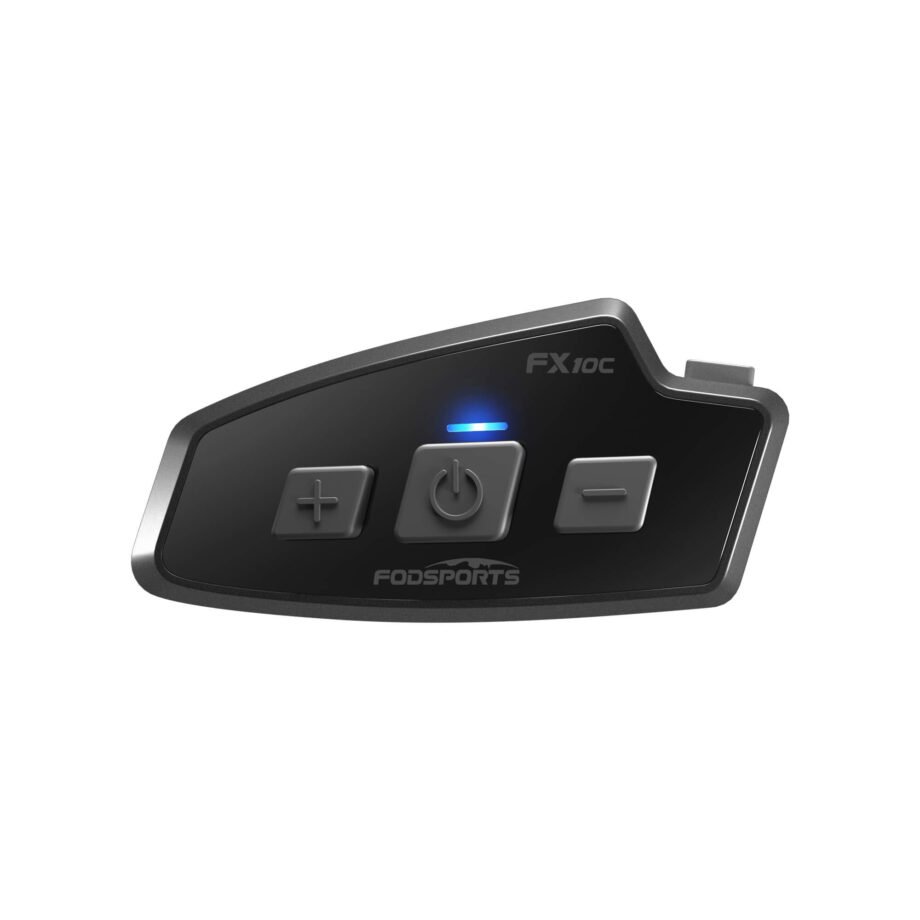

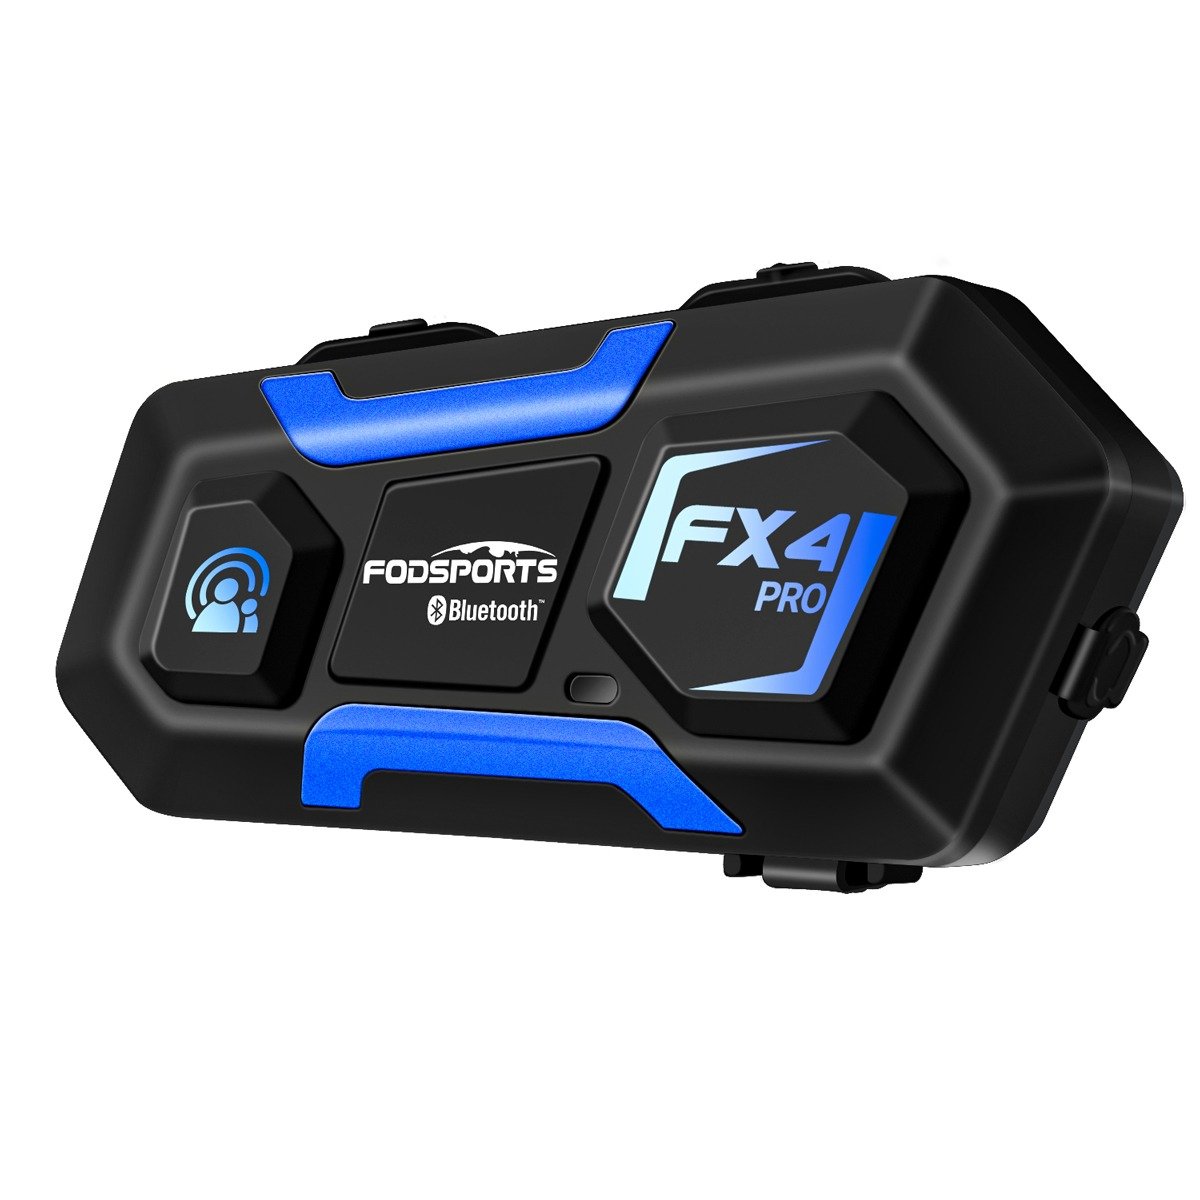


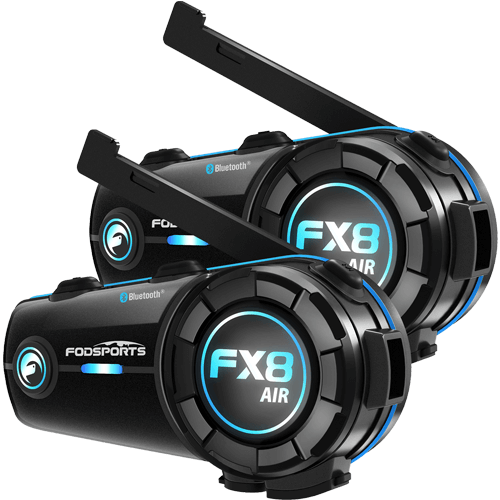


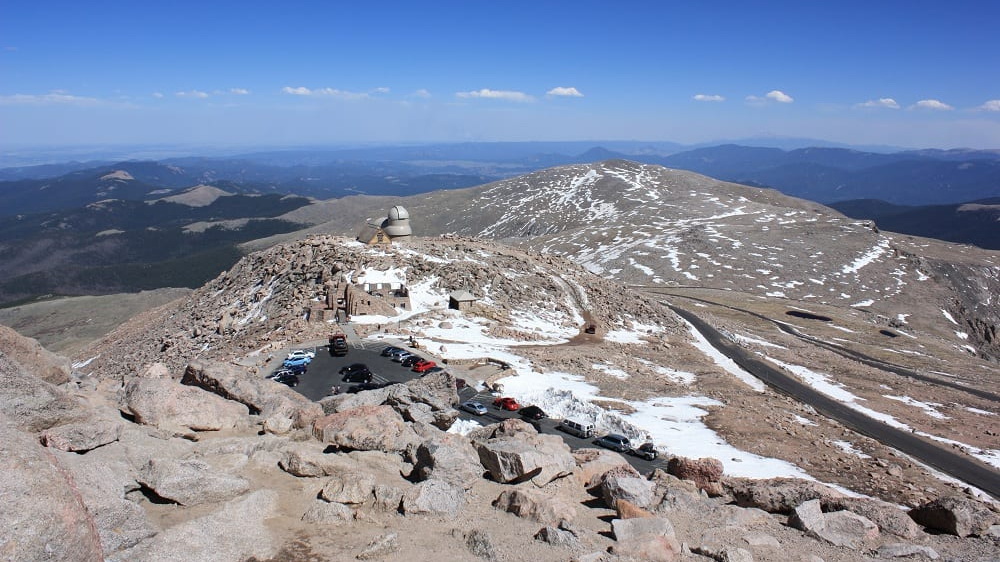
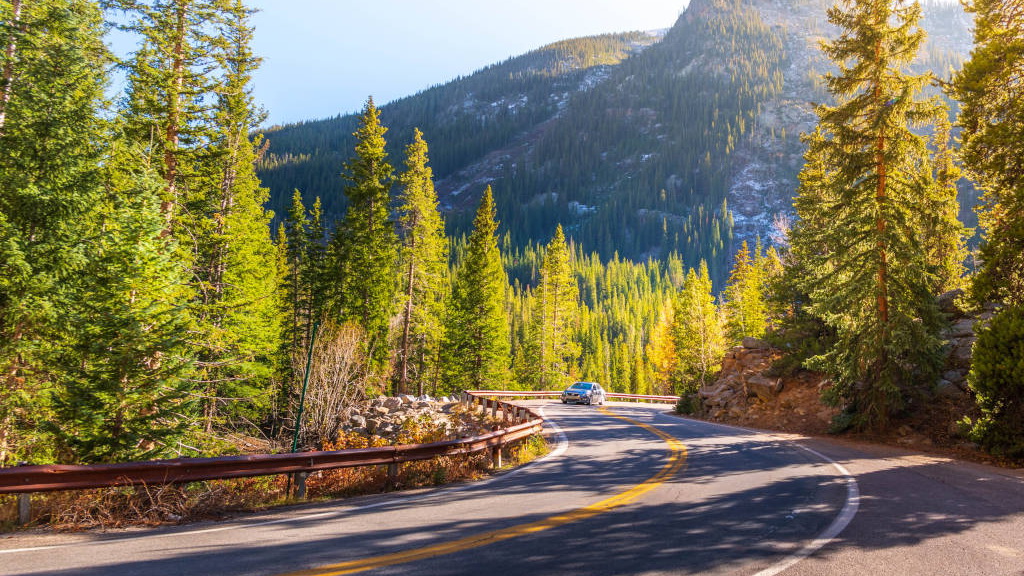
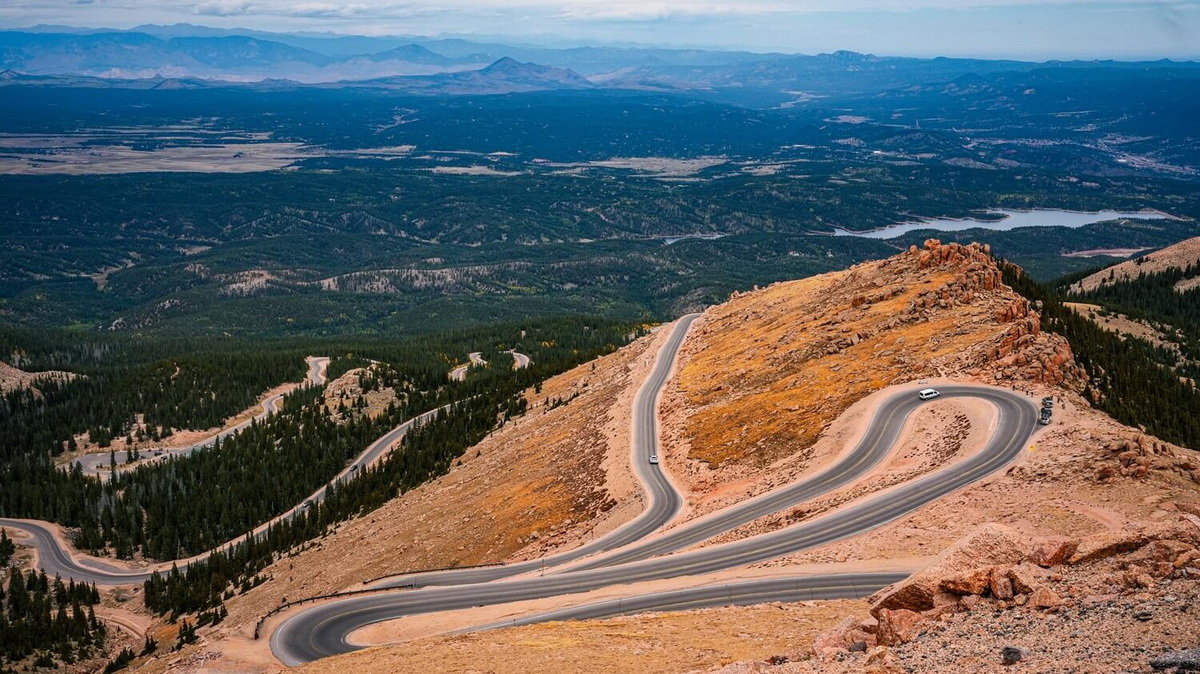
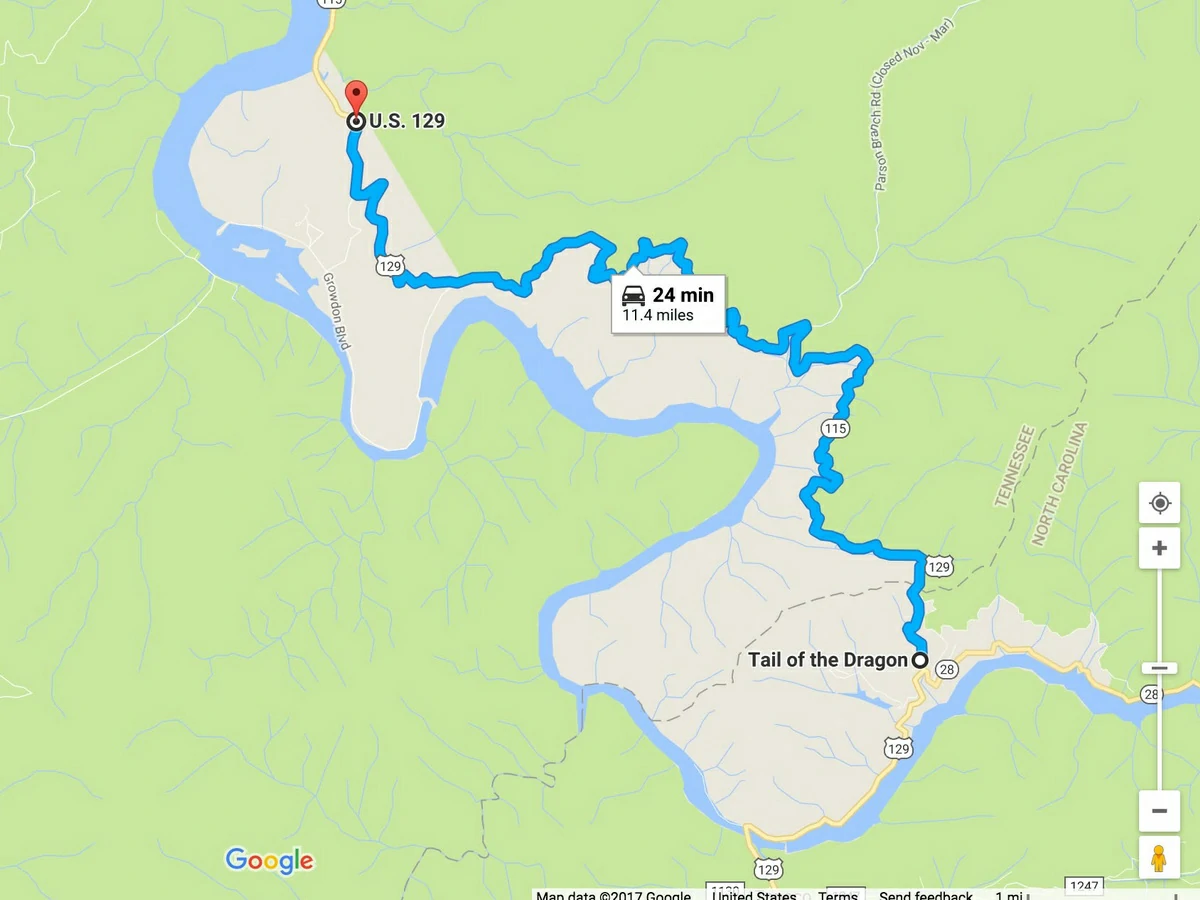


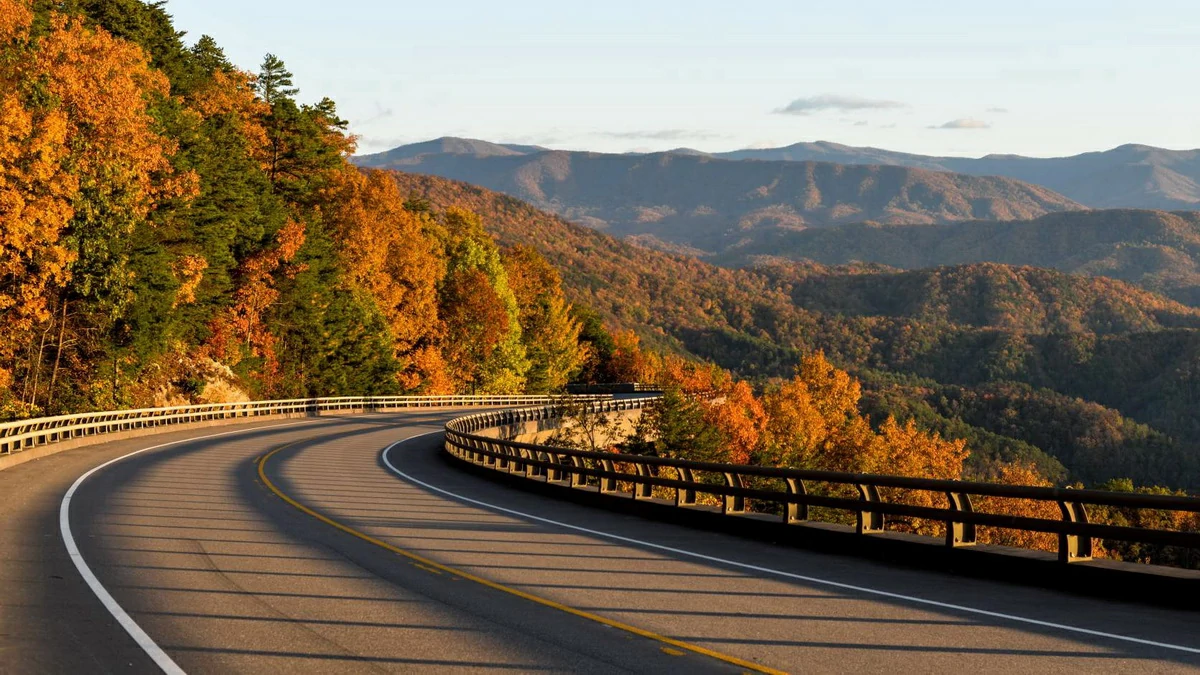
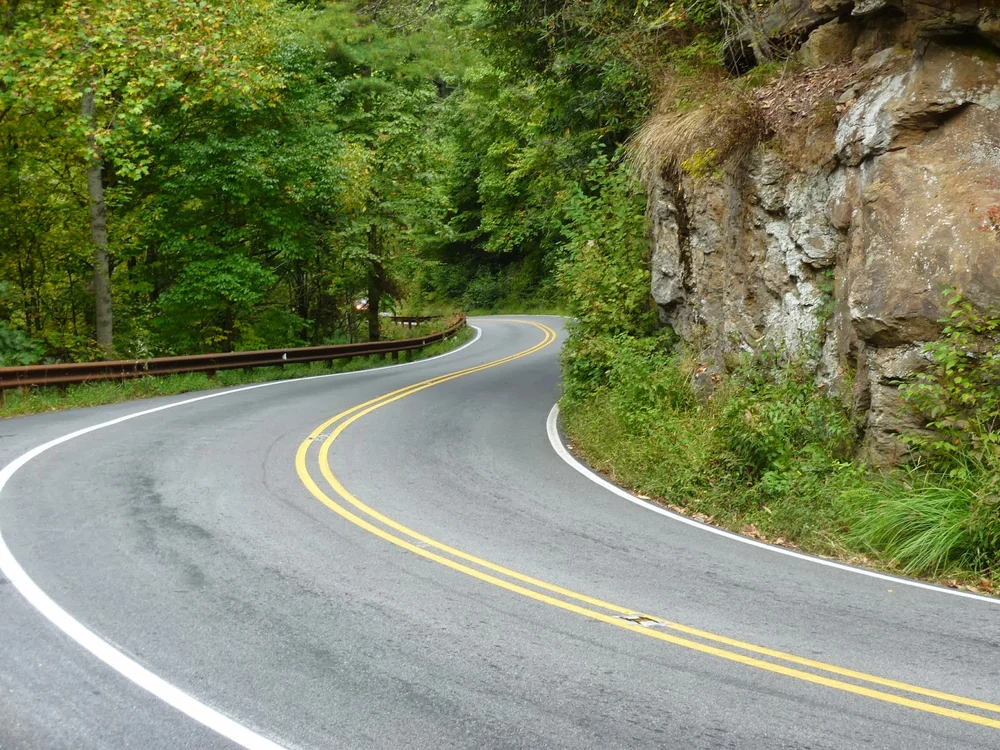
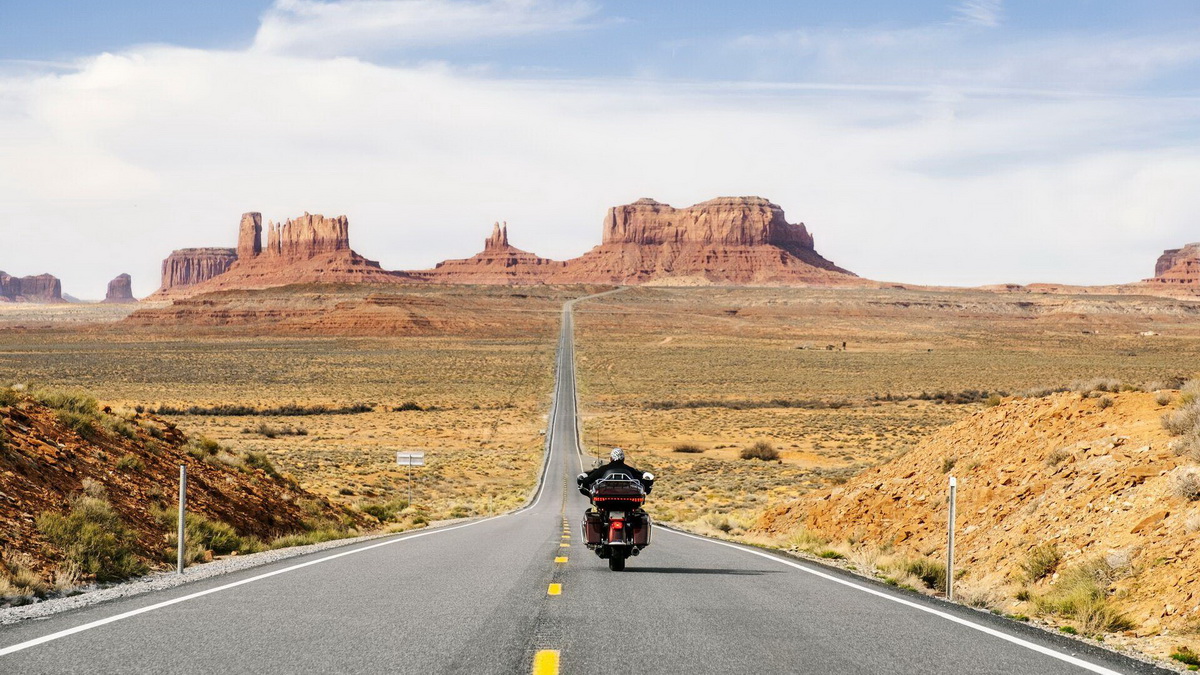


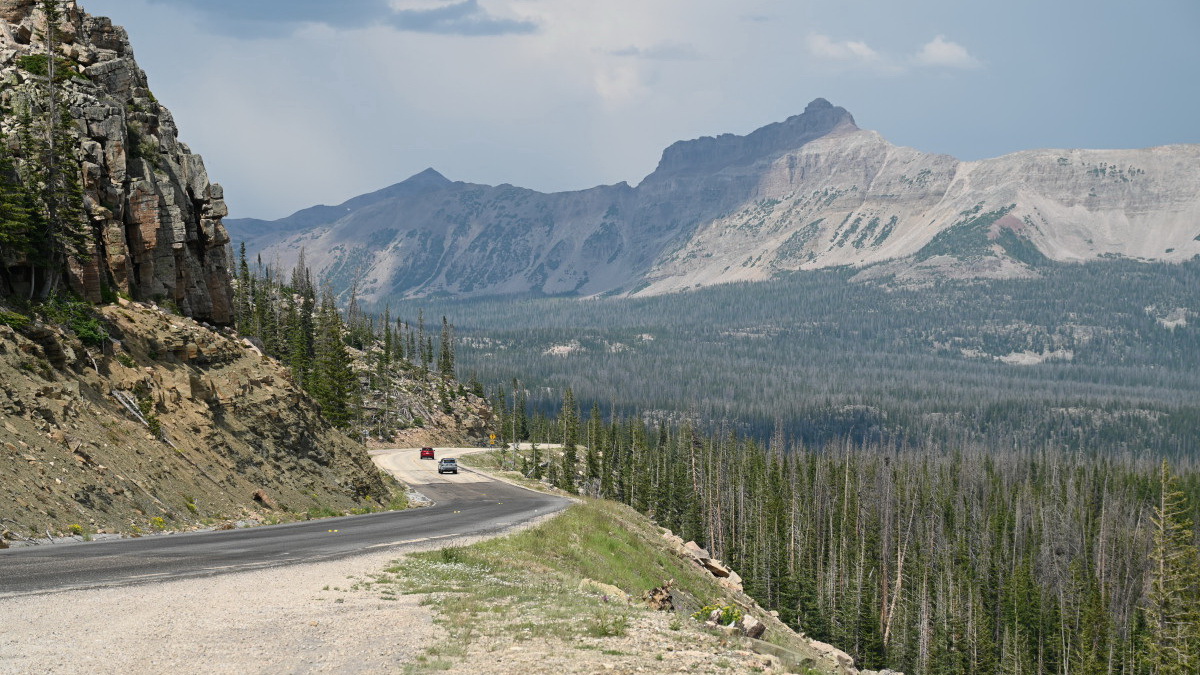

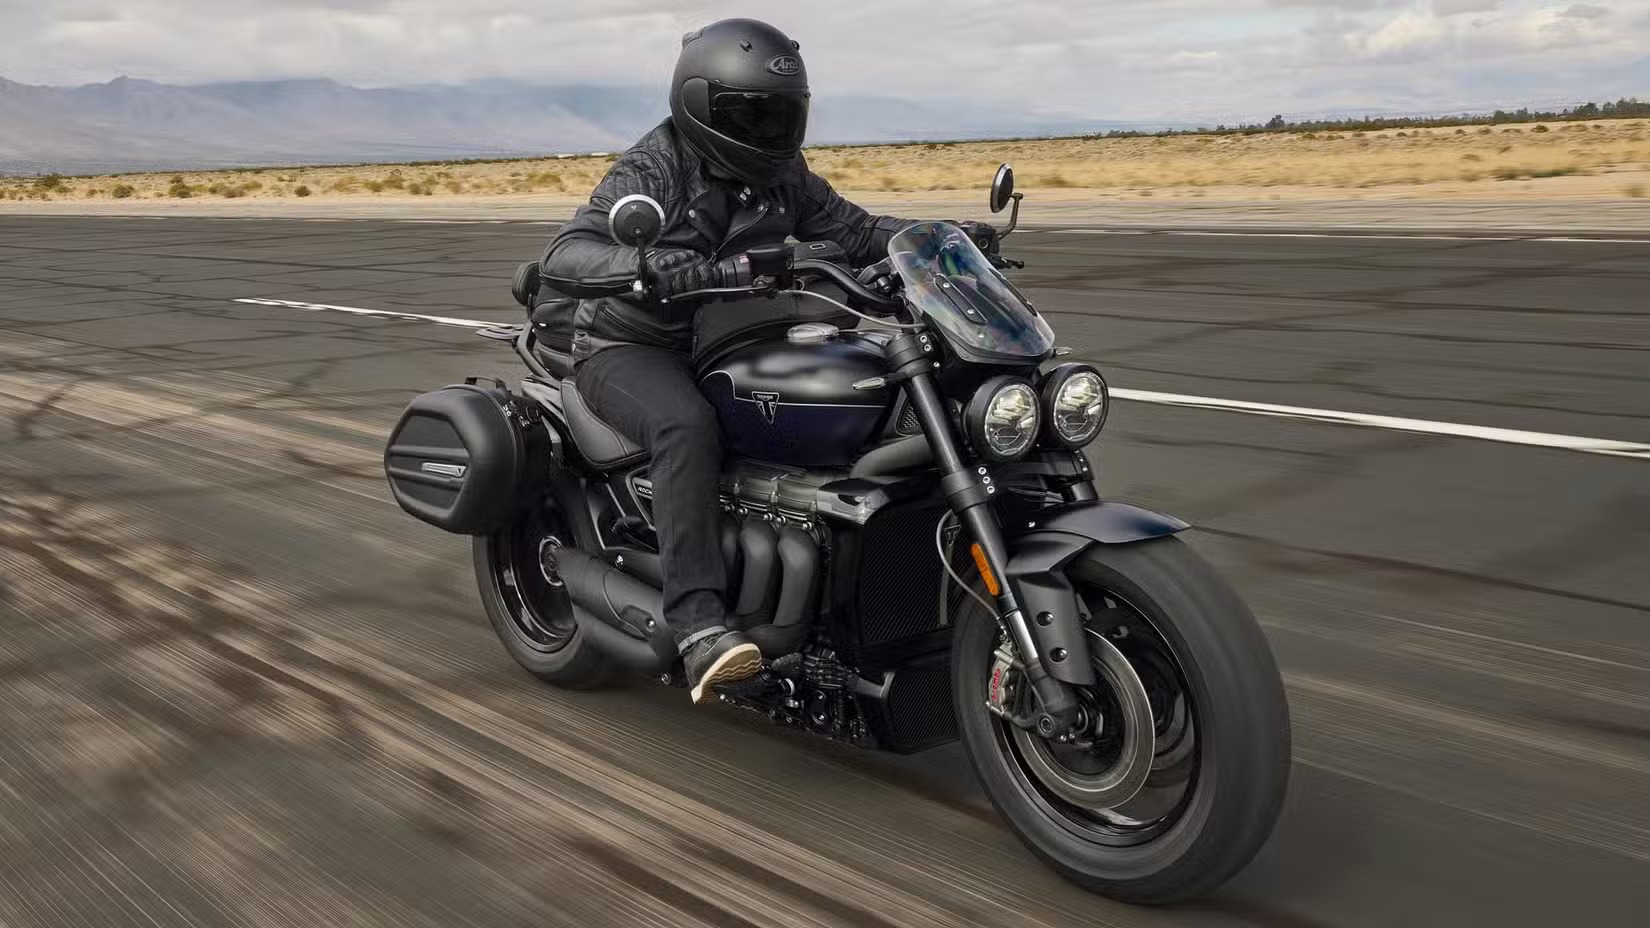
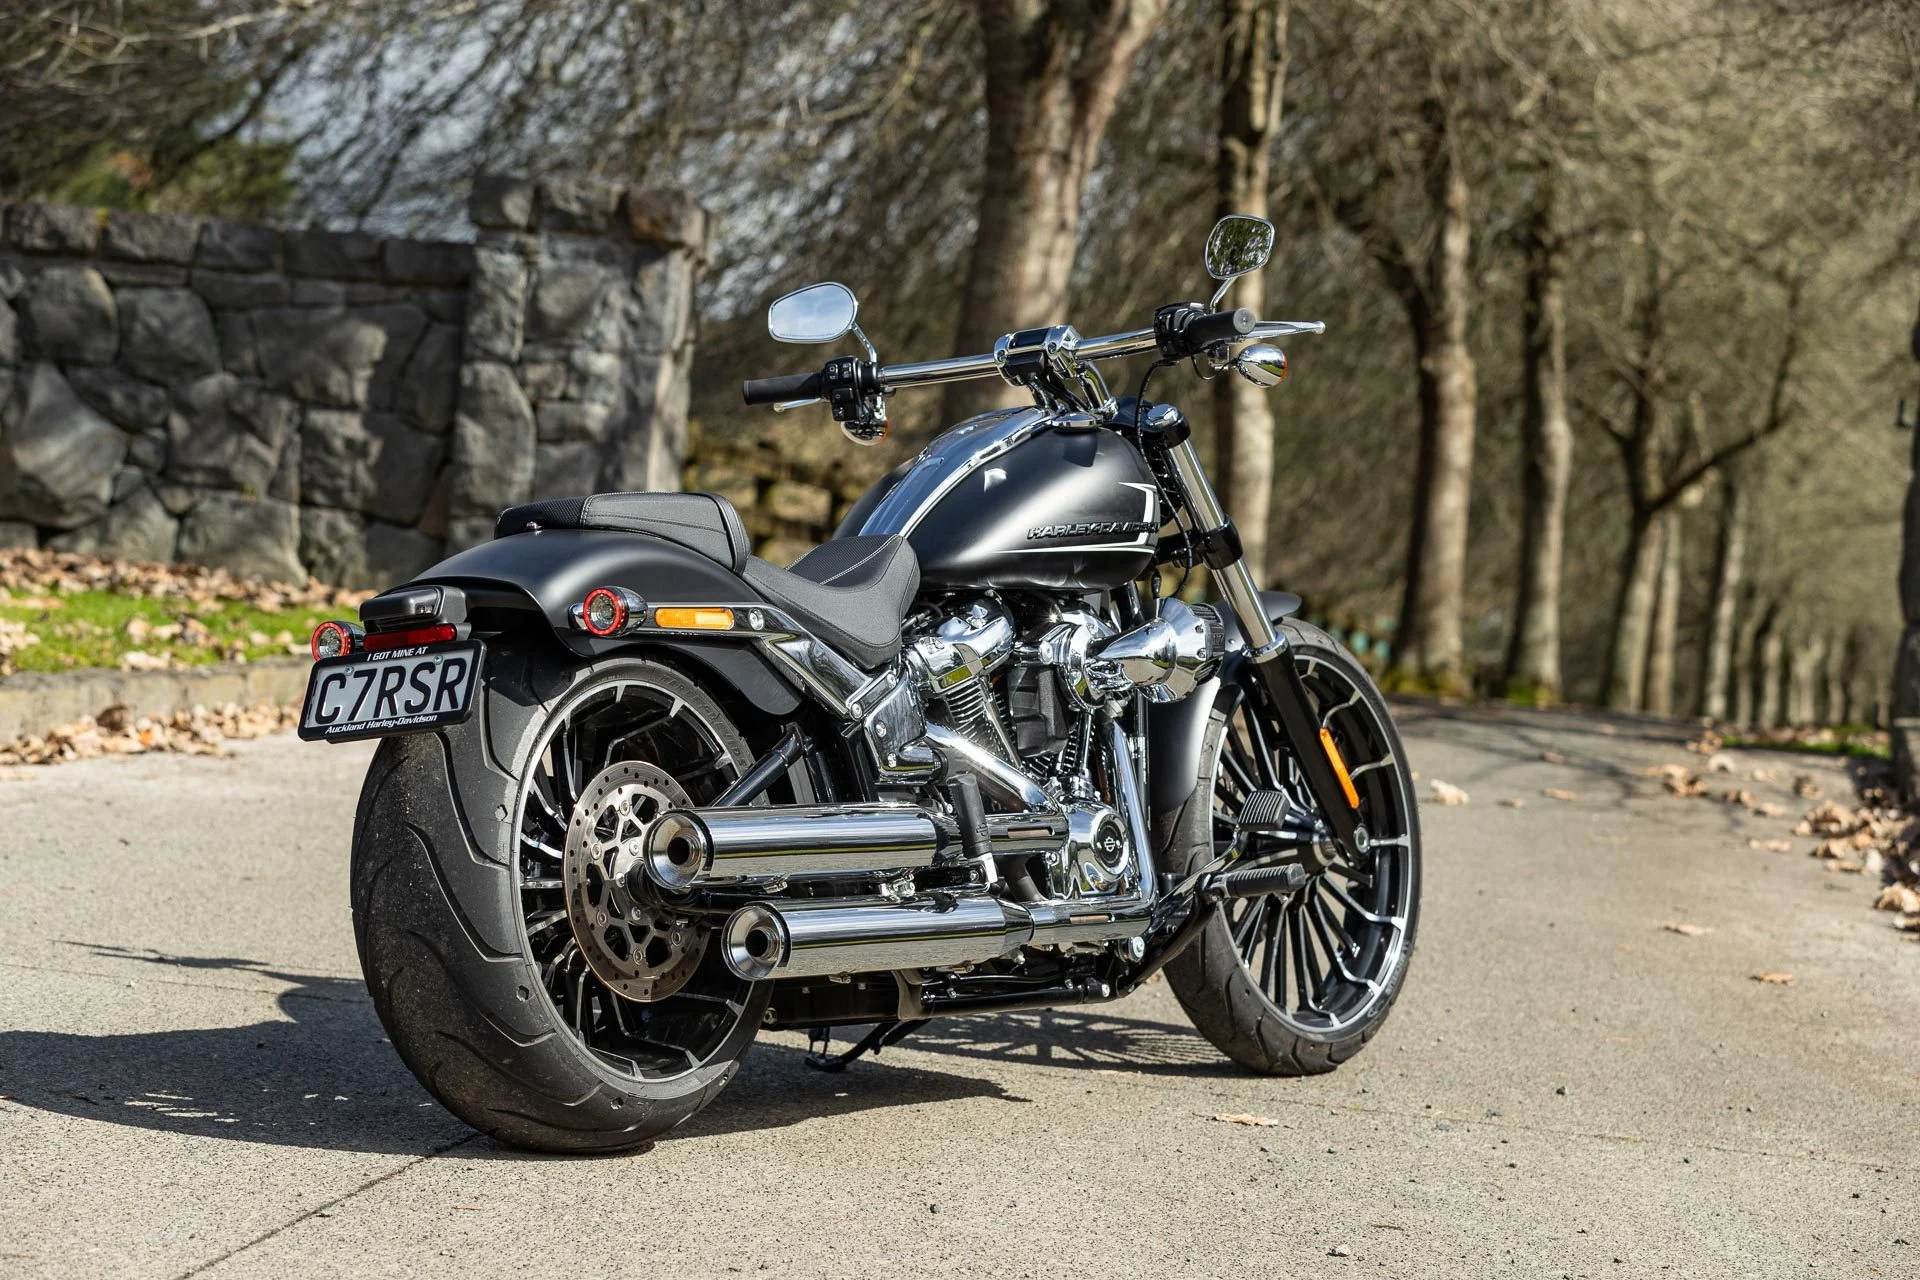
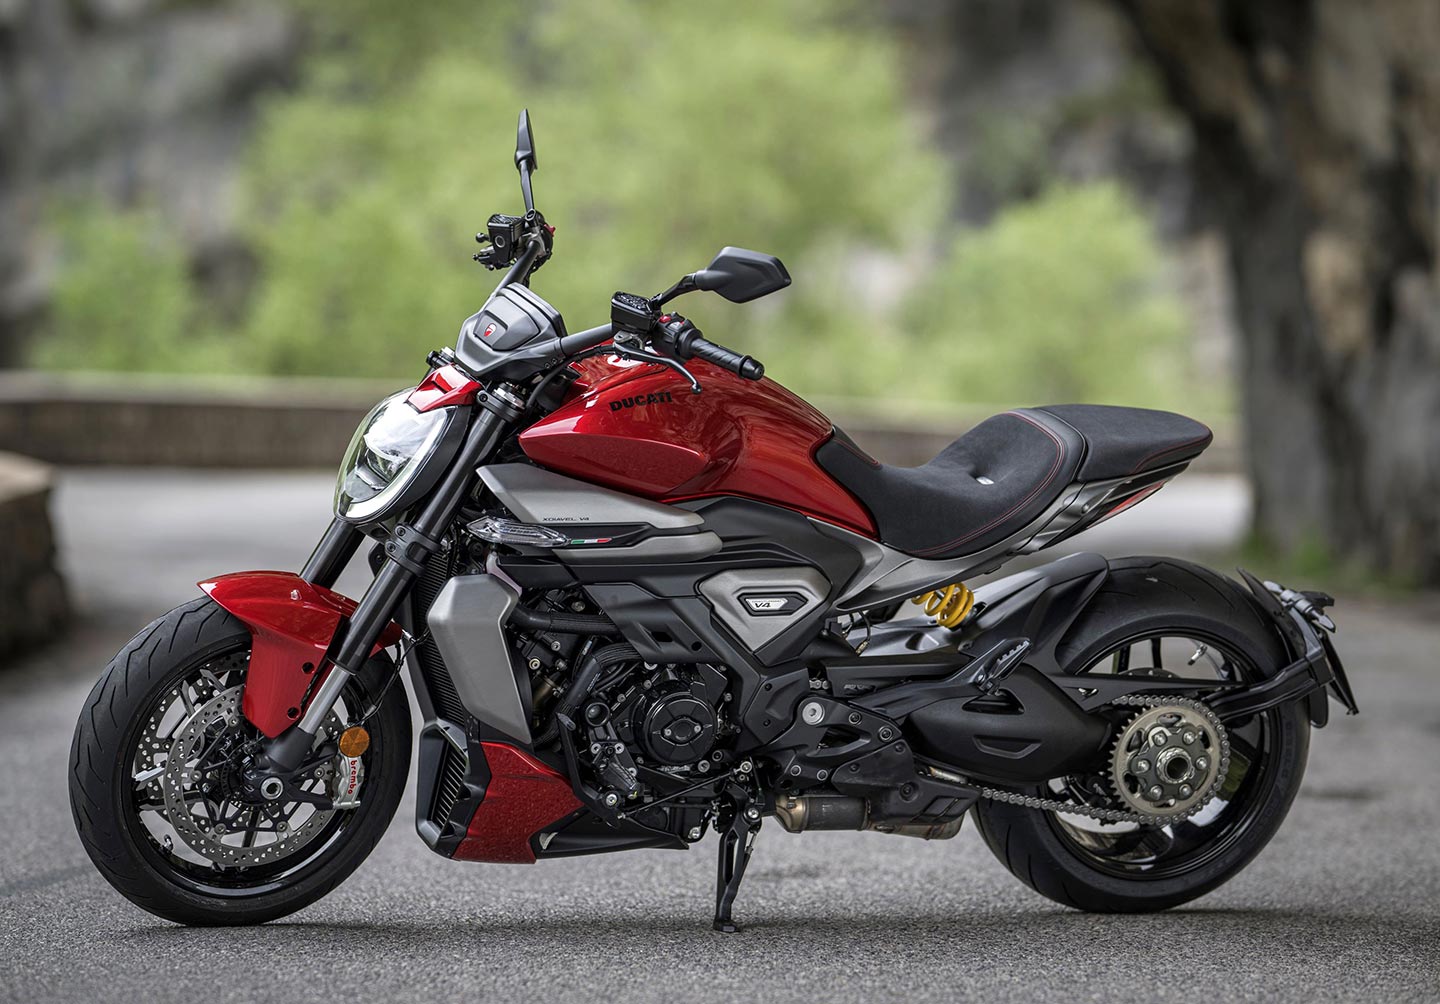
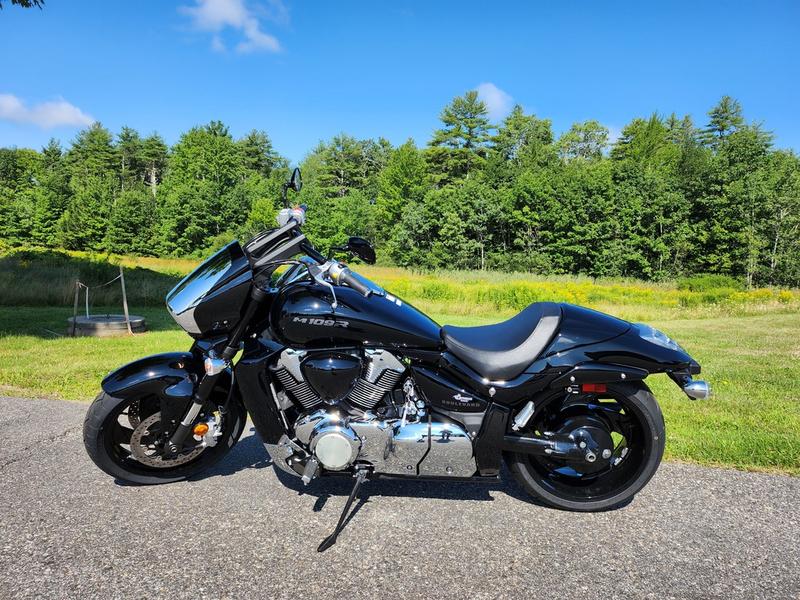


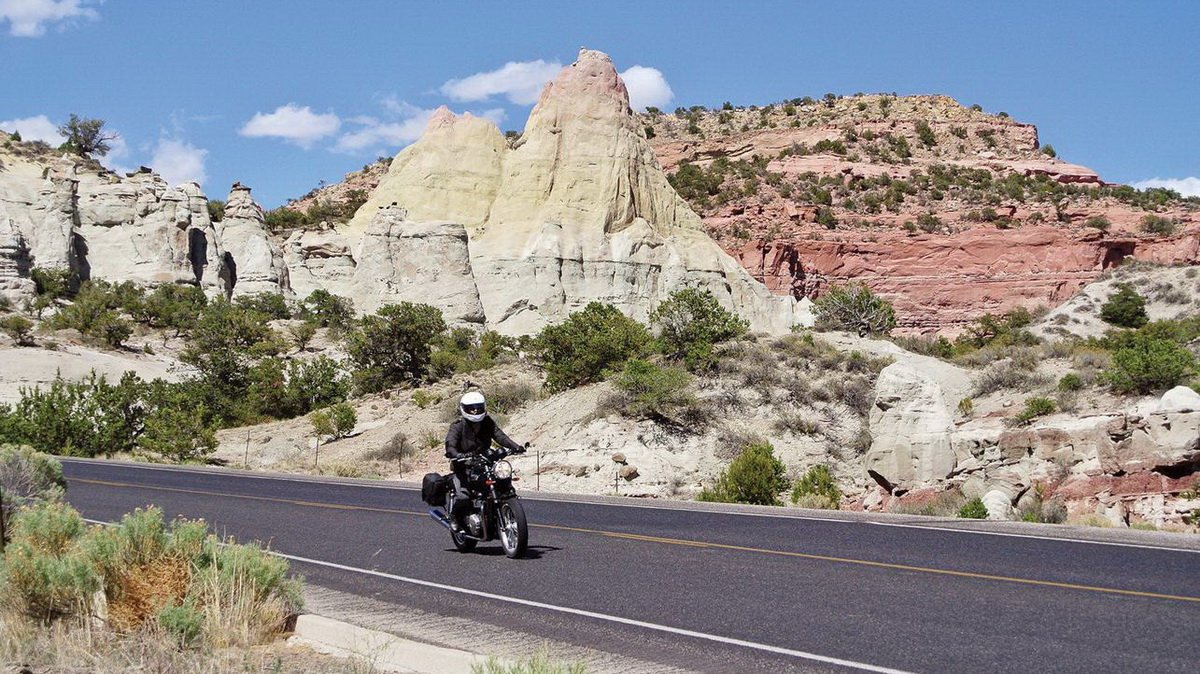


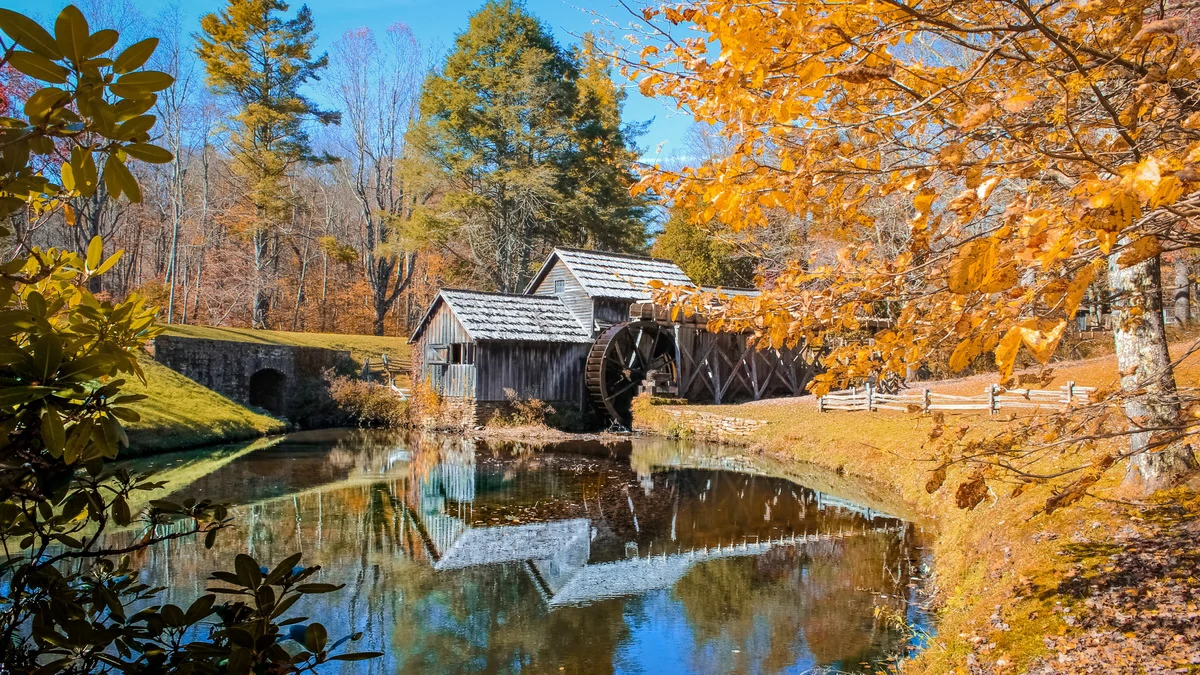
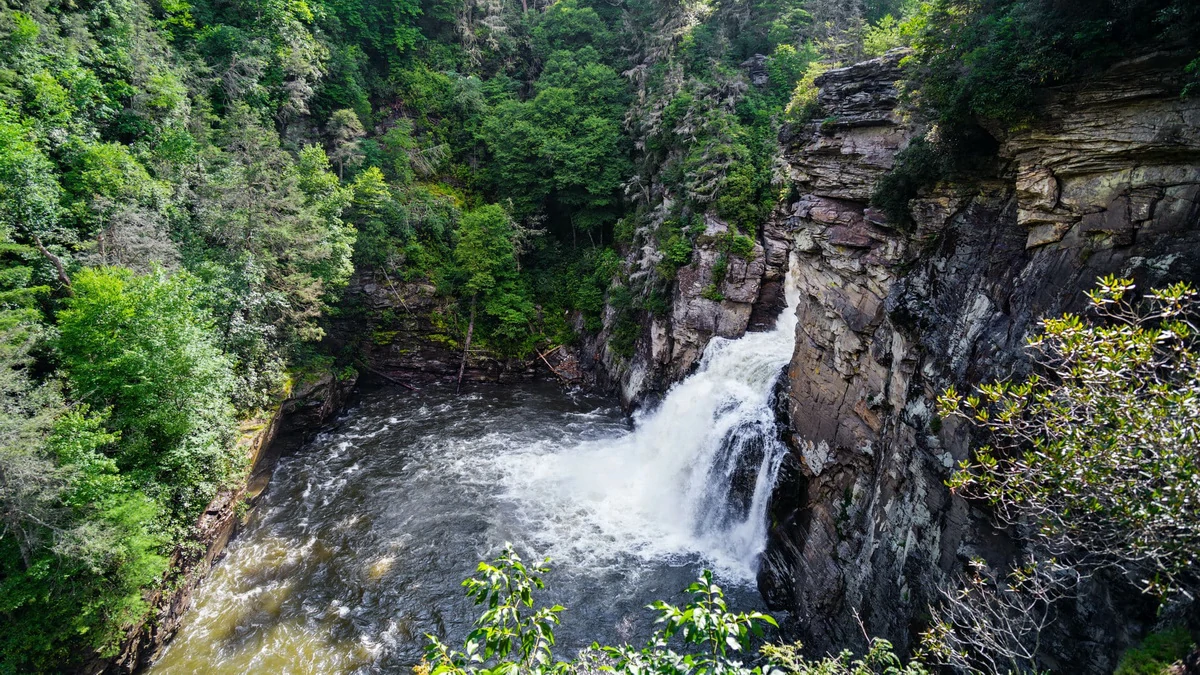


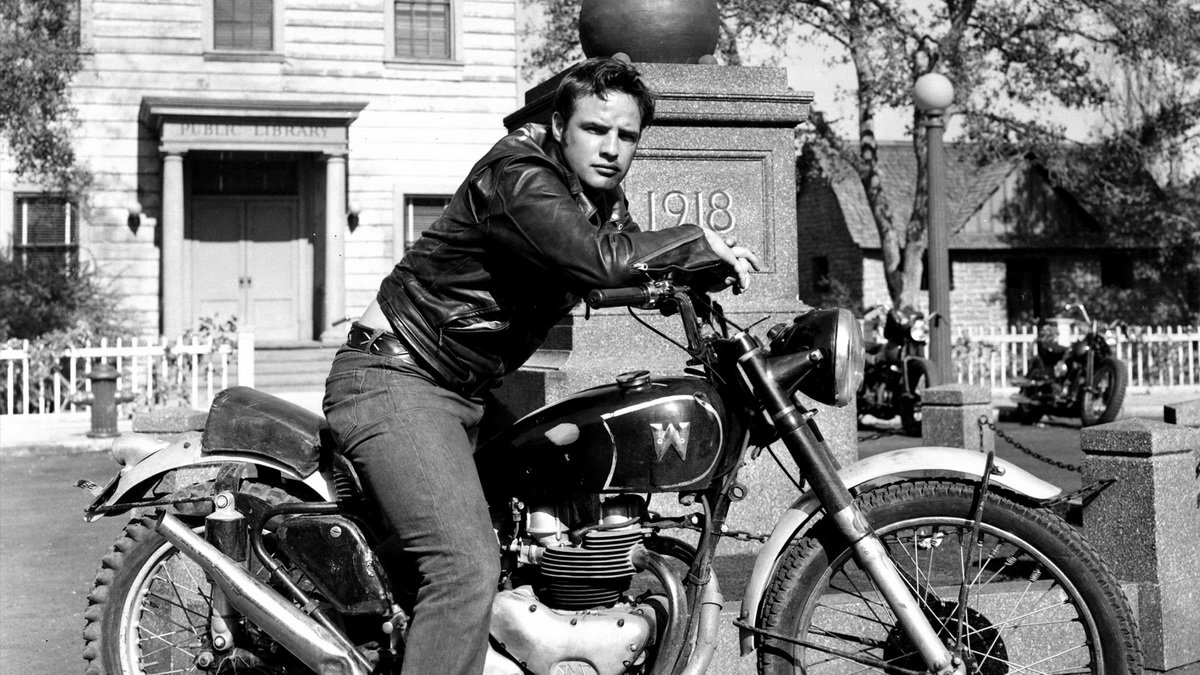

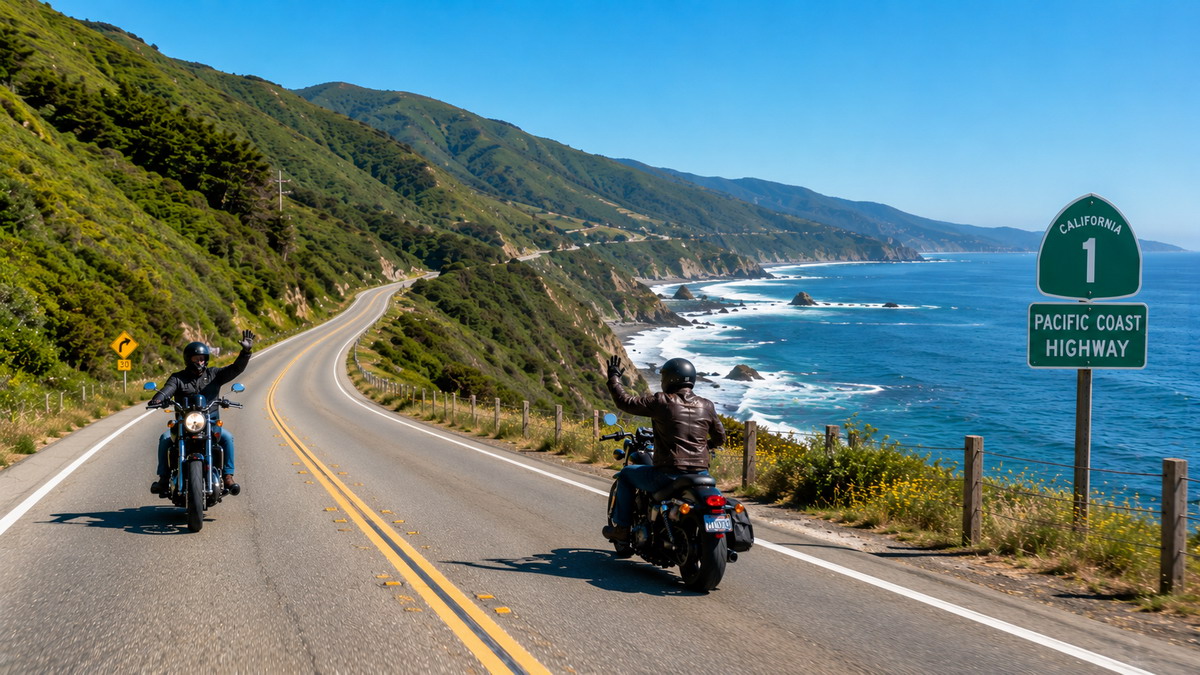
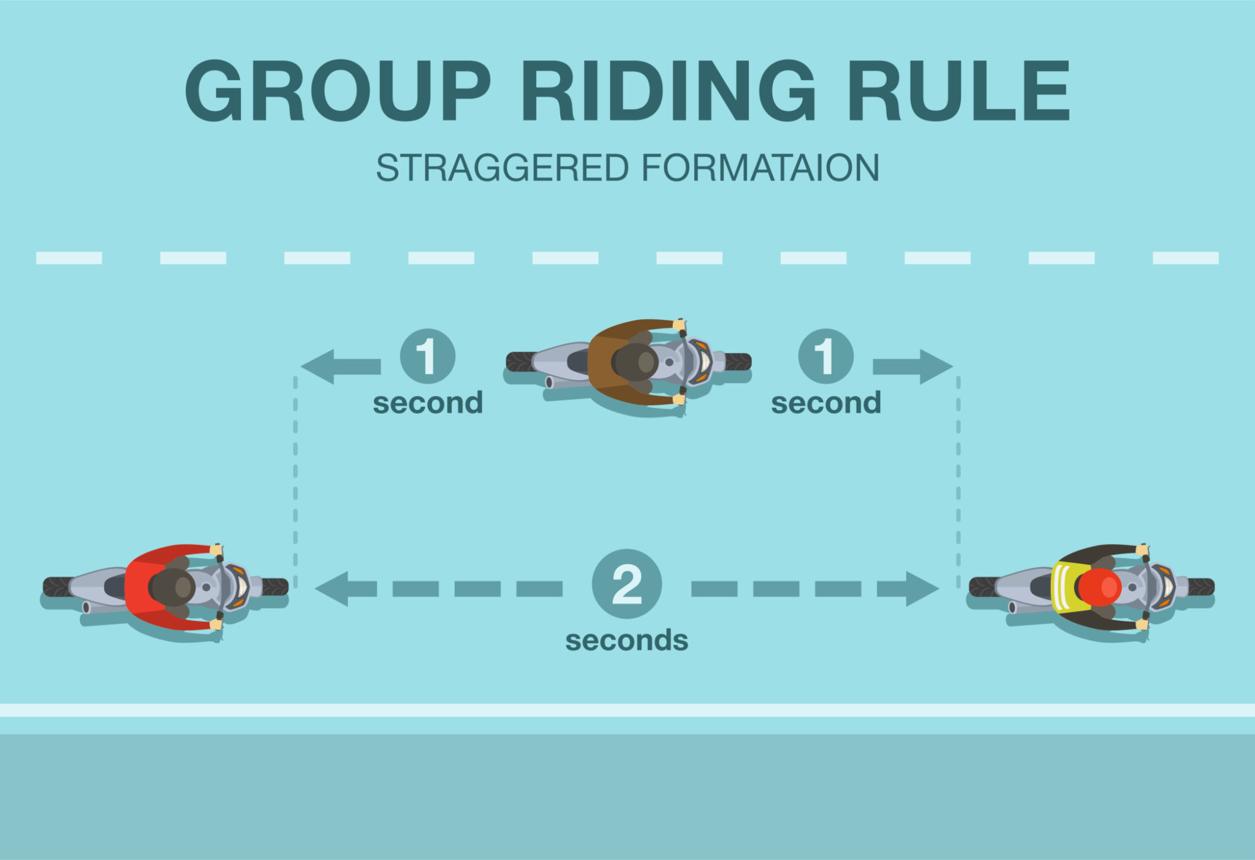


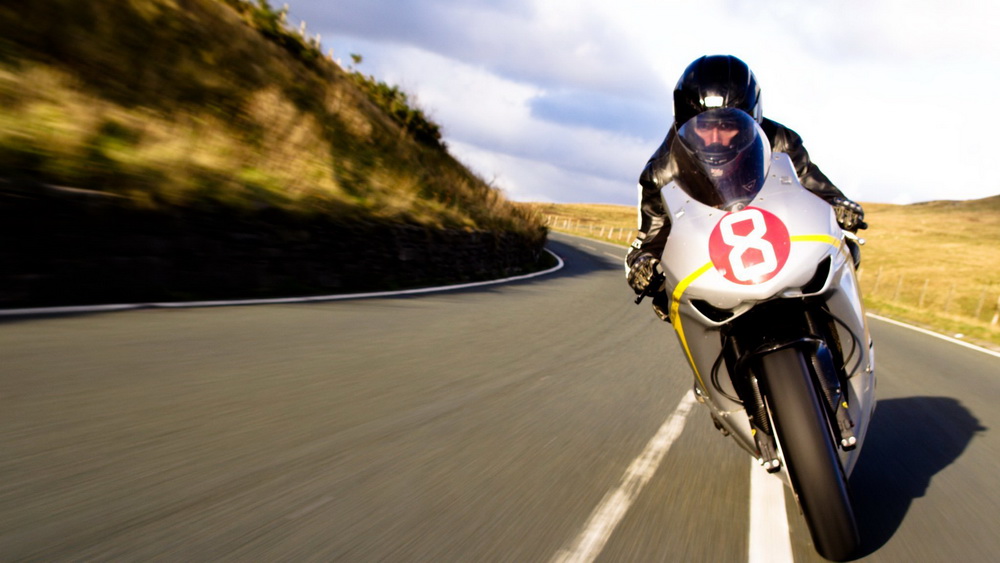
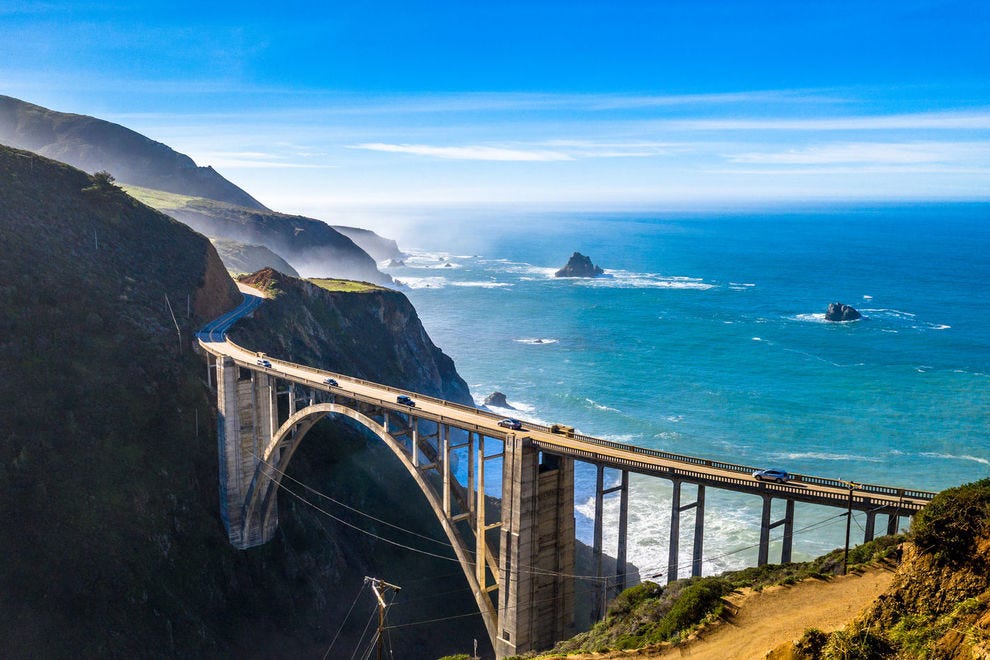

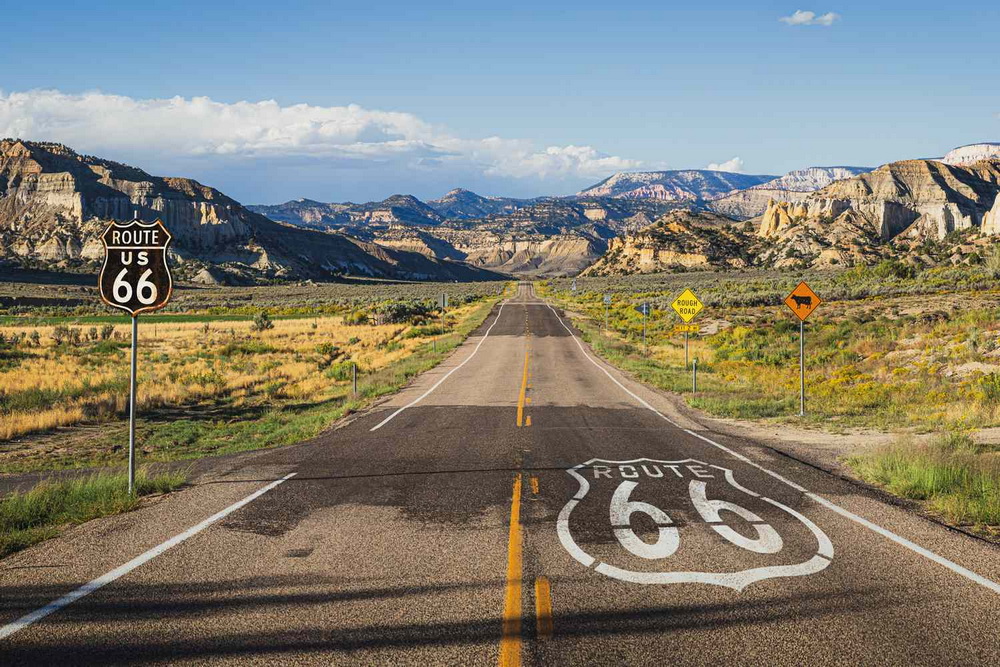
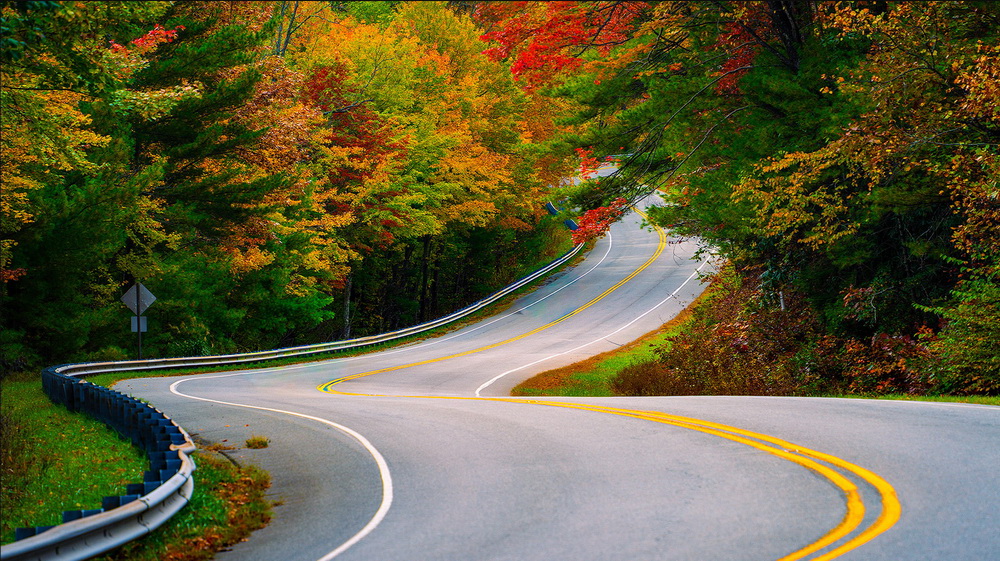

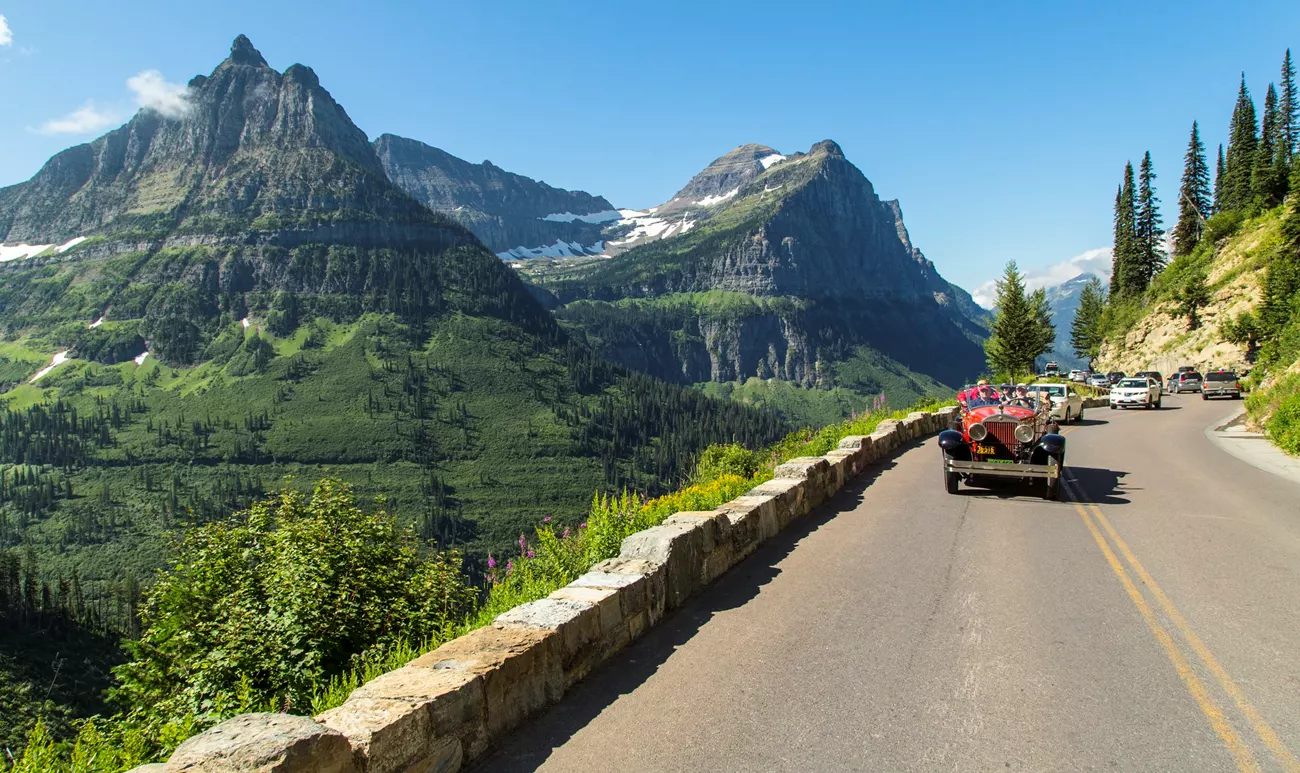
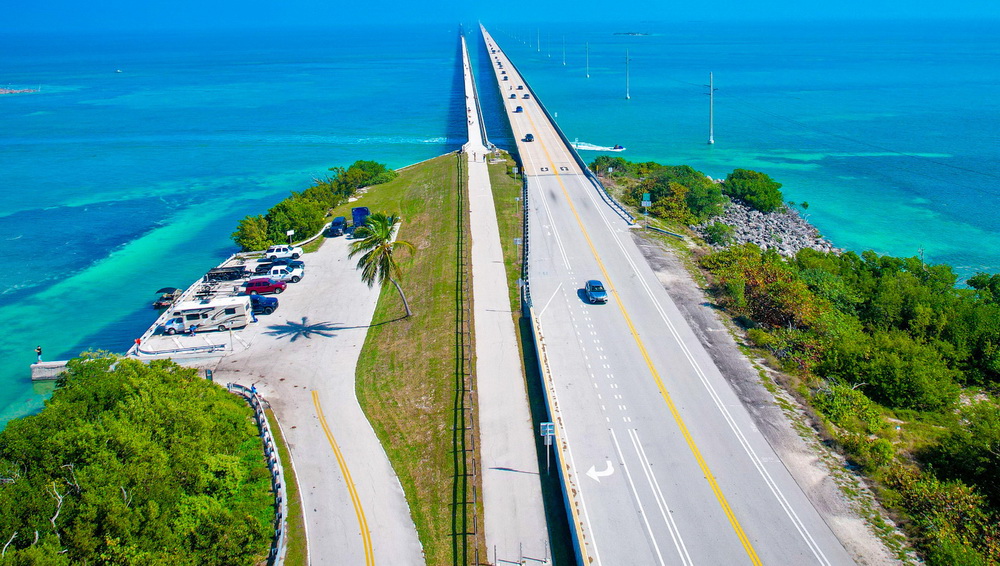
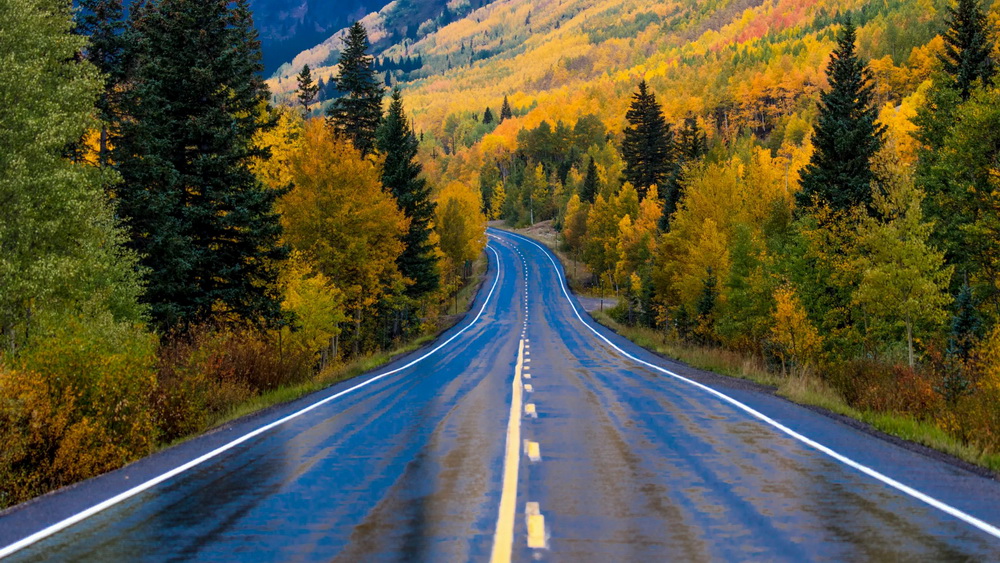

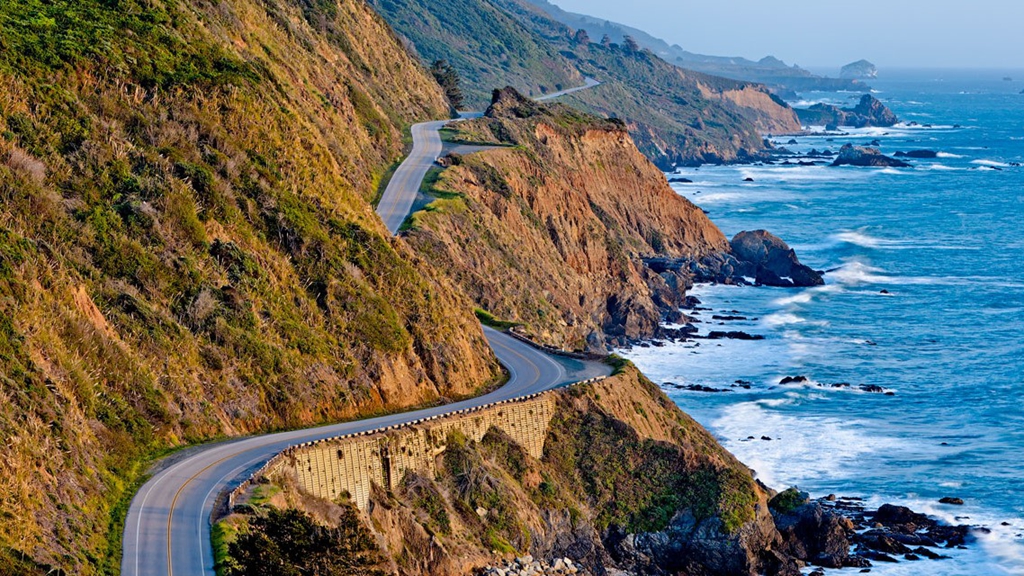

")


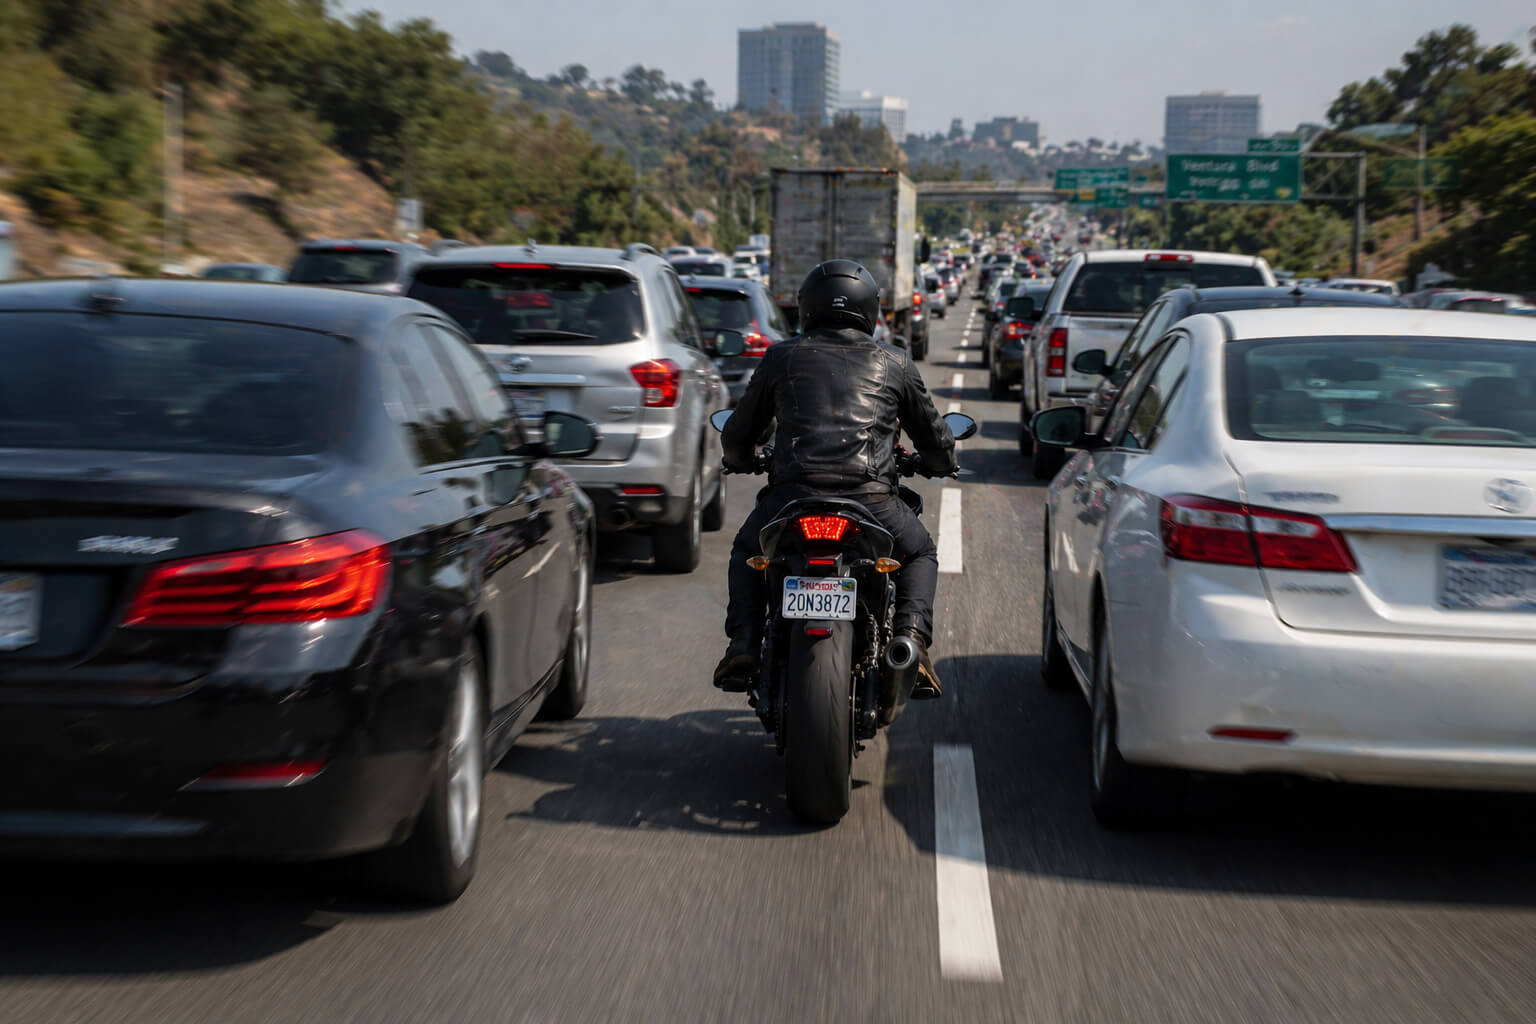
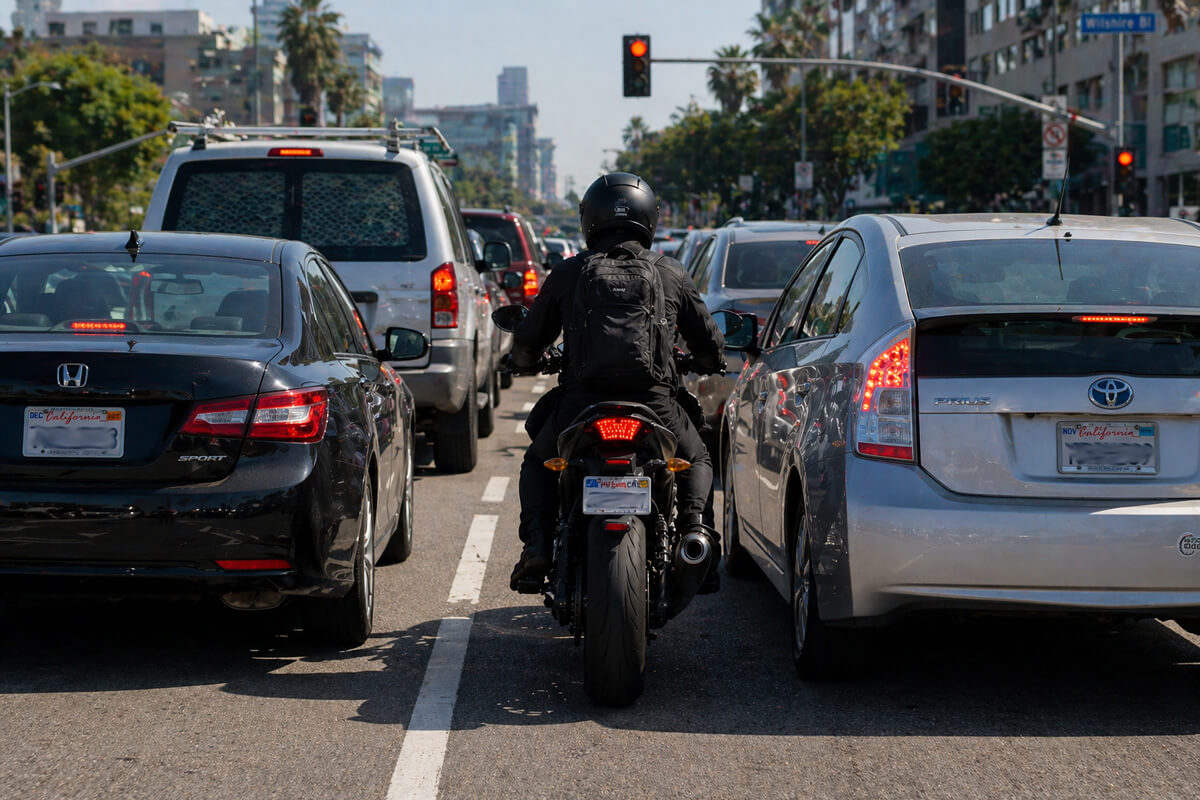
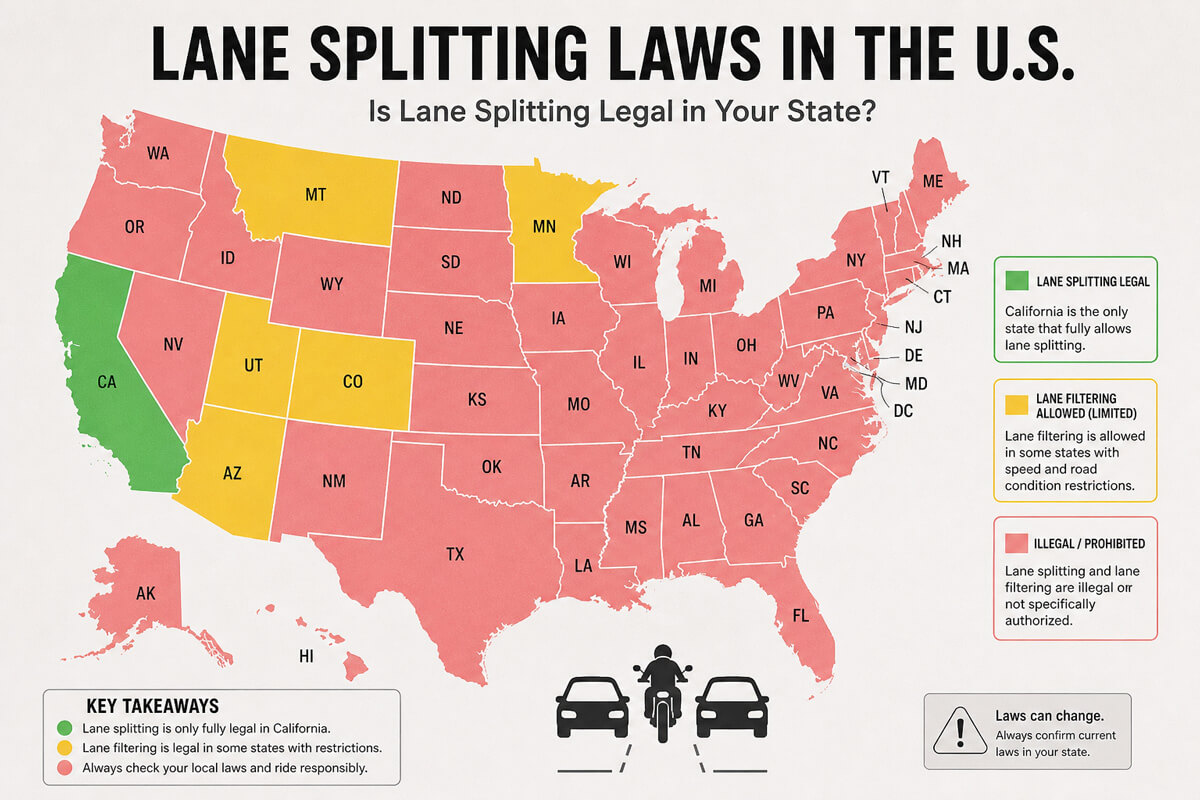
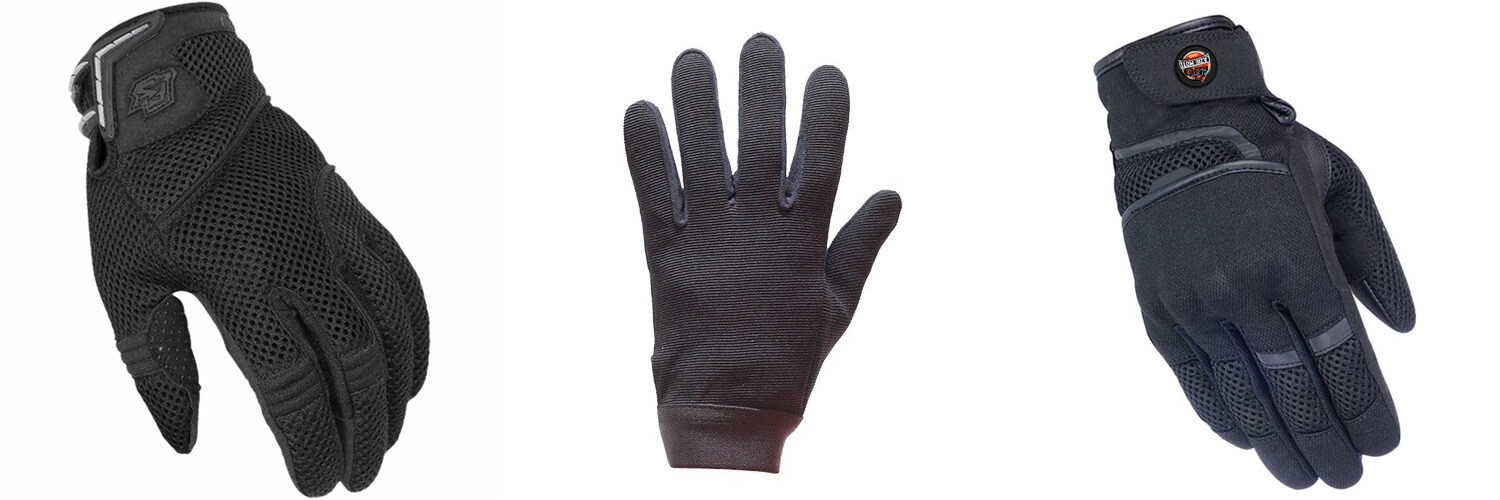
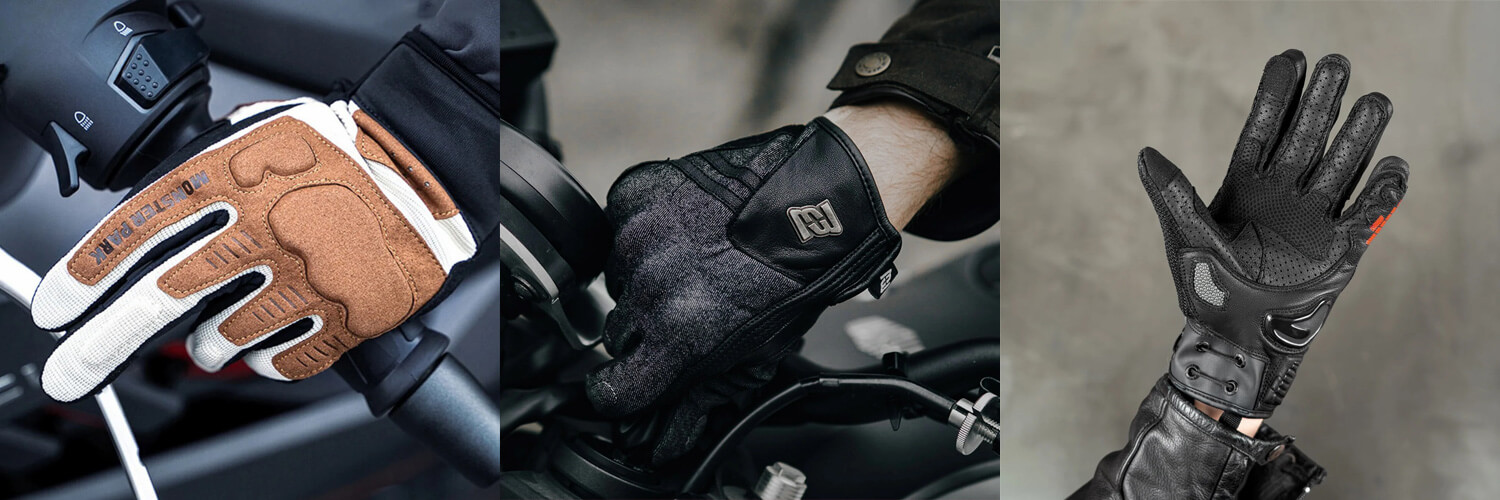
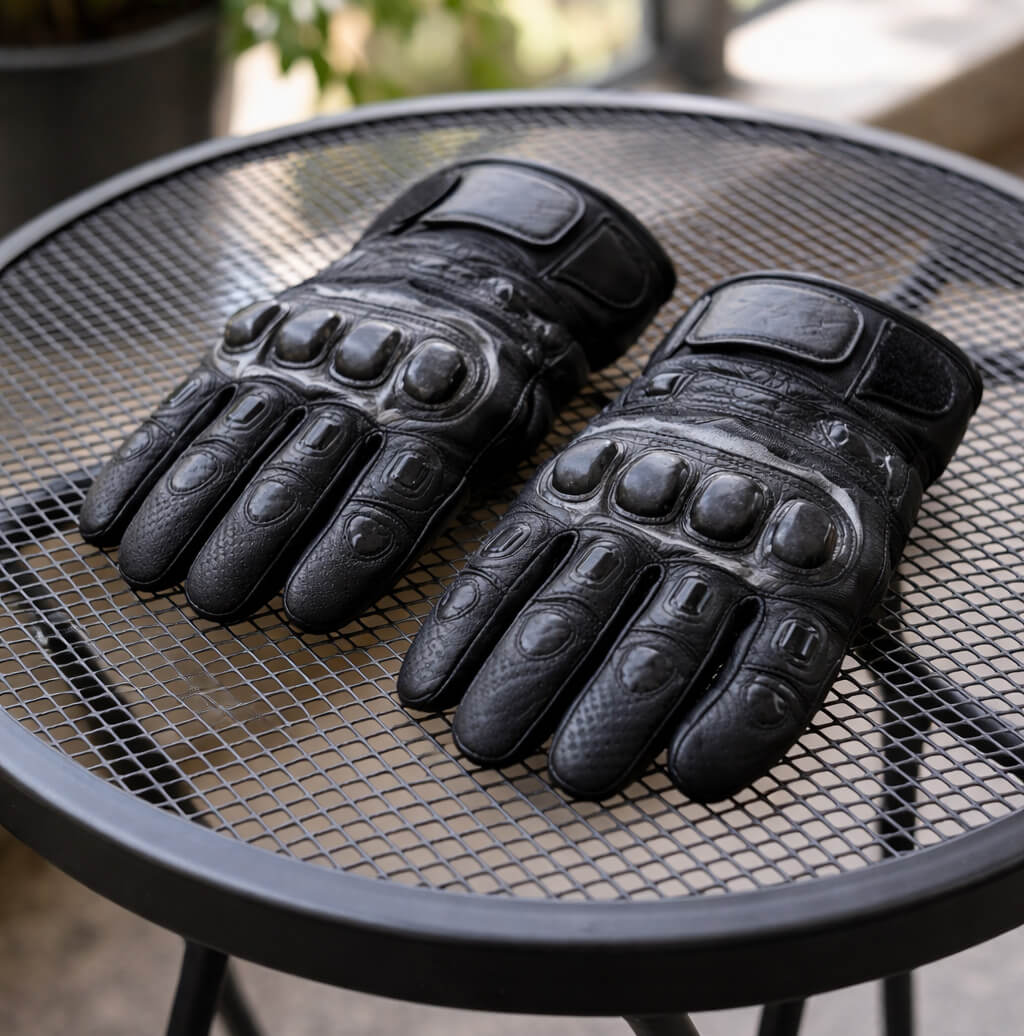

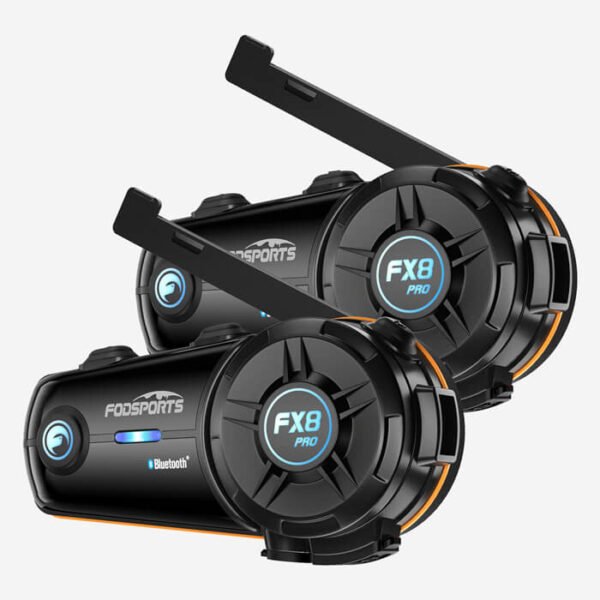


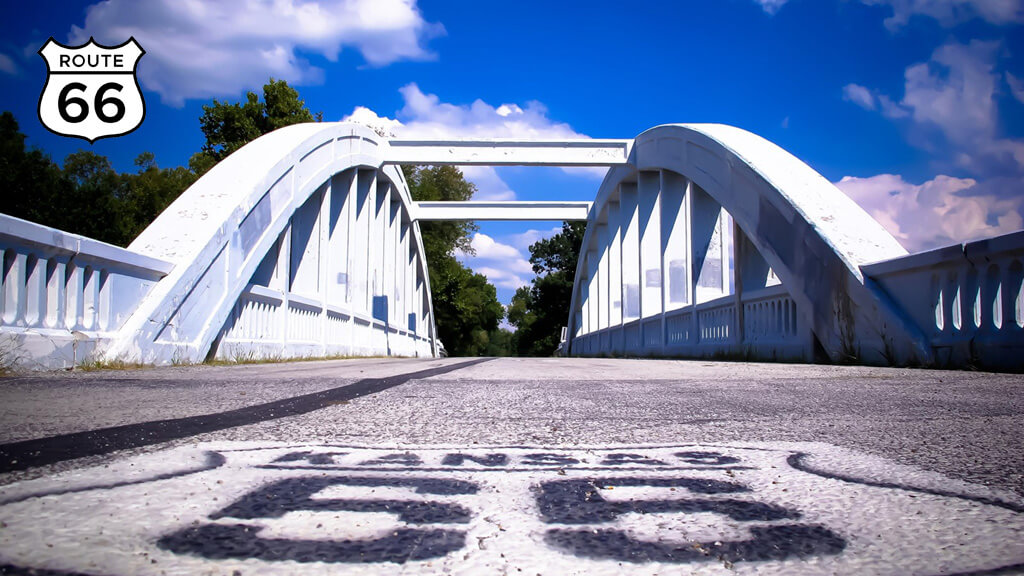


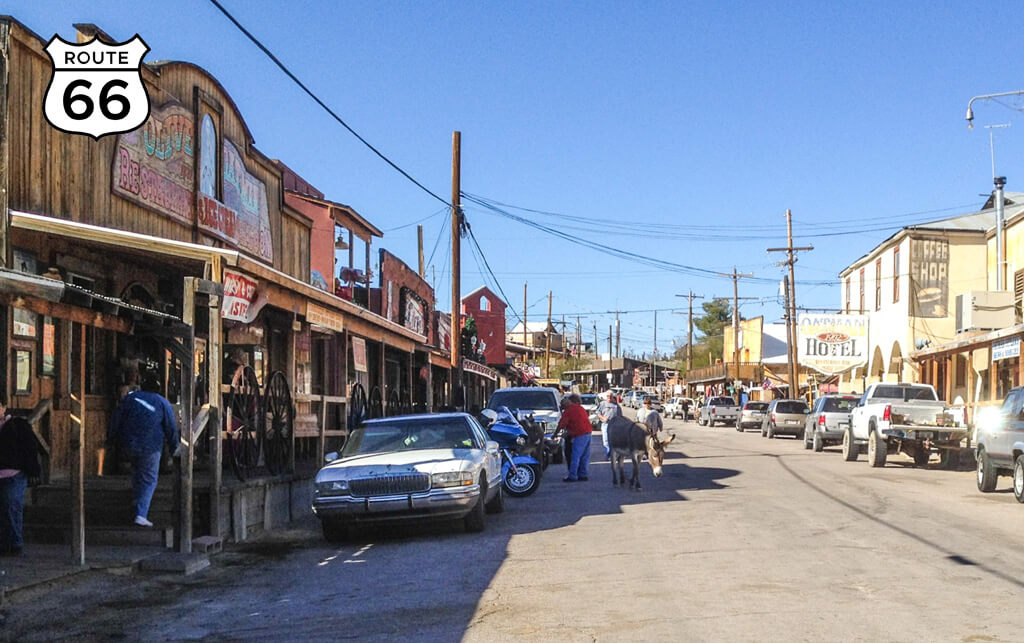

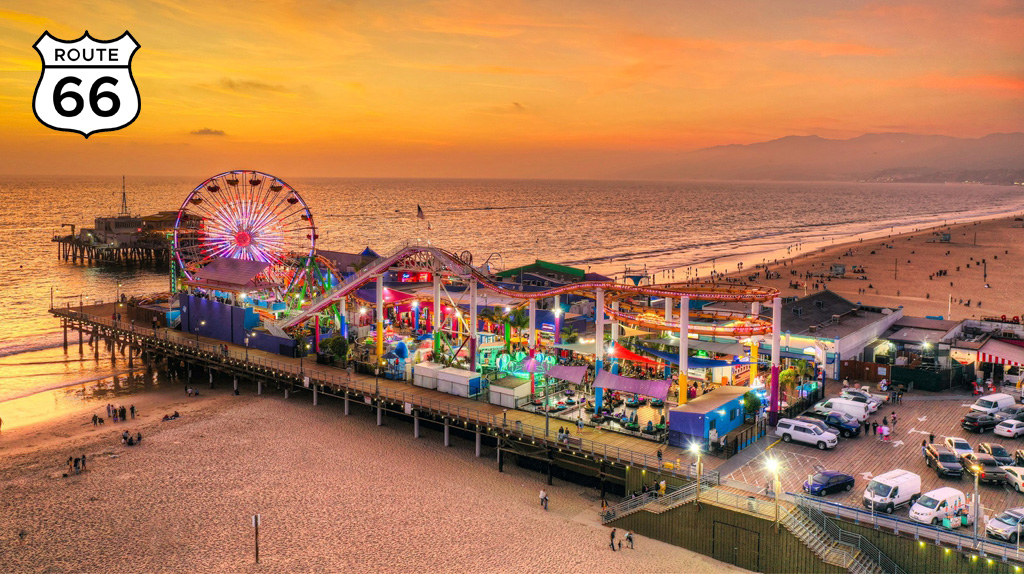
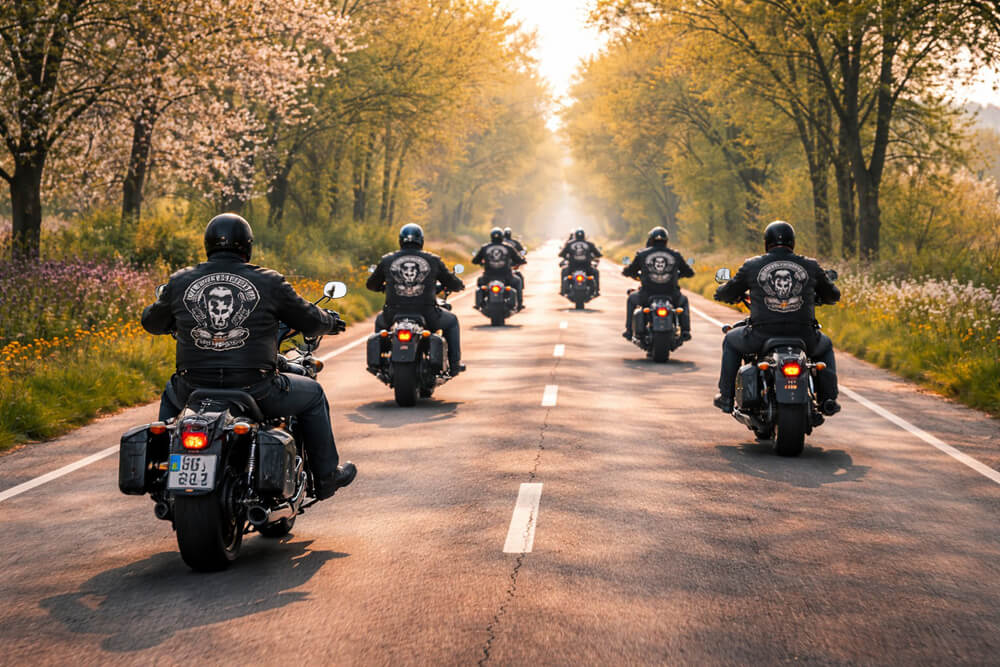
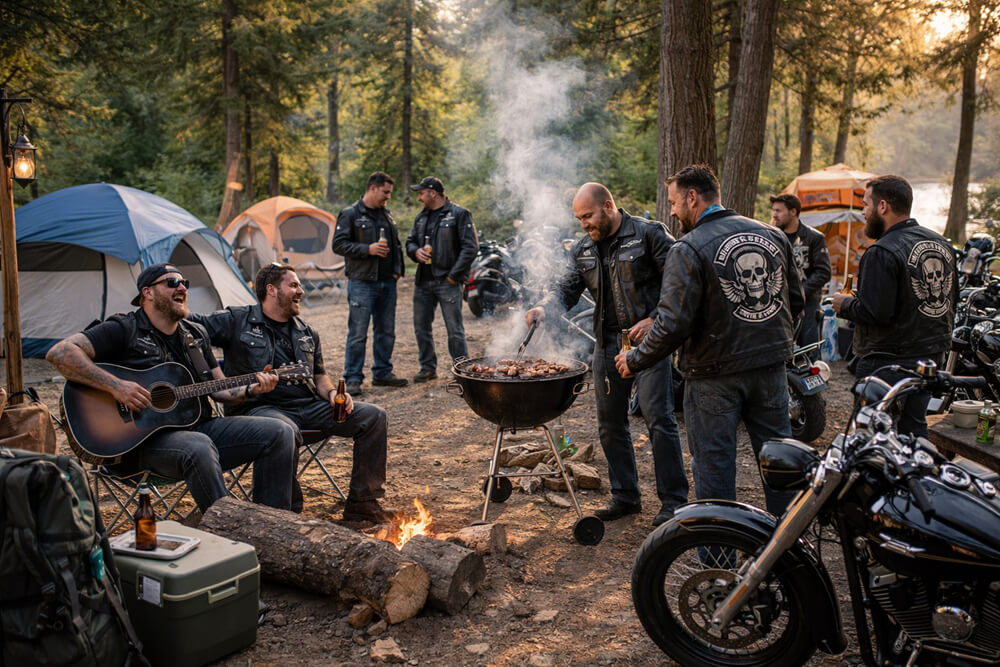

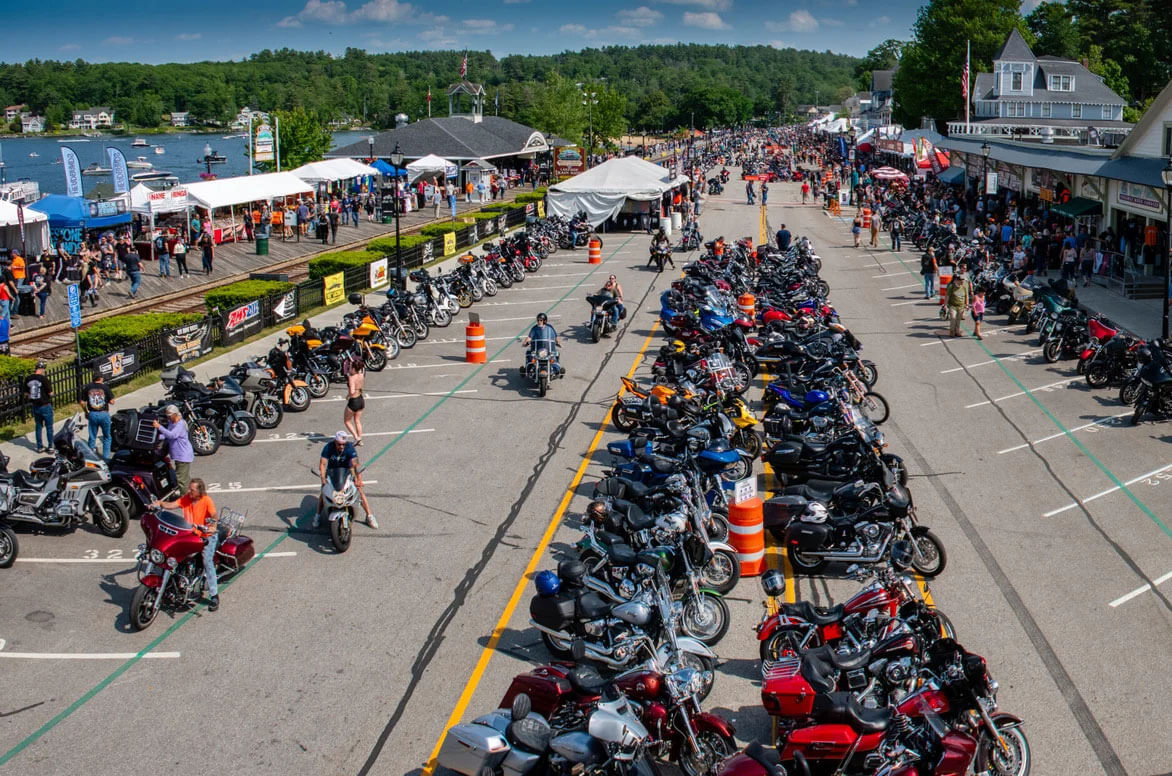
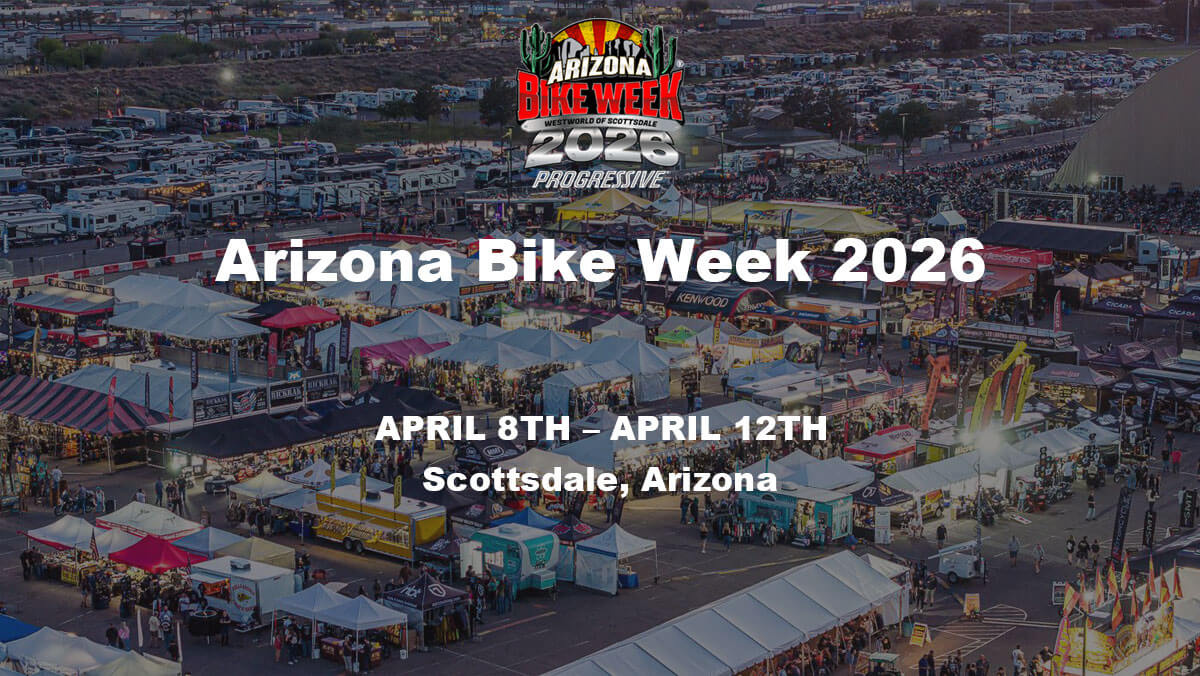
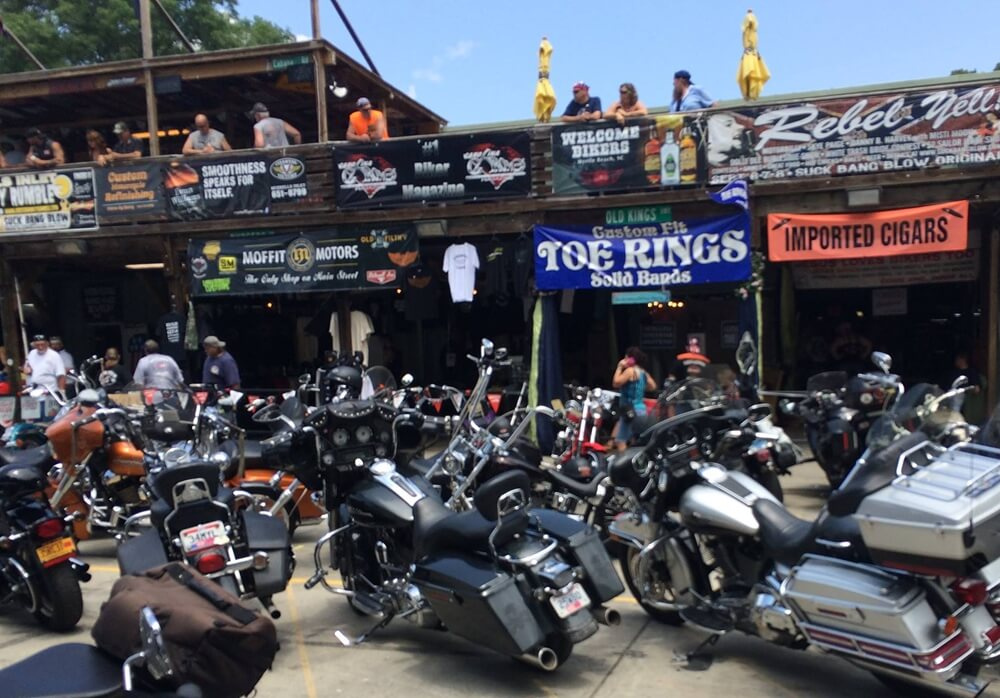
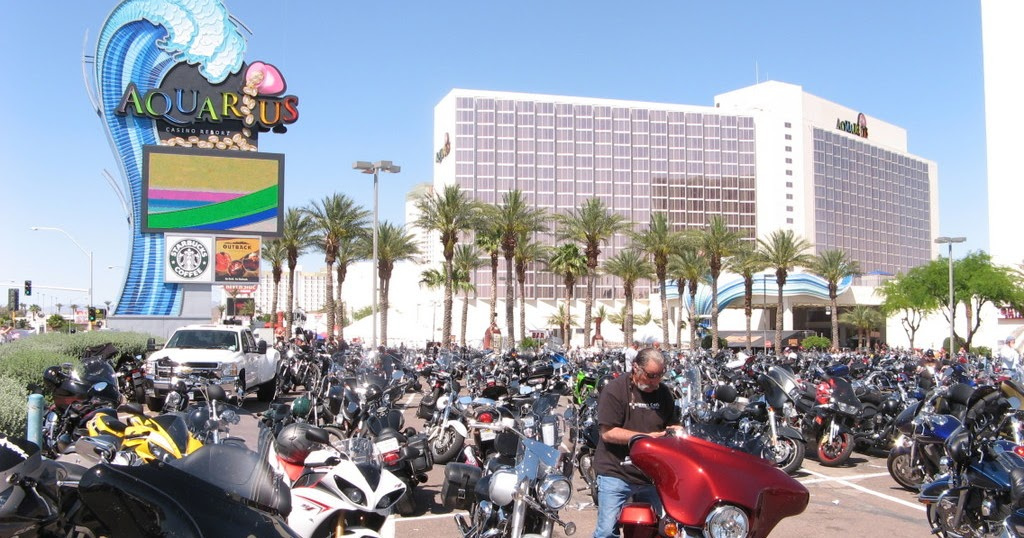

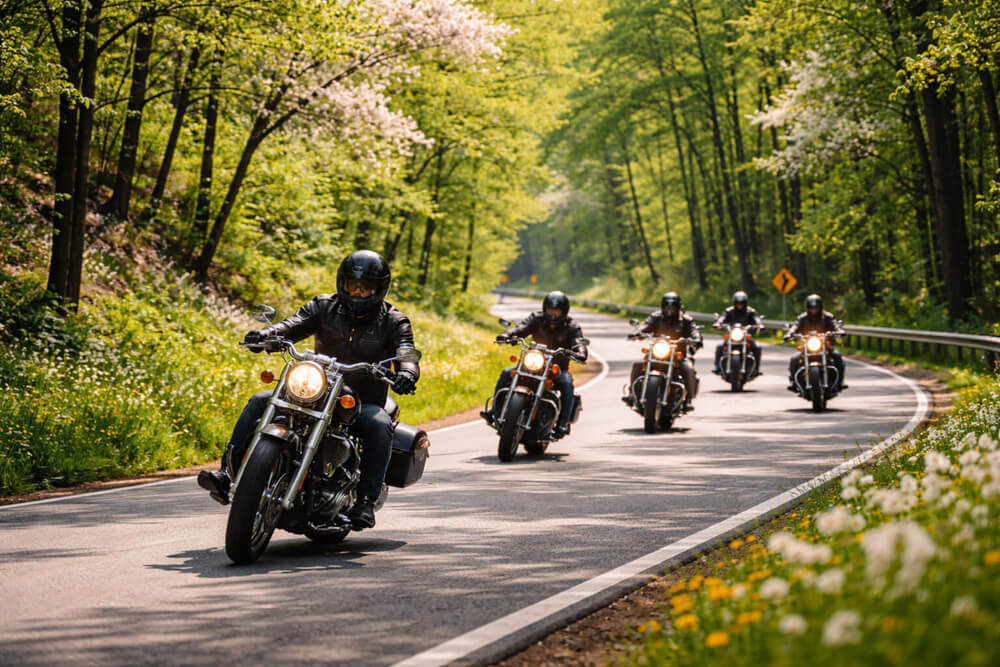
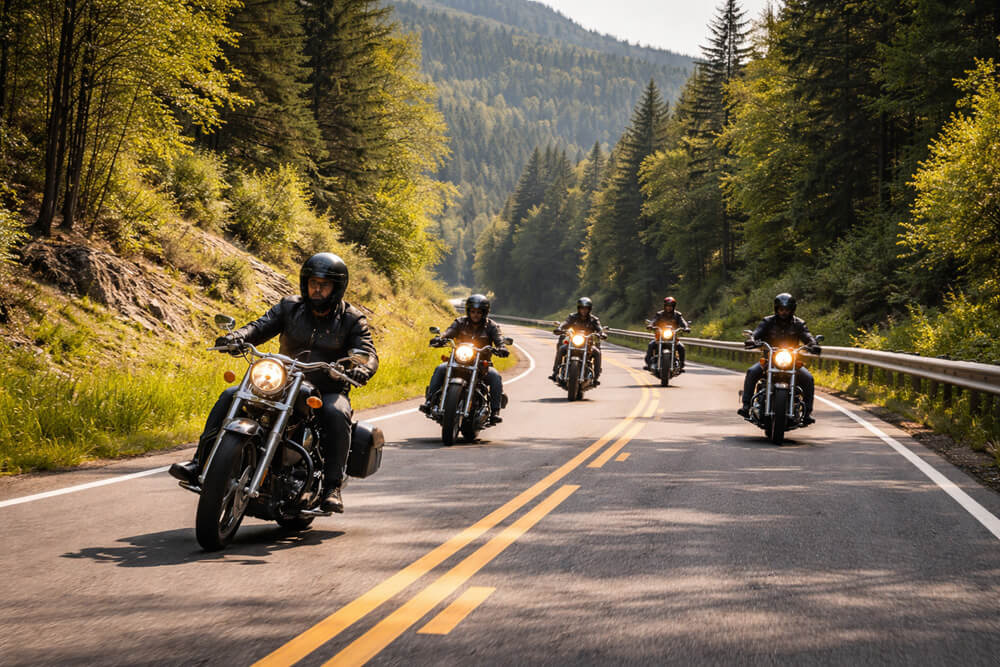
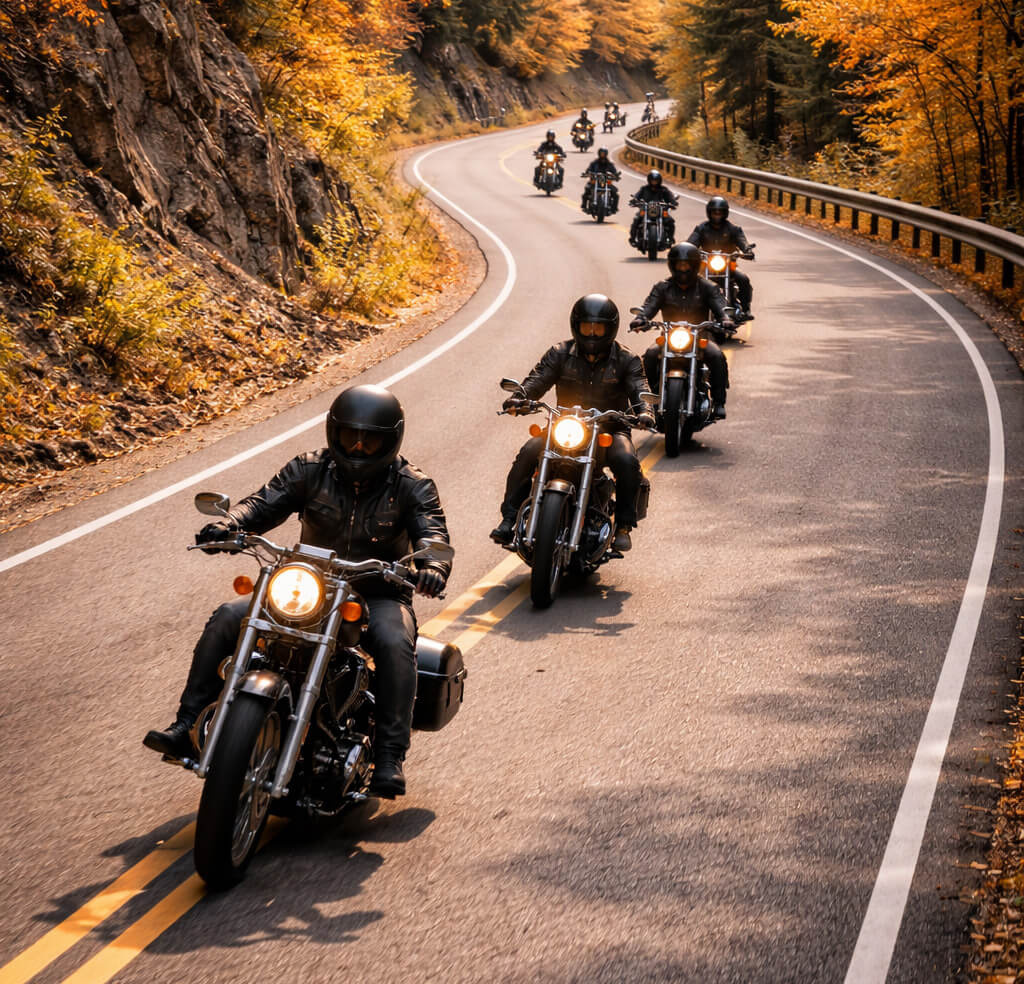


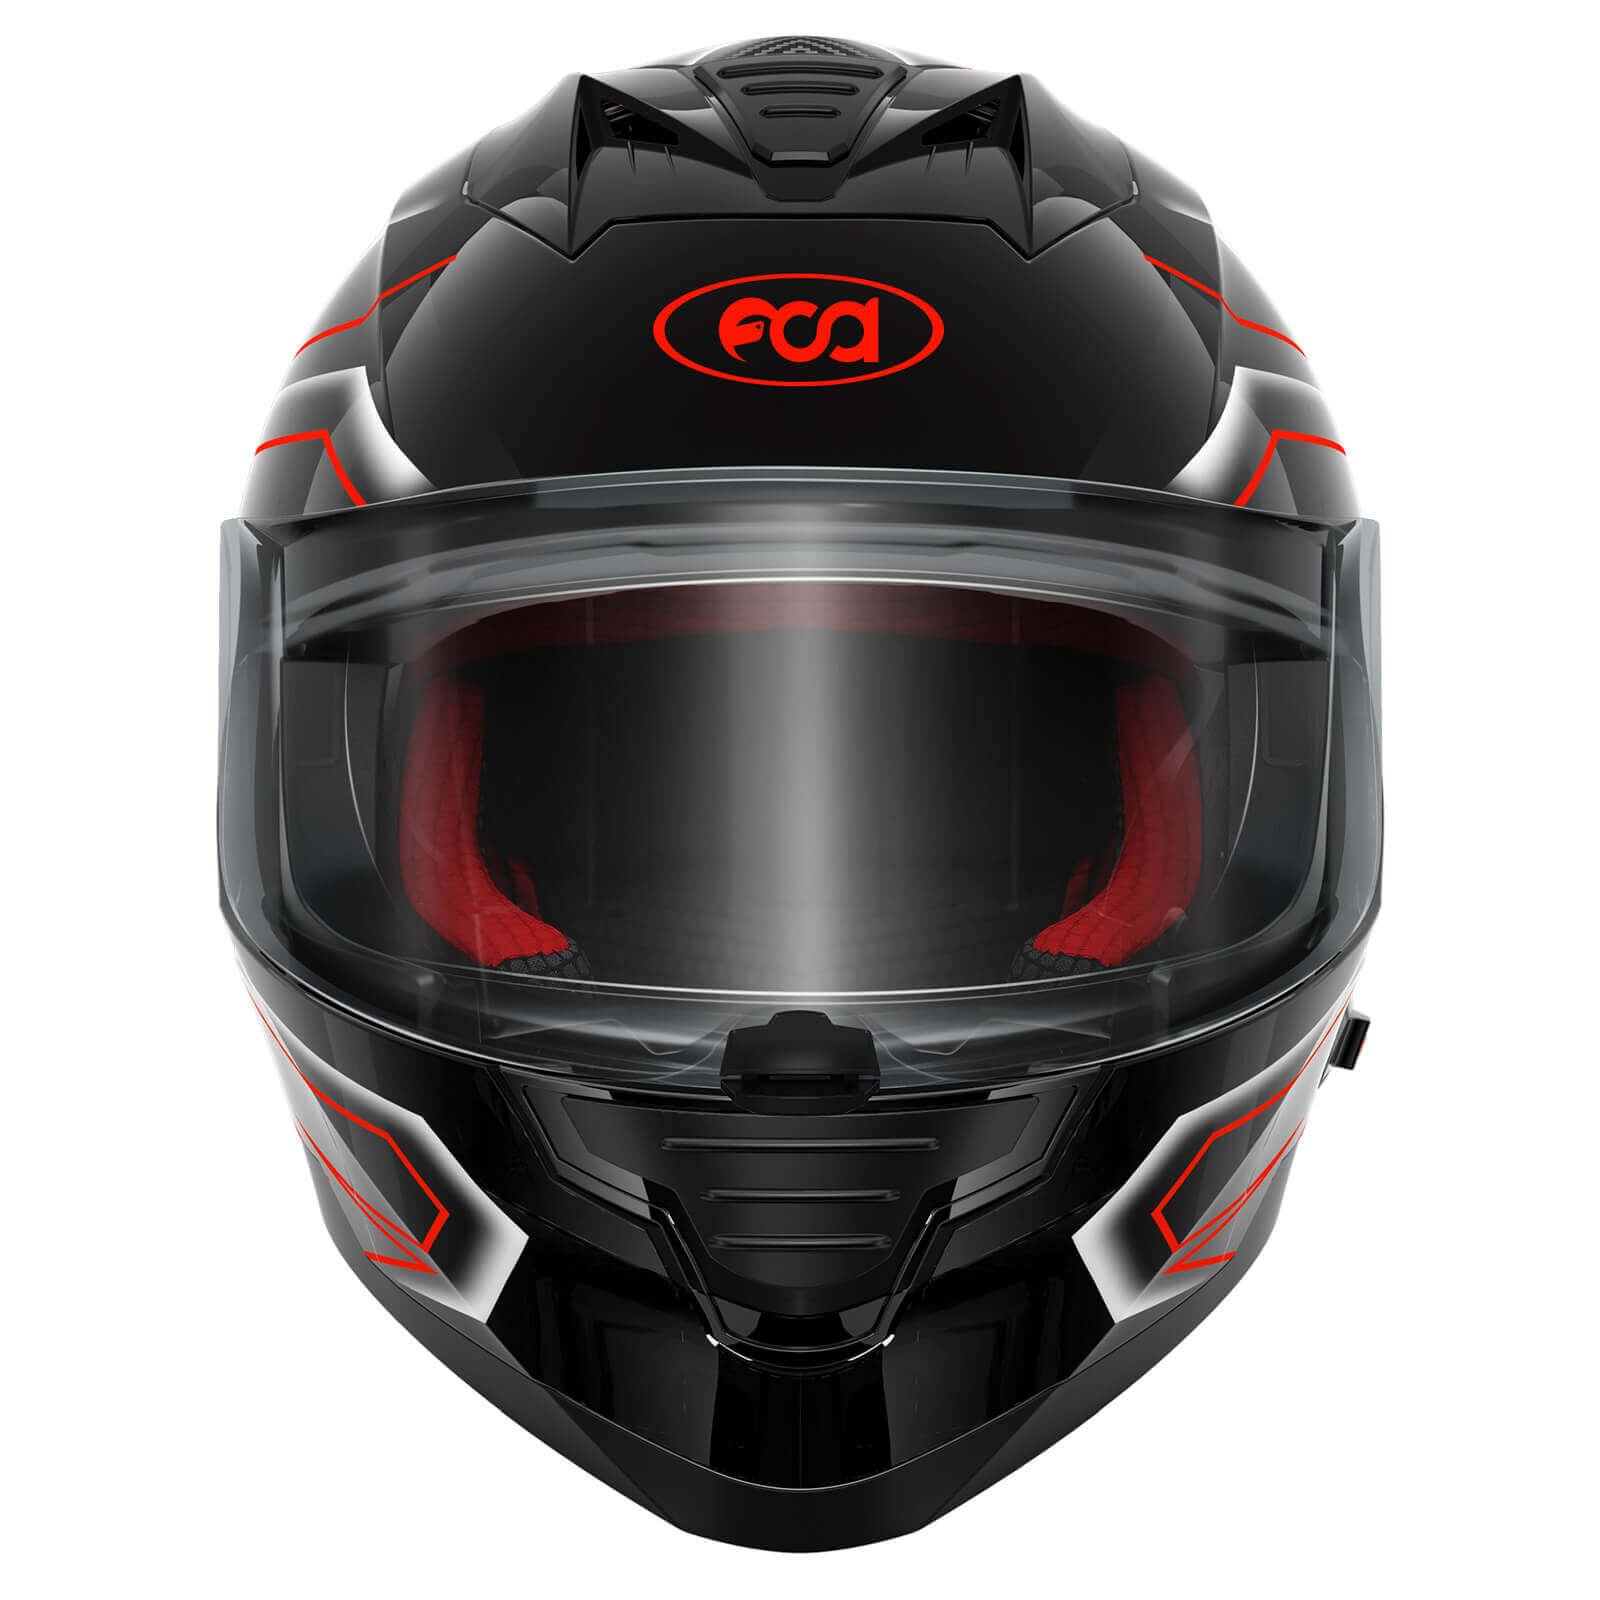
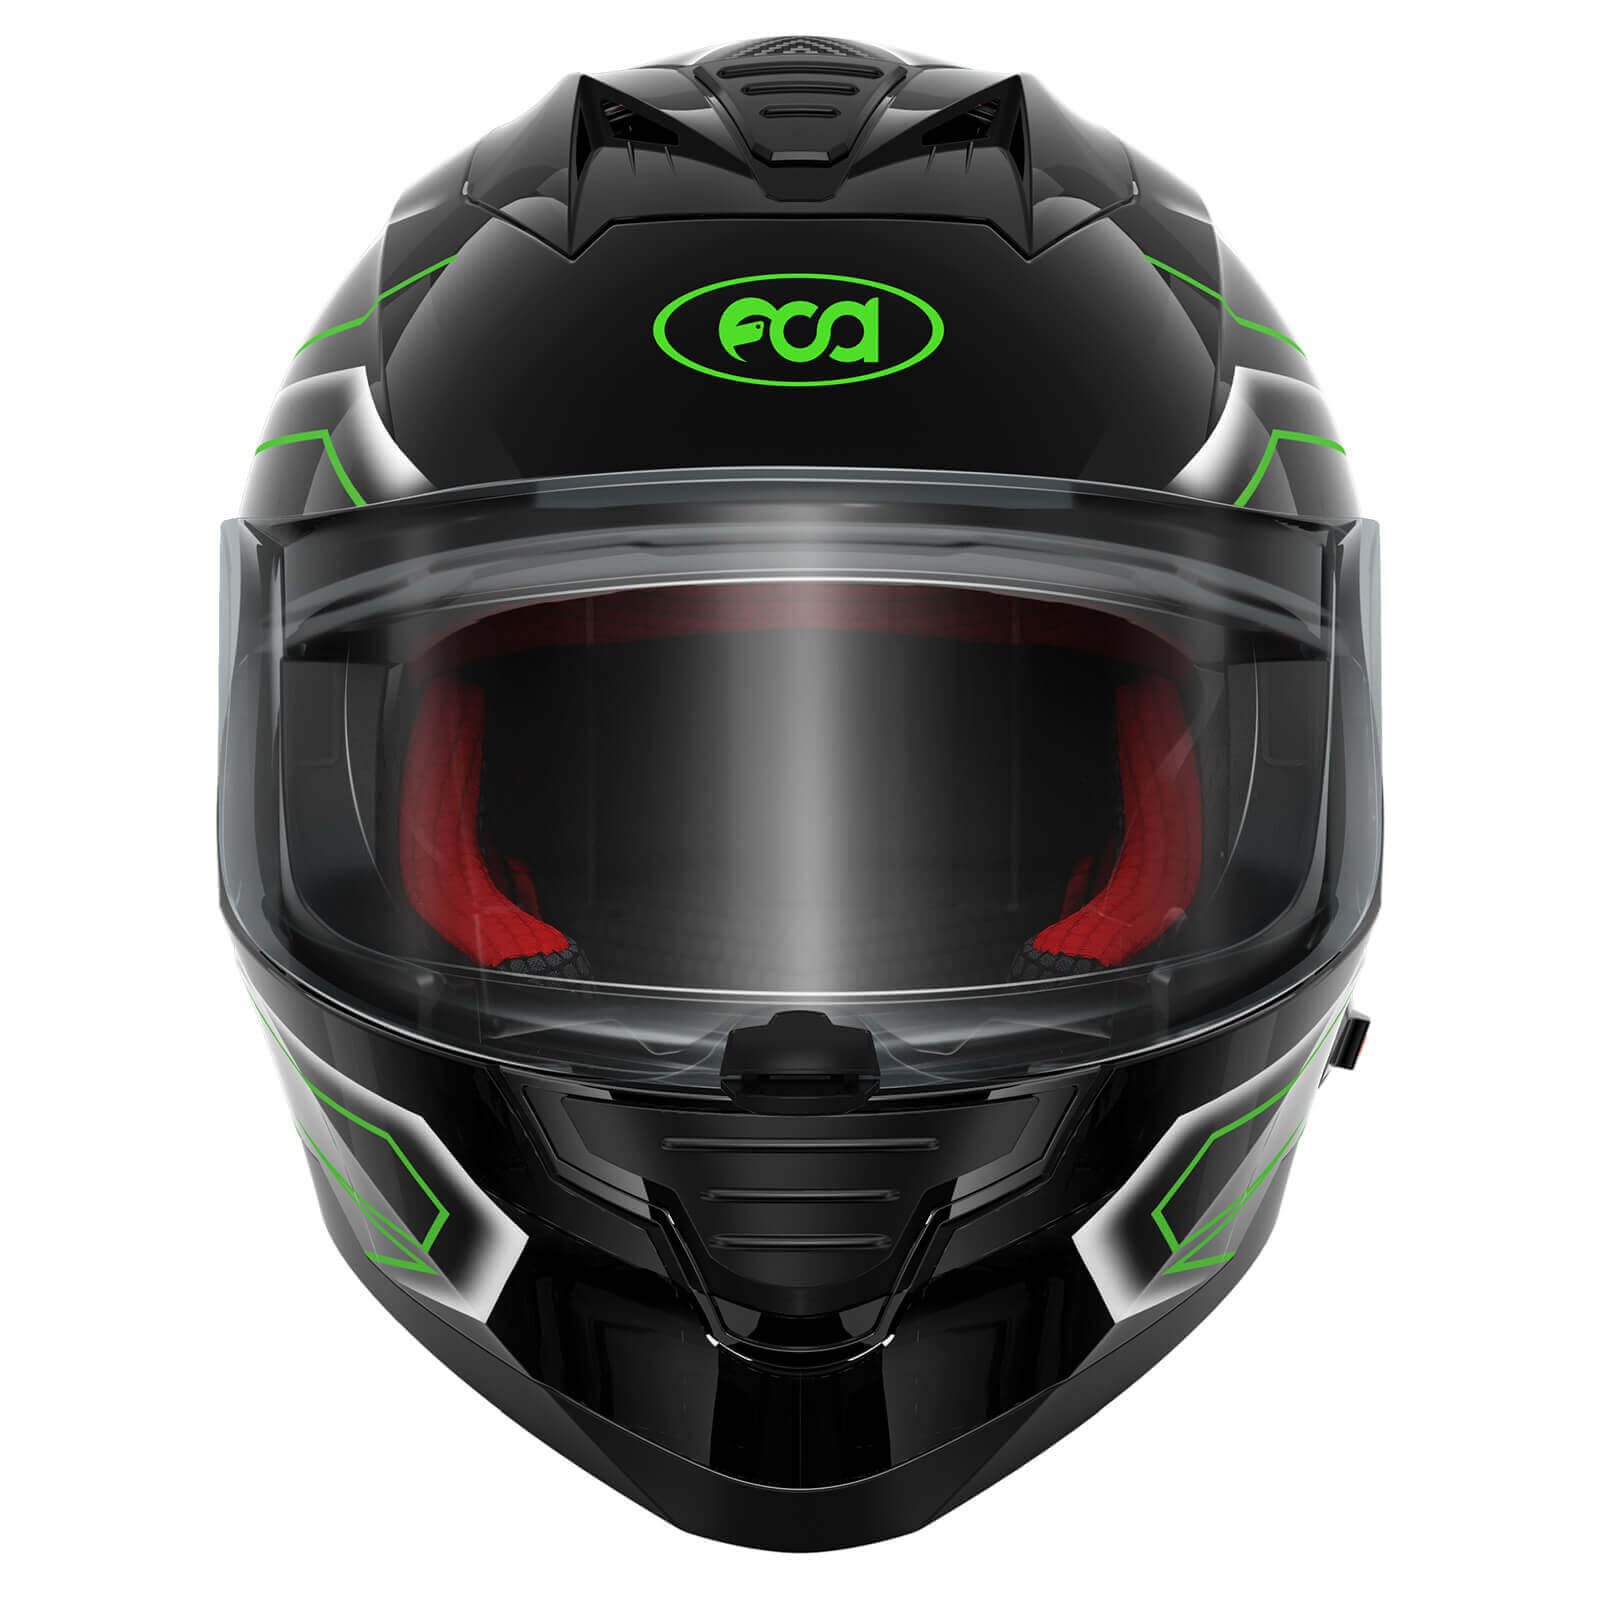
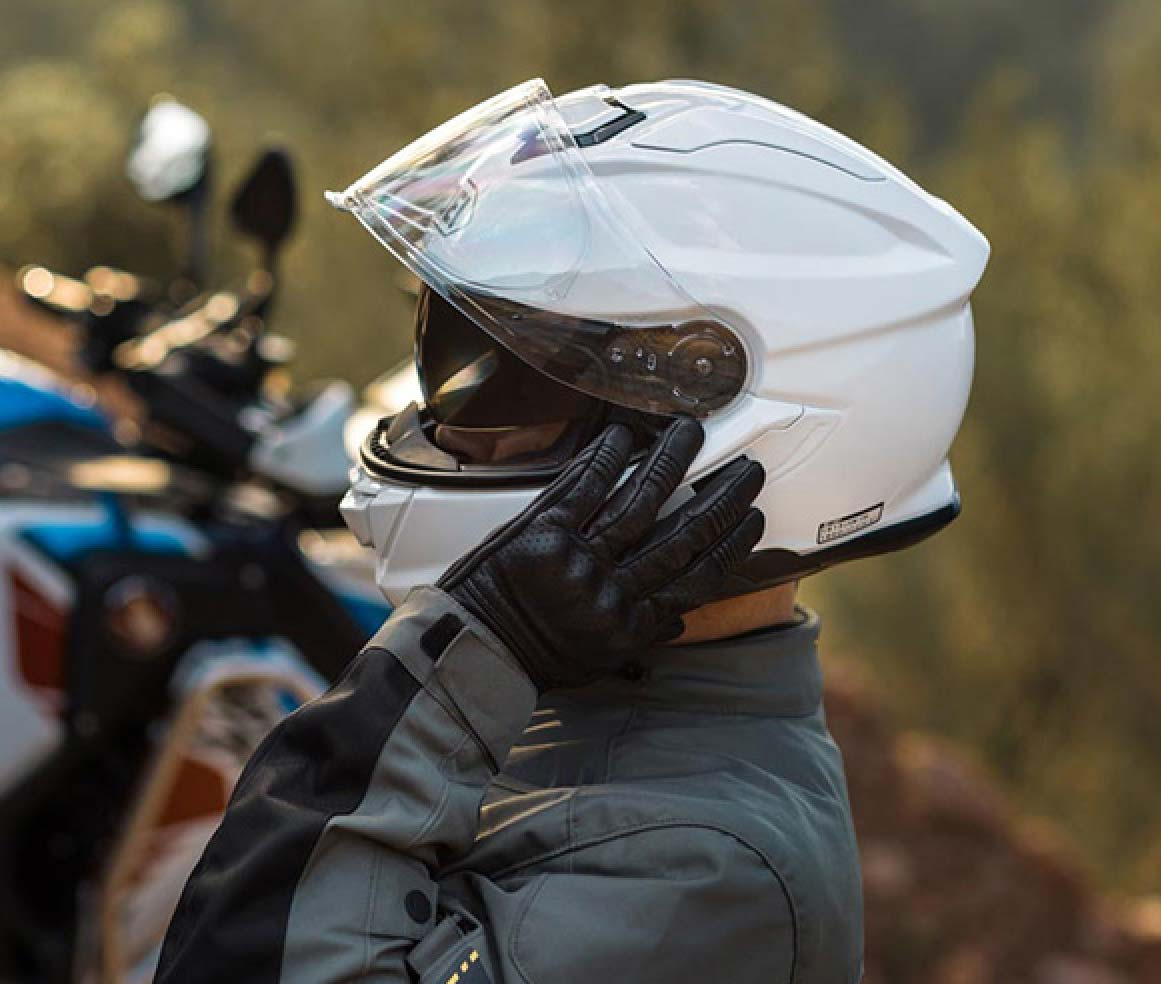


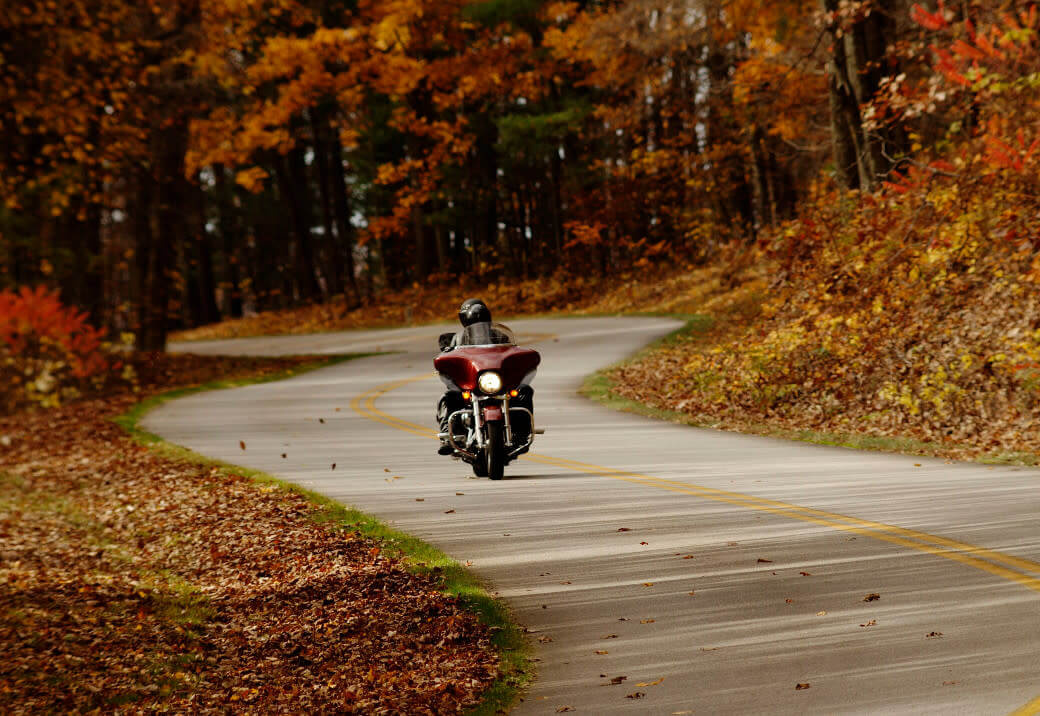
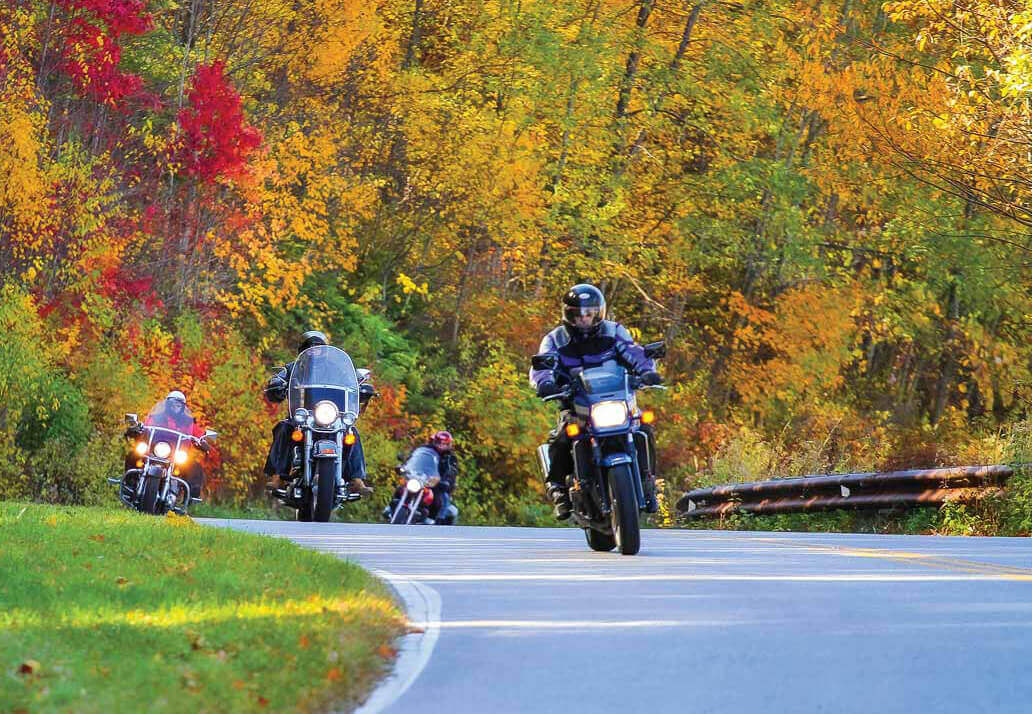
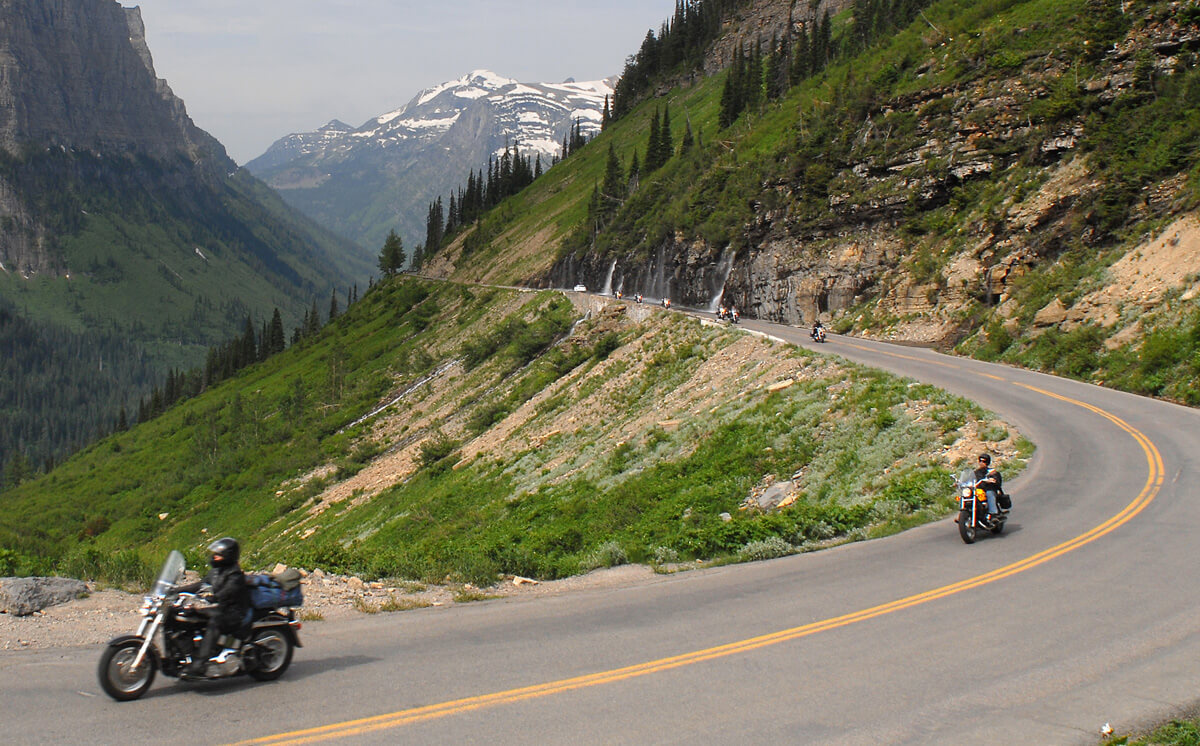
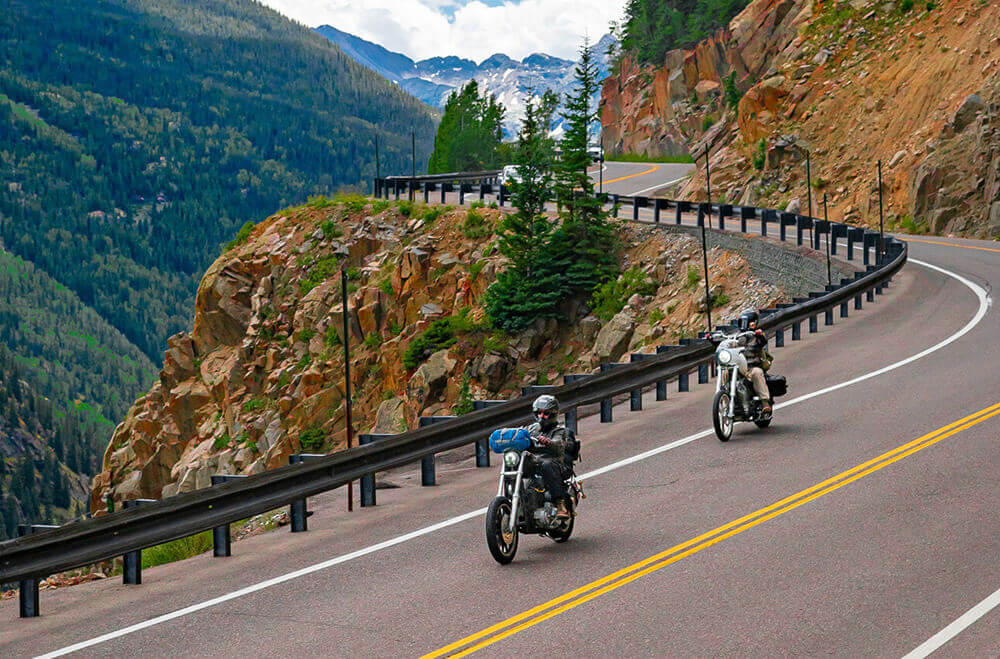

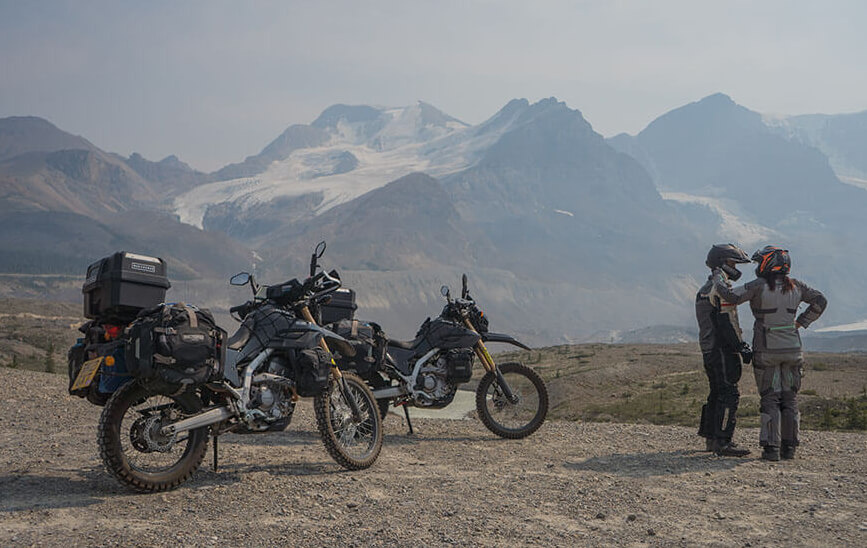

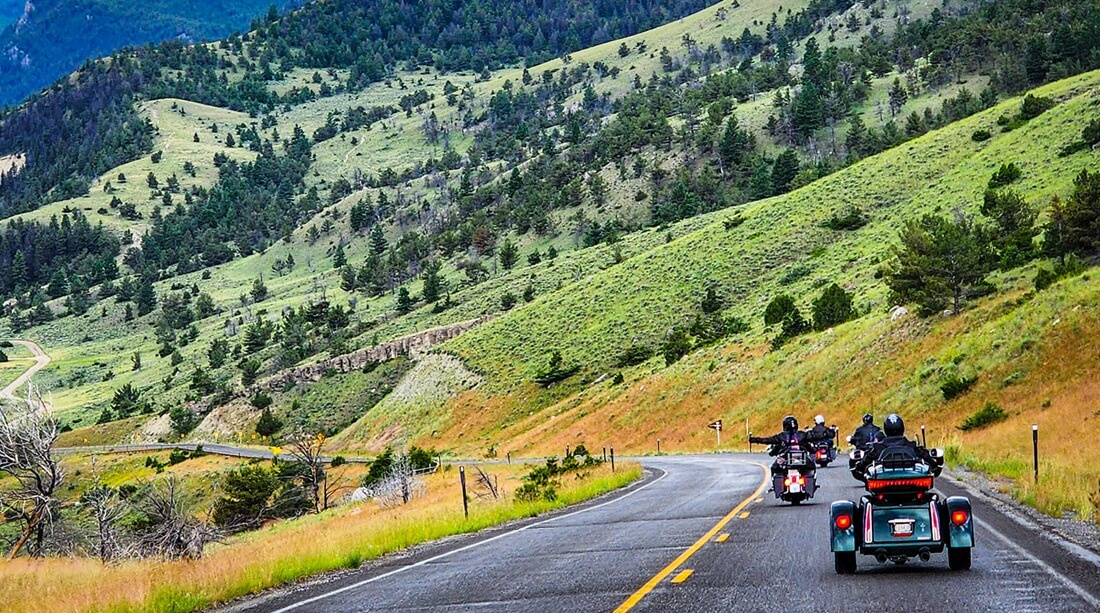

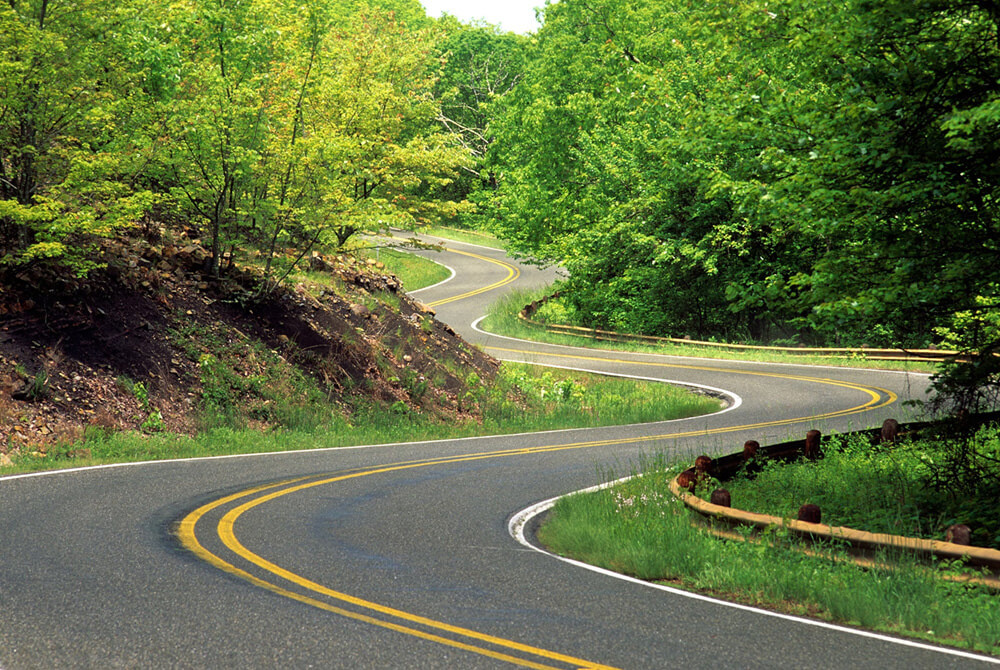
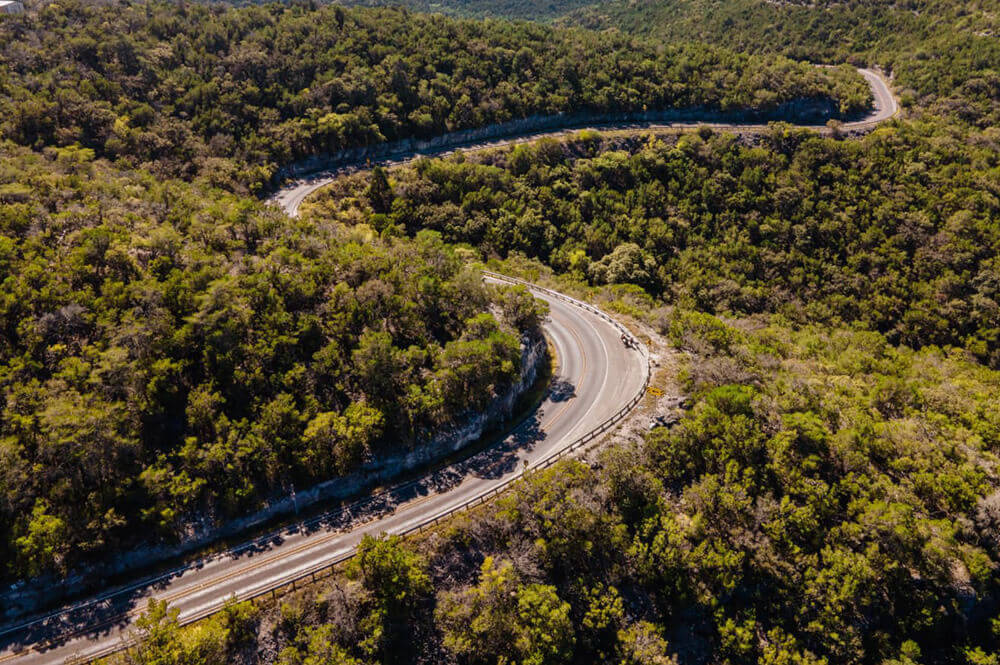
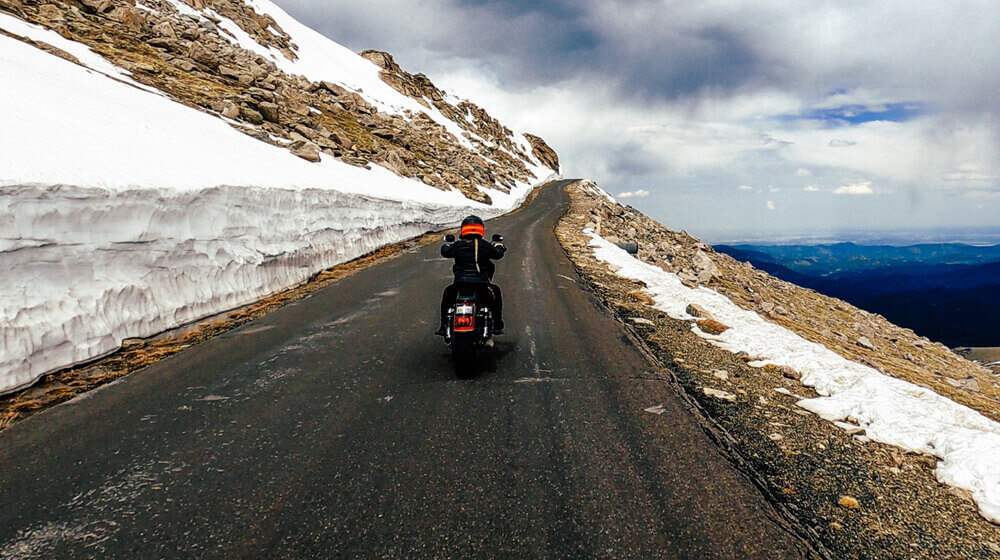
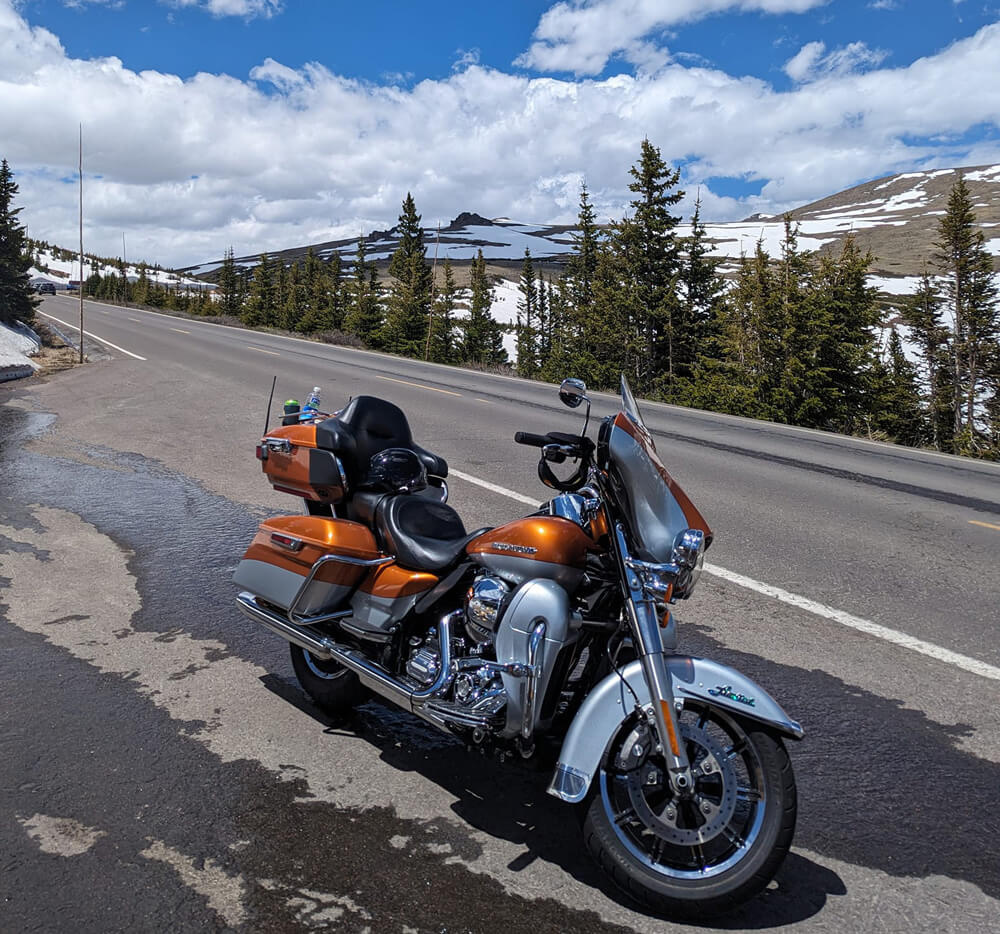

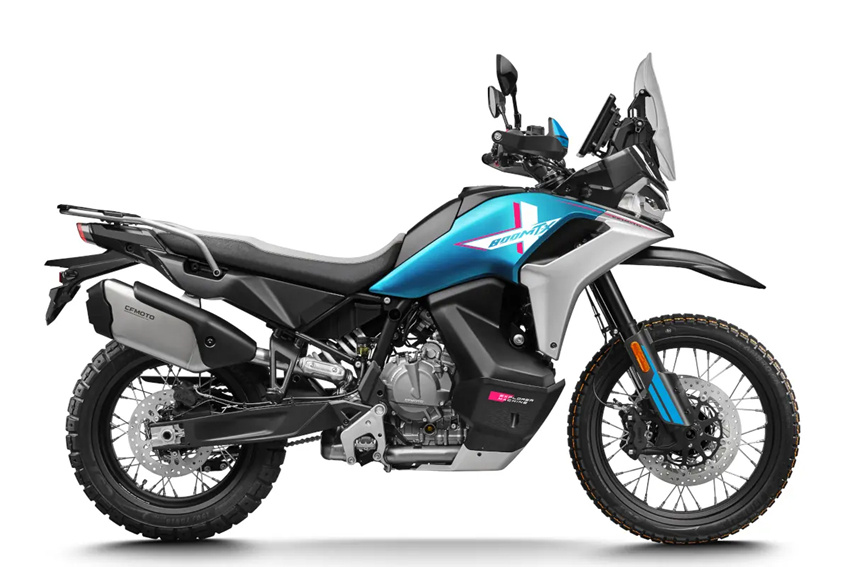
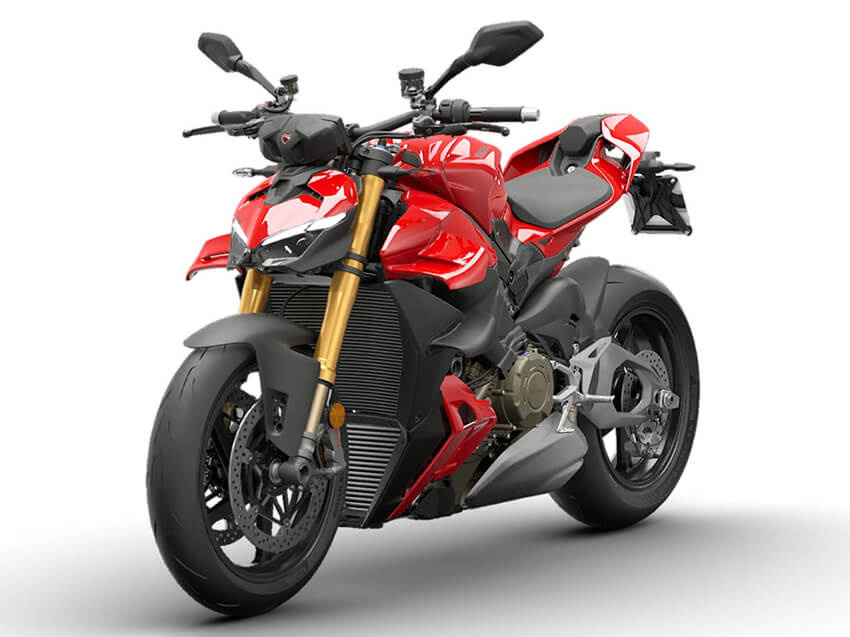
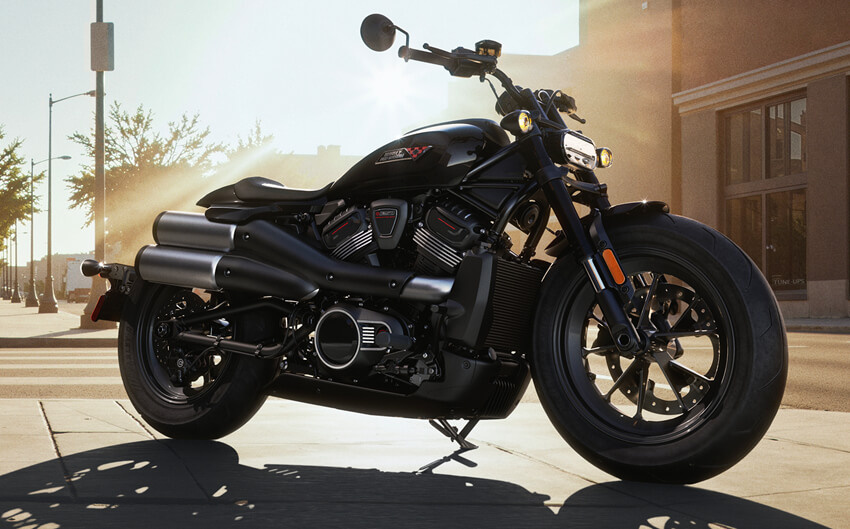
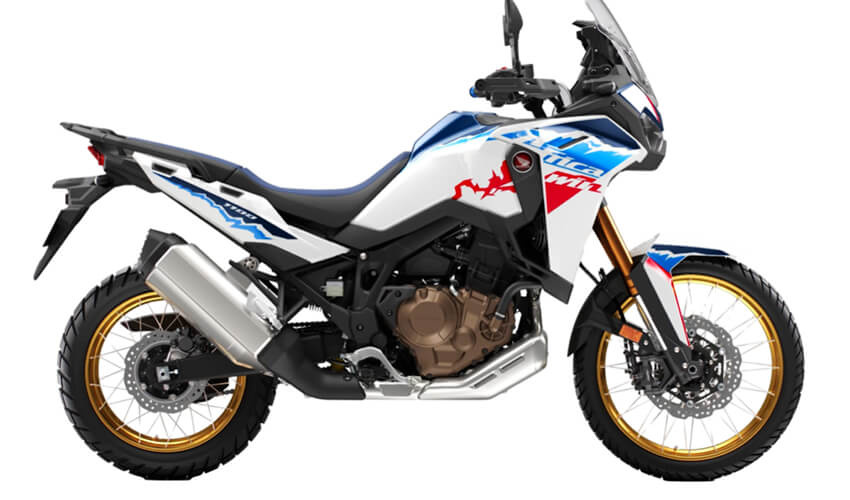
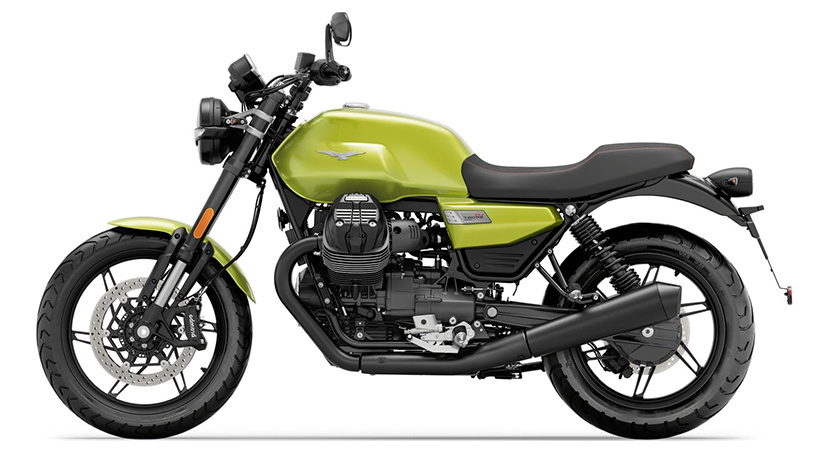
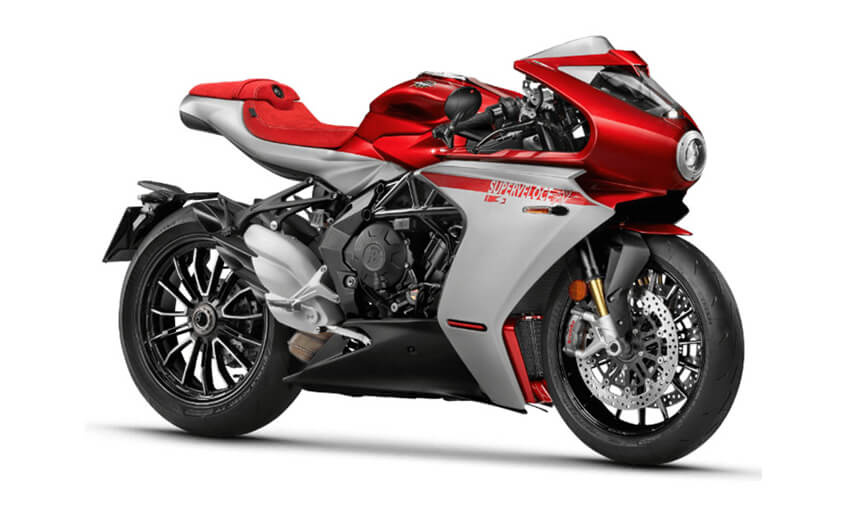
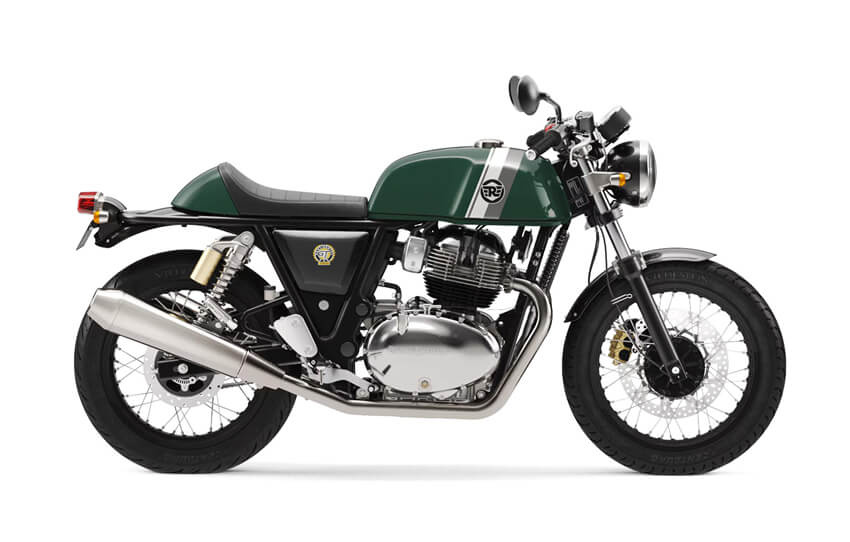
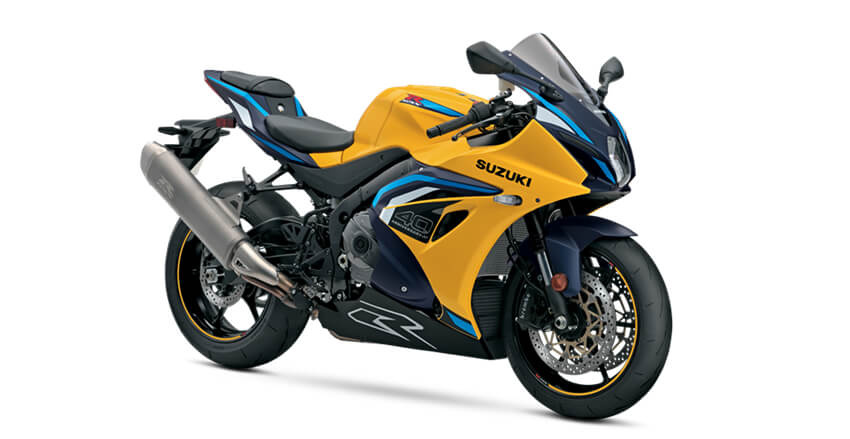
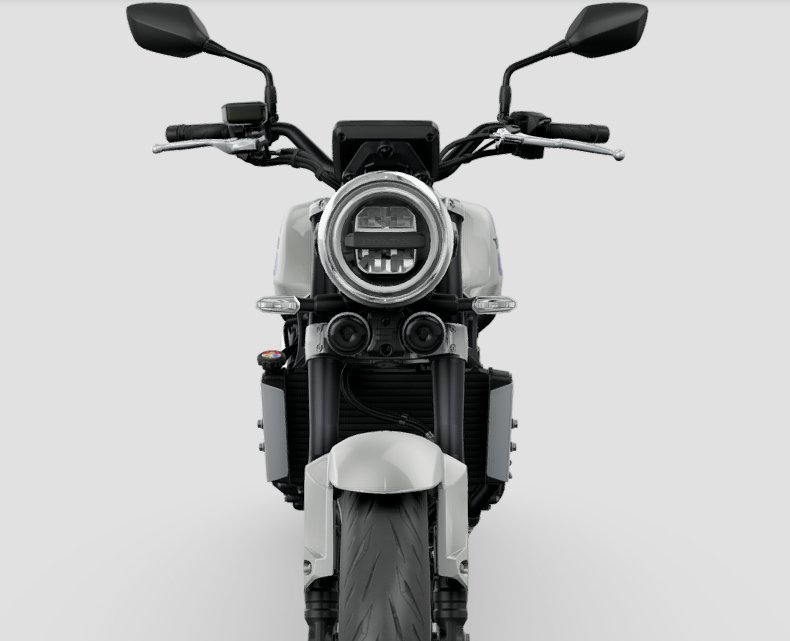
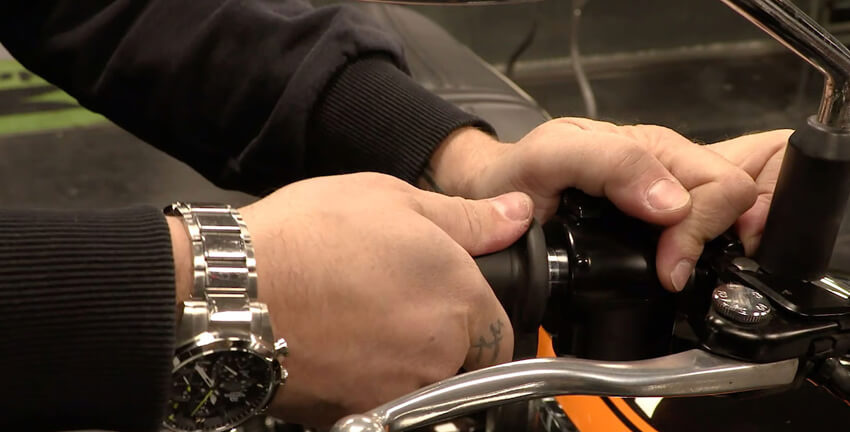

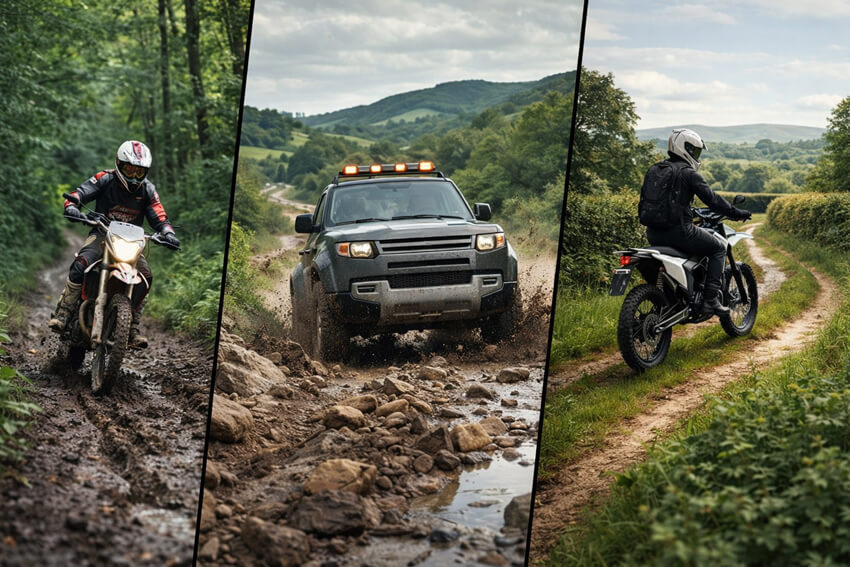
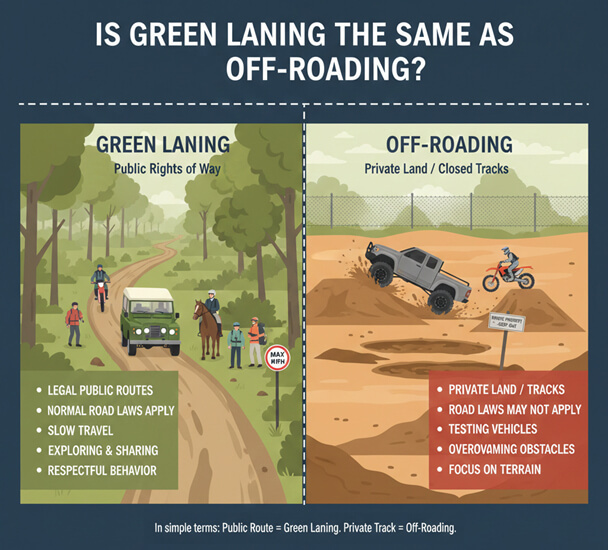
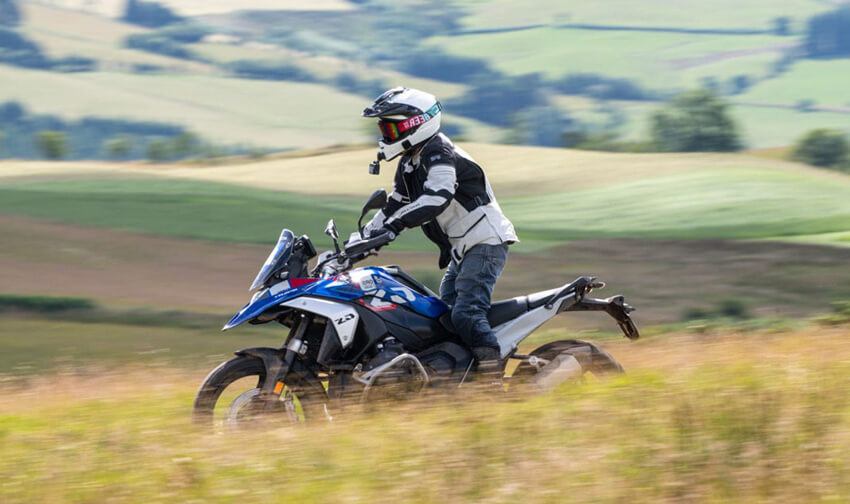

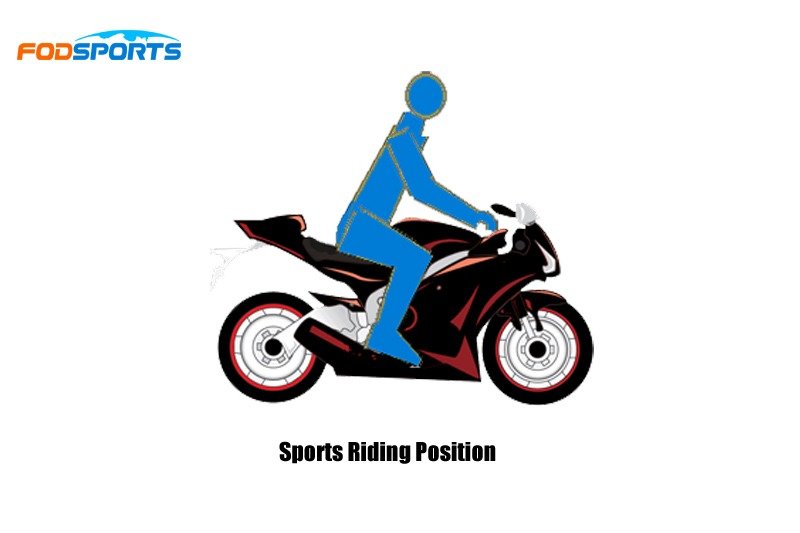
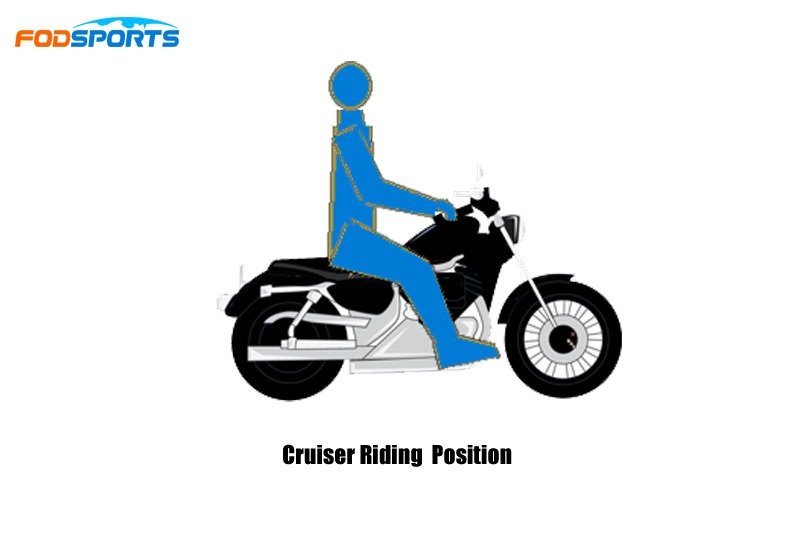


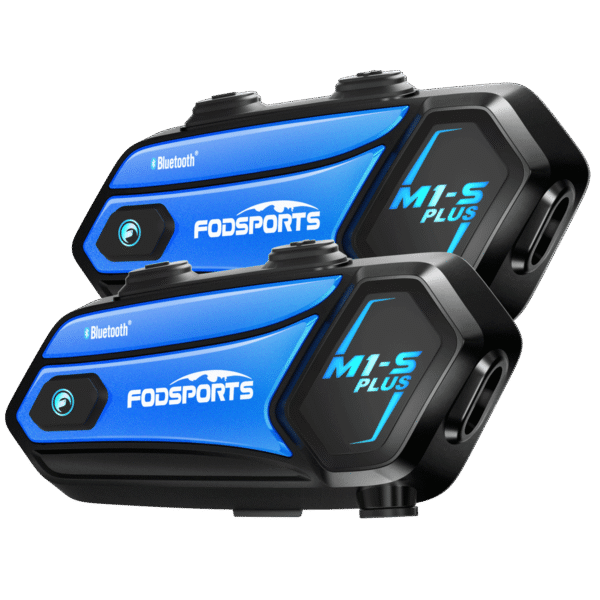
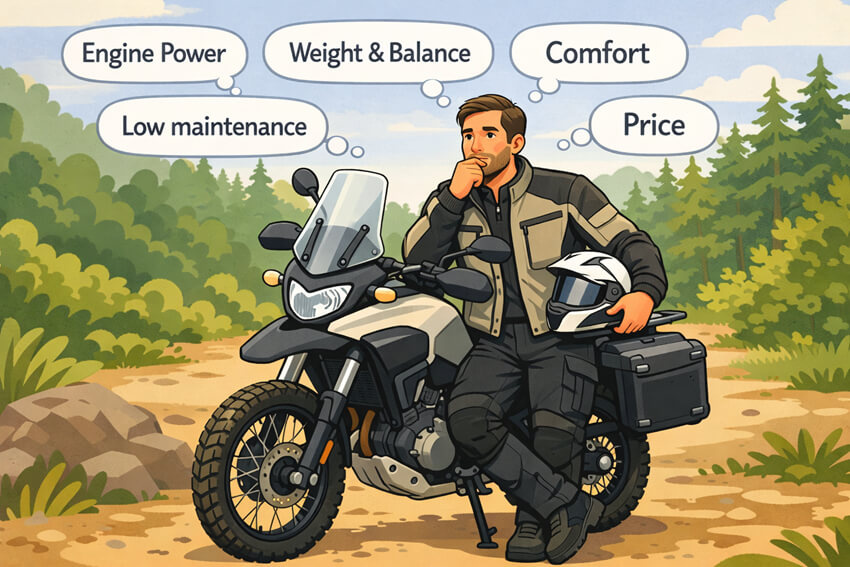
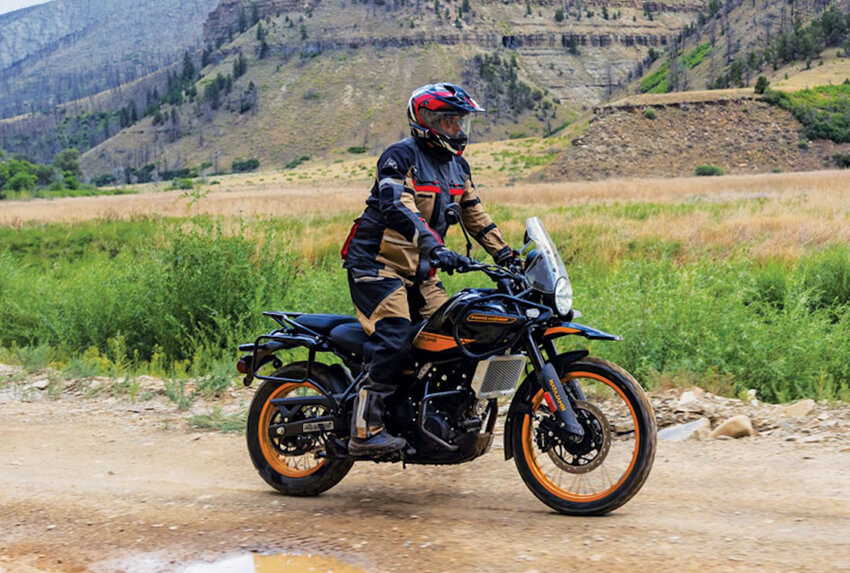
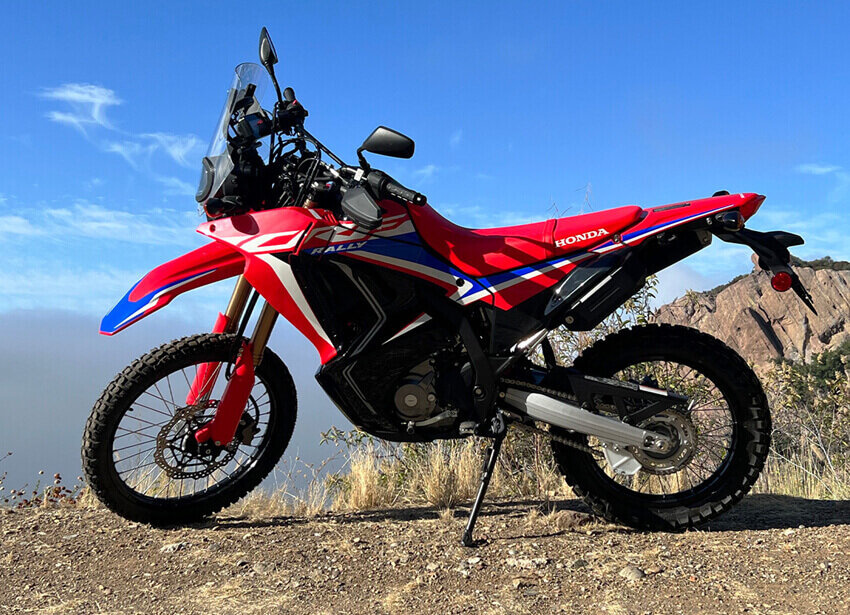
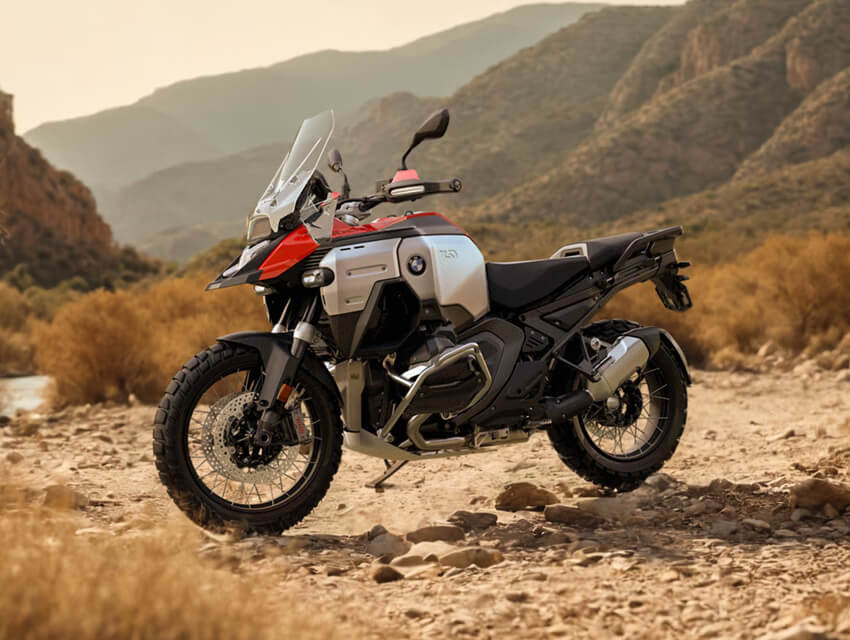
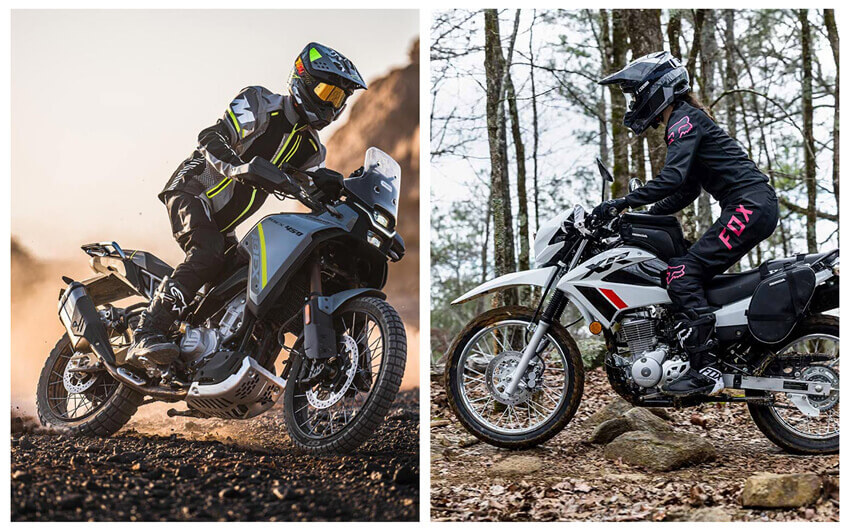
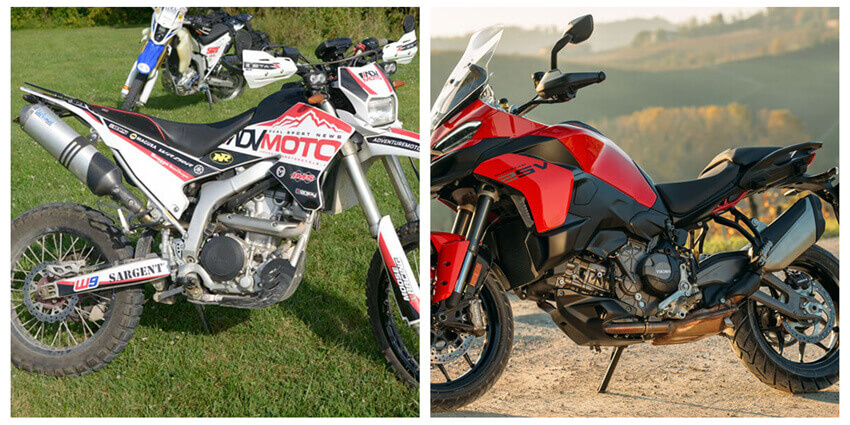
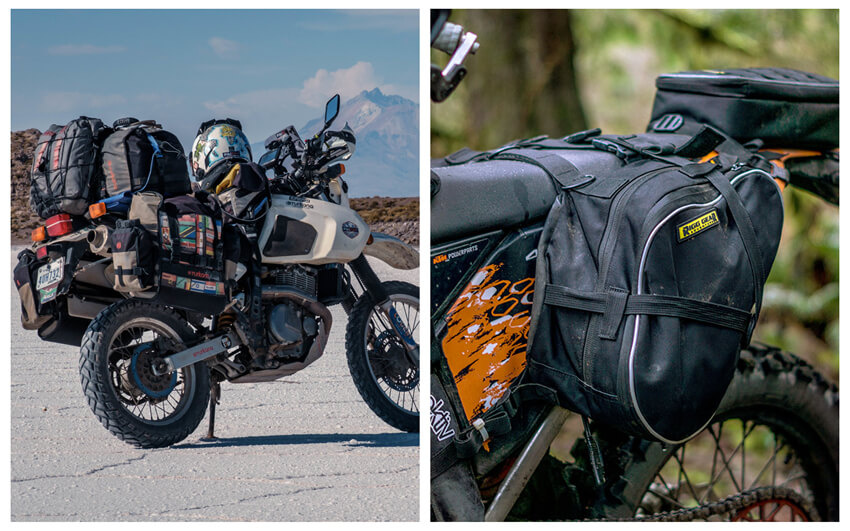

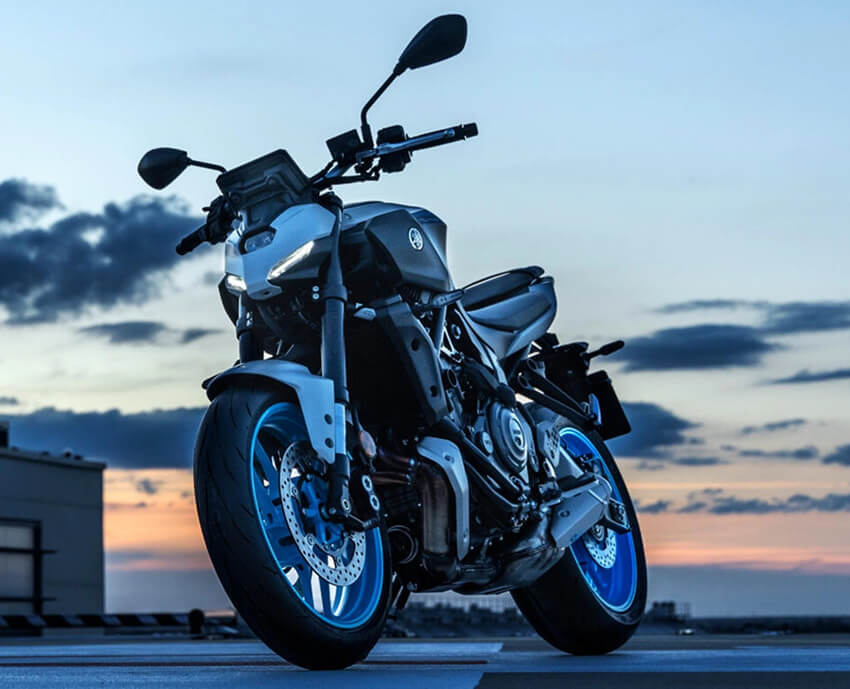
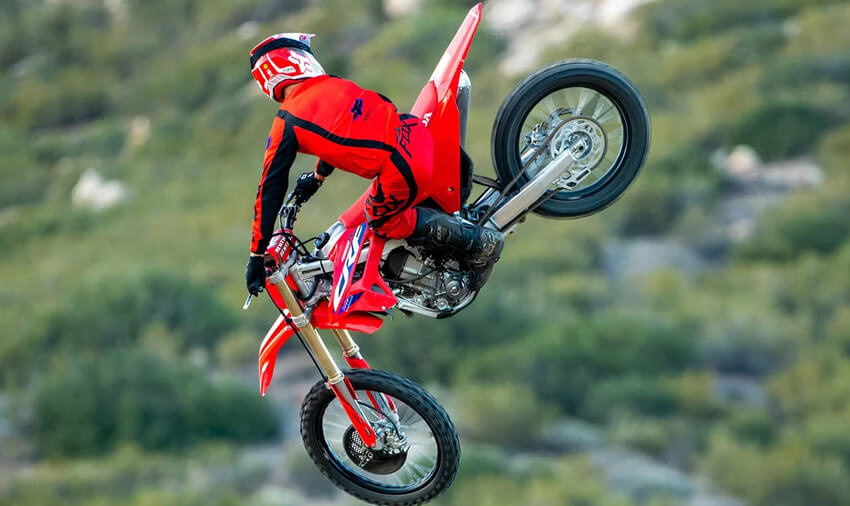
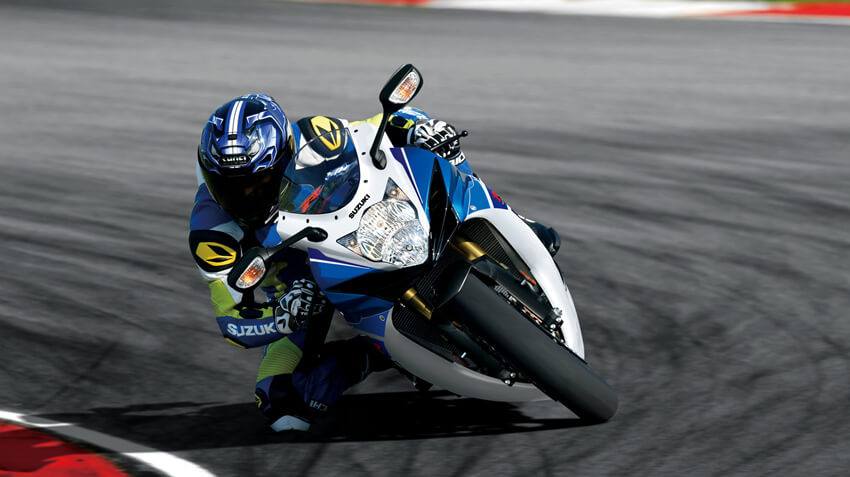

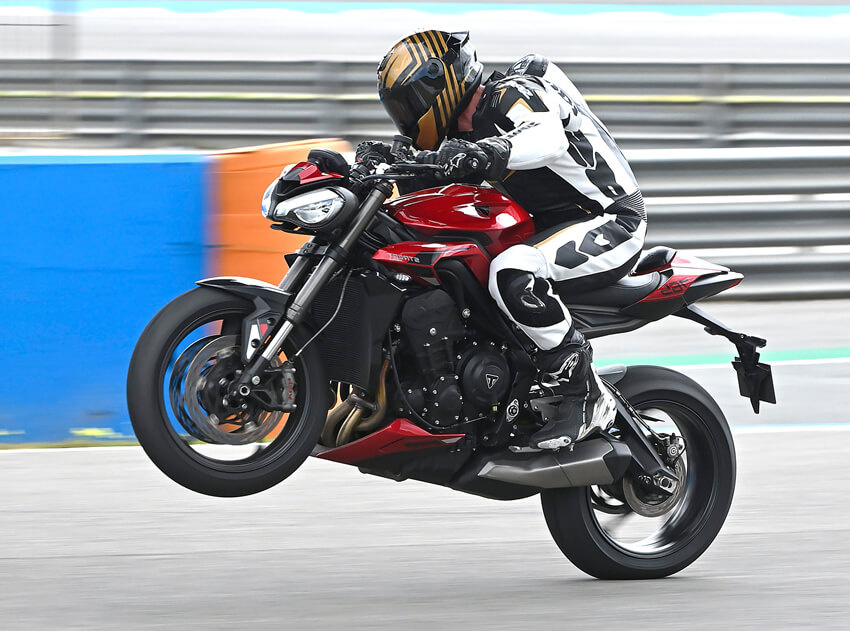
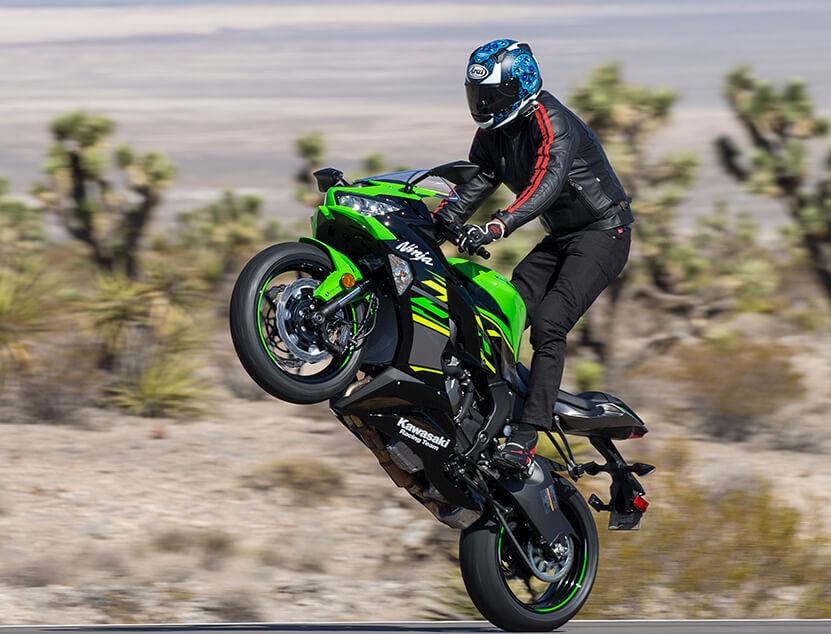
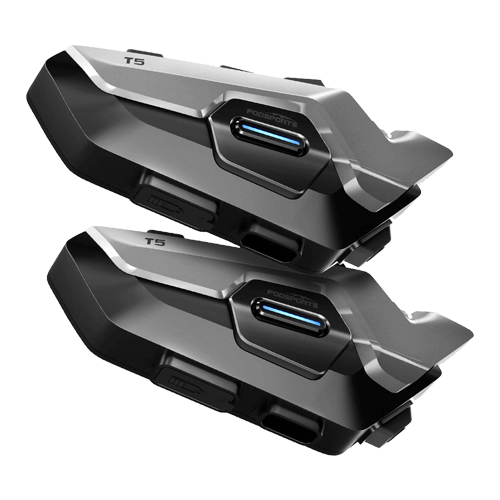
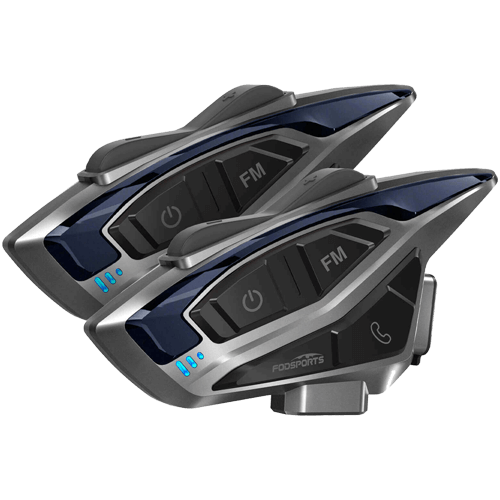


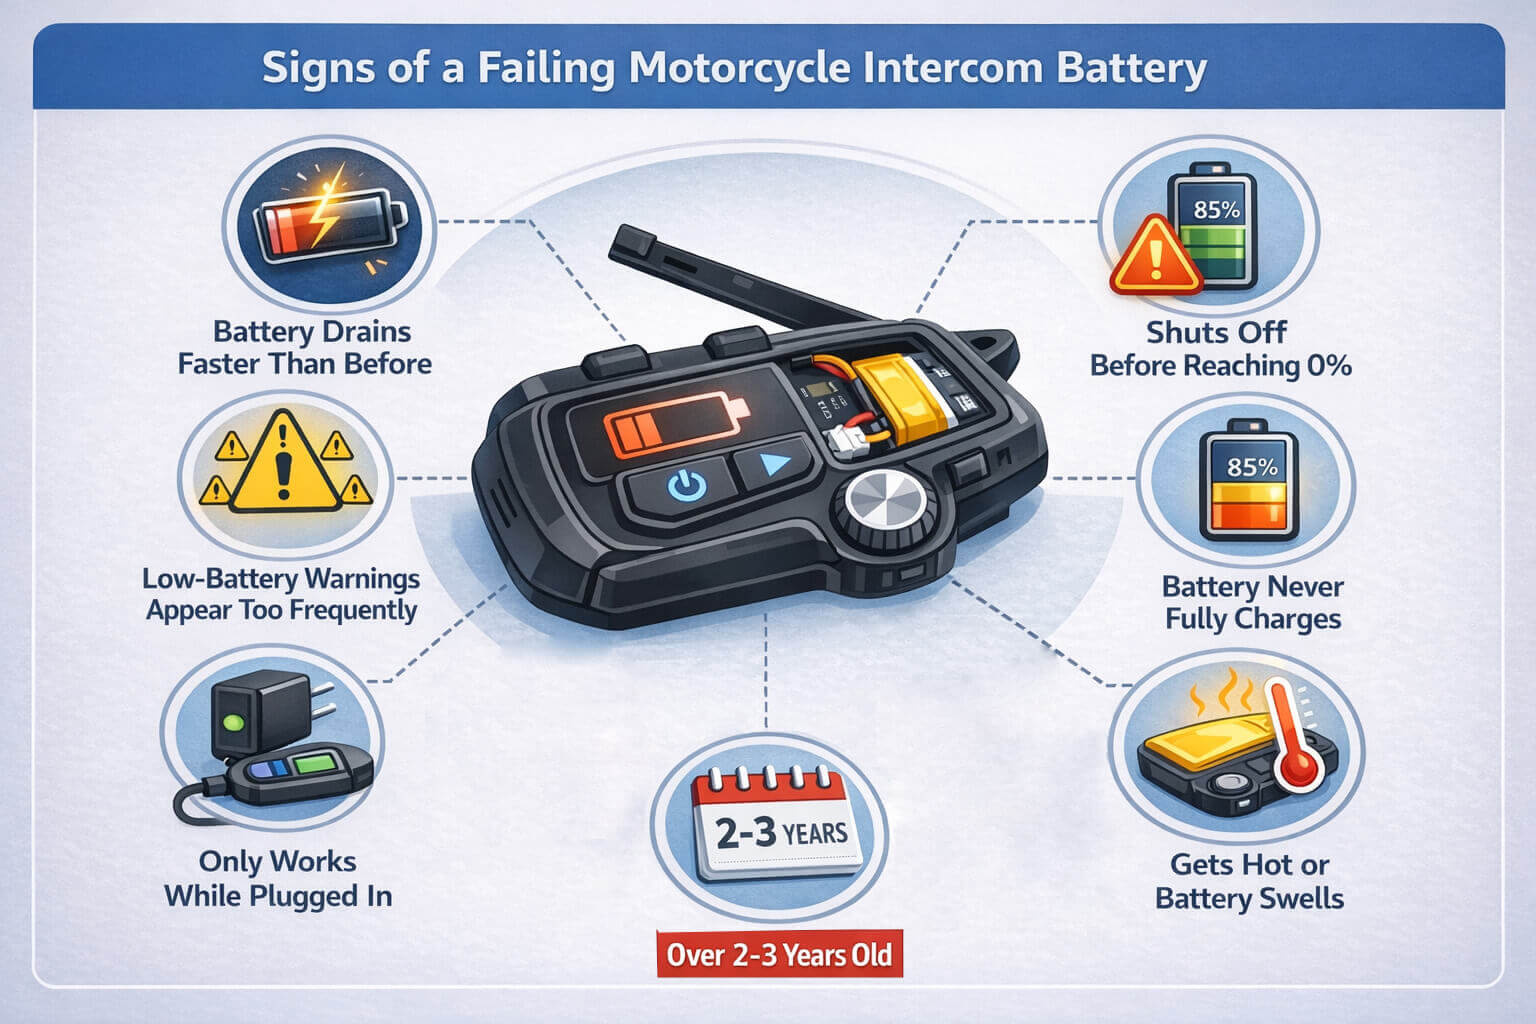


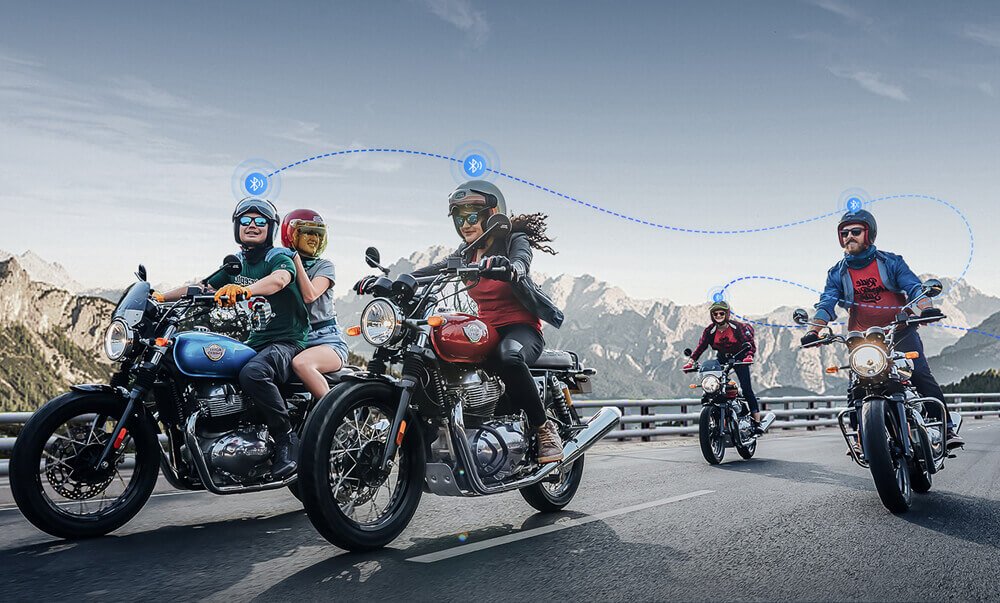


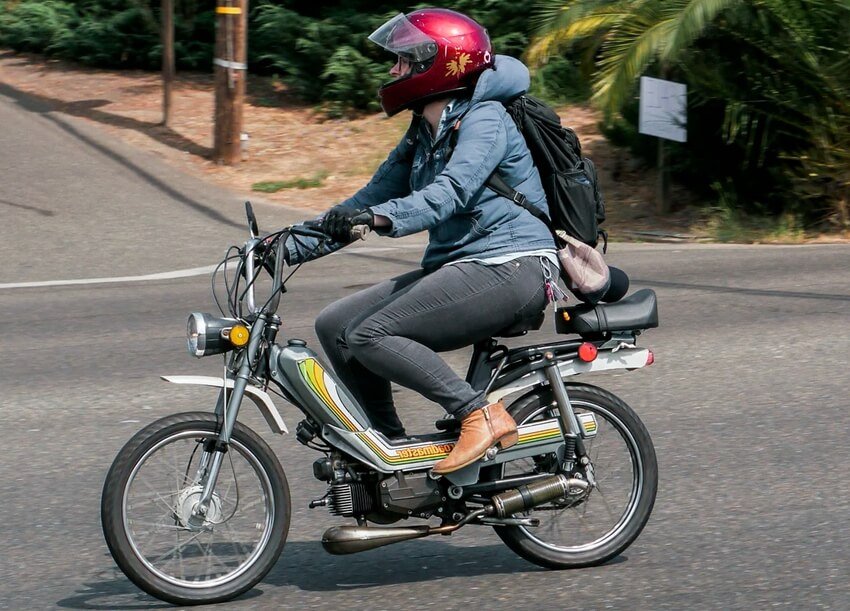

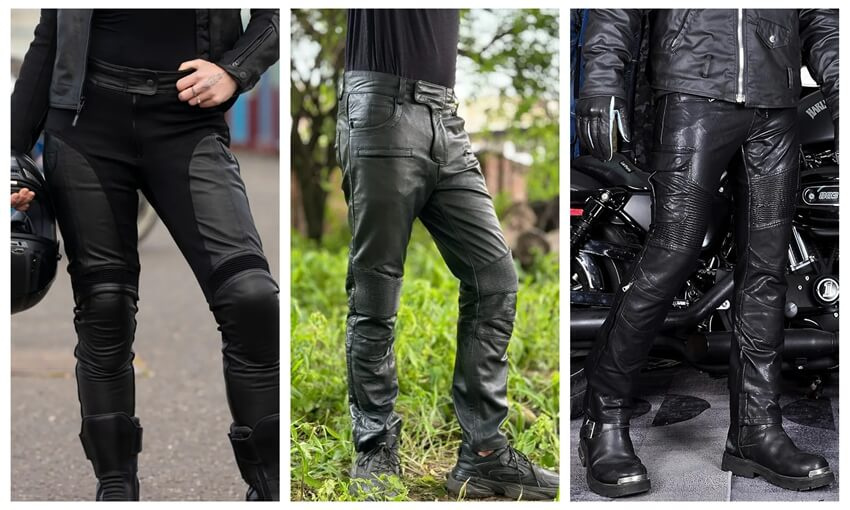

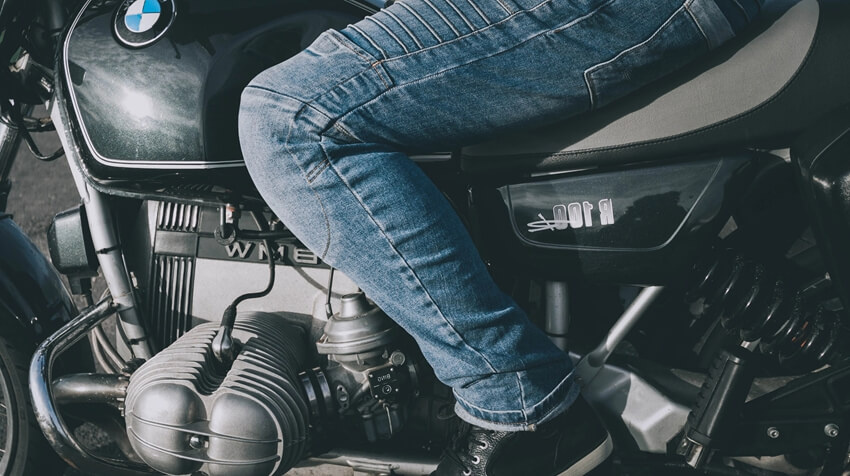
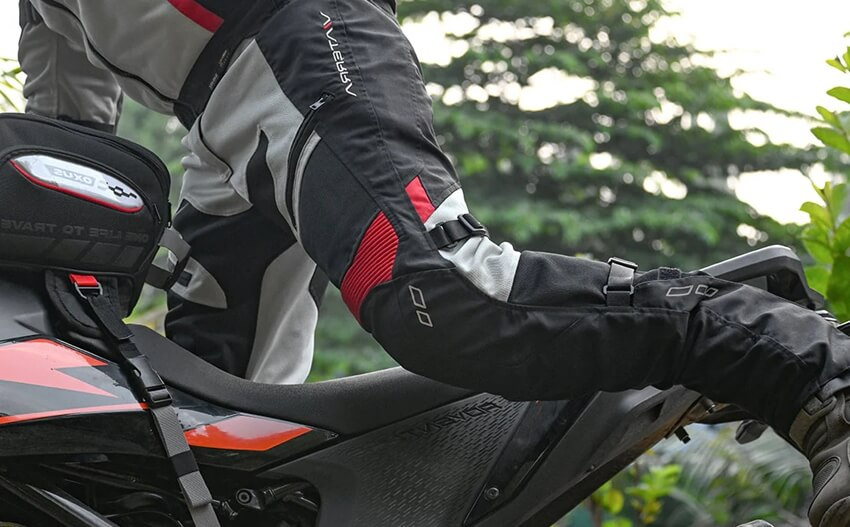
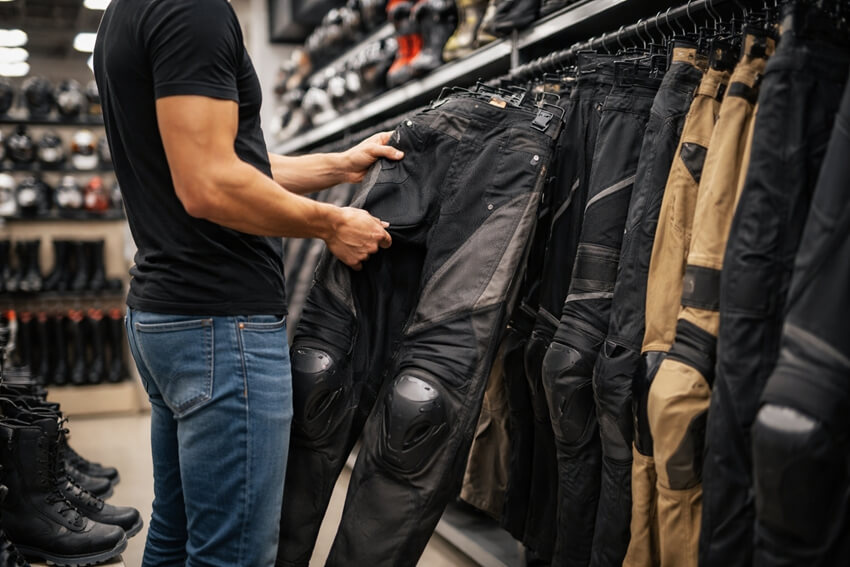

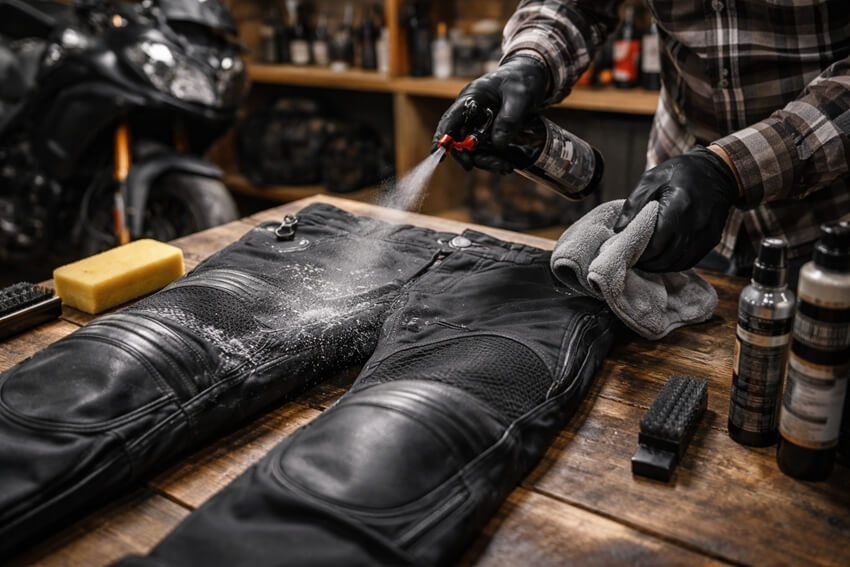


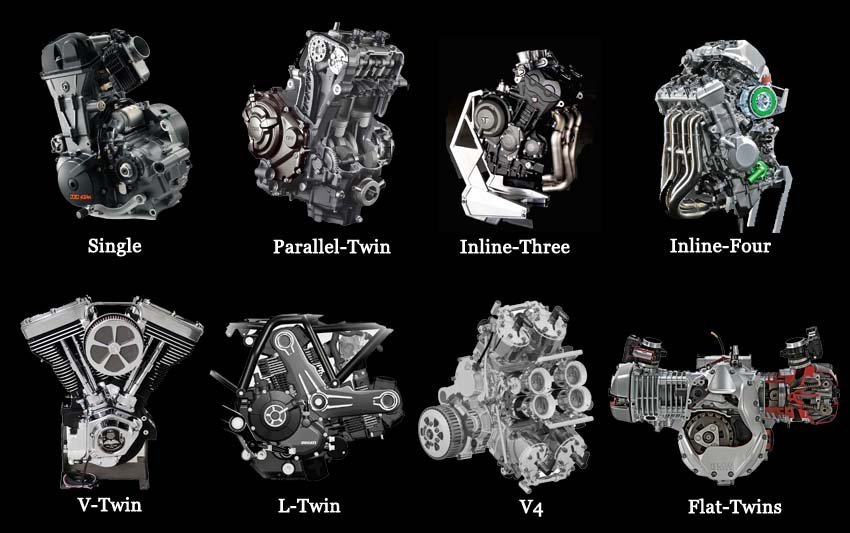
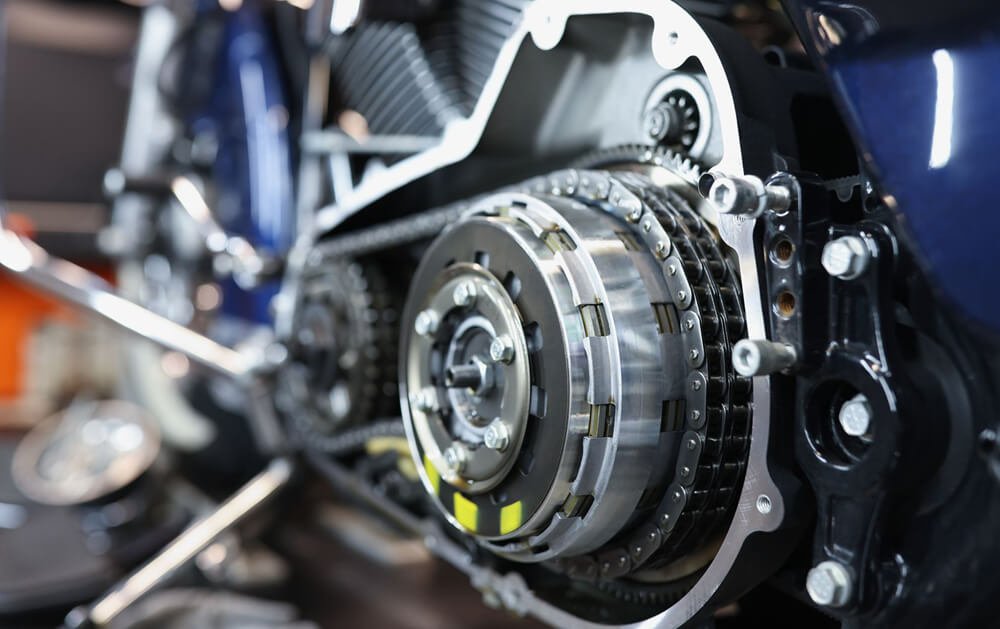


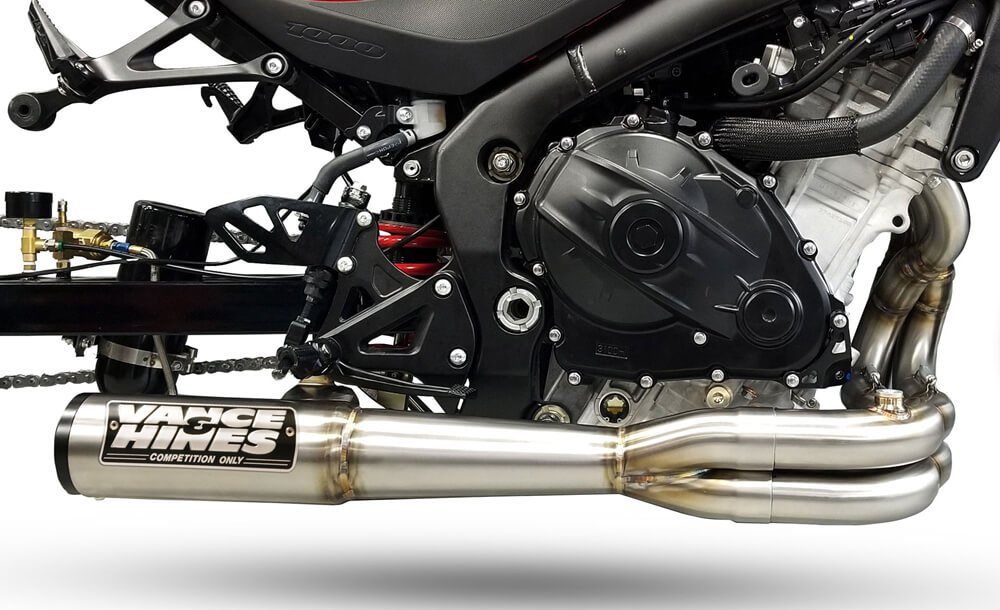


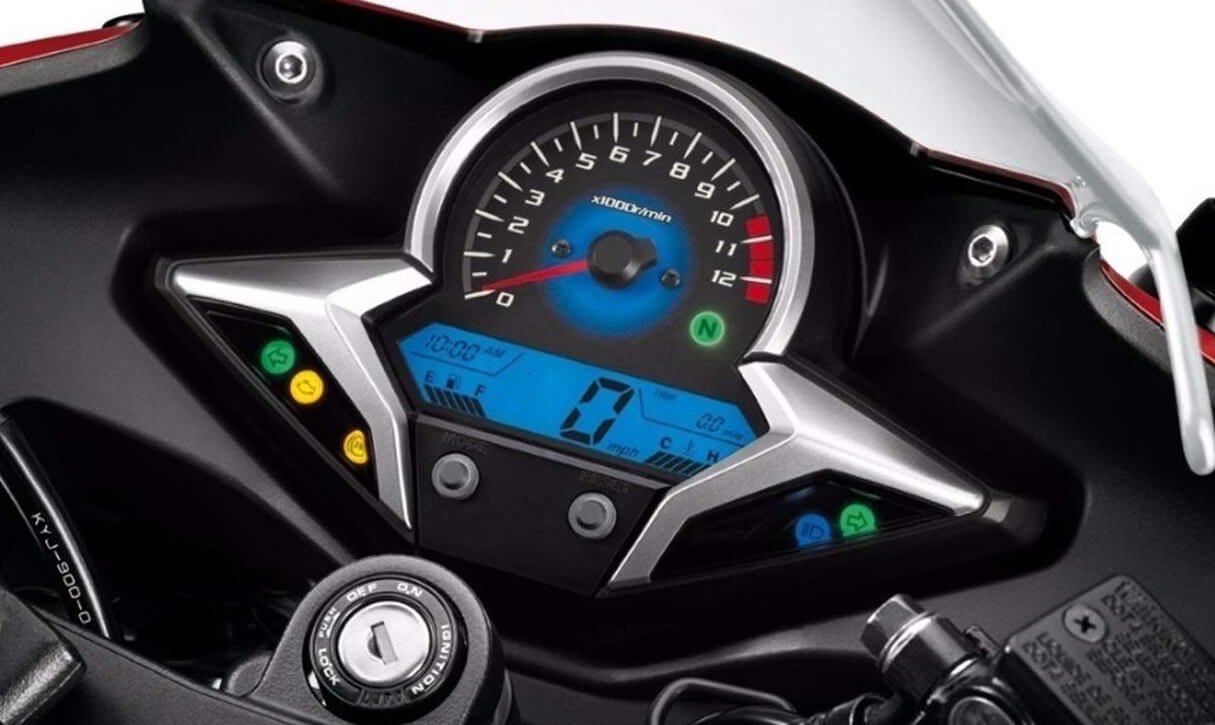
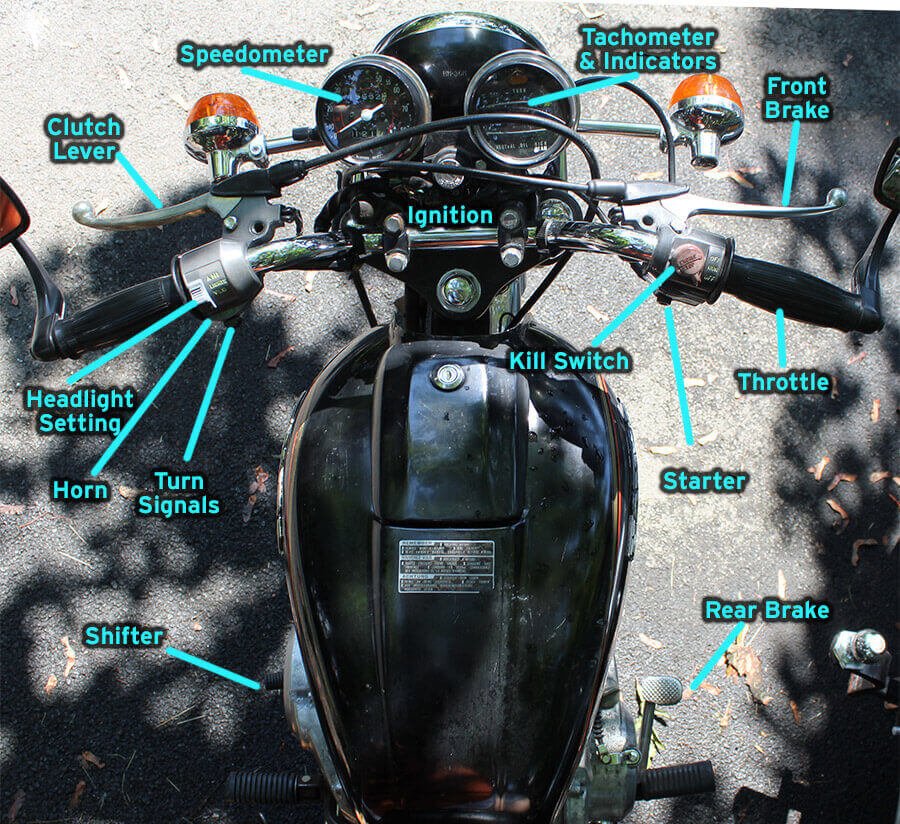

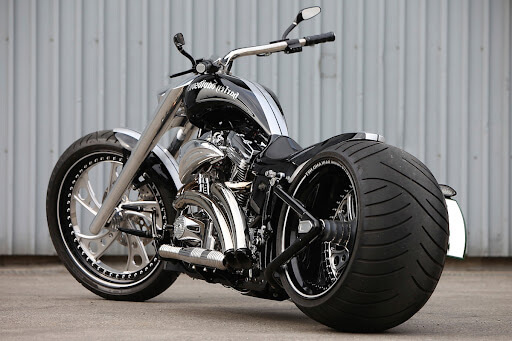


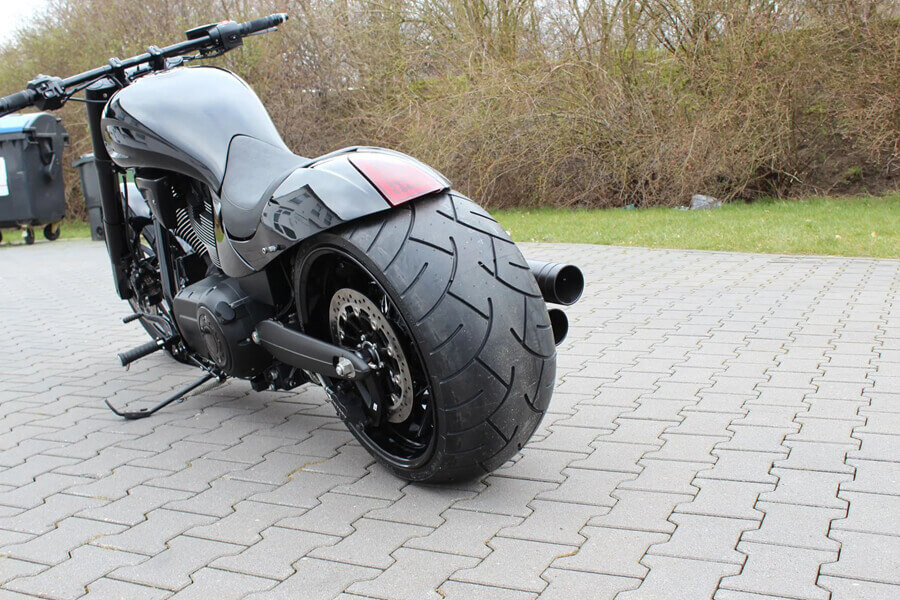


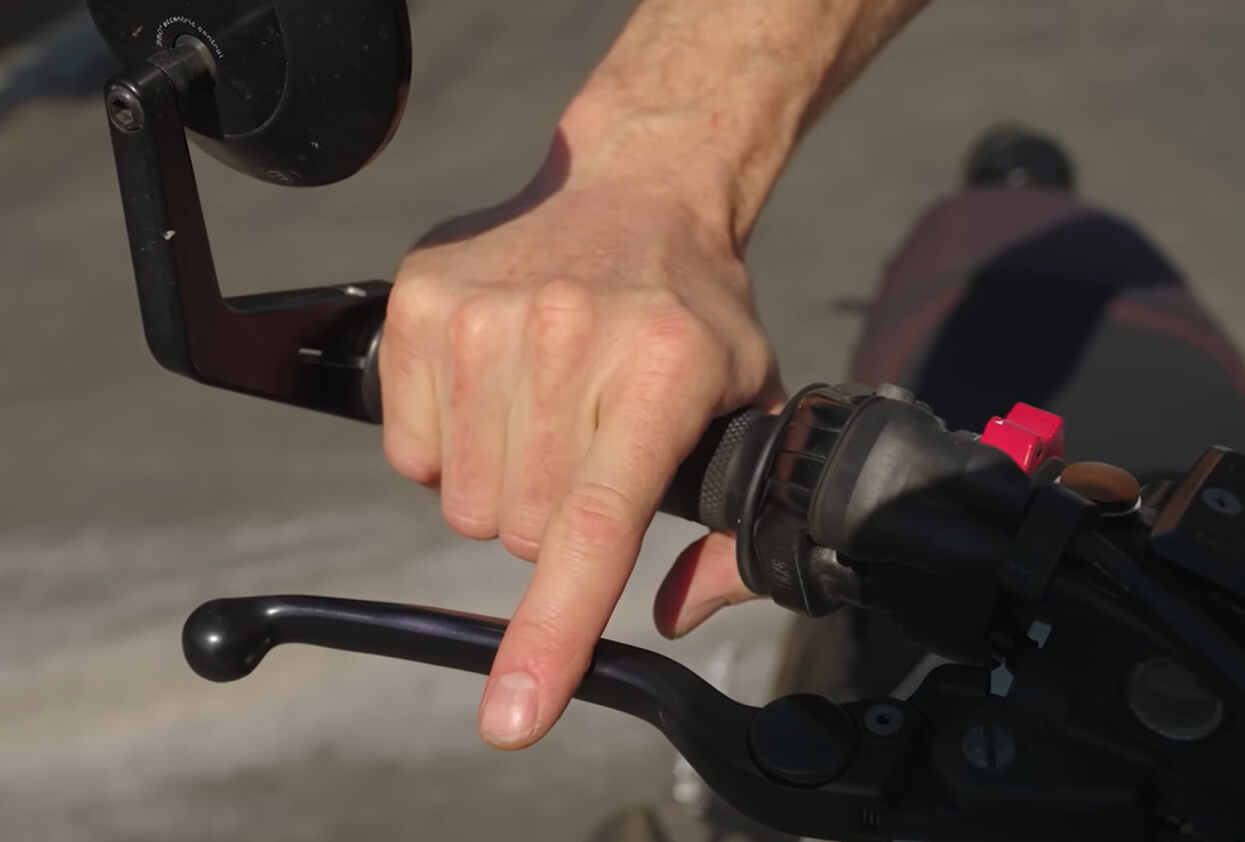
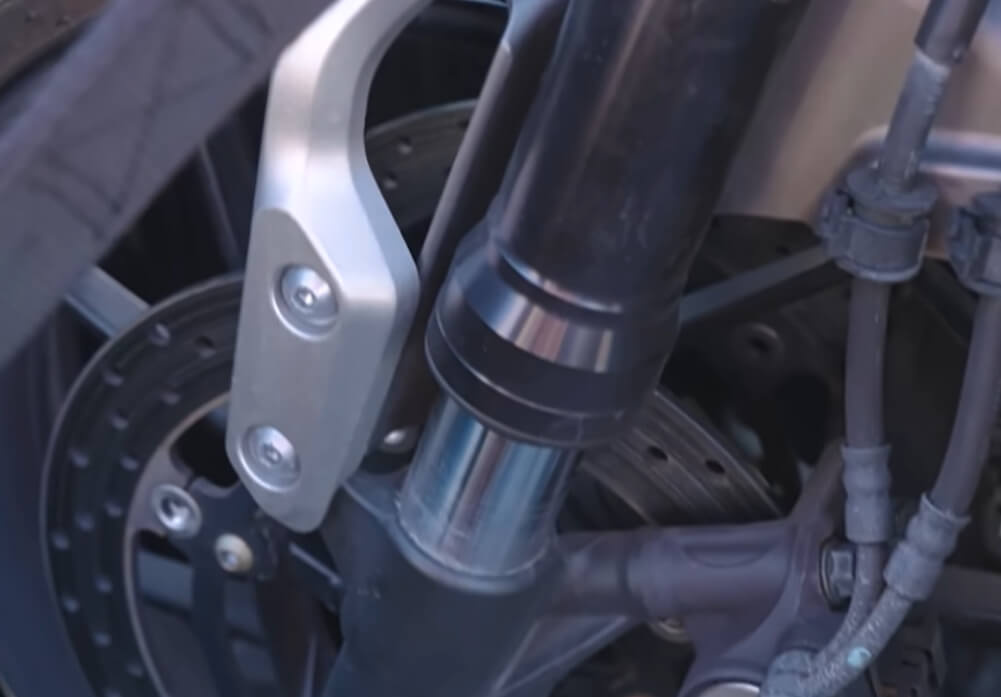
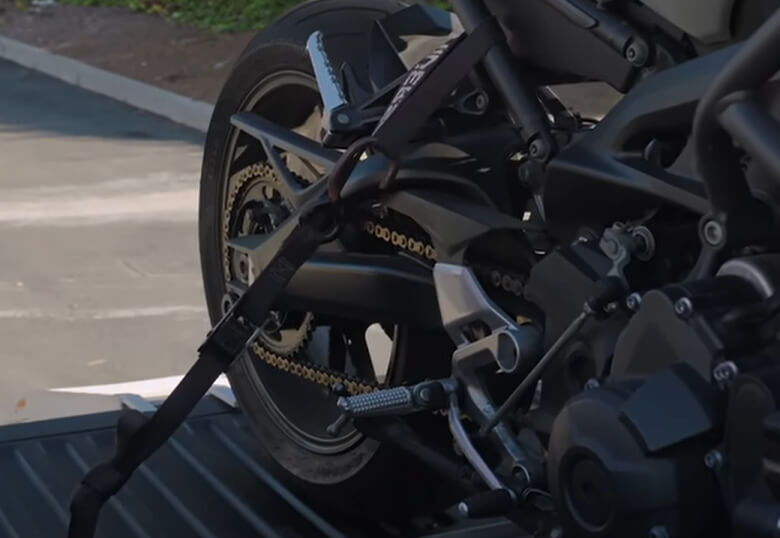


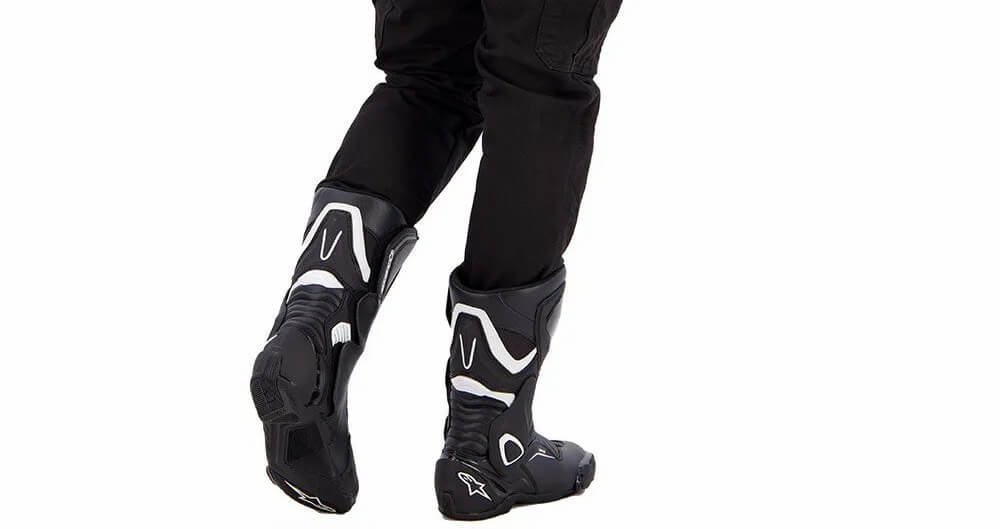
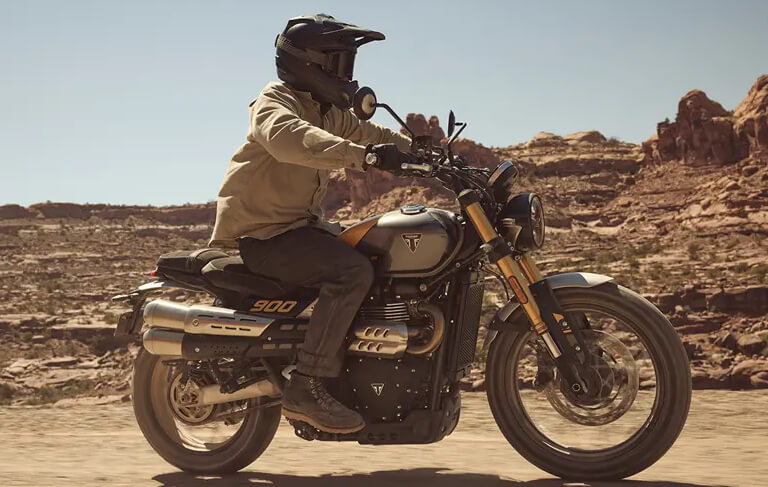
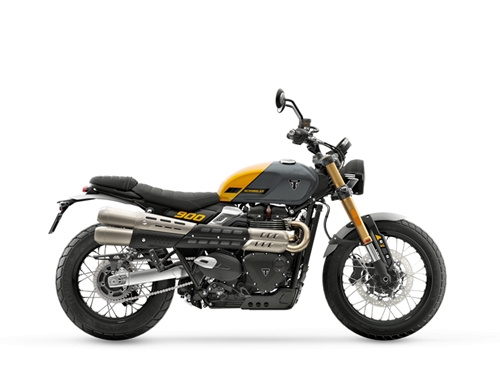
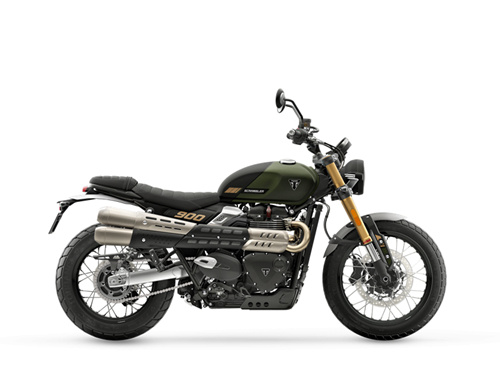
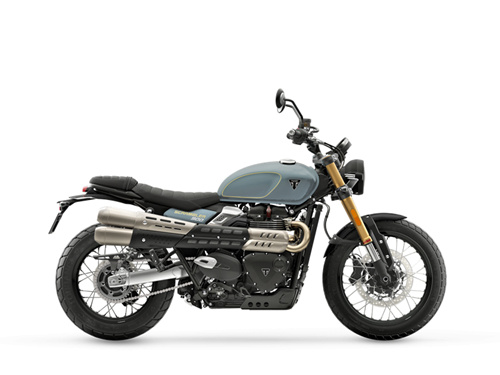
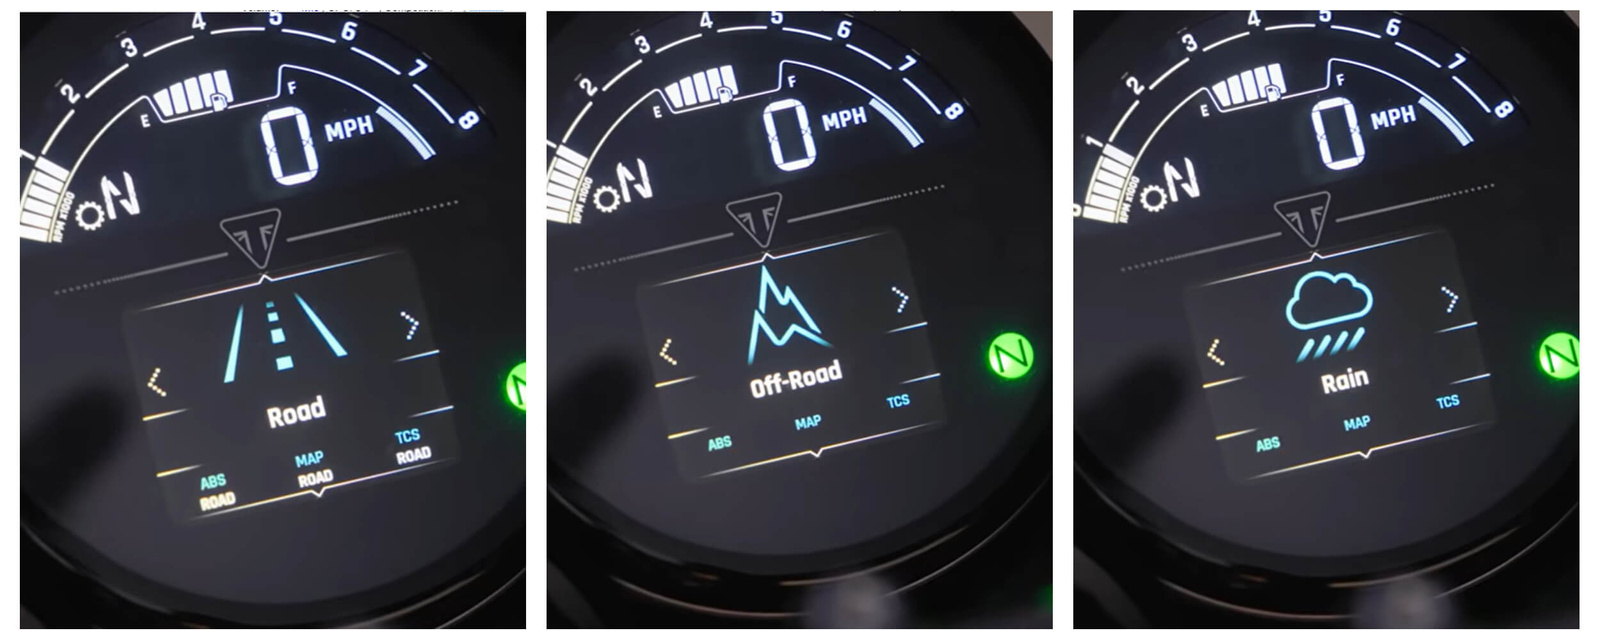
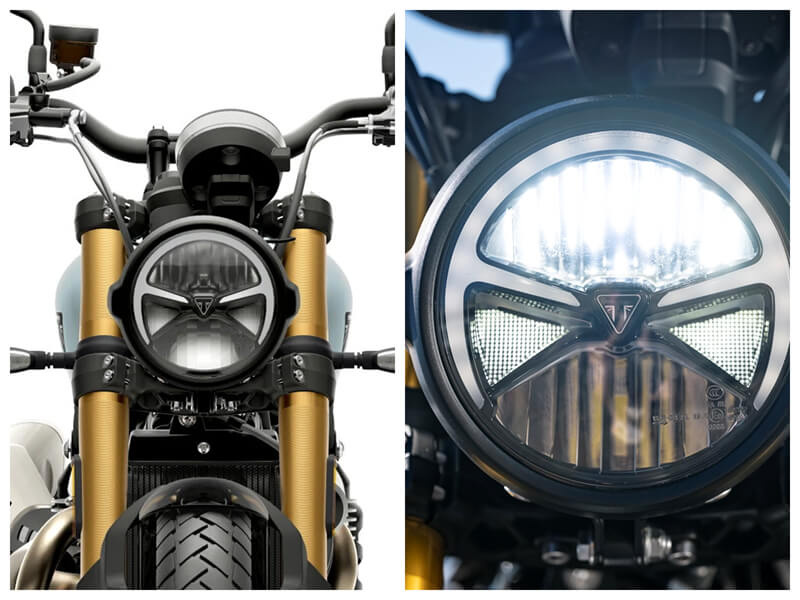
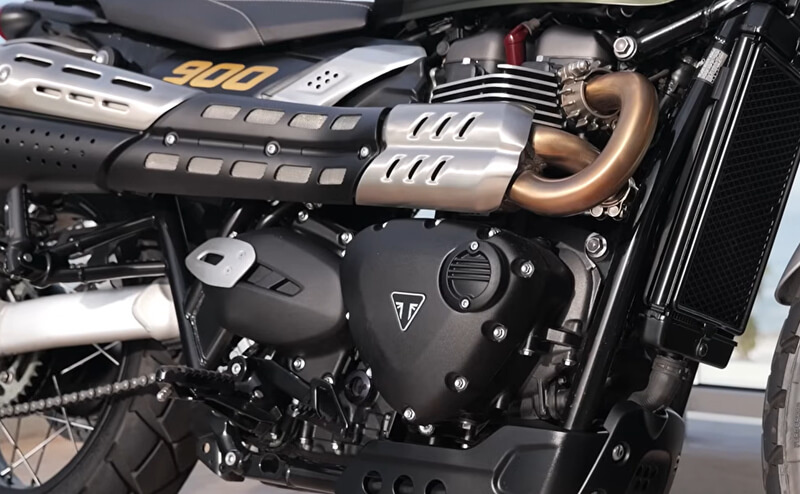

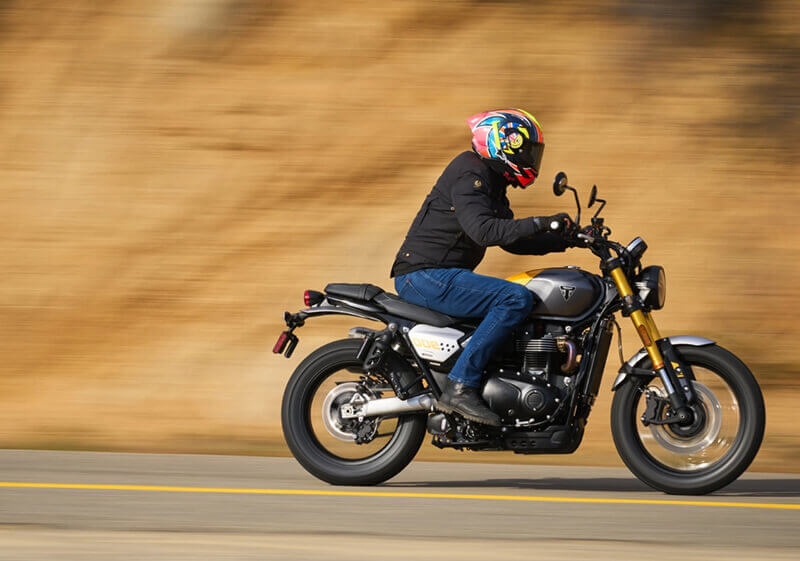
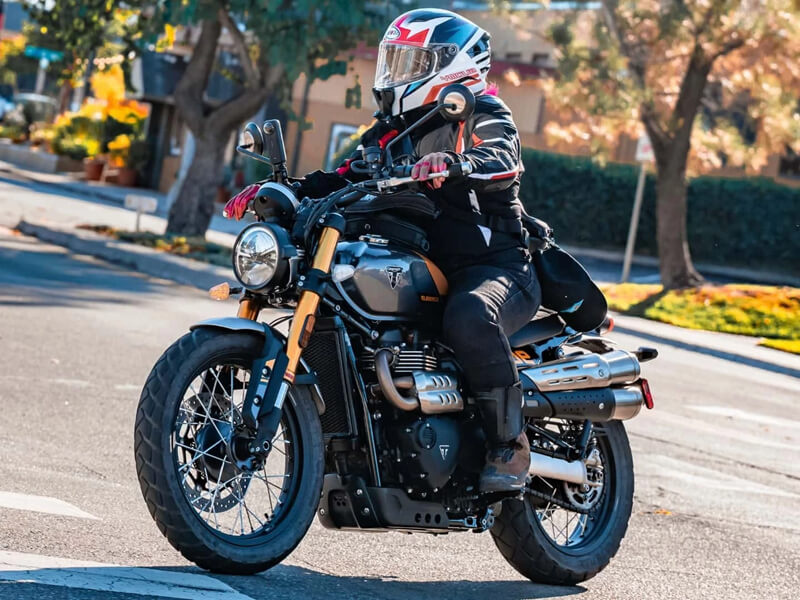
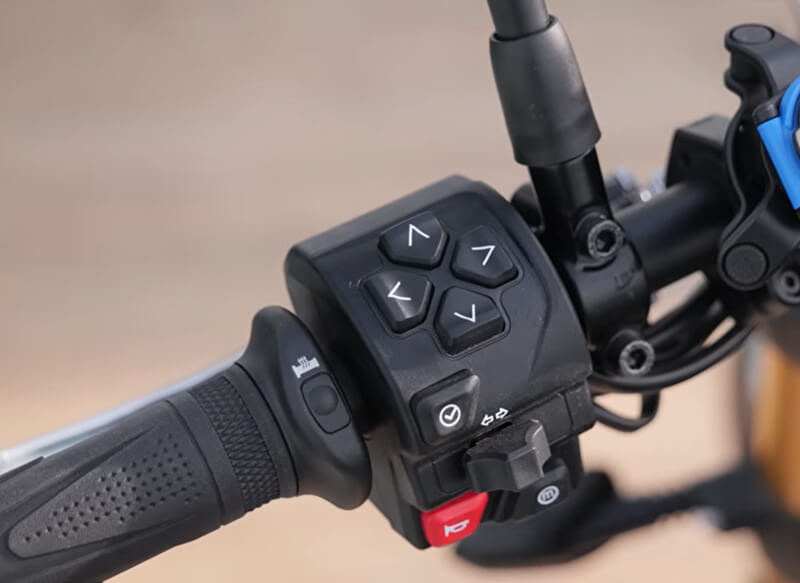
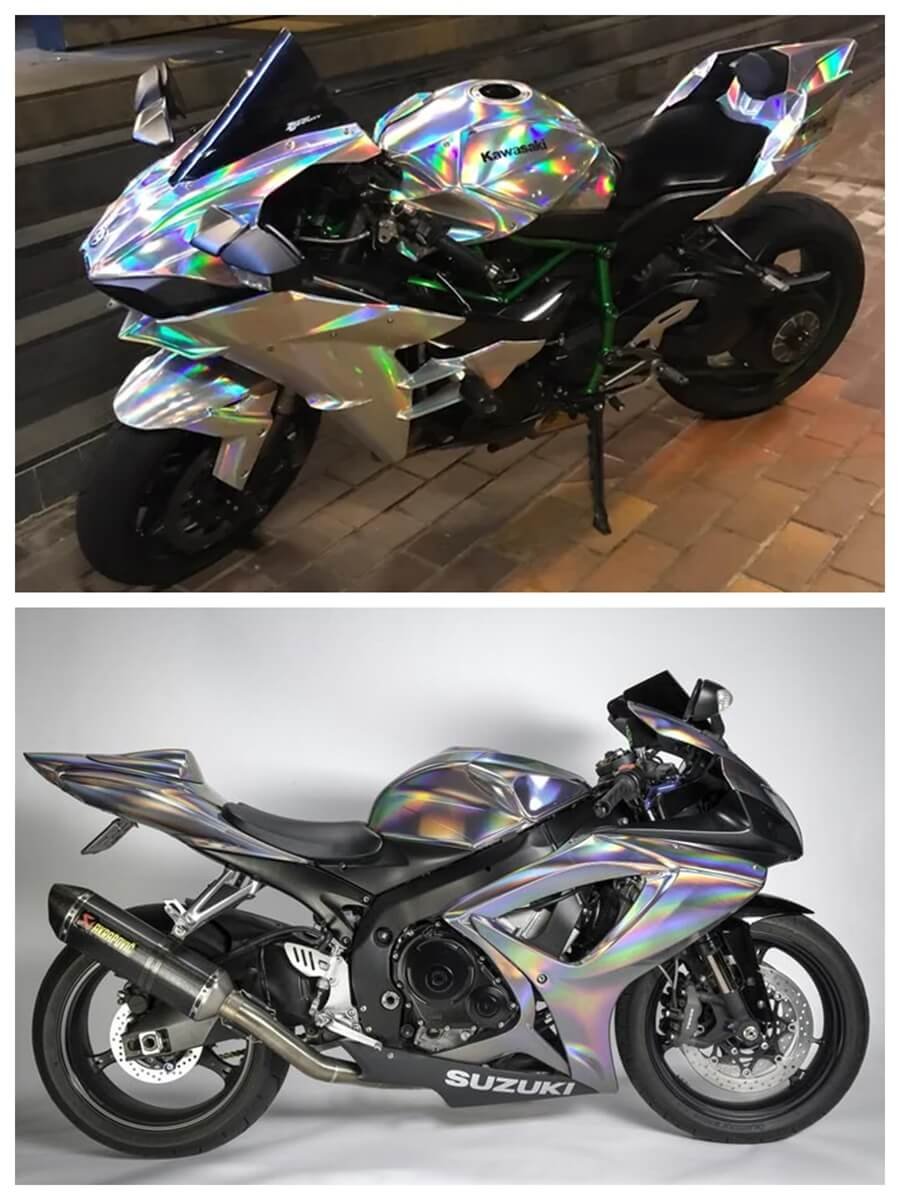
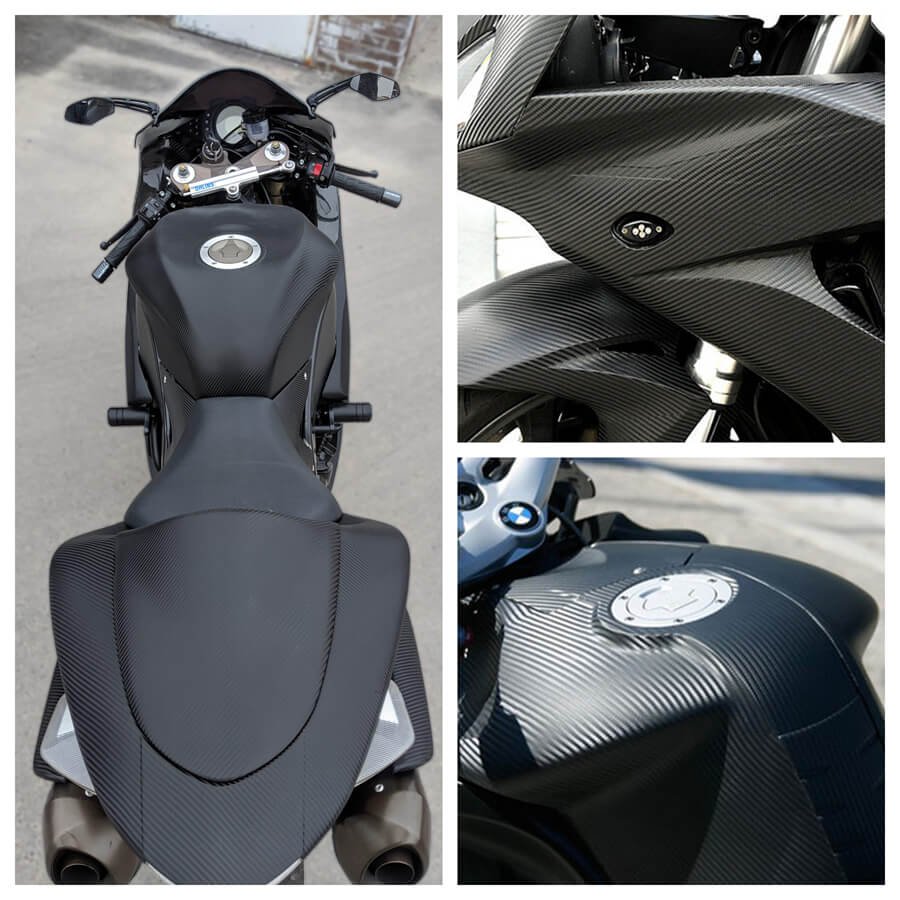


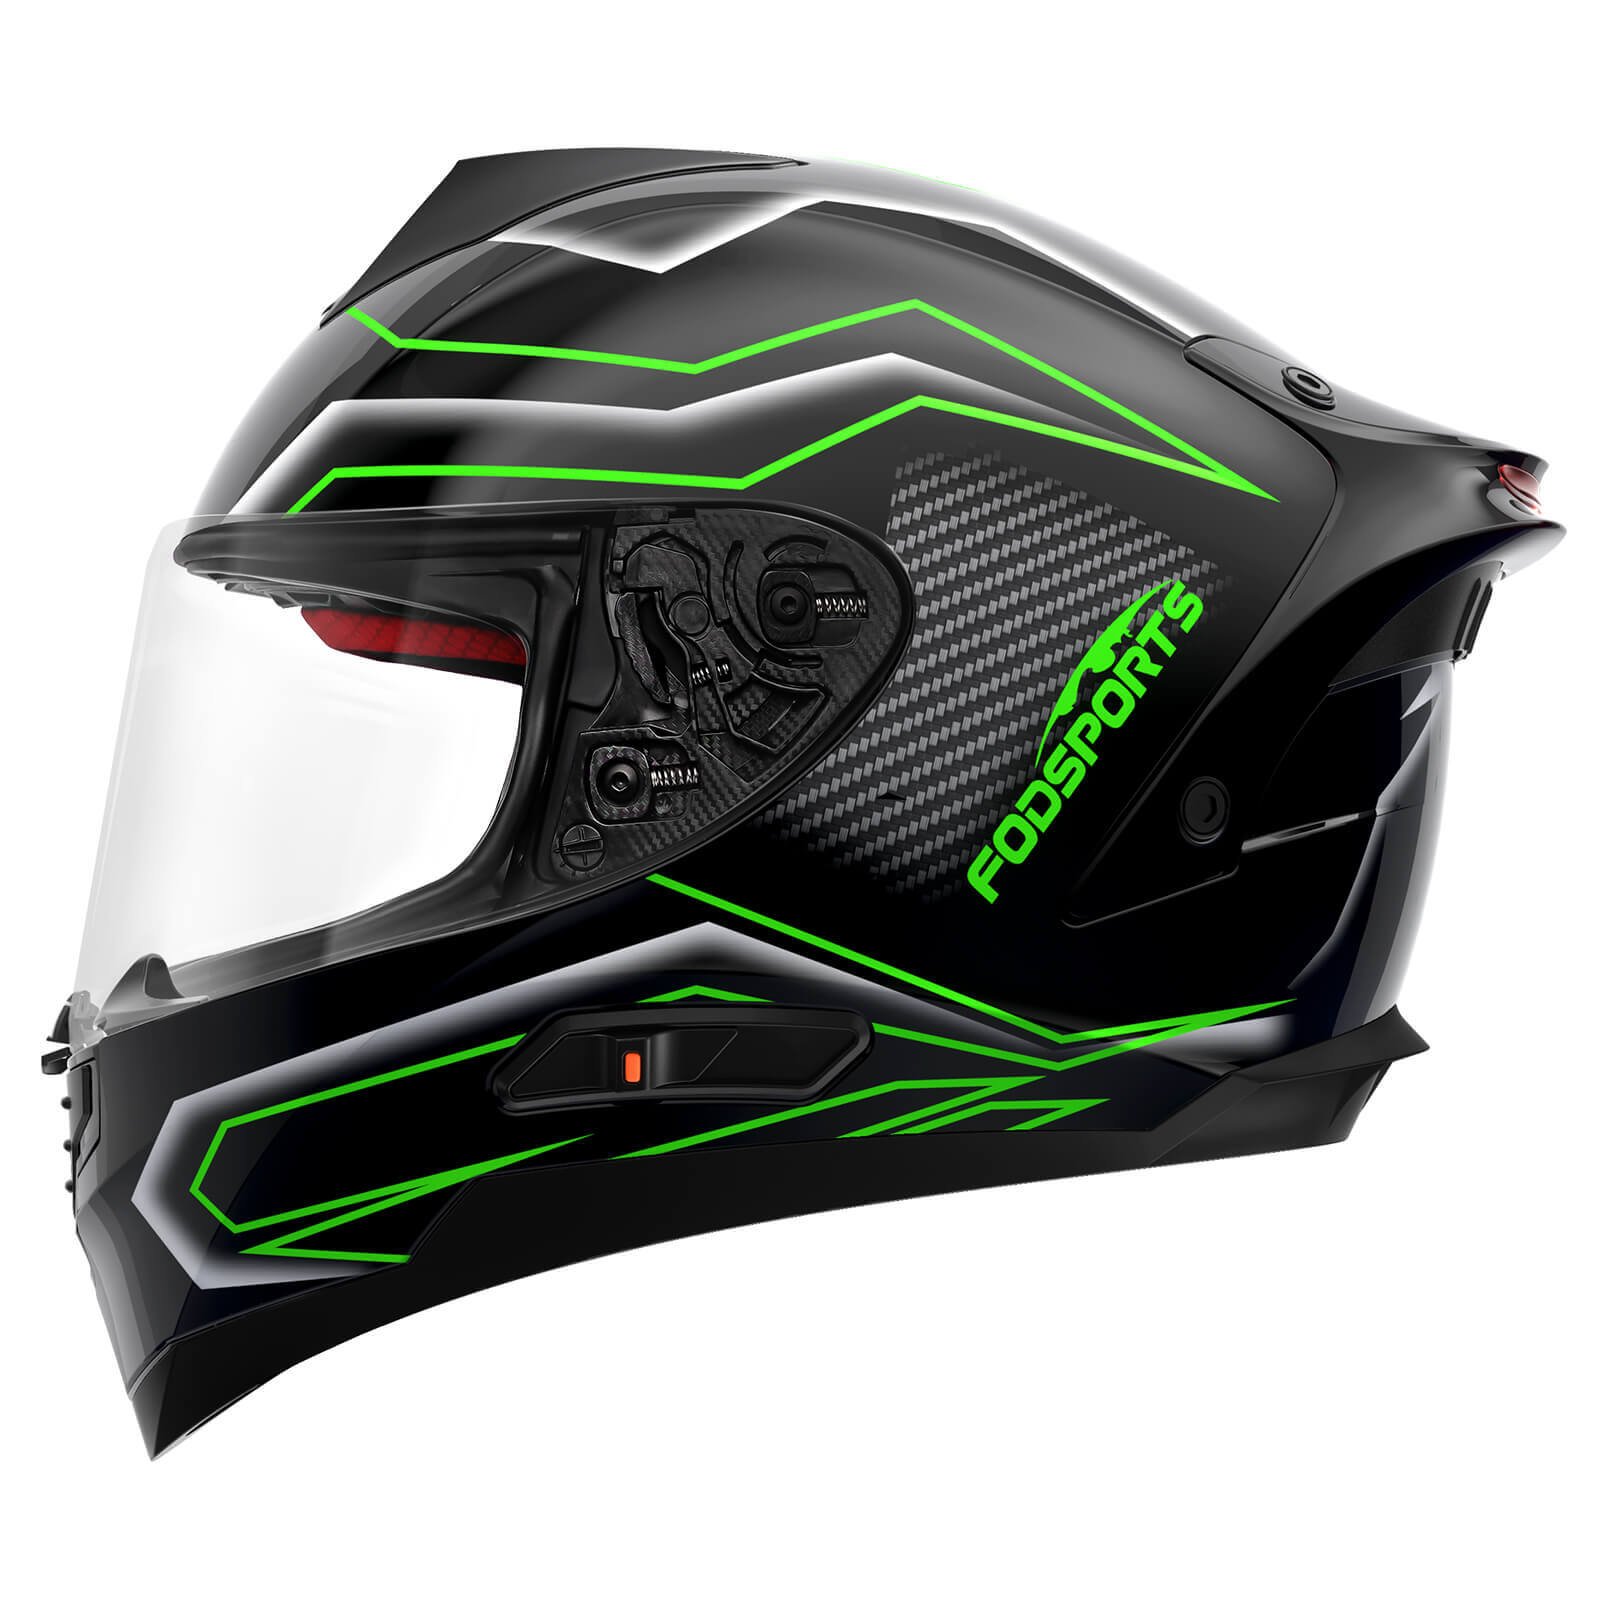


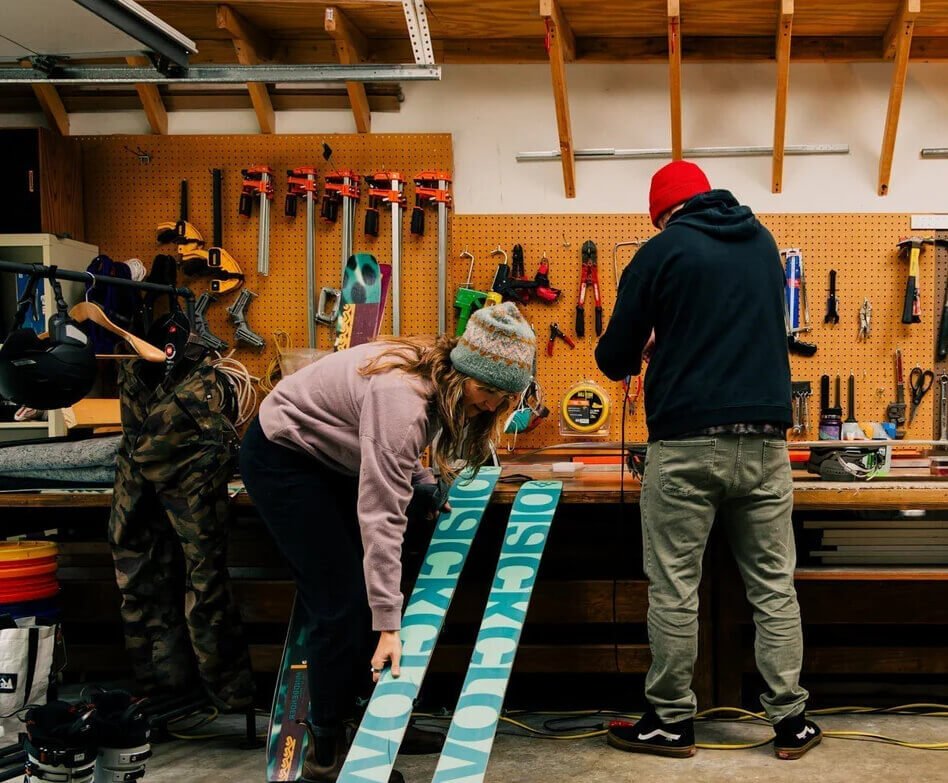


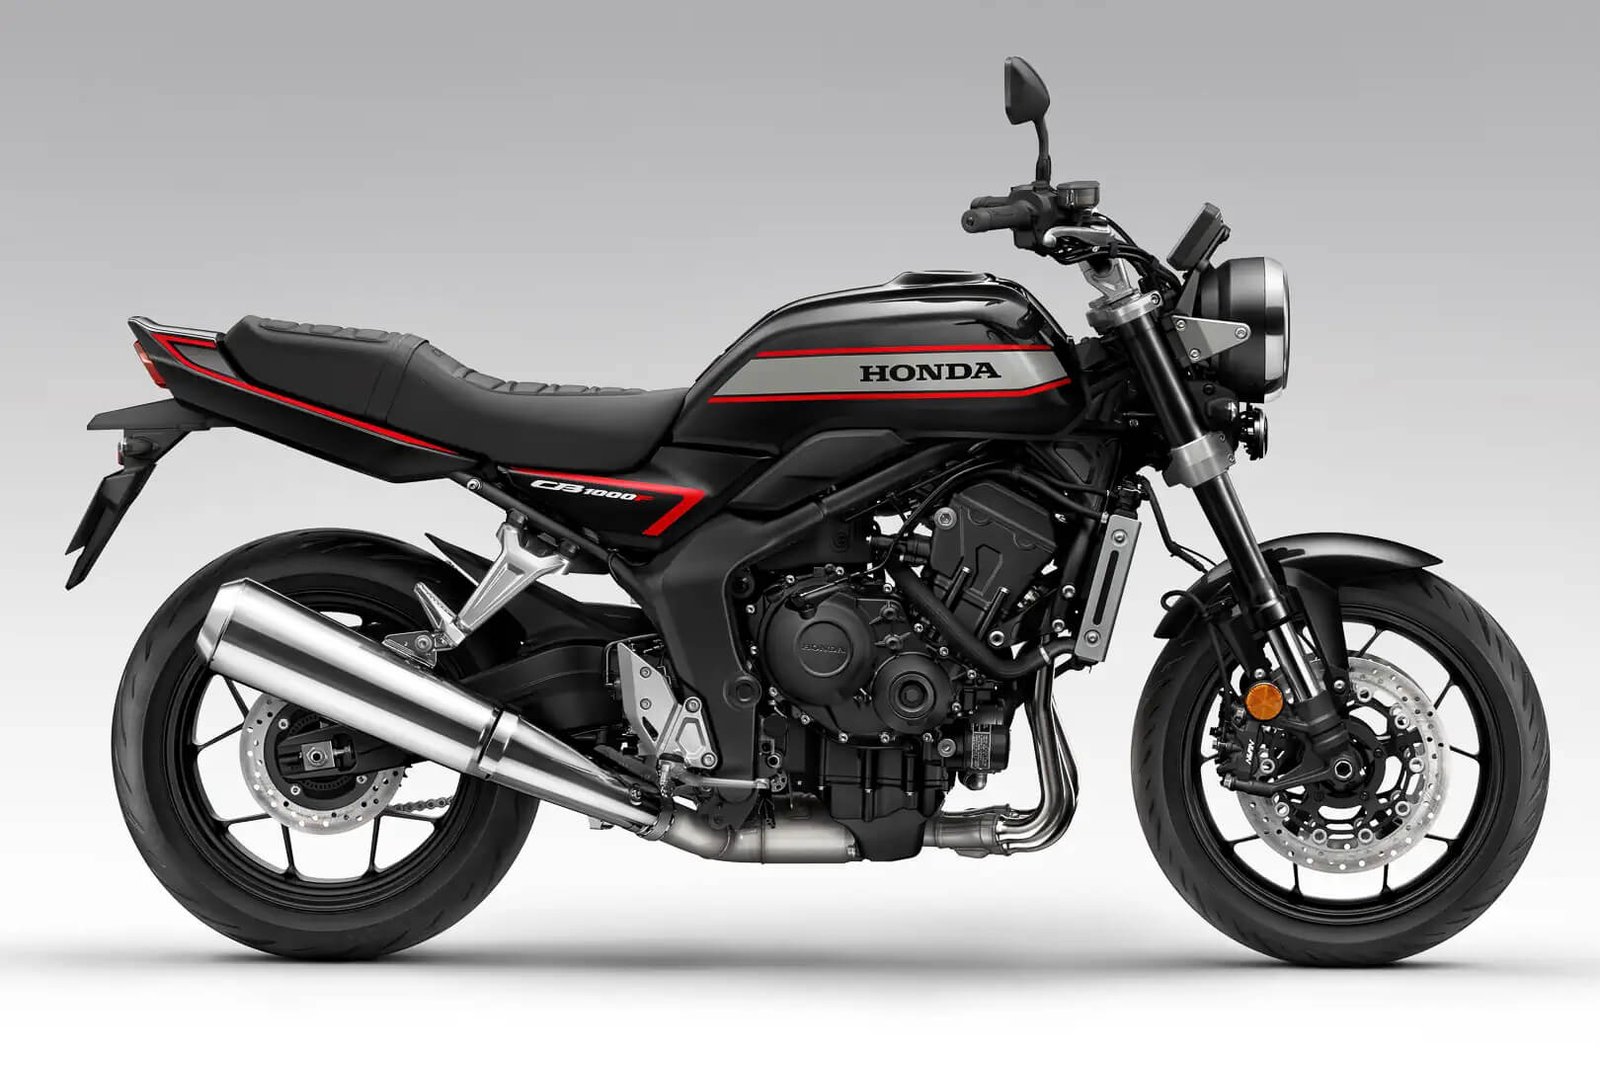
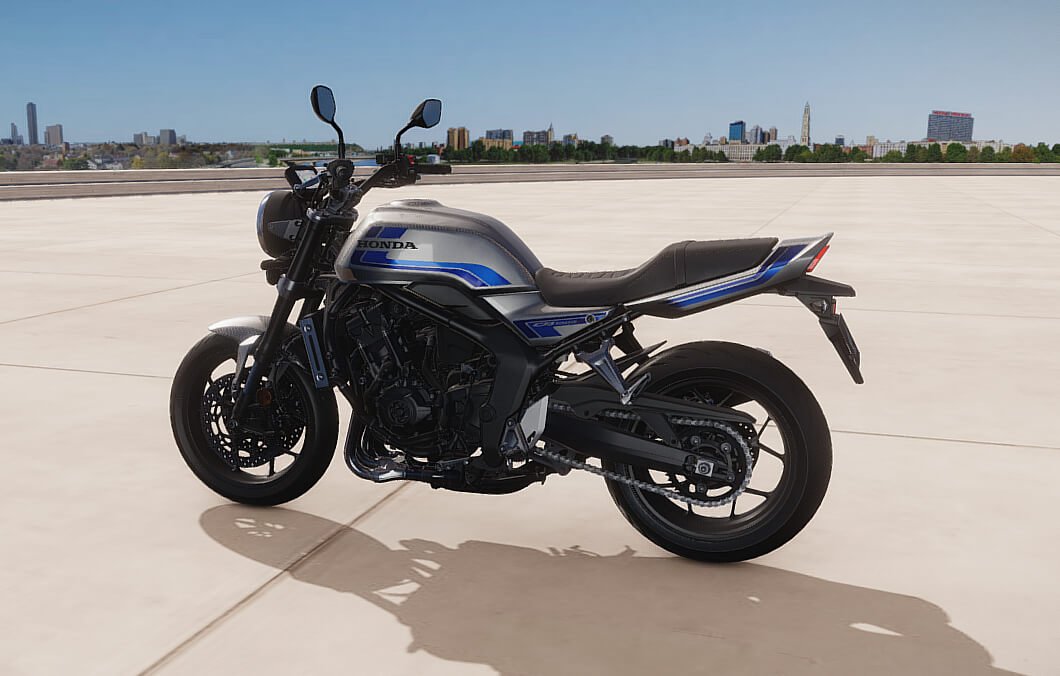


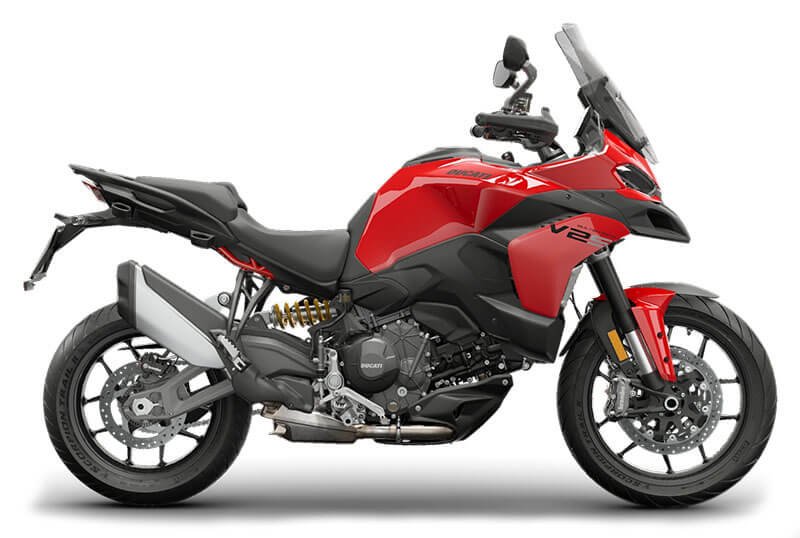
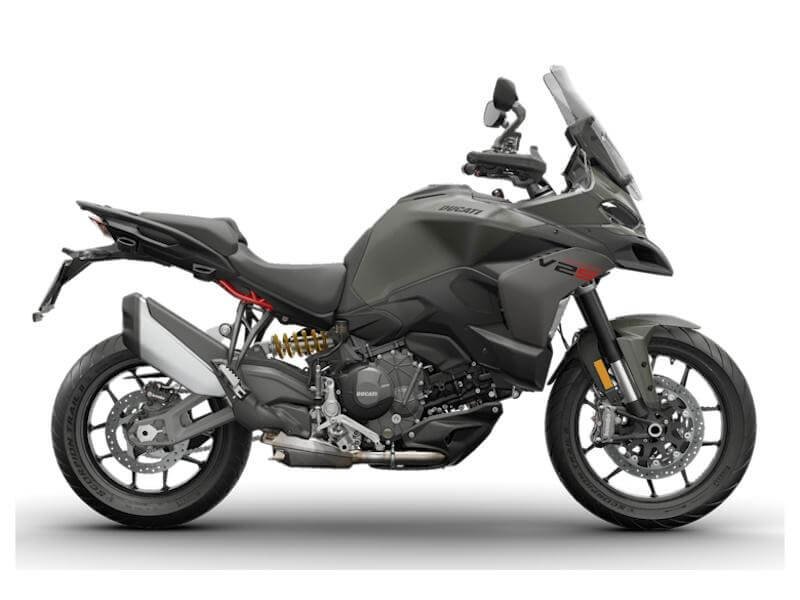
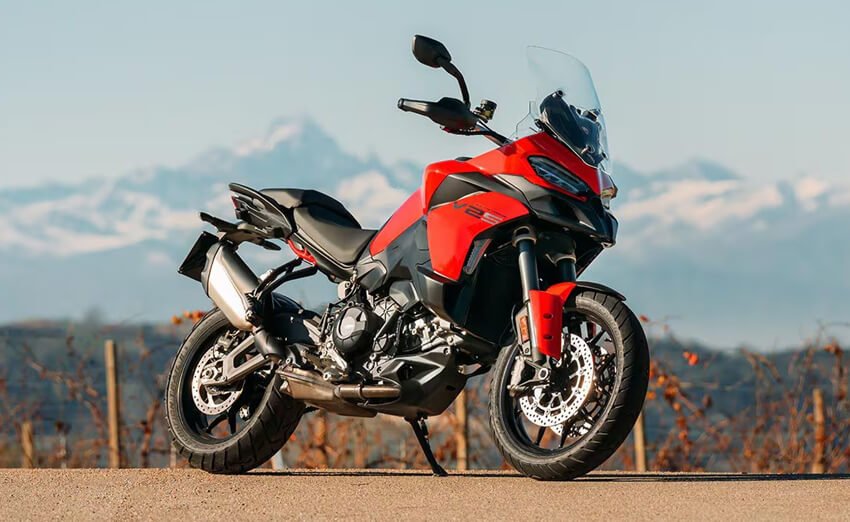
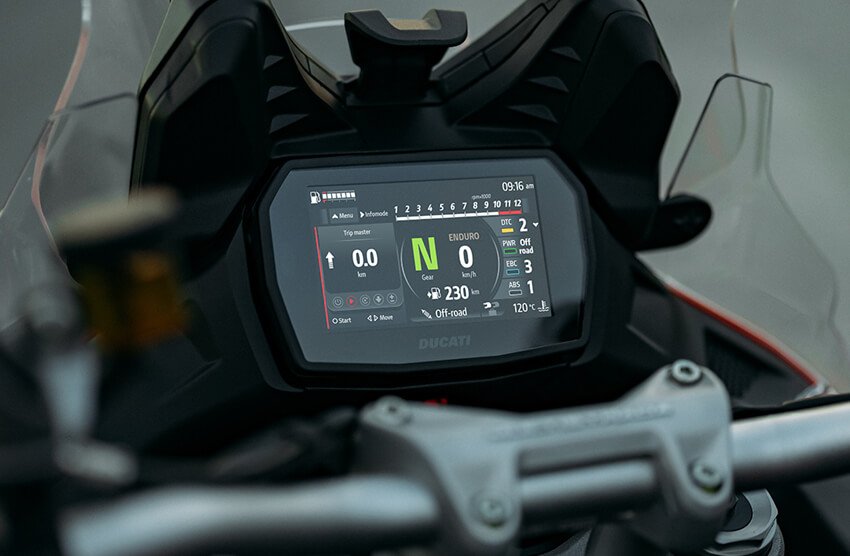

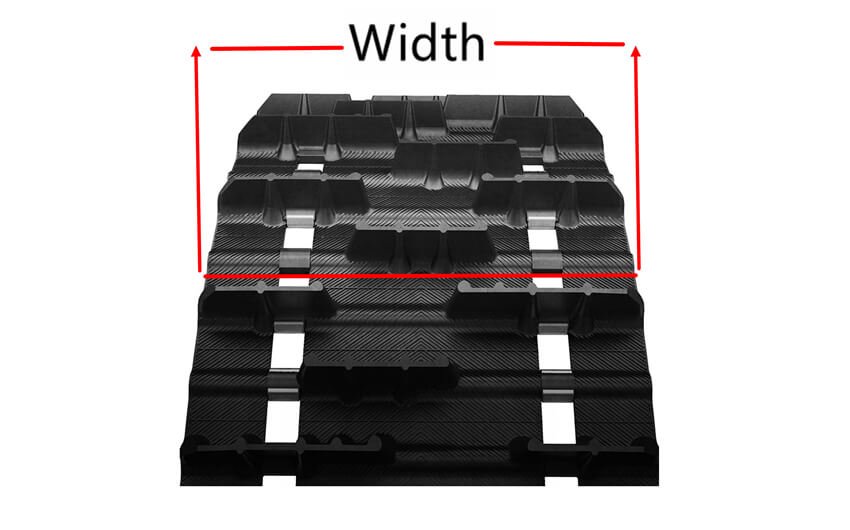
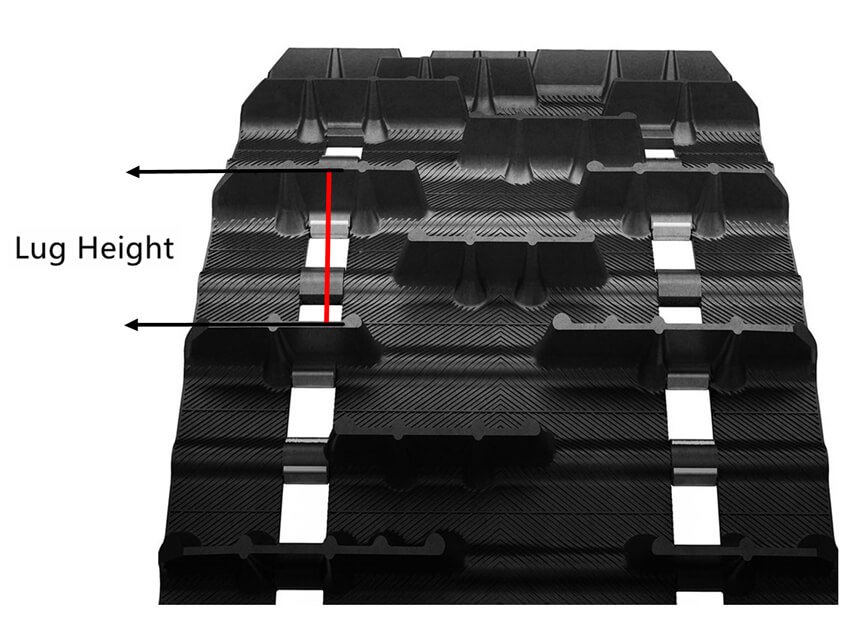
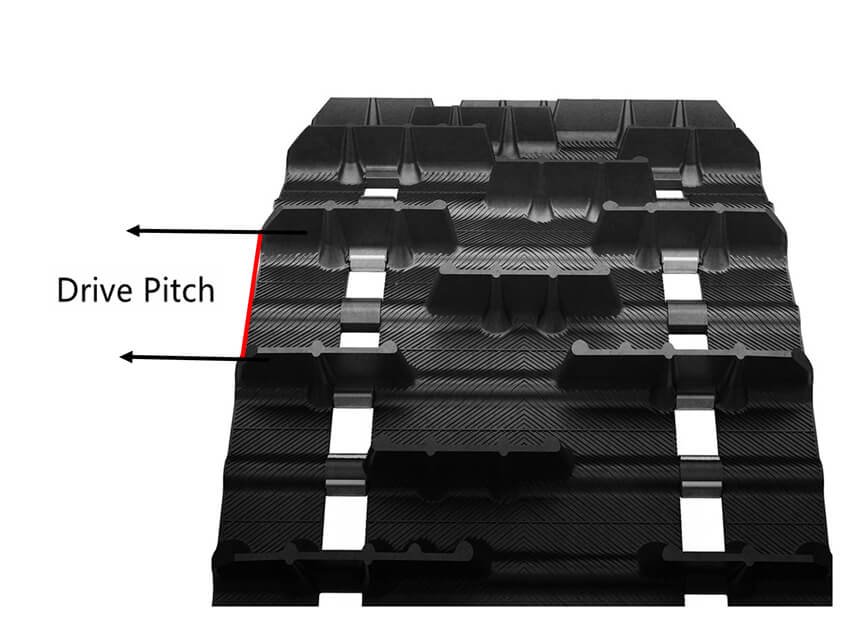
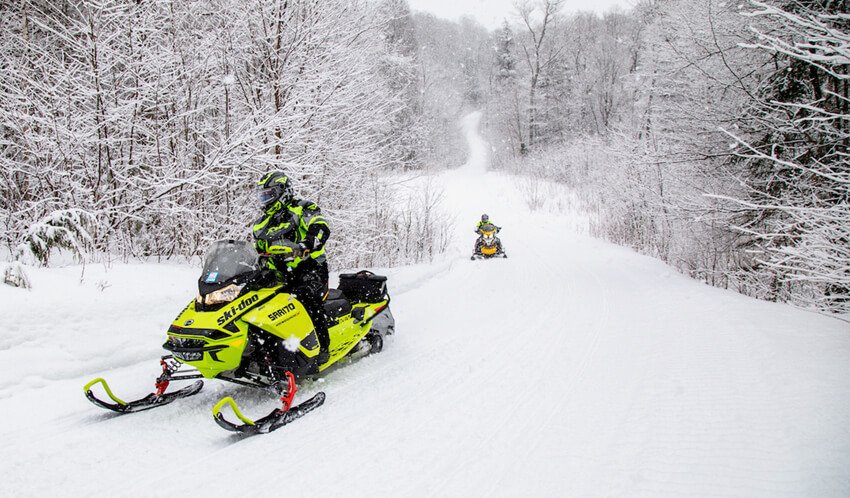


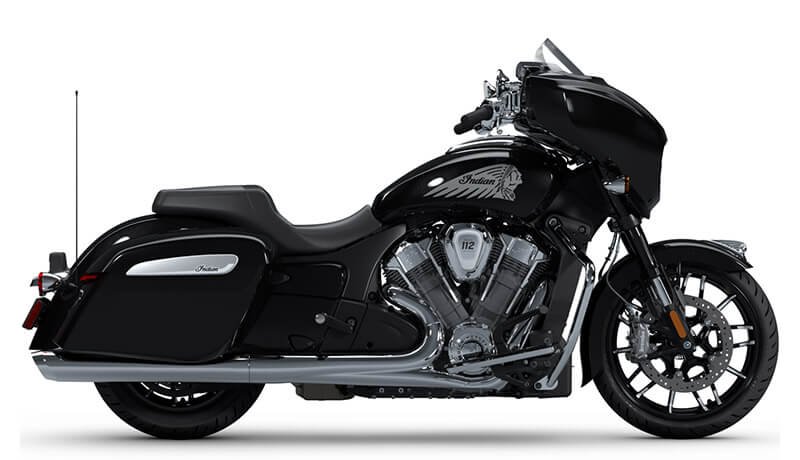
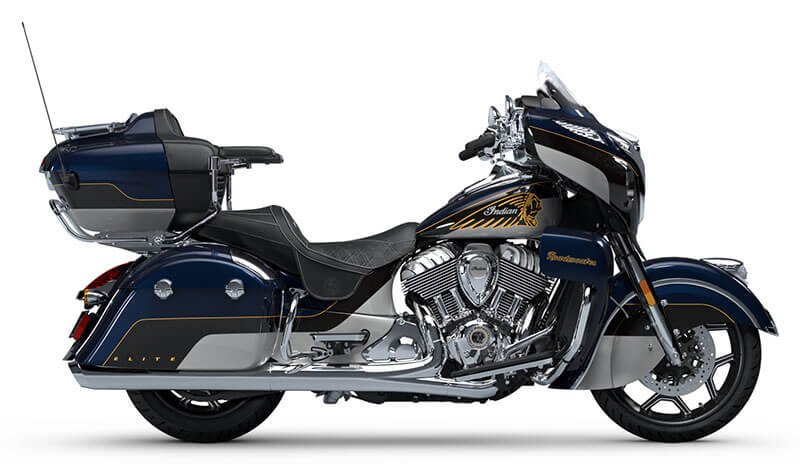
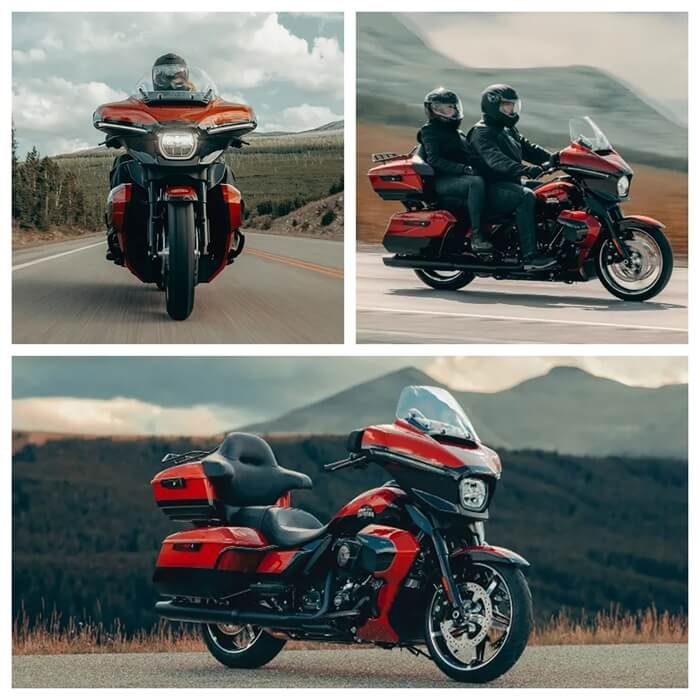
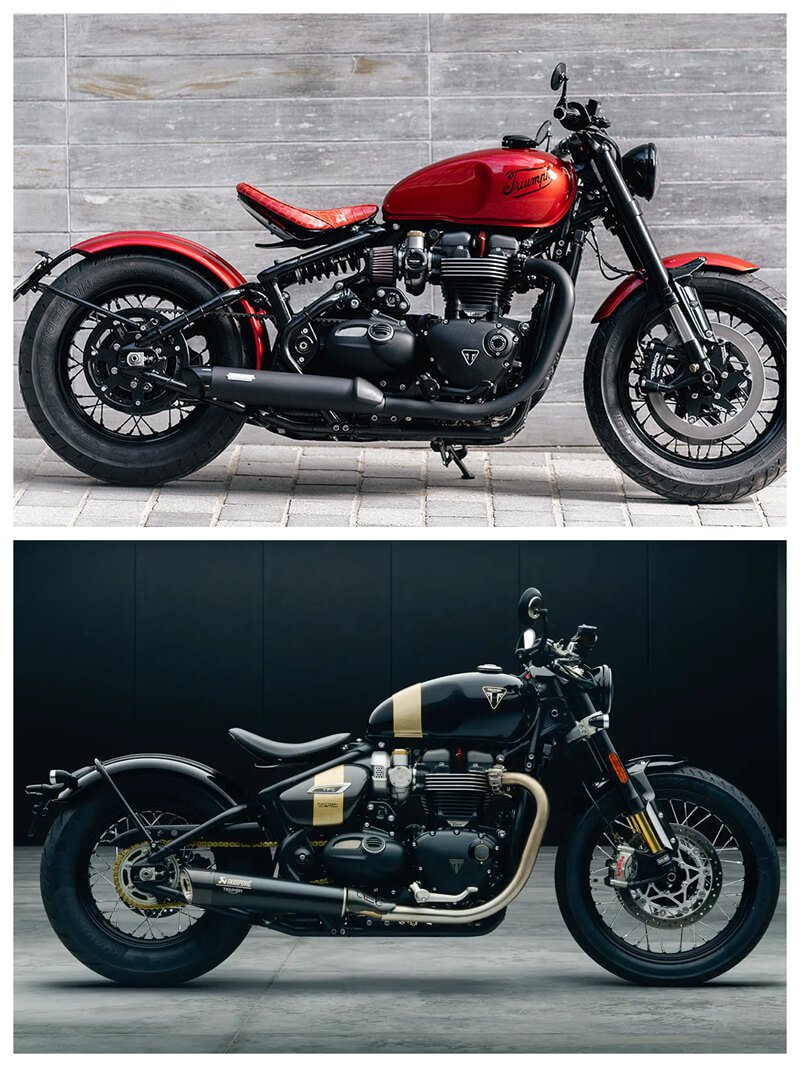
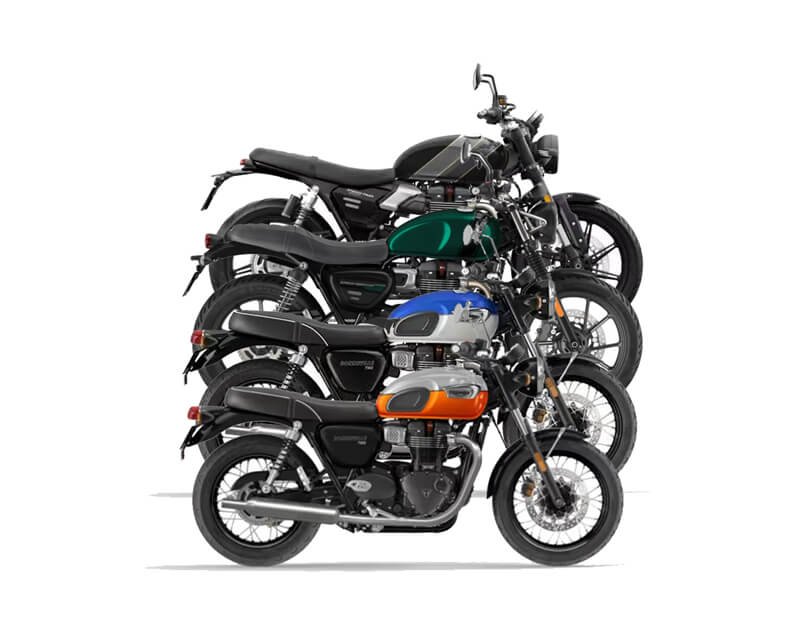
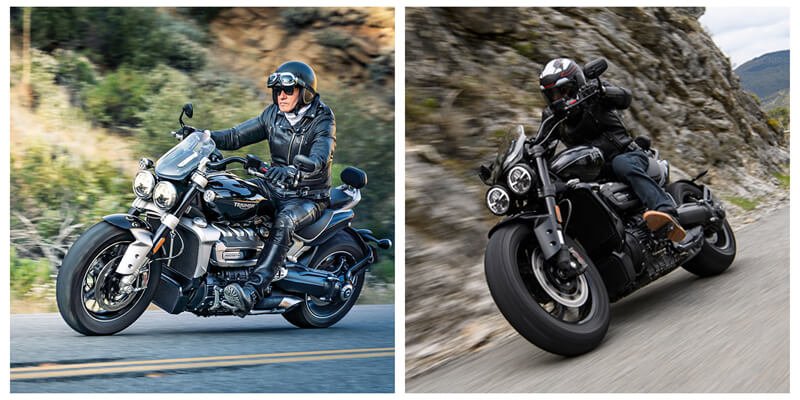
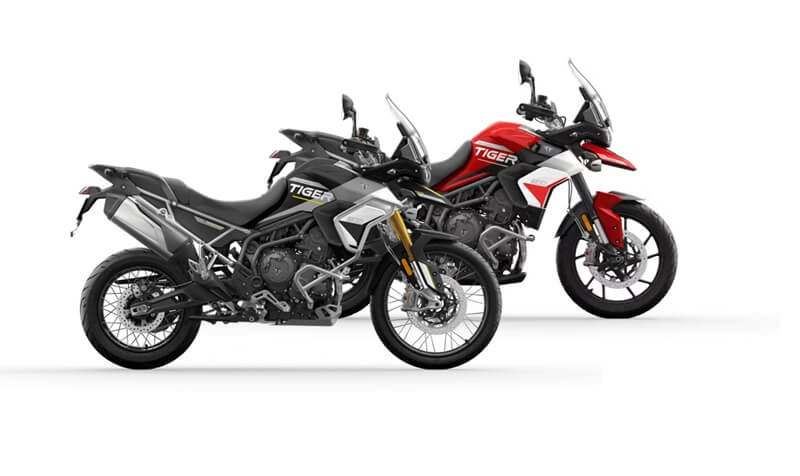
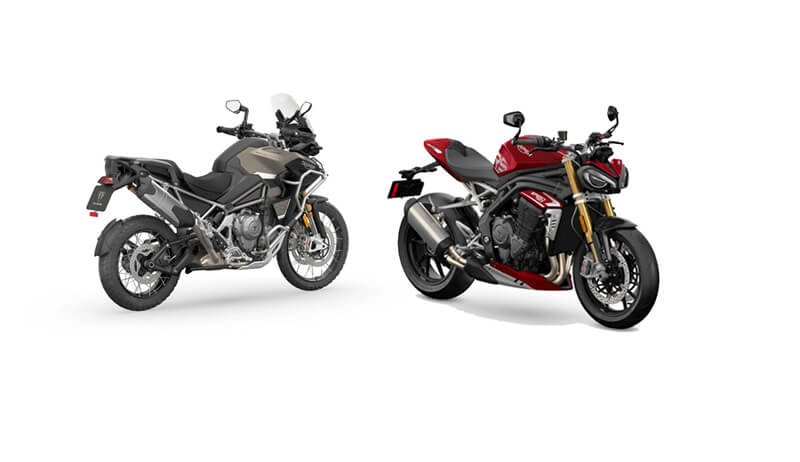
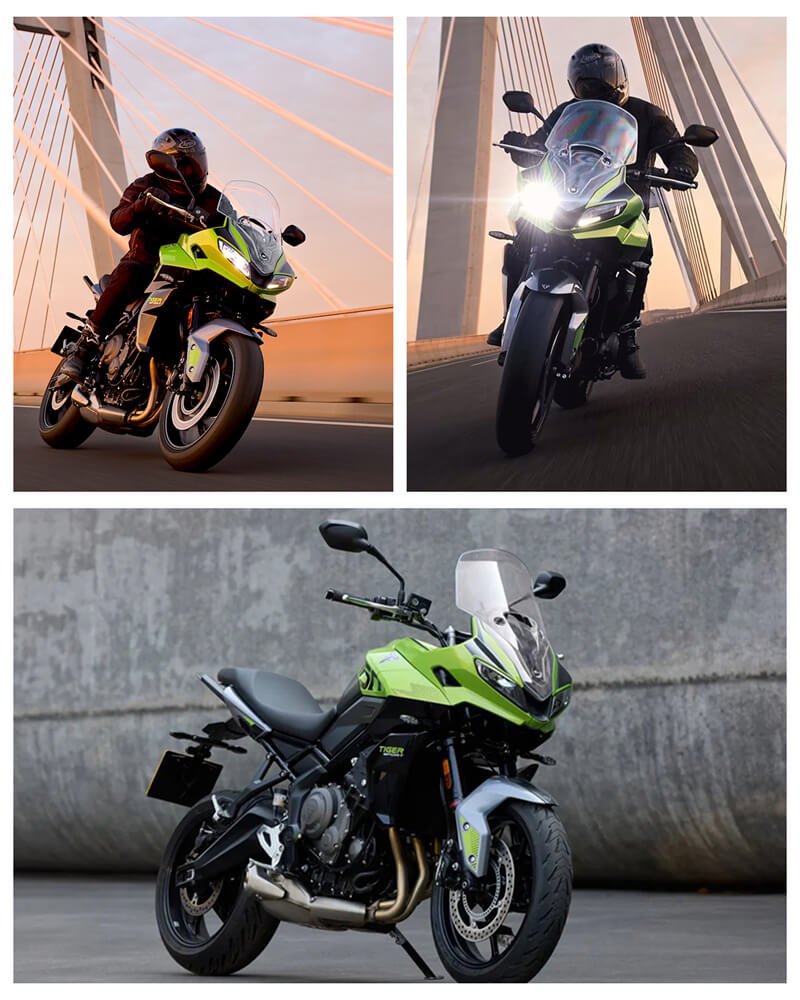
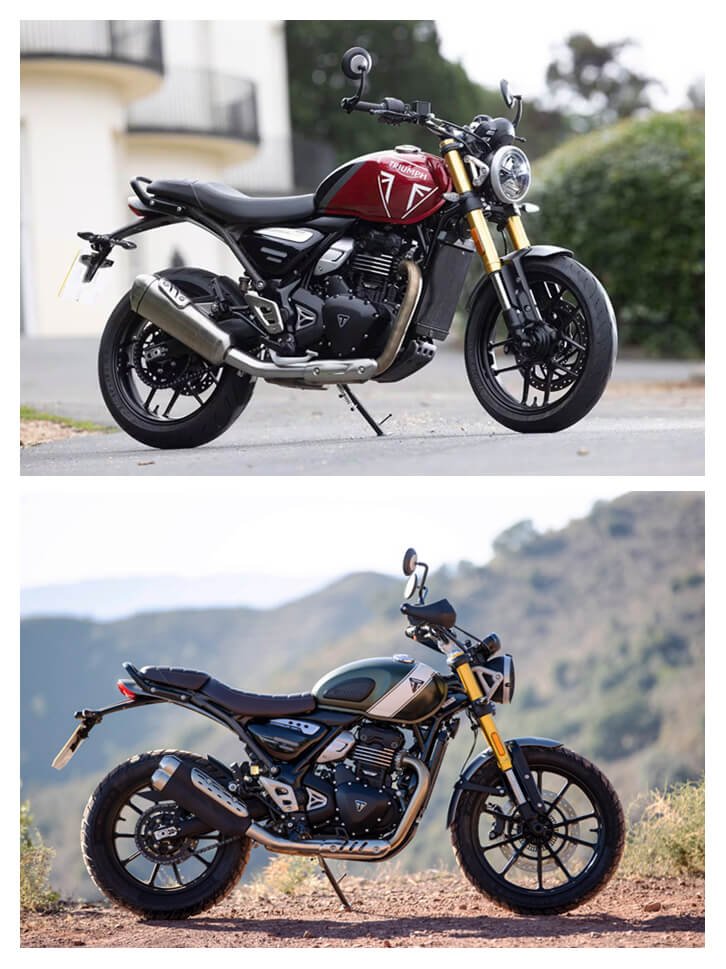
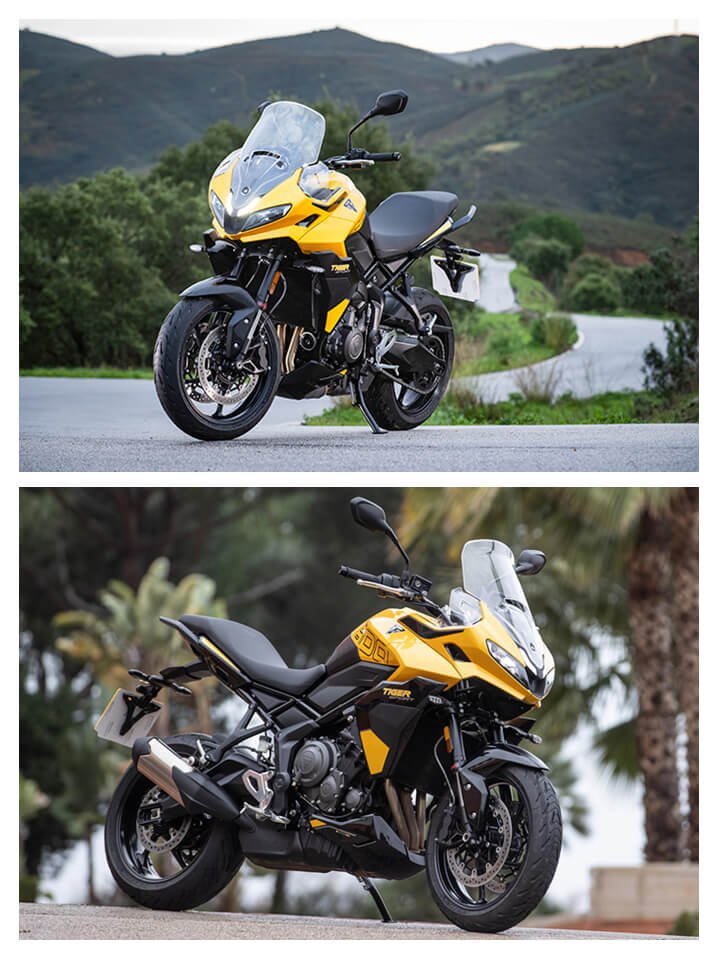
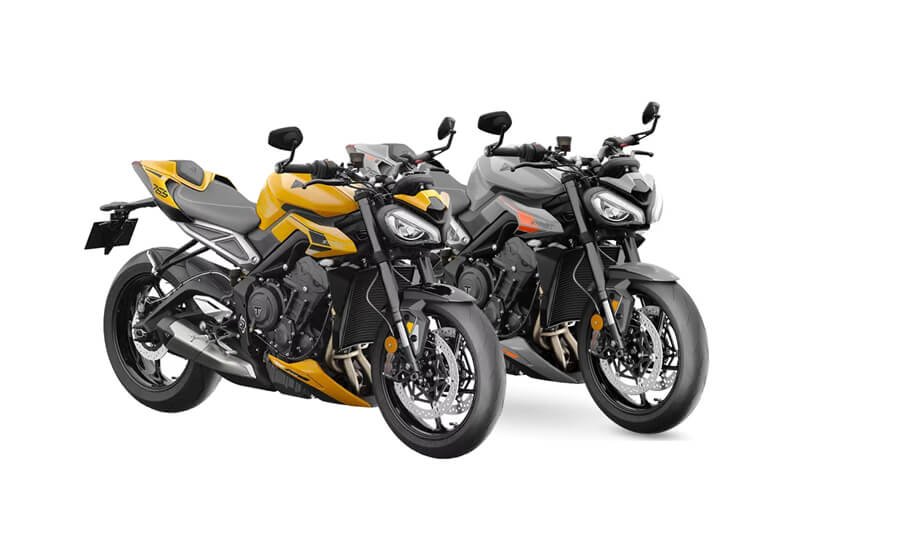
 BMW S1000R 2025
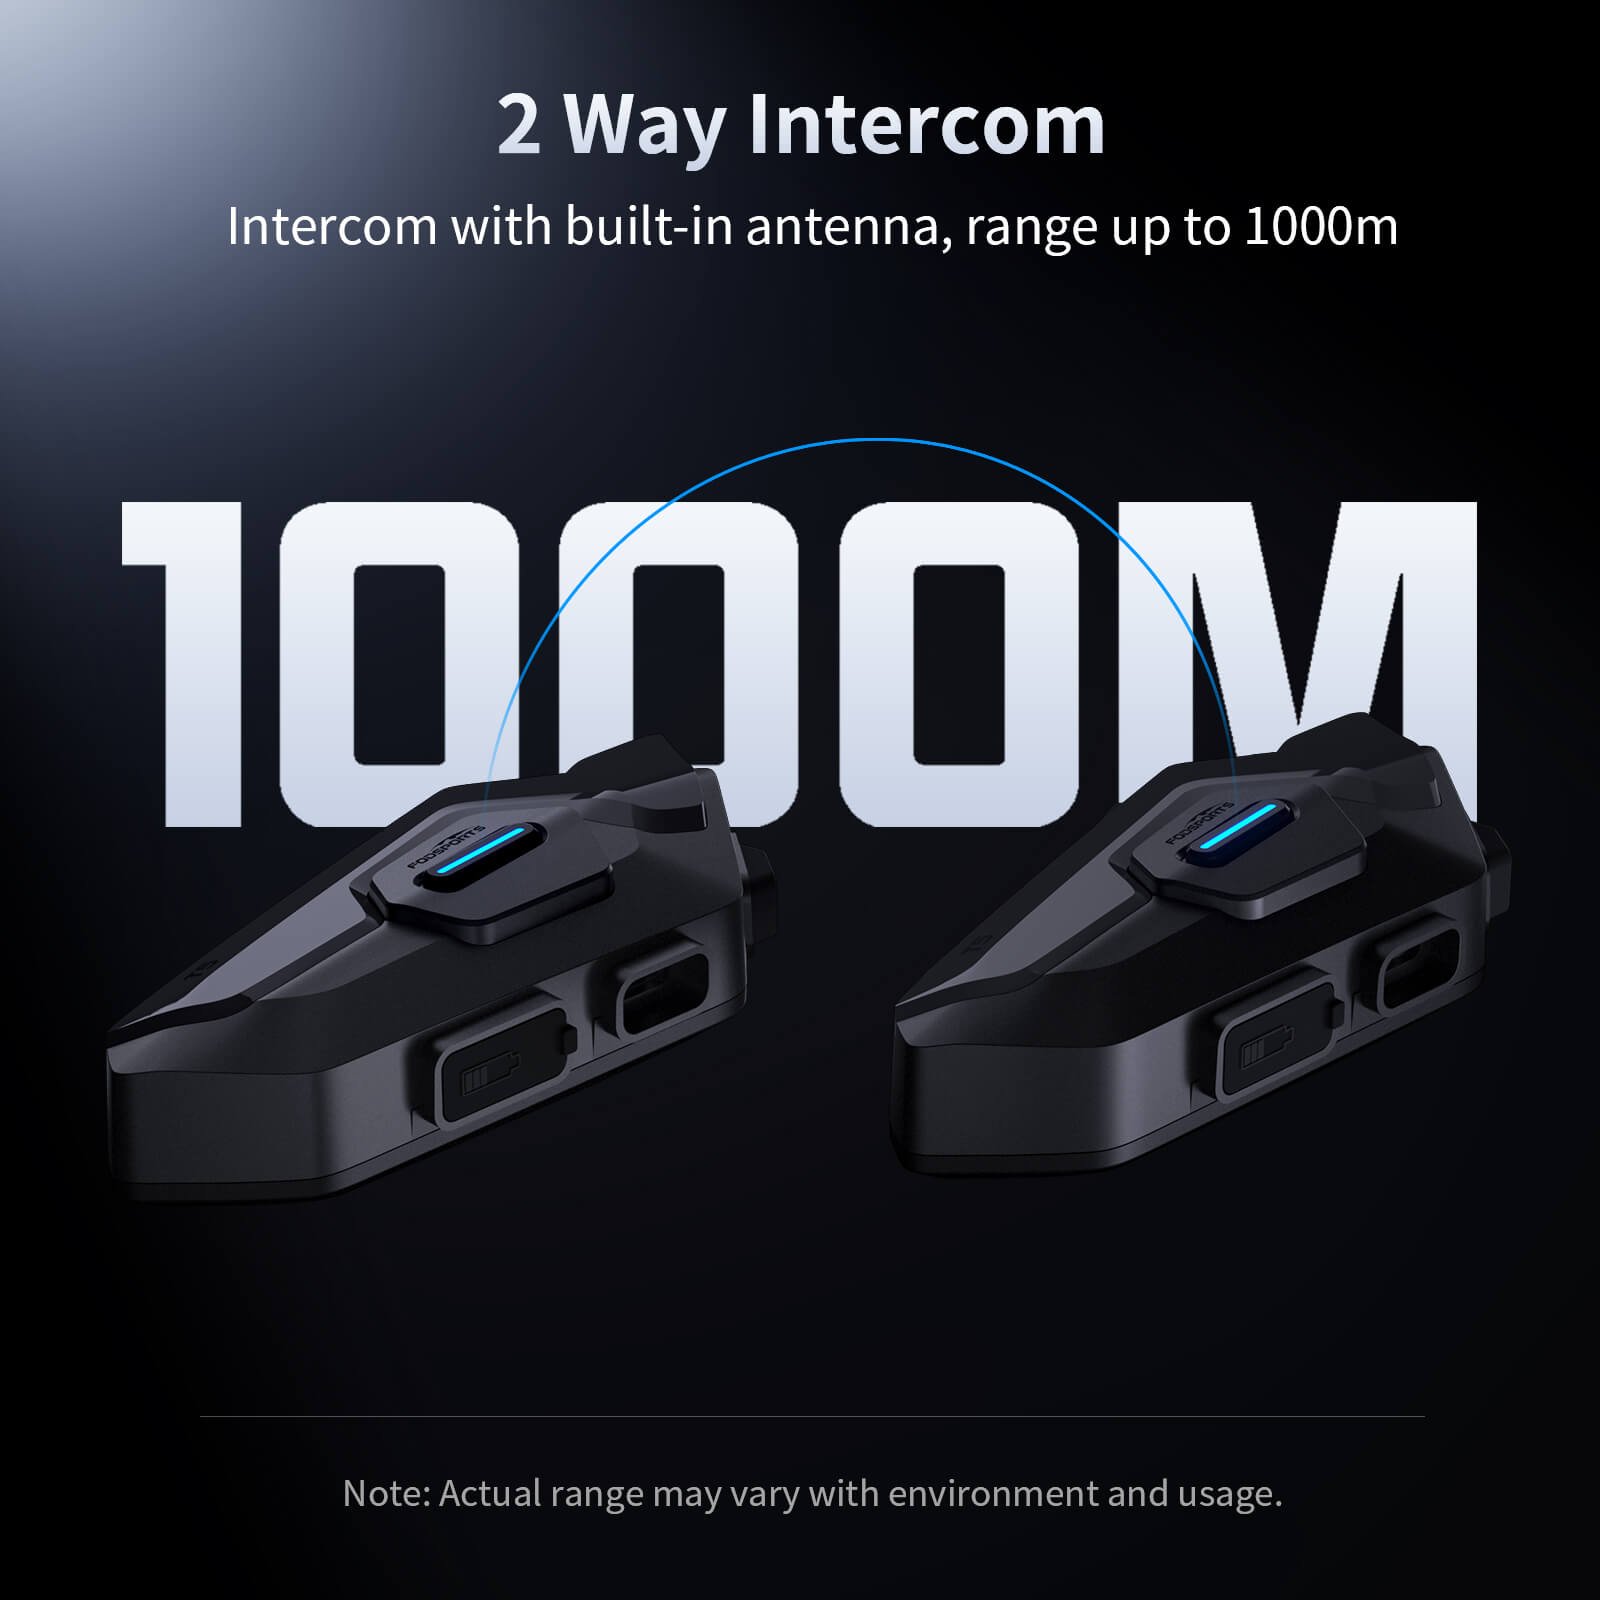


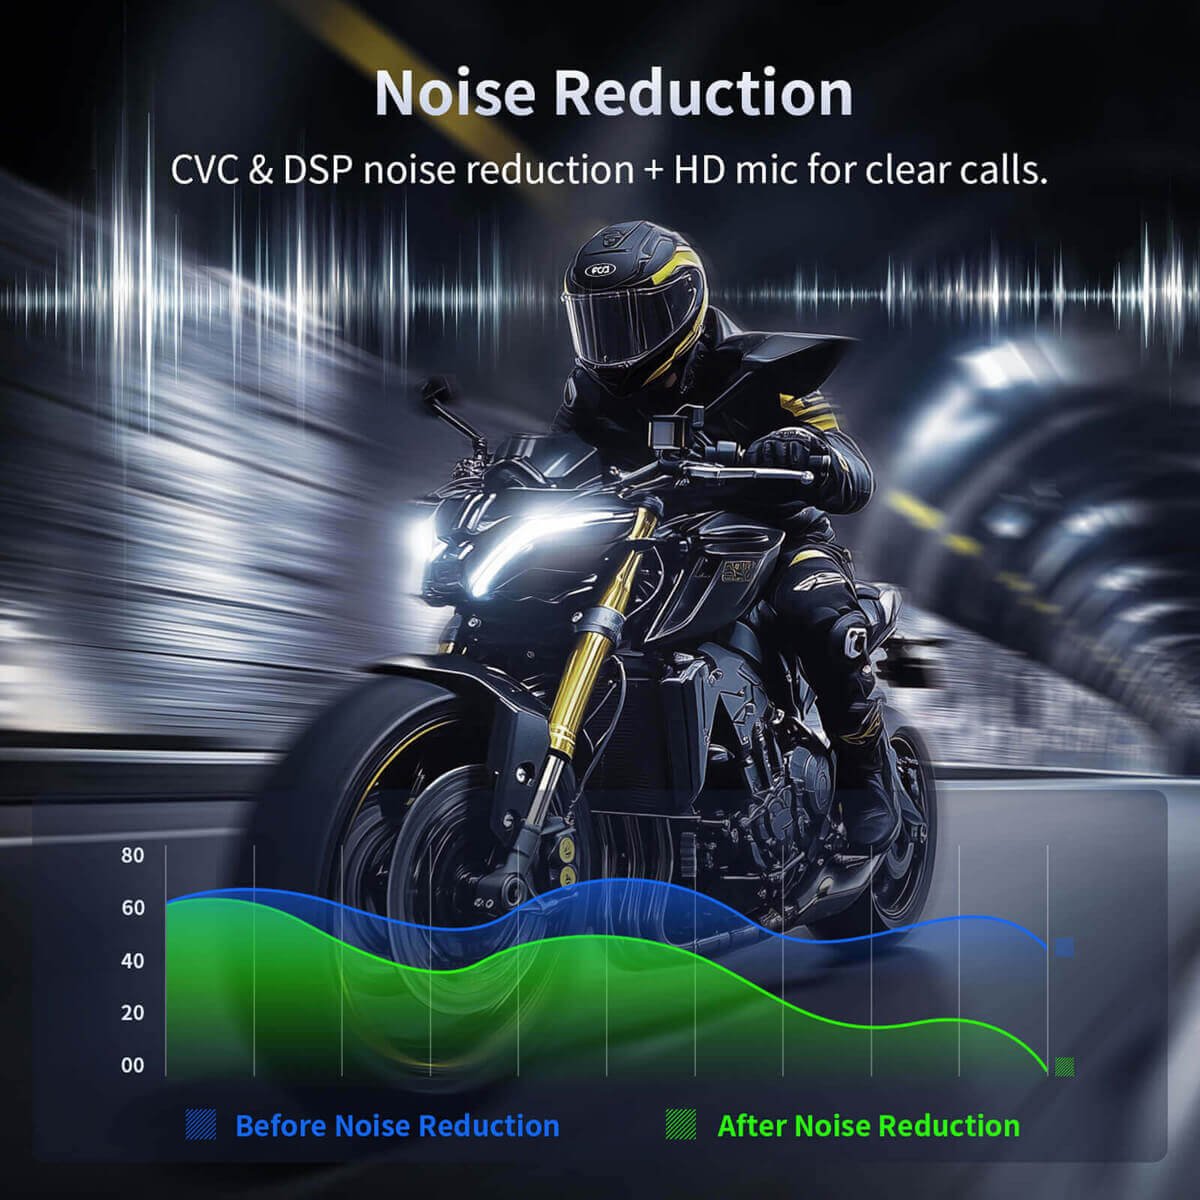


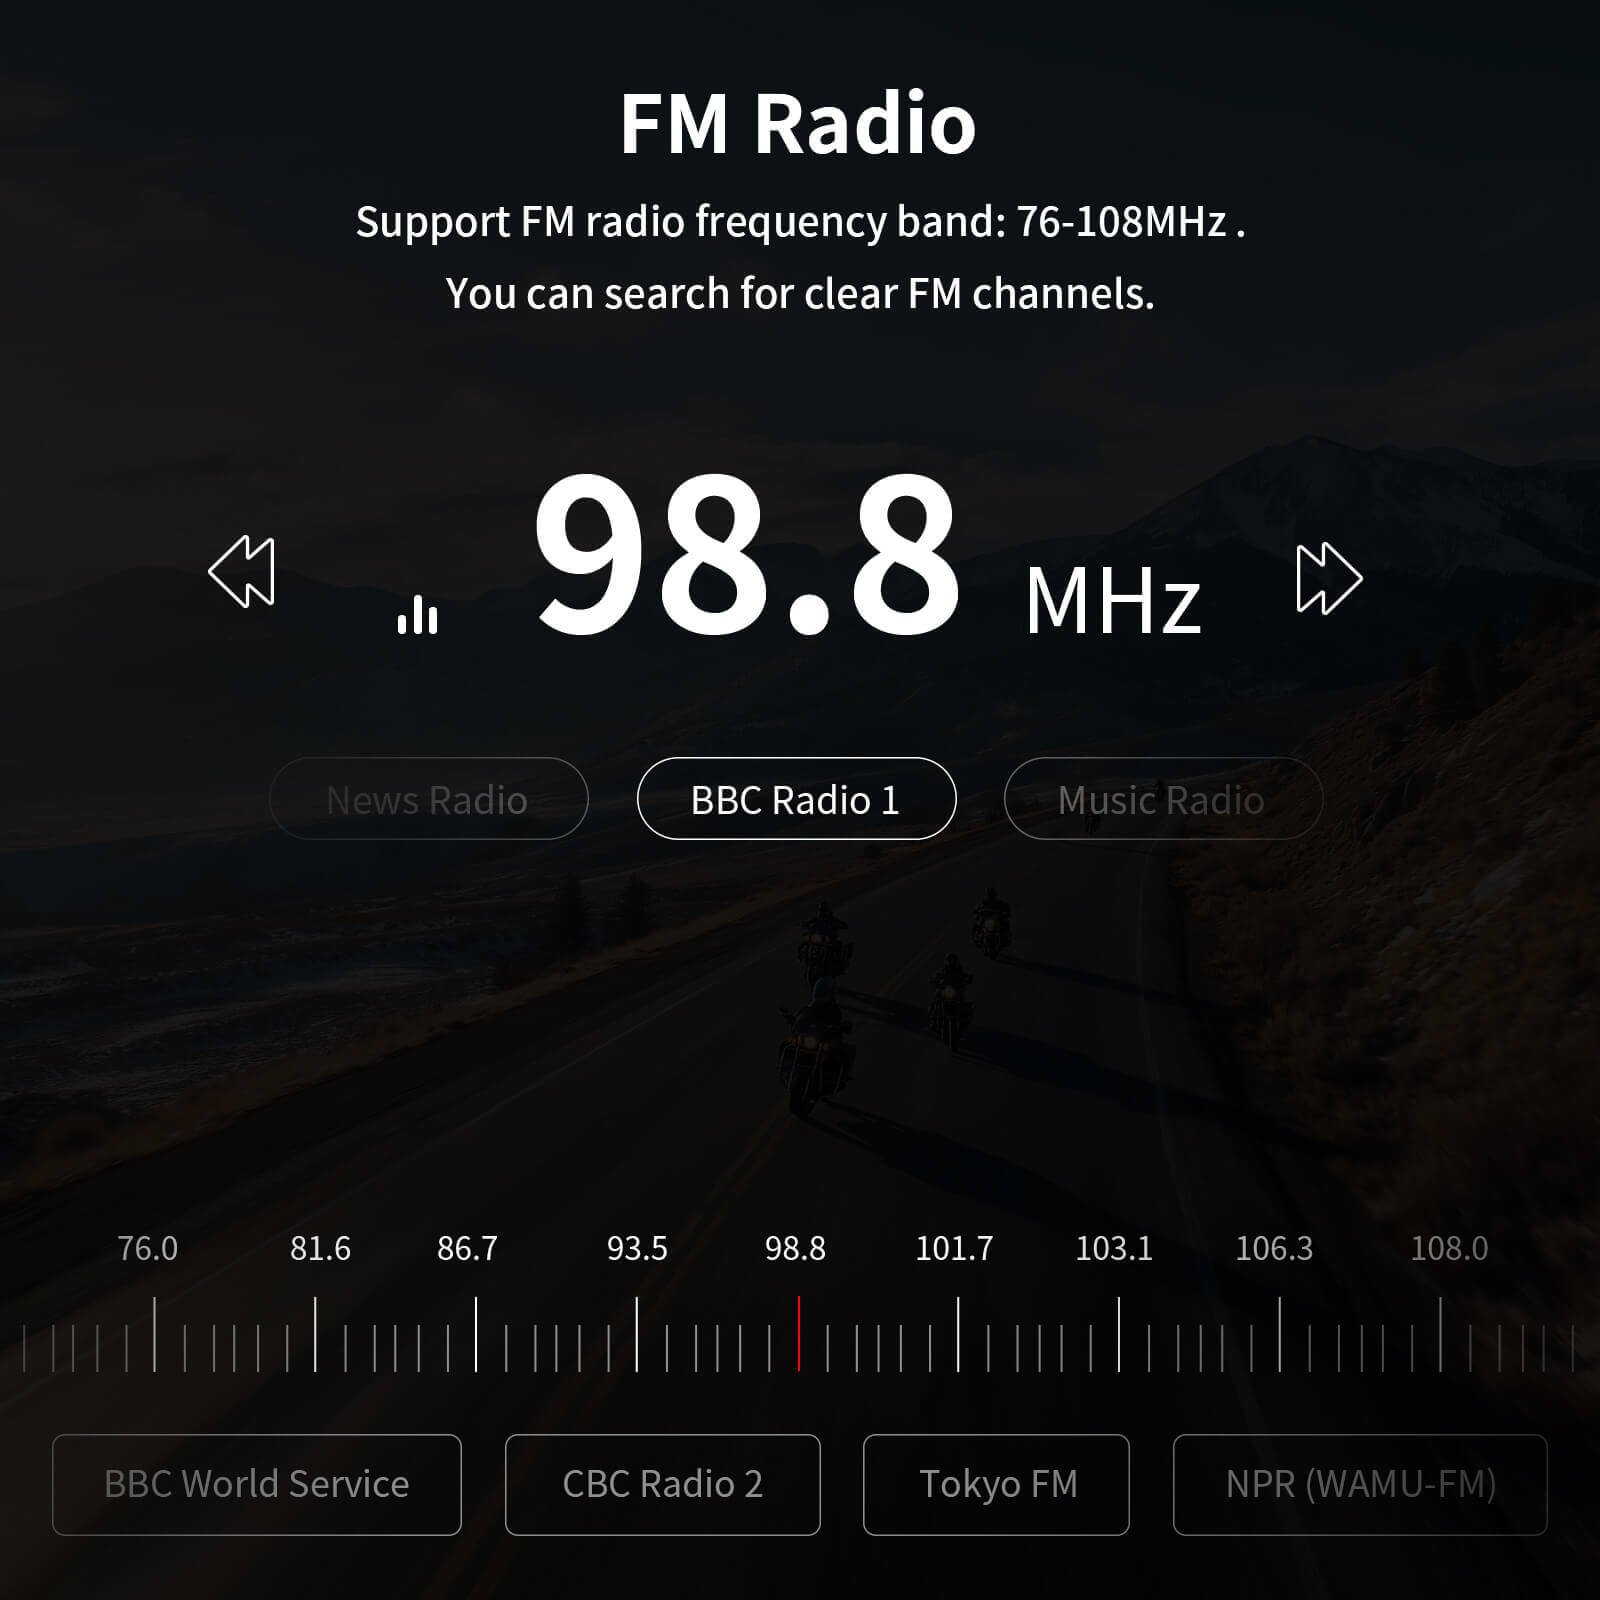

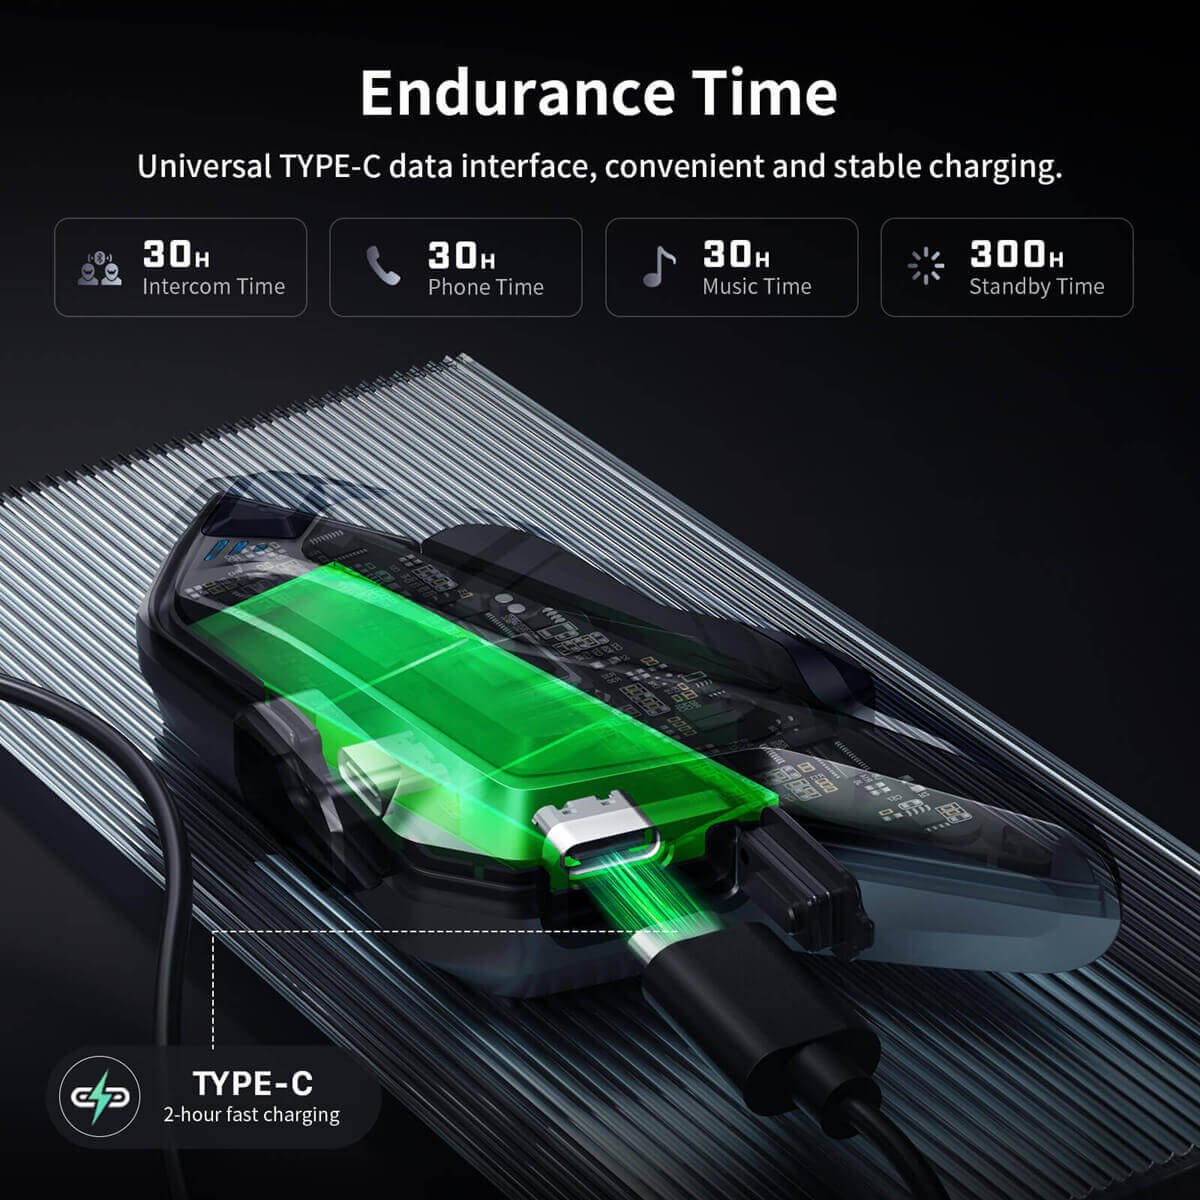

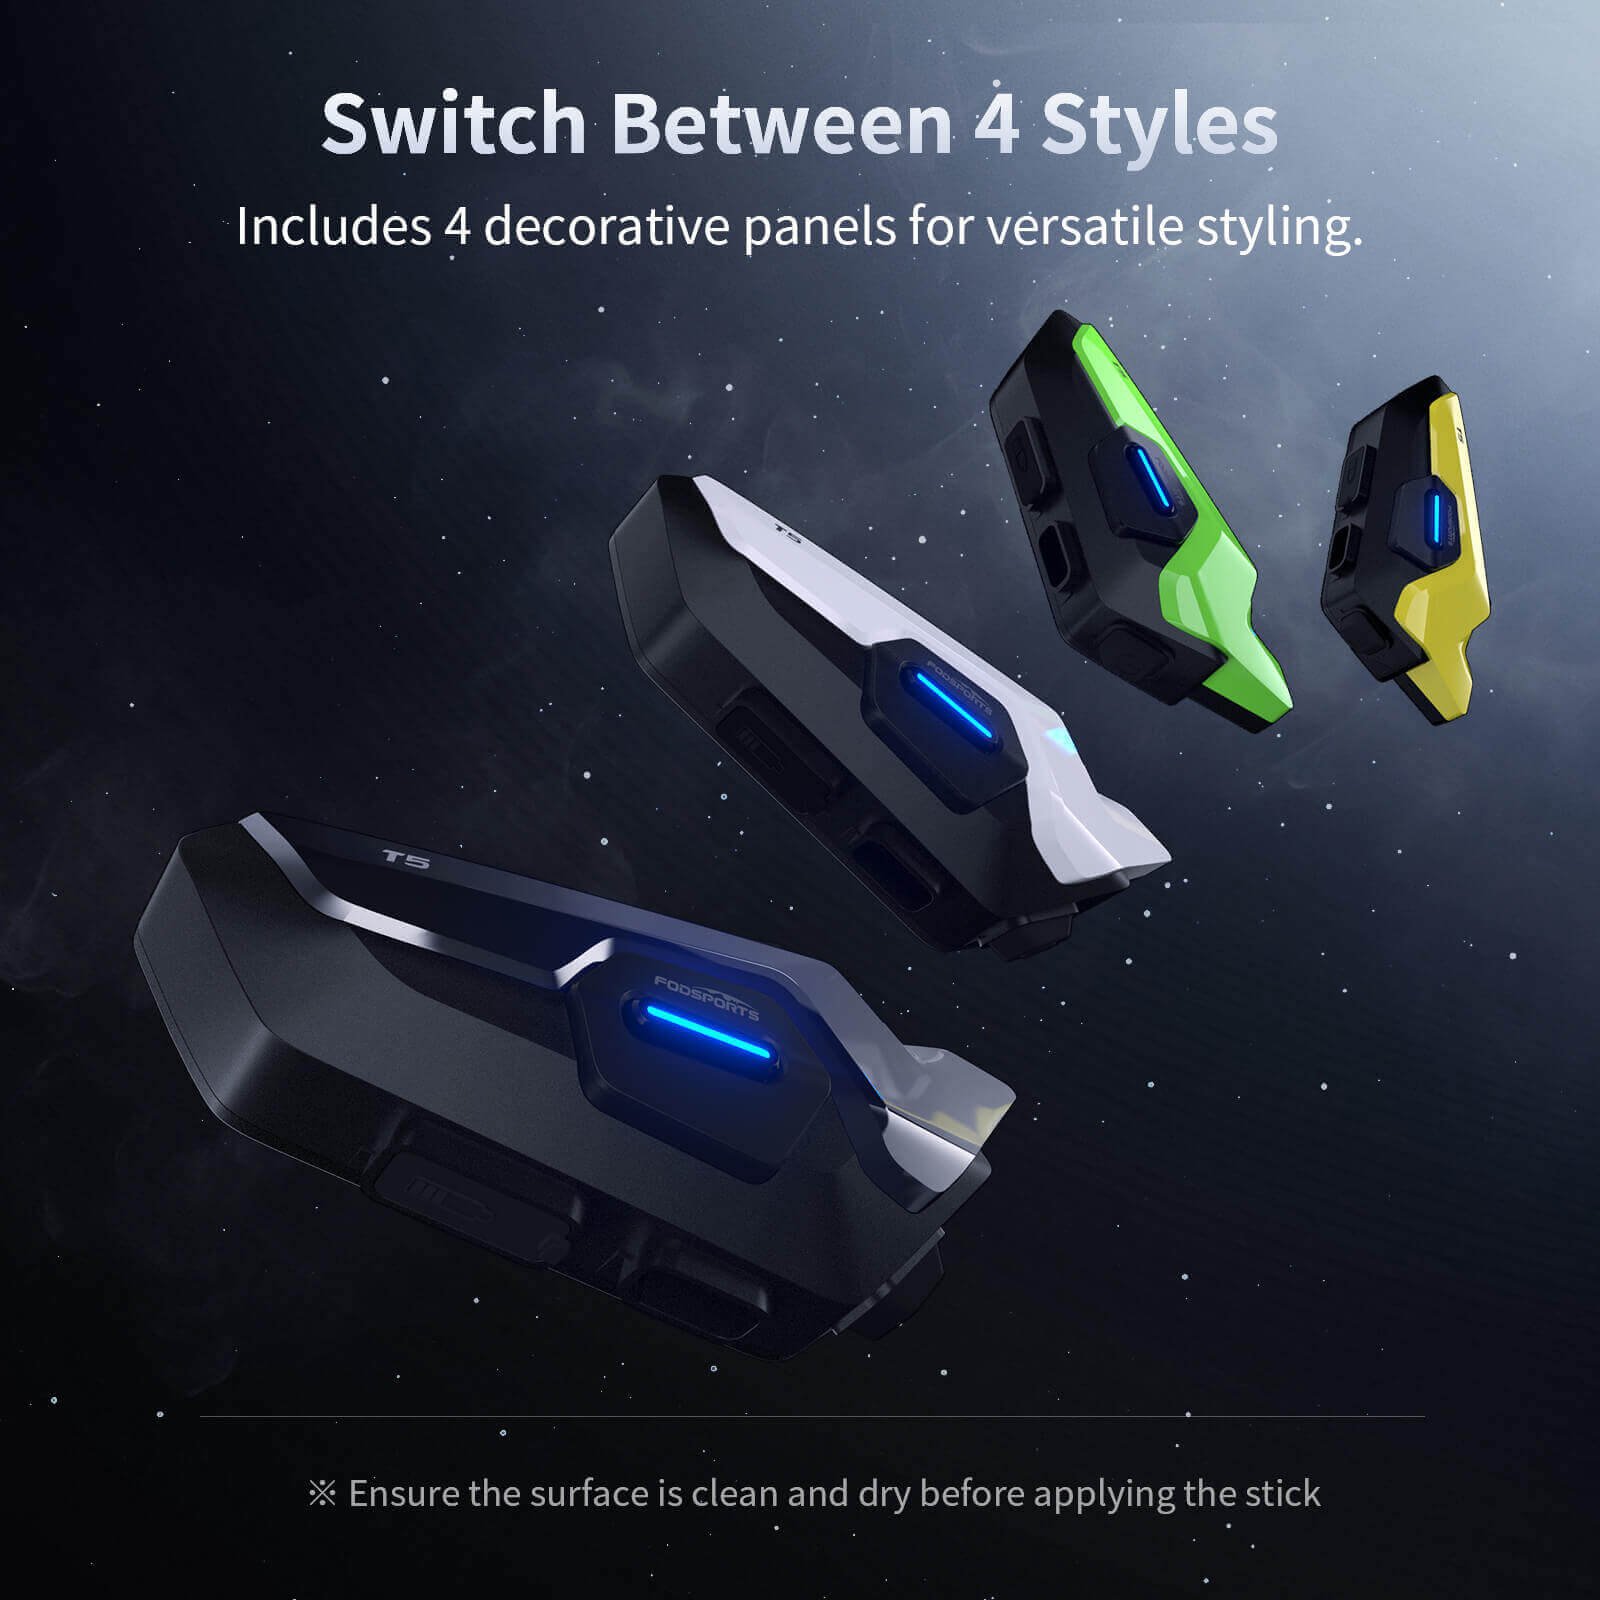
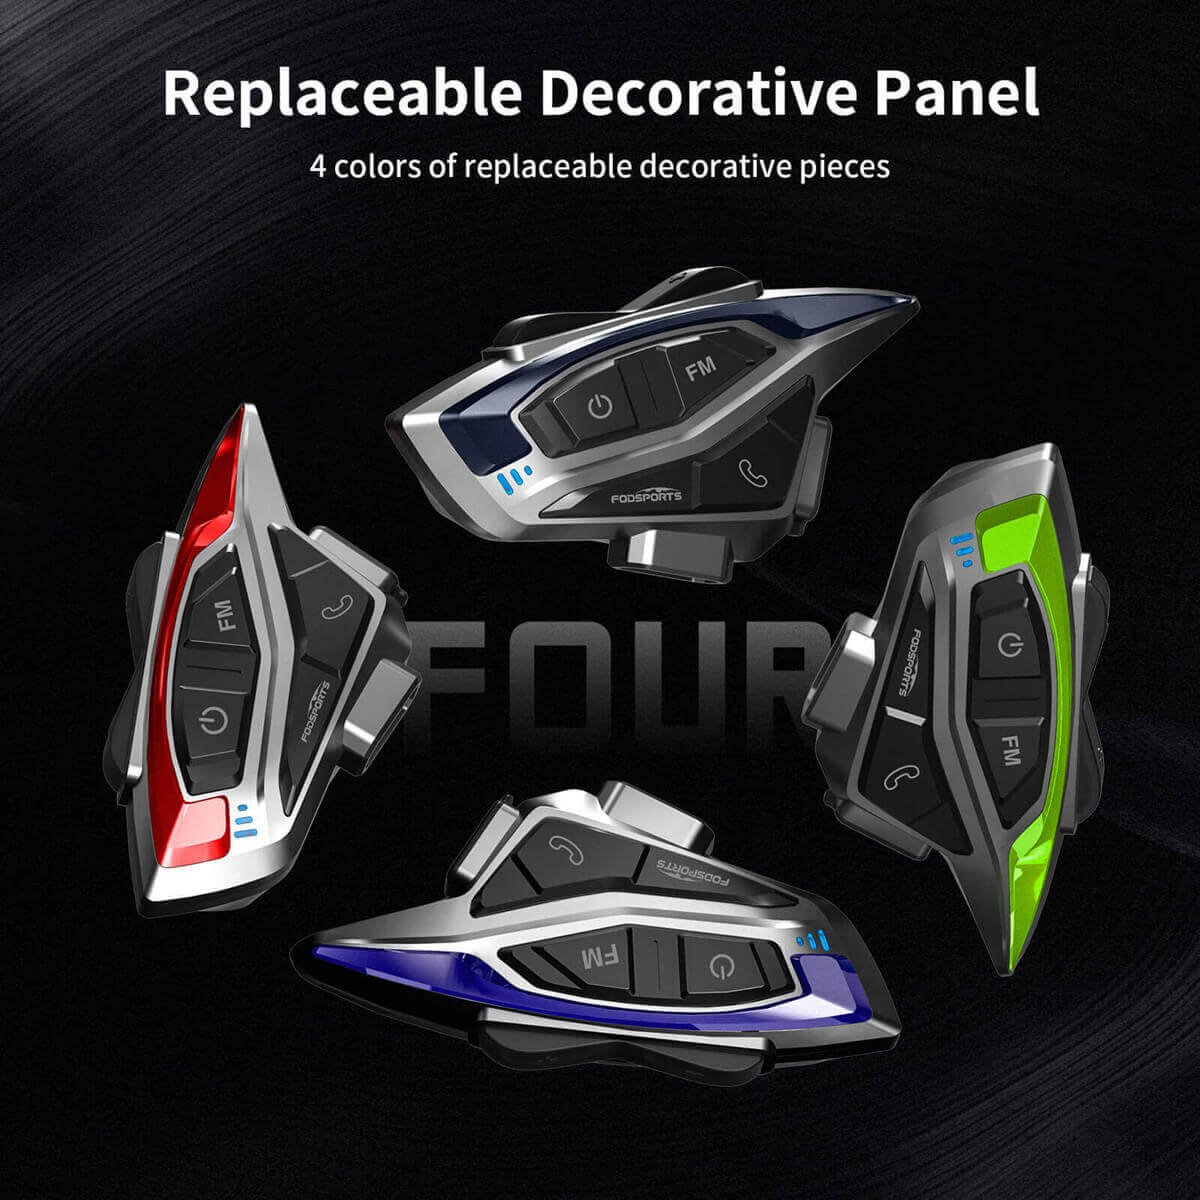
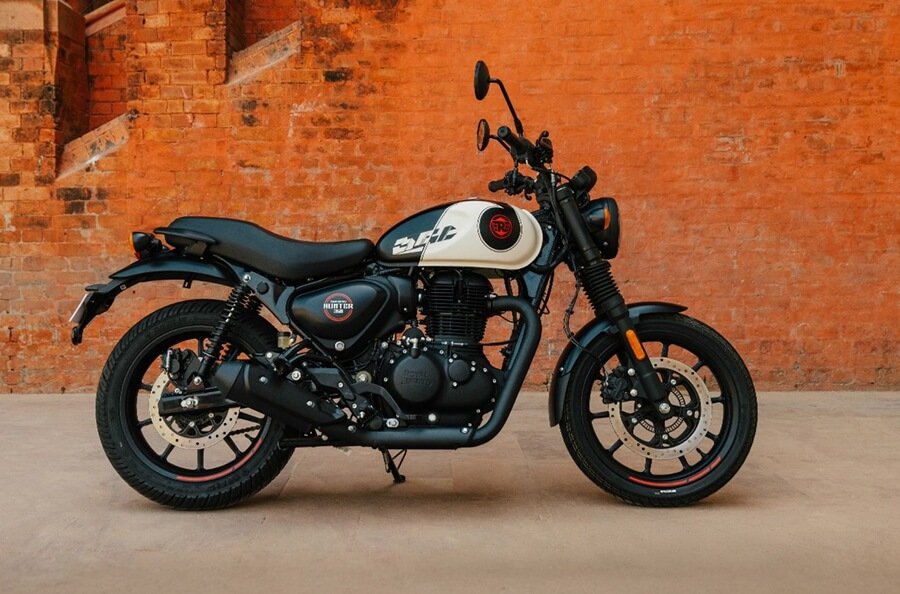
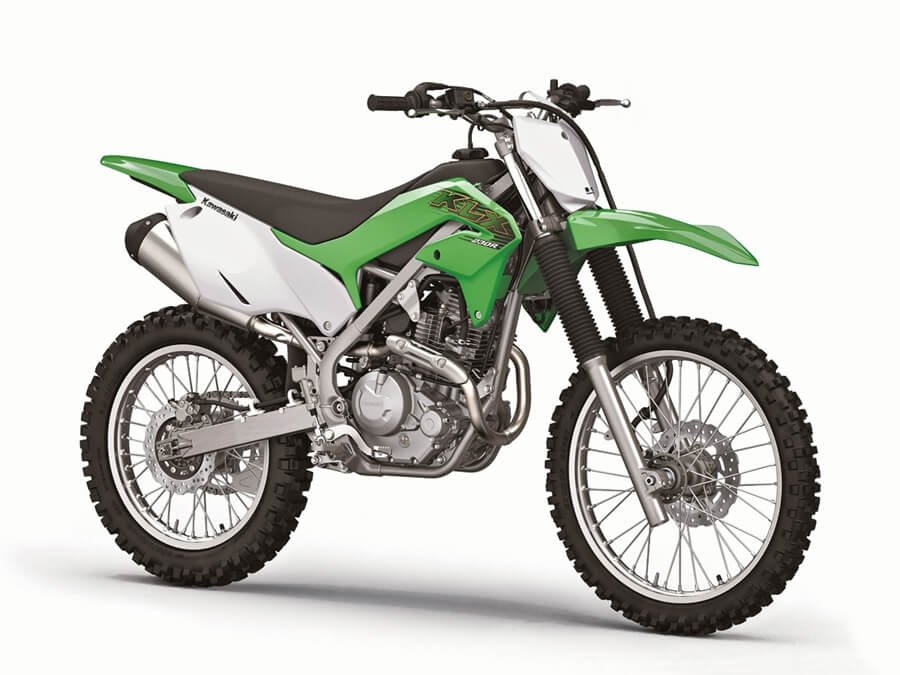
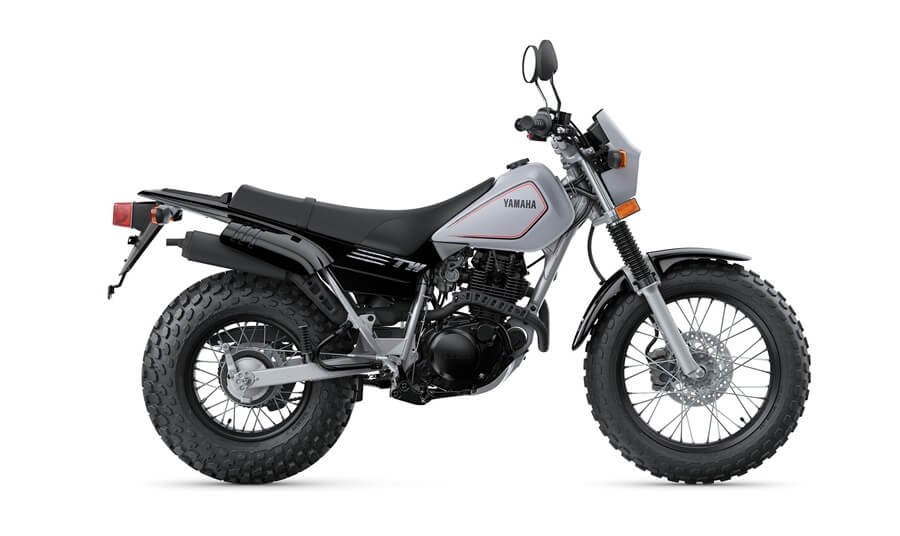
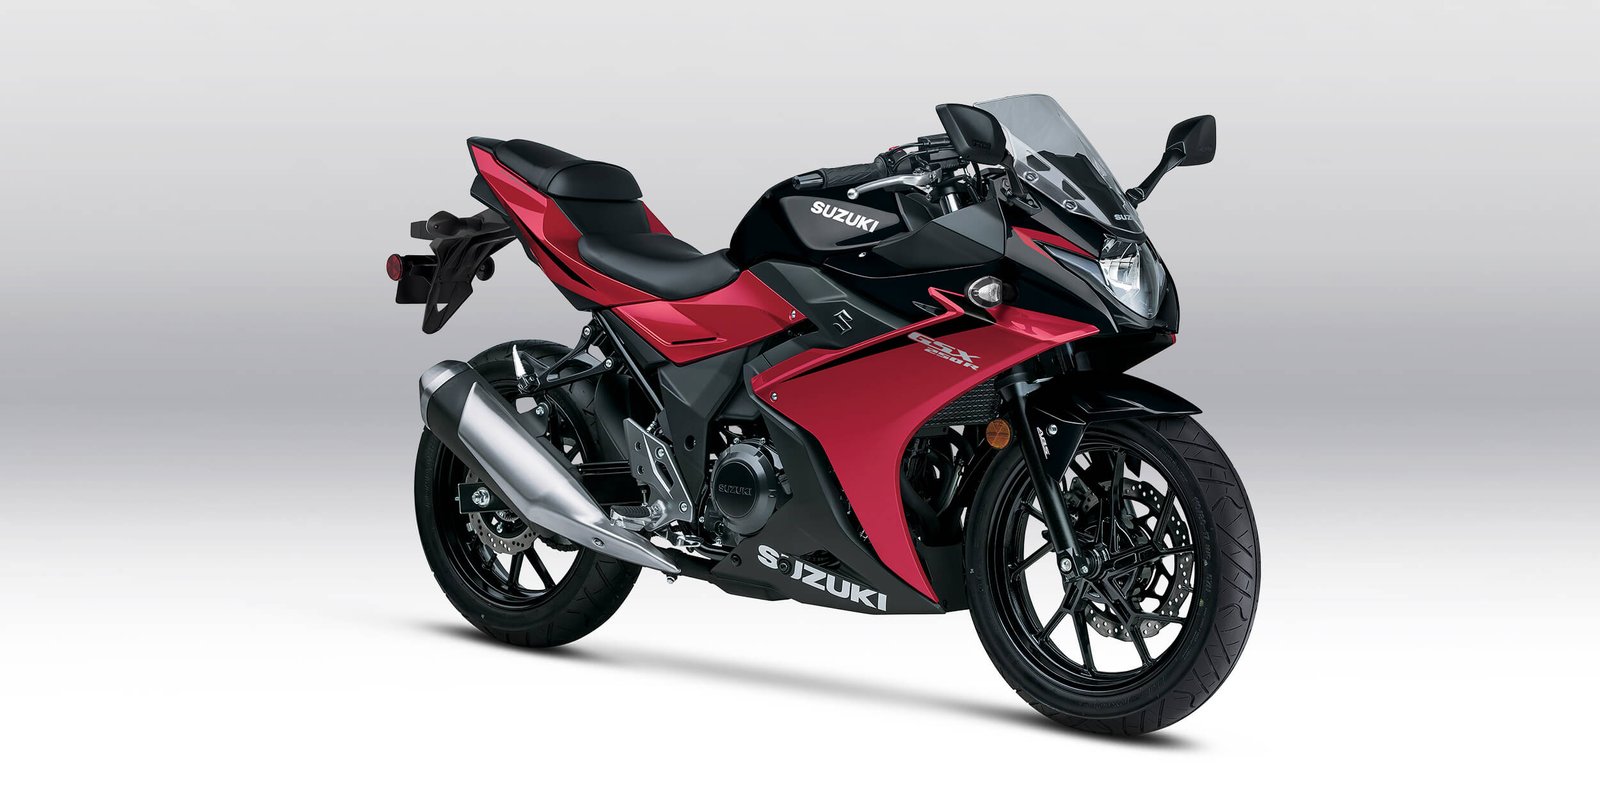
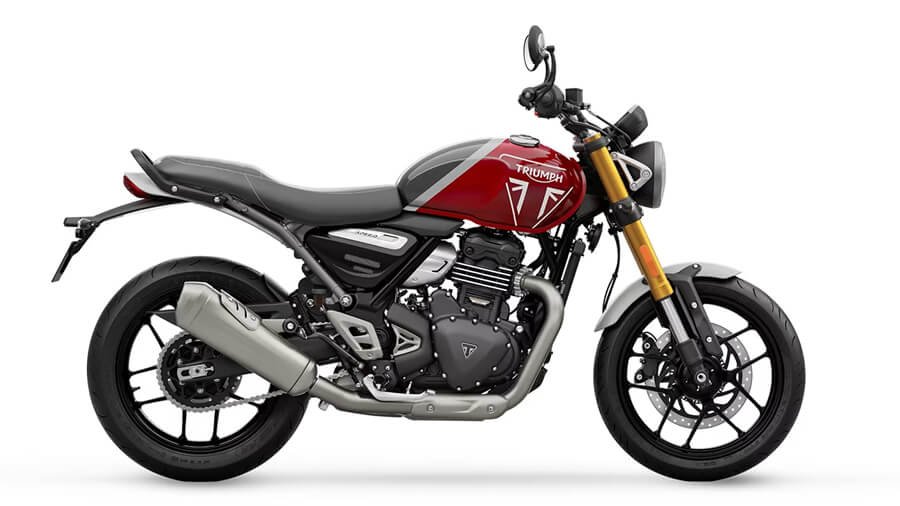
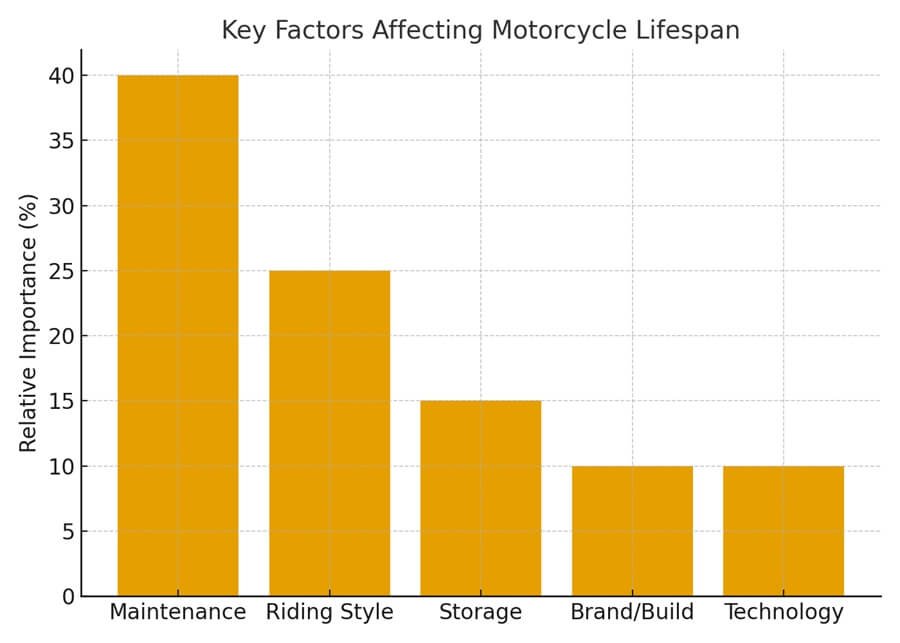
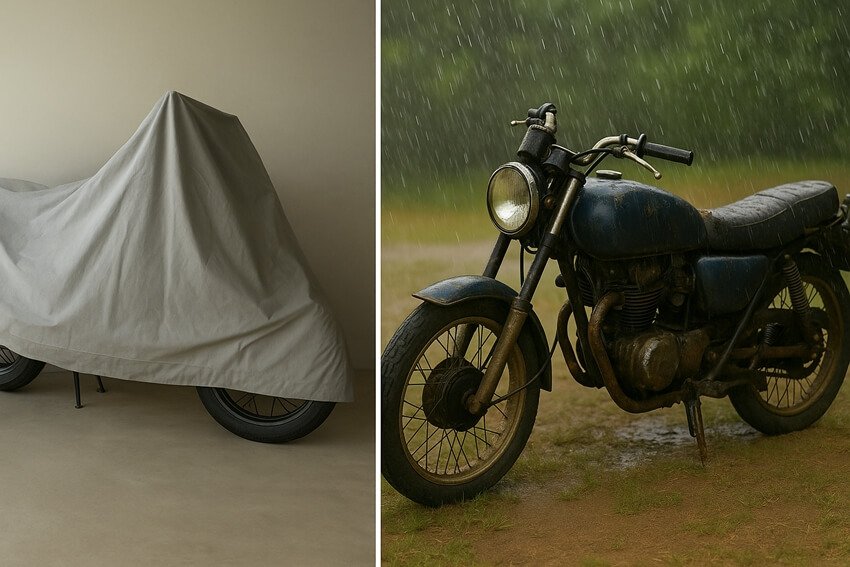
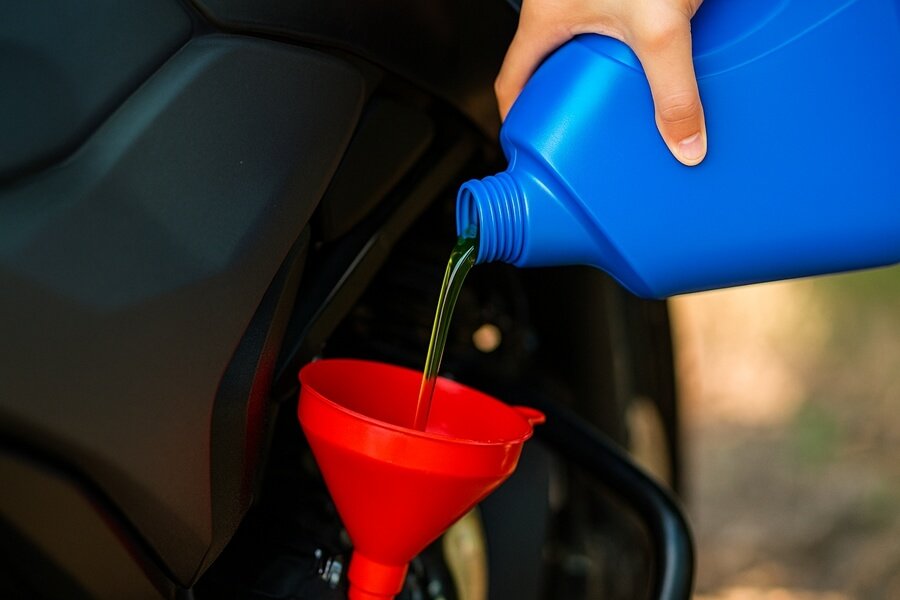

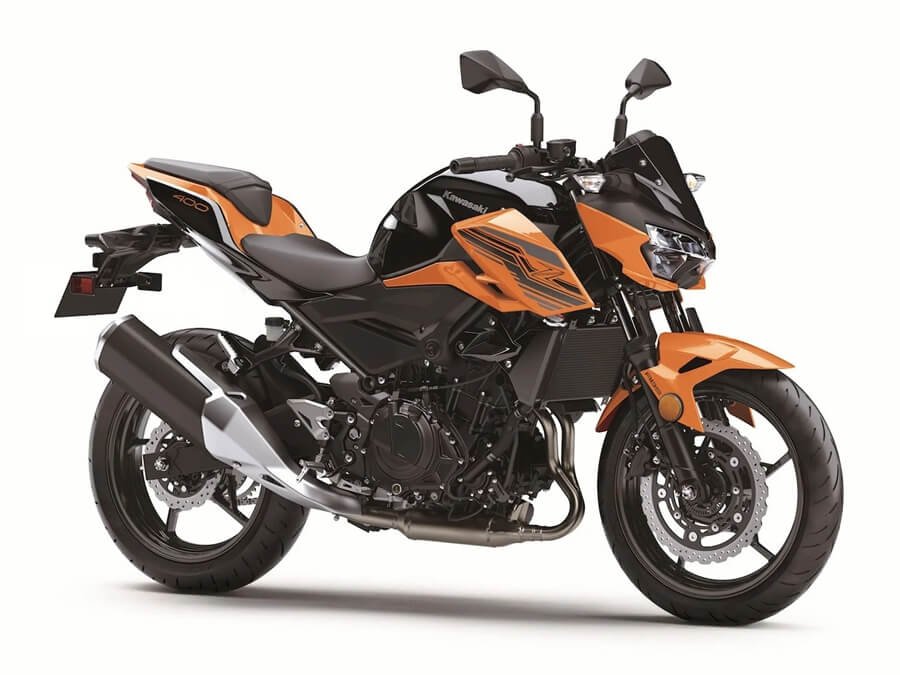
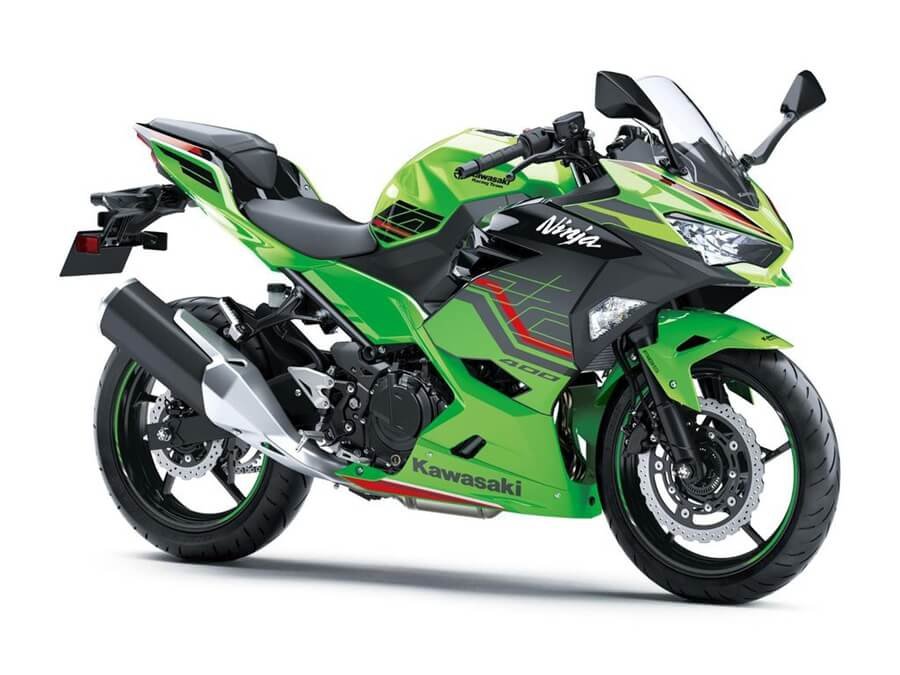

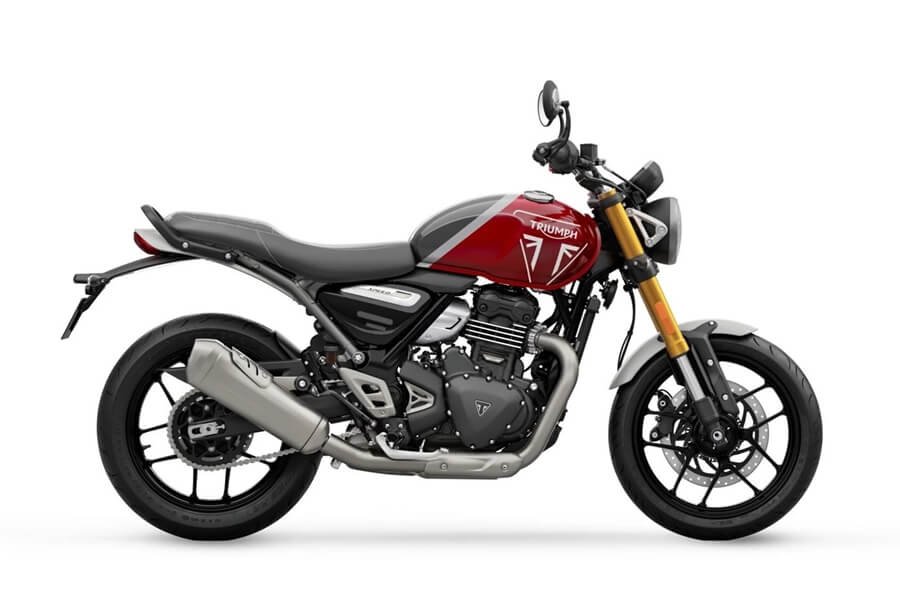
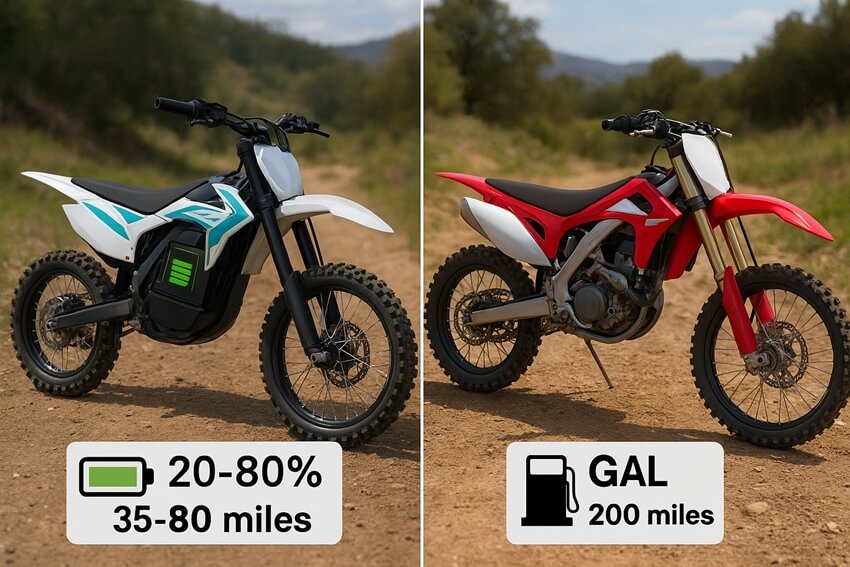
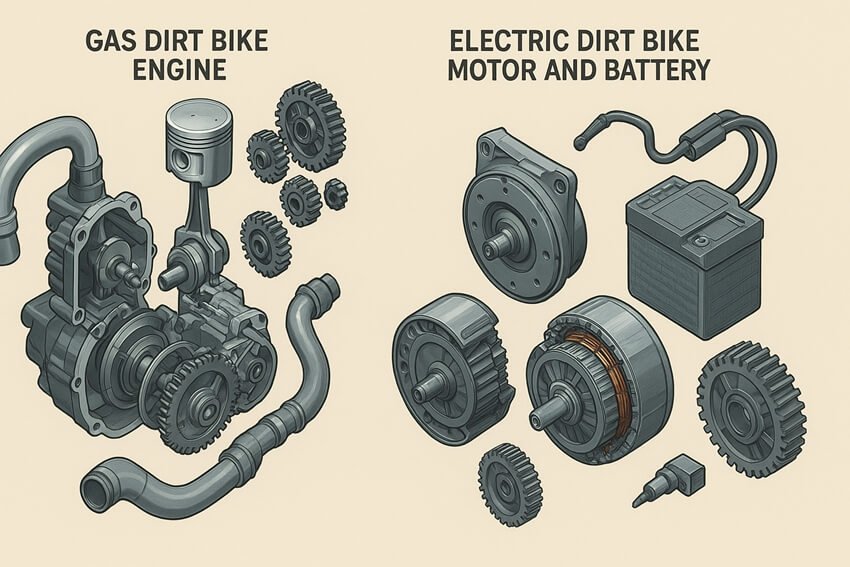
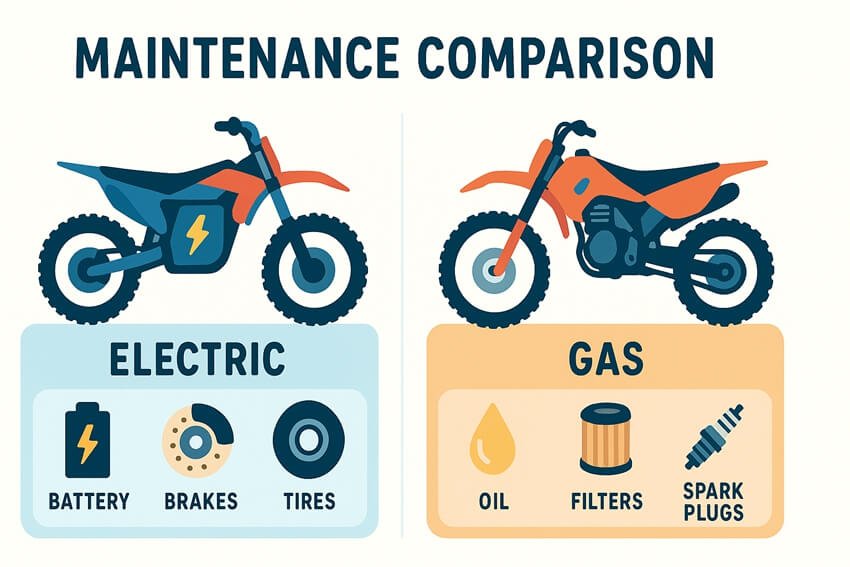
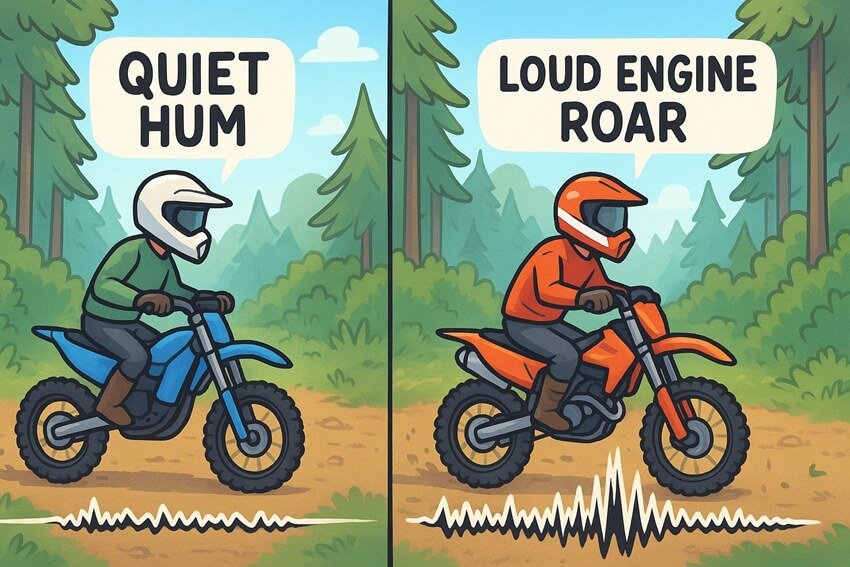
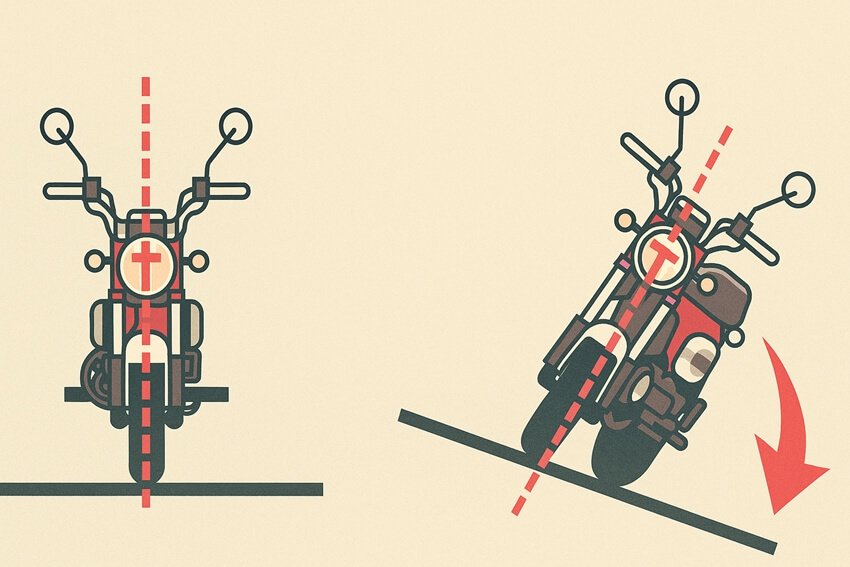


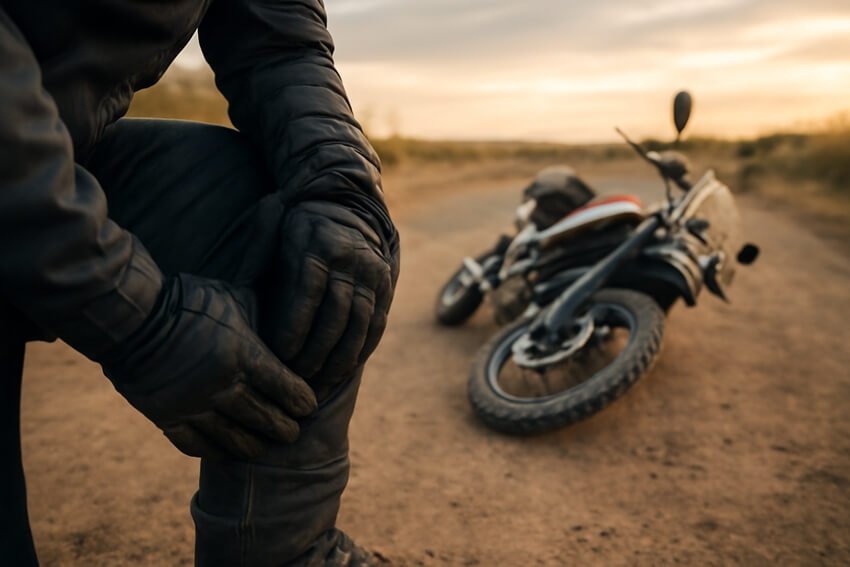
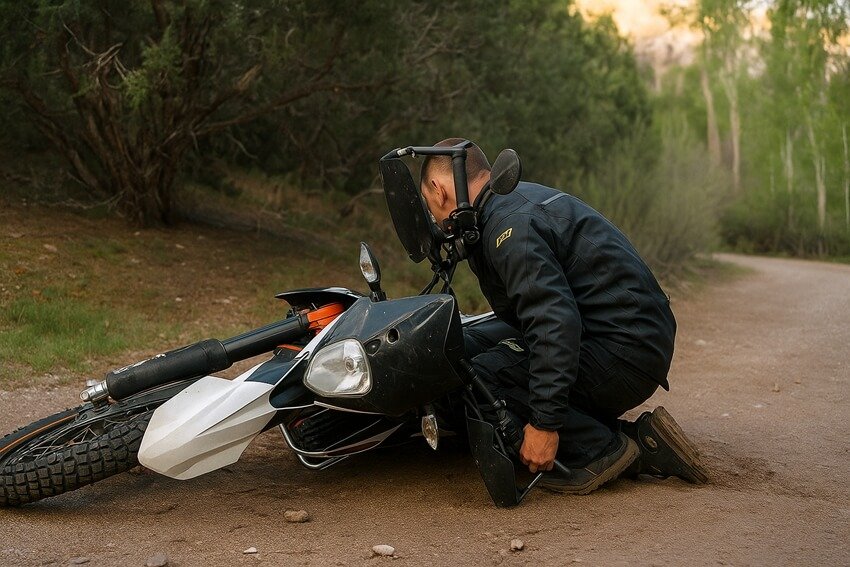
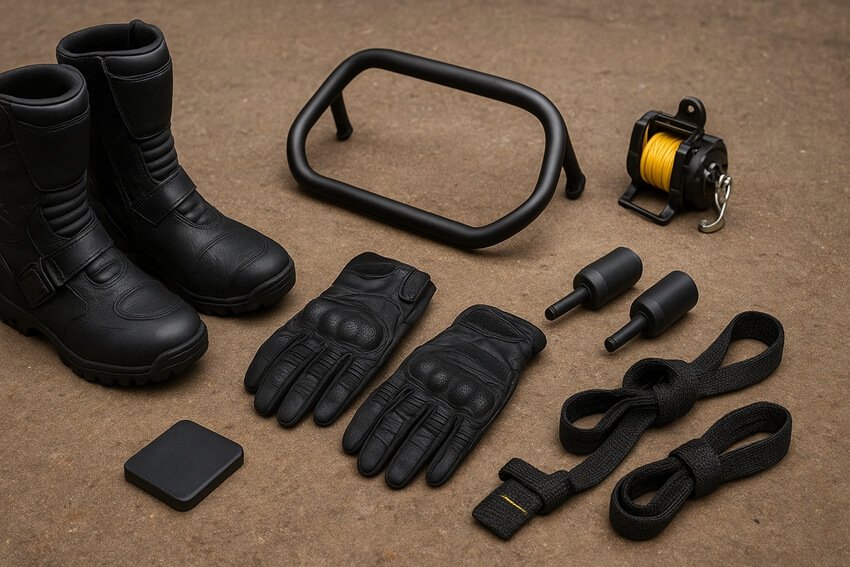
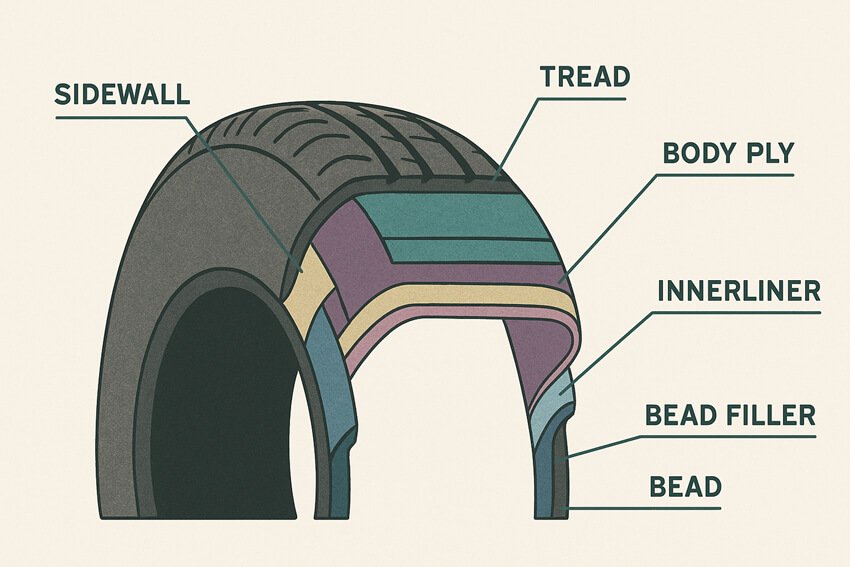

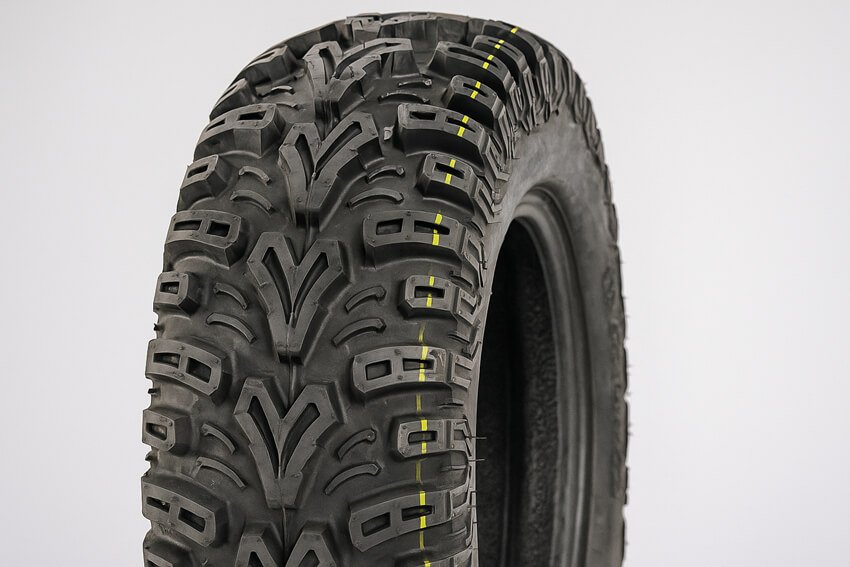
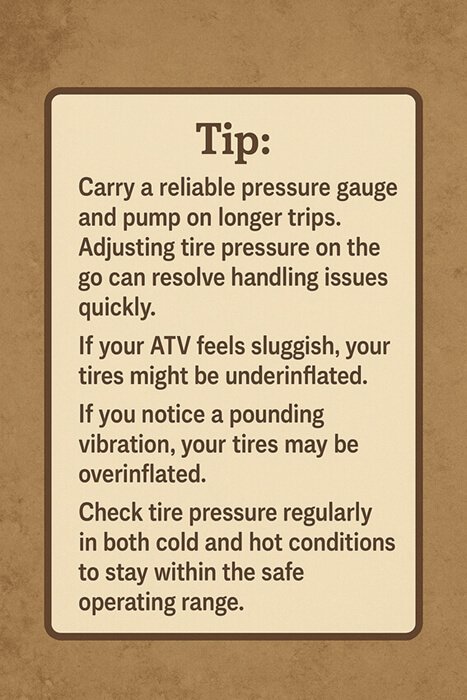 ATV/UTV tires pressure tip